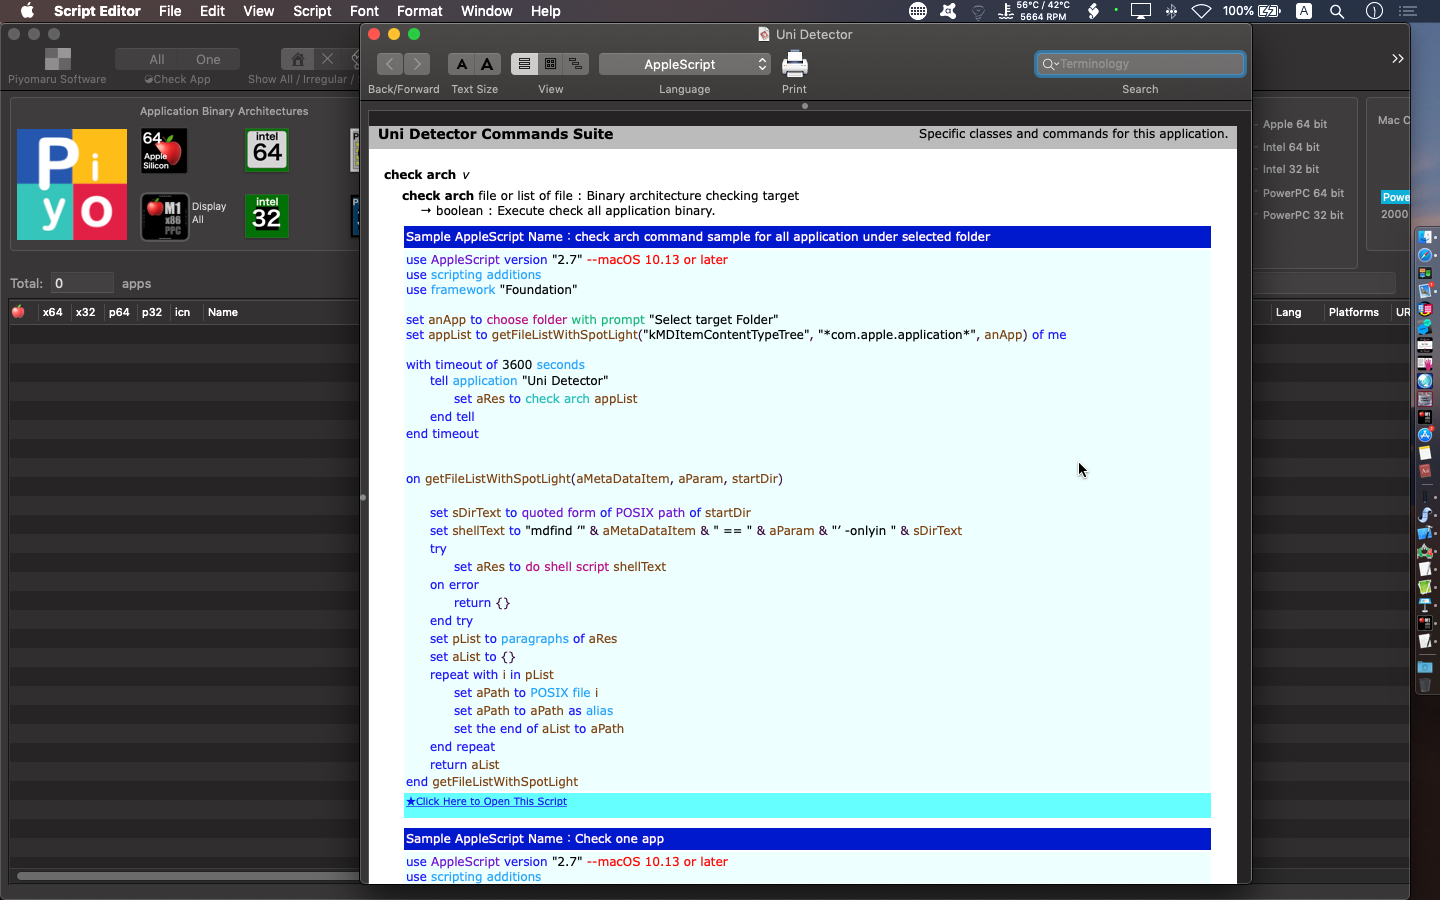
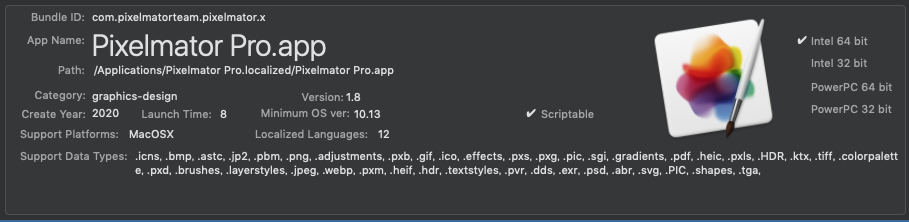
use AppleScript version "2.7" –macOS 10.13 or later use scripting additions use framework "Foundation"
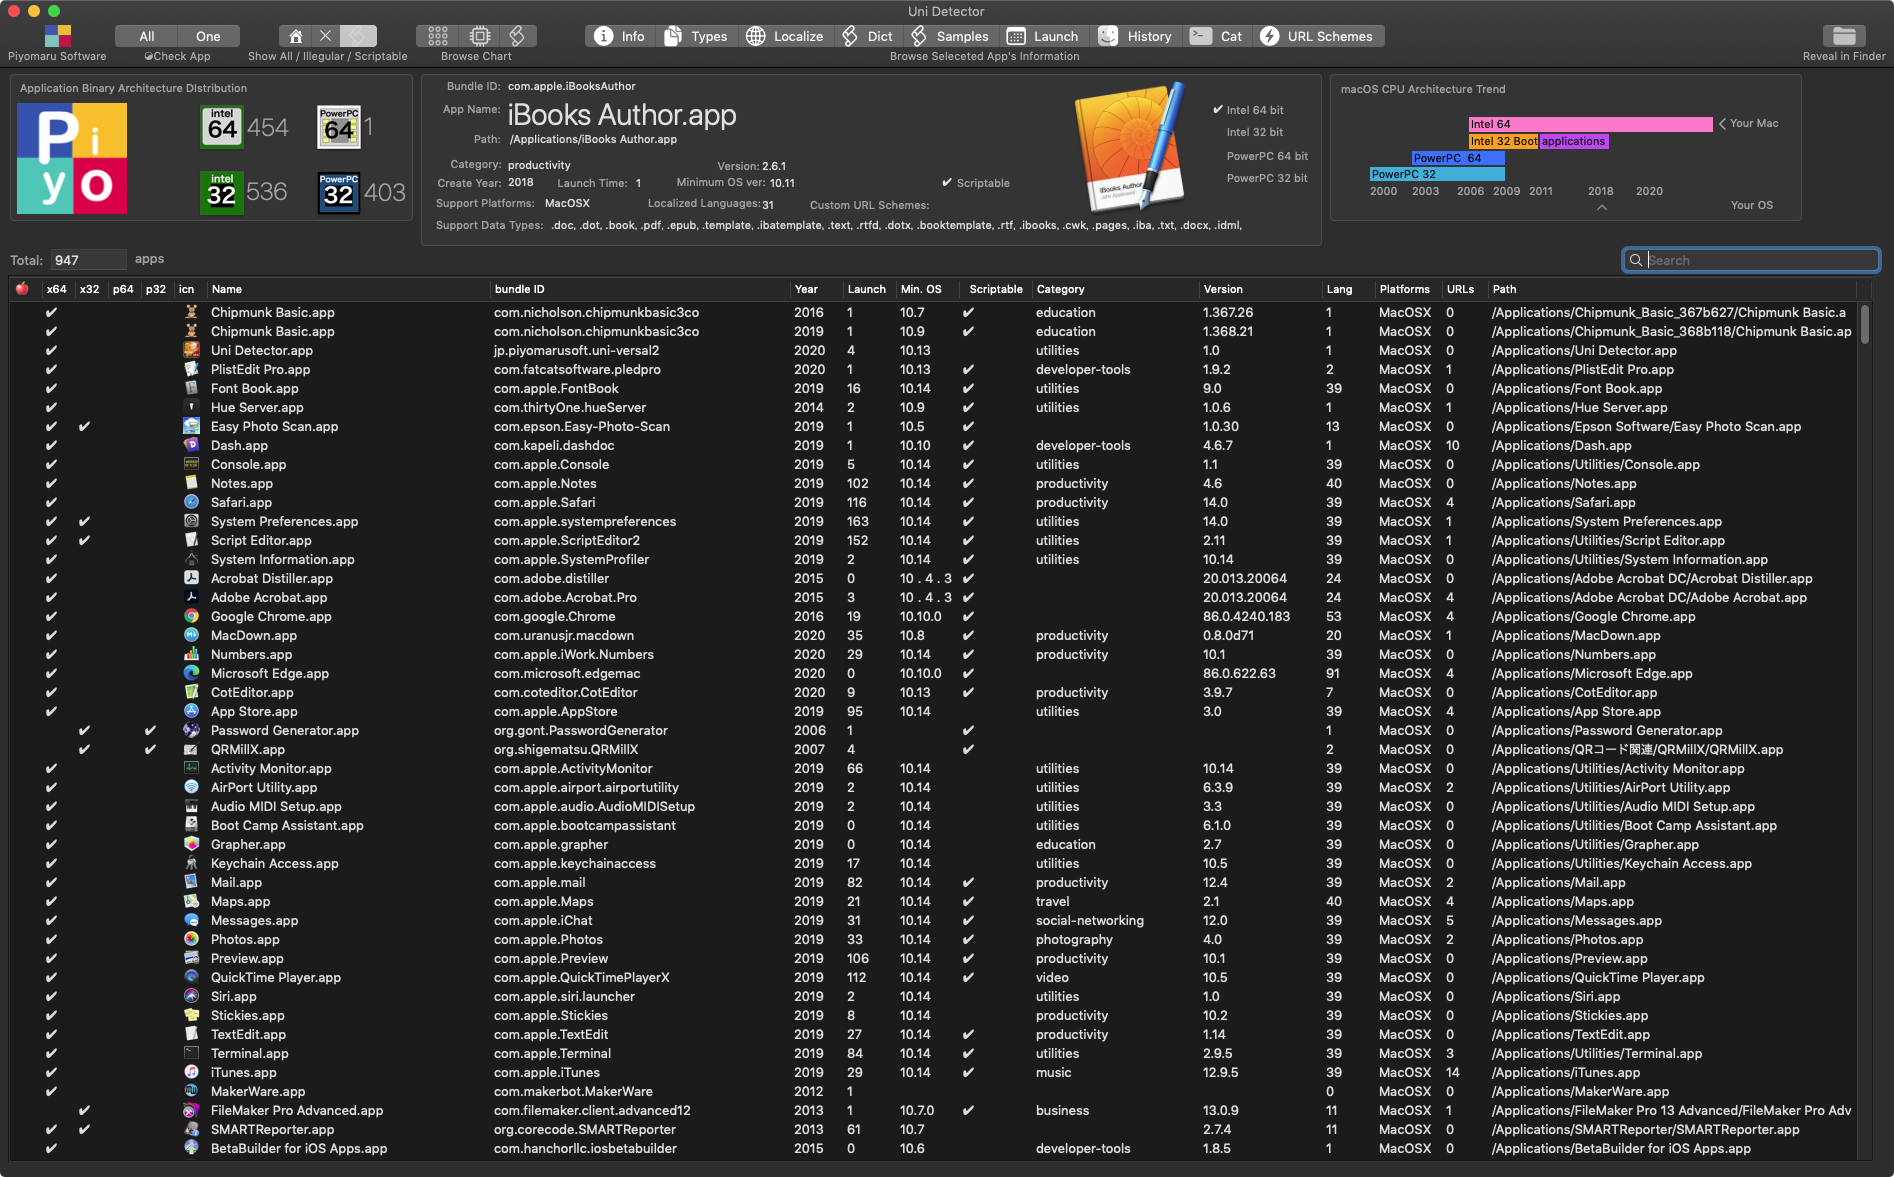
set anApp to choose file of type {"com.apple.application-bundle"} with prompt "Select target one App"
with timeout of 3600 seconds tell application "Uni Detector" set aRes to check arch anApp end tell end timeout
use AppleScript version "2.7" –macOS 10.13 or later use scripting additions use framework "Foundation"
set anApp to choose folder with prompt "Select target Folder" set appList to getFileListWithSpotLight("kMDItemContentTypeTree", "*com.apple.application*", anApp) of me
with timeout of 3600 seconds tell application "Uni Detector" set aRes to check arch appList end tell end timeout
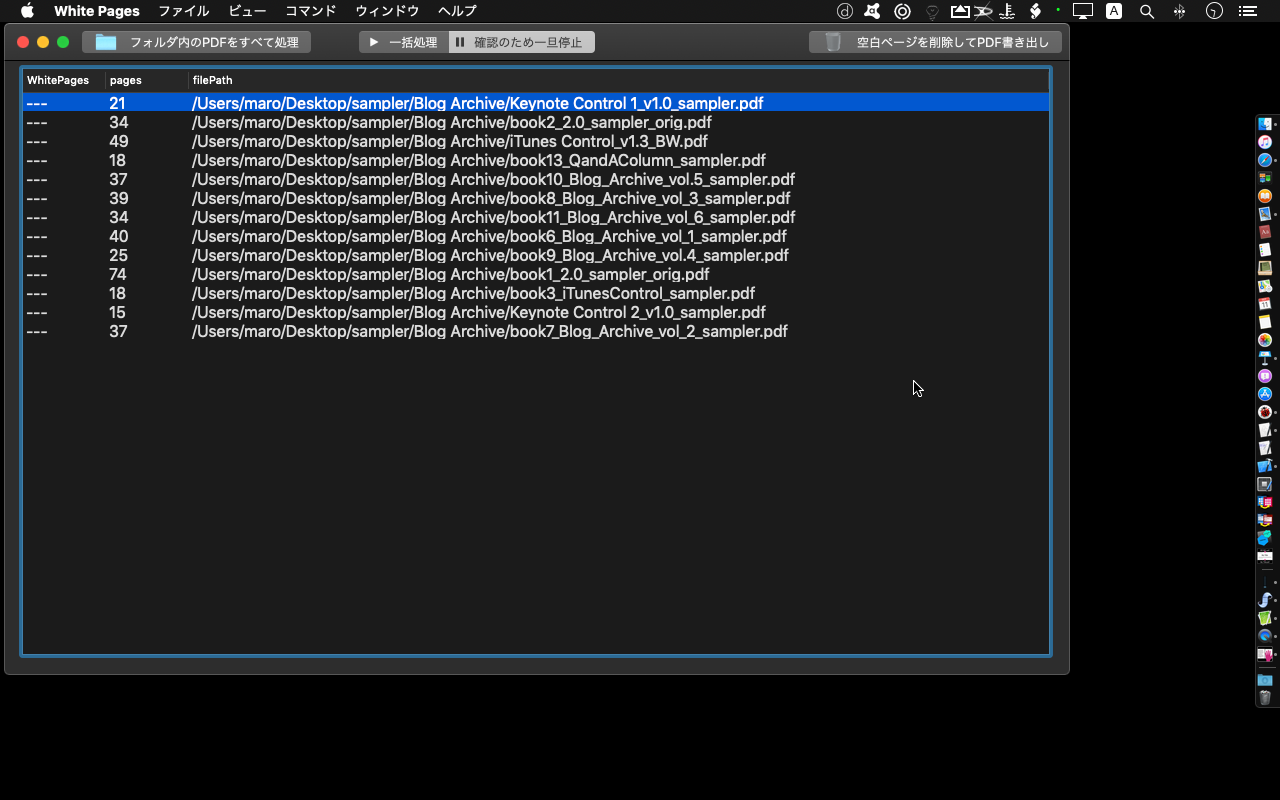
on getFileListWithSpotLight(aMetaDataItem, aParam, startDir)
set sDirText to quoted form of POSIX path of startDir set shellText to "mdfind ’" & aMetaDataItem & " == " & aParam & "’ -onlyin " & sDirText try set aRes to do shell script shellText on error return {} end try set pList to paragraphs of aRes set aList to {} repeat with i in pList set aPath to POSIX file i set aPath to aPath as alias set the end of aList to aPath end repeat return aList end getFileListWithSpotLight
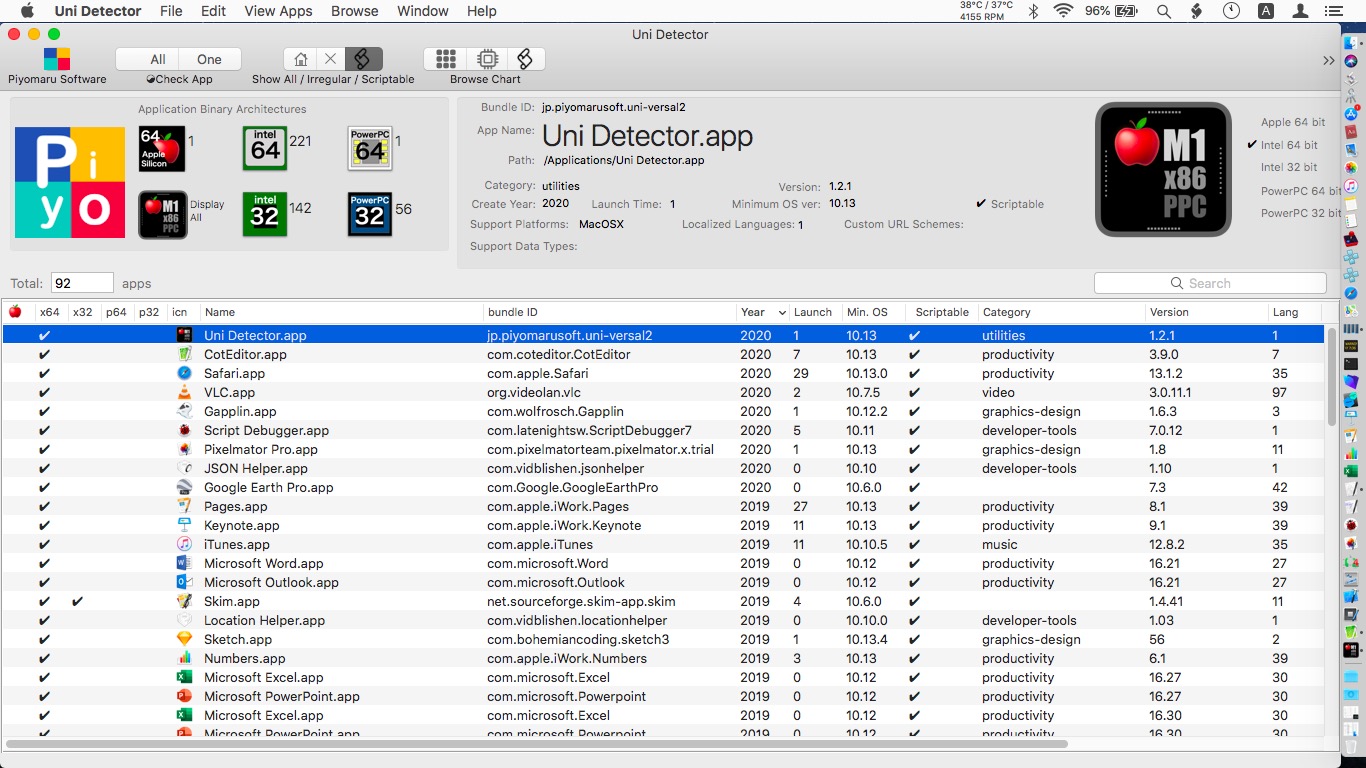
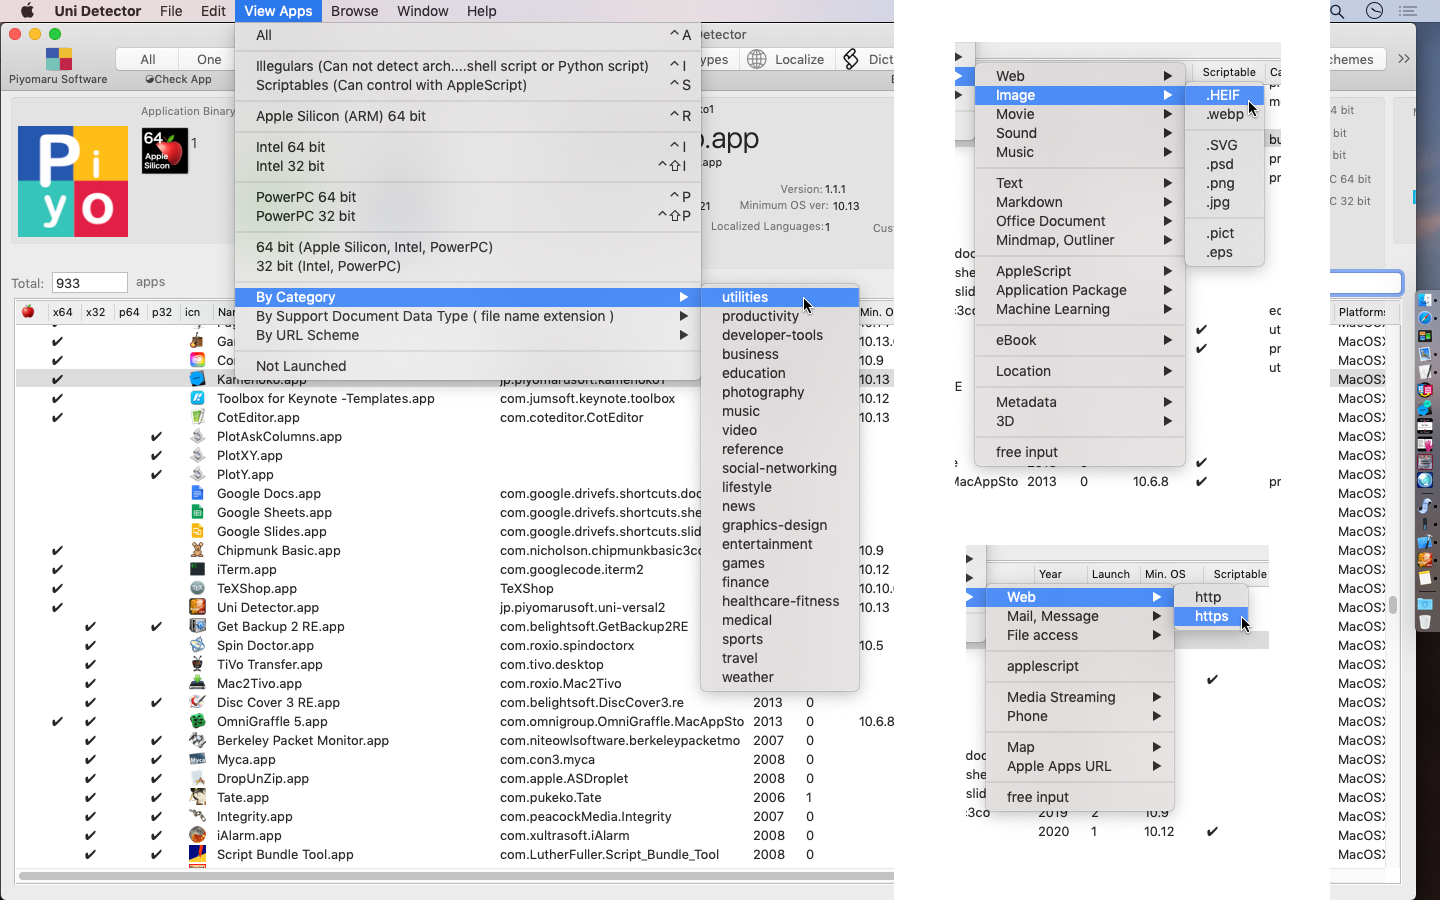
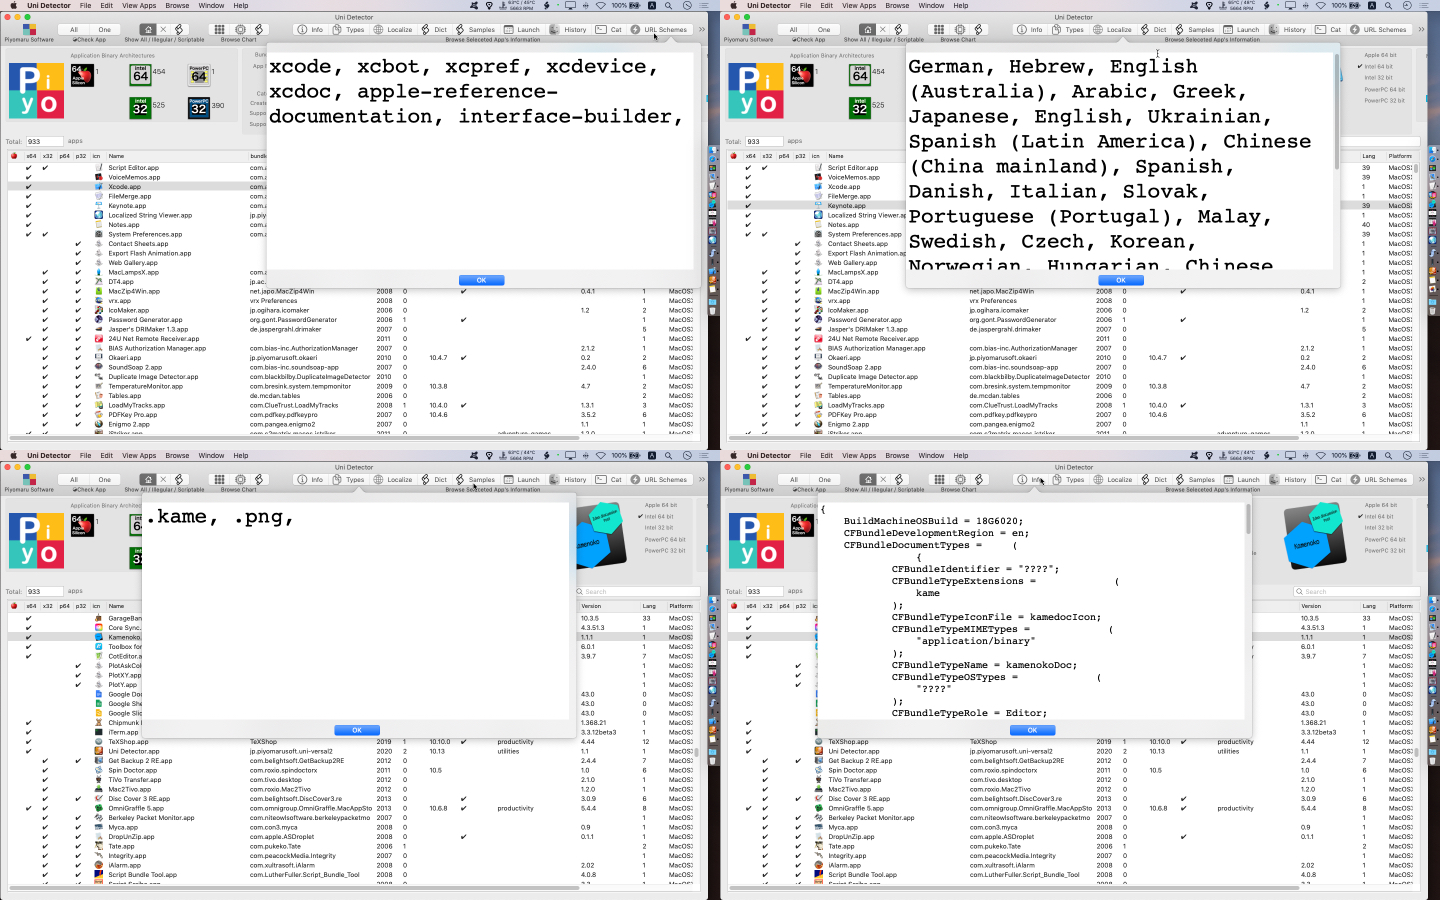
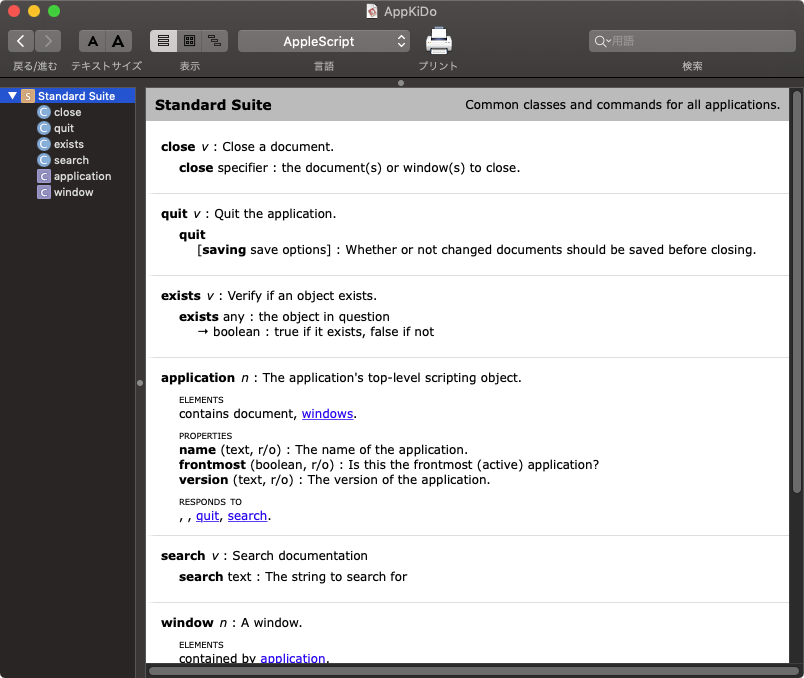
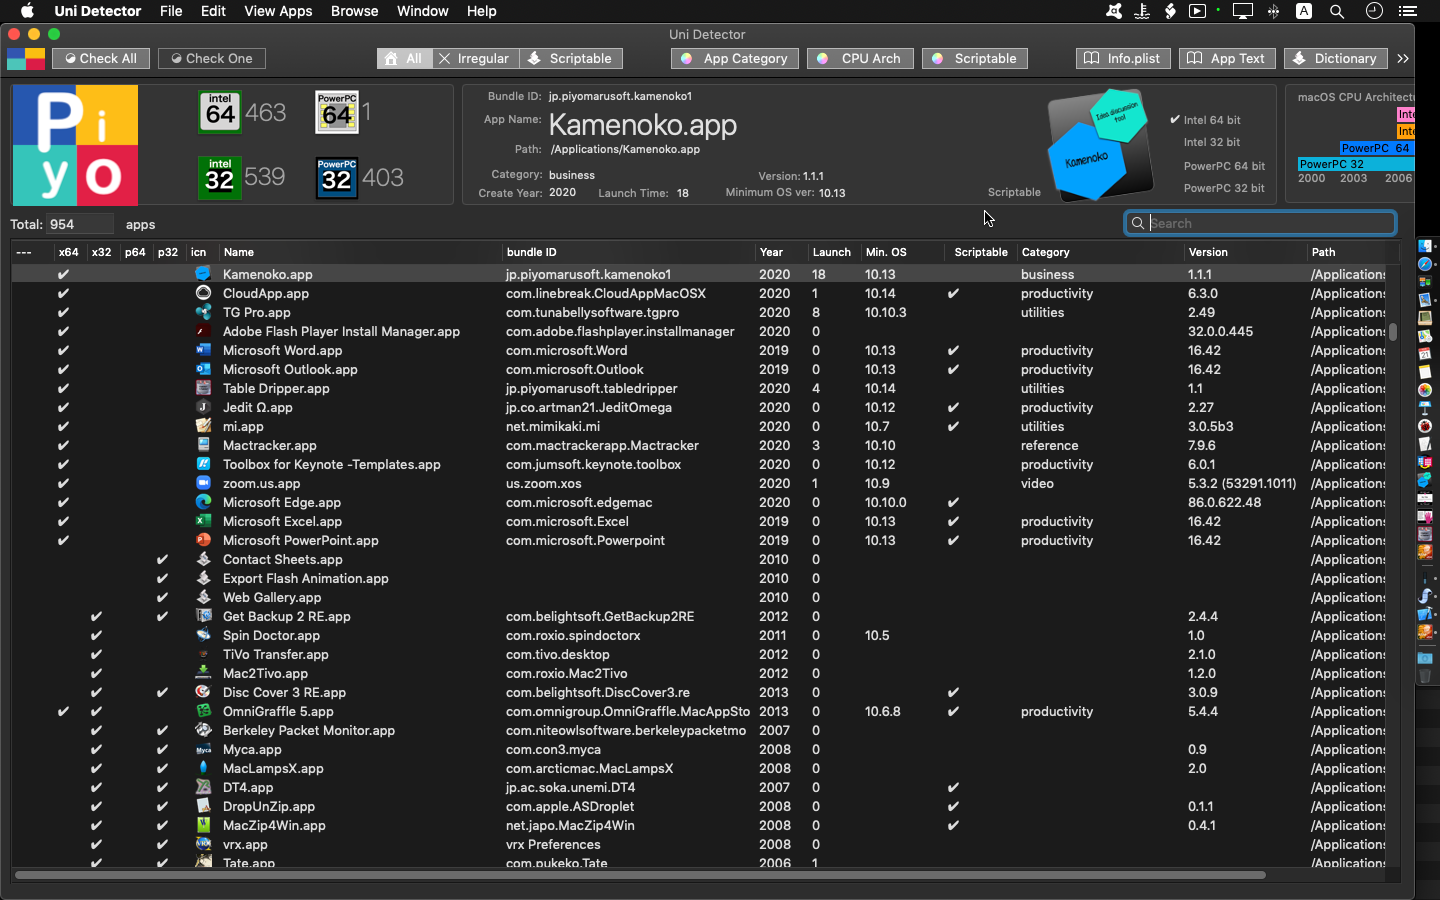
Mac App Storeに提出したアプリケーションをAppleScript対応にしたのは今回が初めてです。Store未提出のアプリケーションではScriptableにしたことはありますし、AppleScript LibrariesにAppleScript用語辞書をつけて配布したことはありますが、GUIアプリにAppleScript用語辞書をつけて配布したのははじめてのことです。
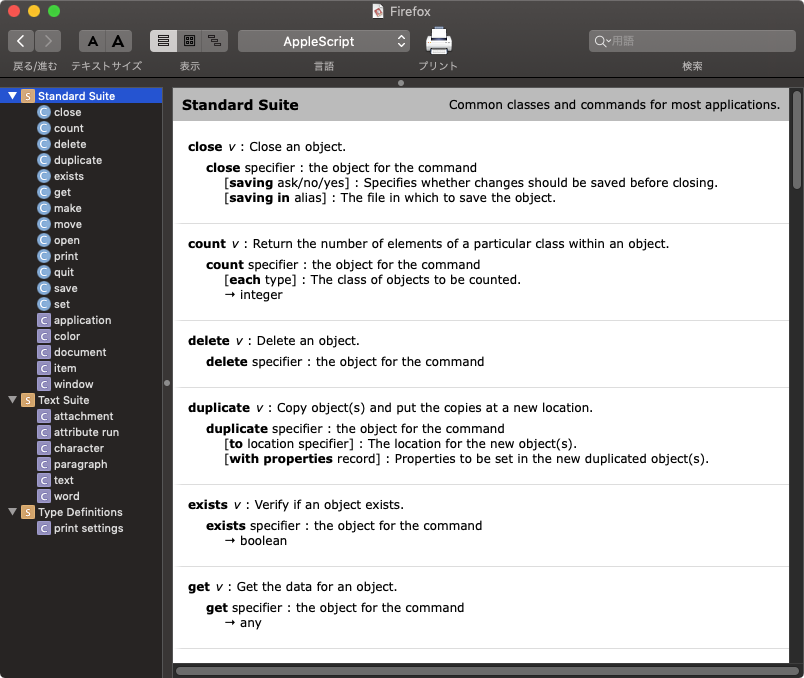
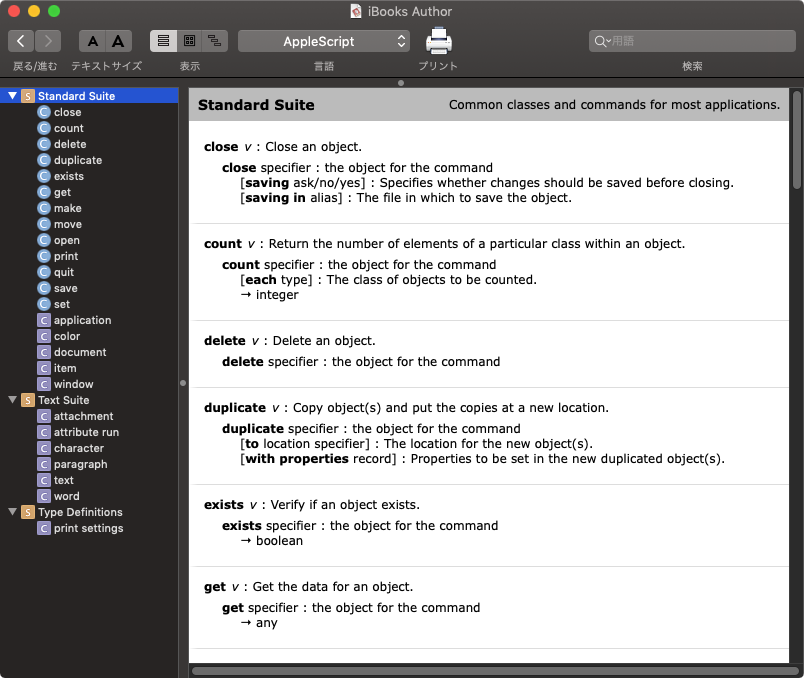
Microsoft officeの補助アプリケーション類がScriptableな表示になっていますが、単独で起動ができないためにScriptableなアプリケーションの範疇に入れてはいけないところでしょう。ちょっと古めのアプリケーションで、AppleScript Studioで作られているものが存在しており、AppleScript用語辞書が入っているものも見られます。これも、外部からコントロールするための辞書ではないので、正確な意味では「Scriptable」ではありませんが、意外と多いのと古いものが中心なので放置しておいています。
— Created 2017-03-03 by Takaaki Naganoya — Modified 2018-02-15 by Shane Stanley–Thanks!! — Modified 2018-02-15 by Takaaki Naganoya — Modified 2020-11-04 by Takaaki Naganoya use AppleScript version "2.5" use scripting additions use framework "Foundation" use framework "AppKit"
property aStatusItem : missing value
on run my performSelectorOnMainThread:"init:" withObject:(missing value) waitUntilDone:true end run
on init:aSender set aList to {"Piyomaru", "Software", "", "Takaaki", {"Yes", "No"}, "", "Machine", {"MacBook Pro", "MacBook Air", "Mac mini"}, "", "Quit"}
set aStatusItem to current application’s NSStatusBar’s systemStatusBar()’s statusItemWithLength:(current application’s NSVariableStatusItemLength)
aStatusItem’s setTitle:"🍎" aStatusItem’s setHighlightMode:true aStatusItem’s setMenu:(createMenu(aList) of me)
–Blink Status Bar Item set aButton to aStatusItem’s button() aButton’s setWantsLayer:true my blinkObject:aButton withRepeat:10 withDuration:1.0 –OK –my scaleObject:aButton withRepeat:10 withDuration:0.5 –OK –my rotateObject:aButton forAxis:90 withRepeat:10 withDuration:0.5 –NG –my moveObject:aButton withRepeat:10 withDuration:0.5–NG end init:
on createMenu(aList) set aMenu to current application’s NSMenu’s alloc()’s init() set aCount to 10
set prevMenuItem to ""
repeat with i in aList set j to contents of i set aClass to (class of j) as string
if j is equal to "" then set aMenuItem to (current application’s NSMenuItem’s separatorItem()) (aMenu’s addItem:aMenuItem) else if (aClass = "text") or (aClass = "string") then
if j = "Quit" then set aMenuItem to (current application’s NSMenuItem’s alloc()’s initWithTitle:j action:"actionHandler:" keyEquivalent:"") else set aMenuItem to (current application’s NSMenuItem’s alloc()’s initWithTitle:j action:"actionHandler:" keyEquivalent:"") end if
set exRes to {} repeat with i in (aRes as list) set j to (current application’s NSDictionary’s dictionaryWithDictionary:(contents of i)) set tmpExt to (j’s valueForKey:"CFBundleTypeExtensions")
if tmpExt is not equal to missing value then set tmpExt to tmpExt as list repeat with ii in tmpExt set jj to "." & (contents of ii) if (jj is not in exRes) and (jj is not equal to ".*") and (jj is not equal to ".???") then set the end of exRes to jj end if end repeat end if end repeat
return exRes end getDocumentTypesExtensionsFromPath
on getDocumentTypesFromAppURL(aURL) set aBundle to current application’s NSBundle’s bundleWithURL:aURL if aBundle = missing value then return {} set aInfo to aBundle’s infoDictionary() if aInfo = missing value then return {} set aRes to aInfo’s objectForKey:"CFBundleDocumentTypes" –Document Types if aRes = missing value then return {} return aRes end getDocumentTypesFromAppURL
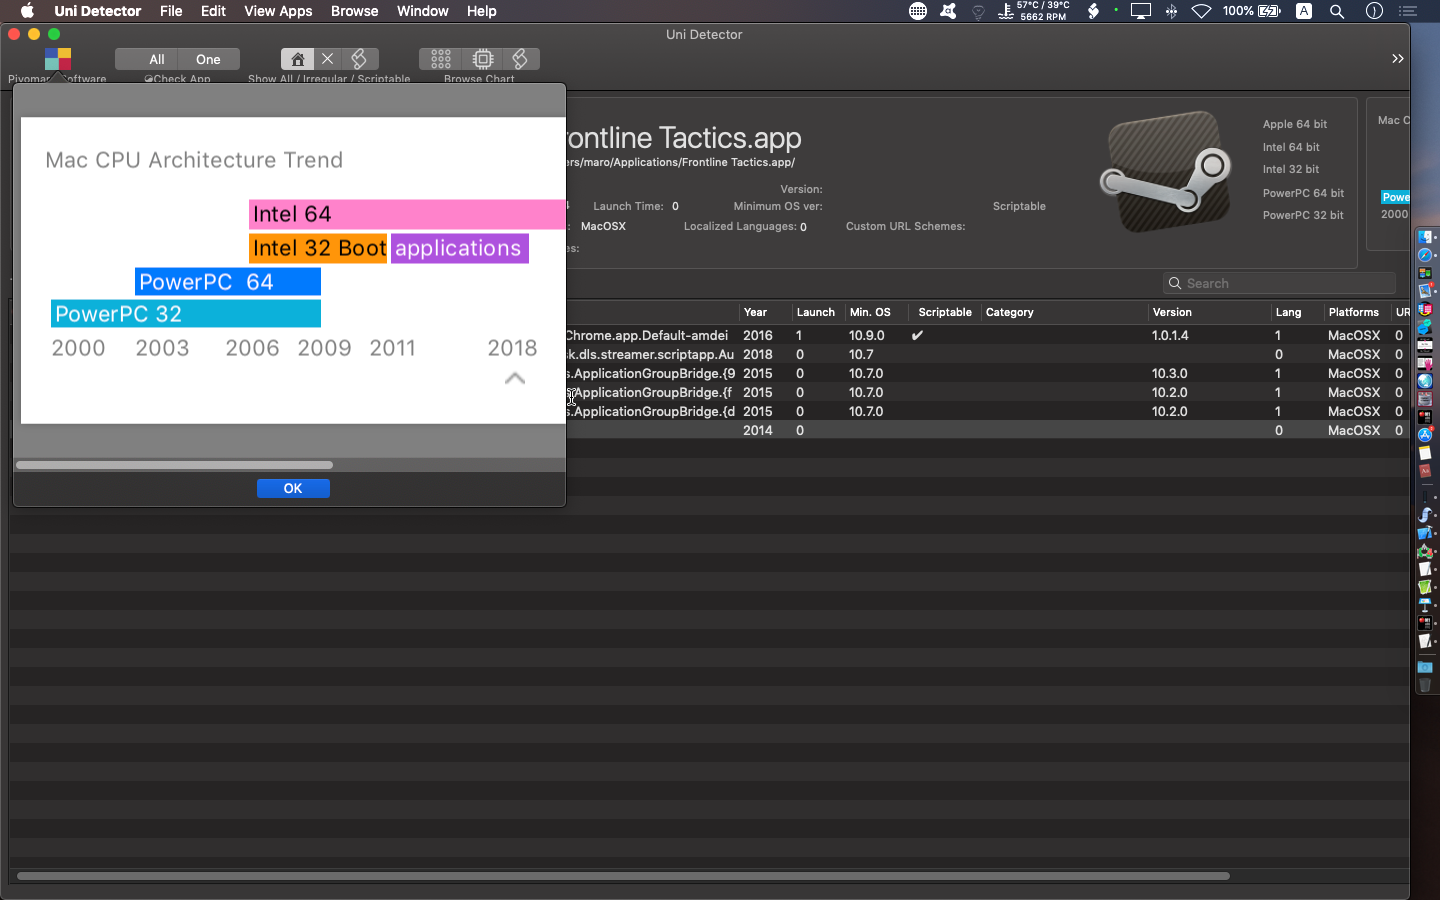
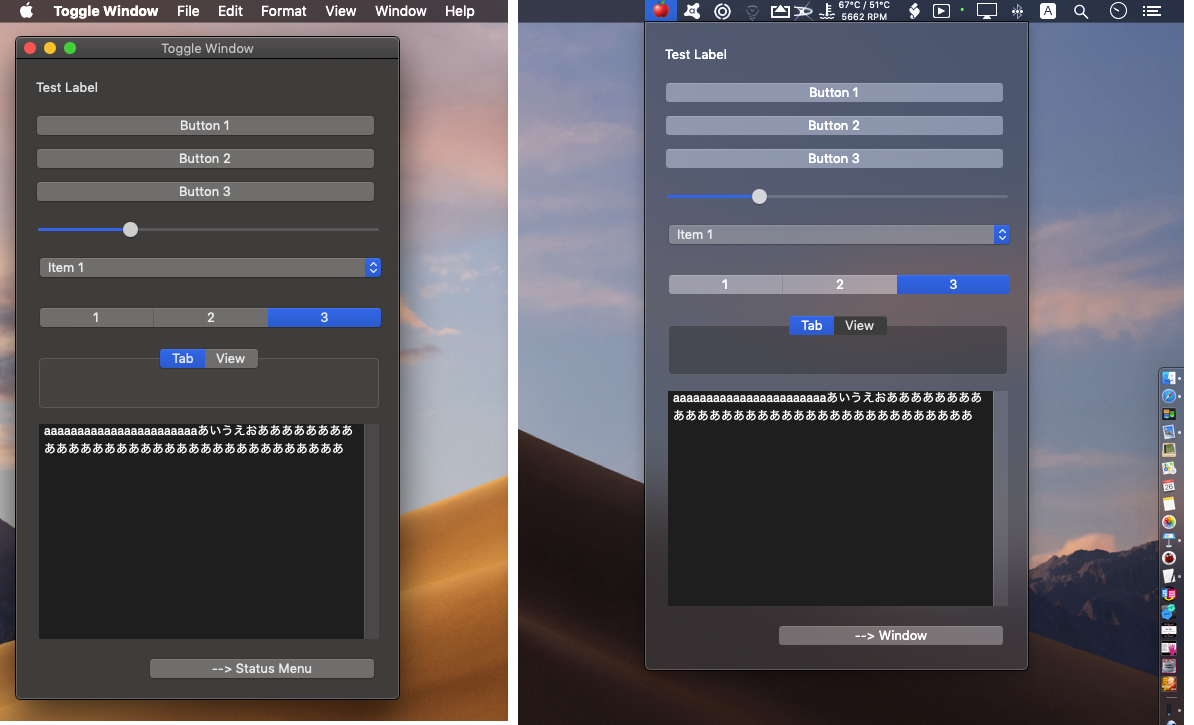
本サンプルについて、当初はステータスバー上のステータスアイテムからPopoverを表示させようかと考えたのですが、menu bar extra(ステータスアイテム)からPopoverは表示できないんですね(Uni Detectorのときに実験してうまく行かず、github上で公開している人のコードも眺めてみましたが……上から下まで全部自前で作っているようでした)。
— IBOutlets property theWindow : missing value property theView : missing value property aButton : missing value
property aFlag : true property aStatusItem : missing value
property aMenu : missing value property bMenuItem : missing value
on applicationWillFinishLaunching:aNotification aButton’s setTitle:"–> Status Menu" set aFlag to true theWindow’s setContentView:theView end applicationWillFinishLaunching:
on applicationShouldTerminate:sender — Insert code here to do any housekeeping before your application quits return current application’s NSTerminateNow end applicationShouldTerminate:
on clicked:aSender set aTag to (tag of aSender) as integer
if aTag = 100 then if aFlag = true then –通常Window表示→Menu表示 my makeStatusItem() theWindow’s performClose:aSender aButton’s setTitle:"–> Window" else –Popup表示→通常Window表示
–Created By Shane Stanley –Modified By Takaaki Naganoya use AppleScript version "2.4" use scripting additions use framework "Foundation"
property |NSURL| : a reference to current application’s |NSURL| property NSOrderedSet : a reference to current application’s NSOrderedSet property NSURLTagNamesKey : a reference to current application’s NSURLTagNamesKey
set anAlias to (choose file) clearTagsForPath(anAlias) of me –delete tags set aRes to getTagsForPath(anAlias) of me –check
— clear all tags on clearTagsForPath(anAlias) set aURL to |NSURL|’s fileURLWithPath:(POSIX path of anAlias) aURL’s setResourceValue:{} forKey:(NSURLTagNamesKey) |error|:(missing value) end clearTagsForPath
— get the tags on getTagsForPath(anAlias) set aURL to |NSURL|’s fileURLWithPath:(POSIX path of anAlias) set {theResult, theTags} to aURL’s getResourceValue:(reference) forKey:(NSURLTagNamesKey) |error|:(missing value) if theTags = missing value then return {} — because when there are none, it returns missing value return theTags as list end getTagsForPath
— set the tags, replacing any existing on setTagsForPath(tagList, anAlias) set aURL to |NSURL|’s fileURLWithPath:(POSIX path of anAlias) aURL’s setResourceValue:tagList forKey:(NSURLTagNamesKey) |error|:(missing value) end setTagsForPath
— add to existing tags on addTagsForPath(tagList, anAlias) set aURL to |NSURL|’s fileURLWithPath:(POSIX path of anAlias) — get existing tags set {theResult, theTags} to aURL’s getResourceValue:(reference) forKey:(NSURLTagNamesKey) |error|:(missing value) if theTags ≠ missing value then — add new tags set tagList to (theTags as list) & tagList set tagList to (NSOrderedSet’s orderedSetWithArray:tagList)’s allObjects() — delete any duplicates end if aURL’s setResourceValue:tagList forKey:(NSURLTagNamesKey) |error|:(missing value) end addTagsForPath
–再生中のポジションを取得 set tRes to (do JavaScript "document.querySelector(’#movie_player video’).currentTime;")
–再生状況を取得 set pRes to (do JavaScript "document.querySelector(’#movie_player video’).paused;")
if pRes = false then –再生中であればPauseする set aRes to (do JavaScript "document.querySelector(’#movie_player .ytp-play-button’).click();") end if
openYouTubeOnRemoteMachine(remoteUserName, remoteUserPass, remoteMachineName, tRes, aURL) of me end tell end if end tell
–指定のリモートマシン上のSafariでYouTubeの指定ムービーの指定箇所からの再生を行う on openYouTubeOnRemoteMachine(remoteUser, remotePass, remoteMachineLocal, newDuration, newURL) set remoteMachineName to "eppc://" & remoteUser & ":" & remotePass & "@" & remoteMachineLocal
–URLの加工。ちょっと手抜きをした if newDuration is not 0 then set tText to retTimeText(newDuration) of me if newURL contains "&" then set sepChar to "?" else set sepChar to "&" end if
set newURL to newURL & sepChar & "t=" & tText end if
using terms from application "Safari" tell application "Safari" of machine remoteMachineName if not running then –起動していなかったらあらためてSafariを起動 launchRemoteSafari(remoteMachineName) of me end if
try close every document end try
set aWin to make new document
tell aWin set URL to newURL –フルスクリーン再生をためしてみたが、こういう書き方ではなかった模様(URLオープンを待つ必要もある) –set aRes to (do JavaScript "document.querySelector(’#movie_player playFullscreen’).click();") end tell
end tell end using terms from end openYouTubeOnRemoteMachine
–リモートマシン上でSafariを起動する on launchRemoteSafari(aMachine) using terms from application "Finder" tell application "Finder" of machine aMachine open application file id "com.apple.Safari" end tell end using terms from end launchRemoteSafari
–数値を「h」「m」「s」でフォーマットして返す on retTimeText(aTime) set aHour to aTime div 3600 set aMinute to (aTime – (aHour * 3600)) div 60 set aSeconds to (aTime mod 60)
set aString to ""
if aHour > 0 then set aString to aHour & "h" end if
if aMinute > 0 then set aString to aString & (aMinute as integer) & "m" end if
if aSeconds > 0 then set aString to aString & (aSeconds as integer as string) & "s" end if
return (aString as string) end retTimeText
–Finderコメントをメタデータ経由で取得 on getFinderComment(aPOSIX) set aURL to |NSURL|’s fileURLWithPath:aPOSIX set aMetaInfo to NSMetadataItem’s alloc()’s initWithURL:aURL set metaDict to (aMetaInfo’s valuesForAttributes:{"kMDItemFinderComment"}) as record if metaDict = {} then return "" set aComment to kMDItemFinderComment of (metaDict) return aComment end getFinderComment
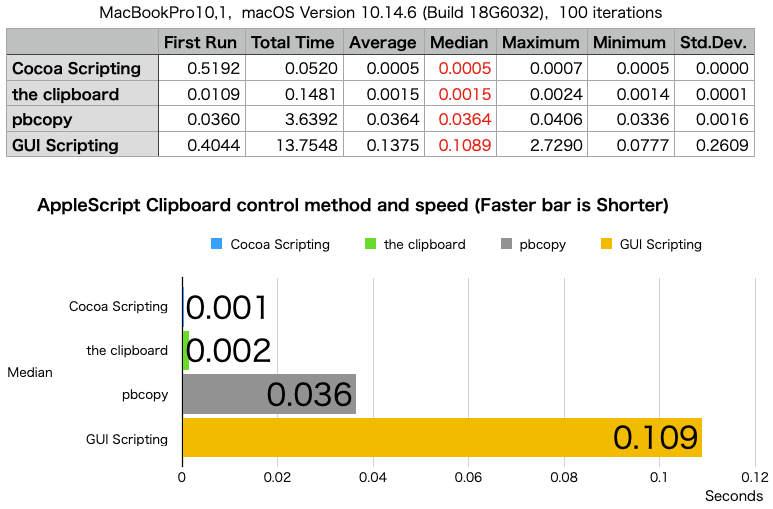
Classic Mac OSの頃は「しかたなく」クリップボードを使って行う処理がありましたが、最近(Mac OS X移行後)では極力使わないようにしています。文字コード変換、スタイル付きテキストのプレーンテキスト化などクリップボードを経由しないとできない処理がたくさんありました。画像の形式変換ですらクリップボードを経由して処理していた記憶があります。
クリップボードにデータを入れる「set the clipboad」、クリップボードからデータを取り出す「the clipboard」、クリップボードの情報を取得する「clioboard info」などがあります。スピードも遅くないのですが、本コマンドでクリップボード内容を捕捉できるまでに(クリップボードの内容が反映されるまでに)若干時間がかかります。
–Created 2015-08-03 by Shane Stanley use AppleScript version "2.4" use scripting additions use framework "Foundation" use framework "AppKit" — for NSPasteboard
my restoreClipboard:{"ABC"}
–クリップボードに内容を設定する on restoreClipboard:theArray — get pasteboard set thePasteboard to current application’s NSPasteboard’s generalPasteboard()
— clear it, then write new contents thePasteboard’s clearContents() thePasteboard’s writeObjects:theArray end restoreClipboard:
make new document activate end tell
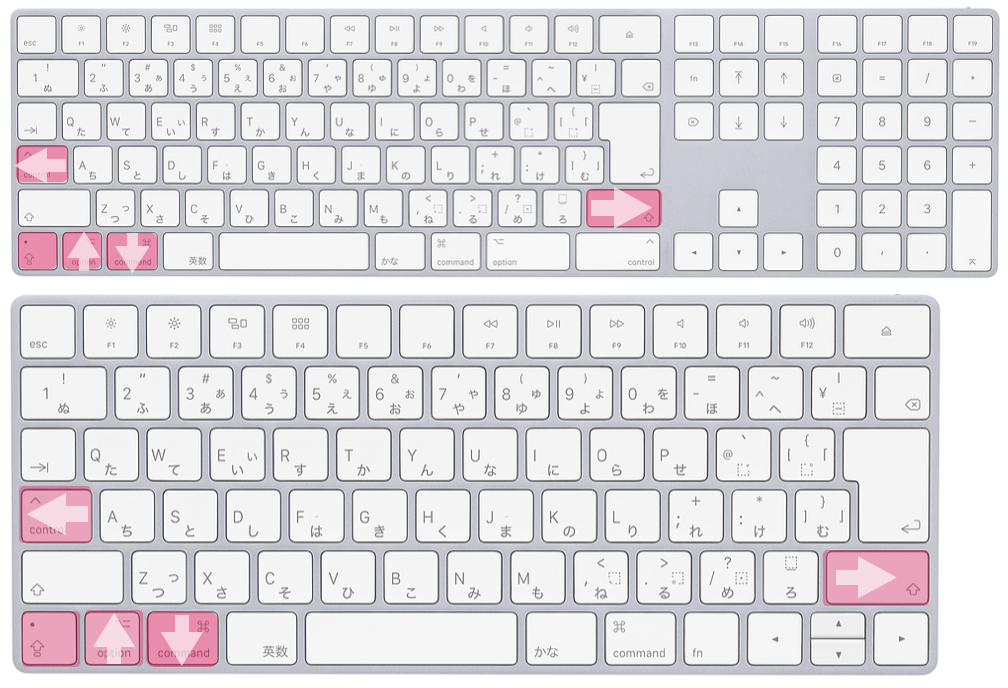
–Main Loop repeat set leftF to my checkModifier:"control" set rightF to my checkModifier:"shift" set upF to my checkModifier:"option" set downF to my checkModifier:"command"
set quitF to my checkModifier:"caps"
if quitF = true then return
if leftF = true then if curPosX > 1 then set curPosX to curPosX – 1 end if else if rightF = true then if curPosX ≤ curMax then set curPosX to curPosX + 1 end if end if
if upF = true then if curPosY > 1 then set curPosY to curPosY – 1 end if else if downF = true then if curPosY < curMax then set curPosY to curPosY + 1 end if end if
–make display text set aText to "" repeat with i from 1 to curMax + 1 if i = curPosX then set aText to aText & "🛑" else set aText to aText & "㍳" end if end repeat
set bText to "" repeat with y from 1 to curMax if y = curPosY then set bText to bText & rText & return else set bText to bText & aText & return end if end repeat
my displayText(bText)
end repeat
–テキスト画面描画 on displayText(aText) tell application "CotEditor" tell front document set contents to aText end tell end tell end displayText
–複数同時検出に対応 on checkModifier:keyName if keyName = "option" then set theMask to current application’s NSAlternateKeyMask as integer else if keyName = "control" then set theMask to current application’s NSControlKeyMask as integer else if keyName = "command" then set theMask to current application’s NSCommandKeyMask as integer else if keyName = "shift" then set theMask to current application’s NSShiftKeyMask as integer else if keyName = "caps" then set theMask to current application’s NSEventModifierFlagCapsLock as integer else if keyName = "num" then set theMask to current application’s NSEventModifierFlagNumericPad as integer else if keyName = "help" then set theMask to current application’s NSEventModifierFlagHelp as integer else if keyName = "fn" then set theMask to current application’s NSEventModifierFlagFunction as integer else return false end if
set theFlag to current application’s NSEvent’s modifierFlags() as integer if ((theFlag div theMask) mod 2) = 0 then return false else return true end if end checkModifier:
— Created 2020-09-27 by Takaaki Naganoya — 2020 Piyomaru Software use AppleScript version "2.4" use scripting additions use framework "Foundation"
–指定文字列の前後に存在するスペースと、文字列本体中に存在する2個以上の連続するスペースを削除して返す set a0Str to " First model, with mechanical scroll wheel. 10 GB model released later ." set aRes to removeWhiteSpaceRepeatation(a0Str, " ") of me –> "First model, with mechanical scroll wheel. 10 GB model released later ."
–クリーニング対象文字(たぶんスペース)が処理対象文字列の前後にあったり、途中に2つ以上連続して存在している場合には削除 on removeWhiteSpaceRepeatation(a0Str as string, aChar as string) if length of aChar is not equal to 1 then return false
set a1Str to trimFromHeadAndTail(a0Str, aChar) of me –> "First model, with mechanical scroll wheel. 10 GB model released later ."
set sucList to detectSuccsessionOfSpace(a1Str, aChar) of me –> {{43, 53}, {80, 108}}
if sucList = {} then return a1Str
set allRes to removeRepeatedSpaceChar(a1Str, sucList)
return allRes end removeWhiteSpaceRepeatation
–同一文字(スペース)の連続出現リスト({{start pos 1, end pos 1}, {start pos 2, end pos 2}……})をもとにテキストを切り抜く on removeRepeatedSpaceChar(a1Str as string, sucList as list) set aList to characters of a1Str
set aLen to length of aList set outStr to "" set aCount to 1 copy contents of item aCount of sucList to {sItem, eItem}
repeat with i in sucList copy i to {tmpS, tmpE} if aCount = tmpS then –Skip copy tmpE to aCount else set tmpStr to text (aCount) thru tmpS of a1Str set outStr to outStr & tmpStr copy tmpE to aCount end if end repeat
if tmpE < aLen then set tmpStr to text (tmpE + 1) thru -1 of a1Str set outStr to outStr & tmpStr end if
return outStr end removeRepeatedSpaceChar
–対象文字列で、2個以上同一文字(スペースを想定)が連続して存在する場合には削除する on detectSuccsessionOfSpace(a1Str as string, sucTargChar as string) set aList to characters of a1Str set aLen to length of aList set newList to {}
set tmpS to 0 set tmpE to 0 set spcF to false –false:spaceではない。true:spaceをみつけた set spcCount to 0
repeat with i from 1 to aLen set j to contents of item i of aList
if j = sucTargChar then –Space 1 char (must be a char)
if spcF = true then –スペースが連続している最中 set spcCount to spcCount + 1 else –スペースの連続部分(?)の先頭をフェッチした状態 set spcF to true set spcCount to 1 copy i to tmpS end if
else –連続スペースの末端部分 if spcF = true then copy i to tmpE if spcCount > 1 then set the end of newList to {tmpS, tmpE – 1} end if set spcCount to 0 set spcF to false else –何もしない end if end if
end repeat
return newList end detectSuccsessionOfSpace
–文字列の先頭と末尾から連続するスペースを検索して削除する on trimFromHeadAndTail(aStr as string, trimChar as string) set aLen to length of aStr set aList to characters of aStr
–Find not target character from head to tail set aCount to 1 repeat with i in aList set j to contents of i if j is not equal to trimChar then exit repeat end if set aCount to aCount + 1 end repeat
if aLen ≤ aCount then return ""
–Find not target character from tail to head set bCount to 1 repeat with ii in (reverse of aList) set jj to contents of ii if jj is not equal to trimChar then exit repeat end if set bCount to bCount + 1 end repeat
set resStr to text aCount thru (aLen – bCount + 1) of aStr return resStr end trimFromHeadAndTail
–Written By Philip Aker –文字置換ルーチン on repChar(origText as string, targStr as string, repStr as string) set {txdl, AppleScript’s text item delimiters} to {AppleScript’s text item delimiters, targStr} set temp to text items of origText set AppleScript’s text item delimiters to repStr set res to temp as text set AppleScript’s text item delimiters to txdl return res end repChar
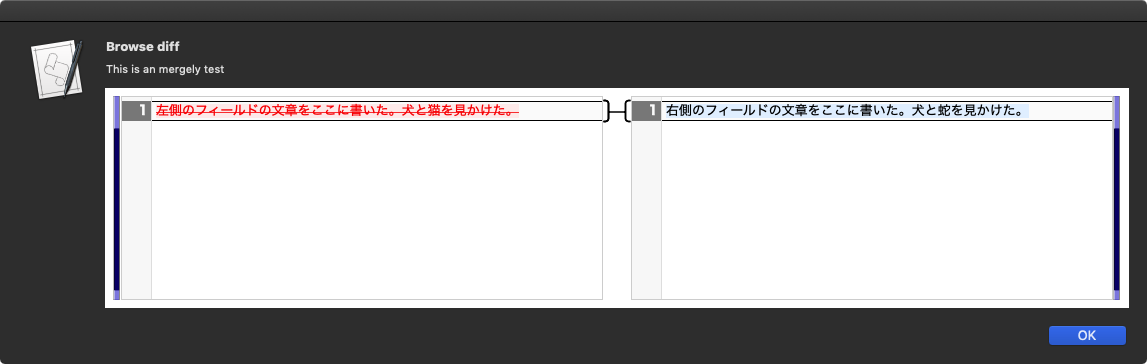
on dispDiff(aStr, bStr, aSize) using terms from scripting additions set mePath to path to me set resPath to (mePath as string) & "Contents:Resources:index.html" set myStr to (read (resPath as alias) as «class utf8») as string end using terms from
set aString to current application’s NSString’s stringWithFormat_(myStr, aStr, bStr) as string set paramObj to {myMessage:"Browse diff", mySubMessage:"This is an mergely test", htmlStr:aString, viewSize:aSize}
webD’s displayWebDialog(paramObj) end dispDiff end script
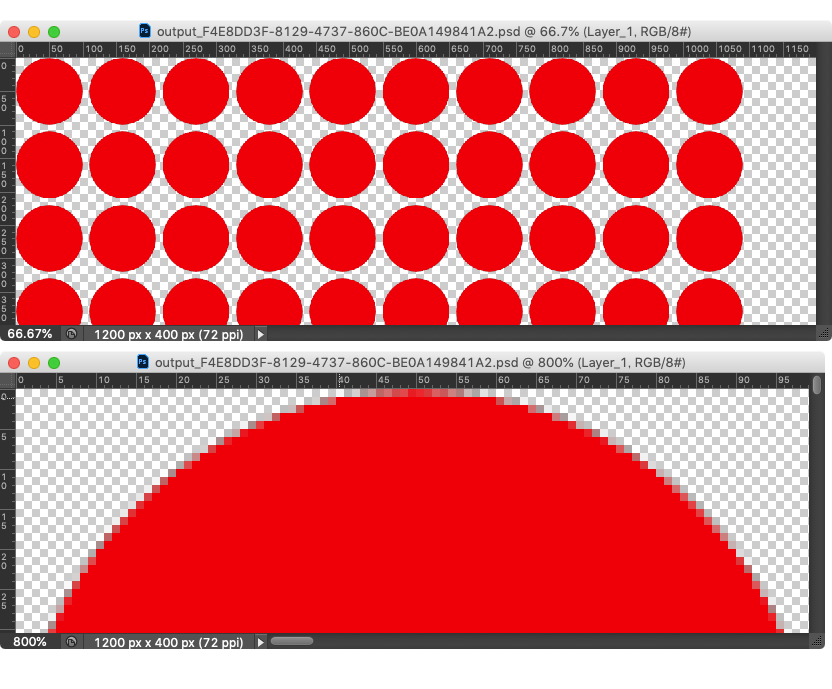
— Created 2016-03-12 by Takaaki Naganoya — Modified 2019-02-27 by Takaaki Naganoya — Modified 2020–09-21 by Takaaki Naganoya — 2020 Piyomaru Software use AppleScript version "2.4" use scripting additions use framework "Foundation" use framework "AppKit" use framework "SFPSDWriter" –https://github.com/shinyfrog/SFPSDWriter
property |NSURL| : a reference to current application’s |NSURL| property NSString : a reference to current application’s NSString property NSUUID : a reference to current application’s NSUUID property NSImage : a reference to current application’s NSImage property SFPSDWriter : a reference to current application’s SFPSDWriter property NSWorkspace : a reference to current application’s NSWorkspace
property SFPSDResolutionUnitPPI : 1 property SFPSDResolutionUnitPPC : 2
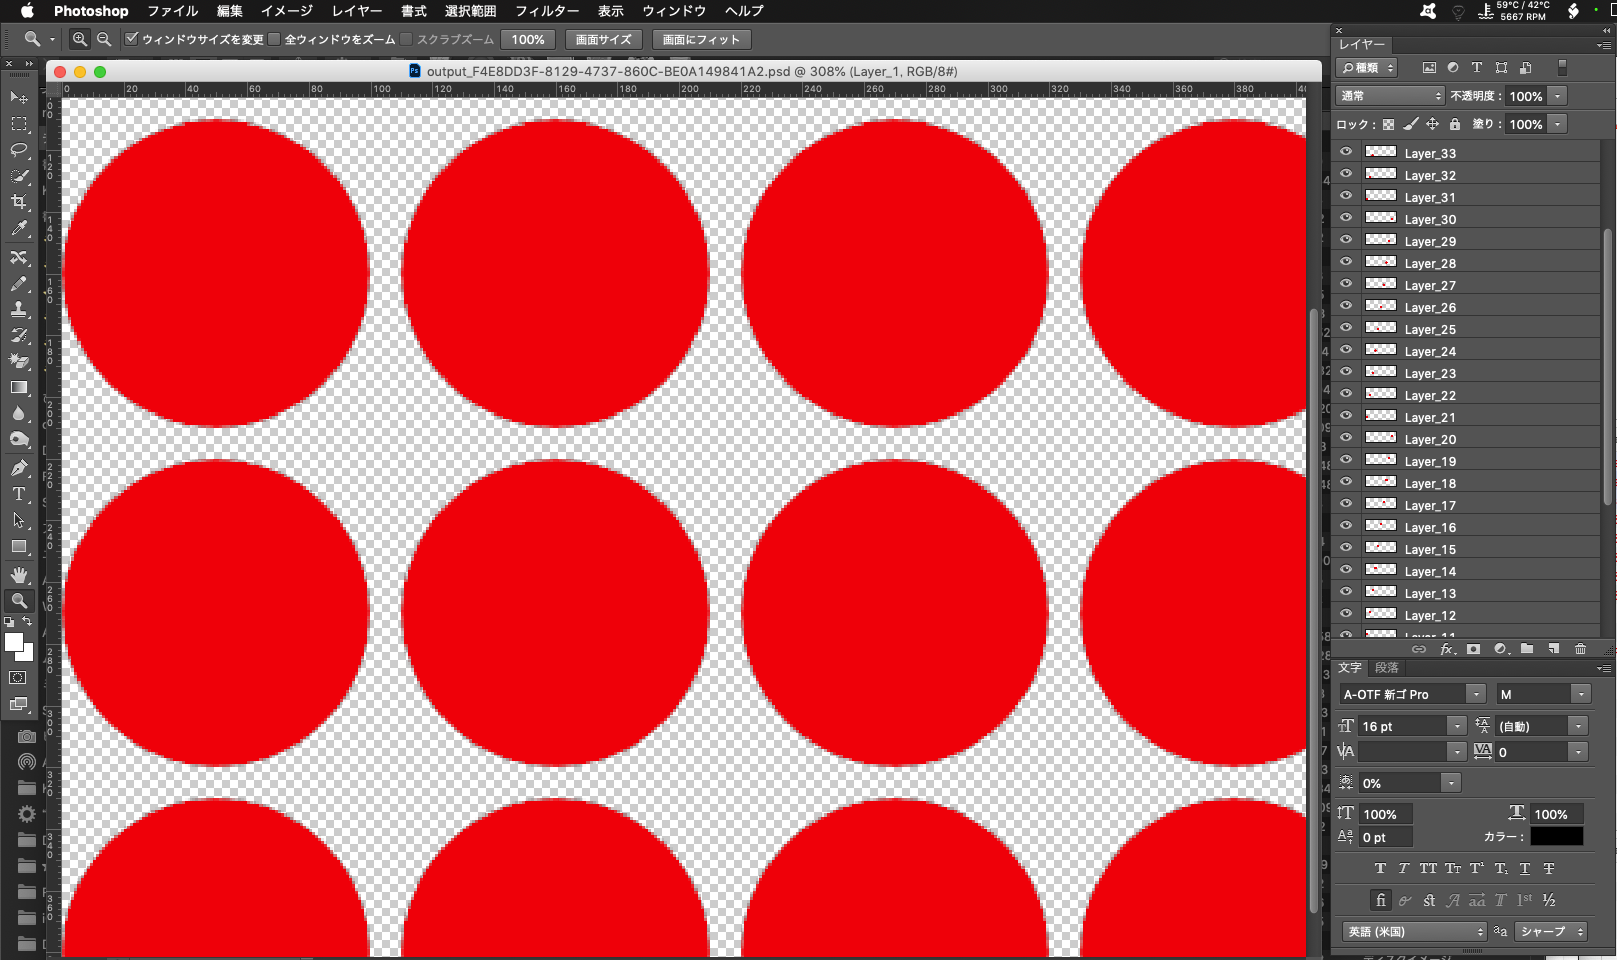
set anWriter to (SFPSDWriter’s alloc()’s initWithDocumentSize:(current application’s CGSizeMake(1200, 400)) andResolution:72.0 andResolutionUnit:(SFPSDResolutionUnitPPI))
set aCount to 1
repeat with yPos from 0 to 400 by 110 repeat with xPos from 0 to 1024 by 110 set aImage to (current application’s NSImage’s alloc()’s initWithSize:{100, 100}) set aColor to current application’s NSColor’s redColor() my drawCircleOnNSIMage(aImage, 100, 0, 0, aColor)
(anWriter’s addLayerWithNSImage:aImage andName:("Layer_" & aCount as string) andOpacity:1.0 andOffset:{x:(xPos as real), y:(yPos as real)}) set aCount to aCount + 1 end repeat end repeat
set aPSD to anWriter’s createPSDData()
set theName to NSUUID’s UUID()’s UUIDString() set pathString to NSString’s stringWithString:("~/Desktop/output_" & theName & ".psd") set newPath to pathString’s stringByExpandingTildeInPath()
aPSD’s writeToFile:newPath atomically:true
# MARK: Call By Reference on drawCircleOnNSIMage(aImage, aRadius, aXpos, aYpos, aColor) set aBezier to generateCircle(aRadius, aXpos, aYpos) of me (aImage)’s lockFocus() aColor’s |set|() aBezier’s fill() –ぬりつぶし (aImage)’s unlockFocus() end drawCircleOnNSIMage
# MARK: circleのBezier曲線を作成して返す on generateCircle(theRadius, x, y) set aRect to current application’s NSMakeRect(x, y, theRadius, theRadius) set aCirCle to current application’s NSBezierPath’s bezierPath() aCirCle’s appendBezierPathWithOvalInRect:aRect return aCirCle end generateCircle
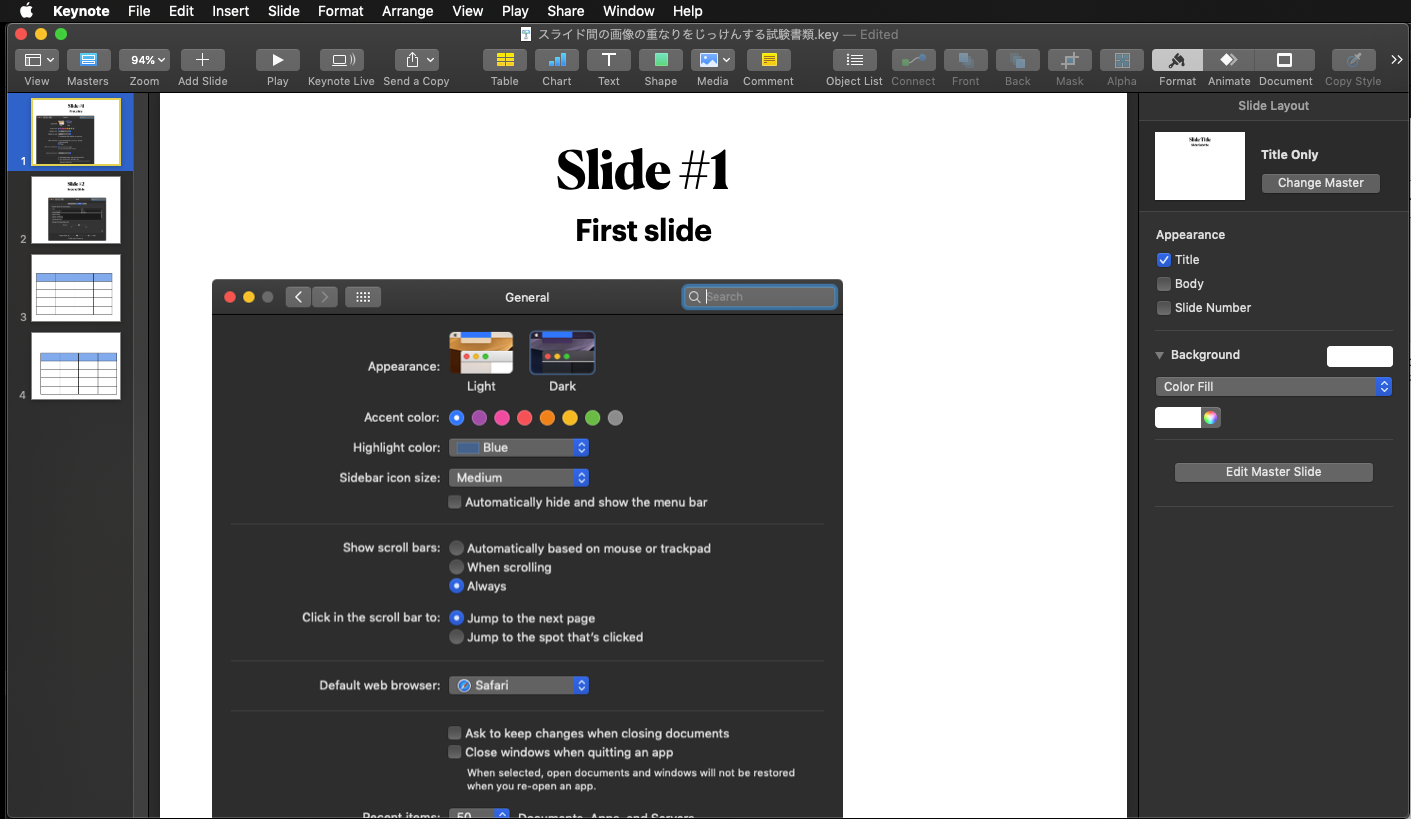
tell front document set allNum to count every slide if allNum < 2 then return –slideの枚数が少なかった場合に処理終了
set curSlide to current slide if allNum = curSlide then return –current slideが末尾だった場合処理終了
set sNum to slide number of curSlide set nextSlide to slide (sNum + 1)
–最初のページ(スライド)からオブジェクトを収集 tell current slide set curObj1 to every image set curObj2 to every group set curObjList to curObj1 & curObj2 if curObjList = {} then return end tell
–次のページ(スライド)からオブジェクトを収集 tell nextSlide set nextObj1 to every image set nextObj2 to every group set nextObjList to nextObj1 & nextObj2 if nextObjList = {} then return end tell
set nexObjRes to calcOverlappedObj(curObjList, nextObjList) of me repeat with i in nexObjRes copy i to {origID, targID} set aOrigObj to contents of item origID of curObjList set aTargObj to contents of item origID of nextObjList set origPos to position of aOrigObj set position of aTargObj to origPos end repeat
set current slide to slide sNum end tell end tell
–与えられた2つのリストに入っているKeynoteオブジェクトの矩形座標が重なっているものをIDペアで出力する –同時に複数のオブジェクトが重なっていないことが前提 on calcOverlappedObj(objList1, objList2) tell application "Keynote" –最初のページのオブジェクトからオブジェクトIDとNSRectからなるリストを作成 set objRecList1 to {} set aCount to 1 repeat with i in objList1 if contents of i is not equal to {} then set {x1, y1} to position of i set aRect to {origin:{x:x1, y:y1}, |size|:{|width|:(width of i), |height|:(height of i)}}
set the end of objRecList1 to {objID:aCount, rect:aRect} end if set aCount to aCount + 1 end repeat
–次のページのオブジェクトからオブジェクトIDとNSRectからなるリストを作成 set objRecList2 to {} set aCount to 1 repeat with i in objList2 if contents of i is not equal to {} then set {x1, y1} to position of i set aRect to {origin:{x:x1, y:y1}, |size|:{|width|:(width of i), |height|:(height of i)}}
set the end of objRecList2 to {objID:aCount, rect:aRect} end if set aCount to aCount + 1 end repeat
–最初のページのオブジェクトと次のページのオブジェクトで矩形エリアが重なっているオブジェクトを抽出してそれぞれのIDをペアにしたリストを作成 set matchList to {} repeat with i in objRecList1
set origRect to rect of i set origID to objID of i
repeat with ii in objRecList2
set targRect to rect of ii set targID to objID of ii set tRes to detectRectanglesCollision(origRect, targRect) of me
if tRes = true then set the end of matchList to {origID, targID} end if end repeat
end repeat
return matchList end tell end calcOverlappedObj
–NSRect同士の衝突判定 on detectRectanglesCollision(aRect, bRect) set a1Res to (current application’s NSIntersectionRect(aRect, bRect)) as {record, list} set tmpClass to class of a1Res
if tmpClass = record then –macOS 10.10, 10.11, 10.12 return not (a1Res = {origin:{x:0.0, y:0.0}, |size|:{width:0.0, height:0.0}}) else if tmpClass = list then –macOS 10.13 or later return not (a1Res = {{0.0, 0.0}, {0.0, 0.0}}) end if end detectRectanglesCollision
— Created 2015-11-01 by Takaaki Naganoya — 2015 Piyomaru Software use AppleScript version "2.4" use scripting additions use framework "Foundation" use framework "AppKit"
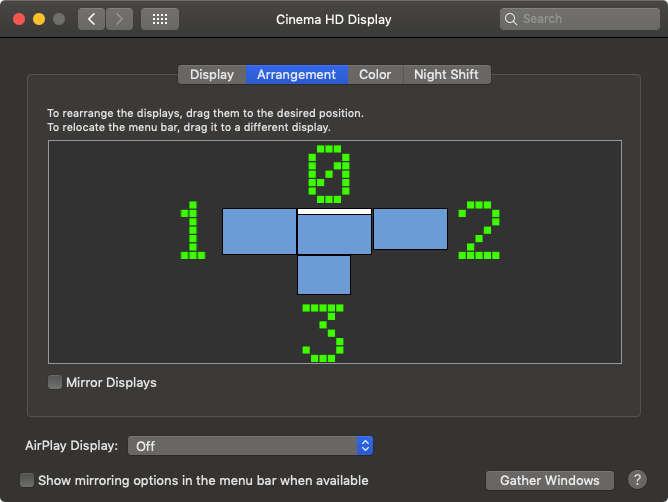
tell application "Finder" if (count every window) = 0 then return tell front window set {xPos, yPos} to position log {xPos, yPos} end tell end tell
set dispID to getPointInWhichScreen(xPos, yPos) of me
–指定座標がどのディスプレイ上に表示されているかをIDで返す(0はじまり。0はメインディスプレイ) on getPointInWhichScreen(xPos, yPos) set dList to getScreensResol() of me
set aPoint to current application’s NSMakePoint(xPos, yPos) set dCount to 0 repeat with i in dList set dRes to current application’s NSPointInRect(aPoint, i) as boolean
if dRes = true then return dCount end if set dCount to dCount + 1 end repeat
return dCount – 1 –ちょっと怪しいが、動作している様子 end getPointInWhichScreen
on getScreensResol() set dispList to (current application’s NSScreen’s screens()) as list set dList to {} repeat with i in dispList set framePref to i’s visibleFrame() set {xPos, yPos} to first item of framePref set theInfo to (i’s deviceDescription()’s NSDeviceSize) as record set a1Rect to {origin:{x:xPos, y:yPos}, |size|:theInfo} set the end of dList to a1Rect end repeat return dList end getScreensResol