Menu

Skip to content
AppleScriptの穴
  • Home
  • Products
  • Books
  • Docs
  • Events
  • Forum
  • About This Blog
  • License
  • 仕事依頼

AppleScriptの穴

Useful & Practical AppleScript archive. Click '★Click Here to Open This Script' Link to download each AppleScript

月: 2018年11月

第8世代Intel Core搭載Mac新モデルでもHaswellと返すsystem info

Posted on 11月 30, 2018 by Takaaki Naganoya

システムまわりの情報を返すAppleScriptの「system info」コマンドが、先日発売された第8世代Intel Coreプロセッサ「Coffe Lake」搭載のMac miniでも「Intel x86-64h Haswell」と返してくることが判明しました。

–> Wikipedia “List of Macintosh models grouped by CPU type”

MacBook Pro Retina 2012だと「CPU type of (system info)」を実行すると、「Intel 80486」と返してきますが、Mac mini 2014だと「Intel x86-64h Haswell」と返します(macOS 10.12.6上で実行)。

先日発売された第8世代Intel Core搭載のMac mini 2018を店頭でさわってみたところ、同機搭載のmacOS 10.14上で、「Intel x86-64h Haswell」と結果を返してきました。


▲PowerBook G4/667(PowerPC G4)@Mac OS X 10.4.11で実行したところ。「PowerPC 7450」と返ってくる

正確なCPU Brand nameを取得するには、こちらの「CPUのBrand Nameとバス速度を表示」AppleScriptを使ってください(CPU Type、Coreの世代を表すコード名ではないのですが、「3720QM」などとBrand Nameを取得できれば、そこから「Ivy Bridge」といった名称テーブルで付け合わせることは十分に可能です)。

CPUアーキテクチャの変わり目の時代に、実行マシンがPowerPC/Intelのどちらかを判定するような用途に使ったこの情報。マシンが想定よりも速すぎる/遅すぎる場合への対策を行うためにこのsystem infoの情報を読んで判定していました。

CPUアーキテクチャが(Intelに)変わってAppleScriptの処理を書き換える必要が出たのは、ファイル処理です。連番ファイルを順次破損チェックして、破損していたら削除して、前の番号のファイルをそのままコピーしてリネームする処理を行なっていたのですが、Intel CPUで実行したら、キャッシュの効きすぎなのか高速なためなのか、破損ファイルが2つ続くとファイルのコピーが間に合わずにエラーになりました。

その際には、処理方式を見直して2パスで(破損画像チェック&削除フェーズ → 欠損画像の補完フェーズ)処理を行うように変更して対処。また、前のファイル番号の画像を単純にコピーするのではなく、空白ブロックを一括で埋める方式に変更して、複数連番画像が欠損しているケースに対応しました。

あとは、データをhexdumpしたときに、byte orderを考慮しつつデータを取り出すような処理を行なったときに、PowerPC/IntelのCPUの違いを検出しました。AppleScript的には、Intel x32とIntel x64の違いについてはほぼ意識する必要はありません。

また、CPUアーキテクチャが変わる可能性があるので、地味にCPUアーキテクチャの確認はおさえておきたいノウハウです。

Posted in System | Tagged 10.12savvy 10.13savvy 10.14savvy | Leave a comment

WebView+ボタンを作成 v3(URLから読み込み)

Posted on 11月 28, 2018 by Takaaki Naganoya

WkWebViewを動的に生成して、YouTube上の指定ムービーを再生するAppleScriptです。

# AppleScriptでは、Webブラウザに命令を出せば数行のコマンドで簡単に任意のURLのWebコンテンツを表示させられますが、本ScriptはAppleScriptから他のアプリケーションを介さずに直接Cocoaの機能を呼び出して自前でWebコンテンツを表示させるものです

NSWindow+NSSplitView+WKWebViewを作成して、Webサーバー上の内容を表示します。WkWebViewでWebの内容を表示させるのにかなり苦労しましたが、Objective-Cのサンプル数本を比較してテストし実現しました。

WkWebViewでコンテンツを表示するのにこんなに大変だと思いませんでしたが、これができるようになったおかげで、AppleScriptの処理結果のURLを(Webブラウザを利用せずに)プレビューできます。

グラフ描画のプログラムがJavaScript+WebViewで作られているケースが多々あるため、凝ったインタラクティブなグラフの表示を行ったり画像やPDFに出力できるようにもなったわけで、たいへんけっこうなことです。


▲Auto StartでYouTube上のムービーの再生を開始する

まだ解決できていないのは、YouTubeのムービー再生が始まるとウィンドウをクローズしてAppleScriptの実行が終了していても再生中の音声が停止しないあたりでしょうか。メモリ上からWebブラウザのオブジェクトを明示的にパージする方法についてはまだ実装できていません。

あと、Script Debugger上で動かすと、WkWebView上のコンテンツの操作(YouTube映像の再生コントロールとか)ができなくなります。ねんのため。

AppleScript名:WebView+ボタンを作成 v3(URLから読み込み)
— Created 2018-11-27 by Takaaki Naganoya
— 2018 Piyomaru Software
use AppleScript version "2.4"
use scripting additions
use framework "Foundation"
use framework "AppKit"
use framework "WebKit"

property |NSURL| : a reference to current application’s |NSURL|
property NSColor : a reference to current application’s NSColor
property NSString : a reference to current application’s NSString
property NSScreen : a reference to current application’s NSScreen
property NSButton : a reference to current application’s NSButton
property NSWindow : a reference to current application’s NSWindow
property NSSplitView : a reference to current application’s NSSplitView
property NSTextView : a reference to current application’s NSTextView
property NSScrollView : a reference to current application’s NSScrollView
property WKWebView : a reference to current application’s WKWebView
property WKUserScript : a reference to current application’s WKUserScript
property NSURLRequest : a reference to current application’s NSURLRequest
property NSMutableString : a reference to current application’s NSMutableString
property NSWindowController : a reference to current application’s NSWindowController
property NSTitledWindowMask : a reference to current application’s NSTitledWindowMask
property NSRoundedBezelStyle : a reference to current application’s NSRoundedBezelStyle
property NSUTF8StringEncoding : a reference to current application’s NSUTF8StringEncoding
property NSBackingStoreBuffered : a reference to current application’s NSBackingStoreBuffered
property WKUserContentController : a reference to current application’s WKUserContentController
property NSMomentaryLightButton : a reference to current application’s NSMomentaryLightButton
property WKWebViewConfiguration : a reference to current application’s WKWebViewConfiguration
property NSScreenSaverWindowLevel : a reference to current application’s NSScreenSaverWindowLevel
property WKUserScriptInjectionTimeAtDocumentEnd : a reference to current application’s WKUserScriptInjectionTimeAtDocumentEnd

property windisp : false
property wController : false

set aWidth to 1100
set aHeight to 600

set aTitle to "WkWebView test"
set aButtonMSG to "OK"
–set aURL to "https://www.youtube.com/watch?v=GP_tVXTYdmY&autoplay=1&hd=1"
set aURL to "https://www.youtube.com/embed/GP_tVXTYdmY?autoplay=1&hd=1"

set paramObj to {aWidth, aHeight, aTitle, aURL, aButtonMSG, "600"}
my performSelectorOnMainThread:"dispWebView:" withObject:(paramObj) waitUntilDone:true

on dispWebView:paramObj
  set my windisp to false
  
copy (paramObj as list) to {aWidth, aHeight, aTitle, tmpURL, aButtonMSG, timeOutSecs}
  
  
set (my windisp) to true
  
  
set aWidth to aWidth as integer
  
set aHeight to aHeight as integer
  
set tmpURL to tmpURL as string
  
  
–WebViewをつくる
  
set aConf to WKWebViewConfiguration’s alloc()’s init()
  
set jsSource to my fetchJSSourceString(tmpURL)
  
set userScript to WKUserScript’s alloc()’s initWithSource:jsSource injectionTime:(WKUserScriptInjectionTimeAtDocumentEnd) forMainFrameOnly:true
  
set userContentController to WKUserContentController’s alloc()’s init()
  
userContentController’s addUserScript:(userScript)
  
aConf’s setUserContentController:userContentController
  
  
set aWebView to WKWebView’s alloc()’s initWithFrame:(current application’s NSMakeRect(0, 0, aWidth, aHeight – 100)) configuration:aConf –フレームの大きさは根拠レス
  
aWebView’s setNavigationDelegate:me
  
aWebView’s setUIDelegate:me
  
aWebView’s setTranslatesAutoresizingMaskIntoConstraints:true
  
  
set bURL to |NSURL|’s URLWithString:tmpURL
  
set aReq to NSURLRequest’s requestWithURL:bURL
  
aWebView’s loadRequest:aReq


–Buttonをつくる
  
set bButton to (NSButton’s alloc()’s initWithFrame:(current application’s NSMakeRect(0, 0, aWidth, 40)))
  
bButton’s setTitle:aButtonMSG
  
bButton’s setTarget:me
  
bButton’s setAction:("clicked:")
  
bButton’s setKeyEquivalent:(return)
  
  
–SplitViewをつくる
  
set aSplitV to NSSplitView’s alloc()’s initWithFrame:(current application’s NSMakeRect(0, 0, aWidth, aHeight))
  
aSplitV’s setVertical:false
  
  
aSplitV’s addSubview:aWebView
  
aSplitV’s addSubview:bButton
  
aSplitV’s setNeedsDisplay:true
  
  
set aWin to makeWinWithView(aSplitV, aWidth, aHeight, aTitle, 1.0)
  
  
–NSWindowControllerを作ってみた
  
set my wController to NSWindowController’s alloc()
  
my (wController’s initWithWindow:aWin)
  
  
my (wController’s showWindow:me)
  
  
set aCount to (timeOutSecs as string as number) * 10 –timeout seconds * 10
  
repeat aCount times
    if (my windisp) = false then
      exit repeat
    end if
    
delay 0.1
  end repeat
  
  
–Purge Web Objects (not success)
  
set aWebView to ""
  
set userContentController to ""
  
set aConf to ""
  
set userScript to ""
  
set my wController to ""
  
  
my closeWin:bButton
end dispWebView:

–Button Clicked Event Handler
on clicked:aSender
  set (my windisp) to false
  
my closeWin:aSender
end clicked:

–make Window for Input
on makeWinWithView(aView, aWinWidth, aWinHeight, aTitle, alphaV)
  set aScreen to NSScreen’s mainScreen()
  
set aFrame to {{0, 0}, {aWinWidth, aWinHeight}}
  
set aBacking to NSTitledWindowMask –NSBorderlessWindowMask
  
set aDefer to NSBackingStoreBuffered
  
  
— Window
  
set aWin to NSWindow’s alloc()
  (
aWin’s initWithContentRect:aFrame styleMask:aBacking backing:aDefer defer:false screen:aScreen)
  
  
aWin’s setTitle:aTitle
  
aWin’s setDelegate:me
  
aWin’s setDisplaysWhenScreenProfileChanges:true
  
aWin’s setHasShadow:true
  
aWin’s setIgnoresMouseEvents:false
  
aWin’s setLevel:(NSScreenSaverWindowLevel)
  
aWin’s setOpaque:false
  
aWin’s setAlphaValue:alphaV –append
  
aWin’s setReleasedWhenClosed:true
  
aWin’s |center|()
  
  
— Set Custom View
  
aWin’s setContentView:aView
  
  
return aWin
end makeWinWithView

–close win
on closeWin:aSender
  set tmpWindow to aSender’s |window|()
  
  
repeat with n from 10 to 1 by -1
    (tmpWindow’s setAlphaValue:n / 10)
    
delay 0.02
  end repeat
  
  
my wController’s |close|()
end closeWin:

on viewDidLoad:aNotification
  return true
end viewDidLoad:

on fetchJSSourceString(aURL)
  set jsURL to |NSURL|’s URLWithString:aURL
  
set jsSourceString to NSString’s stringWithContentsOfURL:jsURL encoding:(NSUTF8StringEncoding) |error|:(missing value)
  
return jsSourceString
end fetchJSSourceString

★Click Here to Open This Script 

Posted in Internet URL | Tagged 10.12savvy 10.13savvy 10.14savvy NSButton NSMomentaryLightButton NSMutableString NSScreen NSScrollView NSSplitView NSString NSTextView NSURL NSURLRequest NSWindow NSWindowController WKUserContentController WKUserScript WKWebView WKWebViewConfiguration | 1 Comment

teratailの指定IDのユーザー情報を取得する_curl

Posted on 11月 27, 2018 by Takaaki Naganoya

プログラミング系質問サイトteratailのREST APIを呼び出して、指定ユーザー名の情報を取得するAppleScriptです。

TeratailのREST APIは、タグ、ユーザー、質問の3ジャンルの情報取得を行えるように整備されており、特定カテゴリ(タグで分類)の新規質問が投稿されたかどうかを定期的に確認するようなAppleScriptを作って運用することもできます(そこまでやっていないですけれども)。

REST API呼び出しにはNSURLConnectionからNSURLSessionに移行していますが、どうもNSURLSessionだと呼び出せない(AppleScriptからの呼び出し処理が完了しない)サービスがあったりするので、結局shellのcurlコマンドを呼び出すのが手短にすむケースが多いようです。

Teratailの場合も、NSURLSessionで呼び出せるAPIもあれば、結果が返ってこないAPIもあり、NSURLConnectionよりも使い勝手がよくないと感じています(個人の感想です)。

このあたり、将来的なmacOSのアップデートでNSURLConnectionが使えなくなる日が来るのかもしれませんが、curlコマンドを使うように集約するべきなのか、NSURLSessionで書き換えるべきなのか悩ましいところです。

AppleScript名:teratailの指定IDのユーザー情報を取得する_curl
— Created 2018-11-26 by Takaaki Naganoya
— 2018 Piyomaru Software
use AppleScript version "2.5"
use scripting additions
use framework "Foundation"

property |NSURL| : a reference to current application’s |NSURL|
property NSString : a reference to current application’s NSString
property NSURLSession : a reference to current application’s NSURLSession
property NSURLQueryItem : a reference to current application’s NSURLQueryItem
property NSJSONSerialization : a reference to current application’s NSJSONSerialization
property NSURLComponents : a reference to current application’s NSURLComponents
property NSMutableDictionary : a reference to current application’s NSMutableDictionary
property NSMutableURLRequest : a reference to current application’s NSMutableURLRequest
property NSUTF8StringEncoding : a reference to current application’s NSUTF8StringEncoding
property NSURLSessionConfiguration : a reference to current application’s NSURLSessionConfiguration

set aUserRes to searchOneUserByDisplayName("Piyomaru") of me
–> {meta:{limit:20, message:"success", hit_num:1, total_page:1, page:1}, users:{{score:43, photo:"https://teratail.storage.googleapis.com/uploads/avatars/u6/66639/MSIS21by_thumbnail.jpg", display_name:"Piyomaru"}}}

on searchOneUserByDisplayName(aName)
  set aRec to {q:aName}
  
set reqURLStr to "https://teratail.com/api/v1/users/search"
  
set bURL to retURLwithParams(reqURLStr, aRec) of me
  
  
set tmpData to (do shell script "curl -X GET \"" & bURL & "\"")
  
set jsonString to NSString’s stringWithString:tmpData
  
set jsonData to jsonString’s dataUsingEncoding:(NSUTF8StringEncoding)
  
set aJsonDict to NSJSONSerialization’s JSONObjectWithData:jsonData options:0 |error|:(missing value)
  
if aJsonDict = missing value then return false
  
return (aJsonDict as record)
end searchOneUserByDisplayName

on retURLwithParams(aBaseURL, aRec)
  set aDic to NSMutableDictionary’s dictionaryWithDictionary:aRec
  
set aKeyList to (aDic’s allKeys()) as list
  
set aValList to (aDic’s allValues()) as list
  
set aLen to length of aKeyList
  
  
set qList to {}
  
repeat with i from 1 to aLen
    set aName to contents of item i of aKeyList
    
set aVal to contents of item i of aValList
    
set the end of qList to (NSURLQueryItem’s queryItemWithName:aName value:aVal)
  end repeat
  
  
set aComp to NSURLComponents’s alloc()’s initWithString:aBaseURL
  
aComp’s setQueryItems:qList
  
set aURL to (aComp’s |URL|()’s absoluteString()) as text
  
  
return aURL
end retURLwithParams

★Click Here to Open This Script 

Posted in Network Record REST API shell script URL | Tagged 10.11savvy 10.12savvy 10.13savvy 10.14savvy NSJSONSerialization NSMutableDictionary NSString NSURL NSURLComponents NSURLQueryItem | 1 Comment

Mail.appで選択中のフォルダ以下に存在する全メールの添付ファイルの拡張子のバリエーションを集計

Posted on 11月 25, 2018 by Takaaki Naganoya

Mail.appで選択中のフォルダ(メールボックス)以下に存在する全メールの添付ファイルの拡張子のバリエーションを集計するAppleScriptです。

階層フォルダで管理しているメールボックス(フォルダ)のうち、選択しているメールフォルダ以下のすべてのメッセージに添付されているファイルの拡張子を取得して結果を表示します。

何のために作ったとかいうことはなくて、ただ単に調査のために作ったものです。処理するメールの数にもよりますが、CPU負荷も大きく、時間もそれなりに(数分ぐらい?)かかります。

AppleScript名:Mail.appで選択中のフォルダ以下に存在する全メールの添付ファイルの拡張子のバリエーションを集計
—
–  Created by: Takaaki Naganoya
–  Created on: 2018/11/25
—
–  Copyright © 2018 Piyomaru Software, All Rights Reserved
—
use AppleScript version "2.4"
use scripting additions
use framework "Foundation"

script spd
  property fullSubPath : {}
  
property tmpMesList : {}
  
property outList : {}
end script

property aFullPath : ""
property tmpFullPath : ""
property extList : {}

–変数の初期化
set tmpFullPath to ""
set aFullPath to ""
set extList to {}
set (fullSubPath of spd) to {}
set (tmpMesList of spd) to {}
set (outList of spd) to {}

–選択中のメールボックス(フォルダ)のフルパスを文字列で取得(dir1/dir2/dir3)
set targMBObj to getSelectedOneMailBox() of me
extraxctTextFullPathOfMBObject(targMBObj) of me

copy aFullPath to targMB

if targMB = "" then
  display notification "Mail.app上で選択中のメールボックス(フォルダ)はありません。" –"No Mail.app folder selection" in Japanese
  
return
end if

–指定メールボックス(フォルダ)以下のすべてのメールボックス(フォルダ)を取得する
tell application "Mail"
  tell mailbox targMB
    set aList to name of every mailbox
  end tell
end tell

–指定フォルダ以下のMailboxをサブフォルダまで再帰ですべて取得する
repeat with i in aList
  set j to contents of i
  
set tmpPath to targMB & "/" & j
  
set the end of (fullSubPath of spd) to tmpPath
  
getEverySubMailbox(tmpPath) of me
end repeat

–全サブフォルダからメールを取得し、添付ファイルの確認を行なって、添付ファイルの拡張子を取得して集計
repeat with i in (fullSubPath of spd)
  set tmpBox to contents of i
  
  
tell application "Mail"
    tell mailbox tmpBox
      set mesList to (every message)
    end tell
    
    
–指定フォルダ中のMailでループ
    
repeat with ii in mesList
      set jj to contents of ii
      
      
try
        set attS to mail attachment of jj
      on error
        set attS to {}
      end try
      
      
if attS is not equal to {} then
        
        
–Mailの添付ファイルの拡張子を集計する
        
try
          repeat with iii in attS
            set jjj to contents of iii
            
set aName to name of jjj
            
            
set aExt to getPathExtension(aName) of me
            
            
if (aExt is not in extList) and (aExt is not equal to "") then
              set the end of extList to aExt
            end if
            
          end repeat
        end try
      end if
    end repeat
  end tell
end repeat

choose from list extList with prompt "選択中のメールフォルダ「" & targMB & "」中のメールに添付されているファイルの種別です" with title "添付ファイルの拡張子一覧"

–指定のメールボックス(フォルダ)以下にあるすべてのサブフォルダを(propertyに)追記して返す
on getEverySubMailbox(aPath)
  tell application "Mail"
    tell mailbox aPath
      set aaList to name of every mailbox
      
if aaList is not equal to {} then
        repeat with i in aaList
          set j to contents of i
          
set tmpFullPath to aPath & "/" & j
          
copy tmpFullPath to newPath
          
set the end of (fullSubPath of spd) to newPath
          
getEverySubMailbox(newPath) of me
        end repeat
      end if
    end tell
  end tell
end getEverySubMailbox

–Message Viewerで現在表示中のメールボックスの情報を1つのみ返す
on getSelectedOneMailBox()
  tell application "Mail"
    tell message viewer 1
      set mbList to selected mailboxes
    end tell
  end tell
  
if length of mbList is equal to 0 then
    return ""
  end if
  
  
set aMailBox to contents of (item 1 of mbList)
  
return aMailBox
end getSelectedOneMailBox

–Mail.appのメールボックスオブジェクトを渡すと、テキストのフルパスに変換
on extraxctTextFullPathOfMBObject(aPath)
  tell application "Mail"
    try
      set parentPath to container of aPath
    on error
      return
    end try
    
    
set meName to name of aPath
    
if aFullPath = "" then –1回目のみスラッシュを入れないで処理
      set aFullPath to meName
    else
      –通常処理はこちら
      
set aFullPath to meName & "/" & aFullPath
    end if
    
    
extraxctTextFullPathOfMBObject(parentPath) of me –再帰呼び出し
  end tell
end extraxctTextFullPathOfMBObject

on getPathExtension(aStr as string)
  set pathString to current application’s NSString’s stringWithString:aStr
  
return (pathString’s pathExtension()) as string
end getPathExtension

★Click Here to Open This Script 

Posted in file list recursive call | Tagged 10.11savvy 10.12savvy Mail | Leave a comment

Mail.appで選択中のフォルダ以下に存在する全メールの指定形式の添付ファイルを指定フォルダにコピー v2

Posted on 11月 25, 2018 by Takaaki Naganoya

Mail.appで選択中のフォルダ(メールボックス)以下に存在する全メールに添付されているファイルのうち、指定形式のファイルのみ指定フォルダに保存するAppleScriptです。

・Mail.appで選択中のフォルダを求め、フォルダの(Mail.app上の)フルパス文字列を再帰処理で取得
・書き出し先フォルダを指定(choose folder)
・指定のMail.app上の選択中のフォルダ以下の全メールフォルダ、およびそれらの中に入っているメールを再帰処理で取得
・取得した全メールをループで調査し、添付ファイルが存在するかチェック
・1メールあたりの添付ファイルはリストで返ってくるので、すべて求めてループで処理
・添付ファイルの拡張子を求め、書き出し許可リスト {“txt”, “gv”, “dot”} に入っていれば、指定フォルダ内に保存


▲書き出したファイル

たまーに、添付ファイルがよく出回っているメーリングリスト(QuartzComposer MLとかGraphViz MLとか)で、メール添付されているファイルを一括で取得するために作成しました。

AppleScript名:Mail.appで選択中のフォルダ以下に存在する全メールの指定形式の添付ファイルを指定フォルダにコピー v2
use AppleScript version "2.4"
use scripting additions
use framework "Foundation"

script spd
  property fullSubPath : {}
  
property tmpMesList : {}
end script

property aFullPath : ""
property tmpFullPath : ""

set targList to {"txt", "gv", "dot"} –書き出し対象拡張子

–変数の初期化
set tmpFullPath to ""
set aFullPath to ""
set (fullSubPath of spd) to {}
set (tmpMesList of spd) to {}

–選択中のメールボックス(フォルダ)のフルパスを文字列で取得(dir1/dir2/dir3)
set targMBObj to getSelectedOneMailBox() of me
extraxctTextFullPathOfMBObject(targMBObj) of me

copy aFullPath to targMB

if targMB = "" then
  display notification "Mail.app上で選択中のメールボックス(フォルダ)はありません。"
  
return
end if

tell current application
  set targFol to choose folder with prompt "添付ファイルの書き出し先フォルダを指定してください"
end tell

–指定メールボックス(フォルダ)以下のすべてのメールボックス(フォルダ)を取得する
tell application "Mail"
  tell mailbox targMB
    set aList to name of every mailbox
  end tell
end tell

–指定フォルダ以下のMailboxをサブフォルダまで再帰ですべて取得する
repeat with i in aList
  set j to contents of i
  
set tmpPath to targMB & "/" & j
  
set the end of (fullSubPath of spd) to tmpPath
  
getEverySubMailbox(tmpPath) of me
end repeat

–全サブフォルダから指定文字列をSubjectに含むものをすべて取得する
repeat with i in (fullSubPath of spd)
  set tmpBox to contents of i
  
  
tell application "Mail"
    tell mailbox tmpBox
      set mesList to (every message)
    end tell
    
    
–指定フォルダ中のMailでループ
    
repeat with ii in mesList
      set jj to contents of ii
      
set attS to mail attachment of jj
      
      
if attS is not equal to {} then
        
        
–Mailの添付ファイルを順次指定フォルダに保存する
        
repeat with iii in attS
          set jjj to contents of iii
          
set aName to name of jjj
          
          
set aExt to getPathExtension(aName) of me
          
if aExt is in targList then
            set savePath to (targFol as string) & aName
            
            
–指定パスに添付ファイルを保存
            
save jjj in file savePath
          end if
        end repeat
        
      end if
    end repeat
  end tell
  
end repeat

–指定のメールボックス(フォルダ)以下にあるすべてのサブフォルダを(propertyに)追記して返す
on getEverySubMailbox(aPath)
  tell application "Mail"
    tell mailbox aPath
      set aaList to name of every mailbox
      
if aaList is not equal to {} then
        repeat with i in aaList
          set j to contents of i
          
set tmpFullPath to aPath & "/" & j
          
copy tmpFullPath to newPath
          
set the end of (fullSubPath of spd) to newPath
          
getEverySubMailbox(newPath) of me
        end repeat
      end if
    end tell
  end tell
end getEverySubMailbox

–Message Viewerで現在表示中のメールボックスの情報を1つのみ返す
on getSelectedOneMailBox()
  tell application "Mail"
    tell message viewer 1
      set mbList to selected mailboxes
    end tell
  end tell
  
if length of mbList is equal to 0 then
    return ""
  end if
  
  
set aMailBox to contents of (item 1 of mbList)
  
return aMailBox
end getSelectedOneMailBox

–Mail.appのメールボックスオブジェクトを渡すと、テキストのフルパスに変換
on extraxctTextFullPathOfMBObject(aPath)
  tell application "Mail"
    try
      set parentPath to container of aPath
    on error
      return
    end try
    
    
set meName to name of aPath
    
if aFullPath = "" then –1回目のみスラッシュを入れないで処理
      set aFullPath to meName
    else
      –通常処理はこちら
      
set aFullPath to meName & "/" & aFullPath
    end if
    
    
extraxctTextFullPathOfMBObject(parentPath) of me –再帰呼び出し
  end tell
end extraxctTextFullPathOfMBObject

–ファイル名から拡張子を取得する
on getPathExtension(aStr as string)
  set pathString to current application’s NSString’s stringWithString:aStr
  
return (pathString’s pathExtension()) as string
end getPathExtension

★Click Here to Open This Script 

Posted in list | Tagged 10.11savvy 10.12savvy Mail NSString | Leave a comment

Mail.appで選択中のメールボックス(フォルダ)のパスを文字列で返す

Posted on 11月 25, 2018 by Takaaki Naganoya

Mail.app上で選択中のメールボックス(フォルダ)のパスをフルパスの文字列で求めるAppleScriptです。

Mail.app上ではメールボックス(フォルダ)を複数階層作成できます。ファイルシステム上のフォルダではないので、ファイル処理でメールのメールボックス(フォルダ)間の移動を行うことはできませんが、パスを指定してmoveコマンドでメールを移動させられます。

Mail.app上のパスは、

level1/level2

のように記述します。

のように選択している場合には、

"ML/Xojo, REALbasic"

と返ってきます。

tell application "Mail"
  tell mailbox "ML/Xojo, REALbasic"
    set aList to every message
  end tell
end tell

★Click Here to Open This Script 

のように指定すれば、指定フォルダ以下のメール(message)が返ってきます(サブフォルダ内のメールは対象外)。ファイルパスと異なり、空白文字が入ってくることに備えてquoted ofでパスをクォート処理しておく必要はありません。

フルパスを求めるのに、再帰処理を行なっています。

AppleScript名:Mail.appで選択中のメールボックス(フォルダ)のパスを文字列で返す
property aFullPath : ""

set aFullPath to ""

–選択中のメールボックス(フォルダ)を取得
set aMB to getSelectedOneMailBox() of me

–メールボックス(フォルダ)のオブジェクトのMail.app上のパスを取得して文字列化する
set pathStr to extraxctTextFullPathOfMBObject(aMB) of me
return aFullPath
–> "ML/Xojo, REALbasic"

–Message Viewerで現在表示中のメールボックスの情報を1つのみ返す
on getSelectedOneMailBox()
  tell application "Mail"
    tell message viewer 1
      set mbList to selected mailboxes
    end tell
  end tell
  
if length of mbList is equal to 0 then
    return ""
  end if
  
  
set aMailBox to contents of (item 1 of mbList)
  
return aMailBox
end getSelectedOneMailBox

–Mail.appのメールボックスオブジェクトを渡すと、テキストのフルパスに変換
on extraxctTextFullPathOfMBObject(aPath)
  tell application "Mail"
    try
      set parentPath to container of aPath
    on error
      return
    end try
    
    
set meName to name of aPath
    
if aFullPath = "" then –1回目のみスラッシュを入れないで処理
      set aFullPath to meName
    else
      –通常処理はこちら
      
set aFullPath to meName & "/" & aFullPath
    end if
    
    
extraxctTextFullPathOfMBObject(parentPath) of me –再帰呼び出し
  end tell
end extraxctTextFullPathOfMBObject

★Click Here to Open This Script 

Posted in list Text | Tagged 10.11savvy 10.12savvy 10.13savvy 10.14savvy Mail | Leave a comment

機械学習で学習したMSの画像を連邦・ジオン軍判定してフォルダ分け v2

Posted on 11月 20, 2018 by Takaaki Naganoya

Create MLでガンダムのMS画像(連邦、ジオン区分け)を学習したCore ML Modelをもとに、画像をどちらの軍所属機体かを判定してフォルダ分けするAppleScriptです。

機械学習(深層学習)データをもとに判定を行って対話型処理ではなくバッチ処理的なフローでデータを「なんとなく」推論して区分けを行うサンプルです。非力なIOT機器が機械学習データをもとに推論処理できるぐらいなので、機械学習データを使ってAppleScriptで推論処理できないはずがありません。推論処理時間もさほどかからず、機械学習データを一括処理的なワークフローの中で利用することが可能です。

例によって「戦場の絆」の公式ページから落としてきたMSの画像を連邦軍とジオン軍、および両軍の鹵獲機体の4フォルダに分けてCreate MLで学習させてみました。

実行するとMS画像が入っているフォルダ(各自ご用意ください)と、連邦軍機体(efsf)およびジオン軍機体(zeon)を仕分けるフォルダを聞かれます。あとはプログラム側がなんとなく推論して仕分けを行います。

前回掲載のモデルもそうですが、きちんと学習後にテストデータで評価を行っています。だいたい8割ぐらいのヒット率ではあるものの、特定の画像については間違えることがあらかじめわかっています。

実行にあたっては、macOS 10.14上でCoreML Modelを組み込んだフレームワーク「msDetector.framework」をインストールして、本ScriptをScript Debugger上で動作させてください。

–> Download msDetector.framework (To ~/Library/Frameworks/)

–> Download msDetector (Code Signed executable AppleScript applet with Framework and libraries in its bundle)

Core MLで判定時に詳細なデータを出力させ、その可能性が0.8を上回るものだけを処理するようにしてみました。ただ、全力で間違った判定を行うケースもあるため、単なる「気休め」です。

テストデータでは、連邦軍側が72機体中間違いが9個(正解87.5%)、ジオン軍側が57機体中間違いが3個(正解95%)。鹵獲機体のデータを排除すると、もう少しいい値が出るかもしれません。ただ、学習させたデータとほぼ同じデータ(数が少ない)で再度判定を行っているだけなので、このぐらいの確度が出ないと逆に困ります。

また、確度が高くないものは排除するように処理したので、確度が低い機体の画像バリエーションを増やして学習画像数を足すと正解の確率が上がるのではないか、などと「なんとなく」考えています。

Create MLでは、もっときちんとした表データやタグ付き自然言語テキストデータ(日本語だと形態素への区分けはあらかじめやっておく必要アリ?)の学習が行えるようなので(自然言語テキストの学習例は英語のものしか見かけないけれども)いろいろやっておきたいところです。

今回は「アニメとかゲームに出てくるMSの画像」の判定という、実用性をまったく考えないで行なってみたものですが、自分の身の回りで有用性の高そうな処理といえば……アイコンやプレゼン用資料の作成画像を学習させておおまかなジャンル分けをしておき(メール系のアイコンとか)、未知のアイコン素材をダウンロードしてきたら機械学習データをもとに自動でフォルダ分けするとかでしょうか。

さすがにアイコン画像だとデフォルメされすぎていて、MicrosoftのAzure Computer Vision APIとかでも画像認識してくれなさそうなので。

AppleScript名:機械学習で学習したMSの画像の連邦軍、ジオン軍判定してフォルダ分け v2.scpt
—
–  Created by: Takaaki Naganoya
–  Created on: 2018/11/20
—
–  Copyright © 2018 Piyomaru Software, All Rights Reserved
—
use AppleScript version "2.7" — Mojave (10.14) or later & Script Debugger
use framework "Foundation"
use framework "AppKit"
use framework "msDetector"
use scripting additions

property |NSURL| : a reference to current application’s |NSURL|
property NSArray : a reference to current application’s NSArray
property NSString : a reference to current application’s NSString
property NSPredicate : a reference to current application’s NSPredicate
property NSFileManager : a reference to current application’s NSFileManager
property NSMutableArray : a reference to current application’s NSMutableArray
property NSSortDescriptor : a reference to current application’s NSSortDescriptor
property NSURLTypeIdentifierKey : a reference to current application’s NSURLTypeIdentifierKey

set aFol to POSIX path of (choose folder with prompt "Choose MS Image folder to go!")
set efsfFol to POSIX path of (choose folder with prompt "EFSF folder")
set zeonFol to POSIX path of (choose folder with prompt "Zeon folder")

–指定フォルダ以下のファイルをすべて取得(再帰ですべて取得)
set aSel to retFullpathsWithinAFolderWithRecursive(aFol) of me

–取得したファイルリストを指定UTIでフィルタリング
set filRes2 to filterPOSIXpathListByUTI(aSel, "public.image") of me

–機械学習モデルを用いて区分けを行い、任意の画像の連邦軍(efsf)、ジオン軍(zeon)へのフォルダ分け(コピー)
set msClassifier to current application’s msClassify’s alloc()’s init()

repeat with i in filRes2
  set aFile to contents of i
  
set aImage to (current application’s NSImage’s alloc()’s initWithContentsOfFile:aFile)
  
  
set resDict to (msClassifier’s ImageClassifierWithImageAndRetDict:aImage) –returns NSDictionary
  
  
–Dictinaryのvalueをソートして、最も値の大きいvalueのkeyを求める
  
set sortedArray to (current application’s NSMutableArray’s arrayWithArray:(resDict’s allValues()))
  (
sortedArray’s sortUsingSelector:"compare:")
  
set aRes to (last item of (sortedArray as list)) –末尾のアイテムが一番値の大きい数値
  
set resKey to first item of ((resDict’s allKeysForObject:aRes) as list) –最大値をもとにKeyを求める
  
  
–可能性の高いものだけ処理してみる(自信たっぷりに全力で間違えることもけっこうある)
  
if (aRes as real) > 0.8 then
    if resKey begins with "efsf" then
      –efsf & efsf_stolen
      
set aRes to (my copyFileAt:aFile toFolder:efsfFol)
    else
      –zeon & zeon_stolen
      
set aRes to (my copyFileAt:aFile toFolder:zeonFol)
    end if
  end if
end repeat

–POSIX path listから指定UTIに含まれるものをPOSIX pathのリストで返す
on filterPOSIXpathListByUTI(aList, targUTI)
  set newList to {}
  
repeat with i in aList
    set j to contents of i
    
set tmpUTI to my retUTIfromPath(j)
    
set utiRes to my filterUTIList({tmpUTI}, targUTI)
    
if utiRes is not equal to {} then
      set the end of newList to j
    end if
  end repeat
  
return newList
end filterPOSIXpathListByUTI

–指定のPOSIX pathのファイルのUTIを求める
on retUTIfromPath(aPOSIXPath)
  set aURL to |NSURL|’s fileURLWithPath:aPOSIXPath
  
set {theResult, theValue} to aURL’s getResourceValue:(reference) forKey:NSURLTypeIdentifierKey |error|:(missing value)
  
  
if theResult = true then
    return theValue as string
  else
    return theResult
  end if
end retUTIfromPath

–UTIリストが指定UTIに含まれているかどうか演算を行う
on filterUTIList(aUTIList, aUTIstr)
  set anArray to NSArray’s arrayWithArray:aUTIList
  
set aPred to NSPredicate’s predicateWithFormat_("SELF UTI-CONFORMS-TO %@", aUTIstr)
  
set bRes to (anArray’s filteredArrayUsingPredicate:aPred) as list
  
return bRes
end filterUTIList

–指定フォルダ以下のすべてのファイルを再帰で取得
on retFullpathsWithinAFolderWithRecursive(aFol)
  set anArray to NSMutableArray’s array()
  
set aPath to NSString’s stringWithString:aFol
  
set dirEnum to NSFileManager’s defaultManager()’s enumeratorAtPath:aPath
  
  
repeat
    set aName to (dirEnum’s nextObject())
    
if aName = missing value then exit repeat
    
set aFullPath to aPath’s stringByAppendingPathComponent:aName
    
anArray’s addObject:(aFullPath as string)
  end repeat
  
  
return anArray as list
end retFullpathsWithinAFolderWithRecursive

on copyFileAt:POSIXPath toFolder:folderPath
  set POSIXPath to NSString’s stringWithString:POSIXPath
  
set folderPOSIXPath to NSString’s stringWithString:folderPath
  
set theName to POSIXPath’s lastPathComponent()
  
set newPath to folderPOSIXPath’s stringByAppendingPathComponent:theName
  
set fileManager to NSFileManager’s defaultManager()
  
set theResult to fileManager’s copyItemAtPath:POSIXPath toPath:newPath |error|:(missing value)
  
return (theResult as integer = 1)
end copyFileAt:toFolder:

★Click Here to Open This Script 

Posted in file File path Image list Machine Learning Record | Tagged 10.14savvy NSArray NSFileManager NSMutableArray NSPredicate NSSortDescriptor NSString NSURL NSURLTypeIdentifierKey | 1 Comment

指定URLをロードしてtitleを取得 v2

Posted on 11月 20, 2018 by Takaaki Naganoya

指定URLのWebページのtitleを取得するAppleScriptです。

この手の処理を記述するには、お手軽にshell scriptでーとか、Cocoaの機能を利用してチクチク記述するとか、SafariにURLをロードしてtitleを読み込むとか、いろいろやり方があって悩むところです。

技術的な難易度が低そう(に見える)やり方を考え、ダウンロード部分はお手軽にcurlコマンドで、取得したHTMLの解析はオープンソースのFramework「HTMLReader」を併用することで高度な処理(URLエンコーディング文字列のデコード)を実現してみました。

–> HTMLReader.framework(To ~/Library/Frameworks/)

AppleScript名:指定URLをロードしてtitleを取得 v2
use AppleScript version "2.4"
use scripting additions
use framework "Foundation"
use framework "AppKit"
use framework "HTMLReader" –https://github.com/nolanw/HTMLReader

property NSString : a reference to current application’s NSString
property HTMLDocument : a reference to current application’s HTMLDocument

set aURL to "http://piyocast.com/as/"
set aTItle to getPageTItleFromURL(aURL) of me
–> "AppleScriptの穴 – Useful & Practical AppleScript archive"

on getPageTItleFromURL(aURL)
  set aRes to (do shell script "curl -s " & aURL)
  
set aData to NSString’s stringWithString:aRes
  
if aData = missing value then return false
  
  
set aHTML to HTMLDocument’s documentWithString:aData
  
  
set aTitleRes to ((aHTML’s nodesMatchingSelector:"title")’s textContent’s firstObject()) as string
  
return aTitleRes
end getPageTItleFromURL

★Click Here to Open This Script 

Posted in Internet Tag Text | Tagged 10.11savvy 10.12savvy 10.13savvy 10.14savvy NSString | Leave a comment

tccKitで指定Bundle IDのアプリケーションの「オートメーション」認証状況を取得

Posted on 11月 19, 2018 by Takaaki Naganoya

システム環境設定の「セキュリティとプライバシー」>「セキュリテイ」>「オートメーション」項目に指定Bundle IDのアプリケーションが登録されているかどうかをチェックするAppleScriptです。

macOS 10.14, Mojaveの機能を利用しているため、macOS 10.14以降を必要とします。また、実行にはScript Debugger上で動かすか、本ScriptをAppleScriptアプレットに保存して結果を別の方法で出力する必要があります(ファイルに書き出すとか、他のテキストエディタなどの新規ドキュメント上に書き込むとか、display notificationコマンドでノーティフィケーション表示するとか)。

プログラムの本体は「Hal Mueller’s Blog」の2018年9月4日掲載記事「Privacy Consent in Mojave (part 2: AppleScript)」内のObjective-CのプログラムをCocoa Framework化した「tccKit」です。

#2023/2/8 Update Universal Binaryでビルド
–> Download tccKit.framework (To ~/Library/Frameworks)

–> Download tccKit source (Xcode 10.1 Project)

掲載Sample Scriptのように、結果は文字列(NSString)で返ってきます。

上記のような「セキュリティ」の状況で実行したところ、

 Keynote:”PrivacyConsentStateGranted”(認証ずみ)
 CotEditor:”PrivacyConsentStateUnknown”(不明、実際には未認証)
 Mail:”PrivacyConsentStateUnknown”(不明、実際には未認証)

のような結果が得られました。

Objective-Cのプログラム側では、PrivacyConsentStateUnknown / PrivacyConsentStateGranted / PrivacyConsentStateDenied の3つの状態を返すようになっています。”PrivacyConsentStateGranted”のみユーザーの認証が得られている、と見てよいのでしょう。

もしも、PrivacyConsentStateDenied(ユーザーがダイアログで「許可しない」ボタンを押した)という状況であれば、シェルの/usr/bin/tccutilコマンドで状態をクリアし(do shell script ”tccutil reset com.apple.Terminal” とか)、再度、ユーザーの認証を取得する(activateなど簡単なコマンドを実行)とよいでしょう。
→ 実際には、activateやpropertyを取得する程度だとOSのオートメーション認証が反応せず、ドキュメントを新規作成するぐらいのことをやる必要があります。じゃあドキュメントを作らないタイプのアプリケーションだとどうなんだという話がありますが、それはひととおり試してみるしかなさそうです

ただ、本Frameworkは本当に単純にHal Mueller’s Blogの記述サンプルをコピペで(ちょっと改変して)呼び出して動かしているだけなので、起動中のアプリケーションのBundle Identifierをすべて取得してループでチェック、といった処理を行うと、なぜか結果が返ってきません(Script Debuggerがハングアップ)。連続で呼び出すのがよくないのか、チェック用のAPIに癖があるのかわかりませんが、現状でわかっている問題点として記載しておきます。

–> いろいろ調査してみたら、Code Signされていないアプリケーション(例:Skim)のチェックを行うとハングアップするようです。スクリプタブルではないアプリケーションのBundle IDを渡しても、ハングアップは起こりません

CAUTION: AEDeterminePermissionToAutomateTarget hangs up with unsigned application such as Skim PDF reader

macOS 10.14上で開発を行う場合には心の底から必要な処理だと思うので、本Frameworkはもうちょっとブラッシュアップしたい気持ちでいっぱいです。macOS 10.13が前代未聞・空前絶後のダメダメさだったので(Tim Cookもう勘弁して)、10.14には期待しているんですよ本当に(文句もいっぱい言ってるけど)。

AppleScript名:tccKitでBundle IDで指定したアプリケーションのtcc状況を取得.scpt
—
–  Created by: Takaaki Naganoya
–  Created on: 2018/11/19
—
–  Copyright © 2018 Piyomaru Software, All Rights Reserved
—
use AppleScript version "2.7" — Mojave (10.14) or later
use framework "Foundation"
use framework "tccKit" –https://halmueller.wordpress.com/2018/09/04/privacy-consent-in-mojave-part-2-applescript/
use scripting additions

set tccCheker to current application’s tccCheck’s alloc()’s init()

set aBundle to "com.apple.iWork.Keynote"
set aRes to (tccCheker’s automationConsentForBundleIdentifier:aBundle promptIfNeeded:false) as string
log aRes
–> "PrivacyConsentStateGranted"

set bBundle to "com.coteditor.CotEditor"
set bRes to (tccCheker’s automationConsentForBundleIdentifier:bBundle promptIfNeeded:false) as string
log bRes
–> "PrivacyConsentStateUnknown"

set cBundle to "com.apple.mail"
set cRes to (tccCheker’s automationConsentForBundleIdentifier:cBundle promptIfNeeded:false) as string
log cRes
–> "PrivacyConsentStateUnknown"

★Click Here to Open This Script 

Posted in Sandbox Security | Tagged 10.14savvy | 3 Comments

システム環境設定>プライバシーの「オートメーション」項目の表示

Posted on 11月 19, 2018 by Takaaki Naganoya

macOS 10.14, Mojaveでにわかに重要になってきた「システム環境設定」>セキュリティとプライバシー>プライバシー>オートメーション 項目の表示を行うAppleScriptです。

もともと、システム環境設定には指定のPreferences Paneを表示する機能が用意されているのですが、最近このシステム環境設定上の項目の移設や統廃合がメジャーバージョンアップごとに行われており、そうした変更にAppleScript系の機能の変更が間に合っていません。

tell application "System Preferences"
  tell pane "com.apple.preference.security"
    get name of every anchor
  end tell
end tell
–> {"Privacy_Reminders", "Privacy_SystemServices", "Privacy_Calendars", "Firewall", "Privacy_Assistive", "Privacy_LinkedIn", "Privacy_LocationServices", "Privacy_Contacts", "General", "Privacy_Diagnostics", "Advanced", "Privacy_Accessibility", "Privacy_Camera", "FDE", "Privacy", "Privacy_AllFiles", "Privacy_Microphone"}

★Click Here to Open This Script 


▲「セキュリティ」項目以下の各anchor。赤く塗った項目はAppleScript用語辞書に用語が用意されていないもの

とくに、この重要な「オートメーション」項目を示す予約語がAppleScript用語辞書に登録されておらず、「フルディスクアクセス」の予約語が用意されているあたり、チェックもれで抜けたものと思われます。

きちんと予約語が存在する項目については、

tell application "System Preferences"
  activate
  
reveal anchor "Privacy_LocationServices" of pane "com.apple.preference.security"
end tell

★Click Here to Open This Script 

のようにして表示できるのですが、前述のとおり「オートメーション」項目の予約語が用意されていません。

そこで、別途URL Event経由で表示させる方法を見つけたのでまとめておきました。

非同期のURL Eventなので、「オートメーション」項目が表示し終わったかどうかといった確認は一切ありません。普通にApple Event経由で実行できるのであれば、表示し終わったという実行結果の確認まで行えるのですが、、、、

AppleScript名:システム環境設定でオートメーションのタブを表示させる
open location "x-apple.systempreferences:com.apple.preference.security?Privacy_Automation"

★Click Here to Open This Script 

Posted in Sandbox System URL | Tagged 10.14savvy System Preferences | Leave a comment

macOS 10.14 AppleScriptリリースノート

Posted on 11月 18, 2018 by Takaaki Naganoya

従来、AppleScriptのRelease Notesは独立して掲載されていましたが、「macOS Mojave 10.14 Release Notes」として1本の記事にまとめて掲載されていました。内容を吟味したうえで日本語訳して掲載します。

macOS 10.14, Mojave上のAppleScriptはバージョン2.7と10.13から変更はありません。このところ、OS2バージョンに1回AppleScript処理系がバージョンアップするような格好になっているため、納得のいくところですが、バージョン番号が変わっていない割には環境が激変しています。控えめに言っても、Classic Mac OSからMac OS Xへの移行時よりも変化が大きい環境です。

(1)アプリケーションとの通信許可システム

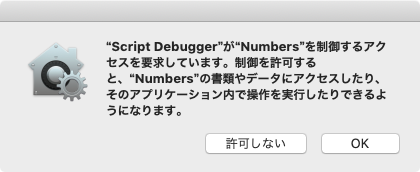
あるアプリケーションからApple eventを送信する場合には、AppleScriptアプレットであっても、ユーザーの許可が必要になった。

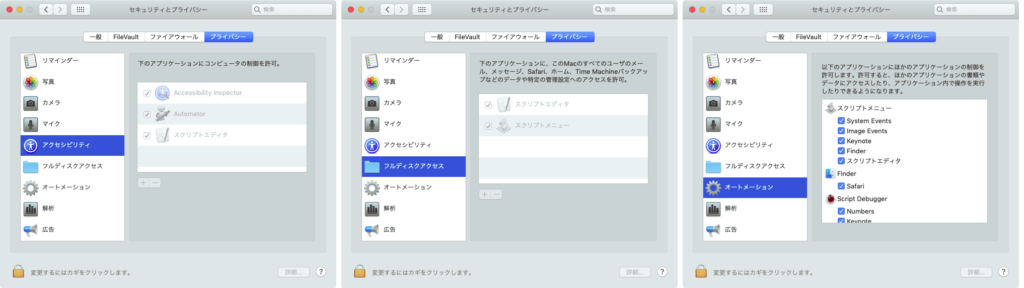
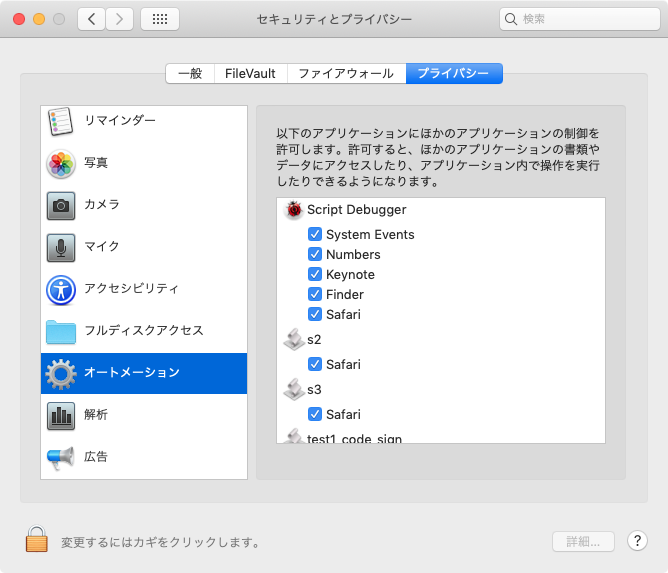
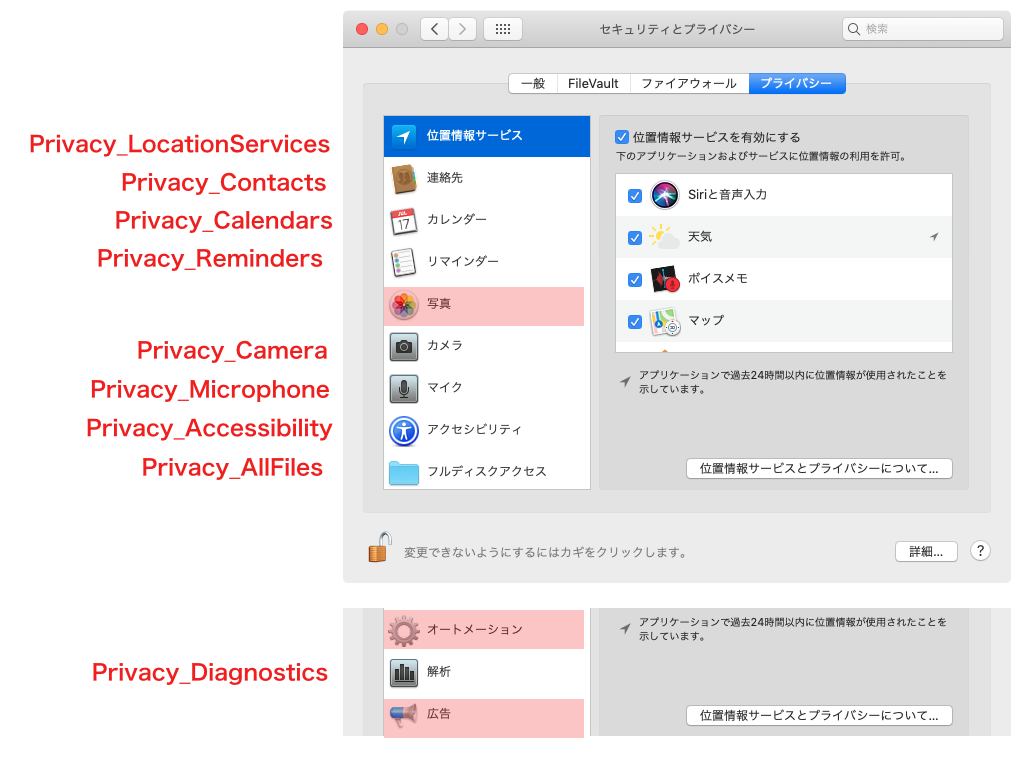
許可取得中アプリケーションの一覧はシステム環境設定.appの「セキュリティとプライバシー」>「プライバシー」>「オートメーション」カテゴリにて、閲覧や編集が行える。

もしも、ユーザーが許可ダイアログで同意を行わなかった場合には、イベントの実行はブロックされ、エラー-1743(”: Not authorized to send Apple events to “)が発生する。Apple eventはAEDeterminePermissionToAutomateTargetで事前に使用可能かどうかの確認を行える。

(2)OSAXの事実上の廃止

サードパーティーのScripting Additions(OSAX)がインストールできなくなった(認識されなくなった)。/Library/ScriptingAdditions、/Network/Library/ScriptingAdditionsおよび~/Library/ScriptingAdditionsフォルダ内に存在するScripting Additionsは無視される。

アプリケーションの一部品としてScripting Additionsをバンドル内に組み込み、アプリケーションとScripting Additionsの両方が同一IDでコードサインを施された場合にのみ実行が許可される。

リリースノート内容の検証

(1)について

アプリケーションとの通信許可が行われる頻度ですが、

 スクリプトエディタ:(確認対象外)
 Script Debugger:実行時初回のみ
 スクリプトメニュー:実行時初回のみ
 AppleScriptアプレット:毎回(初回通信時のみ)実行時初回のみ
 AppleScriptアプレット(Code Sign):初回実行時のみ
 AppleScript GUIアプリケーション(Code Sign):初回実行時のみ

となっています(2019/2/1修正)。アプリケーションとの通信許可が求められる単位は、各実行ファイル。Script Debugger上でScriptを記述するためにSafariと通信を行う場合には、初回のみ許可を求められます。スクリプトエディタ上でAppleScriptを記述する場合には、とくに通信許可の確認ダイアログは表示されません。

許可されたアプリケーション一覧については、/usr/bin/tccutilコマンドでリセット可能。
許可状況のリストアップについては、/Library/Application Support/com.apple.TCC/TCC.dbにて管理。Apple純正ツールtccutilでは削除しかできない状況です。

→ その後、Hal Mueller氏によるサンプルコードを用いたtccKit.frameworkを介して、指定Bundle IDの「オートメーション」認証状況を取得できるようになりました

ただし、同じく「プライバシー」項目の「フルディスクアクセス」に、スクリプトエディタとスクリプトメニューを登録する必要があります。OSインストールや10.14以下のOSからのアップデート時、新規ユーザーアカウント作成時に行う「恒例行事」になることでしょう。

(2)について

Script Addition(=OSAX)の使用/不使用をuse scripting additions文で制御できますが、事実上これがOS標準装備のStandard Additions OSAXおよびDigital Hub Scriptingの使用/不使用制御を行うためだけの存在になったといえます。

現在残存している著名なサードパーティのOSAXに、

・Satimage OSAX
・XMLTools

などがあり、これらは、LateNight SoftwareにてCode Signしてアプリケーション化した「SatimageOSAX.app」を配布して同アプリケーション内蔵のSatimage.osax/XMLLib.osax/Files.osax/FITS.osax/Numerics.osaxを呼び出す環境を提供しています。

ただし、今後もScripting Additions/OSAXの利用について制約が緩和される可能性はないため、移行のための「その場しのぎ」に限定されます。OSAXによるScript機能の拡張については、これで終了です。

個人的には、Classic MacOSからMac OS X(現・macOS)への移行の際に、OSAXになるべく依存しないようにAppleScriptを記述するように方針転換し、本Blog掲載のScriptについても「よほどのこと」がなければOSAXを使用していません。XMLからXPathを用いてデータを取得する用途についてはXMLTools OSAXの機能が強力ですが、XPathQuery4ObjCなどの代替手段を用意しています。

なお、macOS 10.14搭載のスクリプトエディタは~/Library/Frameworksフォルダ内のFrameworkを無視するものの、これが「仕様」なのか「バグ」なのかは不明。Shane Stanley的には「仕様」とのこと。
→ SIPの機能による制限。これを回避するためにはTerminal上からcsrutilコマンドによりSIPを無効化する操作が必要

その他の変更内容

Script Menuは「スクリプトメニュー」という別アプリケーションに分離されました。

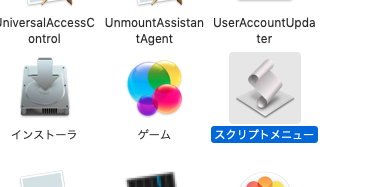
Script MenuはこれまでMenu Exrtraとして存在していたのですが、macOS 10.14で変更されたかたちです(Script Menuは時代によってSystem Eventsが管轄していたり、独立したアプリケーションだった時期があったりとけっこういろいろ存在形態が変更され続けてきました)。Menu Extraから独立アプリケーションへの変更はセキュリティポリシーを独自に適用するため、でしょうか?(なんとなく意図は理解できそうですが、こんな大事なことはリリースノートに書いてほしい)

macOS 10.14搭載のContacts.app(旧称:アドレスブック)から、プラグインScriptがサポートされなくなりました。Contacts.appのAppleScript用語辞書にはプラグインScript用の用語が残っているため注意が必要です。

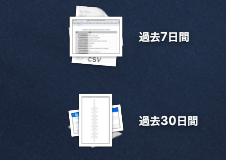
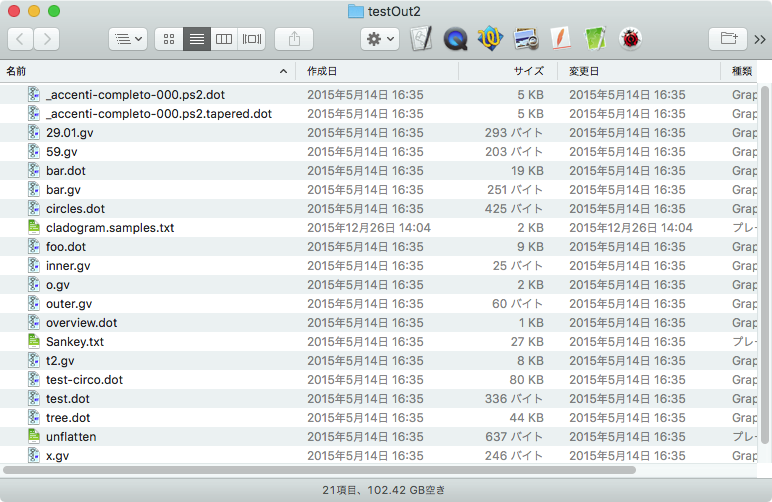
Finderに、デスクトップ上のファイルを「過去7日間」「過去30日間」などとまとめる「スタック」の機能が付きました。AppleScriptからこの「スタック」を選択してselection(as alias list)を取得すると、中に入っているファイルへの参照がリストで返ってきます(スタックに該当するクラスが定義されているわけではありません)。

DVDプレイヤーはアプリケーションから補助ツールに格下げになって(Zipアーカイバなどと同じ)AppleScriptからの操作機能が削除されました。DVD再生コントロールなどはフリーの「Free Mac Media Player」をダウンロードして行うようにしてください。

Posted in System | Tagged 10.14savvy | 2 Comments

値渡しハンドラと参照渡しハンドラ

Posted on 11月 16, 2018 by Takaaki Naganoya

AppleScriptにおけるハンドラ(メソッド、サブルーチン)呼び出し時の値渡し(call by value)と参照渡し(vall by reference)の記述例です。

一般的なプログラミング言語の世界の「お作法」で、ハンドラ呼び出し時に、値そのものを受けわたす「値渡し」(call by value)と、ポインタを受けわたす「参照渡し」(call by reference)の2つがあります。

AppleScriptでハンドラ呼び出し時に、パラメータを受け渡しするのは値渡しがほとんどです。これは、プログラムにバグを作りにくくするためとサブルーチン(ハンドラ)を明確に区分けするためです。

値渡ししか使っていないといっても、参照渡しができないわけではなく、パラメータとして受け取った変数の内容を変更すると参照渡しになる、という「暗黙の参照渡し」を行える仕様になっています。

ほかには、巨大なデータを値渡しするとメモリー消費がそれだけ大きくなるため、パラメータを参照渡しすることがあります。画像のRaw DataやRTFのデータ内容などがそれに該当します。

本Blog掲載サンプル(1,000本以上)のうち、参照渡しを使っているものは、

・迷路をRTFで作成して脱出経路を赤く着色する v3
・画像+文字作成テスト_v4
・Tag CloudっぽいRTFの作成

ぐらいです。

# Xcode上で記述するAppleScript Applicationでは、ARC環境ではあるものの消費したオブジェクトのメモリが解放されにくいので、割と切実に必要になってくるような

AppleScript名:値渡しハンドラ
set aList to {1, 2, 3}
set aRes to aHandler(aList) of me
–> {3, 2, 1}

aList
–> {1, 2, 3}

on aHandler(bList)
  return reverse of bList
end aHandler

★Click Here to Open This Script 

AppleScript名:参照渡しハンドラ
set aList to {1, 2, 3}
aHandler(aList) of me
aList
–> {1, 2, 3, -1}

on aHandler(aList)
  set the end of aList to -1
end aHandler

★Click Here to Open This Script 

Posted in list | Tagged 10.11savvy 10.12savvy 10.13savvy 10.14savvy | Leave a comment

指定画像の指定座標の色情報をRGBで取得

Posted on 11月 15, 2018 by Takaaki Naganoya

指定画像の指定座標のピクセルの色を8ビットRGB値で返すAppleScriptです。

使用する座標系は左上が{0,0}です。

AppleScript名:指定画像の指定座標の色情報をRGBで取得.scptd
—
–  Created by: Takaaki Naganoya
–  Created on: 2018/11/15
—
–  Copyright © 2018 Piyomaru Software, All Rights Reserved
—
use AppleScript version "2.4" — Yosemite (10.10) or later
use framework "Cocoa" –Foundation + AppKit
use scripting additions

property NSImage : a reference to current application’s NSImage
property NSBitmapImageRep : a reference to current application’s NSBitmapImageRep

set aFile to POSIX path of (choose file of type {"public.image"})
set {xNum, yNum} to {0, 0}

set cRes to getColorRGBNumFromImageByPosition(aFile, xNum, yNum) of me
–> {255, 0, 0}

on getColorRGBNumFromImageByPosition(aFilePath, xPos as integer, yPos as integer)
  set anNSImage to NSImage’s alloc()’s initWithContentsOfFile:aFilePath
  
set aRawimg to NSBitmapImageRep’s imageRepWithData:(anNSImage’s TIFFRepresentation())
  
  
set aColor to (aRawimg’s colorAtX:xPos y:yPos)
  
set aRed to (aColor’s redComponent()) * 255
  
set aGreen to (aColor’s greenComponent()) * 255
  
set aBlue to (aColor’s blueComponent()) * 255
  
  
return {aRed as integer, aGreen as integer, aBlue as integer}
end getColorRGBNumFromImageByPosition

★Click Here to Open This Script 

Posted in Color Image list | Tagged 10.11savvy 10.12savvy 10.13savvy 10.14savvy NSBitmapImageRep NSImage | Leave a comment

MecabCocoaで形態素解析

Posted on 11月 14, 2018 by Takaaki Naganoya

オープンソースのMecabラッパー「MecabCocoa.framework」を呼び出して、日本語の文字列を形態素解析するAppleScriptです。

単語(形態素)に分割する形態素解析については、動作しているものの、

 partOfSpeechType:品詞
 originalForm:原形

といったあたりの、重要な情報がまともに返ってこないので、単語分割やよみがなの機能しか動作していないように見えるのですが、、、、

AppleScript名:MecabCocoaで形態素解析.scptd
—
–  Created by: Takaaki Naganoya
–  Created on: 2018/11/13
—
–  Copyright © 2018 Piyomaru Software, All Rights Reserved
—
use AppleScript version "2.4" — Yosemite (10.10) or later
use framework "Foundation"
use framework "MecabCocoa" –https://github.com/shinjukunian/MecabCocoa
use scripting additions

set aStr to "私の名前は長野谷です。"
set tokenArray to (current application’s MecabTokenizer’s alloc()’s parseToNodeWithString:aStr withDictionary:2)
set tList to (tokenArray’s surface) as list
–> {"私", "の", "名前", "は", "長野", "谷", "です", "。"}

set fList to (tokenArray’s features) as list
–> {{"watakushi"}, missing value, {"namae"}, missing value, {"nagano"}, {"tani"}, missing value, missing value}

set psList to (tokenArray’s partOfSpeechType) as list
–> {100, 100, 100, 100, 100, 100, 100, 100} –おかしい?

★Click Here to Open This Script 

Posted in Natural Language Processing Text | Tagged 10.11savvy 10.12savvy 10.13savvy 10.14savvy | Leave a comment

NLLanguageRecognizerで自然言語の推定 v4

Posted on 11月 13, 2018 by Takaaki Naganoya

macOS 10.14であらたに搭載されたNaturalLanguage.frameworkにアクセスして、自然言語テキストが「何語」かを推定し、指定数の言語ごとにその推測した確率を求めるAppleScriptです。

NLLanguageRecognizerで、言語推定時に「言語Aと言語Bのみ考慮してね」と指定し、それぞれに数値による重み付け(0.0〜1.0)を指定できます。

ただ、重み付けを指定してもダメな時はダメなようで……日本語の文章に多めにアルファベットが入っている場合にはまったく日本語と判定されません。

AppleScript名:NLLanguageRecognizerで自然言語の推定 v4
— Created 2018-11-13 by Takaaki Naganoya
use AppleScript version "2.7" — Mojave (10.14) or later
use framework "Foundation"
use framework "NaturalLanguage"
use scripting additions

property NLLanguageEnglish : a reference to current application’s NLLanguageEnglish
property NSMutableDictionary : a reference to current application’s NSMutableDictionary
property NLLanguageJapanese : a reference to current application’s NLLanguageJapanese
property NLLanguageRecognizer : a reference to current application’s NLLanguageRecognizer

set aNL to NLLanguageRecognizer’s alloc()’s init()

–言語ごとに可能性の重み付けを行って、言語推定

–言語推定の可能性ヒントデータを指定。日本語が99.9%、英語は0.1%の可能性として指定
set hintDict to NSMutableDictionary’s dictionaryWithObjects:{1.0E-3, 0.999} forKeys:{NLLanguageEnglish, NLLanguageJapanese}
–> (*(NSDictionary) {en:0.01, ja:0.99}*) –recordで作ってScriptingBridge経由でNSDictionaryに自動変換させてもよかったが、recordでは属性ラベルにハイフンなどは使えないのでこれでいいのだ
set hintRes3 to (aNL’s setLanguageHints:hintDict)

aNL’s processString:"AppleScriptで日本語を処理するよ。"
set langRes4 to (aNL’s languageHypothesesWithMaximum:2) as record
–> {en:1.0}– アルファベットの文字量が多いので、英語と判断されたよ! (>_<)

aNL’s processString:"AppleScriptで日本語を処理するぴよ。"
set langRes5 to (aNL’s languageHypothesesWithMaximum:2) as record
–> {ja:1.0}– 「よ」を「ぴよ」に書き換えたら日本語の文字の量が増えて日本語と判定されたよ! (^ー^)

★Click Here to Open This Script 

Posted in Natural Language Processing Record Text | Tagged 10.14savvy NLLanguageRecognizer NSMutableDictionary | Leave a comment

NLLanguageRecognizerで自然言語の推定 v3

Posted on 11月 13, 2018 by Takaaki Naganoya

macOS 10.14であらたに搭載されたNaturalLanguage.frameworkにアクセスして、自然言語テキストが「何語」かを推定し、指定数の言語ごとにその推測した確率を求めるAppleScriptです。

NLLanguageRecognizerも、「最もそれらしいラベル(言語)値」を返すだけでなく、推測候補言語とその確率(0.0〜1.0、1.0が最もそれらしい)をDictionary形式で(AppleScriptでいうところのrecord)出力するメソッドがあります。試しに呼んでみました。

AppleScript名:NLLanguageRecognizerで自然言語の推定 v3
— Created 2018-11-13 by Takaaki Naganoya
use AppleScript version "2.7" — Mojave (10.14) or later
use framework "Foundation"
use framework "NaturalLanguage"
use scripting additions

property NLLanguageRecognizer : a reference to current application’s NLLanguageRecognizer

set aNL to NLLanguageRecognizer’s alloc()’s init()

–言語推定時の各言語の可能性の数値をリストアップ
aNL’s processString:"AppleScriptで日本語を処理。"
set langRes1 to (aNL’s languageHypothesesWithMaximum:10) as record
–> {|is|:0.017804400995, ro:0.02502822876, fr:0.015569564886, de:0.041996311396, |it|:0.017095085233, nl:0.630239665508, sv:0.041430238634, en:0.11029753834, nb:0.025065546855, hu:0.051682028919}
–アルファベットの比率が高まると、日本語として認識される可能性が極端に下がる

aNL’s processString:"「「「「了解です!」」」」" –なろう系小説の複数人物の同時発話表現
set langRes2 to (aNL’s languageHypothesesWithMaximum:5) as record
–> {|zh-hans|:0.251541793346, ja:0.748288214207, |zh-hant|:1.62590833497234E-4}

★Click Here to Open This Script 

Posted in Natural Language Processing Record Text | Tagged 10.14savvy NLLanguageRecognizer | Leave a comment

NLLanguageRecognizerで自然言語の推定 v2

Posted on 11月 13, 2018 by Takaaki Naganoya

macOS 10.14であらたに搭載されたNaturalLanguage.frameworkにアクセスして、自然言語テキストが「何語」かを推定するAppleScriptです。

以前にNSLinguisticTaggerで言語推定を試してみましたが、ネット上のラノベ文書(セリフが多く、人名がカタカナばっかり)を与えてみたら日本語を日本語として判定せず、「使えない機能」だと感じました。

ポンコツで与える文字列の長さや記号文字の登場頻度に極端に演算結果が左右されていたNSLinguisticTaggerとは異なり、このNLLanguageRecognizerは割と使えるようです。「日本語だよ。」という程度の文章で日本語と判定してくれたので、なかなか使えそうな気配がします。

ただし、実際に試してみたところ文中にアルファベットの単語が多く含まれると日本語として判定してくれなくなるという「弱点」があるので、そのあたりは注意を要します。

AppleScript名:NLLanguageRecognizerで自然言語の推定 v2.scptd
— Created 2018-11-13 by Takaaki Naganoya
use AppleScript version "2.7" — Mojave (10.14) or later
use scripting additions
use framework "Foundation"
use framework "NaturalLanguage" –new framework

set str01 to "Ilmatyynyalukseni on täynnä ankeriaita."
set str02 to "Luftputebåten min er full av ål"
set str03 to "私の名前は長野谷です。"
set str04 to "أنشأ فوكوزاوا يوكيتشي (١٨٣٥–١٩٠١) في اكتوبر عام ١٨٥٨ مدرسة للدراسات الهولندية (تحولت بعد ذلك لمدرسة للغة الانكليزية) في ايدو (طوكيو حاليا). يعد فوكوزاوا يوكيتشي من أحد مؤسسي نهضة اليابان الحديثة، فونهتم بمدرستنا بنوع التعليم الذي ينمي القدرات الإبداعية والفنية التي يتطلب توافرها في طلاب الجامعة بحيث لا ينشغل الطلاب باختبار قبول الجامعات ونحترم استقلالية وتفرد كل طالب وذلك في جو دافئ في بيئة طبيعية مليئة بأشجار"
set str05 to "게이오 기주쿠는 어디에나 있는 학교의 하나로 만족하지 않습니다. 게이오 기주쿠는 기주쿠(義塾, 의숙)에서 배우는 학생과 교원이 일본의 ’기품의 원천’ 및 ’지덕의 모범’이 되는 것을 목표로 하는 학숙(學塾)입니다. "
set str06 to "庆应义塾不是仅仅满足于成为常常见到的一般性学校。"
set str07 to "Je suis japonaise."
set str08 to "Buon pomeriggio."
set str09 to "Хороших выходных!"
set str10 to "Möchten Sie Tee oder Kaffee?"

set a1Res to guessLanguageCodeOf(str01) of me –>  "fi"
set a2Res to guessLanguageCodeOf(str02) of me –>  "sv"
set a3Res to guessLanguageCodeOf(str03) of me –>  "ja"
set a4Res to guessLanguageCodeOf(str04) of me –>  "ar"
set a5Res to guessLanguageCodeOf(str05) of me –>  "ko"
set a6Res to guessLanguageCodeOf(str06) of me –>  "zh-Hans"
set a7Res to guessLanguageCodeOf(str07) of me –>  "fr"
set a8Res to guessLanguageCodeOf(str08) of me –>  "it"
set a9Res to guessLanguageCodeOf(str09) of me –>  "ru"
set a10Res to guessLanguageCodeOf(str10) of me –> "de"

return {a1Res, a2Res, a3Res, a4Res, a5Res, a6Res, a7Res, a8Res, a9Res, a10Res}
–> {"fi", "nb", "ja", "ar", "ko", "zh-Hans", "fr", "it", "ru", "de"}

on guessLanguageCodeOf(theString as string)
  set aNL to current application’s NLLanguageRecognizer’s alloc()’s init()
  
aNL’s processString:theString
  
set langRes to (aNL’s dominantLanguage()) as string
  
return langRes
end guessLanguageCodeOf

★Click Here to Open This Script 

Posted in Natural Language Processing Text | Tagged 10.14savvy NLLanguageRecognizer | Leave a comment

Bayes推定による文章仕分け(Classifier)

Posted on 11月 12, 2018 by Takaaki Naganoya

ベイズ推定を計算するオープンソースのプログラム「Bayes」をCocoaフレームワーク化した「BayesKit」を呼び出してベイズ推定の計算を行うAppleScriptです。

–> Download BayesKit.framework (To ~/Library/Frameworks)

macOS 10.14以外はスクリプトエディタ/Script Debugger上で実行可能で、10.14のみScript Debugger上での実行を必要とします(この仕様、いい加減かったるいので戻してほしい)。

スパムメール選別用途御用達のベイズ推定の演算を行なってみました。プログラムに添付されていたサンプルは英語の文章を処理するようにできていましたが、予想どおり日本語の文章をそのまま与えると単語切り分けが行えずに計算がうまく行きません。

そこで、掲載サンプルScriptのように単語ごとに手動で半角スペースを入れてみました。

本来であれば、形態素解析辞書を使って単語ごとに切り分け、さらに単語の活用形をどうにかする必要があるはずですが、そこまで神経質にならずに簡易日本語パーサーで単語に分解し、助詞などを削除しデータとして与えることでそこそこの実用性は確保できるのではないかと思われます(これだと固有名詞がバラバラになる可能性は否定できませんが)。

NSLinguisticTagger+macOS 10.14で日本語文章の形態素解析+品詞解析は行えることを期待したいですが、未確認です。ただ、できた場合でも固有名詞への配慮がどの程度あるかは不明です。

AppleScript名:Bayes推定による文章仕分け(Classifier).scptd
—
–  Created by: Takaaki Naganoya
–  Created on: 2018/11/12
—
–  Copyright © 2018 Piyomaru Software, All Rights Reserved
—
use AppleScript version "2.5" — El Capitan(10.11) or later
use framework "Foundation"
use framework "BayesKit" –https://github.com/kevincobain2000/Bayes
use scripting additions

property Bayes : a reference to current application’s Bayes
property FeaturesVector : a reference to current application’s FeaturesVector
property NSMutableArray : a reference to current application’s NSMutableArray

–set positiveStr to "word word good good"
–set negativeStr to "thiss word bad bad"
set positiveStr to "良い 良い 良い 良い 。"
set negativeStr to "悪 悪 悪 悪 悪 。"

set classifierObj to Bayes’s alloc()’s init()
set featuresVec to FeaturesVector’s alloc()’s init()

set featuresArray to NSMutableArray’s arrayWithArray:{"tokens"}

featuresVec’s appendFeatures:positiveStr forFeatures:featuresArray
classifierObj’s train:(featuresVec’s features) forlabel:"positive"

featuresVec’s appendFeatures:negativeStr forFeatures:featuresArray
classifierObj’s train:(featuresVec’s features) forlabel:"negative"

–set toGuess to "word"
set toGuess to "良い 。"

featuresVec’s appendFeatures:toGuess forFeatures:featuresArray
classifierObj’s guessNaiveBayes:(featuresVec’s features)

set vRes to (classifierObj’s probabilities) as record
–> {positive:0.6400000453, negative:0.32000002265}–English Sample Words OK
–> {positive:1.0, negative:0.0}–Japanese Sample Words OK

★Click Here to Open This Script 

Posted in Machine Learning Record Text | Tagged 10.11savvy 10.12savvy 10.13savvy 10.14savvy NSMutableArray | Leave a comment

squeezeNetで画像のオブジェクト認識を行い、結果をCSV出力してNumbersでオープン

Posted on 11月 12, 2018 by Takaaki Naganoya

Core MLモデル「squeezeNet.mlmodel」を用いて画像のオブジェクト認識を行い、結果をデスクトップにCSV形式でデータ書き出しを行い、NumbersでオープンするAppleScriptです。

–> Download squeezeNetKit.framework (To ~/Library/Frameworks)

macOS 10.13上ではスクリプトエディタ、Script Debugger上で、macOS 10.14上ではScript Debugger上で動作します(AppleScript Appletでも動作)。

さまざまなCore MLモデルを用いて画像認識を行わせてはみたものの、最もスコアの高いもののラベルだけを返させても、結果がまったく内容にそぐわないケースが多く見られます。


▲機械学習の評価値が1.0に近いものは確度が高く、0.0に近いものは判断に迷った末に消極的に出した値。経験則でいえば、最高スコアの項目が0.7以上のスコアでないといまひとつのようです(0.7以上でもダメな時はダメなわけで、、、)

画像認識については、結果があまりに的外れで「なんじゃこら?」というケースが多いので、確認のためにCSVデータ出力させてNumbers上で確認させてみることにしてみました。そのためにありあわせのサブルーチンを組み合わせて作ったものです。

スコアが高い順に結果を並べて確認してみると、最も高いスコアの値であっても0.0に近い評価値であることがあり、「何も考えずに最高スコアのラベルだけ取ってくるのはものすごく危険」なことがよくわかります。


▲squeezeNet.mlmodelをNetronでビジュアライズしたところ(一部抜粋)

AppleScript名:SqueezeNetでオブジェクト判定して結果をCSV書き出ししてNumbersでオープン.scpt
–  Created by: Takaaki Naganoya
–  Created on: 2018/11/11
–  Copyright © 2018 Piyomaru Software, All Rights Reserved
use AppleScript version "2.7" — High Sierra (10.13) or later
use framework "Foundation"
use framework "AppKit"
use framework "squeezeNetKit"
use scripting additions

property NSUUID : a reference to current application’s NSUUID
property NSArray : a reference to current application’s NSArray
property NSImage : a reference to current application’s NSImage
property NSMutableArray : a reference to current application’s NSMutableArray
property NSSortDescriptor : a reference to current application’s NSSortDescriptor

set aFile to POSIX path of (choose file of type {"public.image"})
set aImage to NSImage’s alloc()’s initWithContentsOfFile:aFile
set resDict to (current application’s imageClassifier’s alloc()’s init()’s ImageClassifierWithImageAndRetDict:aImage)

set kArray to (resDict’s allKeys())
set vArray to (resDict’s allValues())
set aLen to kArray’s |count|()

set anArray to NSMutableArray’s new()

repeat with i from 0 to (aLen – 1)
  set tmpKey to (kArray’s objectAtIndex:i) as string
  
set tmpVal to (vArray’s objectAtIndex:i) as real
  (
anArray’s addObject:{aKey:tmpKey, aVal:tmpVal})
end repeat

–Sort by value
set bList to sortRecListByLabel(anArray, "aVal", false) of me

–record in list –> 2D list
set cList to convRecInListTo2DList(bList) of me

–デスクトップにCSVファイルを書き出してNumbersでオープン
set aPath to (((path to desktop) as string) & (NSUUID’s UUID()’s UUIDString()) as string) & ".csv"
set fRes to saveAsCSV(cList, aPath) of me
tell application "Numbers"
  open (aPath as alias)
end tell

–リストに入れたレコードを、指定の属性ラベルの値でソート
on sortRecListByLabel(aRecList as list, aLabelStr as string, ascendF as boolean)
  set aArray to NSArray’s arrayWithArray:aRecList
  
set sortDesc to NSSortDescriptor’s alloc()’s initWithKey:aLabelStr ascending:ascendF
  
set sortDescArray to NSArray’s arrayWithObjects:sortDesc
  
set sortedArray to aArray’s sortedArrayUsingDescriptors:sortDescArray
  
set bList to (sortedArray) as anything
  
return bList
end sortRecListByLabel

on convRecInListTo2DList(aList)
  set anArray to NSMutableArray’s arrayWithArray:aList
  
set fItem to anArray’s objectAtIndex:0
  
set keyList to fItem’s allKeys() as list
  
set aCount to anArray’s |count|()
  
  
set allArray to NSMutableArray’s new()
  
  
repeat with i from 1 to aCount
    set anItem to (anArray’s objectAtIndex:(i – 1))
    
set tmpItem to {}
    
    
repeat with ii in keyList
      set tmpDat to (anItem’s valueForKeyPath:(contents of ii))
      
if tmpDat is not equal to missing value then
        set the end of tmpItem to tmpDat
      else
        set the end of tmpItem to ""
      end if
    end repeat
    (
allArray’s addObject:tmpItem)
  end repeat
  
  
set allList to allArray as list
  
set the beginning of allList to keyList
  
return allList
end convRecInListTo2DList

–CSV Kit

–2D List to CSV file
on saveAsCSV(aList, aPath)
  –set crlfChar to (ASCII character 13) & (ASCII character 10)
  
set crlfChar to (string id 13) & (string id 10)
  
set LF to (string id 10)
  
set wholeText to ""
  
  
repeat with i in aList
    set newLine to {}
    
    
–Sanitize (Double Quote)
    
repeat with ii in i
      set jj to ii as text
      
set kk to repChar(jj, string id 34, (string id 34) & (string id 34)) of me –Escape Double Quote
      
set the end of newLine to kk
    end repeat
    
    
–Change Delimiter
    
set aLineText to ""
    
set curDelim to AppleScript’s text item delimiters
    
set AppleScript’s text item delimiters to "\",\""
    
set aLineList to newLine as text
    
set AppleScript’s text item delimiters to curDelim
    
    
set aLineText to repChar(aLineList, return, "") of me –delete return
    
set aLineText to repChar(aLineText, LF, "") of me –delete lf
    
    
set wholeText to wholeText & "\"" & aLineText & "\"" & crlfChar –line terminator: CR+LF
  end repeat
  
  
if (aPath as string) does not end with ".csv" then
    set bPath to aPath & ".csv" as Unicode text
  else
    set bPath to aPath as Unicode text
  end if
  
  
write_to_file(wholeText, bPath, false) of me
  
end saveAsCSV

on write_to_file(this_data, target_file, append_data)
  tell current application
    try
      set the target_file to the target_file as text
      
set the open_target_file to open for access file target_file with write permission
      
if append_data is false then set eof of the open_target_file to 0
      
write this_data to the open_target_file starting at eof
      
close access the open_target_file
      
return true
    on error error_message
      try
        close access file target_file
      end try
      
return error_message
    end try
  end tell
end write_to_file

on repChar(origText as text, targChar as text, repChar as text)
  set curDelim to AppleScript’s text item delimiters
  
set AppleScript’s text item delimiters to targChar
  
set tmpList to text items of origText
  
set AppleScript’s text item delimiters to repChar
  
set retText to tmpList as string
  
set AppleScript’s text item delimiters to curDelim
  
return retText
end repChar

★Click Here to Open This Script 

Posted in file Image list Machine Learning Record Sort | Tagged 10.13savvy 10.14savvy NSArray NSImage NSMutableArray NSSortDescriptor NSUUID Numbers | Leave a comment

機械学習モデルをもとに画像のシーン判定

Posted on 11月 6, 2018 by Takaaki Naganoya

Appleが配布しているCoreML Model「Places205-GoogLeNet」を用いて、指定画像のシーン判定を行うAppleScriptです。

Appleが公式に配布している6つのCoreML Modelのうち、「Places205-GoogLeNet」を組み込んだFrameworkを作成して、これをAppleScriptから呼び出しています。

sceneDetection.frameworkをインストールしたうえで、macOS 10.13上ではスクリプトエディタ/Script Debuggerから、macOS 10.14ではScript Debuggerから本Scriptを実行します(AppleScriptアプレットでも動作します)。

「Places205-GoogLeNet」は、

Detects the scene of an image from 205 categories such as an airport terminal, bedroom, forest, coast, and more.

と、画像の内容から、画面やシーン、場所について「だいたいこんなところ」と判定してくれるModelのようです。ただ、日本国内の景色を渡してみると、得られる判定結果にはいまひとつ「ちょっと違う」と感じるものであります。


▲左:crosswalk(横断歩道)実際には自動車販売店と道路(Car shop & road)、右:desert/sand(砂漠、砂)実際にはAirport


▲左:river(川)実際には海、右:bridge(橋) 実際には橋ではありません

–> Download sceneDetection.framework (To ~/Library/Frameworks)


▲GoogLeNetPlaces.mlmodelをNetronでビジュアライズしたところ

AppleScript名:GoogLeNetPlacesでシーン判定.scpt
use AppleScript version "2.7" — High Sierra (10.13) or later
use framework "Foundation"
use framework "AppKit"
use framework "sceneDetection"
use scripting additions

set aFile to POSIX path of (choose file of type {"public.image"})
set aImage to current application’s NSImage’s alloc()’s initWithContentsOfFile:aFile
set msDict to (current application’s sceneDetector’s alloc()’s init()’s GoogLeNetPlacesWithImage:aImage) as string
–> "crosswalk"

★Click Here to Open This Script 

Posted in file Image Machine Learning | Tagged 10.13savvy 10.14savvy NSImage | Leave a comment

Post navigation

  • Older posts

電子書籍(PDF)をオンラインストアで販売中!

Google Search

Popular posts

  • macOS 13, Ventura(継続更新)
  • アラートダイアログ上にWebViewで3Dコンテンツを表示(WebGL+three.js)v3
  • UI Browserがgithub上でソース公開され、オープンソースに
  • macOS 13 TTS Voice環境に変更
  • Xcode 14.2でAppleScript App Templateを復活させる
  • 2022年に書いた価値あるAppleScript
  • ChatGPTで文章のベクトル化(Embedding)
  • 新発売:AppleScriptからSiriを呼び出そう!
  • iWork 12.2がリリースされた
  • 従来と異なるmacOS 13の性格?
  • 新発売:CotEditor Scripting Book with AppleScript
  • macOS 13対応アップデート:AppleScript実践的テクニック集(1)GUI Scripting
  • AS関連データの取り扱いを容易にする(はずの)privateDataTypeLib
  • macOS 13でNSNotFoundバグふたたび
  • macOS 12.5.1、11.6.8でFinderのselectionでスクリーンショット画像をopenできない問題
  • ChatGPTでchatに対する応答文を取得
  • 新発売:iWork Scripting Book with AppleScript
  • Finderの隠し命令openVirtualLocationが発見される
  • macOS 13.1アップデートでスクリプトエディタの挙動がようやくまともに
  • あのコン過去ログビューワー(暫定版)

Tags

10.11savvy (1101) 10.12savvy (1242) 10.13savvy (1390) 10.14savvy (586) 10.15savvy (434) 11.0savvy (277) 12.0savvy (185) 13.0savvy (55) CotEditor (60) Finder (47) iTunes (19) Keynote (98) NSAlert (60) NSArray (51) NSBezierPath (18) NSBitmapImageRep (20) NSBundle (20) NSButton (34) NSColor (51) NSDictionary (27) NSFileManager (23) NSFont (18) NSImage (41) NSJSONSerialization (21) NSMutableArray (62) NSMutableDictionary (21) NSPredicate (36) NSRunningApplication (56) NSScreen (30) NSScrollView (22) NSString (117) NSURL (97) NSURLRequest (23) NSUTF8StringEncoding (30) NSView (33) NSWorkspace (20) Numbers (56) Pages (37) Safari (41) Script Editor (20) WKUserContentController (21) WKUserScript (20) WKUserScriptInjectionTimeAtDocumentEnd (18) WKWebView (23) WKWebViewConfiguration (22)

カテゴリー

  • 2D Bin Packing
  • 3D
  • AirDrop
  • AirPlay
  • Animation
  • AppleScript Application on Xcode
  • beta
  • Bluetooth
  • Books
  • boolean
  • bounds
  • Bug
  • Calendar
  • call by reference
  • Clipboard
  • Code Sign
  • Color
  • Custom Class
  • dialog
  • drive
  • exif
  • file
  • File path
  • filter
  • folder
  • Font
  • Font
  • GAME
  • geolocation
  • GUI
  • GUI Scripting
  • Hex
  • History
  • How To
  • iCloud
  • Icon
  • Image
  • Input Method
  • Internet
  • iOS App
  • JavaScript
  • JSON
  • JXA
  • Keychain
  • Keychain
  • Language
  • Library
  • list
  • Locale
  • Machine Learning
  • Map
  • Markdown
  • Menu
  • Metadata
  • MIDI
  • MIME
  • Natural Language Processing
  • Network
  • news
  • Noification
  • Notarization
  • Number
  • Object control
  • OCR
  • OSA
  • PDF
  • Peripheral
  • PRODUCTS
  • QR Code
  • Raw AppleEvent Code
  • Record
  • rectangle
  • recursive call
  • regexp
  • Release
  • Remote Control
  • Require Control-Command-R to run
  • REST API
  • Review
  • RTF
  • Sandbox
  • Screen Saver
  • Script Libraries
  • sdef
  • search
  • Security
  • selection
  • shell script
  • Shortcuts Workflow
  • Sort
  • Sound
  • Spellchecker
  • Spotlight
  • SVG
  • System
  • Tag
  • Telephony
  • Text
  • Text to Speech
  • timezone
  • Tools
  • Update
  • URL
  • UTI
  • Web Contents Control
  • WiFi
  • XML
  • XML-RPC
  • イベント(Event)
  • 未分類

アーカイブ

  • 2023年9月
  • 2023年8月
  • 2023年7月
  • 2023年6月
  • 2023年5月
  • 2023年4月
  • 2023年3月
  • 2023年2月
  • 2023年1月
  • 2022年12月
  • 2022年11月
  • 2022年10月
  • 2022年9月
  • 2022年8月
  • 2022年7月
  • 2022年6月
  • 2022年5月
  • 2022年4月
  • 2022年3月
  • 2022年2月
  • 2022年1月
  • 2021年12月
  • 2021年11月
  • 2021年10月
  • 2021年9月
  • 2021年8月
  • 2021年7月
  • 2021年6月
  • 2021年5月
  • 2021年4月
  • 2021年3月
  • 2021年2月
  • 2021年1月
  • 2020年12月
  • 2020年11月
  • 2020年10月
  • 2020年9月
  • 2020年8月
  • 2020年7月
  • 2020年6月
  • 2020年5月
  • 2020年4月
  • 2020年3月
  • 2020年2月
  • 2020年1月
  • 2019年12月
  • 2019年11月
  • 2019年10月
  • 2019年9月
  • 2019年8月
  • 2019年7月
  • 2019年6月
  • 2019年5月
  • 2019年4月
  • 2019年3月
  • 2019年2月
  • 2019年1月
  • 2018年12月
  • 2018年11月
  • 2018年10月
  • 2018年9月
  • 2018年8月
  • 2018年7月
  • 2018年6月
  • 2018年5月
  • 2018年4月
  • 2018年3月
  • 2018年2月

https://piyomarusoft.booth.pm/items/301502

メタ情報

  • ログイン
  • 投稿フィード
  • コメントフィード
  • WordPress.org

Forum Posts

  • 人気のトピック
  • 返信がないトピック

メタ情報

  • ログイン
  • 投稿フィード
  • コメントフィード
  • WordPress.org
Proudly powered by WordPress
Theme: Flint by Star Verte LLC