Menu

Skip to content
AppleScriptの穴
  • Home
  • Products
  • Books
  • Docs
  • Events
  • Forum
  • About This Blog
  • License
  • 仕事依頼

AppleScriptの穴

Useful & Practical AppleScript archive. Click '★Click Here to Open This Script' Link to download each AppleScript

タグ: NSBitmapImageRep

Intel MacとApple Silicon Macの速度差〜画像処理

Posted on 1月 2, 2022 by Takaaki Naganoya

macOS 11から12に移行して、なぜかリリースが近づくにつれて細かいバグや巨大なバグが顕在化し、まだ手放しでおすすめできる状況にないのが心苦しいところですが、AppleScriptからのCocoa呼び出しについてはIntel Mac/Apple Silicon Macでも速度が向上。とくに、Apple Silicon Macでの速度向上が顕著です。

で、特定の処理(巨大なlistやrecord in list同士の検索)でM1 Mac miniがiMac Proの2.5倍ぐらい速いといったベンチマークは出しているわけですが、いかにもApple Silicon Macで処理が速そうな画像処理のベンチマークを実施してみました。

Intel Mac mini 2014が手元からなくなってしまったので、以前のメインマシンであったMacBook Pro Retina 2012(MacBookPro10,1)と比較してみました。

ベンチマーク内容は、指定の画像が空白かどうかをチェックするというものです。フルHD画像でも4K画像でも8K画像でも、1ピクセルでも白くない点があれば検出できるという処理内容。外部のGPUImage FrameworkやPhotoshopのヒストグラム処理を呼び出すよりもAppleScriptだけで処理した方が速いというものです(8K画像だとPhotoshopの方が速いかも)。


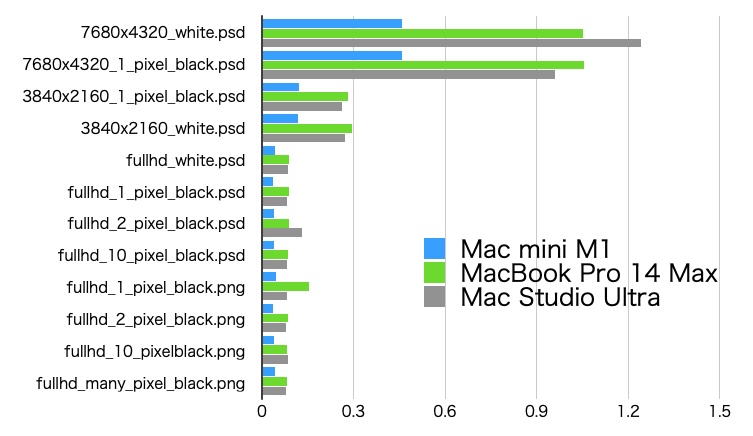
▲画像解像度の変化と処理時間の相関。グラフは数値が小さいほど高速。巨大な画像になると処理速度差が大きくなる傾向にある?

だいたい、MacBook Pro Retina 2012と比べて3〜4倍ぐらいM1 Mac miniの方が高速です。MacBook Pro Retina 2012は2017年のMacBook Pro 13インチといい勝負ぐらいの速度が出ており、古い割にはごく最近まで使えていました。

そこから3〜4倍高速ということで、M1 Mac miniはコストの割にはパワフルです。ファンレスのMacBook Air M1でも同程度の速度が出るはずです。

一方で、M1 Pro/M1 Max搭載のMacBook ProでM1機よりも大幅に高速なのかと言われると……このぐらいの静止画の処理程度だとごくわずかな差しかつかないはずです。下手をすると、速度差がないかもしれません。

→ Download blank_image_detection_benchmark.zip (including script libraries)

–> Download test Data


▲バーが短いほど高速。M1がM1 Maxの2倍高速という結果が出てしまった。M1 Max MBPは2014年のIntel Mac miniより少し速いだけのマシンという結果に。2018年のIntel Mac miniとの比較だとM1 Max MBPよりもIntel Mac miniのほうが速そう

M1、M1 Max、M1 Ultra(最上位機種)で処理時間を比較した結果。予想どおりM1がM1 MaxやM1 Ultraよりも2倍以上高速。もはや8K画像ぐらいは、大きなデータにならないというべきなのか。

AppleScript名:画像の空白判定 v4_bench_時間計測.scptd
—
–  Created by: Takaaki Naganoya
–  Created on: 2022/01/01
—
–  Copyright © 2022 Piyomaru Software, All Rights Reserved
—
use AppleScript version "2.7"
use framework "Foundation"
use framework "AppKit"
use scripting additions
use mdLib : script "Metadata Lib" version "2.0.0"
use easyTable : script "display table by list"

set aFol to choose folder

set aResList to perform search in folders {aFol} predicate string "kMDItemContentTypeTree CONTAINS %@" search arguments {"public.image"}

set aList to {}
repeat with i in aResList
  set a1Dat to current application’s NSDate’s timeIntervalSinceReferenceDate()
  
  
set iRes to checkImageIsWhite(i) of blankImageKit of me
  
  
set b1Dat to current application’s NSDate’s timeIntervalSinceReferenceDate()
  
set c1Dat to b1Dat – a1Dat
  
  
set aName to (current application’s NSString’s stringWithString:i)’s lastPathComponent() as string
  
  
if iRes = true then
    set jRes to "White"
  else
    set jRes to "Black"
  end if
  
  
–log {aName, jRes}
  
  
set the end of aList to {aName, jRes, c1Dat}
end repeat

set fLabels to {"File name", "Result", "Estimate(Seconds)"}
set aRes to (display table by list aList main message "Blank Image check" size {800, 600} labels fLabels)
return aList

script blankImageKit
  use AppleScript version "2.7" — High Sierra (10.13) or later
  
use framework "Foundation"
  
use framework "AppKit"
  
use scripting additions
  
property parent : AppleScript
  
  
property NSData : a reference to current application’s NSData
  
property |NSURL| : a reference to current application’s |NSURL|
  
property NSColor : a reference to current application’s NSColor
  
property NSImage : a reference to current application’s NSImage
  
property NSBezierPath : a reference to current application’s NSBezierPath
  
property NSBitmapImageRep : a reference to current application’s NSBitmapImageRep


–Compare Original Data and
  
on checkImageIsWhite(aFile)
    set aPOSIXpath to POSIX path of aFile
    
set aURL to |NSURL|’s fileURLWithPath:(aPOSIXpath)
    
    
set aNSImage to NSImage’s alloc()’s initWithContentsOfURL:(aURL)
    
set bNSImage to NSImage’s alloc()’s initWithContentsOfURL:(aURL)
    
    
set fillColor1 to NSColor’s clearColor()
    
set blankNSImage1 to drawImageWithFilledColor(aNSImage, fillColor1) of me
    
    
set fillColor2 to makeNSColorFromRGBAval(65535, 65535, 65535, 65535, 65535) of me –white
    
set blankNSImage2 to drawImageWithFilledColor(bNSImage, fillColor2) of me
    
    
set aTiff to blankNSImage1’s TIFFRepresentation()
    
set bTiff to blankNSImage2’s TIFFRepresentation()
    
    
set chkWhite to (aTiff’s isEqualToData:bTiff) as boolean
    
    
return chkWhite
  end checkImageIsWhite


on getSizeOfImage(anNSImage)
    set aSize to anNSImage’s |size|()
    
set aClass to class of aSize
    
if aClass = record then
      copy aSize to theSize –To macOS 10.12.x
    else –macOS 10.13 or later
      set sizeX to (item 1 of item 2 of aSize)
      
set sizeY to (item 2 of item 2 of aSize)
      
set theSize to {width:sizeX, height:sizeY}
    end if
    
return theSize
  end getSizeOfImage


–指定サイズの画像を作成し、背景を指定色で塗る
  
on drawImageWithFilledColor(anImage, fillColor)
    set aSize to getSizeOfImage(anImage) of me
    
    
anImage’s lockFocus()
    
    
set theRect to {{x:0, y:0}, {width:(width of aSize), height:(height of aSize)}}
    
set theNSBezierPath to NSBezierPath’s bezierPath
    
theNSBezierPath’s appendBezierPathWithRect:theRect
    
fillColor’s |set|()
    
theNSBezierPath’s fill()
    
    
anImage’s unlockFocus()
    
    
return anImage
  end drawImageWithFilledColor


–aMaxValを最大値とする数値でNSColorを作成して返す
  
on makeNSColorFromRGBAval(redValue as integer, greenValue as integer, blueValue as integer, alphaValue as integer, aMaxVal as integer)
    set aRedCocoa to (redValue / aMaxVal) as real
    
set aGreenCocoa to (greenValue / aMaxVal) as real
    
set aBlueCocoa to (blueValue / aMaxVal) as real
    
set aAlphaCocoa to (alphaValue / aMaxVal) as real
    
set aColor to NSColor’s colorWithCalibratedRed:aRedCocoa green:aGreenCocoa blue:aBlueCocoa alpha:aAlphaCocoa
    
return aColor
  end makeNSColorFromRGBAval
  
end script

★Click Here to Open This Script 

Posted in Image | Tagged 10.14savvy 10.15savvy 11.0savvy 12.0savvy NSBezierPath NSBitmapImageRep NSColor NSData NSDate NSImage NSURL | Leave a comment

指定のNSImageにNSBezierPathでclearColor塗りつぶし

Posted on 2月 14, 2020 by Takaaki Naganoya

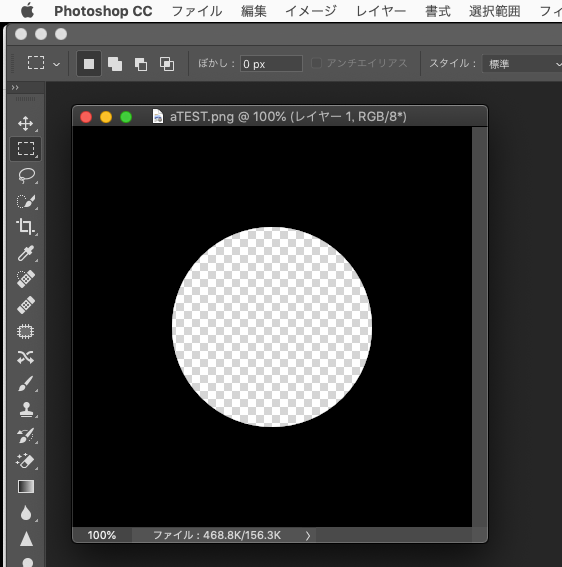
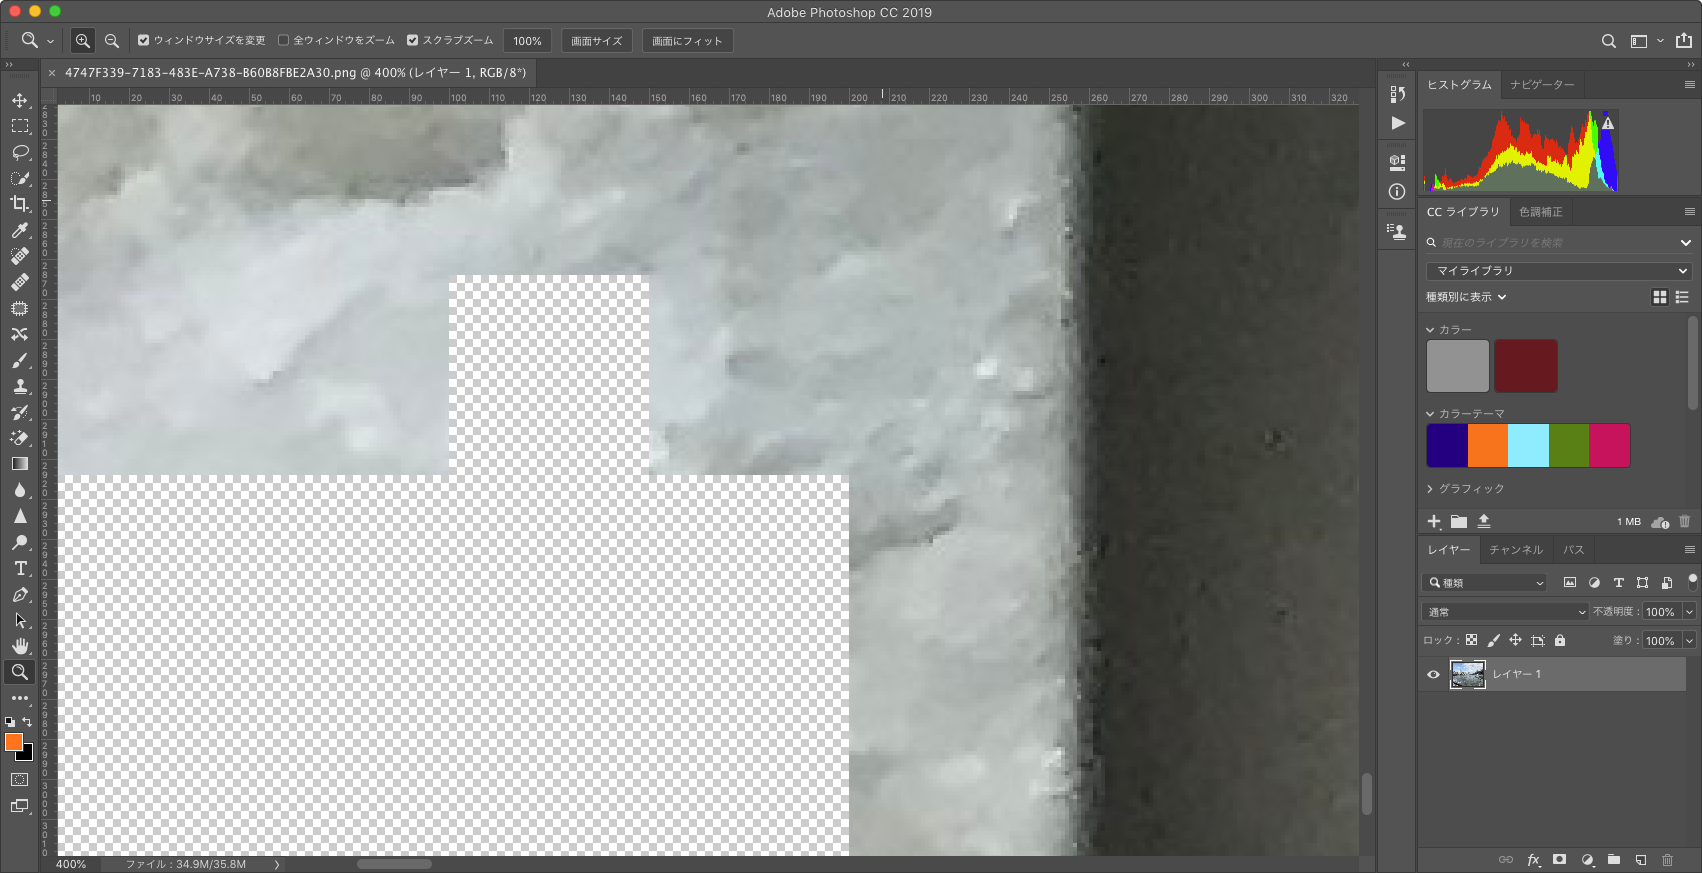
指定色で塗りつぶしたNSImageを用意し、そこにNSBezierPathでclearColorで塗りつぶし(=切り抜き)を行うAppleScriptです。

2005/8/18にCocoa-dev mailing list に対してStefan Schüßler氏が投稿した内容をもとにしています。いろいろ探して回りましたが、ヒットしたのはこの情報だけでした。彼に感謝を。

Re: [NSColor clearColor] and NSBezierPath: not compatible?

NSBezierPath uses the NSCompositeSourceOver operation, therefore clearColor does not do anything. You could change the graphics state in order to clear the path:

  NSGraphicsContext *context;
  context = [NSGraphicsContext currentContext];
  [context saveGraphicsState];
  [context setCompositingOperation:NSCompositeClear];
  [yourBezierPath fill];
  [context restoreGraphicsState];

Hope this helps.

Stefan
AppleScript名:指定のNSImageにNSBezierPathでclearColor塗りつぶし.scptd
— Created 2020-02-14 by Takaaki Naganoya
— 2020 Piyomaru Software
use AppleScript version "2.4"
use scripting additions
use framework "Foundation"
use framework "AppKit"
use framework "CoreImage"

property NSColor : a reference to current application’s NSColor
property NSImage : a reference to current application’s NSImage
property NSZeroRect : a reference to current application’s NSZeroRect
property NSBezierPath : a reference to current application’s NSBezierPath
property NSCompositeCopy : a reference to current application’s NSCompositeCopy
property NSGraphicsContext : a reference to current application’s NSGraphicsContext
property NSBitmapImageRep : a reference to current application’s NSBitmapImageRep
property NSCalibratedRGBColorSpace : a reference to current application’s NSCalibratedRGBColorSpace

set {rCol, gCol, bCol} to choose color

set aNSImage to makeColoredNSImage({rCol, gCol, bCol}, 400, 400) of me
set aPath to generateCircle(200, 100, 100) of me

set bImage to my fillImage:aNSImage withTransparentPathFilling:aPath

set aFile to POSIX path of (choose file name)
set sRes to my saveNSImageAtPathAsPNG(bImage, aFile)

on fillImage:aSourceImg withTransparentPathFilling:aPath
  set aSize to aSourceImg’s |size|()
  
set aWidth to (aSize’s width)
  
set aHeight to (aSize’s height)
  
  
set aRep to NSBitmapImageRep’s alloc()’s initWithBitmapDataPlanes:(missing value) pixelsWide:aWidth pixelsHigh:aHeight bitsPerSample:8 samplesPerPixel:4 hasAlpha:true isPlanar:false colorSpaceName:(NSCalibratedRGBColorSpace) bytesPerRow:0 bitsPerPixel:0
  
  
NSGraphicsContext’s saveGraphicsState()
  
  
NSGraphicsContext’s setCurrentContext:(NSGraphicsContext’s graphicsContextWithBitmapImageRep:aRep)
  
  
aSourceImg’s drawInRect:(current application’s NSMakeRect(0, 0, aWidth, aHeight)) fromRect:(NSZeroRect) operation:(NSCompositeCopy) fraction:(1.0)
  
  
NSGraphicsContext’s currentContext()’s setCompositingOperation:(current application’s NSCompositeClear)
  
aPath’s fill()
  
  
NSGraphicsContext’s restoreGraphicsState()
  
  
set newImg to NSImage’s alloc()’s initWithSize:(aSize)
  
newImg’s addRepresentation:aRep
  
  
return newImg
end fillImage:withTransparentPathFilling:

on generateCircle(theRadius, x, y)
  set aRect to current application’s NSMakeRect(x, y, theRadius, theRadius)
  
set aCirCle to NSBezierPath’s bezierPath()
  
aCirCle’s appendBezierPathWithOvalInRect:aRect
  
return aCirCle
end generateCircle

on makeColoredNSImage(colList, aWidth, aHeight)
  copy colList to {rCol, gCol, bCol}
  
set aColor to makeNSColorFromRGBA65535val(rCol, gCol, bCol, 1.0) of me
  
set aColoredImage to fillColorWithImage(aColor, aWidth, aHeight) of me
  
return aColoredImage
end makeColoredNSImage

on fillColorWithImage(aColor, aWidth, aHeight)
  set colordImage to makeNSImageWithFilledWithColor(aWidth, aHeight, aColor, aWidth, aHeight) of me
  
colordImage’s lockFocus()
  
colordImage’s drawAtPoint:{0, 0} fromRect:(current application’s NSZeroRect) operation:(current application’s NSCompositeDestinationIn) fraction:1.0
  
colordImage’s unlockFocus()
  
return colordImage
end fillColorWithImage

on makeNSImageWithFilledWithColor(aWidth, aHeight, fillColor)
  set anImage to NSImage’s alloc()’s initWithSize:(current application’s NSMakeSize(aWidth, aHeight))
  
anImage’s lockFocus()
  
—
  
set theRect to {{x:0, y:0}, {height:aHeight, width:aWidth}}
  
set theNSBezierPath to NSBezierPath’s bezierPath
  
theNSBezierPath’s appendBezierPathWithRect:theRect
  
—
  
fillColor’s |set|()
  
theNSBezierPath’s fill()
  
—
  
anImage’s unlockFocus()
  
—
  
return anImage
end makeNSImageWithFilledWithColor

on makeNSColorFromRGBA65535val(redValue as integer, greenValue as integer, blueValue as integer, alphaValue as integer)
  set aRedCocoa to (redValue / 65535) as real
  
set aGreenCocoa to (greenValue / 65535) as real
  
set aBlueCocoa to (blueValue / 65535) as real
  
set aAlphaCocoa to 1.0 as real
  
set aColor to NSColor’s colorWithCalibratedRed:aRedCocoa green:aGreenCocoa blue:aBlueCocoa alpha:aAlphaCocoa
  
return aColor
end makeNSColorFromRGBA65535val

on saveNSImageAtPathAsPNG(anImage, outPath)
  set imageRep to anImage’s TIFFRepresentation()
  
set aRawimg to current application’s NSBitmapImageRep’s imageRepWithData:imageRep
  
set pathString to current application’s NSString’s stringWithString:outPath
  
set newPath to pathString’s stringByExpandingTildeInPath()
  
set myNewImageData to (aRawimg’s representationUsingType:(current application’s NSPNGFileType) |properties|:(missing value))
  
set aRes to (myNewImageData’s writeToFile:newPath atomically:true) as boolean
  
return aRes
end saveNSImageAtPathAsPNG

★Click Here to Open This Script 

Posted in Image | Tagged 10.13savvy 10.14savvy 10.15savvy NSBezierPath NSBitmapImageRep NSCalibratedRGBColorSpace NSColor NSCompositeCopy NSGraphicsContext NSImage NSZeroRect | 1 Comment

画像に円を塗る

Posted on 2月 11, 2020 by Takaaki Naganoya

作成した画像(NSImage)に円を塗るAppleScriptです。

最近、6角形の図形ばかり塗りつぶしていましたが、「円に変えるとどうなんだろう?」と考えて、本ルーチンを試作してみました。

ためしに、6角形ではなく円で塗りつぶしてみたものの、そんなにイケていない感じがします。

AppleScript名:画像に円を塗る.scptd
—
–  Created by: Takaaki Naganoya
–  Created on: 2020/02/11
—
–  Copyright © 2020 Piyomaru Software, All Rights Reserved
—
use AppleScript version "2.4" — Yosemite (10.10) or later
use framework "Foundation"
use framework "AppKit"
use scripting additions

property aRadius : 40

set aFile to POSIX path of (choose file name)
if aFile does not end with ".png" then
  set aFile to aFile & ".png"
end if

set aColor to current application’s NSColor’s redColor()

set aImage to current application’s NSImage’s alloc()’s initWithSize:{300, 300}

repeat with y from 0 to 300 by aRadius + 4
  repeat with x from 0 to 300 by aRadius + 4
    my drawCircleOnNSIMage(aImage, aRadius, x, y, aColor)
  end repeat
end repeat

set sRes to my saveNSImageAtPathAsPNG(aImage, aFile)

#  MARK: Call By Reference
on drawCircleOnNSIMage(aImage, aRadius, aXpos, aYpos, aColor)
  set aBezier to generateCircle(aRadius, aXpos, aYpos) of me
  (
aImage)’s lockFocus()
  
aColor’s |set|()
  
aBezier’s fill() –ぬりつぶし
  (
aImage)’s unlockFocus()
end drawCircleOnNSIMage

#  MARK: circleのBezier曲線を作成して返す
on generateCircle(theRadius, x, y)
  set aRect to current application’s NSMakeRect(x, y, theRadius, theRadius)
  
set aCirCle to current application’s NSBezierPath’s bezierPath()
  
aCirCle’s appendBezierPathWithOvalInRect:aRect
  
return aCirCle
end generateCircle

# NSImageを指定パスにPNG形式で保存
on saveNSImageAtPathAsPNG(anImage, outPath)
  set imageRep to anImage’s TIFFRepresentation()
  
set aRawimg to current application’s NSBitmapImageRep’s imageRepWithData:imageRep
  
set pathString to current application’s NSString’s stringWithString:outPath
  
set newPath to pathString’s stringByExpandingTildeInPath()
  
set myNewImageData to (aRawimg’s representationUsingType:(current application’s NSPNGFileType) |properties|:(missing value))
  
set aRes to (myNewImageData’s writeToFile:newPath atomically:true) as boolean
  
return aRes –成功ならtrue、失敗ならfalseが返る
end saveNSImageAtPathAsPNG

★Click Here to Open This Script 

Posted in file File path Image | Tagged 10.14savvy 10.15savvy NSBezierPath NSBitmapImageRep NSColor NSImage NSPNGFileType NSString | Leave a comment

画像の指定エリアを透明色塗りつぶし(矩形切り抜き)

Posted on 2月 3, 2020 by Takaaki Naganoya

指定画像の指定エリア(矩形)を透明色で塗りつぶすAppleScriptです。透明色で塗りつぶす=矩形で切り抜いたようなかっこうになります。

画像(NSImage)を指定色で塗りつぶすという処理はよく見かけるものですが、clearColor()(透明色)で塗りつぶすという処理を行うとどうなるかといえば…………何も起こりません。

透明色でNSImageを塗りつぶすという処理は、たいへんに「ありそう」な処理ですが、なかなか見つからない。

さんざん探し回ったのですが、自分には見つけられませんでした。ちょうどEdama2さんに相談してみたところ、こういう処理を探し出してもらえました(ありがとうございますー)。ただ、見つけてきた処理そのままでは思い通りの結果にならなかったので、修正が必要であったとのこと。

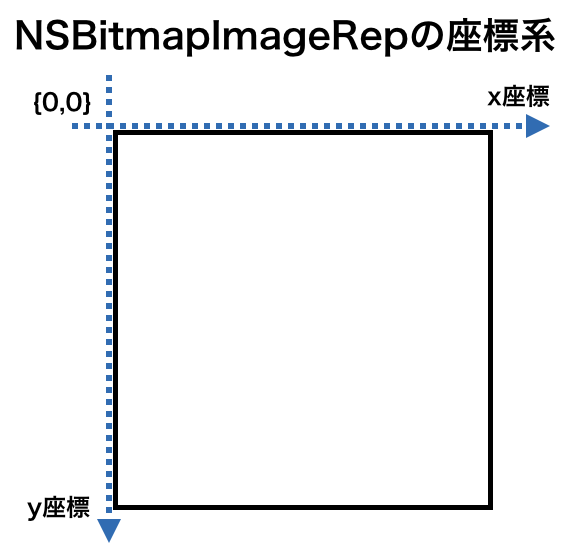
透明塗りつぶし(切り抜き)の指定座標はCocoaの座標系をそのまま利用しているので、左下が原点です。

NSBezierPathで切り抜き(透明色で塗りつぶし)できるといいのになーという感じではあります。

AppleScript名:画像の指定エリアを透明色塗りつぶし(矩形切り抜き)
— Created 2017-11-19 by Takaaki Naganoya
— Modified 2018-02-14 by Takaaki Naganoya
— Modified 2020-02-03 by Edama2 & Takaaki Naganoya
use AppleScript version "2.5"
use scripting additions
use framework "Foundation"
use framework "AppKit"

property NSUUID : a reference to current application’s NSUUID
property NSColor : a reference to current application’s NSColor
property NSString : a reference to current application’s NSString
property NSImage : a reference to current application’s NSImage
property NSScreen : a reference to current application’s NSScreen
property NSBezierPath : a reference to current application’s NSBezierPath
property NSPNGFileType : a reference to current application’s NSPNGFileType
property NSCompositeClear : a reference to current application’s NSCompositeClear
property NSBitmapImageRep : a reference to current application’s NSBitmapImageRep

–切り抜きエリア(複数)
set drawList to {{origin:{x:0, y:0}, |size|:{width:200, height:100}}, {origin:{x:100, y:100}, |size|:{width:50, height:50}}}

set imgPath to POSIX path of (choose file of type {"public.image"})
set anImage to NSImage’s alloc()’s initWithContentsOfFile:imgPath

set fillColor to (NSColor’s colorWithCalibratedRed:1.0 green:0.0 blue:0.0 alpha:0.9)

–透明色塗りつぶし処理呼び出し
set resImage to drawImageWithClearColorFill(anImage, drawList) of me

set aUUIDstr to (NSUUID’s UUID()’s UUIDString()) as string
set aPath to ((NSString’s stringWithString:imgPath)’s stringByDeletingLastPathComponent()’s stringByAppendingPathComponent:aUUIDstr)’s stringByAppendingPathExtension:"png"

set fRes to saveImageRepAtPathAsPNG(resImage, aPath) of me

on drawImageWithClearColorFill(anImage, drawList)
  set retinaF to (NSScreen’s mainScreen()’s backingScaleFactor()) as real
  
–>  2.0 (Retina) / 1.0 (Non Retina)
  
  
set aClearCol to NSColor’s clearColor()
  
set op to current application’s NSCompositeClear
  
  
anImage’s lockFocus() –描画開始
  
  
repeat with i in drawList
    set origX to (x of origin of i) / retinaF
    
set origY to (y of origin of i) / retinaF
    
set sizeX to (width of |size| of i) / retinaF
    
set sizeY to (height of |size| of i) / retinaF
    
    
–Draw Clear Color
    
–http://www.drissman.com/blog/archives/2009/10/09/nsrectfill_and_nscolor_clearcolor.html
    
set theRect to {{x:origX, y:origY}, {width:sizeX, height:sizeY}}
    
aClearCol’s |set|()
    
current application’s NSRectFillUsingOperation(theRect, op)
  end repeat
  
  
anImage’s unlockFocus() –描画ここまで
  
  
return anImage –returns NSImage
end drawImageWithClearColorFill

–画像を指定パスにPNG形式で保存
on saveImageRepAtPathAsPNG(anImage, outPath)
  set imageRep to anImage’s TIFFRepresentation()
  
set aRawimg to NSBitmapImageRep’s imageRepWithData:imageRep
  
  
set pathString to NSString’s stringWithString:outPath
  
set newPath to pathString’s stringByExpandingTildeInPath()
  
  
set myNewImageData to (aRawimg’s representationUsingType:(NSPNGFileType) |properties|:(missing value))
  
return (myNewImageData’s writeToFile:newPath atomically:true) as boolean
end saveImageRepAtPathAsPNG

★Click Here to Open This Script 

Posted in file File path Image | Tagged 10.14savvy 10.15savvy NSBitmapImageRep NSColor NSCompositeClear NSImage NSPNGFileType NSScreen NSString NSUUID | 1 Comment

GUI Scriptingでコンテクストメニューのキャプチャを取得

Posted on 1月 24, 2020 by Takaaki Naganoya

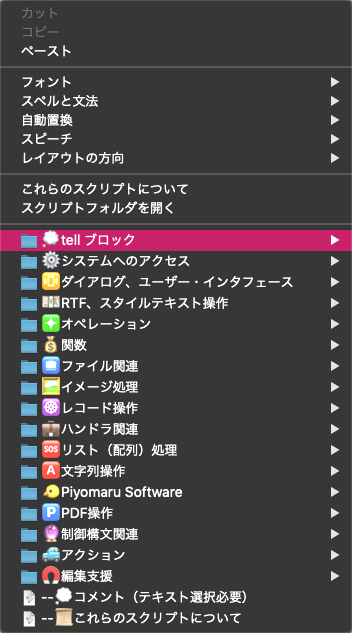
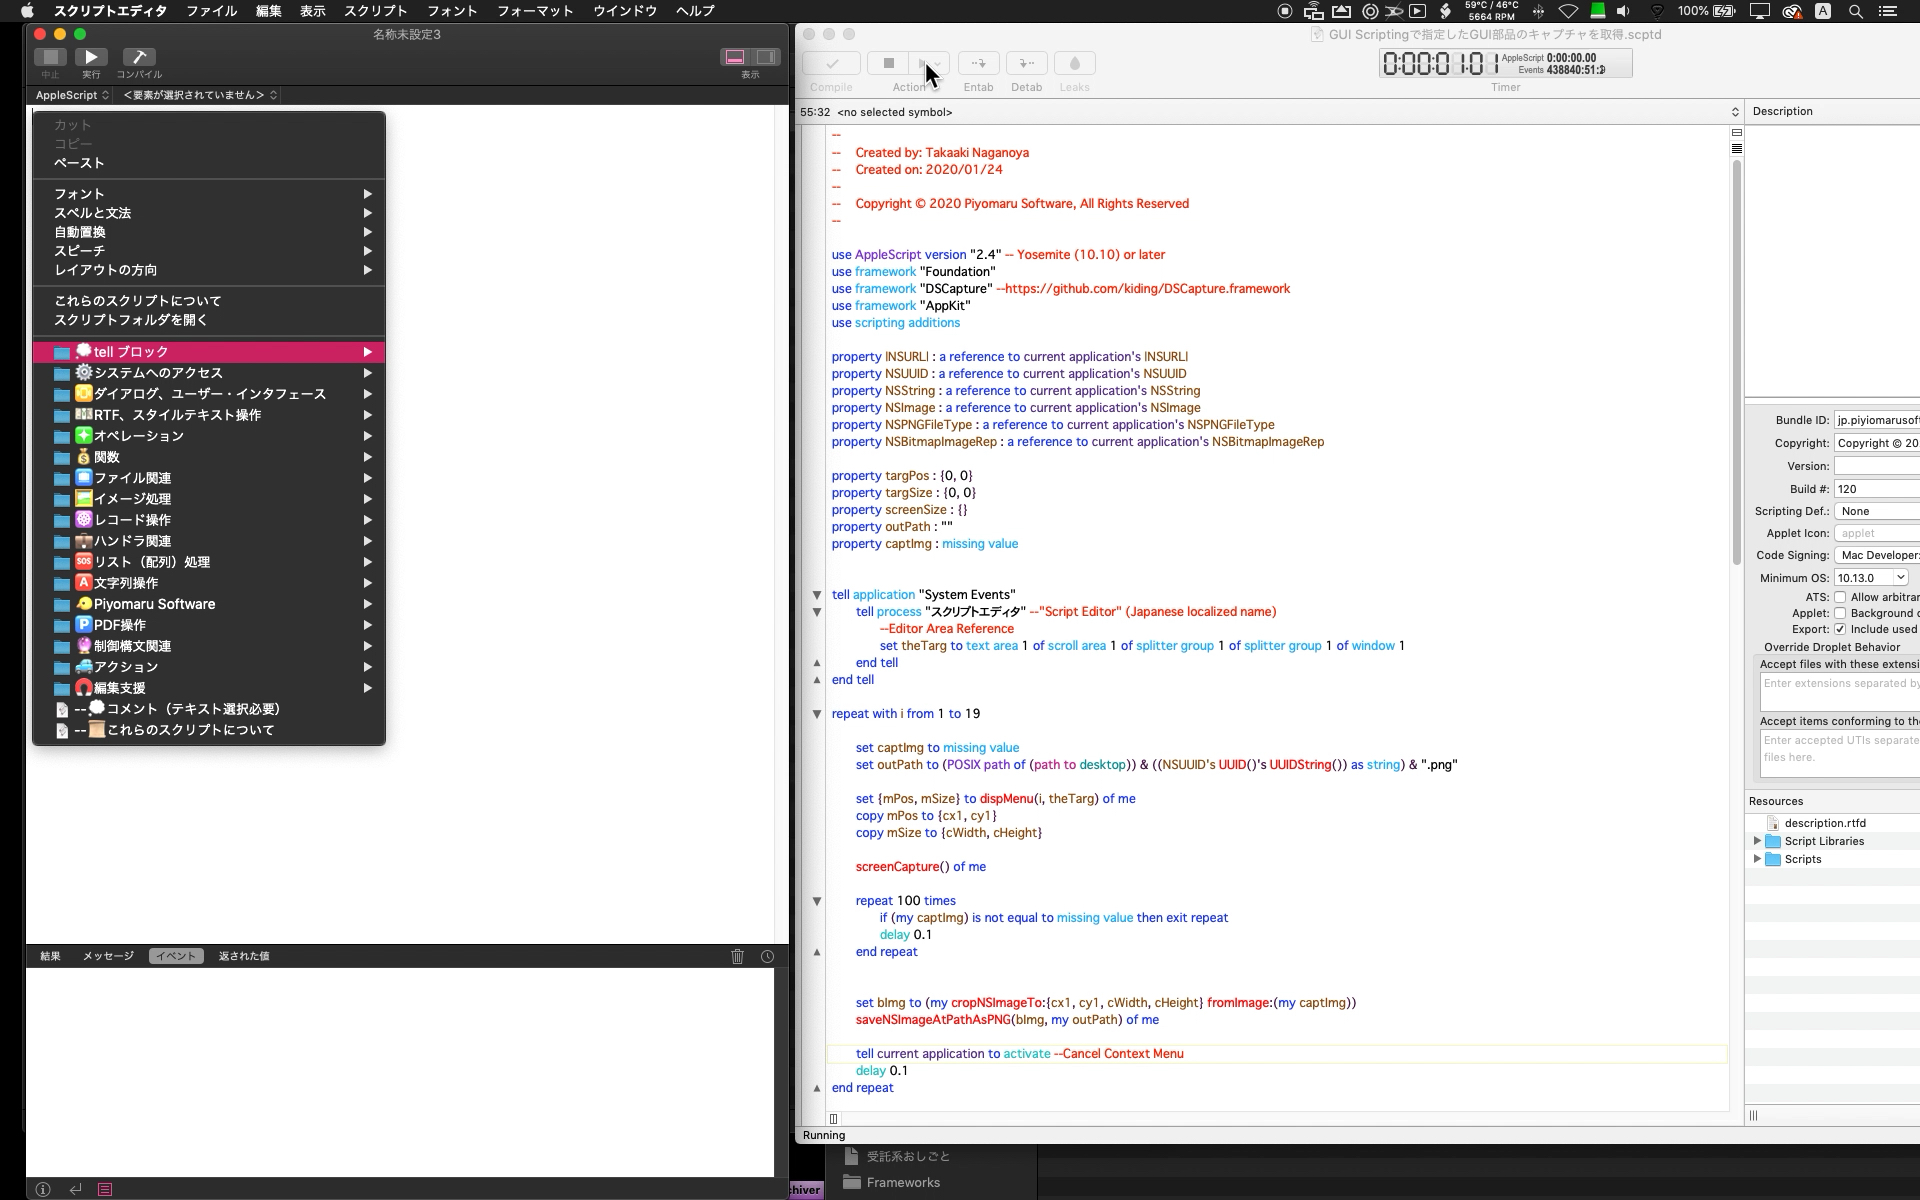
GUI Scriptingを用いてスクリプトエディタ上でコンテクストメニューを表示させて、コンテクストメニューのキャプチャを行うAppleScriptです。macOS 10.14.6上で試しただけなので、10.15上では試していません(たぶん動くと思うのですが)。

–> Watch Demo Movie

画面キャプチャをNSImageに取得する機能については、DSCapture.frameworkをビルドして、AppleScript(実行環境はScript Debugger)から呼び出しています。

–> Download DSCapture.framework (To ~/Library/Frameworks/)

AppleScriptの鬼っ子機能である「GUI Scripting」。ある顧客が「キーボードショートカットとキーボード操作をそのままScript化することでこれを作れ」という仕様を出してきて、とても実現できない内容がまだらに含まれていたので「ナイスジョーク!」と却下した記憶があります。

「できること」(キーボードショートカット操作)に「できないこと」(目視で当該データの位置確認)を混ぜて仕様を出されると悪夢でしかありません。

あと、GUI Scriptingで操作を行うと信頼性がないうえに、信頼性を確保するためには「待つ」という処理が必要だったり、本来のAppleScriptの処理速度よりも100倍以上遅くなるので、本当に必要な箇所にだけ使う&可能なかぎり使用しないというのが自分の基本的なスタンスです。

コンテクストメニューの画面キャプチャを自動で

そんな中、新型Piyomaru Script Assistant(macOS 10.14以降対応。10.13は無視)の資料を作るために、コンテクストメニューの内容を画面キャプチャする必要に迫られました。

AppleScriptが500個ぐらい、階層化されたメニューに入っているので、これの画面キャプチャを撮るだけで一仕事です。テストで1階層分の資料を作ってみたのですが、けっこうかかります。

そこで、スクリプトエディタ上で表示させたコンテクストメニューをプログラムで撮れないかを検討することになります。

真っ先に調べたのはCocoaにそういう機能がないかどうか。自前のプログラムのビューの内容をキャプチャすることはできますが、他のアプリケーションのビューをキャプチャする機能は見つかりませんでした。

仕方がないので、画面のキャプチャをまるごと取得して、撮影対象のビューの座標から画像の切り抜きを行うようにしてみました。

GUI Scriptingでコンテクストメニューを表示させるのは無理かと思っていたのですが、できるんですね。これも冗談半分で探してみたらあっけなく方法が見つかって、

tell theTarget to perform action "AXShowMenu" --コンテクストメニューの表示

これで実際にコンテクストメニューの表示を行えました。

実現はいろいろ大変

スクリプトエディタ上の画面撮影を行うので、Scriptの実行そのものはScript Debuggerで実行。

問題になったのは2点。

1つは、画面キャプチャの撮影を行うフレームワークでメインディスプレイから画面イメージをNSImageで取得し、その結果をメイン側(暗黙のrunハンドラといったほうがいいのか)のプロパティに返しているのですが、すぐに反映されないらしくて、クラッシュを頻発。

結局、プロパティに内容が反映されたことをループで時間待ちして受信。

もう1つ困った点は、コンテクストメニューの表示解除(キャンセル)。1つのコンテクストメニュー表示&キャプチャ撮影だけでは意味がありません。選択メニュー項目を変更して、複数のコンテクストメニューのキャプチャを順次行えなくてはなりません。

いろいろな方法を試してみたものの、最前面のアプリケーションを「スクリプトエディタ」でない状態を作ればコンテクストメニュー表示状態は解除されます(このあたり、AppleScriptが純粋なプログラマーに苦手とされる理由。実際に使っているユーザーでないとこういう発想自体が出てこない)。Script Debugger側で実行しているので、Script Debuggerをactivateすることでその状態(コンテクストメニュー表示解除)を作ってみました。

そんなわけでコンテクストメニューの(選択項目を変更して全項目を選択状態にした)画面キャプチャができました。

現在は1階層分のコンテクストメニューの撮影を行なっていますが、メニュー階層をすべてAppleScript側からスキャンして、それぞれのメニューに対して、各メニュー項目を表示した状態で巡回キャプチャできるとよさそうです。

cropNSImageTo:{x1, y1, x2, y2} fromImage:theImage ハンドラは、Y座標の変換をこの用途(全画面キャプチャしたNSImageの切り抜き)の帳尻合わせのために書き換えています。この用途以外では使えないはずです。

AppleScript名:GUI Scriptingで指定したGUI部品のキャプチャを取得.scptd
—
–  Created by: Takaaki Naganoya
–  Created on: 2020/01/24
—
–  Copyright © 2020 Piyomaru Software, All Rights Reserved
—

use AppleScript version "2.4" — Yosemite (10.10) or later
use framework "Foundation"
use framework "DSCapture" –https://github.com/kiding/DSCapture.framework
use framework "AppKit"
use scripting additions

property |NSURL| : a reference to current application’s |NSURL|
property NSUUID : a reference to current application’s NSUUID
property NSString : a reference to current application’s NSString
property NSImage : a reference to current application’s NSImage
property NSPNGFileType : a reference to current application’s NSPNGFileType
property NSBitmapImageRep : a reference to current application’s NSBitmapImageRep

property targPos : {0, 0}
property targSize : {0, 0}
property screenSize : {}
property outPath : ""
property captImg : missing value

set (my captImg) to missing value

tell application "System Events"
  tell process "スクリプトエディタ" –"Script Editor" (Japanese localized name)
    –Editor Area Reference
    
set theTarg to text area 1 of scroll area 1 of splitter group 1 of splitter group 1 of window 1
  end tell
end tell

repeat with i from 1 to 19
  
  
set captImg to missing value
  
set outPath to (POSIX path of (path to desktop)) & ((NSUUID’s UUID()’s UUIDString()) as string) & ".png"
  
  
set {mPos, mSize} to dispMenu(i, theTarg) of me
  
copy mPos to {cx1, cy1}
  
copy mSize to {cWidth, cHeight}
  
  
screenCapture() of me
  
  
repeat 100 times
    if (my captImg) is not equal to missing value then exit repeat
    
delay 0.1
  end repeat


set bImg to (my cropNSImageTo:{cx1, cy1, cWidth, cHeight} fromImage:(my captImg))
  
saveNSImageAtPathAsPNG(bImg, my outPath) of me
  
  
tell current application to activate –Cancel Context Menu
  
delay 0.1
end repeat

on screenCapture()
  current application’s DSCapture’s sharedCapture()’s |full|()’s captureWithTarget:me selector:"displayCaptureData:" useCG:false
end screenCapture

–Delegate Handler
on displayCaptureData:aSender
  set aCount to aSender’s |count|()
  
set anImage to (aSender’s imageAtIndex:0)
  
set my captImg to anImage
  
–saveNSImageAtPathAsPNG(anImage, my outPath) of me
end displayCaptureData:

on cropNSImageTo:{x1, y1, x2, y2} fromImage:theImage
  set newWidth to x2
  
set newHeight to y2
  
set theSize to (theImage’s |size|())
  
set oldHeight to height of theSize
  
  
— transpose y value for Cocoa coordintates
  
set y1 to oldHeight – newHeight – y1
  
set newRect to {{x:x1, y:y1}, {width:x2, height:y2}}
  
  
theImage’s lockFocus()
  
set theRep to NSBitmapImageRep’s alloc()’s initWithFocusedViewRect:newRect
  
theImage’s unlockFocus()
  
  
set outImage to NSImage’s alloc()’s initWithSize:(theRep’s |size|())
  
outImage’s addRepresentation:theRep
  
  
return outImage
end cropNSImageTo:fromImage:

–NSImageを指定パスにPNG形式で保存
on saveNSImageAtPathAsPNG(anImage, outPath)
  set imageRep to anImage’s TIFFRepresentation()
  
set aRawimg to current application’s NSBitmapImageRep’s imageRepWithData:imageRep
  
set pathString to current application’s NSString’s stringWithString:outPath
  
set newPath to pathString’s stringByExpandingTildeInPath()
  
set myNewImageData to (aRawimg’s representationUsingType:(current application’s NSPNGFileType) |properties|:(missing value))
  
set aRes to (myNewImageData’s writeToFile:newPath atomically:true) as boolean
  
return aRes –成功ならtrue、失敗ならfalseが返る
end saveNSImageAtPathAsPNG

on dispMenu(selInd, theTarget)
  activate application "Script Editor"
  
tell application "System Events"
    tell process "スクリプトエディタ" –"Script Editor" (Japanese localized name)
      
      
ignoring application responses
        tell theTarget to perform action "AXShowMenu" –コンテクストメニューの表示
      end ignoring
      
      
tell text area 1 of scroll area 1 of splitter group 1 of splitter group 1 of window 1
        tell menu 1
          set mPos to position
          
set mSize to size
          
          
set mList to every menu item
          
tell menu item (13 + selInd)
            set aRes to properties
            
set selected to true
          end tell
        end tell
      end tell
      
    end tell
  end tell
  
  
return {mPos, mSize}
end dispMenu

★Click Here to Open This Script 

Posted in GUI Scripting | Tagged 10.14savvy NSBitmapImageRep NSImage NSPNGFileType NSString NSURL NSUUID | Leave a comment

画像の空白判定 v4

Posted on 12月 19, 2019 by Takaaki Naganoya

画像のすべてのピクセルが白であることをチェックするAppleScriptです。

以前にmacOS 10.12上で作成した「空白画像検出v3」は一般的に処理時間のかかる空白画像の検出(ヒストグラム計算してチェックする?)が高速に処理できます(GPUImageでヒストグラム計算を行うより2倍ぐらい高速)。空白検出のためだけにAdobe Photoshopが必要になるといった事態は避けられます。

–> test Data(動作検証用各種テストデータ)

macOS 10.14.6上でこのルーチンを再度試してみたところ、思ったとおりに空白検出(数百万ピクセルの画像でも1つだけ黒であればfalseを返す)してくれません。ちょっと書き方を変えていますが、単体で通常のAppleScript(Cocoa不使用)にコンテクストメニューから突っ込むモジュールとして運用するためです。

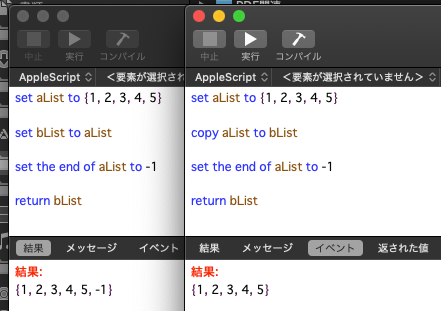
copyコマンドがdeep copyしてくれない?

参照ではなくすべてのデータをコピーするコマンドとして、copyコマンドはとても重宝しています。単に「パラメータの代入の方向が違う偏屈なコマンド」ではなく、明示的にデータ内容をコピーするためのコマンドと認識しています。

AppleScriptのオブジェクト同様、Cocoaのオブジェクトについてもcopyコマンドでdeep copyしてくれるものと理解していましたが、macOS 10.14.6上で本ルーチンを試してみたところ、どうも参照をコピーしている気配がします。

AppleScriptのオブジェクト(配列とか)をcopyコマンドでコピーすると、参照ではなくデータが複製されていることを確認しました。Cocoaオブジェクトのcopyも同様かどうかは、ちょっとそうじゃないんじゃないかというところです。

set bNSImage to aNSImage's |copy|()

Cocoaの世界のオブジェクトのコピーはこんな感じ(↑)でできたので、今後はこちらを採用することにします。

1×1のNSImageに色を塗るとデータサイズが増える

ビットマップ画像の状態であるNSBitmapImageRepになっていれば、1×1画像のサイズは同じことが期待されます。実際、macOS 10.12上ではそのように扱えていました。

ところが、macOS 10.14上で1×1ドットのNSImageに対して色を塗って、NSBitmapImageRepを取得すると、塗らない状態のNSImageよりもデータ(NSData)サイズが大きくなることがわかりました。


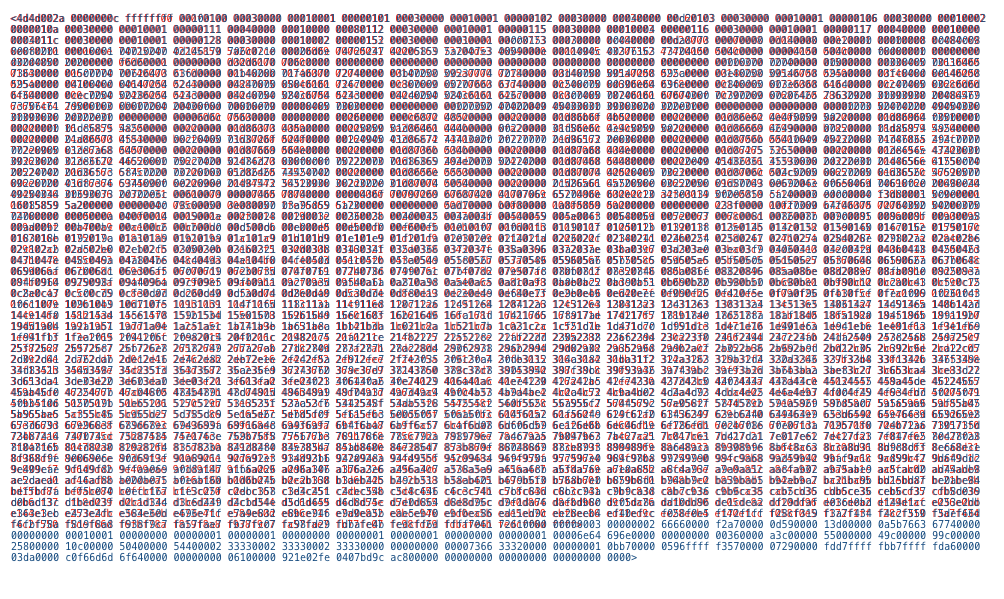
▲1×1のPNG画像をビットマップ化したデータ。赤が処理前、青が塗りつぶし処理後のデータ(macOS 10.14.6)。ピクセル数が増えてるのでは? と疑ってサイズを何回も計算して確認しましたが、間違っていません

しかも、データ量がmacOS 10.14と10.15では大幅に異なります(macOS 10.15では大幅にデータ量が減る)。

 1×1 PNG画像 ビットマップ化したデータサイズ:3,354 Bytes(macOS 10.14.6)
 1×1 PNG画像 塗りつぶし ビットマップ化したデータサイズ:3,574 Bytes(macOS 10.14.6)
 1×1 PNG画像 塗りつぶし ビットマップ化したデータサイズ:750 Bytes(macOS 10.15.2)

さすがに匙を投げかけましたが、比較元のデータに透明の色(clearColor())を塗る=画像的に意味はないが、同じ処理を通すことでデータサイズを同程度にするという処理を行うことで、いい感じに空白検出できるようになりました。

なにをどういじくったら、1×1ビットマップ画像のサイズがOSアップデートごとに大幅に変わるのかさっぱり理解できないのですが、そこに何か意味があるのでしょうか?

Mac App Storeに出したアプリケーションで、PDFの空白ページ検出に本ルーチンを利用していますが、Appleのレビュー段階で「単にPDFから文字を抽出して空白検出しているのだろう」と思われてリジェクトされました。実際には、全ページを画像レンダリングして1ドットの画像でも存在していたら空白としては認識しない仕様になっているのですが、Appleのレビューワーには処理内容を説明して、各種ベンチマーク結果などを出さないと信じてもらえませんでした。

Appleのエンジニアが考えるところの空白検出が「文字チェックだけ」の使い物にならない処理だということはよくわかりました。また、頭からそのように思い込んで攻撃してきた間抜けにも遭遇してウンザリしました。

AppleScript名:画像の空白判定 v4
set aFile to (choose file of type {"public.image"})
set iRes to checkImageIsWhite(aFile) of whiteImageKit
–> true –white (blank) image

script whiteImageKit
  use AppleScript version "2.7" — High Sierra (10.13) or later
  
use framework "Foundation"
  
use framework "AppKit"
  
use scripting additions
  
property parent : AppleScript
  
  
property NSData : a reference to current application’s NSData
  
property NSDate : a reference to current application’s NSDate
  
property |NSURL| : a reference to current application’s |NSURL|
  
property NSColor : a reference to current application’s NSColor
  
property NSImage : a reference to current application’s NSImage
  
property NSBezierPath : a reference to current application’s NSBezierPath
  
property NSBitmapImageRep : a reference to current application’s NSBitmapImageRep
  
  
–Compare Original Data and
  
on checkImageIsWhite(aFile)
    set aPOSIXpath to POSIX path of aFile
    
set aURL to |NSURL|’s fileURLWithPath:(aPOSIXpath)
    
    
set aNSImage to NSImage’s alloc()’s initWithContentsOfURL:(aURL)
    
set bNSImage to NSImage’s alloc()’s initWithContentsOfURL:(aURL)
    
    
–copy aNSImage to bNSImage–Not deep copy ????
    
    
set fillColor1 to NSColor’s clearColor()
    
set blankNSImage1 to drawImageWithFilledColor(aNSImage, fillColor1) of me
    
    
set fillColor2 to makeNSColorFromRGBAval(65535, 65535, 65535, 65535, 65535) of me
    
set blankNSImage2 to drawImageWithFilledColor(bNSImage, fillColor2) of me
    
    
set aTiff to blankNSImage1’s TIFFRepresentation()
    
set bTiff to blankNSImage2’s TIFFRepresentation()
    
    
set chkWhite to (aTiff’s isEqualToData:bTiff) as boolean
    
    
return chkWhite
  end checkImageIsWhite


on getSizeOfImage(anNSImage)
    set aSize to anNSImage’s |size|()
    
set aClass to class of aSize
    
if aClass = record then
      copy aSize to theSize –To macOS 10.12.x
    else –macOS 10.13 or later
      set sizeX to (item 1 of item 2 of aSize)
      
set sizeY to (item 2 of item 2 of aSize)
      
set theSize to {width:sizeX, height:sizeY}
    end if
    
return theSize
  end getSizeOfImage


–指定サイズの画像を作成し、背景を指定色で塗る
  
on drawImageWithFilledColor(anImage, fillColor)
    set aSize to getSizeOfImage(anImage) of me
    
    
anImage’s lockFocus()
    
    
set theRect to {{x:0, y:0}, {width:(width of aSize), height:(height of aSize)}}
    
set theNSBezierPath to NSBezierPath’s bezierPath
    
theNSBezierPath’s appendBezierPathWithRect:theRect
    
fillColor’s |set|()
    
theNSBezierPath’s fill()
    
    
anImage’s unlockFocus()
    
    
return anImage
  end drawImageWithFilledColor


–aMaxValを最大値とする数値でNSColorを作成して返す
  
on makeNSColorFromRGBAval(redValue as integer, greenValue as integer, blueValue as integer, alphaValue as integer, aMaxVal as integer)
    set aRedCocoa to (redValue / aMaxVal) as real
    
set aGreenCocoa to (greenValue / aMaxVal) as real
    
set aBlueCocoa to (blueValue / aMaxVal) as real
    
set aAlphaCocoa to (alphaValue / aMaxVal) as real
    
set aColor to NSColor’s colorWithCalibratedRed:aRedCocoa green:aGreenCocoa blue:aBlueCocoa alpha:aAlphaCocoa
    
return aColor
  end makeNSColorFromRGBAval
  
end script

★Click Here to Open This Script 

Posted in Image | Tagged 10.13savvy 10.14savvy 10.15savvy NSBezierPath NSBitmapImageRep NSColor NSData NSImage NSURL | 3 Comments

指定のNSImageをグレースケールに

Posted on 11月 29, 2019 by Takaaki Naganoya

指定のNSImageをグレースケール画像にしたのちNSImageで出力するAppleScriptです。

GPUImageをプログラムから取り外すにあたって必要になったので用意しました。ふだん、画像変換系のScriptはNSImageで入力したのちにファイルに出力するように組んであったのですが、入出力ともにNSImageにしてあるプログラムが手元に存在していなかったので。

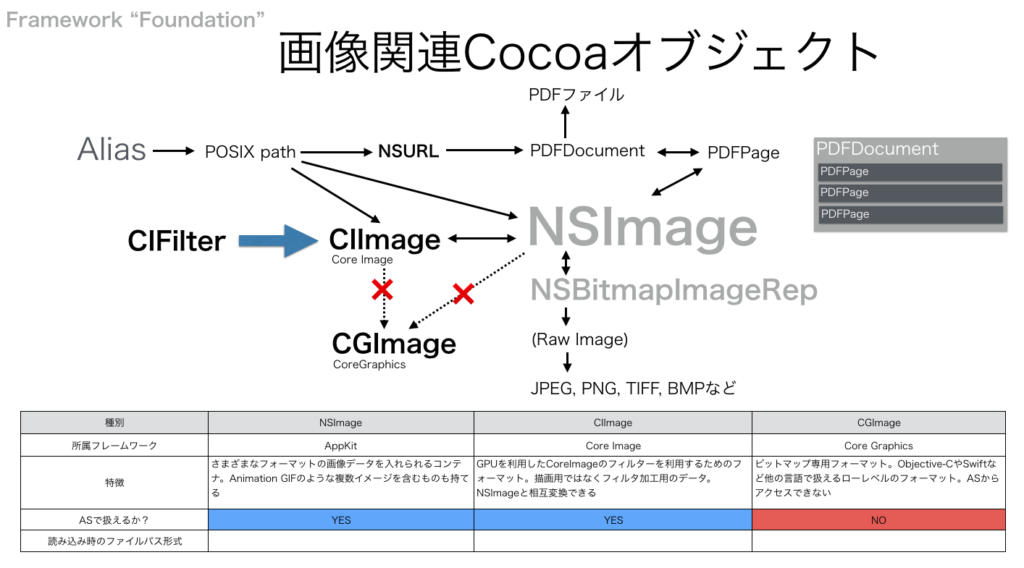
GPUImageが自分にとって使いやすかったのは、入出力にNSImageが使えたからだと思います。CGImageだとAppleScriptからアクセスできないですし、CIImageもアクセスできないわけではないですが、ちょっと遠回りになります。

AppleScript名:指定のNSImageをグレースケールに
— Created 2019-07-09 by Takaaki Naganoya
— 2019 Piyomaru Software
use AppleScript version "2.4"
use scripting additions
use framework "Foundation"
use framework "AppKit"

property NSString : a reference to current application’s NSString
property NSImage : a reference to current application’s NSImage
property NSColorSpace : a reference to current application’s NSColorSpace
property NSBitmapImageRep : a reference to current application’s NSBitmapImageRep
property NSColorRenderingIntentPerceptual : a reference to current application’s NSColorRenderingIntentPerceptual

set aFile to POSIX path of (choose file of type {"public.image"} with prompt "Select Image A")
set aImage to NSImage’s alloc()’s initWithContentsOfFile:aFile

set gImage to convNSIMageAsGray(aImage) of me

–NSImageをグレースケールに変換してNSImageで返す
on convNSIMageAsGray(anImage)
  set imageRep to anImage’s TIFFRepresentation()
  
set aRawimg to NSBitmapImageRep’s imageRepWithData:imageRep
  
  
set bRawimg to convBitMapToDeviceGrey(aRawimg) of me
  
  
set bImage to NSImage’s alloc()’s initWithSize:(bRawimg’s |size|())
  
bImage’s addRepresentation:bRawimg
  
  
return bImage
end convNSIMageAsGray

–NSBitmapImageRepをグレースケールに変換する
on convBitMapToDeviceGrey(aBitmap)
  set aSpace to NSColorSpace’s deviceGrayColorSpace()
  
set bRawimg to aBitmap’s bitmapImageRepByConvertingToColorSpace:aSpace renderingIntent:(NSColorRenderingIntentPerceptual)
  
return bRawimg
end convBitMapToDeviceGrey

★Click Here to Open This Script 

Posted in Color Image | Tagged 10.13savvy 10.14savvy 10.15savvy NSBitmapImageRep NSColorRenderingIntentPerceptual NSColorSpace NSImage NSString | Leave a comment

CIFilterとGPUImageで画像差分検出演算を比較

Posted on 11月 22, 2019 by Takaaki Naganoya

オープンソースのGPUImage.framework(GPUImage1)はAppleScriptから呼び出すのも簡単ですし、機能セットも充実しており、非常に重宝して使っています。

ただし、GPUImage自体はSwiftで書き直されたGPUImage2、OSの変更を受けてOpenGLではなくMetalを用いるように書き直され、いまだ発展途上のGPUImage3と変化してきました。

・GPUImageのバージョンと搭載フィルタ数の推移

GPUImage1:■■■■■■■■■■■■ 125
GPUImage2:■■■■■■■■■■ 100
GPUImage3:■■■■ 45

GPUImage2/3とバージョンが進むにつれて搭載フィルタ数が減っており、かつGPUImage2以降はAppleScriptから呼べないため、GPUImage3は(自分の)移行先になりません。

Objective-CベースのGPUImage1系のプログラムを使い続けるという判断をしている開発者は多いようで、Github上で派生プログラムが大量にみつかります。ただ、GPUImage1系はmacOSがOpenGLを完全廃止にしたとたんに動かなくなるはずです。

このため、GPUImage1系に依存しているプログラムは別の部品を呼び出して処理する必要が出てきます。

一番有望なのは、macOS標準搭載のCIFilter。CIFilterについては、実際にプログラムを組んでみて「組みにくい」という印象を受けていました(機能はちゃんとしていそうなものの、機能数にドキュメントが見合っていません)。あと、AppleScriptからパラメータを指定しにくいという印象を受けていました(パラメータに指定するオブジェクトにAppleScriptから直接指定できないものがあるので、少しラッパーを書く必要がある)。

その後、各種フィルタを呼び出す汎用ルーチンを整備することで、利用難易度を下げる努力を自主的に行なっています。

・GPUImage3とCoreImageの搭載フィルタ数の比較

GPUImage3:■■■■ 45
CoreImage:■■■■■■■■■■■■■■■■■ 174

そこで、実際に処理速度の面でどうなのか、CIFilterとGPUImageを比較するとどうなのか、調べてみました。

まずは、ざっくりありもののルーチンを引っ張り出してきて実行。どちらも期待どおりの動作をしてくれます。ただし、周辺ルーチンの仕様が違っていたのでそこも合わせます。

乱数ファイル名を作成する定番のshell commandの「uuidgen」はお手軽な反面、呼び出すのに時間がかかるので(手元の時間で0.1秒程度強)、より高速なCocoaのUUIDStringを用いる部品に置き換えました。

それぞれのフレームワークごとの挙動の違いもあります。

経験上、GPUImage.frameworkは初回実行時だけは時間が長くかかる傾向があり(1秒以上かかる)、2回目以降はより短い時間で処理できるようになることを確認しています。一方、CIFilterは初回およびそれ以降の呼び出しでもさほど処理時間が変わりません。

これら2つを実際に同じデータで同一条件下で比較してみたところ、同一の処理(画像の差分計算)を行なったかぎりでは処理時間に差はほとんど有意な差はありませんでした。

Script Geek 2.0.1によるScriptの処理時間比較

First:GPUImage Version , Second:CoreImage Version

MacBookPro10,1,  macOS Version 10.14.6 (Build 18G2012),  10 iterations
         First Run   Total Time    Average  
First        0.969        1.194      0.119
Second       0.121        1.221      0.122
Ratio (excluding first run): 1:1.02

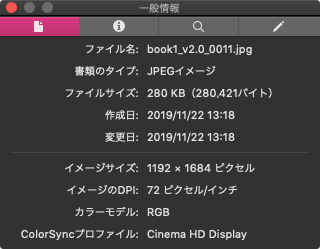
自分のメインマシン(MacBook Pro Retina 2012、Core i7 2.66GHz、RAM 8GB)ではどちらもテストデータ(1192x1684pixel 8bit color image x 2)を0.1〜0.2秒程度で処理できています。個人的には十分なスピードが出ていると感じていますが、不満がある方はデータをRAM Disk上に置いたり、並列処理するとよいのではないでしょうか(シングルスレッド処理が高速なマシンを用意するというのが一番効きそうではあります。iMac 5Kの上位モデルとか)。

すべての類似フィルタで比較を行なったわけではありませんが(どれとどれが類似、という情報を整理するのに手間がかかる)、一番使っている「空白検出のためのヒストグラム計算フィルタ」はGPUImageにしか存在しませんでした(作成当時の話で現在はCoreImageにもCIAreaHistogramなどの機能があります)。

空白検出処理を高速に行えることで巨大なメリットが生じています。用途については枚挙にいとまがありませんが、Markdown書類をPDFにレンダリングした場合に、末尾に無用な空白のページが生じるケースがあり、これを検出しつつ末尾のページを自動削除することで、膨大な無駄手間を削減できています。空白検出処理を高速に行う手段を用意していないと、Photoshopで指定ページをレンダリングしてヒストグラムを計算する必要があるわけで、Photoshopのない環境に進出できなくなります。

空白画像の検出処理はGPUImage.framework抜きで(AppleScriptだけで)2〜3倍高速な処理を行える部品「画像の空白判定 v3」を作成済みなので、GPUImageなしでもさほど困りません。


▲同一環境にて、Photoshop CC 2018、GPUImage、AppleScriptだけで処理している「画像の空白判定 v3」で各種サイズの画像の空白検出を実行(単位:秒)

Objective-C/Swift系の開発者の方々に「GPUImageを経由してGPUのパワーを使って処理するよりも、AppleScript単体で空白の比較演算処理したほうが速かった」という事実をお話しすると、最初は「嘘つけ」というひきつった笑顔の反応なのですが、実際にコードを動かして動作原理を丁寧に説明すると分かっていただけるようです。

–> Download dffFilterDemoPrograms(Two Code-Signed AppleScript Applet Executables with Framework in its bundle)

AppleScript名:CoreImageでCIDifferenceBlendMode.scptd
—
–  Created by: Takaaki Naganoya
–  Created on: 2019/11/22
—
–  Copyright © 2019 Piyomaru Software, All Rights Reserved
—
use AppleScript version "2.4" — Yosemite (10.10) or later
use framework "Foundation"
use framework "AppKit"
use framework "QuartzCore"
use scripting additions

property CIFilter : a reference to current application’s CIFilter
property NSUUID : a reference to current application’s NSUUID
property |NSURL| : a reference to current application’s |NSURL|
property CIImage : a reference to current application’s CIImage
property NSString : a reference to current application’s NSString
property NSImage : a reference to current application’s NSImage
property NSPNGFileType : a reference to current application’s NSPNGFileType
property NSBitmapImageRep : a reference to current application’s NSBitmapImageRep

set mePath to POSIX path of (path to me)
set aImg to mePath & "Contents/Resources/book1_v2.0_0011.jpg"
set bImg to mePath & "Contents/Resources/book1_v2.1_0011.jpg"

–https://developer.apple.com/library/archive/documentation/
–GraphicsImaging/Reference/CoreImageFilterReference/index.html
–#//apple_ref/doc/filter/ci/CIDifferenceBlendMode
set cifilterName to "CIDifferenceBlendMode"

set imgRes to filterBlendImageFiles(aImg, bImg, cifilterName) of me

set outPath to retUUIDfilePath(POSIX path of (path to desktop), "png") of me
set sRes to saveNSImageAtPathAsPNG(imgRes, outPath) of me

–CIFilterをかけたJPEG画像を生成
on filterBlendImageFiles(aPath, bPath, aFilterName)
  –CIImage(A)を生成
  
set aURL to |NSURL|’s fileURLWithPath:aPath –Input
  
set aCIImage to CIImage’s alloc()’s initWithContentsOfURL:aURL
  
  
–CIImage(B)を生成
  
set bURL to |NSURL|’s fileURLWithPath:bPath –Input
  
set bCIImage to CIImage’s alloc()’s initWithContentsOfURL:bURL
  
  
— CIFilter をフィルタの名前で生成
  
set aFilter to CIFilter’s filterWithName:aFilterName
  
aFilter’s setDefaults() –各フィルタのパラメータはデフォルト
  
  
–Blend Filterを実行
  
aFilter’s setValue:(aCIImage) forKey:"inputImage"
  
aFilter’s setValue:(bCIImage) forKey:"inputBackgroundImage"
  
  
set aOutImage to aFilter’s valueForKey:"outputImage"
  
set outNSImage to convCIimageToNSImage(aOutImage) of me
  
return outNSImage
end filterBlendImageFiles

on retUUIDfilePath(aPath, aEXT)
  set aUUIDstr to (NSUUID’s UUID()’s UUIDString()) as string
  
set aPath to ((NSString’s stringWithString:aPath)’s stringByAppendingPathComponent:aUUIDstr)’s stringByAppendingPathExtension:aEXT
  
return aPath
end retUUIDfilePath

on convCIimageToNSImage(aCIImage)
  set aRep to NSBitmapImageRep’s alloc()’s initWithCIImage:aCIImage
  
set tmpSize to aRep’s |size|()
  
set newImg to NSImage’s alloc()’s initWithSize:tmpSize
  
newImg’s addRepresentation:aRep
  
return newImg
end convCIimageToNSImage

on convNSImageToCIimage(aNSImage)
  set tiffDat to aNSImage’s TIFFRepresentation()
  
set aRep to NSBitmapImageRep’s imageRepWithData:tiffDat
  
set newImg to CIImage’s alloc()’s initWithBitmapImageRep:aRep
  
return newImg
end convNSImageToCIimage

–NSImageを指定パスにPNG形式で保存
on saveNSImageAtPathAsPNG(anImage, outPath)
  set imageRep to anImage’s TIFFRepresentation()
  
set aRawimg to NSBitmapImageRep’s imageRepWithData:imageRep
  
set pathString to NSString’s stringWithString:outPath
  
set newPath to pathString’s stringByExpandingTildeInPath()
  
set myNewImageData to (aRawimg’s representationUsingType:(NSPNGFileType) |properties|:(missing value))
  
set aRes to (myNewImageData’s writeToFile:newPath atomically:true) as boolean
  
return aRes –true/false
end saveNSImageAtPathAsPNG

★Click Here to Open This Script 

AppleScript名:(比較用)GPUImageによる差分計算.scptd
—
–  Created by: Takaaki Naganoya
–  Created on: 2019/11/22
—
–  Copyright © 2019 Piyomaru Software, All Rights Reserved
—
use AppleScript version "2.4" — Yosemite (10.10) or later
use scripting additions
use framework "Foundation"
use framework "AppKit"
use framework "GPUImage" –https://github.com/BradLarson/GPUImage

property NSUUID : a reference to current application’s NSUUID
property |NSURL| : a reference to current application’s |NSURL|
property NSString : a reference to current application’s NSString
property NSImage : a reference to current application’s NSImage
property NSPNGFileType : a reference to current application’s NSPNGFileType
property NSBitmapImageRep : a reference to current application’s NSBitmapImageRep

set mePath to POSIX path of (path to me)
set aImagePath to mePath & "Contents/Resources/book1_v2.0_0011.jpg"
set bImagePath to mePath & "Contents/Resources/book1_v2.1_0011.jpg"

set imgRes to composeImageWithBlendFilter(aImagePath, bImagePath, "GPUImageDifferenceBlendFilter") of me

set outPath to retUUIDfilePath(POSIX path of (path to desktop), "png") of me
set sRes to saveNSImageAtPathAsPNG(imgRes, outPath) of me

on composeImageWithBlendFilter(aImagePath, bImagePath, filterName)
  set aImage to NSImage’s alloc()’s initWithContentsOfFile:aImagePath
  
set bImage to NSImage’s alloc()’s initWithContentsOfFile:bImagePath
  
  
set aClass to current application’s NSClassFromString(filterName)
  
set blendFilter to aClass’s alloc()’s init()
  
set pictureA to current application’s GPUImagePicture’s alloc()’s initWithImage:aImage
  
pictureA’s addTarget:blendFilter
  
pictureA’s processImage()
  
set imgRes to blendFilter’s imageByFilteringImage:bImage
  
return imgRes
end composeImageWithBlendFilter

on retUUIDfilePath(aPath, aEXT)
  set aUUIDstr to (NSUUID’s UUID()’s UUIDString()) as string
  
set aPath to ((NSString’s stringWithString:aPath)’s stringByAppendingPathComponent:aUUIDstr)’s stringByAppendingPathExtension:aEXT
  
return aPath
end retUUIDfilePath

–NSImageを指定パスにPNG形式で保存
on saveNSImageAtPathAsPNG(anImage, outPath)
  set imageRep to anImage’s TIFFRepresentation()
  
set aRawimg to NSBitmapImageRep’s imageRepWithData:imageRep
  
set pathString to NSString’s stringWithString:outPath
  
set newPath to pathString’s stringByExpandingTildeInPath()
  
set myNewImageData to (aRawimg’s representationUsingType:(NSPNGFileType) |properties|:(missing value))
  
set aRes to (myNewImageData’s writeToFile:newPath atomically:true) as boolean
  
return aRes –true/false
end saveNSImageAtPathAsPNG

★Click Here to Open This Script 

Posted in file filter Image | Tagged 10.14savvy 10.15savvy CIFilter CIImage NSBitmapImageRep NSImage NSPNGFileType NSString NSURL NSUUID | Leave a comment

指定画像をbase64エンコード文字列に変換

Posted on 10月 27, 2019 by Takaaki Naganoya

指定画像をbase64エンコーディング文字列に変換するAppleScriptです。

用途は、sdef(AppleScript用語辞書)に画像を突っ込む(ためのデータを作る)こと。それだけです。

ただ、あまりにでかい画像をbase64文字化して取得すると、スクリプトエディタが結果を表示したときに不安定になったり処理が返ってこなくなったりするので、文字列を取得する前にデータサイズを計算し、リサイズしてから文字列化するとか、他の形式(GIFなど)を用いてエンコードするなどのケアが必要になります。ねんのため。

元画像が何であっても、NSImageに読み込める画像なら(OSでサポートしている画像なら)読み込んで、PNG形式に変換したのちにBase64エンコード文字列に変換しています。


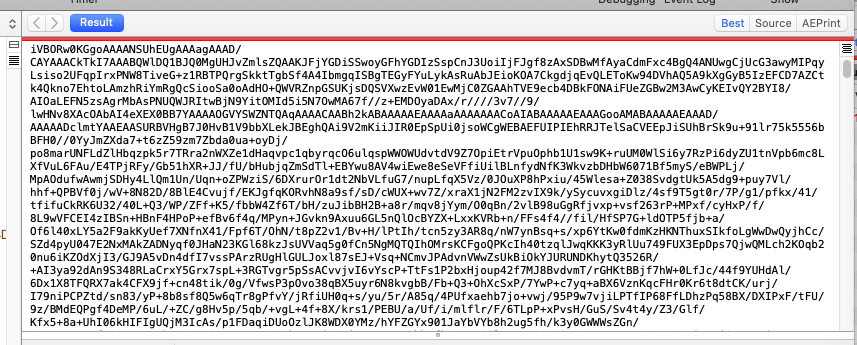
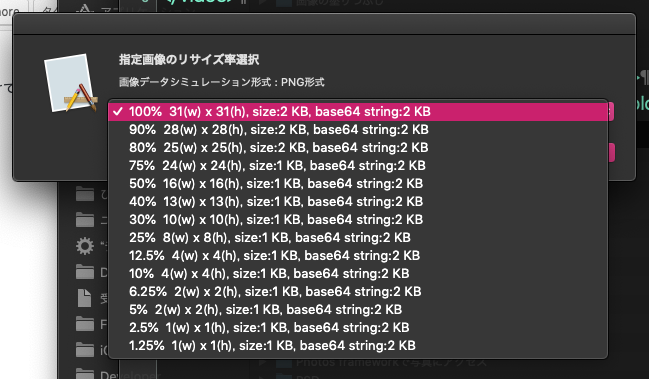
▲エンコードするにしても数10KBとかそのぐらいのファイルサイズの画像にしておかないと後がつらい


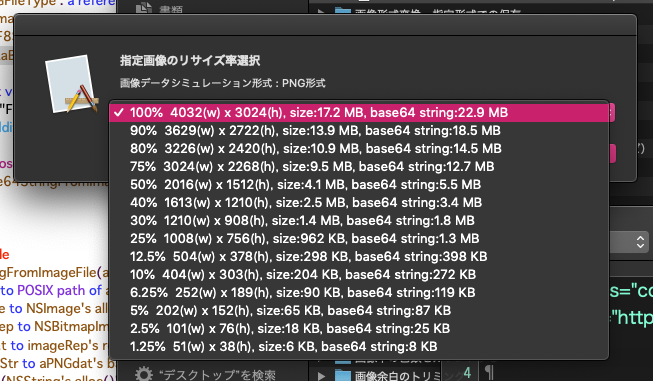
▲4K解像度の画像をbase64エンコードするとこんなに結果が巨大に

AppleScript名:指定画像をbase64エンコード文字列に変換.scptd
—
–  Created by: Takaaki Naganoya
–  Created on: 2019/10/25
—
–  Copyright © 2019 Piyomaru Software, All Rights Reserved
—
property NSString : a reference to current application’s NSString
property NSImage : a reference to current application’s NSImage
property NSPNGFileType : a reference to current application’s NSPNGFileType
property NSBitmapImageRep : a reference to current application’s NSBitmapImageRep
property NSUTF8StringEncoding : a reference to current application’s NSUTF8StringEncoding
property NSDataBase64EncodingEndLineWithLineFeed : a reference to current application’s NSDataBase64EncodingEndLineWithLineFeed

use AppleScript version "2.4" — Yosemite (10.10) or later
use framework "Foundation"
use scripting additions

set aFile to choose file of type {"public.image"}
set aStr to base64StringFromImageFile(aFile) of me

–Base64 Encode
on base64StringFromImageFile(aFile)
  set aPOSIX to POSIX path of aFile
  
set anImage to NSImage’s alloc()’s initWithContentsOfFile:aPOSIX
  
set imageRep to NSBitmapImageRep’s alloc()’s initWithData:(anImage’s TIFFRepresentation())
  
set aPNGdat to imageRep’s representationUsingType:(NSPNGFileType) |properties|:(missing value)
  
set base64Str to aPNGdat’s base64EncodedDataWithOptions:(NSDataBase64EncodingEndLineWithLineFeed)
  
set bStr to (NSString’s alloc()’s initWithData:base64Str encoding:(NSUTF8StringEncoding))
  
return bStr as string –or return NSString (delete as string) for speedy processing
end base64StringFromImageFile

★Click Here to Open This Script 

Posted in Image Text | Tagged 10.12savvy 10.13savvy 10.14savvy 10.15savvy NSBitmapImageRep NSDataBase64EncodingEndLineWithLineFeed NSImage NSPNGFileType NSString NSUTF8StringEncoding | Leave a comment

クリップボードに入れたIllustratorのオブジェクトをQRコード認識 v2

Posted on 7月 28, 2019 by Takaaki Naganoya

Adobe Illustrator書類上にある、QRコードのオブジェクトをクリップボード経由でNSImageに変換してQRコード認識するAppleScriptです。QRコード認識には、OS内蔵のCoreImageの機能を使っています。
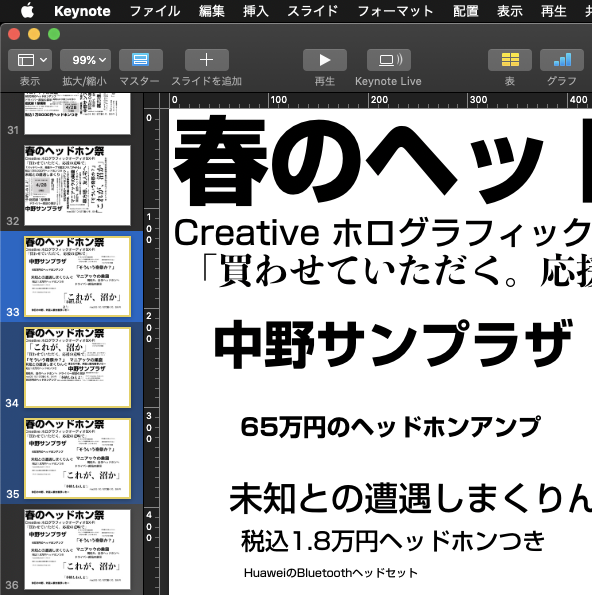
# 実行前にAI書類上のQRコードオブジェクトを選択してコピー(Command-C)を実行してあることを前提条件としています。QRコードっぽいものであれば、別にAI書類上のオブジェクトでなくてもかまいません

昨日のScriptで、「そういえばなんでZXingObjCを使っているんだっけ?」と疑問を抱きました。理由ははっきりしています。CIDetectorではそのまま認識させてみたら認識しなかったためです。

QRコードやJANコード画像認識ソフトウェアは、割といろいろ条件がそろわないと認識してくれません。いわく、画像の大きさ、画像の解像度、画像の向き、コントラスト比、その他いろいろ。

スマホのカメラで認識する際にはユーザーが認識するまでいろいろ条件を変えて試行錯誤するので、ソフトウェアの力だけで認識させているわけではありません。いわば、人間をスマホの周辺機器として使用している状態です。

一方、静止画をソフトウェアで認識処理するさいには、人間が行っているフィードバック動作をソフトウェア側で行わなくてはなりません。

macOS内蔵のCIDetectorは、どうやら画像サイズに敏感なようで、いろいろリサイズして認識するかどうかチェックしなくてはなりません。逆に、最初からQRコードではないとわかっている画像を、しつこくQRコード認識し直しても時間の無駄です。

とりあえず、認識対象を2倍から4倍まで拡大して認識をリトライしています。実際にやってみたら、1倍では認識しなくても2倍で認識してくれました。実際に処理するデータ次第ですが、4倍まで試さなくても大丈夫なケースも多いことでしょう。

AppleScript名:rocogClipAsQR_v2.scptd
— Created 2019-07-28 by Takaaki Naganoya
— 2019 Piyomaru Software
use AppleScript version "2.4"
use scripting additions
use framework "Foundation"
use framework "AppKit"
use framework "CoreImage"

property CIImage : a reference to current application’s CIImage
property NSImage : a reference to current application’s NSImage
property CIDetector : a reference to current application’s CIDetector
property NSZeroRect : a reference to current application’s NSZeroRect
property NSDictionary : a reference to current application’s NSDictionary
property NSPasteboard : a reference to current application’s NSPasteboard
property NSCompositeCopy : a reference to current application’s NSCompositeCopy
property NSGraphicsContext : a reference to current application’s NSGraphicsContext
property NSBitmapImageRep : a reference to current application’s NSBitmapImageRep
property CIDetectorAccuracy : a reference to current application’s CIDetectorAccuracy
property CIDetectorTypeQRCode : a reference to current application’s CIDetectorTypeQRCode
property CIDetectorAccuracyHigh : a reference to current application’s CIDetectorAccuracyHigh
property NSImageInterpolationNone : a reference to current application’s NSImageInterpolationNone
property CIDetectorImageOrientation : a reference to current application’s CIDetectorImageOrientation
property NSCalibratedRGBColorSpace : a reference to current application’s NSCalibratedRGBColorSpace

set aRes to recogPasteboardASQR() of me

–クリップボードの内容をNSImageに
on recogPasteboardASQR()
  set aNSIMage to getClipboardASImage() of me
  
if aNSIMage = false then return false
  
  
set aRes to recogNSImageAsQRcodes(aNSIMage) of me –11: kBarcodeFormatQRCode
  
if aRes is not equal to {} then return aRes
  
  
–ループでQRコードとおぼしきイメージを拡大しつつQRコード認識
  
repeat with i from 2 to 4 –ここはチューニングの余地がある
    set bNSIMage to (my resizeNSImageWithoutAntlialias:aNSIMage toScale:(i as real))
    
set aRes to recogNSImageAsQRcodes(bNSIMage) of me
    
if aRes is not equal to {} then return aRes
  end repeat
  
  
return false
end recogPasteboardASQR

–NSImageをバーコードとして認識する
on recogNSImageAsQRcodes(aNSIMage)
  set imageRef to convNSImageToCIimage(aNSIMage) of me
  
  
— 検出器のオプションを NSDictonary で作成
  
set optDic1 to NSDictionary’s dictionaryWithObject:(CIDetectorAccuracyHigh) forKey:(CIDetectorAccuracy)
  
set faceDetector to CIDetector’s detectorOfType:(CIDetectorTypeQRCode) context:(missing value) options:optDic1
  
  
— QRコードの検出を行う際のオプションを NSDictonary で作成
  
set optDic2 to NSDictionary’s dictionaryWithObject:(CIDetectorImageOrientation) forKey:"Orientation"
  
  
— QRコード検出を実行
  
set faceArray to faceDetector’s featuresInImage:imageRef options:optDic2
  
set fList to {}
  
  
— 検出されたQRコードの位置とサイズをログに出力
  
repeat with i from 1 to (count of faceArray)
    set face to item i of faceArray
    
set bRec to (face’s messageString()) as string
    
–set cRec to retURLdecodedStrings(bRec) of me –URLエンコード対策
    
set the end of fList to bRec
  end repeat
  
  
return fList
end recogNSImageAsQRcodes

— クリップボードの内容をNSImageとして取り出して返す
on getClipboardASImage()
  set theNSPasteboard to NSPasteboard’s generalPasteboard()
  
set anArray to theNSPasteboard’s readObjectsForClasses:({NSImage}) options:(missing value)
  
if anArray = missing value or (anArray as list) = {} then return false
  
set aRes to anArray’s objectAtIndex:0
  
return aRes
end getClipboardASImage

—
on convNSImageToCIimage(aNSIMage)
  set tiffDat to aNSIMage’s TIFFRepresentation()
  
set aRep to NSBitmapImageRep’s imageRepWithData:tiffDat
  
set newImg to CIImage’s alloc()’s initWithBitmapImageRep:aRep
  
return newImg
end convNSImageToCIimage

–NSImageを指定倍率で拡大(アンチエイリアス解除状態で)
on resizeNSImageWithoutAntlialias:aSourceImg toScale:imgScale
  set aSize to aSourceImg’s |size|()
  
set aWidth to (aSize’s width) * imgScale
  
set aHeight to (aSize’s height) * imgScale
  
  
set aRep to NSBitmapImageRep’s alloc()’s initWithBitmapDataPlanes:(missing value) pixelsWide:aWidth pixelsHigh:aHeight bitsPerSample:8 samplesPerPixel:4 hasAlpha:true isPlanar:false colorSpaceName:(NSCalibratedRGBColorSpace) bytesPerRow:0 bitsPerPixel:0
  
  
set newSize to {width:aWidth, height:aHeight}
  
aRep’s setSize:newSize
  
  
NSGraphicsContext’s saveGraphicsState()
  
  
set theContext to NSGraphicsContext’s graphicsContextWithBitmapImageRep:aRep
  
NSGraphicsContext’s setCurrentContext:theContext
  
theContext’s setShouldAntialias:false
  
theContext’s setImageInterpolation:(NSImageInterpolationNone)
  
  
aSourceImg’s drawInRect:(current application’s NSMakeRect(0, 0, aWidth, aHeight)) fromRect:(NSZeroRect) operation:(NSCompositeCopy) fraction:(1.0)
  
  
NSGraphicsContext’s restoreGraphicsState()
  
  
set newImg to NSImage’s alloc()’s initWithSize:newSize
  
newImg’s addRepresentation:aRep
  
  
return newImg
end resizeNSImageWithoutAntlialias:toScale:

★Click Here to Open This Script 

Posted in Clipboard Image list QR Code | Tagged 10.12savvy 10.13savvy 10.14savvy CIDetector CIDetectorAccuracy CIDetectorAccuracyHigh CIDetectorImageOrientation CIDetectorTypeQRCode CIImage NSBitmapImageRep NSCalibratedRGBColorSpace NSCompositeCopy NSDictionary NSGraphicsContext NSImage NSImageInterpolationNone NSPasteboard NSZeroRect | 4 Comments

指定画像をPNG形式(グレースケール)で保存

Posted on 7月 9, 2019 by Takaaki Naganoya

指定の画像ファイルをグレースケールのPNG画像ファイルに変換するAppleScriptです。

Appleが配布しているMNISTの手書き数字画像の認識CoreMLモデルをCocoa Framework化してみたところ、グレースケールの画像を要求されたため、画像をグレースケール化するルーチンを作ってみました。

結局、MNISTの手書き画像認識はうまく行かなかったのですが(全部「0」が返ってくる、、、)、グレースケール変換ルーチンは実用的だったので載せておくことにしました。

AppleScript名:指定画像をPNG形式(グレースケール)で保存
— Created 2019-07-09 by Takaaki Naganoya
— 2019 Piyomaru Software
use AppleScript version "2.4"
use scripting additions
use framework "Foundation"
use framework "AppKit"

property NSUUID : a reference to current application’s NSUUID
property NSString : a reference to current application’s NSString
property NSImage : a reference to current application’s NSImage
property NSColorSpace : a reference to current application’s NSColorSpace
property NSPNGFileType : a reference to current application’s NSPNGFileType
property NSBitmapImageRep : a reference to current application’s NSBitmapImageRep
property NSColorRenderingIntentPerceptual : a reference to current application’s NSColorRenderingIntentPerceptual

set aFile to POSIX path of (choose file of type {"public.image"} with prompt "Select Image A")
set aImage to NSImage’s alloc()’s initWithContentsOfFile:aFile

set fRes to retUUIDfilePath(aFile, "png") of me
set sRes to saveNSImageAtPathAsGreyPNG(aImage, fRes) of me

–指定ファイルパスを元にUUIDのファイル名、指定拡張子をつけたファイルパスを作成して返す
on retUUIDfilePath(aPath, aEXT)
  set aUUIDstr to (NSUUID’s UUID()’s UUIDString()) as string
  
set aPath to ((NSString’s stringWithString:aPath)’s stringByDeletingLastPathComponent()’s stringByAppendingPathComponent:aUUIDstr)’s stringByAppendingPathExtension:aEXT
  
return aPath
end retUUIDfilePath

–NSImageを指定パスにPNG形式で保存
on saveNSImageAtPathAsGreyPNG(anImage, outPath)
  set imageRep to anImage’s TIFFRepresentation()
  
set aRawimg to NSBitmapImageRep’s imageRepWithData:imageRep
  
  
–ビットマップをグレースケール変換
  
set bRawimg to convBitMapToDeviceGrey(aRawimg) of me
  
  
set pathString to NSString’s stringWithString:outPath
  
set newPath to pathString’s stringByExpandingTildeInPath()
  
  
set myNewImageData to (bRawimg’s representationUsingType:(NSPNGFileType) |properties|:(missing value))
  
set aRes to (myNewImageData’s writeToFile:newPath atomically:true) as boolean
  
return aRes –true/false
end saveNSImageAtPathAsGreyPNG

–NSBitmapImageRepをグレースケールに変換する
on convBitMapToDeviceGrey(aBitmap)
  set aSpace to NSColorSpace’s deviceGrayColorSpace()
  
set bRawimg to aBitmap’s bitmapImageRepByConvertingToColorSpace:aSpace renderingIntent:(NSColorRenderingIntentPerceptual)
  
return bRawimg
end convBitMapToDeviceGrey

★Click Here to Open This Script 

AppleScript名:指定画像をグレースケールのNSImageに変換
— Created 2019-07-09 by Takaaki Naganoya
— 2019 Piyomaru Software
use AppleScript version "2.4"
use scripting additions
use framework "Foundation"
use framework "AppKit"

property NSUUID : a reference to current application’s NSUUID
property NSString : a reference to current application’s NSString
property NSImage : a reference to current application’s NSImage
property NSColorSpace : a reference to current application’s NSColorSpace
property NSBitmapImageRep : a reference to current application’s NSBitmapImageRep
property NSColorRenderingIntentDefault : a reference to current application’s NSColorRenderingIntentDefault

set aFile to POSIX path of (choose file of type {"public.image"} with prompt "Select Image")
set aImage to NSImage’s alloc()’s initWithContentsOfFile:aFile

set nsImageRes to convNSImageAsGrey(aImage) of me

–NSImageをグレースケールに変換する(NSImageで入出力)
on convNSImageAsGrey(anImage)
  set imageRep to anImage’s TIFFRepresentation()
  
set aRawimg to NSBitmapImageRep’s imageRepWithData:imageRep
  
set aSpace to NSColorSpace’s deviceGrayColorSpace()
  
set bRawimg to aRawimg’s bitmapImageRepByConvertingToColorSpace:aSpace renderingIntent:(NSColorRenderingIntentDefault)
  
set outImage to NSImage’s alloc()’s initWithSize:(bRawimg’s |size|())
  
outImage’s addRepresentation:(bRawimg)
  
return outImage
end convNSImageAsGrey

★Click Here to Open This Script 

Posted in Color file File path Image | Tagged 10.11savvy 10.12savvy 10.13savvy 10.14savvy NSBitmapImageRep NSColorRenderingIntentPerceptual NSColorSpace NSImage NSPNGFileType NSString NSUUID | Leave a comment

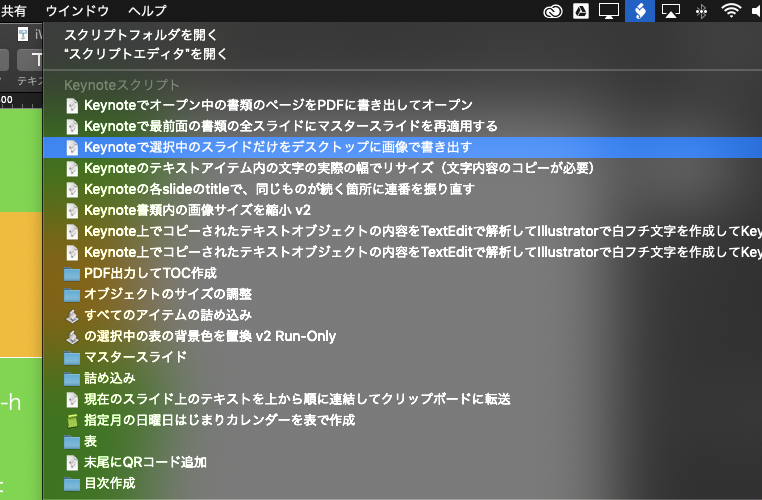
Keynoteで選択中のスライドだけをデスクトップに画像で書き出す

Posted on 6月 20, 2019 by Takaaki Naganoya

Keynoteでオープン中の最前面の書類で、選択中のスライドだけをデスクトップにPNG画像で書き出すAppleScriptです。Keynote 9.xを必要とします(macOS 10.13以降)。

ちょっとした説明のためにKeynoteの資料の一部だけを画面上でキャプチャして、メールなどに添付して送ることはよくあります(全部送ると量がおおすぎたり、焦点がぼやけたり)。

そこで、複数枚のスライド(ページ)を選択しておくと、それらのみを画像書き出しするAppleScriptを作ってみました。Keynoteにそんな機能はないのですが、「選択中のページ番号」は取れるので、書類全体をPDF書き出ししておいて、書き出したPDFから指定ページを画像として再書き出しを行い、PDFを削除しています。

手品のように見える処理でも、実際に行える機能を組み合わせて地道に作っているだけです。問題は、「手品」が実は地道な調査と機能確認、こまごまとしたライブラリの整備の末に実現されていることが、一般の方にはわかりにくいということでしょうか(いきなり手品を求められて絶句すること多し)。

仕事の合間に作ったので、割と雑な作りです。書き出し画像のファイル名衝突チェックなどは入れていません。

それでも、スクリプトメニューに入れて利用するとなかなか便利です。

AppleScript名:Keynoteで選択中のスライドだけをデスクトップに画像で書き出す.scptd
—
–  Created by: Takaaki Naganoya
–  Created on: 2019/06/20
—
–  Copyright © 2019 Piyomaru Software, All Rights Reserved
—
use AppleScript version "2.7" — 10.13 or later
use framework "Foundation"
use framework "Quartz"
use framework "AppKit"
use scripting additions

set dtPath to (path to desktop) as string

tell application "Keynote"
  set aVer to version
  
  
considering numeric strings
    if aVer < "9.0" then
      display dialog "Too old version for this Script." buttons {"OK"} default button 1 with icon 1
      
return
    end if
  end considering
  
  
tell front document
    set aSel to selection –選択中のスライドオブジェクトへの参照がリストで入る
    
set pList to {}
    
repeat with i in aSel
      set tmpPage to slide number of i
      
set the end of pList to tmpPage
    end repeat
    
  end tell
end tell

–Keynote書類を指定フォルダにPDF書き出し(全ページ書き出し)
set savedPDFPath to exportKeynoteDocToPDF(dtPath) of me
if savedPDFPath = false then return –Error

set aPOSIXpath to POSIX path of savedPDFPath

–書き出したPDFから、部分的にPNG画像に書き出す
repeat with p in pList
  –PDFの指定ページをNSImageとして取り出す
  
set tmpNSImage to getNSImageFromPDFPage(aPOSIXpath, p) of me
  
  
–PDFの書き出しファイル名に子番号にスライド番号をつける
  
set bPath to addStringbeforeExtension(aPOSIXpath, "_" & (p as string)) of me
  
  
–PDF書き出しファイル名に
  
set newPath to repFilePathExtension(bPath, ".png") of me
  
  
–指定のNSImageを指定のパスにPNG形式で保存
  
set sRes to saveNSImageAtPathAsPNG(tmpNSImage, newPath) of me
end repeat

–書き出したPDFを削除
tell application "Finder"
  delete savedPDFPath
end tell

–Keynote書類からPDF書き出し
on exportKeynoteDocToPDF(targFolderPath as string)
  tell application "Keynote"
    set dCount to count every document
    
if dCount = 0 then
      return false
    end if
    
set aPath to file of document 1
  end tell
  
  
set curPath to (current application’s NSString’s stringWithString:(POSIX path of aPath))’s lastPathComponent()’s stringByDeletingPathExtension()’s stringByAppendingString:".pdf"
  
set outPath to (targFolderPath & curPath)
  
  
tell application "Keynote"
    set anOpt to {class:export options, export style:IndividualSlides, all stages:false, skipped slides:true, PDF image quality:Best}
    
export document 1 to file outPath as PDF with properties anOpt
  end tell
  
  
return (outPath as alias)
  
end exportKeynoteDocToPDF

–指定のPDFから、指定のページをNSImageで返す
on getNSImageFromPDFPage(aPOSIX, aPage as number)
  set aURL to (current application’s |NSURL|’s fileURLWithPath:aPOSIX)
  
  
set aPDFdoc to current application’s PDFDocument’s alloc()’s initWithURL:aURL
  
set pCount to aPDFdoc’s pageCount()
  
  
set compFactor to 1.0 –1.0 — 0.0 = max jpeg compression, 1.0 = none
  
  
–Detect Retina Environment
  
set retinaF to current application’s NSScreen’s mainScreen()’s backingScaleFactor()
  
if retinaF = 1.0 then
    set aScale to 2.0 –Non Retina Env
  else
    set aScale to 1.0 –Retina Env
  end if
  
  
set thisPage to (aPDFdoc’s pageAtIndex:(aPage – 1))
  
set anNSImage to (current application’s NSImage’s alloc()’s initWithData:(thisPage’s dataRepresentation()))
  
  
if anNSImage = missing value then error "Error in getting imagerep from PDF"
  
  
return anNSImage
end getNSImageFromPDFPage

–ファイル名の拡張子の直前に子番号的な文字列を入れる
on addStringbeforeExtension(aPath, extraString)
  set pathString to current application’s NSString’s stringWithString:aPath
  
set theExtension to pathString’s pathExtension()
  
set thePathNoExt to pathString’s stringByDeletingPathExtension()
  
set newPath to (thePathNoExt’s stringByAppendingString:extraString)’s stringByAppendingPathExtension:theExtension
  
return newPath as string
end addStringbeforeExtension

–与えられたパスの拡張子を付け替える
on repFilePathExtension(origPath, newExt)
  set aName to current application’s NSString’s stringWithString:origPath
  
set theExtension to aName’s pathExtension()
  
if (theExtension as string) is not equal to "" then
    set thePathNoExt to aName’s stringByDeletingPathExtension()
    
set newName to (thePathNoExt’s stringByAppendingString:newExt)
  else
    set newName to (aName’s stringByAppendingString:newExt)
  end if
  
return newName as string
end repFilePathExtension

–NSImageを指定パスにPNG形式で保存
on saveNSImageAtPathAsPNG(anImage, outPath)
  set imageRep to anImage’s TIFFRepresentation()
  
set aRawimg to current application’s NSBitmapImageRep’s imageRepWithData:imageRep
  
set pathString to current application’s NSString’s stringWithString:outPath
  
set newPath to pathString’s stringByExpandingTildeInPath()
  
set myNewImageData to (aRawimg’s representationUsingType:(current application’s NSPNGFileType) |properties|:(missing value))
  
set aRes to (myNewImageData’s writeToFile:newPath atomically:true) as boolean
  
return aRes –true/false
end saveNSImageAtPathAsPNG

★Click Here to Open This Script 

Posted in file File path Image PDF | Tagged 10.13savvy 10.14savvy Finder Keynote NSBitmapImageRep NSImage NSScreen NSString NSURL PDFDocument | Leave a comment

指定単語の花文字テキストを取得する(Retina対応)英文字用 v2

Posted on 3月 29, 2019 by Takaaki Naganoya

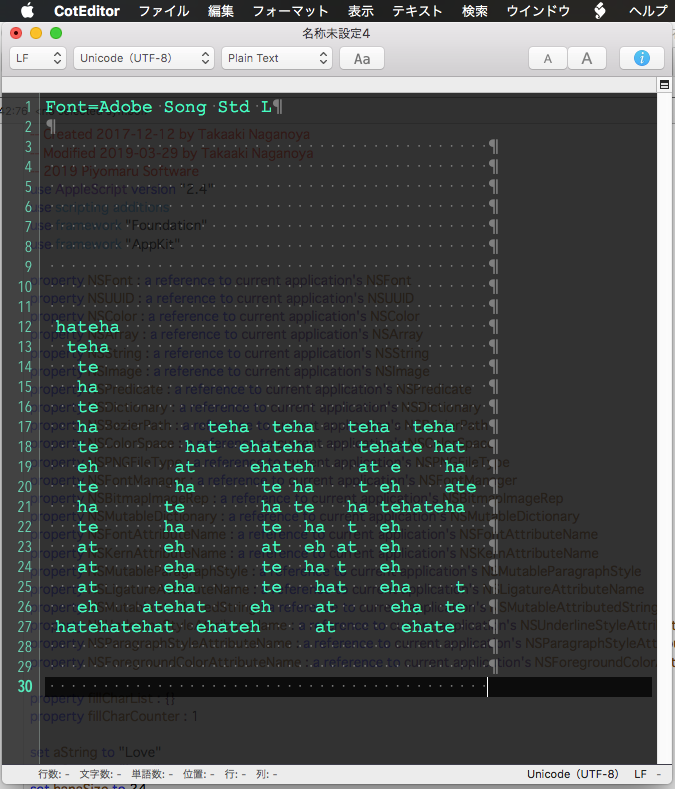
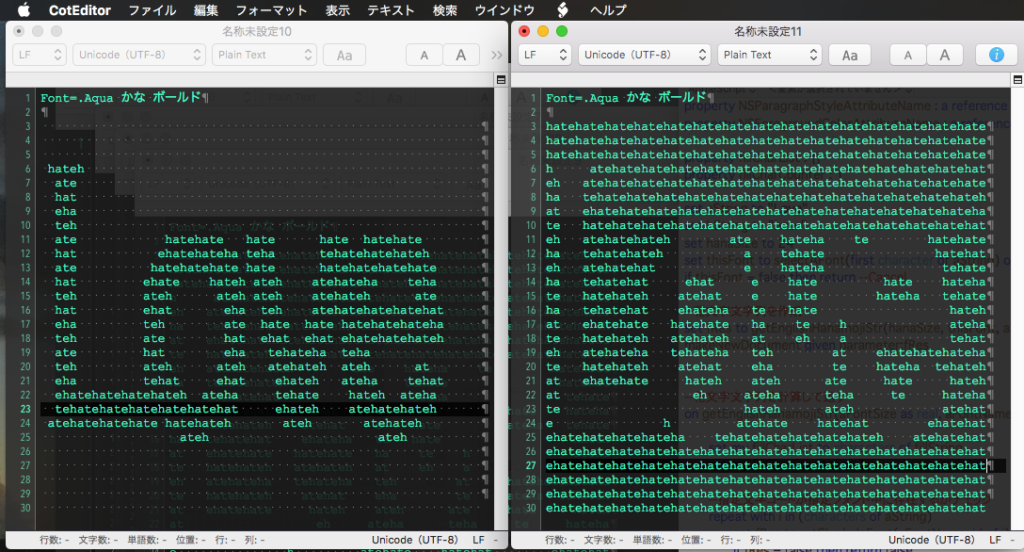
英語版の花文字テキストを作成してテキストエディタ(CotEditor)に出力するAppleScriptです。

描画用の英単語と、塗りつぶし用の英単語を別々に指定できます。invertFをtrueに設定すると、白黒反転出力を行います。

おおもとの元ネタは、大型計算機を大勢のユーザーで共有していた時代(ぱそこん登場前)、計算結果を高速プリンタの帳票に出力するようになっていたころにさかのぼります。どのユーザーの計算結果かを大量のプリンタの出力結果の中から仕分けるため、印刷出力の1ページ目をユーザー名などの情報を印字した「バナー」として使用。

そのさい、ドットインパクトプリンターだったので、決められた固定ドット数の文字しか印字できないため、英数字を組み合わせて擬似的に大きな文字でバナーを印刷していたことに端を発します。

その時代の「残り香」ともいえるバナーがパソコンの電子メールやBBSの時代にお遊びの「花文字」として引き継がれ、原始的なアスキーアートの一種として楽しまれてきました。

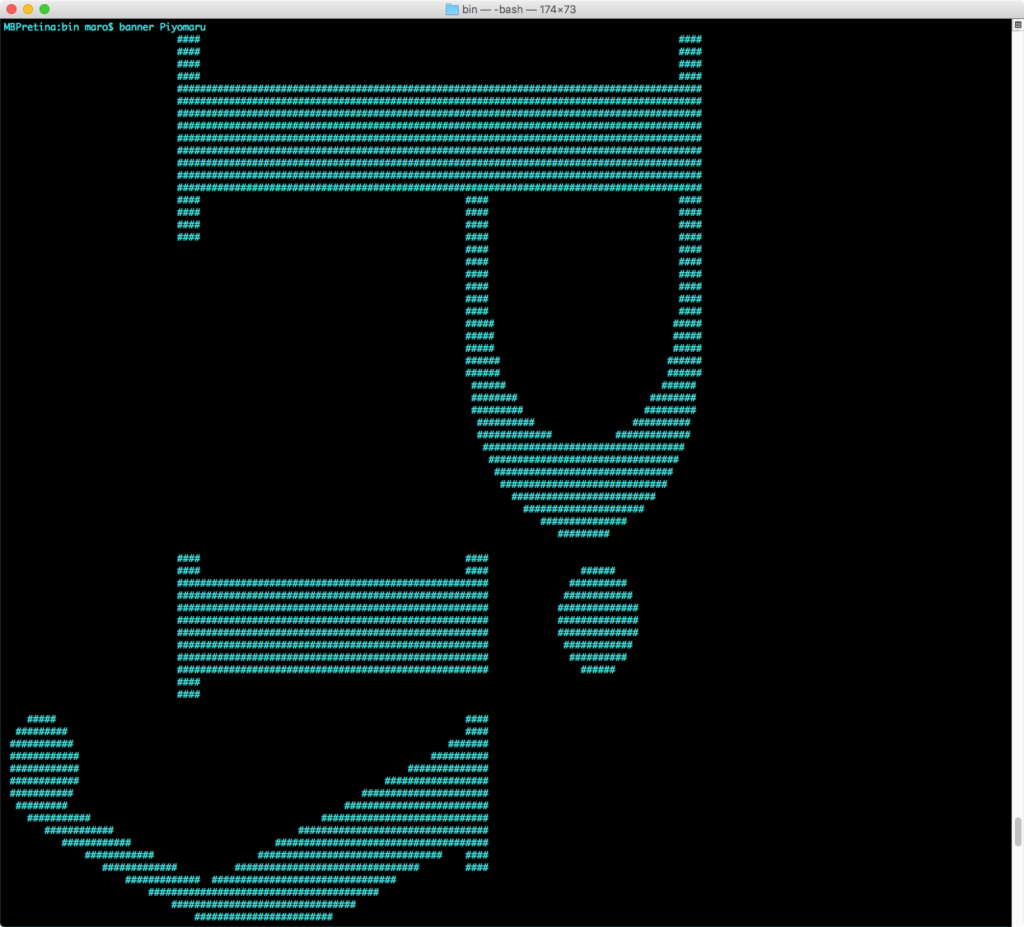
いまでも、shell commandの「banner」コマンドにその末裔を見ることができます。

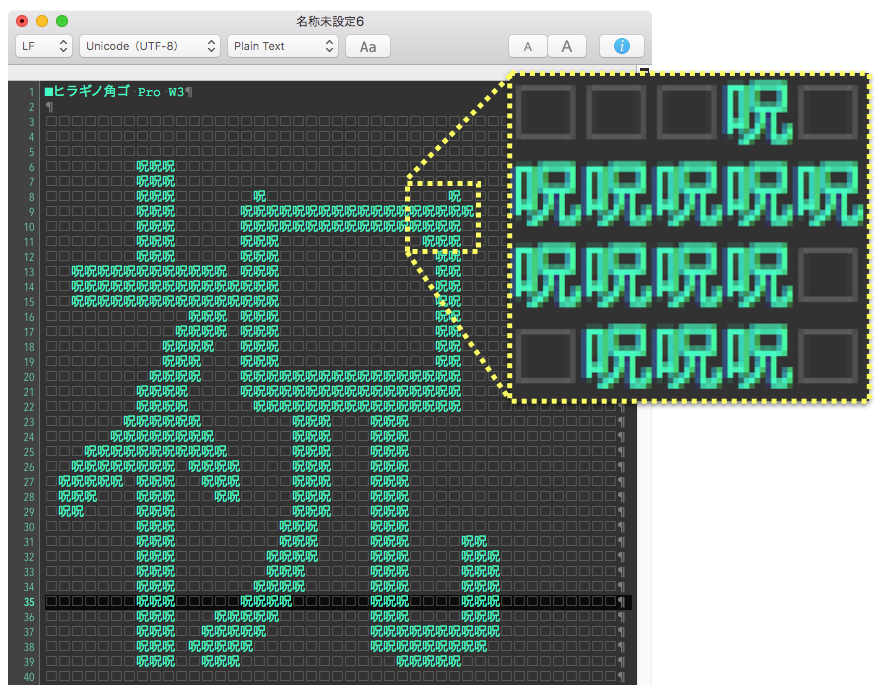
先週のmacOS nativeのデモ時に「祝」という花文字を「呪」の文字で出力するという、定番の持ちネタを披露したところ、たいへんウケておりました。

ただ、これを海外のScripter向けにそのままデモしても受けません。

この、花文字テキストを出力するプログラムの英語版としては、love.scptといういにしえのデータをそのまま使いまわしたものがありますが、描画パターンを数値データで保持しているため、異なるパターンを表示させることはできません。

そこで、日本語版の花文字テキスト出力プログラムに若干手をくわえ、英単語の出力が行えるようにしてみました。

テキストの出力はCotEditorに対して行なっていますが、新規書類を指定文字で作成する程度なので、AppleScriptに対応しているテキストエディタならどれでも作り変えられます。また、表示を等幅フォントにしておく必要があります(あとから指定してもOK)。

AppleScript名:指定単語の花文字テキストを取得する(Retina対応)英文字用 v2
— Created 2017-12-12 by Takaaki Naganoya
— Modified 2019-03-29 by Takaaki Naganoya
— 2019 Piyomaru Software
use AppleScript version "2.4"
use scripting additions
use framework "Foundation"
use framework "AppKit"

property NSFont : a reference to current application’s NSFont
property NSUUID : a reference to current application’s NSUUID
property NSColor : a reference to current application’s NSColor
property NSArray : a reference to current application’s NSArray
property NSString : a reference to current application’s NSString
property NSImage : a reference to current application’s NSImage
property NSPredicate : a reference to current application’s NSPredicate
property NSDictionary : a reference to current application’s NSDictionary
property NSBezierPath : a reference to current application’s NSBezierPath
property NSColorSpace : a reference to current application’s NSColorSpace
property NSPNGFileType : a reference to current application’s NSPNGFileType
property NSFontManager : a reference to current application’s NSFontManager
property NSBitmapImageRep : a reference to current application’s NSBitmapImageRep
property NSMutableDictionary : a reference to current application’s NSMutableDictionary
property NSFontAttributeName : a reference to current application’s NSFontAttributeName
property NSKernAttributeName : a reference to current application’s NSKernAttributeName
property NSMutableParagraphStyle : a reference to current application’s NSMutableParagraphStyle
property NSLigatureAttributeName : a reference to current application’s NSLigatureAttributeName
property NSMutableAttributedString : a reference to current application’s NSMutableAttributedString
property NSUnderlineStyleAttributeName : a reference to current application’s NSUnderlineStyleAttributeName
property NSParagraphStyleAttributeName : a reference to current application’s NSParagraphStyleAttributeName
property NSForegroundColorAttributeName : a reference to current application’s NSForegroundColorAttributeName

property fillCharList : {}
property fillCharCounter : 1

set aString to "Love"
set bString to "hate"
set hanaSize to 24
set thisFont to selectAFont(first character of aString) of me
if thisFont = false then return –Cancel

–花文字文字列を作成
set fRes to getEnglishHanamojiStr(hanaSize, thisFont, aString, bString, 0.7, true, true) of me
makeNewDocument given parameter:fRes

–花文字文字列を計算して返す
on getEnglishHanamojiStr(aFontSize as real, aFontName as string, aString as string, fillString as string, aThread as real, incFontName as boolean, invertF as boolean)
  
  
set my fillCharList to characters of fillString
  
set my fillCharCounter to 1
  
  
–指定文字コードが指定フォント中に存在するかチェック
  
repeat with i in (characters of aString)
    set fRes to retGlyphsInFont(aFontName, id of i) of me
    
if fRes = false then return false
  end repeat
  
  
set aThreadShould to 768 * aThread
  
if (chkMultiByteChar(first character of aString) of me) = false then
    set spaceChar to string id 12288 –全角スペース(UTF-16)
  else
    set spaceChar to string id 32 –半角スペース
  end if
  
  
set fillColor to NSColor’s whiteColor –塗り色
  
set bString to aString & " " –処理内容の帳尻合わせ(そのままだと右端が欠けるのでスペースを入れた)
  
set anAssrStr to makeRTFfromParameters(bString, aFontName, aFontSize, -2, (aFontSize * 1.2)) of me
  
set aSize to anAssrStr’s |size|()
  
  
if class of aSize = record then
    set attrStrWidth to width of aSize
    
set attrStrHeight to height of aSize
  else if class of aSize = list then –macOS 10.13.xのバグ回避
    copy aSize to {attrStrWidth, attrStrHeight}
  end if
  
  
set {xPos, yPos} to {0, 0}
  
  
set tmpImg1 to makeImageWithFilledColor(attrStrWidth, attrStrHeight, fillColor) of me
  
set tmpImg2 to drawAttributedStringsOnImage(tmpImg1, anAssrStr, xPos, yPos) of me
  
set aRawimg to NSBitmapImageRep’s imageRepWithData:(tmpImg2’s TIFFRepresentation())
  
  
–画像から順次指定座標の色データを拾って花文字listに反映
  
set strList to {}
  
repeat with y from 1 to attrStrHeight – 1
    
    
set strListX to {}
    
repeat with x from 0 to attrStrWidth – 1
      set tmpCol to getColorFromRawImage(aRawimg, x, y) of me
      
      
if invertF = false then
        
        
–通常描画(invert = false)時
        
if tmpCol is not equal to false then
          if tmpCol is not equal to {255, 255, 255} then
            copy tmpCol to {tmpR, tmpG, tmpB}
            
if (tmpR + tmpG + tmpB) < aThreadShould then
              set the end of strListX to getChar() of me
            else
              set the end of strListX to spaceChar
            end if
          else
            set the end of strListX to spaceChar
          end if
        end if
        
      else
        –白黒反転(invert = true)時
        
if tmpCol is not equal to false then
          if tmpCol is not equal to {255, 255, 255} then
            copy tmpCol to {tmpR, tmpG, tmpB}
            
if (tmpR + tmpG + tmpB) < aThreadShould then
              set the end of strListX to spaceChar
            else
              set the end of strListX to getChar() of me
            end if
          else
            set the end of strListX to getChar() of me
          end if
        end if
        
      end if
    end repeat
    
set the end of strList to strListX
  end repeat
  
  
–2D List→Text
  
set aRes to list2dToStringByUsingDelimiters(strList, "", return) of me
  
  
if incFontName = true then
    set fName to getDisplayedNameOfFont(aFontName) of me
    
set aRes to "Font=" & fName & return & return & aRes
  end if
  
  
return aRes
end getEnglishHanamojiStr

on getChar()
  set retChar to item (my fillCharCounter) of (my fillCharList)
  
if (my fillCharCounter) = length of (my fillCharList) then
    set (my fillCharCounter) to 1
  else
    set (my fillCharCounter) to (my fillCharCounter) + 1
  end if
  
return retChar
end getChar

–指定Raw画像中の指定座標のピクセルの色をRGBで取り出す
on getColorFromRawImage(aRawimg, x as real, y as real)
  set aRatio to getImageRatio() of me –Retina Display対応
  
set origColor to (aRawimg’s colorAtX:(x * aRatio) y:(y * aRatio))
  
  
set srgbColSpace to NSColorSpace’s deviceRGBColorSpace
  
if srgbColSpace = missing value then return false
  
  
set aColor to (origColor’s colorUsingColorSpace:srgbColSpace)
  
  
set aRed to (aColor’s redComponent()) * 255
  
set aGreen to (aColor’s greenComponent()) * 255
  
set aBlue to (aColor’s blueComponent()) * 255
  
  
return {aRed as integer, aGreen as integer, aBlue as integer}
end getColorFromRawImage

–画像のうえに指定のスタイル付きテキストを描画して画像を返す
on drawAttributedStringsOnImage(anImage, anAssrStr, xPos as real, yPos as real)
  anImage’s lockFocus()
  
anAssrStr’s drawAtPoint:(current application’s NSMakePoint(xPos, yPos))
  
anImage’s unlockFocus()
  
return anImage
end drawAttributedStringsOnImage

–書式つきテキストを組み立てる
on makeRTFfromParameters(aStr as string, fontName as string, aFontSize as real, aKerning as real, aLineSpacing as real)
  set aVal1 to NSFont’s fontWithName:fontName |size|:aFontSize
  
set aKey1 to (NSFontAttributeName)
  
  
set aVal2 to NSColor’s blackColor()
  
set aKey2 to (NSForegroundColorAttributeName)
  
  
set aVal3 to aKerning
  
set akey3 to (NSKernAttributeName)
  
  
set aVal4 to 0
  
set akey4 to (NSUnderlineStyleAttributeName)
  
  
set aVal5 to 2 –all ligature ON
  
set akey5 to (NSLigatureAttributeName)
  
  
set aParagraphStyle to NSMutableParagraphStyle’s alloc()’s init()
  
aParagraphStyle’s setMinimumLineHeight:(aLineSpacing)
  
aParagraphStyle’s setMaximumLineHeight:(aLineSpacing)
  
set akey7 to (NSParagraphStyleAttributeName)
  
  
set keyList to {aKey1, aKey2, akey3, akey4, akey5, akey7}
  
set valList to {aVal1, aVal2, aVal3, aVal4, aVal5, aParagraphStyle}
  
set attrsDictionary to NSMutableDictionary’s dictionaryWithObjects:valList forKeys:keyList
  
  
set attrStr to NSMutableAttributedString’s alloc()’s initWithString:aStr attributes:attrsDictionary
  
return attrStr
end makeRTFfromParameters

–指定サイズの画像を作成し、背景を指定色で塗る
on makeImageWithFilledColor(aWidth as real, aHeight as real, fillColor)
  set anImage to NSImage’s alloc()’s initWithSize:(current application’s NSMakeSize(aWidth, aHeight))
  
set aRatio to getImageRatio() of me –Retina Display対応
  
  
anImage’s lockFocus()
  
set theRect to {{x:0, y:0}, {width:aWidth * aRatio, height:aHeight * aRatio}}
  
set theNSBezierPath to NSBezierPath’s bezierPath
  
theNSBezierPath’s appendBezierPathWithRect:theRect
  
fillColor’s |set|()
  
theNSBezierPath’s fill()
  
anImage’s unlockFocus()
  
  
return anImage
end makeImageWithFilledColor

–2D Listをアイテム間および行間のデリミタを個別に指定してテキスト変換
on list2dToStringByUsingDelimiters(aList as list, itemDelimiter, lineDelimiter)
  set outList to {}
  
repeat with i in aList
    set aStr to listToStringUsingTextItemDelimiter(i, itemDelimiter) of me
    
set the end of outList to aStr
  end repeat
  
  
set bStr to listToStringUsingTextItemDelimiter(outList, lineDelimiter) of me
  
return bStr
end list2dToStringByUsingDelimiters

on listToStringUsingTextItemDelimiter(sourceList as list, textItemDelimiter)
  set CocoaArray to NSArray’s arrayWithArray:sourceList
  
set CocoaString to CocoaArray’s componentsJoinedByString:textItemDelimiter
  
return (CocoaString as string)
end listToStringUsingTextItemDelimiter

–ユーザー環境にインストールされているすべてのフォントのPostScript名とグリフ数を返す
on getEveryFontPSNameANdGlyphsNum(aStr)
  set aFontList to NSFontManager’s sharedFontManager()’s availableFonts()
  
set thePred to NSPredicate’s predicateWithFormat:"NOT SELF BEGINSWITH ’.’"
  
set aFontList to (aFontList’s filteredArrayUsingPredicate:thePred) as list
  
  
set aList to {}
  
repeat with i in aFontList
    set aName to contents of i
    
set aNum to countNumberOfGlyphsInFont(aName) of me
    
set dName to getDisplayedNameOfFont(aName) of me
    
    
set fRes to retGlyphsInFont(aName, id of aStr) of me
    
if fRes = true then
      set the end of aList to {fontName:aName, fontNum:aNum, dispName:dName}
    end if
  end repeat
  
  
return aList
end getEveryFontPSNameANdGlyphsNum

–指定Postscript名称のフォントに定義されている文字数を数えて返す
on countNumberOfGlyphsInFont(fontName as string)
  set aFont to NSFont’s fontWithName:fontName |size|:9.0
  
if aFont = missing value then return false
  
set aProp to aFont’s numberOfGlyphs()
  
return aProp as number
end countNumberOfGlyphsInFont

–フォントのPostScript NameからDisplayed Nameを取得
on getDisplayedNameOfFont(aName as string)
  set aFont to NSFont’s fontWithName:aName |size|:9.0
  
set aDispName to (aFont’s displayName()) as string
  
return aDispName
end getDisplayedNameOfFont

–全角文字が存在するか
on chkMultiByteChar(checkString as string)
  set aStr to NSString’s stringWithString:checkString
  
set aRes to aStr’s canBeConvertedToEncoding:(current application’s NSASCIIStringEncoding)
  
return (aRes as boolean)
end chkMultiByteChar

–指定名称のフォントに指定の文字コードが含まれているかチェック
on retGlyphsInFont(fontName as string, strCode as integer)
  set aFont to NSFont’s fontWithName:fontName |size|:24.0
  
if aFont = missing value then return false
  
set aSet to aFont’s coveredCharacterSet()
  
set aRes to (aSet’s characterIsMember:strCode) as boolean
  
return aRes as list of string or string –as anything
end retGlyphsInFont

on selectAFont(aString)
  set fRes to getEveryFontPSNameANdGlyphsNum(aString) of me
  
set theArray to NSArray’s arrayWithArray:fRes
  
set thePred to NSPredicate’s predicateWithFormat:"fontNum > 10000"
  
set bArray to ((theArray’s filteredArrayUsingPredicate:thePred)’s valueForKeyPath:"dispName") as list
  
set thisFont to choose from list bArray
  
return thisFont
end selectAFont

–Retina Display対応ルーチン
on getImageRatio()
  set retinaF to detectRetinaDisplay() of me
  
if retinaF = true then
    return 2.0 as real
  else
    return 1.0 as real
  end if
end getImageRatio

on detectRetinaDisplay()
  set dispList to current application’s NSScreen’s screens()
  
set retinaF to false
  
  
repeat with i in dispList
    set j to contents of i
    
set aDepth to j’s backingScaleFactor()
    
if aDepth > 1.0 then
      set retinaF to true
    end if
  end repeat
  
  
return retinaF
end detectRetinaDisplay

on makeNewDocument given parameter:aStr
  tell application id "com.coteditor.CotEditor"
    activate
    
set newDoc to make new document
    
tell newDoc
      set contents to aStr
    end tell
  end tell
end makeNewDocument

★Click Here to Open This Script 

Posted in Color Image RTF Text | Tagged 10.12savvy 10.13savvy 10.14savvy CotEditor NSArray NSBezierPath NSBitmapImageRep NSColor NSColorSpace NSDictionary NSFont NSFontManager NSImage NSMutableAttributedString NSMutableDictionary NSPredicate NSString | 1 Comment

アラートダイアログ上に縦棒グラフを表示

Posted on 3月 4, 2019 by Takaaki Naganoya

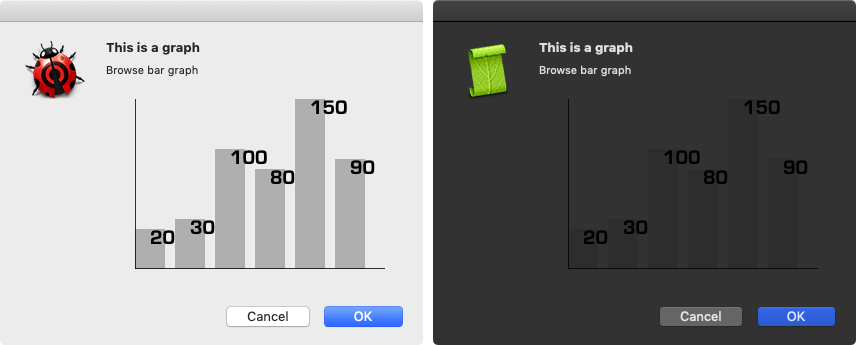
アラートダイアログ上に縦棒グラフを表示するAppleScriptです。

グラフを作成するのであれば、NumbersやKeynoteなどを使ったほうがいいですが、簡単にデータの傾向だけダイアログ上で見せたいような場合のために作成した部品です。

NSImageViewの表示実験がしたかっただけなので、別に他の言語処理系で作成したグラフ画像を読み込んでNSImageに読み込んでからNSIMageViewで表示するぐらいの使い方でもぜんぜんOKでしょう。

WebViewを表示してインタラクティブなグラフ(マウスカーソルに反応してアニメーション表示を行うとか)を表示するといった使い方もよさそうです(アプリケーション化しないとダメかも)。

macOS 10.14上のDark Modeについては、実行環境によって対応度が異なります。


▲macOS 10.14上のDark Modeで実行したところ。左側からスクリプトエディタ、AppleScriptアプレット、スクリプトメニュー


▲macOS 10.14上のDark Modeで実行したところ。左側からScript Debugger、Script DebuggerからSD拡張アプレットで書き出したもの

グラフの描画については、色指定をblackColor()とかgrayColor()などと指定せずに、Dark Mode時に制御されるUI色で指定しておく必要があることでしょう。

AppleScript名:アラートダイアログ上に縦棒グラフを表示.scptd
—
–  Created by: Takaaki Naganoya
–  Created on: 2019/03/04
—
–  Copyright © 2019 Piyomaru Software, All Rights Reserved
—
use AppleScript version "2.4" — Yosemite (10.10) or later
use framework "Foundation"
use framework "AppKit"
use scripting additions

property NSFont : a reference to current application’s NSFont
property NSAlert : a reference to current application’s NSAlert
property NSColor : a reference to current application’s NSColor
property NSArray : a reference to current application’s NSArray
property NSString : a reference to current application’s NSString
property NSImage : a reference to current application’s NSImage
property NSScreen : a reference to current application’s NSScreen
property NSDictionary : a reference to current application’s NSDictionary
property NSBezierPath : a reference to current application’s NSBezierPath
property NSImageView : a reference to current application’s NSImageView
property NSMutableArray : a reference to current application’s NSMutableArray
property NSBitmapImageRep : a reference to current application’s NSBitmapImageRep
property NSRunningApplication : a reference to current application’s NSRunningApplication
property NSFontAttributeName : a reference to current application’s NSFontAttributeName
property NSAlertSecondButtonReturn : a reference to current application’s NSAlertSecondButtonReturn
property NSForegroundColorAttributeName : a reference to current application’s NSForegroundColorAttributeName
property NSImageScaleProportionallyUpOrDown : a reference to current application’s NSImageScaleProportionallyUpOrDown

property returnCode : 0

set plotData to {20, 30, 100, 80, 150, 90}
set paramObj to {myMessage:"This is a graph", mySubMessage:"Browse bar graph", aPlotData:plotData}
my performSelectorOnMainThread:"displayBarGraph:" withObject:(paramObj) waitUntilDone:true

on displayBarGraph:paramObj
  set aMainMes to myMessage of paramObj
  
set aSubMes to mySubMessage of paramObj
  
set aTList to (aPlotData of paramObj) as list
  
  
— make NSIMageView with graph image
  
set anImage to makeGraphImage(aTList, 300, 200) of me
  
set anImageView to NSImageView’s alloc()’s initWithFrame:{origin:{x:0.0, y:0.0}, |size|:{width:300.0, height:200.0}}
  
anImageView’s setImageScaling:(NSImageScaleProportionallyUpOrDown)
  
anImageView’s setEditable:false
  
anImageView’s setImage:anImage
  
anImageView’s display()
  
  
— set up alert  
  
set theAlert to NSAlert’s alloc()’s init()
  
tell theAlert
    its setMessageText:aMainMes
    
its setInformativeText:aSubMes
    
its addButtonWithTitle:"OK"
    
its addButtonWithTitle:"Cancel"
    
its setAccessoryView:anImageView
  end tell
  
  
— show alert in modal loop
  
NSRunningApplication’s currentApplication()’s activateWithOptions:0
  
my performSelectorOnMainThread:"doModal:" withObject:(theAlert) waitUntilDone:true
  
if (my returnCode as number) = 1001 then error number -128
end displayBarGraph:

on doModal:aParam
  set (my returnCode) to aParam’s runModal()
end doModal:

on makeGraphImage(plotData, aWidth, aHeight)
  set innerGapL to 30
  
set innerGapU to 10
  
set innerGapR to 20
  
set innerGapD to 20
  
set barGap to 10
  
  
–パラメータから下地になる画像を作成する
  
set aSize to current application’s NSMakeSize(aWidth, aHeight)
  
set anImage to NSImage’s alloc()’s initWithSize:aSize
  
  
–各種パラメータの計算
  
–copy plotArea to {plotWidth, plotHeight}
  
set itemNum to count every item of plotData
  
set barThickness to (aWidth – (itemNum * barGap * 2)) div itemNum
  
  
–プロットデータの最大値
  
set anArray to NSArray’s arrayWithArray:plotData
  
set aYmax to (anArray’s valueForKeyPath:"@max.self")’s intValue()
  
set aMaxYVal to aHeight – innerGapU – innerGapD
  
set aYPlotArea to aHeight – innerGapU – innerGapD – 20
  
set aYUnit to aYPlotArea / aYmax
  
  
–数値データをもとに描画データを組み立てる
  
set drawList to {}
  
  
set startX to innerGapL
  
copy startX to origX
  
  
repeat with i in plotData
    set the end of drawList to current application’s NSMakeRect(startX, innerGapD, barThickness, innerGapD + (i * aYUnit))
    
set startX to startX + barThickness + barGap
  end repeat
  
  
–グラフ塗りつぶし処理呼び出し
  
set fillColor to (NSColor’s colorWithCalibratedRed:0.1 green:0.1 blue:0.1 alpha:0.3)
  
set resImage to drawImageWithColorFill(anImage, drawList, fillColor) of me
  
  
–数値データ(文字)をグラフィックに記入
  
set fillColor2 to NSColor’s blackColor()
  
set resImage to drawImageWithString(resImage, drawList, fillColor2, plotData, "Eurostile Bold", 20.0) of me
  
  
–補助線を引く
  
set fillColor3 to (NSColor’s colorWithCalibratedRed:0.0 green:0.0 blue:0.0 alpha:0.8)
  
set aVertical to current application’s NSMakeRect(origX, innerGapD, aWidth – innerGapL – innerGapR, 1)
  
set aHorizontal to current application’s NSMakeRect(origX, innerGapD, 1, aHeight – innerGapU – innerGapD)
  
set draw2List to {aVertical, aHorizontal}
  
set resImage to drawImageWithColorFill(resImage, draw2List, fillColor3) of me
  
  
return resImage
end makeGraphImage

–NSImageに対して文字を描画する
on drawImageWithString(anImage, drawList, fillColor, dataList, aPSFontName, aFontSize)
  set retinaF to (NSScreen’s mainScreen()’s backingScaleFactor()) as real
  
–>  2.0 (Retina) / 1.0 (Non Retina)
  
  
set aDict to (NSDictionary’s dictionaryWithObjects:{NSFont’s fontWithName:aPSFontName |size|:aFontSize, fillColor} forKeys:{NSFontAttributeName, NSForegroundColorAttributeName})
  
  
anImage’s lockFocus() –描画開始
  
  
set aLen to length of drawList
  
repeat with i from 1 to aLen
    set i1 to contents of item i of drawList
    
    
set v2 to system attribute "sys2"
    
if v2 ≤ 12 then
      –To macOS 10.12.x
      
set origX to (x of origin of i1) / retinaF
      
set origY to (y of origin of i1) / retinaF
      
set sizeX to (width of |size| of i1) / retinaF
      
set sizeY to (height of |size| of i1) / retinaF
      
set theRect to {{x:origX, y:origY}, {width:sizeX, height:sizeY}}
    else
      –macOS 10.13 or later
      
set origX to (item 1 of item 1 of i1) / retinaF
      
set origY to (item 2 of item 1 of i1) / retinaF
      
set sizeX to (item 1 of item 2 of i1) / retinaF
      
set sizeY to (item 2 of item 2 of i1) / retinaF
      
set theRect to {{origX, origY}, {sizeX, sizeY}}
    end if
    
    
set aString to (current application’s NSString’s stringWithString:((contents of item i of dataList) as string))
    (
aString’s drawAtPoint:(current application’s NSMakePoint(origX + (sizeX / 2), sizeY)) withAttributes:aDict)
  end repeat
  
  
anImage’s unlockFocus() –描画ここまで
  
  
return anImage –returns NSImage
end drawImageWithString

–NSImageに対して矩形を塗りつぶす
on drawImageWithColorFill(anImage, drawList, fillColor)
  set retinaF to (NSScreen’s mainScreen()’s backingScaleFactor()) as real
  
–>  2.0 (Retina) / 1.0 (Non Retina)
  
  
anImage’s lockFocus() –描画開始
  
  
repeat with i in drawList
    set v2 to system attribute "sys2"
    
if v2 ≤ 12 then
      –To macOS 10.12.x
      
set origX to (x of origin of i) / retinaF
      
set origY to (y of origin of i) / retinaF
      
set sizeX to (width of |size| of i) / retinaF
      
set sizeY to (height of |size| of i) / retinaF
      
set theRect to {{x:origX, y:origY}, {width:sizeX, height:sizeY}}
    else
      –macOS 10.13 or later
      
set origX to (item 1 of item 1 of i) / retinaF
      
set origY to (item 2 of item 1 of i) / retinaF
      
set sizeX to (item 1 of item 2 of i) / retinaF
      
set sizeY to (item 2 of item 2 of i) / retinaF
      
set theRect to {{origX, origY}, {sizeX, sizeY}}
    end if
    
    
set theNSBezierPath to NSBezierPath’s bezierPath
    (
theNSBezierPath’s appendBezierPathWithRect:theRect)
    
    
fillColor’s |set|() –色設定
    
theNSBezierPath’s fill() –ぬりつぶし
  end repeat
  
  
anImage’s unlockFocus() –描画ここまで
  
  
return anImage –returns NSImage
end drawImageWithColorFill

★Click Here to Open This Script 

Posted in GUI Image list | Tagged 10.11savvy 10.12savvy 10.13savvy 10.14savvy NSAlert NSAlertSecondButtonReturn NSArray NSBezierPath NSBitmapImageRep NSColor NSDictionary NSFont NSFontAttributeName NSForegroundColorAttributeName NSImage NSImageScaleProportionallyUpOrDown NSImageView NSMutableArray NSRunningApplication NSScreen NSString | Leave a comment

指定ファイルサイズのJPEGに変換(圧縮率可変)_1K=1024で計算

Posted on 2月 11, 2019 by Takaaki Naganoya

Finder上で選択中の画像ファイルを指定ファイルサイズを下回るよう圧縮率を調整してJPEGに変換するAppleScriptです。

指定画像を指定のファイルサイズ(1K=1024で計算)以内になるよう、非圧縮の状態から段階的に圧縮率を高くして仕上がりファイルサイズを下回るかどうか演算を行います。ファイルに書き込まずに仕上がりサイズの計算を行うところが新機軸です。

macOS標準搭載のスクリプトメニューから呼び出して使うことを想定しています。実行すると、ダイアログ表示して指定ファイルサイズをKB単位で数値入力する必要があります。

巨大な画像ファイルを処理してしまった場合への対処として、最初に最高圧縮率で圧縮してみて、指定ファイルサイズ以内になるかどうかを計算します。

最初は圧縮率100%から25%まで1%きざみで仕上がり画像ファイルサイズを計算してみたのですが、数十Mバイトの巨大な画像を処理させたら、途中でマウスカーソルが反応しないほどOSが無反応になったので(暴走状態?)、それを避けるために、このような処理を行なってみました。

JPEGにファイル変換した画像はデスクトップに

UUID_JPEG画質.jpg

の形式で出力されます。JPEG画質は1.0から0.01までの数値です。

AppleScript名:指定ファイルサイズのJPEGに変換(圧縮率可変)_1K=1024で計算
— Created 2014-02-21 Shane Stanley
— Modified 2019-02-11 Takaaki Naganoya
use AppleScript version "2.5"
use scripting additions
use framework "Foundation"
use framework "AppKit"

property |NSURL| : a reference to current application’s |NSURL|
property NSUUID : a reference to current application’s NSUUID
property NSArray : a reference to current application’s NSArray
property NSString : a reference to current application’s NSString
property NSImage : a reference to current application’s NSImage
property NSPredicate : a reference to current application’s NSPredicate
property NSJPEGFileType : a reference to current application’s NSJPEGFileType
property NSBitmapImageRep : a reference to current application’s NSBitmapImageRep
property NSURLTypeIdentifierKey : a reference to current application’s NSURLTypeIdentifierKey

property compressList : {100, 99, 98, 97, 96, 95, 90, 85, 80, 75, 70, 65, 60, 55, 50, 40, 30, 20, 25} –大→小 へと並んでいる必要がある
property kbBase : 1024

tell application "Finder"
  set inFiles to selection as alias list
end tell

–指定のAlias listのうち画像ファイルのみ抽出
set filRes1 to filterAliasListByUTI(inFiles, "public.image") of me
if filRes1 = {} then return

–ターゲットサイズを指定
set aMessage to "Input Target size in KB ( " & (kbBase as string) & " based )"
set aRes to text returned of (display dialog aMessage default answer "300" buttons {"OK"} default button 1)
if aRes = false or aRes = "" then return
set targLimit to (aRes as number) * kbBase

–選択中のファイルのうちの1つから親フォルダを求め、出力先ファイルパスを組み立てる
set outPathTarg to (contents of first item of filRes1)
set pathString to NSString’s stringWithString:outPathTarg
set newPath to (pathString’s stringByDeletingLastPathComponent()) as string

–Main Loop
repeat with i in filRes1
  set aNSImage to (NSImage’s alloc()’s initWithContentsOfFile:(i))
  
  
–巨大すぎる画像のリサイズ時への保険で、最小サイズで投機的に圧縮して結果を確認する
  
set minSize to calcSavedJPEGSizeFromNSIMage(aNSImage, (last item of compressList) / 100) of me
  
  
if minSize < targLimit then
    –Simulate Suitable JPEG Compression Ratio to target file size
    
repeat with ii in compressList
      set jj to ii / 100
      
set fileSize to calcSavedJPEGSizeFromNSIMage(aNSImage, jj) of me
      
      
if fileSize < targLimit then
        exit repeat
      end if
    end repeat
  else
    set jj to 0.01 –エラー時にはやけくそで1%まで圧縮指定
  end if
  
  
set outPOSIXpath to (newPath & "/" & (NSUUID’s UUID()’s UUIDString()) as string) & "_" & (jj as string)
  
set savePath to outPOSIXpath & ".jpg"
  
  
saveNSImageAtPathAsJPG(aNSImage, savePath, jj) of me
end repeat

–Alias listから指定UTIに含まれるものをPOSIX pathのリストで返す
on filterAliasListByUTI(aList, targUTI)
  set newList to {}
  
repeat with i in aList
    set j to POSIX path of i
    
set tmpUTI to my retUTIfromPath(j)
    
set utiRes to my filterUTIList({tmpUTI}, targUTI)
    
if utiRes is not equal to {} then
      set the end of newList to j
    end if
  end repeat
  
return newList
end filterAliasListByUTI

–指定のPOSIX pathのファイルのUTIを求める
on retUTIfromPath(aPOSIXPath)
  set aURL to |NSURL|’s fileURLWithPath:aPOSIXPath
  
set {theResult, theValue} to aURL’s getResourceValue:(reference) forKey:NSURLTypeIdentifierKey |error|:(missing value)
  
  
if theResult = true then
    return theValue as string
  else
    return theResult
  end if
end retUTIfromPath

–UTIリストが指定UTIに含まれているかどうか演算を行う
on filterUTIList(aUTIList, aUTIstr)
  set anArray to NSArray’s arrayWithArray:aUTIList
  
set aPred to NSPredicate’s predicateWithFormat_("SELF UTI-CONFORMS-TO %@", aUTIstr)
  
set bRes to (anArray’s filteredArrayUsingPredicate:aPred) as list
  
return bRes
end filterUTIList

–NSImageを指定パスにJPEG形式で保存、qulityNumは0.0〜1.0。1.0は無圧縮
on saveNSImageAtPathAsJPG(anImage, outPath, qulityNum as real)
  set imageRep to anImage’s TIFFRepresentation()
  
set aRawimg to NSBitmapImageRep’s imageRepWithData:imageRep
  
set pathString to NSString’s stringWithString:outPath
  
set newPath to pathString’s stringByExpandingTildeInPath()
  
set myNewImageData to (aRawimg’s representationUsingType:(NSJPEGFileType) |properties|:{NSImageCompressionFactor:qulityNum})
  
  
set aLength to (myNewImageData’s |length|()) as number
  
  
set aRes to (myNewImageData’s writeToFile:newPath atomically:true) as boolean
  
return aRes –true/false
end saveNSImageAtPathAsJPG

–NSImageをJPEG形式で保存したときのファイルサイズを計算
on calcSavedJPEGSizeFromNSIMage(anImage, qulityNum as real)
  set imageRep to anImage’s TIFFRepresentation()
  
set aRawimg to NSBitmapImageRep’s imageRepWithData:imageRep
  
set myNewImageData to (aRawimg’s representationUsingType:(NSJPEGFileType) |properties|:{NSImageCompressionFactor:qulityNum})
  
set aLength to (myNewImageData’s |length|()) as number
  
return aLength
end calcSavedJPEGSizeFromNSIMage

★Click Here to Open This Script 

Posted in file Image list UTI | Tagged 10.11savvy 10.12savvy 10.13savvy 10.14savvy Finder NSArray NSBitmapImageRep NSImage NSPredicate NSString NSURL NSURLTypeIdentifierKey NSUUID | Leave a comment

Finder上で選択中の画像のうち、最小のものに合わせて各画像の右上を基準にサイズ統一

Posted on 1月 26, 2019 by Takaaki Naganoya

Finderで選択中の画像のうち、最小のものに合わせて各画像の右上を原点にサイズを統一するAppleScriptです。

Finderで選択中のファイルから画像のみ抽出し、そのうちサイズが最小のものに合わせて他の画像をトリミングし、変更したものをデスクトップフォルダに出力します。

以前に画像の左上を基準に自動トリミングするバージョンのScriptを作成しましたが、あれはメニュー操作の説明用スクリーンショットの大きさを統一するためのもの。右上基準の本バージョンは、Driveのリネームやステータスバーの操作内容を説明するためのスクリーンショットの大きさ統一のために用意したものです。


▲大きさを揃える画像をFinder上で選択


▲処理後の画像。大きさが最小の画像に合わせてそろっている。切り抜き基準は右上

スクリーンショット画像を複数撮った場合に、厳密に同じサイズに固定することは(各種スクリーンショット作成ユーティリティを使わないと)行いづらいところです。

そこで、最小の画像を計算で求めて、それに合わせて自動トリミングするようにしてみました。Cocoaの機能を用いて画像処理しているため、Photoshopは必要ありません。

最小の画像を求めるのに、幅+高さの値でソートして最小のものを求めています(widthとheightによる2 key sortではなく1 Keyで済ませたかったので)。

AppleScript名:Finder上で選択中の画像のうち、最小のものに合わせて各画像の右上を基準にサイズ統一
— Created 2018-01-26 by Takaaki Naganoya
— 2019 Piyomaru Software
use AppleScript version "2.5"
use scripting additions
use framework "Foundation"
use framework "AppKit"
use framework "QuartzCore"

property |NSURL| : a reference to current application’s |NSURL|
property NSUUID : a reference to current application’s NSUUID
property NSArray : a reference to current application’s NSArray
property NSString : a reference to current application’s NSString
property NSImage : a reference to current application’s NSImage
property NSScreen : a reference to current application’s NSScreen
property NSZeroRect : a reference to current application’s NSZeroRect
property NSPredicate : a reference to current application’s NSPredicate
property NSPNGFileType : a reference to current application’s NSPNGFileType
property NSMutableArray : a reference to current application’s NSMutableArray
property NSCompositeCopy : a reference to current application’s NSCompositeCopy
property NSGraphicsContext : a reference to current application’s NSGraphicsContext
property NSBitmapImageRep : a reference to current application’s NSBitmapImageRep
property NSURLTypeIdentifierKey : a reference to current application’s NSURLTypeIdentifierKey
property NSCalibratedRGBColorSpace : a reference to current application’s NSCalibratedRGBColorSpace

tell application "Finder"
  set selList to selection as alias list
end tell

–指定のAlias listのうち画像のみ抽出
set filRes1 to filterAliasListByUTI(selList, "public.image") of me
if filRes1 = {} then
  tell current application
    –Error Message (No Selection)
    
display dialog "Finder上で選択されているファイルはありません。" buttons {"OK"} default button 1 with icon 1 with title "画像リサイズ処理できません"
  end tell
  
return
end if

–各種情報を入れたArrayを作成
set anArray to NSMutableArray’s new()
repeat with i in selList
  set imgPath to (POSIX path of i)
  
  
set aImage to makeNSImageFromFile(i) of me
  
set sizeInfo to |size|() of aImage
  
set sizeInfo to sizeInfo & {aImg:aImage, total:(width of sizeInfo) + (height of sizeInfo), myPath:imgPath}
  (
anArray’s addObject:sizeInfo)
end repeat

–最小のサイズの画像の算出
set aRes to anArray’s valueForKeyPath:("@min.total")
set bRes to first item of (filterRecListByLabel(anArray, "total == " & aRes as string) of me) –最小サイズの画像

–最小サイズ画像のwidthとheight
set minWidth to bRes’s width
set minHeight to bRes’s height

–環境情報の取得
set aPath to POSIX path of (path to desktop)
set retinaF to (NSScreen’s mainScreen()’s backingScaleFactor()) as real
–>  2.0 (Retina) / 1.0 (Non Retina)

set cRes to filterRecListByLabel(anArray, "total != " & aRes as string) of me –最小サイズ以外の画像

repeat with i in cRes
  set j to contents of i
  
set anImage to aImg of j
  
set fRes to myPath of j
  
  
set tmpSize to |size|() of anImage
  
set tmpWidth to (width of tmpSize)
  
set tmpHeight to (height of tmpSize)
  
  
set cropedImage to (my cropNSImageBy:{(tmpWidth – minWidth), 0, minWidth, minHeight} fromImage:anImage)
  
  
–Retina環境対策
  
if retinaF > 1.0 then
    set cropedImage to (my resizedImage:cropedImage toScale:(1.0))
  end if
  
  
–ファイル書き込み
  
set fRes to retUUIDfilePathFromDir(aPath, "png") of me
  
set sRes to saveNSImageAtPathAsPNG(cropedImage, fRes) of me
end repeat

–リストに入れたレコードを、指定の属性ラベルの値で抽出
on filterRecListByLabel(aRecList as list, aPredicate as string)
  –ListからNSArrayへの型変換
  
set aArray to NSArray’s arrayWithArray:aRecList
  
  
–抽出
  
set aPredicate to NSPredicate’s predicateWithFormat:aPredicate
  
set filteredArray to aArray’s filteredArrayUsingPredicate:aPredicate
  
  
–NSArrayからListに型変換して返す
  
set bList to filteredArray as list
  
return bList
end filterRecListByLabel

–Alias listから指定UTIに含まれるものをPOSIX pathのリストで返す
on filterAliasListByUTI(aList, targUTI)
  set newList to {}
  
repeat with i in aList
    set j to POSIX path of i
    
set tmpUTI to my retUTIfromPath(j)
    
set utiRes to my filterUTIList({tmpUTI}, targUTI)
    
if utiRes is not equal to {} then
      set the end of newList to j
    end if
  end repeat
  
return newList
end filterAliasListByUTI

–指定のPOSIX pathのファイルのUTIを求める
on retUTIfromPath(aPOSIXPath)
  set aURL to |NSURL|’s fileURLWithPath:aPOSIXPath
  
set {theResult, theValue} to aURL’s getResourceValue:(reference) forKey:NSURLTypeIdentifierKey |error|:(missing value)
  
  
if theResult = true then
    return theValue as string
  else
    return theResult
  end if
end retUTIfromPath

–UTIリストが指定UTIに含まれているかどうか演算を行う
on filterUTIList(aUTIList, aUTIstr)
  set anArray to NSArray’s arrayWithArray:aUTIList
  
set aPred to NSPredicate’s predicateWithFormat_("SELF UTI-CONFORMS-TO %@", aUTIstr)
  
set bRes to (anArray’s filteredArrayUsingPredicate:aPred) as list
  
return bRes
end filterUTIList

on cropNSImageTo:{x1, y1, x2, y2} fromImage:theImage
  set newWidth to x2 – x1
  
set newHeight to y2 – y1
  
set theSize to (theImage’s |size|()) as record
  
set oldHeight to height of theSize
  
  
— transpose y value for Cocoa coordintates
  
set y1 to oldHeight – newHeight – y1
  
set newRect to {{x:x1, y:y1}, {width:newWidth, height:newHeight}}
  
theImage’s lockFocus()
  
set theRep to NSBitmapImageRep’s alloc()’s initWithFocusedViewRect:newRect
  
theImage’s unlockFocus()
  
  
set outImage to NSImage’s alloc()’s initWithSize:(theRep’s |size|())
  
outImage’s addRepresentation:theRep
  
  
return outImage
end cropNSImageTo:fromImage:

on makeNSImageFromFile(anAlias)
  set imgPath to (POSIX path of anAlias)
  
set aURL to (|NSURL|’s fileURLWithPath:(imgPath))
  
return (NSImage’s alloc()’s initWithContentsOfURL:aURL)
end makeNSImageFromFile

–NSImageを指定の大きさでトリミング
on cropNSImageBy:{x1, y1, newWidth, newHeight} fromImage:theImage
  set theSize to (theImage’s |size|()) as record
  
set oldHeight to height of theSize
  
  
— transpose y value for Cocoa coordintates
  
set y1 to oldHeight – newHeight – y1
  
set newRect to {{x:x1, y:y1}, {width:newWidth, height:newHeight}}
  
theImage’s lockFocus()
  
set theRep to NSBitmapImageRep’s alloc()’s initWithFocusedViewRect:newRect
  
theImage’s unlockFocus()
  
  
set outImage to NSImage’s alloc()’s initWithSize:(theRep’s |size|())
  
outImage’s addRepresentation:theRep
  
  
return outImage
end cropNSImageBy:fromImage:

on retUUIDfilePathFromDir(aPath, aEXT)
  set aUUIDstr to (NSUUID’s UUID()’s UUIDString()) as string
  
set aPath to ((NSString’s stringWithString:aPath)’s stringByAppendingPathComponent:aUUIDstr)’s stringByAppendingPathExtension:aEXT
  
return aPath
end retUUIDfilePathFromDir

–NSImageを指定パスにPNG形式で保存
on saveNSImageAtPathAsPNG(anImage, outPath)
  set imageRep to anImage’s TIFFRepresentation()
  
set aRawimg to NSBitmapImageRep’s imageRepWithData:imageRep
  
set pathString to NSString’s stringWithString:outPath
  
set newPath to pathString’s stringByExpandingTildeInPath()
  
set myNewImageData to (aRawimg’s representationUsingType:(NSPNGFileType) |properties|:(missing value))
  
set aRes to (myNewImageData’s writeToFile:newPath atomically:true) as boolean
  
return aRes –true/false
end saveNSImageAtPathAsPNG

on resizedImage:aSourceImg toScale:imgScale
  if (aSourceImg’s isValid()) as boolean = false then error "Invalid NSImage"
  
  
set aSize to aSourceImg’s |size|()
  
–>  {​​​​​width:32.0, ​​​​​height:32.0​​​}
  
  
set aWidth to (aSize’s width) * imgScale
  
set aHeight to (aSize’s height) * imgScale
  
  
set aRep to NSBitmapImageRep’s alloc()’s initWithBitmapDataPlanes:(missing value) pixelsWide:aWidth pixelsHigh:aHeight bitsPerSample:8 samplesPerPixel:4 hasAlpha:true isPlanar:false colorSpaceName:(NSCalibratedRGBColorSpace) bytesPerRow:0 bitsPerPixel:0
  
  
set newSize to {width:aWidth, height:aHeight}
  
aRep’s setSize:newSize
  
  
NSGraphicsContext’s saveGraphicsState()
  
NSGraphicsContext’s setCurrentContext:(NSGraphicsContext’s graphicsContextWithBitmapImageRep:aRep)
  
  
aSourceImg’s drawInRect:(current application’s NSMakeRect(0, 0, aWidth, aHeight)) fromRect:(NSZeroRect) operation:(NSCompositeCopy) fraction:(1.0)
  
  
NSGraphicsContext’s restoreGraphicsState()
  
  
set newImg to NSImage’s alloc()’s initWithSize:newSize
  
newImg’s addRepresentation:aRep
  
  
return newImg
end resizedImage:toScale:

★Click Here to Open This Script 

Posted in file Image | Tagged 10.11savvy 10.12savvy 10.13savvy NSArray NSBitmapImageRep NSImage NSPredicate NSScreen NSString NSURL NSUUID | Leave a comment

指定画像の指定座標の色情報をRGBで取得

Posted on 11月 15, 2018 by Takaaki Naganoya

指定画像の指定座標のピクセルの色を8ビットRGB値で返すAppleScriptです。

使用する座標系は左上が{0,0}です。

AppleScript名:指定画像の指定座標の色情報をRGBで取得.scptd
—
–  Created by: Takaaki Naganoya
–  Created on: 2018/11/15
—
–  Copyright © 2018 Piyomaru Software, All Rights Reserved
—
use AppleScript version "2.4" — Yosemite (10.10) or later
use framework "Cocoa" –Foundation + AppKit
use scripting additions

property NSImage : a reference to current application’s NSImage
property NSBitmapImageRep : a reference to current application’s NSBitmapImageRep

set aFile to POSIX path of (choose file of type {"public.image"})
set {xNum, yNum} to {0, 0}

set cRes to getColorRGBNumFromImageByPosition(aFile, xNum, yNum) of me
–> {255, 0, 0}

on getColorRGBNumFromImageByPosition(aFilePath, xPos as integer, yPos as integer)
  set anNSImage to NSImage’s alloc()’s initWithContentsOfFile:aFilePath
  
set aRawimg to NSBitmapImageRep’s imageRepWithData:(anNSImage’s TIFFRepresentation())
  
  
set aColor to (aRawimg’s colorAtX:xPos y:yPos)
  
set aRed to (aColor’s redComponent()) * 255
  
set aGreen to (aColor’s greenComponent()) * 255
  
set aBlue to (aColor’s blueComponent()) * 255
  
  
return {aRed as integer, aGreen as integer, aBlue as integer}
end getColorRGBNumFromImageByPosition

★Click Here to Open This Script 

Posted in Color Image list | Tagged 10.11savvy 10.12savvy 10.13savvy 10.14savvy NSBitmapImageRep NSImage | Leave a comment

Finder上で選択中の画像のうち、最小のものに合わせて各画像の左上を原点にサイズ統一

Posted on 7月 27, 2018 by Takaaki Naganoya

Finderで選択中の画像のうち、最小のものに合わせて各画像の左上を原点にサイズを統一するAppleScriptです。

Finderで選択中のファイルから画像のみ抽出し、そのうちサイズが最小のものに合わせて他の画像をトリミングし、変更したものをデスクトップフォルダに出力します。


▲大きさを揃える画像をFinder上で選択


▲処理前の画像。大きさがまちまち


▲処理後の画像。大きさが最小の画像に合わせてそろっている

スクリーンショット画像を複数撮った場合に、厳密に同じサイズに固定することは(各種スクリーンショット作成ユーティリティを使わないと)行いづらいところです。

そこで、最小の画像を計算で求めて、それに合わせて自動トリミングするようにしてみました。Cocoaの機能を用いて画像処理しているため、Photoshopは必要ありません。

最小の画像を求めるのに、幅+高さの値でソートして最小のものを求めています(widthとheightによる2 key sortではなく1 Keyで済ませたかったので)。

Blogや書籍用の掲載画面図の作成用、といったところでしょうか。Retina画面で撮ったスクリーンショットと非Retina画面のスクリーンショットが混在するとうまく動きません(スクリーンショット画像からはRetina環境で撮った画像であるかどうかを取得できません)。

スクリーンショットの画像からRetina/非Retina環境で撮ったかを判定するのは、(Retina対応機であるかをMachine IDから取得したあとで)Syslogにアクセスしてスクリーンが接続されたか、取り外されたかといった状態を追っていくしかないのかも。

本ScriptをmacOS 10.13.6上で動作確認して驚いたのですが、いままでRecordが返ってくるべき箇所でlistが返ってくる盛大なバグが直って、本ScriptがmacOS 10.13用に書き換えずに動きました(動かないことを確認しようとして動いたので驚いた)。

AppleScript名:Finder上で選択中の画像のうち、最小のものに合わせて各画像の左上を原点にサイズ統一 v2
— Created 2018-07-23 by Takaaki Naganoya
— 2018 Piyomaru Software
use AppleScript version "2.5"
use scripting additions
use framework "Foundation"
use framework "AppKit"
use framework "QuartzCore"

property |NSURL| : a reference to current application’s |NSURL|
property NSUUID : a reference to current application’s NSUUID
property NSArray : a reference to current application’s NSArray
property NSString : a reference to current application’s NSString
property NSImage : a reference to current application’s NSImage
property NSScreen : a reference to current application’s NSScreen
property NSZeroRect : a reference to current application’s NSZeroRect
property NSPredicate : a reference to current application’s NSPredicate
property NSPNGFileType : a reference to current application’s NSPNGFileType
property NSMutableArray : a reference to current application’s NSMutableArray
property NSCompositeCopy : a reference to current application’s NSCompositeCopy
property NSGraphicsContext : a reference to current application’s NSGraphicsContext
property NSBitmapImageRep : a reference to current application’s NSBitmapImageRep
property NSURLTypeIdentifierKey : a reference to current application’s NSURLTypeIdentifierKey
property NSCalibratedRGBColorSpace : a reference to current application’s NSCalibratedRGBColorSpace

tell application "Finder"
  set selList to selection as alias list
end tell

–指定のAlias listのうち画像のみ抽出
set filRes1 to filterAliasListByUTI(selList, "public.image") of me
if filRes1 = {} then
  tell current application
    –Error Message (No Selection)
    
display dialog "Finder上で選択されているファイルはありません。" buttons {"OK"} default button 1 with icon 1 with title "画像リサイズ処理できません"
  end tell
  
return
end if

–各種情報を入れたArrayを作成
set anArray to NSMutableArray’s new()
repeat with i in selList
  set imgPath to (POSIX path of i)
  
  
set aImage to makeNSImageFromFile(i) of me
  
set sizeInfo to |size|() of aImage
  
set sizeInfo to sizeInfo & {aImg:aImage, total:(width of sizeInfo) + (height of sizeInfo), myPath:imgPath}
  (
anArray’s addObject:sizeInfo)
end repeat

–最小のサイズの画像の算出
set aRes to anArray’s valueForKeyPath:("@min.total")
set bRes to first item of (filterRecListByLabel(anArray, "total == " & aRes as string) of me) –最小サイズの画像

–最小サイズ画像のwidthとheight
set minWidth to bRes’s width
set minHeight to bRes’s height

–環境情報の取得
set aPath to POSIX path of (path to desktop)
set retinaF to (NSScreen’s mainScreen()’s backingScaleFactor()) as real
–>  2.0 (Retina) / 1.0 (Non Retina)

set cRes to filterRecListByLabel(anArray, "total != " & aRes as string) of me –最小サイズ以外の画像

repeat with i in cRes
  set j to contents of i
  
set anImage to aImg of j
  
set fRes to myPath of j
  
  
set cropedImage to (my cropNSImageBy:{0, 0, minWidth, minHeight} fromImage:anImage) –v1で間違っていた
  
  
–Retina環境対策
  
if retinaF > 1.0 then
    set cropedImage to (my resizedImage:cropedImage toScale:(1.0))
  end if
  
  
–ファイル書き込み
  
set fRes to retUUIDfilePathFromDir(aPath, "png") of me
  
set sRes to saveNSImageAtPathAsPNG(cropedImage, fRes) of me
end repeat

–リストに入れたレコードを、指定の属性ラベルの値で抽出
on filterRecListByLabel(aRecList as list, aPredicate as string)
  –ListからNSArrayへの型変換
  
set aArray to NSArray’s arrayWithArray:aRecList
  
  
–抽出
  
set aPredicate to NSPredicate’s predicateWithFormat:aPredicate
  
set filteredArray to aArray’s filteredArrayUsingPredicate:aPredicate
  
  
–NSArrayからListに型変換して返す
  
set bList to filteredArray as list
  
return bList
end filterRecListByLabel

–Alias listから指定UTIに含まれるものをPOSIX pathのリストで返す
on filterAliasListByUTI(aList, targUTI)
  set newList to {}
  
repeat with i in aList
    set j to POSIX path of i
    
set tmpUTI to my retUTIfromPath(j)
    
set utiRes to my filterUTIList({tmpUTI}, targUTI)
    
if utiRes is not equal to {} then
      set the end of newList to j
    end if
  end repeat
  
return newList
end filterAliasListByUTI

–指定のPOSIX pathのファイルのUTIを求める
on retUTIfromPath(aPOSIXPath)
  set aURL to |NSURL|’s fileURLWithPath:aPOSIXPath
  
set {theResult, theValue} to aURL’s getResourceValue:(reference) forKey:NSURLTypeIdentifierKey |error|:(missing value)
  
  
if theResult = true then
    return theValue as string
  else
    return theResult
  end if
end retUTIfromPath

–UTIリストが指定UTIに含まれているかどうか演算を行う
on filterUTIList(aUTIList, aUTIstr)
  set anArray to NSArray’s arrayWithArray:aUTIList
  
set aPred to NSPredicate’s predicateWithFormat_("SELF UTI-CONFORMS-TO %@", aUTIstr)
  
set bRes to (anArray’s filteredArrayUsingPredicate:aPred) as list
  
return bRes
end filterUTIList

on cropNSImageTo:{x1, y1, x2, y2} fromImage:theImage
  set newWidth to x2 – x1
  
set newHeight to y2 – y1
  
set theSize to (theImage’s |size|()) as record
  
set oldHeight to height of theSize
  
  
— transpose y value for Cocoa coordintates
  
set y1 to oldHeight – newHeight – y1
  
set newRect to {{x:x1, y:y1}, {width:newWidth, height:newHeight}}
  
theImage’s lockFocus()
  
set theRep to NSBitmapImageRep’s alloc()’s initWithFocusedViewRect:newRect
  
theImage’s unlockFocus()
  
  
set outImage to NSImage’s alloc()’s initWithSize:(theRep’s |size|())
  
outImage’s addRepresentation:theRep
  
  
return outImage
end cropNSImageTo:fromImage:

on makeNSImageFromFile(anAlias)
  set imgPath to (POSIX path of anAlias)
  
set aURL to (|NSURL|’s fileURLWithPath:(imgPath))
  
return (NSImage’s alloc()’s initWithContentsOfURL:aURL)
end makeNSImageFromFile

–NSImageを指定の大きさでトリミング
on cropNSImageBy:{x1, y1, newWidth, newHeight} fromImage:theImage
  set theSize to (theImage’s |size|()) as record
  
set oldHeight to height of theSize
  
  
— transpose y value for Cocoa coordintates
  
set y1 to oldHeight – newHeight – y1
  
set newRect to {{x:x1, y:y1}, {width:newWidth, height:newHeight}}
  
theImage’s lockFocus()
  
set theRep to NSBitmapImageRep’s alloc()’s initWithFocusedViewRect:newRect
  
theImage’s unlockFocus()
  
  
set outImage to NSImage’s alloc()’s initWithSize:(theRep’s |size|())
  
outImage’s addRepresentation:theRep
  
  
return outImage
end cropNSImageBy:fromImage:

on retUUIDfilePathFromDir(aPath, aEXT)
  set aUUIDstr to (NSUUID’s UUID()’s UUIDString()) as string
  
set aPath to ((NSString’s stringWithString:aPath)’s stringByAppendingPathComponent:aUUIDstr)’s stringByAppendingPathExtension:aEXT
  
return aPath
end retUUIDfilePathFromDir

–NSImageを指定パスにPNG形式で保存
on saveNSImageAtPathAsPNG(anImage, outPath)
  set imageRep to anImage’s TIFFRepresentation()
  
set aRawimg to NSBitmapImageRep’s imageRepWithData:imageRep
  
set pathString to NSString’s stringWithString:outPath
  
set newPath to pathString’s stringByExpandingTildeInPath()
  
set myNewImageData to (aRawimg’s representationUsingType:(NSPNGFileType) |properties|:(missing value))
  
set aRes to (myNewImageData’s writeToFile:newPath atomically:true) as boolean
  
return aRes –true/false
end saveNSImageAtPathAsPNG

on resizedImage:aSourceImg toScale:imgScale
  if (aSourceImg’s isValid()) as boolean = false then error "Invalid NSImage"
  
  
set aSize to aSourceImg’s |size|()
  
–>  {​​​​​width:32.0, ​​​​​height:32.0​​​}
  
  
set aWidth to (aSize’s width) * imgScale
  
set aHeight to (aSize’s height) * imgScale
  
  
set aRep to NSBitmapImageRep’s alloc()’s initWithBitmapDataPlanes:(missing value) pixelsWide:aWidth pixelsHigh:aHeight bitsPerSample:8 samplesPerPixel:4 hasAlpha:true isPlanar:false colorSpaceName:(NSCalibratedRGBColorSpace) bytesPerRow:0 bitsPerPixel:0
  
  
set newSize to {width:aWidth, height:aHeight}
  
aRep’s setSize:newSize
  
  
NSGraphicsContext’s saveGraphicsState()
  
NSGraphicsContext’s setCurrentContext:(NSGraphicsContext’s graphicsContextWithBitmapImageRep:aRep)
  
  
aSourceImg’s drawInRect:(current application’s NSMakeRect(0, 0, aWidth, aHeight)) fromRect:(NSZeroRect) operation:(NSCompositeCopy) fraction:(1.0)
  
  
NSGraphicsContext’s restoreGraphicsState()
  
  
set newImg to NSImage’s alloc()’s initWithSize:newSize
  
newImg’s addRepresentation:aRep
  
  
return newImg
end resizedImage:toScale:

★Click Here to Open This Script 

Posted in file Image | Tagged 10.11savvy 10.12savvy 10.13savvy Finder NSArray NSBitmapImageRep NSImage NSMutableArray NSPredicate NSScreen NSString NSURL NSUUID | 1 Comment

色付き単色画像を作成する(自由色指定&色名推定)

Posted on 7月 17, 2018 by Takaaki Naganoya

指定画像を任意の色で単色化し、指定色名をファイル名に反映させてファイル出力するAppleScriptです。

もとは、「色付き単色画像を作成する」AppleScriptに、

 ・choose colorによるユーザー選択色を反映
 ・choose colorで指定した色のざっくりとした色名検出

などの機能をつなぎ合わせたものです。

日本地図の白地図からカラーバリエーション画像を出力する際に作成しました。線が黒で書かれている白地図(白地図というのはそういうものですが)から、さまざまな色のバリエーションを作成。その際に、どのような色を指定したかをファイル名に反映させておいたほうが便利だったので、そのようにしてみました。

GPUImage.frameworkを利用しています。

–> GPUImage.framework (To ~/Library/Frameworks/)

色名推定のロジックもけっこうしっくりきていますが、明度も反映して、明るいものは「light-」、暗いものは「dark-」と出力させてもいいような気がします。ただし、「dark-orange」はBrownのことですし、ほかにも色名を別途振り直したほうがいいパターンもあるように思われます。

AppleScript名:色付き単色画像を作成する(自由色指定&色名推定)
— Created 2017-02-11 by Takaaki Naganoya
— Modified 2018-07-15 by Takaaki Naganoya
— 2017-2018 Piyomaru Software
use AppleScript version "2.4"
use scripting additions
use framework "Foundation"
use framework "AppKit"
use framework "GPUImage" –https://github.com/BradLarson/GPUImage

property NSUUID : a reference to current application’s NSUUID
property NSColor : a reference to current application’s NSColor
property NSString : a reference to current application’s NSString
property NSImage : a reference to current application’s NSImage
property NSBezierPath : a reference to current application’s NSBezierPath
property NSPNGFileType : a reference to current application’s NSPNGFileType
property GPUImagePicture : a reference to current application’s GPUImagePicture
property NSBitmapImageRep : a reference to current application’s NSBitmapImageRep

–Select Image File
set aFile to POSIX path of (choose file of type {"public.image"} with prompt "Select image")

–Select Color
set {rCol, gCol, bCol} to choose color

set fillColorR to makeNSColorFromRGBAval(rCol, gCol, bCol, 65535, 65535) of me
set fillColorRName to retColorDomainNameFromNSColor(fillColorR) of me –だいたいの色名称を計算

set imgRes to makeMonoColoredImage(aFile, fillColorR) of me
set fRes to retUUIDandKeyfilePath(aFile, fillColorRName, "png") of me
set bRes to saveNSImageAtPathAsPNG(imgRes, fRes) of me

— return "UUID_aKey.aEXT" full path
on retUUIDandKeyfilePath(aPath, aKey, aEXT)
  set aUUIDstr to ((NSUUID’s UUID()’s UUIDString()) as string) & "_" & aKey
  
set aPath to ((NSString’s stringWithString:aPath)’s stringByDeletingLastPathComponent()’s stringByAppendingPathComponent:aUUIDstr)’s stringByAppendingPathExtension:aEXT
  
return aPath
end retUUIDandKeyfilePath

on makeMonoColoredImage(aFile, NScolorObj)
  set aImage to NSImage’s alloc()’s initWithContentsOfFile:aFile
  
return makeColoredNSImageWithColor(aImage, NScolorObj) of me –色付き単色画像を作成する
end makeMonoColoredImage

on makeColoredNSImageWithColor(aImage, fillColor)
  set aSize to aImage’s |size|()
  
set aWidth to width of aSize
  
set aHeight to height of aSize
  
set newNSImage to makeNSImageWithFilledWithColor(aWidth, aHeight, fillColor)
  
set grayImage to filterWithNSImage(aImage, "GPUImageGrayscaleFilter") of me
  
set compImage to composeImageWithBlendFilter(grayImage, newNSImage, "GPUImageScreenBlendFilter") of me
  
return compImage
end makeColoredNSImageWithColor

on filterWithNSImage(aNSImage, filterName as string)
  set aClass to current application’s NSClassFromString(filterName)
  
set aImageFilter to aClass’s alloc()’s init()
  
set aProcImg to (aImageFilter’s imageByFilteringImage:aNSImage)
  
return aProcImg
end filterWithNSImage

on composeImageWithBlendFilter(aImage, bImage, filterName)
  set aClass to current application’s NSClassFromString(filterName)
  
set blendFilter to aClass’s alloc()’s init()
  
set pictureA to GPUImagePicture’s alloc()’s initWithImage:aImage
  
pictureA’s addTarget:blendFilter
  
pictureA’s processImage()
  
set imgRes to blendFilter’s imageByFilteringImage:bImage
  
return imgRes
end composeImageWithBlendFilter

–指定サイズの画像を作成し、指定色で塗ってNSImageで返す
on makeNSImageWithFilledWithColor(aWidth, aHeight, fillColor)
  –Imageの作成  
  
set curSize to current application’s NSMakeSize(aWidth, aHeight)
  
set anImage to NSImage’s alloc()’s initWithSize:curSize
  
  
anImage’s lockFocus() –描画開始
  
  
set theRect to {{x:0, y:0}, {height:aHeight, width:aWidth}}
  
set theNSBezierPath to NSBezierPath’s bezierPath
  
theNSBezierPath’s appendBezierPathWithRect:theRect
  
  
fillColor’s |set|() –色設定
  
theNSBezierPath’s fill() –ぬりつぶし
  
  
anImage’s unlockFocus() –描画ここまで
  
  
–生成した画像のRaw画像を作成
  
set imageRep to anImage’s TIFFRepresentation()
  
set aRawimg to NSBitmapImageRep’s imageRepWithData:imageRep
  
  
set newImg to NSImage’s alloc()’s initWithSize:curSize
  
newImg’s addRepresentation:aRawimg
  
return newImg
end makeNSImageWithFilledWithColor

–NSImageを指定パスにPNG形式で保存
on saveNSImageAtPathAsPNG(anImage, outPath)
  set imageRep to anImage’s TIFFRepresentation()
  
set aRawimg to NSBitmapImageRep’s imageRepWithData:imageRep
  
set pathString to NSString’s stringWithString:outPath
  
set newPath to pathString’s stringByExpandingTildeInPath()
  
set myNewImageData to (aRawimg’s representationUsingType:(NSPNGFileType) |properties|:(missing value))
  
set aRes to (myNewImageData’s writeToFile:newPath atomically:true) as boolean
  
return aRes –true/false
end saveNSImageAtPathAsPNG

–NSColor(内容はRGBAカラー)からだいたいの色名を推測
on retColorDomainNameFromNSColor(aCol)
  set hueVal to aCol’s hueComponent()
  
set satVal to aCol’s saturationComponent()
  
set brightVal to aCol’s brightnessComponent()
  
  
if satVal ≤ 0.01 then set satVal to 0.0
  
  
set colName to ""
  
  
if satVal = 0.0 then
    if brightVal ≤ 0.2 then
      set colName to "black"
    else if (brightVal > 0.95) then
      set colName to "white"
    else
      set colName to "gray"
    end if
  else
    if hueVal ≤ (15.0 / 360) or hueVal ≥ (330 / 360) then
      set colName to "red"
    else if hueVal ≤ (45.0 / 360) then
      set colName to "orange"
    else if hueVal < (70.0 / 360) then
      set colName to "yellow"
    else if hueVal < (150.0 / 360) then
      set colName to "green"
    else if hueVal < (190.0 / 360) then
      set colName to "green(cyan)"
    else if (hueVal < 250.0 / 360.0) then
      set colName to "blue"
    else if (hueVal < 290.0 / 360.0) then
      set colName to "purple"
    else
      set colName to "red(magenta)"
    end if
  end if
  
  
return colName
end retColorDomainNameFromNSColor

on makeNSColorFromRGBAval(redValue as integer, greenValue as integer, blueValue as integer, alphaValue as integer, aMaxVal as integer)
  set aRedCocoa to (redValue / aMaxVal) as real
  
set aGreenCocoa to (greenValue / aMaxVal) as real
  
set aBlueCocoa to (blueValue / aMaxVal) as real
  
set aAlphaCocoa to (alphaValue / aMaxVal) as real
  
set aColor to NSColor’s colorWithCalibratedRed:aRedCocoa green:aGreenCocoa blue:aBlueCocoa alpha:aAlphaCocoa
  
return aColor
end makeNSColorFromRGBAval

★Click Here to Open This Script 

Posted in Color file Image | Tagged 10.11savvy 10.12savvy 10.13savvy NSBezierPath NSBitmapImageRep NSColor NSImage NSString NSUUID | Leave a comment

Skimで現在表示中のPDFのページをJPEG画像で書き出す

Posted on 6月 30, 2018 by Takaaki Naganoya

オープンソースのPDFビューワー「Skim」で現在表示中のPDFの現在表示中のページをJPEG画像で書き出すAppleScriptです。

macOS標準装備のPreview.appはつい最近AppleScriptからの制御が公式に行えるようになった程度で、対応度も最低限です。Skimであれば、こうした「現在オープン中のPDFの表示中のページ」の番号を取得することもできます。

macOS標準装備のScript Menuから呼び出して利用することを前提に作成してあります。

Skimでオープン中の最前面のPDFと同じフォルダに、元ファイル名に対してページの数値をゼロパディングして追加したものをJPEG画像のファイル名に指定しています。ファイル名の重複回避などは行っていません。

ただし、Skimで表示モードが「単一」(1ページ分のみビューワーに表示)以外になっていると、カレントページ(現在表示中のページ)が画面上とアプリケーション側で管理しているものがズレることがあるので、表示モードを「単一」に切り替えてから「このページでよいか?」といった確認をユーザーに対して行うとよいかもしれません。

AppleScript名:Skimで現在表示中のPDFのページをJPEG画像で書き出す
— Created 2018-06-30 by Takaaki Naganoya
— 2018 Piyomaru Software
use AppleScript version "2.4"
use scripting additions
use framework "Foundation"
use framework "Quartz"
use framework "AppKit"

property |NSURL| : a reference to current application’s |NSURL|
property NSString : a reference to current application’s NSString
property NSImage : a reference to current application’s NSImage
property NSScreen : a reference to current application’s NSScreen
property NSNumber : a reference to current application’s NSNumber
property NSZeroPoint : a reference to current application’s NSZeroPoint
property PDFDocument : a reference to current application’s PDFDocument
property NSJPEGFileType : a reference to current application’s NSJPEGFileType
property NSCompositeCopy : a reference to current application’s NSCompositeCopy
property NSGraphicsContext : a reference to current application’s NSGraphicsContext
property NSBitmapImageRep : a reference to current application’s NSBitmapImageRep
property NSNumberFormatter : a reference to current application’s NSNumberFormatter
property NSImageInterpolationHigh : a reference to current application’s NSImageInterpolationHigh

tell application "Skim"
  set docCount to count every document
  
if docCount = 0 then return
  
  
tell front document
    set curInd to index of current page
    
set docFile to file of it
  end tell
end tell

set aPOSIX to POSIX path of docFile
set aURL to (|NSURL|’s fileURLWithPath:aPOSIX)

set aPDFdoc to PDFDocument’s alloc()’s initWithURL:aURL
set pCount to aPDFdoc’s pageCount()

set compFactor to 1.0 –1.0 — 0.0 = max jpeg compression, 1.0 = none

–Detect Retina Environment
set retinaF to NSScreen’s mainScreen()’s backingScaleFactor()
if retinaF = 1.0 then
  set aScale to 2.0 –Non Retina Env
else
  set aScale to 1.0 –Retina Env
end if

–PDFをページごとに分割してJPEGでファイル書き出し
set i to (curInd – 1) –AppleScript index (1 based) to Cocoa index (0 based) conversion

–Pick Up a PDF page as an image
set thisPage to (aPDFdoc’s pageAtIndex:(i))
set thisDoc to (NSImage’s alloc()’s initWithData:(thisPage’s dataRepresentation()))
if thisDoc = missing value then error "Error in getting imagerep from PDF in page:" & (i as string)

–Resize Image
set pointSize to thisDoc’s |size|()
set newSize to current application’s NSMakeSize((pointSize’s width) * aScale, (pointSize’s height) * aScale)
set newImage to (NSImage’s alloc()’s initWithSize:newSize)

newImage’s lockFocus()
(
thisDoc’s setSize:newSize)
(
NSGraphicsContext’s currentContext()’s setImageInterpolation:(NSImageInterpolationHigh))
(
thisDoc’s drawAtPoint:(NSZeroPoint) fromRect:(current application’s CGRectMake(0, 0, newSize’s width, newSize’s height)) operation:(NSCompositeCopy) fraction:2.0)
newImage’s unlockFocus()

–Save Image as JPEG
set theData to newImage’s TIFFRepresentation()
set newRep to (NSBitmapImageRep’s imageRepWithData:theData)
set targData to (newRep’s representationUsingType:(NSJPEGFileType) |properties|:{NSImageCompressionFactor:compFactor, NSImageProgressive:false})
set zText to retZeroPaddingText((i + 1), 4) of me
set outPath to addString_beforeExtensionIn_addingExtension_("_" & zText, aPOSIX, "jpg")

(targData’s writeToFile:outPath atomically:true) –書き出し

–ファイルパス(POSIX path)に対して、文字列(枝番)を追加。任意の拡張子を追加
on addString:extraString beforeExtensionIn:aPath addingExtension:aExt
  set pathString to NSString’s stringWithString:aPath
  
set theExtension to pathString’s pathExtension()
  
set thePathNoExt to pathString’s stringByDeletingPathExtension()
  
  
set newPath to (thePathNoExt’s stringByAppendingString:extraString)’s stringByAppendingPathExtension:aExt
  
return newPath as string
end addString:beforeExtensionIn:addingExtension:

on retZeroPaddingText(aNum as integer, aDigitNum as integer)
  if aNum > (((10 ^ aDigitNum) as integer) – 1) then return "" –Range Check
  
set aFormatter to NSNumberFormatter’s alloc()’s init()
  
aFormatter’s setUsesGroupingSeparator:false
  
aFormatter’s setAllowsFloats:false
  
aFormatter’s setMaximumIntegerDigits:aDigitNum
  
aFormatter’s setMinimumIntegerDigits:aDigitNum
  
aFormatter’s setPaddingCharacter:"0"
  
set aStr to aFormatter’s stringFromNumber:(NSNumber’s numberWithFloat:aNum)
  
return aStr as string
end retZeroPaddingText

★Click Here to Open This Script 

Posted in Image PDF | Tagged 10.11savvy 10.12savvy 10.13savvy NSBitmapImageRep NSImage NSNumber NSNumberFormatter NSScreen NSString NSURL PDFDocument Skim | Leave a comment

電子書籍(PDF)をオンラインストアで販売中!

Google Search

Popular posts

  • 開発機としてM2 Mac miniが来たのでガチレビュー
  • macOS 13.6.5 AS系のバグ、一切直らず
  • CotEditorで2つの書類の行単位での差分検出
  • Apple純正マウス、キーボードのバッテリー残量取得
  • macOS 15, Sequoia
  • ディスプレイをスリープ状態にして処理続行
  • 初心者がつまづきやすい「log」コマンド
  • Adobe AcrobatをAppleScriptから操作してPDF圧縮
  • 与えられた文字列の1D Listのすべての順列組み合わせパターン文字列を返す v3(ベンチマーク用)
  • 指定のWordファイルをPDFに書き出す
  • メキシカンハットの描画
  • macOS 13 TTS環境の変化について
  • 2023年に書いた価値あるAppleScript
  • Pixelmator Pro v3.6.4でAppleScriptからの操作時の挙動に違和感が
  • AdobeがInDesign v19.4からPOSIX pathを採用
  • Pages本執筆中に、2つの書類モード切り替えに気がついた
  • 可変次元のベクトルに対応したコサイン類似度計算
  • Safariで「プロファイル」機能を使うとAppleScriptの処理に影響
  • Cocoa Scripting Course 続刊計画
  • macOS 13.6.2アップデート Cocoa-AppleScript Applet修正はなし

Tags

10.11savvy (1101) 10.12savvy (1242) 10.13savvy (1391) 10.14savvy (586) 10.15savvy (437) 11.0savvy (281) 12.0savvy (201) 13.0savvy (139) 14.0savvy (87) 15.0savvy (63) CotEditor (63) Finder (51) iTunes (19) Keynote (112) NSAlert (60) NSArray (51) NSBitmapImageRep (20) NSBundle (20) NSButton (34) NSColor (51) NSDictionary (27) NSFileManager (23) NSFont (19) NSImage (41) NSJSONSerialization (21) NSMutableArray (62) NSMutableDictionary (21) NSPredicate (36) NSRunningApplication (56) NSScreen (30) NSScrollView (22) NSString (117) NSURL (97) NSURLRequest (23) NSUTF8StringEncoding (30) NSView (33) NSWorkspace (20) Numbers (67) Pages (51) Safari (44) Script Editor (26) WKUserContentController (21) WKUserScript (20) WKWebView (23) WKWebViewConfiguration (22)

カテゴリー

  • 2D Bin Packing
  • 3D
  • AirDrop
  • AirPlay
  • Animation
  • AppleScript Application on Xcode
  • Beginner
  • Benchmark
  • beta
  • Bluetooth
  • Books
  • boolean
  • bounds
  • Bug
  • Calendar
  • call by reference
  • Clipboard
  • Code Sign
  • Color
  • Custom Class
  • dialog
  • diff
  • drive
  • Droplet
  • exif
  • file
  • File path
  • filter
  • folder
  • Font
  • Font
  • GAME
  • geolocation
  • GUI
  • GUI Scripting
  • Hex
  • History
  • How To
  • iCloud
  • Icon
  • Image
  • Input Method
  • Internet
  • iOS App
  • JavaScript
  • JSON
  • JXA
  • Keychain
  • Keychain
  • Language
  • Library
  • list
  • Locale
  • Localize
  • Machine Learning
  • Map
  • Markdown
  • Menu
  • Metadata
  • MIDI
  • MIME
  • Natural Language Processing
  • Network
  • news
  • Noification
  • Notarization
  • Number
  • Object control
  • OCR
  • OSA
  • parallel processing
  • PDF
  • Peripheral
  • PRODUCTS
  • QR Code
  • Raw AppleEvent Code
  • Record
  • rectangle
  • recursive call
  • regexp
  • Release
  • Remote Control
  • Require Control-Command-R to run
  • REST API
  • Review
  • RTF
  • Sandbox
  • Screen Saver
  • Script Libraries
  • sdef
  • search
  • Security
  • selection
  • shell script
  • Shortcuts Workflow
  • Sort
  • Sound
  • Spellchecker
  • Spotlight
  • SVG
  • System
  • Tag
  • Telephony
  • Text
  • Text to Speech
  • timezone
  • Tools
  • Update
  • URL
  • UTI
  • Web Contents Control
  • WiFi
  • XML
  • XML-RPC
  • イベント(Event)
  • 未分類

アーカイブ

  • 2024年11月
  • 2024年10月
  • 2024年9月
  • 2024年8月
  • 2024年7月
  • 2024年6月
  • 2024年5月
  • 2024年4月
  • 2024年3月
  • 2024年2月
  • 2024年1月
  • 2023年12月
  • 2023年11月
  • 2023年10月
  • 2023年9月
  • 2023年8月
  • 2023年7月
  • 2023年6月
  • 2023年5月
  • 2023年4月
  • 2023年3月
  • 2023年2月
  • 2023年1月
  • 2022年12月
  • 2022年11月
  • 2022年10月
  • 2022年9月
  • 2022年8月
  • 2022年7月
  • 2022年6月
  • 2022年5月
  • 2022年4月
  • 2022年3月
  • 2022年2月
  • 2022年1月
  • 2021年12月
  • 2021年11月
  • 2021年10月
  • 2021年9月
  • 2021年8月
  • 2021年7月
  • 2021年6月
  • 2021年5月
  • 2021年4月
  • 2021年3月
  • 2021年2月
  • 2021年1月
  • 2020年12月
  • 2020年11月
  • 2020年10月
  • 2020年9月
  • 2020年8月
  • 2020年7月
  • 2020年6月
  • 2020年5月
  • 2020年4月
  • 2020年3月
  • 2020年2月
  • 2020年1月
  • 2019年12月
  • 2019年11月
  • 2019年10月
  • 2019年9月
  • 2019年8月
  • 2019年7月
  • 2019年6月
  • 2019年5月
  • 2019年4月
  • 2019年3月
  • 2019年2月
  • 2019年1月
  • 2018年12月
  • 2018年11月
  • 2018年10月
  • 2018年9月
  • 2018年8月
  • 2018年7月
  • 2018年6月
  • 2018年5月
  • 2018年4月
  • 2018年3月
  • 2018年2月

https://piyomarusoft.booth.pm/items/301502

メタ情報

  • ログイン
  • 投稿フィード
  • コメントフィード
  • WordPress.org

Forum Posts

  • 人気のトピック
  • 返信がないトピック

メタ情報

  • ログイン
  • 投稿フィード
  • コメントフィード
  • WordPress.org
Proudly powered by WordPress
Theme: Flint by Star Verte LLC