Menu

Skip to content
AppleScriptの穴
  • Home
  • Products
  • Books
  • Docs
  • Events
  • Forum
  • About This Blog
  • License
  • 仕事依頼

AppleScriptの穴

Useful & Practical AppleScript archive. Click '★Click Here to Open This Script' Link to download each AppleScript

タグ: NSPasteboard

macOS 15: Pasteboardにimageを設定したときの挙動が変わった?

Posted on 12月 1 by Takaaki Naganoya

これまで利用してきたAppleScriptの挙動が変わってしまい、面食らっています。SF Symbolsの内容(文字)をコピーして呼び出すと、いい感じに画像にレンダリングしてクリップボードに設定するというScriptです。

SF Symbolsは、Appleがアイコンなどの素材として用意した「フォント」であり、アプリ間の基礎的なアイコンを共通化して、文字が読めなくてもなんとなくアプリを操作できるようにしようという、現代において最も新しい象形文字ともいえます。

SF Symbolsをブラウズするアプリ「SF Symbols」(現行バージョン6.0)が配布されており、画像レンダリング機能もついているのですが、アプリの画面上のアイコンをねらって作られている機能であるため、いまひとつレンダリングサイズが小さいという不満があります。

かくして、クリップボードに入れたSF Symbolsの文字を指定色で透明画像の上にレンダリングしてクリップボードに入れるというAppleScriptは継続して使用しています。

ただ、ここに来て問題が発生しました。指定した色と、実際に画面上で表示される色が異なるという問題です。

macOS 13とmacOS 15の上で比較を行い、同一プログラムでもあきらかに処理結果が違います。

Script Debuggerを用いて、処理のステップごとに値を返すようにして(Script Debuggerだと、NSImageやらを直接画面上でブラウズ可能)確認してみたのですが、どのステップでも期待どおりの結果になっています。

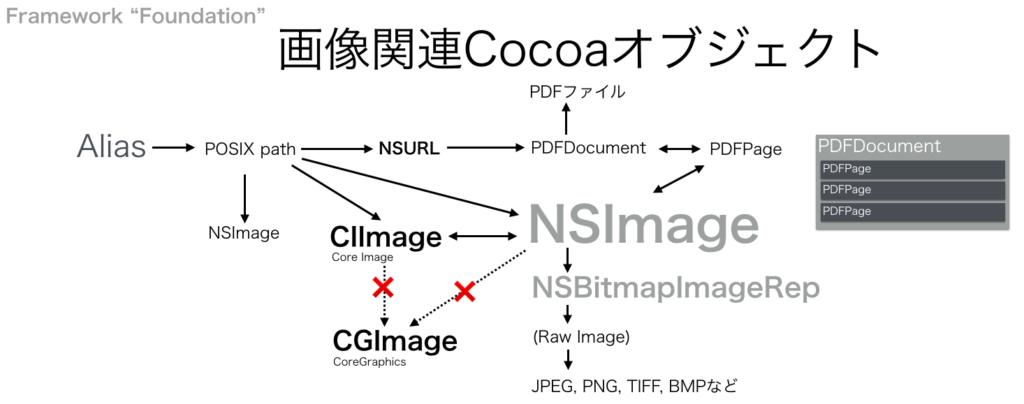
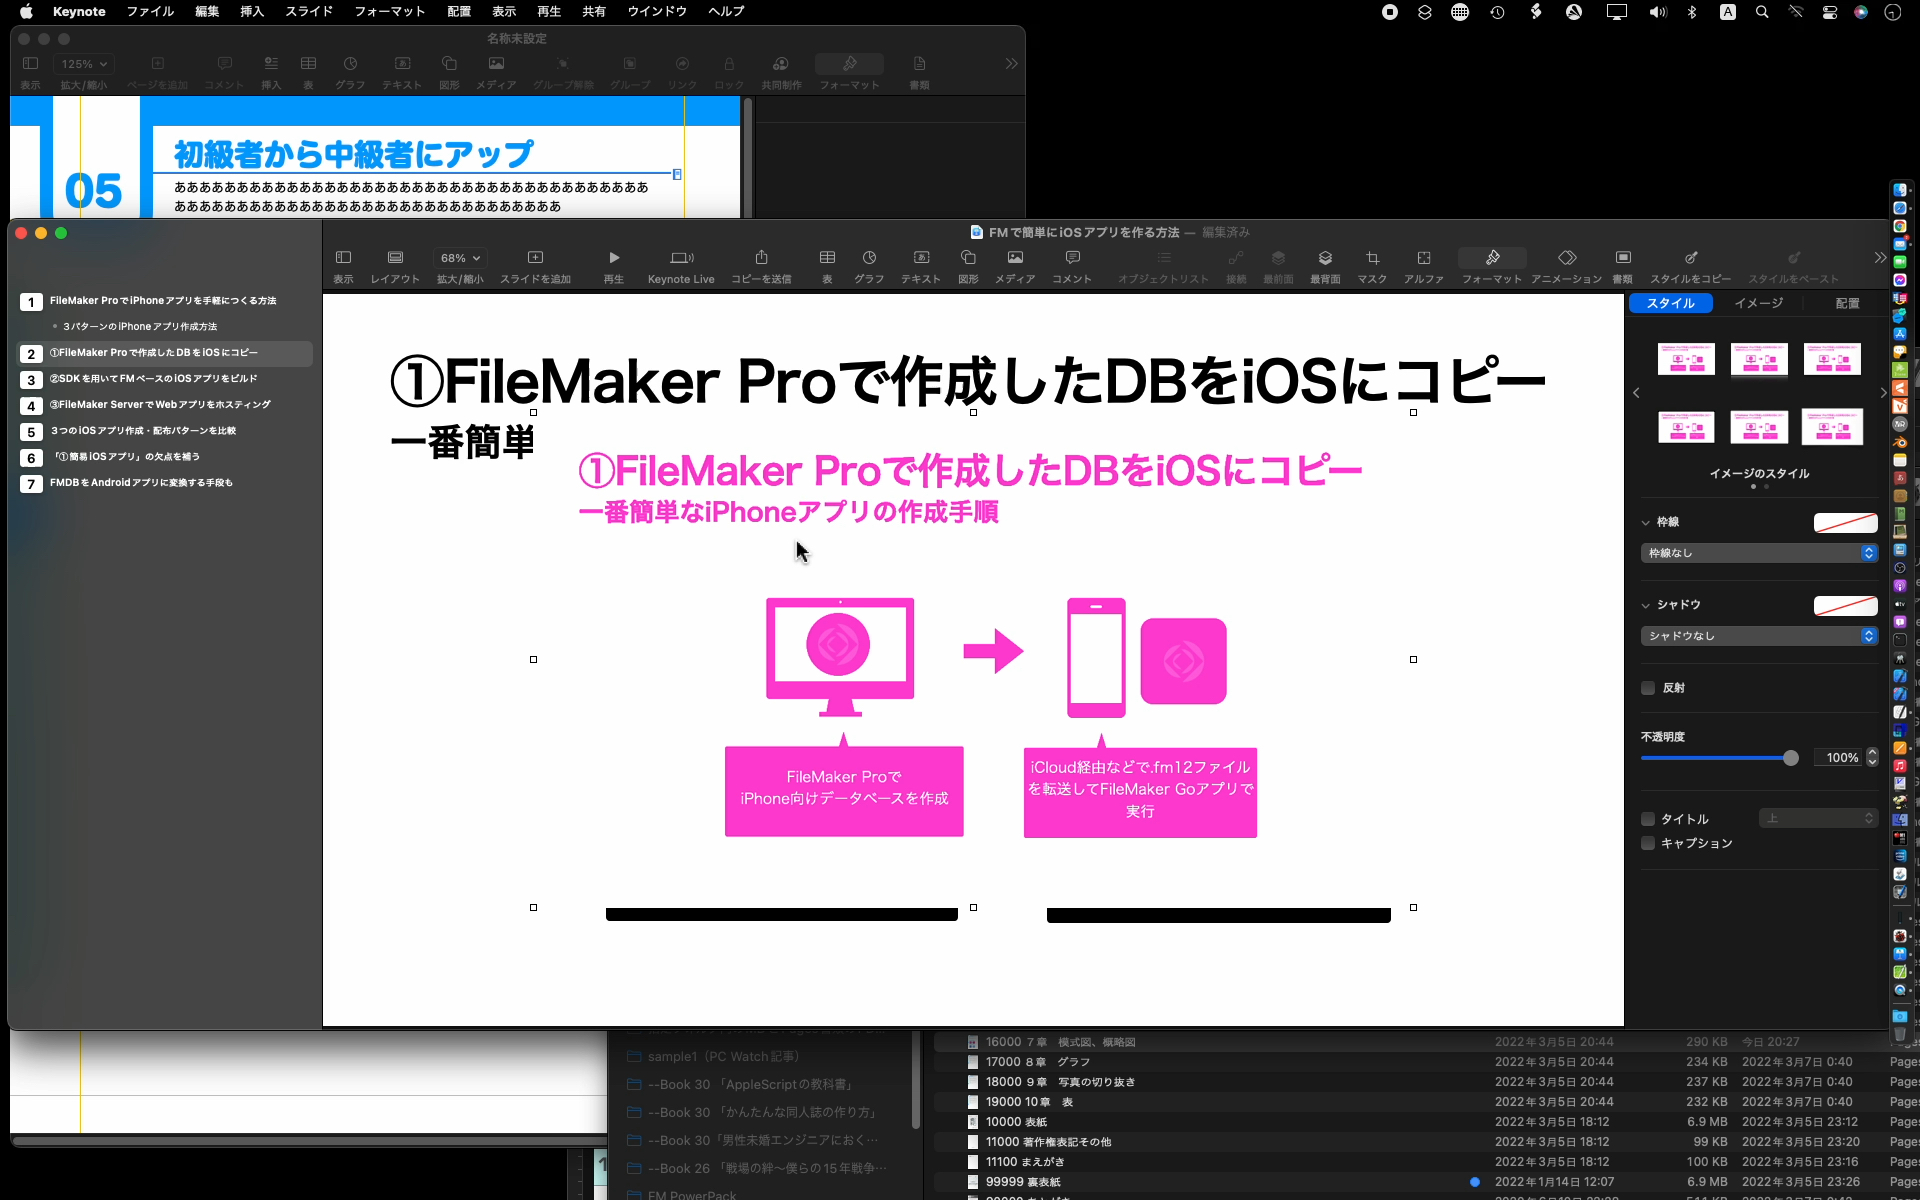
結局残されたのは、Cocoaの機能を用いて記述されたペーストボード(クリップボード)にNSImageを設定する処理。ペーストボードにNSImageを設定したときに色が変わります。

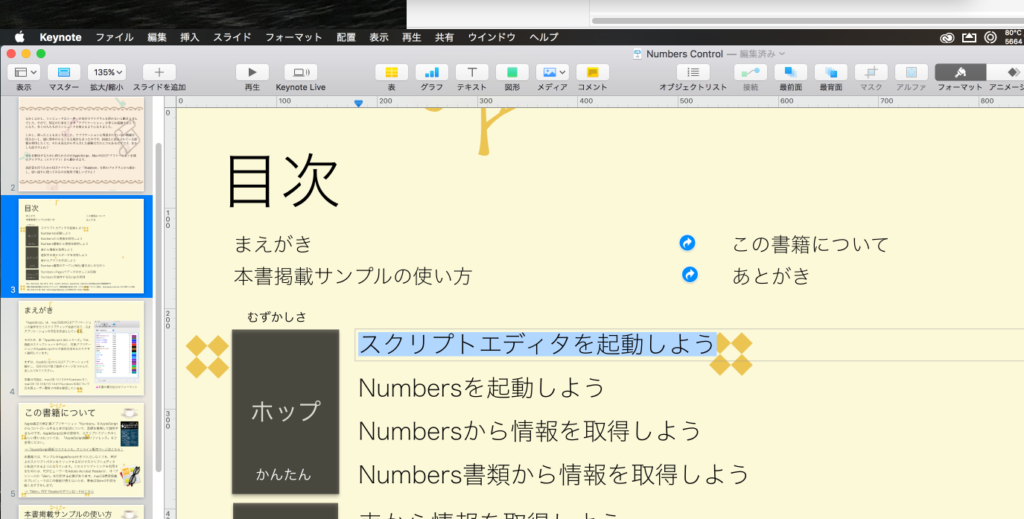
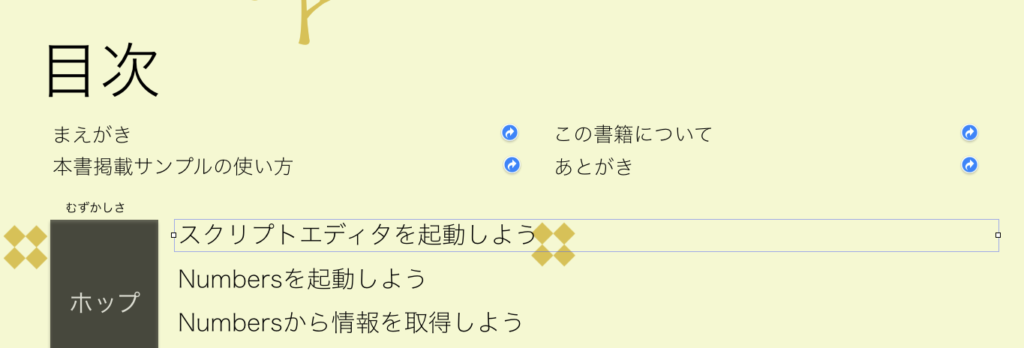
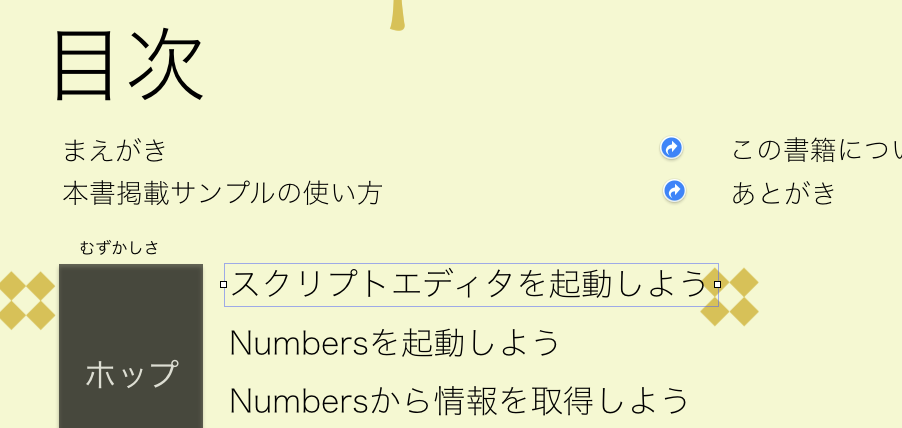
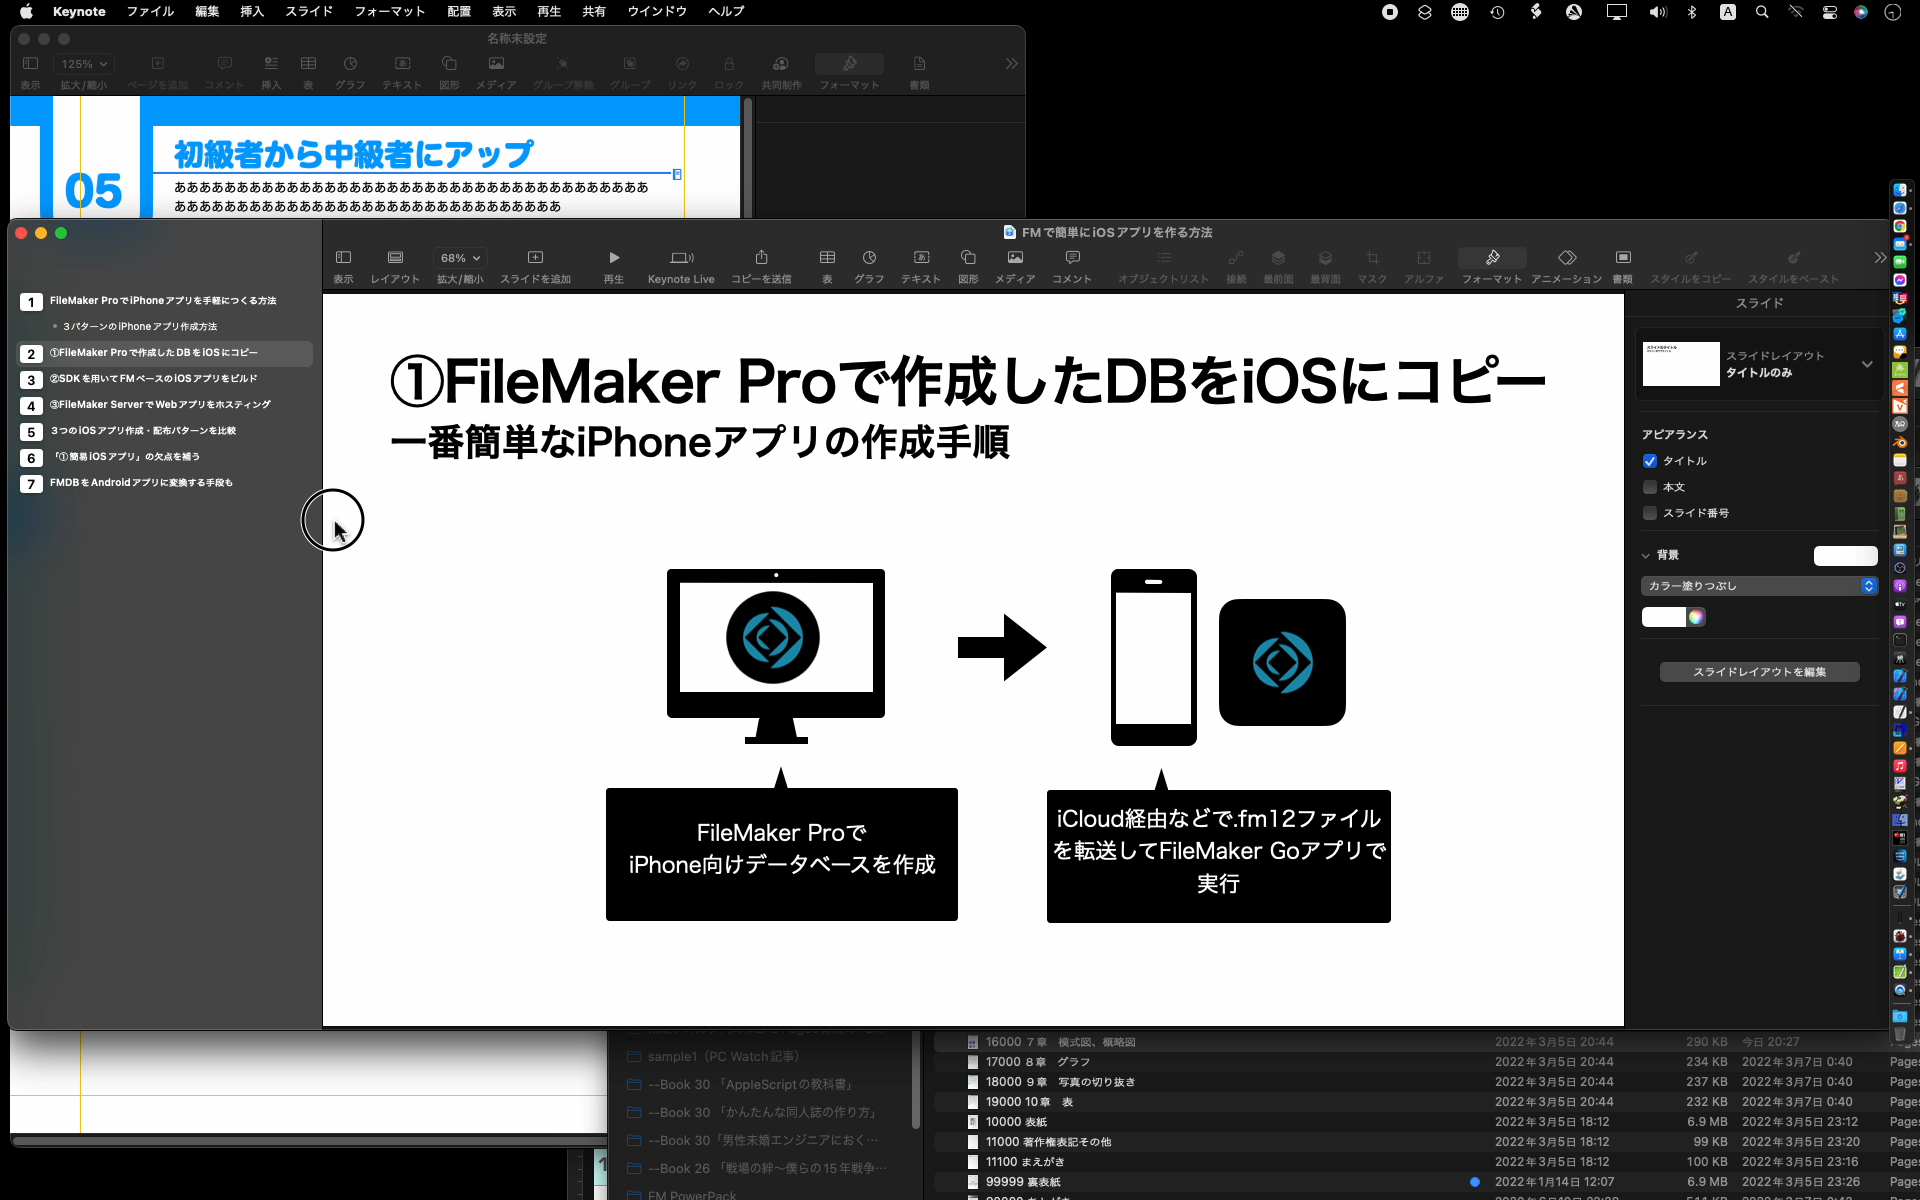
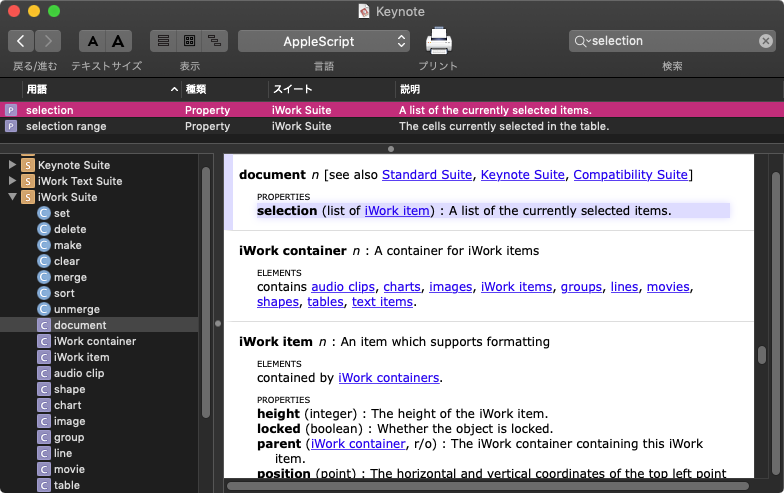
そして、内容をKeynote上にペーストするとその現象の一端が見えてきます。

Keynoteの書類上にmacOS 13上で処理した画像とmacOS 15上で処理した画像を並べて、それぞれを選択してみると……画面右端の画像プレビューエリア上では色がまったく同じです。書類上では違う色に見えるのに、プレビューでは一緒。

これは、間違ったカラープロファイルが適用されてしまっているか、あるいは明示的に何かのカラープロファイルを付加したNSImageをペーストボードに設定する必要があるか、のどちらかでしょう。

–クリップボードに内容を設定する(復帰用)
on restoreClipboard:theArray
— get pasteboard
set thePasteboard to current application’s NSPasteboard’s generalPasteboard()

— clear it, then write new contents
thePasteboard’s clearContents()
thePasteboard’s writeObjects:theArray
end restoreClipboard:


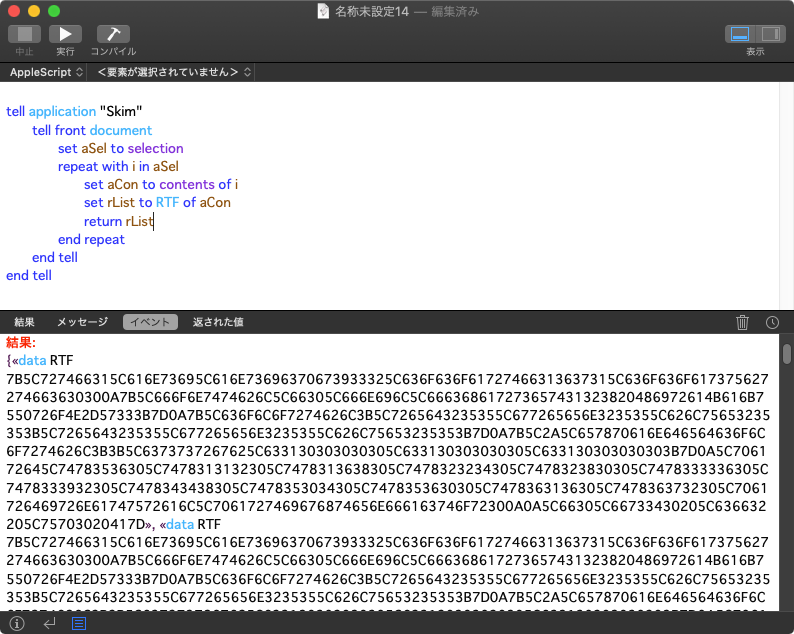
▲クリップボードに設定する直前のNSImageをPNGに変換してファイルに書き出したもの。この時点でも色が変わっていないので、クリップボード設定部分が問題という見立てをした次第


▲Script実行直後の状態。Finder上でクリップボードの内容を表示させたところ。色は変わっていないようだが……

Posted in Clipboard | Tagged 15.0savvy NSPasteboard | Leave a comment

クリップボードの画像を指定色でモノクロ化してクリップボードへ v3

Posted on 3月 13, 2022 by Takaaki Naganoya

クリップボードに入れた画像を、グレースケール化したあとに指定の色のベタ塗り画像とフィルタで合成し、単色の色付き画像に変換するAppleScriptです。

資料に掲載する画像の情報量を減らすために、単色画像に変換したいと考えました。Photoshopだと2つのレイヤーの重ね合わせで指定して処理するような内容です。ただ、もうPhotoshopにできるぐらいのことの大部分は、AppleScriptだけで単独でできてしまうのが2022年的な状況です。

アプリケーションを使わずに処理するためには、CIFilterを用いて画像処理して、単色画像にすることになります。

CIFilterにもいろいろな画像フィルタ機能が用意されているわけで、ここから「どのフィルタを使うか」選ぶことになります。

# フィルタが200種類ぐらいあるんですけど!!

このような場合のために、FileMaker Proで作った「FileMaker Pro PowerPack」だとひととおりのCIFilterをサンプルデータで処理できるようにしておきました。

FileMaker Proのデータベース上にサンプルデータをコピー&ペーストしておけば、DB上でフィルタ処理してどのような処理をしてくれるかがわかります。

いやーー、作っておいてよかったー。「なんでこんなにフィルタ処理ばっかりあるんだよ!」的な話がありましたが、こうして実際に役立つわけで。フィルタの名称、編集できるテストデータ、処理結果が表示されるところまで……「動かせる資料」的なものに仕上がっています>FileMaker Pro PowerPack

ひととおりAppleScriptを作ってみて、いろいろ調整してみたところ……調整し切れなかったので、edama2さんに相談して(送りつけて)こんな感じに仕上がりました。

これでなんとか動くはずなのに、なぜこうなるのか。。。CIFilterを実際に日常的に使うツールで使ったのは実はこれが最初だったので、意外な挙動に割と困りました。


▲画面上の指定範囲のスクリーンショットを撮ってクリップボードへ


▲ScriptをmacOS標準搭載のスクリプトメニューから呼び出すことを前提に作った。


▲クリップボードの内容をペーストすると、単色化された画像が出力される

AppleScript名:クリップボードの画像を指定色でモノクロ化してクリップボードへ v3.scpt
—
–  Created by: Takaaki Naganoya
–  Created on: 2022/03/11
—
–  Copyright © 2022 Piyomaru Software, All Rights Reserved
–  v2 Takaaki Naganoya : マスクが1/4の大きさになったり2倍になったりしていた
–  v3 edama2:上記の問題に対処。クリーンナップ
—
use AppleScript version "2.7"
use framework "AppKit"
use framework "CoreImage"
use framework "Foundation"
use scripting additions

on run
  my main()
end run

on main()
  –クリップボード内のデータをNSImageとして取得
  
set sourceImg to my getClipboardASImage()
  
  
# 色指定
  
set aColor to my makeNSColorFromRGBA255val(252, 2, 128, 255)


# 同じ大きさの塗りつぶし画像を作成
  
tell current application’s NSImage’s alloc()
    tell initWithSize_(sourceImg’s |size|())
      lockFocus()
      
aColor’s |set|()
      
set aRect to current application’s NSMakeRect(0, 0, its |size|()’s width, its |size|()’s height)
      
current application’s NSBezierPath’s fillRect:aRect
      
unlockFocus()
      
set fillImg to it
    end tell
  end tell
  
  
# NSImage –> CIimage
  
set sourceImage to my convNSImageToCIimage(sourceImg)
  
set fillImage to my convNSImageToCIimage(fillImg)
  
  
set newImage to my filterImage2(fillImage, sourceImage)
  
  
my restoreClipboard({newImage})
end main

on filterImage2(fillImage, sourceImage)
  
  
set redValue to 0.295719844358
  
set greenValue to 0.295719844358
  
set blueValue to 0.295719844358
  
set alphaVlaue to 1.0
  
set aCIColor to current application’s CIColor’s alloc()’s initWithRed:redValue green:greenValue blue:blueValue alpha:alphaVlaue
  
  
tell current application’s CIFilter
    — CIFilter(モノクロ化)
    
tell filterWithName_("CIColorMonochrome")
      setDefaults()
      
setValue_forKey_(sourceImage, "inputImage")
      
setValue_forKey_(aCIColor, "inputColor")
      
set filteredImage to valueForKey_("outputImage")
    end tell
    
    
— CIFilter(モノクロ化)
    
tell filterWithName_("CIAdditionCompositing")
      setDefaults()
      
setValue_forKey_(fillImage, "inputImage")
      
setValue_forKey_(filteredImage, "inputBackgroundImage")
      
set theCIImage to valueForKey_(current application’s kCIOutputImageKey)
    end tell
  end tell
  
  
# CIImage –> NSImage
  
set imageRep to current application’s NSCIImageRep’s alloc()’s initWithCIImage:theCIImage
  
set rNSImage to current application’s NSImage’s alloc()’s initWithSize:(imageRep’s |size|())
  
rNSImage’s addRepresentation:imageRep
  
  
return rNSImage
end filterImage2

# NSImage –> CIimage
on convNSImageToCIimage(aNSImage)
  set tiffDat to aNSImage’s TIFFRepresentation()
  
set aRep to current application’s NSBitmapImageRep’s imageRepWithData:tiffDat
  
set newImg to current application’s CIImage’s alloc()’s initWithBitmapImageRep:aRep
  
return newImg
end convNSImageToCIimage

— クリップボードの内容をNSImageとして取り出して返す
on getClipboardASImage()
  set thePasteboard to current application’s NSPasteboard’s generalPasteboard()
  
set theAttributedStringNSArray to thePasteboard’s readObjectsForClasses:({current application’s NSImage}) options:(missing value)
  
set theNSImage to theAttributedStringNSArray’s objectAtIndex:0
  
return theNSImage
end getClipboardASImage

on restoreClipboard(theArray as list)
  set thePasteboard to current application’s NSPasteboard’s generalPasteboard()
  
thePasteboard’s clearContents()
  
thePasteboard’s writeObjects:theArray
end restoreClipboard

on makeNSColorFromRGBA255val(redValue as integer, greenValue as integer, blueValue as integer, alphaValue as integer)
  set aRedCocoa to (redValue / 255) as real
  
set aGreenCocoa to (greenValue / 255) as real
  
set aBlueCocoa to (blueValue / 255) as real
  
set aAlphaCocoa to (alphaValue / 255) as real
  
set aColor to current application’s NSColor’s colorWithCalibratedRed:aRedCocoa green:aGreenCocoa blue:aBlueCocoa alpha:aAlphaCocoa
  
return aColor
end makeNSColorFromRGBA255val

★Click Here to Open This Script 

Posted in filter Image | Tagged 12.0savvy CIColor CIImage NSBezierPath NSCIImageRep NSColor NSImage NSPasteboard | Leave a comment

Keynoteで選択中の画像を特定する

Posted on 1月 22, 2020 by Takaaki Naganoya


Keynoteの書類上で選択中のオブジェクト(image)を特定するAppleScriptです。

Keynoteには、選択中のオブジェクトを求めるという重要な機能「selection」が実装されていません。一応、最新版のKeynoteには「selection」の予約語が存在しているものの、slide中の選択オブジェクトではなく「選択中のスライド」が返ってきます。current slideとほぼ同じ動作です。これでは実用性がいまひとつです。

ないと困るselection(get selected object)ですが、実装されていないのは仕方ありません。

そのものズバリの機能が存在していないものの、他のやりかたで選択中の画像を特定してみました。数が少なかったり重複するものが存在していない場合には有効のようです。

本Scriptでは、Keynote書類上で選択中の画像があるという前提の上で、GUI Scripting経由でコピーを行い、選択対象をクリップボードに入れます。このクリップボード内の画像のサイズを取得。次に、現在のKeynote書類の現在のスライド(ページ)上の画像(imageオブジェクト)のサイズを取得し、順次照合。同じサイズのものがあれば、それが選択中のオブジェクトであると類推します。

かなり穴の多いロジックですが、最初の一歩としては悪くないでしょう。とりあえずは、サイズで比較を行い、同一のものがあれば画像同士の類似性を計算するといった方法も検討できそうです。

お手上げになってしまうのは、画像サイズや内容ともに同一のものが複数あった場合です。その場合を除けば割と識別できそうに思えます。

また、ながらく調査を行なってきた「ローカライズ言語に依存しないGUI Scripting」を用いて選択中のオブジェクトのコピーができるとよさそうです。

AppleScript名:Keynoteで選択中の画像を特定する.scptd
—
–  Created by: Takaaki Naganoya
–  Created on: 2020/01/22
—
–  Copyright © 2020 Piyomaru Software, All Rights Reserved
—
use AppleScript version "2.7"
use scripting additions
use framework "Foundation"
use framework "AppKit"

set kRes to getSelectedImage() of me
–> image 3 of slide 24 of document id "534F4E65-4459-4B00-95D4-34C3E020467E"

on getSelectedImage()
  my executeKeynoteItemCopy() –Execute Copy From Menu
  
  
–クリップボードの内容をNSImageに
  
set aNSIMage to my getClipboardASImage()
  
if aNSIMage = false then
    return false
  end if
  
  
–クリップボード中のNSImageのサイズを取得
  
set aSize to aNSIMage’s |size|()
  
set selWidth to (aSize’s width) as real
  
set selHeight to (aSize’s height) as real
  
  
–Keynoteの最前面のドキュメントの現在のスライド上の画像からサイズを取得してクリップボード内の画像サイズと照合する
  
tell application "Keynote"
    tell front document
      tell current slide
        set iList to every image
        
        
repeat with i in iList
          set myHeight to (height of i) as real
          
set myWidth to (width of i) as real
          
if {myWidth, myHeight} = {selWidth, selHeight} then
            return contents of i
          end if
        end repeat
      end tell
    end tell
  end tell
  
return false
end getSelectedImage

— クリップボードの内容をNSImageとして取り出して返す
on getClipboardASImage()
  set theNSPasteboard to current application’s NSPasteboard’s generalPasteboard()
  
set theAttributedStringNSArray to theNSPasteboard’s readObjectsForClasses:({current application’s NSImage}) options:(missing value)
  
if theAttributedStringNSArray = {} then return false
  
set theNSAttributedString to theAttributedStringNSArray’s objectAtIndex:0
  
return theNSAttributedString
end getClipboardASImage

on executeKeynoteItemCopy()
  activate application "Keynote"
  
tell application "System Events"
    tell process "Keynote"
      –click menu item "Copy" of menu 1 of menu bar item "Edit" of menu bar 1
      
click menu item "コピー" of menu 1 of menu bar item "編集" of menu bar 1
    end tell
  end tell
end executeKeynoteItemCopy

★Click Here to Open This Script 

Posted in Clipboard GUI Scripting Image | Tagged 10.14savvy 10.15savvy Keynote NSImage NSPasteboard | Leave a comment

Skimでオープン中のPDFで選択中のテキストを返す

Posted on 9月 16, 2019 by Takaaki Naganoya

フリーでScriptableなmacOS用PDFビューワー「Skim」上でオープン中のPDFで、選択中のテキストの内容を取得するAppleScriptです。

フリーかつオープンソースで提供されているアプリケーションのうち、奇跡的に豊富なAppleScript対応機能を備えるPDFビューワー、それがSkimです。Skimに比べればPreview.appなど取るに足らない存在。「PDFビューワー四天王」のうち、その最上位に君臨するアプリケーションこそがSkimです(四天王とかいいつつ、Skim、Preview、Acrobatの3人しかいないのはお約束)。


▲SkimでPDFをオープンし、「AppleScriptってなんだろう?」の文字列を選択

ただ、そんなグレートな存在のSkimでも、「選択中のテキストを取得する」という処理を書いたことはありませんでした。

Skimの「selection」によって取得されるのがテキストではなくRTFなので、AppleScriptの基本的な機能ではこのRTFはひどく扱いが難しいデータ「でした」。

しかし、Cocoaの機能を利用することで、テキストへの変換は可能です。

それでも、Cocoaが期待するRTFのデータとAppleScriptの世界のRTFのデータ同士の変換が難儀でした。食後の腹ごなしに行うには手に余るといったレベル。

そこで、お気軽データ変換の最後の砦であるクリップボードを経由してRTFをAppleScriptの世界からCocoaの世界に受け渡してみたところ、大成功。あとは、PDFから取得したテキストデータによくあることですが、日本語のテキストだとUnicodeのNormalize方法の問題によりひらがな/カタカナと濁点や半濁点が分離した状態で返ってきました。

これについても、Cocoaの機能を利用してNormalizeを行い、常識的なテキストに変換できました。

AppleScript名:Skimでオープン中のPDFの選択中のテキストを返す
—
–  Created by: Takaaki Naganoya
–  Created on: 2019/09/16
—
–  Copyright © 2019 Piyomaru Software, All Rights Reserved
—
use AppleScript version "2.4"
use scripting additions
use framework "Foundation"

tell application "Skim"
  tell front document
    set aSel to selection
    
repeat with i in aSel
      set aCon to contents of i
      
set rList to RTF of aCon
      
      
set sCon to ""
      
repeat with ii in rList
        set the clipboard to ii
        
set aText to getClipboardAsText() of me
        
set aCon to aCon & aText
      end repeat
      
      
set aStr to textfy(aCon) of me
      
return aStr
    end repeat
  end tell
end tell

–Normalize Unicode Text in NFKC
on textfy(aText as string)
  set aStr to current application’s NSString’s stringWithString:aText
  
set aNFKC to aStr’s precomposedStringWithCompatibilityMapping()
  
return aNFKC as string
end textfy

–Clipboard内の情報をテキストとして取得する
on getClipboardAsText()
  — get the pasteboard items
  
set theClip to current application’s NSPasteboard’s generalPasteboard()
  
set pbItems to theClip’s pasteboardItems()
  
  
set theStrings to {}
  
  
repeat with anItem in pbItems
    if (anItem’s types()’s containsObject:(current application’s NSPasteboardTypeString)) then
      set end of theStrings to (anItem’s stringForType:(current application’s NSPasteboardTypeString)) as text
    end if
  end repeat
  
  
return theStrings as text
end getClipboardAsText

★Click Here to Open This Script 

とか言ってたら、夕飯の買い物に出かけようとした頃にShane Stanleyから「もっとシンプルに書けるよー」というサンプルが届いて脱力しました。もっと簡潔に書けたようです(同一サンプルで日本語データに対してチェックずみ)。

ただ、PDFから文字取り出ししたあとは、Unicodeの再Normalizeは割とやらないといけないケースが多いので、選択部分(selection)からRTFじゃなくてcharacterでデータを取り出せばよかったというあたりが反省点でしょうか。

set theText to ""
tell application "Skim"
  tell front document
    set aSel to selection
    
repeat with anItem in aSel
      set theText to theText & (characters of anItem) as text
    end repeat
  end tell
end tell
return theText

★Click Here to Open This Script 

Posted in Clipboard RTF Text | Tagged 10.12savvy 10.13savvy 10.14savvy NSPasteboard NSPasteboardTypeString NSString Skim | Leave a comment

クリップボードに入れたIllustratorのオブジェクトをQRコード認識 v2

Posted on 7月 28, 2019 by Takaaki Naganoya

Adobe Illustrator書類上にある、QRコードのオブジェクトをクリップボード経由でNSImageに変換してQRコード認識するAppleScriptです。QRコード認識には、OS内蔵のCoreImageの機能を使っています。
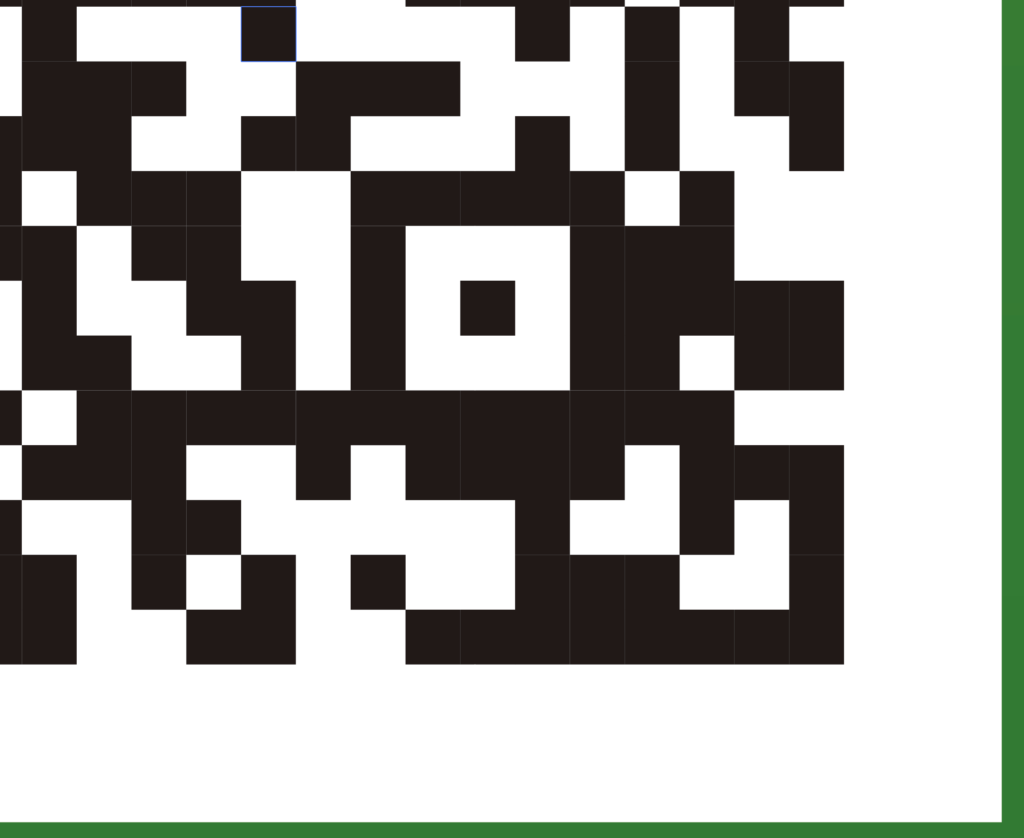
# 実行前にAI書類上のQRコードオブジェクトを選択してコピー(Command-C)を実行してあることを前提条件としています。QRコードっぽいものであれば、別にAI書類上のオブジェクトでなくてもかまいません

昨日のScriptで、「そういえばなんでZXingObjCを使っているんだっけ?」と疑問を抱きました。理由ははっきりしています。CIDetectorではそのまま認識させてみたら認識しなかったためです。

QRコードやJANコード画像認識ソフトウェアは、割といろいろ条件がそろわないと認識してくれません。いわく、画像の大きさ、画像の解像度、画像の向き、コントラスト比、その他いろいろ。

スマホのカメラで認識する際にはユーザーが認識するまでいろいろ条件を変えて試行錯誤するので、ソフトウェアの力だけで認識させているわけではありません。いわば、人間をスマホの周辺機器として使用している状態です。

一方、静止画をソフトウェアで認識処理するさいには、人間が行っているフィードバック動作をソフトウェア側で行わなくてはなりません。

macOS内蔵のCIDetectorは、どうやら画像サイズに敏感なようで、いろいろリサイズして認識するかどうかチェックしなくてはなりません。逆に、最初からQRコードではないとわかっている画像を、しつこくQRコード認識し直しても時間の無駄です。

とりあえず、認識対象を2倍から4倍まで拡大して認識をリトライしています。実際にやってみたら、1倍では認識しなくても2倍で認識してくれました。実際に処理するデータ次第ですが、4倍まで試さなくても大丈夫なケースも多いことでしょう。

AppleScript名:rocogClipAsQR_v2.scptd
— Created 2019-07-28 by Takaaki Naganoya
— 2019 Piyomaru Software
use AppleScript version "2.4"
use scripting additions
use framework "Foundation"
use framework "AppKit"
use framework "CoreImage"

property CIImage : a reference to current application’s CIImage
property NSImage : a reference to current application’s NSImage
property CIDetector : a reference to current application’s CIDetector
property NSZeroRect : a reference to current application’s NSZeroRect
property NSDictionary : a reference to current application’s NSDictionary
property NSPasteboard : a reference to current application’s NSPasteboard
property NSCompositeCopy : a reference to current application’s NSCompositeCopy
property NSGraphicsContext : a reference to current application’s NSGraphicsContext
property NSBitmapImageRep : a reference to current application’s NSBitmapImageRep
property CIDetectorAccuracy : a reference to current application’s CIDetectorAccuracy
property CIDetectorTypeQRCode : a reference to current application’s CIDetectorTypeQRCode
property CIDetectorAccuracyHigh : a reference to current application’s CIDetectorAccuracyHigh
property NSImageInterpolationNone : a reference to current application’s NSImageInterpolationNone
property CIDetectorImageOrientation : a reference to current application’s CIDetectorImageOrientation
property NSCalibratedRGBColorSpace : a reference to current application’s NSCalibratedRGBColorSpace

set aRes to recogPasteboardASQR() of me

–クリップボードの内容をNSImageに
on recogPasteboardASQR()
  set aNSIMage to getClipboardASImage() of me
  
if aNSIMage = false then return false
  
  
set aRes to recogNSImageAsQRcodes(aNSIMage) of me –11: kBarcodeFormatQRCode
  
if aRes is not equal to {} then return aRes
  
  
–ループでQRコードとおぼしきイメージを拡大しつつQRコード認識
  
repeat with i from 2 to 4 –ここはチューニングの余地がある
    set bNSIMage to (my resizeNSImageWithoutAntlialias:aNSIMage toScale:(i as real))
    
set aRes to recogNSImageAsQRcodes(bNSIMage) of me
    
if aRes is not equal to {} then return aRes
  end repeat
  
  
return false
end recogPasteboardASQR

–NSImageをバーコードとして認識する
on recogNSImageAsQRcodes(aNSIMage)
  set imageRef to convNSImageToCIimage(aNSIMage) of me
  
  
— 検出器のオプションを NSDictonary で作成
  
set optDic1 to NSDictionary’s dictionaryWithObject:(CIDetectorAccuracyHigh) forKey:(CIDetectorAccuracy)
  
set faceDetector to CIDetector’s detectorOfType:(CIDetectorTypeQRCode) context:(missing value) options:optDic1
  
  
— QRコードの検出を行う際のオプションを NSDictonary で作成
  
set optDic2 to NSDictionary’s dictionaryWithObject:(CIDetectorImageOrientation) forKey:"Orientation"
  
  
— QRコード検出を実行
  
set faceArray to faceDetector’s featuresInImage:imageRef options:optDic2
  
set fList to {}
  
  
— 検出されたQRコードの位置とサイズをログに出力
  
repeat with i from 1 to (count of faceArray)
    set face to item i of faceArray
    
set bRec to (face’s messageString()) as string
    
–set cRec to retURLdecodedStrings(bRec) of me –URLエンコード対策
    
set the end of fList to bRec
  end repeat
  
  
return fList
end recogNSImageAsQRcodes

— クリップボードの内容をNSImageとして取り出して返す
on getClipboardASImage()
  set theNSPasteboard to NSPasteboard’s generalPasteboard()
  
set anArray to theNSPasteboard’s readObjectsForClasses:({NSImage}) options:(missing value)
  
if anArray = missing value or (anArray as list) = {} then return false
  
set aRes to anArray’s objectAtIndex:0
  
return aRes
end getClipboardASImage

—
on convNSImageToCIimage(aNSIMage)
  set tiffDat to aNSIMage’s TIFFRepresentation()
  
set aRep to NSBitmapImageRep’s imageRepWithData:tiffDat
  
set newImg to CIImage’s alloc()’s initWithBitmapImageRep:aRep
  
return newImg
end convNSImageToCIimage

–NSImageを指定倍率で拡大(アンチエイリアス解除状態で)
on resizeNSImageWithoutAntlialias:aSourceImg toScale:imgScale
  set aSize to aSourceImg’s |size|()
  
set aWidth to (aSize’s width) * imgScale
  
set aHeight to (aSize’s height) * imgScale
  
  
set aRep to NSBitmapImageRep’s alloc()’s initWithBitmapDataPlanes:(missing value) pixelsWide:aWidth pixelsHigh:aHeight bitsPerSample:8 samplesPerPixel:4 hasAlpha:true isPlanar:false colorSpaceName:(NSCalibratedRGBColorSpace) bytesPerRow:0 bitsPerPixel:0
  
  
set newSize to {width:aWidth, height:aHeight}
  
aRep’s setSize:newSize
  
  
NSGraphicsContext’s saveGraphicsState()
  
  
set theContext to NSGraphicsContext’s graphicsContextWithBitmapImageRep:aRep
  
NSGraphicsContext’s setCurrentContext:theContext
  
theContext’s setShouldAntialias:false
  
theContext’s setImageInterpolation:(NSImageInterpolationNone)
  
  
aSourceImg’s drawInRect:(current application’s NSMakeRect(0, 0, aWidth, aHeight)) fromRect:(NSZeroRect) operation:(NSCompositeCopy) fraction:(1.0)
  
  
NSGraphicsContext’s restoreGraphicsState()
  
  
set newImg to NSImage’s alloc()’s initWithSize:newSize
  
newImg’s addRepresentation:aRep
  
  
return newImg
end resizeNSImageWithoutAntlialias:toScale:

★Click Here to Open This Script 

Posted in Clipboard Image list QR Code | Tagged 10.12savvy 10.13savvy 10.14savvy CIDetector CIDetectorAccuracy CIDetectorAccuracyHigh CIDetectorImageOrientation CIDetectorTypeQRCode CIImage NSBitmapImageRep NSCalibratedRGBColorSpace NSCompositeCopy NSDictionary NSGraphicsContext NSImage NSImageInterpolationNone NSPasteboard NSZeroRect | 4 Comments

クリップボードに入れたIllustratorのオブジェクトをQRコード認識

Posted on 7月 27, 2019 by Takaaki Naganoya

Adobe Illustrator書類上にある、QRコードのオブジェクトをクリップボード経由でNSImageに変換してQRコード認識するAppleScriptです。QRコード認識には、オープンソースのZXingObjCをCocoa Framework化したものを使っています。

–> Download recogClipAsQR.scptd (Including Framework)

ことのはじまりは、Adobe Illustrator書類上になにがしかのプラグインで作成されたとおぼしきQRコードのオブジェクトが配置されていたことです。これをデコードして内容が正しいか、デコードしたURLは実在するものかといったチェックをする必要がありました(もっと大きなプログラムの一部として)。

これはけっこうな難問でした。AI書類全体をPDFや他の形式の画像として書き出したものを認識させてみたものの、なかなかQRコードとして認識してくれません。

いろいろ試行錯誤していくうちに、AI書類を構成する各部品ごとに画像書き出しして認識させると、QRコードとして認識したりしました。

結局、AI書類上の各種オブジェクト(QRコードはグループ化されていたので、group item)にアクセスし、クリップボード経由で(いったんコピーして)画像に書き出すと認識してくれました。

ファイルに書き出すオーバーヘッドを減らしたかったので、クリップボードの内容をそのままNSImageとして取得。ここで、AppleScriptの標準搭載命令(the clipboard)からCocoaのNSPasteBoardを使うように変更したことで、大幅なスピードアップを図れました。クリップボード経由でデータ変換するやりかたは、データが小さければ手軽かつ便利でいいのですが、データが大きくなると処理に時間がかかってたいへんです。主にClassic Mac OSの時代によく使われていた方法でもあります(macOS上でもごくたまに使いますが、こういうやり方をなくそうというのがClassic Mac OSからMac OS Xへの移行時のScripter間の共通認識だったので、なるべく避けていたんですね)。

かくして、Adobe Illustrator上でコピーしておいたQRコードのオブジェクトを、クリップボード(ペーストボード)経由でQRコードとしてデコードするものができ、便利に使っています。

本Scriptは、

macOS 10.12.x:スクリプトエディタ、Script Debugger
macOS 10.13.x:スクリプトエディタ、Script Debugger
macOS 10.14.x:Script Debugger、マシンのSIPを解除してあればスクリプトエディタ上でも動作

という環境で動作します。macOS 10.14.x上でSIPを解除していない状態でも、アプレット書き出しした状態であればバンドル内のFrameworkを読み込んで動作します。

AppleScript名:recogClipAsQR.scptd
— Created 2019-07-20 by Takaaki Naganoya
— 2019 Piyomaru Software
use AppleScript version "2.4"
use scripting additions
use framework "Foundation"
use framework "AppKit"
use framework "ZXingObjC" –https://github.com/TheLevelUp/ZXingObjC

property NSImage : a reference to current application’s NSImage
property NSPasteboard : a reference to current application’s NSPasteboard
property ZXDecodeHints : a reference to current application’s ZXDecodeHints
property ZXBinaryBitmap : a reference to current application’s ZXBinaryBitmap
property ZXHybridBinarizer : a reference to current application’s ZXHybridBinarizer
property ZXMultiFormatReader : a reference to current application’s ZXMultiFormatReader
property ZXCGImageLuminanceSource : a reference to current application’s ZXCGImageLuminanceSource

set qrRes to recogClipboardASQR() of me
–> {"http://xxxxxxxxxxxxxxxxxxx", 11}

–クリップボードの内容をNSImageに
on recogClipboardASQR()
  set aNSIMage to my getClipboardASImage()
  
if aNSIMage = false then return false
  
set aRes to recogNSIMageAsBarcodes(aNSIMage, 11) of me –11: kBarcodeFormatQRCode
  
return aRes
end recogClipboardASQR

–NSImageをQRコードとして認識する
on recogNSIMageAsBarcodes(aNSIMage, aHintType)
  set aSource to ZXCGImageLuminanceSource’s alloc()’s initWithNSImage:(aNSIMage)
  
set aBitmap to ZXBinaryBitmap’s binaryBitmapWithBinarizer:(ZXHybridBinarizer’s binarizerWithSource:(aSource))
  
  
–https://github.com/zxingify/zxingify-objc/blob/master/ZXingObjC/core/ZXBarcodeFormat.h
  
set aHints to ZXDecodeHints’s hints()
  
aHints’s addPossibleFormat:(aHintType)
  
  
set aReader to ZXMultiFormatReader’s reader()
  
set aResult to aReader’s decode:(aBitmap) hints:(aHints) |error|:(missing value)
  
  
if aResult is equal to missing value then return false
  
set aCon to (aResult’s |text|()) as string
  
set aFormat to aResult’s barcodeFormat()
  
  
return {aCon, aFormat}
end recogNSIMageAsBarcodes

— クリップボードの内容をNSImageとして取り出して返す
on getClipboardASImage()
  set theNSPasteboard to NSPasteboard’s generalPasteboard()
  
set anArray to theNSPasteboard’s readObjectsForClasses:({NSImage}) options:(missing value)
  
if anArray = missing value or (anArray as list) = {} then return false
  
set aRes to anArray’s objectAtIndex:0
  
return aRes
end getClipboardASImage

★Click Here to Open This Script 

Posted in Clipboard file Image QR Code | Tagged 10.12savvy 10.13savvy 10.14savvy NSImage NSPasteboard | 1 Comment

クリップボードに入れられた画像をNSImageに変換して1Dバーコード認識

Posted on 4月 28, 2019 by Takaaki Naganoya

クリップボードに入れたバーコード画像をNSImageに変換して1Dバーコード認識して内容をデコードするAppleScriptです。

–> Download ZXingObjC.framework(To ~/Library/Frameworks)

1Dバーコード認識には定番の「ZXingObjC」を利用しているのですが、同プログラムは派生プロジェクトが多く、いまひとつどれを使っているのか、自分自身も正確に把握していなかったりします。

カメラからの入力映像から1次元バーコード認識を行うプログラムは多いのですが、画像から認識するプログラムはそれほどみかけません。さらに、それに輪をかけて、入力画像形式がNSImageではなくCGImageである場合が多く、ZXingでも入力はCGImage。

AppleScriptから生成できないCGImage。NSImageから直接の変換メソッドをAppleScript上で利用できないCGImage。

そこで、SFPSDWriterのコメントに書いてあったコードを参考に、NSImageで入力した画像をCGImageに変換して処理するメソッドをObjective-Cで追加して、AppleScriptから呼び出しやすく書き換えて呼び出してみました(オリジナルに「initWithNSImage:」というメソッドは実装されていません)。

実際には、Adobe IllustratorやAdobe InDesignにリンクされたバーコード画像素材をチェックするような用途を想定しています(実際、やっているので)。QRコード画像をデコードするScriptは用意していたものの、1D Bar Code画像をデコードするものを用意していなかったので、再調査。JANはEANとほとんど同じなので大丈夫でしたが、その他の日本マイナーなバーコード規格(郵便コードとか)については未調査のためわかりません。

ちなみに、本FrameworkはQRコードをサポートしているため、JANコード(1Dバーコード)とQRコード(2Dバーコード)の両方を同一Scriptでデコードできました。Illustratorオブジェクトで作られたバーコードを適宜クリップボードを経由してPDF化したものをデコードしてみたのですが、1Dバーコードと2Dバーコードのチェックに別々のルーチンを用意しないとダメだろうと覚悟していたところに、両方とも同じメソッド呼び出しでデコードできてしまい拍子抜け。

macOS 10.14上ではScript Debuggerで実行するか、AppleScriptをバンドル形式で保存してバンドル内にFrameworkを入れアプレット書き出しするとか、SIPによるプロテクションを解除するなどの方法で呼び出せます(Script Debuggerを使うのが一番いいでしょう)。

AppleScript名:クリップボードに入れられた画像をNSImageに変換して1Dバーコード認識.scptd
— Created 2015-09-20 by Takaaki Naganoya
— Modified 2019-04-27 by Takaaki Naganoya
— 2019 Piyomaru Software
use AppleScript version "2.4"
use scripting additions
use framework "Foundation"
use framework "AppKit"
use framework "ZXingObjC" –https://github.com/TheLevelUp/ZXingObjC

–クリップボードの内容をNSImageに
set aNSIMage to my getClipboardASImage()

–NSImageをバーコードとして認識する
set aSource to current application’s ZXCGImageLuminanceSource’s alloc()’s initWithNSImage:aNSIMage
set aBitmap to current application’s ZXBinaryBitmap’s binaryBitmapWithBinarizer:(current application’s ZXHybridBinarizer’s binarizerWithSource:aSource)

set aHints to current application’s ZXDecodeHints’s hints()
set aReader to current application’s ZXMultiFormatReader’s reader()
set aResult to aReader’s decode:(aBitmap) hints:(aHints) |error|:(missing value)

if aResult is equal to missing value then return false
set aCon to (aResult’s |text|()) as string
set aFormat to aResult’s barcodeFormat()

return {aCon, aFormat}

— クリップボードの内容をNSImageとして取り出して返す
on getClipboardASImage()
  set theNSPasteboard to current application’s NSPasteboard’s generalPasteboard()
  
set theAttributedStringNSArray to theNSPasteboard’s readObjectsForClasses:({current application’s NSImage}) options:(missing value)
  
set theNSAttributedString to theAttributedStringNSArray’s objectAtIndex:0
  
return theNSAttributedString
end getClipboardASImage

★Click Here to Open This Script 

Posted in Clipboard Image | Tagged 10.11savvy 10.12savvy 10.13savvy 10.14savvy NSPasteboard | Leave a comment

Keynoteのテキストアイテム内の文字の実際の幅でリサイズ

Posted on 4月 5, 2019 by Takaaki Naganoya

Keynote書類上のテキストアイテムを、内容の文字の実際の幅でリサイズするAppleScriptです。


▲テキストアイテム中のテキストをコピー(Command-C)


▲リサイズ前のテキストアイテム。文字に対してフレームサイズが大きい


▲本Scriptによりリサイズした後のテキストアイテム。文字の内容に対してフレームサイズがフィットしている


▲本Scriptにより順次複数のテキストアイテムを文字幅にリサイズしたところ。selectionがまともに動作していれば、複数のテキストアイテムを選択した状態でScriptを走らせて一度にリサイズできる(はず)だが、selectionが動作していないので複数のオブジェクトに対して同じ回数の操作が必要

Keynoteにはversion 9.0で「selection」の予約語が追加されましたが、これは一般に期待されるような「表示中のスライド上で選択中のオブジェクトへの参照が取得できる」というものではありません。

つまり、選択中のオブジェクトへの参照をKeynoteに対して問い合わせることは、(現時点では)不可能です。

そこで、テキストアイテム内の内容(object text)をコピー(Command-C)してクリップボードに格納し、その内容をキーにして現在表示中のスライド内のテキストアイテムを抽出してみたところ、うまくいきました(なんでこんなことさせられてるんだろ?)。早くselectionがKeynote上でもまともに使えるようになってほしいものです(Pages上ではけっこういい感じに使えるのに)。

テキストアイテムの特定ができるようになったので、入っているobject textのサイズに合わせてテキストアイテムをリサイズする処理を書いてみました。

クリップボードの内容をNSAttributedStringとして取得し、その画面上の描画サイズを取得するサブルーチンは毎日さんざん使っているので(掲載リストのproperty宣言部をソートするのに使っています)信頼性があります。

とりあえず、擬似的に現在選択中のオブジェクトを特定する実験コードにちょっとだけ機能をつけたものですが、操作1に対して結果1というのは普通「自動化」とか言わないので、実用性は皆無です(めんどくさい操作ステップを省けるぐらいしか)。

AppleScript名:Keynoteのテキストアイテム内の文字の実際の幅でリサイズ
—
–  Created by: Takaaki Naganoya
–  Created on: 2019/04/05
—
–  Copyright © 2019 Piyomaru Software, All Rights Reserved
—
use AppleScript version "2.5"
use scripting additions
use framework "Foundation"
use framework "AppKit"
use BPlus : script "BridgePlus" –https://www.macosxautomation.com/applescript/apps/BridgePlus.html

property NSFont : a reference to current application’s NSFont
property NSColor : a reference to current application’s NSColor
property NSPasteboard : a reference to current application’s NSPasteboard
property NSAttributedString : a reference to current application’s NSAttributedString
property NSFontAttributeName : a reference to current application’s NSFontAttributeName
property NSMutableAttributedString : a reference to current application’s NSMutableAttributedString
property NSForegroundColorAttributeName : a reference to current application’s NSForegroundColorAttributeName

load framework

–クリップボードの内容をテキストとして取得し、現在のKeynote書類中のtext itemのうちコピーしたテキストに該当するものを抽出
set targString to (the clipboard) as string

tell application "Keynote"
  tell document 1
    tell current slide
      set tList to every text item whose object text is targString
      
if tList = {} then return
      
set targObject to first item of tList
    end tell
  end tell
end tell

–クリップボードの内容をNSAttributedStringに
set anAttr to my getClipboardASStyledText()

–Split Attributed Strings into lines
set attrList to splitAttributedStringByLines(anAttr) of me

–Sort Attributed String list by its width in descending (large–> small)
set aResList to shellSortListDecending(attrList, 1) of me
set {targObjWidth, targAttrStrObj} to first item of aResList

–Resize Text item objet’s frame by its drawing width on screen
tell application "Keynote"
  tell document 1
    tell current slide
      tell targObject
        set width to ((targObjWidth as number) + 10) –resize it !
      end tell
    end tell
  end tell
end tell

–入れ子のリストを昇順ソート
on shellSortListAscending(a, keyItem)
  return sort2DList(a, keyItem, {true}) of me
end shellSortListAscending

–入れ子のリストを降順ソート
on shellSortListDecending(a, keyItem)
  return sort2DList(a, keyItem, {false}) of me
end shellSortListDecending

–2D Listをソート
on sort2DList(aList as list, sortIndexes as list, sortOrders as list)
  
  
–index値をAS流(アイテムが1はじまり)からCocoa流(アイテムが0はじまり)に変換
  
set newIndex to {}
  
repeat with i in sortIndexes
    set j to contents of i
    
set j to j – 1
    
set the end of newIndex to j
  end repeat
  
  
–Sort TypeのListを作成(あえて外部から指定する内容でもない)
  
set sortTypes to {}
  
repeat (length of sortIndexes) times
    set the end of sortTypes to "compare:"
  end repeat
  
  
–Sort
  
set resList to (current application’s SMSForder’s subarraysIn:(aList) sortedByIndexes:newIndex ascending:sortOrders sortTypes:sortTypes |error|:(missing value)) as list
  
  
return resList
end sort2DList

— クリップボードの内容をNSAttributedStringとして取り出して返す
on getClipboardASStyledText()
  try
    set theNSPasteboard to NSPasteboard’s generalPasteboard()
    
set theAttributedStringNSArray to theNSPasteboard’s readObjectsForClasses:({NSAttributedString}) options:(missing value)
    
set theNSAttributedString to theAttributedStringNSArray’s objectAtIndex:0
    
return theNSAttributedString
  on error
    return missing value
  end try
end getClipboardASStyledText

on splitAttributedStringByLines(theStyledText)
  set outList to {}
  
set outAttr to NSMutableAttributedString’s alloc()’s initWithString:""
  
  
set thePureString to theStyledText’s |string|() –pure string from theStyledText
  
set theLength to theStyledText’s |length|()
  
set startIndex to 0
  
  
repeat until (startIndex = theLength)
    set {theAtts, theRange} to theStyledText’s attributesAtIndex:startIndex longestEffectiveRange:(reference) inRange:{startIndex, theLength – startIndex}
    
set aText to (thePureString’s substringWithRange:theRange) as string –String
    
    
set aColor to (theAtts’s valueForKeyPath:"NSColor") –Color
    
set aFont to (theAtts’s valueForKeyPath:"NSFont") –Font
    
if aFont is equal to missing value then error "Not font name and size are specified" –Font Name error
    
set aDFontName to aFont’s displayName() –Font Name
    
set aDFontSize to aFont’s pointSize() –Font Size
    
    
set tmpAttrStr to generateAttributedString(aText, aDFontName, aDFontSize, aColor) of me
    
outAttr’s appendAttributedString:tmpAttrStr
    
    
if (aText contains return) or (aText contains string id 10) then –CR or LF
      set tmpSize to outAttr’s |size|()
      
set tmpWidth to retWidthFromSize(tmpSize) of me
      
      
set the end of outList to {tmpWidth, outAttr}
      
set outAttr to NSMutableAttributedString’s alloc()’s initWithString:""
    end if
    
    
set startIndex to current application’s NSMaxRange(theRange)
  end repeat
  
  
set tmpSize to outAttr’s |size|()
  
set tmpWidth to retWidthFromSize(tmpSize) of me
  
set the end of outList to {tmpWidth, outAttr}
  
  
return outList
end splitAttributedStringByLines

on retWidthFromSize(tmpSize)
  if class of tmpSize = record then
    –macOS 10.10, 10.11, 10.12
    
set tmpWidth to width of tmpSize
  else
    –macOS 10.13, 10.14
    
set tmpWidth to first item of tmpSize
  end if
  
return tmpWidth
end retWidthFromSize

on generateAttributedString(aStr, aFontPSName, aFontSize, aColor)
  set tmpAttr to NSMutableAttributedString’s alloc()’s initWithString:aStr
  
set aRange to current application’s NSMakeRange(0, tmpAttr’s |length|())
  
set aVal1 to NSFont’s fontWithName:aFontPSName |size|:aFontSize
  
tmpAttr’s beginEditing()
  
tmpAttr’s addAttribute:(NSFontAttributeName) value:aVal1 range:aRange
  
tmpAttr’s addAttribute:(NSForegroundColorAttributeName) value:aColor range:aRange
  
tmpAttr’s endEditing()
  
return tmpAttr
end generateAttributedString

★Click Here to Open This Script 

Posted in Clipboard list Record RTF Sort | Tagged 10.12savvy 10.13savvy 10.14savvy Keynote NSAttributedString NSColor NSFont NSFontAttributeName NSForegroundColorAttributeName NSMutableAttributedString NSPasteboard | Leave a comment

クリップボード内のRTFをStyled Stringとして解釈して行ごとに分割して画面描画サイズ幅で昇順ソートして再結合

Posted on 2月 27, 2019 by Takaaki Naganoya

クリップボードにコピーしておいた書式つきテキストを、行ごとに画面上の描画サイズで昇順ソートし、再結合してクリップボードに転送するAppleScriptです。

ほぼ毎日使っているAppleScriptの改良版です。

Cocoaの機能を呼び出すと、AppleScript冒頭にproperty宣言文を書くことになりますが(書かなくてもいいんですが)、この宣言文を「プロポーショナルフォントを考慮しつつ実際の画面上の描画サイズを考慮」して短いものから長いものにソートして掲載しています。

ただし、従来のバージョンでは実際のフォントではなく一律に指定フォントで描画したさいの描画幅でソートしていたため、ごくまれに掲載時のリストが短い順になっていませんでした(世界中で誰も気にしてねえよ! ^ー^;)。

これを、実際の指定フォントやサイズを考慮した行単位のスタイル付きテキストに分解し、描画幅でソートしたあとにスタイル付きテキストを再合成するようにしました。

従来のOld Style AppleScriptではスタイル付きテキストの操作は一切できませんでしたが、Cocoaの機能を活用することでこのように自由度の高い処理ができるようになった、という好例です。

なお、本ルーチンによって厳密に描画幅でソートしても、Web掲載時にはWebブラウザのレンダリングのルール(&ユーザー側で指定しているWebブラウザのフォント)が適用されるため、macOS上のアプリケーション上での見た目と若干違いが出るという残念な結果も出ています。

macOS標準装備のスクリプトメニューに入れて呼び出しています。

AppleScript名:クリップボード内のRTFをStyled Stringとして解釈して行ごとに分割して画面描画サイズ幅で昇順ソートして再結合
— Created 2017-04-24 by Shane Stanley
— Modified 2019-02-27 by Takaaki Naganoya
use AppleScript version "2.5"
use scripting additions
use framework "Foundation"
use framework "AppKit"
use bPlus : script "BridgePlus" –https://www.macosxautomation.com/applescript/apps/BridgePlus.html

property NSFont : a reference to current application’s NSFont
property NSColor : a reference to current application’s NSColor
property NSPasteboard : a reference to current application’s NSPasteboard
property NSAttributedString : a reference to current application’s NSAttributedString
property NSFontAttributeName : a reference to current application’s NSFontAttributeName
property NSMutableAttributedString : a reference to current application’s NSMutableAttributedString
property NSForegroundColorAttributeName : a reference to current application’s NSForegroundColorAttributeName

–クリップボードの内容をNSAttributedStringに
set anAttr to my getClipboardASStyledText()
if anAttr = missing value then return

–Split Attributed Strings into lines
set attrList to splitAttributedStringByLines(anAttr) of me

–Sort by Width in ascending
set sortedList to shellSortListAscending(attrList, 1) of me

–Append Attributed Strings
set mutableReturn to NSMutableAttributedString’s alloc()’s initWithString:(return)
set outStr to NSMutableAttributedString’s alloc()’s initWithString:""

repeat with i in sortedList
  copy i to {tmpWidth, tmpAttr}
  (
outStr’s appendAttributedString:tmpAttr)
  
  
set tmpStr to tmpAttr’s |string|() as string
  
if (tmpStr does not end with string id 10) and (tmpStr does not end with string id 13) then
    (outStr’s appendAttributedString:mutableReturn)
  end if
end repeat

— Set Styled String to Clipboard
set theArray to {outStr}
restoreClipboard(theArray) of me

–Clipboardにデータを設定する
on restoreClipboard(theArray as list)
  set thePasteboard to NSPasteboard’s generalPasteboard()
  
thePasteboard’s clearContents()
  
thePasteboard’s writeObjects:theArray
end restoreClipboard

— クリップボードの内容をNSAttributedStringとして取り出して返す
on getClipboardASStyledText()
  try
    set theNSPasteboard to NSPasteboard’s generalPasteboard()
    
set theAttributedStringNSArray to theNSPasteboard’s readObjectsForClasses:({NSAttributedString}) options:(missing value)
    
set theNSAttributedString to theAttributedStringNSArray’s objectAtIndex:0
    
return theNSAttributedString
  on error
    return missing value
  end try
end getClipboardASStyledText

on splitAttributedStringByLines(theStyledText)
  set outList to {}
  
set outAttr to NSMutableAttributedString’s alloc()’s initWithString:""
  
  
set thePureString to theStyledText’s |string|() –pure string from theStyledText
  
set theLength to theStyledText’s |length|()
  
set startIndex to 0
  
  
repeat until (startIndex = theLength)
    set {theAtts, theRange} to theStyledText’s attributesAtIndex:startIndex longestEffectiveRange:(reference) inRange:{startIndex, theLength – startIndex}
    
set aText to (thePureString’s substringWithRange:theRange) as string –String
    
    
set aColor to (theAtts’s valueForKeyPath:"NSColor") –Color
    
set aFont to (theAtts’s valueForKeyPath:"NSFont") –Font
    
if aFont is equal to missing value then error "Not font name and size are specified" –Font Name error
    
set aDFontName to aFont’s displayName() –Font Name
    
set aDFontSize to aFont’s pointSize() –Font Size
    
    
set tmpAttrStr to generateAttributedString(aText, aDFontName, aDFontSize, aColor) of me
    
outAttr’s appendAttributedString:tmpAttrStr
    
    
if (aText contains return) or (aText contains string id 10) then –CR or LF
      set tmpSize to outAttr’s |size|()
      
set tmpWidth to retWidthFromSize(tmpSize) of me
      
      
set the end of outList to {tmpWidth, outAttr}
      
set outAttr to NSMutableAttributedString’s alloc()’s initWithString:""
    end if
    
    
set startIndex to current application’s NSMaxRange(theRange)
  end repeat
  
  
set tmpSize to outAttr’s |size|()
  
set tmpWidth to retWidthFromSize(tmpSize) of me
  
set the end of outList to {tmpWidth, outAttr}
  
  
return outList
end splitAttributedStringByLines

on retWidthFromSize(tmpSize)
  if class of tmpSize = record then
    –macOS 10.10, 10.11, 10.12
    
set tmpWidth to width of tmpSize
  else
    –macOS 10.13, 10.14
    
set tmpWidth to first item of tmpSize
  end if
  
return tmpWidth
end retWidthFromSize

on generateAttributedString(aStr, aFontPSName, aFontSize, aColor)
  set tmpAttr to NSMutableAttributedString’s alloc()’s initWithString:aStr
  
set aRange to current application’s NSMakeRange(0, tmpAttr’s |length|())
  
set aVal1 to NSFont’s fontWithName:aFontPSName |size|:aFontSize
  
tmpAttr’s beginEditing()
  
tmpAttr’s addAttribute:(NSFontAttributeName) value:aVal1 range:aRange
  
tmpAttr’s addAttribute:(NSForegroundColorAttributeName) value:aColor range:aRange
  
tmpAttr’s endEditing()
  
return tmpAttr
end generateAttributedString

–入れ子のリストを昇順ソート
on shellSortListAscending(a, keyItem)
  return sort2DList(a, keyItem, {true}) of me
end shellSortListAscending

–入れ子のリストを降順ソート
on shellSortListDecending(a, keyItem)
  return sort2DList(a, keyItem, {false}) of me
end shellSortListDecending

–2D Listをソート
on sort2DList(aList as list, sortIndexes as list, sortOrders as list)
  load framework
  
–index値をAS流(アイテムが1はじまり)からCocoa流(アイテムが0はじまり)に変換
  
set newIndex to {}
  
repeat with i in sortIndexes
    set j to contents of i
    
set j to j – 1
    
set the end of newIndex to j
  end repeat
  
  
–Sort TypeのListを作成(あえて外部から指定する内容でもない)
  
set sortTypes to {}
  
repeat (length of sortIndexes) times
    set the end of sortTypes to "compare:"
  end repeat
  
  
–Sort
  
set resList to (current application’s SMSForder’s subarraysIn:(aList) sortedByIndexes:newIndex ascending:sortOrders sortTypes:sortTypes |error|:(missing value)) as list
  
return resList
end sort2DList

★Click Here to Open This Script 

Posted in Clipboard Color list RTF Sort Text | Tagged 10.11savvy 10.12savvy 10.13savvy 10.14savvy NSAttributedString NSColor NSFont NSFontAttributeName NSForegroundColorAttributeName NSMutableAttributedString NSPasteboard | Leave a comment

電子書籍(PDF)をオンラインストアで販売中!

Google Search

Popular posts

  • 開発機としてM2 Mac miniが来たのでガチレビュー
  • macOS 13.6.5 AS系のバグ、一切直らず
  • CotEditorで2つの書類の行単位での差分検出
  • Apple純正マウス、キーボードのバッテリー残量取得
  • macOS 15, Sequoia
  • 初心者がつまづきやすい「log」コマンド
  • ディスプレイをスリープ状態にして処理続行
  • Adobe AcrobatをAppleScriptから操作してPDF圧縮
  • 指定のWordファイルをPDFに書き出す
  • メキシカンハットの描画
  • 与えられた文字列の1D Listのすべての順列組み合わせパターン文字列を返す v3(ベンチマーク用)
  • macOS 13 TTS環境の変化について
  • 2023年に書いた価値あるAppleScript
  • Pixelmator Pro v3.6.4でAppleScriptからの操作時の挙動に違和感が
  • Pages本執筆中に、2つの書類モード切り替えに気がついた
  • AdobeがInDesign v19.4からPOSIX pathを採用
  • 可変次元のベクトルに対応したコサイン類似度計算
  • Safariで「プロファイル」機能を使うとAppleScriptの処理に影響
  • Cocoa Scripting Course 続刊計画
  • 指定のPages書類の言語設定を英語に

Tags

10.11savvy (1101) 10.12savvy (1242) 10.13savvy (1391) 10.14savvy (586) 10.15savvy (437) 11.0savvy (281) 12.0savvy (202) 13.0savvy (145) 14.0savvy (93) 15.0savvy (70) CotEditor (63) Finder (51) iTunes (19) Keynote (112) NSAlert (60) NSArray (51) NSBitmapImageRep (20) NSBundle (20) NSButton (34) NSColor (51) NSDictionary (27) NSFileManager (23) NSFont (19) NSImage (41) NSJSONSerialization (21) NSMutableArray (62) NSMutableDictionary (21) NSPredicate (36) NSRunningApplication (56) NSScreen (30) NSScrollView (22) NSString (117) NSURL (97) NSURLRequest (23) NSUTF8StringEncoding (30) NSView (33) NSWorkspace (20) Numbers (68) Pages (52) Safari (44) Script Editor (26) WKUserContentController (21) WKUserScript (20) WKWebView (23) WKWebViewConfiguration (22)

カテゴリー

  • 2D Bin Packing
  • 3D
  • AirDrop
  • AirPlay
  • Animation
  • AppleScript Application on Xcode
  • Beginner
  • Benchmark
  • beta
  • Bluetooth
  • Books
  • boolean
  • bounds
  • Bug
  • Calendar
  • call by reference
  • Clipboard
  • Cocoa-AppleScript Applet
  • Code Sign
  • Color
  • Custom Class
  • dialog
  • diff
  • drive
  • Droplet
  • exif
  • file
  • File path
  • filter
  • folder
  • Font
  • Font
  • GAME
  • geolocation
  • GUI
  • GUI Scripting
  • Hex
  • History
  • How To
  • iCloud
  • Icon
  • Image
  • Input Method
  • Internet
  • iOS App
  • JavaScript
  • JSON
  • JXA
  • Keychain
  • Keychain
  • Language
  • Library
  • list
  • Locale
  • Localize
  • Machine Learning
  • Map
  • Markdown
  • Menu
  • Metadata
  • MIDI
  • MIME
  • Natural Language Processing
  • Network
  • news
  • Noification
  • Notarization
  • Number
  • Object control
  • OCR
  • OSA
  • parallel processing
  • PDF
  • Peripheral
  • PRODUCTS
  • QR Code
  • Raw AppleEvent Code
  • Record
  • rectangle
  • recursive call
  • regexp
  • Release
  • Remote Control
  • Require Control-Command-R to run
  • REST API
  • Review
  • RTF
  • Sandbox
  • Screen Saver
  • Script Libraries
  • sdef
  • search
  • Security
  • selection
  • shell script
  • Shortcuts Workflow
  • Sort
  • Sound
  • Spellchecker
  • Spotlight
  • SVG
  • System
  • Tag
  • Telephony
  • Text
  • Text to Speech
  • timezone
  • Tools
  • Update
  • URL
  • UTI
  • Web Contents Control
  • WiFi
  • XML
  • XML-RPC
  • イベント(Event)
  • 未分類

アーカイブ

  • 2024年12月
  • 2024年11月
  • 2024年10月
  • 2024年9月
  • 2024年8月
  • 2024年7月
  • 2024年6月
  • 2024年5月
  • 2024年4月
  • 2024年3月
  • 2024年2月
  • 2024年1月
  • 2023年12月
  • 2023年11月
  • 2023年10月
  • 2023年9月
  • 2023年8月
  • 2023年7月
  • 2023年6月
  • 2023年5月
  • 2023年4月
  • 2023年3月
  • 2023年2月
  • 2023年1月
  • 2022年12月
  • 2022年11月
  • 2022年10月
  • 2022年9月
  • 2022年8月
  • 2022年7月
  • 2022年6月
  • 2022年5月
  • 2022年4月
  • 2022年3月
  • 2022年2月
  • 2022年1月
  • 2021年12月
  • 2021年11月
  • 2021年10月
  • 2021年9月
  • 2021年8月
  • 2021年7月
  • 2021年6月
  • 2021年5月
  • 2021年4月
  • 2021年3月
  • 2021年2月
  • 2021年1月
  • 2020年12月
  • 2020年11月
  • 2020年10月
  • 2020年9月
  • 2020年8月
  • 2020年7月
  • 2020年6月
  • 2020年5月
  • 2020年4月
  • 2020年3月
  • 2020年2月
  • 2020年1月
  • 2019年12月
  • 2019年11月
  • 2019年10月
  • 2019年9月
  • 2019年8月
  • 2019年7月
  • 2019年6月
  • 2019年5月
  • 2019年4月
  • 2019年3月
  • 2019年2月
  • 2019年1月
  • 2018年12月
  • 2018年11月
  • 2018年10月
  • 2018年9月
  • 2018年8月
  • 2018年7月
  • 2018年6月
  • 2018年5月
  • 2018年4月
  • 2018年3月
  • 2018年2月

https://piyomarusoft.booth.pm/items/301502

メタ情報

  • ログイン
  • 投稿フィード
  • コメントフィード
  • WordPress.org

Forum Posts

  • 人気のトピック
  • 返信がないトピック

メタ情報

  • ログイン
  • 投稿フィード
  • コメントフィード
  • WordPress.org
Proudly powered by WordPress
Theme: Flint by Star Verte LLC