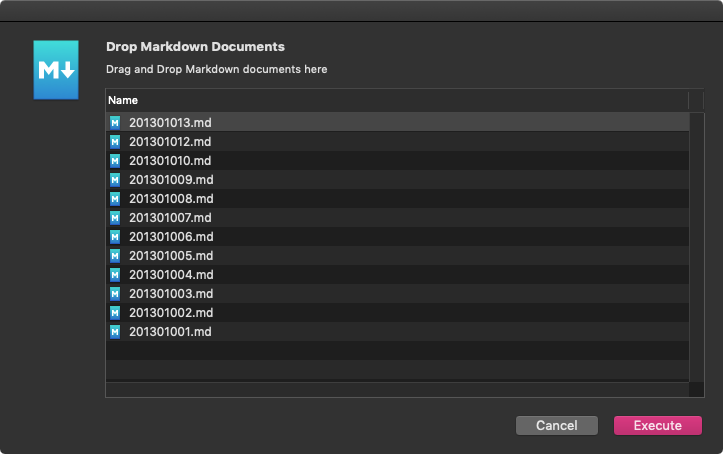
タブでインデントしたテキストを、NSOutlineViewで表示できるデータ形式に変換するAppleScriptです。
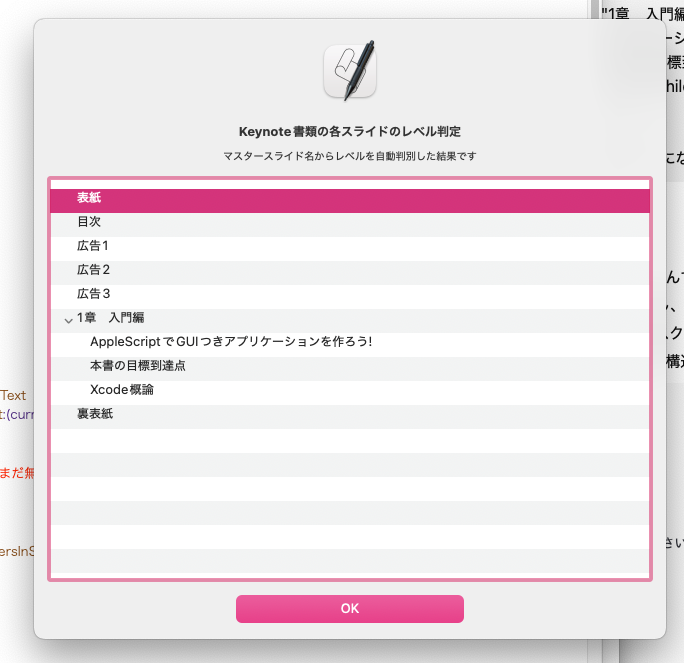
主に、Keynote書類の各スライド(ページ)上のタイトルを、そのマスタースライド名をもとにインデントレベルを仮想的に判定し、PDFのTOCを作成する際の「プレビュー」を行うべく、NSOutLineViewで表示するために作成したものです。
当初はChatGPTに書かせたものですが、途中から(再利用可能な形式に)全面的に書き換えました。処理速度が速いとか遅いとかいったことには留意していません。ただ、ひたすらChatGPTの出してきたコードの添削を行うことに留意しました(動かないコードが出てくることが多いので)。
これ自体は、テストデータ(テキスト)からNSOutLineView表示用のデータを作成する「使い捨てプログラム」だったのですが、ほかにも用途がありそうなので掲載しておきます。
ただし、ChatGPTとのやりとりで終始していたので、Tabが1個の階層までしかサポートしていません。Tab n個のn階層データには未対応です。
表紙
目次
広告1
広告2
広告3
1章 入門編
	AppleScriptでGUIつきアプリケーションを作ろう!
	本書の目標到達点
	Xcode概論
裏表紙
こんなデータを、
{{|name|:"表紙", isLeaf:true, children:{}}, {|name|:"目次", isLeaf:true, children:{}}, {|name|:"広告1", isLeaf:true, children:{}}, {|name|:"広告2", isLeaf:true, children:{}}, {|name|:"広告3", isLeaf:true, children:{}}, {|name|:"1章 入門編", isLeaf:false, children:{{|name|:"AppleScriptでGUIつきアプリケーションを作ろう!", isLeaf:true, children:{}}, {|name|:"本書の目標到達点", isLeaf:true, children:{}}, {|name|:"Xcode概論", isLeaf:true, children:{}}}}, {|name|:"裏表紙", isLeaf:true, children:{}}}
のように変換します。
本来は、Keynote書類の各スライドのタイトルとマスタースライド名を読み取り、そこから上記のデータを作成するフローなのですが、毎回Keynote書類を読み取らせる方式だとテストが大変な感じだったので、テキストからテストデータを作成できると便利なのではないかと。
| AppleScript名:タブでインデントしたテキストをOutLineViewで表示できるデータ形式に変換 v2.scpt |
| — – Created by: Takaaki Naganoya – Created on: 2025/10/09 — – Copyright © 2025 Piyomaru Software, All Rights Reserved — use AppleScript version "2.8" use framework "Foundation" use scripting additions — サンプル入力(ここを実際のテキストに置き換えてください) set srcText to "表紙 目次 広告1 広告2 広告3 1章 入門編 AppleScriptでGUIつきアプリケーションを作ろう! 本書の目標到達点 Xcode概論 裏表紙" set aRec to convStrToStructuredRec(srcText) of me –> {{|name|:"表紙", isLeaf:true, children:{}}, {|name|:"目次", isLeaf:true, children:{}}, {|name|:"広告1", isLeaf:true, children:{}}, {|name|:"広告2", isLeaf:true, children:{}}, {|name|:"広告3", isLeaf:true, children:{}}, {|name|:"1章 入門編", isLeaf:false, children:{{|name|:"AppleScriptでGUIつきアプリケーションを作ろう!", isLeaf:true, children:{}}, {|name|:"本書の目標到達点", isLeaf:true, children:{}}, {|name|:"Xcode概論", isLeaf:true, children:{}}}}, {|name|:"裏表紙", isLeaf:true, children:{}}} — 2階層(タブ0/タブ1)対応の変換関数 on convStrToStructuredRec(srcText) — 行分割(改行種類を問わない) set nsText to current application’s NSString’s stringWithString:srcText set lineArray to nsText’s componentsSeparatedByCharactersInSet:(current application’s NSCharacterSet’s newlineCharacterSet()) set topList to {} — トップレベルのリスト(返却値) set currentParentIndex to 0 — 直近のトップレベル要素の添字(0 = まだ無し) repeat with nsLine in lineArray — 行が空白のみならスキップ(処理終了ではない) set trimmedForEmpty to ((nsLine’s stringByTrimmingCharactersInSet:(current application’s NSCharacterSet’s whitespaceAndNewlineCharacterSet())) as text) if trimmedForEmpty is "" then — 空行は無視して次へ else — Cocoa(NSString)で行頭のタブ数を数える set len to (nsLine’s |length|()) as integer set tabCount to 0 repeat with idx from 0 to (len – 1) set ch to (nsLine’s characterAtIndex:idx) — 文字コード 9 がタブ if (ch as integer) = 9 then set tabCount to tabCount + 1 else exit repeat end if end repeat — 先頭のタブを取り除いた文字列を取得 if len > tabCount then set contentNS to (nsLine’s substringFromIndex:(tabCount)) else set contentNS to (current application’s NSString’s stringWithString:"") end if set contentText to (contentNS as text) if tabCount = 0 then — トップレベル(親)要素:初期は isLeaf:true, children:{} にする set newRec to {|name|:contentText, isLeaf:true, children:{}} set end of topList to newRec set currentParentIndex to (count of topList) else — タブあり = 子要素(直近のトップレベルに追加) — 親が無い場合は安全のためプレースホルダ親を作る(あなたのデータには不要なはず) if currentParentIndex = 0 then set placeholder to {|name|:"", isLeaf:false, children:{}} set end of topList to placeholder set currentParentIndex to (count of topList) end if — 子レコードを作り、親の children に追加。親の isLeaf を false にする set childRec to {|name|:contentText, isLeaf:true, children:{}} set parentRec to item currentParentIndex of topList set parentChildren to parentRec’s children set end of parentChildren to childRec set parentRec’s children to parentChildren set parentRec’s isLeaf to false — 更新した親レコードをリストに戻す set item currentParentIndex of topList to parentRec end if end if end repeat return topList end convStrToStructuredRec |


