Menu

Skip to content
AppleScriptの穴
  • Home
  • Products
  • Books
  • Docs
  • Events
  • Forum
  • About This Blog
  • License
  • 仕事依頼

AppleScriptの穴

Useful & Practical AppleScript archive. Click '★Click Here to Open This Script' Link to download each AppleScript

月: 2019年7月

指定のAppleScriptテキストを構文確認して指定の構文要素が入っていないかチェック

Posted on 7月 31, 2019 by Takaaki Naganoya

指定のテキストをAppleScriptとみなして構文確認して、指定の構文要素が入っていないかチェックするAppleScriptです。

AppleScriptにeval関数はないので、文字列として与えたAppleScriptをその場で実行する「run script」コマンドをevalがわりに使っています。

文字列をそのままrun scriptするのは(一応いろいろ保護機能はあるものの)、セキュリティ的にリスクの高い操作になってしまいます。


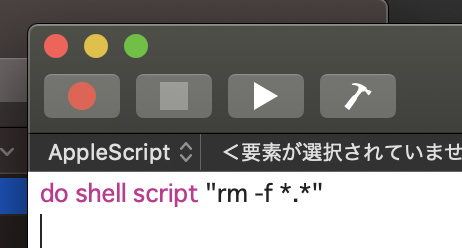
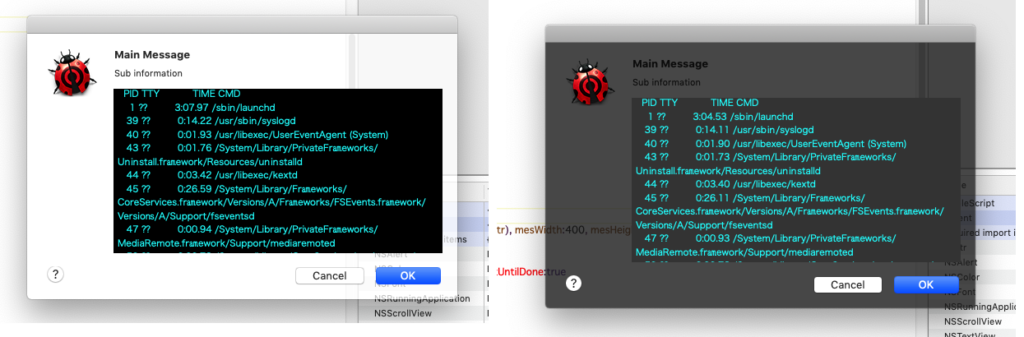
▲こんなのがrun scriptコマンドで実行されてしまったらと思うとゾッとします。ためしに実行してみたら、実行権限がないので実行できないエラーになりました

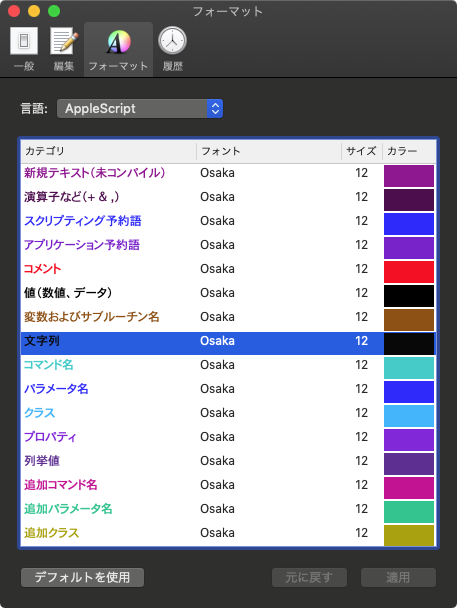
そこで、文字列をいったんAppleScriptとして評価(構文確認)し、コマンドなどの危険と思われる構文要素が入っていないかどうかチェックする処理を書いて使っています。

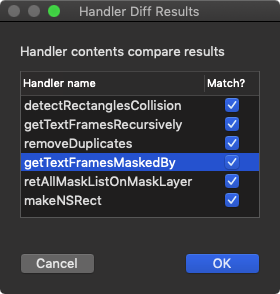
これら、「コマンド」および「追加コマンド」といった構文要素が入っていたらtrueを返します。

本Scriptをライブラリ化して組み込むことで、少ない記述量で対象の文字列をそのままrun scriptしてよいかどうか判定できるようにしています。

–> Download checkDanger(with Library in its bundle)


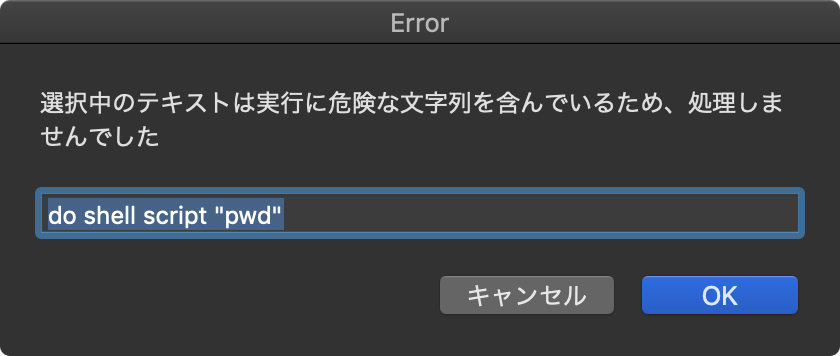
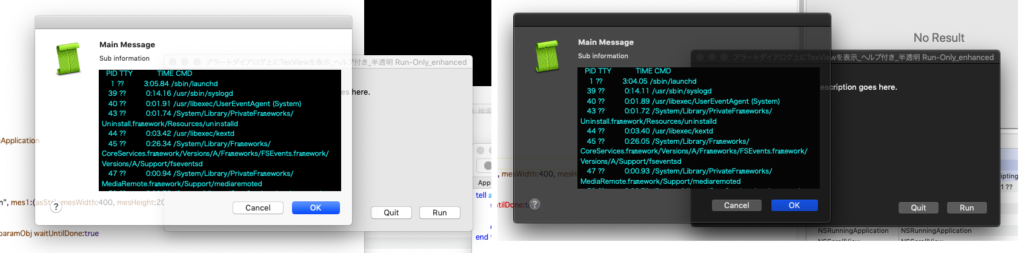
▲実際にテキストをAppleScriptとして評価して構文要素を検出し、このようにコマンド部分(AppleScriptのdo shell scriptコマンド)が入っていることを検知できる

AppleScript名:指定のAppleScriptテキストを構文確認して指定の構文要素が入っていないかチェック.scptd
—
–  Created by: Takaaki Naganoya
–  Created on: 2019/07/31
—
–  Copyright © 2019 Piyomaru Software, All Rights Reserved
—
use AppleScript version "2.4" — Yosemite (10.10) or later
use framework "Foundation"
use scripting additions
use framework "AppKit"
use framework "OSAKit"
use attrLib : script "asAttrRecLib"

property NSArray : a reference to current application’s NSArray
property OSANull : a reference to current application’s OSANull
property NSString : a reference to current application’s NSString
property OSAScript : a reference to current application’s OSAScript
property NSPredicate : a reference to current application’s NSPredicate
property NSDictionary : a reference to current application’s NSDictionary
property NSUnarchiver : a reference to current application’s NSUnarchiver
property OSALanguage : a reference to current application’s OSALanguage
property NSCountedSet : a reference to current application’s NSCountedSet
property NSMutableArray : a reference to current application’s NSMutableArray
property NSMutableDictionary : a reference to current application’s NSMutableDictionary
property OSALanguageInstance : a reference to current application’s OSALanguageInstance

script spd
  property fArray : {}
  
property outList : {}
  
property resStr : {}
end script

on run
  set theSource to "do shell script \"rm -f *.*\""
  
set aRes to chkTargLexicalElementsFromCompiledScriptAttribute(theSource, {9, 14}) of me –{Command, External Command}
  
–> true : 指定の構文要素が入っていた
  
  
set theSource to "{{aName:\"piyoko\", aVal:100}, {aName:\"piyomaru\", aVal:80}, {aName:\"piyoo\", aVal:10}, {aName:\"Gundamo\", aVal:10}}"
  
set bRes to chkTargLexicalElementsFromCompiledScriptAttribute(theSource, {9, 14}) of me –{Command, External Command}
  
–> false : 指定の構文要素は入っていなかった
end run

–AppleScriptのソーステキストをコンパイルして、指定の構文要素が含まれているかチェックする
on chkTargLexicalElementsFromCompiledScriptAttribute(theSource as string, targLexicalElements as list)
  
  
–AppleScriptの構文色分け情報を取得
  
set ccRes to getAppleScriptSourceColors() of me
  
set cRes to chkASLexicalFormatColorConfliction(ccRes) of me –構文色分けの重複色チェック
  
if cRes = false then error "There is some duplicate(s) color among AppleScript’s lexical color settings"
  
  
–検索用の色情報を作成
  
set colTargList to {}
  
repeat with i in targLexicalElements
    set commentCol to contents of item i of ccRes –Variable and Sub-routine name
    
set searchVal to (redValue of commentCol as string) & " " & (greenValue of commentCol as string) & " " & (blueValue of commentCol as string) –for filtering
    
set the end of colTargList to searchVal
  end repeat


–与えられたテキストをAppleScriptとして評価し構文色分け情報をもとにStyle Runs的なDictionary化して返す
  
set aRitch to compileASSourcetextAndReturnStyledText(theSource) of me


–書式付きテキストからstyle runs的な書式リストを作成
  
set anAttrList to getAttributeRunsFromAttrString(aRitch) of attrLib
  
  
set bList to filterRecListByLabelAndSublist(anAttrList, "colorStr IN %@", colTargList) of me
  
  
return not (bList as list = {}) as boolean
  
end chkTargLexicalElementsFromCompiledScriptAttribute

on retDelimedText(aList, aDelim)
  set aText to ""
  
set curDelim to AppleScript’s text item delimiters
  
set AppleScript’s text item delimiters to aDelim
  
set aText to aList as text
  
set AppleScript’s text item delimiters to curDelim
  
return aText
end retDelimedText

——-

–AppleScriptの構文色分けのカラー値をRGBで取得する
on getAppleScriptSourceColors()
  — get the plist info as a dictionary
  
set thePath to NSString’s stringWithString:"~/Library/Preferences/com.apple.applescript.plist"
  
set thePath to thePath’s stringByExpandingTildeInPath()
  
set theInfo to NSDictionary’s dictionaryWithContentsOfFile:thePath
  
  
— extract relevant part and loop through
  
set theArray to (theInfo’s valueForKey:"AppleScriptSourceAttributes") as list
  
  
set colList to {}
  
  
repeat with i from 1 to count of theArray
    set anEntry to item i of theArray
    
    
set colorData to NSColor of anEntry
    
set theColor to (NSUnarchiver’s unarchiveObjectWithData:colorData)
    
    
set {rVal, gVal, bVal} to retColListFromNSColor(theColor, 255) of me
    
    
set fontData to NSFont of anEntry
    
set theFont to (NSUnarchiver’s unarchiveObjectWithData:fontData)
    
    
set aFontName to theFont’s displayName() as text
    
set aFontSize to theFont’s pointSize()
    
    
set aColRec to {redValue:rVal, greenValue:gVal, blueValue:bVal, fontName:aFontName, fontSize:aFontSize}
    
    
set the end of colList to aColRec
  end repeat
  
  
return colList
end getAppleScriptSourceColors

–AppleScriptの構文色分けのカラー値をRGBで取得する
on getAppleScriptSourceNSColorsDict()
  — get the plist info as a dictionary
  
set thePath to NSString’s stringWithString:"~/Library/Preferences/com.apple.applescript.plist"
  
set thePath to thePath’s stringByExpandingTildeInPath()
  
set theInfo to NSDictionary’s dictionaryWithContentsOfFile:thePath
  
  
— extract relevant part and loop through
  
set theArray to (theInfo’s valueForKey:"AppleScriptSourceAttributes") as list
  
  
set aDict to NSMutableDictionary’s alloc()’s init()
  
  
repeat with i from 1 to count of theArray
    set anEntry to item i of theArray
    
    
set colorData to NSColor of anEntry
    
set theColor to (NSUnarchiver’s unarchiveObjectWithData:colorData)
    
    
set {rVal, gVal, bVal} to retColListFromNSColor(theColor, 255) of me
    
    
set fontData to NSFont of anEntry
    
set theFont to (NSUnarchiver’s unarchiveObjectWithData:fontData)
    
    
set aFontName to theFont’s displayName() as text
    
set aFontSize to theFont’s pointSize()
    
    
set colIndStr to (rVal as string) & " " & (gVal as string) & " " & (bVal as string)
    
set tmpColDat to {numList:{rVal, gVal, bVal}, strInd:colIndStr}
    
–(aDict’s addObject:tmpColDat forKey:theColor)
    (
aDict’s addObject:{rVal, gVal, bVal} forKey:theColor)
  end repeat
  
  
return aDict
end getAppleScriptSourceNSColorsDict

–NSColorからRGBの値を取り出す
on retColListFromNSColor(aCol, aMAX as integer)
  set aSpace to (aCol’s colorSpaceName()) as string
  
–set aSpace to (aCol’s type()) as integer
  
  
if aSpace is in {"NSDeviceRGBColorSpace", "NSCalibratedRGBColorSpace"} then
    copy aCol to cCol
  else
    –RGB以外の色空間の色は、RGBに変換
    
–CMYKとグレースケールは同一メソッドでRGBに変換できることを確認済み
    
set cCol to aCol’s colorUsingColorSpaceName:"NSCalibratedRGBColorSpace"
    
if cCol = missing value then error "Color Space Conversion Error (" & aSpace & " to NSCalibratedRGBColorSpace)"
  end if
  
  
set aRed to round ((cCol’s redComponent()) * aMAX) rounding as taught in school
  
set aGreen to round ((cCol’s greenComponent()) * aMAX) rounding as taught in school
  
set aBlue to round ((cCol’s blueComponent()) * aMAX) rounding as taught in school
  
  
if aRed > aMAX then set aRed to aMAX
  
if aGreen > aMAX then set aGreen to aMAX
  
if aBlue > aMAX then set aBlue to aMAX
  
  
return {aRed, aGreen, aBlue} as list
end retColListFromNSColor

–AS書式で配色に重複がないかどうかチェック
on chkASLexicalFormatColorConfliction(aList)
  set anArray to current application’s NSArray’s arrayWithArray:aList
  
set bList to (anArray’s valueForKeyPath:"redValue.stringValue") as list
  
set cList to (anArray’s valueForKeyPath:"greenValue.stringValue") as list
  
set dList to (anArray’s valueForKeyPath:"blueValue.stringValue") as list
  
  
set colStrList to {}
  
repeat with i from 1 to (length of bList)
    set bItem to contents of item i of bList
    
set cItem to contents of item i of cList
    
set dItem to contents of item i of dList
    
set the end of colStrList to bItem & " " & cItem & " " & dItem
  end repeat
  
  
set aRes to returnDuplicatesOnly(colStrList) of me
  
  
if aRes is equal to {} then
    return true –重複が存在しなかった場合
  else
    return false –重複があった場合
  end if
end chkASLexicalFormatColorConfliction

on returnDuplicatesOnly(aList as list)
  set aSet to current application’s NSCountedSet’s alloc()’s initWithArray:aList
  
set bList to (aSet’s allObjects()) as list
  
  
set dupList to {}
  
repeat with i in bList
    set aRes to (aSet’s countForObject:i)
    
if aRes > 1 then
      set the end of dupList to (contents of i)
    end if
  end repeat
  
  
return dupList
end returnDuplicatesOnly

–テキスト形式のAppleScriptをコンパイルして書式付きテキスト(NSAttributedString)を返す
on compileASSourcetextAndReturnStyledText(theSource)
  — create a new AppleScript instance
  
set anOSALanguageInstance to OSALanguage’s languageForName:"AppleScript"
  
  
set theScript to OSAScript’s alloc()’s initWithSource:theSource fromURL:(missing value) languageInstance:anOSALanguageInstance usingStorageOptions:(OSANull)
  
set {theResult, theError} to theScript’s compileAndReturnError:(reference)
  
  
if theResult as boolean is false then
    — handle error
    
error "Compile Error"
  else
    set styledSourceText to theScript’s richTextSource()
  end if
  
  
return styledSourceText
end compileASSourcetextAndReturnStyledText

–文字置換
on repChar(origText as string, targChar as string, repChar as string)
  set curDelim to AppleScript’s text item delimiters
  
set AppleScript’s text item delimiters to targChar
  
set tmpList to text items of origText
  
set AppleScript’s text item delimiters to repChar
  
set retText to tmpList as string
  
set AppleScript’s text item delimiters to curDelim
  
return retText
end repChar

–リストに入れたレコードを、指定の属性ラベルの値で抽出。値が別途指定のリストの中に存在していることが条件
on filterRecListByLabelAndSublist(aRecList as list, aPredicate as string, aSubList as list)
  set aArray to NSArray’s arrayWithArray:aRecList
  
set aSubArray to NSArray’s arrayWithArray:aSubList
  
  
–抽出
  
set aPredicate to NSPredicate’s predicateWithFormat_(aPredicate, aSubArray)
  
set filteredArray to aArray’s filteredArrayUsingPredicate:aPredicate
  
  
return filteredArray as list
end filterRecListByLabelAndSublist

★Click Here to Open This Script 

(Visited 108 times, 1 visits today)
Posted in Color OSA Text | Tagged 10.12savvy 10.13savvy 10.14savvy NSArray NSCountedSet NSDictionary NSMutableArray NSMutableDictionary NSPredicate NSString NSUnarchiver OSALanguage OSALanguageInstance OSANull OSAScript | 2 Comments

アイテム番号リストをもとに、ヒットしなかった項目を返す

Posted on 7月 31, 2019 by Takaaki Naganoya

アイテム番号の入ったリスト(配列変数)をもとに、ヒットしなかった項目を返すというAppleScriptです。

これは、なにがしかのデータとなにがしかの書類上に配置されたデータの照合を行って、存在が確認されなかったデータの一覧を作成するために作成したものです。

存在確認といえば、たいていは「存在していたデータそのもの、あるいはデータのアイテム番号一覧」といったものを出力するようになっています。そこに、「存在が確認できなかったデータの一覧が欲しい」という要望が出てくることも、だいたいは普通の出来事です。

ただ、この手の「言語化すると大したことはないが、実施に精神的な抵抗感をおぼえる処理」といいいますか、「後片付け的な処理」というのは、書くのが面倒で後回しになりがちなものでもあります。

事実、実際に書いてみたら、、、既存のサブルーチンの組み合わせで作りましたが、1日たって見直してみると何が書いてあるのかよく思い出せないレベルです(既存のサブルーチンの組み合わせが過ぎて、意味がわかりにくいのかも)。

AppleScript名:アイテム番号リストをもとに、ヒットしなかった項目を返す.scptd
—
–  Created by: Takaaki Naganoya
–  Created on: 2019/07/29
—
–  Copyright © 2019 Piyomaru Software, All Rights Reserved
—

property NSArray : a reference to current application’s NSArray
property NSMutableSet : a reference to current application’s NSMutableSet
property NSMutableArray : a reference to current application’s NSMutableArray

use AppleScript version "2.4" — Yosemite (10.10) or later
use framework "Foundation"
use scripting additions

set strList to {"Apple", "Book", "Cheeze", "Dictionary", "Escalgo", "Find", "Gorila", "hook", "ink", "jet"}
set hitIDList to {1, 2, 3, 4, 6}

set bList to getUnpickedContents(hitIDList, strList) of me
–> {"Escalgo", "Gorila", "hook", "ink", "jet"}

on getUnpickedContents(aList, strList)
  set aMax to length of strList
  
set bList to getSequentialNumList(aMax) of me
  
set cList to excludeTwoList(bList, aList) of me
  
  
set anArray to NSMutableArray’s arrayWithArray:(cList)
  
set dList to (anArray’s sortedArrayUsingSelector:"compare:") as list
  
  
set eList to retConListFromItemNumList(dList, strList) of me
  
return eList
end getUnpickedContents

–アイテム項目番号が入っているリストをもとに、中身が入っているリストから項目を取り出す
on retConListFromItemNumList(dList, strList)
  set outList to {}
  
repeat with i in dList
    set aTmp to item (contents of i) of strList
    
set the end of outList to aTmp
  end repeat
  
return outList
end retConListFromItemNumList

on excludeTwoList(aList, bList)
  set aArray to NSArray’s arrayWithArray:(aList)
  
set bArray to NSArray’s arrayWithArray:(bList)
  
  
set aSet to NSMutableSet’s alloc()’s initWithArray:aArray
  
set bSet to NSMutableSet’s alloc()’s initWithArray:bArray
  
  
aSet’s minusSet:bSet –補集合
  
set resList to aSet’s allObjects() as list
  
  
return resList
end excludeTwoList

on getSequentialNumList(aMax)
  set outList to {}
  
repeat with i from 1 to aMax
    set the end of outList to i
  end repeat
  
return outList
end getSequentialNumList

★Click Here to Open This Script 

(Visited 58 times, 1 visits today)
Posted in list | Tagged 10.11savvy 10.12savvy 10.13savvy 10.14savvy 10.15savvy NSArray NSMutableArray NSMutableSet | Leave a comment

選択中のリストのテキスト(多分)をもとにKeynoteの表を作成

Posted on 7月 31, 2019 by Takaaki Naganoya

Script Editor上で選択中の1D List(1次元配列)のテキストを評価してリストとして解釈し、それをもとにKeynoteの新規書類上に表を作成するAppleScriptです。

こんな感じ(↑)に、Script Editor上で1D List(1次元配列)のテキストが存在しているものを、資料化するためにKeynote上で表にすることがありますが、これが個人的に超絶かったるいです。

きれいにデータになっているものを、表のセルに細切れにして突っ込む作業がかったるいので、おそらくそれを手動で行う数倍の時間をかけてAppleScriptで自動化しておきました。

(1)Script Editor上でListの箇所を選択しておく
(2)Script Menuに入れておいた本Scriptを呼び出す
(3)Keynoteで新規書類を作成し、1ページ目に表を新規作成し、(1)の内容を1行目に代入

という動作を行います。上記のとおり、Script Menuに入れて呼び出すことを前提にしています。もし、そうでなければ当該部分をコピーしておいて、クリップボード経由で受け取るようにしてみてください。

当初は本Scriptもそういう構造になっていましたが、選択部分をコピーするのを忘れることが多いため、選択箇所から取得するように変更しました。

本Scriptは自分自身で使うことを前提に作ったため(本Blogまるごとそんなもんですが)、run scriptコマンドで文字列をAppleScriptとして評価して実行して結果を取得するという、ひじょーーーーーにセキュリティホールになりやすい処理を行っています。

本来、取得した文字列をAppleScriptとして評価して、構文要素的に「コマンド類」が入っていないか(とくにdo shell script)を評価する必要があると思います。その上で、もしもコマンド類が入っていた場合にはユーザーに再考を促すようにダイアログを表示するなどの処理を行うのがまっとうなやりかたでしょう。

このあたり、ものすごくラフに作ったので、利用はあくまで自己責任で行ってください(本Blogまるごとそんなもんですが)。

AppleScript名:選択中のリストのテキスト(多分)をもとにKeynoteの表を作成
—
–  Created by: Takaaki Naganoya
–  Created on: 2019/07/31
—
–  Copyright © 2019 Piyomaru Software, All Rights Reserved
—
use AppleScript version "2.4" — Yosemite (10.10) or later
use framework "Foundation"
use scripting additions

set aTargMasterSlide to "空白" –This string is *Localized* in Japanese. This is "Blank"

tell application "Script Editor"
  tell front document
    set bText to contents of selection
  end tell
end tell

if bText = "" then return

try
  set aRes to run script bText –Danger!! Take Care of.
  
set aClass to class of aRes
on error
  display dialog "The contents of clipboard seems not to be an AppleScript list (1)." with title "Error"
  
return
end try

if aClass is not equal to list then
  display dialog "The contents of clipboard seems not to be an AppleScript list (2)." with title "Error"
  
return
end if

set aLen to length of aRes

tell application "Keynote"
  activate
  
set aDoc to (make new document with properties {document theme:theme "ホワイト", width:1024, height:768}) — –This string is *Localized* in Japanese. This is "White"
  
  
tell aDoc
    set masList to name of every master slide
    
if aTargMasterSlide is not in masList then return –多分ないと思うが、作成予定のマスタースライドが現在有効でない場合に処理打ち切り
    
    
set base slide of current slide to master slide aTargMasterSlide
    
    
tell current slide
      set aTable to make new table with properties {header column count:0, header row count:1, row count:2, column count:aLen, name:"Test Table"}
      
      
tell aTable
        repeat with y from 1 to 1
          tell row y
            repeat with x from 1 to aLen
              tell cell x
                set value to (item x of aRes) as string
              end tell
            end repeat
          end tell
        end repeat
      end tell
      
    end tell
  end tell
end tell

★Click Here to Open This Script 

(Visited 50 times, 1 visits today)
Posted in list | Tagged 10.12savvy 10.13savvy 10.14savvy Keynote Script Editor | Leave a comment

クリップボードに入れたIllustratorのオブジェクトをQRコード認識 v2

Posted on 7月 28, 2019 by Takaaki Naganoya

Adobe Illustrator書類上にある、QRコードのオブジェクトをクリップボード経由でNSImageに変換してQRコード認識するAppleScriptです。QRコード認識には、OS内蔵のCoreImageの機能を使っています。

# 実行前にAI書類上のQRコードオブジェクトを選択してコピー(Command-C)を実行してあることを前提条件としています。QRコードっぽいものであれば、別にAI書類上のオブジェクトでなくてもかまいません

昨日のScriptで、「そういえばなんでZXingObjCを使っているんだっけ?」と疑問を抱きました。理由ははっきりしています。CIDetectorではそのまま認識させてみたら認識しなかったためです。

QRコードやJANコード画像認識ソフトウェアは、割といろいろ条件がそろわないと認識してくれません。いわく、画像の大きさ、画像の解像度、画像の向き、コントラスト比、その他いろいろ。

スマホのカメラで認識する際にはユーザーが認識するまでいろいろ条件を変えて試行錯誤するので、ソフトウェアの力だけで認識させているわけではありません。いわば、人間をスマホの周辺機器として使用している状態です。

一方、静止画をソフトウェアで認識処理するさいには、人間が行っているフィードバック動作をソフトウェア側で行わなくてはなりません。

macOS内蔵のCIDetectorは、どうやら画像サイズに敏感なようで、いろいろリサイズして認識するかどうかチェックしなくてはなりません。逆に、最初からQRコードではないとわかっている画像を、しつこくQRコード認識し直しても時間の無駄です。

とりあえず、認識対象を2倍から4倍まで拡大して認識をリトライしています。実際にやってみたら、1倍では認識しなくても2倍で認識してくれました。実際に処理するデータ次第ですが、4倍まで試さなくても大丈夫なケースも多いことでしょう。

AppleScript名:rocogClipAsQR_v2.scptd
— Created 2019-07-28 by Takaaki Naganoya
— 2019 Piyomaru Software
use AppleScript version "2.4"
use scripting additions
use framework "Foundation"
use framework "AppKit"
use framework "CoreImage"

property CIImage : a reference to current application’s CIImage
property NSImage : a reference to current application’s NSImage
property CIDetector : a reference to current application’s CIDetector
property NSZeroRect : a reference to current application’s NSZeroRect
property NSDictionary : a reference to current application’s NSDictionary
property NSPasteboard : a reference to current application’s NSPasteboard
property NSCompositeCopy : a reference to current application’s NSCompositeCopy
property NSGraphicsContext : a reference to current application’s NSGraphicsContext
property NSBitmapImageRep : a reference to current application’s NSBitmapImageRep
property CIDetectorAccuracy : a reference to current application’s CIDetectorAccuracy
property CIDetectorTypeQRCode : a reference to current application’s CIDetectorTypeQRCode
property CIDetectorAccuracyHigh : a reference to current application’s CIDetectorAccuracyHigh
property NSImageInterpolationNone : a reference to current application’s NSImageInterpolationNone
property CIDetectorImageOrientation : a reference to current application’s CIDetectorImageOrientation
property NSCalibratedRGBColorSpace : a reference to current application’s NSCalibratedRGBColorSpace

set aRes to recogPasteboardASQR() of me

–クリップボードの内容をNSImageに
on recogPasteboardASQR()
  set aNSIMage to getClipboardASImage() of me
  
if aNSIMage = false then return false
  
  
set aRes to recogNSImageAsQRcodes(aNSIMage) of me –11: kBarcodeFormatQRCode
  
if aRes is not equal to {} then return aRes
  
  
–ループでQRコードとおぼしきイメージを拡大しつつQRコード認識
  
repeat with i from 2 to 4 –ここはチューニングの余地がある
    set bNSIMage to (my resizeNSImageWithoutAntlialias:aNSIMage toScale:(i as real))
    
set aRes to recogNSImageAsQRcodes(bNSIMage) of me
    
if aRes is not equal to {} then return aRes
  end repeat
  
  
return false
end recogPasteboardASQR

–NSImageをバーコードとして認識する
on recogNSImageAsQRcodes(aNSIMage)
  set imageRef to convNSImageToCIimage(aNSIMage) of me
  
  
— 検出器のオプションを NSDictonary で作成
  
set optDic1 to NSDictionary’s dictionaryWithObject:(CIDetectorAccuracyHigh) forKey:(CIDetectorAccuracy)
  
set faceDetector to CIDetector’s detectorOfType:(CIDetectorTypeQRCode) context:(missing value) options:optDic1
  
  
— QRコードの検出を行う際のオプションを NSDictonary で作成
  
set optDic2 to NSDictionary’s dictionaryWithObject:(CIDetectorImageOrientation) forKey:"Orientation"
  
  
— QRコード検出を実行
  
set faceArray to faceDetector’s featuresInImage:imageRef options:optDic2
  
set fList to {}
  
  
— 検出されたQRコードの位置とサイズをログに出力
  
repeat with i from 1 to (count of faceArray)
    set face to item i of faceArray
    
set bRec to (face’s messageString()) as string
    
–set cRec to retURLdecodedStrings(bRec) of me –URLエンコード対策
    
set the end of fList to bRec
  end repeat
  
  
return fList
end recogNSImageAsQRcodes

— クリップボードの内容をNSImageとして取り出して返す
on getClipboardASImage()
  set theNSPasteboard to NSPasteboard’s generalPasteboard()
  
set anArray to theNSPasteboard’s readObjectsForClasses:({NSImage}) options:(missing value)
  
if anArray = missing value or (anArray as list) = {} then return false
  
set aRes to anArray’s objectAtIndex:0
  
return aRes
end getClipboardASImage

—
on convNSImageToCIimage(aNSIMage)
  set tiffDat to aNSIMage’s TIFFRepresentation()
  
set aRep to NSBitmapImageRep’s imageRepWithData:tiffDat
  
set newImg to CIImage’s alloc()’s initWithBitmapImageRep:aRep
  
return newImg
end convNSImageToCIimage

–NSImageを指定倍率で拡大(アンチエイリアス解除状態で)
on resizeNSImageWithoutAntlialias:aSourceImg toScale:imgScale
  set aSize to aSourceImg’s |size|()
  
set aWidth to (aSize’s width) * imgScale
  
set aHeight to (aSize’s height) * imgScale
  
  
set aRep to NSBitmapImageRep’s alloc()’s initWithBitmapDataPlanes:(missing value) pixelsWide:aWidth pixelsHigh:aHeight bitsPerSample:8 samplesPerPixel:4 hasAlpha:true isPlanar:false colorSpaceName:(NSCalibratedRGBColorSpace) bytesPerRow:0 bitsPerPixel:0
  
  
set newSize to {width:aWidth, height:aHeight}
  
aRep’s setSize:newSize
  
  
NSGraphicsContext’s saveGraphicsState()
  
  
set theContext to NSGraphicsContext’s graphicsContextWithBitmapImageRep:aRep
  
NSGraphicsContext’s setCurrentContext:theContext
  
theContext’s setShouldAntialias:false
  
theContext’s setImageInterpolation:(NSImageInterpolationNone)
  
  
aSourceImg’s drawInRect:(current application’s NSMakeRect(0, 0, aWidth, aHeight)) fromRect:(NSZeroRect) operation:(NSCompositeCopy) fraction:(1.0)
  
  
NSGraphicsContext’s restoreGraphicsState()
  
  
set newImg to NSImage’s alloc()’s initWithSize:newSize
  
newImg’s addRepresentation:aRep
  
  
return newImg
end resizeNSImageWithoutAntlialias:toScale:

★Click Here to Open This Script 

(Visited 98 times, 2 visits today)
Posted in Clipboard Image list QR Code | Tagged 10.12savvy 10.13savvy 10.14savvy CIDetector CIDetectorAccuracy CIDetectorAccuracyHigh CIDetectorImageOrientation CIDetectorTypeQRCode CIImage NSBitmapImageRep NSCalibratedRGBColorSpace NSCompositeCopy NSDictionary NSGraphicsContext NSImage NSImageInterpolationNone NSPasteboard NSZeroRect | 4 Comments

クリップボードに入れたIllustratorのオブジェクトをQRコード認識

Posted on 7月 27, 2019 by Takaaki Naganoya

Adobe Illustrator書類上にある、QRコードのオブジェクトをクリップボード経由でNSImageに変換してQRコード認識するAppleScriptです。QRコード認識には、オープンソースのZXingObjCをCocoa Framework化したものを使っています。

–> Download recogClipAsQR.scptd (Including Framework)

ことのはじまりは、Adobe Illustrator書類上になにがしかのプラグインで作成されたとおぼしきQRコードのオブジェクトが配置されていたことです。これをデコードして内容が正しいか、デコードしたURLは実在するものかといったチェックをする必要がありました(もっと大きなプログラムの一部として)。

これはけっこうな難問でした。AI書類全体をPDFや他の形式の画像として書き出したものを認識させてみたものの、なかなかQRコードとして認識してくれません。

いろいろ試行錯誤していくうちに、AI書類を構成する各部品ごとに画像書き出しして認識させると、QRコードとして認識したりしました。

結局、AI書類上の各種オブジェクト(QRコードはグループ化されていたので、group item)にアクセスし、クリップボード経由で(いったんコピーして)画像に書き出すと認識してくれました。

ファイルに書き出すオーバーヘッドを減らしたかったので、クリップボードの内容をそのままNSImageとして取得。ここで、AppleScriptの標準搭載命令(the clipboard)からCocoaのNSPasteBoardを使うように変更したことで、大幅なスピードアップを図れました。クリップボード経由でデータ変換するやりかたは、データが小さければ手軽かつ便利でいいのですが、データが大きくなると処理に時間がかかってたいへんです。主にClassic Mac OSの時代によく使われていた方法でもあります(macOS上でもごくたまに使いますが、こういうやり方をなくそうというのがClassic Mac OSからMac OS Xへの移行時のScripter間の共通認識だったので、なるべく避けていたんですね)。

かくして、Adobe Illustrator上でコピーしておいたQRコードのオブジェクトを、クリップボード(ペーストボード)経由でQRコードとしてデコードするものができ、便利に使っています。

本Scriptは、

macOS 10.12.x:スクリプトエディタ、Script Debugger
macOS 10.13.x:スクリプトエディタ、Script Debugger
macOS 10.14.x:Script Debugger、マシンのSIPを解除してあればスクリプトエディタ上でも動作

という環境で動作します。macOS 10.14.x上でSIPを解除していない状態でも、アプレット書き出しした状態であればバンドル内のFrameworkを読み込んで動作します。

AppleScript名:recogClipAsQR.scptd
— Created 2019-07-20 by Takaaki Naganoya
— 2019 Piyomaru Software
use AppleScript version "2.4"
use scripting additions
use framework "Foundation"
use framework "AppKit"
use framework "ZXingObjC" –https://github.com/TheLevelUp/ZXingObjC

property NSImage : a reference to current application’s NSImage
property NSPasteboard : a reference to current application’s NSPasteboard
property ZXDecodeHints : a reference to current application’s ZXDecodeHints
property ZXBinaryBitmap : a reference to current application’s ZXBinaryBitmap
property ZXHybridBinarizer : a reference to current application’s ZXHybridBinarizer
property ZXMultiFormatReader : a reference to current application’s ZXMultiFormatReader
property ZXCGImageLuminanceSource : a reference to current application’s ZXCGImageLuminanceSource

set qrRes to recogClipboardASQR() of me
–> {"http://xxxxxxxxxxxxxxxxxxx", 11}

–クリップボードの内容をNSImageに
on recogClipboardASQR()
  set aNSIMage to my getClipboardASImage()
  
if aNSIMage = false then return false
  
set aRes to recogNSIMageAsBarcodes(aNSIMage, 11) of me –11: kBarcodeFormatQRCode
  
return aRes
end recogClipboardASQR

–NSImageをQRコードとして認識する
on recogNSIMageAsBarcodes(aNSIMage, aHintType)
  set aSource to ZXCGImageLuminanceSource’s alloc()’s initWithNSImage:(aNSIMage)
  
set aBitmap to ZXBinaryBitmap’s binaryBitmapWithBinarizer:(ZXHybridBinarizer’s binarizerWithSource:(aSource))
  
  
–https://github.com/zxingify/zxingify-objc/blob/master/ZXingObjC/core/ZXBarcodeFormat.h
  
set aHints to ZXDecodeHints’s hints()
  
aHints’s addPossibleFormat:(aHintType)
  
  
set aReader to ZXMultiFormatReader’s reader()
  
set aResult to aReader’s decode:(aBitmap) hints:(aHints) |error|:(missing value)
  
  
if aResult is equal to missing value then return false
  
set aCon to (aResult’s |text|()) as string
  
set aFormat to aResult’s barcodeFormat()
  
  
return {aCon, aFormat}
end recogNSIMageAsBarcodes

— クリップボードの内容をNSImageとして取り出して返す
on getClipboardASImage()
  set theNSPasteboard to NSPasteboard’s generalPasteboard()
  
set anArray to theNSPasteboard’s readObjectsForClasses:({NSImage}) options:(missing value)
  
if anArray = missing value or (anArray as list) = {} then return false
  
set aRes to anArray’s objectAtIndex:0
  
return aRes
end getClipboardASImage

★Click Here to Open This Script 

(Visited 271 times, 3 visits today)
Posted in Clipboard file Image QR Code | Tagged 10.12savvy 10.13savvy 10.14savvy NSImage NSPasteboard | 1 Comment

メインScript側で宣言したglobal変数値をサブ側で使用する

Posted on 7月 25, 2019 by Takaaki Naganoya

バンドル形式のAppleScriptでは、バンドル内にAppleScript Libraryを入れて、Library側の機能を呼び出すことができます。呼び出される方のサブ側のAppleScript Libraryでメイン側で宣言した変数値を参照する基礎的な内容のAppleScriptです。

–> Download mainTest.scptd

基礎は大事なので、ちょっと怪しいと思ったら必要な部分だけ組み立てて動作確認を行っています。

冒頭で(暗黙のrunハンドラの前で)global宣言を行えば、サブ側でも同じ値にアクセスできることを確認しました。一度、巨大なプログラムでやらかしたことがあって、global変数はあまり使わないように自粛していたのですが、必要とあらば仕方ありません。


▲メイン側のAppleScript。バンドル形式のAppleScriptで、この中にサブのAppleScript Libraryを入れて呼び出す


▲メイン側のAppleScriptのバンドル内に、「EverythingToTextKit.scptd」(リストやレコードなどのデータなどすべてテキスト化するライブラリ)と、「sub1.scptd」(サブ側のScript)を格納している


▲サブ側のAppleScript。ただ単にメイン側と共有しているグローバル変数「aProp」の内容をテキスト化してダイアログ表示


▲メイン側のAppleScriptを実行すると、サブ側のルーチンを呼び出して実行

(Visited 161 times, 1 visits today)
Posted in How To | Tagged 10.11savvy 10.12savvy 10.13savvy 10.14savvy 10.15savvy | Leave a comment

recordの値をラベルを指定して変更

Posted on 7月 23, 2019 by Takaaki Naganoya

record型変数に対して、ラベルを指定して変更するAppleScriptです。各種データ型に対応しています。

AppleScriptの属性値ラベル付きデータであるrecord型変数は、さまざまな操作のための方法が(まっとうな手段では)存在せず、使いこなすためにはまっとうでない方法がよく使われてきました(動的にrecordを生成するAppleScriptのテキストを作成してrun scriptで実行するとか。提唱者本人が書いているので間違いない)。

特定のラベルを指定してデータを取り出したり、設定したりはできますが、ラベルを動的に生成して設定するようなことはできませんし、指定のラベルが存在するかどうかを確認する機能もありません(エラートラップを仕掛けて値の取り出しを確認するぐらい?)。

macOS 10.10で全面的にCocoaの機能が利用できるようになってからは、recordを操作するにはCocoaのオブジェクト(NSDictionary, NSMutableDictionary)に変換し、Cocoaの機能を使って加工することが一般的になってきました。

CocoaのNSDictionary/NSMutableDictionaryにはAppleScriptのGUIアプリケーションのオブジェクトは格納できませんが、アプリケーションのオブジェクトを扱わない用途には問題ありません。

本Scriptは、そんな中で(巨大なAppleScriptのプログラムを書く中で)些細なサブルーチンを整備する必要があったために書いたものです。こういう細かい部品を積み重ねていくと、いろいろと巨大な概念を積み上げていくのに便利なもので。

数値に足し算しかできないの? という指摘はあるかもしれませんが、そこはマイナスの数を指定することで引き算は実現できます。

もちろん、この処理はPure AppleScriptだけで書くこともできます。

set aRec to {columnAdr:2, rowAdr:2, tableName:"table1", sheetName:"Sheet1", docName:"numbTest", cellValue:"AAA"}
set tmpVal to aRec’s rowAdr
set tmpVal to tmpVal – 1
set aRec’s rowAdr to tmpVal

return aRec
–> {columnAdr:2, rowAdr:1, tableName:"table1", sheetName:"Sheet1", docName:"numbTest", cellValue:"AAA"}

★Click Here to Open This Script 

本ルーチン(↓)では、記述性を高め、取り出したり入れたりといった記述を省略することが目的です。

# 本ルーチンを実戦投入してみたら、意外と使えなかったというオチが(^ー^;;;

AppleScript名:recordの値をラベルを指定して変更.scptd
—
–  Created by: Takaaki Naganoya
–  Created on: 2019/07/23
—
–  Copyright © 2019 Piyomaru Software, All Rights Reserved
—
use AppleScript version "2.4" — Yosemite (10.10) or later
use framework "Foundation"
use scripting additions

set aRec to {columnAdr:2, rowAdr:2, tableName:"table1", sheetName:"Sheet1", docName:"numbTest", cellValue:{"AAA"}}

–Number
set bRes to changeRecByKeyAndOperator(aRec, "rowAdr", 2) of me
–> {rowAdr:4, docName:"numbTest", cellValue:"AAA", tableName:"table1", sheetName:"Sheet1", columnAdr:2}

–String
set cRes to changeRecByKeyAndOperator(aRec, "docName", ".numbers") of me
–> {rowAdr:2, docName:"numbTest.numbers", cellValue:"AAA", tableName:"table1", sheetName:"Sheet1", columnAdr:2}

–List
set dRes to changeRecByKeyAndOperator(aRec, "cellValue", {".numbers"}) of me
–> {rowAdr:2, docName:"numbTest", cellValue:{"AAA", ".numbers"}, tableName:"table1", sheetName:"Sheet1", columnAdr:2}

–Date (Date value is localized in each locale (This is Japanese locale format). Change Date format in your locale format. It depends on System Preferences > International)
set bRec to {columnAdr:2, rowAdr:2, theTime:date "2019年1月1日 火曜日 0:00:00", sheetName:"Sheet1", docName:"numbTest", cellValue:{"AAA"}}
set eRes to changeRecByKeyAndOperator(bRec, "theTime", 10) of me
–> {theTime:date "2019年1月1日 火曜日 0:00:10", rowAdr:2, docName:"numbTest", cellValue:{"AAA"}, sheetName:"Sheet1", columnAdr:2}

on changeRecByKeyAndOperator(aRec as record, aKey as string, aVal as {date, list, number, string})
  set aDict to current application’s NSMutableDictionary’s dictionaryWithDictionary:aRec
  
set tmpVal to aDict’s valueForKey:aKey
  
  
–指定キーの存在チェック。存在しない場合には元の値をそのまま返す
  
set tmpKeyList to (aDict’s allKeys()) as list
  
if aKey is not in tmpKeyList then return aRec
  
  
set tmpVal to tmpVal as {date, list, number, string}
  
set tmpClass to class of tmpVal
  
  
if tmpClass = integer then
    aDict’s setValue:(tmpVal + aVal) forKey:aKey
  else if tmpClass = string then
    aDict’s setValue:(tmpVal & aVal) forKey:aKey
  else if tmpClass = list then
    aDict’s setValue:(tmpVal & aVal) forKey:aKey
  else if tmpClass = date then
    aDict’s setValue:(tmpVal + aVal) forKey:aKey
  end if
  
  
return aDict as record
end changeRecByKeyAndOperator

★Click Here to Open This Script 

(Visited 223 times, 1 visits today)
Posted in Record | Tagged 10.11savvy 10.12savvy 10.13savvy 10.14savvy | Leave a comment

NumbersのColumn Adr(26進数)と10進数との相互変換

Posted on 7月 22, 2019 by Takaaki Naganoya

Numbersの表のカラムを表現するアドレス文字列(26進数)と数値の間のエンコーダーおよびデコーダーのAppleScriptです。

もともとは、Excel 2004/2008で採用されたカラムアドレス形式に対処するためのScriptでした。

Excel上のセルのアドレス(場所)を指し示す方法は、「R1C1」(行とカラムを数値指定)形式、あるいはAppleScriptの行オブジェクトとセルオブジェクトで指定する形式でした。

そこへ新たに「A1」形式……画面上で表記されている行、カラムと親和性の高い形式が採用されることになりました。当初は相互変換のための関数なども用意されていなかったと記憶しています(間違っていたらご指摘ください)。そのため、Scripterが自力でこのA1形式に対応する必要が出てきました。

そんな中、Excel書類にAppleScriptを埋め込んで実行するAppleScriptを開発。本ルーチンはそのScript開発のために作成したものです。

Excel 2008でVBAの処理系が外されてMac上のVBA的なマクロ処理はAppleSctiptに一本化されるという話になっていたため(当時の話)、これを好機ととらえ、マイクロソフトのご担当にデモして、US本社で紹介していただくということになりました。

ただ、その会議上でVBAの復活プランが発表され、自分の提案したプランは廃案に(まさか当時のREALbasicのコンパイラの開発者を引き抜いてきてVBAの処理系をスクラッチで書かせるとは思いませんでしたわー)。

その後は、Excel 2011でVBAの処理系が復活。本ルーチンも割とHDDの肥やしとして絶賛在庫状態になっておりました。ごくたまーに、このExcel 2011でVBAの処理系が復活したことを知らない方がいて、「VBAで動いているマクロをAppleScriptに移植してほしい」という問い合わせがあるのですが、「Excelの最新版を購入してください。VBAがありますよ」とお返事しています。最新のExcelが動く環境を購入する費用よりも安く仕事としてお受けすることは困難なので。

そこから年月が流れ、AppleがNumbersをリリース。そのカラム表記がExcel 2004/2008と同じ形式になっているために、しまいこんでいたルーチンをふたたび引っ張り出してきた次第です。

一応、条件つきで使えるものの、作りが古い(やっつけ仕事な)点が気になります。きっと、誰かがもっといいルーチンを作って使っているに違いありません。一応、本ルーチンでは1〜1351の範囲での動作を確認しています。

もう少し改良したいところではあります。実用上は、Numbersでそこまで大きなデータは扱わない(はず)ので、問題はあまりないものと思われます。

AppleScript名:NumbersのColumn Adr(26進数)と10進数との相互変換
—
–  Created by: Takaaki Naganoya
–  Created on: 2019/07/21
—
–  Copyright © 2019 Piyomaru Software, All Rights Reserved
—
use AppleScript version "2.4" — Yosemite (10.10) or later
use framework "Foundation"
use scripting additions

property NSString : a reference to current application’s NSString
property NSArray : a reference to current application’s NSArray
property NSRegularExpressionSearch : a reference to current application’s NSRegularExpressionSearch

repeat with i from 1 to 1351
  set a to numAdrToColumnEncode(i) of me
  
set b to colAddrToNumDecode(a) of me
  
set aRes to (i = b) as boolean
  
log {i, b, a, aRes}
  
if aRes = false then display dialog i as string
end repeat

–10進数数値をExcel 2004/2008的カラム表現にエンコードするサブルーチン(エンコード範囲:1〜1351)
on numAdrToColumnEncode(origNum)
  if origNum > 1351 then
    error "エラー:Numbersのカラム表現(A1形式)への変換ルーチンにおいて、想定範囲外(1351以上)のパラメータが指定されました"
  end if
  
  
set upperDigitEncTable to {"A", "B", "C", "D", "E", "F", "G", "H", "I", "J", "K", "L", "M", "N", "O", "P", "Q", "R", "S", "T", "U", "V", "W", "X", "Y", "Z", "A"}
  
set lowerDigitEncTable to {"A", "B", "C", "D", "E", "F", "G", "H", "I", "J", "K", "L", "M", "N", "O", "P", "Q", "R", "S", "T", "U", "V", "W", "X", "Y", "Z", "A"}
  
  
set oNum to origNum
  
set nTh to 26
  
set stringLength to 4
  
  
–数字が1桁の場合の対応
  
if origNum < 27 then
    set aRes to (item origNum of upperDigitEncTable) as string
    
return aRes
  end if


if origNum > 702 then
    –3桁になる場合
    
set upupNum to oNum div 676 –整数除算–上の上の桁
    
set oNum to oNum – (upupNum * 676)
    
set upNum to oNum div 26 –整数除算–上の桁
    
set lowNum to oNum mod 26 – 1 –余剰計算–下の桁
    
    
–log {origNum, upupNum, upNum, lowNum}
    
    
–超つじつま合わせルーチン【強引】
    
if lowNum = -1 then
      set upNum to upNum – 1
      
set lowNum to 25
    end if
    
    
set upupChar to (item upupNum of upperDigitEncTable) as string
    
set upChar to (item upNum of upperDigitEncTable) as string
    
set lowChar to (item (lowNum + 1) of lowerDigitEncTable) as string
    
set resText to upupChar & upChar & lowChar
    
  else
    –2桁の場合
    
set upNum to oNum div 26 –整数除算–上の桁
    
set lowNum to oNum mod 26 – 1 –余剰計算–下の桁


–超つじつま合わせルーチン【強引】
    
if lowNum = -1 then
      set upNum to upNum – 1
      
set lowNum to 25
    end if
    
    
set upChar to (item upNum of upperDigitEncTable) as string
    
set lowChar to (item (lowNum + 1) of lowerDigitEncTable) as string
    
set resText to upChar & lowChar
    
  end if
  
  
return resText
  
end numAdrToColumnEncode

–Numbersの横方向アドレス(A〜Zの26進数)文字列を10進数に変換
on colAddrToNumDecode(origStr)
  return aNthToDecimal(origStr, {"A", "B", "C", "D", "E", "F", "G", "H", "I", "J", "K", "L", "M", "N", "O", "P", "Q", "R", "S", "T", "U", "V", "W", "X", "Y", "Z"}) of me
end colAddrToNumDecode

–n進数文字列を10進数に変換する
on aNthToDecimal(origStr, nTh)
  set resNumber to 0
  
  
set sList to reverse of (characters of origStr)
  
set aLen to length of nTh
  
set digitCount to 0
  
  
repeat with i in sList
    set j to contents of i
    
set aRes to offsetInList(j, nTh) of me
    
    
set resNumber to resNumber + (aLen ^ digitCount) * aRes
    
    
set digitCount to digitCount + 1
  end repeat
  
  
return resNumber as integer
end aNthToDecimal

on offsetInList(aChar, aList)
  set anArray to NSArray’s arrayWithArray:aList
  
set aInd to (anArray’s indexOfObject:aChar)
  
if aInd = current application’s NSNotFound or (aInd as number) > 9.99999999E+8 then
    error "Invalid Character Error"
  else
    return (aInd as integer) + 1 –0 to 1 based index conversion
  end if
end offsetInList

★Click Here to Open This Script 

(Visited 252 times, 1 visits today)
Posted in list Number | Tagged 10.11savvy 10.12savvy 10.13savvy 10.14savvy NSArray NSRegularExpressionSearch NSString Numbers | Leave a comment

TeamViewerの「リモートコントロール」画面からIDとパスワードを取得(v14対応)

Posted on 7月 15, 2019 by Takaaki Naganoya

リモート操作ソフト「TeamViewer」の画面から、ユーザーIDとパスワードを取得するAppleScriptです。


▲TeamViewer v14をmacOS 10.12(左)、10.14(右)で起動したところ

GUI Scriptingの機能を使って、画面上から情報を取得し、正規表現で抽出してみました。

TeamViewerで実家のMacなど、離れた場所にあるマシンをメンテナンスする必要がある場合に、実家から電話がかかってきて、TeamViewerのパスワードとIDを口頭で教えてもらって接続する必要があるわけですが、親が高齢のためそれが心もとなくなりつつある昨今、確実に確認するために作成したものです。

その場で、(自分のために)「TeamViewerを起動してIDとパスを確認して自分あてにメールで送ってくるAppleScript」を作りかけたのですが、途中からビデオ編集の仕方を教えろなどと言われて説明する羽目に。

AppleScript名:TeamViewerの「リモートコントロール」画面からIDとパスワードを取得(v14対応)
【コメント】 ?
— Created 2019-07-15 by Takaaki Naganoya
— 2019 Piyomaru Software
use AppleScript version "2.4"
use scripting additions
use framework "Foundation"

property NSArray : a reference to current application’s NSArray
property NSPredicate : a reference to current application’s NSPredicate
property NSMutableArray : a reference to current application’s NSMutableArray

set aRes to getIDAndPassFromTeamViewer() of me
–> {myID:"XXX XXX XXX", myPass:"xxXxXX"}

–TeamViewerの「リモートコントロール」画面からIDとパスワードを取得(v14対応)
on getIDAndPassFromTeamViewer()
  –画面の表示状態を変更
  
selectRemoteControlRowOnTV("リモートコントロール") of me
  
  
–画面(Window)上のテキストをとりあえず全部取得
  
set sList to retEveryStaticTextInCurrentView() of me
  
  
set anArray to NSArray’s arrayWithArray:sList
  
  
–「使用中のID」を取得
  
set aPred to NSPredicate’s predicateWithFormat:"SELF MATCHES ’[0-9]{1,3}\\.[0-9]{1,3}\\.[0-9]{1,3}\\.[0-9]{1,3}’"
  
set bRes to (anArray’s filteredArrayUsingPredicate:aPred) as list
  
set idRes to contents of first item of bRes
  
–> "XXX XXX XXX"
  
  
set bList to removeItemFromList(sList, idRes) of me
  
set bArray to NSArray’s arrayWithArray:bList
  
set bPred to NSPredicate’s predicateWithFormat:"SELF MATCHES ’^[0-9a-zA-Z]+$’"
  
set cRes to (bArray’s filteredArrayUsingPredicate:bPred) as list
  
set psRes to contents of first item of cRes
  
–> "xxXxXX"
  
  
return {myID:idRes, myPass:psRes}
end getIDAndPassFromTeamViewer

on retEveryStaticTextInCurrentView()
  activate application "TeamViewer"
  
tell application "System Events"
    tell process "TeamViewer"
      tell window 1
        tell group 2
          set sList to value of every static text
          
–> {"接続準備完了(安全な接続)", "パートナーID", "リモートコンピュータの操作", "遠隔操作を受ける許可", "使用中のID", "999 999 999", "パスワード", "xxx999", "無人アクセス"}
          
return sList
        end tell
      end tell
    end tell
  end tell
end retEveryStaticTextInCurrentView

–TeamViewerで「リモートコントロール」行を選択
on selectRemoteControlRowOnTV(aTargStr)
  activate application "TeamViewer"
  
tell application "System Events"
    tell process "TeamViewer"
      tell table 1 of scroll area 1 of window 1
        set rCount to count every row
        
        
repeat with i from 1 to rCount
          tell row i
            tell UI element 1
              set aText to value of static text 1
            end tell
            
            
if aText = aTargStr then
              set selected to true
            end if
          end tell
        end repeat
        
      end tell
    end tell
  end tell
end selectRemoteControlRowOnTV

–1次元配列から指定の内容の要素をすべて削除して返す
on removeItemFromList(aTargList, aTargValue)
  set anArray to NSMutableArray’s arrayWithArray:aTargList
  
repeat
    set aInd to anArray’s indexOfObject:aTargValue
    
if aInd = current application’s NSNotFound or (aInd as real > 9.99999999E+8) then exit repeat
    
anArray’s removeObjectAtIndex:aInd
  end repeat
  
return anArray as list
end removeItemFromList

★Click Here to Open This Script 

(Visited 85 times, 1 visits today)
Posted in GUI Scripting regexp | Tagged 10.11savvy 10.12savvy 10.13savvy 10.14savvy NSArray NSMutableArray NSPredicate TeamViewer | Leave a comment

iMac Proを試してみた

Posted on 7月 12, 2019 by Takaaki Naganoya

開発のために期間限定で手元にiMac Proが来ています。すぐに返却するので、じっくりした評価は行えませんが(評価目的ではないので)、ためしにAppleScriptによる大きめの処理を試してみました。

マシン1:MacBook Pro 2012 Retina Core i7 2.6GHz 4core RAM 8GB
マシン2:iMac Pro 2017 Xeon 3.2GHz 8 core RAM 32GB

(1)700箇所の位置情報から最寄りの駅検索

アーケードゲーム「戦場の絆」が導入されている2015年の時点の約700箇所の日本全国のゲームセンターについて、最寄りの鉄道駅(約8,000箇所)との距離を求め最短のものを最寄駅とし、それぞれ最寄駅までの距離が短い順にソートするという、GUIアプリケーションに依存しない処理です。CoreLocationの機能を用いて距離計算を行います。

もともと90分かかっていたところを隣接都道府県テーブルの導入により10分へ短縮、そしてデータの形式を見直すことで5分程度に処理短縮していたものですが、実験したバージョンでは詳細な分析のために扱う情報を増やしており、マシン1で7分程度かかります。

 マシン1:7分13秒
 マシン2:4分17秒

CPUの動作クロック1.2倍にもかかわらず演算時間6割ということで、Xeonの性能の高さが見て取れました。扱うデータも割と巨大ですが、メモリ容量の大きさにより良好な結果が得られていることが伺われます。

(2)指定のAppleScript書類のコメント部分のみ除去して返す

245行のAppleScript書類を構文書式設定をもとに解釈し、構文色分け情報をもとにコメント部分のみ除去する処理です。つい最近まで、テストデータに対して十数秒かかっていたのですが、「カラーキャッシュ」という機構により大幅な高速化を遂げてしまったものです。

 マシン1:1.55秒
 マシン2:1.07秒

こちらも、想定以上の速度を叩き出せています。

(3)指定の文字列の順列組み合わせ計算(Permutations)

{“G”, “C”, “T”, “A”} などの文字列リスト(配列)の順列組み合わせ総当たり計算(Permutations)を行うものです。Cocoaの機能を用いて、メモリ上で大量のデータを処理するため、演算性能以上にメモリアクセス速度や容量(要素数が増えると8GBだとつらいもよう)の制約が少ないことが効いてきそうです。

・8要素時
 マシン1:107.27秒
 マシン2:64.83秒

これは、素直に速いといえる感じです。

(4)実践的なデータ照合

Adobe Illustratorの書類からピックアップしたテキストフレームのデータと元のCSVデータの比較を行います。単なるテキスト比較とバカにしてはいけません。元CSVデータとの照合を行うために、ゆらぎ吸収用の外部データ(同一視する表記を列挙)の内容を反映して、考えられるありとあらゆるパターンでチェックを行います。

Illustratorからテキスト抽出する際には、グループ化されたアイテムはリストとして取り出し、照合時にこのグループ化されていたデータは順列組み合わせ(Permutations)計算により、元データとの照合を行います(6つのテキストフレームがグループ化されている場合には、6x5x4x3x2x1=720パターンと200項目程度のCSVデータ項目との照合を行うため、(1項目あたり)14万回ぐらい比較を行います。実際のAppleScriptによる処理に近い、たいへん実践的な処理内容です。

 マシン1:10.69秒
 マシン2:6.25秒

ちなみに、MacBook Pro (13-inch, 2017 Two Thunderbolt 3 Ports RAM 16GB。macOS 10.14.5)だと、10秒強程度かかります。2012年から5年後のマシンがこんなに遅い(速くなっていない)とは思ってもみませんでした(^ー^;;

最近では、照合するデータを文字の集合としてとらえ、どれだけ集合同士が近似しているかとか、照合データを形態素解析してさらに類似している単語に展開し、展開したデータ同士の類似度を計算するといった意味類似度ベース/確率計算ベースの照合も行っています。こうした処理にもCPUパワー、とくにシングルスレッドの処理の速さが必要です。

マシン強化はプログラムの高速化手段のひとつ

高価で高速なマシンを使うというのはひとつの解決策ですが、では実際に高価なマシンを使うとどの程度の速度向上を期待できるのか、というのはこれまで実測したことがありませんでした。iMac Proは(Mac Pro不在の)現時点では最高峰のマシンであり、現時点でこれより高速なMacは存在していません(より高速なCPUは市場に存在しているので、そこが悩ましい。たしかに自分で組みたくなる)。

# 2019年のCore i9 5K iMacはiMac Proよりシングルスレッド性能で見ると上かも

ここにあげた処理は、CPUのシングルスレッドの演算能力に大きく依存するような処理であり、そのままではなかなか性能を上げにくいものでもあります。実際に調べてみると動作クロック比率以上の性能向上を見せており、感心させられました。

ただし、コストパフォーマンスの面からいえば20万円前後のマシンに対して(しかもノート)、50万円以上するデスクトップ機がこの程度ということで、

 「高いマシンを買ったからといって価格に見合った演算性能を得られるわけではない」

ということを再確認したにとどまりました(MacBook Pro Retina 2012優秀すぎ。2017年のMacBook Pro 13インチの安い方より高速だし)。より低価格なiMacと異なり、購入後にあとからメモリを増設できないとか(仕様)。2017年に登場して以来アップデートされていないとか。Mac Pro 2019(Cheese Grater)が出てくるまでの「つなぎ」なんでしょう。

もちろん、安定性と快適さ、静粛性はくらべものにならないほどiMac Proが「上」です。外部ディスプレイを3台接続したときにマシン1では放熱ファンが回りまくり、外部冷却ファンを回さないと速度低下するケースも見られるためです(CPUのグリス塗り直しが必要か?)。また、アプリケーションの起動もきわめて高速です。

とくに、1,000行を超えるような巨大なAppleScriptの編集中にはScript Debuggerの応答速度が極端に下がります(カーソル移動に秒単位でかかるとか)。iMac Pro使用時にはこの極端な速度低下を避けられたので、これだけでも効果がありました。

もしも、バッチ処理速度の向上だけを目的として新規マシンの導入を行うのであれば、Mac miniを数台導入して分散処理したほうが得策です。これだと、GUIベースのアプリケーションを操作するAppleScriptのプログラムを、ほぼ何も書き換えずとも良好な結果が得られます。Parallelsなどの仮想環境にゲストOSとしてmacOSをインストールし、これらの環境との間で分散処理してもよいでしょう(こちらはぜんぜん実験していませんけれども)。

また、処理内容がIllustratorやInDesignなどのGUIベースのアプリケーションを用いていない場合には、プログラムを書き換えて並列処理するよう変更してもよいでしょう。

腰をすえてじっくり使う機会があれば、iMac Proのような強力で多コアなデスクトップマシン上で並列処理によりどの程度処理時間を短縮できるのか試してみたいところです。

(Visited 101 times, 1 visits today)
Posted in How To | 2 Comments

People Picker

Posted on 7月 11, 2019 by Takaaki Naganoya

ABPersonPickerでアドレスブックに登録のあるPerson(人)をダイアログ選択するAppleScriptです。

ずいぶんと前に作ってあったものの、活用できる機会がまったくなくて埃をかぶっていました。Alertダイアログ上に表示できないかと修正してみたものの、ABPersonPickerがWindowを要求するようで、書き換えてもうまく動かなかったために「誰か改良してくれるかもしれないし、掲載しとくかー」と、引っ張り出してきたものです。

本Scriptは人物(Person)1人を選択するものであるため、正確にいえば、Person Pickerですね。

人物の選択を行うための機能はAppleScriptには提供されていないため、一般的にはアドレスブックに登録されている全員の氏名を一括で取得してchoose from listで選択するといった話になることでしょう。

それよりは幾分マシではあるものの、使い勝手という面ではさっぱりです。アドレスブック(連絡先)でAppleScriptプラグインが(macOS 10.14で)使えなくなりましたが、このような代替案だったり、使い物にならない連作先.appの代わりにAddressBookフレームワークにアクセスしてPerson情報をしぼりこんでScriptを実行するようなプログラムを作ることになるでしょう。

連絡先(旧称アドレスブック)、カレンダー(旧称iCal)は「ただ動けばいい」ぐらいのぞんざいな作りなのが本当に残念です。


▲macOS 10.14.5(Dark Mode)上で実行したところ


▲ ABPersonPicker上でキーワードによる絞り込みもリアルタイムに行える

AppleScript名:People Picker
— Created 2017-12-20 by Takaaki Naganoya
— 2017 Piyomaru Software
use AppleScript version "2.5"
use scripting additions
use framework "Foundation"
use framework "AppKit"
use framework "AddressBook"

property NSView : a reference to current application’s NSView
property NSScreen : a reference to current application’s NSScreen
property NSButton : a reference to current application’s NSButton
property NSWindow : a reference to current application’s NSWindow
property ABPersonPicker : a reference to current application’s ABPersonPicker
property NSRectEdgeMaxX : a reference to current application’s NSRectEdgeMaxX
property NSWindowController : a reference to current application’s NSWindowController
property NSTitledWindowMask : a reference to current application’s NSTitledWindowMask
property NSRoundedBezelStyle : a reference to current application’s NSRoundedBezelStyle
property NSNormalWindowLevel : a reference to current application’s NSNormalWindowLevel
property NSBackingStoreBuffered : a reference to current application’s NSBackingStoreBuffered
property NSMomentaryLightButton : a reference to current application’s NSMomentaryLightButton

property windisp : false
property selectedPerson : missing value

on run
  set (my selectedPerson) to missing value
  
  
my performSelectorOnMainThread:"dispPeoplePicker:" withObject:(missing value) waitUntilDone:true
  
if (my selectedPerson) = missing value then return false
  
  
set firstName to (my selectedPerson’s |First|) as string
  
set lastName to (my selectedPerson’s |Last|) as string
  
  
return {lastName, firstName}
end run

on dispPeoplePicker:aParam
  set aWidth to 300
  
set aHeight to 100
  
choosePeople(aWidth, aHeight, "Result", "OK", 180) of me
end dispPeoplePicker:

on choosePeople(aWidth as integer, aHeight as integer, aTitle as text, aButtonMSG as text, timeOutSecs as number)
  set (my windisp) to true
  
  
–Buttonをつくる
  
set bButton to (NSButton’s alloc()’s initWithFrame:(current application’s NSMakeRect(aWidth / 4, 0, aWidth / 2, 40)))
  
bButton’s setTitle:aButtonMSG
  
bButton’s setButtonType:(NSMomentaryLightButton)
  
bButton’s setBezelStyle:(NSRoundedBezelStyle)
  
bButton’s setKeyEquivalent:(return)
  
bButton’s setTarget:me
  
bButton’s setAction:("clicked:")
  
  
–NSViewをつくる
  
set aNSV to NSView’s alloc()’s initWithFrame:(current application’s NSMakeRect(0, 0, aHeight, aWidth))
  
aNSV’s addSubview:bButton
  
aNSV’s setNeedsDisplay:true
  
  
–NSWindowをつくる  
  
set aWin to makeWinWithView(aNSV, aWidth, aHeight, aTitle, 1.0)
  
  
–NSWindowControllerをつくる
  
set wController to NSWindowController’s alloc()
  
wController’s initWithWindow:aWin
  
wController’s showWindow:me
  
  
–People Pickerをつくる
  
set anAB to ABPersonPicker’s alloc()’s init()
  
anAB’s showRelativeToRect:(current application’s NSMakeRect(0, 0, 200, 200)) ofView:aNSV preferredEdge:(NSRectEdgeMaxX)
  
anAB’s setDelegate:(me)
  
  
–NSWindowの最前面表示  
  
aWin’s makeKeyAndOrderFront:me
  
  
set aCount to timeOutSecs * 10 –timeout seconds * 10
  
repeat aCount times
    if (my windisp) = false then
      exit repeat
    end if
    
delay 0.1
  end repeat
  
  
my closeWin:aWin
end choosePeople

–Button Clicked Event Handler
on clicked:aSender
  set (my windisp) to false
end clicked:

–make Window for Input
on makeWinWithView(aView, aWinWidth, aWinHeight, aTitle, alphaV)
  set aScreen to NSScreen’s mainScreen()
  
set aFrame to {{0, 0}, {aWinWidth, aWinHeight}}
  
set aBacking to NSTitledWindowMask
  
set aDefer to NSBackingStoreBuffered
  
  
— Window
  
set aWin to NSWindow’s alloc()
  (
aWin’s initWithContentRect:aFrame styleMask:aBacking backing:aDefer defer:false screen:aScreen)
  
  
aWin’s setTitle:aTitle
  
aWin’s setDelegate:me
  
aWin’s setDisplaysWhenScreenProfileChanges:true
  
aWin’s setHasShadow:true
  
aWin’s setIgnoresMouseEvents:false
  
aWin’s setLevel:(NSNormalWindowLevel)
  
aWin’s setOpaque:false
  
aWin’s setAlphaValue:alphaV –append
  
aWin’s setReleasedWhenClosed:true
  
aWin’s |center|()
  
aWin’s makeKeyAndOrderFront:(me)
  
  
— Set Custom View
  
aWin’s setContentView:aView
  
  
return aWin
end makeWinWithView

–close win
on closeWin:aWindow
  repeat with n from 10 to 1 by -1
    (aWindow’s setAlphaValue:n / 10)
    
delay 0.02
  end repeat
  
aWindow’s |close|()
end closeWin:

on personPicker:(aPicker) didChoosePerson:(aPerson) |property|:(aProperty) identifier:(anID)
  log {"personPicker:didChoosePerson:"}
  
log aPicker
  
log aPerson
  
log aProperty
  
log anID
  
copy aPerson to my selectedPerson
end personPicker:didChoosePerson:|property|:identifier:

on personPickerDidClose:(aPicker)
  log {"personPickerDidClose"}
  
set (my windisp) to false
end personPickerDidClose:

★Click Here to Open This Script 

(Visited 50 times, 1 visits today)
Posted in dialog GUI System | Tagged 10.12savvy 10.13savvy 10.14savvy ABPersonPicker NSBackingStoreBuffered NSButton NSMomentaryLightButton NSNormalWindowLevel NSRectEdgeMaxX NSRoundedBezelStyle NSScreen NSTitledWindowMask NSView NSWindow NSWindowController | Leave a comment

アラートダイアログ上にTable Viewを表示 v4

Posted on 7月 11, 2019 by Takaaki Naganoya

アラートダイアログ上にTable Viewを表示するAppleScriptです。

データを表UIで表示する部品としては、Shane Stanleyの「Myriad Tables Lib」が定番ですが、高機能なぶんライブラリ中にFrameworkが含まれていたりして、場合によっては困ることもあります。また、見た目をカスタマイズしたい場合にも、あまりいじくれなくて困ることもあります(とくにデータの文字サイズを変更できなくて困ること多し)。

そのため、AppleScriptだけで書いた表UI表示用の部品も、たまに必要になることがあります。


▲スクリプトエディタで実行@macOS 10.14.5(左:Light Mode、右:Dark Mode)


▲Script Debuggerで実行@macOS 10.14.5(左:Light Mode、右:Dark Mode)


▲AppleScriptアプレットで実行@macOS 10.14.5(左:Light Mode、右:Dark Mode)

AppleScript名:アラートダイアログ上にTable Viewを表示 v4
— Created 2019-02-21 by Takaaki Naganoya
— 2019 Piyomaru Software
use AppleScript version "2.5"
use scripting additions
use framework "Foundation"
use framework "AppKit"

property NSAlert : a reference to current application’s NSAlert
property NSColor : a reference to current application’s NSColor
property NSIndexSet : a reference to current application’s NSIndexSet
property NSScrollView : a reference to current application’s NSScrollView
property NSTableView : a reference to current application’s NSTableView
property NSTableColumn : a reference to current application’s NSTableColumn
property NSMutableArray : a reference to current application’s NSMutableArray
property NSRunningApplication : a reference to current application’s NSRunningApplication
property NSModalPanelWindowLevel : a reference to current application’s NSModalPanelWindowLevel
property NSAlertSecondButtonReturn : a reference to current application’s NSAlertSecondButtonReturn

property theResult : 0
property returnCode : 0
property theDataSource : {}

on run
  set (my theResult) to 0 –initialize
  
  
set paramObj to {myMessage:"項目の選択", mySubMessage:"適切なものを以下からえらんでください", aTableList:{{field1:"MacBook Air", field2:"119,800円", field3:"1.6GHzデュアルコアIntel Core i5(Turbo Boost使用時最大3.6GHz)、4MB L3キャッシュ"}, {field1:"MacBook Pro 13", field2:"139,800円", field3:"1.4GHzクアッドコアIntel Core i5(Turbo Boost使用時最大3.9GHz)、128MB eDRAM"}, {field1:"MacBook Pro 15", field2:"258,800円", field3:"2.6GHz 6コアIntel Core i7(Turbo Boost使用時最大4.5GHz)、12MB共有L3キャッシュ"}, {field1:"Mac mini", field2:"122,800円", field3:"3.0GHz 6コアIntel Core i5 Turbo Boost使用時最大4.1GHz 9MB共有L3キャッシュ"}, {field1:"iMac 21.5", field2:"120,800円", field3:"2.3GHzデュアルコアIntel Core i5(Turbo Boost使用時最大3.6GHz)"}, {field1:"iMac 4K 21.5", field2:"142,800円", field3:"3.6GHzクアッドコアIntel Core i3"}, {field1:"iMac 5K 27", field2:"198,800円", field3:"3.0GHz 6コア Intel Core i5(Turbo Boost使用時最大4.1GHz)"}, {field1:"iMac Pro", field2:"558,800円", field3:"3.2GHz Intel Xeon W Turbo Boost使用時最大4.2GHz 19MBキャッシュ"}}, aSortOrder:{"field1", "field2", "field3"}}
  
  
–my chooseItemByTableView:paramObj–for debug
  
my performSelectorOnMainThread:"chooseItemByTableView:" withObject:paramObj waitUntilDone:true
  
return (my theResult)
end run

on chooseItemByTableView:paramObj
  set aMainMes to myMessage of paramObj
  
set aSubMes to mySubMessage of paramObj
  
set aTList to (aTableList of paramObj) as list
  
set labelSortList to (aSortOrder of paramObj) as list
  
  
set aWidth to 600
  
set aHeight to 200
  
  
set aScroll to makeTableView(aTList, aWidth, aHeight, labelSortList) of me
  
  
–Detect Dark Mode
  
set dMode to retLIghtOrDark() of me
  
if dMode = true then
    set tvCol to 1
    
set tvAlpha to 0.8
    
set bCol to 0.1
    
set bAlpha to 0.8
    
set contentCol to (NSColor’s cyanColor())
  else
    set tvCol to 0
    
set tvAlpha to 0.1
    
set bCol to 1
    
set bAlpha to 0.8
    
set contentCol to (NSColor’s blackColor())
  end if
  
  
— set up alert  
  
set theAlert to NSAlert’s alloc()’s init()
  
tell theAlert
    its setMessageText:aMainMes
    
its setInformativeText:aSubMes
    
its addButtonWithTitle:"OK"
    
its addButtonWithTitle:"Cancel"
    
its setAccessoryView:aScroll
    
    
set myWindow to its |window|
  end tell
  
  
myWindow’s setOpaque:(false)
  
myWindow’s setBackgroundColor:(NSColor’s colorWithCalibratedWhite:(bCol) alpha:(bAlpha))
  
myWindow’s setLevel:(NSModalPanelWindowLevel)
  
  
— show alert in modal loop
  
NSRunningApplication’s currentApplication()’s activateWithOptions:0
  
my performSelectorOnMainThread:"doModal:" withObject:(theAlert) waitUntilDone:true
  
if (my returnCode) = 1001 then error number -128
  
  
set (my theResult) to (aScroll’s documentView’s selectedRow()) + 1
end chooseItemByTableView:

on doModal:aParam
  set (my returnCode) to (aParam’s runModal()) as number
end doModal:

–TableView Event Handlers
on numberOfRowsInTableView:aView
  return my theDataSource’s |count|()
end numberOfRowsInTableView:

on tableView:aView objectValueForTableColumn:aColumn row:aRow
  set aRec to (my theDataSource)’s objectAtIndex:(aRow as number)
  
set aTitle to (aColumn’s headerCell()’s title()) as string
  
set aRes to (aRec’s valueForKey:aTitle)
  
return aRes
end tableView:objectValueForTableColumn:row:

on makeTableView(aDicList, aWidth, aHeight, labelSortList)
  set aOffset to 40
  
set theDataSource to current application’s NSMutableArray’s alloc()’s init()
  
theDataSource’s addObjectsFromArray:aDicList
  
  
set aScroll to current application’s NSScrollView’s alloc()’s initWithFrame:(current application’s NSMakeRect(0, aOffset, aWidth, aHeight))
  
set aView to current application’s NSTableView’s alloc()’s initWithFrame:(current application’s NSMakeRect(0, aOffset, aWidth, aHeight))
  
  
set aLen to length of labelSortList
  
  
repeat with i in labelSortList
    set j to contents of i
    
set aColumn to (current application’s NSTableColumn’s alloc()’s initWithIdentifier:j)
    (
aColumn’s setWidth:(aWidth div aLen))
    (
aColumn’s headerCell()’s setStringValue:j)
    (
aView’s addTableColumn:aColumn)
  end repeat
  
  
aView’s setDelegate:me
  
aView’s setDataSource:me
  
aView’s reloadData()
  
  
aScroll’s setDocumentView:aView
  
aView’s enclosingScrollView()’s setHasVerticalScroller:true
  
aScroll’s setVerticalLineScroll:(30.0 as real)
  
  
–1行目を選択
  
set aIndexSet to current application’s NSIndexSet’s indexSetWithIndex:0
  
aView’s selectRowIndexes:aIndexSet byExtendingSelection:false
  
  
–強制的にトップにスクロール
  
set aDBounds to aScroll’s documentView()’s |bounds|()
  
if class of aDBounds = list then
    –macOS 10.13 or later
    
set maxHeight to item 2 of item 1 of aDBounds
  else
    –macOS 10.10….10.12
    
set maxHeight to height of |size| of aDBounds
  end if
  
  
set aPT to current application’s NSMakePoint(0.0, -1 * (maxHeight as real))
  
aScroll’s documentView()’s scrollPoint:aPT
  
  
return aScroll
end makeTableView

on alertShowHelp:aNotification
  display dialog "Help Me!" buttons {"OK"} default button 1 with icon 1
  
return false –trueを返すと親ウィンドウ(アラートダイアログ)がクローズする
end alertShowHelp:

–ダークモードの判定。ダークモード時:true、ライトモード時:falseが返る。System Eventsを使っていないのは、macOS 10.14以降対策(承認を取得しなくてもいいように)
on retLIghtOrDark()
  set curMode to (current application’s NSUserDefaults’s standardUserDefaults()’s stringForKey:"AppleInterfaceStyle") as string
  
return (curMode = "Dark") as boolean
end retLIghtOrDark

★Click Here to Open This Script 

(Visited 73 times, 1 visits today)
Posted in Color GUI list Record | Tagged 10.11savvy 10.12savvy 10.13savvy 10.14savvy NSAlert NSAlertSecondButtonReturn NSColor NSIndexSet NSModalPanelWindowLevel NSMutableArray NSRunningApplication NSScrollView NSTableColumn NSTableView | 1 Comment

アラートダイアログ上にTexViewを表示_ヘルプ付き_半透明_Float_SuppressionButtonつき

Posted on 7月 10, 2019 by Takaaki Naganoya

アラートダイアログ上にTextViewを表示して、指定のテキストを閲覧するAppleScriptです。

Xcode上でNSAlert.hを調べ、アラートダイアログに指定できる各種オプションを指定してみました。NSWindowLevelの変更は効いていないみたいですけれども。

AppleScript名:アラートダイアログ上にTexViewを表示_ヘルプ付き_半透明_Float_SuppressionButtonつき
— Created 2019-07-09 by Takaaki Naganoya
— 2019 Piyomaru Software
use AppleScript version "2.4"
use scripting additions
use framework "Foundation"
use framework "AppKit"

property |NSURL| : a reference to current application’s |NSURL|
property NSFont : a reference to current application’s NSFont
property NSView : a reference to current application’s NSView
property NSAlert : a reference to current application’s NSAlert
property NSColor : a reference to current application’s NSColor
property NSTextView : a reference to current application’s NSTextView
property NSScrollView : a reference to current application’s NSScrollView
property NSUserDefaults : a reference to current application’s NSUserDefaults
property NSRunningApplication : a reference to current application’s NSRunningApplication
property NSModalPanelWindowLevel : a reference to current application’s NSModalPanelWindowLevel

property returnCode : 0
property supState : false

set asStr to do shell script "cal 2019"
set paramObj to {myMessage:"Main Message", mySubMessage:"Sub information", mes1:(asStr), mesWidth:450, mesHeight:200, fontName:"Courier", fontSize:11.0, suppressionMes:"Some Option"}

–my dispTextViewWithAlertdialog:paramObj–for debug
my performSelectorOnMainThread:"dispTextViewWithAlertdialog:" withObject:paramObj waitUntilDone:true

return (my supState)

on dispTextViewWithAlertdialog:paramObj
  –Receive Parameters
  
set aMainMes to (myMessage of paramObj) as string –Main Message
  
set aSubMes to (mySubMessage of paramObj) as string –Sub Message
  
set mesStr to (mes1 of paramObj) as string –Text Input field 1 Label
  
set aWidth to (mesWidth of paramObj) as integer –TextView width
  
set aHeight to (mesHeight of paramObj) as integer –TextView height
  
set aFontName to (fontName of paramObj) as string –TextView font name
  
set aFontSize to (fontSize of paramObj) as real –TextView font size
  
set aSupMes to (suppressionMes of paramObj) as string –Suppression Button Titile
  
  
–Detect Dark Mode
  
set dMode to retLIghtOrDark() of me
  
if dMode = true then
    set tvCol to 1
    
set tvAlpha to 0.8
    
set bCol to 0.1
    
set bAlpha to 0.8
    
set contentCol to (NSColor’s cyanColor())
  else
    set tvCol to 0
    
set tvAlpha to 0.1
    
set bCol to 1
    
set bAlpha to 0.5
    
set contentCol to (NSColor’s grayColor())
  end if
  
  
— Create a TextView with Scroll View
  
set aScroll to NSScrollView’s alloc()’s initWithFrame:(current application’s NSMakeRect(0, 0, aWidth, aHeight))
  
set aView to NSTextView’s alloc()’s initWithFrame:(current application’s NSMakeRect(0, 0, aWidth, aHeight))
  
set aColor to NSColor’s colorWithDeviceRed:0.0 green:0.0 blue:0.0 alpha:(tvAlpha)
  
  
aView’s setRichText:true
  
aView’s useAllLigatures:true
  
aView’s setTextColor:(contentCol)
  
aView’s setFont:(NSFont’s fontWithName:aFontName |size|:aFontSize)
  
  
aView’s setDrawsBackground:false


aView’s setBackgroundColor:aColor
  
aView’s setOpaque:(false)
  
aView’s setString:mesStr
  
aScroll’s setDocumentView:aView
  
–aScroll’s setBorderType:(current application’s NSBezelBorder)
  
–aScroll’s setBorderType:(current application’s NSGrooveBorder)
  
–aScroll’s setBorderType:(current application’s NSLineBorder)
  
aScroll’s setBorderType:(current application’s NSNoBorder)
  
  
–Ruler
  
–aScroll’s setHasHorizontalRuler:(true)
  
–aScroll’s setRulersVisible:(true)
  
  
aView’s enclosingScrollView()’s setHasVerticalScroller:true
  
  
set anImage to current application’s NSImage’s imageNamed:(current application’s NSImageNameComputer)
  
  
— set up alert
  
set theAlert to NSAlert’s alloc()’s init()
  
tell theAlert
    its setIcon:(anImage)
    
    
–for Messages
    
its setMessageText:(aMainMes)
    
its setInformativeText:(aSubMes)
    
    
–for Buttons
    
its addButtonWithTitle:"OK"
    
its addButtonWithTitle:"Cancel"
    
    
–Add Accessory View
    
its setAccessoryView:(aScroll)
    
    
–for Help Button
    
its setShowsHelp:(true)
    
its setDelegate:(me)
    
    
its setAlertStyle:0 —-0…2
    
    
its setShowsSuppressionButton:(true) –「今後このメッセージを表示しない」チェックボックスを表示
    
    
set suppressionB to its suppressionButton
    
set myWindow to its |window|
  end tell
  
  
myWindow’s setOpaque:(false)
  
myWindow’s setBackgroundColor:(NSColor’s colorWithCalibratedWhite:(bCol) alpha:(bAlpha))
  
myWindow’s setLevel:(NSModalPanelWindowLevel)
  
  
suppressionB’s setTitle:(aSupMes)
  
suppressionB’s setState:(true) —default state
  
  
— show alert in modal loop
  
NSRunningApplication’s currentApplication()’s activateWithOptions:0
  
my performSelectorOnMainThread:"doModal:" withObject:(theAlert) waitUntilDone:true
  
if (my returnCode as number) = 1001 then error number -128
  
  
set my supState to (suppressionB’s state) as boolean
end dispTextViewWithAlertdialog:

on doModal:aParam
  set (my returnCode) to aParam’s runModal()
end doModal:

on alertShowHelp:aNotification
  display dialog "Help Me!" buttons {"OK"} default button 1 with icon 1
  
return false –trueを返すと親ウィンドウ(アラートダイアログ)がクローズする
end alertShowHelp:

–ダークモードの判定。ダークモード時:true、ライトモード時:falseが返る。System Eventsを使っていないのは、macOS 10.14以降対策(承認を取得しなくてもいいように)
on retLIghtOrDark()
  set curMode to (current application’s NSUserDefaults’s standardUserDefaults()’s stringForKey:"AppleInterfaceStyle") as string
  
return (curMode = "Dark") as boolean
end retLIghtOrDark

★Click Here to Open This Script 

(Visited 64 times, 1 visits today)
Posted in Color dialog Font GUI Icon Image | Tagged 10.12savvy 10.13savvy 10.14savvy NSAlert NSColor NSFont NSModalPanelWindowLevel NSRunningApplication NSScrollView NSTextView NSURL NSUserDefaults | Leave a comment

指定画像をPNG形式(グレースケール)で保存

Posted on 7月 9, 2019 by Takaaki Naganoya

指定の画像ファイルをグレースケールのPNG画像ファイルに変換するAppleScriptです。

Appleが配布しているMNISTの手書き数字画像の認識CoreMLモデルをCocoa Framework化してみたところ、グレースケールの画像を要求されたため、画像をグレースケール化するルーチンを作ってみました。

結局、MNISTの手書き画像認識はうまく行かなかったのですが(全部「0」が返ってくる、、、)、グレースケール変換ルーチンは実用的だったので載せておくことにしました。

AppleScript名:指定画像をPNG形式(グレースケール)で保存
— Created 2019-07-09 by Takaaki Naganoya
— 2019 Piyomaru Software
use AppleScript version "2.4"
use scripting additions
use framework "Foundation"
use framework "AppKit"

property NSUUID : a reference to current application’s NSUUID
property NSString : a reference to current application’s NSString
property NSImage : a reference to current application’s NSImage
property NSColorSpace : a reference to current application’s NSColorSpace
property NSPNGFileType : a reference to current application’s NSPNGFileType
property NSBitmapImageRep : a reference to current application’s NSBitmapImageRep
property NSColorRenderingIntentPerceptual : a reference to current application’s NSColorRenderingIntentPerceptual

set aFile to POSIX path of (choose file of type {"public.image"} with prompt "Select Image A")
set aImage to NSImage’s alloc()’s initWithContentsOfFile:aFile

set fRes to retUUIDfilePath(aFile, "png") of me
set sRes to saveNSImageAtPathAsGreyPNG(aImage, fRes) of me

–指定ファイルパスを元にUUIDのファイル名、指定拡張子をつけたファイルパスを作成して返す
on retUUIDfilePath(aPath, aEXT)
  set aUUIDstr to (NSUUID’s UUID()’s UUIDString()) as string
  
set aPath to ((NSString’s stringWithString:aPath)’s stringByDeletingLastPathComponent()’s stringByAppendingPathComponent:aUUIDstr)’s stringByAppendingPathExtension:aEXT
  
return aPath
end retUUIDfilePath

–NSImageを指定パスにPNG形式で保存
on saveNSImageAtPathAsGreyPNG(anImage, outPath)
  set imageRep to anImage’s TIFFRepresentation()
  
set aRawimg to NSBitmapImageRep’s imageRepWithData:imageRep
  
  
–ビットマップをグレースケール変換
  
set bRawimg to convBitMapToDeviceGrey(aRawimg) of me
  
  
set pathString to NSString’s stringWithString:outPath
  
set newPath to pathString’s stringByExpandingTildeInPath()
  
  
set myNewImageData to (bRawimg’s representationUsingType:(NSPNGFileType) |properties|:(missing value))
  
set aRes to (myNewImageData’s writeToFile:newPath atomically:true) as boolean
  
return aRes –true/false
end saveNSImageAtPathAsGreyPNG

–NSBitmapImageRepをグレースケールに変換する
on convBitMapToDeviceGrey(aBitmap)
  set aSpace to NSColorSpace’s deviceGrayColorSpace()
  
set bRawimg to aBitmap’s bitmapImageRepByConvertingToColorSpace:aSpace renderingIntent:(NSColorRenderingIntentPerceptual)
  
return bRawimg
end convBitMapToDeviceGrey

★Click Here to Open This Script 

AppleScript名:指定画像をグレースケールのNSImageに変換
— Created 2019-07-09 by Takaaki Naganoya
— 2019 Piyomaru Software
use AppleScript version "2.4"
use scripting additions
use framework "Foundation"
use framework "AppKit"

property NSUUID : a reference to current application’s NSUUID
property NSString : a reference to current application’s NSString
property NSImage : a reference to current application’s NSImage
property NSColorSpace : a reference to current application’s NSColorSpace
property NSBitmapImageRep : a reference to current application’s NSBitmapImageRep
property NSColorRenderingIntentDefault : a reference to current application’s NSColorRenderingIntentDefault

set aFile to POSIX path of (choose file of type {"public.image"} with prompt "Select Image")
set aImage to NSImage’s alloc()’s initWithContentsOfFile:aFile

set nsImageRes to convNSImageAsGrey(aImage) of me

–NSImageをグレースケールに変換する(NSImageで入出力)
on convNSImageAsGrey(anImage)
  set imageRep to anImage’s TIFFRepresentation()
  
set aRawimg to NSBitmapImageRep’s imageRepWithData:imageRep
  
set aSpace to NSColorSpace’s deviceGrayColorSpace()
  
set bRawimg to aRawimg’s bitmapImageRepByConvertingToColorSpace:aSpace renderingIntent:(NSColorRenderingIntentDefault)
  
set outImage to NSImage’s alloc()’s initWithSize:(bRawimg’s |size|())
  
outImage’s addRepresentation:(bRawimg)
  
return outImage
end convNSImageAsGrey

★Click Here to Open This Script 

(Visited 122 times, 1 visits today)
Posted in Color file File path Image | Tagged 10.11savvy 10.12savvy 10.13savvy 10.14savvy NSBitmapImageRep NSColorRenderingIntentPerceptual NSColorSpace NSImage NSPNGFileType NSString NSUUID | Leave a comment

アラートダイアログ上にTexViewを表示_ヘルプ付き_半透明

Posted on 7月 8, 2019 by Takaaki Naganoya

アラートダイアログ上にTextViewを表示して、指定のテキストを閲覧するAppleScriptです。

# 前バージョンの「自分のソースコード」表示というのは意味不明だったので、プロセス一覧を取得してみました

ヘルプボタン(?)を付け、アラートダイアログのウィンドウ背景を半透明に設定。そのままでは配色の都合上Dark Mode/Light Modeの切り替え時に読みづらい文字なども出てきたため、モード判定を行って表示色などを変更しています。

アプレット書き出ししたときに、スクロールビューがマウスのスクロールホイールの操作に追従したスクロールを行ってくれないので、そのあたり何か追加でNSScrollViewに設定を行う必要があるのだろうかと。


▲スクリプトエディタ上で実行@macOS 10.14.5。左がLight Mode、右がDark Mode(以下同様)


▲ヘルプボタンをクリックしたところ。本当にアンカーを指定して指定のヘルプコンテンツを表示させることもできる模様。そのための基礎的な試験


▲AppleScriptアプレット書き出しして実行したところ


▲Script Debugger上で実行@macOS 10.14.5。Dark Modeに対応できていない(次バージョンで対応することでしょう)


▲Script DebuggerからAppleScript Applet (Enhanced)で書き出して実行したところ。マウスのスクロールホイールの操作を受け付けて文字がスクロールする

AppleScript名:アラートダイアログ上にTexViewを表示_ヘルプ付き_半透明
— Created 2019-07-08 by Takaaki Naganoya
— 2019 Piyomaru Software
use AppleScript version "2.4"
use scripting additions
use framework "Foundation"
use framework "AppKit"

property |NSURL| : a reference to current application’s |NSURL|
property NSFont : a reference to current application’s NSFont
property NSView : a reference to current application’s NSView
property NSAlert : a reference to current application’s NSAlert
property NSColor : a reference to current application’s NSColor
property NSTextView : a reference to current application’s NSTextView
property NSScrollView : a reference to current application’s NSScrollView
property NSRunningApplication : a reference to current application’s NSRunningApplication

property returnCode : 0

–Get Self Source Code (a kind of joke)
set asStr to do shell script "ps -ax"
set paramObj to {myMessage:"Main Message", mySubMessage:"Sub information", mes1:(asStr), mesWidth:400, mesHeight:200, fontName:"HiraginoSans-W3", fontSize:11.0}

–my dispTextViewWithAlertdialog:paramObj–for debug
my performSelectorOnMainThread:"dispTextViewWithAlertdialog:" withObject:paramObj waitUntilDone:true

on dispTextViewWithAlertdialog:paramObj
  –Receive Parameters
  
set aMainMes to (myMessage of paramObj) as string –Main Message
  
set aSubMes to (mySubMessage of paramObj) as string –Sub Message
  
set mesStr to (mes1 of paramObj) as string –Text Input field 1 Label
  
set aWidth to (mesWidth of paramObj) as integer –TextView width
  
set aHeight to (mesHeight of paramObj) as integer –TextView height
  
set aFontName to (fontName of paramObj) as string –TextView font name
  
set aFontSize to (fontSize of paramObj) as real –TextView font size
  
  
–Detect Dark Mode
  
set dMode to retLIghtOrDark() of me
  
if dMode = true then
    set tvCol to 1
    
set tvAlpha to 0.8
    
set bCol to 0.1
    
set bAlpha to 0.8
  else
    set tvCol to 1
    
set tvAlpha to 1.0
    
set bCol to 1
    
set bAlpha to 0.7
  end if
  
  
— Create a TextView with Scroll View
  
set aScroll to NSScrollView’s alloc()’s initWithFrame:(current application’s NSMakeRect(0, 0, aWidth, aHeight))
  
set aView to NSTextView’s alloc()’s initWithFrame:(current application’s NSMakeRect(0, 0, aWidth, aHeight))
  
aView’s setRichText:true
  
aView’s useAllLigatures:true
  
aView’s setTextColor:(NSColor’s cyanColor()) –cyanColor
  
aView’s setFont:(NSFont’s fontWithName:aFontName |size|:aFontSize)
  
set aColor to NSColor’s colorWithDeviceRed:0.0 green:0.0 blue:0.0 alpha:(tvAlpha)
  
aView’s setBackgroundColor:aColor
  
aView’s setOpaque:(false)
  
aView’s setString:mesStr
  
aScroll’s setDocumentView:aView
  
aView’s enclosingScrollView()’s setHasVerticalScroller:true
  
  
— set up alert
  
set theAlert to NSAlert’s alloc()’s init()
  
tell theAlert
    –for Messages
    
its setMessageText:(aMainMes)
    
its setInformativeText:(aSubMes)
    
    
–for Buttons
    
its addButtonWithTitle:"OK"
    
its addButtonWithTitle:"Cancel"
    
    
–Add Accessory View
    
its setAccessoryView:(aScroll)
    
    
–for Help Button
    
its setShowsHelp:(true)
    
its setDelegate:(me)
    
    
set myWindow to its |window|
  end tell
  
  
myWindow’s setOpaque:(false)
  
myWindow’s setBackgroundColor:(NSColor’s colorWithCalibratedWhite:(bCol) alpha:(bAlpha))
  
  
— show alert in modal loop
  
NSRunningApplication’s currentApplication()’s activateWithOptions:0
  
my performSelectorOnMainThread:"doModal:" withObject:(theAlert) waitUntilDone:true
  
if (my returnCode as number) = 1001 then error number -128
end dispTextViewWithAlertdialog:

on doModal:aParam
  set (my returnCode) to aParam’s runModal()
end doModal:

on alertShowHelp:aNotification
  display dialog "Help Me!" buttons {"OK"} default button 1 with icon 1
  
return false –trueを返すと親ウィンドウ(アラートダイアログ)がクローズする
end alertShowHelp:

–ダークモードの判定。ダークモード時:true、ライトモード時:falseが返る
on retLIghtOrDark()
  set curMode to (current application’s NSUserDefaults’s standardUserDefaults()’s stringForKey:"AppleInterfaceStyle") as string
  
return (curMode = "Dark") as boolean
end retLIghtOrDark

★Click Here to Open This Script 

(Visited 82 times, 1 visits today)
Posted in Color dialog GUI | Tagged 10.11savvy 10.12savvy 10.13savvy 10.14savvy NSAlert NSColor NSFont NSRunningApplication NSScrollView NSTextView NSURL NSView | Leave a comment

アラートダイアログ上にTextViewを表示

Posted on 7月 8, 2019 by Takaaki Naganoya

アラートダイアログ上にTextViewを表示して、指定のテキストを閲覧するAppleScriptです。

とくにこれといって何か表示するものを思いつかなかったので、自分自身のソースコードを取得して表示しています。スクリプトエディタやScript Debugger上で実行した場合には自分自身のソースコードをテキストビュー上で表示します。

読み取り専用のスクリプトやアプレットで実行している場合にはソースコードを取得できません。何か適宜自分で表示させたいテキストを与えてみてください。

AppleScript名:アラートダイアログ上にTexViewを表示
— Created 2019-07-02 by Takaaki Naganoya
— 2019 Piyomaru Software
use AppleScript version "2.4"
use scripting additions
use framework "Foundation"
use framework "AppKit"
use framework "OSAKit"

property |NSURL| : a reference to current application’s |NSURL|
property NSFont : a reference to current application’s NSFont
property NSView : a reference to current application’s NSView
property NSAlert : a reference to current application’s NSAlert
property NSColor : a reference to current application’s NSColor
property NSTextView : a reference to current application’s NSTextView
property NSScrollView : a reference to current application’s NSScrollView
property NSRunningApplication : a reference to current application’s NSRunningApplication
property OSAScript : a reference to current application’s OSAScript

property returnCode : 0

–Get Self Source Code (a kind of joke)
set mePath to path to me
set asStr to getASsourceFor(mePath) of me

set paramObj to {myMessage:"Main Message", mySubMessage:"Sub information", mes1:(asStr), mesWidth:400, mesHeight:200, fontName:"HiraginoSans-W3", fontSize:11.0}

–my dispTextViewWithAlertdialog:paramObj–for debug
my performSelectorOnMainThread:"dispTextViewWithAlertdialog:" withObject:paramObj waitUntilDone:true

on dispTextViewWithAlertdialog:paramObj
  –Receive Parameters
  
set aMainMes to (myMessage of paramObj) as string –Main Message
  
set aSubMes to (mySubMessage of paramObj) as string –Sub Message
  
set mesStr to (mes1 of paramObj) as string –Text Input field 1 Label
  
set aWidth to (mesWidth of paramObj) as integer –TextView width
  
set aHeight to (mesHeight of paramObj) as integer –TextView height
  
set aFontName to (fontName of paramObj) as string –TextView font name
  
set aFontSize to (fontSize of paramObj) as real –TextView font size
  
  
— Create a TextView with Scroll View
  
set aScroll to NSScrollView’s alloc()’s initWithFrame:(current application’s NSMakeRect(0, 0, aWidth, aHeight))
  
set aView to NSTextView’s alloc()’s initWithFrame:(current application’s NSMakeRect(0, 0, aWidth, aHeight))
  
aView’s setRichText:true
  
aView’s useAllLigatures:true
  
aView’s setTextColor:(current application’s NSColor’s cyanColor()) –cyanColor
  
aView’s setFont:(current application’s NSFont’s fontWithName:aFontName |size|:aFontSize)
  
set aColor to current application’s NSColor’s colorWithDeviceRed:0.0 green:0.0 blue:0.0 alpha:0.5
  
aView’s setBackgroundColor:aColor
  
aView’s setString:mesStr
  
aScroll’s setDocumentView:aView
  
aView’s enclosingScrollView()’s setHasVerticalScroller:true
  
  
— set up alert
  
set theAlert to NSAlert’s alloc()’s init()
  
tell theAlert
    its setMessageText:aMainMes
    
its setInformativeText:aSubMes
    
its addButtonWithTitle:"OK"
    
its addButtonWithTitle:"Cancel"
    
its setAccessoryView:aScroll
  end tell
  
  
— show alert in modal loop
  
NSRunningApplication’s currentApplication()’s activateWithOptions:0
  
my performSelectorOnMainThread:"doModal:" withObject:(theAlert) waitUntilDone:true
  
if (my returnCode as number) = 1001 then error number -128
end dispTextViewWithAlertdialog:

on doModal:aParam
  set (my returnCode) to aParam’s runModal()
end doModal:

–指定AppleScriptファイルのソースコードを取得する(実行専用Scriptからは取得できない)
— Original Created 2014-02-23 Shane Stanley
on getASsourceFor(anAlias as {alias, string})
  set aURL to |NSURL|’s fileURLWithPath:(POSIX path of anAlias)
  
set theScript to OSAScript’s alloc()’s initWithContentsOfURL:aURL |error|:(missing value)
  
  
if theScript is equal to missing value then
    error "Compile Error" — handle error
  else
    set sourceText to theScript’s source()
  end if
  
  
return sourceText as string
end getASsourceFor

★Click Here to Open This Script 

(Visited 158 times, 1 visits today)
Posted in Color file File path Font GUI Text URL | Tagged 10.11savvy 10.12savvy 10.13savvy 10.14savvy NSAlert NSColor NSFont NSRunningApplication NSScrollView NSTextView NSURL OSAScript | Leave a comment

Cocoa ObjectをキーにしたDictionaryから合致するObjectを取得

Posted on 7月 7, 2019 by Takaaki Naganoya

Cocoa ObjectをキーにしたDictionaryから、Cocoa Objectでキー検索を行い、キーが合致する要素に定義されているオブジェクトを取得するAppleScriptです。

AppleScriptのrecord型変数は、本当に基本的な機能しか用意されておらず、

{keyLabel1:value1, keyLabel2:value2, keyLabel3:value3 } 

のような、キーとなるラベルには「空白文字や使用禁止文字を含まない」文字しか使えませんし、キーに何らかのオブジェクトを指定することはできません。

そんな中、macOS 10.10でCocoa Scriptingが標準搭載されたため、CocoaのNSDictionaryを調べて「へー、キーにオブジェクトが使えるのか!」などと喜んでいました(macOS 10.10が出た頃)。

{Cocoa Object 1:value1, Cocoa Object 2:value2, Cocoa Object 3:value3 } 
{Cocoa Object 1:some object 1, Cocoa Object 2:some object 2, Cocoa Object 3:some object 3 } 

ちょうどそういう(CocoaオブジェクトをキーにしたDictionaryの検索)プログラムを組もうとして、Dictionaryから「valueForKey:」でvalueを取り出そうとして(エラーに遭遇して)試行錯誤していました。

(NSDictionary) {
	NSCalibratedRGBColorSpace 0 1 0 1:"Green",
	NSCalibratedRGBColorSpace 0 0 1 1:"Blue",
	NSCalibratedRGBColorSpace 1 0 0 1:"Red"
}

実際にはこれは「objectForKey:」で取り出さないとエラーになってしまうんですね。その確認のために書いた基礎確認用のAppleScriptです。やっぱり、基礎の再確認はとても大事です。

AppleScript名:Cocoa ObjectをキーにしたDictionaryから合致するObjectを取得
—
–  Created by: Takaaki Naganoya
–  Created on: 2019/07/06
—
–  Copyright © 2019 Piyomaru Software, All Rights Reserved
—
use AppleScript version "2.4" — Yosemite (10.10) or later
use framework "Foundation"
use framework "AppKit"
use scripting additions

set aCol to current application’s NSColor’s redColor()
set bCol to current application’s NSColor’s greenColor()
set cCol to current application’s NSColor’s blueColor()

set aDict to current application’s NSMutableDictionary’s new()
aDict’s addObject:"Red" forKey:aCol
aDict’s addObject:"Green" forKey:bCol
aDict’s addObject:"Blue" forKey:cCol

set dCol to current application’s NSColor’s blueColor()

set aRes to (aDict’s objectForKey:dCol) as string
–> "Blue"

★Click Here to Open This Script 

(Visited 36 times, 1 visits today)
Posted in Color Record | Tagged 10.11savvy 10.12savvy 10.13savvy 10.14savvy NSColor NSMutableDictionary | Leave a comment

構文色分け情報を取得(Color Spaceを考慮)

Posted on 7月 4, 2019 by Takaaki Naganoya

macOS標準搭載のスクリプトエディタで定義している、AppleScriptの構文要素ごとの色分け情報。これを設定ファイルから取り出してレコード型データ(を入れた配列)に変換するAppleScriptの、カラースペースを考慮したデータの取り出しを行う改修版です。

AppleScriptの構文色分け情報は、ユーザーごとに異なります。一応、OSデフォルトの趣味の悪い配色なんかもありますが、

 (1)美的センスがなく見た目に気持ち悪い(ほら変更したいでしょ? 自分の好きなように変えてね、というメッセージだと受け止めました)

 (2)重複した色が設定されている構文要素がたくさんある(構文要素ごとの見分けがしにくいので、デフォルトのままだと無意味。ほら変更したくなったでしょ、というメッセージだと受け止めました)

ということから、AppleScript入門初日に設定色を変更。何度か細かい変更を行いつつも、今日までだいたい同じ感じの設定を使い続けています。

他のScripterがどのような配色にしているかはあまり知りません。Scripterごとに違うんだろうな、ぐらいの感じです。

ところが、蓋を開けてみたらこの構文色分け設定に「RGB以外の色」が設定できることが判明。けっこう長い間、この処理系使い続けてきましたけれど、昨日はじめて知りました。

具体的に言えば、RGB以外の「CMYK色」と「グレースケール色」の2つを設定可能なことが判明。CMYK色は、何度かアクセスしているうちに勝手にRGB色に置き換わってしまうようですが、グレースケールで指定した色はそのまま色種別がグレースケールのまま保持される(RGBに変換されたりしない)ようです。そのため、NSColorからredValue()などのメソッドで数値を取り出そうとするとエラーになる事例が発生したのでした。

そこで、RGBの各チャンネルの値を取り出す前にNSColorの色空間(グレースケール色空間というのはないので、種別ぐらい?)をチェックし、RGB以外であれば変換処理を行うようにしてみました。

ただし、この色空間(色モデル)の確認にNSColorのcolorSpaceNameというメソッドを使っている点に注意が必要です。これはmacOS 10.13で非推奨(deprecated)になっています。ヘッダーファイル上の説明を読むかぎりだと、Color Space(色空間)といいながら実際には色空間に該当する(HSBとかL*a*b*とか)ものを指定しているわけではないので、色タイプと言い換えることにした、という説明が行われていました。

このため、macOS 10.15betaでは未確認ではあるものの、このNSColorからRGB値を取り出すという処理自体を書き換える必要が出てくるため、本ルーチンだけ別のライブラリに分離しておくとか、メンテナンス時にわかるように書いておくとよいでしょう(NSColorのtypeを取得してみたものの、いまひとつサンプルなどもなく不明。macOS 10.14上で全部一律で0が返ってくるし)。

AppleにOS内部の機能修正リクエストを出す場合、「実際に機能不全を起こしているんだから直してほしい」と依頼してもなかなか直らない一方で、「学術的に正しくない」という指摘をされるととっとと変更するんだなーという発見をしたような気がします。

AppleScript名:構文色分け情報を取得(Color Spaceを考慮).scptd
—
–  Created by: Takaaki Naganoya
–  Created on: 2019/07/04
—
–  Copyright © 2019 Piyomaru Software, All Rights Reserved
—
use AppleScript version "2.4" — Yosemite (10.10) or later
use framework "Foundation"
use framework "AppKit"
use scripting additions

property NSArray : a reference to current application’s NSArray
property NSString : a reference to current application’s NSString
property NSDictionary : a reference to current application’s NSDictionary
property NSUnarchiver : a reference to current application’s NSUnarchiver

set cList to getAppleScriptSourceColors() of me

–AppleScriptの構文色分けのカラー値をRGBで取得する
on getAppleScriptSourceColors()
  — get the plist info as a dictionary
  
set thePath to NSString’s stringWithString:"~/Library/Preferences/com.apple.applescript.plist"
  
set thePath to thePath’s stringByExpandingTildeInPath()
  
set theInfo to NSDictionary’s dictionaryWithContentsOfFile:thePath
  
  
— extract relevant part and loop through
  
set theArray to (theInfo’s valueForKey:"AppleScriptSourceAttributes") as list
  
  
set colList to {}
  
  
repeat with i from 1 to count of theArray
    set anEntry to item i of theArray
    
    
set colorData to NSColor of anEntry
    
set theColor to (NSUnarchiver’s unarchiveObjectWithData:colorData)
    
    
set {rVal, gVal, bVal} to retColListFromNSColor(theColor, 255) of me
    
    
set fontData to NSFont of anEntry
    
set theFont to (NSUnarchiver’s unarchiveObjectWithData:fontData)
    
    
set aFontName to theFont’s displayName() as text
    
set aFontSize to theFont’s pointSize()
    
    
set aColRec to {redValue:rVal, greenValue:gVal, blueValue:bVal, fontName:aFontName, fontSize:aFontSize}
    
    
set the end of colList to aColRec
  end repeat
  
  
return colList
end getAppleScriptSourceColors

–NSColorからRGBの値を取り出す
on retColListFromNSColor(aCol, aMAX as integer)
  set aSpace to (aCol’s colorSpaceName()) as string
  
  
if aSpace is in {"NSDeviceRGBColorSpace", "NSCalibratedRGBColorSpace"} then
    –do nothing
  else
    –RGB以外の色空間の色は、RGBに変換
    
–CMYKとグレースケールは同一メソッドでRGBに変換できることを確認済み
    
set cCol to aCol’s colorUsingColorSpaceName:"NSCalibratedRGBColorSpace"
    
if cCol = missing value then error "Color Space Conversion Error (" & aSpace & " to NSCalibratedRGBColorSpace)"
    
copy cCol to aCol
  end if
  
  
set aRed to round ((aCol’s redComponent()) * aMAX) rounding as taught in school
  
set aGreen to round ((aCol’s greenComponent()) * aMAX) rounding as taught in school
  
set aBlue to round ((aCol’s blueComponent()) * aMAX) rounding as taught in school
  
  
if aRed > aMAX then set aRed to aMAX
  
if aGreen > aMAX then set aGreen to aMAX
  
if aBlue > aMAX then set aBlue to aMAX
  
  
return {aRed, aGreen, aBlue}
end retColListFromNSColor

★Click Here to Open This Script 

(Visited 154 times, 1 visits today)
Posted in Color list Record System | Tagged 10.12savvy 10.13savvy 10.14savvy NSArray NSColor NSDictionary NSString NSUnarchiver | Leave a comment

Handle diff v2

Posted on 7月 3, 2019 by Takaaki Naganoya

Script Debugger上でオープン中の2つのAppleScript書類のうち、名称が同じハンドラ(サブルーチン)の内容同士を比較して、お互いに合っているかどうかをチェックするAppleScriptです。

アプリケーション書き出しして、Script Debuggerのスクリプトメニューに入れて実行します(AppleScript書類のままだと、Myriad Tables Lib内のフレームワークが呼べないため)。


▲本Scriptはスクリプトエディタの環境設定で行うAppleScriptの構文色分け設定色が「RGBカラー」でないとエラーになります。CMYKとかグレースケールカラーで指定して、そのままRGBに変換されずに保持される(CMYK色はアクセスしているうちにRGBに変換されるが、グレースケールは保持される)ため、色空間の判定を行ってRGB色に変換してから処理する必要があります(自分用メモ)

スクリプトエディタ上で設定する構文色分け設定をもとに、AppleScriptの構文要素を考慮したハンドラ一覧を作成し、2つのAppleScript書類の間に共通して存在するハンドラ名のハンドラ(サブルーチン)のAppleScriptソースを取得。インデント(tab)を削除したのちに比較を実行。

共通名称のハンドラすべてをチェックして、結果を表インタフェースで表示します。初版(v1)では実行するたびに1つのハンドラをチェックしていたのですが、あまりにかったるいので即座にループですべて調べてまとめて結果を表示するようにしました(v2)。

–> download executable archive (mainly for macOS 10.14 or later)

ただし、1つのAppleScript書類内にScript Object(JavaScriptでいうところのClosureみたいなもの)で論理分割された同名のハンドラが複数回登場するパターンは想定していません。複数検出するとエラーになります。

とくにScript Debuggerを対象にせずスクリプトエディタを対象にしてもよいのですが、些細な変更で実現できるため、興味のある方はやってみてください。あと、本Scriptは必要に迫られまくって作ったものなので、動作でおかしい箇所があったらぜひぜひご指摘を。

個人的には、ハンドラ名称を構文要素を考慮しつつ取得している一方で、ハンドラの内容は単なる文字列検索で取り出しているというあたりにアンバランスさを感じます。ただ、趣味のScriptではないので若干の手抜きを(^ー^;;

macOS 10.14.5上のスクリプトエディタで、構文色分け情報を何回設定しても「黒」になるという現象に遭遇したのですが、他のユーザー環境上での再現性については未知数であるため、まだレポートできない状況です。

→ その後、本ツールは強化されて、構文色分け設定にRGB以外の色が設定してあってもRGBに変換して処理する機能や、構文色分け設定を参照したコメント除去機能や、各種書式情報の取得を3倍高速化するカラーキャッシュなどの機能を実装したプログラムに(必要に迫られて)成長しました。

AppleScript名:Handle diff v2.scptd
—
–  Created by: Takaaki Naganoya
–  Created on: 2019/07/02
—
–  Copyright © 2019 Piyomaru Software, All Rights Reserved
—
use AppleScript version "2.5" — Sierra (10.12) or later (maybe 10.11 is OK but not confirmed)
use framework "Foundation"
use scripting additions
use framework "OSAKit"
use script "Myriad Tables Lib" version "1.0.9" –https://www.macosxautomation.com/applescript/apps/Script_Libs.html

property NSArray : a reference to current application’s NSArray
property NSString : a reference to current application’s NSString
property OSAScript : a reference to current application’s OSAScript
property NSPredicate : a reference to current application’s NSPredicate
property NSDictionary : a reference to current application’s NSDictionary
property NSUnarchiver : a reference to current application’s NSUnarchiver
property NSCountedSet : a reference to current application’s NSCountedSet

–構文色分け設定に重複色がないかチェック
set cList to getAppleScriptSourceColors() of me
set cRes to chkASLexicalFormatColorConfliction(cList) of me –構文色分けの重複色チェック
if cRes = false then error "There is some duplicate(s) color among AppleScript’s lexical color settings"

–Script Debugger上でオープン中の2つのAppleScript書類のパスを取得
set dList to retTwoPathList() of me
if dList = false then return

copy dList to {d1Path, d2Path}

–各AppleScript書類のハンドラ名称一覧を取得する
set hList1 to retHandlerNamesFromAppleScriptSource(d1Path as alias) of me
set hList2 to retHandlerNamesFromAppleScriptSource(d2Path as alias) of me

–2つのAppleScript書類のハンドラの共通項目(名称のみ)を抽出する
set resList to returnDuplicatesOnly(hList1 & hList2) of me
if resList = {} then
  –共通のハンドラ(サブルーチン)が指定の2つのScriptに存在していなかった
  
display dialog "There is no common handler between the scripts." buttons {"OK"} default button 1
  
return
end if

–各AppleScript書類のソースを取得して、指定のハンドラのテキストを取得する
set s1Source to getASsourceFor(d1Path as alias) of me
set s2Source to getASsourceFor(d2Path as alias) of me

if (s1Source = false) or (s2Source = false) then
  display dialog "Error occured in getteing AS source" buttons {"OK"} default button 1
  
return
end if

set outList to {}
repeat with i in resList
  set resHandler to contents of i
  
set s1Source to extractHandlerSourceOnly(s1Source, resHandler) of me
  
set s2Source to extractHandlerSourceOnly(s2Source, resHandler) of me
  
set compareF to (s1Source is equal to s2Source) as boolean
  
set the end of outList to {resHandler, compareF}
end repeat

–結果表示
tell me to activate
display table with data outList with prompt "Handler contents compare results" column headings {"Handler name", "Match?"} with title "Handler Diff Results"

–指定のハンドラの内容を抽出する(コメントぐらいは結果から削除してもいいような気もする)
–Script Objectの使用は考慮していない。1つのAppleScript書類からScript Objectで論理分割された同名のハンドラが複数検出されるケースは想定していない
on extractHandlerSourceOnly(wholeScript as string, handlerName as string)
  –インデント文字(Tab)をすべて削除
  
set targScript to repChar(wholeScript, tab, "") of me
  
  
–"on"ではじまるハンドラと仮定して抽出
  
set handlerStr to extractStrFromTo(targScript, "on " & handlerName, "end " & handlerName) of me
  
if handlerStr = false then
    –"to"ではじまるハンドラと仮定して抽出
    
set handlerStr to extractStrFromTo(targScript, "to " & handlerName, "end " & handlerName) of me
    
if handlerStr = false then return false
  else
    return handlerStr
  end if
end extractHandlerSourceOnly

on retHandlerNamesFromAppleScriptSource(aFile)
  set aRec to getAttrRecFromASPath(aFile) of me
  
set cList to getAppleScriptSourceColors() of me
  
  
set targAttr to contents of item 7 of cList –ハンドラあるいは変数
  
set tmpCoStr to ((redValue of targAttr) as string) & " " & ((greenValue of targAttr) as string) & " " & ((blueValue of targAttr) as string)
  
  
set ontoColItem to contents of item 3 of cList –スクリプティング予約語(on/to)
  
set ontoCoStr to ((redValue of ontoColItem) as string) & " " & ((greenValue of ontoColItem) as string) & " " & ((blueValue of ontoColItem) as string)


–変数あるいはハンドラ名称をリストアップ(variables & handler)
  
set tmp1Array to NSArray’s arrayWithArray:aRec
  
set thePred0 to NSPredicate’s predicateWithFormat_("colorStr == %@", tmpCoStr)
  
set dArray to (tmp1Array’s filteredArrayUsingPredicate:thePred0) as list
  
  
–改行を含むデータをリストアップ(text data contains return)
  
set thePred1 to NSPredicate’s predicateWithFormat_("stringVal CONTAINS %@", return)
  
set eArray to ((tmp1Array’s filteredArrayUsingPredicate:thePred1)’s valueForKeyPath:"itemIndex") as list
  
  
set the beginning of eArray to 0 –ハンドラ宣言部がTopに来る場合に備える
  
  
–"on"(ハンドラ宣言)の項目をリストアップ 文字と色で抽出
  
set thePred2 to NSPredicate’s predicateWithFormat_("stringVal == %@ && colorStr == %@ ", "on", ontoCoStr)
  
set fArray to ((tmp1Array’s filteredArrayUsingPredicate:thePred2)’s valueForKeyPath:"itemIndex") as list
  
  
–"to"(ハンドラ宣言ないしは代入対象指定) の項目をリストアップ文字と色で抽出
  
set thePred3 to NSPredicate’s predicateWithFormat_("stringVal == %@ && colorStr == %@ ", "to", ontoCoStr)
  
set gArray to ((tmp1Array’s filteredArrayUsingPredicate:thePred3)’s valueForKeyPath:"itemIndex") as list


set handlerList to {}
  
  
–on ではじまるハンドラの抽出
  
repeat with i in eArray –改行を含むテキストのアイテム番号リスト
    set j to (contents of i) as integer
    
repeat with ii in fArray –"on"の項目リスト
      set jj to (contents of ii) as integer
      
      
set handlerStr to missing value
      
      
if (j + 1) = jj then
        set handlerStr to stringVal of (item (jj + 2) of (aRec as list))
      else if (j + 2) = jj then
        set handlerStr to stringVal of (item (jj + 2) of (aRec as list))
      end if
      
      
if handlerStr is not in {"error", missing value} and handlerStr is not in handlerList then
        set the end of handlerList to handlerStr
      end if
      
    end repeat
  end repeat


–to ではじまるハンドラの抽出
  
repeat with i in eArray –改行を含むテキストのアイテム番号リスト
    set j to (contents of i) as integer
    
repeat with ii in gArray –"to"の項目リスト
      set jj to (contents of ii) as integer
      
      
set handlerStr to missing value
      
      
if (j + 1) = jj then
        set handlerStr to stringVal of (item (jj + 2) of (aRec as list))
      else if (j + 2) = jj then
        set handlerStr to stringVal of (item (jj + 2) of (aRec as list))
      end if
      
      
if handlerStr is not in {"error", missing value} and handlerStr is not in handlerList then
        set the end of handlerList to handlerStr
      end if
      
    end repeat
  end repeat
  
  
return handlerList
end retHandlerNamesFromAppleScriptSource

–ソースを取得してコンパイル(構文確認)する方式から、URL(fileURL)を指定してコンパイル(構文確認)する方式に変更した
on getAttrRecFromASPath(aFile)
  set aURL to current application’s |NSURL|’s fileURLWithPath:(POSIX path of aFile)
  
set theScript to OSAScript’s alloc()’s initWithContentsOfURL:aURL |error|:(missing value)
  
  
if theScript is equal to missing value then
    — handle error
    
error "Compile Error"
  else
    –set sourceText to theScript’s source() –No Use
    
set styledSourceText to theScript’s richTextSource()
  end if
  
  
set attrRes to getAttributeRunsFromAttrString(styledSourceText) of me
  
return attrRes
end getAttrRecFromASPath

–指定AppleScriptファイルのソースコードを取得する(実行専用Scriptからは取得できない)
— Original Created 2014-02-23 Shane Stanley
on getASsourceFor(anAlias as {alias, string})
  set aURL to current application’s |NSURL|’s fileURLWithPath:(POSIX path of anAlias)
  
set theScript to OSAScript’s alloc()’s initWithContentsOfURL:aURL |error|:(missing value)
  
  
if theScript is equal to missing value then
    — handle error
    
error "Compile Error"
  else
    set sourceText to theScript’s source()
  end if
  
  
return sourceText as string
end getASsourceFor

–Attributed StringをDictionary化
on getAttributeRunsFromAttrString(theStyledText)
  script aSpd
    property styleList : {}
  end script
  
  
set (styleList of aSpd) to {} —for output
  
  
set thePureString to theStyledText’s |string|() –pure string from theStyledText
  
  
set theLength to theStyledText’s |length|()
  
set startIndex to 0
  
set itemCount to 1
  
  
repeat until (startIndex = theLength)
    set {theAtts, theRange} to theStyledText’s attributesAtIndex:startIndex longestEffectiveRange:(specifier) inRange:{startIndex, theLength – startIndex}
    
    
–String  
    
set aText to (thePureString’s substringWithRange:theRange) as string
    
    
–Color
    
set aColor to (theAtts’s valueForKeyPath:"NSColor")
    
if aColor is not equal to missing value then
      set aSpace to aColor’s colorSpace()
      
      
set aRed to (aColor’s redComponent()) * 255
      
set aGreen to (aColor’s greenComponent()) * 255
      
set aBlue to (aColor’s blueComponent()) * 255
      
      
set colList to {aRed as integer, aGreen as integer, aBlue as integer} –for comparison
      
set colStrForFind to (aRed as integer as string) & " " & (aGreen as integer as string) & " " & (aBlue as integer as string) –for filtering
    else
      set colList to {0, 0, 0}
      
set colStrForFind to "0 0 0"
    end if
    
    
–Font
    
set aFont to (theAtts’s valueForKeyPath:"NSFont")
    
if aFont is not equal to missing value then
      set aDFontName to aFont’s displayName()
      
set aDFontSize to aFont’s pointSize()
    end if
    
    
set the end of (styleList of aSpd) to {stringVal:aText, colorStr:colStrForFind, colorVal:colList, fontName:aDFontName as string, fontSize:aDFontSize, itemIndex:itemCount}
    
set startIndex to current application’s NSMaxRange(theRange)
    
    
set itemCount to itemCount + 1
  end repeat
  
  
return (styleList of aSpd)
  
end getAttributeRunsFromAttrString

–AppleScriptの構文色分けのカラー値をRGBで取得する
on getAppleScriptSourceColors()
  
  
— get the plist info as a dictionary
  
set thePath to NSString’s stringWithString:"~/Library/Preferences/com.apple.applescript.plist"
  
set thePath to thePath’s stringByExpandingTildeInPath()
  
set theInfo to NSDictionary’s dictionaryWithContentsOfFile:thePath
  
  
— extract relevant part and loop through
  
set theArray to (theInfo’s valueForKey:"AppleScriptSourceAttributes") as list
  
  
set colList to {}
  
  
repeat with i from 1 to count of theArray
    set anEntry to item i of theArray
    
    
set colorData to NSColor of anEntry
    
set theColor to (NSUnarchiver’s unarchiveObjectWithData:colorData)
    
    
set {rVal, gVal, bVal} to retColListFromNSColor(theColor, 255) of me
    
    
set fontData to NSFont of anEntry
    
set theFont to (NSUnarchiver’s unarchiveObjectWithData:fontData)
    
    
set aFontName to theFont’s displayName() as text
    
set aFontSize to theFont’s pointSize()
    
    
set aColRec to {redValue:rVal, greenValue:gVal, blueValue:bVal, fontName:aFontName, fontSize:aFontSize}
    
    
set the end of colList to aColRec
  end repeat
  
  
return colList
end getAppleScriptSourceColors

–NSColorからRGBの値を取り出す
on retColListFromNSColor(aCol, aMAX as integer)
  set aRed to round ((aCol’s redComponent()) * aMAX) rounding as taught in school
  
set aGreen to round ((aCol’s greenComponent()) * aMAX) rounding as taught in school
  
set aBlue to round ((aCol’s blueComponent()) * aMAX) rounding as taught in school
  
  
if aRed > aMAX then set aRed to aMAX
  
if aGreen > aMAX then set aGreen to aMAX
  
if aBlue > aMAX then set aBlue to aMAX
  
  
return {aRed, aGreen, aBlue}
end retColListFromNSColor

–AS書式で配色に重複がないかどうかチェック
on chkASLexicalFormatColorConfliction(aList)
  set anArray to current application’s NSArray’s arrayWithArray:aList
  
set bList to (anArray’s valueForKeyPath:"redValue.stringValue") as list
  
set cList to (anArray’s valueForKeyPath:"greenValue.stringValue") as list
  
set dList to (anArray’s valueForKeyPath:"blueValue.stringValue") as list
  
  
set colStrList to {}
  
repeat with i from 1 to (length of bList)
    set bItem to contents of item i of bList
    
set cItem to contents of item i of cList
    
set dItem to contents of item i of dList
    
set the end of colStrList to bItem & " " & cItem & " " & dItem
  end repeat
  
  
set aRes to returnDuplicatesOnly(colStrList) of me
  
log aRes
  
if aRes is equal to {} then
    return true –重複が存在しなかった場合
  else
    return false –重複があった場合
  end if
end chkASLexicalFormatColorConfliction

on returnDuplicatesOnly(aList as list)
  set aSet to current application’s NSCountedSet’s alloc()’s initWithArray:aList
  
set bList to (aSet’s allObjects()) as list
  
  
set dupList to {}
  
repeat with i in bList
    set aRes to (aSet’s countForObject:i)
    
if aRes > 1 then
      set the end of dupList to (contents of i)
    end if
  end repeat
  
  
return dupList
end returnDuplicatesOnly

on retTwoPathList()
  tell application "Script Debugger"
    set dList to name of every document
    
set dResList to choose from list dList with prompt "Select two documents" with multiple selections allowed
    
if dResList = false then return false
    
if length of dResList is not equal to 2 then
      display dialog "Please Select two documents to compare handler contents" buttons {"OK"} default button 1 with icon 1 with title "Selection Error"
      
return false
    end if
    
    
set dPathList to {}
    
repeat with i in dResList
      set j to contents of i
      
tell document j
        set tmpPath to (file spec) as string –HFS path string
      end tell
      
      
set the end of dPathList to tmpPath
    end repeat
  end tell
  
  
return dPathList
end retTwoPathList

–Written By Philip Aker
–文字置換ルーチン
on repChar(origText as string, targStr as string, repStr as string)
  set {txdl, AppleScript’s text item delimiters} to {AppleScript’s text item delimiters, targStr}
  
set temp to text items of origText
  
set AppleScript’s text item delimiters to repStr
  
set res to temp as text
  
set AppleScript’s text item delimiters to txdl
  
return res
end repChar

–指定文字と終了文字に囲まれた内容を抽出
on extractStrFromTo(aParamStr, fromStr, toStr)
  set theScanner to current application’s NSScanner’s scannerWithString:aParamStr
  
set anArray to current application’s NSMutableArray’s array()
  
  
repeat until (theScanner’s isAtEnd as boolean)
    set {theResult, theKey} to theScanner’s scanUpToString:fromStr intoString:(specifier)
    
theScanner’s scanString:fromStr intoString:(missing value)
    
set {theResult, theValue} to theScanner’s scanUpToString:toStr intoString:(specifier)
    
if theValue is missing value then set theValue to "" –>追加
    
theScanner’s scanString:toStr intoString:(missing value)
    
anArray’s addObject:theValue
  end repeat
  
  
if anArray’s |count|() is not equal to 1 then return false
  
  
return first item of (anArray as list)
end extractStrFromTo

★Click Here to Open This Script 

(Visited 40 times, 1 visits today)
Posted in Color OSA Record Text | Tagged 10.12savvy 10.13savvy 10.14savvy NSArray NSCountedSet NSDictionary NSPredicate NSString NSUnarchiver OSAScript Script Debugger | Leave a comment

電子書籍(PDF)をオンラインストアで販売中!

Google Search

Popular posts

  • AppleScriptによるWebブラウザ自動操縦ガイド
  • macOS 13, Ventura(継続更新)
  • ドラッグ&ドロップ機能の未来?
  • macOS 12.x上のAppleScriptのトラブルまとめ
  • PFiddlesoft UI Browserが製品終了に
  • macOS 12.3 beta 5、ASの障害が解消される(?)
  • SF Symbolsを名称で指定してPNG画像化
  • 新刊発売:AppleScriptによるWebブラウザ自動操縦ガイド
  • macOS 12.3 beta4、まだ直らないASまわりの障害
  • macOS 12.3上でFinder上で選択中のファイルをそのままオープンできない件
  • Safariで表示中のYouTubeムービーのサムネイル画像を取得
  • macOS 12のスクリプトエディタで、Context Menu機能にバグ
  • Pixelmator Pro v2.4.1で新機能追加+AppleScriptコマンド追加
  • 人類史上初、魔導書の観点から書かれたAppleScript入門書「7つの宝珠」シリーズ開始?!
  • CotEditor v4.1.2でAppleScript系の機能を追加
  • macOS 12.5(21G72)がリリースされた!
  • UI Browserがgithub上でソース公開され、オープンソースに
  • Pages v12に謎のバグ。書類上に11枚しか画像を配置できない→解決
  • 新発売:AppleScriptからSiriを呼び出そう!
  • iWork 12.2がリリースされた

Tags

10.11savvy (1102) 10.12savvy (1243) 10.13savvy (1391) 10.14savvy (586) 10.15savvy (434) 11.0savvy (274) 12.0savvy (174) 13.0savvy (34) CotEditor (60) Finder (47) iTunes (19) Keynote (97) NSAlert (60) NSArray (51) NSBezierPath (18) NSBitmapImageRep (21) NSBundle (20) NSButton (34) NSColor (51) NSDictionary (27) NSFileManager (23) NSFont (18) NSImage (42) NSJSONSerialization (21) NSMutableArray (62) NSMutableDictionary (21) NSPredicate (36) NSRunningApplication (56) NSScreen (30) NSScrollView (22) NSString (118) NSURL (97) NSURLRequest (23) NSUTF8StringEncoding (30) NSUUID (18) NSView (33) NSWorkspace (20) Numbers (55) Pages (36) Safari (41) Script Editor (20) WKUserContentController (21) WKUserScript (20) WKWebView (23) WKWebViewConfiguration (22)

カテゴリー

  • 2D Bin Packing
  • 3D
  • AirDrop
  • AirPlay
  • Animation
  • AppleScript Application on Xcode
  • beta
  • Bluetooth
  • Books
  • boolean
  • bounds
  • Bug
  • Calendar
  • call by reference
  • Clipboard
  • Code Sign
  • Color
  • Custom Class
  • dialog
  • drive
  • exif
  • file
  • File path
  • filter
  • folder
  • Font
  • Font
  • GAME
  • geolocation
  • GUI
  • GUI Scripting
  • Hex
  • History
  • How To
  • iCloud
  • Icon
  • Image
  • Input Method
  • Internet
  • iOS App
  • JavaScript
  • JSON
  • JXA
  • Keychain
  • Keychain
  • Language
  • Library
  • list
  • Locale
  • Machine Learning
  • Map
  • Markdown
  • Menu
  • Metadata
  • MIDI
  • MIME
  • Natural Language Processing
  • Network
  • news
  • Noification
  • Notarization
  • Number
  • Object control
  • OCR
  • OSA
  • PDF
  • Peripheral
  • PRODUCTS
  • QR Code
  • Raw AppleEvent Code
  • Record
  • recursive call
  • regexp
  • Release
  • Remote Control
  • Require Control-Command-R to run
  • REST API
  • Review
  • RTF
  • Sandbox
  • Screen Saver
  • Script Libraries
  • sdef
  • search
  • Security
  • selection
  • shell script
  • Shortcuts Workflow
  • Sort
  • Sound
  • Spellchecker
  • Spotlight
  • SVG
  • System
  • Tag
  • Telephony
  • Text
  • Text to Speech
  • timezone
  • Tools
  • Update
  • URL
  • UTI
  • Web Contents Control
  • WiFi
  • XML
  • XML-RPC
  • イベント(Event)
  • 未分類

アーカイブ

  • 2023年3月
  • 2023年2月
  • 2023年1月
  • 2022年12月
  • 2022年11月
  • 2022年10月
  • 2022年9月
  • 2022年8月
  • 2022年7月
  • 2022年6月
  • 2022年5月
  • 2022年4月
  • 2022年3月
  • 2022年2月
  • 2022年1月
  • 2021年12月
  • 2021年11月
  • 2021年10月
  • 2021年9月
  • 2021年8月
  • 2021年7月
  • 2021年6月
  • 2021年5月
  • 2021年4月
  • 2021年3月
  • 2021年2月
  • 2021年1月
  • 2020年12月
  • 2020年11月
  • 2020年10月
  • 2020年9月
  • 2020年8月
  • 2020年7月
  • 2020年6月
  • 2020年5月
  • 2020年4月
  • 2020年3月
  • 2020年2月
  • 2020年1月
  • 2019年12月
  • 2019年11月
  • 2019年10月
  • 2019年9月
  • 2019年8月
  • 2019年7月
  • 2019年6月
  • 2019年5月
  • 2019年4月
  • 2019年3月
  • 2019年2月
  • 2019年1月
  • 2018年12月
  • 2018年11月
  • 2018年10月
  • 2018年9月
  • 2018年8月
  • 2018年7月
  • 2018年6月
  • 2018年5月
  • 2018年4月
  • 2018年3月
  • 2018年2月

https://piyomarusoft.booth.pm/items/301502

メタ情報

  • 登録
  • ログイン
  • 投稿フィード
  • コメントフィード
  • WordPress.org

Forum Posts

  • 人気のトピック
  • 返信がないトピック

メタ情報

  • 登録
  • ログイン
  • 投稿フィード
  • コメントフィード
  • WordPress.org
Proudly powered by WordPress
Theme: Flint by Star Verte LLC