—
– Created by: Takaaki Naganoya
– Created on: 2019/04/23
—
– Copyright © 2019 Piyomaru Software, All Rights Reserved
—
use AppleScript version "2.4" — Yosemite (10.10) or later
use framework "Foundation"
use scripting additions
use bPlus : script "BridgePlus" –https://www.macosxautomation.com/applescript/apps/BridgePlus.html
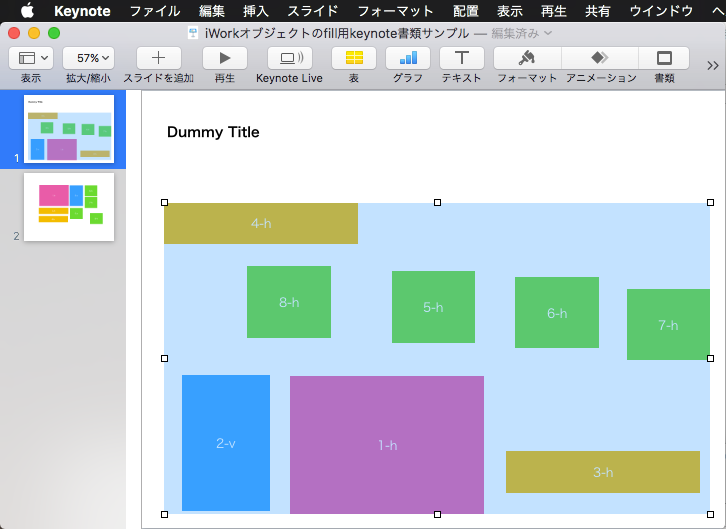
–Packaging Target Area
set binSizeX to 600
set binSizeY to 500
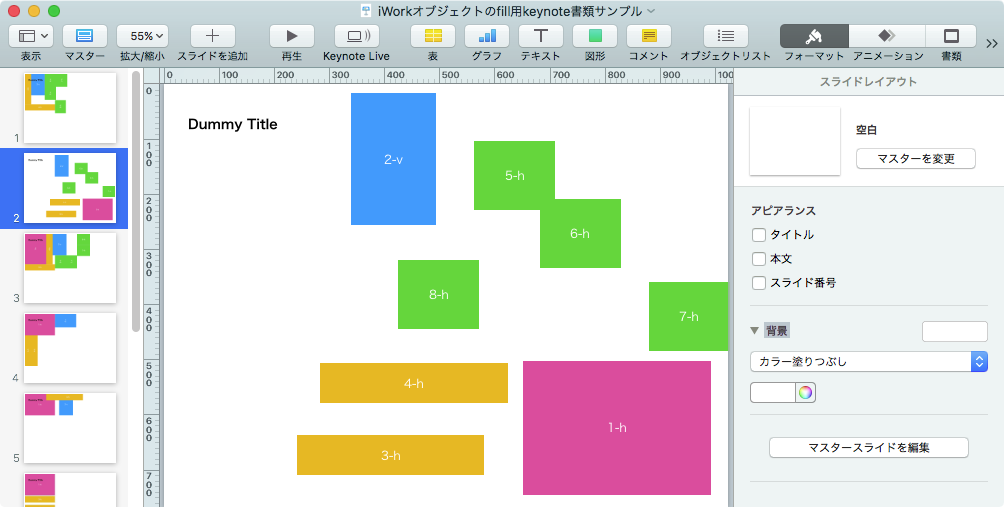
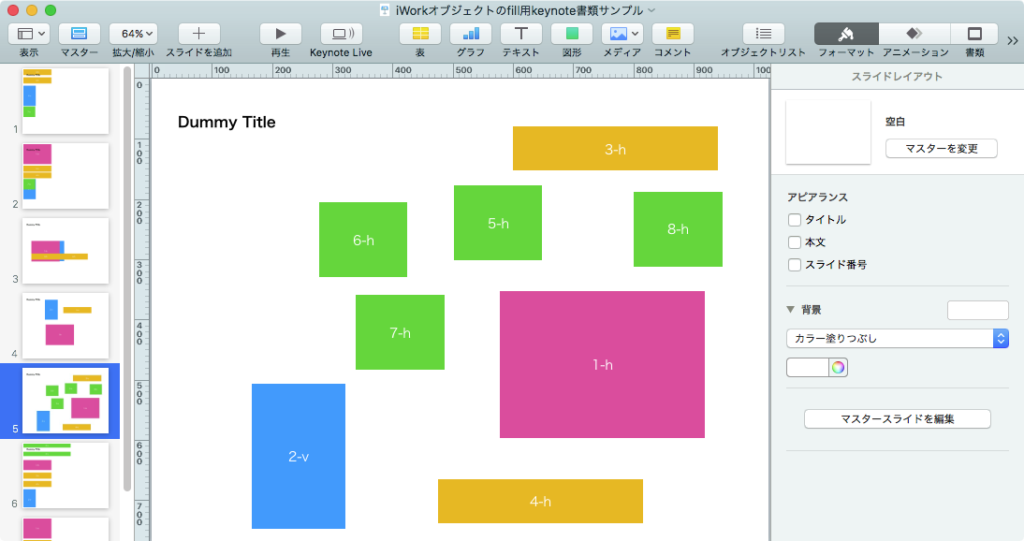
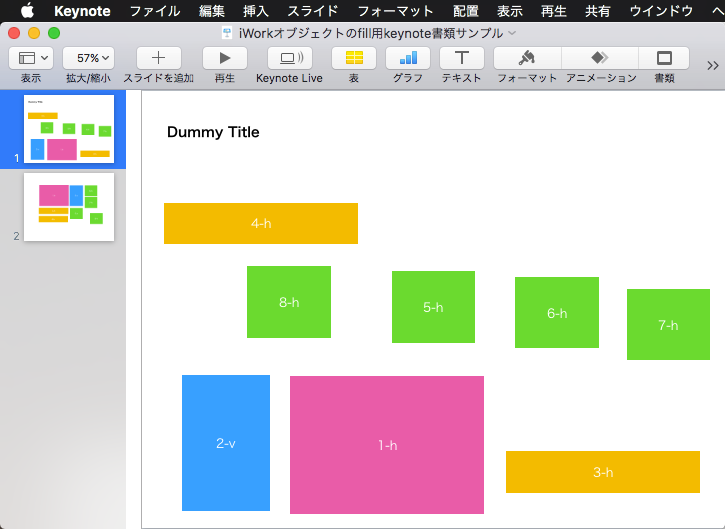
set {tList, a0List} to retRectsFromKeynote() of me
set aList to sortList2DDecending(a0List, {2, 4, 3}) of me –Sorting key is Width(main) and Area(sub) and Height(sub)
–> {{2, 340, 243, 82620}, {3, 340, 73, 24820}, {8, 340, 73, 24820}, {1, 155, 240, 37200}, {4, 147, 125, 18375}, {5, 147, 125, 18375}, {6, 147, 125, 18375}, {7, 147, 125, 18375}}
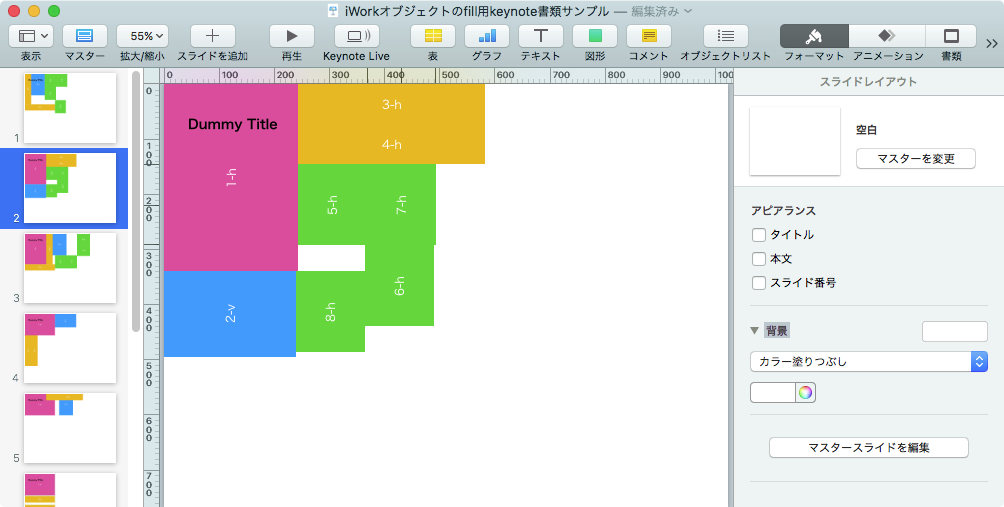
set aRes to twoDBinPacking(binSizeX, binSizeY, aList) of me
if aRes = false then return
–> {{myPos:{0, 0}, myID:1}, {myPos:{0, 340}, myID:2}, {myPos:{243, 0}, myID:3}, {myPos:{316, 0}, myID:4}, {myPos:{340, 240}, myID:5}, {myPos:{465, 240}, myID:6}, {myPos:{590, 0}, myID:7}, {myPos:{590, 125}, myID:8}}
tell application "Keynote"
tell front document
tell current slide
repeat with i in aRes
set {posX, posY} to myPos of i
set itemIndex to myID of i
set aDeg to myDegree of i
set anObjID to item 1 of (item itemIndex of aList)
set rotation of shape anObjID to aDeg
set position of shape anObjID to {posX, posY}
end repeat
end tell
end tell
end tell
on twoDBinPacking(binSizeX as integer, binSizeY as integer, boxList as list)
set aParamList to {binSizeX, binSizeY}
repeat with i in boxList
copy i to {tmpID, tmpX, tmpY, tmpArea}
set aParamList to aParamList & tmpX
set aParamList to aParamList & tmpY
end repeat
set aParam to retDelimitedText(aParamList, " ") of me
–> "800 800 340 243 340 73 340 73 155 240 147 125 147 125 147 125 147 125"
–Parameters for result parsing
set s1Str to "Packed to (x,y)=("
set s2Str to ")"
set s3Str to ","
–https://github.com/juj/RectangleBinPack
set aPath to POSIX path of (path to resource "BinPackTest") –cause error if "BinPackTest" is not present in this script bundle
try
set aRes to do shell script quoted form of aPath & " " & aParam
on error
return false
end try
if aRes does not end with "Done. All rectangles packed." then return false
set aList to paragraphs of aRes
set bList to {}
set aCount to 1
repeat with i in aList
set j to contents of i
if j begins with "Packing rectangle of size " and j does not contain "Failed!" then
set xyRes to pickUpFromToStrAndParse(j, s1Str, s2Str, s3Str) of me
–RectangleBinPackがオブジェクトの回転をサポートしているため、その対処
if xyRes is not equal to false then
set s11Str to "(w,h)=("
set s12Str to ")"
set s13Str to ","
set whRes to pickUpFromToStrAndParse(j, s11Str, s12Str, s13Str) of me
set tmpBox to item aCount of boxList
copy tmpBox to {tmpID, tmpX, tmpY, tmpArea}
if whRes = {tmpX, tmpY} then
set aDeg to 0
else if whRes = {tmpY, tmpX} then
set aDeg to 90
else
error
end if
set the end of bList to {myPos:xyRes, myID:aCount, myDegree:aDeg}
end if
set aCount to aCount + 1
end if
end repeat
return bList
end twoDBinPacking
on pickUpFromToStrAndParse(aStr as string, s1Str as string, s2Str as string, s3Str as string)
set a1Offset to offset of s1Str in aStr
if a1Offset = 0 then return false
set bStr to text (a1Offset + (length of s1Str)) thru -1 of aStr
set a2Offset to offset of s2Str in bStr
if a2Offset = 0 then return false
set cStr to text 1 thru (a2Offset – (length of s2Str)) of bStr
set {x, y} to parseByDelim(cStr, s3Str) of me
return {x as integer, y as integer}
end pickUpFromToStrAndParse
on parseByDelim(aData, aDelim)
set curDelim to AppleScript’s text item delimiters
set AppleScript’s text item delimiters to aDelim
set dList to text items of aData
set AppleScript’s text item delimiters to curDelim
return dList
end parseByDelim
–リストを指定デリミタでテキスト化
on retDelimitedText(aList, aNewDelim)
set aText to ""
set curDelim to AppleScript’s text item delimiters
set AppleScript’s text item delimiters to aNewDelim
set aText to aList as text
set AppleScript’s text item delimiters to curDelim
return aText
end retDelimitedText
on retRectsFromKeynote()
tell application "Keynote"
tell front document
tell current slide
set tList to every shape
set bList to {}
set iCount to 1
repeat with i in tList
set aWidth to width of i
set aHeight to height of i
set {xPos, yPos} to position of i
set anArea to aWidth * aHeight
set the end of bList to {iCount, aWidth, aHeight, anArea}
set iCount to iCount + 1
end repeat
return {tList, bList}
end tell
end tell
end tell
end retRectsFromKeynote
–入れ子のリストを昇順ソート
on sortList2DAscending(a, keyItem)
return sort2DList(a, keyItem, {true}) of me
end sortList2DAscending
–入れ子のリストを降順ソート
on sortList2DDecending(a, keyItem)
return sort2DList(a, keyItem, {false}) of me
end sortList2DDecending
–2D Listをソート
on sort2DList(aList as list, sortIndexes as list, sortOrders as list)
load framework
–index値をAS流(アイテムが1はじまり)からCocoa流(アイテムが0はじまり)に変換
set newIndex to {}
repeat with i in sortIndexes
set j to contents of i
set j to j – 1
set the end of newIndex to j
end repeat
–Sort TypeのListを作成(あえて外部から指定する内容でもない)
set sortTypes to {}
repeat (length of sortIndexes) times
set the end of sortTypes to "compare:"
end repeat
–Sort
set resList to (current application’s SMSForder’s subarraysIn:(aList) sortedByIndexes:newIndex ascending:sortOrders sortTypes:sortTypes |error|:(missing value)) as {missing value, list}
return resList
end sort2DList
|

 1Dバーコード認識には定番の
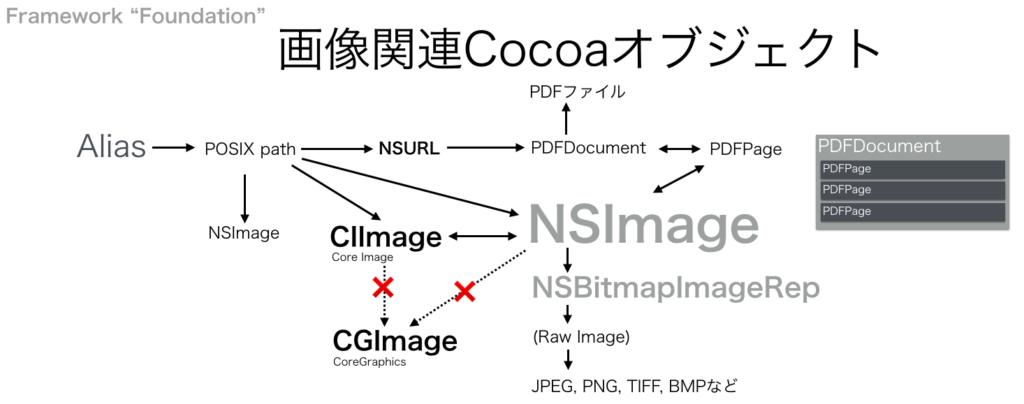


