Menu

Skip to content
AppleScriptの穴
  • Home
  • Products
  • Books
  • Docs
  • Events
  • Forum
  • About This Blog
  • License
  • 仕事依頼

AppleScriptの穴

Useful & Practical AppleScript archive. Click '★Click Here to Open This Script' Link to download each AppleScript

月: 2020年12月

日本語簡易パーサーeasyJParse v5

Posted on 12月 31, 2020 by Takaaki Naganoya

簡易日本語パーサー「easyJParse」のバージョンアップ版です。AppleScriptライブラリ「BridgePlus」を利用しないように改めました。

簡易日本語パーサーというのは、日本語の文を単語に分解するプログラムですが、品詞情報や係り受けの情報が得られるわけではなく、単に単語に分解するだけのもので、用途を日本語コマンド解釈などに限定した簡易版の形態素解析器もどきソフトウェアです。特定の人名など区切られて困る単語についてはカギ括弧などで括ることで(例:「ぴよまるソフトウェア」)まとまった単語として出力する機能を持たせています。

→ easyJParse v3
→ easyJParse v4

前バージョンまではBridgePlus Script Libraryを利用していましたが、同ライブラリがFrameworkを含んでいるために、確実に動かせるように設定するには技量(理解と慣れ)が必要です。自分の手元では動かせていますが、ユーザーによってはBridgePlusをmacOS 10.15以降のMacで利用できないケースも見られ(たぶん、操作間違い)、BridgePlusへの依存がマイナスポイントになりつつあるように感じられます。

本ScriptでBridgePlusから利用しているメソッドは2つ。どちらも既存のAppleScriptのルーチンの組み合わせで再現できる程度の簡単なもの。これらをすべて既存のルーチンの組み合わせで置き換えました。BridgePlus内蔵の機能を書き換える際に、扱うデータサイズはあまり大きくないものであることを前提に最適化しました。あまり巨大なデータを扱うのには向いていませんが、小さなデータを高速に処理できるようにしてあります。

MacBookPro10,1,  macOS Version 10.14.6 (Build 18G8005),  100 iterations
         First Run   Total Time    Average     Median    Maximum    Minimum   Std.Dev.
First       0.6685       0.6236     0.0062     0.0059     0.0083     0.0054     0.0008

正直なところ、この程度の極小データサイズだとCocoaの機能を利用するメリットがあまりないので、Cocoaを使わないように書き換えると高速化できます。高速化は必要に応じて行う程度でしょう。

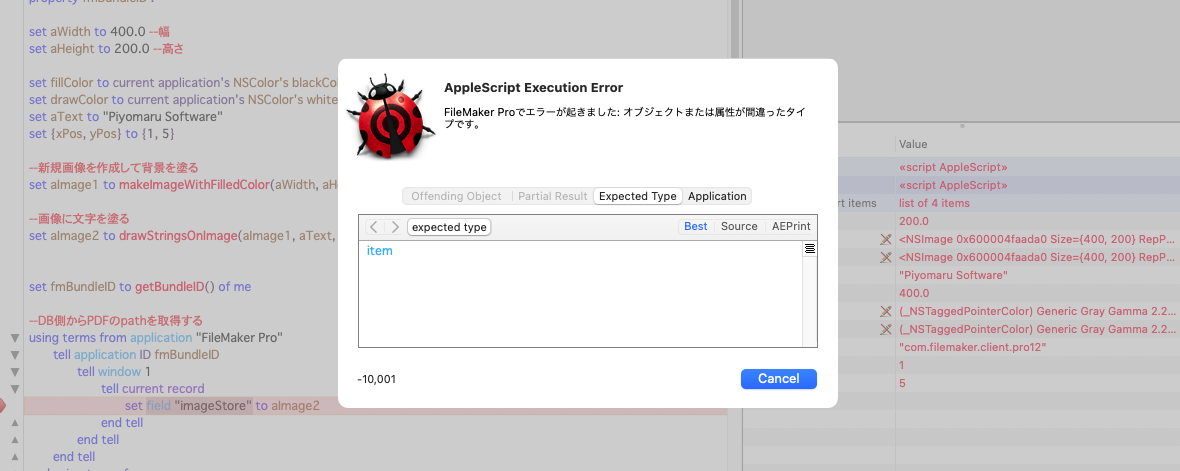
外部ライブラリに依存しなくなったため、たとえばCotEditorのメニューから呼び出すScriptや、FileMaker Pro Scriptの中にまるごと日本語パーサーを突っ込むといった真似ができます。

AppleScript名:easyJParse v5.scptd
— Created 2018-09-26 by Takaaki Naganoya
— Modified 2020-12-31 by Takaaki Naganoya
— 2020 Piyomaru Software
use AppleScript version "2.5" — El Capitan (10.11) or later
use framework "Foundation"
use scripting additions

property NSArray : a reference to current application’s NSArray
property NSSortDescriptor : a reference to current application’s NSSortDescriptor

set aTargName to "Finderで選択中のAI書類上の「製品名」レイヤーから抜き出したコードをもとにスペック情報をGoogle Spreadsheet「製品コード表」から展開して保存。"
set aList to parseJ(aTargName, true) of me
–> {"Finder", "で", "選択", "中", "の", "AI", "書類", "上", "の", "「", "製品名", "」", "レイヤー", "から", "抜き出し", "た", "コード", "を", "もと", "に", "スペック", "情報", "を", "Google", " ", "Spreadsheet", "「", "製品コード表", "」", "から", "展開", "し", "て", "保存", "。"}–v4
–> {"Finder", "で", "選択", "中", "の", "AI", "書類", "上", "の", "「", "製品名", "」", "レイヤー", "から", "抜き出し", "た", "コード", "を", "もと", "に", "スペック", "情報", "を", "Google", " ", "Spreadsheet", "「", "製品コード表", "」", "から", "展開", "し", "て", "保存", "。"}–v5

return aList

set aTargName to "私の名前は「長野谷」です。"
set aList to parseJ(aTargName, true) of me
–> {"私", "の", "名前", "は", "「", "長野谷", "」", "です", "。"}–v4
–> {"私", "の", "名前", "は", "「", "長野谷", "」", "です", "。"}–v5

–カッコのネスティングとクロス(エラー)については、処理せずにそのまま出力
on parseJ(aTargStr as string, pickupPhraseByBracketPair as boolean)
  copy aTargStr to tStr
  
  
set cList to characters of tStr
  
set wList to words of tStr
  
  
set cLen to length of cList
  
  
set w2List to {}
  
set w3List to {}
  
set aCount to 0
  
  
set lastPos to 0
  
  
repeat with i in wList
    set j to contents of i
    
    
using terms from scripting additions
      set anOffset to offset of j in tStr
    end using terms from
    
    
if anOffset is not equal to 1 then
      set aChar to character (lastPos + 1) of aTargStr
      
      
set the end of w3List to {wordList:aChar, characterList:{aChar}, startPos:(lastPos + 1), endPos:(lastPos + 1)}
    end if
    
    
set aLen to length of j
    
    
set w2List to w2List & (characters of j)
    
set startPointer to (anOffset + aCount)
    
set endPointer to (anOffset + aCount + aLen – 1)
    
    
set the end of w3List to {wordList:j, characterList:(characters of j), startPos:startPointer, endPos:endPointer}
    
    
set trimStart to (anOffset + aLen)
    
    
if trimStart > (length of tStr) then
      set trimStart to 1
    end if
    
    
set tStr to text trimStart thru -1 of tStr
    
    
set aCount to aCount + anOffset + aLen – 1
    
copy endPointer to lastPos
  end repeat
  
  
–句読点など。文末の処理
  
if endPointer is not equal to cLen then
    set the end of w3List to {wordList:tStr, characterList:(characters of tStr), startPos:(lastPos + aCount), endPos:aLen}
  end if
  
  
set bArray to sortRecListByLabel((w3List), "startPos", true) of me
  
set cArray to (bArray’s valueForKeyPath:"wordList") as list
  
  
–カッコでくくった範囲を1つの塊として連結する
  
set bracketList to {"「", "」", "『", "』", "【", "】", "《", "》", "〈", "〉", "(", ")"}
  
set bList to jointItemsBetweenBrackets(cArray, bracketList) of me
  
  
return bList
end parseJ

–リストに入れたレコードを、指定の属性ラベルの値でソート
on sortRecListByLabel(aRecList as list, aLabelStr as string, ascendF as boolean)
  set aArray to NSArray’s arrayWithArray:aRecList
  
set sortDesc to NSSortDescriptor’s alloc()’s initWithKey:aLabelStr ascending:ascendF
  
set sortDescArray to NSArray’s arrayWithObject:sortDesc
  
set sortedArray to aArray’s sortedArrayUsingDescriptors:sortDescArray
  
return sortedArray
end sortRecListByLabel

on offset of bArg in anArg
  set aClass to class of anArg
  
set bClass to class of bArg
  
  
if {aClass, bClass} = {text, text} then –case 1
    return getOffset(anArg, bArg) of me
  else if {aClass, bClass} = {list, list} then –case 2 (The target case)
    return execOffsetList(bArg, anArg) of me
  else if {aClass, bClass} = {text, list} then –case 3 (Illegular case)
    return execOffsetList(bArg, {anArg}) of me
  else if {aClass, bClass} = {list, text} then –case 4 (Illegular case)
    return execOffsetList({bArg}, anArg) of me
  end if
end offset

–1D List同士のoffset演算を行うルーチンの本体
on execOffsetList(aList as list, bList as list)
  set resList to {}
  
repeat with i in aList
    set j to contents of i
    
set aCount to 1
    
    
repeat with ii in bList
      set jj to contents of ii
      
if jj = j then
        set the end of resList to aCount
        
exit repeat
      end if
      
set aCount to aCount + 1
    end repeat
  end repeat
  
  
–見つかったItem No.が連続値かどうかチェック
  
set sRes to chkSequential(resList) of me
  
if sRes = true then
    return contents of first item of resList
  else
    return false
  end if
end execOffsetList

–与えられた1D Listが連続値かどうかをチェックする
on chkSequential(aList)
  if length of aList = 1 then return true
  
if aList = {} then return false
  
  
set aFirst to first item of aList
  
set aList to rest of aList
  
  
repeat with i in aList
    set j to contents of i
    
if j is not equal to (aFirst + 1) then
      return false
    end if
    
copy j to aFirst
  end repeat
  
  
return true
end chkSequential

–テキスト同士のoffset ofを(2.5x fasterで)実行する
on getOffset(str, searchStr)
  set d to divideBy(str, searchStr)
  
if (count d) is less than 2 then return 0
  
return (length of item 1 of d) + 1
end getOffset

on divideBy(str, separator)
  set delSave to AppleScript’s text item delimiters
  
set the AppleScript’s text item delimiters to separator
  
set strItems to every text item of str
  
set the AppleScript’s text item delimiters to delSave
  
return strItems
end divideBy

–カッコでくくった範囲を1つの塊として連結する
on jointItemsBetweenBrackets(aList as list, bracketList as list)


–リスト内のブラケット位置の検出
  
set aRes to (my indexesOfItems:bracketList inArray:aList base:0) as list
  
–> {9, 12, 15, 18, 22, 25, 27, 29}–0 based
  
  
if aRes = {} then return aList
  
  
–位置情報リストを開始位置, 終了位置のペアの2D Listに変換する
  
set cList to my subarraysFrom:(aRes) groupedBy:2
  
–> {{9, 12}, {15, 18}, {22, 25}, {27, 29}}–0 based
  
  
–カッコの位置がクロスしていないかチェック(入れ子状態はエラーになる)
  
set dRes to checkCrossRange(cList) of me
  
if dRes = false then return aList
  
  
set ccList to reverse of cList –順次、ブラケットに囲まれた要素を連結していくので、アイテム数が随時変化する。アイテム番号が狂わないよう後方から処理する必要がある。そのために、リストの要素を逆順に組み替える
  
–> {{27, 29}, {22, 25}, {15, 18}, {9, 12}}–0 based
  
  
—
  
copy aList to aaList
  
  
repeat with i in ccList
    copy i to {s2Dat, e2Dat}
    
    
set s2Dat to s2Dat + 1 –Array index conversion from 0 to 1 based
    
set e2Dat to e2Dat + 1 –Array index conversion from 0 to 1 based
    
    
set tmp1 to items 1 thru s2Dat of aaList
    
set tmp2 to (items (s2Dat + 1) thru (e2Dat – 1) of aaList) as string
    
set tmp3 to items e2Dat thru -1 of aaList
    
    
set aaList to tmp1 & tmp2 & tmp3
  end repeat
  
  
return aaList
end jointItemsBetweenBrackets

–{始点, 終点}のペアの2D Listが違いにクロスしていないかチェック
on checkCrossRange(aList as list)
  set rList to {}
  
repeat with i in aList
    copy i to {sRange, eRange}
    
set tmpRange to current application’s NSMakeRange(sRange, eRange – sRange + 1)
    
set the end of rList to tmpRange
  end repeat
  
  
repeat with ii in rList
    set jj to contents of ii
    
repeat with i in rList
      set j to contents of i
      
      
if jj is not equal to j then
        set aRes to current application’s NSIntersectionRange(jj, j)
        
        
if aRes is not equal to {location:0, |length|:0} then
          return false
        end if
      end if
      
    end repeat
  end repeat
  
  
return true
end checkCrossRange

–BridgePlus内の命令を展開
on indexesOfItems:(iList as list) inArray:(aList as list) base:(baseNum as integer)
  return retIndexesOfNumInArray(iList, aList, baseNum) of me
end indexesOfItems:inArray:base:

–1Dリスト中のシーケンシャルサーチ(複数)
on retIndexesOfNumInArray(aTargetList, aList, baseNum)
  script obj
    property list : aList
    
property resList : {}
  end script
  
  
if baseNum is not in {0, 1} then return false
  
  
–set obj’s list to aList
  
set (resList of obj) to {}
  
set aCount to baseNum
  
set hitF to false
  
  
repeat with i in obj’s list
    set j to contents of i
    
if j is in aTargetList then
      set the end of (resList of obj) to aCount
    end if
    
    
set aCount to aCount + 1
  end repeat
  
  
return (resList of obj)
end retIndexesOfNumInArray

on subarraysFrom:(aList as list) groupedBy:(gNum as integer)
  script spdObj
    property list : aList
    
property bList : {}
  end script


–Group Num check
  
if gNum = 0 then return false
  
if length of aList < gNum then return false
  
  
if (length of aList) mod gNum is not equal to 0 then return
  
  
set (bList of spdObj) to {}
  
  
set tmpList to {}
  
set aCount to 1
  
  
repeat with i in aList
    set j to contents of i
    
set the end of tmpList to j
    
set aCount to aCount + 1
    
    
if aCount > gNum then
      set the end of (bList of spdObj) to tmpList
      
set tmpList to {}
      
set aCount to 1
    end if
  end repeat
  
  
return (bList of spdObj)
end subarraysFrom:groupedBy:

★Click Here to Open This Script 

(Visited 53 times, 1 visits today)
Posted in Natural Language Processing Text | Tagged 10.13savvy 10.14savvy 10.15savvy 11.0savvy | Leave a comment

CoreML Modelからパラメータを取得する v2

Posted on 12月 30, 2020 by Takaaki Naganoya

CoreML Modelのファイル(.mlmodelc)から入力パラメータおよび出力データの情報を取得するAppleScriptです。

テストに使ったのはMS Classifier(299×299ピクセルの画像を入力)で、入力画像をGundamのモビルスーツとして扱い、連邦軍機体かジオン軍機体かを判定するCoreML Modelです。

機械学習モデルのパラメータ/モデル解析を行うツール「Netron」にはWebアプリ版もあるので、JavaScriptやPythonで解析できてしまうのかもしれません(Netronのソースを読んでみたら、そういう感じのファイルだけ入っていて驚かされました)。

AppleScript名:CoreML Modelからパラメータを取得する v2.scptd
—
–  Created by: Takaaki Naganoya
–  Created on: 2020/12/28
—
–  Copyright © 2020 Piyomaru Software, All Rights Reserved
—
use AppleScript version "2.7" — 10.13 or later
use framework "Foundation"
use framework "CoreML"
use scripting additions

set aVer to system version of (system info) –Get OS Version

considering numeric strings
  if aVer < "10.15" then
    –macOS 10.14。10.13は未検証
    
set mlFile to POSIX path of (choose folder) –mlmodelcを指定。macOS 10.14のFinder上ではフォルダに見えてしまう
  else
    –macOS 10.15 or later
    
set mlFile to POSIX path of (choose file of type {"com.apple.coreml.mlmodelc"}) –mlmodelcを指定。macOS 10.15以降のFinder上ではファイルに見える
  end if
end considering

set mlURL to current application’s |NSURL|’s fileURLWithPath:mlFile
set aModel to current application’s MLModel’s modelWithContentsOfURL:mlURL |error|:(missing value)
if aModel = missing value then return –mlmodelファイルだとエラーになる

set aMLDesc to aModel’s modelDescription
set inputDesc to aMLDesc’s inputDescriptionsByName()

–Input Information
set kList to inputDesc’s allKeys() as list
–> {"image"}

set vList to inputDesc’s allValues() as list
–> {(MLFeatureDescription) image : Image (Color, 299 x 299)}

–Output Information
set outputDeck to aMLDesc’s outputDescriptionsByName()
set k2List to outputDeck’s allKeys() as list
–> {"classLabel", "classLabelProbs"}

set v2List to outputDeck’s allValues() as list
–> {(MLFeatureDescription) classLabel : String, (MLFeatureDescription) classLabelProbs : Dictionary (String → Double)}

set vResList to {}
repeat with v in v2List
  set the end of vResList to v’s |name|() as string
end repeat
return vResList
–> {"classLabel", "classLabelProbs"}

★Click Here to Open This Script 

(Visited 114 times, 1 visits today)
Posted in Machine Learning | Tagged 10.14savvy 10.15savvy 11.0savvy MLFeatureDescription MLModel NSURL | Leave a comment

Pixelmator ProのSVG to PNG変換

Posted on 12月 28, 2020 by Takaaki Naganoya

Pixelmator ProでSVGのファイルをPNG形式で書き出すAppleScriptです。

この、ダイアログでファイルを選択して書き出しファイル名を入力させるタイプのAppleScriptをたくさん掲載していますが、もともとAppleScriptの一括処理的なプログラムで、いちいちダイアログを出して1つ1つのファイルを保存させるようなことはやりません。あくまで、サンプルScriptの動作を完結させるための仕様です。

実際には、指定フォルダ以下にあるSVGファイルをSpotlightで抽出して、まとめて書き出し先のフォルダにPNG形式で書き出すといった処理になるでしょう。

SVG方面では1024jpさんのGapplinがあり、こちらもAppleScript対応しており各種操作が行えるようになっているのですが、Sandbox対応度に問題があるためかファイル書き出し操作がAppleScriptから行えていないので、現状では大量のSVG書類の変換にはPhotoshopかPixelmator Proということになりそうです。

SVGを読み込んで他の画像形式に書き出すためのCocoa Frameworkを利用できるとよさそうですが、いまひとつうまく動くものを知りません。


▲SVG対応のアプリケーション。SVGを読めるもの、書けるもの、書き出せるもの、と対応度はさまざま

AppleScript名:PixelmatorのSVG to PNG変換
—
–  Created by: Takaaki Naganoya
–  Created on: 2020/12/01
—
–  Copyright © 2020 Piyomaru Software, All Rights Reserved
—

use AppleScript version "2.7" — Yosemite (10.13) or later
use framework "Foundation"
use scripting additions

set aFile to choose file of type {"public.svg-image"}
set outPath to choose file name with prompt "select output file name"

tell application "Pixelmator Pro"
  open aFile
  
  
tell front document
    export to outPath as PNG
    
close without saving
  end tell
end tell

★Click Here to Open This Script 

AppleScript名:GaplinのSVG to PNG変換
set aFile to choose file of type {"public.svg-image"}
set outPath to choose file name with prompt "select output file name"

tell application "Gapplin"
  open aFile
  
  
tell front document
    export to outPath as PNG with options {class:export options, scale:1.0}
    
close without saving
  end tell
end tell

★Click Here to Open This Script 

(Visited 137 times, 1 visits today)
Posted in file Image | Tagged 10.13savvy 10.14savvy 10.15savvy 11.0savvy Pixelmator Pro | Leave a comment

FileMaker ProのObject FieldにNSImageを設定する

Posted on 12月 26, 2020 by Takaaki Naganoya

FileMaker Proデータベースのオブジェクトフィールド上に生成したNSImageを入れるAppleScriptです。FileMaker Pro v19.2.1.14+macOS 11.2betaで動作確認しています。とくに環境依存は行わないはずです。

FileMaker Proのオブジェクトフィールドは一種のBlobで、画像やPDF、機械学習モデル(mlmodel)、他のデータベース(.fmp12)を突っ込んだりできます。

ところが、AppleScriptでNSImageを作成し、その結果をFileMaker Proのオブジェクトフィールドにそのまま入れることはできません。エラーになります。

方法1:AppleScript側でNSImageをクリップボードに入れ、FileMaker Pro側でクリップボードの内容をフィールドに入れる

この方法は、FileMaker Pro側が最前面にある場合には問題なかったのですが、FileMaker Proが最前面にない場合には問題が発生する可能性があります。実際に試して成功したのですが、クリップボード経由でAppleScript側とFileMaker Script側がデータをやりとりすることになり、膨大なデータを処理した場合の信頼性に疑問がつきました。

方法2:AppleScript側でNSImageをクリップボードに入れ、クリップボードの内容を標準命令で画像に変換したのち、普通にオブジェクトフィールドに入れる

各種アプリケーションが認識する「画像データ」に明示的に変換するためには、ファイルに書き出すのが確実ですが、クリップボード経由で「画像」に変換するのが安全策です。

NSImageをJPEGデータに変換して、その結果をそのままオブジェクトフィールドに突っ込んでもエラーになりました。これが最有力な案だと思っていたので、うまく動かなかったのは残念でした。

そこで、安全策をとって(仕方なく)クリップボード経由でNSImageを画像に変換することになりました。このままでは方法1と大差ないように見えますが、実際にはAppleScriptでクリップボードにNSImageを入れて、AppleScriptでクリップボード内容を画像として評価して取得するという処理を行っています。

スピードや確実さを考慮すると、なるべくクリップボード経由の処理は行いたくないので、対策は考えておきたいところです。クリップボードや一時ファイルを経由させるよりも、極力メモリ上で対処したいところです。


▲ユーザーにAppleScriptの実行権限を与えておくとAppleScriptによる制御が有効になるFileMaker Pro


▲テキストフィールド「originalString」から文字情報を取り出して、オブジェクトフィールド「imageStore」にAppleScriptで生成した画像を突っ込む


▲実行前


▲実行後(Mac mini 2014で処理に初回で0.1秒ほど。2回目以降は1桁速くなる) AppleScript側で画像を作成してフィルタ処理をかけたりして、好き放題に合成してFileMaker DB上のフィールドに設定できる。バーコードやQRコードをAppleScript側で生成して設定したり、PDFをレンダリングした画像を設定できるのは便利

AppleScript名:NSImage to FM Object Field v2.scptd
— Created 2020-12-20 by Takaaki Naganoya
— 2020 Piyomaru Software
use AppleScript version "2.4"
use scripting additions
use framework "Foundation"
use framework "AppKit"

property fmBundleID : ""

set fmBundleID to getBundleID() of me

–DB側から画像化するテキストを取得する
using terms from application "FileMaker Pro"
  tell application ID fmBundleID
    tell window 1
      tell current record
        set aText to field "originalString"
      end tell
    end tell
  end tell
end using terms from

set aWidth to 500.0 –幅
set aHeight to 200.0 –高さ

set fillColor to current application’s NSColor’s blackColor –塗り色
set drawColor to current application’s NSColor’s whiteColor –文字色

set {xPos, yPos} to {1, 5}

–新規画像を作成して背景を塗る
set aImage1 to makeImageWithFilledColor(aWidth, aHeight, fillColor) of me

–画像に文字を塗る
set aImage2 to drawStringsOnImage(aImage1, aText, "HiraKakuStd-W8", 36.0, drawColor, xPos, yPos) of me

(my restoreClipboard:{aImage2})
using terms from scripting additions
  set tmpImg to the clipboard as JPEG picture
end using terms from

–DBに画像を設定する
using terms from application "FileMaker Pro"
  tell application ID fmBundleID
    tell window 1
      tell current record
        set field "imageStore" to tmpImg
      end tell
    end tell
  end tell
end using terms from

–画像のうえに指定の文字を描画して画像を返す
on drawStringsOnImage(anImage, aText, aFontName, aPoint, drawColor, xPos, yPos)
  set aString to current application’s NSString’s stringWithString:aText
  
set aDict to current application’s NSDictionary’s dictionaryWithObjects:{current application’s NSFont’s fontWithName:aFontName |size|:aPoint, drawColor} forKeys:{current application’s NSFontAttributeName, current application’s NSForegroundColorAttributeName}
  
  
–文字描画開始
  
anImage’s lockFocus()
  
aString’s drawAtPoint:(current application’s NSMakePoint(xPos, yPos)) withAttributes:aDict
  
anImage’s unlockFocus()
  
–文字描画ここまで
  
  
return anImage
end drawStringsOnImage

–指定サイズの画像を作成し、背景を指定色で塗る
on makeImageWithFilledColor(aWidth, aHeight, fillColor)
  –Imageの作成  
  
set anImage to current application’s NSImage’s alloc()’s initWithSize:(current application’s NSMakeSize(aWidth, aHeight))
  
  
–描画開始
  
anImage’s lockFocus()
  
  
set theRect to {{x:0, y:0}, {width:aWidth, height:aHeight}}
  
set theNSBezierPath to current application’s NSBezierPath’s bezierPath
  
theNSBezierPath’s appendBezierPathWithRect:theRect
  
  
fillColor’s |set|() –色設定
  
theNSBezierPath’s fill() –ぬりつぶし
  
  
anImage’s unlockFocus()
  
–描画ここまで
  
  
return anImage –画像を返す
end makeImageWithFilledColor

on getBundleID()
  –FileMaker Pro 18
  
set fmProID to "com.filemaker.client.pro12"
  
  
–FileMaker Pro 18 Advanced
  
set fmProADVID to "com.filemaker.client.advanced12"
  
  
using terms from application "FileMaker Pro"
    tell current application
      set aName to name
    end tell
  end using terms from
  
  
if aName contains "Advanced" then
    return fmProADVID
  else
    return fmProID
  end if
end getBundleID

–クリップボードに内容を設定する
on restoreClipboard:theArray
  — get pasteboard
  
set thePasteboard to current application’s NSPasteboard’s generalPasteboard()
  
  
— clear it, then write new contents
  
thePasteboard’s clearContents()
  
thePasteboard’s writeObjects:theArray
end restoreClipboard:

★Click Here to Open This Script 

(Visited 66 times, 1 visits today)
Posted in Image | Tagged 10.14savvy 10.15savvy 11.0savvy FileMaker | Leave a comment

Safariで表示中のタブを順次切り替え

Posted on 12月 26, 2020 by Takaaki Naganoya

StreamDeckから呼び出すことを前提に作ってみました。StreamDeckの実機は友人に返却したものの、ソフトウェア版のStreamDeck(iOSデバイスで動く)が稼働するので、iPhone上のStreamDeckアプリでMacをコントロール可能です。

AppleScript名:rotate tabs.scpt
tell application "Safari"
  tell front window
    set tCount to count every tab
    
set curTab to index of current tab
    
    
if curTab = tCount then
      set targTab to 1
    else
      set targTab to curTab + 1
    end if
    
    
set current tab to tab targTab
  end tell
end tell

★Click Here to Open This Script 

こんなAppleScriptを書いて、StreamDeckの設定ソフトウェアで「開く」アクションにAppleScriptを登録。

実行時、初回だけ「Safariのコントロールを許可するか?」というセキュリティダイアログが出てきますが、許可すれば2回目以降で聞かれることはありません。

(Visited 420 times, 4 visits today)
Posted in Peripheral | Tagged 10.14savvy 10.15savvy 11.0savvy Safari Streamdeck | Leave a comment

Pixelmator Pro v2.0.2/2.0.3のAppleScript用語辞書変更点

Posted on 12月 25, 2020 by Takaaki Naganoya

Pixelmator Pro v2.0.1から2.0.2のバージョンアップ時にAppleScript用語辞書が変更されました。

・select color rangeコマンドにmodeを追加

new selection : Create a new selection.
add selection : Add to the existing selection.
subtract selection : Subtract from the existing selection.
intersect selection : Intersect with the existing selection.

Pixelmator Pro v2.0.2から2.0.3へのバージョンアップ時にはとくに変更はありません。

(Visited 35 times, 1 visits today)
Posted in Update | Tagged 10.14savvy 10.15savvy 11.0savvy Pixelmator Pro | Leave a comment

2020年に書いた価値あるAppleScript

Posted on 12月 21, 2020 by Takaaki Naganoya

2020年:macOS 11(自分はmacOS 10.14を使用)

毎年書いている記事であり、いろいろ準備していました。コロナ禍の影響もあり、踏んだり蹴ったりの1年といってよいでしょう。

→ 2019年に書いた価値あるAppleScript
→ ぴよまるソフトウェアが選ぶ、2018年に書いた「価値あるScript」

本Blogにおいては、1つの大きな方針転換を行なっています。自分は高性能な部品を適度に提供しておけば、AppleScriptの有用性は主張できると思っていたのですが、部品だと価値がわからない人がとても多いという結論に至りました。

つまり、おいしい野菜やお肉を提供していても、みんなが調理できないので「料理」として提供しないと理解されないということなんですね。なので、「料理」としてのMac App Storeアプリケーションを作って売ることに重点を移しました。フルコース料理を出してみたら意外とウケなかったので、その引き立て用の小皿料理を増やしているという状況です。

今年1年を通じて一番「会心の一撃」だったのは「Kamenoko」。最も多くの人にリーチしたのは「Uni Detector」でしょう。どちらもAppleScriptで開発して、Mac App Storeから提供しています。

そうしたアプリケーションを作る中で育てられた機能も多く、1年を通じて画期的なScriptが登場してきたと感じます。今年1年だけで相当の進歩が達成されています。

ではさっそく、振り返ってみましょう。

■2020/1

2020年1月は、「各月で2本」という選定基準を遵守できないほど画期的なScriptが多数出てきました。この月に登場したScriptは重要なものばかりです。

とくに、AppleScriptのランタイム環境の名称がAppleScript側から取得できるようになったことの意義は大きく、ランタイム環境ごとに挙動を変化させるといった処理が可能になりました。この情報はかなり前(それこそMac OS X 10.1ぐらいの時期)から調べていたものですが、別の用途のために作ったものが使えてしまい、実は5年前にはその方法を明らかにするScriptを書けていた(のに気づかなかった)ことに驚きを禁じえません。

eppcで他のMac上のアプリケーション操作

GUI Scriptingでコンテクストメニューのキャプチャを取得

1888年1月1日以前の日付が-1日になる問題の原因

AppleScriptを実行中のランタイムプログラム名を取得する

display drop dialog Script Library

RoundWindow v2

■2020/2

Kamenokoの部品として作った「common elements Lib」が登場しています。まだKamenokoにフィードバックできていませんが、個人的にこんな演算ができたことに驚いています。

Wikipedia経由で2つの単語の共通要素を計算するcommon elements Lib Script Library

画像の指定エリアを透明色塗りつぶし(矩形切り抜き)

■2020/3

このあたりもKamenokoの部品です。

正方形セルの表データで指定セルに隣接するセルブロックを検出

NSURLSessionでREST API呼び出しv4.4

■2020/4

AppleScriptで作ったSandboxアプリケーションでファイル保存の処理を行うときに必須の「ファイル保存ダイアログ」Script。アプリケーション内でREST APIを呼び出すための部品もキャッシュが有効になるなど高度な進化を遂げました。今年、JavaScriptのライブラリを呼び出して異次元の処理ができるようになったScript群の先鞭をつけたScriptも4月に登場しています。

ファイル保存ダイアログ(SavePanel)表示

NSURLSessionでREST API呼び出しv4.4.2a

アラートダイアログ上にWkWebViewでGoogle Chartsを表示 v2

■2020/5

このあたりも、Kamenokoのために作った部品ですね。

ダブルクリックとコンテクストメニュー表示をサポートするボタン

Kamenoko、Mac App Storeで販売開始

■2020/6

今年の一番のScriptが登場。WebView上でインタラクティブな表示を行い、選択表示ができる部品に昇華しています。この時点ではただ表示するだけでしたが、指定した内容を表示して、選択したアイテムを取得できるように使いこなせています。

アラートダイアログ上にWebViewで3Dコンテンツを表示(WebGL+three.js)

アラートダイアログ上にd3-cloudを用いてワードクラウドを表示

■2020/7

このあたりも地味ですが、非常に良作です。macOSの新たに作られたUTI系のFrameworkで、実際に使いこなした記事が存在するのが本Blogのみという状況が長く続いていました。

macOS 11.0上のUTIのじっけん

画像の空白判定プログラムの検証

■2020/8

このScriptは、そもそもOS側にそうした機能が存在していないにもかかわらず、実際に機能を提供できてしまうというものです。

PDFにパスワードが設定されている場合には、そのパーミッション情報を取得する

■2020/9

本Scriptはいろいろ重要なものです。PhotoshopデータであるPSD形式の書類を作成できることはとても重要です。Mac App Storeにアプリケーションに、他のアプリケーション(Photoshop)の存在を前提としたものは提出できません。AppleScriptで作ったアプリケーションであったとしても、Photoshop形式のデータを自力でオープンできたり、自力で保存できる必要があります。

SFPSDWriterのじっけん v2

■2020/10

なぜかAppleScriptでゲームを作りました。

AppleScriptでリアルタイムキースキャンを行いCotEditor書類上にカーソル描画

Pixelmator Pro AppleScriptコンテストで優勝

■2020/11

これも、各種アプリケーションで利用するために作成したものです。

ステータスバーアイテムの点滅

■2020/12

実際にいま作っているコンテスト用の作品に向けて書いたものです。

HTMLカラー値から明度を取得

(Visited 81 times, 1 visits today)
Posted in news | 2 Comments

同じバージョン番号のまま大幅に機能が変更されたSystem Events

Posted on 12月 15, 2020 by Takaaki Naganoya

macOS 10.15はBetaの頃から出来が悪くて、とても「これは常用できない」としてメインマシンにはインストールせず、専用のマシンに入れて様子を見ていました。10.15については「こんなもんリリースすんな」という印象。10.13については、担当者の首が飛ばない理由が分からない出来でした。

そんなmacOS 10.15で、ご無体な変更がSystem Eventsに見られました。

10.13、10.14、10.15、11.0とSystem Eventsのバージョン番号は同じ「1.3.6」ですが、AppleScript用語辞書の内容が大幅に変更されています。

これまでにもAppleのエンジニアの失敗やバグにいろいろ酷い目に遭わされてきましたが、「内容に大幅に変更があってもバージョン番号を変えない」という新たな失敗が記録されることになりました。これは、斬新な手口ですね! 

今後も、バージョン番号を変更せずに機能の変更を行なってくることが予想されます。できれば、ちゃんとバージョン番号を変更することも覚えてほしいですよね。

■macOS 10.13→10.14

(1)Disk-Folder-File Suiteから、指定のOSA言語のScriptを実行する「do script」コマンドが削除されました。同機能は標準命令の中にも重複して存在しており、とくに影響はありません。

■macOS 10.14→10.15

(1)desktop picture settingsに「dynamic style」という属性値が新設されました。指定できる値は「auto」「dynamic」「light」「dark」「unknown」。

(2)Audio File Suiteが削除された
どこまで行っても実装が微妙だったAudio File Suiteが削除されました。32bitコードだったのでしょうか。

(3)Movie File Suiteが削除された
同じく、微妙な出来だったMovie File Suitesが削除されました。理由はAudio File Suiteと同じなのでしょう。

(3)QuickTime File Suiteが削除された
同上。

(4)key up/key downコマンドが強化された
文字コードでしか指定できなかったkey up/key downコマンドが強化され、integerでキーコードを指定する従来どおりの指定方法のほか、textでキーボードの文字を指定できるようになりました。

■macOS 10.15→11.1

(1)dock preferences objectに属性値が新設された
autohide menu bar:システムメニューバーの自動非表示機能のオン/オフ
double click behavior:ウィンドウのタイトルバーをダブルクリックしたときの挙動の切り替え
minimize into application:ウィンドウのタイトルバーをダブルクリックしたときにDock上のアプリケーションアイコンに向けて最小化?
show indicators:Dock上のアプリケーションアイコンに起動中のインジケータ表示を行う/行わない設定
show recents:最近使ったアプリケーションのグループを表示する設定

こうした調査は、AppleScript用語辞書ファイル(sdef)そのものや、それをHTMLに書き出したデータを比較することで検討しているわけですが、一回それを電子書籍のオマケにすることを検討したものの、他のScripterに「そういうものに興味はないか?」と聞いてみたところ、まったく関心を持っていないようでした。

ある意味、最重要書類というか「秘伝のタレ」に近い情報ではあったものの、コピペだけでコードを書いているレベルのScripterは、そういう「一次情報」(死活問題になる)に関心がないんだなーということが分かっただけでした。

■表 System Eventsの用語辞書の変遷(「最新事情がわかるAppleScript 10大最新技術」より引用してアップデート)

macOS Version 10.x 2 3 4 5 6 7 8 9 10 11 12 13 14 15 11.0
Standard Suite ■ ■ ■ ■ ■ ■ ■ ■ ■ ■ ■ ■ ■ ■ ■
System Events Suite ■ ■ ■ ■ ■ ■ ■ ■ ■ ■ ■ ■ ■ ■ ■
Accounts Suite ■ ■ ■ ■ ■ ■ ■ ■ ■ ■ ■ ■ ■ ■ ■
Appearance Suite ■ ■ ■ ■ ■ ■ ■ ■ ■ ■ ■ ■
CD and DVD Preferences Suite ■ ■ ■ ■ ■ ■ ■ ■ ■ ■ ■ ■
Desktop Suite ■ ■ ■ ■ ■ ■ ■ ■ ■ ■ ■ ■
Dock Preferences Suite ■ ■ ■ ■ ■ ■ ■ ■ ■ ■ ■ ■
Login Items Suite ■ ■ ■ ■ ■ ■ ■ ■ ■ ■ ■ ■ ■ ■ ■
Network Preferences Suite ■ ■ ■ ■ ■ ■ ■ ■ ■ ■ ■
Screen Saver Suite ■ ■ ■ ■ ■ ■ ■ ■ ■ ■ ■
Audio File Suite ■ ■ ■ ■ ■ ■ ■ ■ ■ ■ ■ ■ ■
Security Suite ■ ■ ■ ■ ■ ■ ■ ■ ■ ■ ■ ■
Disk-Folder-File Suite ■ ■ ■ ■ ■ ■ ■ ■ ■ ■ ■ ■ ■ ■ ■
Folder Actions Suite ■ ■ ■ ■ ■ ■ ■ ■ ■ ■ ■ ■ ■ ■ ■
Movie File Suite ■ ■ ■ ■ ■ ■ ■ ■ ■ ■ ■ ■ ■
Power Suite ■ ■ ■ ■ ■ ■ ■ ■ ■ ■ ■ ■ ■ ■ ■
Processes Suite ■ ■ ■ ■ ■ ■ ■ ■ ■ ■ ■ ■ ■ ■ ■
Property List Suite ■ ■ ■ ■ ■ ■ ■ ■ ■ ■ ■ ■ ■ ■ ■
QuickTime File Suite ■ ■ ■ ■ ■ ■ ■ ■ ■ ■ ■ ■ ■
XML Suite ■ ■ ■ ■ ■ ■ ■ ■ ■ ■ ■ ■ ■ ■ ■
Type Definitions ■ ■ ■ ■ ■ ■ ■ ■ ■ ■ ■ ■ ■ ■ ■
Scripting Definition Suite ■ ■ ■ ■ ■ ■ ■
Text Suite ■ ■ ■ ■ ■ ■ ■
Expose Preferences Suite ■ ■ ■ ■
(Visited 71 times, 1 visits today)
Posted in news | Tagged 10.14savvy 10.15savvy 11.0savvy System Events | 1 Comment

Numbersで選択範囲に背景色を塗られているセル数をカウント

Posted on 12月 14, 2020 by Takaaki Naganoya

Numbersでオープン中の最前面の書類の現在のシート上の選択状態にある表の選択範囲から、背景色(background color)が塗られているセルを数えるAppleScriptです。

用途は、WebGL + three.jsで作られた3Dの回転選択メニューのデータ確認のためです。Numbers上で表示範囲の表を作って、その上で背景色を塗ることで「どの位置にデータを表示するか」を指定します。そのさいに、並べるセル数が表示用のJavaScriptと合っていないと面倒なので、本Scriptで色つきセルをかぞえています。

Numbers上で背景色(background color)が塗られているセルは16ビットで色の値が返ってきますし、塗られていないセルはmissing valueが返ってきます。

AppleScript名:Numbersで選択範囲に背景色を塗られているセル数をカウント
—
–  Created by: Takaaki Naganoya
–  Created on: 2020/12/06
—
–  Copyright © 2020 Piyomaru Software, All Rights Reserved
—

use AppleScript version "2.4" — Yosemite (10.10) or later
use framework "Foundation"
use scripting additions

tell application "Numbers"
  tell front document
    –現在表示中のシートを対象にする
    
tell active sheet
      –Tableを特定する
      
try
        set theTable to first table whose class of selection range is range
      on error
        display notification "Numbers: There is no selection"
        
return {}
      end try
      
      
tell theTable
        –選択範囲のデータを1D Listで取得する
        
set aRes to background color of cells of selection range
      end tell


–Count Background
      
set aCount to 0
      
repeat with i in aRes
        set j to contents of i
        
        
if j is not equal to missing value then
          set aCount to aCount + 1
        end if
      end repeat
      
      
return aCount
    end tell
  end tell
end tell

★Click Here to Open This Script 

同様に、着色セルの座標値(x座標, y座標)を返すものも作って使用しています。

AppleScript名:Numbersで選択中のセルのうち背景色を塗られているもののx,y座標を2D Listで返す
—
–  Created by: Takaaki Naganoya
–  Created on: 2020/12/06
—
–  Copyright © 2020 Piyomaru Software, All Rights Reserved
—

use AppleScript version "2.4" — Yosemite (10.10) or later
use framework "Foundation"
use scripting additions

tell application "Numbers"
  tell front document
    –現在表示中のシートを対象にする
    
tell active sheet
      –Tableを特定する
      
try
        set theTable to first table whose class of selection range is range
      on error
        display notification "Numbers: There is no selection"
        
return {}
      end try
      
      
tell theTable
        tell selection range
          set cellRes to background color of cells
          
set aWidth to count every column
          
set aHeight to count every row
        end tell
      end tell
      
      
–Check selected cell’s background color
      
set cellL to {}
      
set adrCount to 1
      
repeat with y from 1 to aHeight
        repeat with x from 1 to aWidth
          set aTmp to contents of (item adrCount of cellRes)
          
          
if aTmp is not equal to missing value then
            set the end of cellL to {x, y}
          end if
          
          
set adrCount to adrCount + 1
        end repeat
      end repeat
      
      
return cellL
      
–> {{1, 1}, {2, 1}, {3, 1}, {6, 1}, {8, 1}, {12, 1}, {15, 1}, {16, 1}, {20, 1}, {21, 1}, {24, 1}, {27, 1}, {28, 1}, {29, 1}, {1, 2}, {4, 2}, {6, 2}, {9, 2}, {11, 2}, {14, 2}, {17, 2}, {19, 2}, {23, 2}, {25, 2}, {27, 2}, {1, 3}, {2, 3}, {3, 3}, {6, 3}, {10, 3}, {14, 3}, {17, 3}, {19, 3}, {20, 3}, {23, 3}, {25, 3}, {27, 3}, {28, 3}, {29, 3}, {1, 4}, {6, 4}, {10, 4}, {14, 4}, {17, 4}, {21, 4}, {23, 4}, {25, 4}, {27, 4}, {1, 5}, {6, 5}, {10, 5}, {15, 5}, {16, 5}, {19, 5}, {20, 5}, {21, 5}, {24, 5}, {27, 5}, {1, 7}, {5, 7}, {8, 7}, {11, 7}, {12, 7}, {15, 7}, {17, 7}, {19, 7}, {20, 7}, {21, 7}, {23, 7}, {27, 7}, {1, 8}, {2, 8}, {4, 8}, {5, 8}, {7, 8}, {9, 8}, {11, 8}, {13, 8}, {15, 8}, {17, 8}, {20, 8}, {23, 8}, {27, 8}, {1, 9}, {3, 9}, {5, 9}, {7, 9}, {8, 9}, {9, 9}, {11, 9}, {12, 9}, {15, 9}, {17, 9}, {20, 9}, {23, 9}, {25, 9}, {27, 9}, {1, 10}, {5, 10}, {7, 10}, {9, 10}, {11, 10}, {13, 10}, {15, 10}, {17, 10}, {20, 10}, {23, 10}, {24, 10}, {26, 10}, {27, 10}, {1, 11}, {5, 11}, {7, 11}, {9, 11}, {11, 11}, {13, 11}, {16, 11}, {20, 11}, {23, 11}, {27, 11}}
    end tell
  end tell
end tell

★Click Here to Open This Script 

(Visited 561 times, 2 visits today)
Posted in Color list | Tagged 10.13savvy 10.14savvy 10.15savvy 11.0savvy Numbers | Leave a comment

HTMLカラー値から明度を取得

Posted on 12月 8, 2020 by Takaaki Naganoya

HTMLカラー値からNSColorを作成し、Gray Scaleに変換したのちに明度情報を取得するAppleScriptです。

RGB値をHSV(HSB)に変換して明度情報を取得するバージョンも試してみたのですが、個人的にはこちらの処理の方がしっくりくる感じでした。

# コメント部分のWhiteとBlackの記述が逆だったので修正しておきました

AppleScript名:HTMLカラー値から明度を取得 v1.1.scptd
—
–  Created by: Takaaki Naganoya
–  Created on: 2020/12/07
—
–  Copyright © 2020 Piyomaru Software, All Rights Reserved
—
use AppleScript version "2.4" — Yosemite (10.10) or later
use framework "Foundation"
use framework "AppKit"
use scripting additions

property NSColor : a reference to current application’s NSColor
property NSString : a reference to current application’s NSString
property NSAttributedString : a reference to current application’s NSAttributedString
property NSUTF16StringEncoding : a reference to current application’s NSUTF16StringEncoding
property NSDeviceWhiteColorSpace : a reference to current application’s NSDeviceWhiteColorSpace

set aCol to "#412a23"
set wCol to calcBrightnessFromHTMLColorCodeStr(aCol) of me
–> 0.245871186256

set aCol to "#000000" –Black
set wCol to calcBrightnessFromHTMLColorCodeStr(aCol) of me
–> 0.0

set aCol to "#FFFFFF" –White
set wCol to calcBrightnessFromHTMLColorCodeStr(aCol) of me
–> 1.0

set aCol to "#EEA096"
set wCol to calcBrightnessFromHTMLColorCodeStr(aCol) of me
–> 0.759391903877

on calcBrightnessFromHTMLColorCodeStr(aStr as string)
  set {rVal, gVal, bVal} to rgbHex2nunList(aStr) of me
  
–NSColorを作成
  
set aCol to makeNSColorFromRGBAval(rVal, gVal, bVal, 255, 255) of me
  
— グレースケール化
  
set gCol to aCol’s colorUsingColorSpaceName:(NSDeviceWhiteColorSpace)
  
set wComp to gCol’s whiteComponent() –whiteComponentを取得することで擬似的に明度情報を取得  
  
return wComp
end calcBrightnessFromHTMLColorCodeStr

on makeNSColorFromRGBAval(redValue as integer, greenValue as integer, blueValue as integer, alphaValue as integer, aMaxVal as integer)
  set aRedCocoa to (redValue / aMaxVal) as real
  
set aGreenCocoa to (greenValue / aMaxVal) as real
  
set aBlueCocoa to (blueValue / aMaxVal) as real
  
set aAlphaCocoa to (alphaValue / aMaxVal) as real
  
set aColor to NSColor’s colorWithCalibratedRed:aRedCocoa green:aGreenCocoa blue:aBlueCocoa alpha:aAlphaCocoa
  
return aColor
end makeNSColorFromRGBAval

on decodeCharacterReference(aStr)
  set anNSString to NSString’s stringWithString:aStr
  
set theData to anNSString’s dataUsingEncoding:(NSUTF16StringEncoding)
  
set styledString to NSAttributedString’s alloc()’s initWithHTML:theData documentAttributes:(missing value)
  
set plainText to (styledString’s |string|()) as string
  
return plainText
end decodeCharacterReference

–HTMLコードのRGB 16進数コードを数値リストに変換
on rgbHex2nunList(aHexStr)
  –エラーチェック
  
if aHexStr does not start with "#" then return false
  
if length of aHexStr is not equal to 7 then return false
  
set bHex to text 2 thru -1 of aHexStr
  
  
set {rStr, gStr, bStr} to {text 1 thru 2 of bHex, text 3 thru 4 of bHex, text 5 thru 6 of bHex}
  
  
set bList to {}
  
repeat with i in {rStr, gStr, bStr}
    set j to contents of i
    
set the end of bList to aHexStrToNum(j) of me
  end repeat
  
  
return bList
end rgbHex2nunList

–16進数文字列を10進数数値に変換する
on aHexStrToNum(hexStr)
  set hStr to "0123456789ABCDEF"
  
  
set aNum to 0
  
set aLen to length of hexStr
  
  
repeat with i from aLen to 1 by -1
    
    
set aCon to contents of character i of hexStr
    
using terms from scripting additions
      set aVal to (offset of aCon in hStr) – 1
    end using terms from
    
set aNum to aNum + aVal * (16 ^ (aLen – i))
    
  end repeat
  
  
return aNum as integer
end aHexStrToNum

★Click Here to Open This Script 

(Visited 43 times, 1 visits today)
Posted in Color | Tagged 10.13savvy 10.14savvy 10.15savvy 11.0savvy NSAttributedString NSColor NSDeviceWhiteColorSpace NSString NSUTF16StringEncoding | Leave a comment

Numbers選択セルの内容の&エンコーディング文字をプレーン化

Posted on 12月 7, 2020 by Takaaki Naganoya

Numbersのワークシート上で選択したセル中の文字に&エンコーディング文字が存在している場合に、その内容をプレーンテキスト化するAppleScriptです。

内容自体はよくあるものなので、説明が必要なものでもありません。Stream DeckにNumbers関連のScriptをいくつか用意して試していますが、なかなか便利です(かといって、Stream Deckの購入を決意するほどではないのですが)。ただ、実際にデータ整理が少ない手間で行えました。

Stream Deck Softwareの「システム」>「開く」のアクションにscpt形式のAppleScript書類を登録しておけば実行してくれるため、そのような利用方法を想定しています。

Numbers関連のさまざまな雑多な作業をAppleScriptで省力化し、それをStream Deckから呼び出すことで作業の負荷を減らせることを実感しています。それでもStream Deckの物理的な厚みがあるので何度もパチパチ叩いていると疲れやすいような気もします。

AppleScript名:選択セルの内容の&エンコーディング文字をプレーン化.scpt
—
–  Created by: Takaaki Naganoya
–  Created on: 2020/12/06
—
–  Copyright © 2020 Piyomaru Software, All Rights Reserved
—

use AppleScript version "2.4" — Yosemite (10.10) or later
use framework "Foundation"
use scripting additions

decodeSelection() of me

–Numbersの選択範囲のデータを2D Listで返す
on decodeSelection()
  tell application "Numbers"
    tell front document
      –現在表示中のシートを対象にする
      
tell active sheet
        –Tableを特定する
        
try
          set theTable to first table whose class of selection range is range
        on error
          display notification "Numbers: There is no selection"
          
return {}
        end try
        
        
tell theTable
          –選択範囲のデータを1D Listで取得する
          
set aRes to value of cells of selection range
          
–選択範囲のセルのアドレスデータを1D Listで取得する
          
set cellList to cell of selection range
        end tell
        
        
–Percent Decode
        
set newList to {}
        
repeat with i in aRes
          set j to contents of i
          
set aRes to decodeCharacterReference(j as string) of me
          
set the end of newList to aRes
        end repeat
        
        
–Write Back to Numbers
        
repeat with i from 1 to (length of cellList)
          tell item i of cellList
            set value to item i of newList
          end tell
        end repeat
        
      end tell
    end tell
  end tell
end decodeSelection

on parseByDelim(aData, aDelim)
  set curDelim to AppleScript’s text item delimiters
  
set AppleScript’s text item delimiters to aDelim
  
set dList to text items of aData
  
set AppleScript’s text item delimiters to curDelim
  
return dList
end parseByDelim

on decodeCharacterReference(aStr)
  set anNSString to current application’s NSString’s stringWithString:aStr
  
set theData to anNSString’s dataUsingEncoding:(current application’s NSUTF16StringEncoding)
  
set styledString to current application’s NSAttributedString’s alloc()’s initWithHTML:theData documentAttributes:(missing value)
  
set plainText to (styledString’s |string|()) as string
  
return plainText
end decodeCharacterReference

★Click Here to Open This Script 

(Visited 79 times, 2 visits today)
Posted in Text | Tagged 10.14savvy 10.15savvy 11.0savvy Numbers | Leave a comment

Pixelmator Pro v2.0.1でAppleScript用語辞書に命令語追加

Posted on 12月 2, 2020 by Takaaki Naganoya

Pixelmator Proはバージョン1.8でAppleScriptに対応しましたが、その後のアップデートでも用語辞書に変更が加えられています。

v2.0では以前に作ったアイコンの各解像度画像の書き出しScriptがうまく動作していませんでしたが、v2.0.1ではうまく(エラーを出さずに)動作していることを確認しています。バグレポートしてから反映されるまでの時間が短くて、フットワークの軽さに感心しました。こういうところ、Piyomaru Softwareとは比べ物になりません。

■v1.8→v2.0


「elipse shape layer」(楕円レイヤー)に同義語(synonym)が追加定義されました。「circle shape layer」「oval shape layer」と入力して構文確認すると「elipse shape layer」として解釈されます。

■v2.0→v2.0.1


「select color range」コマンドが追加定義されました。写真のようなデータを相手に色域を指定して選択できるようです。このrangeで指定する値が、色差(ΔE)なのか、何か他の指標の数値なのかがいまひとつわかりません。

自分が作った色域指定のAppleScriptでは、文字色の選択のために作ったものなので、もう少し仕様が違います。

select color range v : Select all areas of a specified color. This command can be executed on the document (in which case every layer is sampled) or on a layer, in which case the selection is created based on the layer's content.
select color range document
color list of integer : The color of the areas that should be selected.
[range integer] : The range of the colors that should be selected. With a range of 1, only areas that are exactly of the specified color will be selected. As the range is increased, increasingly more similarly-colored areas will be selected.
[smooth edges boolean] : Whether the edges of the selection should be smoothed.

rangeはrangeとしか書かれていないですね。100を指定するとキャンバス全体が選択されてしまうので、数値範囲は事実上1〜99ということになると思います(AppleScript用語辞書に有効範囲ぐらいは書いておいてほしいなー)。

rangeの値をどう指定するかで、どのぐらいの範囲の「色」を選択できるかが変わってくるので、自分もテストデータの選択色範囲を見ながら値を調整したので、いま指定しているrangeの値が正しいという保証はありません。

もともと、対話的に値を模索するような値なので、画像で使われている色数の分布などの情報をあらかじめ取得して分析しておき、その中でどの程度の色をピックアップするのか知っておく必要があるでしょう。そこまで徹底的に分析してからでないと、このselect color rangeコマンドをバッチ処理的な世界観の中で有効利用することは難しいと思います。

このコマンドを実装するぐらいなら、画像をOCR処理してテキストを取り出して、指定のキーワードが入っているエリアをぼかし処理するといった「OCRフィルタリング」の機能の方がいいかも。画面キャプチャ画像で特定の文字が入っている部分をぼかし処理するパターンがとても多いので、これは自分でも組んでおきたい処理ではあります(OCR次第。OS標準搭載機能だけでなんとかできるとよさそう)。

AppleScript名:選択中のレイヤーから赤っぽい色を選択.scpt
tell application "Pixelmator Pro"
  tell front document
    tell current layer
      select color range color {65535, 0, 0} range 90
    end tell
  end tell
end tell

★Click Here to Open This Script 

AppleScript名:選択中のレイヤーから緑色っぽい色を選択.scpt
tell application "Pixelmator Pro"
  tell front document
    tell current layer
      select color range color {0, 65535, 0} range 90
    end tell
  end tell
end tell

★Click Here to Open This Script 

AppleScript名:選択中のレイヤーから青っぽい色を選択.scpt
tell application "Pixelmator Pro"
  tell front document
    tell current layer
      select color range color {0, 0, 65535} range 80
    end tell
  end tell
end tell

★Click Here to Open This Script 

(Visited 41 times, 1 visits today)
Posted in Color | Tagged 10.13savvy 10.14savvy 10.15savvy 11.0savvy Pixelmator Pro | Leave a comment

Keynote 10.3.8がリリース、AppleScriptバグ修正なし

Posted on 12月 2, 2020 by Takaaki Naganoya

Keynote v10.3.8がリリースされました。対象OSはmacOS 10.15以降です。exportコマンドでCodec指定のEnum「h.264」はそのままで、AppleScriptの言語処理系では構文確認も実行もできないままです。「h.264」→「h264」に修正してほしいんですけどー。

(Visited 46 times, 1 visits today)
Posted in Bug | Tagged 10.15savvy 11.0savvy Keynote | Leave a comment

歴史的大ニュース:Amazon AWSがMacインスタンスのサポートを開始

Posted on 12月 1, 2020 by Takaaki Naganoya

久しぶりに震えました。Amazon AWS(EC2)がMacのインスタンスをサポートしました(Amazon EC2 Mac instances)。

New – Use Amazon EC2 Mac Instances to Build & Test macOS, iOS, ipadOS, tvOS, and watchOS Apps

Amazon EC2 Mac InstancesDevelop, build, test, and sign Apple apps on Amazon EC2

このMacインスタンスは、通常のAWSとは異なりMac1台をまるまる占有するタイプのようです。ハードウェアはMac mini(Core i7 3.2GHz)でメモリ32GB。10Gbit Ethernet搭載モデルとのこと。

Amazon EC2 Mac InstancesがサポートするOSはmacOS 10.14と10.15、2021年にはM1 Mac miniの投入を検討しているのだとか。こちらはmacOS 11.x以降での運用になることでしょう。

利用者はTerminal上でSSHで接続するか、VNC Remote Desktop経由で接続することになるとのこと。XcodeでiOSなどのアプリケーションをビルドするための需要を見込んでいるようです。

「仮想マシンの1インスタンス時間貸し」というAWSのサービスイメージと大きく異なり、1台まるごと貸し出しサービスです。仮想化技術を用いて大量のインスタンスを同時実行する方向では、ライセンスの問題を解決できないことは明らかでしたが、逆に「こういう方法があったのか」というコロンブスの卵的な解決策ではあります。クラウドというよりは、時間貸しのコロケーションサービスともいえます。

最近のmacOSでは滅多にありませんが(のぞく、macOS 10.13と10.15)、OSごとまるごとクラッシュして再起動が必要になるとか、リセットが必要になるケースもないことはないでしょう。また、セキュリティ設定をユーザーが好き勝手にいじくれるかどうかも見所です(SIP解除して運用できるのかどうか、これは切実な問題です)。

Amazon EC2 Mac Instancesのサービス提供リージョンは、US East (N. Virginia), US East (Ohio), US West (Oregon), Europe (Ireland), and Asia Pacific (Singapore) とのことで、Tokyoは現段階ではありません。今後増えていくような書き方はされていますが、正直わかりません。

EC2というと、あらかじめディスクイメージを用意しておいて、インスタンスの起動をディスクイメージで実行、サービス運用と終了の必要な期間がきわめて短くて済むことを売りにしている印象があるものの、このAmazon EC2 Mac Instancesで運用するとどーなるのか。

利用料金をまだ確認できていないので、コロケーションサービス(初期費用が必要)に比べてどうなのかとか、実機まるごと買ったほうが安いんじゃないかとか、疑問はいろいろあるわけですが、REST APIのインタフェースだけ作ってしまえばクラウド上でAppleScriptによってサービスを作って提供できるわけで、ずいぶん悩ましい存在です。

AppleScript on the cloud的なサービスもできるし、仲間内で冗談でしか出てこなかった「Adobe Creative Grid」(時間貸しで大量のマシンによりAdobeアプリケーションのデータを高速かつ並列に処理する)みたいなサービスも作れてしまう(Adobe Createve Cloud税が高いのでむやみに実験はできないんですけれども)わけで、ずいぶん楽しい感じになってきました。

OS X 10.10で通常のAppleScriptからCocoaの機能が利用できるようになり、Cloud系のサービスを利用できるようになりました。機械学習系の機能も利用できています。

AppleScriptで大規模データとか超大量のデータ処理を行うさいの物理的な制約がなくなってきたわけで、数万人のユーザーへの一括メール送信とかいう無茶な処理も、外部のCloud(SendGrridなど)の機能を活用してできるようになりました(そこまで大量の送信は実際にはやっていないので、理論上最大値ということで)。

一方で、AppleScriptを使ってWebサービスそのものを作って運用するという方向には、ほとんど手が伸びていなかった状態です。外部でそのような需要が発生するか否かについては不明ですが、自分で作って自分で運営するサービスでは、柔軟に規模の拡大・縮小が行えることは重要です。

そうしたときに、外部とのI/FをRemote AppleEventで行うわけにはいかないでしょうし(AWSのデータセンターでポート3031へのリクエストが通るんだろか?)、一般的なREST APIでリクエストを受け付けてJSONで返すみたいな構造にする必要はあるでしょう。

あとは、並列処理技術。これまで、「Mac App Store向けのアプリケーションでは仕様上実装しづらい」ことから、それほど活躍の場がなかったAppleScriptによる並列処理技術ですが、外部からのリクエストを処理する場合には、とても必要になってくることでしょう。

やはり、実際にさわってみないとなんとも言えないですね。

Amazon EC2 Mac Instancesについて言及している記事一覧

Amazon Web Services ブログ 新登場 – Amazon EC2 Mac インスタンスを使用した macOS、iOS、ipadOS、tvOS、watchOS アプリの構築とテスト
もともとの記事の日本語版。サービス開始に向けた担当者の思いはわかるものの、費用とかmacOS環境でどのあたりがカスタマイズされているのか(ソフトウェア的に)とか、実際に使うとどの程度の差があるのかといった情報はない。Macユーザーに対して「Amazonは敵じゃないんだよー」と訴えている以上の情報はない

Amazon EC2 Mac Instance を早速使ってみました
EC2の使い方がわかる記事。これを読まないと接続までの手順がわかりづらいものの、これを読んだからといってMac Instanceの実情がわかるというほどの情報量はない

macOSがクラウドで利用可能に――、AWSがMac Miniベースの「Amazon EC2 Mac Instances」を一般提供開始

文章書きのプロがいい感じにまとめている。「よくわからない人」向けにまとめた記事

AWSにMacインスタンスが追加。6コアCore i7搭載Mac miniをクラウドで利用可能に

ニュースリリースまとめただけ。書くのに30分もかけていない速報記事(たぶん)

AWSがMac miniのクラウド化を発表、Apple Silicon Mac miniの導入は2021年初頭か

サービス料金面では一番詳細な記事。Amazon EC2 Mac Instancesは秒単位で課金されるが、最低利用ラインが「24時間」になっているため、24時間を過ぎたら秒単位で課金計算されるということが明記されている

(Visited 61 times, 1 visits today)
Posted in Network news | Tagged 10.14savvy 10.15savvy 11.0savvy | Leave a comment

電子書籍(PDF)をオンラインストアで販売中!

Google Search

Popular posts

  • AppleScriptによるWebブラウザ自動操縦ガイド
  • macOS 13, Ventura(継続更新)
  • ドラッグ&ドロップ機能の未来?
  • macOS 12.x上のAppleScriptのトラブルまとめ
  • PFiddlesoft UI Browserが製品終了に
  • macOS 12.3 beta 5、ASの障害が解消される(?)
  • SF Symbolsを名称で指定してPNG画像化
  • 新刊発売:AppleScriptによるWebブラウザ自動操縦ガイド
  • macOS 12.3 beta4、まだ直らないASまわりの障害
  • macOS 12.3上でFinder上で選択中のファイルをそのままオープンできない件
  • Safariで表示中のYouTubeムービーのサムネイル画像を取得
  • macOS 12のスクリプトエディタで、Context Menu機能にバグ
  • Pixelmator Pro v2.4.1で新機能追加+AppleScriptコマンド追加
  • 人類史上初、魔導書の観点から書かれたAppleScript入門書「7つの宝珠」シリーズ開始?!
  • CotEditor v4.1.2でAppleScript系の機能を追加
  • macOS 12.5(21G72)がリリースされた!
  • UI Browserがgithub上でソース公開され、オープンソースに
  • Pages v12に謎のバグ。書類上に11枚しか画像を配置できない→解決
  • 新発売:AppleScriptからSiriを呼び出そう!
  • iWork 12.2がリリースされた

Tags

10.11savvy (1102) 10.12savvy (1243) 10.13savvy (1391) 10.14savvy (586) 10.15savvy (434) 11.0savvy (274) 12.0savvy (174) 13.0savvy (34) CotEditor (60) Finder (47) iTunes (19) Keynote (97) NSAlert (60) NSArray (51) NSBezierPath (18) NSBitmapImageRep (21) NSBundle (20) NSButton (34) NSColor (51) NSDictionary (27) NSFileManager (23) NSFont (18) NSImage (42) NSJSONSerialization (21) NSMutableArray (62) NSMutableDictionary (21) NSPredicate (36) NSRunningApplication (56) NSScreen (30) NSScrollView (22) NSString (118) NSURL (97) NSURLRequest (23) NSUTF8StringEncoding (30) NSUUID (18) NSView (33) NSWorkspace (20) Numbers (55) Pages (36) Safari (41) Script Editor (20) WKUserContentController (21) WKUserScript (20) WKWebView (23) WKWebViewConfiguration (22)

カテゴリー

  • 2D Bin Packing
  • 3D
  • AirDrop
  • AirPlay
  • Animation
  • AppleScript Application on Xcode
  • beta
  • Bluetooth
  • Books
  • boolean
  • bounds
  • Bug
  • Calendar
  • call by reference
  • Clipboard
  • Code Sign
  • Color
  • Custom Class
  • dialog
  • drive
  • exif
  • file
  • File path
  • filter
  • folder
  • Font
  • Font
  • GAME
  • geolocation
  • GUI
  • GUI Scripting
  • Hex
  • History
  • How To
  • iCloud
  • Icon
  • Image
  • Input Method
  • Internet
  • iOS App
  • JavaScript
  • JSON
  • JXA
  • Keychain
  • Keychain
  • Language
  • Library
  • list
  • Locale
  • Machine Learning
  • Map
  • Markdown
  • Menu
  • Metadata
  • MIDI
  • MIME
  • Natural Language Processing
  • Network
  • news
  • Noification
  • Notarization
  • Number
  • Object control
  • OCR
  • OSA
  • PDF
  • Peripheral
  • PRODUCTS
  • QR Code
  • Raw AppleEvent Code
  • Record
  • recursive call
  • regexp
  • Release
  • Remote Control
  • Require Control-Command-R to run
  • REST API
  • Review
  • RTF
  • Sandbox
  • Screen Saver
  • Script Libraries
  • sdef
  • search
  • Security
  • selection
  • shell script
  • Shortcuts Workflow
  • Sort
  • Sound
  • Spellchecker
  • Spotlight
  • SVG
  • System
  • Tag
  • Telephony
  • Text
  • Text to Speech
  • timezone
  • Tools
  • Update
  • URL
  • UTI
  • Web Contents Control
  • WiFi
  • XML
  • XML-RPC
  • イベント(Event)
  • 未分類

アーカイブ

  • 2023年3月
  • 2023年2月
  • 2023年1月
  • 2022年12月
  • 2022年11月
  • 2022年10月
  • 2022年9月
  • 2022年8月
  • 2022年7月
  • 2022年6月
  • 2022年5月
  • 2022年4月
  • 2022年3月
  • 2022年2月
  • 2022年1月
  • 2021年12月
  • 2021年11月
  • 2021年10月
  • 2021年9月
  • 2021年8月
  • 2021年7月
  • 2021年6月
  • 2021年5月
  • 2021年4月
  • 2021年3月
  • 2021年2月
  • 2021年1月
  • 2020年12月
  • 2020年11月
  • 2020年10月
  • 2020年9月
  • 2020年8月
  • 2020年7月
  • 2020年6月
  • 2020年5月
  • 2020年4月
  • 2020年3月
  • 2020年2月
  • 2020年1月
  • 2019年12月
  • 2019年11月
  • 2019年10月
  • 2019年9月
  • 2019年8月
  • 2019年7月
  • 2019年6月
  • 2019年5月
  • 2019年4月
  • 2019年3月
  • 2019年2月
  • 2019年1月
  • 2018年12月
  • 2018年11月
  • 2018年10月
  • 2018年9月
  • 2018年8月
  • 2018年7月
  • 2018年6月
  • 2018年5月
  • 2018年4月
  • 2018年3月
  • 2018年2月

https://piyomarusoft.booth.pm/items/301502

メタ情報

  • 登録
  • ログイン
  • 投稿フィード
  • コメントフィード
  • WordPress.org

Forum Posts

  • 人気のトピック
  • 返信がないトピック

メタ情報

  • 登録
  • ログイン
  • 投稿フィード
  • コメントフィード
  • WordPress.org
Proudly powered by WordPress
Theme: Flint by Star Verte LLC