Menu

Skip to content
AppleScriptの穴
  • Home
  • Products
  • Books
  • Docs
  • Events
  • Forum
  • About This Blog
  • License
  • 仕事依頼

AppleScriptの穴

Useful & Practical AppleScript archive. Click '★Click Here to Open This Script' Link to download each AppleScript

タグ: NSImage

クリップボードの画像を指定色でモノクロ化してクリップボードへ v3

Posted on 3月 13, 2022 by Takaaki Naganoya

クリップボードに入れた画像を、グレースケール化したあとに指定の色のベタ塗り画像とフィルタで合成し、単色の色付き画像に変換するAppleScriptです。

資料に掲載する画像の情報量を減らすために、単色画像に変換したいと考えました。Photoshopだと2つのレイヤーの重ね合わせで指定して処理するような内容です。ただ、もうPhotoshopにできるぐらいのことの大部分は、AppleScriptだけで単独でできてしまうのが2022年的な状況です。

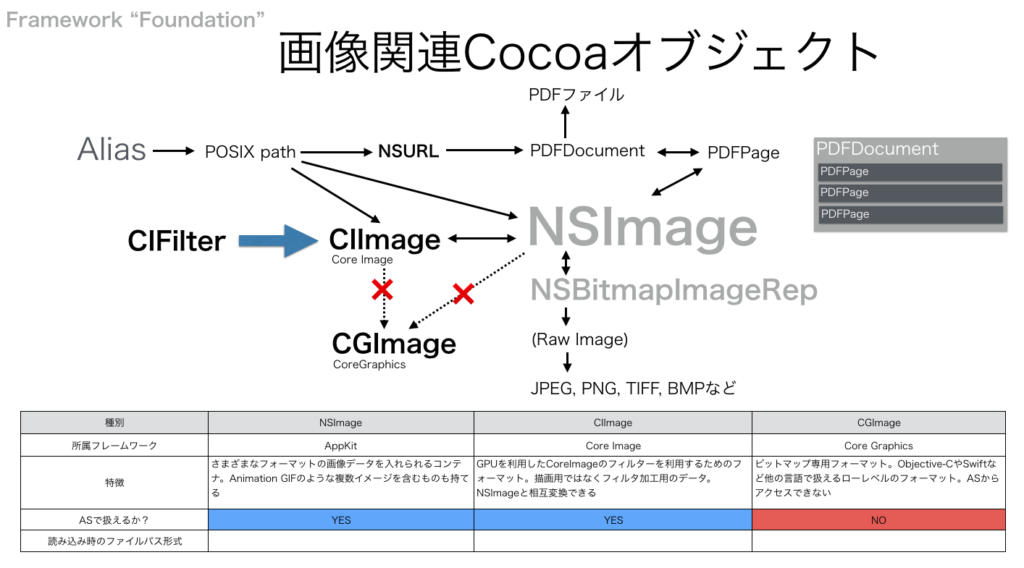
アプリケーションを使わずに処理するためには、CIFilterを用いて画像処理して、単色画像にすることになります。

CIFilterにもいろいろな画像フィルタ機能が用意されているわけで、ここから「どのフィルタを使うか」選ぶことになります。

# フィルタが200種類ぐらいあるんですけど!!

このような場合のために、FileMaker Proで作った「FileMaker Pro PowerPack」だとひととおりのCIFilterをサンプルデータで処理できるようにしておきました。

FileMaker Proのデータベース上にサンプルデータをコピー&ペーストしておけば、DB上でフィルタ処理してどのような処理をしてくれるかがわかります。

いやーー、作っておいてよかったー。「なんでこんなにフィルタ処理ばっかりあるんだよ!」的な話がありましたが、こうして実際に役立つわけで。フィルタの名称、編集できるテストデータ、処理結果が表示されるところまで……「動かせる資料」的なものに仕上がっています>FileMaker Pro PowerPack

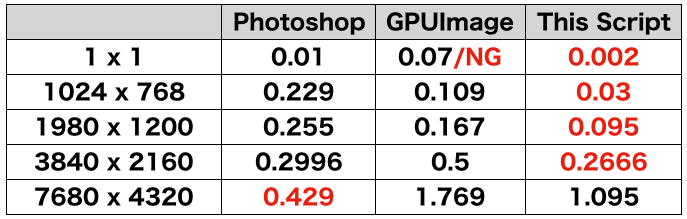
ひととおりAppleScriptを作ってみて、いろいろ調整してみたところ……調整し切れなかったので、edama2さんに相談して(送りつけて)こんな感じに仕上がりました。

これでなんとか動くはずなのに、なぜこうなるのか。。。CIFilterを実際に日常的に使うツールで使ったのは実はこれが最初だったので、意外な挙動に割と困りました。


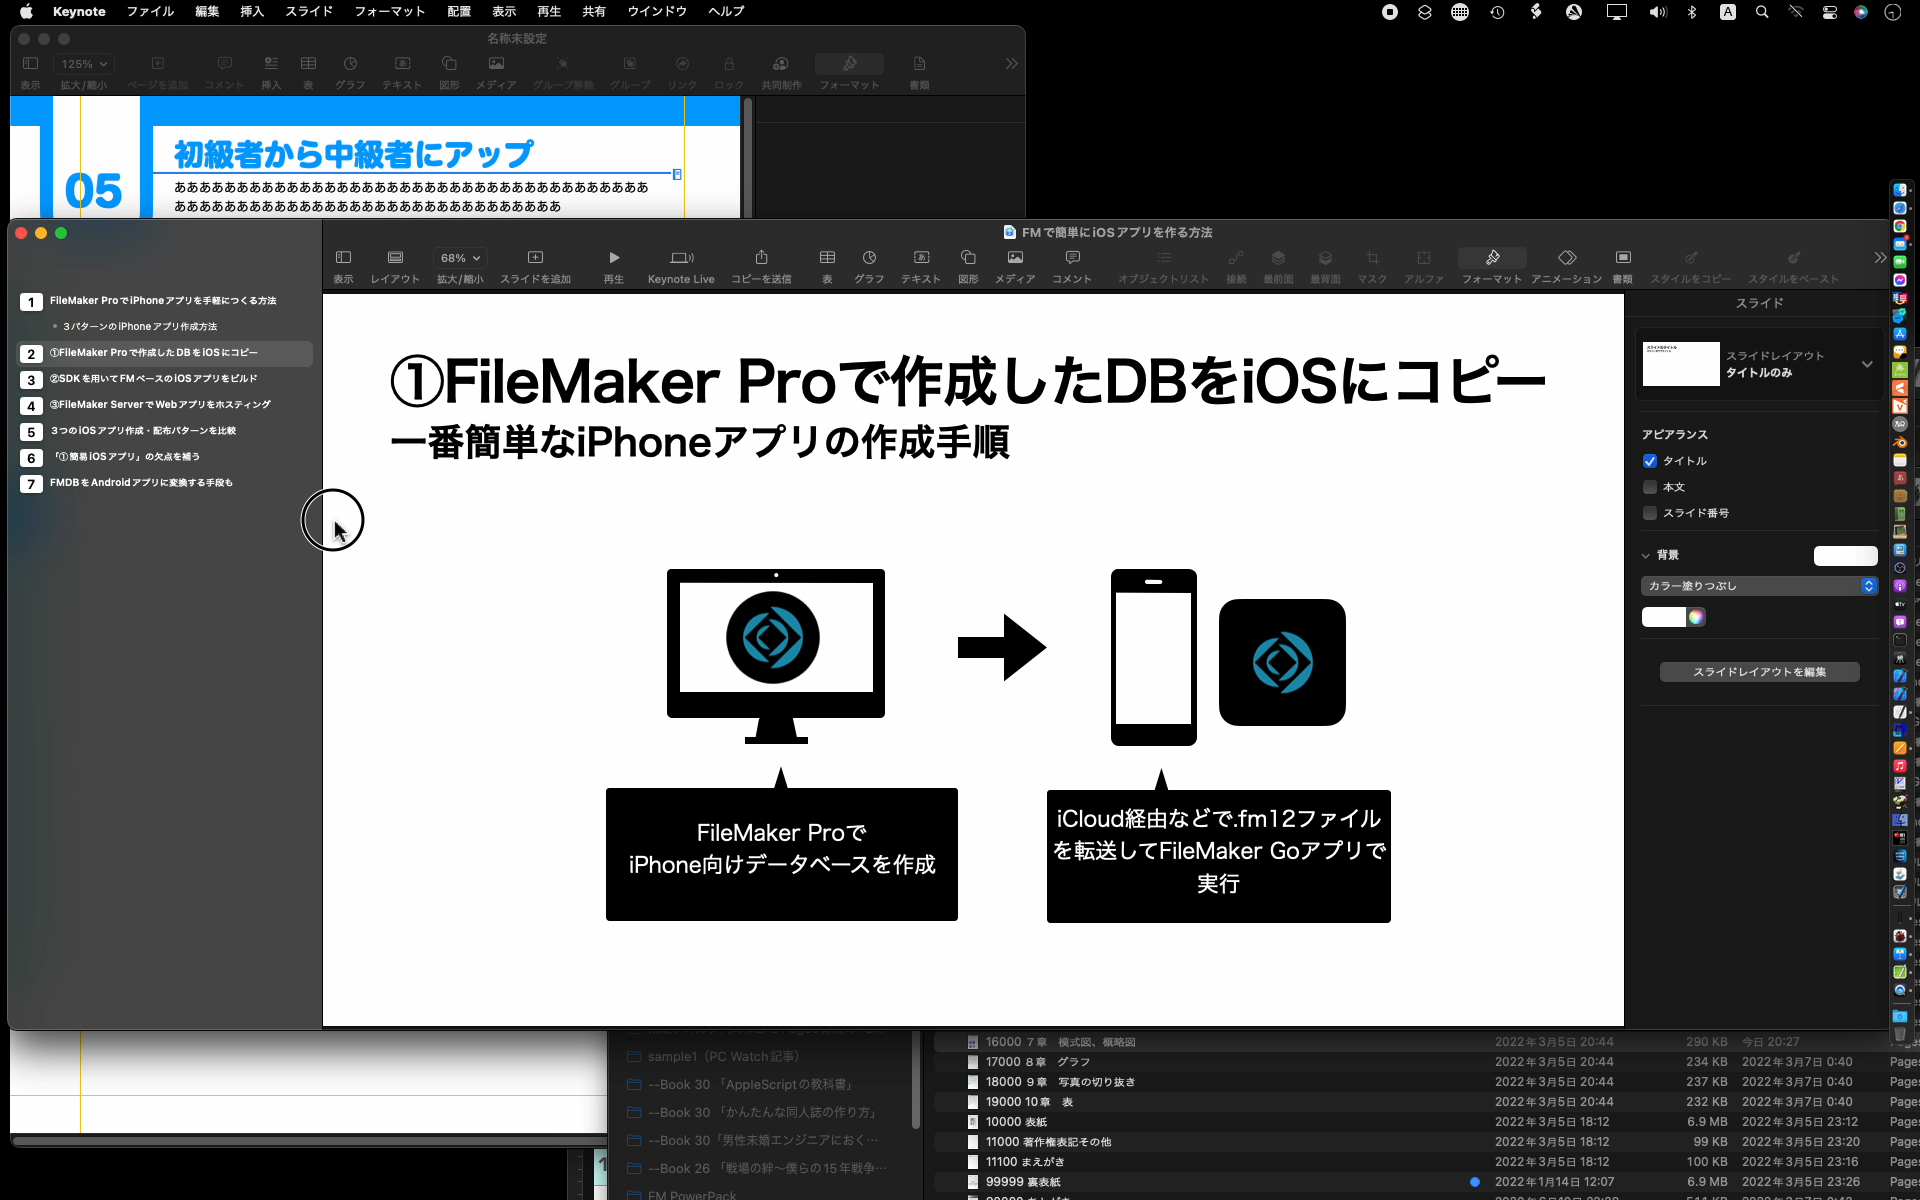
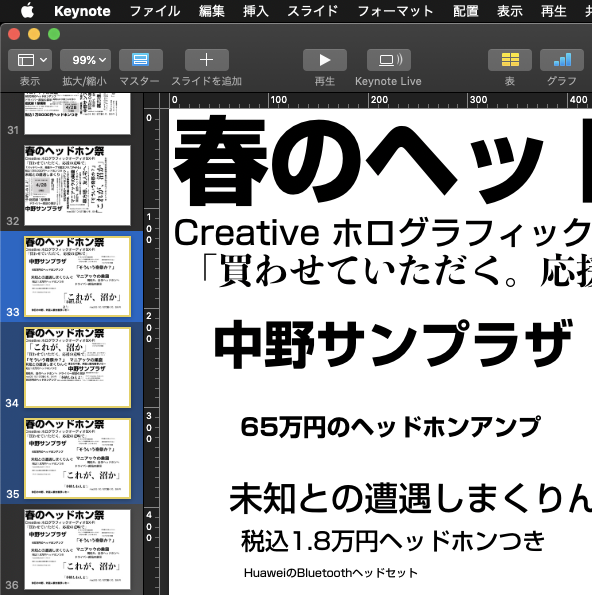
▲画面上の指定範囲のスクリーンショットを撮ってクリップボードへ


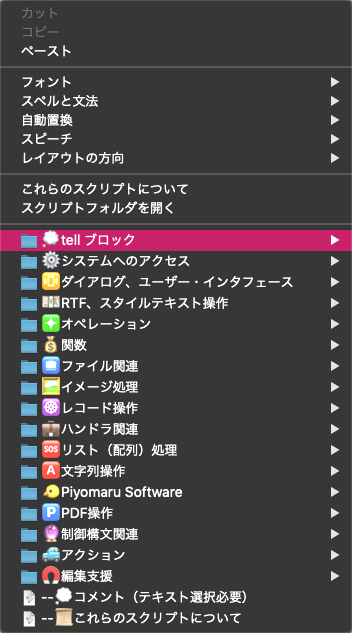
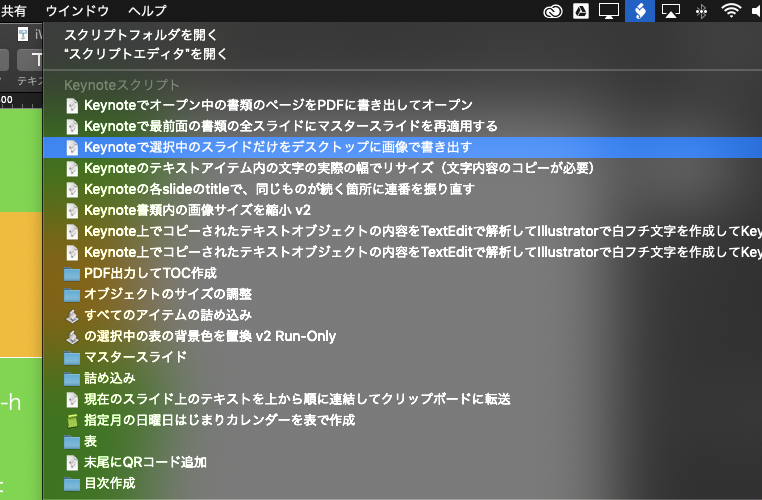
▲ScriptをmacOS標準搭載のスクリプトメニューから呼び出すことを前提に作った。


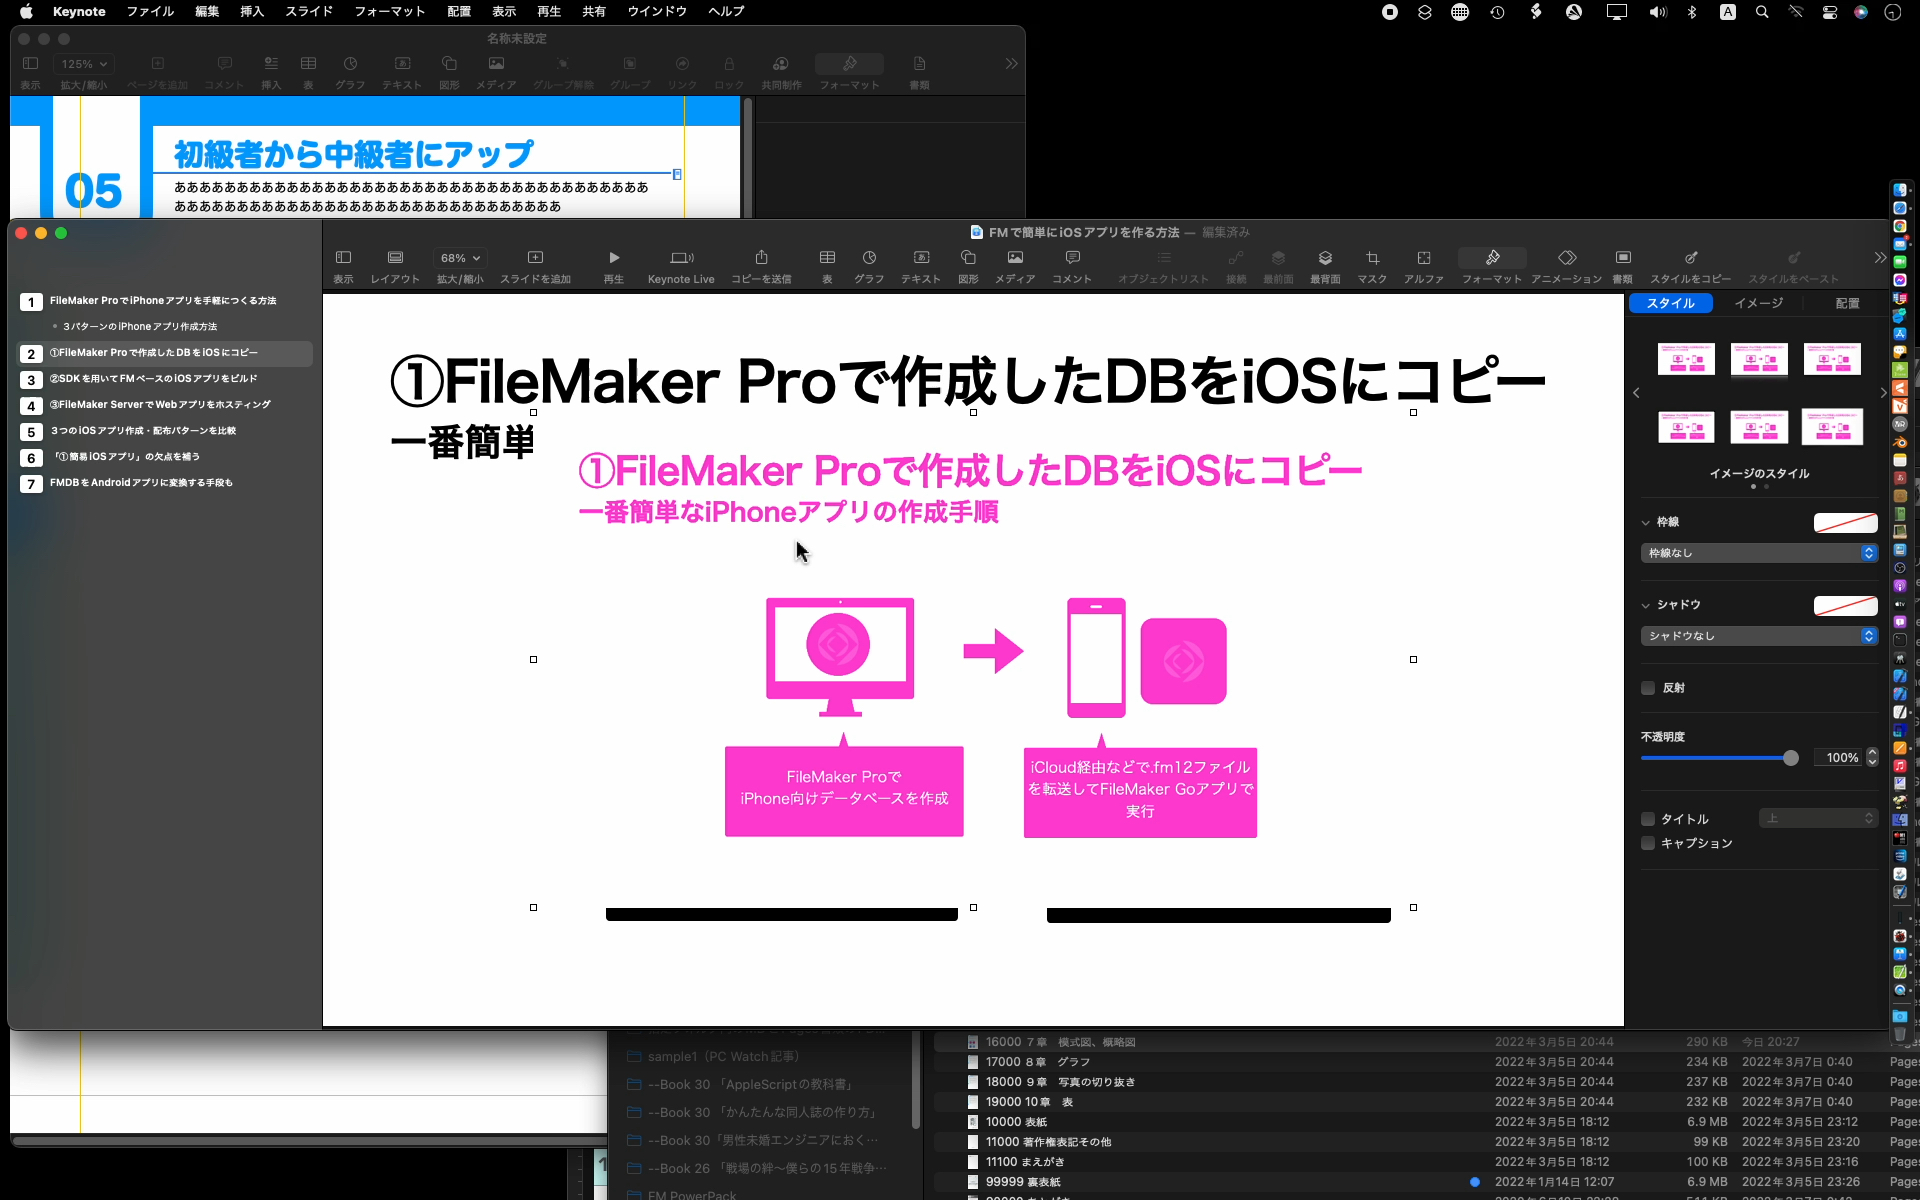
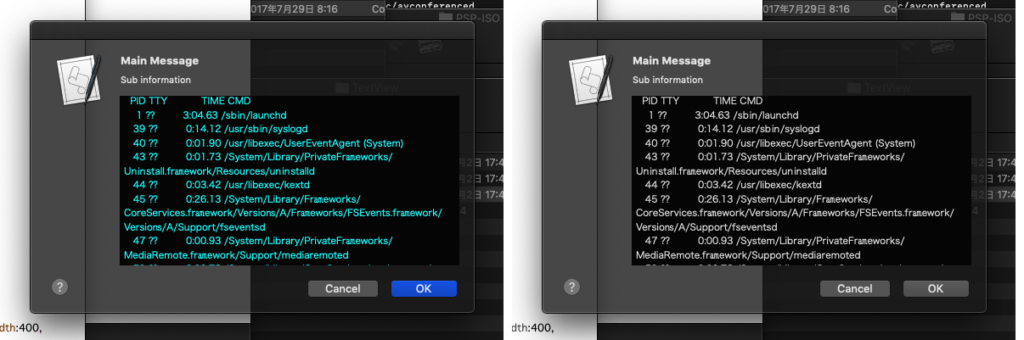
▲クリップボードの内容をペーストすると、単色化された画像が出力される

AppleScript名:クリップボードの画像を指定色でモノクロ化してクリップボードへ v3.scpt
—
–  Created by: Takaaki Naganoya
–  Created on: 2022/03/11
—
–  Copyright © 2022 Piyomaru Software, All Rights Reserved
–  v2 Takaaki Naganoya : マスクが1/4の大きさになったり2倍になったりしていた
–  v3 edama2:上記の問題に対処。クリーンナップ
—
use AppleScript version "2.7"
use framework "AppKit"
use framework "CoreImage"
use framework "Foundation"
use scripting additions

on run
  my main()
end run

on main()
  –クリップボード内のデータをNSImageとして取得
  
set sourceImg to my getClipboardASImage()
  
  
# 色指定
  
set aColor to my makeNSColorFromRGBA255val(252, 2, 128, 255)


# 同じ大きさの塗りつぶし画像を作成
  
tell current application’s NSImage’s alloc()
    tell initWithSize_(sourceImg’s |size|())
      lockFocus()
      
aColor’s |set|()
      
set aRect to current application’s NSMakeRect(0, 0, its |size|()’s width, its |size|()’s height)
      
current application’s NSBezierPath’s fillRect:aRect
      
unlockFocus()
      
set fillImg to it
    end tell
  end tell
  
  
# NSImage –> CIimage
  
set sourceImage to my convNSImageToCIimage(sourceImg)
  
set fillImage to my convNSImageToCIimage(fillImg)
  
  
set newImage to my filterImage2(fillImage, sourceImage)
  
  
my restoreClipboard({newImage})
end main

on filterImage2(fillImage, sourceImage)
  
  
set redValue to 0.295719844358
  
set greenValue to 0.295719844358
  
set blueValue to 0.295719844358
  
set alphaVlaue to 1.0
  
set aCIColor to current application’s CIColor’s alloc()’s initWithRed:redValue green:greenValue blue:blueValue alpha:alphaVlaue
  
  
tell current application’s CIFilter
    — CIFilter(モノクロ化)
    
tell filterWithName_("CIColorMonochrome")
      setDefaults()
      
setValue_forKey_(sourceImage, "inputImage")
      
setValue_forKey_(aCIColor, "inputColor")
      
set filteredImage to valueForKey_("outputImage")
    end tell
    
    
— CIFilter(モノクロ化)
    
tell filterWithName_("CIAdditionCompositing")
      setDefaults()
      
setValue_forKey_(fillImage, "inputImage")
      
setValue_forKey_(filteredImage, "inputBackgroundImage")
      
set theCIImage to valueForKey_(current application’s kCIOutputImageKey)
    end tell
  end tell
  
  
# CIImage –> NSImage
  
set imageRep to current application’s NSCIImageRep’s alloc()’s initWithCIImage:theCIImage
  
set rNSImage to current application’s NSImage’s alloc()’s initWithSize:(imageRep’s |size|())
  
rNSImage’s addRepresentation:imageRep
  
  
return rNSImage
end filterImage2

# NSImage –> CIimage
on convNSImageToCIimage(aNSImage)
  set tiffDat to aNSImage’s TIFFRepresentation()
  
set aRep to current application’s NSBitmapImageRep’s imageRepWithData:tiffDat
  
set newImg to current application’s CIImage’s alloc()’s initWithBitmapImageRep:aRep
  
return newImg
end convNSImageToCIimage

— クリップボードの内容をNSImageとして取り出して返す
on getClipboardASImage()
  set thePasteboard to current application’s NSPasteboard’s generalPasteboard()
  
set theAttributedStringNSArray to thePasteboard’s readObjectsForClasses:({current application’s NSImage}) options:(missing value)
  
set theNSImage to theAttributedStringNSArray’s objectAtIndex:0
  
return theNSImage
end getClipboardASImage

on restoreClipboard(theArray as list)
  set thePasteboard to current application’s NSPasteboard’s generalPasteboard()
  
thePasteboard’s clearContents()
  
thePasteboard’s writeObjects:theArray
end restoreClipboard

on makeNSColorFromRGBA255val(redValue as integer, greenValue as integer, blueValue as integer, alphaValue as integer)
  set aRedCocoa to (redValue / 255) as real
  
set aGreenCocoa to (greenValue / 255) as real
  
set aBlueCocoa to (blueValue / 255) as real
  
set aAlphaCocoa to (alphaValue / 255) as real
  
set aColor to current application’s NSColor’s colorWithCalibratedRed:aRedCocoa green:aGreenCocoa blue:aBlueCocoa alpha:aAlphaCocoa
  
return aColor
end makeNSColorFromRGBA255val

★Click Here to Open This Script 

Posted in filter Image | Tagged 12.0savvy CIColor CIImage NSBezierPath NSCIImageRep NSColor NSImage NSPasteboard | Leave a comment

Intel MacとApple Silicon Macの速度差〜画像処理

Posted on 1月 2, 2022 by Takaaki Naganoya

macOS 11から12に移行して、なぜかリリースが近づくにつれて細かいバグや巨大なバグが顕在化し、まだ手放しでおすすめできる状況にないのが心苦しいところですが、AppleScriptからのCocoa呼び出しについてはIntel Mac/Apple Silicon Macでも速度が向上。とくに、Apple Silicon Macでの速度向上が顕著です。

で、特定の処理(巨大なlistやrecord in list同士の検索)でM1 Mac miniがiMac Proの2.5倍ぐらい速いといったベンチマークは出しているわけですが、いかにもApple Silicon Macで処理が速そうな画像処理のベンチマークを実施してみました。

Intel Mac mini 2014が手元からなくなってしまったので、以前のメインマシンであったMacBook Pro Retina 2012(MacBookPro10,1)と比較してみました。

ベンチマーク内容は、指定の画像が空白かどうかをチェックするというものです。フルHD画像でも4K画像でも8K画像でも、1ピクセルでも白くない点があれば検出できるという処理内容。外部のGPUImage FrameworkやPhotoshopのヒストグラム処理を呼び出すよりもAppleScriptだけで処理した方が速いというものです(8K画像だとPhotoshopの方が速いかも)。


▲画像解像度の変化と処理時間の相関。グラフは数値が小さいほど高速。巨大な画像になると処理速度差が大きくなる傾向にある?

だいたい、MacBook Pro Retina 2012と比べて3〜4倍ぐらいM1 Mac miniの方が高速です。MacBook Pro Retina 2012は2017年のMacBook Pro 13インチといい勝負ぐらいの速度が出ており、古い割にはごく最近まで使えていました。

そこから3〜4倍高速ということで、M1 Mac miniはコストの割にはパワフルです。ファンレスのMacBook Air M1でも同程度の速度が出るはずです。

一方で、M1 Pro/M1 Max搭載のMacBook ProでM1機よりも大幅に高速なのかと言われると……このぐらいの静止画の処理程度だとごくわずかな差しかつかないはずです。下手をすると、速度差がないかもしれません。

→ Download blank_image_detection_benchmark.zip (including script libraries)

–> Download test Data


▲バーが短いほど高速。M1がM1 Maxの2倍高速という結果が出てしまった。M1 Max MBPは2014年のIntel Mac miniより少し速いだけのマシンという結果に。2018年のIntel Mac miniとの比較だとM1 Max MBPよりもIntel Mac miniのほうが速そう

M1、M1 Max、M1 Ultra(最上位機種)で処理時間を比較した結果。予想どおりM1がM1 MaxやM1 Ultraよりも2倍以上高速。もはや8K画像ぐらいは、大きなデータにならないというべきなのか。

AppleScript名:画像の空白判定 v4_bench_時間計測.scptd
—
–  Created by: Takaaki Naganoya
–  Created on: 2022/01/01
—
–  Copyright © 2022 Piyomaru Software, All Rights Reserved
—
use AppleScript version "2.7"
use framework "Foundation"
use framework "AppKit"
use scripting additions
use mdLib : script "Metadata Lib" version "2.0.0"
use easyTable : script "display table by list"

set aFol to choose folder

set aResList to perform search in folders {aFol} predicate string "kMDItemContentTypeTree CONTAINS %@" search arguments {"public.image"}

set aList to {}
repeat with i in aResList
  set a1Dat to current application’s NSDate’s timeIntervalSinceReferenceDate()
  
  
set iRes to checkImageIsWhite(i) of blankImageKit of me
  
  
set b1Dat to current application’s NSDate’s timeIntervalSinceReferenceDate()
  
set c1Dat to b1Dat – a1Dat
  
  
set aName to (current application’s NSString’s stringWithString:i)’s lastPathComponent() as string
  
  
if iRes = true then
    set jRes to "White"
  else
    set jRes to "Black"
  end if
  
  
–log {aName, jRes}
  
  
set the end of aList to {aName, jRes, c1Dat}
end repeat

set fLabels to {"File name", "Result", "Estimate(Seconds)"}
set aRes to (display table by list aList main message "Blank Image check" size {800, 600} labels fLabels)
return aList

script blankImageKit
  use AppleScript version "2.7" — High Sierra (10.13) or later
  
use framework "Foundation"
  
use framework "AppKit"
  
use scripting additions
  
property parent : AppleScript
  
  
property NSData : a reference to current application’s NSData
  
property |NSURL| : a reference to current application’s |NSURL|
  
property NSColor : a reference to current application’s NSColor
  
property NSImage : a reference to current application’s NSImage
  
property NSBezierPath : a reference to current application’s NSBezierPath
  
property NSBitmapImageRep : a reference to current application’s NSBitmapImageRep


–Compare Original Data and
  
on checkImageIsWhite(aFile)
    set aPOSIXpath to POSIX path of aFile
    
set aURL to |NSURL|’s fileURLWithPath:(aPOSIXpath)
    
    
set aNSImage to NSImage’s alloc()’s initWithContentsOfURL:(aURL)
    
set bNSImage to NSImage’s alloc()’s initWithContentsOfURL:(aURL)
    
    
set fillColor1 to NSColor’s clearColor()
    
set blankNSImage1 to drawImageWithFilledColor(aNSImage, fillColor1) of me
    
    
set fillColor2 to makeNSColorFromRGBAval(65535, 65535, 65535, 65535, 65535) of me –white
    
set blankNSImage2 to drawImageWithFilledColor(bNSImage, fillColor2) of me
    
    
set aTiff to blankNSImage1’s TIFFRepresentation()
    
set bTiff to blankNSImage2’s TIFFRepresentation()
    
    
set chkWhite to (aTiff’s isEqualToData:bTiff) as boolean
    
    
return chkWhite
  end checkImageIsWhite


on getSizeOfImage(anNSImage)
    set aSize to anNSImage’s |size|()
    
set aClass to class of aSize
    
if aClass = record then
      copy aSize to theSize –To macOS 10.12.x
    else –macOS 10.13 or later
      set sizeX to (item 1 of item 2 of aSize)
      
set sizeY to (item 2 of item 2 of aSize)
      
set theSize to {width:sizeX, height:sizeY}
    end if
    
return theSize
  end getSizeOfImage


–指定サイズの画像を作成し、背景を指定色で塗る
  
on drawImageWithFilledColor(anImage, fillColor)
    set aSize to getSizeOfImage(anImage) of me
    
    
anImage’s lockFocus()
    
    
set theRect to {{x:0, y:0}, {width:(width of aSize), height:(height of aSize)}}
    
set theNSBezierPath to NSBezierPath’s bezierPath
    
theNSBezierPath’s appendBezierPathWithRect:theRect
    
fillColor’s |set|()
    
theNSBezierPath’s fill()
    
    
anImage’s unlockFocus()
    
    
return anImage
  end drawImageWithFilledColor


–aMaxValを最大値とする数値でNSColorを作成して返す
  
on makeNSColorFromRGBAval(redValue as integer, greenValue as integer, blueValue as integer, alphaValue as integer, aMaxVal as integer)
    set aRedCocoa to (redValue / aMaxVal) as real
    
set aGreenCocoa to (greenValue / aMaxVal) as real
    
set aBlueCocoa to (blueValue / aMaxVal) as real
    
set aAlphaCocoa to (alphaValue / aMaxVal) as real
    
set aColor to NSColor’s colorWithCalibratedRed:aRedCocoa green:aGreenCocoa blue:aBlueCocoa alpha:aAlphaCocoa
    
return aColor
  end makeNSColorFromRGBAval
  
end script

★Click Here to Open This Script 

Posted in Image | Tagged 10.14savvy 10.15savvy 11.0savvy 12.0savvy NSBezierPath NSBitmapImageRep NSColor NSData NSDate NSImage NSURL | Leave a comment

アラートダイアログ上のTable Viewで起動中のアプリケーションを選択 v3c

Posted on 8月 9, 2020 by Takaaki Naganoya

edama2さんからの投稿です。起動中のアプリケーション一覧をダイアログ表示するAppleScriptシリーズで、アプリケーションのアイコン画像やパス情報を表示し、単数/複数のアプリケーション選択ができます。

–> Download Script Bundle archive


▲単一選択(左)のダイアログと、複数選択(右)のダイアログ

タイトルは「アラートダイアログ上のTable Viewで起動中のアプリケーションを選択」
起動中のアプリケーションをiOSライクなレイアウトで表示します
Table Viewにカスタムセルビューを作って表現し、アプリの起動と終了を検知してリアルタイムで更新します
行数は12行に固定し、項目の複数選択がオプションで選べます

AppleScriptObjCフレームワークを呼び出すことにより、Xcod上で記述するAppleScriptアプリケーションのように、各種クラスのサブクラスを定義して利用しているScriptです。さまざまなScripterの技術が積み上がっている感じがして壮観ですが、ほとんどはedama2さんが長い時間をかけて積み上げてきたものの集大成といったものです。

本Scriptは途中で試行錯誤がいろいろあって、返り値がファイルパスだったりアプリケーションオブジェクトになったりと紆余曲折あって、現在の「アプリケーションオブジェクト」になりました。

ただ、実行中のアプリケーション自身を選択すると「current application」になってしまう点に注意が必要です。

AppleScript名:アラートダイアログ上のTable Viewで起動中のアプリケーションを選択 v3c
use AppleScript version "2.4" — Yosemite (10.10) or later
use framework "Foundation"
use framework "AppleScriptObjC"
use scripting additions

on run
  my testRun()
end run

on testRun()
  
  
set mes to "選択モードを指定してください"
  
set bOK to "複数選択"
  
set bOther to "単一選択"
  
set bCancel to "キャンセル"
  
set bList to {bCancel, bOther, bOK}
  
  
set userAction to display dialog mes buttons bList default button bOK cancel button bCancel with icon note
  
  
if userAction’s button returned is bOther then
    set isMultiple to false
  else if userAction’s button returned is bOK then
    set isMultiple to true
  end if
  
  
set aMainMes to "Select Runnning Application"
  
set aSubMes to "Sub Message"
  
set execButtonTitle to "OK😁"
  
set dateObj to my chooseRunningApplication:aMainMes subMes:aSubMes withMultipleSelections:(isMultiple) okTitle:execButtonTitle
  
end testRun

on chooseRunningApplication:(aMainMes as text) subMes:(aSubMes as text) withMultipleSelections:(isMultiple as boolean) okTitle:(execButtonTitle as text)
  
  
# Script Bundle内のResourcesフォルダを求める
  
set resourcePath to POSIX path of (path to me) & "Contents/Resources/"
  
set theBundle to current application’s NSBundle’s bundleWithPath:resourcePath
  
theBundle’s loadAppleScriptObjectiveCScripts()
  
  
# subClasses.scptを呼び出す
  
set DialogCore to current application’s AppDelegate’s new()
  
set fRes to DialogCore’s chooseRunningApplication:aMainMes subMes:aSubMes withMultipleSelections:isMultiple okTitle:execButtonTitle
  
  
if fRes is missing value then error number -128
  
return fRes as list
end chooseRunningApplication:subMes:withMultipleSelections:okTitle:

★Click Here to Open This Script 

AppleScript名:subClasses.scpt
#MARK: AppDelegate
script AppDelegate
  property parent : class "NSObject"
  
  
— IBOutlets
  
property theWindow : missing value
  
  
on applicationShouldTerminate:sender
    return current application’s NSTerminateNow
  end applicationShouldTerminate:
  
  
on applicationShouldTerminateAfterLastWindowClosed:sender
    return true
  end applicationShouldTerminateAfterLastWindowClosed:
  
  
on applicationWillFinishLaunching:aNotification
    log my testRun()
  end applicationWillFinishLaunching:
  
  
——————
  
#MARK: テスト
  
on testRun()
    –log "testRun"
    
    
set mes to "選択モードを指定してください"
    
set bOK to "複数選択"
    
set bOther to "単一選択"
    
set bCancel to "キャンセル"
    
set bList to {bCancel, bOther, bOK}
    
    
set userAction to display dialog mes buttons bList default button bOK cancel button bCancel with icon note
    
    
if userAction’s button returned is bOther then
      set isMultiple to false
    else if userAction’s button returned is bOK then
      set isMultiple to true
    end if
    
    
set aMainMes to "Select Runnning Application"
    
set aSubMes to "Sub Message"
    
set execButtonTitle to "OK😁"
    
set dateObj to my chooseRunningApplication:aMainMes subMes:aSubMes withMultipleSelections:(isMultiple) okTitle:execButtonTitle
    
    
return dateObj
  end testRun
  
  
#MARK: アラートダイアログでtableviewを表示
  
property _retrieve_data : missing value
  
on chooseRunningApplication:(aMainMes as text) subMes:(aSubMes as text) withMultipleSelections:(isMultiple as boolean) okTitle:(execButtonTitle as text)
    # reset
    
set my _retrieve_data to missing value
    
    
#
    
if aMainMes = "" then error "Dialog main message is missing"
    
    
#
    
set dataSourceList to {}
    
    
# OKボタンの文字
    
if execButtonTitle = "" then set execButtonTitle to "Execute"
    
    
set thisFileType to "com.apple.application-bundle"
    
    
#
    
set paramObj to {myMessage:aMainMes}
    
set paramObj to paramObj & {mySubMessage:aSubMes}
    
set paramObj to paramObj & {myDataSource:dataSourceList}
    
set paramObj to paramObj & {myType:thisFileType}
    
set paramObj to paramObj & {mySelectType:isMultiple}
    
set paramObj to paramObj & {myOKTitile:execButtonTitle}
    
    
my performSelectorOnMainThread:"raizeAlert:" withObject:paramObj waitUntilDone:true
    
    
if (my _retrieve_data) is missing value then error number -128
    
set retrieveData to my _retrieve_data
    
set my _retrieve_data to missing value
    
    
return retrieveData
  end chooseRunningApplication:subMes:withMultipleSelections:okTitle:
  
  
#MARK: Raize Alert
  
on raizeAlert:paramObj
    set mesText to paramObj’s myMessage as text
    
set infoText to paramObj’s mySubMessage as text
    
set dataSourceList to paramObj’s myDataSource as list
    
set myUTI to paramObj’s myType as text
    
set isMultiple to paramObj’s mySelectType as boolean
    
set okButton to paramObj’s myOKTitile as text
    
    
### set up view
    
#### data sourceにデータを追加
    
set theController to current application’s YKZArrayController’s alloc()’s initWithContent:dataSourceList
    
theController’s setMultipleSelections:isMultiple
    
theController’s setupView()
    
    
### アイコンの指定
    
–set aImage to current application’s NSWorkspace’s sharedWorkspace()’s iconForFileType:myUTI
    
    
set setSize to 128
    
set fontObj to current application’s NSFont’s systemFontOfSize:setSize
    
set aValue to {fontObj}
    
set aKey to {current application’s NSFontAttributeName}
    
set attributes to current application’s NSDictionary’s dictionaryWithObjects:aValue forKeys:aKey
    
    
set strEmoji to current application’s NSString’s stringWithString:"😎"
    
    
set newSizeObj to current application’s NSMakeSize(setSize, setSize)
    
tell current application’s NSImage’s alloc
      tell initWithSize_(newSizeObj)
        lockFocus()
        
strEmoji’s drawInRect:(current application’s NSMakeRect(0, 0, setSize, setSize)) withAttributes:attributes
        
unlockFocus()
        
set aImage to it
      end tell
    end tell


### set up alert
    
tell current application’s NSAlert’s new()
      addButtonWithTitle_(okButton)
      
addButtonWithTitle_("Cancel")
      
setAccessoryView_(theController’s _the_view)
      
setIcon_(aImage)
      
setInformativeText_(infoText)
      
setMessageText_(mesText)
      
tell |window|()
        setInitialFirstResponder_(theController’s _the_view)
      end tell
      
#### show alert in modal loop
      
if runModal() is (current application’s NSAlertSecondButtonReturn) then return
    end tell
    
    
### retrieve data
    
set (my _retrieve_data) to theController’s retrieveSelectItems()
    
return my _retrieve_data
  end raizeAlert:
end script

#MARK: – NSValueTransformer
script YKZURLToIcon
  property parent : class "NSValueTransformer"
  
property allowsReverseTransformation : false –>逆変換
  
property transformedValueClass : a reference to current application’s NSImage –>クラス
  
  
#変換処理
  
on transformedValue:fileURL
    if fileURL is missing value then return
    
    
set appPath to fileURL’s |path|()
    
set iconImage to current application’s NSWorkspace’s sharedWorkspace’s iconForFile:appPath
    
return iconImage
  end transformedValue:
end script

script YKZURLToDisplayedName
  property parent : class "NSValueTransformer"
  
property allowsReverseTransformation : false –>逆変換
  
property transformedValueClass : a reference to current application’s NSString –>クラス
  
  
#変換処理
  
on transformedValue:fileURL
    if fileURL is missing value then return
    
    
set appPath to fileURL’s |path|()
    
set displayedName to current application’s NSFileManager’s defaultManager’s displayNameAtPath:appPath
    
return displayedName
  end transformedValue:
end script

script YKZURLToPath
  property parent : class "NSValueTransformer"
  
property allowsReverseTransformation : false –>逆変換
  
property transformedValueClass : a reference to current application’s NSString –>クラス
  
  
#変換処理
  
on transformedValue:fileURL
    if fileURL is missing value then return
    
    
set appPath to fileURL’s |path|()
    
return appPath
  end transformedValue:
end script

script YKZURLToVersion
  property parent : class "NSValueTransformer"
  
property allowsReverseTransformation : false –>逆変換
  
property transformedValueClass : a reference to current application’s NSString –>クラス
  
  
#変換処理
  
on transformedValue:fileURL
    if fileURL is missing value then return
    
    
set appPath to fileURL’s |path|()
    
tell (current application’s NSBundle’s bundleWithURL:fileURL)
      tell its infoDictionary()
        set aVar to objectForKey_("CFBundleShortVersionString")
      end tell
    end tell
    
return aVar
  end transformedValue:
end script

#MARK: – Array Controller
script YKZArrayController
  property parent : class "NSArrayController"
  
  
#MARK: IBOutlets
  
property _the_view : missing value
  
property _table_view : missing value
  
  
#MARK: Property
  
property multipleSelections : false
  
property rowCount : 12
  
  
#MARK: 初期化
  
on initWithContent:aContent
    continue initWithContent:aContent
    
    
#通知の登録
    
tell current application’s NSWorkspace’s sharedWorkspace()’s notificationCenter()
      addObserver_selector_name_object_(me, "changed:", "NSWorkspaceDidLaunchApplicationNotification", missing value)
      
addObserver_selector_name_object_(me, "changed:", "NSWorkspaceDidTerminateApplicationNotification", missing value)
    end tell
    
    
return me
  end initWithContent:


#MARK: 戻り値
  
on retrieveSelectItems()
    set retrieveData to {}
    
    
set aIndexSet to my _table_view’s selectedRowIndexes()
    
set chooseItems to ((my _table_view’s dataSource())’s arrangedObjects()’s objectsAtIndexes:aIndexSet) as list
    
repeat with anItem in chooseItems
      set aPath to anItem’s fileURL
      
set retrieveData’s end to application (aPath as text)
    end repeat
    
    
return retrieveData as list
  end retrieveSelectItems
  
  
#MARK: viewの作成
  
on setupView()
    #Transformerの登録
    
set tNames to {}
    
set tNames’s end to "YKZURLToIcon"
    
set tNames’s end to "YKZURLToDisplayedName"
    
set tNames’s end to "YKZURLToPath"
    
set tNames’s end to "YKZURLToVersion"
    
repeat with aTransformer in tNames
      set theTransformer to current application’s class aTransformer’s new()
      (
current application’s NSValueTransformer’s setValueTransformer:theTransformer forName:aTransformer)
    end repeat
    
log multipleSelections
    
## NSTableView
    
tell current application’s NSTableView’s alloc()
      tell initWithFrame_(current application’s CGRectZero)
        –registerForDraggedTypes_({current application’s NSFilenamesPboardType, (my _data_type)})
        
setAllowsEmptySelection_(false)
        
setAllowsMultipleSelection_(multipleSelections)
        
setDataSource_(me)
        
setDelegate_(me)
        
setDoubleAction_("doubleAction:")
        
–setDraggingSourceOperationMask_forLocal_(current application’s NSDragOperationCopy, false)
        
setGridStyleMask_(current application’s NSTableViewSolidVerticalGridLineMask)
        
setSelectionHighlightStyle_(current application’s NSTableViewSelectionHighlightStyleRegular)
        
setTarget_(me)
        
setUsesAlternatingRowBackgroundColors_(true)
        
setHeaderView_(missing value)
        
setRowHeight_(50)
        
        
set thisRowHeight to rowHeight() as integer
        
set my _table_view to it
      end tell
    end tell
    
    
## NSTableColumn
    
### Columnの並び順を指定する
    
set keyrec to {column1:"Name"}
    
set keyDict to (current application’s NSDictionary’s dictionaryWithDictionary:keyrec)
    
    
set viewWidth to 400 –表示幅を変更
    
set columnsCount to keyDict’s |count|()
    
    
repeat with colNum from 1 to columnsCount
      
      
set keyName to "column" & colNum as text
      
set aTitle to (keyDict’s objectForKey:keyName)
      
      
tell (current application’s NSTableColumn’s alloc()’s initWithIdentifier:(colNum as text))
        tell headerCell()
          setStringValue_(aTitle)
          
set thisHeaderHeight to cellSize()’s height
        end tell
        
        
### バインディングのオプション
        
— ソートを無効にする
        
set anObj to (current application’s NSNumber’s numberWithBool:false)
        
set aKey to current application’s NSCreatesSortDescriptorBindingOption
        
set bOptions to (current application’s NSDictionary’s dictionaryWithObject:anObj forKey:aKey)
        
        
### 表示内容をNSArrayControllerにバインディング
        
bind_toObject_withKeyPath_options_(current application’s NSValueBinding, (my _table_view’s dataSource()), "arrangedObjects", bOptions)
        
        
set aTableColumn to it
      end tell
      
      
### Columnの横幅を調整
      
tell (my _table_view)
        addTableColumn_(aTableColumn)
      end tell
      
      
tell aTableColumn
        setWidth_(viewWidth)
      end tell
    end repeat
    
    
## NSScrollView
    
### Viewの高さを計算
    
set viewHeight to thisRowHeight * rowCount + thisHeaderHeight
    
    
#ダイアログ内のビューサイズを指定
    
set aScreen to current application’s NSScreen’s mainScreen()
    
set screenFrame to aScreen’s frame()
    
set aHeight to current application’s NSHeight(screenFrame)
    
set aWidth to current application’s NSWidth(screenFrame)
    
set maxHeight to aHeight * 0.845
    
set maxWidth to aWidth * 0.94
    
–log viewHeight
    
–log maxHeight
    
–set viewHeight to viewHeight + aSpace + sfHeight
    
if viewHeight > maxHeight then set viewHeight to maxHeight
    
if viewWidth > maxWidth then set viewWidth to maxWidth
    
if viewWidth < 360 then set viewWidth to 360
    
    
set vSize to current application’s NSMakeRect(0, 0, viewWidth, viewHeight)
    
    
### Viewを作成
    
tell current application’s NSScrollView’s alloc()
      tell initWithFrame_(vSize)
        setBorderType_(current application’s NSBezelBorder)
        
setDocumentView_(my _table_view)
        
setHasHorizontalScroller_(true)
        
setHasVerticalScroller_(true)
        
set my _the_view to it
      end tell
    end tell
    
    
my changed:me
    
    
# 1行目を選択
    
my setSelectionIndex:0
    
    
return my _the_view
  end setupView
  
  
#MARK: アプリケーションが切り替わった時
  
— tableViewを作成してから実行する
  
on changed:sender
    log "changed"
    
    
tell (my _table_view)’s dataSource()
      removeObjects_(arrangedObjects())
    end tell
    
    
#起動中のアプリケーション
    
set aList to current application’s NSWorkspace’s sharedWorkspace()’s runningApplications()
    
set sort to (current application’s NSSortDescriptor’s alloc()’s initWithKey:"localizedName" ascending:true selector:"caseInsensitiveCompare:")
    
set sortedList to aList’s sortedArrayUsingDescriptors:(sort as list)
    
    
repeat with anItem in (sortedList as list)
      #普通のアプリだけ
      
set aFlag to anItem’s activationPolicy() is current application’s NSApplicationActivationPolicyRegular
      
if aFlag then
        set theURL to anItem’s bundleURL()
        ((
my _table_view)’s dataSource()’s addObject:{fileURL:theURL})
      end if
      
    end repeat
    
  end changed:


#MARK: Data Source Overrides
  
on numberOfRowsInTableView:aTableView
    return (aTableView’s dataSource())’s content()’s |count|()
  end numberOfRowsInTableView:


on tableView:aTableView viewForTableColumn:aColumn row:aRow
    
    
set aCellView to aTableView’s makeViewWithIdentifier:"YKZTableCellView" owner:me
    
    
if aCellView is missing value then
      
      
set frameRect to current application’s NSMakeRect(0, 0, aColumn’s width, aTableView’s rowHeight())
      
set aCellView to current application’s YKZTableCellView’s alloc’s initWithFrame:frameRect
      
      
set anObj to "YKZURLToIcon"
      
set aKey to current application’s NSValueTransformerNameBindingOption
      
set bOptions to (current application’s NSDictionary’s dictionaryWithObject:anObj forKey:aKey)
      (
aCellView’s imageView())’s bind:(current application’s NSValueBinding) toObject:aCellView withKeyPath:"objectValue.fileURL" options:bOptions
      
      
set anObj to "YKZURLToDisplayedName"
      
set aKey to current application’s NSValueTransformerNameBindingOption
      
set bOptions to (current application’s NSDictionary’s dictionaryWithObject:anObj forKey:aKey)
      (
aCellView’s textField())’s bind:(current application’s NSValueBinding) toObject:aCellView withKeyPath:"objectValue.fileURL" options:bOptions
      
      
set anObj to "YKZURLToPath"
      
set aKey to current application’s NSValueTransformerNameBindingOption
      
set bOptions to (current application’s NSDictionary’s dictionaryWithObject:anObj forKey:aKey)
      (
aCellView’s pathTextField)’s bind:(current application’s NSValueBinding) toObject:aCellView withKeyPath:"objectValue.fileURL" options:bOptions
      
      
set anObj to "YKZURLToVersion"
      
set aKey to current application’s NSValueTransformerNameBindingOption
      
set bOptions to (current application’s NSDictionary’s dictionaryWithObject:anObj forKey:aKey)
      (
aCellView’s varTextField)’s bind:(current application’s NSValueBinding) toObject:aCellView withKeyPath:"objectValue.fileURL" options:bOptions
      
      
return aCellView
    end if
    
    
return missing value
  end tableView:viewForTableColumn:row:


# テーブル内のセルが編集できるか
  
on tableView:aTableView shouldEditTableColumn:aColumn row:aRow
    return false
  end tableView:shouldEditTableColumn:row:
  
  
#
  
on validateProposedFirstResponder:aResponder forEvent:aEvent
    log "validateProposedFirstResponder"
    
return true
    
    
set aBoolean to aResponder’s isKindOfClass:(current application’s NSTableCellView’s |class|())
    
if aBoolean as boolean then
      return true
    end if
    
    
return true
  end validateProposedFirstResponder:forEvent:
  
  
# テーブル内をダブルクリックしたらOKボタンを押す
  
on doubleAction:sender
    log "doubleAction"
    
## ヘッダをクリックした時は何もしない
    
if (sender’s clickedRow()) is -1 then return
    
    
set theEvent to current application’s NSEvent’s ¬
      keyEventWithType:(current application’s NSEventTypeKeyDown) ¬
        location:(current application’s NSZeroPoint) ¬
        
modifierFlags:0 ¬
        
timestamp:0.0 ¬
        
windowNumber:(sender’s |window|()’s windowNumber()) ¬
        
context:(current application’s NSGraphicsContext’s currentContext()) ¬
        
|characters|:return ¬
        
charactersIgnoringModifiers:(missing value) ¬
        
isARepeat:false ¬
        
keyCode:0
    current application’s NSApp’s postEvent:theEvent atStart:(not false)
  end doubleAction:
  
end script

#MARK: – NSTableCellView
script YKZTableCellView
  property parent : class "NSTableCellView"
  
  
property acceptsFirstResponder : true
  
  
property pathTextField : missing value
  
property varTextField : missing value
  
  
on initWithFrame:rect
    continue initWithFrame:rect
    
    
setAutoresizingMask_(current application’s NSViewWidthSizable)
    
    
–set myWidth to current application’s NSWidth(rect)
    
–set myHeight to current application’s NSHeight(rect)
    
    
# アイコン
    
tell current application’s NSImageView’s alloc
      tell initWithFrame_(current application’s NSMakeRect(12, 1, 48, 48))
        setImageScaling_(current application’s NSImageScaleProportionallyUpOrDown)
        
setImageAlignment_(current application’s NSImageAlignCenter)
        
my setImageView:it
        
my addSubview:it
      end tell
    end tell
    
    
# 表示名
    
tell current application’s NSTextField’s alloc
      tell initWithFrame_(current application’s NSMakeRect(66, 26, 280, 17))
        setBordered_(false)
        
setDrawsBackground_(false)
        
setEditable_(false)
        
setLineBreakMode_(current application’s NSLineBreakByTruncatingMiddle)
        
setFont_(current application’s NSFont’s boldSystemFontOfSize:13)
        
my setTextField:it
        
my addSubview:it
      end tell
    end tell
    
    
# パス
    
tell current application’s NSTextField’s alloc
      tell initWithFrame_(current application’s NSMakeRect(66, 6, 316, 17))
        setBordered_(false)
        
setDrawsBackground_(false)
        
setEditable_(false)
        
setLineBreakMode_(current application’s NSLineBreakByTruncatingMiddle)
        
setFont_(current application’s NSFont’s systemFontOfSize:11)
        
set my pathTextField to it
        
my addSubview:it
      end tell
    end tell
    
    
# バージョン
    
tell current application’s NSTextField’s alloc
      tell initWithFrame_(current application’s NSMakeRect(300, 24, 80, 17))
        setBordered_(false)
        
setDrawsBackground_(false)
        
setEditable_(false)
        
setFont_(current application’s NSFont’s systemFontOfSize:11)
        
setLineBreakMode_(current application’s NSLineBreakByTruncatingMiddle)
        
setAlignment_(current application’s NSRightTextAlignment)
        
set my varTextField to it
        
my addSubview:it
      end tell
    end tell
    
    
return me
  end initWithFrame:
end script

★Click Here to Open This Script 

Posted in dialog | Tagged 10.13savvy 10.14savvy 10.15savvy 11.0savvy AppDelegate NSAlert NSBundle NSDictionary NSFileManager NSFont NSFontAttributeName NSImage NSString NSValueTransformer NSWorkspace | Leave a comment

アラートダイアログのウィンドウタイトル部分にアイコン指定

Posted on 5月 23, 2020 by Takaaki Naganoya

アラートダイアログのウィンドウタイトル部分に任意の画像をアイコンとして表示するAppleScriptです。

本来、NSWindowのタイトル部分にアイコン表示を行うワザのようです。なにか、Cocoaのバグのような仕様を使っているようです。本来、タイトル部分に直接アイコンを表示させることはできないのですが、ドキュメントのURLを指定すると、該当するパス(URL)の書類アイコンを指定する機能はあります。


▲Mac App Store上で販売中のAppleScriptで開発したアプリケーション「Kamenoko」でも、ウィンドウにアイコン表示するコードが使われています。本Scriptではなく、もっとまっとうな方法で

そこに、存在しないURLを指定すると、直後にアイコン指定できるという、、、どこで役立つのかわかりませんが、そういう方法もあるということで。

AppleScript名:アラートダイアログでウィンドウタイトル部分にアイコン指定
— Created 2020-05-08 by Takaaki Naganoya
— 2020 Piyomaru Software
use AppleScript version "2.4"
use scripting additions
use framework "Foundation"
use framework "AppKit"

property NSAlert : a reference to current application’s NSAlert
property |NSURL| : a reference to current application’s |NSURL|
property NSImage : a reference to current application’s NSImage
property NSRunningApplication : a reference to current application’s NSRunningApplication
property NSImageNameComputer : a reference to current application’s NSImageNameComputer
property NSWindowDocumentIconButton : a reference to current application’s NSWindowDocumentIconButton

property returnCode : 0

–Get Computer Icon
set anImage to getComputerIcon() of me
set aMainMes to "TEST"
set aSubMes to "Window title icon TEST"
set wTitle to "Window Title"

set paramObj to {myMessage:aMainMes, mySubMessage:aSubMes, myWinTitle:wTitle, myImage:anImage}
–my displayAlertDialog:paramObj

my performSelectorOnMainThread:"displayAlertDialog:" withObject:(paramObj) waitUntilDone:true

on displayAlertDialog:paramObj
  set aMainMes to myMessage of paramObj
  
set aSubMes to mySubMessage of paramObj
  
set anImage to myImage of paramObj
  
set aWinTitle to myWinTitle of paramObj
  
  
— set up alert  
  
set theAlert to NSAlert’s alloc()’s init()
  
tell theAlert
    its setMessageText:aMainMes
    
its setInformativeText:aSubMes
    
its addButtonWithTitle:"OK"
    
its addButtonWithTitle:"Cancel"
    
–its setIcon:anImage
    
set aWin to its |window|()
  end tell
  
  
aWin’s setTitle:aWinTitle
  
  
aWin’s setRepresentedURL:(|NSURL|’s URLWithString:"WindowTitle") –Dummy URL
  (
aWin’s standardWindowButton:(current application’s NSWindowDocumentIconButton))’s setImage:(anImage)
  
  
— show alert in modal loop
  
NSRunningApplication’s currentApplication()’s activateWithOptions:0
  
my performSelectorOnMainThread:"doModal:" withObject:(theAlert) waitUntilDone:true
  
if (my returnCode as number) = 1001 then error number -128
end displayAlertDialog:

on doModal:aParam
  set (my returnCode) to aParam’s runModal()
end doModal:

on getComputerIcon()
  return NSImage’s imageNamed:(NSImageNameComputer)
end getComputerIcon

★Click Here to Open This Script 

Posted in dialog | Tagged 10.13savvy 10.14savvy 10.15savvy NSAlert NSImage NSImageNameComputer NSRunningApplication NSURL NSWindowDocumentIconButton | Leave a comment

マウスカーソルを変更

Posted on 3月 24, 2020 by Takaaki Naganoya

Xcode上で記述するAppleScriptアプリケーションにおいて、マウスカーソルを変更するAppleScriptです。

NSCursorにアクセスして、macOS側で用意しているカーソルにマウスカーソルのイメージを変更します。

–> Watch Demo Movie

あらかじめmacOSが用意しているカーソルはいくつかあるわけですが、これで満足するわけがなくて……任意のNSImageをカーソルに指定する方法について調べていたものの、なかなかうまくいかなかったので、このOS側で用意しているカーソルへの切り替えのみまとめておきました。

–> Download Xcode Project

他のアプリケーションに切り替えると通常のカーソルに戻ってしまうので、本プロジェクト側でアプリケーション切り替えのイベントハンドラでカーソルの再変更などを行うべきなのかも。

  set aImage to current application's NSImage's  imageNamed:(current application's NSImageNameComputer)
  set tmpCursor to current application's NSCursor's alloc()'s initWithImage:aImage hotSpot:{0,15}
tmpCursor's |set|()

結局、コンピュータのアイコンをマウスカーソルに指定するというところまでは持って行けた(カーソル画像の差し替えができた)わけなんですが、NSCursorの挙動を評価してみたら、カーソルが標準のものに戻るタイミングがバラバラ(他のディスプレイにカーソルが移動したとき、というわけでもない)で、挙動が謎すぎであります。

その後、対象のビュー(NSViewなど、その派生クラス)にマウスカーソルが入った/出たことを検出するイベントハンドラでマウスカーソルの形状変更を明示的に指定するような実装で落ち着きました(Edama2さんから教えていただきました。ありがとうございます)。

AppleScript名:AppDelegate.applescript
—
— AppDelegate.applescript
— CursorTest
—
— Created by Takaaki Naganoya on 2020/03/24.
— Copyright © 2020 Takaaki Naganoya. All rights reserved.
—

script AppDelegate
  property parent : class "NSObject"
  
  
— IBOutlets
  
property theWindow : missing value
  
  
on applicationWillFinishLaunching:aNotification
    — Insert code here to initialize your application before any files are opened
  end applicationWillFinishLaunching:
  
  
on applicationShouldTerminate:sender
    — Insert code here to do any housekeeping before your application quits
    
return current application’s NSTerminateNoww
  end applicationShouldTerminate:
  
  
on clicked:aSender
    set aTag to (aSender’s tag) as integer
    
if aTag = 100 then
      current application’s NSCursor’s arrowCursor()’s |set|()
    else if aTag = 101 then
      current application’s NSCursor’s disappearingItemCursor()’s |set|()
    else if aTag = 102 then
      current application’s NSCursor’s contextualMenuCursor()’s |set|()
    else if aTag = 103 then
      current application’s NSCursor’s openHandCursor()’s |set|()
    end if
  end clicked:
end script

★Click Here to Open This Script 

Posted in AppleScript Application on Xcode System | Tagged 10.13savvy 10.14savvy 10.15savvy NSCursor NSImage | Leave a comment

指定のNSImageにNSBezierPathでclearColor塗りつぶし

Posted on 2月 14, 2020 by Takaaki Naganoya

指定色で塗りつぶしたNSImageを用意し、そこにNSBezierPathでclearColorで塗りつぶし(=切り抜き)を行うAppleScriptです。

2005/8/18にCocoa-dev mailing list に対してStefan Schüßler氏が投稿した内容をもとにしています。いろいろ探して回りましたが、ヒットしたのはこの情報だけでした。彼に感謝を。

Re: [NSColor clearColor] and NSBezierPath: not compatible?

NSBezierPath uses the NSCompositeSourceOver operation, therefore clearColor does not do anything. You could change the graphics state in order to clear the path:

  NSGraphicsContext *context;
  context = [NSGraphicsContext currentContext];
  [context saveGraphicsState];
  [context setCompositingOperation:NSCompositeClear];
  [yourBezierPath fill];
  [context restoreGraphicsState];

Hope this helps.

Stefan
AppleScript名:指定のNSImageにNSBezierPathでclearColor塗りつぶし.scptd
— Created 2020-02-14 by Takaaki Naganoya
— 2020 Piyomaru Software
use AppleScript version "2.4"
use scripting additions
use framework "Foundation"
use framework "AppKit"
use framework "CoreImage"

property NSColor : a reference to current application’s NSColor
property NSImage : a reference to current application’s NSImage
property NSZeroRect : a reference to current application’s NSZeroRect
property NSBezierPath : a reference to current application’s NSBezierPath
property NSCompositeCopy : a reference to current application’s NSCompositeCopy
property NSGraphicsContext : a reference to current application’s NSGraphicsContext
property NSBitmapImageRep : a reference to current application’s NSBitmapImageRep
property NSCalibratedRGBColorSpace : a reference to current application’s NSCalibratedRGBColorSpace

set {rCol, gCol, bCol} to choose color

set aNSImage to makeColoredNSImage({rCol, gCol, bCol}, 400, 400) of me
set aPath to generateCircle(200, 100, 100) of me

set bImage to my fillImage:aNSImage withTransparentPathFilling:aPath

set aFile to POSIX path of (choose file name)
set sRes to my saveNSImageAtPathAsPNG(bImage, aFile)

on fillImage:aSourceImg withTransparentPathFilling:aPath
  set aSize to aSourceImg’s |size|()
  
set aWidth to (aSize’s width)
  
set aHeight to (aSize’s height)
  
  
set aRep to NSBitmapImageRep’s alloc()’s initWithBitmapDataPlanes:(missing value) pixelsWide:aWidth pixelsHigh:aHeight bitsPerSample:8 samplesPerPixel:4 hasAlpha:true isPlanar:false colorSpaceName:(NSCalibratedRGBColorSpace) bytesPerRow:0 bitsPerPixel:0
  
  
NSGraphicsContext’s saveGraphicsState()
  
  
NSGraphicsContext’s setCurrentContext:(NSGraphicsContext’s graphicsContextWithBitmapImageRep:aRep)
  
  
aSourceImg’s drawInRect:(current application’s NSMakeRect(0, 0, aWidth, aHeight)) fromRect:(NSZeroRect) operation:(NSCompositeCopy) fraction:(1.0)
  
  
NSGraphicsContext’s currentContext()’s setCompositingOperation:(current application’s NSCompositeClear)
  
aPath’s fill()
  
  
NSGraphicsContext’s restoreGraphicsState()
  
  
set newImg to NSImage’s alloc()’s initWithSize:(aSize)
  
newImg’s addRepresentation:aRep
  
  
return newImg
end fillImage:withTransparentPathFilling:

on generateCircle(theRadius, x, y)
  set aRect to current application’s NSMakeRect(x, y, theRadius, theRadius)
  
set aCirCle to NSBezierPath’s bezierPath()
  
aCirCle’s appendBezierPathWithOvalInRect:aRect
  
return aCirCle
end generateCircle

on makeColoredNSImage(colList, aWidth, aHeight)
  copy colList to {rCol, gCol, bCol}
  
set aColor to makeNSColorFromRGBA65535val(rCol, gCol, bCol, 1.0) of me
  
set aColoredImage to fillColorWithImage(aColor, aWidth, aHeight) of me
  
return aColoredImage
end makeColoredNSImage

on fillColorWithImage(aColor, aWidth, aHeight)
  set colordImage to makeNSImageWithFilledWithColor(aWidth, aHeight, aColor, aWidth, aHeight) of me
  
colordImage’s lockFocus()
  
colordImage’s drawAtPoint:{0, 0} fromRect:(current application’s NSZeroRect) operation:(current application’s NSCompositeDestinationIn) fraction:1.0
  
colordImage’s unlockFocus()
  
return colordImage
end fillColorWithImage

on makeNSImageWithFilledWithColor(aWidth, aHeight, fillColor)
  set anImage to NSImage’s alloc()’s initWithSize:(current application’s NSMakeSize(aWidth, aHeight))
  
anImage’s lockFocus()
  
—
  
set theRect to {{x:0, y:0}, {height:aHeight, width:aWidth}}
  
set theNSBezierPath to NSBezierPath’s bezierPath
  
theNSBezierPath’s appendBezierPathWithRect:theRect
  
—
  
fillColor’s |set|()
  
theNSBezierPath’s fill()
  
—
  
anImage’s unlockFocus()
  
—
  
return anImage
end makeNSImageWithFilledWithColor

on makeNSColorFromRGBA65535val(redValue as integer, greenValue as integer, blueValue as integer, alphaValue as integer)
  set aRedCocoa to (redValue / 65535) as real
  
set aGreenCocoa to (greenValue / 65535) as real
  
set aBlueCocoa to (blueValue / 65535) as real
  
set aAlphaCocoa to 1.0 as real
  
set aColor to NSColor’s colorWithCalibratedRed:aRedCocoa green:aGreenCocoa blue:aBlueCocoa alpha:aAlphaCocoa
  
return aColor
end makeNSColorFromRGBA65535val

on saveNSImageAtPathAsPNG(anImage, outPath)
  set imageRep to anImage’s TIFFRepresentation()
  
set aRawimg to current application’s NSBitmapImageRep’s imageRepWithData:imageRep
  
set pathString to current application’s NSString’s stringWithString:outPath
  
set newPath to pathString’s stringByExpandingTildeInPath()
  
set myNewImageData to (aRawimg’s representationUsingType:(current application’s NSPNGFileType) |properties|:(missing value))
  
set aRes to (myNewImageData’s writeToFile:newPath atomically:true) as boolean
  
return aRes
end saveNSImageAtPathAsPNG

★Click Here to Open This Script 

Posted in Image | Tagged 10.13savvy 10.14savvy 10.15savvy NSBezierPath NSBitmapImageRep NSCalibratedRGBColorSpace NSColor NSCompositeCopy NSGraphicsContext NSImage NSZeroRect | 1 Comment

画像に円を塗る

Posted on 2月 11, 2020 by Takaaki Naganoya

作成した画像(NSImage)に円を塗るAppleScriptです。

最近、6角形の図形ばかり塗りつぶしていましたが、「円に変えるとどうなんだろう?」と考えて、本ルーチンを試作してみました。

ためしに、6角形ではなく円で塗りつぶしてみたものの、そんなにイケていない感じがします。

AppleScript名:画像に円を塗る.scptd
—
–  Created by: Takaaki Naganoya
–  Created on: 2020/02/11
—
–  Copyright © 2020 Piyomaru Software, All Rights Reserved
—
use AppleScript version "2.4" — Yosemite (10.10) or later
use framework "Foundation"
use framework "AppKit"
use scripting additions

property aRadius : 40

set aFile to POSIX path of (choose file name)
if aFile does not end with ".png" then
  set aFile to aFile & ".png"
end if

set aColor to current application’s NSColor’s redColor()

set aImage to current application’s NSImage’s alloc()’s initWithSize:{300, 300}

repeat with y from 0 to 300 by aRadius + 4
  repeat with x from 0 to 300 by aRadius + 4
    my drawCircleOnNSIMage(aImage, aRadius, x, y, aColor)
  end repeat
end repeat

set sRes to my saveNSImageAtPathAsPNG(aImage, aFile)

#  MARK: Call By Reference
on drawCircleOnNSIMage(aImage, aRadius, aXpos, aYpos, aColor)
  set aBezier to generateCircle(aRadius, aXpos, aYpos) of me
  (
aImage)’s lockFocus()
  
aColor’s |set|()
  
aBezier’s fill() –ぬりつぶし
  (
aImage)’s unlockFocus()
end drawCircleOnNSIMage

#  MARK: circleのBezier曲線を作成して返す
on generateCircle(theRadius, x, y)
  set aRect to current application’s NSMakeRect(x, y, theRadius, theRadius)
  
set aCirCle to current application’s NSBezierPath’s bezierPath()
  
aCirCle’s appendBezierPathWithOvalInRect:aRect
  
return aCirCle
end generateCircle

# NSImageを指定パスにPNG形式で保存
on saveNSImageAtPathAsPNG(anImage, outPath)
  set imageRep to anImage’s TIFFRepresentation()
  
set aRawimg to current application’s NSBitmapImageRep’s imageRepWithData:imageRep
  
set pathString to current application’s NSString’s stringWithString:outPath
  
set newPath to pathString’s stringByExpandingTildeInPath()
  
set myNewImageData to (aRawimg’s representationUsingType:(current application’s NSPNGFileType) |properties|:(missing value))
  
set aRes to (myNewImageData’s writeToFile:newPath atomically:true) as boolean
  
return aRes –成功ならtrue、失敗ならfalseが返る
end saveNSImageAtPathAsPNG

★Click Here to Open This Script 

Posted in file File path Image | Tagged 10.14savvy 10.15savvy NSBezierPath NSBitmapImageRep NSColor NSImage NSPNGFileType NSString | Leave a comment

画像の指定エリアを透明色塗りつぶし(矩形切り抜き)

Posted on 2月 3, 2020 by Takaaki Naganoya

指定画像の指定エリア(矩形)を透明色で塗りつぶすAppleScriptです。透明色で塗りつぶす=矩形で切り抜いたようなかっこうになります。

画像(NSImage)を指定色で塗りつぶすという処理はよく見かけるものですが、clearColor()(透明色)で塗りつぶすという処理を行うとどうなるかといえば…………何も起こりません。

透明色でNSImageを塗りつぶすという処理は、たいへんに「ありそう」な処理ですが、なかなか見つからない。

さんざん探し回ったのですが、自分には見つけられませんでした。ちょうどEdama2さんに相談してみたところ、こういう処理を探し出してもらえました(ありがとうございますー)。ただ、見つけてきた処理そのままでは思い通りの結果にならなかったので、修正が必要であったとのこと。

透明塗りつぶし(切り抜き)の指定座標はCocoaの座標系をそのまま利用しているので、左下が原点です。

NSBezierPathで切り抜き(透明色で塗りつぶし)できるといいのになーという感じではあります。

AppleScript名:画像の指定エリアを透明色塗りつぶし(矩形切り抜き)
— Created 2017-11-19 by Takaaki Naganoya
— Modified 2018-02-14 by Takaaki Naganoya
— Modified 2020-02-03 by Edama2 & Takaaki Naganoya
use AppleScript version "2.5"
use scripting additions
use framework "Foundation"
use framework "AppKit"

property NSUUID : a reference to current application’s NSUUID
property NSColor : a reference to current application’s NSColor
property NSString : a reference to current application’s NSString
property NSImage : a reference to current application’s NSImage
property NSScreen : a reference to current application’s NSScreen
property NSBezierPath : a reference to current application’s NSBezierPath
property NSPNGFileType : a reference to current application’s NSPNGFileType
property NSCompositeClear : a reference to current application’s NSCompositeClear
property NSBitmapImageRep : a reference to current application’s NSBitmapImageRep

–切り抜きエリア(複数)
set drawList to {{origin:{x:0, y:0}, |size|:{width:200, height:100}}, {origin:{x:100, y:100}, |size|:{width:50, height:50}}}

set imgPath to POSIX path of (choose file of type {"public.image"})
set anImage to NSImage’s alloc()’s initWithContentsOfFile:imgPath

set fillColor to (NSColor’s colorWithCalibratedRed:1.0 green:0.0 blue:0.0 alpha:0.9)

–透明色塗りつぶし処理呼び出し
set resImage to drawImageWithClearColorFill(anImage, drawList) of me

set aUUIDstr to (NSUUID’s UUID()’s UUIDString()) as string
set aPath to ((NSString’s stringWithString:imgPath)’s stringByDeletingLastPathComponent()’s stringByAppendingPathComponent:aUUIDstr)’s stringByAppendingPathExtension:"png"

set fRes to saveImageRepAtPathAsPNG(resImage, aPath) of me

on drawImageWithClearColorFill(anImage, drawList)
  set retinaF to (NSScreen’s mainScreen()’s backingScaleFactor()) as real
  
–>  2.0 (Retina) / 1.0 (Non Retina)
  
  
set aClearCol to NSColor’s clearColor()
  
set op to current application’s NSCompositeClear
  
  
anImage’s lockFocus() –描画開始
  
  
repeat with i in drawList
    set origX to (x of origin of i) / retinaF
    
set origY to (y of origin of i) / retinaF
    
set sizeX to (width of |size| of i) / retinaF
    
set sizeY to (height of |size| of i) / retinaF
    
    
–Draw Clear Color
    
–http://www.drissman.com/blog/archives/2009/10/09/nsrectfill_and_nscolor_clearcolor.html
    
set theRect to {{x:origX, y:origY}, {width:sizeX, height:sizeY}}
    
aClearCol’s |set|()
    
current application’s NSRectFillUsingOperation(theRect, op)
  end repeat
  
  
anImage’s unlockFocus() –描画ここまで
  
  
return anImage –returns NSImage
end drawImageWithClearColorFill

–画像を指定パスにPNG形式で保存
on saveImageRepAtPathAsPNG(anImage, outPath)
  set imageRep to anImage’s TIFFRepresentation()
  
set aRawimg to NSBitmapImageRep’s imageRepWithData:imageRep
  
  
set pathString to NSString’s stringWithString:outPath
  
set newPath to pathString’s stringByExpandingTildeInPath()
  
  
set myNewImageData to (aRawimg’s representationUsingType:(NSPNGFileType) |properties|:(missing value))
  
return (myNewImageData’s writeToFile:newPath atomically:true) as boolean
end saveImageRepAtPathAsPNG

★Click Here to Open This Script 

Posted in file File path Image | Tagged 10.14savvy 10.15savvy NSBitmapImageRep NSColor NSCompositeClear NSImage NSPNGFileType NSScreen NSString NSUUID | 1 Comment

GUI Scriptingでコンテクストメニューのキャプチャを取得

Posted on 1月 24, 2020 by Takaaki Naganoya

GUI Scriptingを用いてスクリプトエディタ上でコンテクストメニューを表示させて、コンテクストメニューのキャプチャを行うAppleScriptです。macOS 10.14.6上で試しただけなので、10.15上では試していません(たぶん動くと思うのですが)。

–> Watch Demo Movie

画面キャプチャをNSImageに取得する機能については、DSCapture.frameworkをビルドして、AppleScript(実行環境はScript Debugger)から呼び出しています。

–> Download DSCapture.framework (To ~/Library/Frameworks/)

AppleScriptの鬼っ子機能である「GUI Scripting」。ある顧客が「キーボードショートカットとキーボード操作をそのままScript化することでこれを作れ」という仕様を出してきて、とても実現できない内容がまだらに含まれていたので「ナイスジョーク!」と却下した記憶があります。

「できること」(キーボードショートカット操作)に「できないこと」(目視で当該データの位置確認)を混ぜて仕様を出されると悪夢でしかありません。

あと、GUI Scriptingで操作を行うと信頼性がないうえに、信頼性を確保するためには「待つ」という処理が必要だったり、本来のAppleScriptの処理速度よりも100倍以上遅くなるので、本当に必要な箇所にだけ使う&可能なかぎり使用しないというのが自分の基本的なスタンスです。

コンテクストメニューの画面キャプチャを自動で

そんな中、新型Piyomaru Script Assistant(macOS 10.14以降対応。10.13は無視)の資料を作るために、コンテクストメニューの内容を画面キャプチャする必要に迫られました。

AppleScriptが500個ぐらい、階層化されたメニューに入っているので、これの画面キャプチャを撮るだけで一仕事です。テストで1階層分の資料を作ってみたのですが、けっこうかかります。

そこで、スクリプトエディタ上で表示させたコンテクストメニューをプログラムで撮れないかを検討することになります。

真っ先に調べたのはCocoaにそういう機能がないかどうか。自前のプログラムのビューの内容をキャプチャすることはできますが、他のアプリケーションのビューをキャプチャする機能は見つかりませんでした。

仕方がないので、画面のキャプチャをまるごと取得して、撮影対象のビューの座標から画像の切り抜きを行うようにしてみました。

GUI Scriptingでコンテクストメニューを表示させるのは無理かと思っていたのですが、できるんですね。これも冗談半分で探してみたらあっけなく方法が見つかって、

tell theTarget to perform action "AXShowMenu" --コンテクストメニューの表示

これで実際にコンテクストメニューの表示を行えました。

実現はいろいろ大変

スクリプトエディタ上の画面撮影を行うので、Scriptの実行そのものはScript Debuggerで実行。

問題になったのは2点。

1つは、画面キャプチャの撮影を行うフレームワークでメインディスプレイから画面イメージをNSImageで取得し、その結果をメイン側(暗黙のrunハンドラといったほうがいいのか)のプロパティに返しているのですが、すぐに反映されないらしくて、クラッシュを頻発。

結局、プロパティに内容が反映されたことをループで時間待ちして受信。

もう1つ困った点は、コンテクストメニューの表示解除(キャンセル)。1つのコンテクストメニュー表示&キャプチャ撮影だけでは意味がありません。選択メニュー項目を変更して、複数のコンテクストメニューのキャプチャを順次行えなくてはなりません。

いろいろな方法を試してみたものの、最前面のアプリケーションを「スクリプトエディタ」でない状態を作ればコンテクストメニュー表示状態は解除されます(このあたり、AppleScriptが純粋なプログラマーに苦手とされる理由。実際に使っているユーザーでないとこういう発想自体が出てこない)。Script Debugger側で実行しているので、Script Debuggerをactivateすることでその状態(コンテクストメニュー表示解除)を作ってみました。

そんなわけでコンテクストメニューの(選択項目を変更して全項目を選択状態にした)画面キャプチャができました。

現在は1階層分のコンテクストメニューの撮影を行なっていますが、メニュー階層をすべてAppleScript側からスキャンして、それぞれのメニューに対して、各メニュー項目を表示した状態で巡回キャプチャできるとよさそうです。

cropNSImageTo:{x1, y1, x2, y2} fromImage:theImage ハンドラは、Y座標の変換をこの用途(全画面キャプチャしたNSImageの切り抜き)の帳尻合わせのために書き換えています。この用途以外では使えないはずです。

AppleScript名:GUI Scriptingで指定したGUI部品のキャプチャを取得.scptd
—
–  Created by: Takaaki Naganoya
–  Created on: 2020/01/24
—
–  Copyright © 2020 Piyomaru Software, All Rights Reserved
—

use AppleScript version "2.4" — Yosemite (10.10) or later
use framework "Foundation"
use framework "DSCapture" –https://github.com/kiding/DSCapture.framework
use framework "AppKit"
use scripting additions

property |NSURL| : a reference to current application’s |NSURL|
property NSUUID : a reference to current application’s NSUUID
property NSString : a reference to current application’s NSString
property NSImage : a reference to current application’s NSImage
property NSPNGFileType : a reference to current application’s NSPNGFileType
property NSBitmapImageRep : a reference to current application’s NSBitmapImageRep

property targPos : {0, 0}
property targSize : {0, 0}
property screenSize : {}
property outPath : ""
property captImg : missing value

set (my captImg) to missing value

tell application "System Events"
  tell process "スクリプトエディタ" –"Script Editor" (Japanese localized name)
    –Editor Area Reference
    
set theTarg to text area 1 of scroll area 1 of splitter group 1 of splitter group 1 of window 1
  end tell
end tell

repeat with i from 1 to 19
  
  
set captImg to missing value
  
set outPath to (POSIX path of (path to desktop)) & ((NSUUID’s UUID()’s UUIDString()) as string) & ".png"
  
  
set {mPos, mSize} to dispMenu(i, theTarg) of me
  
copy mPos to {cx1, cy1}
  
copy mSize to {cWidth, cHeight}
  
  
screenCapture() of me
  
  
repeat 100 times
    if (my captImg) is not equal to missing value then exit repeat
    
delay 0.1
  end repeat


set bImg to (my cropNSImageTo:{cx1, cy1, cWidth, cHeight} fromImage:(my captImg))
  
saveNSImageAtPathAsPNG(bImg, my outPath) of me
  
  
tell current application to activate –Cancel Context Menu
  
delay 0.1
end repeat

on screenCapture()
  current application’s DSCapture’s sharedCapture()’s |full|()’s captureWithTarget:me selector:"displayCaptureData:" useCG:false
end screenCapture

–Delegate Handler
on displayCaptureData:aSender
  set aCount to aSender’s |count|()
  
set anImage to (aSender’s imageAtIndex:0)
  
set my captImg to anImage
  
–saveNSImageAtPathAsPNG(anImage, my outPath) of me
end displayCaptureData:

on cropNSImageTo:{x1, y1, x2, y2} fromImage:theImage
  set newWidth to x2
  
set newHeight to y2
  
set theSize to (theImage’s |size|())
  
set oldHeight to height of theSize
  
  
— transpose y value for Cocoa coordintates
  
set y1 to oldHeight – newHeight – y1
  
set newRect to {{x:x1, y:y1}, {width:x2, height:y2}}
  
  
theImage’s lockFocus()
  
set theRep to NSBitmapImageRep’s alloc()’s initWithFocusedViewRect:newRect
  
theImage’s unlockFocus()
  
  
set outImage to NSImage’s alloc()’s initWithSize:(theRep’s |size|())
  
outImage’s addRepresentation:theRep
  
  
return outImage
end cropNSImageTo:fromImage:

–NSImageを指定パスにPNG形式で保存
on saveNSImageAtPathAsPNG(anImage, outPath)
  set imageRep to anImage’s TIFFRepresentation()
  
set aRawimg to current application’s NSBitmapImageRep’s imageRepWithData:imageRep
  
set pathString to current application’s NSString’s stringWithString:outPath
  
set newPath to pathString’s stringByExpandingTildeInPath()
  
set myNewImageData to (aRawimg’s representationUsingType:(current application’s NSPNGFileType) |properties|:(missing value))
  
set aRes to (myNewImageData’s writeToFile:newPath atomically:true) as boolean
  
return aRes –成功ならtrue、失敗ならfalseが返る
end saveNSImageAtPathAsPNG

on dispMenu(selInd, theTarget)
  activate application "Script Editor"
  
tell application "System Events"
    tell process "スクリプトエディタ" –"Script Editor" (Japanese localized name)
      
      
ignoring application responses
        tell theTarget to perform action "AXShowMenu" –コンテクストメニューの表示
      end ignoring
      
      
tell text area 1 of scroll area 1 of splitter group 1 of splitter group 1 of window 1
        tell menu 1
          set mPos to position
          
set mSize to size
          
          
set mList to every menu item
          
tell menu item (13 + selInd)
            set aRes to properties
            
set selected to true
          end tell
        end tell
      end tell
      
    end tell
  end tell
  
  
return {mPos, mSize}
end dispMenu

★Click Here to Open This Script 

Posted in GUI Scripting | Tagged 10.14savvy NSBitmapImageRep NSImage NSPNGFileType NSString NSURL NSUUID | Leave a comment

Keynoteで選択中の画像を特定する

Posted on 1月 22, 2020 by Takaaki Naganoya


Keynoteの書類上で選択中のオブジェクト(image)を特定するAppleScriptです。

Keynoteには、選択中のオブジェクトを求めるという重要な機能「selection」が実装されていません。一応、最新版のKeynoteには「selection」の予約語が存在しているものの、slide中の選択オブジェクトではなく「選択中のスライド」が返ってきます。current slideとほぼ同じ動作です。これでは実用性がいまひとつです。

ないと困るselection(get selected object)ですが、実装されていないのは仕方ありません。

そのものズバリの機能が存在していないものの、他のやりかたで選択中の画像を特定してみました。数が少なかったり重複するものが存在していない場合には有効のようです。

本Scriptでは、Keynote書類上で選択中の画像があるという前提の上で、GUI Scripting経由でコピーを行い、選択対象をクリップボードに入れます。このクリップボード内の画像のサイズを取得。次に、現在のKeynote書類の現在のスライド(ページ)上の画像(imageオブジェクト)のサイズを取得し、順次照合。同じサイズのものがあれば、それが選択中のオブジェクトであると類推します。

かなり穴の多いロジックですが、最初の一歩としては悪くないでしょう。とりあえずは、サイズで比較を行い、同一のものがあれば画像同士の類似性を計算するといった方法も検討できそうです。

お手上げになってしまうのは、画像サイズや内容ともに同一のものが複数あった場合です。その場合を除けば割と識別できそうに思えます。

また、ながらく調査を行なってきた「ローカライズ言語に依存しないGUI Scripting」を用いて選択中のオブジェクトのコピーができるとよさそうです。

AppleScript名:Keynoteで選択中の画像を特定する.scptd
—
–  Created by: Takaaki Naganoya
–  Created on: 2020/01/22
—
–  Copyright © 2020 Piyomaru Software, All Rights Reserved
—
use AppleScript version "2.7"
use scripting additions
use framework "Foundation"
use framework "AppKit"

set kRes to getSelectedImage() of me
–> image 3 of slide 24 of document id "534F4E65-4459-4B00-95D4-34C3E020467E"

on getSelectedImage()
  my executeKeynoteItemCopy() –Execute Copy From Menu
  
  
–クリップボードの内容をNSImageに
  
set aNSIMage to my getClipboardASImage()
  
if aNSIMage = false then
    return false
  end if
  
  
–クリップボード中のNSImageのサイズを取得
  
set aSize to aNSIMage’s |size|()
  
set selWidth to (aSize’s width) as real
  
set selHeight to (aSize’s height) as real
  
  
–Keynoteの最前面のドキュメントの現在のスライド上の画像からサイズを取得してクリップボード内の画像サイズと照合する
  
tell application "Keynote"
    tell front document
      tell current slide
        set iList to every image
        
        
repeat with i in iList
          set myHeight to (height of i) as real
          
set myWidth to (width of i) as real
          
if {myWidth, myHeight} = {selWidth, selHeight} then
            return contents of i
          end if
        end repeat
      end tell
    end tell
  end tell
  
return false
end getSelectedImage

— クリップボードの内容をNSImageとして取り出して返す
on getClipboardASImage()
  set theNSPasteboard to current application’s NSPasteboard’s generalPasteboard()
  
set theAttributedStringNSArray to theNSPasteboard’s readObjectsForClasses:({current application’s NSImage}) options:(missing value)
  
if theAttributedStringNSArray = {} then return false
  
set theNSAttributedString to theAttributedStringNSArray’s objectAtIndex:0
  
return theNSAttributedString
end getClipboardASImage

on executeKeynoteItemCopy()
  activate application "Keynote"
  
tell application "System Events"
    tell process "Keynote"
      –click menu item "Copy" of menu 1 of menu bar item "Edit" of menu bar 1
      
click menu item "コピー" of menu 1 of menu bar item "編集" of menu bar 1
    end tell
  end tell
end executeKeynoteItemCopy

★Click Here to Open This Script 

Posted in Clipboard GUI Scripting Image | Tagged 10.14savvy 10.15savvy Keynote NSImage NSPasteboard | Leave a comment

画像の空白判定 v4

Posted on 12月 19, 2019 by Takaaki Naganoya

画像のすべてのピクセルが白であることをチェックするAppleScriptです。

以前にmacOS 10.12上で作成した「空白画像検出v3」は一般的に処理時間のかかる空白画像の検出(ヒストグラム計算してチェックする?)が高速に処理できます(GPUImageでヒストグラム計算を行うより2倍ぐらい高速)。空白検出のためだけにAdobe Photoshopが必要になるといった事態は避けられます。

–> test Data(動作検証用各種テストデータ)

macOS 10.14.6上でこのルーチンを再度試してみたところ、思ったとおりに空白検出(数百万ピクセルの画像でも1つだけ黒であればfalseを返す)してくれません。ちょっと書き方を変えていますが、単体で通常のAppleScript(Cocoa不使用)にコンテクストメニューから突っ込むモジュールとして運用するためです。

copyコマンドがdeep copyしてくれない?

参照ではなくすべてのデータをコピーするコマンドとして、copyコマンドはとても重宝しています。単に「パラメータの代入の方向が違う偏屈なコマンド」ではなく、明示的にデータ内容をコピーするためのコマンドと認識しています。

AppleScriptのオブジェクト同様、Cocoaのオブジェクトについてもcopyコマンドでdeep copyしてくれるものと理解していましたが、macOS 10.14.6上で本ルーチンを試してみたところ、どうも参照をコピーしている気配がします。

AppleScriptのオブジェクト(配列とか)をcopyコマンドでコピーすると、参照ではなくデータが複製されていることを確認しました。Cocoaオブジェクトのcopyも同様かどうかは、ちょっとそうじゃないんじゃないかというところです。

set bNSImage to aNSImage's |copy|()

Cocoaの世界のオブジェクトのコピーはこんな感じ(↑)でできたので、今後はこちらを採用することにします。

1×1のNSImageに色を塗るとデータサイズが増える

ビットマップ画像の状態であるNSBitmapImageRepになっていれば、1×1画像のサイズは同じことが期待されます。実際、macOS 10.12上ではそのように扱えていました。

ところが、macOS 10.14上で1×1ドットのNSImageに対して色を塗って、NSBitmapImageRepを取得すると、塗らない状態のNSImageよりもデータ(NSData)サイズが大きくなることがわかりました。


▲1×1のPNG画像をビットマップ化したデータ。赤が処理前、青が塗りつぶし処理後のデータ(macOS 10.14.6)。ピクセル数が増えてるのでは? と疑ってサイズを何回も計算して確認しましたが、間違っていません

しかも、データ量がmacOS 10.14と10.15では大幅に異なります(macOS 10.15では大幅にデータ量が減る)。

 1×1 PNG画像 ビットマップ化したデータサイズ:3,354 Bytes(macOS 10.14.6)
 1×1 PNG画像 塗りつぶし ビットマップ化したデータサイズ:3,574 Bytes(macOS 10.14.6)
 1×1 PNG画像 塗りつぶし ビットマップ化したデータサイズ:750 Bytes(macOS 10.15.2)

さすがに匙を投げかけましたが、比較元のデータに透明の色(clearColor())を塗る=画像的に意味はないが、同じ処理を通すことでデータサイズを同程度にするという処理を行うことで、いい感じに空白検出できるようになりました。

なにをどういじくったら、1×1ビットマップ画像のサイズがOSアップデートごとに大幅に変わるのかさっぱり理解できないのですが、そこに何か意味があるのでしょうか?

Mac App Storeに出したアプリケーションで、PDFの空白ページ検出に本ルーチンを利用していますが、Appleのレビュー段階で「単にPDFから文字を抽出して空白検出しているのだろう」と思われてリジェクトされました。実際には、全ページを画像レンダリングして1ドットの画像でも存在していたら空白としては認識しない仕様になっているのですが、Appleのレビューワーには処理内容を説明して、各種ベンチマーク結果などを出さないと信じてもらえませんでした。

Appleのエンジニアが考えるところの空白検出が「文字チェックだけ」の使い物にならない処理だということはよくわかりました。また、頭からそのように思い込んで攻撃してきた間抜けにも遭遇してウンザリしました。

AppleScript名:画像の空白判定 v4
set aFile to (choose file of type {"public.image"})
set iRes to checkImageIsWhite(aFile) of whiteImageKit
–> true –white (blank) image

script whiteImageKit
  use AppleScript version "2.7" — High Sierra (10.13) or later
  
use framework "Foundation"
  
use framework "AppKit"
  
use scripting additions
  
property parent : AppleScript
  
  
property NSData : a reference to current application’s NSData
  
property NSDate : a reference to current application’s NSDate
  
property |NSURL| : a reference to current application’s |NSURL|
  
property NSColor : a reference to current application’s NSColor
  
property NSImage : a reference to current application’s NSImage
  
property NSBezierPath : a reference to current application’s NSBezierPath
  
property NSBitmapImageRep : a reference to current application’s NSBitmapImageRep
  
  
–Compare Original Data and
  
on checkImageIsWhite(aFile)
    set aPOSIXpath to POSIX path of aFile
    
set aURL to |NSURL|’s fileURLWithPath:(aPOSIXpath)
    
    
set aNSImage to NSImage’s alloc()’s initWithContentsOfURL:(aURL)
    
set bNSImage to NSImage’s alloc()’s initWithContentsOfURL:(aURL)
    
    
–copy aNSImage to bNSImage–Not deep copy ????
    
    
set fillColor1 to NSColor’s clearColor()
    
set blankNSImage1 to drawImageWithFilledColor(aNSImage, fillColor1) of me
    
    
set fillColor2 to makeNSColorFromRGBAval(65535, 65535, 65535, 65535, 65535) of me
    
set blankNSImage2 to drawImageWithFilledColor(bNSImage, fillColor2) of me
    
    
set aTiff to blankNSImage1’s TIFFRepresentation()
    
set bTiff to blankNSImage2’s TIFFRepresentation()
    
    
set chkWhite to (aTiff’s isEqualToData:bTiff) as boolean
    
    
return chkWhite
  end checkImageIsWhite


on getSizeOfImage(anNSImage)
    set aSize to anNSImage’s |size|()
    
set aClass to class of aSize
    
if aClass = record then
      copy aSize to theSize –To macOS 10.12.x
    else –macOS 10.13 or later
      set sizeX to (item 1 of item 2 of aSize)
      
set sizeY to (item 2 of item 2 of aSize)
      
set theSize to {width:sizeX, height:sizeY}
    end if
    
return theSize
  end getSizeOfImage


–指定サイズの画像を作成し、背景を指定色で塗る
  
on drawImageWithFilledColor(anImage, fillColor)
    set aSize to getSizeOfImage(anImage) of me
    
    
anImage’s lockFocus()
    
    
set theRect to {{x:0, y:0}, {width:(width of aSize), height:(height of aSize)}}
    
set theNSBezierPath to NSBezierPath’s bezierPath
    
theNSBezierPath’s appendBezierPathWithRect:theRect
    
fillColor’s |set|()
    
theNSBezierPath’s fill()
    
    
anImage’s unlockFocus()
    
    
return anImage
  end drawImageWithFilledColor


–aMaxValを最大値とする数値でNSColorを作成して返す
  
on makeNSColorFromRGBAval(redValue as integer, greenValue as integer, blueValue as integer, alphaValue as integer, aMaxVal as integer)
    set aRedCocoa to (redValue / aMaxVal) as real
    
set aGreenCocoa to (greenValue / aMaxVal) as real
    
set aBlueCocoa to (blueValue / aMaxVal) as real
    
set aAlphaCocoa to (alphaValue / aMaxVal) as real
    
set aColor to NSColor’s colorWithCalibratedRed:aRedCocoa green:aGreenCocoa blue:aBlueCocoa alpha:aAlphaCocoa
    
return aColor
  end makeNSColorFromRGBAval
  
end script

★Click Here to Open This Script 

Posted in Image | Tagged 10.13savvy 10.14savvy 10.15savvy NSBezierPath NSBitmapImageRep NSColor NSData NSImage NSURL | 3 Comments

指定のNSImageをグレースケールに

Posted on 11月 29, 2019 by Takaaki Naganoya

指定のNSImageをグレースケール画像にしたのちNSImageで出力するAppleScriptです。

GPUImageをプログラムから取り外すにあたって必要になったので用意しました。ふだん、画像変換系のScriptはNSImageで入力したのちにファイルに出力するように組んであったのですが、入出力ともにNSImageにしてあるプログラムが手元に存在していなかったので。

GPUImageが自分にとって使いやすかったのは、入出力にNSImageが使えたからだと思います。CGImageだとAppleScriptからアクセスできないですし、CIImageもアクセスできないわけではないですが、ちょっと遠回りになります。

AppleScript名:指定のNSImageをグレースケールに
— Created 2019-07-09 by Takaaki Naganoya
— 2019 Piyomaru Software
use AppleScript version "2.4"
use scripting additions
use framework "Foundation"
use framework "AppKit"

property NSString : a reference to current application’s NSString
property NSImage : a reference to current application’s NSImage
property NSColorSpace : a reference to current application’s NSColorSpace
property NSBitmapImageRep : a reference to current application’s NSBitmapImageRep
property NSColorRenderingIntentPerceptual : a reference to current application’s NSColorRenderingIntentPerceptual

set aFile to POSIX path of (choose file of type {"public.image"} with prompt "Select Image A")
set aImage to NSImage’s alloc()’s initWithContentsOfFile:aFile

set gImage to convNSIMageAsGray(aImage) of me

–NSImageをグレースケールに変換してNSImageで返す
on convNSIMageAsGray(anImage)
  set imageRep to anImage’s TIFFRepresentation()
  
set aRawimg to NSBitmapImageRep’s imageRepWithData:imageRep
  
  
set bRawimg to convBitMapToDeviceGrey(aRawimg) of me
  
  
set bImage to NSImage’s alloc()’s initWithSize:(bRawimg’s |size|())
  
bImage’s addRepresentation:bRawimg
  
  
return bImage
end convNSIMageAsGray

–NSBitmapImageRepをグレースケールに変換する
on convBitMapToDeviceGrey(aBitmap)
  set aSpace to NSColorSpace’s deviceGrayColorSpace()
  
set bRawimg to aBitmap’s bitmapImageRepByConvertingToColorSpace:aSpace renderingIntent:(NSColorRenderingIntentPerceptual)
  
return bRawimg
end convBitMapToDeviceGrey

★Click Here to Open This Script 

Posted in Color Image | Tagged 10.13savvy 10.14savvy 10.15savvy NSBitmapImageRep NSColorRenderingIntentPerceptual NSColorSpace NSImage NSString | Leave a comment

CIFilterとGPUImageで画像差分検出演算を比較

Posted on 11月 22, 2019 by Takaaki Naganoya

オープンソースのGPUImage.framework(GPUImage1)はAppleScriptから呼び出すのも簡単ですし、機能セットも充実しており、非常に重宝して使っています。

ただし、GPUImage自体はSwiftで書き直されたGPUImage2、OSの変更を受けてOpenGLではなくMetalを用いるように書き直され、いまだ発展途上のGPUImage3と変化してきました。

・GPUImageのバージョンと搭載フィルタ数の推移

GPUImage1:■■■■■■■■■■■■ 125
GPUImage2:■■■■■■■■■■ 100
GPUImage3:■■■■ 45

GPUImage2/3とバージョンが進むにつれて搭載フィルタ数が減っており、かつGPUImage2以降はAppleScriptから呼べないため、GPUImage3は(自分の)移行先になりません。

Objective-CベースのGPUImage1系のプログラムを使い続けるという判断をしている開発者は多いようで、Github上で派生プログラムが大量にみつかります。ただ、GPUImage1系はmacOSがOpenGLを完全廃止にしたとたんに動かなくなるはずです。

このため、GPUImage1系に依存しているプログラムは別の部品を呼び出して処理する必要が出てきます。

一番有望なのは、macOS標準搭載のCIFilter。CIFilterについては、実際にプログラムを組んでみて「組みにくい」という印象を受けていました(機能はちゃんとしていそうなものの、機能数にドキュメントが見合っていません)。あと、AppleScriptからパラメータを指定しにくいという印象を受けていました(パラメータに指定するオブジェクトにAppleScriptから直接指定できないものがあるので、少しラッパーを書く必要がある)。

その後、各種フィルタを呼び出す汎用ルーチンを整備することで、利用難易度を下げる努力を自主的に行なっています。

・GPUImage3とCoreImageの搭載フィルタ数の比較

GPUImage3:■■■■ 45
CoreImage:■■■■■■■■■■■■■■■■■ 174

そこで、実際に処理速度の面でどうなのか、CIFilterとGPUImageを比較するとどうなのか、調べてみました。

まずは、ざっくりありもののルーチンを引っ張り出してきて実行。どちらも期待どおりの動作をしてくれます。ただし、周辺ルーチンの仕様が違っていたのでそこも合わせます。

乱数ファイル名を作成する定番のshell commandの「uuidgen」はお手軽な反面、呼び出すのに時間がかかるので(手元の時間で0.1秒程度強)、より高速なCocoaのUUIDStringを用いる部品に置き換えました。

それぞれのフレームワークごとの挙動の違いもあります。

経験上、GPUImage.frameworkは初回実行時だけは時間が長くかかる傾向があり(1秒以上かかる)、2回目以降はより短い時間で処理できるようになることを確認しています。一方、CIFilterは初回およびそれ以降の呼び出しでもさほど処理時間が変わりません。

これら2つを実際に同じデータで同一条件下で比較してみたところ、同一の処理(画像の差分計算)を行なったかぎりでは処理時間に差はほとんど有意な差はありませんでした。

Script Geek 2.0.1によるScriptの処理時間比較

First:GPUImage Version , Second:CoreImage Version

MacBookPro10,1,  macOS Version 10.14.6 (Build 18G2012),  10 iterations
         First Run   Total Time    Average  
First        0.969        1.194      0.119
Second       0.121        1.221      0.122
Ratio (excluding first run): 1:1.02

自分のメインマシン(MacBook Pro Retina 2012、Core i7 2.66GHz、RAM 8GB)ではどちらもテストデータ(1192x1684pixel 8bit color image x 2)を0.1〜0.2秒程度で処理できています。個人的には十分なスピードが出ていると感じていますが、不満がある方はデータをRAM Disk上に置いたり、並列処理するとよいのではないでしょうか(シングルスレッド処理が高速なマシンを用意するというのが一番効きそうではあります。iMac 5Kの上位モデルとか)。

すべての類似フィルタで比較を行なったわけではありませんが(どれとどれが類似、という情報を整理するのに手間がかかる)、一番使っている「空白検出のためのヒストグラム計算フィルタ」はGPUImageにしか存在しませんでした(作成当時の話で現在はCoreImageにもCIAreaHistogramなどの機能があります)。

空白検出処理を高速に行えることで巨大なメリットが生じています。用途については枚挙にいとまがありませんが、Markdown書類をPDFにレンダリングした場合に、末尾に無用な空白のページが生じるケースがあり、これを検出しつつ末尾のページを自動削除することで、膨大な無駄手間を削減できています。空白検出処理を高速に行う手段を用意していないと、Photoshopで指定ページをレンダリングしてヒストグラムを計算する必要があるわけで、Photoshopのない環境に進出できなくなります。

空白画像の検出処理はGPUImage.framework抜きで(AppleScriptだけで)2〜3倍高速な処理を行える部品「画像の空白判定 v3」を作成済みなので、GPUImageなしでもさほど困りません。


▲同一環境にて、Photoshop CC 2018、GPUImage、AppleScriptだけで処理している「画像の空白判定 v3」で各種サイズの画像の空白検出を実行(単位:秒)

Objective-C/Swift系の開発者の方々に「GPUImageを経由してGPUのパワーを使って処理するよりも、AppleScript単体で空白の比較演算処理したほうが速かった」という事実をお話しすると、最初は「嘘つけ」というひきつった笑顔の反応なのですが、実際にコードを動かして動作原理を丁寧に説明すると分かっていただけるようです。

–> Download dffFilterDemoPrograms(Two Code-Signed AppleScript Applet Executables with Framework in its bundle)

AppleScript名:CoreImageでCIDifferenceBlendMode.scptd
—
–  Created by: Takaaki Naganoya
–  Created on: 2019/11/22
—
–  Copyright © 2019 Piyomaru Software, All Rights Reserved
—
use AppleScript version "2.4" — Yosemite (10.10) or later
use framework "Foundation"
use framework "AppKit"
use framework "QuartzCore"
use scripting additions

property CIFilter : a reference to current application’s CIFilter
property NSUUID : a reference to current application’s NSUUID
property |NSURL| : a reference to current application’s |NSURL|
property CIImage : a reference to current application’s CIImage
property NSString : a reference to current application’s NSString
property NSImage : a reference to current application’s NSImage
property NSPNGFileType : a reference to current application’s NSPNGFileType
property NSBitmapImageRep : a reference to current application’s NSBitmapImageRep

set mePath to POSIX path of (path to me)
set aImg to mePath & "Contents/Resources/book1_v2.0_0011.jpg"
set bImg to mePath & "Contents/Resources/book1_v2.1_0011.jpg"

–https://developer.apple.com/library/archive/documentation/
–GraphicsImaging/Reference/CoreImageFilterReference/index.html
–#//apple_ref/doc/filter/ci/CIDifferenceBlendMode
set cifilterName to "CIDifferenceBlendMode"

set imgRes to filterBlendImageFiles(aImg, bImg, cifilterName) of me

set outPath to retUUIDfilePath(POSIX path of (path to desktop), "png") of me
set sRes to saveNSImageAtPathAsPNG(imgRes, outPath) of me

–CIFilterをかけたJPEG画像を生成
on filterBlendImageFiles(aPath, bPath, aFilterName)
  –CIImage(A)を生成
  
set aURL to |NSURL|’s fileURLWithPath:aPath –Input
  
set aCIImage to CIImage’s alloc()’s initWithContentsOfURL:aURL
  
  
–CIImage(B)を生成
  
set bURL to |NSURL|’s fileURLWithPath:bPath –Input
  
set bCIImage to CIImage’s alloc()’s initWithContentsOfURL:bURL
  
  
— CIFilter をフィルタの名前で生成
  
set aFilter to CIFilter’s filterWithName:aFilterName
  
aFilter’s setDefaults() –各フィルタのパラメータはデフォルト
  
  
–Blend Filterを実行
  
aFilter’s setValue:(aCIImage) forKey:"inputImage"
  
aFilter’s setValue:(bCIImage) forKey:"inputBackgroundImage"
  
  
set aOutImage to aFilter’s valueForKey:"outputImage"
  
set outNSImage to convCIimageToNSImage(aOutImage) of me
  
return outNSImage
end filterBlendImageFiles

on retUUIDfilePath(aPath, aEXT)
  set aUUIDstr to (NSUUID’s UUID()’s UUIDString()) as string
  
set aPath to ((NSString’s stringWithString:aPath)’s stringByAppendingPathComponent:aUUIDstr)’s stringByAppendingPathExtension:aEXT
  
return aPath
end retUUIDfilePath

on convCIimageToNSImage(aCIImage)
  set aRep to NSBitmapImageRep’s alloc()’s initWithCIImage:aCIImage
  
set tmpSize to aRep’s |size|()
  
set newImg to NSImage’s alloc()’s initWithSize:tmpSize
  
newImg’s addRepresentation:aRep
  
return newImg
end convCIimageToNSImage

on convNSImageToCIimage(aNSImage)
  set tiffDat to aNSImage’s TIFFRepresentation()
  
set aRep to NSBitmapImageRep’s imageRepWithData:tiffDat
  
set newImg to CIImage’s alloc()’s initWithBitmapImageRep:aRep
  
return newImg
end convNSImageToCIimage

–NSImageを指定パスにPNG形式で保存
on saveNSImageAtPathAsPNG(anImage, outPath)
  set imageRep to anImage’s TIFFRepresentation()
  
set aRawimg to NSBitmapImageRep’s imageRepWithData:imageRep
  
set pathString to NSString’s stringWithString:outPath
  
set newPath to pathString’s stringByExpandingTildeInPath()
  
set myNewImageData to (aRawimg’s representationUsingType:(NSPNGFileType) |properties|:(missing value))
  
set aRes to (myNewImageData’s writeToFile:newPath atomically:true) as boolean
  
return aRes –true/false
end saveNSImageAtPathAsPNG

★Click Here to Open This Script 

AppleScript名:(比較用)GPUImageによる差分計算.scptd
—
–  Created by: Takaaki Naganoya
–  Created on: 2019/11/22
—
–  Copyright © 2019 Piyomaru Software, All Rights Reserved
—
use AppleScript version "2.4" — Yosemite (10.10) or later
use scripting additions
use framework "Foundation"
use framework "AppKit"
use framework "GPUImage" –https://github.com/BradLarson/GPUImage

property NSUUID : a reference to current application’s NSUUID
property |NSURL| : a reference to current application’s |NSURL|
property NSString : a reference to current application’s NSString
property NSImage : a reference to current application’s NSImage
property NSPNGFileType : a reference to current application’s NSPNGFileType
property NSBitmapImageRep : a reference to current application’s NSBitmapImageRep

set mePath to POSIX path of (path to me)
set aImagePath to mePath & "Contents/Resources/book1_v2.0_0011.jpg"
set bImagePath to mePath & "Contents/Resources/book1_v2.1_0011.jpg"

set imgRes to composeImageWithBlendFilter(aImagePath, bImagePath, "GPUImageDifferenceBlendFilter") of me

set outPath to retUUIDfilePath(POSIX path of (path to desktop), "png") of me
set sRes to saveNSImageAtPathAsPNG(imgRes, outPath) of me

on composeImageWithBlendFilter(aImagePath, bImagePath, filterName)
  set aImage to NSImage’s alloc()’s initWithContentsOfFile:aImagePath
  
set bImage to NSImage’s alloc()’s initWithContentsOfFile:bImagePath
  
  
set aClass to current application’s NSClassFromString(filterName)
  
set blendFilter to aClass’s alloc()’s init()
  
set pictureA to current application’s GPUImagePicture’s alloc()’s initWithImage:aImage
  
pictureA’s addTarget:blendFilter
  
pictureA’s processImage()
  
set imgRes to blendFilter’s imageByFilteringImage:bImage
  
return imgRes
end composeImageWithBlendFilter

on retUUIDfilePath(aPath, aEXT)
  set aUUIDstr to (NSUUID’s UUID()’s UUIDString()) as string
  
set aPath to ((NSString’s stringWithString:aPath)’s stringByAppendingPathComponent:aUUIDstr)’s stringByAppendingPathExtension:aEXT
  
return aPath
end retUUIDfilePath

–NSImageを指定パスにPNG形式で保存
on saveNSImageAtPathAsPNG(anImage, outPath)
  set imageRep to anImage’s TIFFRepresentation()
  
set aRawimg to NSBitmapImageRep’s imageRepWithData:imageRep
  
set pathString to NSString’s stringWithString:outPath
  
set newPath to pathString’s stringByExpandingTildeInPath()
  
set myNewImageData to (aRawimg’s representationUsingType:(NSPNGFileType) |properties|:(missing value))
  
set aRes to (myNewImageData’s writeToFile:newPath atomically:true) as boolean
  
return aRes –true/false
end saveNSImageAtPathAsPNG

★Click Here to Open This Script 

Posted in file filter Image | Tagged 10.14savvy 10.15savvy CIFilter CIImage NSBitmapImageRep NSImage NSPNGFileType NSString NSURL NSUUID | Leave a comment

アラートダイアログ上のWebViewに世界地図を表示 v2b

Posted on 11月 20, 2019 by Takaaki Naganoya

世界地図のSVGをHTMLReader.frameworkでparseして、目的のノードに塗り色の指定を行い、WkWebView上で表示するAppleScriptです。

–> Download selectCountry2(Code-signed AppleScript executable applet)

昨日のものがあくまでSVGのParseと表示が目的の試作品であったのに対し、本Scriptは連続してポップアップメニューから対象を選んで表示するというものです。

同様にmacOS 10.15.1上で作成しましたが、このバージョンのOS環境ではAppleScriptアプレットにFrameworkを入れてAppleScript内から呼び出すことが標準のランタイム(Script Editorから書き出した場合)では行えないようになっており、Script Debuggerから「Application(Enhanced)」で書き出さないと呼び出せないようです(これはちょっとひどいかも、、、、)。

世界地図はWikipediaから拾ってきたもので、ISO国コードではなく名称でIDが振ってあり、日本もJapanではなくHokkaido、Honshu、Shikoku、Kyushuuに分けて登録されています。


▲Script Editor上でサードパーティFramework呼び出しの動作ができているのは、この実行環境でSIPを解除してあるからです

AppleScript名:アラートダイアログ上のWebViewに世界地図を表示 v2b.scptd
—
–  Created by: Takaaki Naganoya
–  Created on: 2019/11/18
—
–  Copyright © 2019 Piyomaru Software, All Rights Reserved
—
use AppleScript version "2.4" — Yosemite (10.10) or later
use framework "Foundation"
use framework "AppKit"
use framework "HTMLReader" –https://github.com/nolanw/HTMLReader
use framework "WebKit"
use scripting additions

property |NSURL| : a reference to current application’s |NSURL|
property NSAlert : a reference to current application’s NSAlert
property NSColor : a reference to current application’s NSColor
property NSString : a reference to current application’s NSString
property NSImage : a reference to current application’s NSImage
property NSScreen : a reference to current application’s NSScreen
property NSButton : a reference to current application’s NSButton
property WKWebView : a reference to current application’s WKWebView
property WKUserScript : a reference to current application’s WKUserScript
property NSURLRequest : a reference to current application’s NSURLRequest
property HTMLDocument : a reference to current application’s HTMLDocument
property NSRunningApplication : a reference to current application’s NSRunningApplication
property NSUTF8StringEncoding : a reference to current application’s NSUTF8StringEncoding
property WKUserContentController : a reference to current application’s WKUserContentController
property WKWebViewConfiguration : a reference to current application’s WKWebViewConfiguration
property WKUserScriptInjectionTimeAtDocumentEnd : a reference to current application’s WKUserScriptInjectionTimeAtDocumentEnd

property theResult : 0
property returnCode : 0
property aWebView : missing value
property aLog : missing value
property tmpURL : ""

tell current application
  set mePath to ((path to me) as string) & "Contents:Resources:World_map_-_low_resolution.svg"
  
set svgCon to read (mePath as alias)
  
  
set aWidth to 950
  
set aHeight to 650


set paramObj to {myMessage:"Browse World map", mySubMessage:"This is a sample SVG World map", targContents:svgCon, myWidth:(aWidth), myHeight:(aHeight)}
  
–my browseLocalWebContents:paramObj
  
my performSelectorOnMainThread:"browseLocalWebContents:" withObject:(paramObj) waitUntilDone:true
  
return aLog
end tell

on browseLocalWebContents:paramObj
  set aMainMes to (myMessage of paramObj) as string
  
set aSubMes to (mySubMessage of paramObj) as string
  
set tmpURL to (targContents of paramObj) as string –local contents
  
set aWidth to (myWidth of paramObj) as integer
  
set aHeight to (myHeight of paramObj) as integer


set aView to current application’s NSView’s alloc()’s initWithFrame:(current application’s NSMakeRect(0, 0, aWidth, aHeight))
  
  
–Ppopup Buttonをつくる
  
set a1Button to current application’s NSPopUpButton’s alloc()’s initWithFrame:(current application’s NSMakeRect(0, aHeight – 26, 200, 24)) pullsDown:(false)
  
a1Button’s removeAllItems()
  
  
–Menuの中身を作る  
  
set aHTML to current application’s HTMLDocument’s documentWithString:(tmpURL)
  
set fList to (aHTML’s nodesMatchingSelector:"path")’s valueForKeyPath:"attributes.id"
  
set fList to fList’s sortedArrayUsingSelector:"compare:"
  
  
a1Button’s addItemWithTitle:"▼Select"
  
  
repeat with i in fList
    (a1Button’s addItemWithTitle:(i as string))
  end repeat
  
  
a1Button’s setTarget:(me)
  
a1Button’s setAction:("mySelector:")
  
a1Button’s setEnabled:(true)
  
  
set aWebView to makeWebViewAndLoadContents(tmpURL, aWidth, aHeight – 40) of me
  
  
aView’s addSubview:a1Button
  
aView’s addSubview:aWebView
  
  
— set up alert  
  
set theAlert to NSAlert’s alloc()’s init()
  
tell theAlert
    its setMessageText:aMainMes
    
its setInformativeText:aSubMes
    
its addButtonWithTitle:"OK"
    
its addButtonWithTitle:"Cancel"
    
its setAccessoryView:aView
  end tell
  
  
— show alert in modal loop
  
NSRunningApplication’s currentApplication()’s activateWithOptions:0
  
my performSelectorOnMainThread:"doModal:" withObject:(theAlert) waitUntilDone:true
  
  
–Stop Web View Action
  
set bURL to |NSURL|’s URLWithString:"about:blank"
  
set bReq to NSURLRequest’s requestWithURL:bURL
  
aWebView’s loadRequest:bReq
  
  
if (my returnCode as number) = 1001 then error number -128
end browseLocalWebContents:

on doModal:aParam
  set (my returnCode) to (aParam’s runModal()) as number
end doModal:

on viewDidLoad:aNotification
  return true
end viewDidLoad:

–Popup Action Handler
on actionHandler:sender
  set aTitle to title of sender as string
end actionHandler:

on fetchJSSourceString(aURL)
  set jsURL to |NSURL|’s URLWithString:aURL
  
set jsSourceString to NSString’s stringWithContentsOfURL:jsURL encoding:(NSUTF8StringEncoding) |error|:(missing value)
  
return jsSourceString
end fetchJSSourceString

on mySelector:aSender
  set targetCountry to (aSender’s title()) as string
  
  
set aHTML to current application’s HTMLDocument’s documentWithString:(tmpURL as string)
  
  
set eList to (aHTML’s nodesMatchingSelector:"path") as list
  
set fList to (aHTML’s nodesMatchingSelector:"path")’s valueForKeyPath:"attributes.id"
  
  
–Search Target Country
  
set aRes to (fList)’s indexOfObject:(targetCountry)
  
if (aRes = current application’s NSNotFound) or (aRes > 9.99999999E+8) then
    error "Target country not found"
  end if
  
  
set aRes to aRes + 1
  
  
–Rewrite target country’s fill color on SVG
  
set tmpNode to contents of item aRes of (eList)
  (
tmpNode’s setObject:"Red" forKeyedSubscript:"fill") –Change Target Country’s fill color
  
  
set svgCon to (tmpNode’s |document|()’s serializedFragment()) as string –HTMLReaderはこういう処理ができるところが好き
  
  
aWebView’s loadHTMLString:svgCon baseURL:(missing value)
end mySelector:

on makeWebViewAndLoadContents(aContents as string, aWidth as integer, aHeight as integer)
  set aConf to WKWebViewConfiguration’s alloc()’s init()
  
  
–指定URLのJavaScriptをFetch
  
set jsSource to my fetchJSSourceString(aContents)
  
set userScript to WKUserScript’s alloc()’s initWithSource:jsSource injectionTime:(WKUserScriptInjectionTimeAtDocumentEnd) forMainFrameOnly:true
  
set userContentController to WKUserContentController’s alloc()’s init()
  
userContentController’s addUserScript:(userScript)
  
aConf’s setUserContentController:userContentController
  
  
set aWebView to WKWebView’s alloc()’s initWithFrame:(current application’s NSMakeRect(0, 0, aWidth, aHeight)) configuration:aConf
  
aWebView’s setNavigationDelegate:me
  
aWebView’s setUIDelegate:me
  
aWebView’s setTranslatesAutoresizingMaskIntoConstraints:true
  
aWebView’s setOpaque:false
  
aWebView’s setBackgroundColor:(NSColor’s clearColor())
  
–aWebView’s scrollView()’s setBackgroundColor:(NSColor’s clearColor())
  
  
aWebView’s loadHTMLString:aContents baseURL:(missing value)
  
return aWebView
end makeWebViewAndLoadContents

★Click Here to Open This Script 

Posted in dialog geolocation GUI Image SVG | Tagged 10.13savvy 10.14savvy 10.15savvy HTMLDocument NSAlert NSButton NSColor NSImage NSRunningApplication NSScreen NSString NSURL NSURLRequest NSUTF8StringEncoding WKUserContentController WKUserScript WKUserScriptInjectionTimeAtDocumentEnd WKWebView WKWebViewConfiguration | Leave a comment

アラートダイアログ上のWebViewに円グラフを表示

Posted on 11月 18, 2019 by Takaaki Naganoya

アラートダイアログ上のWebViewにSVGで作った円グラフを表示するAppleScriptです。

Objective-Cで作られたチャート表示フレームワークなどを呼び出して試していますが、スクリプトエディタ上で作成したAppleScriptから呼び出すと、アニメーションしなかったり表示が行えなかったりといろいろ環境にフィットしていません。

# 逆をいえば、Xcode上でCocoa AppleScriptアプリケーションを作成した場合には割とチャート表示部品をそのまま使えます

そこで、単純なグラフ表示を行うようにレベルを下げ、SVGをWkWebView上に表示する形式にしてみました。

本Scriptでは最低限のサンプルを表示させていますが、SVGの組み立てをもう少し強化してグラフの背景を透明にできればいい感じになるのではないでしょうか。


▲世界地図あたりだといい感じに見えるかもしれません。当該の国だけ色を変えるような処理を仕込めば何かに使えそうです。

AppleScript名:アラートダイアログ上のWebViewに円グラフを表示.scptd
—
–  Created by: Takaaki Naganoya
–  Created on: 2019/11/18
—
–  Copyright © 2019 Piyomaru Software, All Rights Reserved
—
use AppleScript version "2.4" — Yosemite (10.10) or later
use framework "Foundation"
use framework "AppKit"
use framework "WebKit"
use scripting additions

property |NSURL| : a reference to current application’s |NSURL|
property NSAlert : a reference to current application’s NSAlert
property NSColor : a reference to current application’s NSColor
property NSString : a reference to current application’s NSString
property NSImage : a reference to current application’s NSImage
property NSScreen : a reference to current application’s NSScreen
property NSButton : a reference to current application’s NSButton
property WKWebView : a reference to current application’s WKWebView
property WKUserScript : a reference to current application’s WKUserScript
property NSURLRequest : a reference to current application’s NSURLRequest
property NSRunningApplication : a reference to current application’s NSRunningApplication
property NSUTF8StringEncoding : a reference to current application’s NSUTF8StringEncoding
property WKUserContentController : a reference to current application’s WKUserContentController
property WKWebViewConfiguration : a reference to current application’s WKWebViewConfiguration
property WKUserScriptInjectionTimeAtDocumentEnd : a reference to current application’s WKUserScriptInjectionTimeAtDocumentEnd

property theResult : 0
property returnCode : 0

–set svgCon to read (choose file)
set svgCon to retSampleSVG() of me

set paramObj to {myMessage:"Browse Pie Chart", mySubMessage:"This is a sample pie chart made by SVG", targContents:svgCon}
–my browseLocalWebContents:paramObj
my performSelectorOnMainThread:"browseLocalWebContents:" withObject:(paramObj) waitUntilDone:true

on browseLocalWebContents:paramObj
  set aMainMes to (myMessage of paramObj) as string
  
set aSubMes to (mySubMessage of paramObj) as string
  
set tmpURL to (targContents of paramObj) as string –local contents
  
  
set aWidth to 330
  
set aHeight to 430
  
  
–WebViewをつくる
  
set aConf to WKWebViewConfiguration’s alloc()’s init()
  
  
–指定URLのJavaScriptをFetch
  
set jsSource to my fetchJSSourceString(tmpURL)
  
set userScript to WKUserScript’s alloc()’s initWithSource:jsSource injectionTime:(WKUserScriptInjectionTimeAtDocumentEnd) forMainFrameOnly:true
  
set userContentController to WKUserContentController’s alloc()’s init()
  
userContentController’s addUserScript:(userScript)
  
aConf’s setUserContentController:userContentController
  
  
set aWebView to WKWebView’s alloc()’s initWithFrame:(current application’s NSMakeRect(0, 0, aWidth, aHeight – 100)) configuration:aConf
  
aWebView’s setNavigationDelegate:me
  
aWebView’s setUIDelegate:me
  
aWebView’s setTranslatesAutoresizingMaskIntoConstraints:true
  
aWebView’s setOpaque:false
  
aWebView’s setBackgroundColor:(NSColor’s clearColor())
  
–aWebView’s scrollView()’s setBackgroundColor:(NSColor’s clearColor())
  
  
aWebView’s loadHTMLString:tmpURL baseURL:(missing value)


— set up alert  
  
set theAlert to NSAlert’s alloc()’s init()
  
tell theAlert
    its setMessageText:aMainMes
    
its setInformativeText:aSubMes
    
its addButtonWithTitle:"OK"
    
its addButtonWithTitle:"Cancel"
    
its setAccessoryView:aWebView
  end tell
  
  
— show alert in modal loop
  
NSRunningApplication’s currentApplication()’s activateWithOptions:0
  
my performSelectorOnMainThread:"doModal:" withObject:(theAlert) waitUntilDone:true
  
  
–Stop Web View Action
  
set bURL to |NSURL|’s URLWithString:"about:blank"
  
set bReq to NSURLRequest’s requestWithURL:bURL
  
aWebView’s loadRequest:bReq
  
  
if (my returnCode as number) = 1001 then error number -128
end browseLocalWebContents:

on doModal:aParam
  set (my returnCode) to (aParam’s runModal()) as number
end doModal:

on viewDidLoad:aNotification
  return true
end viewDidLoad:

on fetchJSSourceString(aURL)
  set jsURL to |NSURL|’s URLWithString:aURL
  
set jsSourceString to NSString’s stringWithContentsOfURL:jsURL encoding:(NSUTF8StringEncoding) |error|:(missing value)
  
return jsSourceString
end fetchJSSourceString

on retSampleSVG()
  return "<svg xmlns=\"http://www.w3.org/2000/svg\" version=\"1.1\" width=\"300\" height=\"300\" fill-opacity=\"0.9\">
<path d=\"M 150,0 A 150,150 0 1,1 141.8986347236027,299.7810664959306 L 150,150 Z\" fill=\"#0153d8\" stroke=\"#fff\"></path>
<text x=\"170\" y=\"150\" fill=\"#fff\" font-size=\"20\">Piyomaru</text>
<text x=\"170\" y=\"190\" fill=\"#fff\" font-size=\"40\">50.86%</text>
</svg>"
end retSampleSVG

★Click Here to Open This Script 

Posted in dialog GUI | Tagged 10.13savvy 10.14savvy 10.15savvy NSAlert NSButton NSColor NSImage NSRunningApplication NSScreen NSString NSURL NSURLRequest NSUTF8StringEncoding WKUserContentController WKUserScript WKUserScriptInjectionTimeAtDocumentEnd WKWebView WKWebViewConfiguration | 1 Comment

指定画像をbase64エンコード文字列に変換

Posted on 10月 27, 2019 by Takaaki Naganoya

指定画像をbase64エンコーディング文字列に変換するAppleScriptです。

用途は、sdef(AppleScript用語辞書)に画像を突っ込む(ためのデータを作る)こと。それだけです。

ただ、あまりにでかい画像をbase64文字化して取得すると、スクリプトエディタが結果を表示したときに不安定になったり処理が返ってこなくなったりするので、文字列を取得する前にデータサイズを計算し、リサイズしてから文字列化するとか、他の形式(GIFなど)を用いてエンコードするなどのケアが必要になります。ねんのため。

元画像が何であっても、NSImageに読み込める画像なら(OSでサポートしている画像なら)読み込んで、PNG形式に変換したのちにBase64エンコード文字列に変換しています。


▲エンコードするにしても数10KBとかそのぐらいのファイルサイズの画像にしておかないと後がつらい


▲4K解像度の画像をbase64エンコードするとこんなに結果が巨大に

AppleScript名:指定画像をbase64エンコード文字列に変換.scptd
—
–  Created by: Takaaki Naganoya
–  Created on: 2019/10/25
—
–  Copyright © 2019 Piyomaru Software, All Rights Reserved
—
property NSString : a reference to current application’s NSString
property NSImage : a reference to current application’s NSImage
property NSPNGFileType : a reference to current application’s NSPNGFileType
property NSBitmapImageRep : a reference to current application’s NSBitmapImageRep
property NSUTF8StringEncoding : a reference to current application’s NSUTF8StringEncoding
property NSDataBase64EncodingEndLineWithLineFeed : a reference to current application’s NSDataBase64EncodingEndLineWithLineFeed

use AppleScript version "2.4" — Yosemite (10.10) or later
use framework "Foundation"
use scripting additions

set aFile to choose file of type {"public.image"}
set aStr to base64StringFromImageFile(aFile) of me

–Base64 Encode
on base64StringFromImageFile(aFile)
  set aPOSIX to POSIX path of aFile
  
set anImage to NSImage’s alloc()’s initWithContentsOfFile:aPOSIX
  
set imageRep to NSBitmapImageRep’s alloc()’s initWithData:(anImage’s TIFFRepresentation())
  
set aPNGdat to imageRep’s representationUsingType:(NSPNGFileType) |properties|:(missing value)
  
set base64Str to aPNGdat’s base64EncodedDataWithOptions:(NSDataBase64EncodingEndLineWithLineFeed)
  
set bStr to (NSString’s alloc()’s initWithData:base64Str encoding:(NSUTF8StringEncoding))
  
return bStr as string –or return NSString (delete as string) for speedy processing
end base64StringFromImageFile

★Click Here to Open This Script 

Posted in Image Text | Tagged 10.12savvy 10.13savvy 10.14savvy 10.15savvy NSBitmapImageRep NSDataBase64EncodingEndLineWithLineFeed NSImage NSPNGFileType NSString NSUTF8StringEncoding | Leave a comment

クリップボードに入れたIllustratorのオブジェクトをQRコード認識 v2

Posted on 7月 28, 2019 by Takaaki Naganoya

Adobe Illustrator書類上にある、QRコードのオブジェクトをクリップボード経由でNSImageに変換してQRコード認識するAppleScriptです。QRコード認識には、OS内蔵のCoreImageの機能を使っています。

# 実行前にAI書類上のQRコードオブジェクトを選択してコピー(Command-C)を実行してあることを前提条件としています。QRコードっぽいものであれば、別にAI書類上のオブジェクトでなくてもかまいません

昨日のScriptで、「そういえばなんでZXingObjCを使っているんだっけ?」と疑問を抱きました。理由ははっきりしています。CIDetectorではそのまま認識させてみたら認識しなかったためです。

QRコードやJANコード画像認識ソフトウェアは、割といろいろ条件がそろわないと認識してくれません。いわく、画像の大きさ、画像の解像度、画像の向き、コントラスト比、その他いろいろ。

スマホのカメラで認識する際にはユーザーが認識するまでいろいろ条件を変えて試行錯誤するので、ソフトウェアの力だけで認識させているわけではありません。いわば、人間をスマホの周辺機器として使用している状態です。

一方、静止画をソフトウェアで認識処理するさいには、人間が行っているフィードバック動作をソフトウェア側で行わなくてはなりません。

macOS内蔵のCIDetectorは、どうやら画像サイズに敏感なようで、いろいろリサイズして認識するかどうかチェックしなくてはなりません。逆に、最初からQRコードではないとわかっている画像を、しつこくQRコード認識し直しても時間の無駄です。

とりあえず、認識対象を2倍から4倍まで拡大して認識をリトライしています。実際にやってみたら、1倍では認識しなくても2倍で認識してくれました。実際に処理するデータ次第ですが、4倍まで試さなくても大丈夫なケースも多いことでしょう。

AppleScript名:rocogClipAsQR_v2.scptd
— Created 2019-07-28 by Takaaki Naganoya
— 2019 Piyomaru Software
use AppleScript version "2.4"
use scripting additions
use framework "Foundation"
use framework "AppKit"
use framework "CoreImage"

property CIImage : a reference to current application’s CIImage
property NSImage : a reference to current application’s NSImage
property CIDetector : a reference to current application’s CIDetector
property NSZeroRect : a reference to current application’s NSZeroRect
property NSDictionary : a reference to current application’s NSDictionary
property NSPasteboard : a reference to current application’s NSPasteboard
property NSCompositeCopy : a reference to current application’s NSCompositeCopy
property NSGraphicsContext : a reference to current application’s NSGraphicsContext
property NSBitmapImageRep : a reference to current application’s NSBitmapImageRep
property CIDetectorAccuracy : a reference to current application’s CIDetectorAccuracy
property CIDetectorTypeQRCode : a reference to current application’s CIDetectorTypeQRCode
property CIDetectorAccuracyHigh : a reference to current application’s CIDetectorAccuracyHigh
property NSImageInterpolationNone : a reference to current application’s NSImageInterpolationNone
property CIDetectorImageOrientation : a reference to current application’s CIDetectorImageOrientation
property NSCalibratedRGBColorSpace : a reference to current application’s NSCalibratedRGBColorSpace

set aRes to recogPasteboardASQR() of me

–クリップボードの内容をNSImageに
on recogPasteboardASQR()
  set aNSIMage to getClipboardASImage() of me
  
if aNSIMage = false then return false
  
  
set aRes to recogNSImageAsQRcodes(aNSIMage) of me –11: kBarcodeFormatQRCode
  
if aRes is not equal to {} then return aRes
  
  
–ループでQRコードとおぼしきイメージを拡大しつつQRコード認識
  
repeat with i from 2 to 4 –ここはチューニングの余地がある
    set bNSIMage to (my resizeNSImageWithoutAntlialias:aNSIMage toScale:(i as real))
    
set aRes to recogNSImageAsQRcodes(bNSIMage) of me
    
if aRes is not equal to {} then return aRes
  end repeat
  
  
return false
end recogPasteboardASQR

–NSImageをバーコードとして認識する
on recogNSImageAsQRcodes(aNSIMage)
  set imageRef to convNSImageToCIimage(aNSIMage) of me
  
  
— 検出器のオプションを NSDictonary で作成
  
set optDic1 to NSDictionary’s dictionaryWithObject:(CIDetectorAccuracyHigh) forKey:(CIDetectorAccuracy)
  
set faceDetector to CIDetector’s detectorOfType:(CIDetectorTypeQRCode) context:(missing value) options:optDic1
  
  
— QRコードの検出を行う際のオプションを NSDictonary で作成
  
set optDic2 to NSDictionary’s dictionaryWithObject:(CIDetectorImageOrientation) forKey:"Orientation"
  
  
— QRコード検出を実行
  
set faceArray to faceDetector’s featuresInImage:imageRef options:optDic2
  
set fList to {}
  
  
— 検出されたQRコードの位置とサイズをログに出力
  
repeat with i from 1 to (count of faceArray)
    set face to item i of faceArray
    
set bRec to (face’s messageString()) as string
    
–set cRec to retURLdecodedStrings(bRec) of me –URLエンコード対策
    
set the end of fList to bRec
  end repeat
  
  
return fList
end recogNSImageAsQRcodes

— クリップボードの内容をNSImageとして取り出して返す
on getClipboardASImage()
  set theNSPasteboard to NSPasteboard’s generalPasteboard()
  
set anArray to theNSPasteboard’s readObjectsForClasses:({NSImage}) options:(missing value)
  
if anArray = missing value or (anArray as list) = {} then return false
  
set aRes to anArray’s objectAtIndex:0
  
return aRes
end getClipboardASImage

—
on convNSImageToCIimage(aNSIMage)
  set tiffDat to aNSIMage’s TIFFRepresentation()
  
set aRep to NSBitmapImageRep’s imageRepWithData:tiffDat
  
set newImg to CIImage’s alloc()’s initWithBitmapImageRep:aRep
  
return newImg
end convNSImageToCIimage

–NSImageを指定倍率で拡大(アンチエイリアス解除状態で)
on resizeNSImageWithoutAntlialias:aSourceImg toScale:imgScale
  set aSize to aSourceImg’s |size|()
  
set aWidth to (aSize’s width) * imgScale
  
set aHeight to (aSize’s height) * imgScale
  
  
set aRep to NSBitmapImageRep’s alloc()’s initWithBitmapDataPlanes:(missing value) pixelsWide:aWidth pixelsHigh:aHeight bitsPerSample:8 samplesPerPixel:4 hasAlpha:true isPlanar:false colorSpaceName:(NSCalibratedRGBColorSpace) bytesPerRow:0 bitsPerPixel:0
  
  
set newSize to {width:aWidth, height:aHeight}
  
aRep’s setSize:newSize
  
  
NSGraphicsContext’s saveGraphicsState()
  
  
set theContext to NSGraphicsContext’s graphicsContextWithBitmapImageRep:aRep
  
NSGraphicsContext’s setCurrentContext:theContext
  
theContext’s setShouldAntialias:false
  
theContext’s setImageInterpolation:(NSImageInterpolationNone)
  
  
aSourceImg’s drawInRect:(current application’s NSMakeRect(0, 0, aWidth, aHeight)) fromRect:(NSZeroRect) operation:(NSCompositeCopy) fraction:(1.0)
  
  
NSGraphicsContext’s restoreGraphicsState()
  
  
set newImg to NSImage’s alloc()’s initWithSize:newSize
  
newImg’s addRepresentation:aRep
  
  
return newImg
end resizeNSImageWithoutAntlialias:toScale:

★Click Here to Open This Script 

Posted in Clipboard Image list QR Code | Tagged 10.12savvy 10.13savvy 10.14savvy CIDetector CIDetectorAccuracy CIDetectorAccuracyHigh CIDetectorImageOrientation CIDetectorTypeQRCode CIImage NSBitmapImageRep NSCalibratedRGBColorSpace NSCompositeCopy NSDictionary NSGraphicsContext NSImage NSImageInterpolationNone NSPasteboard NSZeroRect | 4 Comments

クリップボードに入れたIllustratorのオブジェクトをQRコード認識

Posted on 7月 27, 2019 by Takaaki Naganoya

Adobe Illustrator書類上にある、QRコードのオブジェクトをクリップボード経由でNSImageに変換してQRコード認識するAppleScriptです。QRコード認識には、オープンソースのZXingObjCをCocoa Framework化したものを使っています。

–> Download recogClipAsQR.scptd (Including Framework)

ことのはじまりは、Adobe Illustrator書類上になにがしかのプラグインで作成されたとおぼしきQRコードのオブジェクトが配置されていたことです。これをデコードして内容が正しいか、デコードしたURLは実在するものかといったチェックをする必要がありました(もっと大きなプログラムの一部として)。

これはけっこうな難問でした。AI書類全体をPDFや他の形式の画像として書き出したものを認識させてみたものの、なかなかQRコードとして認識してくれません。

いろいろ試行錯誤していくうちに、AI書類を構成する各部品ごとに画像書き出しして認識させると、QRコードとして認識したりしました。

結局、AI書類上の各種オブジェクト(QRコードはグループ化されていたので、group item)にアクセスし、クリップボード経由で(いったんコピーして)画像に書き出すと認識してくれました。

ファイルに書き出すオーバーヘッドを減らしたかったので、クリップボードの内容をそのままNSImageとして取得。ここで、AppleScriptの標準搭載命令(the clipboard)からCocoaのNSPasteBoardを使うように変更したことで、大幅なスピードアップを図れました。クリップボード経由でデータ変換するやりかたは、データが小さければ手軽かつ便利でいいのですが、データが大きくなると処理に時間がかかってたいへんです。主にClassic Mac OSの時代によく使われていた方法でもあります(macOS上でもごくたまに使いますが、こういうやり方をなくそうというのがClassic Mac OSからMac OS Xへの移行時のScripter間の共通認識だったので、なるべく避けていたんですね)。

かくして、Adobe Illustrator上でコピーしておいたQRコードのオブジェクトを、クリップボード(ペーストボード)経由でQRコードとしてデコードするものができ、便利に使っています。

本Scriptは、

macOS 10.12.x:スクリプトエディタ、Script Debugger
macOS 10.13.x:スクリプトエディタ、Script Debugger
macOS 10.14.x:Script Debugger、マシンのSIPを解除してあればスクリプトエディタ上でも動作

という環境で動作します。macOS 10.14.x上でSIPを解除していない状態でも、アプレット書き出しした状態であればバンドル内のFrameworkを読み込んで動作します。

AppleScript名:recogClipAsQR.scptd
— Created 2019-07-20 by Takaaki Naganoya
— 2019 Piyomaru Software
use AppleScript version "2.4"
use scripting additions
use framework "Foundation"
use framework "AppKit"
use framework "ZXingObjC" –https://github.com/TheLevelUp/ZXingObjC

property NSImage : a reference to current application’s NSImage
property NSPasteboard : a reference to current application’s NSPasteboard
property ZXDecodeHints : a reference to current application’s ZXDecodeHints
property ZXBinaryBitmap : a reference to current application’s ZXBinaryBitmap
property ZXHybridBinarizer : a reference to current application’s ZXHybridBinarizer
property ZXMultiFormatReader : a reference to current application’s ZXMultiFormatReader
property ZXCGImageLuminanceSource : a reference to current application’s ZXCGImageLuminanceSource

set qrRes to recogClipboardASQR() of me
–> {"http://xxxxxxxxxxxxxxxxxxx", 11}

–クリップボードの内容をNSImageに
on recogClipboardASQR()
  set aNSIMage to my getClipboardASImage()
  
if aNSIMage = false then return false
  
set aRes to recogNSIMageAsBarcodes(aNSIMage, 11) of me –11: kBarcodeFormatQRCode
  
return aRes
end recogClipboardASQR

–NSImageをQRコードとして認識する
on recogNSIMageAsBarcodes(aNSIMage, aHintType)
  set aSource to ZXCGImageLuminanceSource’s alloc()’s initWithNSImage:(aNSIMage)
  
set aBitmap to ZXBinaryBitmap’s binaryBitmapWithBinarizer:(ZXHybridBinarizer’s binarizerWithSource:(aSource))
  
  
–https://github.com/zxingify/zxingify-objc/blob/master/ZXingObjC/core/ZXBarcodeFormat.h
  
set aHints to ZXDecodeHints’s hints()
  
aHints’s addPossibleFormat:(aHintType)
  
  
set aReader to ZXMultiFormatReader’s reader()
  
set aResult to aReader’s decode:(aBitmap) hints:(aHints) |error|:(missing value)
  
  
if aResult is equal to missing value then return false
  
set aCon to (aResult’s |text|()) as string
  
set aFormat to aResult’s barcodeFormat()
  
  
return {aCon, aFormat}
end recogNSIMageAsBarcodes

— クリップボードの内容をNSImageとして取り出して返す
on getClipboardASImage()
  set theNSPasteboard to NSPasteboard’s generalPasteboard()
  
set anArray to theNSPasteboard’s readObjectsForClasses:({NSImage}) options:(missing value)
  
if anArray = missing value or (anArray as list) = {} then return false
  
set aRes to anArray’s objectAtIndex:0
  
return aRes
end getClipboardASImage

★Click Here to Open This Script 

Posted in Clipboard file Image QR Code | Tagged 10.12savvy 10.13savvy 10.14savvy NSImage NSPasteboard | 1 Comment

指定画像をPNG形式(グレースケール)で保存

Posted on 7月 9, 2019 by Takaaki Naganoya

指定の画像ファイルをグレースケールのPNG画像ファイルに変換するAppleScriptです。

Appleが配布しているMNISTの手書き数字画像の認識CoreMLモデルをCocoa Framework化してみたところ、グレースケールの画像を要求されたため、画像をグレースケール化するルーチンを作ってみました。

結局、MNISTの手書き画像認識はうまく行かなかったのですが(全部「0」が返ってくる、、、)、グレースケール変換ルーチンは実用的だったので載せておくことにしました。

AppleScript名:指定画像をPNG形式(グレースケール)で保存
— Created 2019-07-09 by Takaaki Naganoya
— 2019 Piyomaru Software
use AppleScript version "2.4"
use scripting additions
use framework "Foundation"
use framework "AppKit"

property NSUUID : a reference to current application’s NSUUID
property NSString : a reference to current application’s NSString
property NSImage : a reference to current application’s NSImage
property NSColorSpace : a reference to current application’s NSColorSpace
property NSPNGFileType : a reference to current application’s NSPNGFileType
property NSBitmapImageRep : a reference to current application’s NSBitmapImageRep
property NSColorRenderingIntentPerceptual : a reference to current application’s NSColorRenderingIntentPerceptual

set aFile to POSIX path of (choose file of type {"public.image"} with prompt "Select Image A")
set aImage to NSImage’s alloc()’s initWithContentsOfFile:aFile

set fRes to retUUIDfilePath(aFile, "png") of me
set sRes to saveNSImageAtPathAsGreyPNG(aImage, fRes) of me

–指定ファイルパスを元にUUIDのファイル名、指定拡張子をつけたファイルパスを作成して返す
on retUUIDfilePath(aPath, aEXT)
  set aUUIDstr to (NSUUID’s UUID()’s UUIDString()) as string
  
set aPath to ((NSString’s stringWithString:aPath)’s stringByDeletingLastPathComponent()’s stringByAppendingPathComponent:aUUIDstr)’s stringByAppendingPathExtension:aEXT
  
return aPath
end retUUIDfilePath

–NSImageを指定パスにPNG形式で保存
on saveNSImageAtPathAsGreyPNG(anImage, outPath)
  set imageRep to anImage’s TIFFRepresentation()
  
set aRawimg to NSBitmapImageRep’s imageRepWithData:imageRep
  
  
–ビットマップをグレースケール変換
  
set bRawimg to convBitMapToDeviceGrey(aRawimg) of me
  
  
set pathString to NSString’s stringWithString:outPath
  
set newPath to pathString’s stringByExpandingTildeInPath()
  
  
set myNewImageData to (bRawimg’s representationUsingType:(NSPNGFileType) |properties|:(missing value))
  
set aRes to (myNewImageData’s writeToFile:newPath atomically:true) as boolean
  
return aRes –true/false
end saveNSImageAtPathAsGreyPNG

–NSBitmapImageRepをグレースケールに変換する
on convBitMapToDeviceGrey(aBitmap)
  set aSpace to NSColorSpace’s deviceGrayColorSpace()
  
set bRawimg to aBitmap’s bitmapImageRepByConvertingToColorSpace:aSpace renderingIntent:(NSColorRenderingIntentPerceptual)
  
return bRawimg
end convBitMapToDeviceGrey

★Click Here to Open This Script 

AppleScript名:指定画像をグレースケールのNSImageに変換
— Created 2019-07-09 by Takaaki Naganoya
— 2019 Piyomaru Software
use AppleScript version "2.4"
use scripting additions
use framework "Foundation"
use framework "AppKit"

property NSUUID : a reference to current application’s NSUUID
property NSString : a reference to current application’s NSString
property NSImage : a reference to current application’s NSImage
property NSColorSpace : a reference to current application’s NSColorSpace
property NSBitmapImageRep : a reference to current application’s NSBitmapImageRep
property NSColorRenderingIntentDefault : a reference to current application’s NSColorRenderingIntentDefault

set aFile to POSIX path of (choose file of type {"public.image"} with prompt "Select Image")
set aImage to NSImage’s alloc()’s initWithContentsOfFile:aFile

set nsImageRes to convNSImageAsGrey(aImage) of me

–NSImageをグレースケールに変換する(NSImageで入出力)
on convNSImageAsGrey(anImage)
  set imageRep to anImage’s TIFFRepresentation()
  
set aRawimg to NSBitmapImageRep’s imageRepWithData:imageRep
  
set aSpace to NSColorSpace’s deviceGrayColorSpace()
  
set bRawimg to aRawimg’s bitmapImageRepByConvertingToColorSpace:aSpace renderingIntent:(NSColorRenderingIntentDefault)
  
set outImage to NSImage’s alloc()’s initWithSize:(bRawimg’s |size|())
  
outImage’s addRepresentation:(bRawimg)
  
return outImage
end convNSImageAsGrey

★Click Here to Open This Script 

Posted in Color file File path Image | Tagged 10.11savvy 10.12savvy 10.13savvy 10.14savvy NSBitmapImageRep NSColorRenderingIntentPerceptual NSColorSpace NSImage NSPNGFileType NSString NSUUID | Leave a comment

Keynoteで選択中のスライドだけをデスクトップに画像で書き出す

Posted on 6月 20, 2019 by Takaaki Naganoya

Keynoteでオープン中の最前面の書類で、選択中のスライドだけをデスクトップにPNG画像で書き出すAppleScriptです。Keynote 9.xを必要とします(macOS 10.13以降)。

ちょっとした説明のためにKeynoteの資料の一部だけを画面上でキャプチャして、メールなどに添付して送ることはよくあります(全部送ると量がおおすぎたり、焦点がぼやけたり)。

そこで、複数枚のスライド(ページ)を選択しておくと、それらのみを画像書き出しするAppleScriptを作ってみました。Keynoteにそんな機能はないのですが、「選択中のページ番号」は取れるので、書類全体をPDF書き出ししておいて、書き出したPDFから指定ページを画像として再書き出しを行い、PDFを削除しています。

手品のように見える処理でも、実際に行える機能を組み合わせて地道に作っているだけです。問題は、「手品」が実は地道な調査と機能確認、こまごまとしたライブラリの整備の末に実現されていることが、一般の方にはわかりにくいということでしょうか(いきなり手品を求められて絶句すること多し)。

仕事の合間に作ったので、割と雑な作りです。書き出し画像のファイル名衝突チェックなどは入れていません。

それでも、スクリプトメニューに入れて利用するとなかなか便利です。

AppleScript名:Keynoteで選択中のスライドだけをデスクトップに画像で書き出す.scptd
—
–  Created by: Takaaki Naganoya
–  Created on: 2019/06/20
—
–  Copyright © 2019 Piyomaru Software, All Rights Reserved
—
use AppleScript version "2.7" — 10.13 or later
use framework "Foundation"
use framework "Quartz"
use framework "AppKit"
use scripting additions

set dtPath to (path to desktop) as string

tell application "Keynote"
  set aVer to version
  
  
considering numeric strings
    if aVer < "9.0" then
      display dialog "Too old version for this Script." buttons {"OK"} default button 1 with icon 1
      
return
    end if
  end considering
  
  
tell front document
    set aSel to selection –選択中のスライドオブジェクトへの参照がリストで入る
    
set pList to {}
    
repeat with i in aSel
      set tmpPage to slide number of i
      
set the end of pList to tmpPage
    end repeat
    
  end tell
end tell

–Keynote書類を指定フォルダにPDF書き出し(全ページ書き出し)
set savedPDFPath to exportKeynoteDocToPDF(dtPath) of me
if savedPDFPath = false then return –Error

set aPOSIXpath to POSIX path of savedPDFPath

–書き出したPDFから、部分的にPNG画像に書き出す
repeat with p in pList
  –PDFの指定ページをNSImageとして取り出す
  
set tmpNSImage to getNSImageFromPDFPage(aPOSIXpath, p) of me
  
  
–PDFの書き出しファイル名に子番号にスライド番号をつける
  
set bPath to addStringbeforeExtension(aPOSIXpath, "_" & (p as string)) of me
  
  
–PDF書き出しファイル名に
  
set newPath to repFilePathExtension(bPath, ".png") of me
  
  
–指定のNSImageを指定のパスにPNG形式で保存
  
set sRes to saveNSImageAtPathAsPNG(tmpNSImage, newPath) of me
end repeat

–書き出したPDFを削除
tell application "Finder"
  delete savedPDFPath
end tell

–Keynote書類からPDF書き出し
on exportKeynoteDocToPDF(targFolderPath as string)
  tell application "Keynote"
    set dCount to count every document
    
if dCount = 0 then
      return false
    end if
    
set aPath to file of document 1
  end tell
  
  
set curPath to (current application’s NSString’s stringWithString:(POSIX path of aPath))’s lastPathComponent()’s stringByDeletingPathExtension()’s stringByAppendingString:".pdf"
  
set outPath to (targFolderPath & curPath)
  
  
tell application "Keynote"
    set anOpt to {class:export options, export style:IndividualSlides, all stages:false, skipped slides:true, PDF image quality:Best}
    
export document 1 to file outPath as PDF with properties anOpt
  end tell
  
  
return (outPath as alias)
  
end exportKeynoteDocToPDF

–指定のPDFから、指定のページをNSImageで返す
on getNSImageFromPDFPage(aPOSIX, aPage as number)
  set aURL to (current application’s |NSURL|’s fileURLWithPath:aPOSIX)
  
  
set aPDFdoc to current application’s PDFDocument’s alloc()’s initWithURL:aURL
  
set pCount to aPDFdoc’s pageCount()
  
  
set compFactor to 1.0 –1.0 — 0.0 = max jpeg compression, 1.0 = none
  
  
–Detect Retina Environment
  
set retinaF to current application’s NSScreen’s mainScreen()’s backingScaleFactor()
  
if retinaF = 1.0 then
    set aScale to 2.0 –Non Retina Env
  else
    set aScale to 1.0 –Retina Env
  end if
  
  
set thisPage to (aPDFdoc’s pageAtIndex:(aPage – 1))
  
set anNSImage to (current application’s NSImage’s alloc()’s initWithData:(thisPage’s dataRepresentation()))
  
  
if anNSImage = missing value then error "Error in getting imagerep from PDF"
  
  
return anNSImage
end getNSImageFromPDFPage

–ファイル名の拡張子の直前に子番号的な文字列を入れる
on addStringbeforeExtension(aPath, extraString)
  set pathString to current application’s NSString’s stringWithString:aPath
  
set theExtension to pathString’s pathExtension()
  
set thePathNoExt to pathString’s stringByDeletingPathExtension()
  
set newPath to (thePathNoExt’s stringByAppendingString:extraString)’s stringByAppendingPathExtension:theExtension
  
return newPath as string
end addStringbeforeExtension

–与えられたパスの拡張子を付け替える
on repFilePathExtension(origPath, newExt)
  set aName to current application’s NSString’s stringWithString:origPath
  
set theExtension to aName’s pathExtension()
  
if (theExtension as string) is not equal to "" then
    set thePathNoExt to aName’s stringByDeletingPathExtension()
    
set newName to (thePathNoExt’s stringByAppendingString:newExt)
  else
    set newName to (aName’s stringByAppendingString:newExt)
  end if
  
return newName as string
end repFilePathExtension

–NSImageを指定パスにPNG形式で保存
on saveNSImageAtPathAsPNG(anImage, outPath)
  set imageRep to anImage’s TIFFRepresentation()
  
set aRawimg to current application’s NSBitmapImageRep’s imageRepWithData:imageRep
  
set pathString to current application’s NSString’s stringWithString:outPath
  
set newPath to pathString’s stringByExpandingTildeInPath()
  
set myNewImageData to (aRawimg’s representationUsingType:(current application’s NSPNGFileType) |properties|:(missing value))
  
set aRes to (myNewImageData’s writeToFile:newPath atomically:true) as boolean
  
return aRes –true/false
end saveNSImageAtPathAsPNG

★Click Here to Open This Script 

Posted in file File path Image PDF | Tagged 10.13savvy 10.14savvy Finder Keynote NSBitmapImageRep NSImage NSScreen NSString NSURL PDFDocument | Leave a comment

Post navigation

  • Older posts

電子書籍(PDF)をオンラインストアで販売中!

Google Search

Popular posts

  • 開発機としてM2 Mac miniが来たのでガチレビュー
  • macOS 13.6.5 AS系のバグ、一切直らず
  • CotEditorで2つの書類の行単位での差分検出
  • Apple純正マウス、キーボードのバッテリー残量取得
  • macOS 15, Sequoia
  • ディスプレイをスリープ状態にして処理続行
  • 初心者がつまづきやすい「log」コマンド
  • Adobe AcrobatをAppleScriptから操作してPDF圧縮
  • 与えられた文字列の1D Listのすべての順列組み合わせパターン文字列を返す v3(ベンチマーク用)
  • 指定のWordファイルをPDFに書き出す
  • メキシカンハットの描画
  • macOS 13 TTS環境の変化について
  • 2023年に書いた価値あるAppleScript
  • Pixelmator Pro v3.6.4でAppleScriptからの操作時の挙動に違和感が
  • AdobeがInDesign v19.4からPOSIX pathを採用
  • Pages本執筆中に、2つの書類モード切り替えに気がついた
  • 可変次元のベクトルに対応したコサイン類似度計算
  • Safariで「プロファイル」機能を使うとAppleScriptの処理に影響
  • Cocoa Scripting Course 続刊計画
  • macOS 13.6.2アップデート Cocoa-AppleScript Applet修正はなし

Tags

10.11savvy (1101) 10.12savvy (1242) 10.13savvy (1391) 10.14savvy (586) 10.15savvy (437) 11.0savvy (281) 12.0savvy (201) 13.0savvy (139) 14.0savvy (87) 15.0savvy (63) CotEditor (63) Finder (51) iTunes (19) Keynote (112) NSAlert (60) NSArray (51) NSBitmapImageRep (20) NSBundle (20) NSButton (34) NSColor (51) NSDictionary (27) NSFileManager (23) NSFont (19) NSImage (41) NSJSONSerialization (21) NSMutableArray (62) NSMutableDictionary (21) NSPredicate (36) NSRunningApplication (56) NSScreen (30) NSScrollView (22) NSString (117) NSURL (97) NSURLRequest (23) NSUTF8StringEncoding (30) NSView (33) NSWorkspace (20) Numbers (67) Pages (51) Safari (44) Script Editor (26) WKUserContentController (21) WKUserScript (20) WKWebView (23) WKWebViewConfiguration (22)

カテゴリー

  • 2D Bin Packing
  • 3D
  • AirDrop
  • AirPlay
  • Animation
  • AppleScript Application on Xcode
  • Beginner
  • Benchmark
  • beta
  • Bluetooth
  • Books
  • boolean
  • bounds
  • Bug
  • Calendar
  • call by reference
  • Clipboard
  • Code Sign
  • Color
  • Custom Class
  • dialog
  • diff
  • drive
  • Droplet
  • exif
  • file
  • File path
  • filter
  • folder
  • Font
  • Font
  • GAME
  • geolocation
  • GUI
  • GUI Scripting
  • Hex
  • History
  • How To
  • iCloud
  • Icon
  • Image
  • Input Method
  • Internet
  • iOS App
  • JavaScript
  • JSON
  • JXA
  • Keychain
  • Keychain
  • Language
  • Library
  • list
  • Locale
  • Localize
  • Machine Learning
  • Map
  • Markdown
  • Menu
  • Metadata
  • MIDI
  • MIME
  • Natural Language Processing
  • Network
  • news
  • Noification
  • Notarization
  • Number
  • Object control
  • OCR
  • OSA
  • parallel processing
  • PDF
  • Peripheral
  • PRODUCTS
  • QR Code
  • Raw AppleEvent Code
  • Record
  • rectangle
  • recursive call
  • regexp
  • Release
  • Remote Control
  • Require Control-Command-R to run
  • REST API
  • Review
  • RTF
  • Sandbox
  • Screen Saver
  • Script Libraries
  • sdef
  • search
  • Security
  • selection
  • shell script
  • Shortcuts Workflow
  • Sort
  • Sound
  • Spellchecker
  • Spotlight
  • SVG
  • System
  • Tag
  • Telephony
  • Text
  • Text to Speech
  • timezone
  • Tools
  • Update
  • URL
  • UTI
  • Web Contents Control
  • WiFi
  • XML
  • XML-RPC
  • イベント(Event)
  • 未分類

アーカイブ

  • 2024年11月
  • 2024年10月
  • 2024年9月
  • 2024年8月
  • 2024年7月
  • 2024年6月
  • 2024年5月
  • 2024年4月
  • 2024年3月
  • 2024年2月
  • 2024年1月
  • 2023年12月
  • 2023年11月
  • 2023年10月
  • 2023年9月
  • 2023年8月
  • 2023年7月
  • 2023年6月
  • 2023年5月
  • 2023年4月
  • 2023年3月
  • 2023年2月
  • 2023年1月
  • 2022年12月
  • 2022年11月
  • 2022年10月
  • 2022年9月
  • 2022年8月
  • 2022年7月
  • 2022年6月
  • 2022年5月
  • 2022年4月
  • 2022年3月
  • 2022年2月
  • 2022年1月
  • 2021年12月
  • 2021年11月
  • 2021年10月
  • 2021年9月
  • 2021年8月
  • 2021年7月
  • 2021年6月
  • 2021年5月
  • 2021年4月
  • 2021年3月
  • 2021年2月
  • 2021年1月
  • 2020年12月
  • 2020年11月
  • 2020年10月
  • 2020年9月
  • 2020年8月
  • 2020年7月
  • 2020年6月
  • 2020年5月
  • 2020年4月
  • 2020年3月
  • 2020年2月
  • 2020年1月
  • 2019年12月
  • 2019年11月
  • 2019年10月
  • 2019年9月
  • 2019年8月
  • 2019年7月
  • 2019年6月
  • 2019年5月
  • 2019年4月
  • 2019年3月
  • 2019年2月
  • 2019年1月
  • 2018年12月
  • 2018年11月
  • 2018年10月
  • 2018年9月
  • 2018年8月
  • 2018年7月
  • 2018年6月
  • 2018年5月
  • 2018年4月
  • 2018年3月
  • 2018年2月

https://piyomarusoft.booth.pm/items/301502

メタ情報

  • ログイン
  • 投稿フィード
  • コメントフィード
  • WordPress.org

Forum Posts

  • 人気のトピック
  • 返信がないトピック

メタ情報

  • ログイン
  • 投稿フィード
  • コメントフィード
  • WordPress.org
Proudly powered by WordPress
Theme: Flint by Star Verte LLC