Menu

Skip to content
AppleScriptの穴
  • Home
  • Products
  • Books
  • Docs
  • Events
  • Forum
  • About This Blog
  • License
  • 仕事依頼

AppleScriptの穴

Useful & Practical AppleScript archive. Click '★Click Here to Open This Script' Link to download each AppleScript

タグ: NSImage

Keynote書類のテキスト色を置換

Posted on 6月 9, 2019 by Takaaki Naganoya

最前面のKeynote書類の文字色を置換するAppleScriptです。

# 初出時にはmacOS 10.13であったため、スクリプトエディタ上からも野良Framework呼び出しができましたが、macOS 10.14以降ではSIPを解除するかScript Debugger上で実行する必要があります

Keynoteは文字色の置換をする機能が実装されていないので、個別に手で色を変更するか、あるいはスタイルを編集して一括で修正するやり方になります。

そこで、AppleScriptで色置換を行う処理を書いてみました。表の背景色を置換する処理を書いたときの部品を大幅に使いまわしています。

文字色の取得や判定は、テキストアイテムの1文字目の情報で判断しています。途中で色を変更しているような場合にはうまく検出できません(処理スピードを重視したことと、自分の利用方法の範囲ではそういう文字ごとに異なる色を指定するところまではサポートしなくてよいと考えたためです。仕事ならもうちょっと真面目に作り込むかもしれませんが、、、、)。

ポップアップメニュー中の色名の動的な推定に、オープンソースの「DBColorNames」をフレームワーク化した
「dbColNamesKit.framework」を利用しています。

–> dbColNamesKit.framework (To ~/Library/Frameworks)
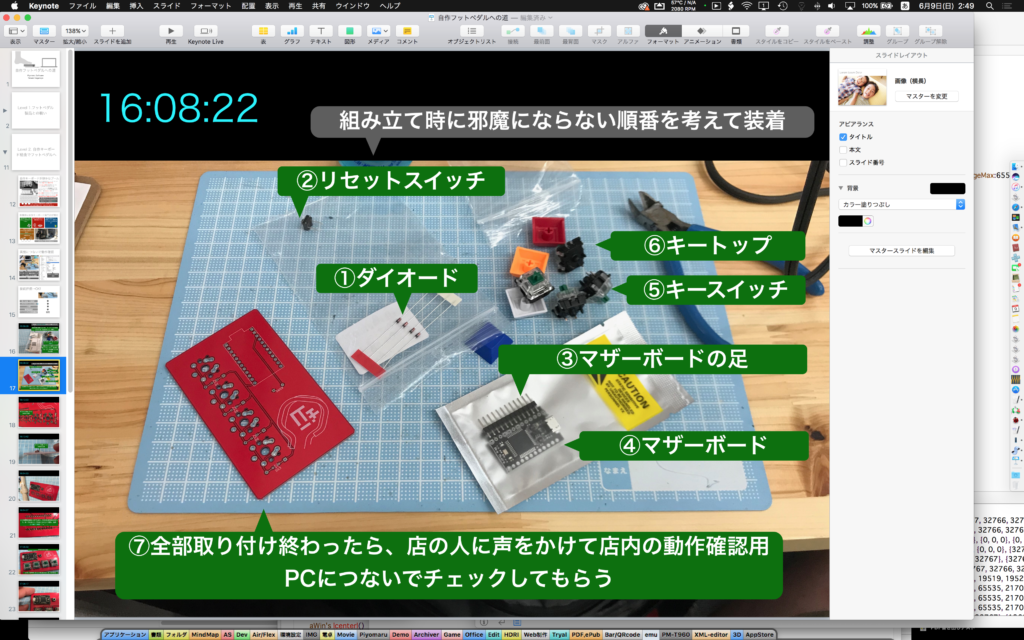

▲左上の時刻部分の色を置換したい
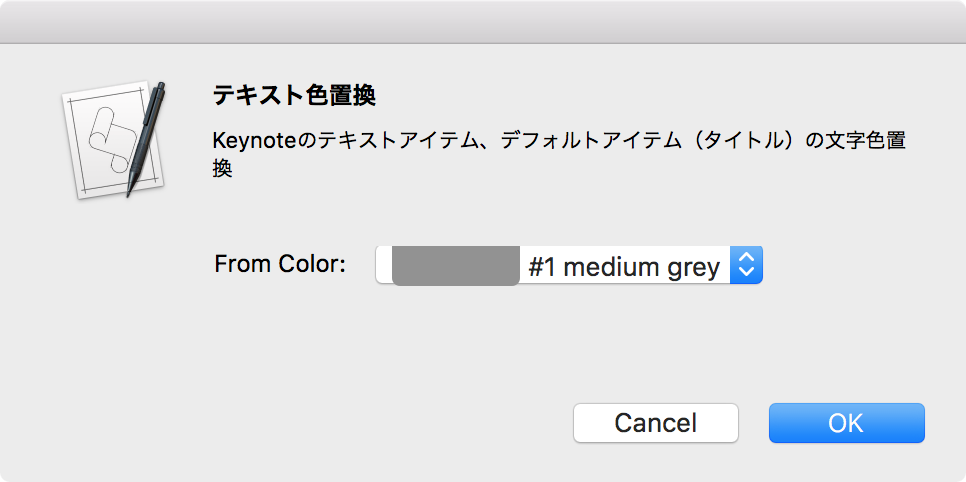

▲本Scriptを実行した直後。最前面のKeynote書類のすべてのテキストを走査して文字色を取得する
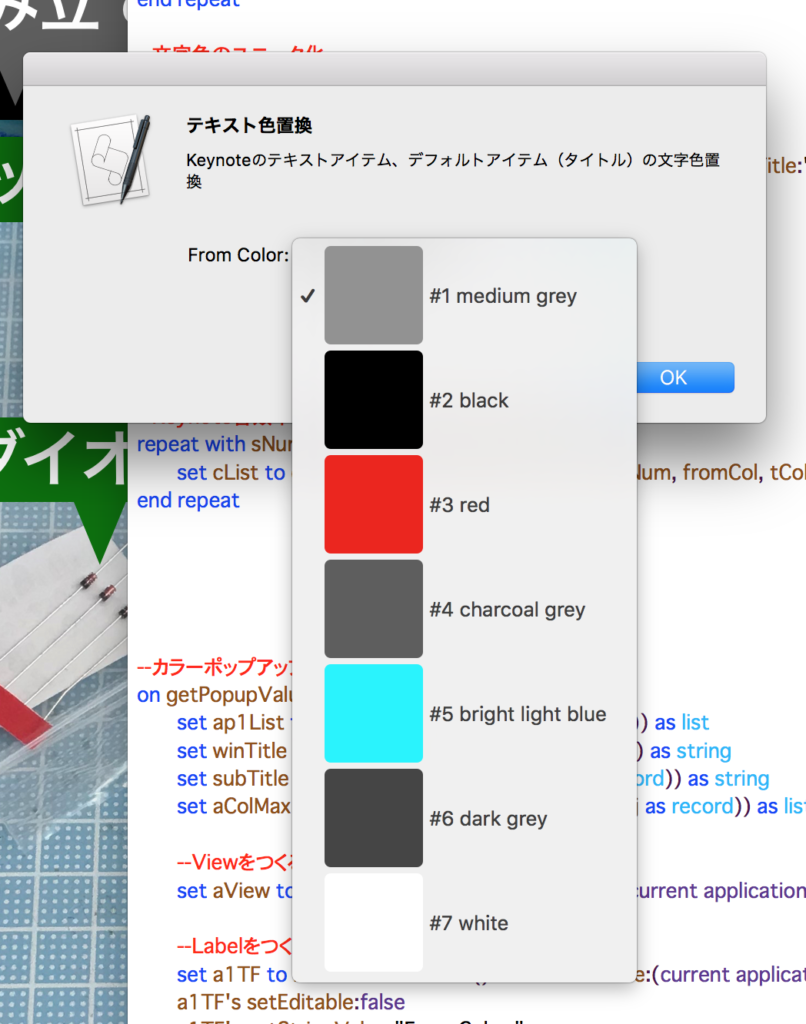

▲取得した文字色リスト。この中から置換対象を選択する。色データから色名を動的に生成し、色IDとともに名称で個別に指定したり識別したりできる
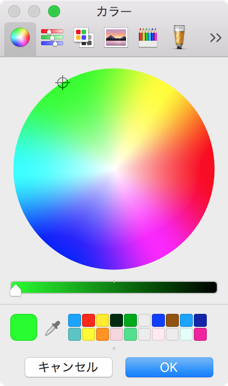

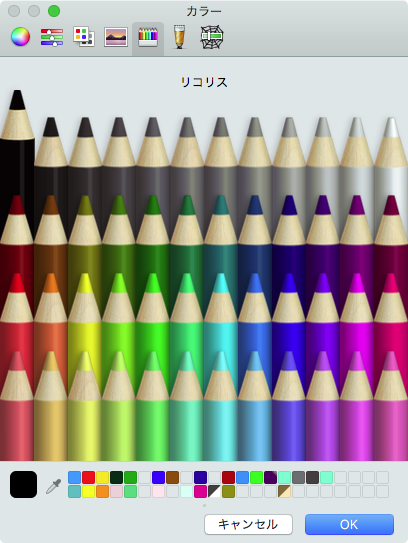
▲変更後の色をカラーピッカーで選択
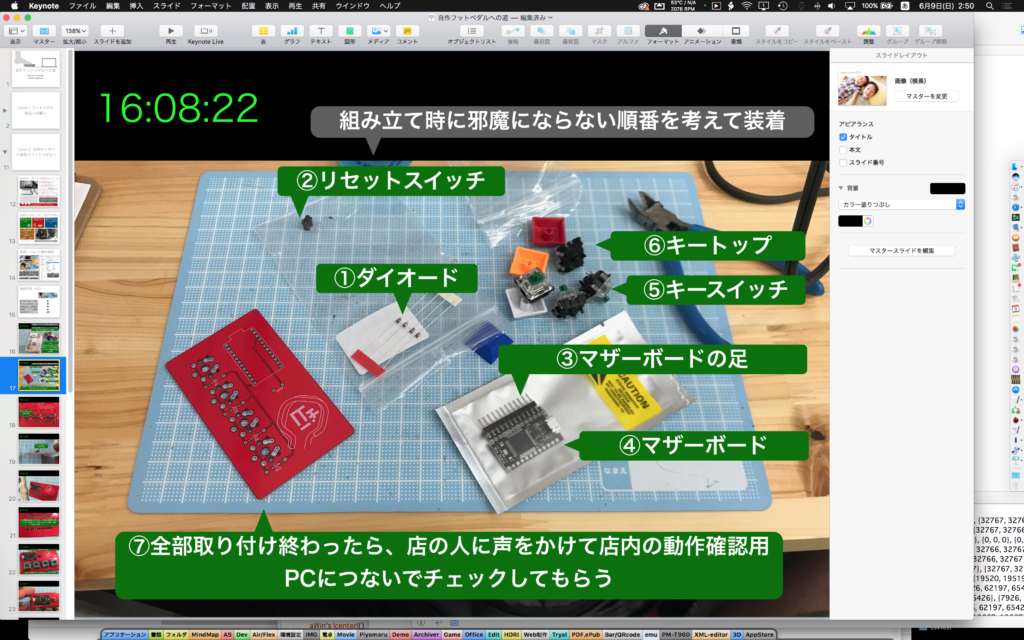

▲Keynote書類上の文字色を変更してみた

AppleScript名:Keynote書類の現在のテキスト色を置換.scptd
—
–  Created by: Takaaki Naganoya
–  Created on: 2019/06/08
—
–  Copyright © 2019 Piyomaru Software, All Rights Reserved
—
use AppleScript version "2.5" — Yosemite (10.11) or later
use framework "Foundation"
use framework "AppKit"
use framework "dbColNamesKit" –https://github.com/daniel-beard/DBColorNames/
use scripting additions

property NSView : a reference to current application’s NSView
property NSAlert : a reference to current application’s NSAlert
property NSColor : a reference to current application’s NSColor
property NSMenu : a reference to current application’s NSMenu
property NSImage : a reference to current application’s NSImage
property NSIndexSet : a reference to current application’s NSIndexSet
property NSTextField : a reference to current application’s NSTextField
property NSColorWell : a reference to current application’s NSColorWell
property NSMenuItem : a reference to current application’s NSMenuItem
property NSBezierPath : a reference to current application’s NSBezierPath
property NSPopUpButton : a reference to current application’s NSPopUpButton
property NSMutableArray : a reference to current application’s NSMutableArray
property NSRunningApplication : a reference to current application’s NSRunningApplication

property returnCode : 0
property pop1ind : 0

–スライド枚数をカウント
tell application "Keynote"
  tell front document
    set sCount to count every slide
  end tell
end tell

–すべてのテキストアイテム、タイトルから色情報を取得する
set cList to {}
repeat with sNum from 1 to sCount
  set cList to cList & getEveryTextColorOfSlide(sNum) of me
end repeat

–文字色のユニーク化
set dList to makeUniqueListOf(cList) of me

set paramObj to {mainDat:dList, myTitle:"テキスト色置換", mySubTitle:"Keynoteのテキストアイテム、デフォルトアイテム(タイトル)の文字色置換", myColorRangeMax:65535}
my getPopupValues:paramObj

if pop1ind = false then return –timed out
set fromCol to (contents of item pop1ind of dList)

–カラーピッカーで置換色選択
set tCol to choose color default color fromCol

–Keynote書類中のテキストの文字色を置換
repeat with sNum from 1 to sCount
  set cList to cList & repEveryTextColorOfSlide(sNum, fromCol, tCol) of me
end repeat

–カラーポップアップメニューをウィンドウ表示
on getPopupValues:paramObj
  set ap1List to (mainDat of (paramObj as record)) as list
  
set winTitle to (myTitle of (paramObj as record)) as string
  
set subTitle to (mySubTitle of (paramObj as record)) as string
  
set aColMax to (myColorRangeMax of (paramObj as record)) as list
  
  
–Viewをつくる
  
set aView to NSView’s alloc()’s initWithFrame:(current application’s NSMakeRect(0, 0, 360, 80))
  
  
–Labelをつくる
  
set a1TF to NSTextField’s alloc()’s initWithFrame:(current application’s NSMakeRect(0, 40, 80, 20))
  
a1TF’s setEditable:false
  
a1TF’s setStringValue:"From Color:"
  
a1TF’s setDrawsBackground:false
  
a1TF’s setBordered:false
  
  
–Ppopup Buttonをつくる
  
set a1Button to NSPopUpButton’s alloc()’s initWithFrame:(current application’s NSMakeRect(80, 40, 200, 20)) pullsDown:false
  
a1Button’s removeAllItems()
  
  
set a1Menu to NSMenu’s alloc()’s init()
  
set aCDB to current application’s DBColorNames’s alloc()’s init()
  
  
–Popup Menuをつくる
  
set iCount to 1
  
repeat with i in ap1List
    copy i to {r1, g1, b1}
    
    
set nsCol to makeNSColorFromRGBAval(r1, g1, b1, aColMax, aColMax) of me
    
set anImage to makeRoundedNSImageWithFilledWithColor(64, 64, nsCol, 4) of me
    
    
–色名をRGB値から動的に生成(あらかじめdbNamesが持っているカラーパレットの近似色の色名を返す)
    
set aTitle to "#" & (iCount as string) & " " & (aCDB’s nameForColor:nsCol) as string
    
    
–Menu Itemを作成する
    
set aMenuItem to (NSMenuItem’s alloc()’s initWithTitle:aTitle action:"actionHandler:" keyEquivalent:"")
    (
aMenuItem’s setImage:anImage)
    (
aMenuItem’s setEnabled:true)
    (
aMenuItem’s setTarget:me)
    (
a1Menu’s addItem:aMenuItem)
    
    
set iCount to iCount + 1
  end repeat
  
  
–Popup ButtonにPopup Menuを設定する
  
a1Button’s setMenu:a1Menu
  
  
–ViewにPopup Buttonとテキストラベルを入れる
  
aView’s addSubview:a1TF
  
aView’s addSubview:a1Button
  
aView’s setNeedsDisplay:true


— set up alert  
  
set theAlert to NSAlert’s alloc()’s init()
  
tell theAlert
    its setMessageText:winTitle
    
its setInformativeText:subTitle
    
its addButtonWithTitle:"OK"
    
its addButtonWithTitle:"Cancel"
    
its setAccessoryView:aView
  end tell
  
  
— show alert in modal loop
  
NSRunningApplication’s currentApplication()’s activateWithOptions:0
  
my performSelectorOnMainThread:"doModal:" withObject:(theAlert) waitUntilDone:true
  
if (my returnCode as number) = 1001 then error number -128
  
  
set s1Val to ((a1Button’s indexOfSelectedItem() as number) + 1)
  
copy s1Val to my pop1ind
end getPopupValues:

on doModal:aParam
  set (my returnCode) to aParam’s runModal()
end doModal:

–Popup Action Handler
on actionHandler:sender
  set aTag to tag of sender as integer
  
set aTitle to title of sender as string
end actionHandler:

–aMaxValを最大値とする数値でNSColorを作成して返す
on makeNSColorFromRGBAval(redValue as integer, greenValue as integer, blueValue as integer, alphaValue as integer, aMaxVal as integer)
  set aRedCocoa to (redValue / aMaxVal) as real
  
set aGreenCocoa to (greenValue / aMaxVal) as real
  
set aBlueCocoa to (blueValue / aMaxVal) as real
  
set aAlphaCocoa to (alphaValue / aMaxVal) as real
  
set aColor to NSColor’s colorWithCalibratedRed:aRedCocoa green:aGreenCocoa blue:aBlueCocoa alpha:aAlphaCocoa
  
return aColor
end makeNSColorFromRGBAval

–指定サイズのNSImageを作成し、指定色で塗ってNSImageで返す
on makeNSImageWithFilledWithColor(aWidth as integer, aHeight as integer, fillColor)
  set anImage to NSImage’s alloc()’s initWithSize:(current application’s NSMakeSize(aWidth, aHeight))
  
anImage’s lockFocus()
  
—
  
set theRect to {{x:0, y:0}, {height:aHeight, width:aWidth}}
  
set theNSBezierPath to NSBezierPath’s bezierPath
  
theNSBezierPath’s appendBezierPathWithRect:theRect
  
—
  
fillColor’s |set|() –色設定
  
theNSBezierPath’s fill() –ぬりつぶし
  
—
  
anImage’s unlockFocus()
  
—
  
return anImage
end makeNSImageWithFilledWithColor

–指定サイズのNSImageを作成し、指定色で塗ってNSImageで返す、anRadiusの半径の角丸で
on makeRoundedNSImageWithFilledWithColor(aWidth as integer, aHeight as integer, fillColor, anRadius as real)
  set anImage to NSImage’s alloc()’s initWithSize:(current application’s NSMakeSize(aWidth, aHeight))
  
anImage’s lockFocus()
  
—
  
set theRect to {{x:0, y:0}, {height:aHeight, width:aWidth}}
  
set theNSBezierPath to NSBezierPath’s bezierPathWithRoundedRect:theRect xRadius:anRadius yRadius:anRadius
  
—
  
fillColor’s |set|() –色設定
  
theNSBezierPath’s fill() –ぬりつぶし
  
—
  
anImage’s unlockFocus()
  
  
return anImage
end makeRoundedNSImageWithFilledWithColor

–最前面のKeynote書類のすべてのスライドから、テキストアイテムとタイトルアイテムの文字色を取得
on getEveryTextColorOfSlide(sNum)
  set cList to {}
  
  
tell application "Keynote"
    tell front document
      set sMax to count every slide
      
if sMax < sNum then return false
      
      
tell slide sNum
        –すべての文字アイテムの先頭の文字の色情報を取得
        
try
          set tCount to count every text item
          
repeat with i from 1 to tCount
            set s1List to color of character 1 of object text of text item i
            
set the end of cList to s1List
          end repeat
        on error
          –set s1List to {}
        end try
        
        
–タイトルの先頭の文字の色情報を取得
        
try
          set s2List to color of character 1 of object text of default title item
          
set the end of cList to s2List
        on error
          set s2List to {}
        end try
      end tell
      
    end tell
  end tell
  
  
return cList
end getEveryTextColorOfSlide

–最前面のKeynote書類の指定番号のスライドで、テキストアイテムとタイトルアイテムの文字色を置換
on repEveryTextColorOfSlide(sNum, fromCol, toCol)
  tell application "Keynote"
    tell front document
      set sMax to count every slide
      
if sMax < sNum then return false
      
      
tell slide sNum
        –すべての文字アイテムの先頭の文字の色情報を置換
        
try
          set tCount to count every text item
          
repeat with i from 1 to tCount
            set s1List to color of character 1 of object text of text item i
            
if s1List = fromCol then
              ignoring application responses
                set color of every character of object text of text item i to toCol
              end ignoring
            end if
          end repeat
        on error
          —
        end try
        
        
–タイトルの先頭の文字の色情報を置換
        
try
          set s2List to color of character 1 of object text of default title item
          
if s2List = fromCol then
            ignoring application responses
              set color of every character of object text of default title item to toCol
            end ignoring
          end if
        on error
          set s2List to {}
        end try
      end tell
      
    end tell
  end tell
end repEveryTextColorOfSlide

–Listのユニーク化
on makeUniqueListOf(theList)
  set theSet to current application’s NSOrderedSet’s orderedSetWithArray:theList
  
return (theSet’s array()) as list
end makeUniqueListOf

★Click Here to Open This Script 

Posted in Color dialog GUI list | Tagged 10.11savvy 10.12savvy 10.13savvy Keynote NSAlert NSBezierPath NSColor NSColorWell NSImage NSIndexSet NSMenu NSMenuItem NSMutableArray NSPopUpButton NSRunningApplication NSTextField NSView | Leave a comment
MP3ファイルからMP3タグの情報を取得

Posted on 4月 1, 2019 by Takaaki Naganoya

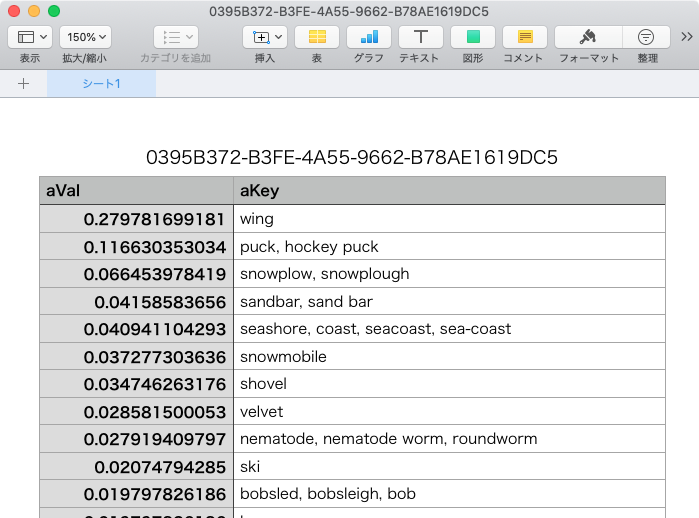
MP3ファイルからMP3タグの情報を取得するAppleScriptです。

とりあえず「取り出せることを確認した」というレベルの実装で、取り出したデータをタグに応じた加工を行うといった処理はほとんど書いてありません。各自よろしくお取り扱いください(投げやり)。

正直、Musicフォルダ以外に転がっている野良MP3ファイルから直接MP3タグ情報を読まなくても、iTunes.appにインポートしておいて、iTunes.appやらiTunesLibrary.framework経由で楽曲ファイルにアクセスしたほうが(データ形式のゆらぎを吸収してもらえるため)安全で楽です。

AppleScript名:MP3ファイルからMP3タグの情報を取得.scptd
—
–  Created by: Takaaki Naganoya
–  Created on: 2019/04/01
—
–  Copyright © 2019 Piyomaru Software, All Rights Reserved
— 参照先:http://d.hatena.ne.jp/terazzo/20120107/1325967445
use AppleScript version "2.4" — Yosemite (10.10) or later
use framework "Foundation"
use framework "AppKit"
use framework "AVFoundation"
use scripting additions

property |NSURL| : a reference to current application’s |NSURL|
property NSImage : a reference to current application’s NSImage
property AVURLAsset : a reference to current application’s AVURLAsset
property AVMetadataFormatID3Metadata : a reference to current application’s AVMetadataFormatID3Metadata
property AVMetadataCommonKeyAlbumName : a reference to current application’s AVMetadataCommonKeyAlbumName

set aPath to POSIX path of (choose file of type {"public.mp3"})
set aMP3Info to getMP3TagsFromFile(aPath) of me

on getMP3TagsFromFile(aPath)
  set aURL to |NSURL|’s fileURLWithPath:aPath
  
set anAsset to AVURLAsset’s assetWithURL:aURL
  
  
set aRes to (anAsset’s availableMetadataFormats()’s containsObject:(AVMetadataFormatID3Metadata)) as boolean
  
if aRes = false then return false
  
  
set origMetadata to (anAsset’s metadataForFormat:(AVMetadataFormatID3Metadata)) as list
  
set outList to {}
  
  
repeat with i in origMetadata
    set aKey to (i’s |key|()) as list of string or string –as anything
    
set bKey to i’s commonKey() as list of string or string –as anything
    
    
if aKey = "PIC" or aKey = "APIC" then
      set aVal to (i’s value())
      
set aVal to (NSImage’s alloc()’s initWithData:aVal)
    else
      set aVal to (i’s value()) as list of string or string –as anything
    end if
    
set the end of outList to {aKey, bKey, aVal}
  end repeat
  
  
return outList
end getMP3TagsFromFile

★Click Here to Open This Script 

Posted in file | Tagged 10.12savvy 10.13savvy 10.14savvy AVURLAsset NSImage NSURL | Leave a comment

指定単語の花文字テキストを取得する(Retina対応)英文字用 v2

Posted on 3月 29, 2019 by Takaaki Naganoya

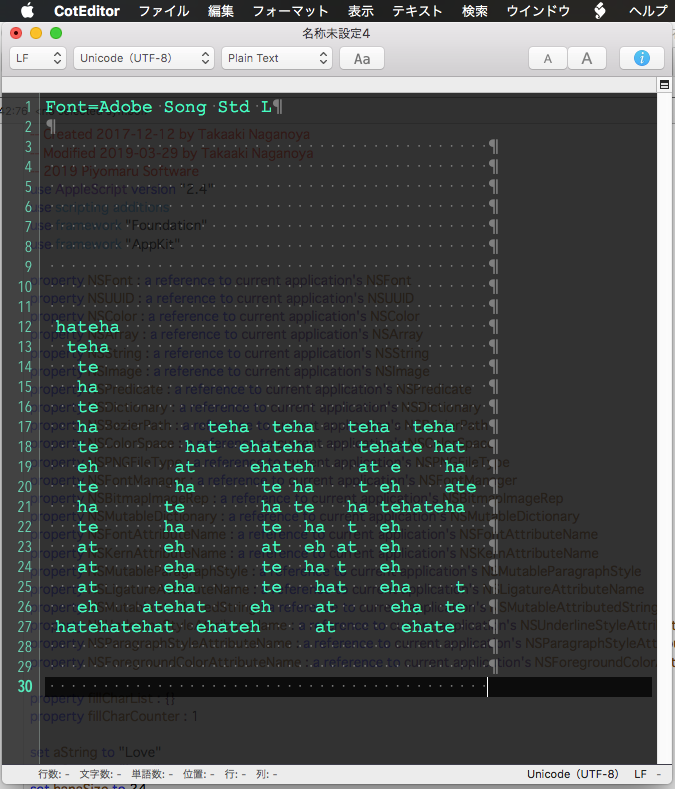
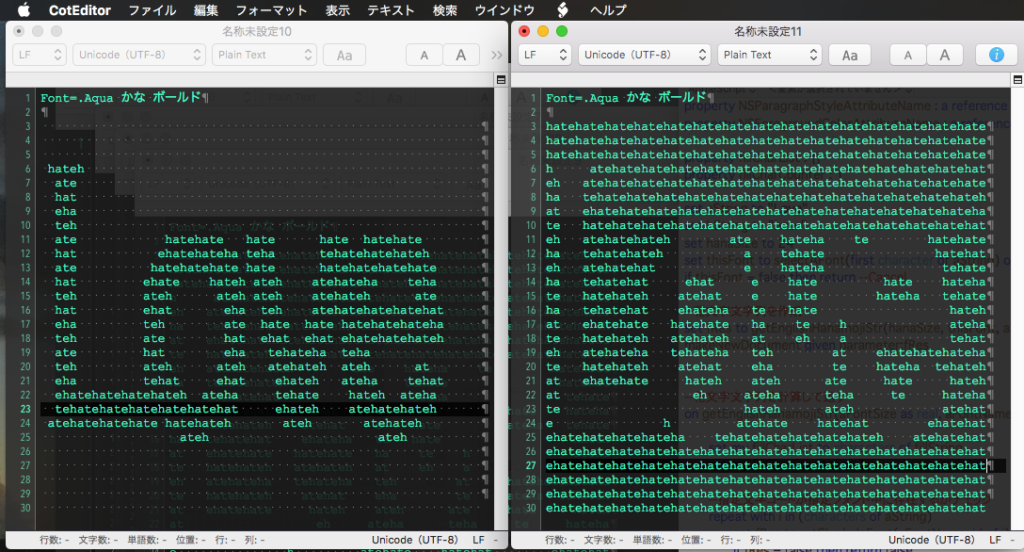
英語版の花文字テキストを作成してテキストエディタ(CotEditor)に出力するAppleScriptです。

描画用の英単語と、塗りつぶし用の英単語を別々に指定できます。invertFをtrueに設定すると、白黒反転出力を行います。

おおもとの元ネタは、大型計算機を大勢のユーザーで共有していた時代(ぱそこん登場前)、計算結果を高速プリンタの帳票に出力するようになっていたころにさかのぼります。どのユーザーの計算結果かを大量のプリンタの出力結果の中から仕分けるため、印刷出力の1ページ目をユーザー名などの情報を印字した「バナー」として使用。

そのさい、ドットインパクトプリンターだったので、決められた固定ドット数の文字しか印字できないため、英数字を組み合わせて擬似的に大きな文字でバナーを印刷していたことに端を発します。

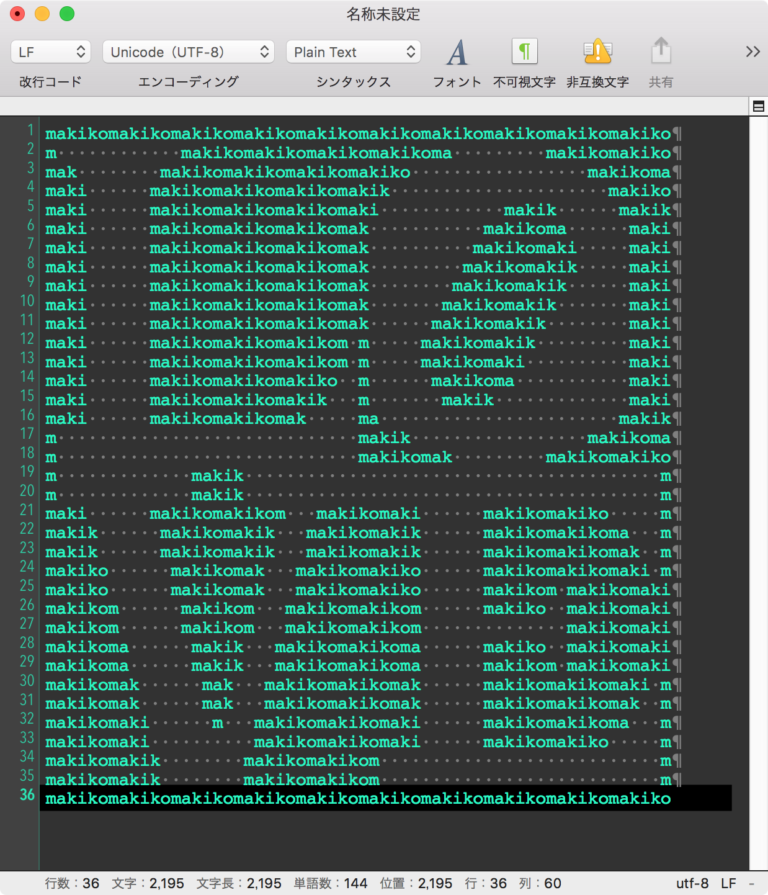
その時代の「残り香」ともいえるバナーがパソコンの電子メールやBBSの時代にお遊びの「花文字」として引き継がれ、原始的なアスキーアートの一種として楽しまれてきました。

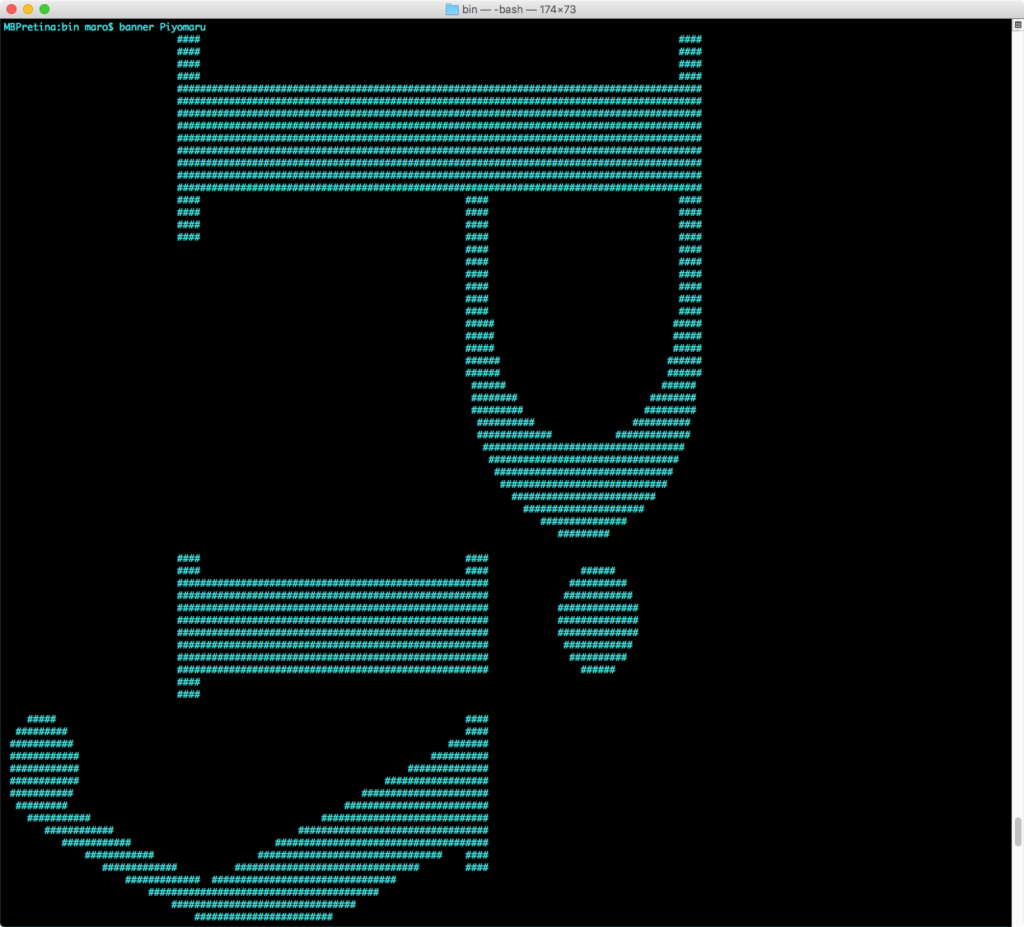
いまでも、shell commandの「banner」コマンドにその末裔を見ることができます。

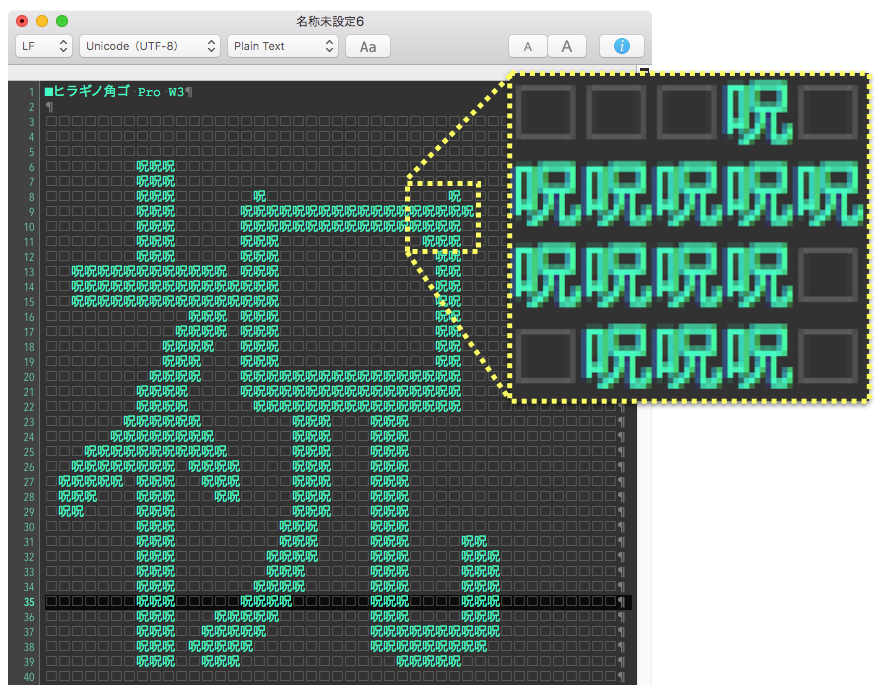
先週のmacOS nativeのデモ時に「祝」という花文字を「呪」の文字で出力するという、定番の持ちネタを披露したところ、たいへんウケておりました。

ただ、これを海外のScripter向けにそのままデモしても受けません。

この、花文字テキストを出力するプログラムの英語版としては、love.scptといういにしえのデータをそのまま使いまわしたものがありますが、描画パターンを数値データで保持しているため、異なるパターンを表示させることはできません。

そこで、日本語版の花文字テキスト出力プログラムに若干手をくわえ、英単語の出力が行えるようにしてみました。

テキストの出力はCotEditorに対して行なっていますが、新規書類を指定文字で作成する程度なので、AppleScriptに対応しているテキストエディタならどれでも作り変えられます。また、表示を等幅フォントにしておく必要があります(あとから指定してもOK)。

AppleScript名:指定単語の花文字テキストを取得する(Retina対応)英文字用 v2
— Created 2017-12-12 by Takaaki Naganoya
— Modified 2019-03-29 by Takaaki Naganoya
— 2019 Piyomaru Software
use AppleScript version "2.4"
use scripting additions
use framework "Foundation"
use framework "AppKit"

property NSFont : a reference to current application’s NSFont
property NSUUID : a reference to current application’s NSUUID
property NSColor : a reference to current application’s NSColor
property NSArray : a reference to current application’s NSArray
property NSString : a reference to current application’s NSString
property NSImage : a reference to current application’s NSImage
property NSPredicate : a reference to current application’s NSPredicate
property NSDictionary : a reference to current application’s NSDictionary
property NSBezierPath : a reference to current application’s NSBezierPath
property NSColorSpace : a reference to current application’s NSColorSpace
property NSPNGFileType : a reference to current application’s NSPNGFileType
property NSFontManager : a reference to current application’s NSFontManager
property NSBitmapImageRep : a reference to current application’s NSBitmapImageRep
property NSMutableDictionary : a reference to current application’s NSMutableDictionary
property NSFontAttributeName : a reference to current application’s NSFontAttributeName
property NSKernAttributeName : a reference to current application’s NSKernAttributeName
property NSMutableParagraphStyle : a reference to current application’s NSMutableParagraphStyle
property NSLigatureAttributeName : a reference to current application’s NSLigatureAttributeName
property NSMutableAttributedString : a reference to current application’s NSMutableAttributedString
property NSUnderlineStyleAttributeName : a reference to current application’s NSUnderlineStyleAttributeName
property NSParagraphStyleAttributeName : a reference to current application’s NSParagraphStyleAttributeName
property NSForegroundColorAttributeName : a reference to current application’s NSForegroundColorAttributeName

property fillCharList : {}
property fillCharCounter : 1

set aString to "Love"
set bString to "hate"
set hanaSize to 24
set thisFont to selectAFont(first character of aString) of me
if thisFont = false then return –Cancel

–花文字文字列を作成
set fRes to getEnglishHanamojiStr(hanaSize, thisFont, aString, bString, 0.7, true, true) of me
makeNewDocument given parameter:fRes

–花文字文字列を計算して返す
on getEnglishHanamojiStr(aFontSize as real, aFontName as string, aString as string, fillString as string, aThread as real, incFontName as boolean, invertF as boolean)
  
  
set my fillCharList to characters of fillString
  
set my fillCharCounter to 1
  
  
–指定文字コードが指定フォント中に存在するかチェック
  
repeat with i in (characters of aString)
    set fRes to retGlyphsInFont(aFontName, id of i) of me
    
if fRes = false then return false
  end repeat
  
  
set aThreadShould to 768 * aThread
  
if (chkMultiByteChar(first character of aString) of me) = false then
    set spaceChar to string id 12288 –全角スペース(UTF-16)
  else
    set spaceChar to string id 32 –半角スペース
  end if
  
  
set fillColor to NSColor’s whiteColor –塗り色
  
set bString to aString & " " –処理内容の帳尻合わせ(そのままだと右端が欠けるのでスペースを入れた)
  
set anAssrStr to makeRTFfromParameters(bString, aFontName, aFontSize, -2, (aFontSize * 1.2)) of me
  
set aSize to anAssrStr’s |size|()
  
  
if class of aSize = record then
    set attrStrWidth to width of aSize
    
set attrStrHeight to height of aSize
  else if class of aSize = list then –macOS 10.13.xのバグ回避
    copy aSize to {attrStrWidth, attrStrHeight}
  end if
  
  
set {xPos, yPos} to {0, 0}
  
  
set tmpImg1 to makeImageWithFilledColor(attrStrWidth, attrStrHeight, fillColor) of me
  
set tmpImg2 to drawAttributedStringsOnImage(tmpImg1, anAssrStr, xPos, yPos) of me
  
set aRawimg to NSBitmapImageRep’s imageRepWithData:(tmpImg2’s TIFFRepresentation())
  
  
–画像から順次指定座標の色データを拾って花文字listに反映
  
set strList to {}
  
repeat with y from 1 to attrStrHeight – 1
    
    
set strListX to {}
    
repeat with x from 0 to attrStrWidth – 1
      set tmpCol to getColorFromRawImage(aRawimg, x, y) of me
      
      
if invertF = false then
        
        
–通常描画(invert = false)時
        
if tmpCol is not equal to false then
          if tmpCol is not equal to {255, 255, 255} then
            copy tmpCol to {tmpR, tmpG, tmpB}
            
if (tmpR + tmpG + tmpB) < aThreadShould then
              set the end of strListX to getChar() of me
            else
              set the end of strListX to spaceChar
            end if
          else
            set the end of strListX to spaceChar
          end if
        end if
        
      else
        –白黒反転(invert = true)時
        
if tmpCol is not equal to false then
          if tmpCol is not equal to {255, 255, 255} then
            copy tmpCol to {tmpR, tmpG, tmpB}
            
if (tmpR + tmpG + tmpB) < aThreadShould then
              set the end of strListX to spaceChar
            else
              set the end of strListX to getChar() of me
            end if
          else
            set the end of strListX to getChar() of me
          end if
        end if
        
      end if
    end repeat
    
set the end of strList to strListX
  end repeat
  
  
–2D List→Text
  
set aRes to list2dToStringByUsingDelimiters(strList, "", return) of me
  
  
if incFontName = true then
    set fName to getDisplayedNameOfFont(aFontName) of me
    
set aRes to "Font=" & fName & return & return & aRes
  end if
  
  
return aRes
end getEnglishHanamojiStr

on getChar()
  set retChar to item (my fillCharCounter) of (my fillCharList)
  
if (my fillCharCounter) = length of (my fillCharList) then
    set (my fillCharCounter) to 1
  else
    set (my fillCharCounter) to (my fillCharCounter) + 1
  end if
  
return retChar
end getChar

–指定Raw画像中の指定座標のピクセルの色をRGBで取り出す
on getColorFromRawImage(aRawimg, x as real, y as real)
  set aRatio to getImageRatio() of me –Retina Display対応
  
set origColor to (aRawimg’s colorAtX:(x * aRatio) y:(y * aRatio))
  
  
set srgbColSpace to NSColorSpace’s deviceRGBColorSpace
  
if srgbColSpace = missing value then return false
  
  
set aColor to (origColor’s colorUsingColorSpace:srgbColSpace)
  
  
set aRed to (aColor’s redComponent()) * 255
  
set aGreen to (aColor’s greenComponent()) * 255
  
set aBlue to (aColor’s blueComponent()) * 255
  
  
return {aRed as integer, aGreen as integer, aBlue as integer}
end getColorFromRawImage

–画像のうえに指定のスタイル付きテキストを描画して画像を返す
on drawAttributedStringsOnImage(anImage, anAssrStr, xPos as real, yPos as real)
  anImage’s lockFocus()
  
anAssrStr’s drawAtPoint:(current application’s NSMakePoint(xPos, yPos))
  
anImage’s unlockFocus()
  
return anImage
end drawAttributedStringsOnImage

–書式つきテキストを組み立てる
on makeRTFfromParameters(aStr as string, fontName as string, aFontSize as real, aKerning as real, aLineSpacing as real)
  set aVal1 to NSFont’s fontWithName:fontName |size|:aFontSize
  
set aKey1 to (NSFontAttributeName)
  
  
set aVal2 to NSColor’s blackColor()
  
set aKey2 to (NSForegroundColorAttributeName)
  
  
set aVal3 to aKerning
  
set akey3 to (NSKernAttributeName)
  
  
set aVal4 to 0
  
set akey4 to (NSUnderlineStyleAttributeName)
  
  
set aVal5 to 2 –all ligature ON
  
set akey5 to (NSLigatureAttributeName)
  
  
set aParagraphStyle to NSMutableParagraphStyle’s alloc()’s init()
  
aParagraphStyle’s setMinimumLineHeight:(aLineSpacing)
  
aParagraphStyle’s setMaximumLineHeight:(aLineSpacing)
  
set akey7 to (NSParagraphStyleAttributeName)
  
  
set keyList to {aKey1, aKey2, akey3, akey4, akey5, akey7}
  
set valList to {aVal1, aVal2, aVal3, aVal4, aVal5, aParagraphStyle}
  
set attrsDictionary to NSMutableDictionary’s dictionaryWithObjects:valList forKeys:keyList
  
  
set attrStr to NSMutableAttributedString’s alloc()’s initWithString:aStr attributes:attrsDictionary
  
return attrStr
end makeRTFfromParameters

–指定サイズの画像を作成し、背景を指定色で塗る
on makeImageWithFilledColor(aWidth as real, aHeight as real, fillColor)
  set anImage to NSImage’s alloc()’s initWithSize:(current application’s NSMakeSize(aWidth, aHeight))
  
set aRatio to getImageRatio() of me –Retina Display対応
  
  
anImage’s lockFocus()
  
set theRect to {{x:0, y:0}, {width:aWidth * aRatio, height:aHeight * aRatio}}
  
set theNSBezierPath to NSBezierPath’s bezierPath
  
theNSBezierPath’s appendBezierPathWithRect:theRect
  
fillColor’s |set|()
  
theNSBezierPath’s fill()
  
anImage’s unlockFocus()
  
  
return anImage
end makeImageWithFilledColor

–2D Listをアイテム間および行間のデリミタを個別に指定してテキスト変換
on list2dToStringByUsingDelimiters(aList as list, itemDelimiter, lineDelimiter)
  set outList to {}
  
repeat with i in aList
    set aStr to listToStringUsingTextItemDelimiter(i, itemDelimiter) of me
    
set the end of outList to aStr
  end repeat
  
  
set bStr to listToStringUsingTextItemDelimiter(outList, lineDelimiter) of me
  
return bStr
end list2dToStringByUsingDelimiters

on listToStringUsingTextItemDelimiter(sourceList as list, textItemDelimiter)
  set CocoaArray to NSArray’s arrayWithArray:sourceList
  
set CocoaString to CocoaArray’s componentsJoinedByString:textItemDelimiter
  
return (CocoaString as string)
end listToStringUsingTextItemDelimiter

–ユーザー環境にインストールされているすべてのフォントのPostScript名とグリフ数を返す
on getEveryFontPSNameANdGlyphsNum(aStr)
  set aFontList to NSFontManager’s sharedFontManager()’s availableFonts()
  
set thePred to NSPredicate’s predicateWithFormat:"NOT SELF BEGINSWITH ’.’"
  
set aFontList to (aFontList’s filteredArrayUsingPredicate:thePred) as list
  
  
set aList to {}
  
repeat with i in aFontList
    set aName to contents of i
    
set aNum to countNumberOfGlyphsInFont(aName) of me
    
set dName to getDisplayedNameOfFont(aName) of me
    
    
set fRes to retGlyphsInFont(aName, id of aStr) of me
    
if fRes = true then
      set the end of aList to {fontName:aName, fontNum:aNum, dispName:dName}
    end if
  end repeat
  
  
return aList
end getEveryFontPSNameANdGlyphsNum

–指定Postscript名称のフォントに定義されている文字数を数えて返す
on countNumberOfGlyphsInFont(fontName as string)
  set aFont to NSFont’s fontWithName:fontName |size|:9.0
  
if aFont = missing value then return false
  
set aProp to aFont’s numberOfGlyphs()
  
return aProp as number
end countNumberOfGlyphsInFont

–フォントのPostScript NameからDisplayed Nameを取得
on getDisplayedNameOfFont(aName as string)
  set aFont to NSFont’s fontWithName:aName |size|:9.0
  
set aDispName to (aFont’s displayName()) as string
  
return aDispName
end getDisplayedNameOfFont

–全角文字が存在するか
on chkMultiByteChar(checkString as string)
  set aStr to NSString’s stringWithString:checkString
  
set aRes to aStr’s canBeConvertedToEncoding:(current application’s NSASCIIStringEncoding)
  
return (aRes as boolean)
end chkMultiByteChar

–指定名称のフォントに指定の文字コードが含まれているかチェック
on retGlyphsInFont(fontName as string, strCode as integer)
  set aFont to NSFont’s fontWithName:fontName |size|:24.0
  
if aFont = missing value then return false
  
set aSet to aFont’s coveredCharacterSet()
  
set aRes to (aSet’s characterIsMember:strCode) as boolean
  
return aRes as list of string or string –as anything
end retGlyphsInFont

on selectAFont(aString)
  set fRes to getEveryFontPSNameANdGlyphsNum(aString) of me
  
set theArray to NSArray’s arrayWithArray:fRes
  
set thePred to NSPredicate’s predicateWithFormat:"fontNum > 10000"
  
set bArray to ((theArray’s filteredArrayUsingPredicate:thePred)’s valueForKeyPath:"dispName") as list
  
set thisFont to choose from list bArray
  
return thisFont
end selectAFont

–Retina Display対応ルーチン
on getImageRatio()
  set retinaF to detectRetinaDisplay() of me
  
if retinaF = true then
    return 2.0 as real
  else
    return 1.0 as real
  end if
end getImageRatio

on detectRetinaDisplay()
  set dispList to current application’s NSScreen’s screens()
  
set retinaF to false
  
  
repeat with i in dispList
    set j to contents of i
    
set aDepth to j’s backingScaleFactor()
    
if aDepth > 1.0 then
      set retinaF to true
    end if
  end repeat
  
  
return retinaF
end detectRetinaDisplay

on makeNewDocument given parameter:aStr
  tell application id "com.coteditor.CotEditor"
    activate
    
set newDoc to make new document
    
tell newDoc
      set contents to aStr
    end tell
  end tell
end makeNewDocument

★Click Here to Open This Script 

Posted in Color Image RTF Text | Tagged 10.12savvy 10.13savvy 10.14savvy CotEditor NSArray NSBezierPath NSBitmapImageRep NSColor NSColorSpace NSDictionary NSFont NSFontManager NSImage NSMutableAttributedString NSMutableDictionary NSPredicate NSString | 1 Comment

画像の空白判定 v3

Posted on 3月 7, 2019 by Takaaki Naganoya

指定の画像のドットがすべて白色かをチェックする(=画像の空白判定)AppleScriptです。

画像の空白判定処理は自分的にはひじょうに重要な処理であり、画像をグレースケール化しておいて、

(方法1)Photoshopを用いて明度ヒストグラムを取得し、明度=255のデータだけが存在することを確認
(方法2)GPUImage.frameworkを用いて明度ヒストグラムを取得し、明度=255のデータだけが存在することを確認

といった方法で確認を行なっていました。

PDFの余白ページ判定処理や、画像同士の差分確認など、Photoshopを使わずに済めば利用範囲も広がるため(Mac App Storeに出せるため)、AppleScript+Frameworkぐらいで高速処理できることにはものすごく価値があります。

そんな中、GPUImageは急速に2度の方向転換を行い、AppleScriptからは付き合いにくいフレームワークに変化しました。

全面的にSwiftで書き換えたGPUImage2、さらにmacOS 10.14で行われた「OpenGL/OpenCLの非推奨化」という方針転換(わかっていたことですが)を受け、Metalを活用するように書き換えられたGPUImage3へと姿を変えました。オリジナルから見るとほぼ別物です。

GPUImage 3はまだまだ機能不足なうえにAppleScriptから呼べない状態。ヒストグラムの計算フィルタも搭載されていません。Objective-Cで書かれ、中国のスマホ開発者が写真加工するのに活用しまくった、人民に愛されまくったGPUImageの姿はもう見られないのでしょうか。

GPUImageを用いた他のフィルタ処理はCIFilterで代替できるのであまり問題にはなりませんが、この空白画像検出処理だけはなんとしても代替手段を見つける必要に迫られました。応用例が多すぎるからです。

そこで思いついたのが、「チェック対象の画像と同サイズの白い画像を作って、データ内容が同じかどうか調べる」というシンプルな方法(最初から思いついてほしい>自分)。

これならCPUパワーもそれほど必要とせず、GPUの力を絞り出す必要もありません(あたりまえ)。

さっそく書いてみたものの、今度はどうも「白い色」の値が合わず、頭をひねりまくりました。


▲1×1ドット画像を新規作成して白く塗りつぶして比較。Photoshopで作成してファイルから読み込んだ画像とDataが同じにならない

カラープロファイルが合わないために「白い色」を指定してもイコールにならないようだったので、オリジナル画像をコピーしてそれ自体を白く塗りつぶして空白検出の比較対象としてみました。これで空白検出が無事できるようになりました。しかも、GPUImage.frameworkを使っていたバージョンよりもあからさまに高速、、、、

処理速度をPhotoshop版、GPUImage版のAppleScriptと比較してみたところ、1980×1200ピクセルぐらいの画像だとGPUImage版の倍ぐらい高速、8K(7680×4320)ぐらいになるとPhotoshopに負けるといったところです。


▲同一環境にて、Photoshop CC 2018、GPUImage、本Scriptで各種サイズの画像の空白検出を実行(単位:秒)

処理内容がシンプルなだけに小さい画像の処理は得意で、大きな画像は不向きといえるかもしれません。テスト機は例によってCore i7 2.66GHzメモリ8GBのマシンであり、より搭載メモリ量の多いマシンで実行すると挙動が変わってくるかもしれません。

補足までに、GPUImageの明度ヒストグラム検出は、結果を数値の配列ではなく、1×256ドットの「画像」として返してくる変態仕様なので、結果を判定するために1×256ピクセルの画像をループでチェックする必要があります。この仕様が余計なオーバーヘッドを生んでいる(つまり、GPUで処理しているから爆速、という世間の期待値を大幅に下回る処理内容になっている)可能性は否定できません。

ただ、PhosothopなしでPhotoshopと同様のヒストグラム処理が行えるという「手軽さ」がいいと思ってGPUImageを使い出したので、速度をベンチマークしてみると「こんなもんだろ」という印象です。

AppleScript名:画像の空白判定 v3.scpt
—
–  Created by: Takaaki Naganoya
–  Created on: 2019/03/07
—
–  Copyright © 2019 Piyomaru Software, All Rights Reserved
—
use AppleScript version "2.4" — Yosemite (10.10) or later
use framework "Foundation"
use framework "AppKit"
use scripting additions

property NSData : a reference to current application’s NSData
property NSDate : a reference to current application’s NSDate
property |NSURL| : a reference to current application’s |NSURL|
property NSColor : a reference to current application’s NSColor
property NSImage : a reference to current application’s NSImage
property NSBezierPath : a reference to current application’s NSBezierPath
property NSBitmapImageRep : a reference to current application’s NSBitmapImageRep

set aPOSIXpath to POSIX path of (choose file of type {"public.image"})

set a1Dat to NSDate’s timeIntervalSinceReferenceDate()

set iRes to checkImageIsWhite(aPOSIXpath) of me

set b1Dat to NSDate’s timeIntervalSinceReferenceDate()
set c1Dat to b1Dat – a1Dat

return {iRes, c1Dat}

–Compare Original Data and
on checkImageIsWhite(aPOSIXpath)
  set aURL to |NSURL|’s fileURLWithPath:(aPOSIXpath)
  
set anNSImage to NSImage’s alloc()’s initWithContentsOfURL:(aURL)
  
  
copy anNSImage to bNSImage
  
  
set fillColor to makeNSColorFromRGBAval(65535, 65535, 65535, 65535, 65535) of me
  
–set fillColor to NSColor’s whiteColor()
  
set blankImage to drawImageWithFilledColor(bNSImage, fillColor) of me
  
  
set imgA to anNSImage’s TIFFRepresentation()
  
set imgB to blankImage’s TIFFRepresentation()
  
  
set chkWhite to (imgA’s isEqualToData:imgB) as boolean
  
return chkWhite
end checkImageIsWhite

on getSizeOfImage(anNSImage)
  set aSize to anNSImage’s |size|()
  
set aClass to class of aSize
  
if aClass = record then
    copy aSize to theSize –To macOS 10.12.x
  else –macOS 10.13 or later
    set sizeX to (item 1 of item 2 of aSize)
    
set sizeY to (item 2 of item 2 of aSize)
    
set theSize to {width:sizeX, height:sizeY}
  end if
  
return theSize
end getSizeOfImage

–指定サイズの画像を作成し、背景を指定色で塗る
on drawImageWithFilledColor(anImage, fillColor)
  set aSize to getSizeOfImage(anImage) of me
  
  
anImage’s lockFocus()
  
  
set theRect to {{x:0, y:0}, {width:(width of aSize), height:(height of aSize)}}
  
set theNSBezierPath to NSBezierPath’s bezierPath
  
theNSBezierPath’s appendBezierPathWithRect:theRect
  
fillColor’s |set|()
  
theNSBezierPath’s fill()
  
  
anImage’s unlockFocus()
  
  
return anImage
end drawImageWithFilledColor

–aMaxValを最大値とする数値でNSColorを作成して返す
on makeNSColorFromRGBAval(redValue as integer, greenValue as integer, blueValue as integer, alphaValue as integer, aMaxVal as integer)
  set aRedCocoa to (redValue / aMaxVal) as real
  
set aGreenCocoa to (greenValue / aMaxVal) as real
  
set aBlueCocoa to (blueValue / aMaxVal) as real
  
set aAlphaCocoa to (alphaValue / aMaxVal) as real
  
set aColor to NSColor’s colorWithCalibratedRed:aRedCocoa green:aGreenCocoa blue:aBlueCocoa alpha:aAlphaCocoa
  
return aColor
end makeNSColorFromRGBAval

★Click Here to Open This Script 

Posted in Image | Tagged 10.11savvy 10.12savvy 10.13savvy 10.14savvy NSBezierPath NSColor NSData NSDate NSImage NSURL | 3 Comments

アラートダイアログ上に縦棒グラフを表示

Posted on 3月 4, 2019 by Takaaki Naganoya

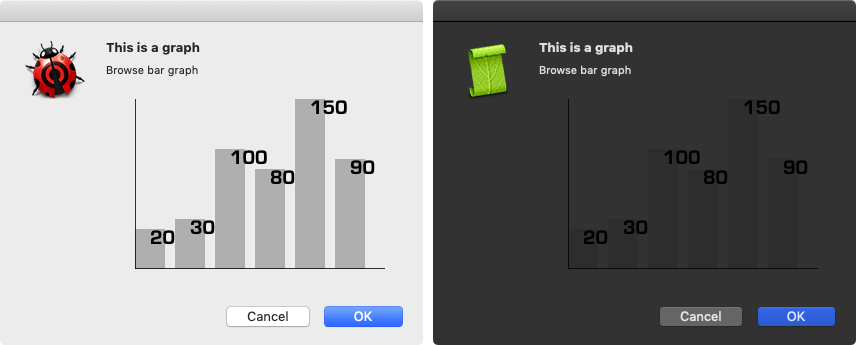
アラートダイアログ上に縦棒グラフを表示するAppleScriptです。

グラフを作成するのであれば、NumbersやKeynoteなどを使ったほうがいいですが、簡単にデータの傾向だけダイアログ上で見せたいような場合のために作成した部品です。

NSImageViewの表示実験がしたかっただけなので、別に他の言語処理系で作成したグラフ画像を読み込んでNSImageに読み込んでからNSIMageViewで表示するぐらいの使い方でもぜんぜんOKでしょう。

WebViewを表示してインタラクティブなグラフ(マウスカーソルに反応してアニメーション表示を行うとか)を表示するといった使い方もよさそうです(アプリケーション化しないとダメかも)。

macOS 10.14上のDark Modeについては、実行環境によって対応度が異なります。


▲macOS 10.14上のDark Modeで実行したところ。左側からスクリプトエディタ、AppleScriptアプレット、スクリプトメニュー


▲macOS 10.14上のDark Modeで実行したところ。左側からScript Debugger、Script DebuggerからSD拡張アプレットで書き出したもの

グラフの描画については、色指定をblackColor()とかgrayColor()などと指定せずに、Dark Mode時に制御されるUI色で指定しておく必要があることでしょう。

AppleScript名:アラートダイアログ上に縦棒グラフを表示.scptd
—
–  Created by: Takaaki Naganoya
–  Created on: 2019/03/04
—
–  Copyright © 2019 Piyomaru Software, All Rights Reserved
—
use AppleScript version "2.4" — Yosemite (10.10) or later
use framework "Foundation"
use framework "AppKit"
use scripting additions

property NSFont : a reference to current application’s NSFont
property NSAlert : a reference to current application’s NSAlert
property NSColor : a reference to current application’s NSColor
property NSArray : a reference to current application’s NSArray
property NSString : a reference to current application’s NSString
property NSImage : a reference to current application’s NSImage
property NSScreen : a reference to current application’s NSScreen
property NSDictionary : a reference to current application’s NSDictionary
property NSBezierPath : a reference to current application’s NSBezierPath
property NSImageView : a reference to current application’s NSImageView
property NSMutableArray : a reference to current application’s NSMutableArray
property NSBitmapImageRep : a reference to current application’s NSBitmapImageRep
property NSRunningApplication : a reference to current application’s NSRunningApplication
property NSFontAttributeName : a reference to current application’s NSFontAttributeName
property NSAlertSecondButtonReturn : a reference to current application’s NSAlertSecondButtonReturn
property NSForegroundColorAttributeName : a reference to current application’s NSForegroundColorAttributeName
property NSImageScaleProportionallyUpOrDown : a reference to current application’s NSImageScaleProportionallyUpOrDown

property returnCode : 0

set plotData to {20, 30, 100, 80, 150, 90}
set paramObj to {myMessage:"This is a graph", mySubMessage:"Browse bar graph", aPlotData:plotData}
my performSelectorOnMainThread:"displayBarGraph:" withObject:(paramObj) waitUntilDone:true

on displayBarGraph:paramObj
  set aMainMes to myMessage of paramObj
  
set aSubMes to mySubMessage of paramObj
  
set aTList to (aPlotData of paramObj) as list
  
  
— make NSIMageView with graph image
  
set anImage to makeGraphImage(aTList, 300, 200) of me
  
set anImageView to NSImageView’s alloc()’s initWithFrame:{origin:{x:0.0, y:0.0}, |size|:{width:300.0, height:200.0}}
  
anImageView’s setImageScaling:(NSImageScaleProportionallyUpOrDown)
  
anImageView’s setEditable:false
  
anImageView’s setImage:anImage
  
anImageView’s display()
  
  
— set up alert  
  
set theAlert to NSAlert’s alloc()’s init()
  
tell theAlert
    its setMessageText:aMainMes
    
its setInformativeText:aSubMes
    
its addButtonWithTitle:"OK"
    
its addButtonWithTitle:"Cancel"
    
its setAccessoryView:anImageView
  end tell
  
  
— show alert in modal loop
  
NSRunningApplication’s currentApplication()’s activateWithOptions:0
  
my performSelectorOnMainThread:"doModal:" withObject:(theAlert) waitUntilDone:true
  
if (my returnCode as number) = 1001 then error number -128
end displayBarGraph:

on doModal:aParam
  set (my returnCode) to aParam’s runModal()
end doModal:

on makeGraphImage(plotData, aWidth, aHeight)
  set innerGapL to 30
  
set innerGapU to 10
  
set innerGapR to 20
  
set innerGapD to 20
  
set barGap to 10
  
  
–パラメータから下地になる画像を作成する
  
set aSize to current application’s NSMakeSize(aWidth, aHeight)
  
set anImage to NSImage’s alloc()’s initWithSize:aSize
  
  
–各種パラメータの計算
  
–copy plotArea to {plotWidth, plotHeight}
  
set itemNum to count every item of plotData
  
set barThickness to (aWidth – (itemNum * barGap * 2)) div itemNum
  
  
–プロットデータの最大値
  
set anArray to NSArray’s arrayWithArray:plotData
  
set aYmax to (anArray’s valueForKeyPath:"@max.self")’s intValue()
  
set aMaxYVal to aHeight – innerGapU – innerGapD
  
set aYPlotArea to aHeight – innerGapU – innerGapD – 20
  
set aYUnit to aYPlotArea / aYmax
  
  
–数値データをもとに描画データを組み立てる
  
set drawList to {}
  
  
set startX to innerGapL
  
copy startX to origX
  
  
repeat with i in plotData
    set the end of drawList to current application’s NSMakeRect(startX, innerGapD, barThickness, innerGapD + (i * aYUnit))
    
set startX to startX + barThickness + barGap
  end repeat
  
  
–グラフ塗りつぶし処理呼び出し
  
set fillColor to (NSColor’s colorWithCalibratedRed:0.1 green:0.1 blue:0.1 alpha:0.3)
  
set resImage to drawImageWithColorFill(anImage, drawList, fillColor) of me
  
  
–数値データ(文字)をグラフィックに記入
  
set fillColor2 to NSColor’s blackColor()
  
set resImage to drawImageWithString(resImage, drawList, fillColor2, plotData, "Eurostile Bold", 20.0) of me
  
  
–補助線を引く
  
set fillColor3 to (NSColor’s colorWithCalibratedRed:0.0 green:0.0 blue:0.0 alpha:0.8)
  
set aVertical to current application’s NSMakeRect(origX, innerGapD, aWidth – innerGapL – innerGapR, 1)
  
set aHorizontal to current application’s NSMakeRect(origX, innerGapD, 1, aHeight – innerGapU – innerGapD)
  
set draw2List to {aVertical, aHorizontal}
  
set resImage to drawImageWithColorFill(resImage, draw2List, fillColor3) of me
  
  
return resImage
end makeGraphImage

–NSImageに対して文字を描画する
on drawImageWithString(anImage, drawList, fillColor, dataList, aPSFontName, aFontSize)
  set retinaF to (NSScreen’s mainScreen()’s backingScaleFactor()) as real
  
–>  2.0 (Retina) / 1.0 (Non Retina)
  
  
set aDict to (NSDictionary’s dictionaryWithObjects:{NSFont’s fontWithName:aPSFontName |size|:aFontSize, fillColor} forKeys:{NSFontAttributeName, NSForegroundColorAttributeName})
  
  
anImage’s lockFocus() –描画開始
  
  
set aLen to length of drawList
  
repeat with i from 1 to aLen
    set i1 to contents of item i of drawList
    
    
set v2 to system attribute "sys2"
    
if v2 ≤ 12 then
      –To macOS 10.12.x
      
set origX to (x of origin of i1) / retinaF
      
set origY to (y of origin of i1) / retinaF
      
set sizeX to (width of |size| of i1) / retinaF
      
set sizeY to (height of |size| of i1) / retinaF
      
set theRect to {{x:origX, y:origY}, {width:sizeX, height:sizeY}}
    else
      –macOS 10.13 or later
      
set origX to (item 1 of item 1 of i1) / retinaF
      
set origY to (item 2 of item 1 of i1) / retinaF
      
set sizeX to (item 1 of item 2 of i1) / retinaF
      
set sizeY to (item 2 of item 2 of i1) / retinaF
      
set theRect to {{origX, origY}, {sizeX, sizeY}}
    end if
    
    
set aString to (current application’s NSString’s stringWithString:((contents of item i of dataList) as string))
    (
aString’s drawAtPoint:(current application’s NSMakePoint(origX + (sizeX / 2), sizeY)) withAttributes:aDict)
  end repeat
  
  
anImage’s unlockFocus() –描画ここまで
  
  
return anImage –returns NSImage
end drawImageWithString

–NSImageに対して矩形を塗りつぶす
on drawImageWithColorFill(anImage, drawList, fillColor)
  set retinaF to (NSScreen’s mainScreen()’s backingScaleFactor()) as real
  
–>  2.0 (Retina) / 1.0 (Non Retina)
  
  
anImage’s lockFocus() –描画開始
  
  
repeat with i in drawList
    set v2 to system attribute "sys2"
    
if v2 ≤ 12 then
      –To macOS 10.12.x
      
set origX to (x of origin of i) / retinaF
      
set origY to (y of origin of i) / retinaF
      
set sizeX to (width of |size| of i) / retinaF
      
set sizeY to (height of |size| of i) / retinaF
      
set theRect to {{x:origX, y:origY}, {width:sizeX, height:sizeY}}
    else
      –macOS 10.13 or later
      
set origX to (item 1 of item 1 of i) / retinaF
      
set origY to (item 2 of item 1 of i) / retinaF
      
set sizeX to (item 1 of item 2 of i) / retinaF
      
set sizeY to (item 2 of item 2 of i) / retinaF
      
set theRect to {{origX, origY}, {sizeX, sizeY}}
    end if
    
    
set theNSBezierPath to NSBezierPath’s bezierPath
    (
theNSBezierPath’s appendBezierPathWithRect:theRect)
    
    
fillColor’s |set|() –色設定
    
theNSBezierPath’s fill() –ぬりつぶし
  end repeat
  
  
anImage’s unlockFocus() –描画ここまで
  
  
return anImage –returns NSImage
end drawImageWithColorFill

★Click Here to Open This Script 

Posted in GUI Image list | Tagged 10.11savvy 10.12savvy 10.13savvy 10.14savvy NSAlert NSAlertSecondButtonReturn NSArray NSBezierPath NSBitmapImageRep NSColor NSDictionary NSFont NSFontAttributeName NSForegroundColorAttributeName NSImage NSImageScaleProportionallyUpOrDown NSImageView NSMutableArray NSRunningApplication NSScreen NSString | Leave a comment

指定ファイルサイズのJPEGに変換(圧縮率可変)_1K=1024で計算

Posted on 2月 11, 2019 by Takaaki Naganoya

Finder上で選択中の画像ファイルを指定ファイルサイズを下回るよう圧縮率を調整してJPEGに変換するAppleScriptです。

指定画像を指定のファイルサイズ(1K=1024で計算)以内になるよう、非圧縮の状態から段階的に圧縮率を高くして仕上がりファイルサイズを下回るかどうか演算を行います。ファイルに書き込まずに仕上がりサイズの計算を行うところが新機軸です。

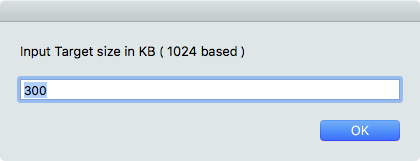
macOS標準搭載のスクリプトメニューから呼び出して使うことを想定しています。実行すると、ダイアログ表示して指定ファイルサイズをKB単位で数値入力する必要があります。

巨大な画像ファイルを処理してしまった場合への対処として、最初に最高圧縮率で圧縮してみて、指定ファイルサイズ以内になるかどうかを計算します。

最初は圧縮率100%から25%まで1%きざみで仕上がり画像ファイルサイズを計算してみたのですが、数十Mバイトの巨大な画像を処理させたら、途中でマウスカーソルが反応しないほどOSが無反応になったので(暴走状態?)、それを避けるために、このような処理を行なってみました。

JPEGにファイル変換した画像はデスクトップに

UUID_JPEG画質.jpg

の形式で出力されます。JPEG画質は1.0から0.01までの数値です。

AppleScript名:指定ファイルサイズのJPEGに変換(圧縮率可変)_1K=1024で計算
— Created 2014-02-21 Shane Stanley
— Modified 2019-02-11 Takaaki Naganoya
use AppleScript version "2.5"
use scripting additions
use framework "Foundation"
use framework "AppKit"

property |NSURL| : a reference to current application’s |NSURL|
property NSUUID : a reference to current application’s NSUUID
property NSArray : a reference to current application’s NSArray
property NSString : a reference to current application’s NSString
property NSImage : a reference to current application’s NSImage
property NSPredicate : a reference to current application’s NSPredicate
property NSJPEGFileType : a reference to current application’s NSJPEGFileType
property NSBitmapImageRep : a reference to current application’s NSBitmapImageRep
property NSURLTypeIdentifierKey : a reference to current application’s NSURLTypeIdentifierKey

property compressList : {100, 99, 98, 97, 96, 95, 90, 85, 80, 75, 70, 65, 60, 55, 50, 40, 30, 20, 25} –大→小 へと並んでいる必要がある
property kbBase : 1024

tell application "Finder"
  set inFiles to selection as alias list
end tell

–指定のAlias listのうち画像ファイルのみ抽出
set filRes1 to filterAliasListByUTI(inFiles, "public.image") of me
if filRes1 = {} then return

–ターゲットサイズを指定
set aMessage to "Input Target size in KB ( " & (kbBase as string) & " based )"
set aRes to text returned of (display dialog aMessage default answer "300" buttons {"OK"} default button 1)
if aRes = false or aRes = "" then return
set targLimit to (aRes as number) * kbBase

–選択中のファイルのうちの1つから親フォルダを求め、出力先ファイルパスを組み立てる
set outPathTarg to (contents of first item of filRes1)
set pathString to NSString’s stringWithString:outPathTarg
set newPath to (pathString’s stringByDeletingLastPathComponent()) as string

–Main Loop
repeat with i in filRes1
  set aNSImage to (NSImage’s alloc()’s initWithContentsOfFile:(i))
  
  
–巨大すぎる画像のリサイズ時への保険で、最小サイズで投機的に圧縮して結果を確認する
  
set minSize to calcSavedJPEGSizeFromNSIMage(aNSImage, (last item of compressList) / 100) of me
  
  
if minSize < targLimit then
    –Simulate Suitable JPEG Compression Ratio to target file size
    
repeat with ii in compressList
      set jj to ii / 100
      
set fileSize to calcSavedJPEGSizeFromNSIMage(aNSImage, jj) of me
      
      
if fileSize < targLimit then
        exit repeat
      end if
    end repeat
  else
    set jj to 0.01 –エラー時にはやけくそで1%まで圧縮指定
  end if
  
  
set outPOSIXpath to (newPath & "/" & (NSUUID’s UUID()’s UUIDString()) as string) & "_" & (jj as string)
  
set savePath to outPOSIXpath & ".jpg"
  
  
saveNSImageAtPathAsJPG(aNSImage, savePath, jj) of me
end repeat

–Alias listから指定UTIに含まれるものをPOSIX pathのリストで返す
on filterAliasListByUTI(aList, targUTI)
  set newList to {}
  
repeat with i in aList
    set j to POSIX path of i
    
set tmpUTI to my retUTIfromPath(j)
    
set utiRes to my filterUTIList({tmpUTI}, targUTI)
    
if utiRes is not equal to {} then
      set the end of newList to j
    end if
  end repeat
  
return newList
end filterAliasListByUTI

–指定のPOSIX pathのファイルのUTIを求める
on retUTIfromPath(aPOSIXPath)
  set aURL to |NSURL|’s fileURLWithPath:aPOSIXPath
  
set {theResult, theValue} to aURL’s getResourceValue:(reference) forKey:NSURLTypeIdentifierKey |error|:(missing value)
  
  
if theResult = true then
    return theValue as string
  else
    return theResult
  end if
end retUTIfromPath

–UTIリストが指定UTIに含まれているかどうか演算を行う
on filterUTIList(aUTIList, aUTIstr)
  set anArray to NSArray’s arrayWithArray:aUTIList
  
set aPred to NSPredicate’s predicateWithFormat_("SELF UTI-CONFORMS-TO %@", aUTIstr)
  
set bRes to (anArray’s filteredArrayUsingPredicate:aPred) as list
  
return bRes
end filterUTIList

–NSImageを指定パスにJPEG形式で保存、qulityNumは0.0〜1.0。1.0は無圧縮
on saveNSImageAtPathAsJPG(anImage, outPath, qulityNum as real)
  set imageRep to anImage’s TIFFRepresentation()
  
set aRawimg to NSBitmapImageRep’s imageRepWithData:imageRep
  
set pathString to NSString’s stringWithString:outPath
  
set newPath to pathString’s stringByExpandingTildeInPath()
  
set myNewImageData to (aRawimg’s representationUsingType:(NSJPEGFileType) |properties|:{NSImageCompressionFactor:qulityNum})
  
  
set aLength to (myNewImageData’s |length|()) as number
  
  
set aRes to (myNewImageData’s writeToFile:newPath atomically:true) as boolean
  
return aRes –true/false
end saveNSImageAtPathAsJPG

–NSImageをJPEG形式で保存したときのファイルサイズを計算
on calcSavedJPEGSizeFromNSIMage(anImage, qulityNum as real)
  set imageRep to anImage’s TIFFRepresentation()
  
set aRawimg to NSBitmapImageRep’s imageRepWithData:imageRep
  
set myNewImageData to (aRawimg’s representationUsingType:(NSJPEGFileType) |properties|:{NSImageCompressionFactor:qulityNum})
  
set aLength to (myNewImageData’s |length|()) as number
  
return aLength
end calcSavedJPEGSizeFromNSIMage

★Click Here to Open This Script 

Posted in file Image list UTI | Tagged 10.11savvy 10.12savvy 10.13savvy 10.14savvy Finder NSArray NSBitmapImageRep NSImage NSPredicate NSString NSURL NSURLTypeIdentifierKey NSUUID | Leave a comment

指定色で塗りつぶし角丸画像を作成

Posted on 2月 5, 2019 by Takaaki Naganoya

指定の矩形に対して、指定色で、指定半径の角丸で、指定ファイルパスに角丸ぬりつぶしPNG画像を作成するAppleScriptです。

色選択のポップアップメニュー中に入れるNSImage作成用に作ったものですが、ねんのために(動作確認のために)ファイル出力させてみました。

AppleScript名:指定色で塗りつぶし角丸画像を作成.scptd
—
–  Created by: Piyomaru Software
–  Created on: 2019/01/29
—
–  Copyright © 2019 Piyomaru Software, All Rights Reserved
—
use AppleScript version "2.4" — Yosemite (10.10) or later
use framework "Foundation"
use scripting additions
use framework "AppKit"

property |NSURL| : a reference to current application’s |NSURL|
property NSColor : a reference to current application’s NSColor
property NSString : a reference to current application’s NSString
property NSImage : a reference to current application’s NSImage
property NSScreen : a reference to current application’s NSScreen
property NSBezierPath : a reference to current application’s NSBezierPath
property NSPNGFileType : a reference to current application’s NSPNGFileType
property NSBitmapImageRep : a reference to current application’s NSBitmapImageRep

set tCol to choose color
copy tCol to {rVal, gVal, bVal}

set aRadius to 12
set aNSColor to makeNSColorFromRGBAval(rVal, gVal, bVal, 65535, 65535) of me
set aNSImage to makeRoundedNSImageWithFilledWithColor(100, 100, aNSColor, aRadius) of me

set aPath to NSString’s stringWithString:(POSIX path of (choose file name))
set bPath to aPath’s stringByAppendingPathExtension:"png"
set aRes to saveNSImageAtPathAsPNG(aNSImage, bPath) of me

–指定サイズのNSImageを作成し、指定色で塗ってNSImageで返す、anRadiusの半径の角丸で
on makeRoundedNSImageWithFilledWithColor(aWidth, aHeight, fillColor, anRadius as real)
  set anImage to NSImage’s alloc()’s initWithSize:(current application’s NSMakeSize(aWidth, aHeight))
  
anImage’s lockFocus()
  
—
  
set theRect to {{x:0, y:0}, {height:aHeight, width:aWidth}}
  
set theNSBezierPath to NSBezierPath’s bezierPathWithRoundedRect:theRect xRadius:anRadius yRadius:anRadius
  
—
  
fillColor’s |set|() –色設定
  
theNSBezierPath’s fill() –ぬりつぶし
  
—
  
anImage’s unlockFocus()
  
  
return anImage
end makeRoundedNSImageWithFilledWithColor

–aMaxValを最大値とする数値でNSColorを作成して返す
on makeNSColorFromRGBAval(redValue as integer, greenValue as integer, blueValue as integer, alphaValue as integer, aMaxVal as integer)
  set aRedCocoa to (redValue / aMaxVal) as real
  
set aGreenCocoa to (greenValue / aMaxVal) as real
  
set aBlueCocoa to (blueValue / aMaxVal) as real
  
set aAlphaCocoa to (alphaValue / aMaxVal) as real
  
set aColor to NSColor’s colorWithCalibratedRed:aRedCocoa green:aGreenCocoa blue:aBlueCocoa alpha:aAlphaCocoa
  
return aColor
end makeNSColorFromRGBAval

–NSImageを指定パスにPNG形式で保存
on saveNSImageAtPathAsPNG(anImage, outPath)
  set imageRep to anImage’s TIFFRepresentation()
  
set aRawimg to NSBitmapImageRep’s imageRepWithData:imageRep
  
  
set pathString to NSString’s stringWithString:outPath
  
set newPath to pathString’s stringByExpandingTildeInPath()
  
  
set myNewImageData to (aRawimg’s representationUsingType:(NSPNGFileType) |properties|:(missing value))
  
set aRes to (myNewImageData’s writeToFile:newPath atomically:true) as boolean
  
  
return aRes –成功ならtrue、失敗ならfalseが返る
end saveNSImageAtPathAsPNG

★Click Here to Open This Script 

Posted in file Image | Tagged 10.11savvy 10.12savvy 10.13savvy 10.14savvy NSBezierPath NSColor NSImage NSScreen NSString NSURL | Leave a comment

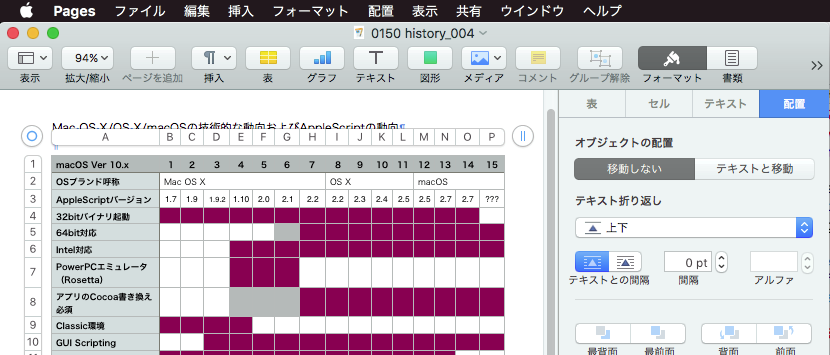
Keynote書類の現在のスライド上の表1の背景色を置換 v1

Posted on 1月 31, 2019 by Takaaki Naganoya

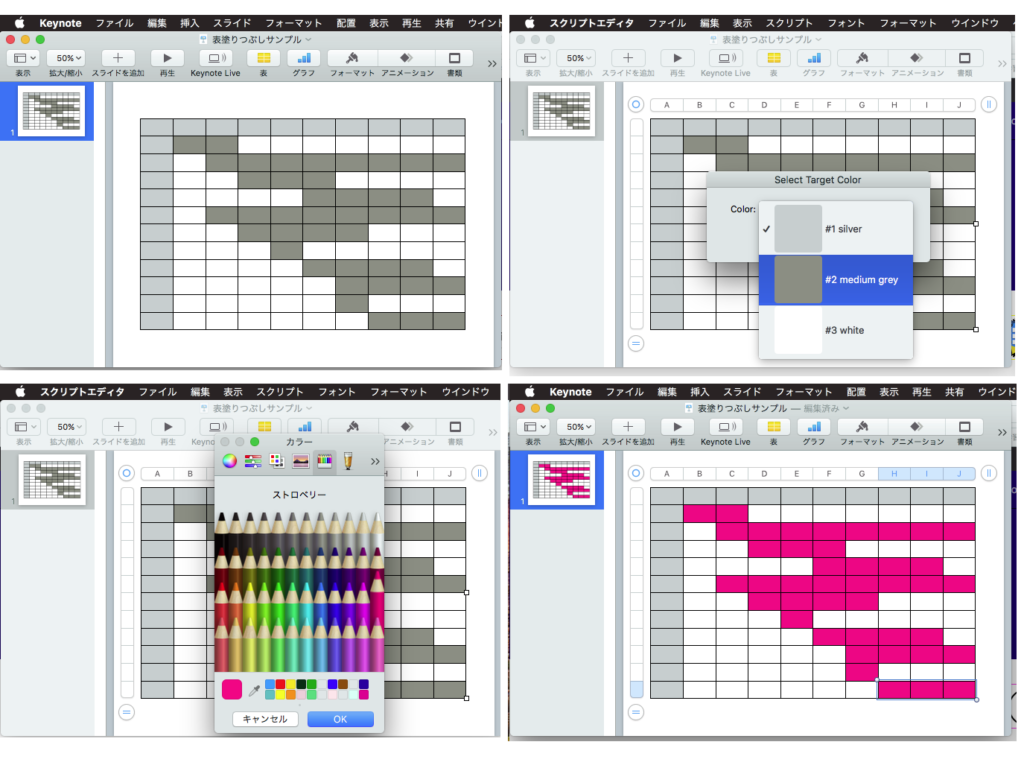
Keynoteでオープン中の最前面の書類の現在表示中のスライドに存在する表1の背景色を置換するAppleScriptです。

Pages用のScriptをごく一部修正してkeynoteの表に対して処理できるようにしてみました。macOS 10.11, 10.12, 10.13ではスクリプトエディタ上で動作します。macOS 10.14ではSIPを解除してスクリプトエディタで動かすか、アプレット形式で書き出して、アプレットのバンドル中にdbColNamesKit.frameworkを入れると動きます。

Script DebuggerとScript Menu上では動作しません。

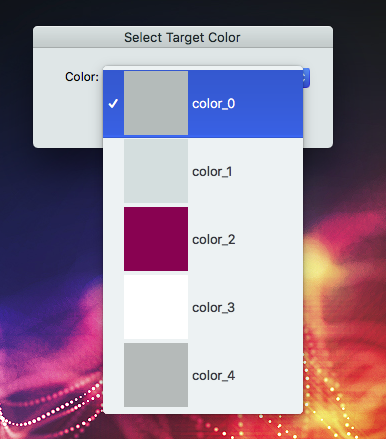
ポップアップメニュー中に色の名称の動的な推定に、オープンソースの「DBColorNames」をフレームワーク化した
「dbColNamesKit.framework」を利用しています。

–> dbColNamesKit.framework (To ~/Library/Frameworks)

AppleScript名:Keynote書類の現在のスライド上の表の背景色を置換 v1
— Created 2019-01-29 by Takaaki Naganoya
— 2019 Piyomaru Software
use AppleScript version "2.4"
use scripting additions
use framework "Foundation"
use framework "AppKit"
use framework "dbColNamesKit" –https://github.com/daniel-beard/DBColorNames/
use Bplus : script "BridgePlus" –https://www.macosxautomation.com/applescript/apps/BridgePlus.html

–v1:Convert Pages version to Keynote

property NSView : a reference to current application’s NSView
property NSColor : a reference to current application’s NSColor
property NSArray : a reference to current application’s NSArray
property NSMenu : a reference to current application’s NSMenu
property NSImage : a reference to current application’s NSImage
property NSScreen : a reference to current application’s NSScreen
property NSButton : a reference to current application’s NSButton
property NSWindow : a reference to current application’s NSWindow
property NSTextField : a reference to current application’s NSTextField
property NSMenuItem : a reference to current application’s NSMenuItem
property NSBezierPath : a reference to current application’s NSBezierPath
property NSPopUpButton : a reference to current application’s NSPopUpButton
property NSWindowController : a reference to current application’s NSWindowController
property NSTitledWindowMask : a reference to current application’s NSTitledWindowMask
property NSRoundedBezelStyle : a reference to current application’s NSRoundedBezelStyle
property NSFloatingWindowLevel : a reference to current application’s NSFloatingWindowLevel
property NSBackingStoreBuffered : a reference to current application’s NSBackingStoreBuffered
property NSMomentaryLightButton : a reference to current application’s NSMomentaryLightButton

property windisp : true
property wController : missing value
property pop1ind : 1

–初期化
set (my windisp) to true
set (my pop1ind) to 1
load framework

–Pagesの1ページ目にある表の塗り色を取得
tell application "Keynote"
  tell front document
    tell current slide
      tell table 1
        set c1List to background color of every cell
        
set aProp to properties
        
set xCount to column count of aProp
      end tell
    end tell
  end tell
end tell

–Convert 1D List to 2D List
set c3List to (current application’s SMSForder’s subarraysFrom:c1List groupedBy:xCount |error|:(missing value)) as list

–色データをユニーク化(重複削除)
set bList to uniquifyList(c1List) of me

–missing value(背景色なし)を除外する
set c2List to (current application’s SMSForder’s arrayByDeletingBlanksIn:(bList)) as list

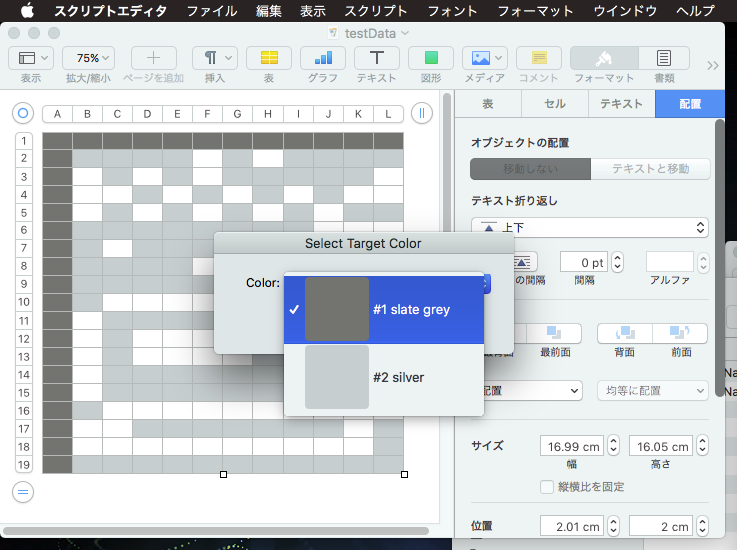
–Popup Menuで置換色選択
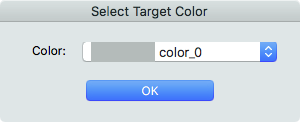
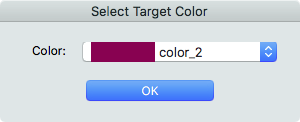
set paramObj to {c2List, 65535, "OK", "Select Target Color", 180} –Timeout = 180 sec, Color val range = 16bit
my performSelectorOnMainThread:"getPopupValues:" withObject:(paramObj) waitUntilDone:true
if pop1ind = false then return –timed out
set fromCol to (contents of item pop1ind of c2List)

–カラーピッカーで置換色選択
set tCol to choose color default color fromCol

set d1 to current date

–実際に表の背景色を置換する
set hitList to findDataFrom2DList(fromCol, c3List) of me –データ上で当該色のセル情報を計算する

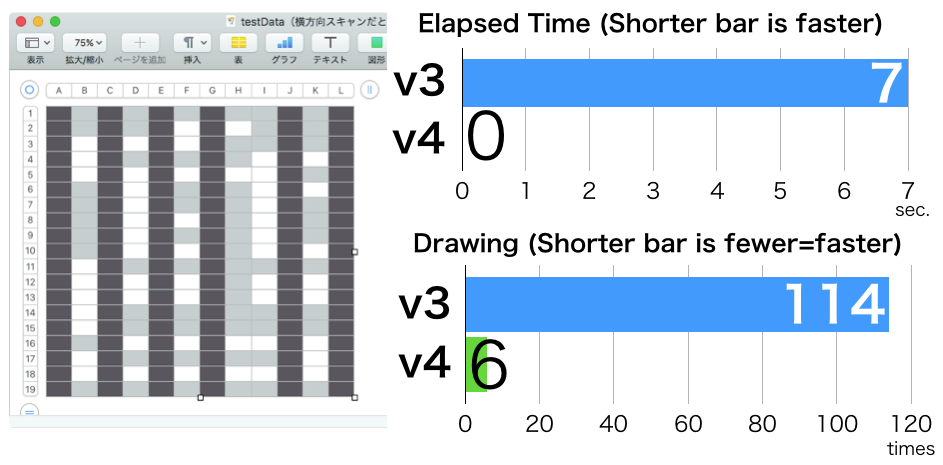
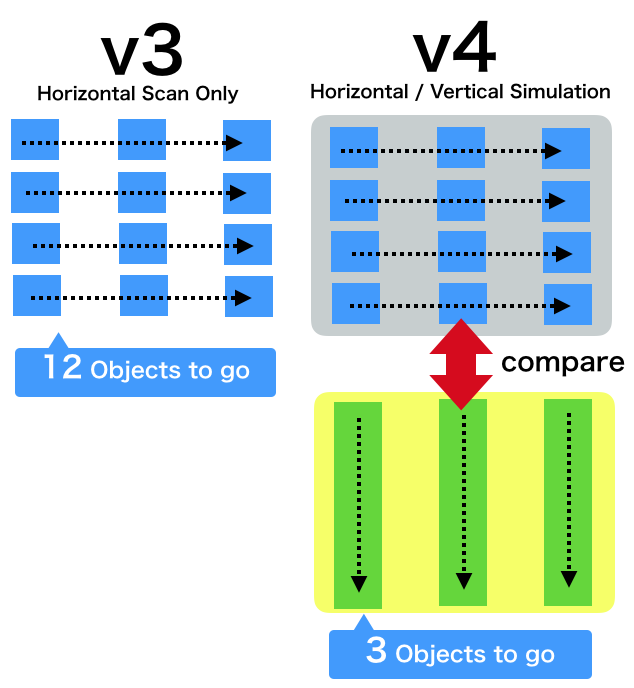
–Rangeを横スキャンと縦スキャンの2通りで試算(Two way Simulation)
set rList1 to retRangeFromPosListHorizontal(hitList) of me –横方向へのrange評価
set rList2 to retRangeFromPosListVertival(hitList) of me –縦方向へのrange評価

–Simulationの結果、要素数の少ない方(=処理時間の短い方=高速な方)を採用する
log {"Simulation", (length of rList1), (length of rList2)}
if (length of rList1) < (length of rList2) then
  copy rList1 to rangeList
else
  copy rList2 to rangeList
end if

tell application "Keynote"
  activate
  
tell front document
    tell current slide
      tell table 1
        repeat with i in rangeList
          set j to contents of i
          
          
ignoring application responses –非同期実行モードで高速実行
            set background color of range j to tCol
          end ignoring
          
        end repeat
      end tell
    end tell
  end tell
end tell

set d2 to current date
return d2 – d1

–カラーポップアップメニューをウィンドウ表示
on getPopupValues:paramObj
  copy (paramObj as list) to {ap1List, aColMax, aButtonMSG, aSliderValMSG, timeOutSecs}
  
  
set (my windisp) to true
  
  
set aView to NSView’s alloc()’s initWithFrame:(current application’s NSMakeRect(0, 0, 360, 100))
  
  
–Labelをつくる
  
set a1TF to NSTextField’s alloc()’s initWithFrame:(current application’s NSMakeRect(30, 60, 80, 20))
  
a1TF’s setEditable:false
  
a1TF’s setStringValue:"Color:"
  
a1TF’s setDrawsBackground:false
  
a1TF’s setBordered:false
  
  
–Ppopup Buttonをつくる
  
set a1Button to NSPopUpButton’s alloc()’s initWithFrame:(current application’s NSMakeRect(80, 60, 200, 20)) pullsDown:false
  
a1Button’s removeAllItems()
  
  
set a1Menu to NSMenu’s alloc()’s init()
  
set aCDB to current application’s DBColorNames’s alloc()’s init()
  
  
set iCount to 1
  
repeat with i in ap1List
    copy i to {r1, g1, b1}
    
    
set nsCol to makeNSColorFromRGBAval(r1, g1, b1, aColMax, aColMax) of me
    
set anImage to makeRoundedNSImageWithFilledWithColor(64, 64, nsCol, 4) of me
    
    
set aTitle to "#" & (iCount as string) & " " & (aCDB’s nameForColor:nsCol) as string
    
set aMenuItem to (NSMenuItem’s alloc()’s initWithTitle:aTitle action:"actionHandler:" keyEquivalent:"")
    (
aMenuItem’s setImage:anImage)
    (
aMenuItem’s setEnabled:true)
    (
a1Menu’s addItem:aMenuItem)
    
    
set iCount to iCount + 1
  end repeat
  
  
a1Button’s setMenu:a1Menu


–Buttonをつくる
  
set bButton to (NSButton’s alloc()’s initWithFrame:(current application’s NSMakeRect(80, 10, 140, 40)))
  
bButton’s setButtonType:(NSMomentaryLightButton)
  
bButton’s setBezelStyle:(NSRoundedBezelStyle)
  
bButton’s setTitle:aButtonMSG
  
bButton’s setTarget:me
  
bButton’s setAction:("clicked:")
  
bButton’s setKeyEquivalent:(return)
  
  
aView’s addSubview:a1TF
  
  
aView’s addSubview:a1Button
  
aView’s addSubview:bButton
  
aView’s setNeedsDisplay:true
  
  
–NSWindowControllerを作ってみた(いらない?)
  
set aWin to (my makeWinWithView(aView, 300, 100, aSliderValMSG))
  
  
set wController to NSWindowController’s alloc()
  
wController’s initWithWindow:aWin
  
  
wController’s showWindow:me
  
  
set aCount to timeOutSecs * 100
  
  
set hitF to false
  
repeat aCount times
    if (my windisp) = false then
      set hitF to true
      
exit repeat
    end if
    
delay 0.01
    
set aCount to aCount – 1
  end repeat
  
  
my closeWin:aWin
  
  
if hitF = true then
    set s1Val to ((a1Button’s indexOfSelectedItem() as number) + 1)
  else
    set s1Val to false
  end if
  
  
copy s1Val to my pop1ind
  
end getPopupValues:

on clicked:aSender
  set (my windisp) to false
end clicked:

–make Window for Display
on makeWinWithView(aView, aWinWidth as integer, aWinHeight as integer, aTitle as string)
  set aScreen to NSScreen’s mainScreen()
  
set aFrame to {{0, 0}, {aWinWidth, aWinHeight}}
  
  
set aBacking to NSTitledWindowMask
  
  
set aDefer to NSBackingStoreBuffered
  
  
— Window
  
set aWin to NSWindow’s alloc()
  (
aWin’s initWithContentRect:aFrame styleMask:aBacking backing:aDefer defer:false screen:aScreen)
  
  
aWin’s setTitle:aTitle
  
aWin’s setDelegate:me
  
aWin’s setDisplaysWhenScreenProfileChanges:true
  
aWin’s setHasShadow:true
  
aWin’s setIgnoresMouseEvents:false
  
aWin’s setLevel:(NSFloatingWindowLevel)
  
aWin’s setOpaque:false
  
aWin’s setReleasedWhenClosed:true
  
aWin’s |center|()
  
  
aWin’s setContentView:aView
  
  
return aWin
end makeWinWithView

–close win
on closeWin:aWindow
  repeat with n from 10 to 1 by -1
    (aWindow’s setAlphaValue:n / 10)
    
delay 0.02
  end repeat
  
aWindow’s |close|()
end closeWin:

–Popup Action Handler
on actionHandler:sender
  set aTag to tag of sender as integer
  
set aTitle to title of sender as string
end actionHandler:

–aMaxValを最大値とする数値でNSColorを作成して返す
on makeNSColorFromRGBAval(redValue as integer, greenValue as integer, blueValue as integer, alphaValue as integer, aMaxVal as integer)
  set aRedCocoa to (redValue / aMaxVal) as real
  
set aGreenCocoa to (greenValue / aMaxVal) as real
  
set aBlueCocoa to (blueValue / aMaxVal) as real
  
set aAlphaCocoa to (alphaValue / aMaxVal) as real
  
set aColor to NSColor’s colorWithCalibratedRed:aRedCocoa green:aGreenCocoa blue:aBlueCocoa alpha:aAlphaCocoa
  
return aColor
end makeNSColorFromRGBAval

–指定サイズのNSImageを作成し、指定色で塗ってNSImageで返す
on makeNSImageWithFilledWithColor(aWidth as integer, aHeight as integer, fillColor)
  set anImage to NSImage’s alloc()’s initWithSize:(current application’s NSMakeSize(aWidth, aHeight))
  
anImage’s lockFocus()
  
—
  
set theRect to {{x:0, y:0}, {height:aHeight, width:aWidth}}
  
set theNSBezierPath to NSBezierPath’s bezierPath
  
theNSBezierPath’s appendBezierPathWithRect:theRect
  
—
  
fillColor’s |set|() –色設定
  
theNSBezierPath’s fill() –ぬりつぶし
  
—
  
anImage’s unlockFocus()
  
—
  
return anImage
end makeNSImageWithFilledWithColor

–指定サイズのNSImageを作成し、指定色で塗ってNSImageで返す、anRadiusの半径の角丸で
on makeRoundedNSImageWithFilledWithColor(aWidth as integer, aHeight as integer, fillColor, anRadius as real)
  set anImage to NSImage’s alloc()’s initWithSize:(current application’s NSMakeSize(aWidth, aHeight))
  
anImage’s lockFocus()
  
—
  
set theRect to {{x:0, y:0}, {height:aHeight, width:aWidth}}
  
set theNSBezierPath to NSBezierPath’s bezierPathWithRoundedRect:theRect xRadius:anRadius yRadius:anRadius
  
—
  
fillColor’s |set|() –色設定
  
theNSBezierPath’s fill() –ぬりつぶし
  
—
  
anImage’s unlockFocus()
  
  
return anImage
end makeRoundedNSImageWithFilledWithColor

on uniquifyList(aList as list)
  set aArray to NSArray’s arrayWithArray:aList
  
set bArray to aArray’s valueForKeyPath:"@distinctUnionOfObjects.self"
  
return bArray as list
end uniquifyList

on findDataFrom2DList(anItem, aList as list)
  script spd
    property aList : {}
    
property resList : {}
  end script
  
  
set (aList of spd) to aList
  
set (resList of spd) to {}
  
  
set yCount to 1
  
  
repeat with i in (aList of spd)
    
    
set aResList to (Bplus’s indexesOfItem:anItem inList:i inverting:false) as list
    
    
set tmpList to {}
    
if aResList is not equal to {} then
      repeat with ii in aResList
        set jj to contents of ii
        
set the end of tmpList to {jj, yCount}
      end repeat
      
set (resList of spd) to (resList of spd) & tmpList
    end if
    
    
set yCount to yCount + 1
  end repeat
  
  
return (resList of spd) –return {{x, y}…..} item list (1-based)
end findDataFrom2DList

on retRangeFromPosListVertival(posList as list)
  script rangeSPD
    property posList2 : {}
  end script
  
  
–縦方向へのrange評価に都合がいいようにソート
  
set (posList2 of rangeSPD) to shellSortListAscending(posList, {1, 2}) of me
  
  
–先頭データをピックアップ
  
set firstData to first item of (posList2 of rangeSPD)
  
set (posList2 of rangeSPD) to rest of (posList2 of rangeSPD)
  
  
copy firstData to {curX1, curY1}
  
set tmpRangeStr to aNumToExcelColumn(curX1) of me & (curY1 as string) & ":"
  
  
set tmpRange to {}
  
set hitF to false
  
  
set outList to {}
  
  
repeat with i in (posList2 of rangeSPD)
    copy i to {tmpX, tmpY}
    
    
–log {"{curX1, curY1}", {curX1, curY1}}
    
–log {"{tmpX, tmpY}", {tmpX, tmpY}}


if (curX1 = tmpX) and (curY1 + 1 = tmpY) then
      –Y方向への連続値を拾っている最中
      
if hitF = false then
        –log "case 1a"
        
–log {"hitF", hitF}
        
set hitF to true
      else
        –log "case 1b"
        
–log {"hitF", hitF}
        
–横に連続しているブロックの途中
      end if
    else
      –直前の値と連続していない
      
if hitF = false then
        –log "case 2a"
        
–log {"hitF", hitF}
        
set tmpRangeStr to tmpRangeStr & aNumToExcelColumn(curX1) of me & (curY1 as string)
        
set the end of outList to tmpRangeStr
        
set tmpRangeStr to aNumToExcelColumn(tmpX) of me & (tmpY as string) & ":"
        
set hitF to false
      else
        –log "case 2b"
        
–log {"hitF", hitF}
        
–連続ブロックの末尾を拾った
        
set tmpRangeStr to tmpRangeStr & aNumToExcelColumn(curX1) of me & (curY1 as string)
        
set the end of outList to tmpRangeStr
        
set tmpRangeStr to aNumToExcelColumn(tmpX) of me & (tmpY as string) & ":"
        
set hitF to false
        
–log {"tmpRangeStr", tmpRangeStr}
      end if
    end if
    
    
copy {tmpX, tmpY} to {curX1, curY1}
  end repeat
  
  
–log {tmpRangeStr, hitF}
  
  
if (hitF = true) or (tmpRangeStr is not equal to "") then
    set tmpRangeStr to tmpRangeStr & aNumToExcelColumn(curX1) of me & (curY1 as string)
    
set the end of outList to tmpRangeStr
  end if
  
  
return outList
end retRangeFromPosListVertival

on retRangeFromPosListHorizontal(posList as list)
  script rangeSPD
    property posList2 : {}
  end script
  
  
copy posList to (posList2 of rangeSPD)
  
  
–先頭データをピックアップ
  
set firstData to first item of (posList2 of rangeSPD)
  
set (posList2 of rangeSPD) to rest of (posList2 of rangeSPD)
  
  
copy firstData to {curX1, curY1}
  
set tmpRangeStr to aNumToExcelColumn(curX1) of me & (curY1 as string) & ":"
  
  
set tmpRange to {}
  
set hitF to false
  
  
set outList to {}
  
  
repeat with i in (posList2 of rangeSPD)
    copy i to {tmpX, tmpY}
    
    
–log {"{curX1, curY1}", {curX1, curY1}}
    
–log {"{tmpX, tmpY}", {tmpX, tmpY}}


if (curX1 + 1 = tmpX) and (curY1 = tmpY) then
      –X方向への連続値を拾っている最中
      
if hitF = false then
        –log "case 1a"
        
–log {"hitF", hitF}
        
set hitF to true
      else
        –log "case 1b"
        
–log {"hitF", hitF}
        
–横に連続しているブロックの途中
      end if
    else
      –直前の値と連続していない
      
if hitF = false then
        –log "case 2a"
        
–log {"hitF", hitF}
        
set tmpRangeStr to tmpRangeStr & aNumToExcelColumn(curX1) of me & (curY1 as string)
        
set the end of outList to tmpRangeStr
        
set tmpRangeStr to aNumToExcelColumn(tmpX) of me & (tmpY as string) & ":"
        
set hitF to false
      else
        –log "case 2b"
        
–log {"hitF", hitF}
        
–連続ブロックの末尾を拾った
        
set tmpRangeStr to tmpRangeStr & aNumToExcelColumn(curX1) of me & (curY1 as string)
        
set the end of outList to tmpRangeStr
        
set tmpRangeStr to aNumToExcelColumn(tmpX) of me & (tmpY as string) & ":"
        
set hitF to false
        
–log {"tmpRangeStr", tmpRangeStr}
      end if
    end if
    
    
copy {tmpX, tmpY} to {curX1, curY1}
  end repeat
  
  
–log {tmpRangeStr, hitF}
  
  
if (hitF = true) or (tmpRangeStr is not equal to "") then
    set tmpRangeStr to tmpRangeStr & aNumToExcelColumn(curX1) of me & (curY1 as string)
    
set the end of outList to tmpRangeStr
  end if
  
  
return outList
end retRangeFromPosListHorizontal

–2008/05/01 By Takaaki Naganoya
–10進数数値をExcel 2004/2008的カラム表現にエンコードするサブルーチン を使いまわし
–1〜1351までの間であれば正しいエンコーディング結果を返す
on aNumToExcelColumn(origNum as integer)
  if origNum > 1351 then
    error "エラー:Excel 2004/2008的カラム表現(A1形式)への変換ルーチンにおいて、想定範囲外(1351以上)のパラメータが指定されました"
  end if
  
  
set upperDigitEncTable to {"A", "B", "C", "D", "E", "F", "G", "H", "I", "J", "K", "L", "M", "N", "O", "P", "Q", "R", "S", "T", "U", "V", "W", "X", "Y", "Z", "A"}
  
set lowerDigitEncTable to {"A", "B", "C", "D", "E", "F", "G", "H", "I", "J", "K", "L", "M", "N", "O", "P", "Q", "R", "S", "T", "U", "V", "W", "X", "Y", "Z", "A"}
  
  
set oNum to origNum
  
set nTh to 26
  
set stringLength to 4
  
  
–数字が1桁の場合の対応
  
if origNum < 27 then
    set aRes to (item origNum of upperDigitEncTable) as string
    
return aRes
  end if


if origNum > 702 then
    –3桁になる場合
    
set upupNum to oNum div 676 –整数除算–上の上の桁
    
set oNum to oNum – (upupNum * 676)
    
set upNum to oNum div 26 –整数除算–上の桁
    
set lowNum to oNum mod 26 – 1 –余剰計算–下の桁
    
    
–超つじつま合わせ処理
    
if lowNum = -1 then
      set upNum to upNum – 1
      
set lowNum to 25
    end if
    
    
set upupChar to (item upupNum of upperDigitEncTable) as string
    
set upChar to (item upNum of upperDigitEncTable) as string
    
set lowChar to (item (lowNum + 1) of lowerDigitEncTable) as string
    
set resText to upupChar & upChar & lowChar
    
  else
    –2桁の場合
    
set upNum to oNum div 26 –整数除算–上の桁
    
set lowNum to oNum mod 26 – 1 –余剰計算–下の桁
    
    
–超つじつま合わせ処理
    
if lowNum = -1 then
      set upNum to upNum – 1
      
set lowNum to 25
    end if
    
    
set upChar to (item upNum of upperDigitEncTable) as string
    
set lowChar to (item (lowNum + 1) of lowerDigitEncTable) as string
    
set resText to upChar & lowChar
    
  end if
  
  
return resText
end aNumToExcelColumn

–入れ子のリストを昇順ソート
on shellSortListAscending(a, keyItem)
  return sort2DList(a, keyItem, {true}) of me
end shellSortListAscending

–入れ子のリストを降順ソート
on shellSortListDecending(a, keyItem)
  return sort2DList(a, keyItem, {false}) of me
end shellSortListDecending

–2D Listをソート
on sort2DList(aList as list, sortIndexes as list, sortOrders as list)
  
  
–index値をAS流(アイテムが1はじまり)からCocoa流(アイテムが0はじまり)に変換
  
set newIndex to {}
  
repeat with i in sortIndexes
    set j to contents of i
    
set j to j – 1
    
set the end of newIndex to j
  end repeat
  
  
–Sort TypeのListを作成(あえて外部から指定する内容でもない)
  
set sortTypes to {}
  
repeat (length of sortIndexes) times
    set the end of sortTypes to "compare:"
  end repeat
  
  
–Sort
  
set resList to (current application’s SMSForder’s subarraysIn:(aList) sortedByIndexes:newIndex ascending:sortOrders sortTypes:sortTypes |error|:(missing value)) as list
  
  
return resList
end sort2DList

★Click Here to Open This Script 

Posted in Color GUI | Tagged 10.11savvy 10.12savvy 10.13savvy 10.14savvy Keynote NSArray NSBezierPath NSButton NSColor NSImage NSMenu NSMenuItem NSPopUpButton NSScreen NSTextField NSView NSWindow NSWindowController | 1 Comment

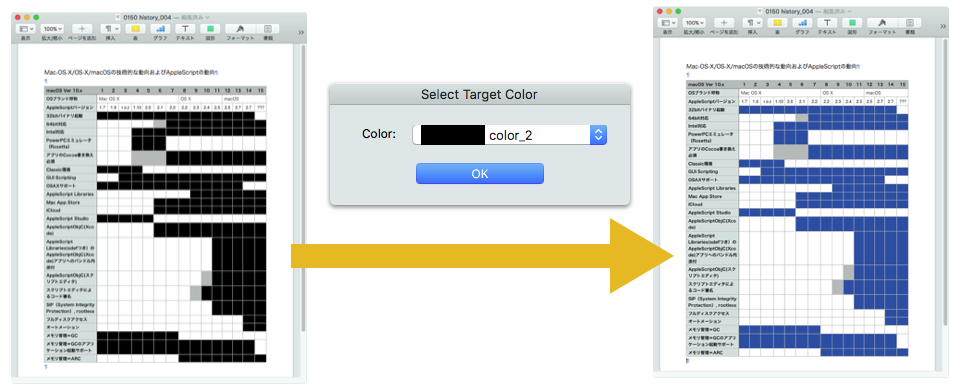
Numbers書類の現在のシート上の表1の背景色を置換 v1

Posted on 1月 31, 2019 by Takaaki Naganoya

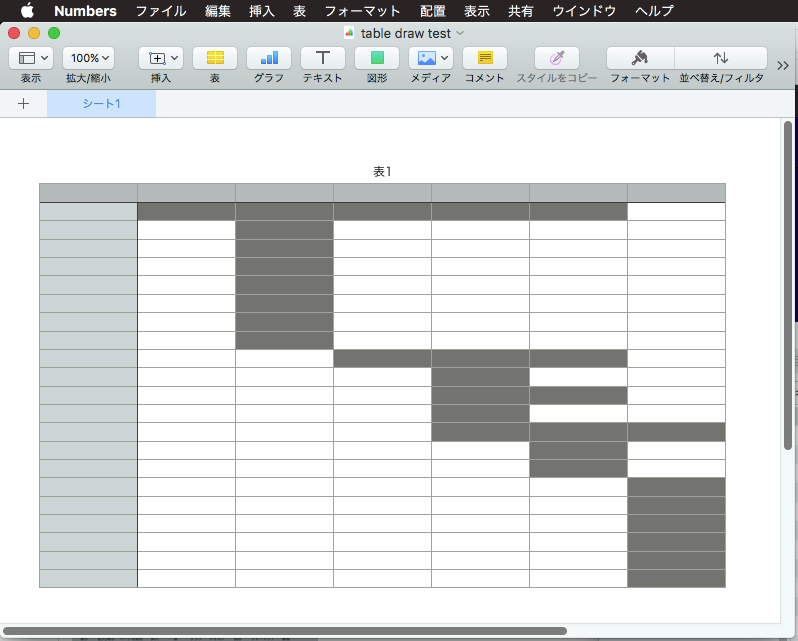
Numbersでオープン中の最前面の書類の現在表示中のシートに存在する表1の背景色を置換するAppleScriptです。

Pages用のScriptをごく一部修正してNumbersの表に対して処理できるようにしてみました。macOS 10.11, 10.12, 10.13ではスクリプトエディタ上で動作します。macOS 10.14ではSIPを解除してスクリプトエディタで動かすか、アプレット形式で書き出して、アプレットのバンドル中にdbColNamesKit.frameworkを入れると動きます。

Script DebuggerとScript Menu上では動作しません。

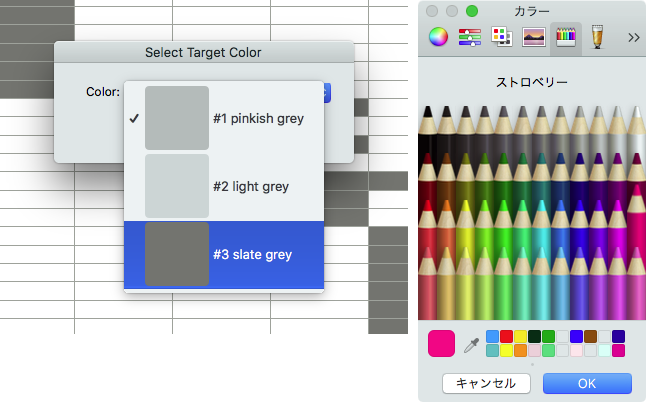
ポップアップメニュー中に色の名称の動的な推定に、オープンソースの「DBColorNames」をフレームワーク化した
「dbColNamesKit.framework」を利用しています。

–> dbColNamesKit.framework (To ~/Library/Frameworks)

AppleScript名:Numbers書類の現在のシート上の表1の背景色を置換 v1
— Created 2019-01-29 by Takaaki Naganoya
— 2019 Piyomaru Software
use AppleScript version "2.4"
use scripting additions
use framework "Foundation"
use framework "AppKit"
use framework "dbColNamesKit" –https://github.com/daniel-beard/DBColorNames/
use Bplus : script "BridgePlus" –https://www.macosxautomation.com/applescript/apps/BridgePlus.html

–v1:Change Pages part to Numbers

property NSView : a reference to current application’s NSView
property NSColor : a reference to current application’s NSColor
property NSArray : a reference to current application’s NSArray
property NSMenu : a reference to current application’s NSMenu
property NSImage : a reference to current application’s NSImage
property NSScreen : a reference to current application’s NSScreen
property NSButton : a reference to current application’s NSButton
property NSWindow : a reference to current application’s NSWindow
property NSTextField : a reference to current application’s NSTextField
property NSMenuItem : a reference to current application’s NSMenuItem
property NSBezierPath : a reference to current application’s NSBezierPath
property NSPopUpButton : a reference to current application’s NSPopUpButton
property NSWindowController : a reference to current application’s NSWindowController
property NSTitledWindowMask : a reference to current application’s NSTitledWindowMask
property NSRoundedBezelStyle : a reference to current application’s NSRoundedBezelStyle
property NSFloatingWindowLevel : a reference to current application’s NSFloatingWindowLevel
property NSBackingStoreBuffered : a reference to current application’s NSBackingStoreBuffered
property NSMomentaryLightButton : a reference to current application’s NSMomentaryLightButton

property windisp : true
property wController : missing value
property pop1ind : 1

–初期化
set (my windisp) to true
set (my pop1ind) to 1
load framework

–Pagesの1ページ目にある表の塗り色を取得
tell application "Numbers"
  tell front document
    tell active sheet
      tell table 1
        set c1List to background color of every cell
        
set aProp to properties
        
set xCount to column count of aProp
      end tell
    end tell
  end tell
end tell

–Convert 1D List to 2D List
set c3List to (current application’s SMSForder’s subarraysFrom:c1List groupedBy:xCount |error|:(missing value)) as list

–色データをユニーク化(重複削除)
set bList to uniquifyList(c1List) of me

–missing value(背景色なし)を除外する
set c2List to (current application’s SMSForder’s arrayByDeletingBlanksIn:(bList)) as list

–Popup Menuで置換色選択
set paramObj to {c2List, 65535, "OK", "Select Target Color", 180} –Timeout = 180 sec, Color val range = 16bit
my performSelectorOnMainThread:"getPopupValues:" withObject:(paramObj) waitUntilDone:true
if pop1ind = false then return –timed out
set fromCol to (contents of item pop1ind of c2List)

–カラーピッカーで置換色選択
set tCol to choose color default color fromCol

set d1 to current date

–実際に表の背景色を置換する
set hitList to findDataFrom2DList(fromCol, c3List) of me –データ上で当該色のセル情報を計算する

–Rangeを横スキャンと縦スキャンの2通りで試算(Two way Simulation)
set rList1 to retRangeFromPosListHorizontal(hitList) of me –横方向へのrange評価
set rList2 to retRangeFromPosListVertival(hitList) of me –縦方向へのrange評価

–Simulationの結果、要素数の少ない方(=処理時間の短い方=高速な方)を採用する
if (length of rList1) < (length of rList2) then
  copy rList1 to rangeList
else
  copy rList2 to rangeList
end if

tell application "Numbers"
  activate
  
tell front document
    tell active sheet
      tell table 1
        repeat with i in rangeList
          set j to contents of i
          
          
ignoring application responses –非同期実行モードで高速実行
            set background color of range j to tCol
          end ignoring
          
        end repeat
      end tell
    end tell
  end tell
end tell

set d2 to current date
return d2 – d1

–カラーポップアップメニューをウィンドウ表示
on getPopupValues:paramObj
  copy (paramObj as list) to {ap1List, aColMax, aButtonMSG, aSliderValMSG, timeOutSecs}
  
  
set (my windisp) to true
  
  
set aView to NSView’s alloc()’s initWithFrame:(current application’s NSMakeRect(0, 0, 360, 100))
  
  
–Labelをつくる
  
set a1TF to NSTextField’s alloc()’s initWithFrame:(current application’s NSMakeRect(30, 60, 80, 20))
  
a1TF’s setEditable:false
  
a1TF’s setStringValue:"Color:"
  
a1TF’s setDrawsBackground:false
  
a1TF’s setBordered:false
  
  
–Ppopup Buttonをつくる
  
set a1Button to NSPopUpButton’s alloc()’s initWithFrame:(current application’s NSMakeRect(80, 60, 200, 20)) pullsDown:false
  
a1Button’s removeAllItems()
  
  
set a1Menu to NSMenu’s alloc()’s init()
  
set aCDB to current application’s DBColorNames’s alloc()’s init()
  
  
set iCount to 1
  
repeat with i in ap1List
    copy i to {r1, g1, b1}
    
    
set nsCol to makeNSColorFromRGBAval(r1, g1, b1, aColMax, aColMax) of me
    
set anImage to makeRoundedNSImageWithFilledWithColor(64, 64, nsCol, 4) of me
    
    
set aTitle to "#" & (iCount as string) & " " & (aCDB’s nameForColor:nsCol) as string
    
set aMenuItem to (NSMenuItem’s alloc()’s initWithTitle:aTitle action:"actionHandler:" keyEquivalent:"")
    (
aMenuItem’s setImage:anImage)
    (
aMenuItem’s setEnabled:true)
    (
a1Menu’s addItem:aMenuItem)
    
    
set iCount to iCount + 1
  end repeat
  
  
a1Button’s setMenu:a1Menu


–Buttonをつくる
  
set bButton to (NSButton’s alloc()’s initWithFrame:(current application’s NSMakeRect(80, 10, 140, 40)))
  
bButton’s setButtonType:(NSMomentaryLightButton)
  
bButton’s setBezelStyle:(NSRoundedBezelStyle)
  
bButton’s setTitle:aButtonMSG
  
bButton’s setTarget:me
  
bButton’s setAction:("clicked:")
  
bButton’s setKeyEquivalent:(return)
  
  
aView’s addSubview:a1TF
  
  
aView’s addSubview:a1Button
  
aView’s addSubview:bButton
  
aView’s setNeedsDisplay:true
  
  
–NSWindowControllerを作ってみた(いらない?)
  
set aWin to (my makeWinWithView(aView, 300, 100, aSliderValMSG))
  
  
set wController to NSWindowController’s alloc()
  
wController’s initWithWindow:aWin
  
  
wController’s showWindow:me
  
  
set aCount to timeOutSecs * 100
  
  
set hitF to false
  
repeat aCount times
    if (my windisp) = false then
      set hitF to true
      
exit repeat
    end if
    
delay 0.01
    
set aCount to aCount – 1
  end repeat
  
  
my closeWin:aWin
  
  
if hitF = true then
    set s1Val to ((a1Button’s indexOfSelectedItem() as number) + 1)
  else
    set s1Val to false
  end if
  
  
copy s1Val to my pop1ind
  
end getPopupValues:

on clicked:aSender
  set (my windisp) to false
end clicked:

–make Window for Display
on makeWinWithView(aView, aWinWidth as integer, aWinHeight as integer, aTitle as string)
  set aScreen to NSScreen’s mainScreen()
  
set aFrame to {{0, 0}, {aWinWidth, aWinHeight}}
  
  
set aBacking to NSTitledWindowMask
  
  
set aDefer to NSBackingStoreBuffered
  
  
— Window
  
set aWin to NSWindow’s alloc()
  (
aWin’s initWithContentRect:aFrame styleMask:aBacking backing:aDefer defer:false screen:aScreen)
  
  
aWin’s setTitle:aTitle
  
aWin’s setDelegate:me
  
aWin’s setDisplaysWhenScreenProfileChanges:true
  
aWin’s setHasShadow:true
  
aWin’s setIgnoresMouseEvents:false
  
aWin’s setLevel:(NSFloatingWindowLevel)
  
aWin’s setOpaque:false
  
aWin’s setReleasedWhenClosed:true
  
aWin’s |center|()
  
  
aWin’s setContentView:aView
  
  
return aWin
end makeWinWithView

–close win
on closeWin:aWindow
  repeat with n from 10 to 1 by -1
    (aWindow’s setAlphaValue:n / 10)
    
delay 0.02
  end repeat
  
aWindow’s |close|()
end closeWin:

–Popup Action Handler
on actionHandler:sender
  set aTag to tag of sender as integer
  
set aTitle to title of sender as string
end actionHandler:

–aMaxValを最大値とする数値でNSColorを作成して返す
on makeNSColorFromRGBAval(redValue as integer, greenValue as integer, blueValue as integer, alphaValue as integer, aMaxVal as integer)
  set aRedCocoa to (redValue / aMaxVal) as real
  
set aGreenCocoa to (greenValue / aMaxVal) as real
  
set aBlueCocoa to (blueValue / aMaxVal) as real
  
set aAlphaCocoa to (alphaValue / aMaxVal) as real
  
set aColor to NSColor’s colorWithCalibratedRed:aRedCocoa green:aGreenCocoa blue:aBlueCocoa alpha:aAlphaCocoa
  
return aColor
end makeNSColorFromRGBAval

–指定サイズのNSImageを作成し、指定色で塗ってNSImageで返す
on makeNSImageWithFilledWithColor(aWidth as integer, aHeight as integer, fillColor)
  set anImage to NSImage’s alloc()’s initWithSize:(current application’s NSMakeSize(aWidth, aHeight))
  
anImage’s lockFocus()
  
—
  
set theRect to {{x:0, y:0}, {height:aHeight, width:aWidth}}
  
set theNSBezierPath to NSBezierPath’s bezierPath
  
theNSBezierPath’s appendBezierPathWithRect:theRect
  
—
  
fillColor’s |set|() –色設定
  
theNSBezierPath’s fill() –ぬりつぶし
  
—
  
anImage’s unlockFocus()
  
—
  
return anImage
end makeNSImageWithFilledWithColor

–指定サイズのNSImageを作成し、指定色で塗ってNSImageで返す、anRadiusの半径の角丸で
on makeRoundedNSImageWithFilledWithColor(aWidth as integer, aHeight as integer, fillColor, anRadius as real)
  set anImage to NSImage’s alloc()’s initWithSize:(current application’s NSMakeSize(aWidth, aHeight))
  
anImage’s lockFocus()
  
—
  
set theRect to {{x:0, y:0}, {height:aHeight, width:aWidth}}
  
set theNSBezierPath to NSBezierPath’s bezierPathWithRoundedRect:theRect xRadius:anRadius yRadius:anRadius
  
—
  
fillColor’s |set|() –色設定
  
theNSBezierPath’s fill() –ぬりつぶし
  
—
  
anImage’s unlockFocus()
  
  
return anImage
end makeRoundedNSImageWithFilledWithColor

on uniquifyList(aList as list)
  set aArray to NSArray’s arrayWithArray:aList
  
set bArray to aArray’s valueForKeyPath:"@distinctUnionOfObjects.self"
  
return bArray as list
end uniquifyList

on findDataFrom2DList(anItem, aList as list)
  script spd
    property aList : {}
    
property resList : {}
  end script
  
  
set (aList of spd) to aList
  
set (resList of spd) to {}
  
  
set yCount to 1
  
  
repeat with i in (aList of spd)
    
    
set aResList to (Bplus’s indexesOfItem:anItem inList:i inverting:false) as list
    
    
set tmpList to {}
    
if aResList is not equal to {} then
      repeat with ii in aResList
        set jj to contents of ii
        
set the end of tmpList to {jj, yCount}
      end repeat
      
set (resList of spd) to (resList of spd) & tmpList
    end if
    
    
set yCount to yCount + 1
  end repeat
  
  
return (resList of spd) –return {{x, y}…..} item list (1-based)
end findDataFrom2DList

on retRangeFromPosListVertival(posList as list)
  script rangeSPD
    property posList2 : {}
  end script
  
  
–縦方向へのrange評価に都合がいいようにソート
  
set (posList2 of rangeSPD) to shellSortListAscending(posList, {1, 2}) of me
  
  
–先頭データをピックアップ
  
set firstData to first item of (posList2 of rangeSPD)
  
set (posList2 of rangeSPD) to rest of (posList2 of rangeSPD)
  
  
copy firstData to {curX1, curY1}
  
set tmpRangeStr to aNumToExcelColumn(curX1) of me & (curY1 as string) & ":"
  
  
set tmpRange to {}
  
set hitF to false
  
  
set outList to {}
  
  
repeat with i in (posList2 of rangeSPD)
    copy i to {tmpX, tmpY}
    
    
–log {"{curX1, curY1}", {curX1, curY1}}
    
–log {"{tmpX, tmpY}", {tmpX, tmpY}}


if (curX1 = tmpX) and (curY1 + 1 = tmpY) then
      –Y方向への連続値を拾っている最中
      
if hitF = false then
        –log "case 1a"
        
–log {"hitF", hitF}
        
set hitF to true
      else
        –log "case 1b"
        
–log {"hitF", hitF}
        
–横に連続しているブロックの途中
      end if
    else
      –直前の値と連続していない
      
if hitF = false then
        –log "case 2a"
        
–log {"hitF", hitF}
        
set tmpRangeStr to tmpRangeStr & aNumToExcelColumn(curX1) of me & (curY1 as string)
        
set the end of outList to tmpRangeStr
        
set tmpRangeStr to aNumToExcelColumn(tmpX) of me & (tmpY as string) & ":"
        
set hitF to false
      else
        –log "case 2b"
        
–log {"hitF", hitF}
        
–連続ブロックの末尾を拾った
        
set tmpRangeStr to tmpRangeStr & aNumToExcelColumn(curX1) of me & (curY1 as string)
        
set the end of outList to tmpRangeStr
        
set tmpRangeStr to aNumToExcelColumn(tmpX) of me & (tmpY as string) & ":"
        
set hitF to false
        
–log {"tmpRangeStr", tmpRangeStr}
      end if
    end if
    
    
copy {tmpX, tmpY} to {curX1, curY1}
  end repeat
  
  
–log {tmpRangeStr, hitF}
  
  
if (hitF = true) or (tmpRangeStr is not equal to "") then
    set tmpRangeStr to tmpRangeStr & aNumToExcelColumn(curX1) of me & (curY1 as string)
    
set the end of outList to tmpRangeStr
  end if
  
  
return outList
end retRangeFromPosListVertival

on retRangeFromPosListHorizontal(posList as list)
  script rangeSPD
    property posList2 : {}
  end script
  
  
copy posList to (posList2 of rangeSPD)
  
  
–先頭データをピックアップ
  
set firstData to first item of (posList2 of rangeSPD)
  
set (posList2 of rangeSPD) to rest of (posList2 of rangeSPD)
  
  
copy firstData to {curX1, curY1}
  
set tmpRangeStr to aNumToExcelColumn(curX1) of me & (curY1 as string) & ":"
  
  
set tmpRange to {}
  
set hitF to false
  
  
set outList to {}
  
  
repeat with i in (posList2 of rangeSPD)
    copy i to {tmpX, tmpY}
    
    
–log {"{curX1, curY1}", {curX1, curY1}}
    
–log {"{tmpX, tmpY}", {tmpX, tmpY}}


if (curX1 + 1 = tmpX) and (curY1 = tmpY) then
      –X方向への連続値を拾っている最中
      
if hitF = false then
        –log "case 1a"
        
–log {"hitF", hitF}
        
set hitF to true
      else
        –log "case 1b"
        
–log {"hitF", hitF}
        
–横に連続しているブロックの途中
      end if
    else
      –直前の値と連続していない
      
if hitF = false then
        –log "case 2a"
        
–log {"hitF", hitF}
        
set tmpRangeStr to tmpRangeStr & aNumToExcelColumn(curX1) of me & (curY1 as string)
        
set the end of outList to tmpRangeStr
        
set tmpRangeStr to aNumToExcelColumn(tmpX) of me & (tmpY as string) & ":"
        
set hitF to false
      else
        –log "case 2b"
        
–log {"hitF", hitF}
        
–連続ブロックの末尾を拾った
        
set tmpRangeStr to tmpRangeStr & aNumToExcelColumn(curX1) of me & (curY1 as string)
        
set the end of outList to tmpRangeStr
        
set tmpRangeStr to aNumToExcelColumn(tmpX) of me & (tmpY as string) & ":"
        
set hitF to false
        
–log {"tmpRangeStr", tmpRangeStr}
      end if
    end if
    
    
copy {tmpX, tmpY} to {curX1, curY1}
  end repeat
  
  
–log {tmpRangeStr, hitF}
  
  
if (hitF = true) or (tmpRangeStr is not equal to "") then
    set tmpRangeStr to tmpRangeStr & aNumToExcelColumn(curX1) of me & (curY1 as string)
    
set the end of outList to tmpRangeStr
  end if
  
  
return outList
end retRangeFromPosListHorizontal

–2008/05/01 By Takaaki Naganoya
–10進数数値をExcel 2004/2008的カラム表現にエンコードするサブルーチン を使いまわし
–1〜1351までの間であれば正しいエンコーディング結果を返す
on aNumToExcelColumn(origNum as integer)
  if origNum > 1351 then
    error "エラー:Excel 2004/2008的カラム表現(A1形式)への変換ルーチンにおいて、想定範囲外(1351以上)のパラメータが指定されました"
  end if
  
  
set upperDigitEncTable to {"A", "B", "C", "D", "E", "F", "G", "H", "I", "J", "K", "L", "M", "N", "O", "P", "Q", "R", "S", "T", "U", "V", "W", "X", "Y", "Z", "A"}
  
set lowerDigitEncTable to {"A", "B", "C", "D", "E", "F", "G", "H", "I", "J", "K", "L", "M", "N", "O", "P", "Q", "R", "S", "T", "U", "V", "W", "X", "Y", "Z", "A"}
  
  
set oNum to origNum
  
set nTh to 26
  
set stringLength to 4
  
  
–数字が1桁の場合の対応
  
if origNum < 27 then
    set aRes to (item origNum of upperDigitEncTable) as string
    
return aRes
  end if


if origNum > 702 then
    –3桁になる場合
    
set upupNum to oNum div 676 –整数除算–上の上の桁
    
set oNum to oNum – (upupNum * 676)
    
set upNum to oNum div 26 –整数除算–上の桁
    
set lowNum to oNum mod 26 – 1 –余剰計算–下の桁
    
    
–超つじつま合わせ処理
    
if lowNum = -1 then
      set upNum to upNum – 1
      
set lowNum to 25
    end if
    
    
set upupChar to (item upupNum of upperDigitEncTable) as string
    
set upChar to (item upNum of upperDigitEncTable) as string
    
set lowChar to (item (lowNum + 1) of lowerDigitEncTable) as string
    
set resText to upupChar & upChar & lowChar
    
  else
    –2桁の場合
    
set upNum to oNum div 26 –整数除算–上の桁
    
set lowNum to oNum mod 26 – 1 –余剰計算–下の桁
    
    
–超つじつま合わせ処理
    
if lowNum = -1 then
      set upNum to upNum – 1
      
set lowNum to 25
    end if
    
    
set upChar to (item upNum of upperDigitEncTable) as string
    
set lowChar to (item (lowNum + 1) of lowerDigitEncTable) as string
    
set resText to upChar & lowChar
    
  end if
  
  
return resText
end aNumToExcelColumn

–入れ子のリストを昇順ソート
on shellSortListAscending(a, keyItem)
  return sort2DList(a, keyItem, {true}) of me
end shellSortListAscending

–入れ子のリストを降順ソート
on shellSortListDecending(a, keyItem)
  return sort2DList(a, keyItem, {false}) of me
end shellSortListDecending

–2D Listをソート
on sort2DList(aList as list, sortIndexes as list, sortOrders as list)
  
  
–index値をAS流(アイテムが1はじまり)からCocoa流(アイテムが0はじまり)に変換
  
set newIndex to {}
  
repeat with i in sortIndexes
    set j to contents of i
    
set j to j – 1
    
set the end of newIndex to j
  end repeat
  
  
–Sort TypeのListを作成(あえて外部から指定する内容でもない)
  
set sortTypes to {}
  
repeat (length of sortIndexes) times
    set the end of sortTypes to "compare:"
  end repeat
  
  
–Sort
  
set resList to (current application’s SMSForder’s subarraysIn:(aList) sortedByIndexes:newIndex ascending:sortOrders sortTypes:sortTypes |error|:(missing value)) as list
  
  
return resList
end sort2DList

★Click Here to Open This Script 

Posted in Color GUI | Tagged 10.11savvy 10.12savvy 10.13savvy 10.14savvy NSArray NSBezierPath NSButton NSColor NSImage NSMenu NSMenuItem NSPopUpButton NSRoundedBezelStyle NSScreen NSTextField NSTitledWindowMask NSView NSWindow NSWindowController Numbers | Leave a comment

Pages書類の1ページ目の表の背景色を置換 v4

Posted on 1月 30, 2019 by Takaaki Naganoya

Pagesでオープン中の最前面の書類の1ページ目に存在する表オブジェクト中の背景色を置換するAppleScriptです。

例によって、Pages書類上の表オブジェクトは「配置」を「移動しない」に設定しないとAppleScriptからアクセスできないので、あらかじめ「移動しない」設定にしておく必要があります。

本バージョンでは、データの連続部分をrangeとしてまとめて処理する方法を、1行ずつ横方向に(左→右)スキャンした場合と、1列ずつ(上→下)縦方向にスキャンした場合の2パターンで処理し、より少ないデータ単位(より多くのセルを一括で指定)で処理できる方の方式を採用するようにしました。

このため、処理データによって塗りつぶし動作が変わってきます。横方向のみのスキャンでは大幅に遅くなるタイプのデータ(縦に処理対象セルが並んでいて、横方向にはつながっていない)でも「遅くならない」ことがテーマです。

ほかには、オープンソースの「DBColorNames」を利用して色から色名称を動的に取得したり、ポップアップメニューに表示する色イメージ画像を角丸にしたりしています。

–> dbColNamesKit.framework (To ~/Library/Frameworks)

これ以上の高速化は、「縦横混在のrangeシミュレーション」でも行わないとできないと思いますが、方法についてはいろいろ思いつくので論理的には可能だと思います。ただ、単に塗りつぶしを高速化するためだけに何日も試行錯誤するのはちょっと………なので、このぐらいにしておこうかと。

macOS 10.14上では、「csrutil disable」でSIPをオフにすると、ホームディレクトリ下の~/Library/Frameworksフォルダ内のFrameworkにアクセスでき、本Scriptをそのままスクリプトエディタで実行できました。アプレット形式で書き出して、アプレット内にFrameworkを入れればSIPをオフにしなくても実行できるはずです。Script Debugger/Script Menu上では実行できないというあたりが困りどころです。

AppleScript名:Pages書類の1ページ目の表の背景色を置換 v4.1
— Created 2017-07-15 by Takaaki Naganoya
— Modified 2019-01-29 by Takaaki Naganoya
— 2019 Piyomaru Software
use AppleScript version "2.4"
use scripting additions
use framework "Foundation"
use framework "AppKit"
use framework "dbColNamesKit" –https://github.com/daniel-beard/DBColorNames/
use Bplus : script "BridgePlus" –https://www.macosxautomation.com/applescript/apps/BridgePlus.html

–v1:First Version
–v2:Pick Up target cells by calculate every background color (35% speed up)
–v3:Draw cells by range (x20 speed up)
–v3.1:Bug Fix (retRangeFromPosList)
–v3.1.1:Bug Fix (retRangeFromPosList)
–v4:Two-way Simulation (Horizontal / Vertical scan), Corner-Rounded NSImage, Dynamic Color Naming
–v4.1:Correct Vertical Scan simulation (Sort list for vertical range evaluation, at first)

property NSView : a reference to current application’s NSView
property NSColor : a reference to current application’s NSColor
property NSArray : a reference to current application’s NSArray
property NSMenu : a reference to current application’s NSMenu
property NSImage : a reference to current application’s NSImage
property NSScreen : a reference to current application’s NSScreen
property NSButton : a reference to current application’s NSButton
property NSWindow : a reference to current application’s NSWindow
property NSTextField : a reference to current application’s NSTextField
property NSMenuItem : a reference to current application’s NSMenuItem
property NSBezierPath : a reference to current application’s NSBezierPath
property NSPopUpButton : a reference to current application’s NSPopUpButton
property NSWindowController : a reference to current application’s NSWindowController
property NSTitledWindowMask : a reference to current application’s NSTitledWindowMask
property NSRoundedBezelStyle : a reference to current application’s NSRoundedBezelStyle
property NSFloatingWindowLevel : a reference to current application’s NSFloatingWindowLevel
property NSBackingStoreBuffered : a reference to current application’s NSBackingStoreBuffered
property NSMomentaryLightButton : a reference to current application’s NSMomentaryLightButton

property windisp : true
property wController : missing value
property pop1ind : 1

–初期化
set (my windisp) to true
set (my pop1ind) to 1
load framework

–Pagesの1ページ目にある表の塗り色を取得
tell application "Pages"
  tell front document
    tell table 1
      set c1List to background color of every cell
      
set aProp to properties
      
set xCount to column count of aProp
    end tell
  end tell
end tell

–色データをユニーク化(重複削除)
set bList to uniquifyList(c1List) of me

–Convert 1D List to 2D List
set c3List to (current application’s SMSForder’s subarraysFrom:c1List groupedBy:xCount |error|:(missing value)) as list

–missing value(背景色なし)を除外する
set c2List to (current application’s SMSForder’s arrayByDeletingBlanksIn:(bList)) as list

–Popup Menuで置換色選択
set paramObj to {c2List, 65535, "OK", "Select Target Color", 180} –Timeout = 180 sec, Color val range = 16bit
my performSelectorOnMainThread:"getPopupValues:" withObject:(paramObj) waitUntilDone:true
if pop1ind = false then return –timed out
set fromCol to (contents of item pop1ind of c2List)

–カラーピッカーで置換色選択
set tCol to choose color default color fromCol

set d1 to current date

–実際に表の背景色を置換する
set hitList to findDataFrom2DList(fromCol, c3List) of me –データ上で当該色のセル情報を計算する

–Rangeを横スキャンと縦スキャンの2通りで試算(Two way Simulation)
set rList1 to retRangeFromPosListHorizontal(hitList) of me –横方向へのrange評価
set rList2 to retRangeFromPosListVertival(hitList) of me –縦方向へのrange評価

–Simulationの結果、要素数の少ない方(=処理時間の短い方=高速な方)を採用する
log {"Simulation", (length of rList1), (length of rList2)}
if (length of rList1) < (length of rList2) then
  copy rList1 to rangeList
else
  copy rList2 to rangeList
end if

tell application "Pages"
  activate
  
tell front document
    tell table 1
      repeat with i in rangeList
        set j to contents of i
        
        
ignoring application responses –非同期実行モードで高速実行
          set background color of range j to tCol
        end ignoring
        
      end repeat
    end tell
  end tell
end tell

set d2 to current date
return d2 – d1

–カラーポップアップメニューをウィンドウ表示
on getPopupValues:paramObj
  copy (paramObj as list) to {ap1List, aColMax, aButtonMSG, aSliderValMSG, timeOutSecs}
  
  
set (my windisp) to true
  
  
set aView to NSView’s alloc()’s initWithFrame:(current application’s NSMakeRect(0, 0, 360, 100))
  
  
–Labelをつくる
  
set a1TF to NSTextField’s alloc()’s initWithFrame:(current application’s NSMakeRect(30, 60, 80, 20))
  
a1TF’s setEditable:false
  
a1TF’s setStringValue:"Color:"
  
a1TF’s setDrawsBackground:false
  
a1TF’s setBordered:false
  
  
–Ppopup Buttonをつくる
  
set a1Button to NSPopUpButton’s alloc()’s initWithFrame:(current application’s NSMakeRect(80, 60, 200, 20)) pullsDown:false
  
a1Button’s removeAllItems()
  
  
set a1Menu to NSMenu’s alloc()’s init()
  
set aCDB to current application’s DBColorNames’s alloc()’s init()
  
  
set iCount to 1
  
repeat with i in ap1List
    copy i to {r1, g1, b1}
    
    
set nsCol to makeNSColorFromRGBAval(r1, g1, b1, aColMax, aColMax) of me
    
set anImage to makeRoundedNSImageWithFilledWithColor(64, 64, nsCol, 4) of me
    
    
set aTitle to "#" & (iCount as string) & " " & (aCDB’s nameForColor:nsCol) as string
    
set aMenuItem to (NSMenuItem’s alloc()’s initWithTitle:aTitle action:"actionHandler:" keyEquivalent:"")
    (
aMenuItem’s setImage:anImage)
    (
aMenuItem’s setEnabled:true)
    (
a1Menu’s addItem:aMenuItem)
    
    
set iCount to iCount + 1
  end repeat
  
  
a1Button’s setMenu:a1Menu


–Buttonをつくる
  
set bButton to (NSButton’s alloc()’s initWithFrame:(current application’s NSMakeRect(80, 10, 140, 40)))
  
bButton’s setButtonType:(NSMomentaryLightButton)
  
bButton’s setBezelStyle:(NSRoundedBezelStyle)
  
bButton’s setTitle:aButtonMSG
  
bButton’s setTarget:me
  
bButton’s setAction:("clicked:")
  
bButton’s setKeyEquivalent:(return)
  
  
aView’s addSubview:a1TF
  
  
aView’s addSubview:a1Button
  
aView’s addSubview:bButton
  
aView’s setNeedsDisplay:true
  
  
–NSWindowControllerを作ってみた(いらない?)
  
set aWin to (my makeWinWithView(aView, 300, 100, aSliderValMSG))
  
  
set wController to NSWindowController’s alloc()
  
wController’s initWithWindow:aWin
  
  
wController’s showWindow:me
  
  
set aCount to timeOutSecs * 100
  
  
set hitF to false
  
repeat aCount times
    if (my windisp) = false then
      set hitF to true
      
exit repeat
    end if
    
delay 0.01
    
set aCount to aCount – 1
  end repeat
  
  
my closeWin:aWin
  
  
if hitF = true then
    set s1Val to ((a1Button’s indexOfSelectedItem() as number) + 1)
  else
    set s1Val to false
  end if
  
  
copy s1Val to my pop1ind
  
end getPopupValues:

on clicked:aSender
  set (my windisp) to false
end clicked:

–make Window for Display
on makeWinWithView(aView, aWinWidth as integer, aWinHeight as integer, aTitle as string)
  set aScreen to NSScreen’s mainScreen()
  
set aFrame to {{0, 0}, {aWinWidth, aWinHeight}}
  
  
set aBacking to NSTitledWindowMask
  
  
set aDefer to NSBackingStoreBuffered
  
  
— Window
  
set aWin to NSWindow’s alloc()
  (
aWin’s initWithContentRect:aFrame styleMask:aBacking backing:aDefer defer:false screen:aScreen)
  
  
aWin’s setTitle:aTitle
  
aWin’s setDelegate:me
  
aWin’s setDisplaysWhenScreenProfileChanges:true
  
aWin’s setHasShadow:true
  
aWin’s setIgnoresMouseEvents:false
  
aWin’s setLevel:(NSFloatingWindowLevel)
  
aWin’s setOpaque:false
  
aWin’s setReleasedWhenClosed:true
  
aWin’s |center|()
  
  
aWin’s setContentView:aView
  
  
return aWin
end makeWinWithView

–close win
on closeWin:aWindow
  repeat with n from 10 to 1 by -1
    (aWindow’s setAlphaValue:n / 10)
    
delay 0.02
  end repeat
  
aWindow’s |close|()
end closeWin:

–Popup Action Handler
on actionHandler:sender
  set aTag to tag of sender as integer
  
set aTitle to title of sender as string
end actionHandler:

–aMaxValを最大値とする数値でNSColorを作成して返す
on makeNSColorFromRGBAval(redValue as integer, greenValue as integer, blueValue as integer, alphaValue as integer, aMaxVal as integer)
  set aRedCocoa to (redValue / aMaxVal) as real
  
set aGreenCocoa to (greenValue / aMaxVal) as real
  
set aBlueCocoa to (blueValue / aMaxVal) as real
  
set aAlphaCocoa to (alphaValue / aMaxVal) as real
  
set aColor to NSColor’s colorWithCalibratedRed:aRedCocoa green:aGreenCocoa blue:aBlueCocoa alpha:aAlphaCocoa
  
return aColor
end makeNSColorFromRGBAval

–指定サイズのNSImageを作成し、指定色で塗ってNSImageで返す
on makeNSImageWithFilledWithColor(aWidth as integer, aHeight as integer, fillColor)
  set anImage to NSImage’s alloc()’s initWithSize:(current application’s NSMakeSize(aWidth, aHeight))
  
anImage’s lockFocus()
  
—
  
set theRect to {{x:0, y:0}, {height:aHeight, width:aWidth}}
  
set theNSBezierPath to NSBezierPath’s bezierPath
  
theNSBezierPath’s appendBezierPathWithRect:theRect
  
—
  
fillColor’s |set|() –色設定
  
theNSBezierPath’s fill() –ぬりつぶし
  
—
  
anImage’s unlockFocus()
  
—
  
return anImage
end makeNSImageWithFilledWithColor

–指定サイズのNSImageを作成し、指定色で塗ってNSImageで返す、anRadiusの半径の角丸で
on makeRoundedNSImageWithFilledWithColor(aWidth as integer, aHeight as integer, fillColor, anRadius as real)
  set anImage to NSImage’s alloc()’s initWithSize:(current application’s NSMakeSize(aWidth, aHeight))
  
anImage’s lockFocus()
  
—
  
set theRect to {{x:0, y:0}, {height:aHeight, width:aWidth}}
  
set theNSBezierPath to NSBezierPath’s bezierPathWithRoundedRect:theRect xRadius:anRadius yRadius:anRadius
  
—
  
fillColor’s |set|() –色設定
  
theNSBezierPath’s fill() –ぬりつぶし
  
—
  
anImage’s unlockFocus()
  
  
return anImage
end makeRoundedNSImageWithFilledWithColor

on uniquifyList(aList as list)
  set aArray to NSArray’s arrayWithArray:aList
  
set bArray to aArray’s valueForKeyPath:"@distinctUnionOfObjects.self"
  
return bArray as list
end uniquifyList

on findDataFrom2DList(anItem, aList as list)
  script spd
    property aList : {}
    
property resList : {}
  end script
  
  
set (aList of spd) to aList
  
set (resList of spd) to {}
  
  
set yCount to 1
  
  
repeat with i in (aList of spd)
    
    
set aResList to (Bplus’s indexesOfItem:anItem inList:i inverting:false) as list
    
    
set tmpList to {}
    
if aResList is not equal to {} then
      repeat with ii in aResList
        set jj to contents of ii
        
set the end of tmpList to {jj, yCount}
      end repeat
      
set (resList of spd) to (resList of spd) & tmpList
    end if
    
    
set yCount to yCount + 1
  end repeat
  
  
return (resList of spd) –return {{x, y}…..} item list (1-based)
end findDataFrom2DList

on retRangeFromPosListVertival(posList as list)
  script rangeSPD
    property posList2 : {}
  end script
  
  
–縦方向へのrange評価に都合がいいようにソート
  
set (posList2 of rangeSPD) to shellSortListAscending(posList, {1, 2}) of me
  
  
–先頭データをピックアップ
  
set firstData to first item of (posList2 of rangeSPD)
  
set (posList2 of rangeSPD) to rest of (posList2 of rangeSPD)
  
  
copy firstData to {curX1, curY1}
  
set tmpRangeStr to aNumToExcelColumn(curX1) of me & (curY1 as string) & ":"
  
  
set tmpRange to {}
  
set hitF to false
  
  
set outList to {}
  
  
repeat with i in (posList2 of rangeSPD)
    copy i to {tmpX, tmpY}
    
    
–log {"{curX1, curY1}", {curX1, curY1}}
    
–log {"{tmpX, tmpY}", {tmpX, tmpY}}


if (curX1 = tmpX) and (curY1 + 1 = tmpY) then
      –Y方向への連続値を拾っている最中
      
if hitF = false then
        –log "case 1a"
        
–log {"hitF", hitF}
        
set hitF to true
      else
        –log "case 1b"
        
–log {"hitF", hitF}
        
–横に連続しているブロックの途中
      end if
    else
      –直前の値と連続していない
      
if hitF = false then
        –log "case 2a"
        
–log {"hitF", hitF}
        
set tmpRangeStr to tmpRangeStr & aNumToExcelColumn(curX1) of me & (curY1 as string)
        
set the end of outList to tmpRangeStr
        
set tmpRangeStr to aNumToExcelColumn(tmpX) of me & (tmpY as string) & ":"
        
set hitF to false
      else
        –log "case 2b"
        
–log {"hitF", hitF}
        
–連続ブロックの末尾を拾った
        
set tmpRangeStr to tmpRangeStr & aNumToExcelColumn(curX1) of me & (curY1 as string)
        
set the end of outList to tmpRangeStr
        
set tmpRangeStr to aNumToExcelColumn(tmpX) of me & (tmpY as string) & ":"
        
set hitF to false
        
–log {"tmpRangeStr", tmpRangeStr}
      end if
    end if
    
    
copy {tmpX, tmpY} to {curX1, curY1}
  end repeat
  
  
–log {tmpRangeStr, hitF}
  
  
if (hitF = true) or (tmpRangeStr is not equal to "") then
    set tmpRangeStr to tmpRangeStr & aNumToExcelColumn(curX1) of me & (curY1 as string)
    
set the end of outList to tmpRangeStr
  end if
  
  
return outList
end retRangeFromPosListVertival

on retRangeFromPosListHorizontal(posList as list)
  script rangeSPD
    property posList2 : {}
  end script
  
  
copy posList to (posList2 of rangeSPD)
  
  
–先頭データをピックアップ
  
set firstData to first item of (posList2 of rangeSPD)
  
set (posList2 of rangeSPD) to rest of (posList2 of rangeSPD)
  
  
copy firstData to {curX1, curY1}
  
set tmpRangeStr to aNumToExcelColumn(curX1) of me & (curY1 as string) & ":"
  
  
set tmpRange to {}
  
set hitF to false
  
  
set outList to {}
  
  
repeat with i in (posList2 of rangeSPD)
    copy i to {tmpX, tmpY}
    
    
–log {"{curX1, curY1}", {curX1, curY1}}
    
–log {"{tmpX, tmpY}", {tmpX, tmpY}}


if (curX1 + 1 = tmpX) and (curY1 = tmpY) then
      –X方向への連続値を拾っている最中
      
if hitF = false then
        –log "case 1a"
        
–log {"hitF", hitF}
        
set hitF to true
      else
        –log "case 1b"
        
–log {"hitF", hitF}
        
–横に連続しているブロックの途中
      end if
    else
      –直前の値と連続していない
      
if hitF = false then
        –log "case 2a"
        
–log {"hitF", hitF}
        
set tmpRangeStr to tmpRangeStr & aNumToExcelColumn(curX1) of me & (curY1 as string)
        
set the end of outList to tmpRangeStr
        
set tmpRangeStr to aNumToExcelColumn(tmpX) of me & (tmpY as string) & ":"
        
set hitF to false
      else
        –log "case 2b"
        
–log {"hitF", hitF}
        
–連続ブロックの末尾を拾った
        
set tmpRangeStr to tmpRangeStr & aNumToExcelColumn(curX1) of me & (curY1 as string)
        
set the end of outList to tmpRangeStr
        
set tmpRangeStr to aNumToExcelColumn(tmpX) of me & (tmpY as string) & ":"
        
set hitF to false
        
–log {"tmpRangeStr", tmpRangeStr}
      end if
    end if
    
    
copy {tmpX, tmpY} to {curX1, curY1}
  end repeat
  
  
–log {tmpRangeStr, hitF}
  
  
if (hitF = true) or (tmpRangeStr is not equal to "") then
    set tmpRangeStr to tmpRangeStr & aNumToExcelColumn(curX1) of me & (curY1 as string)
    
set the end of outList to tmpRangeStr
  end if
  
  
return outList
end retRangeFromPosListHorizontal

–2008/05/01 By Takaaki Naganoya
–10進数数値をExcel 2004/2008的カラム表現にエンコードするサブルーチン を使いまわし
–1〜1351までの間であれば正しいエンコーディング結果を返す
on aNumToExcelColumn(origNum as integer)
  if origNum > 1351 then
    error "エラー:Excel 2004/2008的カラム表現(A1形式)への変換ルーチンにおいて、想定範囲外(1351以上)のパラメータが指定されました"
  end if
  
  
set upperDigitEncTable to {"A", "B", "C", "D", "E", "F", "G", "H", "I", "J", "K", "L", "M", "N", "O", "P", "Q", "R", "S", "T", "U", "V", "W", "X", "Y", "Z", "A"}
  
set lowerDigitEncTable to {"A", "B", "C", "D", "E", "F", "G", "H", "I", "J", "K", "L", "M", "N", "O", "P", "Q", "R", "S", "T", "U", "V", "W", "X", "Y", "Z", "A"}
  
  
set oNum to origNum
  
set nTh to 26
  
set stringLength to 4
  
  
–数字が1桁の場合の対応
  
if origNum < 27 then
    set aRes to (item origNum of upperDigitEncTable) as string
    
return aRes
  end if


if origNum > 702 then
    –3桁になる場合
    
set upupNum to oNum div 676 –整数除算–上の上の桁
    
set oNum to oNum – (upupNum * 676)
    
set upNum to oNum div 26 –整数除算–上の桁
    
set lowNum to oNum mod 26 – 1 –余剰計算–下の桁
    
    
–超つじつま合わせ処理
    
if lowNum = -1 then
      set upNum to upNum – 1
      
set lowNum to 25
    end if
    
    
set upupChar to (item upupNum of upperDigitEncTable) as string
    
set upChar to (item upNum of upperDigitEncTable) as string
    
set lowChar to (item (lowNum + 1) of lowerDigitEncTable) as string
    
set resText to upupChar & upChar & lowChar
    
  else
    –2桁の場合
    
set upNum to oNum div 26 –整数除算–上の桁
    
set lowNum to oNum mod 26 – 1 –余剰計算–下の桁
    
    
–超つじつま合わせ処理
    
if lowNum = -1 then
      set upNum to upNum – 1
      
set lowNum to 25
    end if
    
    
set upChar to (item upNum of upperDigitEncTable) as string
    
set lowChar to (item (lowNum + 1) of lowerDigitEncTable) as string
    
set resText to upChar & lowChar
    
  end if
  
  
return resText
end aNumToExcelColumn

–入れ子のリストを昇順ソート
on shellSortListAscending(a, keyItem)
  return sort2DList(a, keyItem, {true}) of me
end shellSortListAscending

–入れ子のリストを降順ソート
on shellSortListDecending(a, keyItem)
  return sort2DList(a, keyItem, {false}) of me
end shellSortListDecending

–2D Listをソート
on sort2DList(aList as list, sortIndexes as list, sortOrders as list)
  
  
–index値をAS流(アイテムが1はじまり)からCocoa流(アイテムが0はじまり)に変換
  
set newIndex to {}
  
repeat with i in sortIndexes
    set j to contents of i
    
set j to j – 1
    
set the end of newIndex to j
  end repeat
  
  
–Sort TypeのListを作成(あえて外部から指定する内容でもない)
  
set sortTypes to {}
  
repeat (length of sortIndexes) times
    set the end of sortTypes to "compare:"
  end repeat
  
  
–Sort
  
set resList to (current application’s SMSForder’s subarraysIn:(aList) sortedByIndexes:newIndex ascending:sortOrders sortTypes:sortTypes |error|:(missing value)) as list
  
  
return resList
end sort2DList

★Click Here to Open This Script 

Posted in Color GUI list | Tagged 10.11savvy 10.12savvy 10.13savvy 10.14savvy NSArray NSBezierPath NSButton NSColor NSImage NSMenu NSMenuItem NSPopUpButton NSScreen NSTextField NSView NSWindow NSWindowController Pages | 2 Comments

Pages書類の1ページ目の表の背景色を置換 v3.1(約20倍速)

Posted on 1月 29, 2019 by Takaaki Naganoya

Pagesでオープン中の最前面の書類の1ページ目に存在する表オブジェクト中の背景色を置換するAppleScriptの高速化版です。

初版では表中のセルをすべて取得し、すべてのセルについて順次背景色を求め、置換対象色であれば塗り直していました。セル1個ずつ塗っていたので、それなりの時間(テストデータでは20秒)がかかっていました。GUIアプリケーションを操作するために存在しているAppleScriptですが、アプリケーションとの通信はコストが高いので、この通信部分を減らすことが高速化の基本です。

ちなみに、「ignoring application responses」〜「end ignoring」で囲った範囲は非同期実行モードで実行され、2.5倍ぐらい高速になります。AppleScriptでは、GUIアプリケーションに対してコマンドを実行した場合、「コマンド実行」「コマンド処理」「コマンド結果受信」の3ステップを行なっています。非同期実行モードでは「コマンド実行」だけを行うので高速ですが、設定値や状態を知りたいような場合には(結果が返ってこないので)使う意味がありません。本Blogを「ignoring application responses」で検索しても、あまり出てこないはずです。

v2では、高速化のために全セルの背景色を抽出したあとに、2次元配列データ上で当該セルの座標を計算し、塗り替え対象セルのみ処理することで約35%のスピードアップを行いました。GUIアプリケーションにコマンドを送る(そして、処理を待って結果を受信する)よりも配列変数上で検索を行ったほうがはるかに高速です。

本v3では、さらなる高速化のために、2次元配列データ上で当該セルの座標を計算したあと、それらを横方向にスキャンして、点ではなく範囲(range)として評価し、極力複数のセルを連続する範囲(range)としてまとめて、rangeを一括塗りすることで初版から約20倍の高速化を行なったものです。v1やv2ではセルを1つずつ塗りつぶしていましたが、v3からは横方向に複数まとめてぬりつぶします。

実際のPages書類上の表の塗りつぶし領域が、ヘッダーや年表のような横方向に連続した塗りエリアを持つことが多いことに着目して、複数セルを一度に塗りつぶすことで高速化しました(1セル塗るのと複数セルを塗るのとで時間かわらず)。本Scriptでも1マスごとに塗りつぶしが存在するようなハッチング模様の表の塗りつぶし色を変更する場合にはパフォーマンスが最悪の状態に落ち込みますが、v2のレベル以下に落ちることはないでしょう。

この世のどこかには、さらにデータを1D Arrayではなく2D Arrayとして評価して、最大限まとめた面積のrangeとみなすことで本ルーチンの2倍ぐらいの速度で処理できるプログラムも存在しそうですが、人類の叡智のレベルを超えそうなので、自分はこのぐらいの速度が出れば満足です(総当たり的なアプローチで全パターンをシミュレーションして、一番いい結果が出るものを採用というのも考えないではないですが、シミュレーションをていねいに行うと処理時間が余計にかかるので、、、)。

1D Listに入っている座標値をX軸方向に評価して、連続値であればrangeに変換するルーチン「retRangeFromPosList」については、それほど真剣にテストしていないので処理が間違っている可能性もあります。
→ 処理に誤りがあったので修正しました(v3.1)

また、数値からExcelのA1形式のアドレスに変換するために作ってホコリをかぶっていた「aNumToExcelColumn」ルーチンも、一応テストはしてありますが変換できるアドレスの上限値が存在しているため注意が必要です。

AppleScript名:Pages書類の1ページ目の表の背景色を置換 v3.11
— Created 2017-07-15 by Takaaki Naganoya
— Modified 2019-01-29 by Takaaki Naganoya
— 2019 Piyomaru Software
use AppleScript version "2.4"
use scripting additions
use framework "Foundation"
use framework "AppKit"
use Bplus : script "BridgePlus" –https://www.macosxautomation.com/applescript/apps/BridgePlus.html

–v1:First Version
–v2:Pick Up target cells by calculate every background color (35% speed up)
–v3:Draw cells by range (x20 speed up)
–v3.1:Bug Fix (retRangeFromPosList)
–v3.1.1:Bug Fix (retRangeFromPosList)

property NSView : a reference to current application’s NSView
property NSColor : a reference to current application’s NSColor
property NSArray : a reference to current application’s NSArray
property NSMenu : a reference to current application’s NSMenu
property NSImage : a reference to current application’s NSImage
property NSScreen : a reference to current application’s NSScreen
property NSButton : a reference to current application’s NSButton
property NSWindow : a reference to current application’s NSWindow
property NSTextField : a reference to current application’s NSTextField
property NSMenuItem : a reference to current application’s NSMenuItem
property NSBezierPath : a reference to current application’s NSBezierPath
property NSPopUpButton : a reference to current application’s NSPopUpButton
property NSWindowController : a reference to current application’s NSWindowController
property NSTitledWindowMask : a reference to current application’s NSTitledWindowMask
property NSRoundedBezelStyle : a reference to current application’s NSRoundedBezelStyle
property NSNormalWindowLevel : a reference to current application’s NSNormalWindowLevel
property NSBackingStoreBuffered : a reference to current application’s NSBackingStoreBuffered
property NSMomentaryLightButton : a reference to current application’s NSMomentaryLightButton

property windisp : true
property wController : missing value
property pop1ind : 1

–初期化
set (my windisp) to true
set (my pop1ind) to 1
load framework

–Pagesの1ページ目にある表の塗り色を取得
tell application "Pages"
  tell front document
    tell table 1
      set c1List to background color of every cell
      
set aProp to properties
      
set xCount to column count of aProp
    end tell
  end tell
end tell

–色データをユニーク化(重複削除)
set bList to uniquifyList(c1List) of me

–Convert 1D List to 2D List
set c3List to (current application’s SMSForder’s subarraysFrom:c1List groupedBy:xCount |error|:(missing value)) as list

–missing value(背景色なし)を除外する
load framework
set c2List to (current application’s SMSForder’s arrayByDeletingBlanksIn:(bList)) as list

–Popup Menuで置換色選択
set aButtonMSG to "OK"
set aSliderValMSG to "Select Target Color"
set paramObj to {c2List, 65535, aButtonMSG, aSliderValMSG, 20}
my performSelectorOnMainThread:"getPopupValues:" withObject:(paramObj) waitUntilDone:true
set fromCol to (contents of item pop1ind of c2List)

–カラーピッカーで置換色選択
set tCol to choose color default color fromCol

set d1 to current date

–実際に表の背景色を置換する
set hitList to findDataFrom2DList(fromCol, c3List) of me –データ上で当該色のセル情報を計算する

set rangeList to retRangeFromPosList(hitList) of me

tell application "Pages"
  tell front document
    tell table 1
      repeat with i in rangeList
        set j to contents of i
        
        
ignoring application responses –非同期実行モードで高速実行
          set background color of range j to tCol
        end ignoring
      end repeat
    end tell
  end tell
end tell

set d2 to current date
return d2 – d1

–カラーポップアップメニューをウィンドウ表示
on getPopupValues:paramObj
  copy (paramObj as list) to {ap1List, aColMax, aButtonMSG, aSliderValMSG, timeOutSecs}
  
  
set (my windisp) to true
  
  
set aView to NSView’s alloc()’s initWithFrame:(current application’s NSMakeRect(0, 0, 360, 100))
  
  
–Labelをつくる
  
set a1TF to NSTextField’s alloc()’s initWithFrame:(current application’s NSMakeRect(30, 60, 80, 20))
  
a1TF’s setEditable:false
  
a1TF’s setStringValue:"Color:"
  
a1TF’s setDrawsBackground:false
  
a1TF’s setBordered:false
  
  
–Ppopup Buttonをつくる
  
set a1Button to NSPopUpButton’s alloc()’s initWithFrame:(current application’s NSMakeRect(80, 60, 200, 20)) pullsDown:false
  
a1Button’s removeAllItems()
  
  
set a1Menu to NSMenu’s alloc()’s init()
  
  
set iCount to 1
  
repeat with i in ap1List
    copy i to {r1, g1, b1}
    
    
set nsCol to makeNSColorFromRGBAval(r1, g1, b1, aColMax, aColMax) of me
    
set anImage to makeNSImageWithFilledWithColor(64, 64, nsCol) of me
    
    
set aTitle to "color_" & (iCount as string)
    
set aMenuItem to (NSMenuItem’s alloc()’s initWithTitle:aTitle action:"actionHandler:" keyEquivalent:"")
    (
aMenuItem’s setImage:anImage)
    (
aMenuItem’s setEnabled:true)
    (
a1Menu’s addItem:aMenuItem)
    
    
set iCount to iCount + 1
  end repeat
  
  
a1Button’s setMenu:a1Menu


–Buttonをつくる
  
set bButton to (NSButton’s alloc()’s initWithFrame:(current application’s NSMakeRect(80, 10, 140, 40)))
  
bButton’s setButtonType:(NSMomentaryLightButton)
  
bButton’s setBezelStyle:(NSRoundedBezelStyle)
  
bButton’s setTitle:aButtonMSG
  
bButton’s setTarget:me
  
bButton’s setAction:("clicked:")
  
bButton’s setKeyEquivalent:(return)
  
  
aView’s addSubview:a1TF
  
  
aView’s addSubview:a1Button
  
aView’s addSubview:bButton
  
aView’s setNeedsDisplay:true
  
  
–NSWindowControllerを作ってみた(いらない?)
  
set aWin to (my makeWinWithView(aView, 300, 100, aSliderValMSG))
  
  
set wController to NSWindowController’s alloc()
  
wController’s initWithWindow:aWin
  
  
wController’s showWindow:me
  
  
set aCount to timeOutSecs * 100
  
  
set hitF to false
  
repeat aCount times
    if (my windisp) = false then
      set hitF to true
      
exit repeat
    end if
    
delay 0.01
    
set aCount to aCount – 1
  end repeat
  
  
my closeWin:aWin
  
  
if hitF = true then
    set s1Val to ((a1Button’s indexOfSelectedItem() as number) + 1)
  else
    set s1Val to false
  end if
  
  
copy s1Val to my pop1ind
  
end getPopupValues:

on clicked:aSender
  set (my windisp) to false
end clicked:

–make Window for Display
on makeWinWithView(aView, aWinWidth, aWinHeight, aTitle)
  set aScreen to NSScreen’s mainScreen()
  
set aFrame to {{0, 0}, {aWinWidth, aWinHeight}}
  
  
set aBacking to NSTitledWindowMask
  
  
set aDefer to NSBackingStoreBuffered
  
  
— Window
  
set aWin to NSWindow’s alloc()
  (
aWin’s initWithContentRect:aFrame styleMask:aBacking backing:aDefer defer:false screen:aScreen)
  
  
aWin’s setTitle:aTitle
  
aWin’s setDelegate:me
  
aWin’s setDisplaysWhenScreenProfileChanges:true
  
aWin’s setHasShadow:true
  
aWin’s setIgnoresMouseEvents:false
  
aWin’s setLevel:(NSNormalWindowLevel)
  
aWin’s setOpaque:false
  
aWin’s setReleasedWhenClosed:true
  
aWin’s |center|()
  
  
aWin’s setContentView:aView
  
  
return aWin
end makeWinWithView

–close win
on closeWin:aWindow
  repeat with n from 10 to 1 by -1
    (aWindow’s setAlphaValue:n / 10)
    
delay 0.02
  end repeat
  
aWindow’s |close|()
end closeWin:

–Popup Action Handler
on actionHandler:sender
  set aTag to tag of sender as integer
  
set aTitle to title of sender as string
end actionHandler:

–aMaxValを最大値とする数値でNSColorを作成して返す
on makeNSColorFromRGBAval(redValue as integer, greenValue as integer, blueValue as integer, alphaValue as integer, aMaxVal as integer)
  set aRedCocoa to (redValue / aMaxVal) as real
  
set aGreenCocoa to (greenValue / aMaxVal) as real
  
set aBlueCocoa to (blueValue / aMaxVal) as real
  
set aAlphaCocoa to (alphaValue / aMaxVal) as real
  
set aColor to NSColor’s colorWithCalibratedRed:aRedCocoa green:aGreenCocoa blue:aBlueCocoa alpha:aAlphaCocoa
  
return aColor
end makeNSColorFromRGBAval

–指定サイズのNSImageを作成し、指定色で塗ってNSImageで返す
on makeNSImageWithFilledWithColor(aWidth, aHeight, fillColor)
  set anImage to NSImage’s alloc()’s initWithSize:(current application’s NSMakeSize(aWidth, aHeight))
  
anImage’s lockFocus()
  
—
  
set theRect to {{x:0, y:0}, {height:aHeight, width:aWidth}}
  
set theNSBezierPath to NSBezierPath’s bezierPath
  
theNSBezierPath’s appendBezierPathWithRect:theRect
  
—
  
fillColor’s |set|() –色設定
  
theNSBezierPath’s fill() –ぬりつぶし
  
—
  
anImage’s unlockFocus()
  
—
  
return anImage
end makeNSImageWithFilledWithColor

on uniquifyList(aList as list)
  set aArray to NSArray’s arrayWithArray:aList
  
set bArray to aArray’s valueForKeyPath:"@distinctUnionOfObjects.self"
  
return bArray as list
end uniquifyList

on findDataFrom2DList(anItem, aList)
  script spd
    property aList : {}
    
property resList : {}
  end script
  
  
set (aList of spd) to aList
  
set (resList of spd) to {}
  
  
set yCount to 1
  
  
repeat with i in (aList of spd)
    
    
set aResList to (Bplus’s indexesOfItem:anItem inList:i inverting:false) as list
    
    
set tmpList to {}
    
if aResList is not equal to {} then
      repeat with ii in aResList
        set jj to contents of ii
        
set the end of tmpList to {jj, yCount}
      end repeat
      
set (resList of spd) to (resList of spd) & tmpList
    end if
    
    
set yCount to yCount + 1
  end repeat
  
  
return (resList of spd) –return {{x, y}…..} item list (1-based)
end findDataFrom2DList

on retRangeFromPosList(posList as list)
  script rangeSPD
    property posList2 : {}
  end script
  
  
copy posList to (posList2 of rangeSPD)
  
  
–先頭データをピックアップ
  
set firstData to first item of (posList2 of rangeSPD)
  
set (posList2 of rangeSPD) to rest of (posList2 of rangeSPD)
  
  
copy firstData to {curX1, curY1}
  
set tmpRangeStr to aNumToExcelColumn(curX1) of me & (curY1 as string) & ":"
  
  
set tmpRange to {}
  
set hitF to false
  
  
set outList to {}
  
  
repeat with i in (posList2 of rangeSPD)
    copy i to {tmpX, tmpY}
    
    
–log {"{curX1, curY1}", {curX1, curY1}}
    
–log {"{tmpX, tmpY}", {tmpX, tmpY}}


if (curX1 + 1 = tmpX) and (curY1 = tmpY) then
      –X方向への連続値を拾っている最中
      
if hitF = false then
        –log "case 1a"
        
–log {"hitF", hitF}
        
set hitF to true
      else
        –log "case 1b"
        
–log {"hitF", hitF}
        
–横に連続しているブロックの途中
      end if
    else
      –直前の値と連続していない
      
if hitF = false then
        –log "case 2a"
        
–log {"hitF", hitF}
        
set tmpRangeStr to tmpRangeStr & aNumToExcelColumn(curX1) of me & (curY1 as string)
        
set the end of outList to tmpRangeStr
        
set tmpRangeStr to aNumToExcelColumn(tmpX) of me & (tmpY as string) & ":"
        
set hitF to false
      else
        –log "case 2b"
        
–log {"hitF", hitF}
        
–連続ブロックの末尾を拾った
        
set tmpRangeStr to tmpRangeStr & aNumToExcelColumn(curX1) of me & (curY1 as string)
        
set the end of outList to tmpRangeStr
        
set tmpRangeStr to aNumToExcelColumn(tmpX) of me & (tmpY as string) & ":"
        
set hitF to false
        
–log {"tmpRangeStr", tmpRangeStr}
      end if
    end if
    
    
copy {tmpX, tmpY} to {curX1, curY1}
  end repeat
  
  
–log {tmpRangeStr, hitF}
  
  
if (hitF = true) or (tmpRangeStr is not equal to "") then
    set tmpRangeStr to tmpRangeStr & aNumToExcelColumn(curX1) of me & (curY1 as string)
    
set the end of outList to tmpRangeStr
  end if
  
  
return outList
end retRangeFromPosList

–2008/05/01 By Takaaki Naganoya
–10進数数値をExcel 2004/2008的カラム表現にエンコードするサブルーチン を使いまわし
–1〜1351までの間であれば正しいエンコーディング結果を返す
on aNumToExcelColumn(origNum as integer)
  if origNum > 1351 then
    display dialog "エラー:Excel 2004/2008的カラム表現(A1形式)への変換ルーチンにおいて、想定範囲外(1351以上)のパラメータが指定されました" buttons {"OK"} default button 1
    
return ""
  end if
  
  
set upperDigitEncTable to {"A", "B", "C", "D", "E", "F", "G", "H", "I", "J", "K", "L", "M", "N", "O", "P", "Q", "R", "S", "T", "U", "V", "W", "X", "Y", "Z", "A"}
  
set lowerDigitEncTable to {"A", "B", "C", "D", "E", "F", "G", "H", "I", "J", "K", "L", "M", "N", "O", "P", "Q", "R", "S", "T", "U", "V", "W", "X", "Y", "Z", "A"}
  
  
set oNum to origNum
  
set nTh to 26
  
set stringLength to 4
  
  
–数字が1桁の場合の対応
  
if origNum < 27 then
    set aRes to (item origNum of upperDigitEncTable) as string
    
return aRes
  end if


if origNum > 702 then
    –3桁になる場合
    
set upupNum to oNum div 676 –整数除算–上の上の桁
    
set oNum to oNum – (upupNum * 676)
    
set upNum to oNum div 26 –整数除算–上の桁
    
set lowNum to oNum mod 26 – 1 –余剰計算–下の桁
    
    
–超つじつま合わせ処理
    
if lowNum = -1 then
      set upNum to upNum – 1
      
set lowNum to 25
    end if
    
    
set upupChar to (item upupNum of upperDigitEncTable) as string
    
set upChar to (item upNum of upperDigitEncTable) as string
    
set lowChar to (item (lowNum + 1) of lowerDigitEncTable) as string
    
set resText to upupChar & upChar & lowChar
    
  else
    –2桁の場合
    
set upNum to oNum div 26 –整数除算–上の桁
    
set lowNum to oNum mod 26 – 1 –余剰計算–下の桁
    
    
–超つじつま合わせ処理
    
if lowNum = -1 then
      set upNum to upNum – 1
      
set lowNum to 25
    end if
    
    
set upChar to (item upNum of upperDigitEncTable) as string
    
set lowChar to (item (lowNum + 1) of lowerDigitEncTable) as string
    
set resText to upChar & lowChar
    
  end if
  
  
return resText
end aNumToExcelColumn

★Click Here to Open This Script 

Posted in Color GUI list | Tagged 10.11savvy 10.12savvy 10.13savvy 10.14savvy NSArray NSBackingStoreBuffered NSBezierPath NSButton NSColor NSImage NSMenu NSMenuItem NSMomentaryLightButton NSNormalWindowLevel NSPopUpButton NSRoundedBezelStyle NSScreen NSTextField NSTitledWindowMask NSView NSWindow NSWindowController Pages | Leave a comment

Pages書類の1ページ目の表の背景色を置換

Posted on 1月 28, 2019 by Takaaki Naganoya

Pagesでオープン中の最前面の書類の1ページ目に存在する表オブジェクト中の背景色を置換するAppleScriptです。

Pages書類の「表オブジェクト」にAppleScriptからアクセスするためには、Pages上で表オブジェクトを選択した状態で、

「オブジェクトの配置」を「移動しない」に事前に設定しておく必要があります。

本AppleScriptを実行可能なランタイム環境は、スクリプトエディタ、アプレットの2つです。スクリプトメニューおよびScript Debuggerでは各GUI部品のクリックイベントを拾えないために、実行しても選択などが行えません。

のように、1ページのみのPages書類に表オブジェクトを入れて、「移動しない」設定にしてある状態で本AppleScriptを実行。

表のセル中の色をすべて取得して、ユニーク化してポップアップメニューから「変更元」の色を選択できます。

選択して、「OK」ボタンをクリック。ここで選択した色が置換されます。

選択した色をどの色に変更(置換)するのかを指定します。

黒い色を選択。

ちょっと置換に時間がかかりますが(テストデータ+開発環境で20秒前後)、セルの背景色をします。このあたり、Pagesの表オブジェクト中のセルに対して、background colorでフィルタ参照できればよかったのですが、自分が試した範囲ではフィルタ参照で抽出できませんでした。全セルを取得してループで背景色のチェックと置換を行なっています。

こういう機能が最初からPagesに実装されているわけでもないので、手作業よりははるかに高速なのでしばらく放っておけば終わるのでいいんじゃないでしょうか。

本来であれば、指定色に該当するセルをフィルタ参照で抽出して、ヒットしたセルだけでループして背景色を変更できるとベストですが、実際にフィルタ参照で抽出できるかどうかはアプリケーション側の対応度次第なので、実際にやってみないとわかりません。

AppleScript名:Pages書類の1ページ目の表の背景色を置換
— Created 2017-07-15 by Takaaki Naganoya
— Created 2019-01-28 by Takaaki Naganoya
— 2019 Piyomaru Software
use AppleScript version "2.4"
use scripting additions
use framework "Foundation"
use framework "AppKit"
use Bplus : script "BridgePlus" –https://www.macosxautomation.com/applescript/apps/BridgePlus.html

property NSView : a reference to current application’s NSView
property NSColor : a reference to current application’s NSColor
property NSArray : a reference to current application’s NSArray
property NSMenu : a reference to current application’s NSMenu
property NSImage : a reference to current application’s NSImage
property NSScreen : a reference to current application’s NSScreen
property NSButton : a reference to current application’s NSButton
property NSWindow : a reference to current application’s NSWindow
property NSTextField : a reference to current application’s NSTextField
property NSMenuItem : a reference to current application’s NSMenuItem
property NSBezierPath : a reference to current application’s NSBezierPath
property NSPopUpButton : a reference to current application’s NSPopUpButton
property NSWindowController : a reference to current application’s NSWindowController
property NSTitledWindowMask : a reference to current application’s NSTitledWindowMask
property NSRoundedBezelStyle : a reference to current application’s NSRoundedBezelStyle
property NSNormalWindowLevel : a reference to current application’s NSNormalWindowLevel
property NSBackingStoreBuffered : a reference to current application’s NSBackingStoreBuffered
property NSMomentaryLightButton : a reference to current application’s NSMomentaryLightButton

property windisp : false
property wController : false
property pop1ind : missing value

–Pagesの1ページ目にある表の塗り色を取得
tell application "Pages"
  tell front document
    tell table 1
      set cList to background color of every cell
    end tell
  end tell
end tell

–色データをユニーク化(重複削除)
set bList to uniquifyList(cList) of me

–missing value(背景色なし)を除外する
load framework
set cList to (current application’s SMSForder’s arrayByDeletingBlanksIn:(bList)) as list

–Popup Menuで置換色選択
set aButtonMSG to "OK"
set aSliderValMSG to "Select Target Color"
set paramObj to {cList, 65535, aButtonMSG, aSliderValMSG, 20}
my performSelectorOnMainThread:"getPopupValues:" withObject:(paramObj) waitUntilDone:true

–カラーピッカーで色選択
set fromCol to (contents of item pop1ind of cList)
set tCol to choose color default color fromCol

–実際に表の背景色を置換する
tell application "Pages"
  tell front document
    tell table 1
      set cellList to every cell
      
      
repeat with i in cellList
        set aBG to background color of i
        
        
if aBG = fromCol then
          ignoring application responses
            set background color of i to tCol
          end ignoring
        end if
      end repeat
    end tell
  end tell
end tell

–カラーポップアップメニューをウィンドウ表示
on getPopupValues:paramObj
  copy (paramObj as list) to {ap1List, aColMax, aButtonMSG, aSliderValMSG, timeOutSecs}
  
  
set (my windisp) to true
  
  
set aView to NSView’s alloc()’s initWithFrame:(current application’s NSMakeRect(0, 0, 360, 100))
  
  
–Labelをつくる
  
set a1TF to NSTextField’s alloc()’s initWithFrame:(current application’s NSMakeRect(30, 60, 80, 20))
  
a1TF’s setEditable:false
  
a1TF’s setStringValue:"Color:"
  
a1TF’s setDrawsBackground:false
  
a1TF’s setBordered:false
  
  
–Ppopup Buttonをつくる
  
set a1Button to NSPopUpButton’s alloc()’s initWithFrame:(current application’s NSMakeRect(80, 60, 200, 20)) pullsDown:false
  
a1Button’s removeAllItems()
  
  
set a1Menu to NSMenu’s alloc()’s init()
  
  
set iCount to 0
  
repeat with i in ap1List
    copy i to {r1, g1, b1}
    
    
set nsCol to makeNSColorFromRGBAval(r1, g1, b1, aColMax, aColMax) of me
    
set anImage to makeNSImageWithFilledWithColor(64, 64, nsCol) of me
    
    
set aTitle to "color_" & (iCount as string)
    
set aMenuItem to (NSMenuItem’s alloc()’s initWithTitle:aTitle action:"actionHandler:" keyEquivalent:"")
    (
aMenuItem’s setImage:anImage)
    (
aMenuItem’s setEnabled:true)
    (
a1Menu’s addItem:aMenuItem)
    
    
set iCount to iCount + 1
  end repeat
  
  
a1Button’s setMenu:a1Menu


–Buttonをつくる
  
set bButton to (NSButton’s alloc()’s initWithFrame:(current application’s NSMakeRect(80, 10, 140, 40)))
  
bButton’s setButtonType:(NSMomentaryLightButton)
  
bButton’s setBezelStyle:(NSRoundedBezelStyle)
  
bButton’s setTitle:aButtonMSG
  
bButton’s setTarget:me
  
bButton’s setAction:("clicked:")
  
bButton’s setKeyEquivalent:(return)
  
  
aView’s addSubview:a1TF
  
  
aView’s addSubview:a1Button
  
aView’s addSubview:bButton
  
aView’s setNeedsDisplay:true
  
  
–NSWindowControllerを作ってみた(いらない?)
  
set aWin to (my makeWinWithView(aView, 300, 100, aSliderValMSG))
  
  
set wController to NSWindowController’s alloc()
  
wController’s initWithWindow:aWin
  
  
wController’s showWindow:me
  
  
set aCount to timeOutSecs * 100
  
  
set hitF to false
  
repeat aCount times
    if (my windisp) = false then
      set hitF to true
      
exit repeat
    end if
    
delay 0.01
    
set aCount to aCount – 1
  end repeat
  
  
my closeWin:aWin
  
  
if hitF = true then
    set s1Val to ((a1Button’s indexOfSelectedItem() as number) + 1)
  else
    set s1Val to false
  end if
  
  
copy s1Val to my pop1ind
  
end getPopupValues:

on clicked:aSender
  set (my windisp) to false
end clicked:

–make Window for Display
on makeWinWithView(aView, aWinWidth, aWinHeight, aTitle)
  set aScreen to NSScreen’s mainScreen()
  
set aFrame to {{0, 0}, {aWinWidth, aWinHeight}}
  
  
set aBacking to NSTitledWindowMask
  
  
set aDefer to NSBackingStoreBuffered
  
  
— Window
  
set aWin to NSWindow’s alloc()
  (
aWin’s initWithContentRect:aFrame styleMask:aBacking backing:aDefer defer:false screen:aScreen)
  
  
aWin’s setTitle:aTitle
  
aWin’s setDelegate:me
  
aWin’s setDisplaysWhenScreenProfileChanges:true
  
aWin’s setHasShadow:true
  
aWin’s setIgnoresMouseEvents:false
  
aWin’s setLevel:(NSNormalWindowLevel)
  
aWin’s setOpaque:false
  
aWin’s setReleasedWhenClosed:true
  
aWin’s |center|()
  
  
aWin’s setContentView:aView
  
  
return aWin
end makeWinWithView

–close win
on closeWin:aWindow
  repeat with n from 10 to 1 by -1
    (aWindow’s setAlphaValue:n / 10)
    
delay 0.02
  end repeat
  
aWindow’s |close|()
end closeWin:

–Popup Action Handler
on actionHandler:sender
  set aTag to tag of sender as integer
  
set aTitle to title of sender as string
end actionHandler:

–aMaxValを最大値とする数値でNSColorを作成して返す
on makeNSColorFromRGBAval(redValue as integer, greenValue as integer, blueValue as integer, alphaValue as integer, aMaxVal as integer)
  set aRedCocoa to (redValue / aMaxVal) as real
  
set aGreenCocoa to (greenValue / aMaxVal) as real
  
set aBlueCocoa to (blueValue / aMaxVal) as real
  
set aAlphaCocoa to (alphaValue / aMaxVal) as real
  
set aColor to NSColor’s colorWithCalibratedRed:aRedCocoa green:aGreenCocoa blue:aBlueCocoa alpha:aAlphaCocoa
  
return aColor
end makeNSColorFromRGBAval

–指定サイズのNSImageを作成し、指定色で塗ってNSImageで返す
on makeNSImageWithFilledWithColor(aWidth, aHeight, fillColor)
  set anImage to NSImage’s alloc()’s initWithSize:(current application’s NSMakeSize(aWidth, aHeight))
  
anImage’s lockFocus()
  
—
  
set theRect to {{x:0, y:0}, {height:aHeight, width:aWidth}}
  
set theNSBezierPath to NSBezierPath’s bezierPath
  
theNSBezierPath’s appendBezierPathWithRect:theRect
  
—
  
fillColor’s |set|() –色設定
  
theNSBezierPath’s fill() –ぬりつぶし
  
—
  
anImage’s unlockFocus()
  
—
  
return anImage
end makeNSImageWithFilledWithColor

on uniquifyList(aList as list)
  set aArray to NSArray’s arrayWithArray:aList
  
set bArray to aArray’s valueForKeyPath:"@distinctUnionOfObjects.self"
  
return bArray as list
end uniquifyList

★Click Here to Open This Script 

Posted in Color GUI | Tagged 10.11savvy 10.12savvy 10.13savvy 10.14savvy NSArray NSBackingStoreBuffered NSBezierPath NSButton NSColor NSImage NSMenu NSMenuItem NSMomentaryLightButton NSNormalWindowLevel NSPopUpButton NSRoundedBezelStyle NSScreen NSTextField NSTitledWindowMask NSView NSWindow NSWindowController Pages | 1 Comment

Finder上で選択中の画像のうち、最小のものに合わせて各画像の右上を基準にサイズ統一

Posted on 1月 26, 2019 by Takaaki Naganoya

Finderで選択中の画像のうち、最小のものに合わせて各画像の右上を原点にサイズを統一するAppleScriptです。

Finderで選択中のファイルから画像のみ抽出し、そのうちサイズが最小のものに合わせて他の画像をトリミングし、変更したものをデスクトップフォルダに出力します。

以前に画像の左上を基準に自動トリミングするバージョンのScriptを作成しましたが、あれはメニュー操作の説明用スクリーンショットの大きさを統一するためのもの。右上基準の本バージョンは、Driveのリネームやステータスバーの操作内容を説明するためのスクリーンショットの大きさ統一のために用意したものです。


▲大きさを揃える画像をFinder上で選択


▲処理後の画像。大きさが最小の画像に合わせてそろっている。切り抜き基準は右上

スクリーンショット画像を複数撮った場合に、厳密に同じサイズに固定することは(各種スクリーンショット作成ユーティリティを使わないと)行いづらいところです。

そこで、最小の画像を計算で求めて、それに合わせて自動トリミングするようにしてみました。Cocoaの機能を用いて画像処理しているため、Photoshopは必要ありません。

最小の画像を求めるのに、幅+高さの値でソートして最小のものを求めています(widthとheightによる2 key sortではなく1 Keyで済ませたかったので)。

AppleScript名:Finder上で選択中の画像のうち、最小のものに合わせて各画像の右上を基準にサイズ統一
— Created 2018-01-26 by Takaaki Naganoya
— 2019 Piyomaru Software
use AppleScript version "2.5"
use scripting additions
use framework "Foundation"
use framework "AppKit"
use framework "QuartzCore"

property |NSURL| : a reference to current application’s |NSURL|
property NSUUID : a reference to current application’s NSUUID
property NSArray : a reference to current application’s NSArray
property NSString : a reference to current application’s NSString
property NSImage : a reference to current application’s NSImage
property NSScreen : a reference to current application’s NSScreen
property NSZeroRect : a reference to current application’s NSZeroRect
property NSPredicate : a reference to current application’s NSPredicate
property NSPNGFileType : a reference to current application’s NSPNGFileType
property NSMutableArray : a reference to current application’s NSMutableArray
property NSCompositeCopy : a reference to current application’s NSCompositeCopy
property NSGraphicsContext : a reference to current application’s NSGraphicsContext
property NSBitmapImageRep : a reference to current application’s NSBitmapImageRep
property NSURLTypeIdentifierKey : a reference to current application’s NSURLTypeIdentifierKey
property NSCalibratedRGBColorSpace : a reference to current application’s NSCalibratedRGBColorSpace

tell application "Finder"
  set selList to selection as alias list
end tell

–指定のAlias listのうち画像のみ抽出
set filRes1 to filterAliasListByUTI(selList, "public.image") of me
if filRes1 = {} then
  tell current application
    –Error Message (No Selection)
    
display dialog "Finder上で選択されているファイルはありません。" buttons {"OK"} default button 1 with icon 1 with title "画像リサイズ処理できません"
  end tell
  
return
end if

–各種情報を入れたArrayを作成
set anArray to NSMutableArray’s new()
repeat with i in selList
  set imgPath to (POSIX path of i)
  
  
set aImage to makeNSImageFromFile(i) of me
  
set sizeInfo to |size|() of aImage
  
set sizeInfo to sizeInfo & {aImg:aImage, total:(width of sizeInfo) + (height of sizeInfo), myPath:imgPath}
  (
anArray’s addObject:sizeInfo)
end repeat

–最小のサイズの画像の算出
set aRes to anArray’s valueForKeyPath:("@min.total")
set bRes to first item of (filterRecListByLabel(anArray, "total == " & aRes as string) of me) –最小サイズの画像

–最小サイズ画像のwidthとheight
set minWidth to bRes’s width
set minHeight to bRes’s height

–環境情報の取得
set aPath to POSIX path of (path to desktop)
set retinaF to (NSScreen’s mainScreen()’s backingScaleFactor()) as real
–>  2.0 (Retina) / 1.0 (Non Retina)

set cRes to filterRecListByLabel(anArray, "total != " & aRes as string) of me –最小サイズ以外の画像

repeat with i in cRes
  set j to contents of i
  
set anImage to aImg of j
  
set fRes to myPath of j
  
  
set tmpSize to |size|() of anImage
  
set tmpWidth to (width of tmpSize)
  
set tmpHeight to (height of tmpSize)
  
  
set cropedImage to (my cropNSImageBy:{(tmpWidth – minWidth), 0, minWidth, minHeight} fromImage:anImage)
  
  
–Retina環境対策
  
if retinaF > 1.0 then
    set cropedImage to (my resizedImage:cropedImage toScale:(1.0))
  end if
  
  
–ファイル書き込み
  
set fRes to retUUIDfilePathFromDir(aPath, "png") of me
  
set sRes to saveNSImageAtPathAsPNG(cropedImage, fRes) of me
end repeat

–リストに入れたレコードを、指定の属性ラベルの値で抽出
on filterRecListByLabel(aRecList as list, aPredicate as string)
  –ListからNSArrayへの型変換
  
set aArray to NSArray’s arrayWithArray:aRecList
  
  
–抽出
  
set aPredicate to NSPredicate’s predicateWithFormat:aPredicate
  
set filteredArray to aArray’s filteredArrayUsingPredicate:aPredicate
  
  
–NSArrayからListに型変換して返す
  
set bList to filteredArray as list
  
return bList
end filterRecListByLabel

–Alias listから指定UTIに含まれるものをPOSIX pathのリストで返す
on filterAliasListByUTI(aList, targUTI)
  set newList to {}
  
repeat with i in aList
    set j to POSIX path of i
    
set tmpUTI to my retUTIfromPath(j)
    
set utiRes to my filterUTIList({tmpUTI}, targUTI)
    
if utiRes is not equal to {} then
      set the end of newList to j
    end if
  end repeat
  
return newList
end filterAliasListByUTI

–指定のPOSIX pathのファイルのUTIを求める
on retUTIfromPath(aPOSIXPath)
  set aURL to |NSURL|’s fileURLWithPath:aPOSIXPath
  
set {theResult, theValue} to aURL’s getResourceValue:(reference) forKey:NSURLTypeIdentifierKey |error|:(missing value)
  
  
if theResult = true then
    return theValue as string
  else
    return theResult
  end if
end retUTIfromPath

–UTIリストが指定UTIに含まれているかどうか演算を行う
on filterUTIList(aUTIList, aUTIstr)
  set anArray to NSArray’s arrayWithArray:aUTIList
  
set aPred to NSPredicate’s predicateWithFormat_("SELF UTI-CONFORMS-TO %@", aUTIstr)
  
set bRes to (anArray’s filteredArrayUsingPredicate:aPred) as list
  
return bRes
end filterUTIList

on cropNSImageTo:{x1, y1, x2, y2} fromImage:theImage
  set newWidth to x2 – x1
  
set newHeight to y2 – y1
  
set theSize to (theImage’s |size|()) as record
  
set oldHeight to height of theSize
  
  
— transpose y value for Cocoa coordintates
  
set y1 to oldHeight – newHeight – y1
  
set newRect to {{x:x1, y:y1}, {width:newWidth, height:newHeight}}
  
theImage’s lockFocus()
  
set theRep to NSBitmapImageRep’s alloc()’s initWithFocusedViewRect:newRect
  
theImage’s unlockFocus()
  
  
set outImage to NSImage’s alloc()’s initWithSize:(theRep’s |size|())
  
outImage’s addRepresentation:theRep
  
  
return outImage
end cropNSImageTo:fromImage:

on makeNSImageFromFile(anAlias)
  set imgPath to (POSIX path of anAlias)
  
set aURL to (|NSURL|’s fileURLWithPath:(imgPath))
  
return (NSImage’s alloc()’s initWithContentsOfURL:aURL)
end makeNSImageFromFile

–NSImageを指定の大きさでトリミング
on cropNSImageBy:{x1, y1, newWidth, newHeight} fromImage:theImage
  set theSize to (theImage’s |size|()) as record
  
set oldHeight to height of theSize
  
  
— transpose y value for Cocoa coordintates
  
set y1 to oldHeight – newHeight – y1
  
set newRect to {{x:x1, y:y1}, {width:newWidth, height:newHeight}}
  
theImage’s lockFocus()
  
set theRep to NSBitmapImageRep’s alloc()’s initWithFocusedViewRect:newRect
  
theImage’s unlockFocus()
  
  
set outImage to NSImage’s alloc()’s initWithSize:(theRep’s |size|())
  
outImage’s addRepresentation:theRep
  
  
return outImage
end cropNSImageBy:fromImage:

on retUUIDfilePathFromDir(aPath, aEXT)
  set aUUIDstr to (NSUUID’s UUID()’s UUIDString()) as string
  
set aPath to ((NSString’s stringWithString:aPath)’s stringByAppendingPathComponent:aUUIDstr)’s stringByAppendingPathExtension:aEXT
  
return aPath
end retUUIDfilePathFromDir

–NSImageを指定パスにPNG形式で保存
on saveNSImageAtPathAsPNG(anImage, outPath)
  set imageRep to anImage’s TIFFRepresentation()
  
set aRawimg to NSBitmapImageRep’s imageRepWithData:imageRep
  
set pathString to NSString’s stringWithString:outPath
  
set newPath to pathString’s stringByExpandingTildeInPath()
  
set myNewImageData to (aRawimg’s representationUsingType:(NSPNGFileType) |properties|:(missing value))
  
set aRes to (myNewImageData’s writeToFile:newPath atomically:true) as boolean
  
return aRes –true/false
end saveNSImageAtPathAsPNG

on resizedImage:aSourceImg toScale:imgScale
  if (aSourceImg’s isValid()) as boolean = false then error "Invalid NSImage"
  
  
set aSize to aSourceImg’s |size|()
  
–>  {​​​​​width:32.0, ​​​​​height:32.0​​​}
  
  
set aWidth to (aSize’s width) * imgScale
  
set aHeight to (aSize’s height) * imgScale
  
  
set aRep to NSBitmapImageRep’s alloc()’s initWithBitmapDataPlanes:(missing value) pixelsWide:aWidth pixelsHigh:aHeight bitsPerSample:8 samplesPerPixel:4 hasAlpha:true isPlanar:false colorSpaceName:(NSCalibratedRGBColorSpace) bytesPerRow:0 bitsPerPixel:0
  
  
set newSize to {width:aWidth, height:aHeight}
  
aRep’s setSize:newSize
  
  
NSGraphicsContext’s saveGraphicsState()
  
NSGraphicsContext’s setCurrentContext:(NSGraphicsContext’s graphicsContextWithBitmapImageRep:aRep)
  
  
aSourceImg’s drawInRect:(current application’s NSMakeRect(0, 0, aWidth, aHeight)) fromRect:(NSZeroRect) operation:(NSCompositeCopy) fraction:(1.0)
  
  
NSGraphicsContext’s restoreGraphicsState()
  
  
set newImg to NSImage’s alloc()’s initWithSize:newSize
  
newImg’s addRepresentation:aRep
  
  
return newImg
end resizedImage:toScale:

★Click Here to Open This Script 

Posted in file Image | Tagged 10.11savvy 10.12savvy 10.13savvy NSArray NSBitmapImageRep NSImage NSPredicate NSScreen NSString NSURL NSUUID | Leave a comment

指定画像の指定座標の色情報をRGBで取得

Posted on 11月 15, 2018 by Takaaki Naganoya

指定画像の指定座標のピクセルの色を8ビットRGB値で返すAppleScriptです。

使用する座標系は左上が{0,0}です。

AppleScript名:指定画像の指定座標の色情報をRGBで取得.scptd
—
–  Created by: Takaaki Naganoya
–  Created on: 2018/11/15
—
–  Copyright © 2018 Piyomaru Software, All Rights Reserved
—
use AppleScript version "2.4" — Yosemite (10.10) or later
use framework "Cocoa" –Foundation + AppKit
use scripting additions

property NSImage : a reference to current application’s NSImage
property NSBitmapImageRep : a reference to current application’s NSBitmapImageRep

set aFile to POSIX path of (choose file of type {"public.image"})
set {xNum, yNum} to {0, 0}

set cRes to getColorRGBNumFromImageByPosition(aFile, xNum, yNum) of me
–> {255, 0, 0}

on getColorRGBNumFromImageByPosition(aFilePath, xPos as integer, yPos as integer)
  set anNSImage to NSImage’s alloc()’s initWithContentsOfFile:aFilePath
  
set aRawimg to NSBitmapImageRep’s imageRepWithData:(anNSImage’s TIFFRepresentation())
  
  
set aColor to (aRawimg’s colorAtX:xPos y:yPos)
  
set aRed to (aColor’s redComponent()) * 255
  
set aGreen to (aColor’s greenComponent()) * 255
  
set aBlue to (aColor’s blueComponent()) * 255
  
  
return {aRed as integer, aGreen as integer, aBlue as integer}
end getColorRGBNumFromImageByPosition

★Click Here to Open This Script 

Posted in Color Image list | Tagged 10.11savvy 10.12savvy 10.13savvy 10.14savvy NSBitmapImageRep NSImage | Leave a comment

squeezeNetで画像のオブジェクト認識を行い、結果をCSV出力してNumbersでオープン

Posted on 11月 12, 2018 by Takaaki Naganoya

Core MLモデル「squeezeNet.mlmodel」を用いて画像のオブジェクト認識を行い、結果をデスクトップにCSV形式でデータ書き出しを行い、NumbersでオープンするAppleScriptです。

–> Download squeezeNetKit.framework (To ~/Library/Frameworks)

macOS 10.13上ではスクリプトエディタ、Script Debugger上で、macOS 10.14上ではScript Debugger上で動作します(AppleScript Appletでも動作)。

さまざまなCore MLモデルを用いて画像認識を行わせてはみたものの、最もスコアの高いもののラベルだけを返させても、結果がまったく内容にそぐわないケースが多く見られます。


▲機械学習の評価値が1.0に近いものは確度が高く、0.0に近いものは判断に迷った末に消極的に出した値。経験則でいえば、最高スコアの項目が0.7以上のスコアでないといまひとつのようです(0.7以上でもダメな時はダメなわけで、、、)

画像認識については、結果があまりに的外れで「なんじゃこら?」というケースが多いので、確認のためにCSVデータ出力させてNumbers上で確認させてみることにしてみました。そのためにありあわせのサブルーチンを組み合わせて作ったものです。

スコアが高い順に結果を並べて確認してみると、最も高いスコアの値であっても0.0に近い評価値であることがあり、「何も考えずに最高スコアのラベルだけ取ってくるのはものすごく危険」なことがよくわかります。


▲squeezeNet.mlmodelをNetronでビジュアライズしたところ(一部抜粋)

AppleScript名:SqueezeNetでオブジェクト判定して結果をCSV書き出ししてNumbersでオープン.scpt
–  Created by: Takaaki Naganoya
–  Created on: 2018/11/11
–  Copyright © 2018 Piyomaru Software, All Rights Reserved
use AppleScript version "2.7" — High Sierra (10.13) or later
use framework "Foundation"
use framework "AppKit"
use framework "squeezeNetKit"
use scripting additions

property NSUUID : a reference to current application’s NSUUID
property NSArray : a reference to current application’s NSArray
property NSImage : a reference to current application’s NSImage
property NSMutableArray : a reference to current application’s NSMutableArray
property NSSortDescriptor : a reference to current application’s NSSortDescriptor

set aFile to POSIX path of (choose file of type {"public.image"})
set aImage to NSImage’s alloc()’s initWithContentsOfFile:aFile
set resDict to (current application’s imageClassifier’s alloc()’s init()’s ImageClassifierWithImageAndRetDict:aImage)

set kArray to (resDict’s allKeys())
set vArray to (resDict’s allValues())
set aLen to kArray’s |count|()

set anArray to NSMutableArray’s new()

repeat with i from 0 to (aLen – 1)
  set tmpKey to (kArray’s objectAtIndex:i) as string
  
set tmpVal to (vArray’s objectAtIndex:i) as real
  (
anArray’s addObject:{aKey:tmpKey, aVal:tmpVal})
end repeat

–Sort by value
set bList to sortRecListByLabel(anArray, "aVal", false) of me

–record in list –> 2D list
set cList to convRecInListTo2DList(bList) of me

–デスクトップにCSVファイルを書き出してNumbersでオープン
set aPath to (((path to desktop) as string) & (NSUUID’s UUID()’s UUIDString()) as string) & ".csv"
set fRes to saveAsCSV(cList, aPath) of me
tell application "Numbers"
  open (aPath as alias)
end tell

–リストに入れたレコードを、指定の属性ラベルの値でソート
on sortRecListByLabel(aRecList as list, aLabelStr as string, ascendF as boolean)
  set aArray to NSArray’s arrayWithArray:aRecList
  
set sortDesc to NSSortDescriptor’s alloc()’s initWithKey:aLabelStr ascending:ascendF
  
set sortDescArray to NSArray’s arrayWithObjects:sortDesc
  
set sortedArray to aArray’s sortedArrayUsingDescriptors:sortDescArray
  
set bList to (sortedArray) as anything
  
return bList
end sortRecListByLabel

on convRecInListTo2DList(aList)
  set anArray to NSMutableArray’s arrayWithArray:aList
  
set fItem to anArray’s objectAtIndex:0
  
set keyList to fItem’s allKeys() as list
  
set aCount to anArray’s |count|()
  
  
set allArray to NSMutableArray’s new()
  
  
repeat with i from 1 to aCount
    set anItem to (anArray’s objectAtIndex:(i – 1))
    
set tmpItem to {}
    
    
repeat with ii in keyList
      set tmpDat to (anItem’s valueForKeyPath:(contents of ii))
      
if tmpDat is not equal to missing value then
        set the end of tmpItem to tmpDat
      else
        set the end of tmpItem to ""
      end if
    end repeat
    (
allArray’s addObject:tmpItem)
  end repeat
  
  
set allList to allArray as list
  
set the beginning of allList to keyList
  
return allList
end convRecInListTo2DList

–CSV Kit

–2D List to CSV file
on saveAsCSV(aList, aPath)
  –set crlfChar to (ASCII character 13) & (ASCII character 10)
  
set crlfChar to (string id 13) & (string id 10)
  
set LF to (string id 10)
  
set wholeText to ""
  
  
repeat with i in aList
    set newLine to {}
    
    
–Sanitize (Double Quote)
    
repeat with ii in i
      set jj to ii as text
      
set kk to repChar(jj, string id 34, (string id 34) & (string id 34)) of me –Escape Double Quote
      
set the end of newLine to kk
    end repeat
    
    
–Change Delimiter
    
set aLineText to ""
    
set curDelim to AppleScript’s text item delimiters
    
set AppleScript’s text item delimiters to "\",\""
    
set aLineList to newLine as text
    
set AppleScript’s text item delimiters to curDelim
    
    
set aLineText to repChar(aLineList, return, "") of me –delete return
    
set aLineText to repChar(aLineText, LF, "") of me –delete lf
    
    
set wholeText to wholeText & "\"" & aLineText & "\"" & crlfChar –line terminator: CR+LF
  end repeat
  
  
if (aPath as string) does not end with ".csv" then
    set bPath to aPath & ".csv" as Unicode text
  else
    set bPath to aPath as Unicode text
  end if
  
  
write_to_file(wholeText, bPath, false) of me
  
end saveAsCSV

on write_to_file(this_data, target_file, append_data)
  tell current application
    try
      set the target_file to the target_file as text
      
set the open_target_file to open for access file target_file with write permission
      
if append_data is false then set eof of the open_target_file to 0
      
write this_data to the open_target_file starting at eof
      
close access the open_target_file
      
return true
    on error error_message
      try
        close access file target_file
      end try
      
return error_message
    end try
  end tell
end write_to_file

on repChar(origText as text, targChar as text, repChar as text)
  set curDelim to AppleScript’s text item delimiters
  
set AppleScript’s text item delimiters to targChar
  
set tmpList to text items of origText
  
set AppleScript’s text item delimiters to repChar
  
set retText to tmpList as string
  
set AppleScript’s text item delimiters to curDelim
  
return retText
end repChar

★Click Here to Open This Script 

Posted in file Image list Machine Learning Record Sort | Tagged 10.13savvy 10.14savvy NSArray NSImage NSMutableArray NSSortDescriptor NSUUID Numbers | Leave a comment

機械学習モデルをもとに画像のシーン判定

Posted on 11月 6, 2018 by Takaaki Naganoya

Appleが配布しているCoreML Model「Places205-GoogLeNet」を用いて、指定画像のシーン判定を行うAppleScriptです。

Appleが公式に配布している6つのCoreML Modelのうち、「Places205-GoogLeNet」を組み込んだFrameworkを作成して、これをAppleScriptから呼び出しています。

sceneDetection.frameworkをインストールしたうえで、macOS 10.13上ではスクリプトエディタ/Script Debuggerから、macOS 10.14ではScript Debuggerから本Scriptを実行します(AppleScriptアプレットでも動作します)。

「Places205-GoogLeNet」は、

Detects the scene of an image from 205 categories such as an airport terminal, bedroom, forest, coast, and more.

と、画像の内容から、画面やシーン、場所について「だいたいこんなところ」と判定してくれるModelのようです。ただ、日本国内の景色を渡してみると、得られる判定結果にはいまひとつ「ちょっと違う」と感じるものであります。


▲左:crosswalk(横断歩道)実際には自動車販売店と道路(Car shop & road)、右:desert/sand(砂漠、砂)実際にはAirport


▲左:river(川)実際には海、右:bridge(橋) 実際には橋ではありません

–> Download sceneDetection.framework (To ~/Library/Frameworks)


▲GoogLeNetPlaces.mlmodelをNetronでビジュアライズしたところ

AppleScript名:GoogLeNetPlacesでシーン判定.scpt
use AppleScript version "2.7" — High Sierra (10.13) or later
use framework "Foundation"
use framework "AppKit"
use framework "sceneDetection"
use scripting additions

set aFile to POSIX path of (choose file of type {"public.image"})
set aImage to current application’s NSImage’s alloc()’s initWithContentsOfFile:aFile
set msDict to (current application’s sceneDetector’s alloc()’s init()’s GoogLeNetPlacesWithImage:aImage) as string
–> "crosswalk"

★Click Here to Open This Script 

Posted in file Image Machine Learning | Tagged 10.13savvy 10.14savvy NSImage | Leave a comment

CreateMLで機械学習したモデルを利用して、MS画像の連邦、ジオン軍判定

Posted on 11月 6, 2018 by Takaaki Naganoya

「戦場の絆」のホームページからダウンロードしたMSの画像を学習させた機械学習モデルを使用して、指定のMS画像が地球連邦軍(EFSF)かジオン軍(zeon)かを判定するAppleScriptです。


■©創通・サンライズ 学習時に299×299ピクセルに縮小されるので、モノアイとかそういう部分が特徴量として検出されることはないもよう

両軍合わせて180機体ほどの画像を学習させただけなので、正直なところ判定間違いが多いですが、増やしていくとけっこう簡単に判定できそうです(数万ファイルぐらい画像を学習させるともっと明確な傾向が出てくるかも?)。


▲学習させたMS画像データ。efsf、efsf_stole(鹵獲機体)、zeon、zeon_stole(鹵獲機体)に分けてみた。CoreMLで任意のMS画像がこれらのどのグループに所属する可能性が最も高いかをフォルダ名で返してくることになる

macOS 10.14上のスクリプトエディタは野良Frameworkを認識してくれないので、macOS 10.14.x+Script Debugger上で実行する必要があります。あと、AppleScriptアプレットに書き出して実行すると野良Frameworkを認識して実行するので、アプレットに書き出して実行するとScript DebuggerのないmacOS 10.14環境でも動作確認できます。

Xcode上でSwift Playgroundを用いて認識していた時よりも認識精度が下がっているように見えます。結局画像は299×299ピクセルぐらいに縮小されて判定されるので、判定前に画像余白部分をトリミングしておくと認識精度が上がりそうな気もします。

299×299ピクセルに縮小されると、さすがにモノアイが特徴量として認識される可能性も低く、色とかポーズとか構図とかで識別されているのでしょう。


▲作成したmodelをNetronでビジュアライズしたところ

CreateMLで機械学習モデルを作るのがとても簡単であることがわかり、機械学習モデルを呼び出すためのAppleScriptのコードがとてもシンプルなことがわかり、さらに学習モデルを用いた画像分類が短い時間で行えることを確認できました。

現在のところ、1つの機械学習モデル(.mlmodel)を使うためにそのモデルを組み込んだFrameworkを必要としている状態ですが、機械学習モデル自体も外部からパスで指定して柔軟に指定できるようにしたいところです。

これで調子に乗って手書き文字画像データ(Mnist)をCreateMLで機械学習して、手書き文字の画像をスキャナから読み取って手軽に手書き文字認識できるかも?! と、鼻息荒くテストしてみましたが、期待したような精度では判定されないことを思い知らされたのでした。

–> Download msDetector.framework (To ~/Library/Frameworks)

AppleScript名:機械学習で学習したMSの画像の連邦軍、ジオン軍判定.scpt
use AppleScript version "2.7" — Mojave (10.14) or later
use framework "Foundation"
use framework "AppKit"
use framework "msDetector"
use scripting additions

set aFile to POSIX path of (choose file of type {"public.image"})
set aImage to current application’s NSImage’s alloc()’s initWithContentsOfFile:aFile
set msRes to current application’s msClassify’s alloc()’s init()’s ImageClassifierWithImage:aImage
–> "efsf" / "zeon"

★Click Here to Open This Script 

Posted in file Image Machine Learning | Tagged 10.14savvy NSImage | Leave a comment

ZipZap frameworkを使ってZipアーカイブ内の情報を取得しファイルタイプごとに対応出力

Posted on 9月 29, 2018 by Takaaki Naganoya

オープンソースのZipZap frameworkを用いて、指定Zipアーカイブ内の情報を取得し、ファイルタイプごとに対応した出力を行うAppleScriptです。

–> ZipZap.framework(To ~/Library/Frameworks/)

客観的に動作内容を書くとわかりにくいですが、「目的」を書くと非常にわかりやすい部品です。

「バンドル内にパスワード付きのZipアーカイブ化したAppleScript書類を入れておいて、実行時にアーカイブからAppleScriptのソースを取り出して実行する」

というのが、その用途です。

プレーンテキストと画像を取り出せるような記述になっていますが、それらはあくまでも実験用で、AppleScript書類のソースを取り出すのが本来の目的です。

AppleScriptでGUIアプリケーションを作成したときに、GUIまわりは普通にXcode上で記述して(あるいは、外部エディタ上で記述して)おきますが、外部のアプリケーションをコントロールするコードは、実行専用の.scpt形式でかつ書き込み禁止状態にしてバンドル内に入れておいたりします(SandBox対応のため)。

ただ、さまざまな要求を満たすようにGUIアプリケーション操作用のScriptを呼び出そうとすると、load scriptで読み込んで実行させていたのでは、都合がよくない場合があります(何らかのキーを長押しすると実行を停止できるとか、システム内の別の要素……たとえばCPUの温度が上がりすぎたら停止させるとか)。

load scriptで実行すると、

(1)途中で実行停止しにくい
(2)セキュリティ上の制約がきつい(とくにGUI Scriptingまわり)
(3)スクリプトエディタ上で動かしていた時と挙動が変わる箇所がある(Finder上のselectionを取得していた場合とか)

といった問題がありますが、OSAScriptView上にAppleScriptのソースを展開して実行すると、これらの問題を解決できる一方、ソースが見える形式でアプリケーションバンドル内に入れるのはためらわれます。

その問題を解決するために書いたものです。展開したデータをファイル出力せず、すべて変数上で(オンメモリで)処理できるので都合がいいです。

Mac App Storeで販売するアプリケーションでこの部品を使ったことはありませんが、客先に納品するアプリケーションでは使えるといったところでしょうか。ここまで手の込んだプログラムだとリジェクトできないとは思っています(もっとレベルの低い指摘しか来ないので)。

AppleScript名:ZipZap frameworkを使ってZipアーカイブ内の情報を取得してファイルタイプごとに対応出力 v2
— Created 2018-09-28 by Takaaki Naganoya
— 2018 Piyomaru Software
use AppleScript version "2.5"
use scripting additions
use framework "Foundation"
use framework "OSAKit"
use framework "ZipZap" –https://github.com/pixelglow/zipzap
use bPlus : script "BridgePlus" –https://www.macosxautomation.com/applescript/apps/BridgePlus.html

property |NSURL| : a reference to current application’s |NSURL|
property NSArray : a reference to current application’s NSArray
property NSString : a reference to current application’s NSString
property NSImage : a reference to current application’s NSImage
property ZZArchive : a reference to current application’s ZZArchive
property OSAScript : a reference to current application’s OSAScript
property NSPredicate : a reference to current application’s NSPredicate
property NSUTF8StringEncoding : a reference to current application’s NSUTF8StringEncoding
property NSURLTypeIdentifierKey : a reference to current application’s NSURLTypeIdentifierKey

set aPassword to "piyomarusoftware"
set aPath to POSIX path of (choose file of type {"public.zip-archive"})
set aList to extractArchive(aPath, aPassword) of me

on extractArchive(aPath, aPass)
  set oldArchive to ZZArchive’s archiveWithURL:(|NSURL|’s fileURLWithPath:aPath) |error|:(missing value)
  
set aList to oldArchive’s entries() as list
  
  
set outList to {}
  
  
repeat with i in aList
    set encF to i’s encrypted() as boolean
    
    
set aFileName to i’s fileName()
    
    
if (aFileName as string) does not start with "__MACOSX/" then
      set aExt to (aFileName’s pathExtension()) as string
      
set aUTI to my retFileFormatUTI(aExt)
      
set aData to (i’s newDataWithError:(missing value)) –Uncompressed raw data
      
      
if aData = missing value then
        set aData to (i’s newDataWithPassword:(aPass) |error|:(missing value))
        
if aData is equal to (missing value) then
          error "Internal archive error in extracting"
        end if
      end if
      
      
if aUTI = "public.plain-text" then
        –Plain Text
        
set aStr to (NSString’s alloc()’s initWithData:aData encoding:(NSUTF8StringEncoding)) as string
        
      else if aUTI = "com.apple.applescript.script" then
        –AppleScript .scpt file
        
set aScript to (OSAScript’s alloc()’s initWithCompiledData:aData |error|:(missing value))
        
set aStr to (aScript’s source()) as string
        
      else if (my filterUTIList({aUTI}, "public.image")) is not equal to {} then
        –Various Images
        
set aStr to (NSImage’s alloc()’s initWithData:aData)
        
      end if
      
      
set the end of outList to aStr
    end if
  end repeat
  
  
return outList
end extractArchive

on retFileFormatUTI(aExt as string)
  tell script "BridgePlus"
    load framework
    
return (current application’s SMSForder’s UTIForExtension:aExt) as string
  end tell
end retFileFormatUTI

–UTIリストが指定UTIに含まれているかどうか演算を行う
on filterUTIList(aUTIList, aUTIstr)
  set anArray to NSArray’s arrayWithArray:aUTIList
  
set aPred to NSPredicate’s predicateWithFormat_("SELF UTI-CONFORMS-TO %@", aUTIstr)
  
set bRes to (anArray’s filteredArrayUsingPredicate:aPred) as list
  
return bRes
end filterUTIList

★Click Here to Open This Script 

Posted in file OSA Text URL UTI | Tagged 10.11savvy 10.12savvy 10.13savvy NSArray NSImage NSPredicate NSString NSURL NSURLTypeIdentifierKey NSUTF8StringEncoding OSAScript ZZArchive | Leave a comment

Finder上で選択中の画像のうち、最小のものに合わせて各画像の左上を原点にサイズ統一

Posted on 7月 27, 2018 by Takaaki Naganoya

Finderで選択中の画像のうち、最小のものに合わせて各画像の左上を原点にサイズを統一するAppleScriptです。

Finderで選択中のファイルから画像のみ抽出し、そのうちサイズが最小のものに合わせて他の画像をトリミングし、変更したものをデスクトップフォルダに出力します。


▲大きさを揃える画像をFinder上で選択


▲処理前の画像。大きさがまちまち


▲処理後の画像。大きさが最小の画像に合わせてそろっている

スクリーンショット画像を複数撮った場合に、厳密に同じサイズに固定することは(各種スクリーンショット作成ユーティリティを使わないと)行いづらいところです。

そこで、最小の画像を計算で求めて、それに合わせて自動トリミングするようにしてみました。Cocoaの機能を用いて画像処理しているため、Photoshopは必要ありません。

最小の画像を求めるのに、幅+高さの値でソートして最小のものを求めています(widthとheightによる2 key sortではなく1 Keyで済ませたかったので)。

Blogや書籍用の掲載画面図の作成用、といったところでしょうか。Retina画面で撮ったスクリーンショットと非Retina画面のスクリーンショットが混在するとうまく動きません(スクリーンショット画像からはRetina環境で撮った画像であるかどうかを取得できません)。

スクリーンショットの画像からRetina/非Retina環境で撮ったかを判定するのは、(Retina対応機であるかをMachine IDから取得したあとで)Syslogにアクセスしてスクリーンが接続されたか、取り外されたかといった状態を追っていくしかないのかも。

本ScriptをmacOS 10.13.6上で動作確認して驚いたのですが、いままでRecordが返ってくるべき箇所でlistが返ってくる盛大なバグが直って、本ScriptがmacOS 10.13用に書き換えずに動きました(動かないことを確認しようとして動いたので驚いた)。

AppleScript名:Finder上で選択中の画像のうち、最小のものに合わせて各画像の左上を原点にサイズ統一 v2
— Created 2018-07-23 by Takaaki Naganoya
— 2018 Piyomaru Software
use AppleScript version "2.5"
use scripting additions
use framework "Foundation"
use framework "AppKit"
use framework "QuartzCore"

property |NSURL| : a reference to current application’s |NSURL|
property NSUUID : a reference to current application’s NSUUID
property NSArray : a reference to current application’s NSArray
property NSString : a reference to current application’s NSString
property NSImage : a reference to current application’s NSImage
property NSScreen : a reference to current application’s NSScreen
property NSZeroRect : a reference to current application’s NSZeroRect
property NSPredicate : a reference to current application’s NSPredicate
property NSPNGFileType : a reference to current application’s NSPNGFileType
property NSMutableArray : a reference to current application’s NSMutableArray
property NSCompositeCopy : a reference to current application’s NSCompositeCopy
property NSGraphicsContext : a reference to current application’s NSGraphicsContext
property NSBitmapImageRep : a reference to current application’s NSBitmapImageRep
property NSURLTypeIdentifierKey : a reference to current application’s NSURLTypeIdentifierKey
property NSCalibratedRGBColorSpace : a reference to current application’s NSCalibratedRGBColorSpace

tell application "Finder"
  set selList to selection as alias list
end tell

–指定のAlias listのうち画像のみ抽出
set filRes1 to filterAliasListByUTI(selList, "public.image") of me
if filRes1 = {} then
  tell current application
    –Error Message (No Selection)
    
display dialog "Finder上で選択されているファイルはありません。" buttons {"OK"} default button 1 with icon 1 with title "画像リサイズ処理できません"
  end tell
  
return
end if

–各種情報を入れたArrayを作成
set anArray to NSMutableArray’s new()
repeat with i in selList
  set imgPath to (POSIX path of i)
  
  
set aImage to makeNSImageFromFile(i) of me
  
set sizeInfo to |size|() of aImage
  
set sizeInfo to sizeInfo & {aImg:aImage, total:(width of sizeInfo) + (height of sizeInfo), myPath:imgPath}
  (
anArray’s addObject:sizeInfo)
end repeat

–最小のサイズの画像の算出
set aRes to anArray’s valueForKeyPath:("@min.total")
set bRes to first item of (filterRecListByLabel(anArray, "total == " & aRes as string) of me) –最小サイズの画像

–最小サイズ画像のwidthとheight
set minWidth to bRes’s width
set minHeight to bRes’s height

–環境情報の取得
set aPath to POSIX path of (path to desktop)
set retinaF to (NSScreen’s mainScreen()’s backingScaleFactor()) as real
–>  2.0 (Retina) / 1.0 (Non Retina)

set cRes to filterRecListByLabel(anArray, "total != " & aRes as string) of me –最小サイズ以外の画像

repeat with i in cRes
  set j to contents of i
  
set anImage to aImg of j
  
set fRes to myPath of j
  
  
set cropedImage to (my cropNSImageBy:{0, 0, minWidth, minHeight} fromImage:anImage) –v1で間違っていた
  
  
–Retina環境対策
  
if retinaF > 1.0 then
    set cropedImage to (my resizedImage:cropedImage toScale:(1.0))
  end if
  
  
–ファイル書き込み
  
set fRes to retUUIDfilePathFromDir(aPath, "png") of me
  
set sRes to saveNSImageAtPathAsPNG(cropedImage, fRes) of me
end repeat

–リストに入れたレコードを、指定の属性ラベルの値で抽出
on filterRecListByLabel(aRecList as list, aPredicate as string)
  –ListからNSArrayへの型変換
  
set aArray to NSArray’s arrayWithArray:aRecList
  
  
–抽出
  
set aPredicate to NSPredicate’s predicateWithFormat:aPredicate
  
set filteredArray to aArray’s filteredArrayUsingPredicate:aPredicate
  
  
–NSArrayからListに型変換して返す
  
set bList to filteredArray as list
  
return bList
end filterRecListByLabel

–Alias listから指定UTIに含まれるものをPOSIX pathのリストで返す
on filterAliasListByUTI(aList, targUTI)
  set newList to {}
  
repeat with i in aList
    set j to POSIX path of i
    
set tmpUTI to my retUTIfromPath(j)
    
set utiRes to my filterUTIList({tmpUTI}, targUTI)
    
if utiRes is not equal to {} then
      set the end of newList to j
    end if
  end repeat
  
return newList
end filterAliasListByUTI

–指定のPOSIX pathのファイルのUTIを求める
on retUTIfromPath(aPOSIXPath)
  set aURL to |NSURL|’s fileURLWithPath:aPOSIXPath
  
set {theResult, theValue} to aURL’s getResourceValue:(reference) forKey:NSURLTypeIdentifierKey |error|:(missing value)
  
  
if theResult = true then
    return theValue as string
  else
    return theResult
  end if
end retUTIfromPath

–UTIリストが指定UTIに含まれているかどうか演算を行う
on filterUTIList(aUTIList, aUTIstr)
  set anArray to NSArray’s arrayWithArray:aUTIList
  
set aPred to NSPredicate’s predicateWithFormat_("SELF UTI-CONFORMS-TO %@", aUTIstr)
  
set bRes to (anArray’s filteredArrayUsingPredicate:aPred) as list
  
return bRes
end filterUTIList

on cropNSImageTo:{x1, y1, x2, y2} fromImage:theImage
  set newWidth to x2 – x1
  
set newHeight to y2 – y1
  
set theSize to (theImage’s |size|()) as record
  
set oldHeight to height of theSize
  
  
— transpose y value for Cocoa coordintates
  
set y1 to oldHeight – newHeight – y1
  
set newRect to {{x:x1, y:y1}, {width:newWidth, height:newHeight}}
  
theImage’s lockFocus()
  
set theRep to NSBitmapImageRep’s alloc()’s initWithFocusedViewRect:newRect
  
theImage’s unlockFocus()
  
  
set outImage to NSImage’s alloc()’s initWithSize:(theRep’s |size|())
  
outImage’s addRepresentation:theRep
  
  
return outImage
end cropNSImageTo:fromImage:

on makeNSImageFromFile(anAlias)
  set imgPath to (POSIX path of anAlias)
  
set aURL to (|NSURL|’s fileURLWithPath:(imgPath))
  
return (NSImage’s alloc()’s initWithContentsOfURL:aURL)
end makeNSImageFromFile

–NSImageを指定の大きさでトリミング
on cropNSImageBy:{x1, y1, newWidth, newHeight} fromImage:theImage
  set theSize to (theImage’s |size|()) as record
  
set oldHeight to height of theSize
  
  
— transpose y value for Cocoa coordintates
  
set y1 to oldHeight – newHeight – y1
  
set newRect to {{x:x1, y:y1}, {width:newWidth, height:newHeight}}
  
theImage’s lockFocus()
  
set theRep to NSBitmapImageRep’s alloc()’s initWithFocusedViewRect:newRect
  
theImage’s unlockFocus()
  
  
set outImage to NSImage’s alloc()’s initWithSize:(theRep’s |size|())
  
outImage’s addRepresentation:theRep
  
  
return outImage
end cropNSImageBy:fromImage:

on retUUIDfilePathFromDir(aPath, aEXT)
  set aUUIDstr to (NSUUID’s UUID()’s UUIDString()) as string
  
set aPath to ((NSString’s stringWithString:aPath)’s stringByAppendingPathComponent:aUUIDstr)’s stringByAppendingPathExtension:aEXT
  
return aPath
end retUUIDfilePathFromDir

–NSImageを指定パスにPNG形式で保存
on saveNSImageAtPathAsPNG(anImage, outPath)
  set imageRep to anImage’s TIFFRepresentation()
  
set aRawimg to NSBitmapImageRep’s imageRepWithData:imageRep
  
set pathString to NSString’s stringWithString:outPath
  
set newPath to pathString’s stringByExpandingTildeInPath()
  
set myNewImageData to (aRawimg’s representationUsingType:(NSPNGFileType) |properties|:(missing value))
  
set aRes to (myNewImageData’s writeToFile:newPath atomically:true) as boolean
  
return aRes –true/false
end saveNSImageAtPathAsPNG

on resizedImage:aSourceImg toScale:imgScale
  if (aSourceImg’s isValid()) as boolean = false then error "Invalid NSImage"
  
  
set aSize to aSourceImg’s |size|()
  
–>  {​​​​​width:32.0, ​​​​​height:32.0​​​}
  
  
set aWidth to (aSize’s width) * imgScale
  
set aHeight to (aSize’s height) * imgScale
  
  
set aRep to NSBitmapImageRep’s alloc()’s initWithBitmapDataPlanes:(missing value) pixelsWide:aWidth pixelsHigh:aHeight bitsPerSample:8 samplesPerPixel:4 hasAlpha:true isPlanar:false colorSpaceName:(NSCalibratedRGBColorSpace) bytesPerRow:0 bitsPerPixel:0
  
  
set newSize to {width:aWidth, height:aHeight}
  
aRep’s setSize:newSize
  
  
NSGraphicsContext’s saveGraphicsState()
  
NSGraphicsContext’s setCurrentContext:(NSGraphicsContext’s graphicsContextWithBitmapImageRep:aRep)
  
  
aSourceImg’s drawInRect:(current application’s NSMakeRect(0, 0, aWidth, aHeight)) fromRect:(NSZeroRect) operation:(NSCompositeCopy) fraction:(1.0)
  
  
NSGraphicsContext’s restoreGraphicsState()
  
  
set newImg to NSImage’s alloc()’s initWithSize:newSize
  
newImg’s addRepresentation:aRep
  
  
return newImg
end resizedImage:toScale:

★Click Here to Open This Script 

Posted in file Image | Tagged 10.11savvy 10.12savvy 10.13savvy Finder NSArray NSBitmapImageRep NSImage NSMutableArray NSPredicate NSScreen NSString NSURL NSUUID | 1 Comment

色付き単色画像を作成する(自由色指定&色名推定)

Posted on 7月 17, 2018 by Takaaki Naganoya

指定画像を任意の色で単色化し、指定色名をファイル名に反映させてファイル出力するAppleScriptです。

もとは、「色付き単色画像を作成する」AppleScriptに、

 ・choose colorによるユーザー選択色を反映
 ・choose colorで指定した色のざっくりとした色名検出

などの機能をつなぎ合わせたものです。

日本地図の白地図からカラーバリエーション画像を出力する際に作成しました。線が黒で書かれている白地図(白地図というのはそういうものですが)から、さまざまな色のバリエーションを作成。その際に、どのような色を指定したかをファイル名に反映させておいたほうが便利だったので、そのようにしてみました。

GPUImage.frameworkを利用しています。

–> GPUImage.framework (To ~/Library/Frameworks/)

色名推定のロジックもけっこうしっくりきていますが、明度も反映して、明るいものは「light-」、暗いものは「dark-」と出力させてもいいような気がします。ただし、「dark-orange」はBrownのことですし、ほかにも色名を別途振り直したほうがいいパターンもあるように思われます。

AppleScript名:色付き単色画像を作成する(自由色指定&色名推定)
— Created 2017-02-11 by Takaaki Naganoya
— Modified 2018-07-15 by Takaaki Naganoya
— 2017-2018 Piyomaru Software
use AppleScript version "2.4"
use scripting additions
use framework "Foundation"
use framework "AppKit"
use framework "GPUImage" –https://github.com/BradLarson/GPUImage

property NSUUID : a reference to current application’s NSUUID
property NSColor : a reference to current application’s NSColor
property NSString : a reference to current application’s NSString
property NSImage : a reference to current application’s NSImage
property NSBezierPath : a reference to current application’s NSBezierPath
property NSPNGFileType : a reference to current application’s NSPNGFileType
property GPUImagePicture : a reference to current application’s GPUImagePicture
property NSBitmapImageRep : a reference to current application’s NSBitmapImageRep

–Select Image File
set aFile to POSIX path of (choose file of type {"public.image"} with prompt "Select image")

–Select Color
set {rCol, gCol, bCol} to choose color

set fillColorR to makeNSColorFromRGBAval(rCol, gCol, bCol, 65535, 65535) of me
set fillColorRName to retColorDomainNameFromNSColor(fillColorR) of me –だいたいの色名称を計算

set imgRes to makeMonoColoredImage(aFile, fillColorR) of me
set fRes to retUUIDandKeyfilePath(aFile, fillColorRName, "png") of me
set bRes to saveNSImageAtPathAsPNG(imgRes, fRes) of me

— return "UUID_aKey.aEXT" full path
on retUUIDandKeyfilePath(aPath, aKey, aEXT)
  set aUUIDstr to ((NSUUID’s UUID()’s UUIDString()) as string) & "_" & aKey
  
set aPath to ((NSString’s stringWithString:aPath)’s stringByDeletingLastPathComponent()’s stringByAppendingPathComponent:aUUIDstr)’s stringByAppendingPathExtension:aEXT
  
return aPath
end retUUIDandKeyfilePath

on makeMonoColoredImage(aFile, NScolorObj)
  set aImage to NSImage’s alloc()’s initWithContentsOfFile:aFile
  
return makeColoredNSImageWithColor(aImage, NScolorObj) of me –色付き単色画像を作成する
end makeMonoColoredImage

on makeColoredNSImageWithColor(aImage, fillColor)
  set aSize to aImage’s |size|()
  
set aWidth to width of aSize
  
set aHeight to height of aSize
  
set newNSImage to makeNSImageWithFilledWithColor(aWidth, aHeight, fillColor)
  
set grayImage to filterWithNSImage(aImage, "GPUImageGrayscaleFilter") of me
  
set compImage to composeImageWithBlendFilter(grayImage, newNSImage, "GPUImageScreenBlendFilter") of me
  
return compImage
end makeColoredNSImageWithColor

on filterWithNSImage(aNSImage, filterName as string)
  set aClass to current application’s NSClassFromString(filterName)
  
set aImageFilter to aClass’s alloc()’s init()
  
set aProcImg to (aImageFilter’s imageByFilteringImage:aNSImage)
  
return aProcImg
end filterWithNSImage

on composeImageWithBlendFilter(aImage, bImage, filterName)
  set aClass to current application’s NSClassFromString(filterName)
  
set blendFilter to aClass’s alloc()’s init()
  
set pictureA to GPUImagePicture’s alloc()’s initWithImage:aImage
  
pictureA’s addTarget:blendFilter
  
pictureA’s processImage()
  
set imgRes to blendFilter’s imageByFilteringImage:bImage
  
return imgRes
end composeImageWithBlendFilter

–指定サイズの画像を作成し、指定色で塗ってNSImageで返す
on makeNSImageWithFilledWithColor(aWidth, aHeight, fillColor)
  –Imageの作成  
  
set curSize to current application’s NSMakeSize(aWidth, aHeight)
  
set anImage to NSImage’s alloc()’s initWithSize:curSize
  
  
anImage’s lockFocus() –描画開始
  
  
set theRect to {{x:0, y:0}, {height:aHeight, width:aWidth}}
  
set theNSBezierPath to NSBezierPath’s bezierPath
  
theNSBezierPath’s appendBezierPathWithRect:theRect
  
  
fillColor’s |set|() –色設定
  
theNSBezierPath’s fill() –ぬりつぶし
  
  
anImage’s unlockFocus() –描画ここまで
  
  
–生成した画像のRaw画像を作成
  
set imageRep to anImage’s TIFFRepresentation()
  
set aRawimg to NSBitmapImageRep’s imageRepWithData:imageRep
  
  
set newImg to NSImage’s alloc()’s initWithSize:curSize
  
newImg’s addRepresentation:aRawimg
  
return newImg
end makeNSImageWithFilledWithColor

–NSImageを指定パスにPNG形式で保存
on saveNSImageAtPathAsPNG(anImage, outPath)
  set imageRep to anImage’s TIFFRepresentation()
  
set aRawimg to NSBitmapImageRep’s imageRepWithData:imageRep
  
set pathString to NSString’s stringWithString:outPath
  
set newPath to pathString’s stringByExpandingTildeInPath()
  
set myNewImageData to (aRawimg’s representationUsingType:(NSPNGFileType) |properties|:(missing value))
  
set aRes to (myNewImageData’s writeToFile:newPath atomically:true) as boolean
  
return aRes –true/false
end saveNSImageAtPathAsPNG

–NSColor(内容はRGBAカラー)からだいたいの色名を推測
on retColorDomainNameFromNSColor(aCol)
  set hueVal to aCol’s hueComponent()
  
set satVal to aCol’s saturationComponent()
  
set brightVal to aCol’s brightnessComponent()
  
  
if satVal ≤ 0.01 then set satVal to 0.0
  
  
set colName to ""
  
  
if satVal = 0.0 then
    if brightVal ≤ 0.2 then
      set colName to "black"
    else if (brightVal > 0.95) then
      set colName to "white"
    else
      set colName to "gray"
    end if
  else
    if hueVal ≤ (15.0 / 360) or hueVal ≥ (330 / 360) then
      set colName to "red"
    else if hueVal ≤ (45.0 / 360) then
      set colName to "orange"
    else if hueVal < (70.0 / 360) then
      set colName to "yellow"
    else if hueVal < (150.0 / 360) then
      set colName to "green"
    else if hueVal < (190.0 / 360) then
      set colName to "green(cyan)"
    else if (hueVal < 250.0 / 360.0) then
      set colName to "blue"
    else if (hueVal < 290.0 / 360.0) then
      set colName to "purple"
    else
      set colName to "red(magenta)"
    end if
  end if
  
  
return colName
end retColorDomainNameFromNSColor

on makeNSColorFromRGBAval(redValue as integer, greenValue as integer, blueValue as integer, alphaValue as integer, aMaxVal as integer)
  set aRedCocoa to (redValue / aMaxVal) as real
  
set aGreenCocoa to (greenValue / aMaxVal) as real
  
set aBlueCocoa to (blueValue / aMaxVal) as real
  
set aAlphaCocoa to (alphaValue / aMaxVal) as real
  
set aColor to NSColor’s colorWithCalibratedRed:aRedCocoa green:aGreenCocoa blue:aBlueCocoa alpha:aAlphaCocoa
  
return aColor
end makeNSColorFromRGBAval

★Click Here to Open This Script 

Posted in Color file Image | Tagged 10.11savvy 10.12savvy 10.13savvy NSBezierPath NSBitmapImageRep NSColor NSImage NSString NSUUID | Leave a comment

Post navigation

  • Older posts
  • Newer posts

電子書籍(PDF)をオンラインストアで販売中!

Google Search

Popular posts

  • 開発機としてM2 Mac miniが来たのでガチレビュー
  • macOS 13.6.5 AS系のバグ、一切直らず
  • CotEditorで2つの書類の行単位での差分検出
  • Apple純正マウス、キーボードのバッテリー残量取得
  • macOS 15, Sequoia
  • ディスプレイをスリープ状態にして処理続行
  • 初心者がつまづきやすい「log」コマンド
  • Adobe AcrobatをAppleScriptから操作してPDF圧縮
  • 与えられた文字列の1D Listのすべての順列組み合わせパターン文字列を返す v3(ベンチマーク用)
  • 指定のWordファイルをPDFに書き出す
  • メキシカンハットの描画
  • macOS 13 TTS環境の変化について
  • 2023年に書いた価値あるAppleScript
  • Pixelmator Pro v3.6.4でAppleScriptからの操作時の挙動に違和感が
  • AdobeがInDesign v19.4からPOSIX pathを採用
  • Pages本執筆中に、2つの書類モード切り替えに気がついた
  • 可変次元のベクトルに対応したコサイン類似度計算
  • Safariで「プロファイル」機能を使うとAppleScriptの処理に影響
  • Cocoa Scripting Course 続刊計画
  • macOS 13.6.2アップデート Cocoa-AppleScript Applet修正はなし

Tags

10.11savvy (1101) 10.12savvy (1242) 10.13savvy (1391) 10.14savvy (586) 10.15savvy (437) 11.0savvy (281) 12.0savvy (201) 13.0savvy (138) 14.0savvy (86) 15.0savvy (62) CotEditor (63) Finder (51) iTunes (19) Keynote (112) NSAlert (60) NSArray (51) NSBitmapImageRep (20) NSBundle (20) NSButton (34) NSColor (51) NSDictionary (27) NSFileManager (23) NSFont (19) NSImage (41) NSJSONSerialization (21) NSMutableArray (62) NSMutableDictionary (21) NSPredicate (36) NSRunningApplication (56) NSScreen (30) NSScrollView (22) NSString (117) NSURL (97) NSURLRequest (23) NSUTF8StringEncoding (30) NSView (33) NSWorkspace (20) Numbers (67) Pages (51) Safari (44) Script Editor (26) WKUserContentController (21) WKUserScript (20) WKWebView (23) WKWebViewConfiguration (22)

カテゴリー

  • 2D Bin Packing
  • 3D
  • AirDrop
  • AirPlay
  • Animation
  • AppleScript Application on Xcode
  • Beginner
  • Benchmark
  • beta
  • Bluetooth
  • Books
  • boolean
  • bounds
  • Bug
  • Calendar
  • call by reference
  • Clipboard
  • Code Sign
  • Color
  • Custom Class
  • dialog
  • diff
  • drive
  • Droplet
  • exif
  • file
  • File path
  • filter
  • folder
  • Font
  • Font
  • GAME
  • geolocation
  • GUI
  • GUI Scripting
  • Hex
  • History
  • How To
  • iCloud
  • Icon
  • Image
  • Input Method
  • Internet
  • iOS App
  • JavaScript
  • JSON
  • JXA
  • Keychain
  • Keychain
  • Language
  • Library
  • list
  • Locale
  • Localize
  • Machine Learning
  • Map
  • Markdown
  • Menu
  • Metadata
  • MIDI
  • MIME
  • Natural Language Processing
  • Network
  • news
  • Noification
  • Notarization
  • Number
  • Object control
  • OCR
  • OSA
  • parallel processing
  • PDF
  • Peripheral
  • PRODUCTS
  • QR Code
  • Raw AppleEvent Code
  • Record
  • rectangle
  • recursive call
  • regexp
  • Release
  • Remote Control
  • Require Control-Command-R to run
  • REST API
  • Review
  • RTF
  • Sandbox
  • Screen Saver
  • Script Libraries
  • sdef
  • search
  • Security
  • selection
  • shell script
  • Shortcuts Workflow
  • Sort
  • Sound
  • Spellchecker
  • Spotlight
  • SVG
  • System
  • Tag
  • Telephony
  • Text
  • Text to Speech
  • timezone
  • Tools
  • Update
  • URL
  • UTI
  • Web Contents Control
  • WiFi
  • XML
  • XML-RPC
  • イベント(Event)
  • 未分類

アーカイブ

  • 2024年11月
  • 2024年10月
  • 2024年9月
  • 2024年8月
  • 2024年7月
  • 2024年6月
  • 2024年5月
  • 2024年4月
  • 2024年3月
  • 2024年2月
  • 2024年1月
  • 2023年12月
  • 2023年11月
  • 2023年10月
  • 2023年9月
  • 2023年8月
  • 2023年7月
  • 2023年6月
  • 2023年5月
  • 2023年4月
  • 2023年3月
  • 2023年2月
  • 2023年1月
  • 2022年12月
  • 2022年11月
  • 2022年10月
  • 2022年9月
  • 2022年8月
  • 2022年7月
  • 2022年6月
  • 2022年5月
  • 2022年4月
  • 2022年3月
  • 2022年2月
  • 2022年1月
  • 2021年12月
  • 2021年11月
  • 2021年10月
  • 2021年9月
  • 2021年8月
  • 2021年7月
  • 2021年6月
  • 2021年5月
  • 2021年4月
  • 2021年3月
  • 2021年2月
  • 2021年1月
  • 2020年12月
  • 2020年11月
  • 2020年10月
  • 2020年9月
  • 2020年8月
  • 2020年7月
  • 2020年6月
  • 2020年5月
  • 2020年4月
  • 2020年3月
  • 2020年2月
  • 2020年1月
  • 2019年12月
  • 2019年11月
  • 2019年10月
  • 2019年9月
  • 2019年8月
  • 2019年7月
  • 2019年6月
  • 2019年5月
  • 2019年4月
  • 2019年3月
  • 2019年2月
  • 2019年1月
  • 2018年12月
  • 2018年11月
  • 2018年10月
  • 2018年9月
  • 2018年8月
  • 2018年7月
  • 2018年6月
  • 2018年5月
  • 2018年4月
  • 2018年3月
  • 2018年2月

https://piyomarusoft.booth.pm/items/301502

メタ情報

  • ログイン
  • 投稿フィード
  • コメントフィード
  • WordPress.org

Forum Posts

  • 人気のトピック
  • 返信がないトピック

メタ情報

  • ログイン
  • 投稿フィード
  • コメントフィード
  • WordPress.org
Proudly powered by WordPress
Theme: Flint by Star Verte LLC