Menu

Skip to content
AppleScriptの穴
  • Home
  • Products
  • Books
  • Docs
  • Events
  • Forum
  • About This Blog
  • License
  • 仕事依頼

AppleScriptの穴

Useful & Practical AppleScript archive. Click '★Click Here to Open This Script' Link to download each AppleScript

月: 2018年4月

miでAppleScriptを実行して結果を新規Windowで返す

Posted on 4月 26, 2018 by Takaaki Naganoya

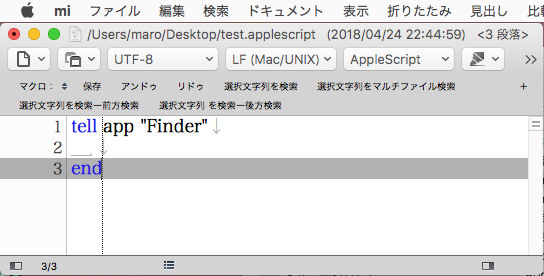
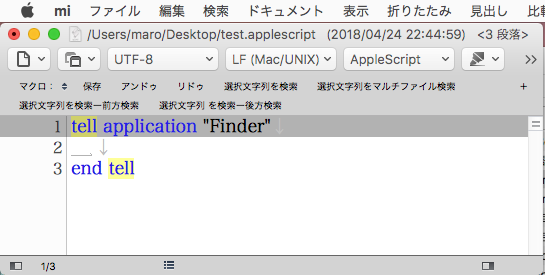
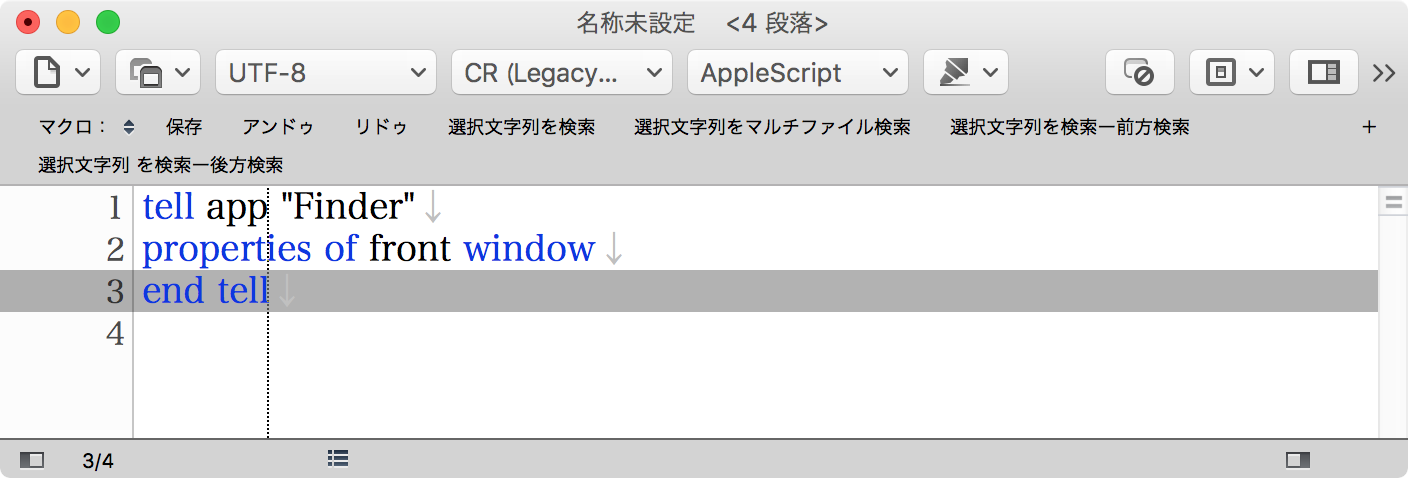
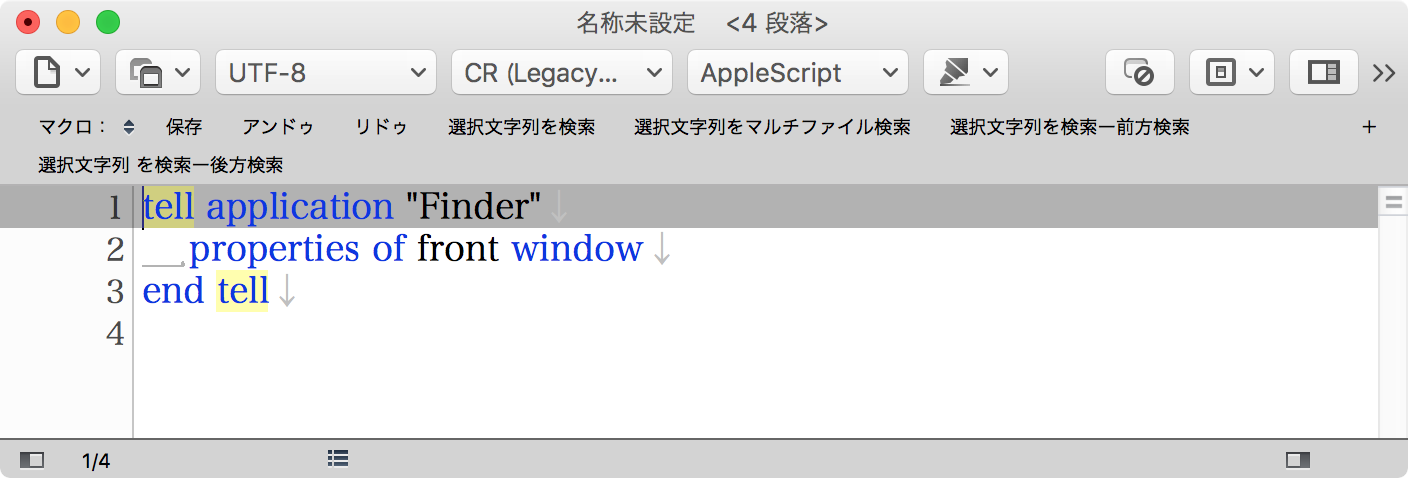
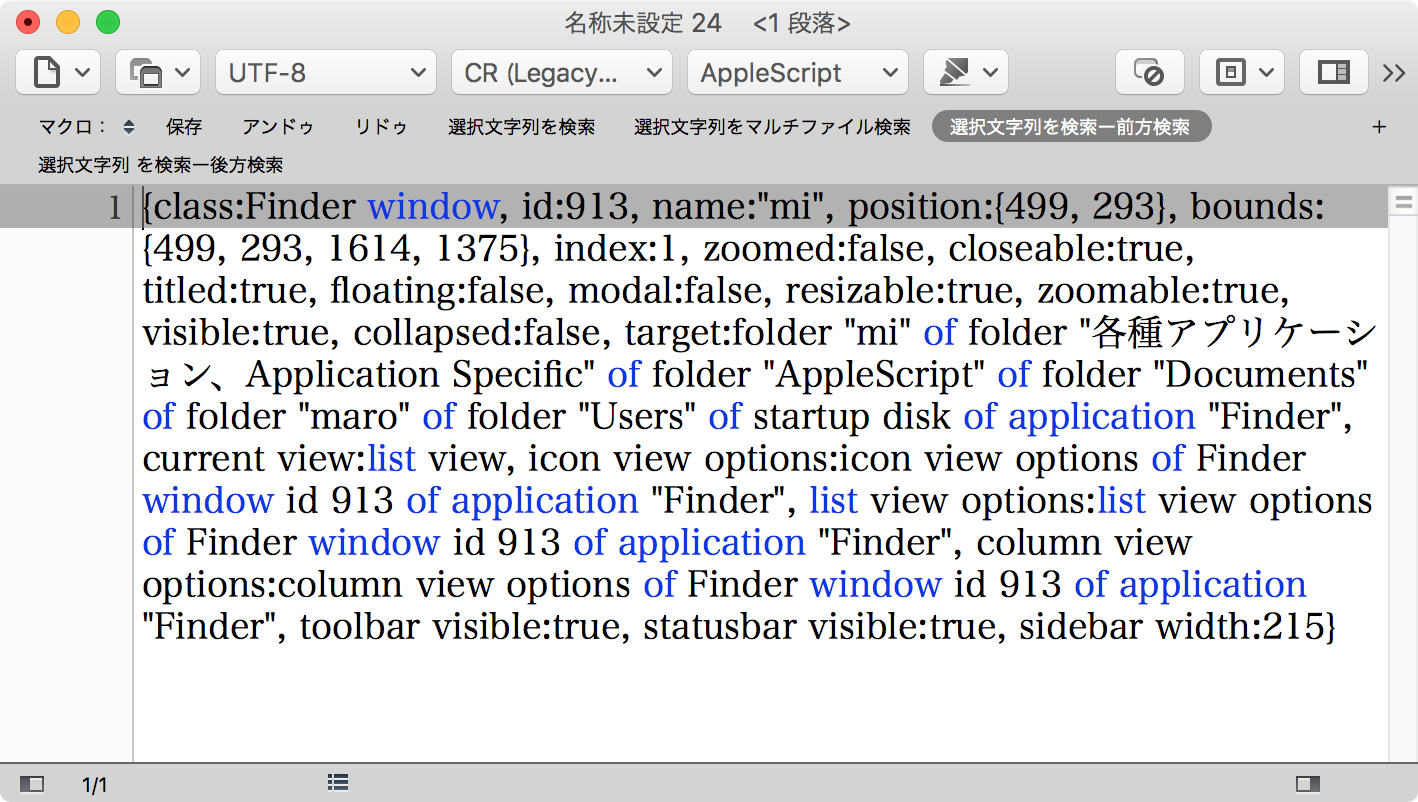
テキストエディタ「mi」v3.0のドキュメントに記述してあるAppleScriptをコンパイル(構文確認)して元の書類に書き戻し、結果を新規Windowに表示するAppleScriptです。

–> Watch Demo

とくに、miでなくても他のテキストエディタでも同様の動作は可能です。

AppleScript名:miでAppleScriptを実行して結果を新規Windowで返す
— Created 2018-04-24 by Takaaki Naganoya
— 2018 Piyomaru Software
use AppleScript version "2.5"
use scripting additions
use framework "Foundation"
use framework "OSAKit"

property NSThread : a reference to current application’s NSThread
property OSAScript : a reference to current application’s OSAScript
property NSTextView : a reference to current application’s NSTextView
property OSALanguage : a reference to current application’s OSALanguage
property OSAScriptView : a reference to current application’s OSAScriptView
property OSAScriptController : a reference to current application’s OSAScriptController
property OSALanguageInstance : a reference to current application’s OSALanguageInstance

property theResult : "" –result

set my theResult to ""

tell application "mi"
  tell front document
    if mode is not equal to "AppleScript" then return
    
set theSource to content
  end tell
end tell

set asSource to my compileASandReturnString:theSource
my performSelectorOnMainThread:"execASandReturnString:" withObject:theSource waitUntilDone:true

tell application "mi"
  tell front document
    set content to asSource
  end tell
  
  
set newDoc to make new document
  
tell newDoc
    set mode to "AppleScript"
    
set content to theResult
  end tell
end tell

on execASandReturnString:(theSource as string)
  set targX to 1024 –View Width
  
set targY to 2048 –View Height
  
  
set osaCon to current application’s OSAScriptController’s alloc()’s init()
  
set osaView to current application’s OSAScriptView’s alloc()’s initWithFrame:(current application’s NSMakeRect(0, 0, targX, targY))
  
  
set resView to NSTextView’s alloc()’s initWithFrame:(current application’s NSMakeRect(0, 0, targX, targY))
  
resView’s setRichText:true
  
resView’s useAllLigatures:true
  
  
osaCon’s setScriptView:osaView
  
osaCon’s setLanguage:(OSALanguage’s languageForName:"AppleScript")
  
osaCon’s setResultView:resView
  
  
osaView’s setString:theSource
  
osaCon’s compileScript:(missing value) –Compile(構文確認)
  
osaCon’s runScript:(missing value)
  
  
set asRes to resView’s |string|() as list of string or string –as anything
  
  
set aRes to (osaView’s |string|()) as string
  
  
copy asRes to theResult
end execASandReturnString:

on compileASandReturnString:(theSource as string)
  set targX to 1024 –View Width
  
set targY to 2048 –View Height
  
  
set osaCon to current application’s OSAScriptController’s alloc()’s init()
  
set osaView to current application’s OSAScriptView’s alloc()’s initWithFrame:(current application’s NSMakeRect(0, 0, targX, targY))
  
  
set resView to NSTextView’s alloc()’s initWithFrame:(current application’s NSMakeRect(0, 0, targX, targY))
  
resView’s setRichText:true
  
resView’s useAllLigatures:true
  
  
osaCon’s setScriptView:osaView
  
osaCon’s setLanguage:(OSALanguage’s languageForName:"AppleScript")
  
osaCon’s setResultView:resView
  
  
osaView’s setString:theSource
  
osaCon’s compileScript:(missing value) –Compile(構文確認)
  
  
set aRes to (osaView’s |string|()) as string
  
  
return aRes
end compileASandReturnString:

★Click Here to Open This Script 

(Visited 98 times, 1 visits today)
Posted in OSA | Tagged 10.11savvy 10.12savvy 10.13savvy mi | Leave a comment

1D Listから指定文字列で終わっている要素を削除して返す

Posted on 4月 25, 2018 by Takaaki Naganoya

1D Listから指定文字列で終わっている要素を削除して返すAppleScriptです。

AppleScript名:1D Listから指定文字列で終わっている要素を削除して返す
— Created 2018-04-24 by Takaaki Naganoya
— 2018 Piyomaru Software
use AppleScript version "2.4"
use scripting additions
use framework "Foundation"

set aList to {"aVar", "level1’s", "level2’s", "level3’s", "bVar", "level10’s", "level11’s", "level12’s"}
set bList to my fiter1DList:(aList) byTailingKeyword:"’s"
–> {"aVar", "bVar"}

–指定文字列が末端にある要素を除外
on fiter1DList:(aList as list) byTailingKeyword:(keyWord as string)
  set itemCount1 to count every item of aList
  
set tmpArray to current application’s NSMutableArray’s arrayWithArray:aList
  
set thePred2 to current application’s NSPredicate’s predicateWithFormat_("!(self ENDSWITH %@)", keyWord)
  
set bArray to (tmpArray’s filteredArrayUsingPredicate:thePred2) as list of string or string
  
return bArray
end fiter1DList:byTailingKeyword:

★Click Here to Open This Script 

(Visited 25 times, 1 visits today)
Posted in list | Tagged 10.11savvy 10.12savvy 10.13savvy | Leave a comment

指定キーワードで始まるリスト要素をリストアップ

Posted on 4月 25, 2018 by Takaaki Naganoya

2D List(配列)のうち、最初の項目が指定キーワードではじまる要素をリストアップするAppleScriptです。

AppleScript名:指定キーワードで始まるリスト要素をリストアップ
— Created 2017-05-2 by Takaaki Naganoya
— 2017 Piyomaru Software
use AppleScript version "2.4"
use scripting additions
use framework "Foundation"

set aList to {{"A1 uploading", 2, 2}, {"A2 loginAndDownload", 1, 1}, {"A11 selfCheck", 3, 1}}

set bList to my fiter2DList:(aList) byHeadingKeyword:"A1"
–> {"A1 TEST1", 2, 2}

on fiter2DList:(pathList as list) byHeadingKeyword:(keyWord as string)
  set keyWord2 to keyWord & " " –ここが重要
  
set itemCount1 to count every item of pathList
  
set tmpArray to current application’s NSMutableArray’s arrayWithArray:pathList
  
  
–指定キーワードで始まるファイルをリストアップ
  
set thePred2 to current application’s NSPredicate’s predicateWithFormat_("self[0] BEGINSWITH %@", keyWord2)
  
set bArray to (tmpArray’s filteredArrayUsingPredicate:thePred2) as list of string or string
  
if bArray = {} then return false
  
return bArray
end fiter2DList:byHeadingKeyword:

★Click Here to Open This Script 

(Visited 34 times, 1 visits today)
Posted in list | Tagged 10.11savvy 10.12savvy 10.13savvy | Leave a comment

miの最前面のドキュメントをAppleScriptとみなして構文確認して戻す

Posted on 4月 24, 2018 by Takaaki Naganoya

テキストエディタ「mi」の最前面のドキュメントをAppleScriptとみなして構文確認してmiの本文に戻すAppleScriptです。

ながらくバージョン3.0のβ版が公開されていたものの、正式版が登場しなかったテキストエディタ「mi」。その正式版が2018.4.21に唐突に登場しました。

そこで、正式版のmiをAppleScriptからコントロールしていろいろ試してみました。

miのAppleScript対応機能は必要なものは十分にそろっているレベルで、最前面のドキュメントの選択部分を取得したり、選択部分に演算結果を戻してみたりと、期待されるような処理は行えます。

そこで、ひととおりの機能を確認してみると、書類の「モード」(種別ごとの書式情報切り替え)をAppleScriptから確認できたりと、他のエディタでは見られないような実装もあります。

ただ、どのテキストエディタでもそうなのですが、書式情報だけ切り替えて認識できてもほとんど実用性はなく、テキストエディタ上でAppleScriptを書く意味はほとんどありません。「構文確認」が行えないので、構文チェックや短縮表記の展開などが一切行えないためです。


▲mi上でモードを「AppleScript」に指定して編集


▲構文確認した結果をmi上に書き戻したところ。「app」–>「application」、「end」–>「end tell」などの短縮表記を展開している

–> Demo Movie

そこで、AppleScript自体でAppleScriptのテキストを構文確認して文法チェックや短縮表現の展開などを行い、結果をテキストエディタ(ここではmi)に書き戻すようにしてみました。

このぐらいの処理なら、アプリケーションに依存している部分はほどんとないので、CotEditorでもJeditΩでも、BBEditでも問題なく行えます。

AppleScript名:miの最前面のドキュメントをAppleScriptとみなして構文確認して戻す
— Created 2018-04-24 by Takaaki Naganoya
— 2018 Piyomaru Software
use AppleScript version "2.5"
use scripting additions
use framework "Foundation"
use framework "OSAKit"

property OSAScript : a reference to current application’s OSAScript
property OSALanguage : a reference to current application’s OSALanguage
property OSALanguageInstance : a reference to current application’s OSALanguageInstance

set targX to 1024 –View Width
set targY to 2048 –View Height

tell application "mi"
  tell front document
    if mode is not equal to "AppleScript" then return
    
set theSource to content
  end tell
end tell

–Compile AppleScript Source
set osaCon to current application’s OSAScriptController’s alloc()’s init()
set osaView to current application’s OSAScriptView’s alloc()’s initWithFrame:(current application’s NSMakeRect(0, 0, targX, targY))
osaCon’s setScriptView:osaView
osaCon’s setLanguage:(OSALanguage’s languageForName:"AppleScript")
osaView’s setString:theSource
osaCon’s compileScript:(missing value) –Compile(構文確認)

set aRes to (osaView’s |string|()) as string

tell application "mi"
  tell front document
    set content to aRes
  end tell
end tell

★Click Here to Open This Script 

(Visited 115 times, 1 visits today)
Posted in OSA | Tagged 10.11savvy 10.12savvy 10.13savvy mi | Leave a comment

AS構文色分け情報の重複チェック

Posted on 4月 23, 2018 by Takaaki Naganoya

plistから読み取ったAppleScriptの構文色分け書式データをもとに、各構文要素の指定色に重複がないかどうかチェックするAppleScriptです。

もう少しシンプルに書けそうな気もするのですが、、、

AppleScript名:AS構文色分け情報の重複チェック
— Created 2018-04-22 by Takaaki Naganoya
— 2018 Piyomaru Software
use AppleScript version "2.4"
use scripting additions
use framework "Foundation"

set aList to {{redValue:145, greenValue:40, blueValue:144, fontName:"Osaka", fontSize:13.0}, {redValue:61, greenValue:12, blueValue:62, fontName:"Osaka", fontSize:13.0}, {redValue:14, greenValue:62, blueValue:251, fontName:"Osaka", fontSize:13.0}, {redValue:120, greenValue:52, blueValue:203, fontName:"Osaka", fontSize:13.0}, {redValue:255, greenValue:0, blueValue:0, fontName:"Osaka", fontSize:13.0}, {redValue:0, greenValue:0, blueValue:0, fontName:"Osaka", fontSize:13.0}, {redValue:145, greenValue:82, blueValue:17, fontName:"Osaka", fontSize:13.0}, {redValue:0, greenValue:0, blueValue:0, fontName:"Osaka", fontSize:13.0}, {redValue:39, greenValue:201, blueValue:201, fontName:"Osaka", fontSize:13.0}, {redValue:15, greenValue:62, blueValue:251, fontName:"Osaka", fontSize:13.0}, {redValue:31, greenValue:182, blueValue:252, fontName:"Osaka", fontSize:13.0}, {redValue:129, greenValue:58, blueValue:217, fontName:"Osaka", fontSize:13.0}, {redValue:93, greenValue:54, blueValue:146, fontName:"Osaka", fontSize:13.0}, {redValue:185, greenValue:12, blueValue:128, fontName:"Osaka", fontSize:13.0}, {redValue:25, greenValue:184, blueValue:126, fontName:"Osaka", fontSize:13.0}, {redValue:156, greenValue:145, blueValue:5, fontName:"Osaka", fontSize:13.0}, {redValue:79, greenValue:0, blueValue:136, fontName:"Osaka", fontSize:13.0}, {redValue:18, greenValue:138, blueValue:139, fontName:"Osaka", fontSize:13.0}}

set cRes to chkASLexicalFormatColorConfliction(aList) of me
–> false–重複があった

on chkASLexicalFormatColorConfliction(aList)
  set anArray to current application’s NSArray’s arrayWithArray:aList
  
set bList to (anArray’s valueForKeyPath:"redValue.stringValue") as list
  
set cList to (anArray’s valueForKeyPath:"greenValue.stringValue") as list
  
set dList to (anArray’s valueForKeyPath:"blueValue.stringValue") as list
  
  
set colStrList to {}
  
repeat with i from 1 to (length of bList)
    set bItem to contents of item i of bList
    
set cItem to contents of item i of cList
    
set dItem to contents of item i of dList
    
set the end of colStrList to bItem & " " & cItem & " " & dItem
  end repeat
  
  
set aRes to returnDuplicatesOnly(colStrList) of me
  
if aRes is equal to {} then
    return true –重複が存在しなかった場合
  else
    return false –重複があった場合
  end if
end chkASLexicalFormatColorConfliction

on returnDuplicatesOnly(aList as list)
  set aSet to current application’s NSCountedSet’s alloc()’s initWithArray:aList
  
set bList to (aSet’s allObjects()) as list
  
  
set dupList to {}
  
repeat with i in bList
    set aRes to (aSet’s countForObject:i)
    
if aRes > 1 then
      set the end of dupList to (contents of i)
    end if
  end repeat
  
  
return dupList
end returnDuplicatesOnly

★Click Here to Open This Script 

(Visited 46 times, 1 visits today)
Posted in file list OSA Record | Tagged 10.11savvy 10.12savvy 10.13savvy | 1 Comment

表示中のKeynoteの現在のスライド上のテキストを上から順に連結してクリップボードに転送

Posted on 4月 23, 2018 by Takaaki Naganoya

現在オープン中の最前面のKeynote書類の表示中のスライド(ページ)上にあるテキストオブジェクト内のテキストを、Y座標値をもとに(上から下に)並べ替えてクリップボードに転送するAppleScriptです。

–> Demo Movie

Keynote上で選択した複数のテキストオブジェクトの内容をそのままテキストエディタにコピー&ペーストで持っていけないので即席で書いたものです。

AppleScript名:表示中のKeynoteの現在のスライド上のテキストを上から順に連結してクリップボードに転送
— Created 2018-04-22 by Takaaki Naganoya
— 2018 Piyomaru Software
use AppleScript version "2.4"
use scripting additions
use framework "Foundation"
use bPlus : script "BridgePlus" –https://www.macosxautomation.com/applescript/apps/BridgePlus.html

tell application "Keynote"
  tell front document
    tell (current slide)
      set tList to properties of text items
    end tell
    
    
set posList to {}
    
repeat with i in tList
      set tmpPos to position of i
      
set tmpText to object text of i
      
set the end of posList to (tmpPos & tmpText)
    end repeat
    
  end tell
end tell

–Sort 2D List
load framework
set sortIndexes to {1} –Key Item id: begin from 0
set sortOrders to {true} –ascending = true
set sortTypes to {"compare:"}
set resList to (current application’s SMSForder’s subarraysIn:(posList) sortedByIndexes:sortIndexes ascending:sortOrders sortTypes:sortTypes |error|:(missing value)) as list

set allDat to ""

repeat with i in resList
  set a to contents of last item of i
  
set allDat to allDat & return & a
end repeat

set the clipboard to allDat

★Click Here to Open This Script 

(Visited 37 times, 1 visits today)
Posted in Text | Tagged 10.11savvy 10.12savvy 10.13savvy Keynote | Leave a comment

指定パスのAppleScript書類の内容をURL文字列化 v3

Posted on 4月 22, 2018 by Takaaki Naganoya

指定したAppleScript書類の内容を読み取って、URL文字列に変換するAppleScriptです。

Shane Stanleyによる「もうちょっと楽に書けるよ」というツッコミです。記述がシンプルになるのはいいことです。

もともと、オリジナルのScriptは10年以上昔に誰かが(Sal Soghoianあたり?)作ったもので、Cocoaの機能が利用できない時代に書かれたものでした。中途半端にCocoaの機能を利用していたので、そこを置き換えたかたちです。

AppleScript名:指定パスのAppleScript書類の内容をURL文字列化 v3
— Created 2018-03-28 by Takaaki Naganoya
— Modified 2018-04-22 by Shane Stanley
use AppleScript version "2.4"
use scripting additions
use framework "Foundation"
use framework "OSAKit"
use framework "AppKit"

set asPath to choose file of type {"com.apple.applescript.script", "com.apple.applescript.script-bundle"}

set contText to getContentsOfFile(asPath) of me

set encText to makeEncodedScript(contText) of me
set newLinkText to "applescript://com.apple.scripteditor?action=new&script=" & encText
–> "applescript://com.apple.scripteditor?action=new&script=use%20AppleScript%20version%20%222%2E4%22%0D………"

–指定AppleScriptファイルのソースコードを取得する(実行専用Scriptからは取得できない)
— Original Created 2014-02-23 Shane Stanley
on getContentsOfFile(anAlias as {alias, string})
  set anHFSpath to anAlias as string
  
set aURL to current application’s |NSURL|’s fileURLWithPath:(POSIX path of anHFSpath)
  
set theScript to current application’s OSAScript’s alloc()’s initWithContentsOfURL:aURL |error|:(missing value)
  
return theScript’s source() as text
end getContentsOfFile

on makeEncodedScript(contText)
  set aStr to current application’s NSString’s stringWithString:contText
  
set encodedStr to aStr’s stringByAddingPercentEncodingWithAllowedCharacters:(current application’s NSCharacterSet’s URLQueryAllowedCharacterSet())
  
return encodedStr as text
end makeEncodedScript

★Click Here to Open This Script 

(Visited 31 times, 1 visits today)
Posted in file OSA | Tagged 10.11savvy 10.12savvy 10.13savvy | Leave a comment

指定パスのAppleScript書類の内容をURL文字列化 v2

Posted on 4月 21, 2018 by Takaaki Naganoya

指定したAppleScript書類の内容を読み取って、URL文字列に変換するAppleScriptです。

XML-RPC経由でWordPressにAppleScriptのプログラムをHTML化して掲載する時とか、PDFに対して「applescript://」カスタムプロトコルリンクを付加する処理を書いたときに使用しました。クリックすると内容がスクリプトエディタに転送されるリンクを作成するためのものです。

AppleScript名:指定パスのAppleScript書類の内容をURL文字列化 v2
— Created 2018-03-28 by Takaaki Naganoya
— 2018 Piyomaru Software
use AppleScript version "2.4"
use scripting additions
use framework "Foundation"
use framework "OSAKit"
use framework "AppKit"

property quotChar : string id 34

set asPath to choose file of type {"com.apple.applescript.script", "com.apple.applescript.script-bundle"}

set contText to getContentsOfFile(asPath) of me

set encText to makeEncodedScript(contText) of me
set newLinkText to "applescript://com.apple.scripteditor?action=new&script=" & encText
–> "applescript://com.apple.scripteditor?action=new&script=use%20AppleScript%20version%20%222%2E4%22%0D………"

–指定AppleScriptファイルのソースコードを取得する(実行専用Scriptからは取得できない)
— Original Created 2014-02-23 Shane Stanley
on getContentsOfFile(anAlias as {alias, string})
  set anHFSpath to anAlias as string
  
set aURL to current application’s |NSURL|’s fileURLWithPath:(POSIX path of anHFSpath)
  
set theScript to current application’s OSAScript’s alloc()’s initWithContentsOfURL:aURL |error|:(missing value)
  
return theScript’s source() as text
end getContentsOfFile

on makeEncodedScript(contText)
  set delimA to "★☆temp★☆"
  
set delimB to (retURLencodedStrings(delimA) of me) as text
  
  
set aList to every paragraph of contText
  
set aClass to class of aList
  
if aClass = list then
    set aLen to length of aList
  else
    set aLen to 1
  end if
  
  
set aaList to {}
  
  
set delim to AppleScript’s text item delimiters
  
set AppleScript’s text item delimiters to delimA
  
set bList to aList as text
  
set AppleScript’s text item delimiters to delim
  
  
set aaList to (retURLencodedStrings(bList) of me) as text
  
  
set search_string to delimB as text
  
set replacement_string to "%0D" as text
  
set bList to replace_chars(aaList, search_string, replacement_string) of me
  
  
return bList
end makeEncodedScript

on replace_chars(this_text, search_string, replacement_string)
  set AppleScript’s text item delimiters to the search_string
  
set the item_list to every text item of this_text
  
set AppleScript’s text item delimiters to the replacement_string
  
set this_text to the item_list as string
  
set AppleScript’s text item delimiters to ""
  
return this_text
end replace_chars

on retURLencodedStrings(aText)
  set aStr to current application’s NSString’s stringWithString:aText
  
set encodedStr to aStr’s stringByAddingPercentEncodingWithAllowedCharacters:(current application’s NSCharacterSet’s alphanumericCharacterSet())
  
return encodedStr as text
end retURLencodedStrings

★Click Here to Open This Script 

(Visited 38 times, 1 visits today)
Posted in file OSA | Tagged 10.11savvy 10.12savvy 10.13savvy | Leave a comment

ScriptDebugger 7で最前面のドキュメントから特殊な属性値を取得

Posted on 4月 20, 2018 by Takaaki Naganoya

AppleScriptの統合開発環境「Script Debugger 7」をAppleScriptからコントロールしたときに、編集中のAppleScript書類から特殊な属性値を取り出せることを確認しました。

# 寝て起きたらShane Stanleyからコメントが送られてきていたので、追記しています(Thanks Shane!)

AppleScriptを編集するプログラム「スクリプトエディタ」「Script Debugger」自体もAppleScriptからのコントロールが可能になっています。対応度でいうとスクリプトエディタのほうが「できることが多い」状態(Attribute Runsを取得できるので、スクリプトの解析を行うにはスクリプトエディタの方が有利)ですが、Script Debuggerにもいろいろと独自に拡張した機能が見られます。

よくよく確認してみたところ「なんでこんなもんが取れるんだ?」という不思議なものがいくつかありました。

Copyright表記(copyright)

なぜ、このようなものが取得できるのか不思議ですが、調べてみたところ編集中のAppleScriptを解析して取り出しているのではなく、バンドル形式のAppleScript書類中のInfo.plistのエントリを取り出しているようです。

–> Shane Stanleyから「そのとおり」とコメント

使用Framework(used framework files)

これは、編集中のAppleScriptを文字列サーチして見つけているものと思われます。ファイルパスのリストで返ってきます。

–> ファイルパスではなく名称リストでした(訂正) また、文字列としてサーチしているのではなく(コメントにuse frameworkを書いておいても無視)実際に解釈して処理しているとのこと
use AppleScript version "2.4"
use framework "Foundation"
use framework "OSAKit"
use scripting additions

–本ScriptをScript Debuggerでオープンしておき、他のエディタ(Script Editor)でAppleScript書類のプロパティを取得すると、used frameworksを取得できる

–> used frameworks:{"Foundation", "OSAKit"}

★Click Here to Open This Script 

使用Script Libraries(used script library files)

ファイルパスのリストで返ってきます。同一ライブラリのうちどのバージョンのものが検知されるのか、といったところは確認しておきたいところです。

レガシーScript Libraries(legacy script libraries)

macOS 10.9で搭載されたAppleScript Librariesですが、10.9からどこまでがScript Debuggerが想定している「レガシー形式」(legacy script libraries)なのかが不明です。

 (a) macOS 10.9だけLegacy Libraries
 (b) macOS 10.9〜10.10がLegacy Libraries

の2つの可能性が存在しています。

–> Shane Stanleyのコメントによれば、本プロパティはScript Debugger 6までのみで有効な値であるとのこと。Script Debugger 7はmacOS 10.11以降でのみ動作するので、(b)の可能性が高そうです(憶測)。

OSAX(used scripting addition files)

これは、あまり真剣に調べていませんが、、、、正確にAppleScript中で使用しているOSAXをリストアップしているのかどうか、半信半疑なところです。

–> Shane Stanleyによれば、これはちゃんとAppleScriptを解釈して抽出しているとのこと

アプリケーション(used applications)

本当に検知できるのか半信半疑なところです。バンドルIDで指定したらどうなるのか、とか疑問がけっこうあります。

–> ShaneからBundle IDで評価しているとのコメントアリ。実際にさまざまな形式でアプリケーションを指定してみたら、取得できました。
use AppleScript version "2.4" — Yosemite (10.10) or later
use framework "Foundation"
use scripting additions

tell application "Finder"
  –アプリケーション名
end tell

tell application id "com.apple.Safari"
  –Bundle ID
end tell

tell application "/Applications/Mac Down"
  –Path
end tell

set aScriptStr to "tell application \"Terminal\" to activate"
run script aScriptStr –String

—————–
–> used applications:{"Finder", "Mac Down", "Safari"}

★Click Here to Open This Script 

組み込みScript Libraries(embedded script libraries)

編集中のバンドル形式のAppleScript書類のバンドル中にAppleScript Librariesを入れている場合にこれを検出するようです。バンドル内を走査してバンドル内に入っているAppleScript Librariesのリストアップはできますが、バンドル内に入れてあるのにuse宣言していない場合にはどーなるのか、といった「穴」はいろいろと見つかりそうな気配がしています。

–> Shane Stanleyによれば、いったん利用中のScript Libraryの情報を取得して、バンドル中に存在するもののみを抽出しているとのこと。「利用していないが入っている」ライブラリは無視するとのこと。また、入れ子でライブラリ中に入っている状態のライブラリは検出しないとのこと。AppleScriptバンドル書類を「親」とすると、AppleScript Libraries in bundleを「子」、さらにその中に入っているAppleScript Librariesを「孫」としたときに、「子」の階層までが検出範囲であるとしています

AppleScript名:ScriptDebugger 7で最前面のドキュメントから特殊な属性値を取得
tell application "Script Debugger"
  tell front document
    –set reqImportFiles to required import items of front document
    
    
set aCopyright to (copyright)
    
–> "Copyright © 2018 Piyomaru Software, All Rights Reserved"
    
    
set frameworkList to (used framework files)
    
–> {file "Cherry:System:Library:Frameworks:Foundation.framework:"}
    
    
set libList to (used script library files)
    
–> {file "Cherry:Users:me:Library:Script Libraries:asHTMLexportLib.scpt", file "Cherry:Users:me:Library:Script Libraries:BridgePlus.scptd:"}
    
    
set legacyLibs to (legacy script libraries) –What?
    
–> {}
    
    
set osaxList to (used scripting addition files)
    
–> {file "Cherry:System:Library:ScriptingAdditions:StandardAdditions.osax:"}
    
    
set appList to (used applications)
    
–> {"Finder"}
    
    
set embLib to (embedded script libraries)
    
–> {}
    
    
properties
  end tell
end tell

★Click Here to Open This Script 

(Visited 42 times, 1 visits today)
Posted in 未分類 | Tagged 10.12savvy 10.13savvy Script Debugger | Leave a comment

指定のAppleScriptのソースを取得してOLD Style ASかASOCかを判定する v2

Posted on 4月 20, 2018 by Takaaki Naganoya
AppleScript名:指定のAppleScriptのソースを取得してOLD Style ASかASOCかを判定する v2
— Created 2017-06-03 by Takaaki Naganoya
— 2017 Piyomaru Software
use AppleScript version "2.4"
use scripting additions
use framework "Foundation"
use framework "OSAKit"

set aFile to choose file of type {"com.apple.applescript.script", "com.apple.applescript.script-bundle"}
set aRes to detectScriptIsPureASorASOC(aFile) of me

–指定AppleScriptファイルがOLD Style ASかASOCかを判定して返す
on detectScriptIsPureASorASOC(aFile)
  set sRes to getASsourceFor(aFile) of me
  
set sName to scriptKind of sRes –Name
  
set sText to scriptSource of sRes –Source
  
if sText = "" or sText = missing value then return missing value
  
  
if sName = "AppleScript" then
    if sText contains "use framework \"Foundation\"" then
      return true –ASOC
    else
      return false –Pure AppleScript
    end if
  else
    –JXAなど他のOSA言語の場合
    
return sName
  end if
end detectScriptIsPureASorASOC

–指定AppleScriptファイルのソースコードを取得する(実行専用Scriptからは取得できない)
on getASsourceFor(anAlias as {alias, string})
  set anHFSpath to anAlias as string
  
set aURL to current application’s |NSURL|’s fileURLWithPath:(POSIX path of anHFSpath)
  
set theScript to current application’s OSAScript’s alloc()’s initWithContentsOfURL:aURL |error|:(missing value)
  
set scriptName to theScript’s |language|()’s |name|() as string
  
set theSource to theScript’s source() as text
  
return {scriptKind:scriptName, scriptSource:theSource}
end getASsourceFor

★Click Here to Open This Script 

(Visited 31 times, 1 visits today)
Posted in OSA | Tagged 10.11savvy 10.12savvy 10.13savvy | Leave a comment

NSObjectの各種メソッドのじっけん

Posted on 4月 20, 2018 by Takaaki Naganoya

Cocoaの各種オブジェクトのルートクラスであるNSObjectが持っているメソッドのうち有用そうなものをAppleScriptから呼び出す実験です。

各種クラス(NSStringとかNSArrayとか)のReferenceに掲載されていないのに使えるメソッドが存在していることに、Cocoaを使い始めたころ不思議に思っていたのですが、上位クラスが持っているメソッドであることに(後になって)気づきました。

AppleScript名:isEqualTo
— Created 2018-01-08 by Takaaki Naganoya
— 2018 Piyomaru Software
use AppleScript version "2.4"
use scripting additions
use framework "Foundation"

set aStr to current application’s NSString’s stringWithString:"ABC"
aStr’s isEqualTo:"ABC"
–> true

aStr’s isEqualTo:"abc"
–>  false

★Click Here to Open This Script 

AppleScript名:isLike
— Created 2018-01-08 by Takaaki Naganoya
— 2018 Piyomaru Software
use AppleScript version "2.4"
use scripting additions
use framework "Foundation"

–https://stackoverflow.com/questions/35902973/what-does-nsstrings-islike-actually-do

set aStr to current application’s NSString’s stringWithString:"ABC"

set aRes1 to aStr’s isLike:"AB*"
–>  true

set aRes2 to aStr’s isLike:"AB?"
–>  true

set aRes3 to aStr’s isLike:"[Aa]BC"
–>  true

set aRes4 to aStr’s isLike:"[Aa][Bb]C"
–>  true

set aRes5 to aStr’s isLike:"[^A]BC"
–>  true

set aRes6 to aStr’s isLike:"[^a]BC"
–> false

set bStr to current application’s NSString’s stringWithString:"A1download"
set aRes7 to bStr’s isLike:"[A-Z][0-9]" –こういう書き方は通らないらしい

★Click Here to Open This Script 

AppleScript名:doesContain
— Created 2018-01-07 by Takaaki Naganoya
— 2018 Piyomaru Software
use AppleScript version "2.4"
use scripting additions
use framework "Foundation"

set anArray to current application’s NSArray’s arrayWithArray:{1, 2, 3}
anArray’s doesContain:1
–>  true

anArray’s doesContain:9
–>  false

–2D Arrayには通じないらしい
set bArray to current application’s NSArray’s arrayWithArray:{{1, 1}, {2, 2}, {3, 3}}
set cArray to current application’s NSArray’s arrayWithArray:{2, 2}
bArray’s doesContain:cArray
–>  false

bArray’s doesContain:2
–>  false

★Click Here to Open This Script 

AppleScript名:instancesRespondToSelector
— Created 2018-01-07 by Takaaki Naganoya
— 2018 Piyomaru Software
use AppleScript version "2.4"
use scripting additions
use framework "Foundation"

(current application’s NSObject’s |class|())’s instancesRespondToSelector:"init"
–> true

★Click Here to Open This Script 

AppleScript名:isSubclassOfClassのじっけん
— Created 2018-01-07 12:59:32 +0900 by Takaaki Naganoya
— 2018 Piyomaru Software
use AppleScript version "2.4"
use scripting additions
use framework "Foundation"

set aStr to current application’s NSString’s stringWithString:"ABC"
aStr’s superclass()’s isSubclassOfClass:(current application’s NSNumber)
–>  false

aStr’s superclass()’s isSubclassOfClass:(current application’s NSString)
–>  true

★Click Here to Open This Script 

AppleScript名:superclassを求める
— Created 2018-01-07 12:53:44 +0900 by Takaaki Naganoya
— 2018 Piyomaru Software
use AppleScript version "2.4"
use scripting additions
use framework "Foundation"

set aStr to current application’s NSString’s stringWithString:"ABC"
aStr’s superclass()
–>  (Class) NSMutableString

aStr’s superclass()’s superclass()
–>  (Class) NSString

aStr’s superclass()’s superclass()’s superclass()
–>  (Class) NSObject

★Click Here to Open This Script 

(Shane Stanleyからツッコミがあって追加↓)

AppleScript名:scriptingIsEqualTo
use AppleScript version "2.4"
use scripting additions
use framework "Foundation"

set aStr to current application’s NSString’s stringWithString:"ABC"
aStr’s scriptingIsEqualTo:"ABC" –only for NSString/NSMutableString
–> true

aStr’s scriptingIsEqualTo:"abc"
–> true

set bStr to current application’s NSString’s stringWithString:"あいうえお" –Japanese Hiragana
bStr’s scriptingIsEqualTo:"アイウエオ" –Japanese Katakana
–> false

bStr’s scriptingIsEqualTo:"ぁぃぅぇぉ" –Japanese Hiragana (Yo-On)
–> false

set bResAS to ("あいうえお" = "ぁぃぅぇぉ") –AppleScript system treat them as *Same* (NFKC Casefold)
–>  true

★Click Here to Open This Script 

(Visited 51 times, 1 visits today)
Posted in 未分類 | Tagged 10.11savvy 10.12savvy 10.13savvy | 1 Comment

デスクトップの表示、非表示切り替え

Posted on 4月 19, 2018 by Takaaki Naganoya

デスクトップの表示・非表示切り替えを行うAppleScriptです。

白い画像や黒い画像とデスクトップ表示状態を切り替えるAppleScriptを別々に実行するとデスクトップ非表示状態のまま戻ってこなくなることがあったので、単体で切り替えするScriptを用意してみた次第です。

AppleScript名:デスクトップの表示、非表示切り替え
showHideDesktop(true)

on showHideDesktop(aBool)
  set aBoolStr to aBool as string
  
do shell script "defaults write com.apple.finder CreateDesktop -bool " & aBoolStr
  
do shell script "killall Finder"
end showHideDesktop

★Click Here to Open This Script 

(Visited 161 times, 2 visits today)
Posted in Image System | Tagged 10.11savvy 10.12savvy 10.13savvy | Leave a comment

デスクトップピクチャを白いピクチャとトグルで差し替え v2

Posted on 4月 19, 2018 by Takaaki Naganoya

デスクトップピクチャの表示状態と、単色白色のデスクトップ+デスクトップ非表示状態のトグル切り替えを行うAppleScriptです。

資料や仕様書を作成する際に画面キャプチャを行うことが多いですが、その際にデスクトップに散らかっているファイルが映るとみっともないので、隠すために作成したものです。

1回実行するとデスクトップを隠し、もう1回実行すると元に戻ります。

AppleScript名:デスクトップピクチャを白いピクチャとトグルで差し替え v2
— Created 2016-05-31 by Takaaki Naganoya
— Modified 2016-06-01 by Takaaki Naganoya–Desktop Iconの表示/非表示を追加
— 2016 Piyomaru Software
use AppleScript version "2.4"
use scripting additions
use framework "Foundation"
use framework "AppKit"

property aSwitch : false
property desktopPictures : {}
property aColpath : ""

if aSwitch = false then
  –デスクトップを白くする
  
set desktopPictures to getDesktopPicturePathList() of me
  
–白い画像を作成してデスクトップピクチャに設定
  
set aColpath to makeColordImageToTmp(255, 255, 255, 255) of me –R,G,B,A(それぞれ 0〜255)
  
setDesktopPicture(aColpath) of me
  
showHideDesktop(false) of me
  
set aSwitch to true
else
  –保存しておいたDesktop Pictureのリストを戻す
  
setDesktopPicturePathList(desktopPictures) of me
  
do shell script "rm -f " & quoted form of aColpath
  
showHideDesktop(true) of me
  
set aSwitch to false
end if

–デスクトップの表示/非表示切り替え
on showHideDesktop(aBool as boolean)
  set aBoolStr to aBool as string
  
do shell script "defaults write com.apple.finder CreateDesktop -bool " & aBoolStr
  
do shell script "killall Finder"
end showHideDesktop

–デスクトップピクチャの状態を復帰する
on setDesktopPicturePathList(aliasList)
  if aliasList = {} then
    display notification "保存しておいたデスクトップピクチャのリストが空になっています"
    
return
  end if
  
  
tell application "System Events"
    set dCount to count every desktop
    
repeat with i from 1 to dCount
      set j to contents of item i of aliasList
      
tell desktop i
        set picture to (POSIX path of j)
      end tell
    end repeat
  end tell
end setDesktopPicturePathList

–デスクトップピクチャの強制指定
on setDesktopPicture(aPathStr)
  tell application "System Events"
    set picture of every desktop to aPathStr
  end tell
end setDesktopPicture

–デスクトップピクチャのパスをaliasリストで取得
on getDesktopPicturePathList()
  set pList to {}
  
tell application "System Events"
    set dCount to count every desktop
    
repeat with i from 1 to dCount
      tell desktop i
        set aPic to (picture as POSIX file) as alias
        
set end of pList to aPic
      end tell
    end repeat
  end tell
  
return pList
end getDesktopPicturePathList

–テンポラリフォルダに指定色の画像を作成
on makeColordImageToTmp(rDat as integer, gDat as integer, bDat as integer, aDat as integer)
  set rCol to 255 / rDat
  
set gCol to 255 / gDat
  
set bCol to 255 / bDat
  
set aCol to 255 / aDat
  
—
  
set aColor to current application’s NSColor’s colorWithDeviceRed:rCol green:gCol blue:bCol alpha:aCol
  
set aDesktopPath to current application’s NSString’s stringWithString:(POSIX path of (path to temporary items))
  
set savePath to aDesktopPath’s stringByAppendingString:((current application’s NSUUID’s UUID()’s UUIDString())’s stringByAppendingString:".png")
  
set aRes to makeImageWithFilledWithColor(1, 1, savePath, aColor) of me
  
return (savePath as string)
end makeColordImageToTmp

–指定サイズの画像を作成し、指定色で塗ってファイル書き出し
on makeImageWithFilledWithColor(aWidth, aHeight, outPath, fillColor)
  –Imageの作成  
  
set anImage to current application’s NSImage’s alloc()’s initWithSize:(current application’s NSMakeSize(aWidth, aHeight))
  
  
anImage’s lockFocus() –描画実行
  
set theRect to {{x:0, y:0}, {height:aHeight, width:aWidth}}
  
set theNSBezierPath to current application’s NSBezierPath’s bezierPath
  
theNSBezierPath’s appendBezierPathWithRect:theRect
  
fillColor’s |set|()
  
theNSBezierPath’s fill()
  
anImage’s unlockFocus() –描画ここまで
  
  
–生成した画像のRaw画像を作成
  
set imageRep to anImage’s TIFFRepresentation()
  
set aRawimg to current application’s NSBitmapImageRep’s imageRepWithData:imageRep
  
set myNewImageData to (aRawimg’s representationUsingType:(current application’s NSPNGFileType) |properties|:(missing value))
  
  
–書き出しファイルパス情報を作成
  
set pathString to current application’s NSString’s stringWithString:outPath
  
set newPath to pathString’s stringByExpandingTildeInPath()
  
set aRes to (myNewImageData’s writeToFile:newPath atomically:true) as boolean
  
return aRes –成功ならtrue、失敗ならfalseが返る
  
end makeImageWithFilledWithColor

★Click Here to Open This Script 

(Visited 40 times, 1 visits today)
Posted in Image System | Tagged 10.11savvy 10.12savvy 10.13savvy | Leave a comment

デスクトップピクチャを黒いピクチャとトグルで差し替え v2

Posted on 4月 19, 2018 by Takaaki Naganoya

デスクトップピクチャの表示状態と、単色黒色のデスクトップ+デスクトップ非表示状態のトグル切り替えを行うAppleScriptです。

資料や仕様書を作成する際に画面キャプチャを行うことが多いですが、その際にデスクトップに散らかっているファイルが映るとみっともないので、隠すために作成したものです。–> Demo Movie

1回実行するとデスクトップを隠し、もう1回実行すると元に戻ります。

AppleScript名:デスクトップピクチャを黒いピクチャとトグルで差し替え v2
— Created 2016-05-31 by Takaaki Naganoya
— Modified 2016-06-01 by Takaaki Naganoya–Desktop Iconの表示/非表示を追加
— 2016 Piyomaru Software
use AppleScript version "2.4"
use scripting additions
use framework "Foundation"
use framework "AppKit"

property aSwitch : false
property desktopPictures : {}
property aColpath : ""

if aSwitch = false then
  –デスクトップを黒くする
  
set desktopPictures to getDesktopPicturePathList() of me
  
–白い画像を作成してデスクトップピクチャに設定
  
set aColor to current application’s NSColor’s blackColor()
  
set aColpath to makeColordImageToTmp(aColor) of me
  
setDesktopPicture(aColpath) of me
  
showHideDesktop(false) of me
  
set aSwitch to true
else
  –保存しておいたDesktop Pictureのリストを戻す
  
setDesktopPicturePathList(desktopPictures) of me
  
do shell script "rm -f " & quoted form of aColpath
  
showHideDesktop(true) of me
  
set aSwitch to false
end if

–デスクトップの表示/非表示切り替え
on showHideDesktop(aBool as boolean)
  set aBoolStr to aBool as string
  
do shell script "defaults write com.apple.finder CreateDesktop -bool " & aBoolStr
  
do shell script "killall Finder"
end showHideDesktop

–デスクトップピクチャの状態を復帰する
on setDesktopPicturePathList(aliasList)
  if aliasList = {} then
    display notification "保存しておいたデスクトップピクチャのリストが空になっています"
    
return
  end if
  
  
tell application "System Events"
    set dCount to count every desktop
    
repeat with i from 1 to dCount
      set j to contents of item i of aliasList
      
tell desktop i
        set picture to (POSIX path of j)
      end tell
    end repeat
  end tell
end setDesktopPicturePathList

–デスクトップピクチャの強制指定
on setDesktopPicture(aPathStr)
  tell application "System Events"
    set picture of every desktop to aPathStr
  end tell
end setDesktopPicture

–デスクトップピクチャのパスをaliasリストで取得
on getDesktopPicturePathList()
  set pList to {}
  
tell application "System Events"
    set dCount to count every desktop
    
repeat with i from 1 to dCount
      tell desktop i
        set aPic to (picture as POSIX file) as alias
        
set end of pList to aPic
      end tell
    end repeat
  end tell
  
return pList
end getDesktopPicturePathList

–テンポラリフォルダに指定色の画像を作成
on makeColordImageToTmp(aColor)
  –set aColor to current application’s NSColor’s colorWithDeviceRed:rCol green:gCol blue:bCol alpha:aCol
  
set aDesktopPath to current application’s NSString’s stringWithString:(POSIX path of (path to temporary items))
  
set savePath to aDesktopPath’s stringByAppendingString:((current application’s NSUUID’s UUID()’s UUIDString())’s stringByAppendingString:".png")
  
set aRes to makeImageWithFilledWithColor(1, 1, savePath, aColor) of me
  
return (savePath as string)
end makeColordImageToTmp

–指定サイズの画像を作成し、指定色で塗ってファイル書き出し
on makeImageWithFilledWithColor(aWidth, aHeight, outPath, fillColor)
  –Imageの作成  
  
set anImage to current application’s NSImage’s alloc()’s initWithSize:(current application’s NSMakeSize(aWidth, aHeight))
  
  
anImage’s lockFocus() –描画実行
  
set theRect to {{x:0, y:0}, {height:aHeight, width:aWidth}}
  
set theNSBezierPath to current application’s NSBezierPath’s bezierPath
  
theNSBezierPath’s appendBezierPathWithRect:theRect
  
fillColor’s |set|()
  
theNSBezierPath’s fill()
  
anImage’s unlockFocus() –描画ここまで
  
  
–生成した画像のRaw画像を作成
  
set imageRep to anImage’s TIFFRepresentation()
  
set aRawimg to current application’s NSBitmapImageRep’s imageRepWithData:imageRep
  
set myNewImageData to (aRawimg’s representationUsingType:(current application’s NSPNGFileType) |properties|:(missing value))
  
  
–書き出しファイルパス情報を作成
  
set pathString to current application’s NSString’s stringWithString:outPath
  
set newPath to pathString’s stringByExpandingTildeInPath()
  
set aRes to (myNewImageData’s writeToFile:newPath atomically:true) as boolean
  
return aRes –成功ならtrue、失敗ならfalseが返る
  
end makeImageWithFilledWithColor

★Click Here to Open This Script 

(Visited 56 times, 1 visits today)
Posted in Image System | Tagged 10.11savvy 10.12savvy 10.13savvy | Leave a comment

Finderの最前面のアイコン表示ウィンドウ上の画像をY座標の情報をキーにして縦連結

Posted on 4月 18, 2018 by Takaaki Naganoya

Finderの最前面のWindowがアイコン表示になっている場合に、Window(Folder)内の画像ファイルをFinder上でのアイコン位置情報(Y座標のみ)を考慮して縦方向に1枚ものの画像に結合するAppleScriptです。

–> Demo Movie

AppleScript名:Finderの最前面のアイコン表示ウィンドウ上の画像をY座標の情報をキーにして縦連結
— Created 2018-04-10 by Takaaki Naganoya
— 2018 Piyomaru Software
use AppleScript version "2.5"
use scripting additions
use framework "Foundation"
use framework "QuartzCore"
use framework "AppKit"
use bPlus : script "BridgePlus" –https://www.macosxautomation.com/applescript/apps/BridgePlus.html

property |NSURL| : a reference to current application’s |NSURL|
property NSUUID : a reference to current application’s NSUUID
property NSArray : a reference to current application’s NSArray
property NSString : a reference to current application’s NSString
property NSImage : a reference to current application’s NSImage
property NSWorkspace : a reference to current application’s NSWorkspace
property NSPNGFileType : a reference to current application’s NSPNGFileType
property NSMutableArray : a reference to current application’s NSMutableArray
property NSBitmapImageRep : a reference to current application’s NSBitmapImageRep
property NSURLTypeIdentifierKey : a reference to current application’s NSURLTypeIdentifierKey

property yGap : 10 –連結時の画像間のアキ(縦方向)

load framework

tell application "Finder"
  tell front window
    set curView to current view
    
if curView is not equal to icon view then
      display dialog "最前面のウィンドウがアイコン表示になっていないので、処理を終了します。"
      
return
    end if
    
    
try
      set posList to position of every file whose kind contains "イメージ" –"イメージ" is "image" or "picture" in Japanese
      
set fileList to (every file whose kind contains "イメージ") as alias list –"イメージ" is "image" or "picture" in Japanese
    on error
      display dialog "最前面のウィンドウに画像ファイルが配置されていないため、処理を中止します。"
      
return
    end try
  end tell
  
  
set aList to {}
  
set aLen to length of posList
  
set bLen to length of fileList
  
if aLen is not equal to bLen then return
  
  
repeat with i from 1 to aLen
    set posItem to contents of item i of posList
    
set aPath to POSIX path of item i of fileList
    
set the end of aList to (posItem & aPath)
  end repeat
end tell

–> {{127, 42, "/Users/me/Desktop/名称未設定フォルダ/000_keynote_print.png"}, {302, 43, "/Users/me/Desktop/名称未設定フォルダ/999_indesign_print.png"}}

set bList to sort2DListAscendingWithSecondItemKey(aList) of me
–> {{127, 42, "/Users/me/Desktop/名称未設定フォルダ/000_keynote_print.png"}, {302, 43, "/Users/me/Desktop/名称未設定フォルダ/999_indesign_print.png"}}

set cList to getEveryIndicatedItemsFrom2DList(bList, 3) of me
–>  {​​​​​"/Users/me/Desktop/名称未設定フォルダ/000_keynote_print.png", ​​​​​"/Users/me/Desktop/名称未設定フォルダ/999_indesign_print.png"​​​}

–Finder最前面の画像ファイルをpathからImageを読み込んでArrayに入れる
set imgList to NSMutableArray’s new()
repeat with i in cList
  set aPath to contents of i
  
  
set imgRes to (my isImageAtPath:aPath)
  
if imgRes as boolean = true then
    set aNSImage to (NSImage’s alloc()’s initWithContentsOfFile:aPath)
    (
imgList’s addObject:aNSImage)
  end if
end repeat

–KVCで画像の各種情報をまとめて取得
set sizeList to (imgList’s valueForKeyPath:"size") as list –NSSize to list of record conversion
set maxWidth to ((NSArray’s arrayWithArray:sizeList)’s valueForKeyPath:"@max.width") as real
set totalHeight to (((NSArray’s arrayWithArray:sizeList)’s valueForKeyPath:"@sum.height") as real) + 50
set totalCount to ((NSArray’s arrayWithArray:sizeList)’s valueForKeyPath:"@count") as integer

–出力画像作成
set tSize to current application’s NSMakeSize(maxWidth, totalHeight + (yGap * totalCount))
set newImage to NSImage’s alloc()’s initWithSize:tSize

–順次画像を新規画像に上書き
set yOrig to 0
repeat with i in (imgList as list)
  set j to contents of i
  
set curSize to j’s |size|()
  
–set aRect to {0, (maxWidth – (curSize’s height())), (curSize’s width()), (curSize’s height())}
  
set aRect to {0, (totalHeight – (curSize’s height())) – yOrig, (curSize’s width()), (curSize’s height())}
  
set newImage to composeImage(newImage, j, aRect) of me
  
set yOrig to yOrig + (curSize’s height()) + yGap
end repeat

–デスクトップにPNG形式でNSImageをファイル保存
set aDesktopPath to current application’s NSHomeDirectory()’s stringByAppendingString:"/Desktop/"
set savePath to aDesktopPath’s stringByAppendingString:((NSUUID’s UUID()’s UUIDString())’s stringByAppendingString:".png")
set fRes to saveNSImageAtPathAsPNG(newImage, savePath) of me

–2つのNSImageを重ね合わせ合成してNSImageで返す
on composeImage(backImage, composeImage, aTargerRect)
  set newImage to NSImage’s alloc()’s initWithSize:(backImage’s |size|())
  
  
copy aTargerRect to {x1, y1, x2, y2}
  
  
newImage’s lockFocus()
  
  
set v2 to system attribute "sys2"
  
if v2 ≤ 12 then
    –To macOS 10.12.x
    
set bRect to current application’s NSMakeRect(x1, y1, x2, y2)
    
set newImageRect to current application’s CGRectZero
    
set newImageRect’s |size| to (newImage’s |size|)
  else
    –macOS 10.13 or later
    
set bRect to {{x1, y1}, {x2, y2}}
    
set newImageRect to {{0, 0}, (newImage’s |size|)}
  end if
  
  
backImage’s drawInRect:newImageRect
  
composeImage’s drawInRect:bRect
  
  
newImage’s unlockFocus()
  
return newImage
end composeImage

–NSImageを指定パスにPNG形式で保存
on saveNSImageAtPathAsPNG(anImage, outPath)
  set imageRep to anImage’s TIFFRepresentation()
  
set aRawimg to NSBitmapImageRep’s imageRepWithData:imageRep
  
set pathString to NSString’s stringWithString:outPath
  
set newPath to pathString’s stringByExpandingTildeInPath()
  
set myNewImageData to (aRawimg’s representationUsingType:(NSPNGFileType) |properties|:(missing value))
  
set aRes to (myNewImageData’s writeToFile:newPath atomically:true) as boolean
  
return aRes –成功ならtrue、失敗ならfalseが返る
end saveNSImageAtPathAsPNG

–指定のパスのファイルが画像かどうかをチェック
on isImageAtPath:aPath
  set aURL to |NSURL|’s fileURLWithPath:aPath
  
set {theResult, theValue} to aURL’s getResourceValue:(reference) forKey:NSURLTypeIdentifierKey |error|:(missing value)
  
return (NSImage’s imageTypes()’s containsObject:theValue) as boolean
end isImageAtPath:

on sort2DListAscendingWithSecondItemKey(aList as list)
  set sortIndexList to {1} –Key Item id: begin from 0
  
set sortOrders to {true} –ascending = true
  
set sortTypes to {"compare:"}
  
set resList to (current application’s SMSForder’s subarraysIn:(aList) sortedByIndexes:sortIndexList ascending:sortOrders sortTypes:sortTypes |error|:(missing value)) as list
  
return resList
end sort2DListAscendingWithSecondItemKey

–2D Listの各要素から、指定アイテムの要素だけを取り出してリストで返す
on getEveryIndicatedItemsFrom2DList(aList as list, anItem as integer) –this item No. begins from 1
  set outList to {}
  
repeat with i in aList
    set j to contents of item anItem of i
    
set the end of outList to j
  end repeat
  
return outList
end getEveryIndicatedItemsFrom2DList

★Click Here to Open This Script 

(Visited 133 times, 1 visits today)
Posted in file Image | Tagged 10.11savvy 10.12savvy 10.13savvy | Leave a comment

Finderの最前面のアイコン表示ウィンドウ上の画像をX座標の情報をキーにして横連結

Posted on 4月 17, 2018 by Takaaki Naganoya

Finderの最前面のWindowがアイコン表示になっている場合に、Window(Folder)内の画像ファイルをFinder上でのアイコン位置情報(X座標のみ)を考慮して横方向に1枚ものの画像に結合するAppleScriptです。

Blog掲載時に利用するために、Finder上で選択中の複数の画像ファイルを1枚ものの画像に(横方向/縦方向に)連結するAppleScriptを便利に使っています(ただし、「動けばいいや」程度で雑に作ったので、普段よりもやっつけ度がかなり高い、、、)。

ただし、画像の並び順については「たぶん、作成日時の古い順」に連結されるといった具合に明示的に並び順を指定できるものではなかったので、本Scriptを作ってみました。 –> Demo Movie

Finder上でicon viewに指定したWindow(Folder)内でLeft–>Rightの順に(X座標のみ評価)座標値をソートして連結します。

AppleScript名:Finderの最前面のアイコン表示ウィンドウ上の画像をX座標の情報をキーにして横連結
— Created 2018-04-10 by Takaaki Naganoya
— 2018 Piyomaru Software
use AppleScript version "2.5"
use scripting additions
use framework "Foundation"
use framework "QuartzCore"
use framework "AppKit"
use bPlus : script "BridgePlus" –https://www.macosxautomation.com/applescript/apps/BridgePlus.html

property |NSURL| : a reference to current application’s |NSURL|
property NSUUID : a reference to current application’s NSUUID
property NSArray : a reference to current application’s NSArray
property NSString : a reference to current application’s NSString
property NSImage : a reference to current application’s NSImage
property NSWorkspace : a reference to current application’s NSWorkspace
property NSPNGFileType : a reference to current application’s NSPNGFileType
property NSMutableArray : a reference to current application’s NSMutableArray
property NSBitmapImageRep : a reference to current application’s NSBitmapImageRep
property NSURLTypeIdentifierKey : a reference to current application’s NSURLTypeIdentifierKey

property xGap : 10 –連結時の画像間のアキ(横方向)

load framework

tell application "Finder"
  tell front window
    set curView to current view
    
if curView is not equal to icon view then
      display dialog "最前面のウィンドウがアイコン表示になっていないので、処理を終了します。"
      
return
    end if
    
    
try
      set posList to position of every file whose kind contains "イメージ" –"イメージ" is "image" or "picture" in Japanese
      
set fileList to (every file whose kind contains "イメージ") as alias list –"イメージ" is "image" or "picture" in Japanese
    on error
      display dialog "最前面のウィンドウに画像ファイルが配置されていないため、処理を中止します。"
      
return
    end try
  end tell
  
  
set aList to {}
  
set aLen to length of posList
  
set bLen to length of fileList
  
if aLen is not equal to bLen then return
  
  
repeat with i from 1 to aLen
    set posItem to contents of item i of posList
    
set aPath to POSIX path of item i of fileList
    
set the end of aList to (posItem & aPath)
  end repeat
end tell

–> {{127, 42, "/Users/me/Desktop/名称未設定フォルダ/000_keynote_print.png"}, {302, 43, "/Users/me/Desktop/名称未設定フォルダ/999_indesign_print.png"}}

set bList to sort2DListAscendingWithFirstItemKey(aList) of me
–> {{127, 42, "/Users/me/Desktop/名称未設定フォルダ/000_keynote_print.png"}, {302, 43, "/Users/me/Desktop/名称未設定フォルダ/999_indesign_print.png"}}

set cList to getEveryIndicatedItemsFrom2DList(bList, 3) of me
–>  {​​​​​"/Users/me/Desktop/名称未設定フォルダ/000_keynote_print.png", ​​​​​"/Users/me/Desktop/名称未設定フォルダ/999_indesign_print.png"​​​}

–Finder最前面の画像ファイルをpathからImageを読み込んでArrayに入れる
set imgList to NSMutableArray’s new()
repeat with i in cList
  set aPath to contents of i
  
  
set imgRes to (my isImageAtPath:aPath)
  
if imgRes as boolean = true then
    set aNSImage to (NSImage’s alloc()’s initWithContentsOfFile:aPath)
    (
imgList’s addObject:aNSImage)
  end if
end repeat

–KVCで画像の各種情報をまとめて取得
set sizeList to (imgList’s valueForKeyPath:"size") as list –NSSize to list of record conversion
set maxHeight to ((NSArray’s arrayWithArray:sizeList)’s valueForKeyPath:"@max.height") as real
set totalWidth to ((NSArray’s arrayWithArray:sizeList)’s valueForKeyPath:"@sum.width") as real
set totalCount to ((NSArray’s arrayWithArray:sizeList)’s valueForKeyPath:"@count") as integer

–出力画像作成
set tSize to current application’s NSMakeSize((totalWidth + (xGap * totalCount)), maxHeight)
set newImage to NSImage’s alloc()’s initWithSize:tSize

–順次画像を新規画像に上書き
set xOrig to 0
repeat with i in (imgList as list)
  set j to contents of i
  
set curSize to j’s |size|()
  
set aRect to {xOrig, (maxHeight – (curSize’s height())), (curSize’s width()), (curSize’s height())}
  
set newImage to composeImage(newImage, j, aRect) of me
  
set xOrig to xOrig + (curSize’s width()) + xGap
end repeat

–デスクトップにPNG形式でNSImageをファイル保存
set aDesktopPath to current application’s NSHomeDirectory()’s stringByAppendingString:"/Desktop/"
set savePath to aDesktopPath’s stringByAppendingString:((NSUUID’s UUID()’s UUIDString())’s stringByAppendingString:".png")
set fRes to saveNSImageAtPathAsPNG(newImage, savePath) of me

–2つのNSImageを重ね合わせ合成してNSImageで返す
on composeImage(backImage, composeImage, aTargerRect)
  set newImage to NSImage’s alloc()’s initWithSize:(backImage’s |size|())
  
  
copy aTargerRect to {x1, y1, x2, y2}
  
  
newImage’s lockFocus()
  
  
set v2 to system attribute "sys2"
  
if v2 ≤ 12 then
    –To macOS 10.12.x
    
set bRect to current application’s NSMakeRect(x1, y1, x2, y2)
    
set newImageRect to current application’s CGRectZero
    
set newImageRect’s |size| to (newImage’s |size|)
  else
    –macOS 10.13 or later
    
set bRect to {{x1, y1}, {x2, y2}}
    
set newImageRect to {{0, 0}, (newImage’s |size|)}
  end if
  
  
backImage’s drawInRect:newImageRect
  
composeImage’s drawInRect:bRect
  
  
newImage’s unlockFocus()
  
return newImage
end composeImage

–NSImageを指定パスにPNG形式で保存
on saveNSImageAtPathAsPNG(anImage, outPath)
  set imageRep to anImage’s TIFFRepresentation()
  
set aRawimg to NSBitmapImageRep’s imageRepWithData:imageRep
  
set pathString to NSString’s stringWithString:outPath
  
set newPath to pathString’s stringByExpandingTildeInPath()
  
set myNewImageData to (aRawimg’s representationUsingType:(NSPNGFileType) |properties|:(missing value))
  
set aRes to (myNewImageData’s writeToFile:newPath atomically:true) as boolean
  
return aRes –成功ならtrue、失敗ならfalseが返る
end saveNSImageAtPathAsPNG

–指定のパスのファイルが画像かどうかをチェック
on isImageAtPath:aPath
  set aURL to |NSURL|’s fileURLWithPath:aPath
  
set {theResult, theValue} to aURL’s getResourceValue:(reference) forKey:NSURLTypeIdentifierKey |error|:(missing value)
  
return (NSImage’s imageTypes()’s containsObject:theValue) as boolean
end isImageAtPath:

on sort2DListAscendingWithFirstItemKey(aList as list)
  set sortIndexList to {0} –Key Item id: begin from 0
  
set sortOrders to {true} –ascending = true
  
set sortTypes to {"compare:"}
  
set resList to (current application’s SMSForder’s subarraysIn:(aList) sortedByIndexes:sortIndexList ascending:sortOrders sortTypes:sortTypes |error|:(missing value)) as list
  
return resList
end sort2DListAscendingWithFirstItemKey

–2D Listの各要素から、指定アイテムの要素だけを取り出してリストで返す
on getEveryIndicatedItemsFrom2DList(aList as list, anItem as integer) –this item No. begins from 1
  set outList to {}
  
repeat with i in aList
    set j to contents of item anItem of i
    
set the end of outList to j
  end repeat
  
return outList
end getEveryIndicatedItemsFrom2DList

★Click Here to Open This Script 

(Visited 123 times, 5 visits today)
Posted in file Image | Tagged 10.11savvy 10.12savvy 10.13savvy Finder | Leave a comment

プリンタを指定してダイアログ非表示状態で印刷実行

Posted on 4月 17, 2018 by Takaaki Naganoya

出力先のプリンタを指定して、アプリケーション側の印刷ダイアログを表示させないで印刷を実行するAppleScriptです。

MacのGUIアプリケーションは、大別すると・・・

(1)標準的な印刷ダイアログ(Keynote, Pages, Numbersなど)
(2)アプリケーション側で自前で実装しているダイアログ(Adobe InDesign, Illustrator, Photoshop)
(3)その他(Javaアプリケーションやその他互換開発環境で作られたmacOSの標準機能を利用しないで作られたGUIアプリケーションなど)

のような印刷ダイアログがあり、ここで想定しているのは(1)です。(2)については専用の指定方法があり、(3)については「見なかったこと」にしています((3)だとAppleEventによる操作はほぼできません)。

ただし、macOS 10.12.6+Safari 11.1で試してみたところ、Safariでダイアログ非表示の印刷はできませんでした。セキュリティ上の対策で抑止しているのか、それともバグなのかは不明です。

AppleScript名:プリンタを指定してダイアログ非表示状態で印刷実行
use AppleScript version "2.4"
use scripting additions
use framework "Foundation"
use framework "AppKit"

set pArray to current application’s NSPrinter’s printerNames
set pList to pArray as list

if length of pList > 1 then
  set targPrinter to choose from list pList with prompt "Choose a printer"
  
if targPrinter = false then return
end if

set aPrinter to first item of targPrinter

tell application "CotEditor"
  if (count every document) = 0 then return
  
  
tell front document
    set aPrintSetting to {copies:1, starting page:1, ending page:1, target printer:aPrinter}
    
print with properties aPrintSetting without print dialog
  end tell
end tell

★Click Here to Open This Script 

(Visited 586 times, 2 visits today)
Posted in System | Tagged 10.11savvy 10.12savvy 10.13savvy NSPrinter | Leave a comment

プリント情報にアクセスする

Posted on 4月 17, 2018 by Takaaki Naganoya
AppleScript名:プリント情報にアクセスする
— Created 2014-11-27 by Takaaki Naganoya
— 2014 Piyomaru Software
use AppleScript version "2.4"
use scripting additions
use framework "Foundation"
use framework "AppKit"

set aPrintInfo to current application’s NSPrintInfo’s sharedPrintInfo()
set aPaperName to (aPrintInfo’s paperName()) as string
–>  "iso-a4"
set aPaperSize to (aPrintInfo’s paperSize()) as record
–>  {​​​​​width:595.0, ​​​​​height:842.0​​​}
set aLocPaperName to (aPrintInfo’s localizedPaperName()) as string
–>  "A4"
set anOrientation to (aPrintInfo’s orientation()) as integer
–>  0

aPrintInfo’s setPaperName:"iso-a5"
set aPaperName to (aPrintInfo’s paperName()) as string
–>  "iso-a5"
set aPaperSize to (aPrintInfo’s paperSize()) as record
–>  {​​​​​width:420.0, ​​​​​height:595.0​​​}
set aLocPaperName to (aPrintInfo’s localizedPaperName()) as string
–>  "A5"
aPrintInfo’s setOrientation:1 –(0:portrait, 1:landscape)
set anOrientation to (aPrintInfo’s orientation()) as integer
–>  1

★Click Here to Open This Script 

(Visited 43 times, 1 visits today)
Posted in System | Tagged 10.11savvy 10.12savvy 10.13savvy | Leave a comment

プリンタ一覧を取得してデフォルトに設定

Posted on 4月 17, 2018 by Takaaki Naganoya

AppleScript名:プリンタ一覧を取得してデフォルトに設定
— Created 2015-08-11 by Shane Stanley
use AppleScript version "2.4"
use scripting additions
use framework "Foundation"
use framework "AppKit"

set theNames to current application’s NSPrinter’s printerNames() as list
–>  {​​​​​"KING JIM TEPRA PRO SR3700P", ​​​​​"NEC MultiWriter 5750C @ MBA13", ​​​​​"PDFwriter", ​​​​​"PM-T960-1", ​​​​​"USB Modem"​​​}

set printerName to (choose from list theNames with prompt "Choose a printer:")
if printerName = false then error number -128

set thePrinter to current application’s NSPrinter’s printerWithName:(item 1 of printerName)
(*
–>  (NSPrinter) {
"Device Description" = {
NSDeviceIsPrinter = YES;
};
"Language Level" = 3;
Name = "NEC MultiWriter 5750C @ MBA13";
Type = "NEC MultiWriter 5750C v2.4";
}
*)

set thePrintInfo to current application’s NSPrintInfo’s sharedPrintInfo()
(*
–>  (NSPrintInfo) {
NSBottomMargin = 90;
NSCopies = 1;
NSDestinationFormat = "com.apple.documentformat.default";
NSDetailedErrorReporting = 0;
NSFaxNumber = "";
NSFirstPage = 1;
NSHorizonalPagination = 2;
NSHorizontallyCentered = 1;
NSJobDisposition = NSPrintSpoolJob;
NSJobSavingFileNameExtensionHidden = 0;
NSLastPage = 2147483647;
NSLeftMargin = 72;
NSMustCollate = 1;
NSOrientation = 0;
NSPagesAcross = 1;
NSPagesDown = 1;
NSPaperName = "iso-a4";
NSPaperSize = "NSSize: {595, 842}";
NSPrintAllPages = 1;
NSPrintProtected = 0;
NSPrintSelectionOnly = 0;
NSPrintTime = "0000-12-30 00:00:00 +0000";
NSPrinter = "{\n \"Device Description\" = {\n NSDeviceIsPrinter = YES;\n };\n \"Language Level\" = 3;\n Name = \"NEC MultiWriter 5750C @ MBA13\";\n Type = \"NEC MultiWriter 5750C v2.4\";\n}";
NSPrinterName = "NEC MultiWriter 5750C @ MBA13";
NSRightMargin = 72;
NSSavePath = "";
NSScalingFactor = 1;
NSTopMargin = 90;
NSVerticalPagination = 0;
NSVerticallyCentered = 1;
}
*)

thePrintInfo’s setPrinter:thePrinter

★Click Here to Open This Script 

(Visited 102 times, 1 visits today)
Posted in System | Tagged 10.11savvy 10.12savvy 10.13savvy NSPrinter | Leave a comment

プリンタ一覧の情報を取得する v2

Posted on 4月 17, 2018 by Takaaki Naganoya

現在使用可能なプリンタの名称一覧を取得するAppleScriptです。

macOS上の各種アプリケーションでAppleScript用語辞書中にprintコマンドを含んでいる場合、文字列でプリンタ名称を指定できますが、そのプリンタ名称を取得するストレートな手段がありませんでした(lpstatコマンドで調べていました)。

# 初期のMac OS XにはPrint Centerというアプリケーションが存在しており、それがScriptableでした

本ScriptはCocoaの機能を呼び出して、プリンタ名を取得します。正直なところ、プリンタ名を直接指定して印刷出力する例はそれほど多くないのですが、印刷ダイアログを表示せずに印刷させたいケースがないわけではありません。また、プリンタ名を状況に応じて変更することも(OSが勝手にやってくれるとはいえ)、必要なケースもあります。ネットワーク上に複数のプリンタが存在している場合には必要になってくることでしょう。

AppleScript名:プリンタ一覧の情報を取得する v2
— Created 2014-11-27 by Takaaki Naganoya
— Modified 2016-02-02 by Takaaki Naganoya
— 2016 Piyomaru Software
use AppleScript version "2.5"
use scripting additions
use framework "Foundation"
use framework "AppKit"

set pList to getPrinterNames() of me
–>  {"Canon iP110 series", "NEC MultiWriter 5750C @ MBA13", "PDFwriter", "PM-T960-1", "Print to VipRiser", "Print to VipRiser (CUPS-PDF)"}

on getPrinterNames()
  –Get Printer Names
  
set pArray to current application’s NSPrinter’s printerNames
  
set pList to pArray as list
  
–>  {"Canon iP110 series", "KING JIM TEPRA PRO SR3700P", "NEC MultiWriter 5750C @ MBA13", "PageSender-Fax", "PDFwriter", "PM-T960-1", "Print to VipRiser", "Print to VipRiser (CUPS-PDF)"}
  
  
–Get Printer Type (Driver Name?)
  
set tArray to current application’s NSPrinter’s printerTypes
  
set tList to tArray as list
  
–> {"TEPRA PRO SR3700P", "NEC MultiWriter 5750C v2.4", "Lisanet PDFwriter", "EPSON PM-T960", "Fax Printer"}
  
  
set colorPinterList to {}
  
  
repeat with i in pList
    set j to contents of i
    
    
–Is it a Printer?
    
set aPrinter to (current application’s NSPrinter’s printerWithName:j)
    
set aDesc to aPrinter’s deviceDescription
    
set aRec to aDesc as record
    
–> {NSDeviceIsPrinter:"YES"}
    
    
–Is it a Color Printer?
    
set aColor to (aPrinter’s isColor()) as boolean –isColor() deprecated? It works
    
if aColor = true then
      set the end of colorPinterList to j
    end if
    
  end repeat
  
  
return colorPinterList
  
end getPrinterNames

★Click Here to Open This Script 

(Visited 228 times, 1 visits today)
Posted in System | Tagged 10.11savvy 10.12savvy 10.13savvy NSPrinter | Leave a comment

Post navigation

  • Older posts

電子書籍(PDF)をオンラインストアで販売中!

Google Search

Popular posts

  • AppleScriptによるWebブラウザ自動操縦ガイド
  • macOS 13, Ventura(継続更新)
  • ドラッグ&ドロップ機能の未来?
  • macOS 12.x上のAppleScriptのトラブルまとめ
  • PFiddlesoft UI Browserが製品終了に
  • macOS 12.3 beta 5、ASの障害が解消される(?)
  • SF Symbolsを名称で指定してPNG画像化
  • 新刊発売:AppleScriptによるWebブラウザ自動操縦ガイド
  • macOS 12.3上でFinder上で選択中のファイルをそのままオープンできない件
  • Pixelmator Pro v2.4.1で新機能追加+AppleScriptコマンド追加
  • Safariで表示中のYouTubeムービーのサムネイル画像を取得
  • macOS 12のスクリプトエディタで、Context Menu機能にバグ
  • 人類史上初、魔導書の観点から書かれたAppleScript入門書「7つの宝珠」シリーズ開始?!
  • UI Browserがgithub上でソース公開され、オープンソースに
  • macOS 12.5(21G72)がリリースされた!
  • Pages v12に謎のバグ。書類上に11枚しか画像を配置できない→解決
  • 新発売:AppleScriptからSiriを呼び出そう!
  • iWork 12.2がリリースされた
  • macOS 13 TTS Voice環境に変更
  • NSCharacterSetの使い方を間違えた

Tags

10.11savvy (1102) 10.12savvy (1243) 10.13savvy (1391) 10.14savvy (586) 10.15savvy (434) 11.0savvy (274) 12.0savvy (174) 13.0savvy (34) CotEditor (60) Finder (47) iTunes (19) Keynote (97) NSAlert (60) NSArray (51) NSBezierPath (18) NSBitmapImageRep (21) NSBundle (20) NSButton (34) NSColor (51) NSDictionary (27) NSFileManager (23) NSFont (18) NSImage (42) NSJSONSerialization (21) NSMutableArray (62) NSMutableDictionary (21) NSPredicate (36) NSRunningApplication (56) NSScreen (30) NSScrollView (22) NSString (118) NSURL (97) NSURLRequest (23) NSUTF8StringEncoding (30) NSUUID (18) NSView (33) NSWorkspace (20) Numbers (55) Pages (36) Safari (41) Script Editor (20) WKUserContentController (21) WKUserScript (20) WKWebView (23) WKWebViewConfiguration (22)

カテゴリー

  • 2D Bin Packing
  • 3D
  • AirDrop
  • AirPlay
  • Animation
  • AppleScript Application on Xcode
  • beta
  • Bluetooth
  • Books
  • boolean
  • bounds
  • Bug
  • Calendar
  • call by reference
  • Clipboard
  • Code Sign
  • Color
  • Custom Class
  • dialog
  • drive
  • exif
  • file
  • File path
  • filter
  • folder
  • Font
  • Font
  • GAME
  • geolocation
  • GUI
  • GUI Scripting
  • Hex
  • History
  • How To
  • iCloud
  • Icon
  • Image
  • Input Method
  • Internet
  • iOS App
  • JavaScript
  • JSON
  • JXA
  • Keychain
  • Keychain
  • Language
  • Library
  • list
  • Locale
  • Machine Learning
  • Map
  • Markdown
  • Menu
  • Metadata
  • MIDI
  • MIME
  • Natural Language Processing
  • Network
  • news
  • Noification
  • Notarization
  • Number
  • Object control
  • OCR
  • OSA
  • PDF
  • Peripheral
  • PRODUCTS
  • QR Code
  • Raw AppleEvent Code
  • Record
  • recursive call
  • regexp
  • Release
  • Remote Control
  • Require Control-Command-R to run
  • REST API
  • Review
  • RTF
  • Sandbox
  • Screen Saver
  • Script Libraries
  • sdef
  • search
  • Security
  • selection
  • shell script
  • Shortcuts Workflow
  • Sort
  • Sound
  • Spellchecker
  • Spotlight
  • SVG
  • System
  • Tag
  • Telephony
  • Text
  • Text to Speech
  • timezone
  • Tools
  • Update
  • URL
  • UTI
  • Web Contents Control
  • WiFi
  • XML
  • XML-RPC
  • イベント(Event)
  • 未分類

アーカイブ

  • 2023年3月
  • 2023年2月
  • 2023年1月
  • 2022年12月
  • 2022年11月
  • 2022年10月
  • 2022年9月
  • 2022年8月
  • 2022年7月
  • 2022年6月
  • 2022年5月
  • 2022年4月
  • 2022年3月
  • 2022年2月
  • 2022年1月
  • 2021年12月
  • 2021年11月
  • 2021年10月
  • 2021年9月
  • 2021年8月
  • 2021年7月
  • 2021年6月
  • 2021年5月
  • 2021年4月
  • 2021年3月
  • 2021年2月
  • 2021年1月
  • 2020年12月
  • 2020年11月
  • 2020年10月
  • 2020年9月
  • 2020年8月
  • 2020年7月
  • 2020年6月
  • 2020年5月
  • 2020年4月
  • 2020年3月
  • 2020年2月
  • 2020年1月
  • 2019年12月
  • 2019年11月
  • 2019年10月
  • 2019年9月
  • 2019年8月
  • 2019年7月
  • 2019年6月
  • 2019年5月
  • 2019年4月
  • 2019年3月
  • 2019年2月
  • 2019年1月
  • 2018年12月
  • 2018年11月
  • 2018年10月
  • 2018年9月
  • 2018年8月
  • 2018年7月
  • 2018年6月
  • 2018年5月
  • 2018年4月
  • 2018年3月
  • 2018年2月

https://piyomarusoft.booth.pm/items/301502

メタ情報

  • 登録
  • ログイン
  • 投稿フィード
  • コメントフィード
  • WordPress.org

Forum Posts

  • 人気のトピック
  • 返信がないトピック

メタ情報

  • 登録
  • ログイン
  • 投稿フィード
  • コメントフィード
  • WordPress.org
Proudly powered by WordPress
Theme: Flint by Star Verte LLC