| AppleScript名:PDFを印刷するテスト v2 |
| — Created 2015-08-24 by Takaaki Naganoya — Modified 2018-03-24 by Takaaki Naganoya — 2018 Piyomaru Software use AppleScript version "2.4" use scripting additions use framework "Foundation" use framework "Quartz" use framework "AppKit" –Choose a PDF to print set aDoc to POSIX path of (choose file of type {"com.adobe.pdf"}) my performSelectorOnMainThread:"printPDF:" withObject:aDoc waitUntilDone:true on printPDF:anObject set aDocPath to current application’s NSString’s stringWithString:anObject set aPDF to current application’s PDFDocument’s alloc()’s initWithURL:(current application’s |NSURL|’s fileURLWithPath:aDocPath) –Make PDFView set aPDFView to current application’s PDFView’s alloc()’s init() aPDFView’s setDocument:aPDF aPDFView’s setAutoScales:true aPDFView’s setDisplaysPageBreaks:false –Make Window set aWin to current application’s NSWindow’s alloc()’s init() aWin’s setContentSize:(aPDFView’s frame()’s |size|()) aWin’s setContentView:aPDFView aWin’s |center|() –Print PDF set sharedPrintInfo to current application’s NSPrintInfo’s sharedPrintInfo() aPDFView’s printWithInfo:sharedPrintInfo autoRotate:true end printPDF: |
月: 2018年4月
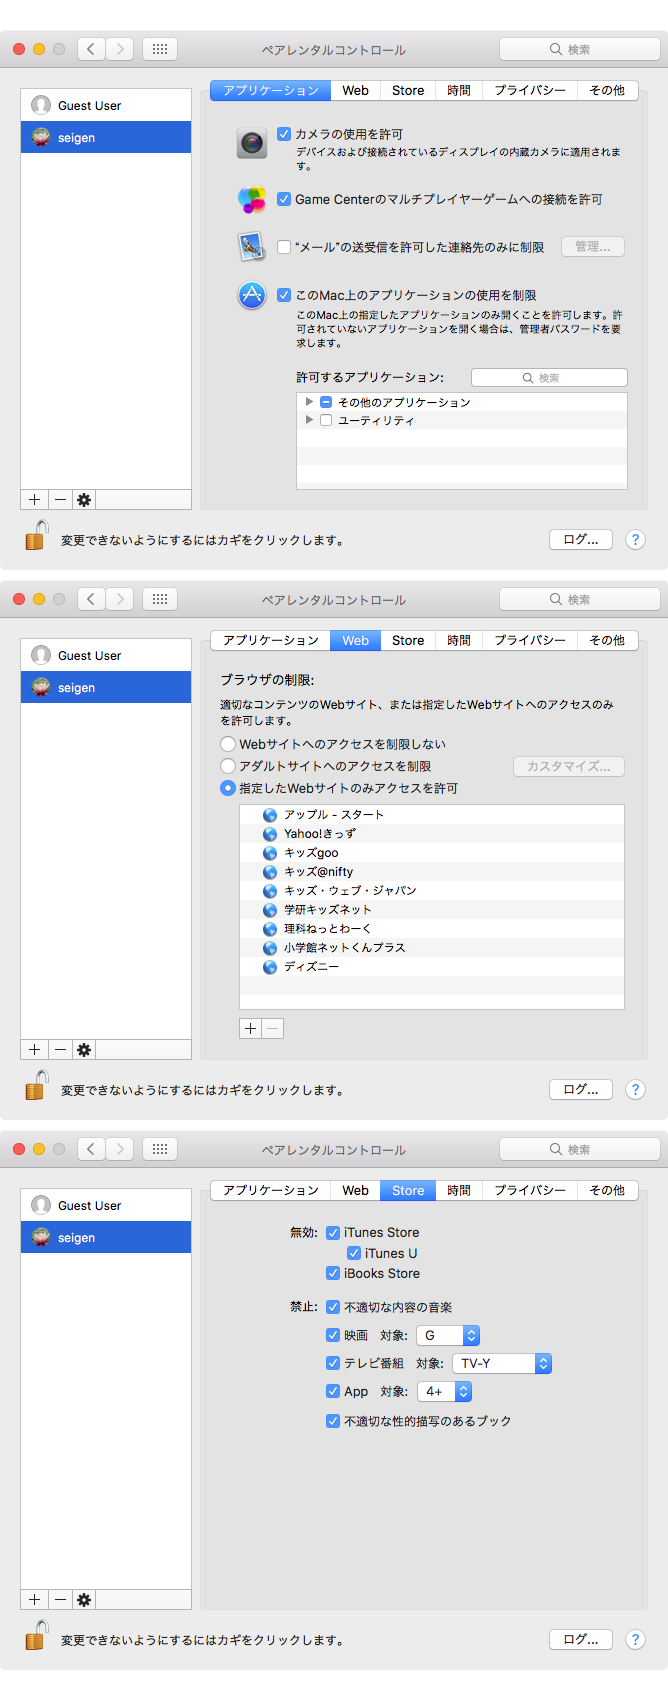
AppStore.appをコントロール
macOS用のAppStore.appはmacOS 10.13搭載バージョンまではある程度(ちょっとだけ)AppleScriptからコントロール可能でした。macOS 10.14〜11.0搭載のAppStore.app V3.0ではコントロールできなくなっています。
もちろん、強引にGUI Scriptingで操作することは可能ですし、アプリケーション自体のAppleScript用語辞書に依存しないURL Event(open location)で指定のアプリケーションを表示状態にすることは可能です。
| AppleScript名:AppStore.appをコントロール |
| tell application "App Store" properties –> {frontmost:false, class:application, name:"App Store", version:"1.0"} tell window 1 properties –> {document:missing value, closeable:true, zoomed:false, class:window, index:1, visible:true, name:"", modal:false, miniaturizable:true, titled:true, miniaturized:false, floating:false, id:55, resizable:true, bounds:{356, 22, 1843, 1161}, zoomable:true} end tell end tell delay 3 –指定のURLをオープンする open location "macappstore://itunes.apple.com/jp/app/double-pdf/id1243418387?mt=12" –> App Storeで指定のURLを表示 |
エイリアス書類からオリジナルファイルの情報を取得する
指定のエイリアス書類から、オリジナルファイルの情報を取得するAppleScriptです。
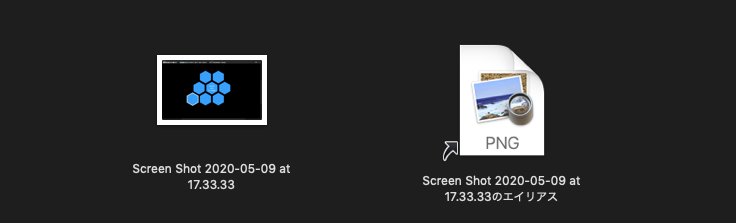
オリジナルファイルを求める処理、というよりはエイリアス書類のリンク切れ(実体ファイルの存在)チェックを行うというのが「隠れた目的」です。
「エイリアス書類」とaliasは別物なので注意が必要です。どちらかといえば説明に注意が必要といったところなのかも???
本Blogでは両者を「エイリアス書類」「alias」と区別して記述しています。
| AppleScript名:エイリアス書類からオリジナルファイルの情報を取得する |
| set aFile to choose file
tell application "Finder" try set origI to (original item of aFile) as alias on error –エイリアス書類のオリジナルファイルが削除されていた場合(リンク切れ。オリジナル書類が削除されていた場合)にはエラーになる set origI to false end try end tell |
自分を最前面に移動させてAbout表示
実行プログラムを最前面に移動させて、Aboutウィンドウを表示するAppleScriptです。
Xcode上で作成するAppleScriptObjCアプリケーションで実行する場合には強制的にメインスレッドで実行させる(performSelectorOnMainThread:① withObject:② waitUntilDone:③)指定は必要ないのですが、スクリプトエディタ上で実行する分には必要です。
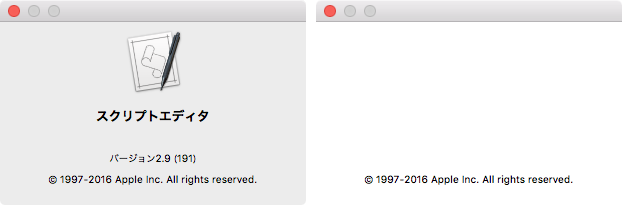
▲左側がメインスレッド実行指定時 右側は何も指定しないでスクリプトエディタ上で実行した場合(たまにこうなる)
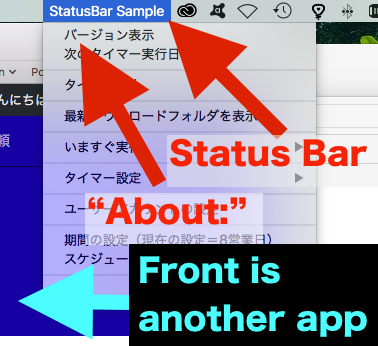
ステータスバーに常駐するタイプのAppleScriptで、About表示を行う際に作成しました。つねに、他のアプリケーションが最前面にいるので、About表示を行うために一工夫必要だったので。
| AppleScript名:自分を最前面に移動させてAbout表示 |
| — Created 2018-04-10 by Takaaki Naganoya — 2018 Piyomaru Software use AppleScript version "2.4" use scripting additions use framework "Foundation" use framework "AppKit" — perform run this script in main thread my performSelectorOnMainThread:"aboutDisp:" withObject:(missing value) waitUntilDone:true on aboutDisp:aSender current application’s NSApp’s activateIgnoringOtherApps:true current application’s NSApp’s orderFrontStandardAboutPanel:(current application) end aboutDisp: |
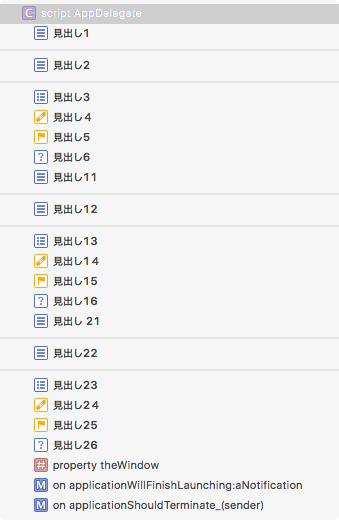
Xcode上のAppleScriptObjCでpragma markを使う
Xcode上でGUIアプリケーションをAppleScriptObjCで記述できますが、Xcodeの「pragma mark」の機能をAppleScriptで利用する方法についてまとめておきます。
pragma markはXcode上のテキストエディタで現在編集中のソーステキスト内の移動を行いやすくするもので、基本的には「ただのコメント文」です。
Xcodeに編集中のソースの各プロパティやハンドラの一覧を表示するポップアップ・メニューが存在しており、これがソースの長さによっては膨大な量になるため、ポップアップ・メニューに「セパレータ」や「目印(数種類のアイコン指定可能)」をpragma markによって表示させます。長くなるメニューを見やすくする、という役割があります。
pragma markはプログラムの実行には何も影響しません。
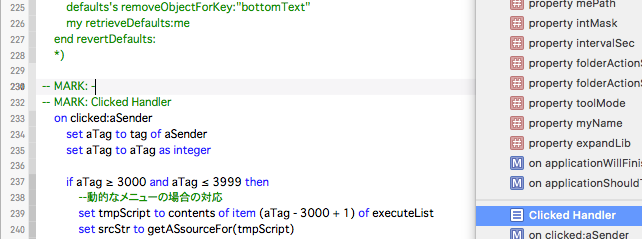
Xcode上で編集中のソースコードに「pragma mark」形式のコメントがあると、Xcodeがそれを読み取って、ポップアップ・メニュー上に指定内容を表示します。

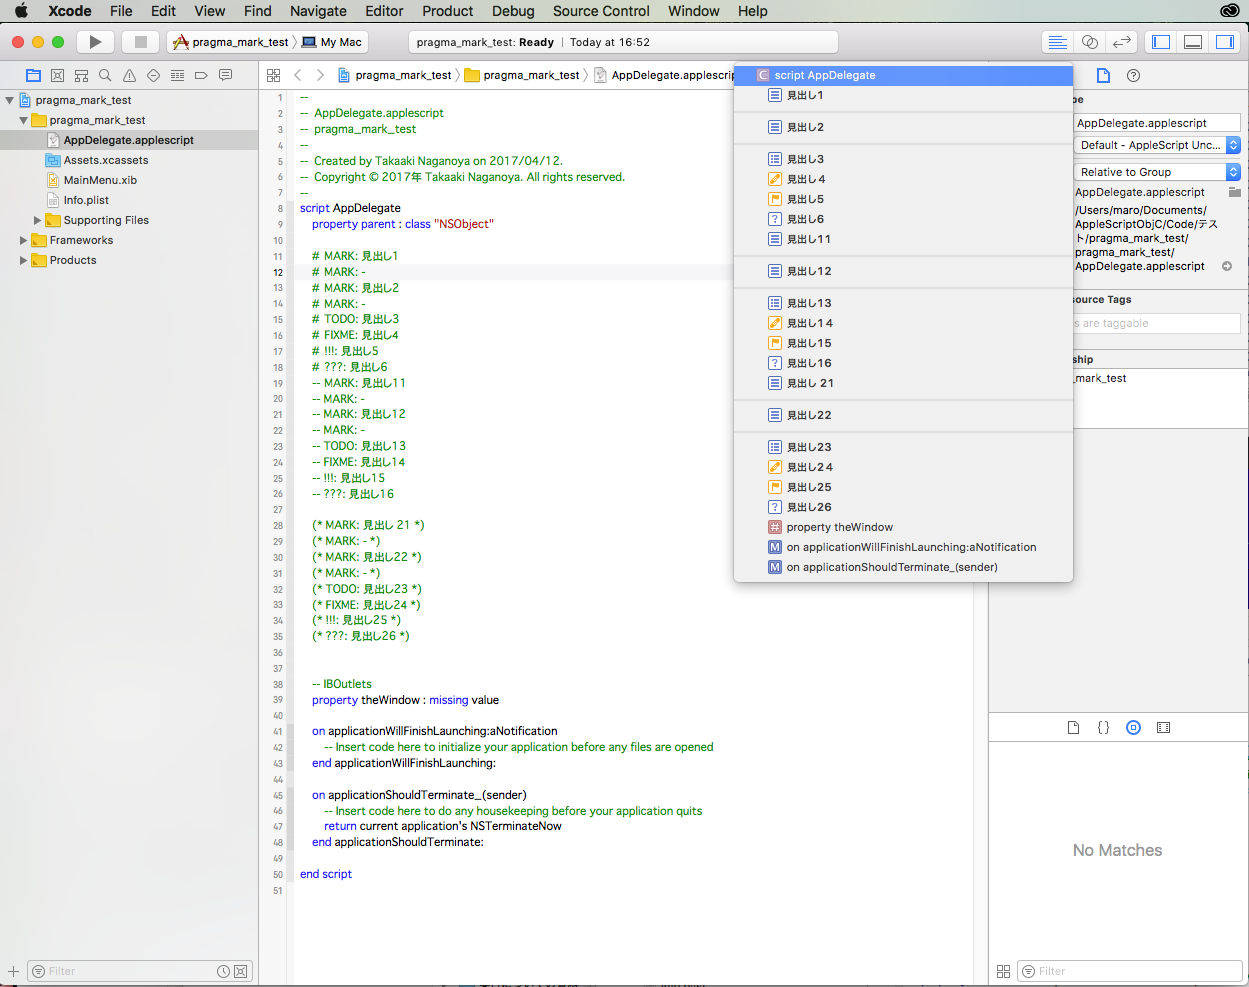
ただし、外部エディタ(ASObjC Explorer 4やScript Debugger)を併用しないと、途中からXcodeがまともにpragma markを表示しなくなることは日常茶飯事であることを明記しておきます。
–> Download pragma_mark_test Xcode Project
→ PRAGMA MARKのコメント行の先頭にTABを入れないとまともに表示される模様。
指定フォルダのサブフォルダの中からYYYY_MM_DDで最新のものを抽出してFinderでオープン
指定フォルダ以下に存在するYYYY/MM/DDの3階層のフォルダで最新のものを抽出してFinder上で選択状態にするAppleScriptです。
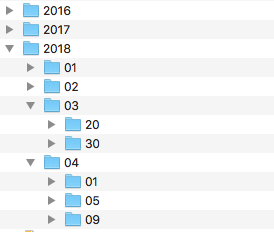
もともと、Safariのダウンロードフォルダに対してFolder Action Scriptを設定して、当日のYYYY/MM/DDの3階層のフォルダを作成してそこにダウンロードしたファイルを移動する処理を行っていました。
その最新フォルダをFinder上で表示する必要があったので、作成したものです。
AppleScriptのPOSIX pathとCocoaのPOSIX path(NSString)では末尾のスラッシュの有無が異なっており、専用ルーチンから切り分けて汎用ルーチンとして使いまわそうとして久しぶりにハマりました。
| AppleScript名:指定フォルダのサブフォルダの中からYYYY_MM_DDで最新のものを抽出してFinderでオープン |
| — Created 2018-04-09 by Takaaki Naganoya — 2018 Piyomaru Software use AppleScript version "2.4" use scripting additions use framework "Foundation" use bPlus : script "BridgePlus" –https://www.macosxautomation.com/applescript/apps/BridgePlus.html set sDL to POSIX path of (choose folder) –> "/Users/me/Downloads/"–AppleScript HFS to POSIX path (ends with slash) retLatestYYYYMMDDFolderUnder(sDL, 2017) of me on retLatestYYYYMMDDFolderUnder(aPOSIXFolderPath as string, minYYYY as integer) load framework –load BridgePlus framework if aPOSIXFolderPath ends with "/" then set aPOSIXFolderPath to text 1 thru -2 of aPOSIXFolderPath end if –> "/Users/maro/Downloads"–Cocoa POSIX path (does not end with) set sList to (current application’s NSString’s stringWithString:aPOSIXFolderPath)’s pathComponents() as list –> {"/", "Users", "me", "Downloads"} set sLen to length of sList –> 4 set fListRes to getFolderspathComponentsIn(aPOSIXFolderPath) of me –> {{"/", "Users", "me", "Downloads", "2016"}, {"/", "Users", "me", "Downloads", "2018", "03", "20"}…} set anArray to current application’s NSMutableArray’s arrayWithArray:fListRes set predStr to "SELF[SIZE] = " & (sLen + 3) as string set aPredicate to current application’s NSPredicate’s predicateWithFormat:predStr set t1Array to (anArray’s filteredArrayUsingPredicate:aPredicate) –> {{"/", "Users", "me", "Downloads", "2018", "03", "20"}…} set predStr1 to ("SELF[" & (sLen) as string) & "].floatValue >= " & (minYYYY as string) & " && SELF[" & ((sLen + 1) as string) & "].floatValue >= 1 && SELF[" & ((sLen + 2) as string) & "].floatValue >= 1" set aPredicate1 to current application’s NSPredicate’s predicateWithFormat:predStr1 set t2Array to (t1Array’s filteredArrayUsingPredicate:aPredicate1) as list –YYYY, MM, DDでそれぞれ降順ソート。最新のものを取得 set theResult to current application’s SMSForder’s subarraysIn:t2Array sortedByIndexes:{sLen, sLen + 1, sLen + 2} ascending:{false, false, false} sortTypes:{"compare:", "compare:", "compare:"} |error|:(missing value) if (theResult as list = {} or theResult = missing value) then return {} –最新のYYYY/MM/DDフォルダを取得してFinder上で選択表示 set theNewest to contents of first item of (theResult as list) set theNewestStr to (current application’s NSString’s pathWithComponents:theNewest) set parentPath to theNewestStr’s stringByDeletingLastPathComponent() set aRes to current application’s NSWorkspace’s sharedWorkspace()’s selectFile:theNewestStr inFileViewerRootedAtPath:parentPath end retLatestYYYYMMDDFolderUnder on getFolderspathComponentsIn(posixPath) script spd property allItems : {} end script set allItems of spd to {} set theNSURL to current application’s |NSURL|’s fileURLWithPath:posixPath set theNSFileManager to current application’s NSFileManager’s new() — get URL enumerator set theNSFileEnumerator to theNSFileManager’s enumeratorAtURL:theNSURL includingPropertiesForKeys:{current application’s NSURLIsDirectoryKey, current application’s NSURLIsPackageKey} options:((current application’s NSDirectoryEnumerationSkipsPackageDescendants) + (current application’s NSDirectoryEnumerationSkipsHiddenFiles as integer)) errorHandler:(missing value) — get all items from enumerator set (allItems of spd) to theNSFileEnumerator’s allObjects() set theFolders to {} — to store folders — loop through repeat with i from 1 to count of (allItems of spd) — is it a directory? set {theResult, isDirectory} to ((item i of (allItems of spd))’s getResourceValue:(reference) forKey:(current application’s NSURLIsDirectoryKey) |error|:(missing value)) if isDirectory as boolean = true then set {theResult, isPackage} to ((item i of (allItems of spd))’s getResourceValue:(reference) forKey:(current application’s NSURLIsPackageKey) |error|:(missing value)) — is it not a package? if not isPackage as boolean = true then set end of theFolders to (item i of (allItems of spd))’s pathComponents() as list –parse each directory into list end if end if end repeat return theFolders end getFolderspathComponentsIn |
Safariのダウンロードフォルダを求める v5
| AppleScript名:Safariのダウンロードフォルダを求める v5 |
| — Created 2015-03-06 by Takaaki Naganoya — Created 2018-04-09 by Takaaki Naganoya — 2018 Piyomaru Software use AppleScript version "2.4" use scripting additions use framework "Foundation" set dlRes to getSafariDownloadFolder() of me –> "/Users/maro/Downloads" on getSafariDownloadFolder() set theID to id of application "Safari" –> "com.apple.Safari" set dlRes2 to getAppDefaultsValue(theID, "DownloadsPath") return dlRes2 end getSafariDownloadFolder on getAppDefaultsValue(appBundleID, appKey) set storedDefaults to (current application’s NSUserDefaults’s standardUserDefaults()’s persistentDomainForName:appBundleID) set keyList to storedDefaults’s allKeys() as list if appKey is not in keyList then return missing value set dlRes to (storedDefaults’s valueForKeyPath:appKey) set dlRes2 to (dlRes’s stringByExpandingTildeInPath()) as list of string or string return dlRes2 end getAppDefaultsValue |
2D Listをアイテム数でフィルタリングする
| AppleScript名:2D Listをアイテム数でフィルタリングする |
| — Created 2018-04-09 by Takaaki Naganoya — 2018 Piyomaru Software use AppleScript version "2.4" use scripting additions use framework "Foundation" set aList to {{"1"}, {"2", "2"}, {"3", "3", "3"}, {"4", "4", "4", "4"}, {"5", "5", "5", "5", "5"}, {"6", "6", "6", "6", "6", "6"}, {"7", "7", "7", "7", "7", "7", "7"}, {"8", "8", "8", "8", "8", "8", "8", "8"}} set minItemNum to 7 set itemRes1 to retFilterItemMinNum(aList, minItemNum) of me –> {{"7", "7", "7", "7", "7", "7", "7"}, {"8", "8", "8", "8", "8", "8", "8", "8"}} set itemRes2 to retFilterItemEquNum(aList, minItemNum) of me –> {{"7", "7", "7", "7", "7", "7", "7"}} set itemRes3 to retFilterItemMaxNum(aList, minItemNum) of me –> {{"1"}, {"2", "2"}, {"3", "3", "3"}, {"4", "4", "4", "4"}, {"5", "5", "5", "5", "5"}, {"6", "6", "6", "6", "6", "6"}, {"7", "7", "7", "7", "7", "7", "7"}} on retFilterItemMinNum(aList, minItemNum) set anArray to current application’s NSMutableArray’s arrayWithArray:aList set predStr to "SELF[SIZE] >= " & (minItemNum as string) set aPredicate to current application’s NSPredicate’s predicateWithFormat:predStr set t2Array to (anArray’s filteredArrayUsingPredicate:aPredicate) as list return t2Array end retFilterItemMinNum on retFilterItemEquNum(aList, minItemNum) set anArray to current application’s NSMutableArray’s arrayWithArray:aList set predStr to "SELF[SIZE] = " & (minItemNum as string) set aPredicate to current application’s NSPredicate’s predicateWithFormat:predStr set t2Array to (anArray’s filteredArrayUsingPredicate:aPredicate) as list return t2Array end retFilterItemEquNum on retFilterItemMaxNum(aList, minItemNum) set anArray to current application’s NSMutableArray’s arrayWithArray:aList set predStr to "SELF[SIZE] <= " & (minItemNum as string) set aPredicate to current application’s NSPredicate’s predicateWithFormat:predStr set t2Array to (anArray’s filteredArrayUsingPredicate:aPredicate) as list return t2Array end retFilterItemMaxNum |
イメージビュー+ボタンを作成 v2
指定の画像を、画面の中央にウィンドウ表示するAppleScriptです。
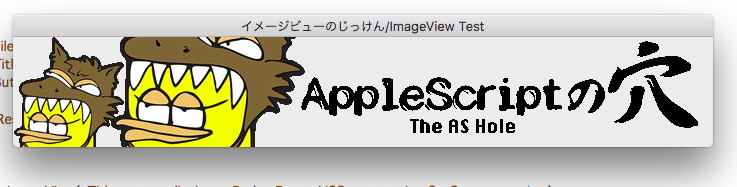
NSWindowを作成して、そこにNSImageViewを表示し、さらにその上に透明状態のボタンを表示しています。画像をクリックすると、その上にかぶせているボタンがクリックを受信してウィンドウのクローズを行います。
| AppleScript名:イメージビュー+ボタンを作成 v2 |
| — Created 2015-12-11 by Takaaki Naganoya — Modified 2018-04-08 by Takaaki Naganoya — 2018 Piyomaru Software use AppleScript version "2.4" use scripting additions use framework "Foundation" use framework "AppKit" property windisp : false set aFilePath to POSIX path of (choose file) set aTitle to "イメージビューのじっけん/ImageView Test" set aButtonMSG to "OK" set wRes to dispImageView(aTitle, aFilePath, aButtonMSG, 10) of me on dispImageView(aTitle as text, dispImagePath, aButtonMSG as text, timeOutSecs as number) set (my windisp) to true –指定パスからNSImageに画像を読み込む set aImageURL to current application’s |NSURL|’s fileURLWithPath:dispImagePath set {theResult, theValue} to aImageURL’s getResourceValue:(reference) forKey:(current application’s NSURLTypeIdentifierKey) |error|:(missing value) if theResult is not equal to true then return false –the file is not a image set aImage to current application’s NSImage’s alloc()’s initWithContentsOfURL:aImageURL set aSize to aImage’s |size|() set imgWidth to width of aSize set imgHeight to height of aSize –NSImageViewを作って画像を読み込む set aView to current application’s NSImageView’s alloc()’s init() aView’s setBounds:(current application’s NSMakeRect(0, 0, imgWidth, imgHeight)) aView’s setImageScaling:(current application’s NSImageScaleProportionallyUpOrDown) aView’s setEditable:false aView’s setImage:aImage –Windowをつくる set aWin to makeWinWithView(aView, imgWidth, imgHeight, aTitle, 1.0) set wController to current application’s NSWindowController’s alloc() wController’s initWithWindow:aWin wController’s showWindow:me –Buttonをつくる set bButton to (current application’s NSButton’s alloc()’s initWithFrame:(current application’s NSMakeRect(0, 0, imgWidth, imgHeight))) bButton’s setTitle:"OK" bButton’s setTransparent:true bButton’s setTarget:me bButton’s setAction:("clicked:") aView’s addSubview:bButton aWin’s makeKeyAndOrderFront:me –Windowを表示状態に set aCount to timeOutSecs * 10 –timeout seconds * 10 repeat aCount times if (my windisp) = false then exit repeat end if delay 0.1 set aCount to aCount – 1 end repeat my closeWin:aWin return true –Safely closed end dispImageView –Button Clicked Event Handler on clicked:aSender log {"clicked:"} set (my windisp) to false end clicked: –make Window for Input on makeWinWithView(aView, aWinWidth, aWinHeight, aTitle, alphaV) set aScreen to current application’s NSScreen’s mainScreen() set aFrame to {{0, 0}, {aWinWidth, aWinHeight}} set aBacking to current application’s NSTitledWindowMask –NSBorderlessWindowMask set aDefer to current application’s NSBackingStoreBuffered — Window set aWin to current application’s NSWindow’s alloc() (aWin’s initWithContentRect:aFrame styleMask:aBacking backing:aDefer defer:false screen:aScreen) –aWin’s setBackgroundColor:(current application’s NSColor’s whiteColor()) aWin’s setTitle:aTitle aWin’s setDelegate:me aWin’s setDisplaysWhenScreenProfileChanges:true aWin’s setHasShadow:true aWin’s setIgnoresMouseEvents:false aWin’s setLevel:(current application’s NSPopUpMenuWindowLevel) –NSNormalWindowLevel aWin’s setOpaque:false aWin’s setAlphaValue:alphaV –append aWin’s setReleasedWhenClosed:true aWin’s |center|() aWin’s makeKeyAndOrderFront:(me) — Set Custom View aWin’s setContentView:aView return aWin end makeWinWithView –close win on closeWin:aWindow repeat with n from 10 to 1 by -1 (aWindow’s setAlphaValue:n / 10) delay 0.02 end repeat aWindow’s |close|() end closeWin: |
当日が1年の何週目かを求める
| AppleScript名:当日が1年の何週目かを求める.scptd |
| — – Created by: Takaaki Naganoya – Created on: 2018/04/08 — – Copyright © 2018 Piyomaru Software, All Rights Reserved — use AppleScript version "2.4" — Yosemite (10.10) or later use framework "Foundation" use scripting additions set a1Unit to (current application’s NSWeekOfYearCalendarUnit) set a2Unit to (current application’s NSDayCalendarUnit) set a3Unit to (current application’s NSMonthCalendarUnit) set a4Unit to (current application’s NSYearCalendarUnit) set aCalendar to current application’s NSCalendar’s currentCalendar() set aComponent to aCalendar’s components:(a1Unit + a2Unit + a3Unit + a4Unit) fromDate:(current application’s NSDate’s |date|()) set aWN to aComponent’s weekOfYear() –> 15 |
現時点における年齢を計算する
| AppleScript名:現時点における年齢を計算する |
| — Created 2015-09-10 by Takaaki Naganoya — 2015 Piyomaru Software use AppleScript version "2.4" use scripting additions use framework "Foundation" –http://stackoverflow.com/questions/4463893/ –how-to-calculate-the-age-based-on-nsdate set aBirthday to "2009-04-24 12:00:00" –誕生日 set aFormatter to current application’s NSDateFormatter’s alloc()’s init() aFormatter’s setDateFormat:"yyyy-MM-dd HH:mm:ss" aFormatter’s setTimeZone:(current application’s NSTimeZone’s timeZoneForSecondsFromGMT:0) set aBirthdayDate to aFormatter’s dateFromString:aBirthday set currentDate to current application’s NSDate’s |date|() set ageComponents to current application’s NSCalendar’s currentCalendar()’s components:(current application’s NSCalendarUnitYear) fromDate:aBirthdayDate toDate:currentDate options:0 set myAge to ageComponents’s |year|() –> 8 |
指定日における年齢を計算する
| AppleScript名:指定日における年齢を計算する |
| — Created 2015-09-10 by Takaaki Naganoya — 2015 Piyomaru Software use AppleScript version "2.4" use scripting additions use framework "Foundation" –http://stackoverflow.com/questions/4463893/ –how-to-calculate-the-age-based-on-nsdate set aBirthday to "2009-04-24 12:00:00" –誕生日 set aFormatter to current application’s NSDateFormatter’s alloc()’s init() aFormatter’s setDateFormat:"yyyy-MM-dd HH:mm:ss" aFormatter’s setTimeZone:(current application’s NSTimeZone’s timeZoneForSecondsFromGMT:0) set aBirthdayDate to aFormatter’s dateFromString:aBirthday set currentDate to getDateInternational(2018, 4, 1, 9, 59, 35, "JST") of me set ageComponents to current application’s NSCalendar’s currentCalendar()’s components:(current application’s NSCalendarUnitYear) fromDate:aBirthdayDate toDate:currentDate options:0 set myAge to ageComponents’s |year|() –> 8 –Make a GMT Date Object with parameters from a given time zone. on getDateInternational(aYear, aMonth, aDay, anHour, aMinute, aSecond, timeZoneAbbreviation) set theNSCalendar to current application’s NSCalendar’s currentCalendar() theNSCalendar’s setTimeZone:(current application’s NSTimeZone’s timeZoneWithAbbreviation:(timeZoneAbbreviation)) set theDate to theNSCalendar’s dateWithEra:1 |year|:aYear |month|:aMonth |day|:aDay hour:anHour minute:aMinute |second|:aSecond nanosecond:0 return theDate end getDateInternational |
Finder上で選択中の画像を縦方向に連結 v1
Finder上で選択中の画像ファイルを縦方向に連結して結果をデスクトップ上に出力するAppleScriptです。
| AppleScript名:Finder上で選択中の画像を縦方向に連結 v1 |
| — Created 2017-11-21 by Takaaki Naganoya — Modified 2018-04-06 by Takaaki Naganoya — 2018 Piyomaru Software use AppleScript version "2.5" — El Capitan (10.11) or later use framework "Foundation" use framework "QuartzCore" use framework "AppKit" use scripting additions property |NSURL| : a reference to current application’s |NSURL| property NSUUID : a reference to current application’s NSUUID property NSArray : a reference to current application’s NSArray property NSString : a reference to current application’s NSString property NSImage : a reference to current application’s NSImage property NSWorkspace : a reference to current application’s NSWorkspace property NSPNGFileType : a reference to current application’s NSPNGFileType property NSMutableArray : a reference to current application’s NSMutableArray property NSBitmapImageRep : a reference to current application’s NSBitmapImageRep property NSURLTypeIdentifierKey : a reference to current application’s NSURLTypeIdentifierKey property yGap : 10 –連結時の画像間のアキ(横方向) tell application "Finder" set aSel to selection as alias list if aSel = {} or aSel = "" then return end tell –選択した画像をArrayに入れる set imgList to NSMutableArray’s new() repeat with i in aSel set aPath to POSIX path of i set imgRes to (my isImageAtPath:aPath) if imgRes as boolean = true then set aNSImage to (NSImage’s alloc()’s initWithContentsOfFile:aPath) (imgList’s addObject:aNSImage) end if end repeat –KVCで画像の各種情報をまとめて取得 set sizeList to (imgList’s valueForKeyPath:"size") as list –NSSize to list of record conversion set maxWidth to ((NSArray’s arrayWithArray:sizeList)’s valueForKeyPath:"@max.width") as real set totalHeight to (((NSArray’s arrayWithArray:sizeList)’s valueForKeyPath:"@sum.height") as real) + 50 set totalCount to ((NSArray’s arrayWithArray:sizeList)’s valueForKeyPath:"@count") as integer –出力画像作成 set tSize to current application’s NSMakeSize(maxWidth, totalHeight + (yGap * totalCount)) set newImage to NSImage’s alloc()’s initWithSize:tSize –順次画像を新規画像に上書き set yOrig to 0 repeat with i in (imgList as list) set j to contents of i set curSize to j’s |size|() –set aRect to {0, (maxWidth – (curSize’s height())), (curSize’s width()), (curSize’s height())} set aRect to {0, (totalHeight – (curSize’s height())) – yOrig, (curSize’s width()), (curSize’s height())} set newImage to composeImage(newImage, j, aRect) of me set yOrig to yOrig + (curSize’s height()) + yGap end repeat –デスクトップにPNG形式でNSImageをファイル保存 set aDesktopPath to current application’s NSHomeDirectory()’s stringByAppendingString:"/Desktop/" set savePath to aDesktopPath’s stringByAppendingString:((NSUUID’s UUID()’s UUIDString())’s stringByAppendingString:".png") set fRes to saveNSImageAtPathAsPNG(newImage, savePath) of me –2つのNSImageを重ね合わせ合成してNSImageで返す on composeImage(backImage, composeImage, aTargerRect) set newImage to NSImage’s alloc()’s initWithSize:(backImage’s |size|()) copy aTargerRect to {x1, y1, x2, y2} newImage’s lockFocus() set v2 to system attribute "sys2" if v2 ≤ 12 then –To macOS 10.12.x set bRect to current application’s NSMakeRect(x1, y1, x2, y2) set newImageRect to current application’s CGRectZero set newImageRect’s |size| to (newImage’s |size|) else –macOS 10.13 or later set bRect to {{x1, y1}, {x2, y2}} set newImageRect to {{0, 0}, (newImage’s |size|)} end if backImage’s drawInRect:newImageRect composeImage’s drawInRect:bRect newImage’s unlockFocus() return newImage end composeImage –NSImageを指定パスにPNG形式で保存 on saveNSImageAtPathAsPNG(anImage, outPath) set imageRep to anImage’s TIFFRepresentation() set aRawimg to NSBitmapImageRep’s imageRepWithData:imageRep set pathString to NSString’s stringWithString:outPath set newPath to pathString’s stringByExpandingTildeInPath() set myNewImageData to (aRawimg’s representationUsingType:(NSPNGFileType) |properties|:(missing value)) set aRes to (myNewImageData’s writeToFile:newPath atomically:true) as boolean return aRes –成功ならtrue、失敗ならfalseが返る end saveNSImageAtPathAsPNG –指定のパスのファイルが画像かどうかをチェック on isImageAtPath:aPath set aURL to |NSURL|’s fileURLWithPath:aPath set {theResult, theValue} to aURL’s getResourceValue:(reference) forKey:NSURLTypeIdentifierKey |error|:(missing value) return (NSImage’s imageTypes()’s containsObject:theValue) as boolean end isImageAtPath: |
配列に入れた画像を類似度でソートする
ターゲット画像に対して配列に入れた複数の画像を類似度をキーにしてソートするAppleScriptです。
最も類似度が高いと思われる画像をデスクトップにPNG形式で書き出します。
CocoaImageHashing.framework (To ~/Library/Frameworks/)
| AppleScript名:配列に入れた画像を類似度でソートする |
| — Created 2016-10-30 by Takaaki Naganoya — 2016 Piyomaru Software use AppleScript version "2.4" use scripting additions use framework "Foundation" use framework "CocoaImageHashing" –https://github.com/ameingast/cocoaimagehashing –From Example: "Sorting an NSArray containing image data" –比較元の画像を選択 set baseData to retDataFromPath(POSIX path of (choose file {"public.image"})) of me –比較対象のデータを選択 set aData to retDataFromPath(POSIX path of (choose file {"public.image"})) of me set bData to retDataFromPath(POSIX path of (choose file {"public.image"})) of me set cData to retDataFromPath(POSIX path of (choose file {"public.image"})) of me set aList to {aData, bData, cData} set anArray to current application’s NSMutableArray’s arrayWithArray:aList –配列に入れられた画像を類似度でソートする set aRes to (current application’s OSImageHashing’s sharedInstance()’s sortedArrayUsingImageSimilartyComparator:baseData forArray:anArray) –最も類似度の高い画像データを取り出す set firstObj to aRes’s objectAtIndex:0 set anImage to current application’s NSImage’s alloc()’s initWithData:firstObj –確認のため、デスクトップにPNG形式で最も類似度の高い画像を書き出す set aFolder to POSIX path of (path to desktop folder) set fRes to retUUIDfilePathFromFolder(aFolder, "png") of me set sRes to saveNSImageAtPathAsPNG(anImage, fRes) of me on retUUIDfilePathFromFolder(aFolder, aEXT) set aUUIDstr to (current application’s NSUUID’s UUID()’s UUIDString()) as string set aPath to ((current application’s NSString’s stringWithString:aFolder)’s stringByAppendingPathComponent:aUUIDstr)’s stringByAppendingPathExtension:aEXT return aPath end retUUIDfilePathFromFolder –NSImageを指定パスにPNG形式で保存 on saveNSImageAtPathAsPNG(anImage, outPath) set imageRep to anImage’s TIFFRepresentation() set aRawimg to current application’s NSBitmapImageRep’s imageRepWithData:imageRep set pathString to current application’s NSString’s stringWithString:outPath set newPath to pathString’s stringByExpandingTildeInPath() set myNewImageData to (aRawimg’s representationUsingType:(current application’s NSPNGFileType) |properties|:(missing value)) set aRes to (myNewImageData’s writeToFile:newPath atomically:true) as boolean return aRes –true/false end saveNSImageAtPathAsPNG on retDataFromPath(aFile) set aURL to current application’s |NSURL|’s fileURLWithPath:aFile set aData to current application’s NSData’s dataWithContentsOfURL:aURL return aData end retDataFromPath |
2つの画像が類似しているかを判定
2つの画像が類似しているかどうかを判定するAppleScriptです。
CocoaImageHashing.framework (To ~/Library/Frameworks/)
| AppleScript名:2つの画像が類似しているかを判定 |
| — Created 2016-10-30 by Takaaki Naganoya — 2016 Piyomaru Software use AppleScript version "2.4" use scripting additions use framework "Foundation" use framework "CocoaImageHashing" –https://github.com/ameingast/cocoaimagehashing –From Example: "Comparing two images for similarity" set aFile to POSIX path of (choose file {"public.image"}) set bFile to POSIX path of (choose file {"public.image"}) set aRes to checkSimiliality(aFile, bFile) of me –> true / false on checkSimiliality(aFile, bFile) set aURL to current application’s |NSURL|’s fileURLWithPath:aFile set bURL to current application’s |NSURL|’s fileURLWithPath:bFile set aData to current application’s NSData’s dataWithContentsOfURL:aURL set bData to current application’s NSData’s dataWithContentsOfURL:bURL set aRes to (current application’s OSImageHashing’s sharedInstance()’s compareImageData:aData |to|:bData) as boolean return aRes end checkSimiliality |
NSImageをリサイズ(アンチエイリアス解除)pattern 4
指定ファイルをNSImageに読み込んで、アンチエイリアスを使用せずに指定倍率に拡大するAppleScriptです。

▲Original & Resized Image (x10)
| AppleScript名:NSImageをリサイズ(アンチエイリアス解除)pattern 4 |
| — Created 2017-02-03 by Takaaki Naganoya — Modified 2017-03-22 by Shane Stanley use AppleScript version "2.4" use scripting additions use framework "Foundation" use framework "AppKit" set aPath to POSIX path of (choose file of type {"public.image"} with prompt "Select Image file to scale up (x10)") set aNSImage to current application’s NSImage’s alloc()’s initWithContentsOfFile:aPath set resizedImg to my resizeNSImageWithoutAntlialias:aNSImage toScale:10 set aDesktopPath to (current application’s NSProcessInfo’s processInfo()’s environment()’s objectForKey:("HOME"))’s stringByAppendingString:"/Desktop/" set savePath to aDesktopPath’s stringByAppendingString:((current application’s NSUUID’s UUID()’s UUIDString())’s stringByAppendingString:".png") set fRes to saveNSImageAtPathAsPNG(resizedImg, savePath) of me –NSImageを指定倍率で拡大(アンチエイリアス解除状態で) on resizeNSImageWithoutAntlialias:aSourceImg toScale:imgScale set aSize to aSourceImg’s |size|() set aWidth to (aSize’s width) * imgScale set aHeight to (aSize’s height) * imgScale set aRep to current application’s NSBitmapImageRep’s alloc()’s initWithBitmapDataPlanes:(missing value) pixelsWide:aWidth pixelsHigh:aHeight bitsPerSample:8 samplesPerPixel:4 hasAlpha:true isPlanar:false colorSpaceName:(current application’s NSCalibratedRGBColorSpace) bytesPerRow:0 bitsPerPixel:0 set newSize to {width:aWidth, height:aHeight} aRep’s setSize:newSize current application’s NSGraphicsContext’s saveGraphicsState() set theContext to current application’s NSGraphicsContext’s graphicsContextWithBitmapImageRep:aRep current application’s NSGraphicsContext’s setCurrentContext:theContext theContext’s setShouldAntialias:false theContext’s setImageInterpolation:(current application’s NSImageInterpolationNone) aSourceImg’s drawInRect:(current application’s NSMakeRect(0, 0, aWidth, aHeight)) fromRect:(current application’s NSZeroRect) operation:(current application’s NSCompositeCopy) fraction:(1.0) current application’s NSGraphicsContext’s restoreGraphicsState() set newImg to current application’s NSImage’s alloc()’s initWithSize:newSize newImg’s addRepresentation:aRep return newImg end resizeNSImageWithoutAntlialias:toScale: –NSImageを指定パスにPNG形式で保存 on saveNSImageAtPathAsPNG(anImage, outPath) set imageRep to anImage’s TIFFRepresentation() set aRawimg to current application’s NSBitmapImageRep’s imageRepWithData:imageRep set pathString to current application’s NSString’s stringWithString:outPath set newPath to pathString’s stringByExpandingTildeInPath() set myNewImageData to (aRawimg’s representationUsingType:(current application’s NSPNGFileType) |properties|:(missing value)) set aRes to (myNewImageData’s writeToFile:newPath atomically:true) as boolean return aRes end saveNSImageAtPathAsPNG |
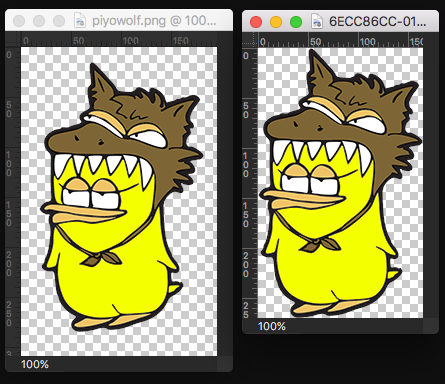
画像中の色の置き換え
指定画像中の指定色を置き換えるAppleScriptです。
replaceColorKit.framework (To ~/Library/Frameworks/)

▲Color Replaced Image & Original (Yellow)
| AppleScript名:画像中の色の置き換え |
| — Created 2017-04-23 by Takaaki Naganoya — 2017 Piyomaru Software use AppleScript version "2.4" use scripting additions use framework "Foundation" use framework "replaceColorKit" –https://github.com/braginets/NSImage-replace-color use framework "AppKit" set aThreshold to 0.2 set aFile to POSIX path of (choose file of type {"public.image"}) set anImage to (current application’s NSImage’s alloc()’s initWithContentsOfFile:aFile) set aColor to makeNSColorFromRGBA255val(246, 253, 0, 255) of me set bColor to makeNSColorFromRGBA255val(154, 154, 154, 255) of me set bImage to (anImage’s replaceColor:aColor withColor:bColor withThreshold:aThreshold) set aDesktopPath to ((current application’s NSProcessInfo’s processInfo()’s environment()’s objectForKey:("HOME"))’s stringByAppendingString:"/Desktop/") set savePath to (aDesktopPath’s stringByAppendingString:((current application’s NSString’s stringWithString:(aThreshold as string))’s stringByAppendingString:".png")) set fRes to saveNSImageAtPathAsPNG(bImage, savePath) of me –0〜255の数値でNSColorを作成する on makeNSColorFromRGBA255val(redValue as integer, greenValue as integer, blueValue as integer, alphaValue as integer) set aRedCocoa to (redValue / 255) as real set aGreenCocoa to (greenValue / 255) as real set aBlueCocoa to (blueValue / 255) as real set aAlphaCocoa to (alphaValue / 255) as real set aColor to current application’s NSColor’s colorWithCalibratedRed:aRedCocoa green:aGreenCocoa blue:aBlueCocoa alpha:aAlphaCocoa return aColor end makeNSColorFromRGBA255val –NSImageを指定パスにPNG形式で保存 on saveNSImageAtPathAsPNG(anImage, outPath) set imageRep to anImage’s TIFFRepresentation() set aRawimg to current application’s NSBitmapImageRep’s imageRepWithData:imageRep set pathString to current application’s NSString’s stringWithString:outPath set newPath to pathString’s stringByExpandingTildeInPath() set myNewImageData to (aRawimg’s representationUsingType:(current application’s NSPNGFileType) |properties|:(missing value)) set aRes to (myNewImageData’s writeToFile:newPath atomically:true) as boolean return aRes end saveNSImageAtPathAsPNG |
指定画像の余白の自動トリミング
指定画像の余白トリミングを自動で行うAppleScriptです。
KGPixelBoundsClipKit.framework (To ~/Library/Frameworks/)
| AppleScript名:指定画像の余白の自動トリミング |
| — Created 2017-04-26 by Takaaki Naganoya — 2017 Piyomaru Software use AppleScript version "2.4" use scripting additions use framework "Foundation" use framework "AppKit" use framework "KGPixelBoundsClipKit" –https://github.com/kgn/KGPixelBoundsClip set aFile to POSIX path of (choose file of type {"public.image"}) set anImage to (current application’s NSImage’s alloc()’s initWithContentsOfFile:aFile) set bImage to anImage’s imageClippedToPixelBounds() set aDesktopPath to (current application’s NSProcessInfo’s processInfo()’s environment()’s objectForKey:("HOME"))’s stringByAppendingString:"/Desktop/" set savePath to aDesktopPath’s stringByAppendingString:((current application’s NSUUID’s UUID()’s UUIDString())’s stringByAppendingString:".png") set fRes to saveNSImageAtPathAsPNG(bImage, savePath) of me –NSImageを指定パスにPNG形式で保存 on saveNSImageAtPathAsPNG(anImage, outPath) set imageRep to anImage’s TIFFRepresentation() set aRawimg to current application’s NSBitmapImageRep’s imageRepWithData:imageRep set pathString to current application’s NSString’s stringWithString:outPath set newPath to pathString’s stringByExpandingTildeInPath() set myNewImageData to (aRawimg’s representationUsingType:(current application’s NSPNGFileType) |properties|:(missing value)) set aRes to (myNewImageData’s writeToFile:newPath atomically:true) as boolean return aRes end saveNSImageAtPathAsPNG |
NSImageの垂直、水平反転
NSImageの垂直方向、水平方向の反転を行うAppleScriptです。

▲Original Image

▲Horizontal Flipped Image

▲Vertical Flipped Image
| AppleScript名:NSImageの垂直、水平反転 |
| — Created 2017-07-25 by Takaaki Naganoya — 2017 Piyomaru Software use AppleScript version "2.4" use scripting additions use framework "Foundation" use framework "AppKit" –https://stackoverflow.com/questions/10936590/flip-nsimage-on-both-axes set aFile to POSIX path of (choose file of type {"public.image"} with prompt "Select an Image") set currentImage to current application’s NSImage’s alloc()’s initWithContentsOfFile:aFile set imgRes to flipImageVertically(currentImage) of me set fRes to retUUIDfilePath(aFile, "png") of me set sRes to saveNSImageAtPathAsPNG(imgRes, fRes) of me –水平方向の画像反転 on flipImageHorizontally(anNSImage) set transform to current application’s NSAffineTransform’s transform() set dimList to anNSImage’s |size|() set flipList to {-1.0, 0.0, 0.0, 1.0, dimList’s width, 0.0} set tmpImage to current application’s NSImage’s alloc()’s initWithSize:(dimList) tmpImage’s lockFocus() transform’s setTransformStruct:flipList transform’s concat() anNSImage’s drawAtPoint:(current application’s NSMakePoint(0, 0)) fromRect:(current application’s NSMakeRect(0, 0, dimList’s width, dimList’s height)) operation:(current application’s NSCompositeCopy) fraction:1.0 tmpImage’s unlockFocus() return tmpImage end flipImageHorizontally –垂直方向の画像反転 on flipImageVertically(anNSImage) set transform to current application’s NSAffineTransform’s transform() set dimList to anNSImage’s |size|() set flipList to {1.0, 0.0, 0.0, -1.0, 0.0, dimList’s height} set tmpImage to current application’s NSImage’s alloc()’s initWithSize:(dimList) tmpImage’s lockFocus() transform’s setTransformStruct:flipList transform’s concat() anNSImage’s drawAtPoint:(current application’s NSMakePoint(0, 0)) fromRect:(current application’s NSMakeRect(0, 0, dimList’s width, dimList’s height)) operation:(current application’s NSCompositeCopy) fraction:1.0 tmpImage’s unlockFocus() return tmpImage end flipImageVertically on retUUIDfilePath(aPath, aEXT) set aUUIDstr to (current application’s NSUUID’s UUID()’s UUIDString()) as string set aPath to ((current application’s NSString’s stringWithString:aPath)’s stringByDeletingLastPathComponent()’s stringByAppendingPathComponent:aUUIDstr)’s stringByAppendingPathExtension:aEXT return aPath end retUUIDfilePath –NSImageを指定パスにPNG形式で保存 on saveNSImageAtPathAsPNG(anImage, outPath) set imageRep to anImage’s TIFFRepresentation() set aRawimg to current application’s NSBitmapImageRep’s imageRepWithData:imageRep set pathString to current application’s NSString’s stringWithString:outPath set newPath to pathString’s stringByExpandingTildeInPath() set myNewImageData to (aRawimg’s representationUsingType:(current application’s NSPNGFileType) |properties|:(missing value)) set aRes to (myNewImageData’s writeToFile:newPath atomically:true) as boolean return aRes –true/false end saveNSImageAtPathAsPNG |
単色画像(アルファ値必要)に色を指定して塗りつぶし
単色画像に色を指定して塗りつぶしを行うAppleScriptです。

▲Original Image

▲Result Image
| AppleScript名:単色画像(アルファ値必要)に色を指定して塗りつぶし |
| — Created 2017-04-24 by Takaaki Naganoya — 2017 Piyomaru Software use AppleScript version "2.4" use scripting additions use framework "Foundation" use framework "AppKit" use framework "QuartzCore" –http://piyocast.com/as/archives/4615 set aFile to POSIX path of (choose file of type "public.image") set aColor to makeNSColorFromRGBA255val(0, 0, 255, 255) of me set aColoredImage to fillColorWithImage(aFile, aColor) of me set aDesktopPath to ((current application’s NSProcessInfo’s processInfo()’s environment()’s objectForKey:("HOME"))’s stringByAppendingString:"/Desktop/") set savePath to (aDesktopPath’s stringByAppendingString:((current application’s NSString’s stringWithString:"testOverlay")’s stringByAppendingString:".png")) set fRes to saveNSImageAtPathAsPNG(aColoredImage, savePath) of me on fillColorWithImage(aFile, aColor) set anImage to (current application’s NSImage’s alloc()’s initWithContentsOfFile:aFile) set aSize to anImage’s |size|() set aWidth to (aSize’s width) set aHeight to (aSize’s height) set colordImage to makeNSImageWithFilledWithColor(aWidth, aHeight, aColor) of me colordImage’s lockFocus() anImage’s drawAtPoint:{0, 0} fromRect:(current application’s NSZeroRect) operation:(current application’s NSCompositeDestinationIn) fraction:1.0 colordImage’s unlockFocus() return colordImage end fillColorWithImage –指定サイズの画像を作成し、指定色で塗ってファイル書き出し on makeNSImageWithFilledWithColor(aWidth, aHeight, fillColor) set anImage to current application’s NSImage’s alloc()’s initWithSize:(current application’s NSMakeSize(aWidth, aHeight)) anImage’s lockFocus() — set theRect to {{x:0, y:0}, {height:aHeight, width:aWidth}} set theNSBezierPath to current application’s NSBezierPath’s bezierPath theNSBezierPath’s appendBezierPathWithRect:theRect — fillColor’s |set|() –色設定 theNSBezierPath’s fill() –ぬりつぶし — anImage’s unlockFocus() — return anImage end makeNSImageWithFilledWithColor on makeNSColorFromRGBA255val(redValue as integer, greenValue as integer, blueValue as integer, alphaValue as integer) set aRedCocoa to (redValue / 255) as real set aGreenCocoa to (greenValue / 255) as real set aBlueCocoa to (blueValue / 255) as real set aAlphaCocoa to (alphaValue / 255) as real set aColor to current application’s NSColor’s colorWithCalibratedRed:aRedCocoa green:aGreenCocoa blue:aBlueCocoa alpha:aAlphaCocoa return aColor end makeNSColorFromRGBA255val –NSImageを指定パスにPNG形式で保存 on saveNSImageAtPathAsPNG(anImage, outPath) set imageRep to anImage’s TIFFRepresentation() set aRawimg to current application’s NSBitmapImageRep’s imageRepWithData:imageRep set pathString to current application’s NSString’s stringWithString:outPath set newPath to pathString’s stringByExpandingTildeInPath() set myNewImageData to (aRawimg’s representationUsingType:(current application’s NSPNGFileType) |properties|:(missing value)) set aRes to (myNewImageData’s writeToFile:newPath atomically:true) as boolean return aRes –成功ならtrue、失敗ならfalseが返る end saveNSImageAtPathAsPNG |