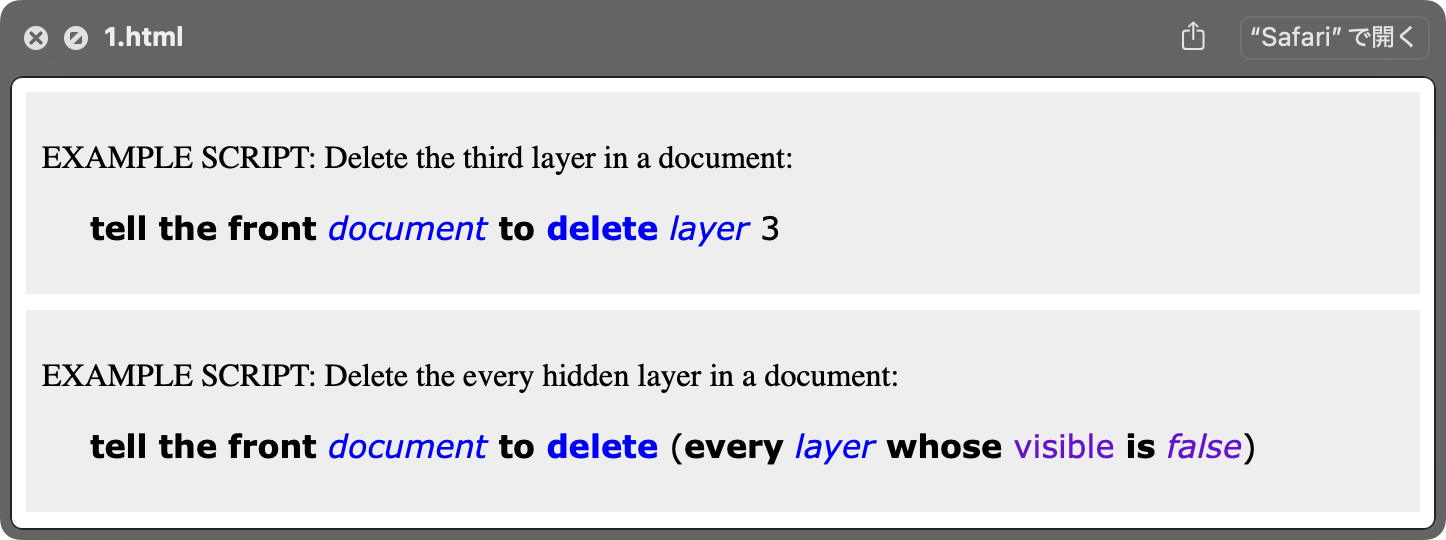
指定の画像をアスキーアート化して、ダイアログ表示するAppleScriptです。
–> Download Script archive with Library
面倒だったのでChatGPTに書かせてみましたが、Retina Display対応や細かい箇所のエラーを取りきれず、途中から自分で書き換えました。
画像のアスキーアート化Scriptは、できることはわかっていつつも、これほど役立たずに時間の無駄なプログラムも珍しいところ。こういうのはChatGPTに書かせるのがお似合いです。
それにしても、けっこうこまめにコメント入れるもんですね。正しい内容かどうかは定かではありませんが……>ChatGPT
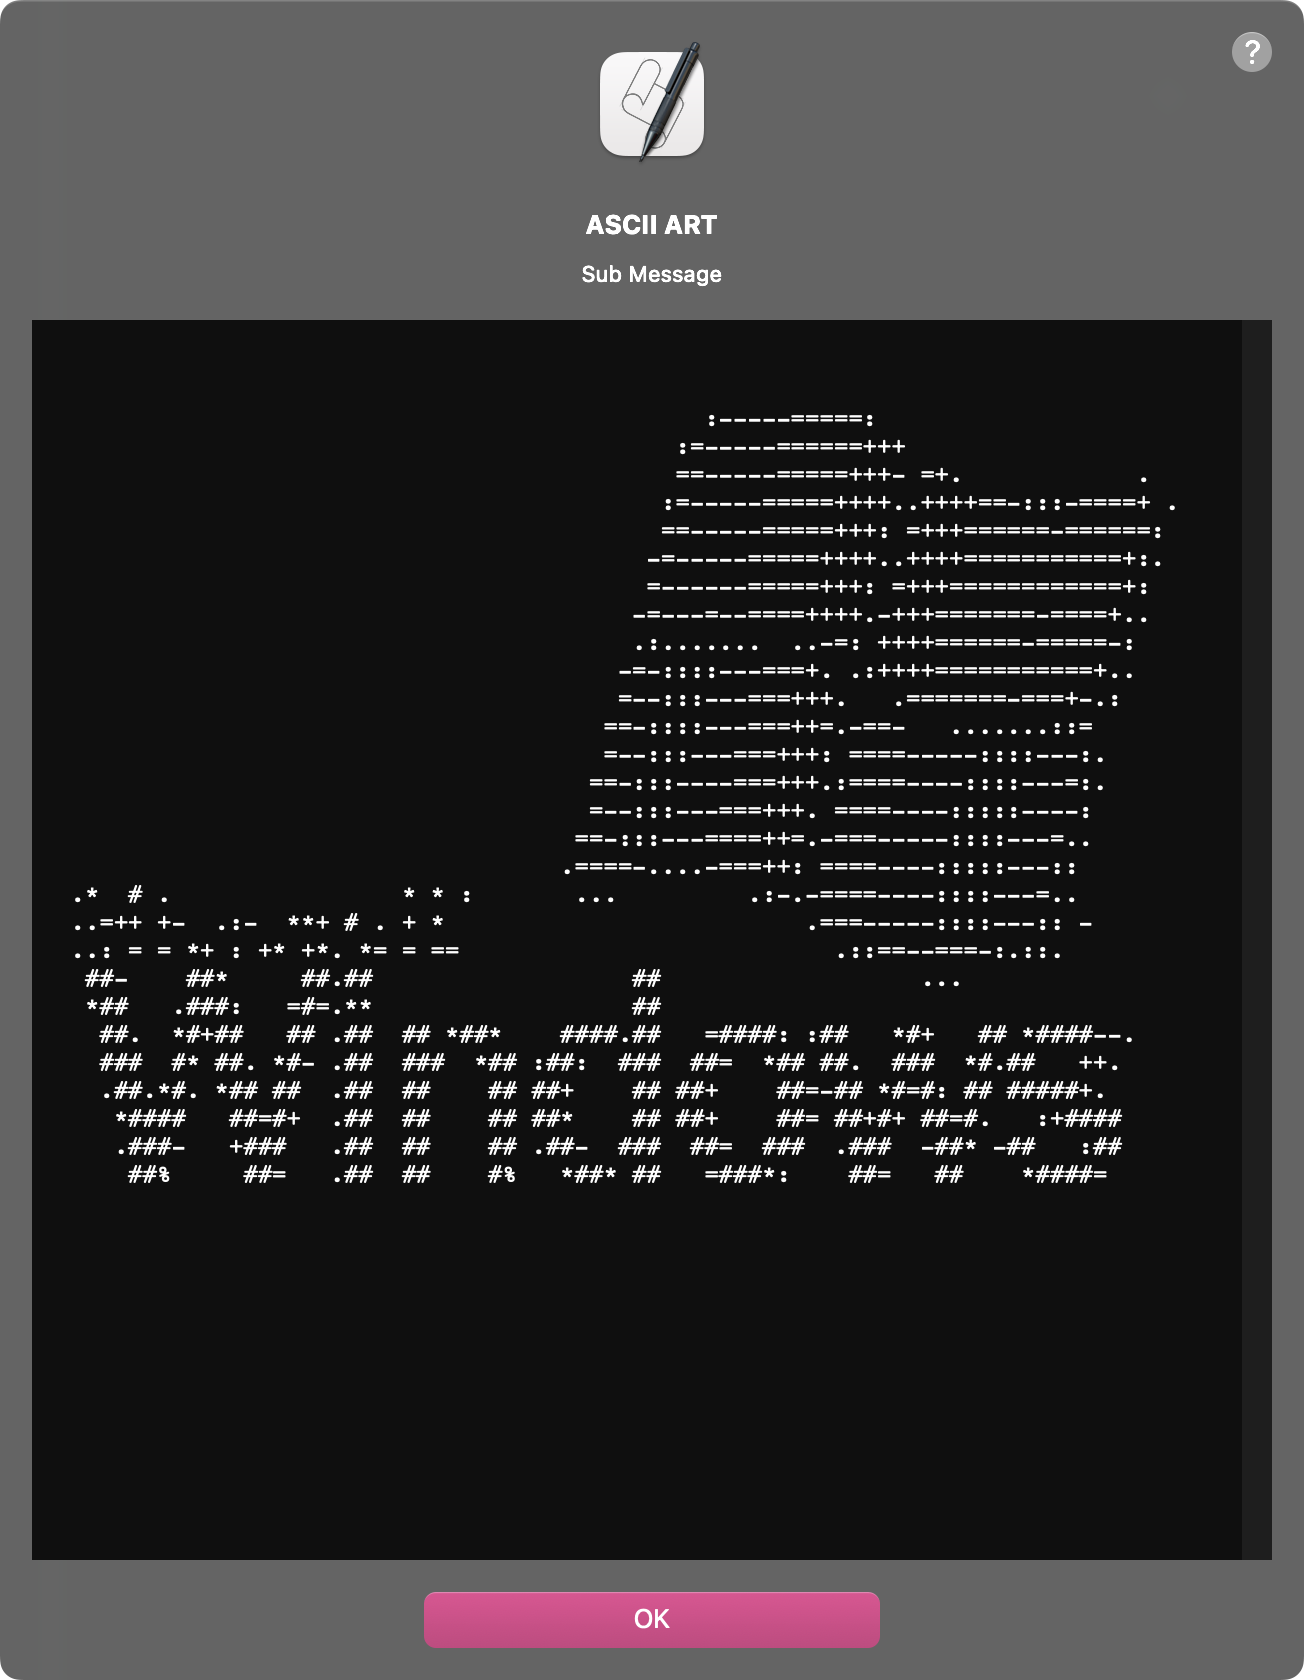
| AppleScript名:画像をAppleScriptでアスキーアート化.scptd |
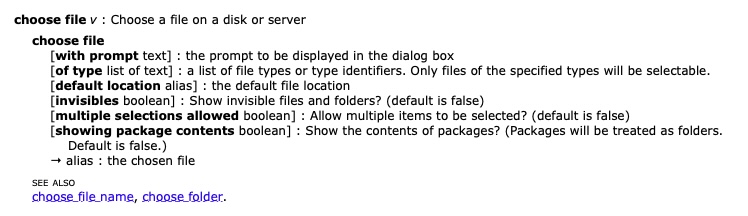
| — – Created by: Takaaki Naganoya – Created on: 2025/02/26 — – Copyright © 2025 Piyomaru Software, All Rights Reserved — use AppleScript version "2.4" use framework "Foundation" use framework "AppKit" use scripting additions use radioLib : script "displayTextView" property retinaF : missing value — ファイル選択ダイアログで画像を選ぶ set imagePath to POSIX path of (choose file with prompt "画像を選択してください:") — ASCIIアートを生成 set asciiText to convertImageToASCII(imagePath) display text view asciiText main message "ASCII ART" sub message "Sub Message" with properties {font name:"Courier", size:12, width:620, height:620, color:{255, 255, 255}} on convertImageToASCII(imagePath) set asciiChars to "@%#*+=-:. " — 濃い→薄い順の文字列 — Retina用のスケールファクターを取得 set retinaF to (current application’s NSScreen’s mainScreen()’s backingScaleFactor()) as real — 画像を読み込む set imageURL to current application’s NSURL’s fileURLWithPath:imagePath set imageData to current application’s NSImage’s alloc()’s initWithContentsOfURL:imageURL — 論理サイズ(points単位)を取得("size"は予約語なのでエスケープ) set imageSize to imageData’s |size|() set {w_pt, h_pt} to {imageSize’s |width|, imageSize’s |height|} — リサイズ後の幅(文字数)を指定し、論理サイズに基づいてスケール計算 set newWidth to 80 set scaleFactor to newWidth / w_pt set newHeight to round (h_pt * scaleFactor * 0.55) — 文字の縦横比調整 — ピクセル単位のサイズに変換(Retina対応) set pixelWidth to newWidth * retinaF set pixelHeight to newHeight * retinaF set pixelSize to current application’s NSMakeSize(pixelWidth, pixelHeight) — 新しいピクセルサイズでNSImageを作成し、元画像を描画 set resizedImage to current application’s NSImage’s alloc()’s initWithSize:pixelSize resizedImage’s lockFocus() current application’s NSGraphicsContext’s currentContext()’s setImageInterpolation:(current application’s NSImageInterpolationHigh) imageData’s drawInRect:{{0, 0}, pixelSize} fromRect:{{0, 0}, imageSize} operation:(current application’s NSCompositingOperationCopy) fraction:1.0 resizedImage’s unlockFocus() — リサイズ後の画像からNSBitmapImageRepを取得 set resizedRep to current application’s NSBitmapImageRep’s imageRepWithData:(resizedImage’s TIFFRepresentation()) — 各ピクセルをASCII文字に変換(Retina対応のため、retinaFごとにサンプリング) set asciiArt to "" set stepX to retinaF as integer set stepY to retinaF as integer repeat with y from 0 to (pixelHeight – 1) by stepY repeat with x from 0 to (pixelWidth – 1) by stepX set pixelColor to (resizedRep’s colorAtX:(x * retinaF) y:(y * retinaF)) set r to pixelColor’s redComponent() set g to pixelColor’s greenComponent() set b to pixelColor’s blueComponent() set brightness to (r + g + b) / 3 set charIndex to round (brightness * ((count of asciiChars) – 1)) set asciiArt to asciiArt & (character (charIndex + 1) of asciiChars) end repeat set asciiArt to asciiArt & linefeed end repeat return asciiArt end convertImageToASCII |