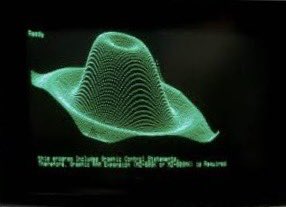
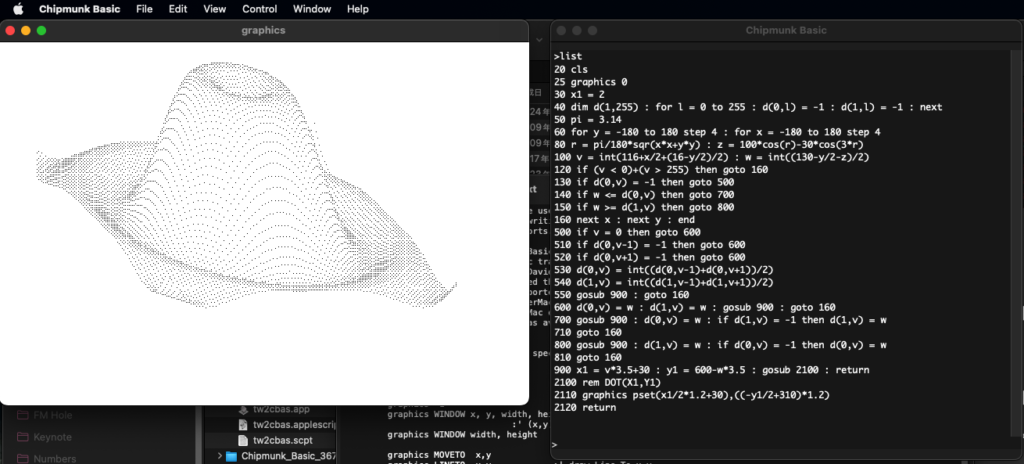
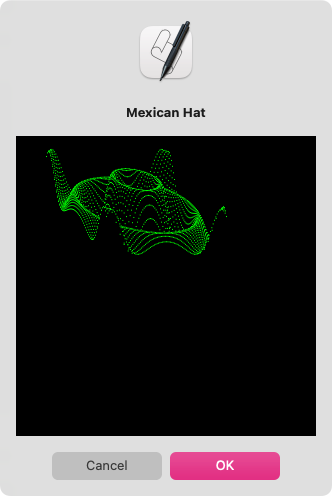
X(旧称Twitter)の一部で流行っている、むかーーしむかしのBASIC処理サンプルの1つ、メキシカンハット型グラフの描画AppleScriptです。
–> Download full script bundle with libraries

自分もChipmunk BASIC用に移植して投稿していたのですが、AppleScriptにフル書き換えするとどんなもんだと思い、書いてみました。

関数演算ライブラリは、自作のcalcLibASがあるので、これを使い、画像のダイアログ表示用ライブラリを使って画面表示。

AppleScriptでも1秒ぐらいで処理が終了してしまいますが、黒地に緑で描画すると、謎の「味」があります。
| AppleScript名:メキシカンハット v2.scptd |
| — Created 2024-06-28 by Takaaki Naganoya use AppleScript version "2.5" use scripting additions use framework "Foundation" use framework "AppKit" use mLib : script "calcLibAS" use imgDispLib : script "imageDisplayLib" property NSColor : a reference to current application’s NSColor property NSString : a reference to current application’s NSString property NSImage : a reference to current application’s NSImage property NSScreen : a reference to current application’s NSScreen property NSBezierPath : a reference to current application’s NSBezierPath property NSBitmapImageRep : a reference to current application’s NSBitmapImageRep –パラメータから下地になる画像を作成する set aSize to current application’s NSMakeSize(300, 300) set anImage to NSImage’s alloc()’s initWithSize:aSize set backlColor to (NSColor’s colorWithCalibratedRed:0.0 green:0.0 blue:0.0 alpha:1.0) set anImage to drawImageWithColorFill(anImage, {0, 0, 300, 300}, backlColor) of me –描画色 set drawColor to (NSColor’s colorWithCalibratedRed:0.0 green:1.0 blue:0.0 alpha:1.0) –Mexican Hat set D to {} set rDnum to pi / 180 repeat 256 times set end of D to 100 end repeat repeat with y from -180 to 180 by 6 repeat with x from -180 to 180 by 4 set u to 120 + (x / 3) – (y / 6) if u < 0 or u ≥ 240 then — else set r to rDnum * (sqrt ((x ^ 2) + (y ^ 2))) set z to 100 * (cos (r – 30)) * (cos (3 * r)) set v to 40 – y / 6 – z / 2 if (item u of D) > v then set anImage to psetOnImage(anImage, {u, 256 – v}, drawColor) of me copy v to (item u of D) end if end if end repeat end repeat –結果表示 dispImage(anImage, "Mexican Hat") of imgDispLib on psetOnImage(anImage, posDat, fillColor) set retinaF to (NSScreen’s mainScreen()’s backingScaleFactor()) as real –> 2.0 (Retina) / 1.0 (Non Retina) anImage’s lockFocus() –描画開始 set origX to (item 1 of posDat) / retinaF set origY to (item 2 of posDat) / retinaF set sizeX to (1) / retinaF set sizeY to (1) / retinaF set theRect to {{x:origX, y:origY}, {width:sizeX, height:sizeY}} set theNSBezierPath to NSBezierPath’s bezierPath (theNSBezierPath’s appendBezierPathWithRect:theRect) fillColor’s |set|() –色設定 theNSBezierPath’s fill() –ぬりつぶし anImage’s unlockFocus() –描画ここまで return anImage –returns NSImage end psetOnImage on drawImageWithColorFill(anImage, drawList, fillColor) set retinaF to (NSScreen’s mainScreen()’s backingScaleFactor()) as real –> 2.0 (Retina) / 1.0 (Non Retina) anImage’s lockFocus() –描画開始 set origX to (item 1 of drawList) / retinaF set origY to (item 2 of drawList) / retinaF set sizeX to (item 3 of drawList) / retinaF set sizeY to (item 4 of drawList) / retinaF set theRect to {{x:origX, y:origY}, {width:sizeX, height:sizeY}} set theNSBezierPath to NSBezierPath’s bezierPath (theNSBezierPath’s appendBezierPathWithRect:theRect) fillColor’s |set|() –色設定 theNSBezierPath’s fill() –ぬりつぶし anImage’s unlockFocus() –描画ここまで return anImage –returns NSImage end drawImageWithColorFill |
(Visited 318 times, 1 visits today)


PeterH says:
こんにちは、
calcLibAS v.1.5には不思議なバグがひそんでいるらしいのですが。
こちらのシステム(Sonoma14.8.2 (23J126))では
(sqrt ((x ^ 2) + (y ^ 2)))
という計算がナンバー値ではなく、falseを返します。
よって上記のスクリプトはエッラーしてしまいます。
本当に不思議なのですが。
Peter
Takaaki Naganoya says:
Wir wurden darüber informiert, dass bezüglich calcLibAS nicht die erwarteten Berechnungsergebnisse erzielt wurden. Dies ist das zweite Beispiel. Allerdings ist diese Bibliothek sehr einfach und verwendet nur JavaScriptCore.framework zur Durchführung von Berechnungen, was das Aufspüren von Problemen tendenziell erschwert.
In einer japanischen Umgebung habe ich unter macOS 14/15/26 die erwarteten Ergebnisse erzielt (obwohl dieses Programm vor dem Kauf meines MacBook Air geschrieben wurde und daher mit Retina-Displays etwas inkompatibel ist).
Tritt dieses Problem in einer deutschen Umgebung mit macOS 14 auf?
Die Verarbeitung des SQR-Berechnungsteils der Bibliothek ist wie folgt und gibt nur dann false zurück, wenn das Berechnungsergebnis von JavaScriptCore „NaN“ ist.
on sqrt aParam as real : 0.0
set aRes to calcSqrt(aParam) of calSub
if aRes as string = “NaN” then
return false
else
return aRes
end if
end sqrt
Wenn Sie die Werte von x und y kennen, wenn ein Rechenfehler auftritt, ist es einfacher, die Nachholprüfung abzulegen. Bitte lassen Sie es mich wissen (da das Problem in einer japanischen Umgebung nicht aufgetreten ist).
Darüber hinaus ist bekannt, dass die Durchführung funktionaler Berechnungen über JavaScriptCore auf Computern mit Intel Xeon-CPUs zu anomalen Ergebnissen führt. Ich würde mich freuen, wenn Sie mir auch den Typ der CPU mitteilen könnten.
PeterH says:
TEST – my answer to your message does not go through, tried several times, please send me your e-Mail adress – thank you!
Takaaki Naganoya says:
maro_ml@piyocast.com
is my email address.
PeterH says:
Since my messages did not go through to you (I clicked “Post Comment” but could not find my message in the message list, several times), I sent you several private messages to macscripter.net. Hope you will be able to read them. I hope this one will go through! Thank you!
Takaaki Naganoya says:
macscripter.net admin banned me for the reason “You wrote Japanese comment”.
I cannot understand the actions of the administrator who bans users for reasons I cannot understand.
I’m treating the site as if it never existed.
PeterH says:
Apparently, posts containing Apple Script or JavaScript code do not go through but somehow get “eaten” by the system.
Takaaki Naganoya says:
It’s either a bug in WordPress or an attack protection plugin. This site has been attacked by a lot of bad actors.
PeterH says:
PeterH says:
github . com / gianzellweger / Math
PeterH says:
Also, posts containing URLs, even those being html encoded (as described) below, don’t go through. I tried many, many times. The software for this board is severely broken.
PeterH says:
My final word: If I replace your JavaScript based Math Lib by the one by gianzellweger, both Mexican Hats and ASCII art work for me.
Takaaki Naganoya says:
Looking at the current phenomenon, it looks like the source of a program created by someone else was posted on Github without clearly stating the source, but could you please explain this in a way that I can understand?
PeterH says:
The Github Repository contains a Math AppleScript Library.
It works perfectly.
I use it in Mexican Hats as a replacment for your calcLibAS library.
When I do so, the error in Mexican Hats goes away.
Takaaki Naganoya says:
You need to understand that there is a “time difference” on Earth. Japan’s time difference from Greenwich Mean Time is +9 hours.
Takaaki Naganoya says:
I realize that you have been very rude to me. Please know that I will deal with rude people accordingly. People who ban for no apparent reason, like the administrator of Macscripter.net, are the type of people I dislike the most.
PeterH says:
I am very sorry, that you consider me having been rude.
It was not my intention.
And, of course, I do not consider myself having been rude.
I just desperatly tried to contact you and help to find the bug in your calcLibAS library.
That is all.
I wish you a Happy New Year!
Peter
PeterH says:
I have sent you many examples for the bug in calcLibAS and on how to avoid it or fix it in a private message to you at MacScripter.
I sincerely hope that you will be able to read it.
I was unable to post code on this board, so I tried to use MacScripter as a communication channel.
I just want to help.
Thank you!
Peter
Takaaki Naganoya says:
I’ve written this many times, but it seems you don’t understand.
I haven’t been able to access Macscripter.net for several months. My account has been frozen by an administrator. Therefore, even if you send me a message on Macscripter.net, I can’t see it.
Do you understand?