Menu

Skip to content
AppleScriptの穴
  • Home
  • Products
  • Books
  • Docs
  • Events
  • Forum
  • About This Blog
  • License
  • 仕事依頼

AppleScriptの穴

Useful & Practical AppleScript archive. Click '★Click Here to Open This Script' Link to download each AppleScript

カテゴリー: Color

AS書類を書式で分解して再構成

Posted on 1月 12 by Takaaki Naganoya

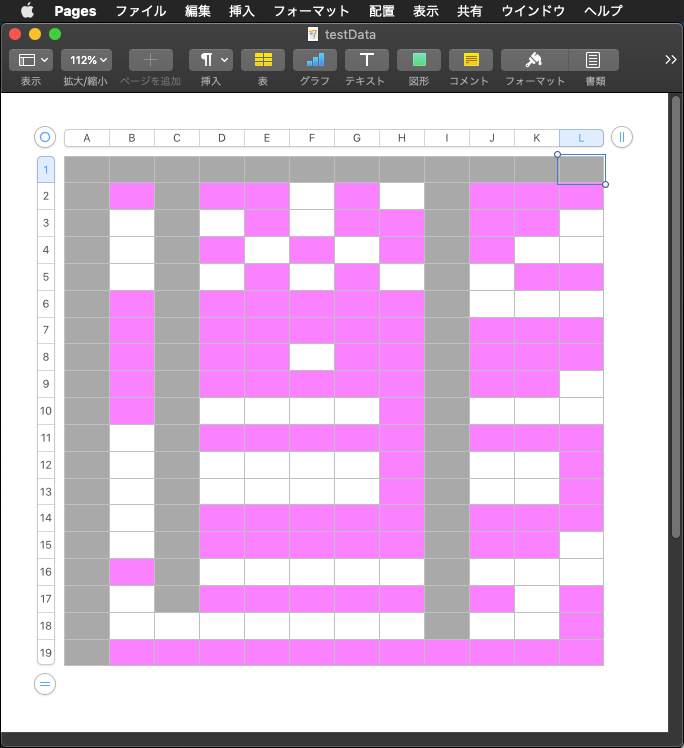
AppleScriptの書類を読み込んでNSAttributedStringに変換し、書式情報にもとづいてNSDictionary in NSArrayに変換。この状態でデータ抽出などを行なっていたのですが、このデータをもとにNSAttributedStringに再構成するAppleScriptです。

本Scriptの通しの処理内容としては、読み込んだAppleScriptを書式情報をもとに分解して、再構成するという……大豆から豆腐を作って、豆腐を崩して豆を得る、みたいな内容です。

NSAttributedStringを再構成する部分の処理を書いていなかったので、必要に迫られて書いてみました。

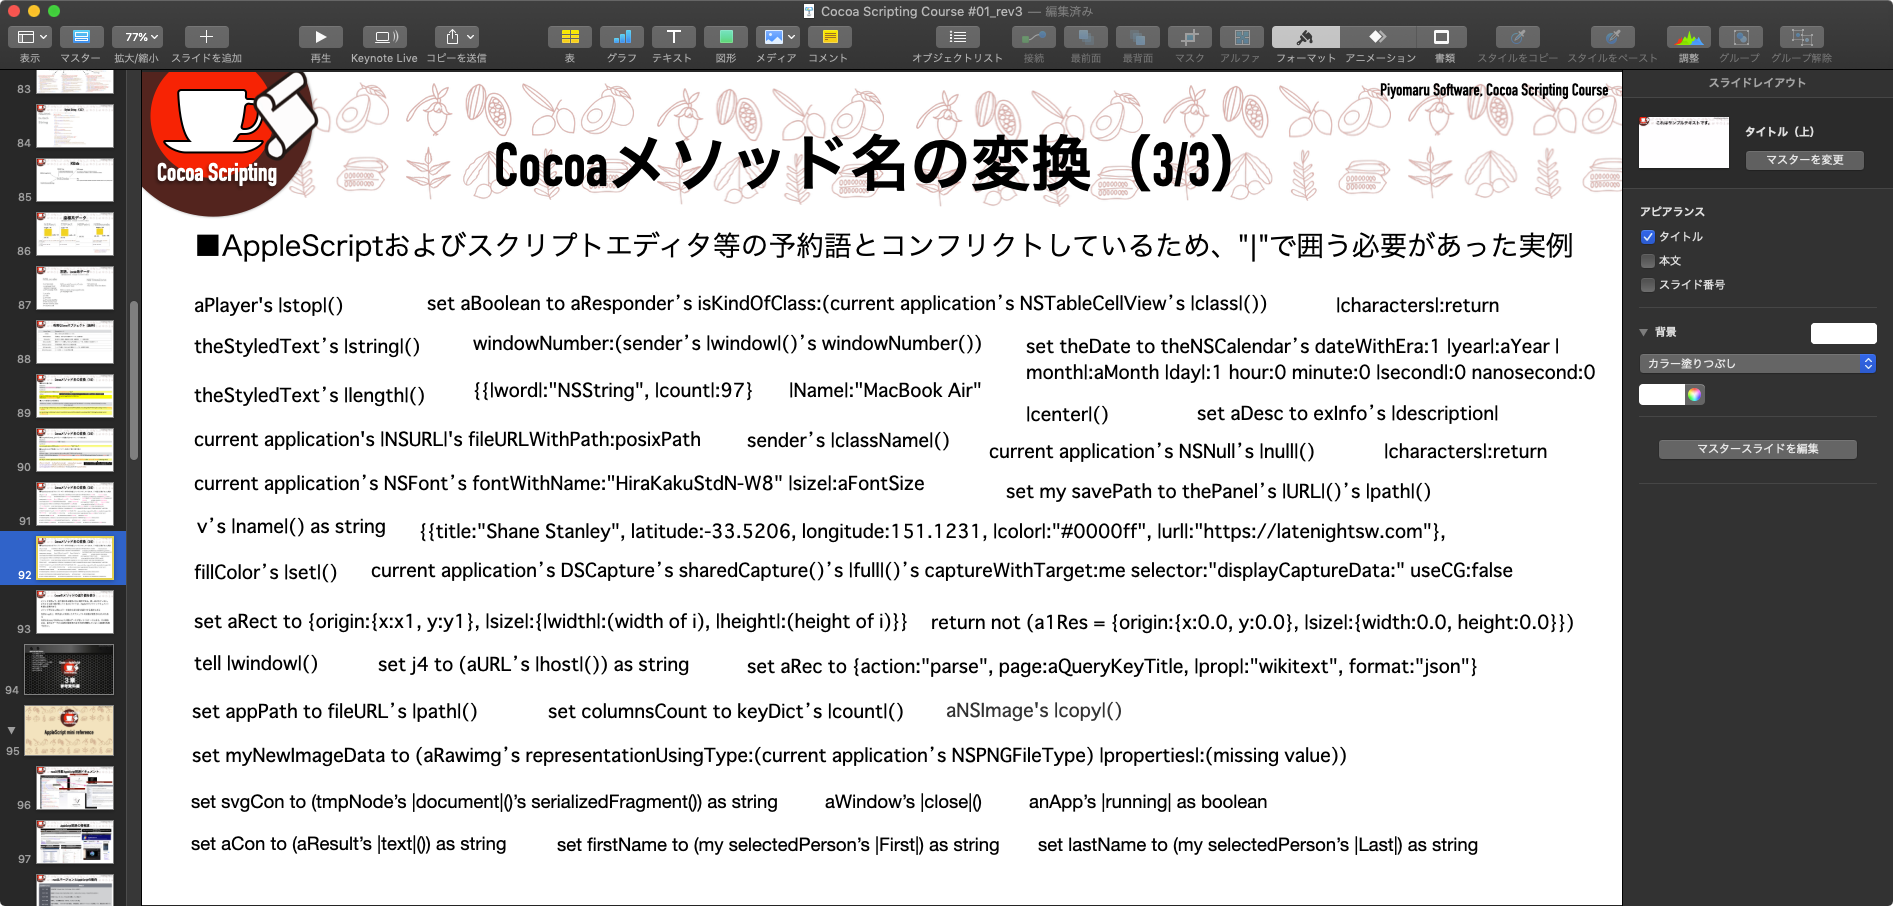
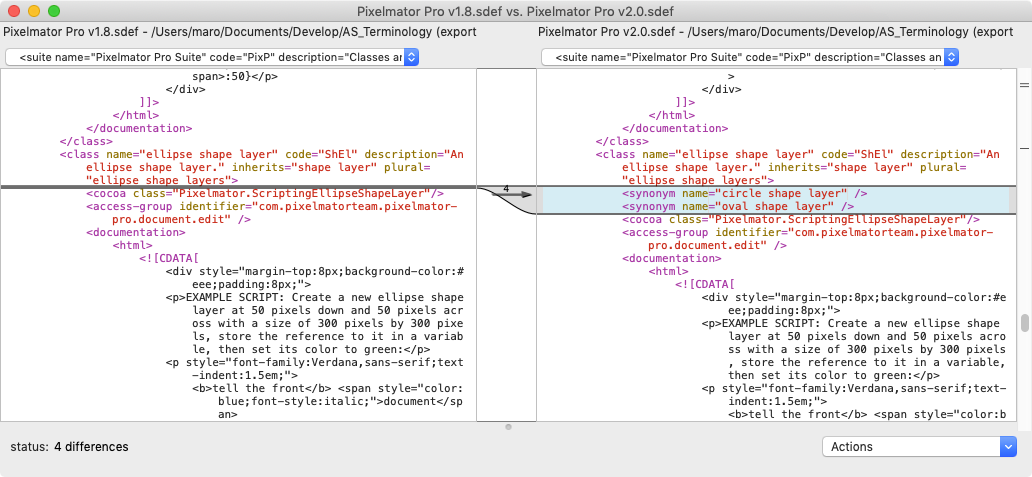
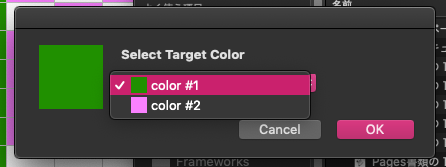
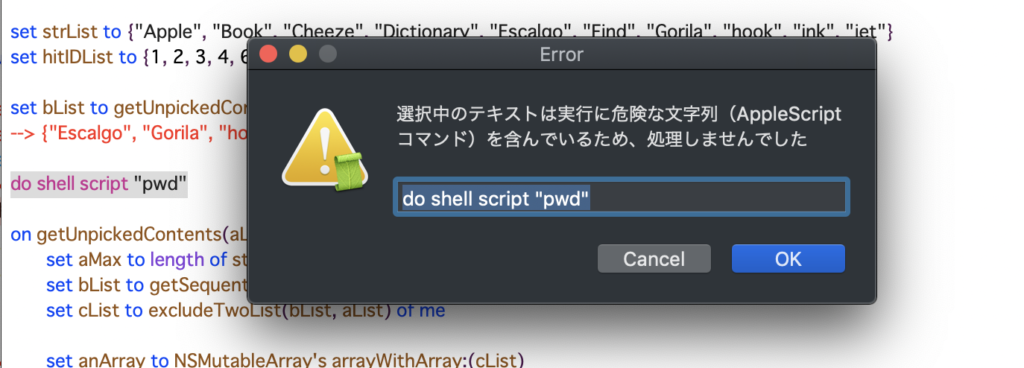
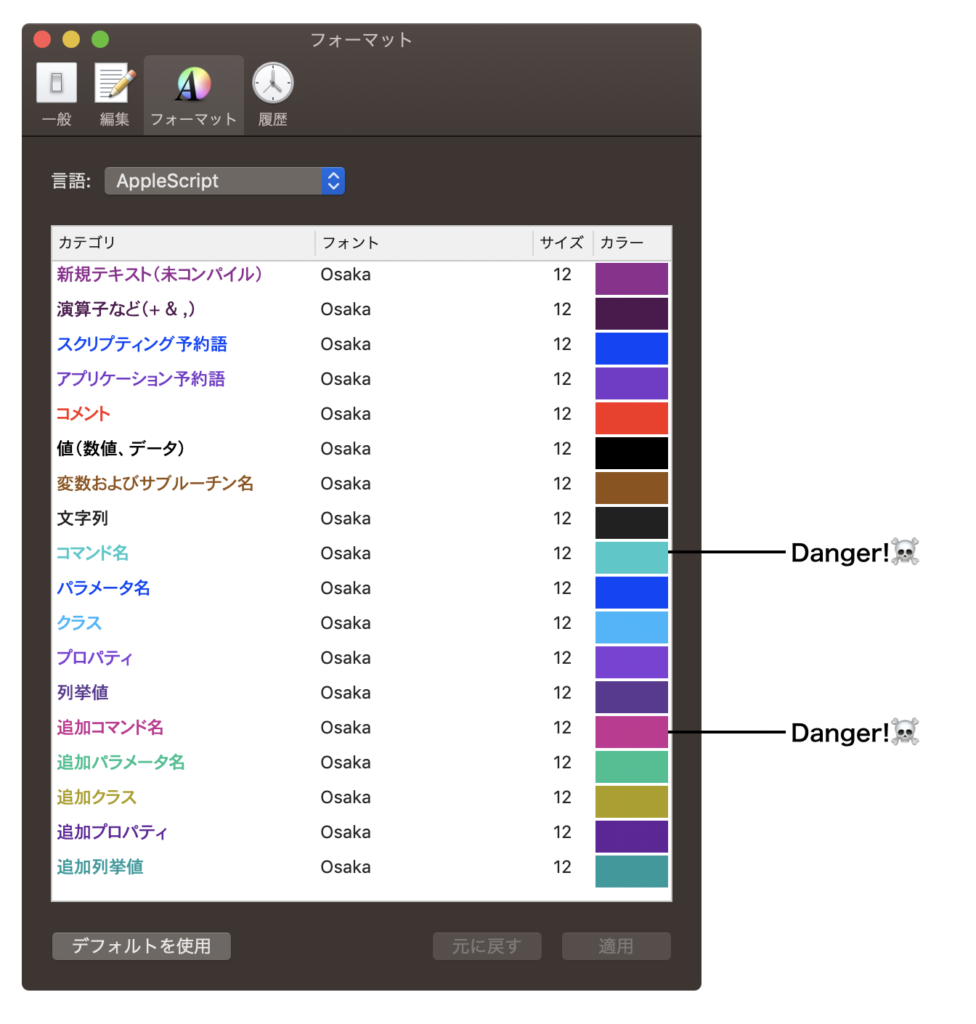
AppleScript構文色分け設定情報をもとに処理するため、色分け設定で複数の構文要素で同じ色を指定している場合にはエラーを返します。単にNSAttributedStringを解釈して再構成する、といった処理であればAppleScript構文色分け設定へのアクセス自体は必要ないところですが、すでに不可分なレベルで組み込まれているため、現状ではそのままです。

いっそ、こうした処理をする前にplistをバックアップし、必要な情報を書き込んだplistを設定ファイルとして使用するといった処理を行った方がいいのかもしれません。これまでは、「そんな処理はとても行えない」と判断していましたが、よくよく考えればとくに苦労せずに実現できそうです。

AppleScript名:AS書類を書式で分解して再構成.scptd
—
–  Created by: Takaaki Naganoya
–  Created on: 2025/01/12
—
–  Copyright © 2025 Piyomaru Software, All Rights Reserved
—

use AppleScript version "2.8"
use scripting additions
use framework "Foundation"
use framework "AppKit"

property NSFont : a reference to current application’s NSFont
property NSColor : a reference to current application’s NSColor
property |NSURL| : a reference to current application’s |NSURL|
property NSString : a reference to current application’s NSString
property OSAScript : a reference to current application’s OSAScript
property NSDictionary : a reference to current application’s NSDictionary
property NSUnarchiver : a reference to current application’s NSUnarchiver
property NSMutableDictionary : a reference to current application’s NSMutableDictionary
property NSFontAttributeName : a reference to current application’s NSFontAttributeName
property NSMutableAttributedString : a reference to current application’s NSMutableAttributedString
property NSForegroundColorAttributeName : a reference to current application’s NSForegroundColorAttributeName

property asCol : {}

set asCol to getAppleScriptSourceColors() of me –AppleScript構文色分け設定をplistから読み込む

set aFile to POSIX path of (choose file of type {"com.apple.applescript.script", "com.apple.applescript.script-bundle"})
set aURL to |NSURL|’s fileURLWithPath:(aFile)
set theScript to current application’s OSAScript’s alloc()’s initWithContentsOfURL:aURL |error|:(missing value)
set styledText to theScript’s richTextSource()

–Styled TextをDictionarry in Listに
set sRes to getAttributeRunsFromAttrStringRBO(styledText) of styleTextToDict

–Dictionarry in ListをStyled Textに再構成
set bRes to retAttributedStringFromAttrDict(sRes) of attrDictToAttrStr

script styleTextToDict
  use AppleScript
  
use framework "Foundation"
  
use framework "AppKit"
  
use scripting additions
  
property parent : AppleScript
  
  
–Styled Textを
  
on getAttributeRunsFromAttrStringRBO(theStyledText)
    script aSpd
      property styleList : {}
    end script
    
    
set (styleList of aSpd) to {} —for output
    
    
set thePureString to theStyledText’s |string|() –pure string from theStyledText
    
    
set theLength to theStyledText’s |length|()
    
set startIndex to 0
    
set aCount to 0
    
    
repeat until (startIndex = theLength)
      set {theAtts, theRange} to theStyledText’s attributesAtIndex:startIndex longestEffectiveRange:(reference) inRange:{startIndex, theLength – startIndex}
      
      
–String  
      
set aText to (thePureString’s substringWithRange:theRange) as string
      
set strLen to (length of aText)
      
      
–Color
      
set aColor to (theAtts’s valueForKeyPath:"NSColor")
      
if aColor is not equal to missing value then
        set aSpace to aColor’s colorSpace()
        
        
set aRed to (aColor’s redComponent()) * 255
        
set aGreen to (aColor’s greenComponent()) * 255
        
set aBlue to (aColor’s blueComponent()) * 255
        
        
set colList to {aRed as integer, aGreen as integer, aBlue as integer} –for comparison
        
set colStrForFind to (aRed as integer as string) & " " & (aGreen as integer as string) & " " & (aBlue as integer as string) –for filtering
      else
        set colList to {0, 0, 0}
        
set colStrForFind to "0 0 0"
      end if
      
      
–Font
      
set aFont to (theAtts’s valueForKeyPath:"NSFont")
      
if aFont is not equal to missing value then
        set aDFontName to aFont’s displayName()
        
set aDFontSize to aFont’s pointSize()
      end if
      
      
–Range
      
set the end of (styleList of aSpd) to {stringVal:aText, atrIndex:aCount, colorStr:colStrForFind, colorVal:colList, fontName:aDFontName as string, fontSize:aDFontSize}
      
set startIndex to current application’s NSMaxRange(theRange)
      
      
set aCount to aCount + 1
    end repeat
    
    
return (styleList of aSpd)
    
  end getAttributeRunsFromAttrStringRBO
  
  
–NSColorからRGBの値を取り出す
  
on retColListFromNSColor(aCol, aMAX as integer)
    using terms from scripting additions
      set aRed to round ((aCol’s redComponent()) * aMAX) rounding as taught in school
      
set aGreen to round ((aCol’s greenComponent()) * aMAX) rounding as taught in school
      
set aBlue to round ((aCol’s blueComponent()) * aMAX) rounding as taught in school
    end using terms from
    
if aRed > aMAX then set aRed to aMAX
    
if aGreen > aMAX then set aGreen to aMAX
    
if aBlue > aMAX then set aBlue to aMAX
    
    
return {aRed, aGreen, aBlue}
  end retColListFromNSColor
  
  
–aMaxValを最大値とする数値でNSColorを作成して返す
  
on makeNSColorFromRGBAval(redValue as integer, greenValue as integer, blueValue as integer, alphaValue as integer, aMaxVal as integer)
    set aRedCocoa to (redValue / aMaxVal) as real
    
set aGreenCocoa to (greenValue / aMaxVal) as real
    
set aBlueCocoa to (blueValue / aMaxVal) as real
    
set aAlphaCocoa to (alphaValue / aMaxVal) as real
    
set aColor to NSColor’s colorWithCalibratedRed:aRedCocoa green:aGreenCocoa blue:aBlueCocoa alpha:aAlphaCocoa
    
return aColor
  end makeNSColorFromRGBAval
  
end script

script attrDictToAttrStr
  use AppleScript
  
use framework "Foundation"
  
use framework "AppKit"
  
use scripting additions
  
property parent : AppleScript
  
  
–書式つきテキストを組み立てる(メイン側)
  
on retAttributedStringFromAttrDict(attrRes)
    script aSpd
      property styleList : {}
    end script
    
    
set (styleList of aSpd) to {} —for output
    
    
set allAttrStr to NSMutableAttributedString’s alloc()’s init()
    
    
repeat with i in attrRes
      set j to contents of i
      
set tmpAttrStr to makeRTFfromParameters(stringVal of j, fontName of j, fontSize of j, colorVal of j) of me
      
      (
allAttrStr’s appendAttributedString:tmpAttrStr)
    end repeat
    
    
return allAttrStr
  end retAttributedStringFromAttrDict
  
  
–書式つきテキストを組み立てる(パーツ組み立て用サブ側)
  
on makeRTFfromParameters(aStr as string, fontName as string, aFontSize as real, aColorList as list)
    –Font & Size
    
set aVal1 to NSFont’s fontWithName:fontName |size|:aFontSize
    
set aKey1 to (NSFontAttributeName)
    
    
–Color
    
copy aColorList to {rCol, gCol, bCOl}
    
set aVal2 to makeNSColorFromRGBAval(rCol, gCol, bCOl, 255, 255) of asCol
    
set aKey2 to (NSForegroundColorAttributeName)
    
    
set keyList to {aKey1, aKey2}
    
set valList to {aVal1, aVal2}
    
set attrsDictionary to NSMutableDictionary’s dictionaryWithObjects:valList forKeys:keyList
    
    
–Text
    
set attrStr to NSMutableAttributedString’s alloc()’s initWithString:aStr attributes:attrsDictionary
    
return attrStr
  end makeRTFfromParameters


–aMaxValを最大値とする数値でNSColorを作成して返す
  
on makeNSColorFromRGBAval(redValue as integer, greenValue as integer, blueValue as integer, alphaValue as integer, aMaxVal as integer)
    set aRedCocoa to (redValue / aMaxVal) as real
    
set aGreenCocoa to (greenValue / aMaxVal) as real
    
set aBlueCocoa to (blueValue / aMaxVal) as real
    
set aAlphaCocoa to (alphaValue / aMaxVal) as real
    
set aColor to NSColor’s colorWithCalibratedRed:aRedCocoa green:aGreenCocoa blue:aBlueCocoa alpha:aAlphaCocoa
    
return aColor
  end makeNSColorFromRGBAval
  
end script

–AppleScriptの構文色分けのカラー値をRGBで取得する
on getAppleScriptSourceColors()
  — get the plist info as a dictionary
  
set thePath to NSString’s stringWithString:"~/Library/Preferences/com.apple.applescript.plist"
  
set thePath to thePath’s stringByExpandingTildeInPath()
  
set theInfo to NSDictionary’s dictionaryWithContentsOfFile:thePath
  
  
— extract relevant part and loop through
  
set theArray to (theInfo’s valueForKey:"AppleScriptSourceAttributes") as list
  
  
set colList to {}
  
  
repeat with i from 1 to count of theArray
    set anEntry to item i of theArray
    
    
set colorData to NSColor of anEntry
    
set theColor to (NSUnarchiver’s unarchiveObjectWithData:colorData)
    
    
set {rVal, gVal, bVal} to retColListFromNSColor(theColor, 255) of me
    
    
set fontData to NSFont of anEntry
    
set theFont to (NSUnarchiver’s unarchiveObjectWithData:fontData)
    
    
set aFontName to theFont’s displayName() as text
    
set aFontSize to theFont’s pointSize()
    
    
set aColRec to {redValue:rVal, greenValue:gVal, blueValue:bVal, fontName:aFontName, fontSize:aFontSize}
    
    
set the end of colList to aColRec
  end repeat
  
  
return colList
end getAppleScriptSourceColors

–NSColorからRGBの値を取り出す
on retColListFromNSColor(aCol, aMAX as integer)
  using terms from scripting additions
    set aRed to round ((aCol’s redComponent()) * aMAX) rounding as taught in school
    
set aGreen to round ((aCol’s greenComponent()) * aMAX) rounding as taught in school
    
set aBlue to round ((aCol’s blueComponent()) * aMAX) rounding as taught in school
  end using terms from
  
  
if aRed > aMAX then set aRed to aMAX
  
if aGreen > aMAX then set aGreen to aMAX
  
if aBlue > aMAX then set aBlue to aMAX
  
  
return {aRed, aGreen, aBlue}
end retColListFromNSColor

★Click Here to Open This Script 

Posted in Color file Font OSA RTF | Tagged 13.0savvy 14.0savvy 15.0savvy NSAttributedString NSColor NSDictionary NSFont NSMutableAttributedString NSMutableDictionary NSString NSUnarchiver NSURL OSAScript | Leave a comment

16bitカラー値から明度を取得 v1.1

Posted on 1月 20, 2022 by Takaaki Naganoya

choose colorコマンドやiWorkアプリケーションが返してくる16ビットのカラー値({R,G,B})から明度情報を取得するAppleScriptです。0から1までの値を返し、0に近づくほど暗く、1に近づくほど明るい色であることを表現しています。

色情報同士を比較して、明るい箇所に指定している色データと暗い箇所に指定している色データを、RGB値から自動認識するような処理に使っています。

また、ファイル名から「章」(Chapter)の番号を検出して、実際のツメ(Index)の選択部分を暗い色で塗り直す処理も行なっています。

–> Watch Demo Movie

Pages書類の上に作成したツメ(辞書などの端に印刷されているAからZのインデックス)に対して、ツメのオブジェクトを(座標や形状から)自動認識したあとに、色の塗り分け情報を本ルーチンを用いて自動認識。濃い色を現在の選択箇所の色、明るい(淡い)色を通常の箇所の色情報として扱い、あらかじめツメに指定していた色情報を用いて実際の章構成を反映させてツメのオブジェクト(表)を再構成する処理に必須のものです。

明度情報の取得には、グレースケールに変換してグレー度(whiteComponent)を明度とみなして計算しています。直感的にこちらのほうが、まっとうな処理(HSB色空間の色に変換してからBrightnessを取得)よりもしっくり来る計算結果だったので採用しています。

おまけで、2つの色情報のうちどちらが暗いか、結果をインデックス値で返す処理ルーチンをつけています。これも、選択色と非選択色の自動識別のために必要なものです。

AppleScript名:16bitカラー値から明度を取得 v1.1.scptd
—
–  Created by: Takaaki Naganoya
–  Created on: 2022/01/20
—
–  Copyright © 2022 Piyomaru Software, All Rights Reserved
—

set a1Col to {26148, 65535, 58650}
set a1Col to choose color default color a1Col
set w1Col to calcBrightnessFrom16bitColorList(a1Col) of colorBrightnessKit
–> 0.900838315487

set a2Col to {2966, 23133, 21203}
set a2Col to choose color default color a2Col
set w2Col to calcBrightnessFrom16bitColorList(a2Col) of colorBrightnessKit
–> 0.37399661541–0に近いのでこちらのほうが暗い

set cIndRes to calcColorPairsDarkerCol(a1Col, a2Col) of colorBrightnessKit
–> {2, 1}–暗い順にインデックス値を返す

–色情報から明度を計算するKit。0に近い値が暗い。CMYKやグレースケール値は対象外。RGBのみ
script colorBrightnessKit
  
  
use AppleScript
  
use framework "Foundation"
  
use framework "AppKit"
  
use scripting additions
  
property parent : AppleScript
  
  
property NSColor : a reference to current application’s NSColor
  
property NSString : a reference to current application’s NSString
  
property NSAttributedString : a reference to current application’s NSAttributedString
  
property NSUTF16StringEncoding : a reference to current application’s NSUTF16StringEncoding
  
property NSDeviceWhiteColorSpace : a reference to current application’s NSDeviceWhiteColorSpace


–2つの16ビットカラー値でそれぞれ明度を計算し、暗いものから順にインデックス値を返す
  
on calcColorPairsDarkerCol(aCol as list, bCol as list)
    set b1 to calcBrightnessFrom16bitColorList(aCol) of me
    
set b2 to calcBrightnessFrom16bitColorList(bCol) of me
    
if b1 ≥ b2 then
      return {2, 1} –bColのほうが暗い
    else
      return {1, 2} –aColのほうが暗い
    end if
  end calcColorPairsDarkerCol


–16ビットカラー値から明度を計算
  
on calcBrightnessFrom16bitColorList(colList as list)
    copy colList to {rVal, gVal, bVal}
    
–NSColorを作成
    
set aCol to makeNSColorFromRGBAval(rVal, gVal, bVal, 65535, 65535) of me
    
— グレースケール化
    
set gCol to aCol’s colorUsingColorSpaceName:(NSDeviceWhiteColorSpace)
    
set wComp to gCol’s whiteComponent() –whiteComponentを取得することで擬似的に明度情報を取得  
    
return wComp
  end calcBrightnessFrom16bitColorList


–HTMLカラー値あから明度を計算
  
on calcBrightnessFromHTMLColorCodeStr(aStr as string)
    set {rVal, gVal, bVal} to rgbHex2nunList(aStr) of me
    
–NSColorを作成
    
set aCol to makeNSColorFromRGBAval(rVal, gVal, bVal, 255, 255) of me
    
— グレースケール化
    
set gCol to aCol’s colorUsingColorSpaceName:(NSDeviceWhiteColorSpace)
    
set wComp to gCol’s whiteComponent() –whiteComponentを取得することで擬似的に明度情報を取得  
    
return wComp
  end calcBrightnessFromHTMLColorCodeStr


on makeNSColorFromRGBAval(redValue as integer, greenValue as integer, blueValue as integer, alphaValue as integer, aMaxVal as integer)
    set aRedCocoa to (redValue / aMaxVal) as real
    
set aGreenCocoa to (greenValue / aMaxVal) as real
    
set aBlueCocoa to (blueValue / aMaxVal) as real
    
set aAlphaCocoa to (alphaValue / aMaxVal) as real
    
set aColor to NSColor’s colorWithCalibratedRed:aRedCocoa green:aGreenCocoa blue:aBlueCocoa alpha:aAlphaCocoa
    
return aColor
  end makeNSColorFromRGBAval


on decodeCharacterReference(aStr)
    set anNSString to NSString’s stringWithString:aStr
    
set theData to anNSString’s dataUsingEncoding:(NSUTF16StringEncoding)
    
set styledString to NSAttributedString’s alloc()’s initWithHTML:theData documentAttributes:(missing value)
    
set plainText to (styledString’s |string|()) as string
    
return plainText
  end decodeCharacterReference


–HTMLコードのRGB 16進数コードを数値リストに変換
  
on rgbHex2nunList(aHexStr)
    –エラーチェック
    
if aHexStr does not start with "#" then return false
    
if length of aHexStr is not equal to 7 then return false
    
set bHex to text 2 thru -1 of aHexStr
    
    
set {rStr, gStr, bStr} to {text 1 thru 2 of bHex, text 3 thru 4 of bHex, text 5 thru 6 of bHex}
    
    
set bList to {}
    
repeat with i in {rStr, gStr, bStr}
      set j to contents of i
      
set the end of bList to aHexStrToNum(j) of me
    end repeat
    
    
return bList
  end rgbHex2nunList


–16進数文字列を10進数数値に変換する
  
on aHexStrToNum(hexStr)
    set hStr to "0123456789ABCDEF"
    
    
set aNum to 0
    
set aLen to length of hexStr
    
    
repeat with i from aLen to 1 by -1
      
      
set aCon to contents of character i of hexStr
      
using terms from scripting additions
        set aVal to (offset of aCon in hStr) – 1
      end using terms from
      
set aNum to aNum + aVal * (16 ^ (aLen – i))
      
    end repeat
    
    
return aNum as integer
  end aHexStrToNum
end script

★Click Here to Open This Script 

Posted in Color list | Tagged 10.15savvy 11.0savvy 12.0savvy NSColor | Leave a comment

Pixelmator Proで指定の画像を複数の3D LUTを用いてカラー調整して画像書き出し

Posted on 5月 2, 2021 by Takaaki Naganoya

Pixelmator Pro v2.0.8で追加された3D LUT(Look Up Table)によるカラー調整機能。これを用いて、複数の3D LUTファイルによるカラー調整を行い、それぞれ3D LUTファイルのファイル名を反映させて書き出すAppleScriptです。

3D LUTファイルは、探してみるとあちこちで配布されており、割とありふれた存在のようです。実際にフリー配布されている3D LUTファイルをダウンロードしてきて、1つのフォルダに入れておき、指定画像に対してカラー調整を行わせてみました。

–> [全てフリー!] シネマティックなルックになる10のLUTsを紹介します!!

フォルダに入っている3D LUTファイルをすべてループで処理するので、3D LUTファイル100個でも1,000個でも処理できますし、ちょっと書き換えれば複数の画像に対してそれぞれすべての3D LUTファイルによる色調整を実行するようにもできます。

AppleScript名:指定の画像を複数の3D LUTでカラー調整して画像書き出し.scpt
—
–  Created by: Takaaki Naganoya
–  Created on: 2020/05/02
—
–  Copyright © 2020 Piyomaru Software, All Rights Reserved
—
use AppleScript version "2.4" — Yosemite (10.10) or later
use framework "Foundation"
use scripting additions

property |NSURL| : a reference to current application’s |NSURL|
property NSArray : a reference to current application’s NSArray
property NSPredicate : a reference to current application’s NSPredicate
property NSURLTypeIdentifierKey : a reference to current application’s NSURLTypeIdentifierKey

–処理対象の画像を選択
set anImage to choose file of type {"public.image"} default location (path to pictures folder) with prompt "Select Proc Image"
set imgParent to getParentPathFromAlias(anImage) of me

–3D LUTファイルを入れてあるフォルダを選択
set lutFolder to choose folder with prompt "Select 3D LUT folder"

–Filter 3D LUT (.cube) files only
tell application "Finder"
  set fList to (every file of folder lutFolder) as alias list
end tell

set lutList to getFilesWithUTI("com.blackmagicdesign.cube", fList) of me

–指定の画像ファイルをオープン
tell application "Pixelmator Pro"
  close every document saving no
  
open anImage
end tell

–Main Loop
repeat with i in lutList
  set aLut to contents of i
  
  
–ファイルパスの加工処理
  
set newImgName to ((current application’s NSString’s stringWithString:(POSIX path of aLut))’s lastPathComponent()’s stringByDeletingPathExtension()’s stringByAppendingString:".jpg") as string
  
set newImgFullPath to (imgParent as string) & "/" & newImgName
  
set newImgFile to POSIX file newImgFullPath
  
  
tell application "Pixelmator Pro"
    activate
    
tell front document
      tell color adjustments of first layer –ここだけ、ネスティングを分割するとエラーになる
        set its custom lut to aLut
      end tell
      
      
export to newImgFullPath as JPEG with properties {compression factor:0.5, bits per channel:8}
      
undo
    end tell
  end tell
end repeat

–後片付け
tell application "Pixelmator Pro"
  tell front document
    close without saving
  end tell
end tell

on getParentPathFromAlias(aliasPath)
  set aPath to POSIX path of aliasPath
  
set pathString to current application’s NSString’s stringWithString:aPath
  
set newPath to pathString’s stringByDeletingLastPathComponent()
  
return newPath
end getParentPathFromAlias

on getFilesWithUTI(acceptUTI, aliasList)
  set aList to {}
  
  
repeat with i in aliasList
    set anAlias to i as alias
    
set aUTI to getUTIfromPath(anAlias) of me
    
if aUTI is not equal to missing value then
      set uRes to filterUTIList({aUTI}, acceptUTI) of me
      
      
if uRes is not equal to {} then
        set the end of aList to contents of i
      end if
    end if
  end repeat
  
  
return aList
end getFilesWithUTI

–AliasからUTIを求める
on getUTIfromPath(anAlias)
  set aPOSIXpath to POSIX path of anAlias
  
set aURL to current application’s |NSURL|’s fileURLWithPath:aPOSIXpath
  
if aURL = missing value then return missing value
  
set aRes to aURL’s resourceValuesForKeys:{current application’s NSURLTypeIdentifierKey} |error|:(missing value)
  
if aRes = missing value then return missing value
  
return (aRes’s NSURLTypeIdentifierKey) as string
end getUTIfromPath

–UTIリストが指定UTIに含まれているかどうか演算を行う
on filterUTIList(aUTIList, aUTIstr)
  set anArray to NSArray’s arrayWithArray:aUTIList
  
set aPred to NSPredicate’s predicateWithFormat_("SELF UTI-CONFORMS-TO %@", aUTIstr)
  
set bRes to (anArray’s filteredArrayUsingPredicate:aPred) as list
  
return bRes
end filterUTIList

★Click Here to Open This Script 

Posted in Color file File path Image | Tagged 10.14savvy 10.15savvy 11.0savvy Pixelmator Pro | Leave a comment

Pixelmator Pro がv2.0.8で3D LUTをサポート

Posted on 5月 2, 2021 by Takaaki Naganoya

Pixelmator Proがv2.0.5からv2.0.8にバージョンアップして、3D LUT(Look Up Table)をサポートしました。

自分は知らなかったのですが、映像や画像の処理時に、色の明度カーブをテーブルで置き換えることで、色の調子を整えたり、「●●っぽい色(光)使い」のデータを他の映像/画像データに統一的に適用させたりと、カラーフィルタ的なものをプログラムではなくデータで表現したもの、と理解しました。カラーコレクション系の技術というか手法で、調べてみるとnVidiaとかAdobeとか、そういう会社が関わってきたようで。

3D LUTのファイル(拡張子「.cube」)のUTIを確認したところ、”com.blackmagicdesign.cube”。ビデオ編集関連のハードウェア/ソフトウェアでさまざまな製品を世に送り出しているBlackMagic Designが仕様の策定を行っているのでしょうか。

この3D LUTをPixelmator Proがサポート。42個のLUTをアプリケーション内で持っているほか、外部の3D LUTファイルを指定することも、Pixelmator書類から3D LUTを生成して書き出すこともできるようです。

AppleScript用語辞書的には、「export as lut」コマンドを新設したことと、「color adjustments」コマンドに「custom lut」を指定するオプションを追加しています。

AppleScript名:現在オープン中の写真に指定のLUTを反映させる.scpt
–Pixelmator Pro用語辞書内に掲載されているサンプルを、読みやすいように書き換えた
set lutFile to choose file with prompt "Choose the LUT you’d like to apply to the layer:" of type {"com.blackmagicdesign.cube"}

tell application "Pixelmator Pro"
  tell front document
    tell color adjustments of first layer –ここだけ、ネスティングを分割するとエラーになる
      set its custom lut to lutFile
    end tell
  end tell
end tell

★Click Here to Open This Script 

Githubを調べてみたら、Objective-Cで書かれた「CocoaLUT」というプロジェクトを見つけました。ずいぶん前から(7年以上前から)存在していたようで、自分は寡聞にしてこれを知りませんでした。ひととおり機能に目を通してみると、3D LUTのファイルを読み込んでNSImageにカラー変更を適用するといった処理が行えるようです。AppleScriptからダイレクトにCocoaLUTを呼び出して色変更できそうです。

一応、Pixelmator Proの「謝辞」を見てみたところ、「CocoaLUT」に関する記載はなかったので、Pixelmator Proでこのプロジェクトの成果物を利用しているといったことはなさそうです。

YouTubeにアップしたムービーをご覧いただければわかるように、Pixelmator Proで3D LUTによる色置換処理を行ってみると、とても高速です。

Posted in Color Image | Tagged 10.14savvy 10.15savvy 11.0savvy Pixelmator Pro | Leave a comment

Keynoteの表の背景色がない箇所を白く塗る

Posted on 4月 29, 2021 by Takaaki Naganoya

Keynoteでオープン中の最前面の書類の現在表示中のスライド(ページ)の上にある表の背景色が塗られていないセルを白く塗るAppleScriptです。

一応、非同期処理モードを使うことでスピードを稼いでいますが、この処理は速くありません。非同期処理モードの宣言部分を外した姿が本当のスピードです。

全部一括で塗るとかRangeを指定して塗るといった処理ができるとスピードを稼げると思いますが、「辻褄合わせ」とか「例外」的な処理なので、(Apple側の対応は)あまり期待できないでしょう。


▲処理前


▲処理後

AppleScript名:Keynoteの表の背景色がない箇所を白く塗る
tell application "Keynote"
  tell front document
    tell current slide
      tell table 1
        set cList to every cell
        
repeat with i in cList
          tell i
            set tmpColor to background color
            
if tmpColor = missing value then
              ignoring application responses
                set background color to {65535, 65535, 65535}
              end ignoring
            end if
          end tell
        end repeat
      end tell
    end tell
  end tell
end tell

★Click Here to Open This Script 

Posted in Color list | Tagged 10.14savvy 10.15savvy 11.0savvy Keynote | Leave a comment

指定した文字で囲まれたキーワードの色を置換する

Posted on 2月 24, 2021 by Takaaki Naganoya

Keynoteで現在オープン中の書類の現在表示中のスライド(ページ)中にあるtext itemのうち、開始文字、終了文字ではさまれているテキストを指定色に塗り替えるAppleScriptです。

用途はご覧の通り、現在作成中のCocoa Scripting本の資料の装飾のためであり、「|」と「|」で囲まれている箇所の色を変えたら見やすいのでは? と、考えて作成・実行したものです。

NSScannerを使えば楽に書けるかも? などと思っておりましたが、検出位置(文字数)を返す機能がないので、位置だけを返してほしいという用途に向いていないもよう。仕方なく、普通にAppleScriptで1文字ごとチェック&開始文字/終了文字のチェックをフラグ管理……という、高級言語らしからぬ泥臭いコードを書く羽目に(でも、こういうの書くケースが多いですよね)。


▲実行前


▲実行後

AppleScript名:指定した文字で囲まれたキーワードの色を置換する
—
–  Created by: Takaaki Naganoya
–  Created on: 2021/02/24
—
–  Copyright © 2021 Piyomaru Software, All Rights Reserved
—
use AppleScript version "2.5"
use scripting additions
use framework "Foundation"

set targCol to choose color –塗る文字色を選択

set headPickUpChar to "|"
set tailPickUpChar to "|"

–処理対象データの取得
tell application "Keynote"
  
  
–最前面の書類
  
tell front document
    
    
–現在表示中のスライド
    
tell current slide
      –text itemをすべて取得
      
set tList to every text item
      
if tList = {} then return –何もtext itemが存在しなかったら処理終了
      
      
–text itemの中に入っている文字列を取得
      
set objTList to object text of every text item
      
    end tell
  end tell
end tell

–出現判定しつつ色を塗る
tell application "Keynote"
  tell front document
    tell current slide
      
      
set posList to {}
      
set aCount to 1
      
      
–text itemでループ
      
repeat with i in objTList
        set j to contents of i
        
        
–ターゲット文字で囲まれている箇所を検出。複数箇所検出対応
        
set bCon to pickUpPositionPairsFromTo(j, headPickUpChar, tailPickUpChar) of me
        
        
if bCon is not equal to {} then
          
          
set aTarg to item aCount of tList
          
          
–出現位置でループ(複数検出対応)
          
repeat with ii in bCon
            copy ii to {aStart, anEnd}
            
            
–高速処理のために非同期実行
            
ignoring application responses
              tell aTarg
                set color of characters aStart thru anEnd of object text to targCol
              end tell
            end ignoring
            
          end repeat
          
        end if
        
        
set aCount to aCount + 1
      end repeat
      
    end tell
  end tell
end tell

–開始文字と終了文字に囲われた文字列のすべての位置情報を返す
on pickUpPositionPairsFromTo(aParamStr, fromStr, toStr)
  script hsAry
    property anArray : {}
    
property aList : {}
  end script
  
  
set (anArray of hsAry) to {}
  
set (aList of hsAry) to characters of aParamStr
  
  
set tmpPair to {}
  
set searchMode to 0 — 0:fromStr, 1:toStr
  
set aCount to 1
  
  
repeat with i in (aList of hsAry)
    set j to contents of i
    
    
if searchMode = 0 then
      if j = fromStr then
        set the end of tmpPair to aCount
        
set searchMode to 1
      end if
      
    else if searchMode = 1 then
      if j = toStr then
        set the end of tmpPair to aCount
        
set searchMode to 0
        
set the end of (anArray of hsAry) to tmpPair
        
set tmpPair to {}
      end if
    end if
    
    
set aCount to aCount + 1
  end repeat
  
  
return (anArray of hsAry)
end pickUpPositionPairsFromTo

★Click Here to Open This Script 

Posted in Color Text | Tagged 10.14savvy 10.15savvy 11.0savvy Keynote | 1 Comment

Numbersで選択範囲に背景色を塗られているセル数をカウント

Posted on 12月 14, 2020 by Takaaki Naganoya

Numbersでオープン中の最前面の書類の現在のシート上の選択状態にある表の選択範囲から、背景色(background color)が塗られているセルを数えるAppleScriptです。

用途は、WebGL + three.jsで作られた3Dの回転選択メニューのデータ確認のためです。Numbers上で表示範囲の表を作って、その上で背景色を塗ることで「どの位置にデータを表示するか」を指定します。そのさいに、並べるセル数が表示用のJavaScriptと合っていないと面倒なので、本Scriptで色つきセルをかぞえています。

Numbers上で背景色(background color)が塗られているセルは16ビットで色の値が返ってきますし、塗られていないセルはmissing valueが返ってきます。

AppleScript名:Numbersで選択範囲に背景色を塗られているセル数をカウント
—
–  Created by: Takaaki Naganoya
–  Created on: 2020/12/06
—
–  Copyright © 2020 Piyomaru Software, All Rights Reserved
—

use AppleScript version "2.4" — Yosemite (10.10) or later
use framework "Foundation"
use scripting additions

tell application "Numbers"
  tell front document
    –現在表示中のシートを対象にする
    
tell active sheet
      –Tableを特定する
      
try
        set theTable to first table whose class of selection range is range
      on error
        display notification "Numbers: There is no selection"
        
return {}
      end try
      
      
tell theTable
        –選択範囲のデータを1D Listで取得する
        
set aRes to background color of cells of selection range
      end tell


–Count Background
      
set aCount to 0
      
repeat with i in aRes
        set j to contents of i
        
        
if j is not equal to missing value then
          set aCount to aCount + 1
        end if
      end repeat
      
      
return aCount
    end tell
  end tell
end tell

★Click Here to Open This Script 

同様に、着色セルの座標値(x座標, y座標)を返すものも作って使用しています。

AppleScript名:Numbersで選択中のセルのうち背景色を塗られているもののx,y座標を2D Listで返す
—
–  Created by: Takaaki Naganoya
–  Created on: 2020/12/06
—
–  Copyright © 2020 Piyomaru Software, All Rights Reserved
—

use AppleScript version "2.4" — Yosemite (10.10) or later
use framework "Foundation"
use scripting additions

tell application "Numbers"
  tell front document
    –現在表示中のシートを対象にする
    
tell active sheet
      –Tableを特定する
      
try
        set theTable to first table whose class of selection range is range
      on error
        display notification "Numbers: There is no selection"
        
return {}
      end try
      
      
tell theTable
        tell selection range
          set cellRes to background color of cells
          
set aWidth to count every column
          
set aHeight to count every row
        end tell
      end tell
      
      
–Check selected cell’s background color
      
set cellL to {}
      
set adrCount to 1
      
repeat with y from 1 to aHeight
        repeat with x from 1 to aWidth
          set aTmp to contents of (item adrCount of cellRes)
          
          
if aTmp is not equal to missing value then
            set the end of cellL to {x, y}
          end if
          
          
set adrCount to adrCount + 1
        end repeat
      end repeat
      
      
return cellL
      
–> {{1, 1}, {2, 1}, {3, 1}, {6, 1}, {8, 1}, {12, 1}, {15, 1}, {16, 1}, {20, 1}, {21, 1}, {24, 1}, {27, 1}, {28, 1}, {29, 1}, {1, 2}, {4, 2}, {6, 2}, {9, 2}, {11, 2}, {14, 2}, {17, 2}, {19, 2}, {23, 2}, {25, 2}, {27, 2}, {1, 3}, {2, 3}, {3, 3}, {6, 3}, {10, 3}, {14, 3}, {17, 3}, {19, 3}, {20, 3}, {23, 3}, {25, 3}, {27, 3}, {28, 3}, {29, 3}, {1, 4}, {6, 4}, {10, 4}, {14, 4}, {17, 4}, {21, 4}, {23, 4}, {25, 4}, {27, 4}, {1, 5}, {6, 5}, {10, 5}, {15, 5}, {16, 5}, {19, 5}, {20, 5}, {21, 5}, {24, 5}, {27, 5}, {1, 7}, {5, 7}, {8, 7}, {11, 7}, {12, 7}, {15, 7}, {17, 7}, {19, 7}, {20, 7}, {21, 7}, {23, 7}, {27, 7}, {1, 8}, {2, 8}, {4, 8}, {5, 8}, {7, 8}, {9, 8}, {11, 8}, {13, 8}, {15, 8}, {17, 8}, {20, 8}, {23, 8}, {27, 8}, {1, 9}, {3, 9}, {5, 9}, {7, 9}, {8, 9}, {9, 9}, {11, 9}, {12, 9}, {15, 9}, {17, 9}, {20, 9}, {23, 9}, {25, 9}, {27, 9}, {1, 10}, {5, 10}, {7, 10}, {9, 10}, {11, 10}, {13, 10}, {15, 10}, {17, 10}, {20, 10}, {23, 10}, {24, 10}, {26, 10}, {27, 10}, {1, 11}, {5, 11}, {7, 11}, {9, 11}, {11, 11}, {13, 11}, {16, 11}, {20, 11}, {23, 11}, {27, 11}}
    end tell
  end tell
end tell

★Click Here to Open This Script 

Posted in Color list | Tagged 10.13savvy 10.14savvy 10.15savvy 11.0savvy Numbers | Leave a comment

HTMLカラー値から明度を取得

Posted on 12月 8, 2020 by Takaaki Naganoya

HTMLカラー値からNSColorを作成し、Gray Scaleに変換したのちに明度情報を取得するAppleScriptです。

RGB値をHSV(HSB)に変換して明度情報を取得するバージョンも試してみたのですが、個人的にはこちらの処理の方がしっくりくる感じでした。

# コメント部分のWhiteとBlackの記述が逆だったので修正しておきました

AppleScript名:HTMLカラー値から明度を取得 v1.1.scptd
—
–  Created by: Takaaki Naganoya
–  Created on: 2020/12/07
—
–  Copyright © 2020 Piyomaru Software, All Rights Reserved
—
use AppleScript version "2.4" — Yosemite (10.10) or later
use framework "Foundation"
use framework "AppKit"
use scripting additions

property NSColor : a reference to current application’s NSColor
property NSString : a reference to current application’s NSString
property NSAttributedString : a reference to current application’s NSAttributedString
property NSUTF16StringEncoding : a reference to current application’s NSUTF16StringEncoding
property NSDeviceWhiteColorSpace : a reference to current application’s NSDeviceWhiteColorSpace

set aCol to "#412a23"
set wCol to calcBrightnessFromHTMLColorCodeStr(aCol) of me
–> 0.245871186256

set aCol to "#000000" –Black
set wCol to calcBrightnessFromHTMLColorCodeStr(aCol) of me
–> 0.0

set aCol to "#FFFFFF" –White
set wCol to calcBrightnessFromHTMLColorCodeStr(aCol) of me
–> 1.0

set aCol to "#EEA096"
set wCol to calcBrightnessFromHTMLColorCodeStr(aCol) of me
–> 0.759391903877

on calcBrightnessFromHTMLColorCodeStr(aStr as string)
  set {rVal, gVal, bVal} to rgbHex2nunList(aStr) of me
  
–NSColorを作成
  
set aCol to makeNSColorFromRGBAval(rVal, gVal, bVal, 255, 255) of me
  
— グレースケール化
  
set gCol to aCol’s colorUsingColorSpaceName:(NSDeviceWhiteColorSpace)
  
set wComp to gCol’s whiteComponent() –whiteComponentを取得することで擬似的に明度情報を取得  
  
return wComp
end calcBrightnessFromHTMLColorCodeStr

on makeNSColorFromRGBAval(redValue as integer, greenValue as integer, blueValue as integer, alphaValue as integer, aMaxVal as integer)
  set aRedCocoa to (redValue / aMaxVal) as real
  
set aGreenCocoa to (greenValue / aMaxVal) as real
  
set aBlueCocoa to (blueValue / aMaxVal) as real
  
set aAlphaCocoa to (alphaValue / aMaxVal) as real
  
set aColor to NSColor’s colorWithCalibratedRed:aRedCocoa green:aGreenCocoa blue:aBlueCocoa alpha:aAlphaCocoa
  
return aColor
end makeNSColorFromRGBAval

on decodeCharacterReference(aStr)
  set anNSString to NSString’s stringWithString:aStr
  
set theData to anNSString’s dataUsingEncoding:(NSUTF16StringEncoding)
  
set styledString to NSAttributedString’s alloc()’s initWithHTML:theData documentAttributes:(missing value)
  
set plainText to (styledString’s |string|()) as string
  
return plainText
end decodeCharacterReference

–HTMLコードのRGB 16進数コードを数値リストに変換
on rgbHex2nunList(aHexStr)
  –エラーチェック
  
if aHexStr does not start with "#" then return false
  
if length of aHexStr is not equal to 7 then return false
  
set bHex to text 2 thru -1 of aHexStr
  
  
set {rStr, gStr, bStr} to {text 1 thru 2 of bHex, text 3 thru 4 of bHex, text 5 thru 6 of bHex}
  
  
set bList to {}
  
repeat with i in {rStr, gStr, bStr}
    set j to contents of i
    
set the end of bList to aHexStrToNum(j) of me
  end repeat
  
  
return bList
end rgbHex2nunList

–16進数文字列を10進数数値に変換する
on aHexStrToNum(hexStr)
  set hStr to "0123456789ABCDEF"
  
  
set aNum to 0
  
set aLen to length of hexStr
  
  
repeat with i from aLen to 1 by -1
    
    
set aCon to contents of character i of hexStr
    
using terms from scripting additions
      set aVal to (offset of aCon in hStr) – 1
    end using terms from
    
set aNum to aNum + aVal * (16 ^ (aLen – i))
    
  end repeat
  
  
return aNum as integer
end aHexStrToNum

★Click Here to Open This Script 

Posted in Color | Tagged 10.13savvy 10.14savvy 10.15savvy 11.0savvy NSAttributedString NSColor NSDeviceWhiteColorSpace NSString NSUTF16StringEncoding | Leave a comment

Pixelmator Pro v2.0.1でAppleScript用語辞書に命令語追加

Posted on 12月 2, 2020 by Takaaki Naganoya

Pixelmator Proはバージョン1.8でAppleScriptに対応しましたが、その後のアップデートでも用語辞書に変更が加えられています。

v2.0では以前に作ったアイコンの各解像度画像の書き出しScriptがうまく動作していませんでしたが、v2.0.1ではうまく(エラーを出さずに)動作していることを確認しています。バグレポートしてから反映されるまでの時間が短くて、フットワークの軽さに感心しました。こういうところ、Piyomaru Softwareとは比べ物になりません。

■v1.8→v2.0


「elipse shape layer」(楕円レイヤー)に同義語(synonym)が追加定義されました。「circle shape layer」「oval shape layer」と入力して構文確認すると「elipse shape layer」として解釈されます。

■v2.0→v2.0.1


「select color range」コマンドが追加定義されました。写真のようなデータを相手に色域を指定して選択できるようです。このrangeで指定する値が、色差(ΔE)なのか、何か他の指標の数値なのかがいまひとつわかりません。

自分が作った色域指定のAppleScriptでは、文字色の選択のために作ったものなので、もう少し仕様が違います。

select color range v : Select all areas of a specified color. This command can be executed on the document (in which case every layer is sampled) or on a layer, in which case the selection is created based on the layer's content.
select color range document
color list of integer : The color of the areas that should be selected.
[range integer] : The range of the colors that should be selected. With a range of 1, only areas that are exactly of the specified color will be selected. As the range is increased, increasingly more similarly-colored areas will be selected.
[smooth edges boolean] : Whether the edges of the selection should be smoothed.

rangeはrangeとしか書かれていないですね。100を指定するとキャンバス全体が選択されてしまうので、数値範囲は事実上1〜99ということになると思います(AppleScript用語辞書に有効範囲ぐらいは書いておいてほしいなー)。

rangeの値をどう指定するかで、どのぐらいの範囲の「色」を選択できるかが変わってくるので、自分もテストデータの選択色範囲を見ながら値を調整したので、いま指定しているrangeの値が正しいという保証はありません。

もともと、対話的に値を模索するような値なので、画像で使われている色数の分布などの情報をあらかじめ取得して分析しておき、その中でどの程度の色をピックアップするのか知っておく必要があるでしょう。そこまで徹底的に分析してからでないと、このselect color rangeコマンドをバッチ処理的な世界観の中で有効利用することは難しいと思います。

このコマンドを実装するぐらいなら、画像をOCR処理してテキストを取り出して、指定のキーワードが入っているエリアをぼかし処理するといった「OCRフィルタリング」の機能の方がいいかも。画面キャプチャ画像で特定の文字が入っている部分をぼかし処理するパターンがとても多いので、これは自分でも組んでおきたい処理ではあります(OCR次第。OS標準搭載機能だけでなんとかできるとよさそう)。

AppleScript名:選択中のレイヤーから赤っぽい色を選択.scpt
tell application "Pixelmator Pro"
  tell front document
    tell current layer
      select color range color {65535, 0, 0} range 90
    end tell
  end tell
end tell

★Click Here to Open This Script 

AppleScript名:選択中のレイヤーから緑色っぽい色を選択.scpt
tell application "Pixelmator Pro"
  tell front document
    tell current layer
      select color range color {0, 65535, 0} range 90
    end tell
  end tell
end tell

★Click Here to Open This Script 

AppleScript名:選択中のレイヤーから青っぽい色を選択.scpt
tell application "Pixelmator Pro"
  tell front document
    tell current layer
      select color range color {0, 0, 65535} range 80
    end tell
  end tell
end tell

★Click Here to Open This Script 

Posted in Color | Tagged 10.13savvy 10.14savvy 10.15savvy 11.0savvy Pixelmator Pro | Leave a comment

カラーリストの処理

Posted on 7月 27, 2020 by Takaaki Naganoya

カラーリストまわりの情報を取得するAppleScriptです。

カラーピッカーで取得できる各種色セットの内容を取得できたりと、割と使いでがあります。

AppleScript名:使用可能なカラーリスト名称一覧を取得.scptd
—
–  Created by: Takaaki Naganoya
–  Created on: 2020/07/26
—
–  Copyright © 2020 Piyomaru Software, All Rights Reserved
—

use AppleScript version "2.4"
use scripting additions
use framework "Foundation"
use framework "AppKit"

set cList to ((current application’s NSColorList’s availableColorLists())’s valueForKeyPath:"name") as list
–> {"Apple", "System", "World", "Europe", "Japanese", "Scrivener", "AquaPro", "Crayons", "Web セーフカラー"}

★Click Here to Open This Script 

AppleScript名:指定名称のカラーリストに登録されているNSColorを配列で取得.scptd
—
–  Created by: Takaaki Naganoya
–  Created on: 2020/07/26
—
–  Copyright © 2020 Piyomaru Software, All Rights Reserved
—

use AppleScript version "2.4"
use scripting additions
use framework "Foundation"
use framework "AppKit"

set aColList to (current application’s NSColorList’s colorListNamed:"Crayons")

set kList to (aColList’s allKeys()) as list
set colList to {}
repeat with i in kList
  set j to contents of i
  
set cVal to (aColList’s colorWithKey:j)
  
set the end of colList to cVal
end repeat

return colList

★Click Here to Open This Script 

Posted in Color System | Tagged 10.13savvy 10.14savvy 10.15savvy 11.0savvy NSColor NSColorList | Leave a comment

指定のフォントとサイズに該当するテキストを抽出する v3

Posted on 12月 1, 2019 by Takaaki Naganoya

指定のRTFファイルから書式情報を取得し、フォント名とフォントサイズのペアをスタイルを反映させたポップアップメニューで選択。RTFの内容を解析したのち、ダイアログが表示されます(ここの所要時間は読ませるRTFのサイズ次第)。ポップアップメニューで書式を選ぶと、すぐさま抽出した箇所をすべてまとめて表示します。

–> Watch Demo Movie

–> Download Script Bundle with Sample data

ダイアログ表示前に書式ごとの抽出を完了し、個別のTabViewに抽出後の文字データを展開しておくので、ポップアップメニューから選択すると、展開ずみのデータを入れてあるTabViewに表示を切り替えるだけ。切り替え時に計算は行わないため、すぐに抽出ずみの文字データが表示されるという寸法です。

今回は短いサンプルデータを処理してみましたが、サンプル抽出時にあらかじめ範囲指定するなどして、データ処理規模を限定することで処理時間を稼ぐこともできることでしょう。

テキストエディットでオープン中のRTF書類のパスを取得して、それを処理対象にしてもいいでしょう。

ただし、やっつけで作ったのでスクリプトエディタ上でCommand-Control-Rで実行しないと動きません(メインスレッド実行をプログラムで強制しても、途中でクラッシュしてしまいます)。それほど時間もかけずに作ったやっつけプログラムなので、あまり原因追求も行えずそのままです。

AppleScript名:アラートダイアログ+Tab View v3.scptd
—
–  Created by: Takaaki Naganoya
–  Created on: 2019/09/16
—
–  Copyright © 2019 Piyomaru Software, All Rights Reserved
—
use AppleScript version "2.4"
use scripting additions
use framework "Foundation"
use framework "AppKit"
use rtfLib : script "readStyledTextLib"
use parseLib : script "parseAttrLib"

property NSFont : a reference to current application’s NSFont
property NSView : a reference to current application’s NSView
property NSAlert : a reference to current application’s NSAlert
property NSColor : a reference to current application’s NSColor
property NSMenu : a reference to current application’s NSMenu
property NSArray : a reference to current application’s NSArray
property NSTabView : a reference to current application’s NSTabView
property NSPredicate : a reference to current application’s NSPredicate
property NSTextView : a reference to current application’s NSTextView
property NSMenuItem : a reference to current application’s NSMenuItem
property NSTabViewItem : a reference to current application’s NSTabViewItem
property NSPopUpButton : a reference to current application’s NSPopUpButton
property NSMutableDictionary : a reference to current application’s NSMutableDictionary
property NSRunningApplication : a reference to current application’s NSRunningApplication
property NSFontAttributeName : a reference to current application’s NSFontAttributeName
property NSKernAttributeName : a reference to current application’s NSKernAttributeName
property NSLigatureAttributeName : a reference to current application’s NSLigatureAttributeName
property NSMutableAttributedString : a reference to current application’s NSMutableAttributedString
property NSStrokeWidthAttributeName : a reference to current application’s NSStrokeWidthAttributeName
property NSUnderlineStyleAttributeName : a reference to current application’s NSUnderlineStyleAttributeName
property NSForegroundColorAttributeName : a reference to current application’s NSForegroundColorAttributeName

property TabPosition : 4 —0=Top, 1=Left, 2=Bottom, 3=Right, 4=None

property returnCode : 0

property aTabV : missing value
property selectedNum : {}

set aFile to choose file of type {"public.rtf"}

set aStyledStr to readRTFfile(aFile) of rtfLib
set paramObj to {myMessage:"Select Style", mySubMessage:"Select style you want to filter", viewWidth:800, viewHeight:400, myStyledStr:aStyledStr}

my dispTabViewWithAlertdialog:paramObj –for debug
–my performSelectorOnMainThread:"dispTabViewWithAlertdialog:" withObject:paramObj waitUntilDone:true
return selectedNum

on dispTabViewWithAlertdialog:paramObj
  –Receive Parameters
  
set aMainMes to (myMessage of paramObj) as string –Main Message
  
set aSubMes to (mySubMessage of paramObj) as string –Sub Message
  
set aWidth to (viewWidth of paramObj) as integer –TextView width
  
set aHeight to (viewHeight of paramObj) as integer –TextView height
  
set aStyledStr to (myStyledStr of paramObj)
  
  
set attrResTmp to getAttributeRunsFromAttrString(aStyledStr) of parseLib
  
set attrList to attributes of attrResTmp
  
set menuStyle to menuList of attrResTmp
  
  
set selectedNum to {}
  
  
set aView to NSView’s alloc()’s initWithFrame:(current application’s NSMakeRect(0, 0, aWidth, aHeight))
  
  
–Ppopup Buttonをつくる
  
set a1Button to NSPopUpButton’s alloc()’s initWithFrame:(current application’s NSMakeRect(0, aHeight – 20, 400, 20)) pullsDown:false
  
a1Button’s removeAllItems()
  
  
–WYSIWHG popup menuをつくる
  
set a1Menu to NSMenu’s alloc()’s init()
  
repeat with i from 1 to (length of menuStyle)
    set {tmpFont, tmpSize} to contents of item i of menuStyle
    
set aTitle to (tmpFont & " " & tmpSize as string) & " point"
    
set aMenuItem to (NSMenuItem’s alloc()’s initWithTitle:aTitle action:"actionHandler:" keyEquivalent:"")
    
    
set attributedTitle to makeRTFfromParameters(aTitle, tmpFont, tmpSize, NSColor’s blackColor()) of me
    
    (
aMenuItem’s setEnabled:true)
    (
aMenuItem’s setTarget:me)
    (
aMenuItem’s setTag:(i as string))
    (
aMenuItem’s setAttributedTitle:(attributedTitle))
    (
a1Menu’s addItem:aMenuItem)
  end repeat
  
  
–Ppopup Buttonにmenuをつける
  
a1Button’s setMenu:a1Menu
  
  
–Make Tab View
  
set aTabV to NSTabView’s alloc()’s initWithFrame:(current application’s NSMakeRect(0, 0, aWidth, aHeight – 30))
  
aTabV’s setTabViewType:(TabPosition)


–TabViewに中身を入れる
  
repeat with i from 1 to (length of menuStyle)
    set {tmpFont, tmpSize} to contents of item i of menuStyle
    
set tmpKey to (tmpFont as string) & "/" & (tmpSize as string)
    
set tmpArry to filterRecListByLabel1(attrList, "styleKey2 == ’" & tmpKey & "’") of me
    
set tmpStr to (tmpArry’s valueForKeyPath:"stringVal") as list
    
    
set aTVItem to (NSTabViewItem’s alloc()’s initWithIdentifier:(i as string))
    (
aTVItem’s setLabel:(i as string))


set aTextView to (NSTextView’s alloc()’s initWithFrame:(current application’s NSMakeRect(0, 0, aWidth – 10, aHeight – 10)))
    (
aTextView’s setRichText:true)
    
set tmpAttr to makeRTFfromParameters(tmpStr as string, tmpFont, tmpSize, NSColor’s blackColor()) of me
    (
aTextView’s textStorage()’s appendAttributedString:tmpAttr)
    
    (
aTVItem’s setView:aTextView)
    
    (
aTabV’s addTabViewItem:aTVItem)
  end repeat


aView’s setSubviews:{a1Button, aTabV}
  
aView’s setNeedsDisplay:true


— set up alert
  
set theAlert to NSAlert’s alloc()’s init()
  
tell theAlert
    –for Messages
    
its setMessageText:(aMainMes)
    
its setInformativeText:(aSubMes)
    
    
–for Buttons
    
its addButtonWithTitle:"OK"
    
its addButtonWithTitle:"Cancel"
    
    
–Add Accessory View
    
its setAccessoryView:(aView)
    
    
–for Help Button
    
its setShowsHelp:(true)
    
its setDelegate:(me)
  end tell


— show alert in modal loop
  
NSRunningApplication’s currentApplication()’s activateWithOptions:0
  
my performSelectorOnMainThread:"doModal:" withObject:(theAlert) waitUntilDone:true
  
if (my returnCode as number) = 1001 then error number -128
  
  
set selectedNum to contents of item ((a1Button’s indexOfSelectedItem()) + 1) of menuStyle
end dispTabViewWithAlertdialog:

on doModal:aParam
  set (my returnCode) to aParam’s runModal()
end doModal:

on alertShowHelp:aNotification
  display dialog "Help Me!" buttons {"OK"} default button 1 with icon 1
  
return false –trueを返すと親ウィンドウ(アラートダイアログ)がクローズする
end alertShowHelp:

–Popup Action Handler
on actionHandler:sender
  set aTag to tag of sender as integer
  
aTabV’s selectTabViewItemAtIndex:(aTag – 1)
end actionHandler:

–書式つきテキストを組み立てる
on makeRTFfromParameters(aStr as string, aFontName as string, aFontSize as real, aColor)
  –フォント
  
set aVal1 to NSFont’s fontWithName:(aFontName) |size|:aFontSize
  
set aKey1 to (NSFontAttributeName)
  
  
–色
  
set aVal2 to aColor
  
set aKey2 to (NSForegroundColorAttributeName)
  
  
–カーニング
  
set aVal3 to 0.0
  
set akey3 to (NSKernAttributeName)
  
  
–アンダーライン
  
set aVal4 to 0
  
set akey4 to (NSUnderlineStyleAttributeName)
  
  
–リガチャ
  
–set aVal5 to 2 –全てのリガチャを有効にする
  
–set akey5 to ( NSLigatureAttributeName)
  
  
–枠線(アウトライン)
  
–set aVal6 to outlineNum
  
–set akey6 to ( NSStrokeWidthAttributeName)


set keyList to {aKey1, aKey2, akey3, akey4}
  
set valList to {aVal1, aVal2, aVal3, aVal4}
  
set attrsDictionary to NSMutableDictionary’s dictionaryWithObjects:valList forKeys:keyList
  
  
set attrStr to NSMutableAttributedString’s alloc()’s initWithString:aStr attributes:attrsDictionary
  
return attrStr
end makeRTFfromParameters

–リストに入れたレコードを、指定の属性ラベルの値で抽出
on filterRecListByLabel1(aRecList as list, aPredicate as string)
  set aArray to NSArray’s arrayWithArray:aRecList
  
set aPredicate to NSPredicate’s predicateWithFormat:aPredicate
  
set filteredArray to aArray’s filteredArrayUsingPredicate:aPredicate
  
set bList to filteredArray
  
return bList
end filterRecListByLabel1

★Click Here to Open This Script 

Posted in Color dialog Font GUI Require Control-Command-R to run RTF | Tagged 10.14savvy 10.15savvy NSAlert NSArray NSColor NSFont NSFontAttributeName NSForegroundColorAttributeName NSKernAttributeName NSLigatureAttributeName NSMenu NSMenuItem NSMutableAttributedString NSMutableDictionary NSPopUpButton NSPredicate NSRunningApplication NSStrokeWidthAttributeName NSTabView NSTabViewItem NSTextView NSUnderlineStyleAttributeName NSView | 1 Comment

指定のNSImageをグレースケールに

Posted on 11月 29, 2019 by Takaaki Naganoya

指定のNSImageをグレースケール画像にしたのちNSImageで出力するAppleScriptです。

GPUImageをプログラムから取り外すにあたって必要になったので用意しました。ふだん、画像変換系のScriptはNSImageで入力したのちにファイルに出力するように組んであったのですが、入出力ともにNSImageにしてあるプログラムが手元に存在していなかったので。

GPUImageが自分にとって使いやすかったのは、入出力にNSImageが使えたからだと思います。CGImageだとAppleScriptからアクセスできないですし、CIImageもアクセスできないわけではないですが、ちょっと遠回りになります。

AppleScript名:指定のNSImageをグレースケールに
— Created 2019-07-09 by Takaaki Naganoya
— 2019 Piyomaru Software
use AppleScript version "2.4"
use scripting additions
use framework "Foundation"
use framework "AppKit"

property NSString : a reference to current application’s NSString
property NSImage : a reference to current application’s NSImage
property NSColorSpace : a reference to current application’s NSColorSpace
property NSBitmapImageRep : a reference to current application’s NSBitmapImageRep
property NSColorRenderingIntentPerceptual : a reference to current application’s NSColorRenderingIntentPerceptual

set aFile to POSIX path of (choose file of type {"public.image"} with prompt "Select Image A")
set aImage to NSImage’s alloc()’s initWithContentsOfFile:aFile

set gImage to convNSIMageAsGray(aImage) of me

–NSImageをグレースケールに変換してNSImageで返す
on convNSIMageAsGray(anImage)
  set imageRep to anImage’s TIFFRepresentation()
  
set aRawimg to NSBitmapImageRep’s imageRepWithData:imageRep
  
  
set bRawimg to convBitMapToDeviceGrey(aRawimg) of me
  
  
set bImage to NSImage’s alloc()’s initWithSize:(bRawimg’s |size|())
  
bImage’s addRepresentation:bRawimg
  
  
return bImage
end convNSIMageAsGray

–NSBitmapImageRepをグレースケールに変換する
on convBitMapToDeviceGrey(aBitmap)
  set aSpace to NSColorSpace’s deviceGrayColorSpace()
  
set bRawimg to aBitmap’s bitmapImageRepByConvertingToColorSpace:aSpace renderingIntent:(NSColorRenderingIntentPerceptual)
  
return bRawimg
end convBitMapToDeviceGrey

★Click Here to Open This Script 

Posted in Color Image | Tagged 10.13savvy 10.14savvy 10.15savvy NSBitmapImageRep NSColorRenderingIntentPerceptual NSColorSpace NSImage NSString | Leave a comment

Pages書類の1ページ目の表の背景色を置換 v5

Posted on 10月 25, 2019 by Takaaki Naganoya

Pagesでオープン中の最前面の書類の1ページ目に存在する表オブジェクト中の背景色を置換するAppleScriptです。カラー選択のポップアップメニューUser Interfaceをpickup colorライブラリに分離したため、実行できる環境が増えました(Script Debugger上でも動くようになりました)。

–> Download Code-signed AppleScript applet with sample Pages data

Pages書類の「表オブジェクト」にAppleScriptからアクセスするためには、Pages上で表オブジェクトを選択した状態で、

「オブジェクトの配置」を「移動しない」に事前に設定しておく必要があります。

本AppleScriptを実行可能なランタイム環境は、スクリプトエディタ、アプレットの2つです。スクリプトメニューおよびScript Debuggerでは各GUI部品のクリックイベントを拾えないために、実行しても選択などが行えません。

のように、1ページのみのPages書類に表オブジェクトを入れて、「移動しない」設定にしてある状態で本AppleScriptを実行。

表のセル中の色をすべて取得して、ユニーク化してポップアップメニューから「変更元」の色を選択できます。

選択して、「OK」ボタンをクリック。ここで選択した色が置換されます。

選択した色をどの色に変更(置換)するのかを指定します。

グレーを選択。

AppleScript名:Pages書類の1ページ目の表の背景色を置換 v5
— Created 2017-07-15 by Takaaki Naganoya
— Modified 2019-10-25 by Takaaki Naganoya
— 2019 Piyomaru Software
use AppleScript version "2.4"
use scripting additions
use framework "Foundation"
use framework "AppKit"
use Bplus : script "BridgePlus" –https://www.macosxautomation.com/applescript/apps/BridgePlus.html
use pickLib : script "pickup color" –http://piyocast.com/as/asinyaye

–v1:First Version
–v2:Pick Up target cells by calculate every background color (35% speed up)
–v3:Draw cells by range (x20 speed up)
–v3.1:Bug Fix (retRangeFromPosList)
–v3.1.1:Bug Fix (retRangeFromPosList)
–v4:Two-way Simulation (Horizontal / Vertical scan), Corner-Rounded NSImage, Dynamic Color Naming
–v4.1:Correct Vertical Scan simulation (Sort list for vertical range evaluation, at first)
–v5: Use "pickup color" library, Auto color name suggestion function was removed

property NSArray : a reference to current application’s NSArray
property SMSForder : a reference to current application’s SMSForder

–初期化
load framework

–Pagesの1ページ目にある表の塗り色を取得
tell application "Pages"
  if (count of (every document)) = 0 then return
  
  
tell front document
    if (count of (every table)) = 0 then return
    
    
tell table 1
      set c1List to background color of every cell
      
set aProp to properties
      
set xCount to column count of aProp
    end tell
  end tell
end tell

–色データをユニーク化(重複削除)
set bList to uniquifyList(c1List) of me

–Convert 1D List to 2D List
set c3List to (SMSForder’s subarraysFrom:c1List groupedBy:xCount |error|:(missing value)) as list

–missing value(背景色なし)を除外する
set c2List to (SMSForder’s arrayByDeletingBlanksIn:(bList)) as list

–Popup Menuで置換色選択
set cRes to pickup color c2List main message "Select Target Color" color max max65535
if cRes = 0 then return

set fromCol to (contents of item cRes of c2List)

–カラーピッカーで置換色選択
set tCol to choose color default color fromCol

set d1 to current date

–実際に表の背景色を置換する
set hitList to findDataFrom2DList(fromCol, c3List) of me –データ上で当該色のセル情報を計算する

–Rangeを横スキャンと縦スキャンの2通りで試算(Two way Simulation)
set rList1 to retRangeFromPosListHorizontal(hitList) of me –横方向へのrange評価
set rList2 to retRangeFromPosListVertival(hitList) of me –縦方向へのrange評価

–Simulationの結果、要素数の少ない方(=処理時間の短い方=高速な方)を採用する
–log {"Simulation", (length of rList1), (length of rList2)}
if (length of rList1) < (length of rList2) then
  copy rList1 to rangeList
else
  copy rList2 to rangeList
end if

tell application "Pages"
  activate
  
tell front document
    tell table 1
      repeat with i in rangeList
        set j to contents of i
        
        
ignoring application responses –非同期実行モードで高速実行
          set background color of range j to tCol
        end ignoring
        
      end repeat
    end tell
  end tell
end tell

set d2 to current date
return d2 – d1

on uniquifyList(aList as list)
  set aArray to NSArray’s arrayWithArray:aList
  
set bArray to aArray’s valueForKeyPath:"@distinctUnionOfObjects.self"
  
return bArray as list
end uniquifyList

on findDataFrom2DList(anItem, aList as list)
  script spd
    property aList : {}
    
property resList : {}
  end script
  
  
set (aList of spd) to aList
  
set (resList of spd) to {}
  
  
set yCount to 1
  
  
repeat with i in (aList of spd)
    
    
set aResList to (Bplus’s indexesOfItem:anItem inList:i inverting:false) as list
    
    
set tmpList to {}
    
if aResList is not equal to {} then
      repeat with ii in aResList
        set jj to contents of ii
        
set the end of tmpList to {jj, yCount}
      end repeat
      
set (resList of spd) to (resList of spd) & tmpList
    end if
    
    
set yCount to yCount + 1
  end repeat
  
  
return (resList of spd) –return {{x, y}…..} item list (1-based)
end findDataFrom2DList

on retRangeFromPosListVertival(posList as list)
  script rangeSPD
    property posList2 : {}
  end script
  
  
–縦方向へのrange評価に都合がいいようにソート
  
set (posList2 of rangeSPD) to shellSortListAscending(posList, {1, 2}) of me
  
  
–先頭データをピックアップ
  
set firstData to first item of (posList2 of rangeSPD)
  
set (posList2 of rangeSPD) to rest of (posList2 of rangeSPD)
  
  
copy firstData to {curX1, curY1}
  
set tmpRangeStr to aNumToExcelColumn(curX1) of me & (curY1 as string) & ":"
  
  
set tmpRange to {}
  
set hitF to false
  
  
set outList to {}
  
  
repeat with i in (posList2 of rangeSPD)
    copy i to {tmpX, tmpY}
    
    
–log {"{curX1, curY1}", {curX1, curY1}}
    
–log {"{tmpX, tmpY}", {tmpX, tmpY}}
    
    
if (curX1 = tmpX) and (curY1 + 1 = tmpY) then
      –Y方向への連続値を拾っている最中
      
if hitF = false then
        –log "case 1a"
        
–log {"hitF", hitF}
        
set hitF to true
      else
        –log "case 1b"
        
–log {"hitF", hitF}
        
–横に連続しているブロックの途中
      end if
    else
      –直前の値と連続していない
      
if hitF = false then
        –log "case 2a"
        
–log {"hitF", hitF}
        
set tmpRangeStr to tmpRangeStr & aNumToExcelColumn(curX1) of me & (curY1 as string)
        
set the end of outList to tmpRangeStr
        
set tmpRangeStr to aNumToExcelColumn(tmpX) of me & (tmpY as string) & ":"
        
set hitF to false
      else
        –log "case 2b"
        
–log {"hitF", hitF}
        
–連続ブロックの末尾を拾った
        
set tmpRangeStr to tmpRangeStr & aNumToExcelColumn(curX1) of me & (curY1 as string)
        
set the end of outList to tmpRangeStr
        
set tmpRangeStr to aNumToExcelColumn(tmpX) of me & (tmpY as string) & ":"
        
set hitF to false
        
–log {"tmpRangeStr", tmpRangeStr}
      end if
    end if
    
    
copy {tmpX, tmpY} to {curX1, curY1}
  end repeat
  
  
–log {tmpRangeStr, hitF}
  
  
if (hitF = true) or (tmpRangeStr is not equal to "") then
    set tmpRangeStr to tmpRangeStr & aNumToExcelColumn(curX1) of me & (curY1 as string)
    
set the end of outList to tmpRangeStr
  end if
  
  
return outList
end retRangeFromPosListVertival

on retRangeFromPosListHorizontal(posList as list)
  script rangeSPD
    property posList2 : {}
  end script
  
  
copy posList to (posList2 of rangeSPD)
  
  
–先頭データをピックアップ
  
set firstData to first item of (posList2 of rangeSPD)
  
set (posList2 of rangeSPD) to rest of (posList2 of rangeSPD)
  
  
copy firstData to {curX1, curY1}
  
set tmpRangeStr to aNumToExcelColumn(curX1) of me & (curY1 as string) & ":"
  
  
set tmpRange to {}
  
set hitF to false
  
  
set outList to {}
  
  
repeat with i in (posList2 of rangeSPD)
    copy i to {tmpX, tmpY}
    
    
–log {"{curX1, curY1}", {curX1, curY1}}
    
–log {"{tmpX, tmpY}", {tmpX, tmpY}}


if (curX1 + 1 = tmpX) and (curY1 = tmpY) then
      –X方向への連続値を拾っている最中
      
if hitF = false then
        –log "case 1a"
        
–log {"hitF", hitF}
        
set hitF to true
      else
        –log "case 1b"
        
–log {"hitF", hitF}
        
–横に連続しているブロックの途中
      end if
    else
      –直前の値と連続していない
      
if hitF = false then
        –log "case 2a"
        
–log {"hitF", hitF}
        
set tmpRangeStr to tmpRangeStr & aNumToExcelColumn(curX1) of me & (curY1 as string)
        
set the end of outList to tmpRangeStr
        
set tmpRangeStr to aNumToExcelColumn(tmpX) of me & (tmpY as string) & ":"
        
set hitF to false
      else
        –log "case 2b"
        
–log {"hitF", hitF}
        
–連続ブロックの末尾を拾った
        
set tmpRangeStr to tmpRangeStr & aNumToExcelColumn(curX1) of me & (curY1 as string)
        
set the end of outList to tmpRangeStr
        
set tmpRangeStr to aNumToExcelColumn(tmpX) of me & (tmpY as string) & ":"
        
set hitF to false
        
–log {"tmpRangeStr", tmpRangeStr}
      end if
    end if
    
    
copy {tmpX, tmpY} to {curX1, curY1}
  end repeat
  
  
–log {tmpRangeStr, hitF}
  
  
if (hitF = true) or (tmpRangeStr is not equal to "") then
    set tmpRangeStr to tmpRangeStr & aNumToExcelColumn(curX1) of me & (curY1 as string)
    
set the end of outList to tmpRangeStr
  end if
  
  
return outList
end retRangeFromPosListHorizontal

–2008/05/01 By Takaaki Naganoya
–10進数数値をExcel 2004/2008的カラム表現にエンコードするサブルーチン を使いまわし
–1〜1351までの間であれば正しいエンコーディング結果を返す
on aNumToExcelColumn(origNum as integer)
  if origNum > 1351 then
    error "エラー:Excel 2004/2008的カラム表現(A1形式)への変換ルーチンにおいて、想定範囲外(1351以上)のパラメータが指定されました"
  end if
  
  
set upperDigitEncTable to {"A", "B", "C", "D", "E", "F", "G", "H", "I", "J", "K", "L", "M", "N", "O", "P", "Q", "R", "S", "T", "U", "V", "W", "X", "Y", "Z", "A"}
  
set lowerDigitEncTable to {"A", "B", "C", "D", "E", "F", "G", "H", "I", "J", "K", "L", "M", "N", "O", "P", "Q", "R", "S", "T", "U", "V", "W", "X", "Y", "Z", "A"}
  
  
set oNum to origNum
  
set nTh to 26
  
set stringLength to 4
  
  
–数字が1桁の場合の対応
  
if origNum < 27 then
    set aRes to (item origNum of upperDigitEncTable) as string
    
return aRes
  end if


if origNum > 702 then
    –3桁になる場合
    
set upupNum to oNum div 676 –整数除算–上の上の桁
    
set oNum to oNum – (upupNum * 676)
    
set upNum to oNum div 26 –整数除算–上の桁
    
set lowNum to oNum mod 26 – 1 –余剰計算–下の桁
    
    
–超つじつま合わせ処理
    
if lowNum = -1 then
      set upNum to upNum – 1
      
set lowNum to 25
    end if
    
    
set upupChar to (item upupNum of upperDigitEncTable) as string
    
set upChar to (item upNum of upperDigitEncTable) as string
    
set lowChar to (item (lowNum + 1) of lowerDigitEncTable) as string
    
set resText to upupChar & upChar & lowChar
    
  else
    –2桁の場合
    
set upNum to oNum div 26 –整数除算–上の桁
    
set lowNum to oNum mod 26 – 1 –余剰計算–下の桁
    
    
–超つじつま合わせ処理
    
if lowNum = -1 then
      set upNum to upNum – 1
      
set lowNum to 25
    end if
    
    
set upChar to (item upNum of upperDigitEncTable) as string
    
set lowChar to (item (lowNum + 1) of lowerDigitEncTable) as string
    
set resText to upChar & lowChar
    
  end if
  
  
return resText
end aNumToExcelColumn

–入れ子のリストを昇順ソート
on shellSortListAscending(a, keyItem)
  return sort2DList(a, keyItem, {true}) of me
end shellSortListAscending

–入れ子のリストを降順ソート
on shellSortListDecending(a, keyItem)
  return sort2DList(a, keyItem, {false}) of me
end shellSortListDecending

–2D Listをソート
on sort2DList(aList as list, sortIndexes as list, sortOrders as list)
  
  
–index値をAS流(アイテムが1はじまり)からCocoa流(アイテムが0はじまり)に変換
  
set newIndex to {}
  
repeat with i in sortIndexes
    set j to contents of i
    
set j to j – 1
    
set the end of newIndex to j
  end repeat
  
  
–Sort TypeのListを作成(あえて外部から指定する内容でもない)
  
set sortTypes to {}
  
repeat (length of sortIndexes) times
    set the end of sortTypes to "compare:"
  end repeat
  
  
–Sort
  
set resList to (SMSForder’s subarraysIn:(aList) sortedByIndexes:newIndex ascending:sortOrders sortTypes:sortTypes |error|:(missing value)) as list
  
  
return resList
end sort2DList

★Click Here to Open This Script 

Posted in Color dialog Script Libraries | Tagged 10.13savvy 10.14savvy 10.15savvy Pages | Leave a comment

透明ウィンドウで時計表示

Posted on 10月 2, 2019 by Takaaki Naganoya

透明のNSTextView+NSWindowで時計を表示するAppleScriptです。ありものを組み合わせて作ってみました。

テキストビュー+ボタンをつくる ScriptにTimerを組み合わせたぐらいです。macOS標準装備のスクリプトエディタ上でそのまま動きますし、Script Debugger上でも動作確認ずみです。

この手のプログラムは初心者が割と作りたくなるものの、作ってもそれほど役に立たない上に、「まあ、こんなもんか」という程度にしかなりません。初心者向けといえば初心者向けですが、記述量がそれほど少なくないのが困りものです(Xcode上でAppleScriptでCocoa-Appを書いたほうがずっと短く書けることでしょう)。

それもこれも、実際に動かしてみないとわからないことでしょう。Safariで表示中の表だけCSVに書き出すScriptなどと比べると、ものすごく面白くありません。

AppleScript名:テキストビュー+ボタンを作成(フォント指定)_+Timer
— Created 2019-10-02 by Takaaki Naganoya
— 2019 Piyomaru Software
use AppleScript version "2.4"
use scripting additions
use framework "Foundation"
use framework "AppKit"

property NSFont : a reference to current application’s NSFont
property NSColor : a reference to current application’s NSColor
property NSTimer : a reference to current application’s NSTimer
property NSScreen : a reference to current application’s NSScreen
property NSButton : a reference to current application’s NSButton
property NSWindow : a reference to current application’s NSWindow
property NSSplitView : a reference to current application’s NSSplitView
property NSTextView : a reference to current application’s NSTextView
property NSWindowController : a reference to current application’s NSWindowController
property NSTitledWindowMask : a reference to current application’s NSTitledWindowMask
property NSFloatingWindowLevel : a reference to current application’s NSFloatingWindowLevel
property NSBackingStoreBuffered : a reference to current application’s NSBackingStoreBuffered

property windisp : false
property aView : missing value

set aFontName to "Arial-Black"
set aWidth to 350
set aHeight to 120
set aTitle to "Clock Test" –Window Title
set aButtonMSG to "OK" –Button Title

set aRes to checkExistenceOfFont(aFontName) of me
if aRes = false then
  display dialog "There is no <" & aFontName & "> font. Select another one." –No font
  
return
end if
set dispStr to ""

set paramObj to {myWidth:aWidth, myHeight:aHeight, myTitle:aTitle, myBMes:aButtonMSG, myTimeOut:180, myFontID:aFontName, myFontSize:48}
–my dispTextView:aRecObj
my performSelectorOnMainThread:"dispTextView:" withObject:paramObj waitUntilDone:true

on dispTextView:aRecObj
  set aWidth to myWidth of aRecObj as integer
  
set aHeight to myHeight of aRecObj as integer
  
set aTitle to myTitle of aRecObj as string
  
set aButtonMSG to myBMes of aRecObj as string
  
set timeOutSecs to myTimeOut of aRecObj as integer
  
set fontID to myFontID of aRecObj as string
  
set fontSize to myFontSize of aRecObj as integer
  
  
set dispStr to ""
  
  
–Make Timer
  
set aTimer to NSTimer’s scheduledTimerWithTimeInterval:1 target:me selector:"idleHandler:" userInfo:(missing value) repeats:true
  
  
— Text View Background color
  
set aColor to NSColor’s colorWithDeviceRed:0.0 green:0.0 blue:0.0 alpha:0.0
  
set (my windisp) to true
  
  
–Text View+Scroll Viewをつくる
  
set aView to NSTextView’s alloc()’s initWithFrame:(current application’s NSMakeRect(0, 0, aWidth, aHeight))
  
aView’s setRichText:true
  
aView’s useAllLigatures:true
  
aView’s setTextColor:(NSColor’s magentaColor())
  
aView’s setFont:(NSFont’s fontWithName:fontID |size|:fontSize)
  
aView’s setBackgroundColor:aColor
  
aView’s setAlphaValue:1.0
  
aView’s setEditable:false
  
–aView’s enclosingScrollView()’s setHasVerticalScroller:true
  
  
–Buttonをつくる
  
set bButton to (NSButton’s alloc()’s initWithFrame:(current application’s NSMakeRect(0, 0, aWidth, 40)))
  
bButton’s setTitle:aButtonMSG
  
bButton’s setTarget:me
  
bButton’s setAction:("clicked:")
  
  
–SplitViewをつくる
  
set aSplitV to NSSplitView’s alloc()’s initWithFrame:(current application’s NSMakeRect(0, 0, aHeight, aWidth))
  
aSplitV’s setVertical:false
  
  
aSplitV’s addSubview:aView
  
aSplitV’s addSubview:bButton
  
aSplitV’s setNeedsDisplay:true
  
  
–WindowとWindow Controllerをつくる
  
set aWin to makeWinWithView(aSplitV, aWidth, aHeight, aTitle, 1.0)
  
aWin’s makeKeyAndOrderFront:(missing value)
  
set wController to NSWindowController’s alloc()
  
wController’s initWithWindow:aWin
  
aWin’s makeFirstResponder:aView
  
aView’s setString:dispStr
  
wController’s showWindow:me
  
  
set aCount to timeOutSecs * 10 –timeout seconds * 10
  
repeat aCount times
    if (my windisp) = false then
      exit repeat
    end if
    
delay 0.1
    
set aCount to aCount – 1
  end repeat
  
  
aTimer’s invalidate() –Stop Timer
  
my closeWin:aWin
  
end dispTextView:

–Button Clicked Event Handler
on clicked:aSender
  set (my windisp) to false
end clicked:

–make Window for Input
on makeWinWithView(aView, aWinWidth, aWinHeight, aTitle, alphaV)
  set aScreen to NSScreen’s mainScreen()
  
set aFrame to {{0, 0}, {aWinWidth, aWinHeight}}
  
set aBacking to NSTitledWindowMask –NSBorderlessWindowMask
  
set aDefer to NSBackingStoreBuffered
  
  
— Window
  
set aWin to NSWindow’s alloc()
  (
aWin’s initWithContentRect:aFrame styleMask:aBacking backing:aDefer defer:false screen:aScreen)
  
aWin’s setBackgroundColor:(NSColor’s clearColor())
  
  
aWin’s setTitle:aTitle
  
aWin’s setDelegate:me
  
aWin’s setDisplaysWhenScreenProfileChanges:true
  
aWin’s setHasShadow:true
  
aWin’s setIgnoresMouseEvents:false
  
aWin’s setLevel:(NSFloatingWindowLevel)
  
aWin’s setOpaque:false
  
aWin’s setAlphaValue:alphaV –append
  
aWin’s setReleasedWhenClosed:true
  
aWin’s |center|()
  
–aWin’s makeKeyAndOrderFront:(me)
  
  
— Set Custom View
  
aWin’s setContentView:aView
  
  
return aWin
end makeWinWithView

–close win
on closeWin:aWindow
  aWindow’s |close|()
end closeWin:

–指定PostScript名称のフォントがコンピューター上に存在するかどうかチェック
on checkExistenceOfFont(fontName as string)
  if fontName = "" then return false
  
set aFont to NSFont’s fontWithName:fontName |size|:9.0
  
if aFont = missing value then
    return false
  else
    return true
  end if
end checkExistenceOfFont

–タイマー割り込み
on idleHandler:aSender
  set mesStr to time string of (current date)
  
aView’s setString:mesStr
end idleHandler:

★Click Here to Open This Script 

Posted in Color dialog | Tagged 10.12savvy 10.13savvy 10.14savvy NSBackingStoreBuffered NSButton NSColor NSFloatingWindowLevel NSFont NSScreen NSSplitView NSTextView NSTimer NSTitledWindowMask NSWindow NSWindowController | 6 Comments

pickup color Script Library

Posted on 8月 31, 2019 by Takaaki Naganoya

指定した複数の色からどれかを選ぶコマンドを提供するAppleScriptライブラリ+呼び出しサンプルScriptです。

–> Download pickup color.scptd(To ~/Library/Script Libraries)

使い道があるんだかないんだか微妙ですが、本来であれば何らかの画像を入力して、画像内の色をポスタライズして色数を減らし、その上で本ライブラリのようなインタフェースを用いて色選択。元画像のうち選択色の占めるエリアをダイアログ上で点滅表示……という処理が行いたいところです。

アラートダイアログのアイコン表示部分は、本来なら実行をリクエストしたアプリケーションのアイコンが表示されますが、選択色のプレビュー領域に使ってみました。このアイコン表示は最前面のアプリケーションのアイコンが入るべきという「ルール」があるわけですが、最前面のアプリケーションが何であるかは分かりきっています。

別の運用方法でもっと便利になるのであれば、そういうことを試してみてもいいでしょう。


▲本来は、指定画像中の色を検出して、選択した色が表示されているエリアのみ点滅表示させたい。Xcode上で作ればできそう、、、、

また、Frameworkを呼び出してNSImageから色名をダイナミックに生成するという処理も、ライブラリとして運用するために取り外していますが、これも取り外したくはない部品です。

本来やりたい処理のすべてができているわけではないので、本ライブラリはまだまだ試作品レベルです。

色データを8ビットの整数値で与えるか、16ビットの整数値で与えるかをEnum「max255」「max65535」で表現していますが、もう少しスマートに表現したいところです。

AppleScript名:pickup color sample
—
–  Created by: Takaaki Naganoya
–  Created on: 2019/08/31
—
–  Copyright © 2019 jp.piyomarusoft, All Rights Reserved
—
use AppleScript version "2.4"
use scripting additions
use framework "Foundation"
use colPic : script "pickup color"

set ap1List to {{65535, 0, 65535}, {0, 32896, 16448}, {65535, 65531, 2689}, {0, 32896, 65535}, {8608, 65514, 1548}, {46003, 46003, 46003}, {19702, 31223, 40505}}

set cRes to pickup color ap1List main message "Color Dialog" sub message "Choose a color from popup button" color max max65535

★Click Here to Open This Script 

Posted in Color GUI OSA Script Libraries sdef | Tagged 10.12savvy 10.13savvy 10.14savvy | Leave a comment

アラートダイアログ上にpath control x2を表示 v2

Posted on 8月 3, 2019 by Takaaki Naganoya

アラートダイアログ上にPathcontrolを表示して、ファイルパス選択をドラッグ&ドロップで受け付けるAppleScriptの改良版です。

実行中にアピアランスのDark Mode/Light Modeへの変更が行われたときの対応を追加してみました。

実行途中でアピアランスの変更が行われると、OSが提供している部品をそのまま利用している分にはOSの管理下で色変更が行われますが、あとから色指定している部品はそのままです(↑)。上記の(↑)ように、割と違和感があるというか、実用上困る(そもそもアピアランス変更をそんな時に行う方がどうかしているとは思うのですが)ので、対処してみました。

部品はひととおり作ってあったので、組み合わせただけです。アピアランスの変更Notificationを受信する部品や、アピアランステーマを判定する部品などです。

部品の組み合わせ方にも些細なノウハウがあるので、一応やっておいたことには意義があると思っています。

AppleScript名:アラートダイアログ上にpath control x2を表示 v2
— Created 2019-08-02 by Takaaki Naganoya
— 2019 Piyomaru Software
use AppleScript version "2.5"
use scripting additions
use framework "Foundation"
use framework "AppKit"

property NSView : a reference to current application’s NSView
property NSAlert : a reference to current application’s NSAlert
property NSColor : a reference to current application’s NSColor
property NSTextField : a reference to current application’s NSTextField
property NSPathControl : a reference to current application’s NSPathControl
property NSUserDefaults : a reference to current application’s NSUserDefaults
property NSRunningApplication : a reference to current application’s NSRunningApplication
property NSDistributedNotificationCenter : a reference to current application’s NSDistributedNotificationCenter

property theResult : 0
property returnCode : 0
property resList : {}
property aPathControl : missing value
property bPathControl : missing value

set paramObj to {myMessage:"ファイルの入出力フォルダ選択", mySubMessage:"どれか選択してください。", fromPathMes:"移動元:", toPathMes:"移動先:"}
my performSelectorOnMainThread:"chooseTwoPath:" withObject:paramObj waitUntilDone:true

return resList
–> {fromPathRes:"/Users/me/Desktop/keyn1.png", toPathRes:"/Users/me/Desktop/scriptmenu1.png"}

on chooseTwoPath:paramObj
  set aMainMes to myMessage of paramObj
  
set aSubMes to mySubMessage of paramObj
  
set fromLabel to fromPathMes of paramObj
  
set toLabel to toPathMes of paramObj
  
  
—Dark Mode Notification受信開始
  
NSDistributedNotificationCenter’s defaultCenter()’s addObserver:me selector:"darkModeChanged:" |name|:"AppleInterfaceThemeChangedNotification" object:(missing value)
  
  
— create a view
  
set theView to NSView’s alloc()’s initWithFrame:(current application’s NSMakeRect(0, 0, 600, 60))
  
  
— create two path control & text field
  
set aPathControl to NSPathControl’s alloc()’s initWithFrame:(current application’s NSMakeRect(100, 35, 700, 20))
  
set bPathControl to NSPathControl’s alloc()’s initWithFrame:(current application’s NSMakeRect(100, 0, 700, 20))
  
  
–Set path control’s bg colors
  
set {aCol, bCol} to pathControlSrtringColor() of me
  
aPathControl’s setBackgroundColor:(aCol)
  
bPathControl’s setBackgroundColor:(bCol)


set aHome to current application’s |NSURL|’s fileURLWithPath:(current application’s NSHomeDirectory()) –initial dir
  
aPathControl’s setURL:aHome
  
bPathControl’s setURL:aHome
  
  
set a1TF to NSTextField’s alloc()’s initWithFrame:(current application’s NSMakeRect(0, 35, 100, 20))
  
set a2TF to NSTextField’s alloc()’s initWithFrame:(current application’s NSMakeRect(0, 0, 100, 20))
  
a1TF’s setEditable:false
  
a2TF’s setEditable:false
  
a1TF’s setStringValue:fromLabel
  
a2TF’s setStringValue:toLabel
  
a1TF’s setDrawsBackground:false
  
a2TF’s setDrawsBackground:false
  
a1TF’s setBordered:false
  
a2TF’s setBordered:false
  
  
theView’s setSubviews:{a1TF, aPathControl, a2TF, bPathControl}
  
  
— set up alert
  
set theAlert to NSAlert’s alloc()’s init()
  
tell theAlert
    its setMessageText:aMainMes
    
its setInformativeText:aSubMes
    
its addButtonWithTitle:"OK"
    
its addButtonWithTitle:"Cancel"
    
its setAccessoryView:theView
  end tell
  
  
— show alert in modal loop
  
NSRunningApplication’s currentApplication()’s activateWithOptions:0
  
my performSelectorOnMainThread:"doModal:" withObject:(theAlert) waitUntilDone:true
  
if (my returnCode as number) = 1001 then error number -128
  
  
set s1Val to (aPathControl’s |URL|’s |path|()) as string
  
set s2Val to (bPathControl’s |URL|’s |path|()) as string
  
  
set resList to {fromPathRes:s1Val, toPathRes:s2Val}
  
  
–Notification受信停止
  
NSDistributedNotificationCenter’s defaultCenter()’s removeObserver:me |name|:"AppleInterfaceThemeChangedNotification" object:(missing value)
end chooseTwoPath:

on doModal:aParam
  set (my returnCode) to aParam’s runModal()
end doModal:

–ダークモードの判定。ダークモード時:true、ライトモード時:falseが返る
on retLIghtOrDark()
  set curMode to (NSUserDefaults’s standardUserDefaults()’s stringForKey:"AppleInterfaceStyle") as string
  
return (curMode = "Dark") as boolean
end retLIghtOrDark

–aMaxValを最大値とする数値でNSColorを作成して返す
on makeNSColorFromRGBAval(redValue as integer, greenValue as integer, blueValue as integer, alphaValue as integer, aMaxVal as integer)
  set aRedCocoa to (redValue / aMaxVal) as real
  
set aGreenCocoa to (greenValue / aMaxVal) as real
  
set aBlueCocoa to (blueValue / aMaxVal) as real
  
set aAlphaCocoa to (alphaValue / aMaxVal) as real
  
set aColor to NSColor’s colorWithCalibratedRed:aRedCocoa green:aGreenCocoa blue:aBlueCocoa alpha:aAlphaCocoa
  
return aColor
end makeNSColorFromRGBAval

–Notification handler
on darkModeChanged:(aNotification)
  set {aCol, bCol} to pathControlSrtringColor() of me
  
aPathControl’s setBackgroundColor:(aCol)
  
bPathControl’s setBackgroundColor:(bCol)
end darkModeChanged:

on pathControlSrtringColor()
  set dMode to retLIghtOrDark() of me –Dark mode:true
  
if dMode = false then
    –Light Mode
    
set aCol to (NSColor’s cyanColor())
    
set bCol to (NSColor’s yellowColor())
  else
    –Dark Mode
    
set aCol to (makeNSColorFromRGBAval(0, 96, 65, 255, 255) of me)
    
set bCol to (makeNSColorFromRGBAval(93, 92, 0, 255, 255) of me)
  end if
  
  
return {aCol, bCol}
end pathControlSrtringColor

★Click Here to Open This Script 

Posted in Color dialog GUI Noification | Tagged 10.12savvy 10.13savvy 10.14savvy 10.15savvy NSAlert NSColor NSDistributedNotificationCenter NSPathControl NSRunningApplication NSTextField NSUserDefaults NSView | Leave a comment

選択中のリストのテキスト(多分)をもとにKeynoteの表を作成 v2

Posted on 8月 1, 2019 by Takaaki Naganoya

Script Editor上で選択中の1D List(1次元配列)のテキストを評価してリストとして解釈し、それをもとにKeynoteの新規書類上に表を作成するAppleScriptの改良版です。

こんな感じ(↑)に、Script Editor上で1D List(1次元配列)のテキストが存在しているものを、資料化するためにKeynote上で表にすることがあり、その作業を自動化してみました。

スクリプトエディタ上の選択範囲のテキストをrun scriptコマンドで実際に実行(Evalのような使い方)して本物のAppleScriptのリストを作成して処理します。

ここがたいへんにセキュリティホールになりやすいので、実行前にテキストをAppleScriptとして構文確認を行い、危ない構文要素(コマンド類)が入っていないか、AppleScriptの構文的に中途半端でないかチェックを行います。

技術的にはMac OS X 10.4ないし10.5の時代に確立していた内容ではありますが、当時はスクリプトエディタをコントロールして構文色分け情報を取得していたので、macOS 10.10以降でCocoaの機能がAppleScriptから直接利用できるようになって、よりスマートに処理できるようになりました。

Mac OS X 10.4の時代には、plistの情報はテキストで記録されていたので、構文色分け設定を読むのは簡単でした。スクリプトエディタから書式つきテキスト情報(attribute runs)を取得して付け合わせを行っていました。途中でplistの内容がバイナリ化されてplistを読むことが難しくなったので、新規書類に「すべての構文要素が入った最低限度のAppleScript」を転送して構文確認を行い、attribute runsを取得して規定の場所の書式情報を取得することで、特定の構文要素の色分け情報を取得していました(一瞬で新規書類を作成して構文確認し、すぐに破棄するので目には見えない)。

–> Download selectedStrToKeynoteTable (Source AppleScript Bundle with Library)

–> Download selectedStrToKeynoteTableWithCodeSign(AppleScript Applet executable with Code Sign)

ただし、本ScriptをmacOS 10.14上で実行してみていろいろ問題を感じました。まずは、スクリプトエディタ/Script Debugger上で実行する分には何も問題はありません。ここは大事なので明記しておきます。

これ以外の実行環境で実行させると、とたんに首をひねりたくなるような挙動が見られます。Script Menuから実行することを前提に作ってみたわけですが………

普通にScriptとして保存して実行(署名なし、公証なし):初回実行時にオートメーション認証ダイアログが表示されて実行。数回同じScriptを実行すると実行されなくなる(!)

Appletとして保存して実行(署名なし、公証なし):実行時、毎回オートメーション認証ダイアログが表示されて実行。

Appletとして保存して実行(署名あり、公証なし):初回実行時、オートメーション認証ダイアログが表示されて実行。連続して実行するとダイアログ表示なし。しばらく時間を置いて実行するとダイアログ表示される。

macOS 10.14については2か月前から使い始めたので、公証についてもまだうまく行えていません(SD Nortaryで開発者IDが認識されない、、、)。こちら(公証)も試してみるべきなんでしょう。

公証関連については、実際に行っている方、失敗した方の意見をまとめておきたいので、本Blog併設のフォーラムにて(言語は英語でも何語でもOKなので)情報交換させてください。

AppleScript名:選択中のリストのテキスト(多分)をもとにKeynoteの表を作成 v2
—
–  Created by: Takaaki Naganoya
–  Created on: 2019/07/31
—
–  Copyright © 2019 Piyomaru Software, All Rights Reserved
—
use AppleScript version "2.4" — Yosemite (10.10) or later
use framework "Foundation"
use scripting additions
use dangerAS : script "checkDangerAS"

set aTargMasterSlide to "空白" –This string is *Localized* in Japanese. This is "Blank"

tell application "Script Editor"
  tell front document
    set bText to contents of selection
  end tell
end tell

if bText = "" then return

–指定のテキストをAppleScriptとして評価し、指定の構文要素に該当するものが含まれているかどうかチェック
set dRes to chkTargLexicalElementsFromCompiledScriptAttribute(bText, {9, 14}) of dangerAS
if dRes = missing value then
  –The selected text contains AppleScript lexical error
  
display dialog "選択中のテキストにAppleScriptの構文エラーが検出されました" default answer bText with title "Error" with icon 2
  
return
end if

if dRes = true then
  –The selected text contain danger AppleScript lexical element (maybe it is any command)
  
display dialog "選択中のテキストは実行に危険な文字列(AppleScriptコマンド)を含んでいるため、処理しませんでした" default answer bText with title "Error" with icon 2
  
return
end if

try
  set aRes to run script bText –Danger!! Take Care of.
  
set aClass to class of aRes
on error
  –The Evaluation error (some AppleScript lexical error)
  
display dialog "The contents of clipboard seems not to be an AppleScript list but " & (aClass as string) & return & bText with title "Error (1)" with icon 2
  
return
end try

if aClass is not equal to list then
  –The Evaluated result is not list
  
display dialog "The contents of clipboard seems not to be an AppleScript list but " & (aClass as string) & return & bText with title "Error (2)" with icon 2
  
return
end if

set aLen to length of aRes
set aDim to getDimension given tArray:aRes
if aDim > 1 then
  –Check List’s dimension (the taeget dimension is 1)
  
display dialog "選択中のテキストを評価したリスト(配列)の次元数が1ではなかったので、処理しませんでした" default answer bText with title "Dimension Error(3)" with icon 2
  
return
end if

tell application "Keynote"
  activate
  
set aDoc to (make new document with properties {document theme:theme "ホワイト", width:1024, height:768}) — –This string is *Localized* in Japanese. This is "White"
  
  
tell aDoc
    set masList to name of every master slide
    
if aTargMasterSlide is not in masList then return –多分ないと思うが、作成予定のマスタースライドが現在有効でない場合に処理打ち切り
    
    
set base slide of current slide to master slide aTargMasterSlide
    
    
tell current slide
      set aTable to make new table with properties {header column count:0, header row count:1, row count:2, column count:aLen, name:"Test Table"}
      
      
tell aTable
        repeat with y from 1 to 1
          tell row y
            repeat with x from 1 to aLen
              tell cell x
                set value to (item x of aRes) as string
              end tell
            end repeat
          end tell
        end repeat
      end tell
      
    end tell
  end tell
end tell

–指定Listの次元を再帰で取得する
on getDimension given tArray:aList as list : {}, curDim:aNum as integer : 1
  set anItem to contents of first item of aList
  
set aClass to class of anItem
  
  
if aClass = list then
    set aNum to aNum + 1
    
set aRes to getDimension given tArray:anItem, curDim:aNum
  else
    return aNum
  end if
end getDimension

★Click Here to Open This Script 

Posted in Code Sign Color list Notarization OSA regexp | Tagged 10.12savvy 10.13savvy 10.14savvy Keynote Script Editor | Leave a comment

指定のAppleScriptテキストを構文確認して指定の構文要素が入っていないかチェック

Posted on 7月 31, 2019 by Takaaki Naganoya

指定のテキストをAppleScriptとみなして構文確認して、指定の構文要素が入っていないかチェックするAppleScriptです。

AppleScriptにeval関数はないので、文字列として与えたAppleScriptをその場で実行する「run script」コマンドをevalがわりに使っています。

文字列をそのままrun scriptするのは(一応いろいろ保護機能はあるものの)、セキュリティ的にリスクの高い操作になってしまいます。


▲こんなのがrun scriptコマンドで実行されてしまったらと思うとゾッとします。ためしに実行してみたら、実行権限がないので実行できないエラーになりました

そこで、文字列をいったんAppleScriptとして評価(構文確認)し、コマンドなどの危険と思われる構文要素が入っていないかどうかチェックする処理を書いて使っています。

これら、「コマンド」および「追加コマンド」といった構文要素が入っていたらtrueを返します。

本Scriptをライブラリ化して組み込むことで、少ない記述量で対象の文字列をそのままrun scriptしてよいかどうか判定できるようにしています。

–> Download checkDanger(with Library in its bundle)


▲実際にテキストをAppleScriptとして評価して構文要素を検出し、このようにコマンド部分(AppleScriptのdo shell scriptコマンド)が入っていることを検知できる

AppleScript名:指定のAppleScriptテキストを構文確認して指定の構文要素が入っていないかチェック.scptd
—
–  Created by: Takaaki Naganoya
–  Created on: 2019/07/31
—
–  Copyright © 2019 Piyomaru Software, All Rights Reserved
—
use AppleScript version "2.4" — Yosemite (10.10) or later
use framework "Foundation"
use scripting additions
use framework "AppKit"
use framework "OSAKit"
use attrLib : script "asAttrRecLib"

property NSArray : a reference to current application’s NSArray
property OSANull : a reference to current application’s OSANull
property NSString : a reference to current application’s NSString
property OSAScript : a reference to current application’s OSAScript
property NSPredicate : a reference to current application’s NSPredicate
property NSDictionary : a reference to current application’s NSDictionary
property NSUnarchiver : a reference to current application’s NSUnarchiver
property OSALanguage : a reference to current application’s OSALanguage
property NSCountedSet : a reference to current application’s NSCountedSet
property NSMutableArray : a reference to current application’s NSMutableArray
property NSMutableDictionary : a reference to current application’s NSMutableDictionary
property OSALanguageInstance : a reference to current application’s OSALanguageInstance

script spd
  property fArray : {}
  
property outList : {}
  
property resStr : {}
end script

on run
  set theSource to "do shell script \"rm -f *.*\""
  
set aRes to chkTargLexicalElementsFromCompiledScriptAttribute(theSource, {9, 14}) of me –{Command, External Command}
  
–> true : 指定の構文要素が入っていた
  
  
set theSource to "{{aName:\"piyoko\", aVal:100}, {aName:\"piyomaru\", aVal:80}, {aName:\"piyoo\", aVal:10}, {aName:\"Gundamo\", aVal:10}}"
  
set bRes to chkTargLexicalElementsFromCompiledScriptAttribute(theSource, {9, 14}) of me –{Command, External Command}
  
–> false : 指定の構文要素は入っていなかった
end run

–AppleScriptのソーステキストをコンパイルして、指定の構文要素が含まれているかチェックする
on chkTargLexicalElementsFromCompiledScriptAttribute(theSource as string, targLexicalElements as list)
  
  
–AppleScriptの構文色分け情報を取得
  
set ccRes to getAppleScriptSourceColors() of me
  
set cRes to chkASLexicalFormatColorConfliction(ccRes) of me –構文色分けの重複色チェック
  
if cRes = false then error "There is some duplicate(s) color among AppleScript’s lexical color settings"
  
  
–検索用の色情報を作成
  
set colTargList to {}
  
repeat with i in targLexicalElements
    set commentCol to contents of item i of ccRes –Variable and Sub-routine name
    
set searchVal to (redValue of commentCol as string) & " " & (greenValue of commentCol as string) & " " & (blueValue of commentCol as string) –for filtering
    
set the end of colTargList to searchVal
  end repeat


–与えられたテキストをAppleScriptとして評価し構文色分け情報をもとにStyle Runs的なDictionary化して返す
  
set aRitch to compileASSourcetextAndReturnStyledText(theSource) of me


–書式付きテキストからstyle runs的な書式リストを作成
  
set anAttrList to getAttributeRunsFromAttrString(aRitch) of attrLib
  
  
set bList to filterRecListByLabelAndSublist(anAttrList, "colorStr IN %@", colTargList) of me
  
  
return not (bList as list = {}) as boolean
  
end chkTargLexicalElementsFromCompiledScriptAttribute

on retDelimedText(aList, aDelim)
  set aText to ""
  
set curDelim to AppleScript’s text item delimiters
  
set AppleScript’s text item delimiters to aDelim
  
set aText to aList as text
  
set AppleScript’s text item delimiters to curDelim
  
return aText
end retDelimedText

——-

–AppleScriptの構文色分けのカラー値をRGBで取得する
on getAppleScriptSourceColors()
  — get the plist info as a dictionary
  
set thePath to NSString’s stringWithString:"~/Library/Preferences/com.apple.applescript.plist"
  
set thePath to thePath’s stringByExpandingTildeInPath()
  
set theInfo to NSDictionary’s dictionaryWithContentsOfFile:thePath
  
  
— extract relevant part and loop through
  
set theArray to (theInfo’s valueForKey:"AppleScriptSourceAttributes") as list
  
  
set colList to {}
  
  
repeat with i from 1 to count of theArray
    set anEntry to item i of theArray
    
    
set colorData to NSColor of anEntry
    
set theColor to (NSUnarchiver’s unarchiveObjectWithData:colorData)
    
    
set {rVal, gVal, bVal} to retColListFromNSColor(theColor, 255) of me
    
    
set fontData to NSFont of anEntry
    
set theFont to (NSUnarchiver’s unarchiveObjectWithData:fontData)
    
    
set aFontName to theFont’s displayName() as text
    
set aFontSize to theFont’s pointSize()
    
    
set aColRec to {redValue:rVal, greenValue:gVal, blueValue:bVal, fontName:aFontName, fontSize:aFontSize}
    
    
set the end of colList to aColRec
  end repeat
  
  
return colList
end getAppleScriptSourceColors

–AppleScriptの構文色分けのカラー値をRGBで取得する
on getAppleScriptSourceNSColorsDict()
  — get the plist info as a dictionary
  
set thePath to NSString’s stringWithString:"~/Library/Preferences/com.apple.applescript.plist"
  
set thePath to thePath’s stringByExpandingTildeInPath()
  
set theInfo to NSDictionary’s dictionaryWithContentsOfFile:thePath
  
  
— extract relevant part and loop through
  
set theArray to (theInfo’s valueForKey:"AppleScriptSourceAttributes") as list
  
  
set aDict to NSMutableDictionary’s alloc()’s init()
  
  
repeat with i from 1 to count of theArray
    set anEntry to item i of theArray
    
    
set colorData to NSColor of anEntry
    
set theColor to (NSUnarchiver’s unarchiveObjectWithData:colorData)
    
    
set {rVal, gVal, bVal} to retColListFromNSColor(theColor, 255) of me
    
    
set fontData to NSFont of anEntry
    
set theFont to (NSUnarchiver’s unarchiveObjectWithData:fontData)
    
    
set aFontName to theFont’s displayName() as text
    
set aFontSize to theFont’s pointSize()
    
    
set colIndStr to (rVal as string) & " " & (gVal as string) & " " & (bVal as string)
    
set tmpColDat to {numList:{rVal, gVal, bVal}, strInd:colIndStr}
    
–(aDict’s addObject:tmpColDat forKey:theColor)
    (
aDict’s addObject:{rVal, gVal, bVal} forKey:theColor)
  end repeat
  
  
return aDict
end getAppleScriptSourceNSColorsDict

–NSColorからRGBの値を取り出す
on retColListFromNSColor(aCol, aMAX as integer)
  set aSpace to (aCol’s colorSpaceName()) as string
  
–set aSpace to (aCol’s type()) as integer
  
  
if aSpace is in {"NSDeviceRGBColorSpace", "NSCalibratedRGBColorSpace"} then
    copy aCol to cCol
  else
    –RGB以外の色空間の色は、RGBに変換
    
–CMYKとグレースケールは同一メソッドでRGBに変換できることを確認済み
    
set cCol to aCol’s colorUsingColorSpaceName:"NSCalibratedRGBColorSpace"
    
if cCol = missing value then error "Color Space Conversion Error (" & aSpace & " to NSCalibratedRGBColorSpace)"
  end if
  
  
set aRed to round ((cCol’s redComponent()) * aMAX) rounding as taught in school
  
set aGreen to round ((cCol’s greenComponent()) * aMAX) rounding as taught in school
  
set aBlue to round ((cCol’s blueComponent()) * aMAX) rounding as taught in school
  
  
if aRed > aMAX then set aRed to aMAX
  
if aGreen > aMAX then set aGreen to aMAX
  
if aBlue > aMAX then set aBlue to aMAX
  
  
return {aRed, aGreen, aBlue} as list
end retColListFromNSColor

–AS書式で配色に重複がないかどうかチェック
on chkASLexicalFormatColorConfliction(aList)
  set anArray to current application’s NSArray’s arrayWithArray:aList
  
set bList to (anArray’s valueForKeyPath:"redValue.stringValue") as list
  
set cList to (anArray’s valueForKeyPath:"greenValue.stringValue") as list
  
set dList to (anArray’s valueForKeyPath:"blueValue.stringValue") as list
  
  
set colStrList to {}
  
repeat with i from 1 to (length of bList)
    set bItem to contents of item i of bList
    
set cItem to contents of item i of cList
    
set dItem to contents of item i of dList
    
set the end of colStrList to bItem & " " & cItem & " " & dItem
  end repeat
  
  
set aRes to returnDuplicatesOnly(colStrList) of me
  
  
if aRes is equal to {} then
    return true –重複が存在しなかった場合
  else
    return false –重複があった場合
  end if
end chkASLexicalFormatColorConfliction

on returnDuplicatesOnly(aList as list)
  set aSet to current application’s NSCountedSet’s alloc()’s initWithArray:aList
  
set bList to (aSet’s allObjects()) as list
  
  
set dupList to {}
  
repeat with i in bList
    set aRes to (aSet’s countForObject:i)
    
if aRes > 1 then
      set the end of dupList to (contents of i)
    end if
  end repeat
  
  
return dupList
end returnDuplicatesOnly

–テキスト形式のAppleScriptをコンパイルして書式付きテキスト(NSAttributedString)を返す
on compileASSourcetextAndReturnStyledText(theSource)
  — create a new AppleScript instance
  
set anOSALanguageInstance to OSALanguage’s languageForName:"AppleScript"
  
  
set theScript to OSAScript’s alloc()’s initWithSource:theSource fromURL:(missing value) languageInstance:anOSALanguageInstance usingStorageOptions:(OSANull)
  
set {theResult, theError} to theScript’s compileAndReturnError:(reference)
  
  
if theResult as boolean is false then
    — handle error
    
error "Compile Error"
  else
    set styledSourceText to theScript’s richTextSource()
  end if
  
  
return styledSourceText
end compileASSourcetextAndReturnStyledText

–文字置換
on repChar(origText as string, targChar as string, repChar as string)
  set curDelim to AppleScript’s text item delimiters
  
set AppleScript’s text item delimiters to targChar
  
set tmpList to text items of origText
  
set AppleScript’s text item delimiters to repChar
  
set retText to tmpList as string
  
set AppleScript’s text item delimiters to curDelim
  
return retText
end repChar

–リストに入れたレコードを、指定の属性ラベルの値で抽出。値が別途指定のリストの中に存在していることが条件
on filterRecListByLabelAndSublist(aRecList as list, aPredicate as string, aSubList as list)
  set aArray to NSArray’s arrayWithArray:aRecList
  
set aSubArray to NSArray’s arrayWithArray:aSubList
  
  
–抽出
  
set aPredicate to NSPredicate’s predicateWithFormat_(aPredicate, aSubArray)
  
set filteredArray to aArray’s filteredArrayUsingPredicate:aPredicate
  
  
return filteredArray as list
end filterRecListByLabelAndSublist

★Click Here to Open This Script 

Posted in Color OSA Text | Tagged 10.12savvy 10.13savvy 10.14savvy NSArray NSCountedSet NSDictionary NSMutableArray NSMutableDictionary NSPredicate NSString NSUnarchiver OSALanguage OSALanguageInstance OSANull OSAScript | 2 Comments

アラートダイアログ上にTable Viewを表示 v4

Posted on 7月 11, 2019 by Takaaki Naganoya

アラートダイアログ上にTable Viewを表示するAppleScriptです。

データを表UIで表示する部品としては、Shane Stanleyの「Myriad Tables Lib」が定番ですが、高機能なぶんライブラリ中にFrameworkが含まれていたりして、場合によっては困ることもあります。また、見た目をカスタマイズしたい場合にも、あまりいじくれなくて困ることもあります(とくにデータの文字サイズを変更できなくて困ること多し)。

そのため、AppleScriptだけで書いた表UI表示用の部品も、たまに必要になることがあります。


▲スクリプトエディタで実行@macOS 10.14.5(左:Light Mode、右:Dark Mode)


▲Script Debuggerで実行@macOS 10.14.5(左:Light Mode、右:Dark Mode)


▲AppleScriptアプレットで実行@macOS 10.14.5(左:Light Mode、右:Dark Mode)

AppleScript名:アラートダイアログ上にTable Viewを表示 v4
— Created 2019-02-21 by Takaaki Naganoya
— 2019 Piyomaru Software
use AppleScript version "2.5"
use scripting additions
use framework "Foundation"
use framework "AppKit"

property NSAlert : a reference to current application’s NSAlert
property NSColor : a reference to current application’s NSColor
property NSIndexSet : a reference to current application’s NSIndexSet
property NSScrollView : a reference to current application’s NSScrollView
property NSTableView : a reference to current application’s NSTableView
property NSTableColumn : a reference to current application’s NSTableColumn
property NSMutableArray : a reference to current application’s NSMutableArray
property NSRunningApplication : a reference to current application’s NSRunningApplication
property NSModalPanelWindowLevel : a reference to current application’s NSModalPanelWindowLevel
property NSAlertSecondButtonReturn : a reference to current application’s NSAlertSecondButtonReturn

property theResult : 0
property returnCode : 0
property theDataSource : {}

on run
  set (my theResult) to 0 –initialize
  
  
set paramObj to {myMessage:"項目の選択", mySubMessage:"適切なものを以下からえらんでください", aTableList:{{field1:"MacBook Air", field2:"119,800円", field3:"1.6GHzデュアルコアIntel Core i5(Turbo Boost使用時最大3.6GHz)、4MB L3キャッシュ"}, {field1:"MacBook Pro 13", field2:"139,800円", field3:"1.4GHzクアッドコアIntel Core i5(Turbo Boost使用時最大3.9GHz)、128MB eDRAM"}, {field1:"MacBook Pro 15", field2:"258,800円", field3:"2.6GHz 6コアIntel Core i7(Turbo Boost使用時最大4.5GHz)、12MB共有L3キャッシュ"}, {field1:"Mac mini", field2:"122,800円", field3:"3.0GHz 6コアIntel Core i5 Turbo Boost使用時最大4.1GHz 9MB共有L3キャッシュ"}, {field1:"iMac 21.5", field2:"120,800円", field3:"2.3GHzデュアルコアIntel Core i5(Turbo Boost使用時最大3.6GHz)"}, {field1:"iMac 4K 21.5", field2:"142,800円", field3:"3.6GHzクアッドコアIntel Core i3"}, {field1:"iMac 5K 27", field2:"198,800円", field3:"3.0GHz 6コア Intel Core i5(Turbo Boost使用時最大4.1GHz)"}, {field1:"iMac Pro", field2:"558,800円", field3:"3.2GHz Intel Xeon W Turbo Boost使用時最大4.2GHz 19MBキャッシュ"}}, aSortOrder:{"field1", "field2", "field3"}}
  
  
–my chooseItemByTableView:paramObj–for debug
  
my performSelectorOnMainThread:"chooseItemByTableView:" withObject:paramObj waitUntilDone:true
  
return (my theResult)
end run

on chooseItemByTableView:paramObj
  set aMainMes to myMessage of paramObj
  
set aSubMes to mySubMessage of paramObj
  
set aTList to (aTableList of paramObj) as list
  
set labelSortList to (aSortOrder of paramObj) as list
  
  
set aWidth to 600
  
set aHeight to 200
  
  
set aScroll to makeTableView(aTList, aWidth, aHeight, labelSortList) of me
  
  
–Detect Dark Mode
  
set dMode to retLIghtOrDark() of me
  
if dMode = true then
    set tvCol to 1
    
set tvAlpha to 0.8
    
set bCol to 0.1
    
set bAlpha to 0.8
    
set contentCol to (NSColor’s cyanColor())
  else
    set tvCol to 0
    
set tvAlpha to 0.1
    
set bCol to 1
    
set bAlpha to 0.8
    
set contentCol to (NSColor’s blackColor())
  end if
  
  
— set up alert  
  
set theAlert to NSAlert’s alloc()’s init()
  
tell theAlert
    its setMessageText:aMainMes
    
its setInformativeText:aSubMes
    
its addButtonWithTitle:"OK"
    
its addButtonWithTitle:"Cancel"
    
its setAccessoryView:aScroll
    
    
set myWindow to its |window|
  end tell
  
  
myWindow’s setOpaque:(false)
  
myWindow’s setBackgroundColor:(NSColor’s colorWithCalibratedWhite:(bCol) alpha:(bAlpha))
  
myWindow’s setLevel:(NSModalPanelWindowLevel)
  
  
— show alert in modal loop
  
NSRunningApplication’s currentApplication()’s activateWithOptions:0
  
my performSelectorOnMainThread:"doModal:" withObject:(theAlert) waitUntilDone:true
  
if (my returnCode) = 1001 then error number -128
  
  
set (my theResult) to (aScroll’s documentView’s selectedRow()) + 1
end chooseItemByTableView:

on doModal:aParam
  set (my returnCode) to (aParam’s runModal()) as number
end doModal:

–TableView Event Handlers
on numberOfRowsInTableView:aView
  return my theDataSource’s |count|()
end numberOfRowsInTableView:

on tableView:aView objectValueForTableColumn:aColumn row:aRow
  set aRec to (my theDataSource)’s objectAtIndex:(aRow as number)
  
set aTitle to (aColumn’s headerCell()’s title()) as string
  
set aRes to (aRec’s valueForKey:aTitle)
  
return aRes
end tableView:objectValueForTableColumn:row:

on makeTableView(aDicList, aWidth, aHeight, labelSortList)
  set aOffset to 40
  
set theDataSource to current application’s NSMutableArray’s alloc()’s init()
  
theDataSource’s addObjectsFromArray:aDicList
  
  
set aScroll to current application’s NSScrollView’s alloc()’s initWithFrame:(current application’s NSMakeRect(0, aOffset, aWidth, aHeight))
  
set aView to current application’s NSTableView’s alloc()’s initWithFrame:(current application’s NSMakeRect(0, aOffset, aWidth, aHeight))
  
  
set aLen to length of labelSortList
  
  
repeat with i in labelSortList
    set j to contents of i
    
set aColumn to (current application’s NSTableColumn’s alloc()’s initWithIdentifier:j)
    (
aColumn’s setWidth:(aWidth div aLen))
    (
aColumn’s headerCell()’s setStringValue:j)
    (
aView’s addTableColumn:aColumn)
  end repeat
  
  
aView’s setDelegate:me
  
aView’s setDataSource:me
  
aView’s reloadData()
  
  
aScroll’s setDocumentView:aView
  
aView’s enclosingScrollView()’s setHasVerticalScroller:true
  
aScroll’s setVerticalLineScroll:(30.0 as real)
  
  
–1行目を選択
  
set aIndexSet to current application’s NSIndexSet’s indexSetWithIndex:0
  
aView’s selectRowIndexes:aIndexSet byExtendingSelection:false
  
  
–強制的にトップにスクロール
  
set aDBounds to aScroll’s documentView()’s |bounds|()
  
if class of aDBounds = list then
    –macOS 10.13 or later
    
set maxHeight to item 2 of item 1 of aDBounds
  else
    –macOS 10.10….10.12
    
set maxHeight to height of |size| of aDBounds
  end if
  
  
set aPT to current application’s NSMakePoint(0.0, -1 * (maxHeight as real))
  
aScroll’s documentView()’s scrollPoint:aPT
  
  
return aScroll
end makeTableView

on alertShowHelp:aNotification
  display dialog "Help Me!" buttons {"OK"} default button 1 with icon 1
  
return false –trueを返すと親ウィンドウ(アラートダイアログ)がクローズする
end alertShowHelp:

–ダークモードの判定。ダークモード時:true、ライトモード時:falseが返る。System Eventsを使っていないのは、macOS 10.14以降対策(承認を取得しなくてもいいように)
on retLIghtOrDark()
  set curMode to (current application’s NSUserDefaults’s standardUserDefaults()’s stringForKey:"AppleInterfaceStyle") as string
  
return (curMode = "Dark") as boolean
end retLIghtOrDark

★Click Here to Open This Script 

Posted in Color GUI list Record | Tagged 10.11savvy 10.12savvy 10.13savvy 10.14savvy NSAlert NSAlertSecondButtonReturn NSColor NSIndexSet NSModalPanelWindowLevel NSMutableArray NSRunningApplication NSScrollView NSTableColumn NSTableView | 1 Comment

アラートダイアログ上にTexViewを表示_ヘルプ付き_半透明_Float_SuppressionButtonつき

Posted on 7月 10, 2019 by Takaaki Naganoya

アラートダイアログ上にTextViewを表示して、指定のテキストを閲覧するAppleScriptです。

Xcode上でNSAlert.hを調べ、アラートダイアログに指定できる各種オプションを指定してみました。NSWindowLevelの変更は効いていないみたいですけれども。

AppleScript名:アラートダイアログ上にTexViewを表示_ヘルプ付き_半透明_Float_SuppressionButtonつき
— Created 2019-07-09 by Takaaki Naganoya
— 2019 Piyomaru Software
use AppleScript version "2.4"
use scripting additions
use framework "Foundation"
use framework "AppKit"

property |NSURL| : a reference to current application’s |NSURL|
property NSFont : a reference to current application’s NSFont
property NSView : a reference to current application’s NSView
property NSAlert : a reference to current application’s NSAlert
property NSColor : a reference to current application’s NSColor
property NSTextView : a reference to current application’s NSTextView
property NSScrollView : a reference to current application’s NSScrollView
property NSUserDefaults : a reference to current application’s NSUserDefaults
property NSRunningApplication : a reference to current application’s NSRunningApplication
property NSModalPanelWindowLevel : a reference to current application’s NSModalPanelWindowLevel

property returnCode : 0
property supState : false

set asStr to do shell script "cal 2019"
set paramObj to {myMessage:"Main Message", mySubMessage:"Sub information", mes1:(asStr), mesWidth:450, mesHeight:200, fontName:"Courier", fontSize:11.0, suppressionMes:"Some Option"}

–my dispTextViewWithAlertdialog:paramObj–for debug
my performSelectorOnMainThread:"dispTextViewWithAlertdialog:" withObject:paramObj waitUntilDone:true

return (my supState)

on dispTextViewWithAlertdialog:paramObj
  –Receive Parameters
  
set aMainMes to (myMessage of paramObj) as string –Main Message
  
set aSubMes to (mySubMessage of paramObj) as string –Sub Message
  
set mesStr to (mes1 of paramObj) as string –Text Input field 1 Label
  
set aWidth to (mesWidth of paramObj) as integer –TextView width
  
set aHeight to (mesHeight of paramObj) as integer –TextView height
  
set aFontName to (fontName of paramObj) as string –TextView font name
  
set aFontSize to (fontSize of paramObj) as real –TextView font size
  
set aSupMes to (suppressionMes of paramObj) as string –Suppression Button Titile
  
  
–Detect Dark Mode
  
set dMode to retLIghtOrDark() of me
  
if dMode = true then
    set tvCol to 1
    
set tvAlpha to 0.8
    
set bCol to 0.1
    
set bAlpha to 0.8
    
set contentCol to (NSColor’s cyanColor())
  else
    set tvCol to 0
    
set tvAlpha to 0.1
    
set bCol to 1
    
set bAlpha to 0.5
    
set contentCol to (NSColor’s grayColor())
  end if
  
  
— Create a TextView with Scroll View
  
set aScroll to NSScrollView’s alloc()’s initWithFrame:(current application’s NSMakeRect(0, 0, aWidth, aHeight))
  
set aView to NSTextView’s alloc()’s initWithFrame:(current application’s NSMakeRect(0, 0, aWidth, aHeight))
  
set aColor to NSColor’s colorWithDeviceRed:0.0 green:0.0 blue:0.0 alpha:(tvAlpha)
  
  
aView’s setRichText:true
  
aView’s useAllLigatures:true
  
aView’s setTextColor:(contentCol)
  
aView’s setFont:(NSFont’s fontWithName:aFontName |size|:aFontSize)
  
  
aView’s setDrawsBackground:false


aView’s setBackgroundColor:aColor
  
aView’s setOpaque:(false)
  
aView’s setString:mesStr
  
aScroll’s setDocumentView:aView
  
–aScroll’s setBorderType:(current application’s NSBezelBorder)
  
–aScroll’s setBorderType:(current application’s NSGrooveBorder)
  
–aScroll’s setBorderType:(current application’s NSLineBorder)
  
aScroll’s setBorderType:(current application’s NSNoBorder)
  
  
–Ruler
  
–aScroll’s setHasHorizontalRuler:(true)
  
–aScroll’s setRulersVisible:(true)
  
  
aView’s enclosingScrollView()’s setHasVerticalScroller:true
  
  
set anImage to current application’s NSImage’s imageNamed:(current application’s NSImageNameComputer)
  
  
— set up alert
  
set theAlert to NSAlert’s alloc()’s init()
  
tell theAlert
    its setIcon:(anImage)
    
    
–for Messages
    
its setMessageText:(aMainMes)
    
its setInformativeText:(aSubMes)
    
    
–for Buttons
    
its addButtonWithTitle:"OK"
    
its addButtonWithTitle:"Cancel"
    
    
–Add Accessory View
    
its setAccessoryView:(aScroll)
    
    
–for Help Button
    
its setShowsHelp:(true)
    
its setDelegate:(me)
    
    
its setAlertStyle:0 —-0…2
    
    
its setShowsSuppressionButton:(true) –「今後このメッセージを表示しない」チェックボックスを表示
    
    
set suppressionB to its suppressionButton
    
set myWindow to its |window|
  end tell
  
  
myWindow’s setOpaque:(false)
  
myWindow’s setBackgroundColor:(NSColor’s colorWithCalibratedWhite:(bCol) alpha:(bAlpha))
  
myWindow’s setLevel:(NSModalPanelWindowLevel)
  
  
suppressionB’s setTitle:(aSupMes)
  
suppressionB’s setState:(true) —default state
  
  
— show alert in modal loop
  
NSRunningApplication’s currentApplication()’s activateWithOptions:0
  
my performSelectorOnMainThread:"doModal:" withObject:(theAlert) waitUntilDone:true
  
if (my returnCode as number) = 1001 then error number -128
  
  
set my supState to (suppressionB’s state) as boolean
end dispTextViewWithAlertdialog:

on doModal:aParam
  set (my returnCode) to aParam’s runModal()
end doModal:

on alertShowHelp:aNotification
  display dialog "Help Me!" buttons {"OK"} default button 1 with icon 1
  
return false –trueを返すと親ウィンドウ(アラートダイアログ)がクローズする
end alertShowHelp:

–ダークモードの判定。ダークモード時:true、ライトモード時:falseが返る。System Eventsを使っていないのは、macOS 10.14以降対策(承認を取得しなくてもいいように)
on retLIghtOrDark()
  set curMode to (current application’s NSUserDefaults’s standardUserDefaults()’s stringForKey:"AppleInterfaceStyle") as string
  
return (curMode = "Dark") as boolean
end retLIghtOrDark

★Click Here to Open This Script 

Posted in Color dialog Font GUI Icon Image | Tagged 10.12savvy 10.13savvy 10.14savvy NSAlert NSColor NSFont NSModalPanelWindowLevel NSRunningApplication NSScrollView NSTextView NSURL NSUserDefaults | Leave a comment

Post navigation

  • Older posts

電子書籍(PDF)をオンラインストアで販売中!

Google Search

Popular posts

  • 開発機としてM2 Mac miniが来たのでガチレビュー
  • macOS 13.6.5 AS系のバグ、一切直らず
  • CotEditorで2つの書類の行単位での差分検出
  • Apple純正マウス、キーボードのバッテリー残量取得
  • macOS 15, Sequoia
  • 初心者がつまづきやすい「log」コマンド
  • 指定のWordファイルをPDFに書き出す
  • Adobe AcrobatをAppleScriptから操作してPDF圧縮
  • メキシカンハットの描画
  • Pages本執筆中に、2つの書類モード切り替えに気がついた
  • 与えられた文字列の1D Listのすべての順列組み合わせパターン文字列を返す v3(ベンチマーク用)
  • 2023年に書いた価値あるAppleScript
  • Pixelmator Pro v3.6.4でAppleScriptからの操作時の挙動に違和感が
  • AdobeがInDesign v19.4からPOSIX pathを採用
  • Safariで「プロファイル」機能を使うとAppleScriptの処理に影響
  • Cocoa Scripting Course 続刊計画
  • NaturalLanguage.frameworkでNLEmbeddingの処理が可能な言語をチェック
  • macOS 14.xでScript Menuの実行速度が大幅に下がるバグ
  • Numbersで選択範囲のセルの前後の空白を削除
  • AppleScriptによる並列処理

Tags

10.11savvy (1102) 10.12savvy (1243) 10.13savvy (1392) 10.14savvy (587) 10.15savvy (438) 11.0savvy (283) 12.0savvy (207) 13.0savvy (171) 14.0savvy (121) 15.0savvy (98) CotEditor (64) Finder (51) iTunes (19) Keynote (115) NSAlert (61) NSArray (51) NSBitmapImageRep (20) NSBundle (20) NSButton (34) NSColor (52) NSDictionary (28) NSFileManager (23) NSFont (20) NSImage (41) NSJSONSerialization (21) NSMutableArray (62) NSMutableDictionary (22) NSPredicate (36) NSRunningApplication (56) NSScreen (30) NSScrollView (22) NSString (118) NSURL (98) NSURLRequest (23) NSUTF8StringEncoding (30) NSView (33) NSWorkspace (20) Numbers (72) Pages (53) Safari (44) Script Editor (27) WKUserContentController (21) WKUserScript (20) WKWebView (23) WKWebViewConfiguration (22)

カテゴリー

  • 2D Bin Packing
  • 3D
  • AirDrop
  • AirPlay
  • Animation
  • AppleScript Application on Xcode
  • Beginner
  • Benchmark
  • beta
  • Bluetooth
  • Books
  • boolean
  • bounds
  • Bug
  • Calendar
  • call by reference
  • check sum
  • Clipboard
  • Cocoa-AppleScript Applet
  • Code Sign
  • Color
  • Custom Class
  • dialog
  • diff
  • drive
  • Droplet
  • exif
  • file
  • File path
  • filter
  • folder
  • Font
  • Font
  • GAME
  • geolocation
  • GUI
  • GUI Scripting
  • Hex
  • History
  • How To
  • iCloud
  • Icon
  • Image
  • Input Method
  • Internet
  • iOS App
  • JavaScript
  • JSON
  • JXA
  • Keychain
  • Keychain
  • Language
  • Library
  • list
  • Locale
  • Localize
  • Machine Learning
  • Map
  • Markdown
  • Menu
  • Metadata
  • MIDI
  • MIME
  • Natural Language Processing
  • Network
  • news
  • Noification
  • Notarization
  • Number
  • Object control
  • OCR
  • OSA
  • parallel processing
  • PDF
  • Peripheral
  • PRODUCTS
  • QR Code
  • Raw AppleEvent Code
  • Record
  • rectangle
  • recursive call
  • regexp
  • Release
  • Remote Control
  • Require Control-Command-R to run
  • REST API
  • Review
  • RTF
  • Sandbox
  • Screen Saver
  • Script Libraries
  • sdef
  • search
  • Security
  • selection
  • shell script
  • Shortcuts Workflow
  • Sort
  • Sound
  • Spellchecker
  • Spotlight
  • SVG
  • System
  • Tag
  • Telephony
  • Text
  • Text to Speech
  • timezone
  • Tools
  • Update
  • URL
  • UTI
  • Web Contents Control
  • WiFi
  • XML
  • XML-RPC
  • イベント(Event)
  • 未分類

アーカイブ

  • 2025年1月
  • 2024年12月
  • 2024年11月
  • 2024年10月
  • 2024年9月
  • 2024年8月
  • 2024年7月
  • 2024年6月
  • 2024年5月
  • 2024年4月
  • 2024年3月
  • 2024年2月
  • 2024年1月
  • 2023年12月
  • 2023年11月
  • 2023年10月
  • 2023年9月
  • 2023年8月
  • 2023年7月
  • 2023年6月
  • 2023年5月
  • 2023年4月
  • 2023年3月
  • 2023年2月
  • 2023年1月
  • 2022年12月
  • 2022年11月
  • 2022年10月
  • 2022年9月
  • 2022年8月
  • 2022年7月
  • 2022年6月
  • 2022年5月
  • 2022年4月
  • 2022年3月
  • 2022年2月
  • 2022年1月
  • 2021年12月
  • 2021年11月
  • 2021年10月
  • 2021年9月
  • 2021年8月
  • 2021年7月
  • 2021年6月
  • 2021年5月
  • 2021年4月
  • 2021年3月
  • 2021年2月
  • 2021年1月
  • 2020年12月
  • 2020年11月
  • 2020年10月
  • 2020年9月
  • 2020年8月
  • 2020年7月
  • 2020年6月
  • 2020年5月
  • 2020年4月
  • 2020年3月
  • 2020年2月
  • 2020年1月
  • 2019年12月
  • 2019年11月
  • 2019年10月
  • 2019年9月
  • 2019年8月
  • 2019年7月
  • 2019年6月
  • 2019年5月
  • 2019年4月
  • 2019年3月
  • 2019年2月
  • 2019年1月
  • 2018年12月
  • 2018年11月
  • 2018年10月
  • 2018年9月
  • 2018年8月
  • 2018年7月
  • 2018年6月
  • 2018年5月
  • 2018年4月
  • 2018年3月
  • 2018年2月

https://piyomarusoft.booth.pm/items/301502

メタ情報

  • ログイン
  • 投稿フィード
  • コメントフィード
  • WordPress.org

Forum Posts

  • 人気のトピック
  • 返信がないトピック

メタ情報

  • ログイン
  • 投稿フィード
  • コメントフィード
  • WordPress.org
Proudly powered by WordPress
Theme: Flint by Star Verte LLC