Menu

Skip to content
AppleScriptの穴
  • Home
  • Products
  • Books
  • Docs
  • Events
  • Forum
  • About This Blog
  • License
  • 仕事依頼

AppleScriptの穴

Useful & Practical AppleScript archive. Click '★Click Here to Open This Script' Link to download each AppleScript

タグ: NSUUID

クリップボード内のテキストをSayコマンドで読み上げて音声ファイル化

Posted on 5月 27, 2020 by Takaaki Naganoya

読み上げ対象のテキストをコピーした状態で実行するAppleScriptです。クリップボード内のテキストをSayコマンドで読み上げて、音声ファイルにレンダリングします。出力後、読み上げ所要時間を出力ファイルから求めてダイアログ表示します。

音声レンダリング処理は実際の音声読み上げ処理よりも短い時間で完了します。

–> Downlad Script With library within its bundle

掲載のリストを実行しても、スライダー入力ライブラリが含まれていないため、そのままでは実行できません。↑のScriptをまるごとダウンロードして展開すると、ライブラリ入りのScriptになります。実行にはダウンロードしたScriptをご利用ください。プログラムリスト掲載は参考のために行なっているものです。


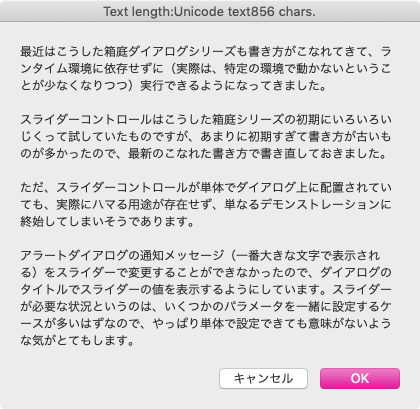
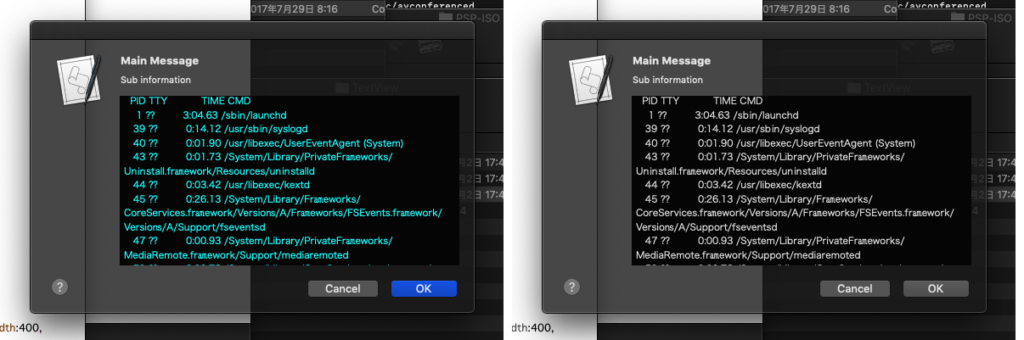
▲ステップ1:念のために、読み上げ対象テキストをダイアログ表示


▲ステップ2:読み上げ時の速度をスライダーで選択
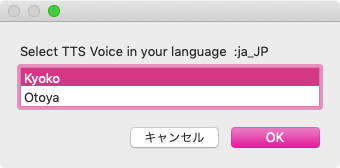

▲ステップ3:読み上げ音声を選択


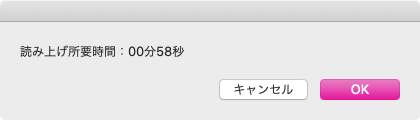
▲ステップ4:読み上げ所要時間をダイアログ表示


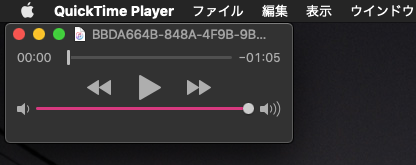
▲ステップ5:音声レンダリングしたファイルをQuickTime Playerでオープン

AppleScript名:クリップボード内のテキストをSayコマンドで読み上げて音声ファイル化.scptd
—
–  Created by: Takaaki Naganoya
–  Created on: 2020/05/27
—
–  Copyright © 2020 Piyomaru Software, All Rights Reserved
—

use AppleScript version "2.4" — Yosemite (10.10) or later
use framework "Foundation"
use framework "AppKit"
use framework "AVFoundation"
use scripting additions
use slLib : script "sliderLib"

property |NSURL| : a reference to current application’s |NSURL|
property NSDate : a reference to current application’s NSDate
property NSUUID : a reference to current application’s NSUUID
property NSFileManager : a reference to current application’s NSFileManager
property AVAudioPlayer : a reference to current application’s AVAudioPlayer
property NSDateFormatter : a reference to current application’s NSDateFormatter
property NSSpeechSynthesizer : a reference to current application’s NSSpeechSynthesizer

set aInfo to clipboard info
set uCount to (clipboard info for Unicode text)
if uCount = {} then
  display dialog "There is no text information in the clipboard" with title "Terminate information" buttons {"OK"} default button 1 with icon 2
  
return
end if

set totalCount to item 2 of item 1 of uCount

set aStr to the clipboard as text

–読み上げ内容の確認
display dialog aStr with title "Text length:" & (uCount as string) & " chars."

–読み上げ速度をSliderで入力
set rRes to slLib’s chooseBySlider(180, 220, "Select TTS reading pitch (small number:slow)")

–読み上げTTSキャラクタの選択
set aLoc to (current application’s NSLocale’s currentLocale()’s identifier()) as string –>  "ja_JP"
set vList to getTTSVoiceNameWithLanguage(aLoc) of me
set vRes to choose from list vList with prompt ("Select TTS Voice in your language :" & aLoc) without empty selection allowed
if vRes = false then return

set vCharacter to contents of first item of vRes

–音声ファイルの作成先パスを求める
set aUUID to NSUUID’s UUID()’s UUIDString() as string
set aPath to (((path to movies folder) as string) & aUUID & ".aif")
set aPOSIX to POSIX path of aPath

–音声レンダリング
tell current application
  say aStr using vCharacter saving to (aPOSIX) speaking rate rRes without waiting until completion
end tell

–レンダリングした音声の読み上げ所要時間を計算
set aDur to getDuration(aPath as alias) of me

–レンダリングした音声ファイルをオープン
tell application "QuickTime Player"
  open aPath
end tell

–完了報告
display dialog "読み上げ所要時間:" & my formatHMS(aDur)

on getTTSVoiceNameWithLanguage(voiceLang)
  set outArray to current application’s NSMutableArray’s new()
  
  
set aList to NSSpeechSynthesizer’s availableVoices()
  
set bList to aList as list
  
  
repeat with i in bList
    set j to contents of i
    
set aDIc to (NSSpeechSynthesizer’s attributesForVoice:j)
    (
outArray’s addObject:aDIc)
  end repeat
  
  
set aPredicate to current application’s NSPredicate’s predicateWithFormat_("VoiceLocaleIdentifier == %@", voiceLang)
  
set filteredArray to outArray’s filteredArrayUsingPredicate:aPredicate
  
set aResList to (filteredArray’s valueForKey:"VoiceName") as list
  
  
return aResList
end getTTSVoiceNameWithLanguage

on getDuration(aFile)
  set aURL to |NSURL|’s fileURLWithPath:(POSIX path of aFile)
  
  
repeat 1000 times
    set aAudioPlayer to AVAudioPlayer’s alloc()’s initWithContentsOfURL:aURL |error|:(missing value)
    
set aRes to aAudioPlayer’s prepareToPlay()
    
if aRes as boolean = true then exit repeat
    
delay 0.5
  end repeat
  
  
set channelCount to aAudioPlayer’s numberOfChannels()
  
set aDuration to aAudioPlayer’s duration()
  
return aDuration as real
end getDuration

on retAvailableTTSnames()
  set outList to {}
  
  
set aList to NSSpeechSynthesizer’s availableVoices()
  
set bList to aList as list
  
  
repeat with i in bList
    set j to contents of i
    
set aInfo to (NSSpeechSynthesizer’s attributesForVoice:j)
    
set aInfoRec to aInfo as record
    
set aName to VoiceName of aInfoRec
    
set the end of outList to aName
  end repeat
  
  
return outList
end retAvailableTTSnames

on formatHMS(aTime)
  set aDate to NSDate’s dateWithTimeIntervalSince1970:aTime
  
set aFormatter to NSDateFormatter’s alloc()’s init()
  
  
—This formatter text is localized in Japanese.
  
if aTime < hours then
    aFormatter’s setDateFormat:"mm分ss秒"
  else if aTime < days then
    aFormatter’s setDateFormat:"HH時間mm分ss秒"
  else
    aFormatter’s setDateFormat:"DD日HH時間mm分ss秒"
  end if
  
  
set timeStr to (aFormatter’s stringFromDate:aDate) as string
  
return timeStr
end formatHMS

★Click Here to Open This Script 

(Visited 153 times, 1 visits today)
Posted in dialog file Language Locale Text | Tagged 10.13savvy 10.14savvy 10.15savvy AVAudioPlayer NSDate NSDateFormatter NSFileManager NSMutableArray NSPredicate NSSpeechSynthesizer NSURL NSUUID | Leave a comment

画像の指定エリアを透明色塗りつぶし(矩形切り抜き)

Posted on 2月 3, 2020 by Takaaki Naganoya

指定画像の指定エリア(矩形)を透明色で塗りつぶすAppleScriptです。透明色で塗りつぶす=矩形で切り抜いたようなかっこうになります。

画像(NSImage)を指定色で塗りつぶすという処理はよく見かけるものですが、clearColor()(透明色)で塗りつぶすという処理を行うとどうなるかといえば…………何も起こりません。

透明色でNSImageを塗りつぶすという処理は、たいへんに「ありそう」な処理ですが、なかなか見つからない。

さんざん探し回ったのですが、自分には見つけられませんでした。ちょうどEdama2さんに相談してみたところ、こういう処理を探し出してもらえました(ありがとうございますー)。ただ、見つけてきた処理そのままでは思い通りの結果にならなかったので、修正が必要であったとのこと。

透明塗りつぶし(切り抜き)の指定座標はCocoaの座標系をそのまま利用しているので、左下が原点です。

NSBezierPathで切り抜き(透明色で塗りつぶし)できるといいのになーという感じではあります。

AppleScript名:画像の指定エリアを透明色塗りつぶし(矩形切り抜き)
— Created 2017-11-19 by Takaaki Naganoya
— Modified 2018-02-14 by Takaaki Naganoya
— Modified 2020-02-03 by Edama2 & Takaaki Naganoya
use AppleScript version "2.5"
use scripting additions
use framework "Foundation"
use framework "AppKit"

property NSUUID : a reference to current application’s NSUUID
property NSColor : a reference to current application’s NSColor
property NSString : a reference to current application’s NSString
property NSImage : a reference to current application’s NSImage
property NSScreen : a reference to current application’s NSScreen
property NSBezierPath : a reference to current application’s NSBezierPath
property NSPNGFileType : a reference to current application’s NSPNGFileType
property NSCompositeClear : a reference to current application’s NSCompositeClear
property NSBitmapImageRep : a reference to current application’s NSBitmapImageRep

–切り抜きエリア(複数)
set drawList to {{origin:{x:0, y:0}, |size|:{width:200, height:100}}, {origin:{x:100, y:100}, |size|:{width:50, height:50}}}

set imgPath to POSIX path of (choose file of type {"public.image"})
set anImage to NSImage’s alloc()’s initWithContentsOfFile:imgPath

set fillColor to (NSColor’s colorWithCalibratedRed:1.0 green:0.0 blue:0.0 alpha:0.9)

–透明色塗りつぶし処理呼び出し
set resImage to drawImageWithClearColorFill(anImage, drawList) of me

set aUUIDstr to (NSUUID’s UUID()’s UUIDString()) as string
set aPath to ((NSString’s stringWithString:imgPath)’s stringByDeletingLastPathComponent()’s stringByAppendingPathComponent:aUUIDstr)’s stringByAppendingPathExtension:"png"

set fRes to saveImageRepAtPathAsPNG(resImage, aPath) of me

on drawImageWithClearColorFill(anImage, drawList)
  set retinaF to (NSScreen’s mainScreen()’s backingScaleFactor()) as real
  
–>  2.0 (Retina) / 1.0 (Non Retina)
  
  
set aClearCol to NSColor’s clearColor()
  
set op to current application’s NSCompositeClear
  
  
anImage’s lockFocus() –描画開始
  
  
repeat with i in drawList
    set origX to (x of origin of i) / retinaF
    
set origY to (y of origin of i) / retinaF
    
set sizeX to (width of |size| of i) / retinaF
    
set sizeY to (height of |size| of i) / retinaF
    
    
–Draw Clear Color
    
–http://www.drissman.com/blog/archives/2009/10/09/nsrectfill_and_nscolor_clearcolor.html
    
set theRect to {{x:origX, y:origY}, {width:sizeX, height:sizeY}}
    
aClearCol’s |set|()
    
current application’s NSRectFillUsingOperation(theRect, op)
  end repeat
  
  
anImage’s unlockFocus() –描画ここまで
  
  
return anImage –returns NSImage
end drawImageWithClearColorFill

–画像を指定パスにPNG形式で保存
on saveImageRepAtPathAsPNG(anImage, outPath)
  set imageRep to anImage’s TIFFRepresentation()
  
set aRawimg to NSBitmapImageRep’s imageRepWithData:imageRep
  
  
set pathString to NSString’s stringWithString:outPath
  
set newPath to pathString’s stringByExpandingTildeInPath()
  
  
set myNewImageData to (aRawimg’s representationUsingType:(NSPNGFileType) |properties|:(missing value))
  
return (myNewImageData’s writeToFile:newPath atomically:true) as boolean
end saveImageRepAtPathAsPNG

★Click Here to Open This Script 

(Visited 98 times, 1 visits today)
Posted in file File path Image | Tagged 10.14savvy 10.15savvy NSBitmapImageRep NSColor NSCompositeClear NSImage NSPNGFileType NSScreen NSString NSUUID | 1 Comment

GUI Scriptingでコンテクストメニューのキャプチャを取得

Posted on 1月 24, 2020 by Takaaki Naganoya

GUI Scriptingを用いてスクリプトエディタ上でコンテクストメニューを表示させて、コンテクストメニューのキャプチャを行うAppleScriptです。macOS 10.14.6上で試しただけなので、10.15上では試していません(たぶん動くと思うのですが)。

–> Watch Demo Movie

画面キャプチャをNSImageに取得する機能については、DSCapture.frameworkをビルドして、AppleScript(実行環境はScript Debugger)から呼び出しています。

–> Download DSCapture.framework (To ~/Library/Frameworks/)

AppleScriptの鬼っ子機能である「GUI Scripting」。ある顧客が「キーボードショートカットとキーボード操作をそのままScript化することでこれを作れ」という仕様を出してきて、とても実現できない内容がまだらに含まれていたので「ナイスジョーク!」と却下した記憶があります。

「できること」(キーボードショートカット操作)に「できないこと」(目視で当該データの位置確認)を混ぜて仕様を出されると悪夢でしかありません。

あと、GUI Scriptingで操作を行うと信頼性がないうえに、信頼性を確保するためには「待つ」という処理が必要だったり、本来のAppleScriptの処理速度よりも100倍以上遅くなるので、本当に必要な箇所にだけ使う&可能なかぎり使用しないというのが自分の基本的なスタンスです。

コンテクストメニューの画面キャプチャを自動で

そんな中、新型Piyomaru Script Assistant(macOS 10.14以降対応。10.13は無視)の資料を作るために、コンテクストメニューの内容を画面キャプチャする必要に迫られました。

AppleScriptが500個ぐらい、階層化されたメニューに入っているので、これの画面キャプチャを撮るだけで一仕事です。テストで1階層分の資料を作ってみたのですが、けっこうかかります。

そこで、スクリプトエディタ上で表示させたコンテクストメニューをプログラムで撮れないかを検討することになります。

真っ先に調べたのはCocoaにそういう機能がないかどうか。自前のプログラムのビューの内容をキャプチャすることはできますが、他のアプリケーションのビューをキャプチャする機能は見つかりませんでした。

仕方がないので、画面のキャプチャをまるごと取得して、撮影対象のビューの座標から画像の切り抜きを行うようにしてみました。

GUI Scriptingでコンテクストメニューを表示させるのは無理かと思っていたのですが、できるんですね。これも冗談半分で探してみたらあっけなく方法が見つかって、

tell theTarget to perform action "AXShowMenu" --コンテクストメニューの表示

これで実際にコンテクストメニューの表示を行えました。

実現はいろいろ大変

スクリプトエディタ上の画面撮影を行うので、Scriptの実行そのものはScript Debuggerで実行。

問題になったのは2点。

1つは、画面キャプチャの撮影を行うフレームワークでメインディスプレイから画面イメージをNSImageで取得し、その結果をメイン側(暗黙のrunハンドラといったほうがいいのか)のプロパティに返しているのですが、すぐに反映されないらしくて、クラッシュを頻発。

結局、プロパティに内容が反映されたことをループで時間待ちして受信。

もう1つ困った点は、コンテクストメニューの表示解除(キャンセル)。1つのコンテクストメニュー表示&キャプチャ撮影だけでは意味がありません。選択メニュー項目を変更して、複数のコンテクストメニューのキャプチャを順次行えなくてはなりません。

いろいろな方法を試してみたものの、最前面のアプリケーションを「スクリプトエディタ」でない状態を作ればコンテクストメニュー表示状態は解除されます(このあたり、AppleScriptが純粋なプログラマーに苦手とされる理由。実際に使っているユーザーでないとこういう発想自体が出てこない)。Script Debugger側で実行しているので、Script Debuggerをactivateすることでその状態(コンテクストメニュー表示解除)を作ってみました。

そんなわけでコンテクストメニューの(選択項目を変更して全項目を選択状態にした)画面キャプチャができました。

現在は1階層分のコンテクストメニューの撮影を行なっていますが、メニュー階層をすべてAppleScript側からスキャンして、それぞれのメニューに対して、各メニュー項目を表示した状態で巡回キャプチャできるとよさそうです。

cropNSImageTo:{x1, y1, x2, y2} fromImage:theImage ハンドラは、Y座標の変換をこの用途(全画面キャプチャしたNSImageの切り抜き)の帳尻合わせのために書き換えています。この用途以外では使えないはずです。

AppleScript名:GUI Scriptingで指定したGUI部品のキャプチャを取得.scptd
—
–  Created by: Takaaki Naganoya
–  Created on: 2020/01/24
—
–  Copyright © 2020 Piyomaru Software, All Rights Reserved
—

use AppleScript version "2.4" — Yosemite (10.10) or later
use framework "Foundation"
use framework "DSCapture" –https://github.com/kiding/DSCapture.framework
use framework "AppKit"
use scripting additions

property |NSURL| : a reference to current application’s |NSURL|
property NSUUID : a reference to current application’s NSUUID
property NSString : a reference to current application’s NSString
property NSImage : a reference to current application’s NSImage
property NSPNGFileType : a reference to current application’s NSPNGFileType
property NSBitmapImageRep : a reference to current application’s NSBitmapImageRep

property targPos : {0, 0}
property targSize : {0, 0}
property screenSize : {}
property outPath : ""
property captImg : missing value

set (my captImg) to missing value

tell application "System Events"
  tell process "スクリプトエディタ" –"Script Editor" (Japanese localized name)
    –Editor Area Reference
    
set theTarg to text area 1 of scroll area 1 of splitter group 1 of splitter group 1 of window 1
  end tell
end tell

repeat with i from 1 to 19
  
  
set captImg to missing value
  
set outPath to (POSIX path of (path to desktop)) & ((NSUUID’s UUID()’s UUIDString()) as string) & ".png"
  
  
set {mPos, mSize} to dispMenu(i, theTarg) of me
  
copy mPos to {cx1, cy1}
  
copy mSize to {cWidth, cHeight}
  
  
screenCapture() of me
  
  
repeat 100 times
    if (my captImg) is not equal to missing value then exit repeat
    
delay 0.1
  end repeat


set bImg to (my cropNSImageTo:{cx1, cy1, cWidth, cHeight} fromImage:(my captImg))
  
saveNSImageAtPathAsPNG(bImg, my outPath) of me
  
  
tell current application to activate –Cancel Context Menu
  
delay 0.1
end repeat

on screenCapture()
  current application’s DSCapture’s sharedCapture()’s |full|()’s captureWithTarget:me selector:"displayCaptureData:" useCG:false
end screenCapture

–Delegate Handler
on displayCaptureData:aSender
  set aCount to aSender’s |count|()
  
set anImage to (aSender’s imageAtIndex:0)
  
set my captImg to anImage
  
–saveNSImageAtPathAsPNG(anImage, my outPath) of me
end displayCaptureData:

on cropNSImageTo:{x1, y1, x2, y2} fromImage:theImage
  set newWidth to x2
  
set newHeight to y2
  
set theSize to (theImage’s |size|())
  
set oldHeight to height of theSize
  
  
— transpose y value for Cocoa coordintates
  
set y1 to oldHeight – newHeight – y1
  
set newRect to {{x:x1, y:y1}, {width:x2, height:y2}}
  
  
theImage’s lockFocus()
  
set theRep to NSBitmapImageRep’s alloc()’s initWithFocusedViewRect:newRect
  
theImage’s unlockFocus()
  
  
set outImage to NSImage’s alloc()’s initWithSize:(theRep’s |size|())
  
outImage’s addRepresentation:theRep
  
  
return outImage
end cropNSImageTo:fromImage:

–NSImageを指定パスにPNG形式で保存
on saveNSImageAtPathAsPNG(anImage, outPath)
  set imageRep to anImage’s TIFFRepresentation()
  
set aRawimg to current application’s NSBitmapImageRep’s imageRepWithData:imageRep
  
set pathString to current application’s NSString’s stringWithString:outPath
  
set newPath to pathString’s stringByExpandingTildeInPath()
  
set myNewImageData to (aRawimg’s representationUsingType:(current application’s NSPNGFileType) |properties|:(missing value))
  
set aRes to (myNewImageData’s writeToFile:newPath atomically:true) as boolean
  
return aRes –成功ならtrue、失敗ならfalseが返る
end saveNSImageAtPathAsPNG

on dispMenu(selInd, theTarget)
  activate application "Script Editor"
  
tell application "System Events"
    tell process "スクリプトエディタ" –"Script Editor" (Japanese localized name)
      
      
ignoring application responses
        tell theTarget to perform action "AXShowMenu" –コンテクストメニューの表示
      end ignoring
      
      
tell text area 1 of scroll area 1 of splitter group 1 of splitter group 1 of window 1
        tell menu 1
          set mPos to position
          
set mSize to size
          
          
set mList to every menu item
          
tell menu item (13 + selInd)
            set aRes to properties
            
set selected to true
          end tell
        end tell
      end tell
      
    end tell
  end tell
  
  
return {mPos, mSize}
end dispMenu

★Click Here to Open This Script 

(Visited 236 times, 3 visits today)
Posted in GUI Scripting | Tagged 10.14savvy NSBitmapImageRep NSImage NSPNGFileType NSString NSURL NSUUID | Leave a comment

CIFilterとGPUImageで画像差分検出演算を比較

Posted on 11月 22, 2019 by Takaaki Naganoya

オープンソースのGPUImage.framework(GPUImage1)はAppleScriptから呼び出すのも簡単ですし、機能セットも充実しており、非常に重宝して使っています。

ただし、GPUImage自体はSwiftで書き直されたGPUImage2、OSの変更を受けてOpenGLではなくMetalを用いるように書き直され、いまだ発展途上のGPUImage3と変化してきました。

・GPUImageのバージョンと搭載フィルタ数の推移

GPUImage1:■■■■■■■■■■■■ 125
GPUImage2:■■■■■■■■■■ 100
GPUImage3:■■■■ 45

GPUImage2/3とバージョンが進むにつれて搭載フィルタ数が減っており、かつGPUImage2以降はAppleScriptから呼べないため、GPUImage3は(自分の)移行先になりません。

Objective-CベースのGPUImage1系のプログラムを使い続けるという判断をしている開発者は多いようで、Github上で派生プログラムが大量にみつかります。ただ、GPUImage1系はmacOSがOpenGLを完全廃止にしたとたんに動かなくなるはずです。

このため、GPUImage1系に依存しているプログラムは別の部品を呼び出して処理する必要が出てきます。

一番有望なのは、macOS標準搭載のCIFilter。CIFilterについては、実際にプログラムを組んでみて「組みにくい」という印象を受けていました(機能はちゃんとしていそうなものの、機能数にドキュメントが見合っていません)。あと、AppleScriptからパラメータを指定しにくいという印象を受けていました(パラメータに指定するオブジェクトにAppleScriptから直接指定できないものがあるので、少しラッパーを書く必要がある)。

その後、各種フィルタを呼び出す汎用ルーチンを整備することで、利用難易度を下げる努力を自主的に行なっています。

・GPUImage3とCoreImageの搭載フィルタ数の比較

GPUImage3:■■■■ 45
CoreImage:■■■■■■■■■■■■■■■■■ 174

そこで、実際に処理速度の面でどうなのか、CIFilterとGPUImageを比較するとどうなのか、調べてみました。

まずは、ざっくりありもののルーチンを引っ張り出してきて実行。どちらも期待どおりの動作をしてくれます。ただし、周辺ルーチンの仕様が違っていたのでそこも合わせます。

乱数ファイル名を作成する定番のshell commandの「uuidgen」はお手軽な反面、呼び出すのに時間がかかるので(手元の時間で0.1秒程度強)、より高速なCocoaのUUIDStringを用いる部品に置き換えました。

それぞれのフレームワークごとの挙動の違いもあります。

経験上、GPUImage.frameworkは初回実行時だけは時間が長くかかる傾向があり(1秒以上かかる)、2回目以降はより短い時間で処理できるようになることを確認しています。一方、CIFilterは初回およびそれ以降の呼び出しでもさほど処理時間が変わりません。

これら2つを実際に同じデータで同一条件下で比較してみたところ、同一の処理(画像の差分計算)を行なったかぎりでは処理時間に差はほとんど有意な差はありませんでした。

Script Geek 2.0.1によるScriptの処理時間比較

First:GPUImage Version , Second:CoreImage Version

MacBookPro10,1,  macOS Version 10.14.6 (Build 18G2012),  10 iterations
         First Run   Total Time    Average  
First        0.969        1.194      0.119
Second       0.121        1.221      0.122
Ratio (excluding first run): 1:1.02

自分のメインマシン(MacBook Pro Retina 2012、Core i7 2.66GHz、RAM 8GB)ではどちらもテストデータ(1192x1684pixel 8bit color image x 2)を0.1〜0.2秒程度で処理できています。個人的には十分なスピードが出ていると感じていますが、不満がある方はデータをRAM Disk上に置いたり、並列処理するとよいのではないでしょうか(シングルスレッド処理が高速なマシンを用意するというのが一番効きそうではあります。iMac 5Kの上位モデルとか)。

すべての類似フィルタで比較を行なったわけではありませんが(どれとどれが類似、という情報を整理するのに手間がかかる)、一番使っている「空白検出のためのヒストグラム計算フィルタ」はGPUImageにしか存在しませんでした(作成当時の話で現在はCoreImageにもCIAreaHistogramなどの機能があります)。

空白検出処理を高速に行えることで巨大なメリットが生じています。用途については枚挙にいとまがありませんが、Markdown書類をPDFにレンダリングした場合に、末尾に無用な空白のページが生じるケースがあり、これを検出しつつ末尾のページを自動削除することで、膨大な無駄手間を削減できています。空白検出処理を高速に行う手段を用意していないと、Photoshopで指定ページをレンダリングしてヒストグラムを計算する必要があるわけで、Photoshopのない環境に進出できなくなります。

空白画像の検出処理はGPUImage.framework抜きで(AppleScriptだけで)2〜3倍高速な処理を行える部品「画像の空白判定 v3」を作成済みなので、GPUImageなしでもさほど困りません。


▲同一環境にて、Photoshop CC 2018、GPUImage、AppleScriptだけで処理している「画像の空白判定 v3」で各種サイズの画像の空白検出を実行(単位:秒)

Objective-C/Swift系の開発者の方々に「GPUImageを経由してGPUのパワーを使って処理するよりも、AppleScript単体で空白の比較演算処理したほうが速かった」という事実をお話しすると、最初は「嘘つけ」というひきつった笑顔の反応なのですが、実際にコードを動かして動作原理を丁寧に説明すると分かっていただけるようです。

–> Download dffFilterDemoPrograms(Two Code-Signed AppleScript Applet Executables with Framework in its bundle)

AppleScript名:CoreImageでCIDifferenceBlendMode.scptd
—
–  Created by: Takaaki Naganoya
–  Created on: 2019/11/22
—
–  Copyright © 2019 Piyomaru Software, All Rights Reserved
—
use AppleScript version "2.4" — Yosemite (10.10) or later
use framework "Foundation"
use framework "AppKit"
use framework "QuartzCore"
use scripting additions

property CIFilter : a reference to current application’s CIFilter
property NSUUID : a reference to current application’s NSUUID
property |NSURL| : a reference to current application’s |NSURL|
property CIImage : a reference to current application’s CIImage
property NSString : a reference to current application’s NSString
property NSImage : a reference to current application’s NSImage
property NSPNGFileType : a reference to current application’s NSPNGFileType
property NSBitmapImageRep : a reference to current application’s NSBitmapImageRep

set mePath to POSIX path of (path to me)
set aImg to mePath & "Contents/Resources/book1_v2.0_0011.jpg"
set bImg to mePath & "Contents/Resources/book1_v2.1_0011.jpg"

–https://developer.apple.com/library/archive/documentation/
–GraphicsImaging/Reference/CoreImageFilterReference/index.html
–#//apple_ref/doc/filter/ci/CIDifferenceBlendMode
set cifilterName to "CIDifferenceBlendMode"

set imgRes to filterBlendImageFiles(aImg, bImg, cifilterName) of me

set outPath to retUUIDfilePath(POSIX path of (path to desktop), "png") of me
set sRes to saveNSImageAtPathAsPNG(imgRes, outPath) of me

–CIFilterをかけたJPEG画像を生成
on filterBlendImageFiles(aPath, bPath, aFilterName)
  –CIImage(A)を生成
  
set aURL to |NSURL|’s fileURLWithPath:aPath –Input
  
set aCIImage to CIImage’s alloc()’s initWithContentsOfURL:aURL
  
  
–CIImage(B)を生成
  
set bURL to |NSURL|’s fileURLWithPath:bPath –Input
  
set bCIImage to CIImage’s alloc()’s initWithContentsOfURL:bURL
  
  
— CIFilter をフィルタの名前で生成
  
set aFilter to CIFilter’s filterWithName:aFilterName
  
aFilter’s setDefaults() –各フィルタのパラメータはデフォルト
  
  
–Blend Filterを実行
  
aFilter’s setValue:(aCIImage) forKey:"inputImage"
  
aFilter’s setValue:(bCIImage) forKey:"inputBackgroundImage"
  
  
set aOutImage to aFilter’s valueForKey:"outputImage"
  
set outNSImage to convCIimageToNSImage(aOutImage) of me
  
return outNSImage
end filterBlendImageFiles

on retUUIDfilePath(aPath, aEXT)
  set aUUIDstr to (NSUUID’s UUID()’s UUIDString()) as string
  
set aPath to ((NSString’s stringWithString:aPath)’s stringByAppendingPathComponent:aUUIDstr)’s stringByAppendingPathExtension:aEXT
  
return aPath
end retUUIDfilePath

on convCIimageToNSImage(aCIImage)
  set aRep to NSBitmapImageRep’s alloc()’s initWithCIImage:aCIImage
  
set tmpSize to aRep’s |size|()
  
set newImg to NSImage’s alloc()’s initWithSize:tmpSize
  
newImg’s addRepresentation:aRep
  
return newImg
end convCIimageToNSImage

on convNSImageToCIimage(aNSImage)
  set tiffDat to aNSImage’s TIFFRepresentation()
  
set aRep to NSBitmapImageRep’s imageRepWithData:tiffDat
  
set newImg to CIImage’s alloc()’s initWithBitmapImageRep:aRep
  
return newImg
end convNSImageToCIimage

–NSImageを指定パスにPNG形式で保存
on saveNSImageAtPathAsPNG(anImage, outPath)
  set imageRep to anImage’s TIFFRepresentation()
  
set aRawimg to NSBitmapImageRep’s imageRepWithData:imageRep
  
set pathString to NSString’s stringWithString:outPath
  
set newPath to pathString’s stringByExpandingTildeInPath()
  
set myNewImageData to (aRawimg’s representationUsingType:(NSPNGFileType) |properties|:(missing value))
  
set aRes to (myNewImageData’s writeToFile:newPath atomically:true) as boolean
  
return aRes –true/false
end saveNSImageAtPathAsPNG

★Click Here to Open This Script 

AppleScript名:(比較用)GPUImageによる差分計算.scptd
—
–  Created by: Takaaki Naganoya
–  Created on: 2019/11/22
—
–  Copyright © 2019 Piyomaru Software, All Rights Reserved
—
use AppleScript version "2.4" — Yosemite (10.10) or later
use scripting additions
use framework "Foundation"
use framework "AppKit"
use framework "GPUImage" –https://github.com/BradLarson/GPUImage

property NSUUID : a reference to current application’s NSUUID
property |NSURL| : a reference to current application’s |NSURL|
property NSString : a reference to current application’s NSString
property NSImage : a reference to current application’s NSImage
property NSPNGFileType : a reference to current application’s NSPNGFileType
property NSBitmapImageRep : a reference to current application’s NSBitmapImageRep

set mePath to POSIX path of (path to me)
set aImagePath to mePath & "Contents/Resources/book1_v2.0_0011.jpg"
set bImagePath to mePath & "Contents/Resources/book1_v2.1_0011.jpg"

set imgRes to composeImageWithBlendFilter(aImagePath, bImagePath, "GPUImageDifferenceBlendFilter") of me

set outPath to retUUIDfilePath(POSIX path of (path to desktop), "png") of me
set sRes to saveNSImageAtPathAsPNG(imgRes, outPath) of me

on composeImageWithBlendFilter(aImagePath, bImagePath, filterName)
  set aImage to NSImage’s alloc()’s initWithContentsOfFile:aImagePath
  
set bImage to NSImage’s alloc()’s initWithContentsOfFile:bImagePath
  
  
set aClass to current application’s NSClassFromString(filterName)
  
set blendFilter to aClass’s alloc()’s init()
  
set pictureA to current application’s GPUImagePicture’s alloc()’s initWithImage:aImage
  
pictureA’s addTarget:blendFilter
  
pictureA’s processImage()
  
set imgRes to blendFilter’s imageByFilteringImage:bImage
  
return imgRes
end composeImageWithBlendFilter

on retUUIDfilePath(aPath, aEXT)
  set aUUIDstr to (NSUUID’s UUID()’s UUIDString()) as string
  
set aPath to ((NSString’s stringWithString:aPath)’s stringByAppendingPathComponent:aUUIDstr)’s stringByAppendingPathExtension:aEXT
  
return aPath
end retUUIDfilePath

–NSImageを指定パスにPNG形式で保存
on saveNSImageAtPathAsPNG(anImage, outPath)
  set imageRep to anImage’s TIFFRepresentation()
  
set aRawimg to NSBitmapImageRep’s imageRepWithData:imageRep
  
set pathString to NSString’s stringWithString:outPath
  
set newPath to pathString’s stringByExpandingTildeInPath()
  
set myNewImageData to (aRawimg’s representationUsingType:(NSPNGFileType) |properties|:(missing value))
  
set aRes to (myNewImageData’s writeToFile:newPath atomically:true) as boolean
  
return aRes –true/false
end saveNSImageAtPathAsPNG

★Click Here to Open This Script 

(Visited 288 times, 3 visits today)
Posted in file filter Image | Tagged 10.14savvy 10.15savvy CIFilter CIImage NSBitmapImageRep NSImage NSPNGFileType NSString NSURL NSUUID | Leave a comment

Safariで現在見えている表を抽出してCSV書き出しv3

Posted on 10月 8, 2019 by Takaaki Naganoya

Safariの最前面のウィンドウで表示中のページのうち、現在ウィンドウ内に表示中の表要素をCSV書き出ししてNumbersでオープンするAppleScriptの改良版です。HTMLのtable中にrowspan(複数セルを行方向に連結)とcolspan(複数セルを列方向に連結)の属性値が指定されていた場合に対応します。

–> Download table2CSV_visibleonly_v2 (Code-Signed AppleScript applet with Framework and Library in its bundle)

各DOM ElementsのWebコンテンツ中の表示座標を取得して、絞り込みを行なっています。ただし、各DOM座標はWebブラウザのスクロールにしたがって数値が変わる(相対座標)ため、少々手こずりました。また、本Scriptでは上下スクロールのみ考慮してDOM要素の抽出を行なっており、横に長いページの横方向スクロールは考慮しておりません。

このバージョンではrowspan / colspanへの対処を追加しました。

行単位で(1次元配列ベースで)表を作っていてはとても対処できなかったので、HTMLの表と同じセル数のヌル文字が入った2次元配列を作成し、そこにX座標/Y座標を指定してセルを埋めるように処理内容を変更しました。また、rowspan/colspanの属性を見つけた場合には、結合されていた複数セルを個別の(同じ値を入れた)セルに分解しています。

本バージョンでは、1つのセル(td)でrowspanとcolspanを同時に指定しないことが処理の前提条件となっています。また、一番上の行がヘッダーの場合を想定しており、一番左の列がヘッダーになっているケースには対処しておりません。

AppleScript名:Safariで現在見えている表を抽出してCSV書き出しv3.scptd
—
–  Created by: Takaaki Naganoya
–  Created on: 2019/09/22
–  Modified on: 2019/10/07
—
–  Copyright © 2019 Piyomaru Software, All Rights Reserved
—
use AppleScript version "2.4"
use scripting additions
use framework "Foundation"
use framework "HTMLReader" –https://github.com/nolanw/HTMLReader
use aLib : script "arrayLib"

property NSUUID : a reference to current application’s NSUUID
property NSString : a reference to current application’s NSString
property HTMLDocument : a reference to current application’s HTMLDocument
property NSMutableArray : a reference to current application’s NSMutableArray
property NSJSONSerialization : a reference to current application’s NSJSONSerialization

set aTag to "table"

set indRes to getVisibleElementIndexList(aTag) of me
if indRes = false or indRes = {} then
  display notification "No Visible Table in Web browser"
  
return
end if

tell application "Safari"
  tell front document
    set aSource to source
  end tell
end tell

repeat with i in indRes
  set inList to filterATableAndPaseCells(aSource, i, aTag) of me
  
  
if inList = false or inList = {} then return
  
set aUUID to current application’s NSUUID’s UUID()’s UUIDString() as text
  
set aNewFile to ((path to desktop) as string) & aUUID & ".csv"
  
saveAsCSV(inList, aNewFile) of me
  
  
tell application "Numbers"
    activate
    
open (aNewFile as alias)
  end tell
end repeat

on filterATableAndPaseCells(aSource as string, targInd as integer, aTag as string)
  set aHTML to current application’s HTMLDocument’s documentWithString:(aSource as string)
  
  
–Table要素をリストアップ
  
set eList to (aHTML’s nodesMatchingSelector:aTag) as list
  
set aObj to contents of item (targInd + 1) of eList
  
  
–Count columns of Table Header (Count only)
  
set aTableHeader to (aObj’s nodesMatchingSelector:"tr")’s firstObject()
  
set hList to aTableHeader’s nodesMatchingSelector:"th"
  
set hStrList to {}
  
repeat with i1 in hList
    set hCellStr to i1’s textContent() as string
    
set the end of hStrList to (hCellStr)
  end repeat
  
set hLen to length of hStrList –count columns


–Acquire whole table body contents
  
set aTableBody to (aObj’s nodesMatchingSelector:"tbody")’s firstObject()
  
set bList to (aTableBody’s nodesMatchingSelector:"tr") as list
  
  
set rCount to (length of bList) –count rows
  
  
–行単位ループ
  
set yCount to 1
  
set attrList to make2DBlankArray(hLen, rCount) of aLib
  
  
repeat with i2 in bList
    set bb2List to {}
    
set i3 to (i2’s nodesMatchingSelector:"th") as list
    
if i3 = {} then
      set i3 to (i2’s nodesMatchingSelector:"td") as list
    end if
    
    
–カラム単位ループ
    
set xCount to 1
    
repeat with i4 in i3
      set anAttr to i4’s attributes()
      
set colAtr to (anAttr’s valueForKey:"colspan")
      
set rowAttr to (anAttr’s valueForKey:"rowspan")
      
set cellStr to i4’s textContent() as string
      
      
if colAtr is not equal to missing value then
        –colspan処理
        
set colNum to colAtr as integer
        
set attrList to xFill(xCount, yCount, attrList, cellStr, colNum) of aLib
        
      else if rowAttr is not equal to missing value then
        –rowspan処理
        
set rowNum to rowAttr as integer
        
set attrList to yFill(xCount, yCount, attrList, cellStr, rowNum) of aLib
        
      else if cellStr is not equal to "" then
        –通常処理
        
repeat with ii from xCount to hLen
          set aRes to getItemByXY(ii, yCount, attrList, "") of aLib
          
if aRes = "" then
            set attrList to setItemByXY(ii, yCount, attrList, cellStr) of aLib
            
exit repeat
          else
            set xCount to xCount + 1
          end if
        end repeat
        
      end if
      
      
set xCount to xCount + 1
    end repeat
    
    
set yCount to yCount + 1
  end repeat
  
  
return attrList
end filterATableAndPaseCells

–Safariのウィンドウ上で表示中のDOM Elementsを座標計算して返す
on getVisibleElementIndexList(aTag as string)
  tell application "Safari"
    set dCount to count every document
    
if dCount = 0 then return false
    
    
set jRes to do JavaScript "var winWidth = window.innerWidth,
winHeight = window.innerHeight,
winLeft = window.scrollX,
winTop = window.scrollY,
winBottom = winTop + winHeight,
winRight = winLeft + winWidth,
    elementsArray = document.body.getElementsByTagName(’" & aTag & "’),
    elemLen = elementsArray.length,
inView = [];
      
    var step;
    for (step = 0 ; step < elemLen ; step++) {
      var tmpElem = document.body.getElementsByTagName(’" & aTag & "’)[step];
      var bVar = tmpElem.getBoundingClientRect();
      if (bVar.top > 0 && bVar.top < winHeight) {
        inView.push(step);
      }
    }
    JSON.stringify(inView);"
in front document
    
    
set jList to parseJSONAsList(jRes) of me
    
return jList
    
  end tell
end getVisibleElementIndexList

on parseJSONAsList(jsRes as string)
  set jsonString to NSString’s stringWithString:jsRes
  
set jsonData to jsonString’s dataUsingEncoding:(current application’s NSUTF8StringEncoding)
  
set aJsonDict to NSJSONSerialization’s JSONObjectWithData:jsonData options:0 |error|:(missing value)
  
return aJsonDict as list
end parseJSONAsList

–Save 2D List to CSV file
on saveAsCSV(aList as list, aPath)
  set crlfChar to (string id 13) & (string id 10)
  
set LF to (string id 10)
  
set wholeText to ""
  
  
repeat with i in aList
    set newLine to {}
    
    
–Sanitize (Double Quote)
    
repeat with ii in i
      set jj to ii as text
      
set kk to repChar(jj, string id 34, (string id 34) & (string id 34)) of me –Escape Double Quote
      
set the end of newLine to kk
    end repeat
    
    
–Change Delimiter
    
set aLineText to ""
    
set curDelim to AppleScript’s text item delimiters
    
set AppleScript’s text item delimiters to "\",\""
    
set aLineList to newLine as text
    
set AppleScript’s text item delimiters to curDelim
    
    
set aLineText to repChar(aLineList, return, "") of me –delete return
    
set aLineText to repChar(aLineText, LF, "") of me –delete lf
    
    
set wholeText to wholeText & "\"" & aLineText & "\"" & crlfChar –line terminator: CR+LF
  end repeat
  
  
if (aPath as string) does not end with ".csv" then
    set bPath to aPath & ".csv" as Unicode text
  else
    set bPath to aPath as Unicode text
  end if
  
  
writeToFileAsUTF8(wholeText, bPath, false) of me
  
end saveAsCSV

on writeToFileAsUTF8(this_data, target_file, append_data)
  tell current application
    try
      set the target_file to the target_file as text
      
set the open_target_file to open for access file target_file with write permission
      
if append_data is false then set eof of the open_target_file to 0
      
write this_data as «class utf8» to the open_target_file starting at eof
      
close access the open_target_file
      
return true
    on error error_message
      try
        close access file target_file
      end try
      
return error_message
    end try
  end tell
end writeToFileAsUTF8

on repChar(origText as text, targChar as text, repChar as text)
  set curDelim to AppleScript’s text item delimiters
  
set AppleScript’s text item delimiters to targChar
  
set tmpList to text items of origText
  
set AppleScript’s text item delimiters to repChar
  
set retText to tmpList as string
  
set AppleScript’s text item delimiters to curDelim
  
return retText
end repChar

★Click Here to Open This Script 

(Visited 141 times, 1 visits today)
Posted in file JavaScript JSON list Record Text | Tagged 10.12savvy 10.13savvy 10.14savvy HTMLDocument NSJSONSerialization NSMutableArray NSString NSUUID Numbers Safari | 4 Comments

Safariで現在見えている表を抽出してCSV書き出し

Posted on 9月 24, 2019 by Takaaki Naganoya

Safariの最前面のウィンドウで表示中のページのうち、現在ウィンドウ内に表示中の表要素をCSV書き出ししてNumbersでオープンするAppleScriptです。

このところ下調べを行なっていた「Webブラウザで表示中の要素を処理する」「表示中ではない要素は処理をしない」というScriptです。

これで、「表の一部を選択しておく」とかいった操作は不要になりました。ウィンドウ内に表示されている表をWebコンテンツ内部の表示座標をもとに自動抽出します。表示エリア外に位置しているものは書き出し処理しません。

各DOM ElementsのWebコンテンツ中の表示座標を取得して、絞り込みを行なっています。ただし、各DOM座標はWebブラウザのスクロールにしたがって数値が変わる(相対座標)ため、少々手こずりました。また、本Scriptでは上下スクロールのみ考慮してDOM要素の抽出を行なっており、横に長いページの横方向スクロールは考慮しておりません。

本Scriptは大量一括処理を志向するプログラムではなく、「見えているもの」をそのまま処理してほしいという考えで作ったものでもあり、Webブラウザ(Safari)で表示中のページのソースを取得してそのまま処理しています。つまり、ユーザーが閲覧中のページのデータそのものを処理しています。

これは、ページのソースを取得するコマンドを持っていないGoogle Chromeにはできない処理です(同じURLの内容を別途curlコマンドなどで取得すればOK。Cookie値などの再現が大変でしょうけれども)。

その他、実際に作って使ってみた感想は、装飾用に使われている表データまで取り込んでしまう点に不満があるぐらいでしょうか。これら「ゴミデータ」(再利用する価値のない装飾用の表データ)を区別するために、行数が足りない場合には書き出さないといった「足切り」を行う必要性を感じます。

–> Download VisibleTableExporter(Code-signed executable applet with Framework in its bundle)

AppleScript名:Safariで現在見えている表を抽出してCSV書き出し.scptd
—
–  Created by: Takaaki Naganoya
–  Created on: 2019/09/22
—
–  Copyright © 2019 Piyomaru Software, All Rights Reserved
—
use AppleScript version "2.4"
use scripting additions
use framework "Foundation"
use framework "HTMLReader" –https://github.com/nolanw/HTMLReader

property NSUUID : a reference to current application’s NSUUID
property NSString : a reference to current application’s NSString
property HTMLDocument : a reference to current application’s HTMLDocument
property NSMutableArray : a reference to current application’s NSMutableArray
property NSJSONSerialization : a reference to current application’s NSJSONSerialization

set aTag to "table"

set indRes to getVisibleElementIndexList(aTag) of me
if indRes = false or indRes = {} then
  display notification "No Visible Table in Web browser"
  
return
end if

tell application "Safari"
  tell front document
    set aSource to source
  end tell
end tell

repeat with i in indRes
  set inList to filterATableAndPaseCells(aSource, i, aTag) of me
  
if inList = false or inList = {} then return
  
set aUUID to current application’s NSUUID’s UUID()’s UUIDString() as text
  
set aNewFile to ((path to desktop) as string) & aUUID & ".csv"
  
saveAsCSV(inList, aNewFile) of me
  
  
tell application "Numbers"
    open (aNewFile as alias)
  end tell
end repeat

tell application "Numbers" to activate

on filterATableAndPaseCells(aSource as string, targInd as integer, aTag as string)
  set aHTML to current application’s HTMLDocument’s documentWithString:(aSource as string)
  
  
–Table要素をリストアップ
  
set eList to (aHTML’s nodesMatchingSelector:aTag) as list
  
set aObj to contents of item (targInd + 1) of eList


–Count columns of Table Header
  
set aTableHeader to (aObj’s nodesMatchingSelector:"tr")’s firstObject()
  
set hList to aTableHeader’s nodesMatchingSelector:"th"
  
set hStrList to {}
  
repeat with i1 in hList
    set the end of hStrList to i1’s textContent() as string
  end repeat
  
set hLen to length of hStrList –count columns
  
  
–Acquire whole table body contents
  
set aTableBody to (aObj’s nodesMatchingSelector:"tbody")’s firstObject()
  
set bList to aTableBody’s nodesMatchingSelector:"td"
  
set bbList to {}
  
repeat with i2 in bList
    set the end of bbList to i2’s textContent() as string
  end repeat
  
  
set tbList to makeList1DTo2D(bbList, hLen) of me
  
  
return {hStrList} & tbList
end filterATableAndPaseCells

–1D Listを2D化
on makeList1DTo2D(orig1DList as list, aMax)
  set tbList to {}
  
set tmpList to {}
  
set aCount to 1
  
  
repeat with i3 in orig1DList
    set j to contents of i3
    
set the end of tmpList to j
    
    
if aCount ≥ aMax then
      set aCount to 1
      
set the end of tbList to tmpList
      
set tmpList to {}
    else
      set aCount to aCount + 1
    end if
  end repeat
  
  
return tbList
end makeList1DTo2D

–Safariのウィンドウ上で表示中のDOM Elementsを座標計算して返す
on getVisibleElementIndexList(aTag as string)
  tell application "Safari"
    set dCount to count every document
    
if dCount = 0 then return false
    
    
set jRes to do JavaScript "var winWidth = window.innerWidth,
winHeight = window.innerHeight,
winLeft = window.scrollX
winTop = window.scrollY,
winBottom = winTop + winHeight,
winRight = winLeft + winWidth,
    elementsArray = document.body.getElementsByTagName(’" & aTag & "’),
    elemLen = elementsArray.length,
inView = [];
      
    var step;
    for (step = 0 ; step < elemLen ; step++) {
      var tmpElem = document.body.getElementsByTagName(’" & aTag & "’)[step];
      var bVar = tmpElem.getBoundingClientRect();
      if (bVar.top > 0 && bVar.top < winHeight) {
        inView.push(step);
      }
    }
    JSON.stringify(inView);"
in front document
    
    
set jList to parseJSONAsList(jRes) of me
    
return jList
    
  end tell
end getVisibleElementIndexList

on parseJSONAsList(jsRes as string)
  set jsonString to NSString’s stringWithString:jsRes
  
set jsonData to jsonString’s dataUsingEncoding:(current application’s NSUTF8StringEncoding)
  
set aJsonDict to NSJSONSerialization’s JSONObjectWithData:jsonData options:0 |error|:(missing value)
  
return aJsonDict as list
end parseJSONAsList

–Save 2D List to CSV file
on saveAsCSV(aList as list, aPath)
  set crlfChar to (string id 13) & (string id 10)
  
set LF to (string id 10)
  
set wholeText to ""
  
  
repeat with i in aList
    set newLine to {}
    
    
–Sanitize (Double Quote)
    
repeat with ii in i
      set jj to ii as text
      
set kk to repChar(jj, string id 34, (string id 34) & (string id 34)) of me –Escape Double Quote
      
set the end of newLine to kk
    end repeat
    
    
–Change Delimiter
    
set aLineText to ""
    
set curDelim to AppleScript’s text item delimiters
    
set AppleScript’s text item delimiters to "\",\""
    
set aLineList to newLine as text
    
set AppleScript’s text item delimiters to curDelim
    
    
set aLineText to repChar(aLineList, return, "") of me –delete return
    
set aLineText to repChar(aLineText, LF, "") of me –delete lf
    
    
set wholeText to wholeText & "\"" & aLineText & "\"" & crlfChar –line terminator: CR+LF
  end repeat
  
  
if (aPath as string) does not end with ".csv" then
    set bPath to aPath & ".csv" as Unicode text
  else
    set bPath to aPath as Unicode text
  end if
  
  
writeToFileAsUTF8(wholeText, bPath, false) of me
  
end saveAsCSV

on writeToFileAsUTF8(this_data, target_file, append_data)
  tell current application
    try
      set the target_file to the target_file as text
      
set the open_target_file to open for access file target_file with write permission
      
if append_data is false then set eof of the open_target_file to 0
      
write this_data as «class utf8» to the open_target_file starting at eof
      
close access the open_target_file
      
return true
    on error error_message
      try
        close access file target_file
      end try
      
return error_message
    end try
  end tell
end writeToFileAsUTF8

on repChar(origText as text, targChar as text, repChar as text)
  set curDelim to AppleScript’s text item delimiters
  
set AppleScript’s text item delimiters to targChar
  
set tmpList to text items of origText
  
set AppleScript’s text item delimiters to repChar
  
set retText to tmpList as string
  
set AppleScript’s text item delimiters to curDelim
  
return retText
end repChar

★Click Here to Open This Script 

(Visited 147 times, 4 visits today)
Posted in file JavaScript JSON list Text | Tagged 10.12savvy 10.13savvy 10.14savvy HTMLDocument NSJSONSerialization NSMutableArray NSString NSUUID Numbers Safari | 1 Comment

指定画像をPNG形式(グレースケール)で保存

Posted on 7月 9, 2019 by Takaaki Naganoya

指定の画像ファイルをグレースケールのPNG画像ファイルに変換するAppleScriptです。

Appleが配布しているMNISTの手書き数字画像の認識CoreMLモデルをCocoa Framework化してみたところ、グレースケールの画像を要求されたため、画像をグレースケール化するルーチンを作ってみました。

結局、MNISTの手書き画像認識はうまく行かなかったのですが(全部「0」が返ってくる、、、)、グレースケール変換ルーチンは実用的だったので載せておくことにしました。

AppleScript名:指定画像をPNG形式(グレースケール)で保存
— Created 2019-07-09 by Takaaki Naganoya
— 2019 Piyomaru Software
use AppleScript version "2.4"
use scripting additions
use framework "Foundation"
use framework "AppKit"

property NSUUID : a reference to current application’s NSUUID
property NSString : a reference to current application’s NSString
property NSImage : a reference to current application’s NSImage
property NSColorSpace : a reference to current application’s NSColorSpace
property NSPNGFileType : a reference to current application’s NSPNGFileType
property NSBitmapImageRep : a reference to current application’s NSBitmapImageRep
property NSColorRenderingIntentPerceptual : a reference to current application’s NSColorRenderingIntentPerceptual

set aFile to POSIX path of (choose file of type {"public.image"} with prompt "Select Image A")
set aImage to NSImage’s alloc()’s initWithContentsOfFile:aFile

set fRes to retUUIDfilePath(aFile, "png") of me
set sRes to saveNSImageAtPathAsGreyPNG(aImage, fRes) of me

–指定ファイルパスを元にUUIDのファイル名、指定拡張子をつけたファイルパスを作成して返す
on retUUIDfilePath(aPath, aEXT)
  set aUUIDstr to (NSUUID’s UUID()’s UUIDString()) as string
  
set aPath to ((NSString’s stringWithString:aPath)’s stringByDeletingLastPathComponent()’s stringByAppendingPathComponent:aUUIDstr)’s stringByAppendingPathExtension:aEXT
  
return aPath
end retUUIDfilePath

–NSImageを指定パスにPNG形式で保存
on saveNSImageAtPathAsGreyPNG(anImage, outPath)
  set imageRep to anImage’s TIFFRepresentation()
  
set aRawimg to NSBitmapImageRep’s imageRepWithData:imageRep
  
  
–ビットマップをグレースケール変換
  
set bRawimg to convBitMapToDeviceGrey(aRawimg) of me
  
  
set pathString to NSString’s stringWithString:outPath
  
set newPath to pathString’s stringByExpandingTildeInPath()
  
  
set myNewImageData to (bRawimg’s representationUsingType:(NSPNGFileType) |properties|:(missing value))
  
set aRes to (myNewImageData’s writeToFile:newPath atomically:true) as boolean
  
return aRes –true/false
end saveNSImageAtPathAsGreyPNG

–NSBitmapImageRepをグレースケールに変換する
on convBitMapToDeviceGrey(aBitmap)
  set aSpace to NSColorSpace’s deviceGrayColorSpace()
  
set bRawimg to aBitmap’s bitmapImageRepByConvertingToColorSpace:aSpace renderingIntent:(NSColorRenderingIntentPerceptual)
  
return bRawimg
end convBitMapToDeviceGrey

★Click Here to Open This Script 

AppleScript名:指定画像をグレースケールのNSImageに変換
— Created 2019-07-09 by Takaaki Naganoya
— 2019 Piyomaru Software
use AppleScript version "2.4"
use scripting additions
use framework "Foundation"
use framework "AppKit"

property NSUUID : a reference to current application’s NSUUID
property NSString : a reference to current application’s NSString
property NSImage : a reference to current application’s NSImage
property NSColorSpace : a reference to current application’s NSColorSpace
property NSBitmapImageRep : a reference to current application’s NSBitmapImageRep
property NSColorRenderingIntentDefault : a reference to current application’s NSColorRenderingIntentDefault

set aFile to POSIX path of (choose file of type {"public.image"} with prompt "Select Image")
set aImage to NSImage’s alloc()’s initWithContentsOfFile:aFile

set nsImageRes to convNSImageAsGrey(aImage) of me

–NSImageをグレースケールに変換する(NSImageで入出力)
on convNSImageAsGrey(anImage)
  set imageRep to anImage’s TIFFRepresentation()
  
set aRawimg to NSBitmapImageRep’s imageRepWithData:imageRep
  
set aSpace to NSColorSpace’s deviceGrayColorSpace()
  
set bRawimg to aRawimg’s bitmapImageRepByConvertingToColorSpace:aSpace renderingIntent:(NSColorRenderingIntentDefault)
  
set outImage to NSImage’s alloc()’s initWithSize:(bRawimg’s |size|())
  
outImage’s addRepresentation:(bRawimg)
  
return outImage
end convNSImageAsGrey

★Click Here to Open This Script 

(Visited 122 times, 1 visits today)
Posted in Color file File path Image | Tagged 10.11savvy 10.12savvy 10.13savvy 10.14savvy NSBitmapImageRep NSColorRenderingIntentPerceptual NSColorSpace NSImage NSPNGFileType NSString NSUUID | Leave a comment

CotEditorで編集中のMarkdown書類をPDFプレビュー

Posted on 6月 15, 2019 by Takaaki Naganoya

CotEditorで編集中のMarkdown書類を、MacDownでPDF書き出しして、Skimでオープンして表示するAppleScriptです。

CotEditorにMarkdownのプレビュー機能がついたらいいと思っている人は多いようですが、MarkdownはMarkdownで、方言は多いし標準がないし、1枚もののMarkdown書類だけ編集できればいいのか、本などのプロジェクト単位で編集とか、目次が作成できないとダメとか、リンクした画像の扱いをどうするのかとか、対応しようとすると「ほぼ別のソフトを作るのと同じ」ぐらい手間がかかりそうです(メンテナー様ご本人談)。

そこで、AppleScript経由で他のソフトを連携させてPDFプレビューさせてみました。これなら、誰にも迷惑をかけずに、今日この時点からすぐにMarkdownのプレビューが行えます(当然、HTML書き出ししてSafariでプレビューするバージョンははるかかなた昔に作ってあります)。

ただし、OS側の機能制限の問題で、CotEditor上のスクリプトメニューから実行はできません(GUI Scriptingの実行が許可されない)。OS側のスクリプトメニューに登録して実行する必要があります。

GUI Scriptingを利用してメニュー操作を行なっているため、システム環境設定で許可しておく必要があります。

本来であれば、PDFの書き出し先フォルダ(この場合は書き出しダイアログで、GUI Scirptingを用いてCommand-Dで指定して一律に場所指定が行えるデスクトップフォルダ)に同名のPDFが存在しないかどうかチェックし、存在すれば削除するといった処理が必要ですが、面倒だったのであらかじめMarkdown書類をUUIDにリネームしておくことで、書き出されたPDFも同じくUUIDのファイル名になるため、論理上はファイル名の衝突を回避できるため、削除処理を省略しています。

AppleScript名:🌏レンダリングしてPDFプレビュー
— Created 2019-06-15 by Takaaki Naganoya
— 2019 Piyomaru Software
use AppleScript version "2.5"
use scripting additions
use framework "Foundation"
use framework "AppKit"

property NSUUID : a reference to current application’s NSUUID
property NSWorkspace : a reference to current application’s NSWorkspace

–オープン中のMarkdown書類を取得する
tell application "CotEditor"
  tell front document
    set cStyle to coloring style
    
if cStyle is not equal to "Markdown" then
      display dialog "編集中のファイルはMarkdown書類ではないようです。" buttons {"OK"} default button 1
      
return
    end if
    
    
set aPath to path
  end tell
end tell

–一時フォルダにMarkdown書類をコピー
set sPath to (path to temporary items)
tell application "Finder"
  set sRes to (duplicate ((POSIX file aPath) as alias) to folder sPath with replacing)
end tell

–コピーしたMarkdown書類をリネーム
set s1Res to sRes as alias
set aUUID to NSUUID’s UUID()’s UUIDString() as text –UUIDを作成する
tell application "Finder"
  set name of s1Res to (aUUID & ".md")
end tell

–Markdown書類をデスクトップにPDF書き出し
set pdfRes to exportFromMacDown(POSIX path of s1Res) of me

–PDF Viewerでオープン
tell application "Skim" –Preview.appでもOK
  activate
  
open pdfRes
end tell

–一時フォルダに書き出したMarkdown書類を削除
tell application "Finder"
  delete s1Res
end tell

–指定のMacDownファイル(alias)をデスクトップ上にPDFで書き出し
on exportFromMacDown(anAlias)
  set s1Text to paragraphs of (do shell script "ls ~/Desktop/*.pdf") –pdf書き出し前のファイル一覧
  
  
tell application "MacDown"
    open {anAlias}
  end tell
  
  
macDownForceSave() of me
  
  
tell application "MacDown"
    close every document without saving
  end tell
  
  
do shell script "sync" –ねんのため
  
  
set s2Text to paragraphs of (do shell script "ls ~/Desktop/*.pdf") –pdf書き出し後のファイル一覧
  
  
set dRes to getDiffBetweenLists(s1Text, s2Text) of me –デスクトップ上のPDFファイル名一覧の差分を取得
  
set d2Res to (addItems of dRes)
  
  
if length of d2Res ≥ 1 then
    return contents of first item of d2Res
  else
    error "Error in exporting PDF to desktop folder…."
  end if
end exportFromMacDown

on getDiffBetweenLists(aArray as list, bArray as list)
  set allSet to current application’s NSMutableSet’s setWithArray:aArray
  
allSet’s addObjectsFromArray:bArray
  
  
–重複する要素のみ抜き出す
  
set duplicateSet to current application’s NSMutableSet’s setWithArray:aArray
  
duplicateSet’s intersectSet:(current application’s NSSet’s setWithArray:bArray)
  
  
–重複部分を削除する
  
allSet’s minusSet:duplicateSet
  
set resArray to (allSet’s allObjects()) as list
  
  
set aSet to current application’s NSMutableSet’s setWithArray:aArray
  
set bSet to current application’s NSMutableSet’s setWithArray:resArray
  
aSet’s intersectSet:bSet –積集合
  
set addRes to aSet’s allObjects() as list
  
  
set cSet to current application’s NSMutableSet’s setWithArray:bArray
  
cSet’s intersectSet:bSet –積集合
  
set minusRes to cSet’s allObjects() as list
  
  
return {addItems:minusRes, minusItems:addRes}
end getDiffBetweenLists

–注意!! ここでGUI Scriptingを使用。バージョンが変わったときにメニュー階層などの変更があったら書き換え
on macDownForceSave()
  activate application "MacDown"
  
tell application "System Events"
    tell process "MacDown"
      — File > Export > PDF
      
click menu item 2 of menu 1 of menu item 14 of menu 1 of menu bar item 3 of menu bar 1
      
      
–Go to Desktop Folder
      
keystroke "d" using {command down}
      
      
–Save Button on Sheet
      
click button 1 of sheet 1 of window 1
    end tell
  end tell
end macDownForceSave

–Bundle IDからアプリケーションのPathを返す
on retAppAbusolutePathFromBundleID(aBundleID)
  set appPath to NSWorkspace’s sharedWorkspace()’s absolutePathForAppBundleWithIdentifier:aBundleID
  
if appPath = missing value then return false
  
return appPath as string
end retAppAbusolutePathFromBundleID

★Click Here to Open This Script 

(Visited 782 times, 2 visits today)
Posted in file File path GUI Scripting Markdown PDF shell script | Tagged 10.11savvy 10.12savvy 10.13savvy CotEditor Finder MacDown NSUUID NSWorkspace Skim | Leave a comment

Finder上で選択中のファイルをDMGに変換して圧縮 v2

Posted on 6月 6, 2019 by Takaaki Naganoya

Finder上で選択中のファイルをあらたに作ったDiskImageに入れてZip圧縮するAppleScriptです。

Script Menuに入れて実行することを前提にして作ってあります。

Google DriveなどのクラウドストレージにAppleScriptアプレットなどの実行ファイルをアップロードすると、バンドルが壊れたり、実行できなくなったりします。

そのため、仕方なくZip圧縮してアップロードしたりするわけですが、どうもZipの中身までGoogle Drive側が内容を展開して確認するらしく、ウィルスと疑われてZip圧縮した実行ファイルをダウンロードできないケースが見られます。

また、.dmgファイルに入れただけでもGoogle Driveが中身をスキャンして実行ファイルに警告を出すとのこと。一般的にはウィルスの拡散を防止する機能として好意的に受け止められるべきものですが、本当にプログラムを受け渡す必要がある場合には、こまった仕様です。

そこで、Diskimageに入れて、本来であればパスワードをつけてZip圧縮したいところですが、取り回しが悪くなるので、パスワードはつけないでアーカイブ化するようにしてみました。


▲Finder上で選択中のファイル(複数可)


▲本Scriptでdmg化してZip圧縮したもの


▲Zipアーカイブを展開してdiskimageファイルをマウントしたところ

本Scriptは、おおよそ自分で組んだ記憶がないのと、プログラムの構造が自分らしくないので、おそらくMacScripter.netあたりで拾ってきたScriptをそのまま使っていたものでしょう。それを一部修正してみました。オリジナルのScriptではFinder上で選択中のフォルダのみ処理するようになっていましたが、実際にはファイルをやりとりしたい(AppleScriptアプレットのケース多し)ので、ファイルをそのままdmg化できるように変更しました(単にフォルダを作成してコピーするだけですが)。

本ScriptはmacOS 10.15Beta1上では、macOS 10.15側にバグがあるため動作しません(POSIX pathへの変換程度でバグを作ってほしくないなー)。

AppleScript名:Finder上で選択中のファイルをDMGに変換して圧縮 v2
—
–  Created by: Takaaki Naganoya
–  Created on: 2019/06/06
—
–  Copyright © 2019 Piyomaru Software, All Rights Reserved
—
use AppleScript version "2.5"
use scripting additions
use framework "Foundation"

property NSUUID : a reference to current application’s NSUUID

property deleteV : true –DMG変換後に対象フォルダを削除しない(trueで削除)
property zipDmg : true –DMG作成後にZip圧縮する(trueで圧縮+DMG削除)

–Finder上の選択項目を取得、選択されていない場合には処理終了
tell application "Finder"
  set selList to selection as alias list
  
if selList = {} or selList = "" or selList = missing value then
    activate
    
display dialog "何も選択されていません。" buttons {"OK"} default button 1 with icon 1
    
return
  end if
end tell

–一時フォルダを作って選択中のアイテムをコピー
set aUUID to NSUUID’s UUID()’s UUIDString() as text

set aTmp to POSIX path of (path to desktop) –macOS 10.15 beta1ではおかしな結果が返ってくる
set tmpDir to aTmp & aUUID
do shell script "mkdir -p " & quoted form of tmpDir

set targFol to (POSIX file tmpDir) as alias

try
  tell application "Finder"
    duplicate selList to folder targFol
  end tell
on error
  display dialog "エラー:ファイルのコピー中にエラーが発生" buttons {"OK"} default button 1 with icon 1
  
return
end try

set aList to {targFol}

tell application "Finder"
  
  
set dmgList to {}
  
  
–選択中のアイテムを順次処理するループ
  
repeat with i in aList
    set the end of dmgList to makeDMGfromFolderAlias(i, "") of me –パスワードは付けない
    
    
–処理後のフォルダを削除する処理
    
if (deleteV as boolean) = true then
      deleteFolderItself(i) of me
    else
      –元フォルダを削除しない場合、元フォルダの名前を変更する
      
tell application "Finder"
        set aName to name of i
      end tell
      
      
set aName to aName & "_origFol"
      
      
tell application "Finder"
        set name of i to aName
      end tell
    end if
  end repeat
  
  
if zipDmg = true then
    repeat with i in dmgList
      set j to contents of i
      
      
set f1Path to quoted form of j –DMGファイルのPOSIX Path
      
set f2Path to quoted form of (j & ".zip") –ZipファイルのPOSIX Path
      
      
–タイムアウト時間は2時間
      
with timeout of 7200 seconds
        do shell script "/usr/bin/zip -r -j " & f2Path & " " & f1Path
        
do shell script "/bin/rm -f " & f1Path
      end timeout
      
    end repeat
  end if
end tell

–指定のフォルダ(alias)をDiskImageに変換する
on makeDMGfromFolderAlias(aaSel, aPassword)
  
  
set aPassword to aPassword as string
  
  
tell application "Finder"
    set fn to name of aaSel
  end tell
  
  
set aDir to (POSIX path of aaSel)
  
set aDir to quoted form of aDir
  
  
set fp2 to do shell script "dirname " & aDir
  
set fp2 to fp2 & "/"
  
  
set outPath to (fp2 & fn & ".dmg")
  
  
if aPassword is not equal to "" then
    –パスワードつきの場合
    
set aCMD to "printf ’" & aPassword & "’ | hdiutil create -encryption -srcfolder " & aDir & " " & (quoted form of outPath)
  else
    –パスワードなしの場合
    
set aCMD to "hdiutil create -srcfolder " & aDir & " " & (quoted form of outPath)
  end if
  
  
set fp3 to do shell script aCMD
  
  
return outPath
  
end makeDMGfromFolderAlias

–指定フォルダ内をすべて削除し、そのフォルダ自体も削除
on deleteFolderItself(aFol)
  set aU to (quoted form of POSIX path of aFol)
  
do shell script "rm -rf " & aU
end deleteFolderItself

★Click Here to Open This Script 

(Visited 93 times, 1 visits today)
Posted in file list | Tagged 10.12savvy 10.13savvy 10.14savvy Finder NSUUID | Leave a comment

Photosで選択中の写真をKeynoteの現在の書類の現在のスライド以降に配置 v2

Posted on 5月 27, 2019 by Takaaki Naganoya

Photosで選択中の写真をKeynoteで現在オープン中の書類の現在のスライド(ページ)以降に配置していくAppleScriptの改良版です。

作業の過程をiPhoneで写真撮影。撮影した写真を写真.app(Photos.app)経由でKeynote書類にまとめる作業を行なっていました。作業工程を時間こみで表示できないとわかりにくかったので、Keynoteの各スライドに時刻を入れるようにAppleScriptを書いておきました。

初版では写真.app(Photos)上の選択項目を一切ソートなどしなかったため、exifから取得した撮影日付で昇順ソートしています。


▲写真.app(Photos)上でKeynoteに配置したい写真を選択


▲あらかじめKeynote上でマスタースライド「画像(横長)」上のアイテムを編集しておくといいかも


▲AppleScriptによって写真.app上の写真をKeynote書類上に順次割り付け。タイトル部分にexifに記録されていた撮影時刻が入る


▲実行結果。写真.appから割り付けた写真は撮影日時でソートされている

AppleScript名:Photosで選択中の写真をKeynoteの現在の書類の現在のスライド以降に配置 v2
—
–  Created by: Takaaki Naganoya
–  Created on: 2019/05/26
—
–  Copyright © 2019 Piyomaru Software, All Rights Reserved
—
use AppleScript version "2.4"
use scripting additions
use framework "Foundation"
use framework "AppKit"
use BPlus : script "BridgePlus" –https://www.macosxautomation.com/applescript/apps/BridgePlus.html
use mdLib : script "Metadata Lib" version "2.0.0" –https://www.macosxautomation.com/applescript/apps/Script_Libs.html#Metadata_Lib

property NSUUID : a reference to current application’s NSUUID
property NSString : a reference to current application’s NSString
property SMSForder : a reference to current application’s SMSForder
property NSFileManager : a reference to current application’s NSFileManager

tell application "Keynote"
  if (count every document) = 0 then return
end tell

–Photosで選択中の写真をすべて書き出してalias listを取得する
set aList to exportSelectedPhotoOnPhotos() of me
if aList = {} or aList = false then return

set aLen to length of aList

–書き出した画像の親フォルダを求めておく(あとで削除するため)
tell application "Finder"
  set parentFol to parent of (item 1 of aList)
end tell

–exifから撮影日時を取得して2D List化
set aaList to {}
repeat with i in aList
  set j to contents of i
  
set exifDate to readExifDateTimeOriginal(j) of me
  
set the end of aaList to {j, exifDate, (time string of exifDate)}
end repeat

–撮影日時で昇順ソート
set aaaList to sortList2DAscending(aaList, {2}) of me

tell application "Keynote"
  tell front document
    tell current slide
      set curNum to slide number –現在表示中のスライドの番号(ページ数)を取得する
    end tell
    
    
–Photosから取得した写真のアイテム数でループ
    
repeat with i from 1 to aLen
      copy (item i of aaaList) to {aPhoto, aDateObj, creTime}
      
      
set newSlide to make new slide at slide (curNum + i) with properties {base slide:master slide "画像(横長)"} –This item is localized!! Maybe a "Photo"
      
      
tell newSlide
        set object text of default title item to creTime
        
set file name of image 1 to aPhoto –place an image to image placeholder
      end tell
      
      
–配置画像を削除
      
tell application "Finder"
        delete aPhoto –配置した写真を削除
      end tell
    end repeat
  end tell
end tell

–あとしまつ
tell application "Finder"
  delete parentFol –画像のダウンロードフォルダを削除
end tell

–Photosで選択中のファイルをtmporaryフォルダに書き出してalias listで返す
on exportSelectedPhotoOnPhotos()
  set dtPath to (path to temporary items) as text
  
set aUUID to NSUUID’s UUID()’s UUIDString() as text
  
  
set dirPath to ((POSIX path of dtPath) & aUUID)
  
set fileManager to NSFileManager’s defaultManager()
  
set aRes to (fileManager’s createDirectoryAtPath:dirPath withIntermediateDirectories:true attributes:(missing value) |error|:(reference))
  
set dtPath to dtPath & aUUID
  
  
tell application "Photos"
    set a to selection
    
if a = {} then return {}
    
set aRes to (export a to file dtPath)
  end tell
  
  
tell application "Finder"
    tell folder dtPath
      set fList to (every file) as alias list
    end tell
  end tell
  
  
if fList = {} then return false
  
return fList
end exportSelectedPhotoOnPhotos

–指定JPEG画像のExif情報からDateTimeOriginalを取得してAS dateオブジェクトに変換して返す
on readExifDateTimeOriginal(aTargFileAlias)
  set theMetadata to readMetadataFrom(aTargFileAlias) of me
  
if theMetadata = false then return false
  
  
set keysList to theMetadata’s allKeys()
  
  
if "{Exif}" is not in (keysList as list) then return false
  
  
set exifDate to theMetadata’s valueForKeyPath:"{Exif}.DateTimeOriginal"
  
if exifDate = missing value then return false
  
  
set a to NSString’s stringWithString:exifDate
  
set {aDateStr, aTimeStr} to (a’s componentsSeparatedByString:" ") as list
  
set bDateStr to repChar(aDateStr, ":", "/") of me
  
set fullDate to date (bDateStr & " " & aTimeStr)
  
  
return fullDate
end readExifDateTimeOriginal

–指定のファイルからメタデータを取得する
on readMetadataFrom(imageFile)
  load framework
  
set {theRecord, theError} to SMSForder’s metadataFromImage:imageFile |error|:(reference)
  
if theRecord = missing value then — there was a problem, so extract the error description
    error false
  else
    return theRecord
  end if
end readMetadataFrom

–文字置換
on repChar(origText as string, targChar as string, repChar as string)
  set curDelim to AppleScript’s text item delimiters
  
set AppleScript’s text item delimiters to targChar
  
set tmpList to text items of origText
  
set AppleScript’s text item delimiters to repChar
  
set retText to tmpList as string
  
set AppleScript’s text item delimiters to curDelim
  
return retText
end repChar

–入れ子のリストを昇順ソート
on sortList2DAscending(a, keyItem)
  return sort2DList(a, keyItem, {true}) of me
end sortList2DAscending

–入れ子のリストを降順ソート
on sortList2DDecending(a, keyItem)
  return sort2DList(a, keyItem, {false}) of me
end sortList2DDecending

–2D Listをソート
on sort2DList(aList as list, sortIndexes as list, sortOrders as list)
  load framework
  
  
–index値をAS流(アイテムが1はじまり)からCocoa流(アイテムが0はじまり)に変換
  
set newIndex to {}
  
repeat with i in sortIndexes
    set j to contents of i
    
set j to j – 1
    
set the end of newIndex to j
  end repeat
  
  
set sortTypes to {}
  
repeat (length of sortIndexes) times
    set the end of sortTypes to "compare:"
  end repeat
  
  
set resList to (SMSForder’s subarraysIn:(aList) sortedByIndexes:newIndex ascending:sortOrders sortTypes:sortTypes |error|:(missing value)) as {missing value, list}
  
  
return resList
end sort2DList

★Click Here to Open This Script 

(Visited 72 times, 1 visits today)
Posted in Calendar exif file Image list | Tagged 10.12savvy 10.13savvy 10.14savvy Finder Keynote NSFileManager NSString NSUUID Photos | Leave a comment

Photosで選択中の写真をKeynoteの現在の書類の現在のスライド以降に配置

Posted on 5月 27, 2019 by Takaaki Naganoya

Photosで選択中の写真をKeynoteで現在オープン中の書類の現在のスライド(ページ)以降に配置していくAppleScriptです。

作業の過程をiPhoneで写真撮影。撮影した写真を写真.app(Photos.app)経由でKeynote書類にまとめる作業を行なっていました。作業工程を時間こみで表示できないとわかりにくかったので、Keynoteの各スライドに時刻を入れるようにAppleScriptを書いておきました(同じ作業が二度あるかは不明ですが、二度目からは明らかに時間の節約。つまり時間の貯金ができることになります)。

写真.app(Photos)上でKeynoteに配置したい写真を選択しておき、本Scriptを実行します。

Keynote書類上に新規スライドを追加し、撮影時刻と写真を配置していきます。

実行直後にPhotosで選択中の写真をファイルに書き出すため、若干待たされます。

# 複数のマシンでiCloudを介して写真を同期した場合に、写真.appのライブラリの写真の並び順は撮影日時どおりにならないようなので、明示的にソートしておく必要があるようです

ちなみに、写真の自作キーボードキットはこの後フットペダルにつなぎなおして、PPSSPP用の足踏みコントローラー化する予定です(「戦場の絆ポータブル」用)。

AppleScript名:Photosで選択中の写真をKeynoteの現在の書類の現在のスライド以降に配置
—
–  Created by: Takaaki Naganoya
–  Created on: 2019/05/26
—
–  Copyright © 2019 Piyomaru Software, All Rights Reserved
—
use AppleScript version "2.4"
use scripting additions
use framework "Foundation"
use framework "AppKit"
use BPlus : script "BridgePlus" –https://www.macosxautomation.com/applescript/apps/BridgePlus.html
use mdLib : script "Metadata Lib" version "2.0.0" –https://www.macosxautomation.com/applescript/apps/Script_Libs.html#Metadata_Lib

property NSUUID : a reference to current application’s NSUUID
property NSString : a reference to current application’s NSString
property NSFileManager : a reference to current application’s NSFileManager

tell application "Keynote"
  if (count every document) = 0 then return
end tell

–Photosで選択中の写真をすべて書き出してalias listを取得する
set aList to exportSelectedPhotoOnPhotos() of me
if aList = {} or aList = false then return

set aLen to length of aList

–書き出した画像の親フォルダを求めておく(あとで削除するため)
tell application "Finder"
  set parentFol to parent of (item 1 of aList)
end tell

tell application "Keynote"
  tell front document
    tell current slide
      set curNum to slide number –現在表示中のスライドの番号(ページ数)を取得する
    end tell
    
    
–Photosから取得した写真のアイテム数でループ
    
repeat with i from 1 to aLen
      set aPhoto to contents of item i of aList
      
set newSlide to make new slide at slide (curNum + i) with properties {base slide:master slide "画像(横長)"} –This item is localized!! Maybe a "Photo"
      
set creTime to getCreationTime(aPhoto) of me
      
tell newSlide
        set object text of default title item to creTime
        
set file name of image 1 to aPhoto –place an image to image placeholder
      end tell
      
      
–配置画像を削除
      
tell application "Finder"
        delete aPhoto –配置した写真を削除
      end tell
    end repeat
  end tell
end tell

–あとしまつ
tell application "Finder"
  delete parentFol –画像のダウンロードフォルダを削除
end tell

–指定のaliasからExif情報の作成日の時刻情報を返す
on getCreationTime(anAlias)
  set exifDate to readExifDateTimeOriginal(anAlias) of me
  
return time string of exifDate
end getCreationTime

–Photosで選択中のファイルをtmporaryフォルダに書き出してalias listで返す
on exportSelectedPhotoOnPhotos()
  set dtPath to (path to temporary items) as text
  
set aUUID to NSUUID’s UUID()’s UUIDString() as text
  
  
set dirPath to ((POSIX path of dtPath) & aUUID)
  
set fileManager to NSFileManager’s defaultManager()
  
set aRes to (fileManager’s createDirectoryAtPath:dirPath withIntermediateDirectories:true attributes:(missing value) |error|:(reference))
  
set dtPath to dtPath & aUUID
  
  
tell application "Photos"
    set a to selection
    
if a = {} then return {}
    
set aRes to (export a to file dtPath)
  end tell
  
  
tell application "Finder"
    tell folder dtPath
      set fList to (every file) as alias list
    end tell
  end tell
  
  
if fList = {} then return false
  
return fList
end exportSelectedPhotoOnPhotos

–指定JPEG画像のExif情報からDateTimeOriginalを取得してAS dateオブジェクトに変換して返す
on readExifDateTimeOriginal(aTargFileAlias)
  set theMetadata to readMetadataFrom(aTargFileAlias) of me
  
if theMetadata = false then return false
  
  
set keysList to theMetadata’s allKeys()
  
  
if "{Exif}" is not in (keysList as list) then return false
  
  
set exifDate to theMetadata’s valueForKeyPath:"{Exif}.DateTimeOriginal"
  
if exifDate = missing value then return false
  
  
set a to NSString’s stringWithString:exifDate
  
set {aDateStr, aTimeStr} to (a’s componentsSeparatedByString:" ") as list
  
set bDateStr to repChar(aDateStr, ":", "/") of me
  
set fullDate to date (bDateStr & " " & aTimeStr)
  
  
return fullDate
end readExifDateTimeOriginal

–指定のファイルからメタデータを取得する
on readMetadataFrom(imageFile)
  load framework
  
set {theRecord, theError} to current application’s SMSForder’s metadataFromImage:imageFile |error|:(reference)
  
if theRecord = missing value then — there was a problem, so extract the error description
    error false
  else
    return theRecord
  end if
end readMetadataFrom

–文字置換
on repChar(origText as string, targChar as string, repChar as string)
  set curDelim to AppleScript’s text item delimiters
  
set AppleScript’s text item delimiters to targChar
  
set tmpList to text items of origText
  
set AppleScript’s text item delimiters to repChar
  
set retText to tmpList as string
  
set AppleScript’s text item delimiters to curDelim
  
return retText
end repChar

★Click Here to Open This Script 

(Visited 102 times, 1 visits today)
Posted in Calendar exif file Image list | Tagged 10.12savvy 10.13savvy 10.14savvy Finder Keynote NSFileManager NSString NSUUID Photos | 1 Comment

指定ファイルサイズのJPEGに変換(圧縮率可変)_1K=1024で計算

Posted on 2月 11, 2019 by Takaaki Naganoya

Finder上で選択中の画像ファイルを指定ファイルサイズを下回るよう圧縮率を調整してJPEGに変換するAppleScriptです。

指定画像を指定のファイルサイズ(1K=1024で計算)以内になるよう、非圧縮の状態から段階的に圧縮率を高くして仕上がりファイルサイズを下回るかどうか演算を行います。ファイルに書き込まずに仕上がりサイズの計算を行うところが新機軸です。

macOS標準搭載のスクリプトメニューから呼び出して使うことを想定しています。実行すると、ダイアログ表示して指定ファイルサイズをKB単位で数値入力する必要があります。

巨大な画像ファイルを処理してしまった場合への対処として、最初に最高圧縮率で圧縮してみて、指定ファイルサイズ以内になるかどうかを計算します。

最初は圧縮率100%から25%まで1%きざみで仕上がり画像ファイルサイズを計算してみたのですが、数十Mバイトの巨大な画像を処理させたら、途中でマウスカーソルが反応しないほどOSが無反応になったので(暴走状態?)、それを避けるために、このような処理を行なってみました。

JPEGにファイル変換した画像はデスクトップに

UUID_JPEG画質.jpg

の形式で出力されます。JPEG画質は1.0から0.01までの数値です。

AppleScript名:指定ファイルサイズのJPEGに変換(圧縮率可変)_1K=1024で計算
— Created 2014-02-21 Shane Stanley
— Modified 2019-02-11 Takaaki Naganoya
use AppleScript version "2.5"
use scripting additions
use framework "Foundation"
use framework "AppKit"

property |NSURL| : a reference to current application’s |NSURL|
property NSUUID : a reference to current application’s NSUUID
property NSArray : a reference to current application’s NSArray
property NSString : a reference to current application’s NSString
property NSImage : a reference to current application’s NSImage
property NSPredicate : a reference to current application’s NSPredicate
property NSJPEGFileType : a reference to current application’s NSJPEGFileType
property NSBitmapImageRep : a reference to current application’s NSBitmapImageRep
property NSURLTypeIdentifierKey : a reference to current application’s NSURLTypeIdentifierKey

property compressList : {100, 99, 98, 97, 96, 95, 90, 85, 80, 75, 70, 65, 60, 55, 50, 40, 30, 20, 25} –大→小 へと並んでいる必要がある
property kbBase : 1024

tell application "Finder"
  set inFiles to selection as alias list
end tell

–指定のAlias listのうち画像ファイルのみ抽出
set filRes1 to filterAliasListByUTI(inFiles, "public.image") of me
if filRes1 = {} then return

–ターゲットサイズを指定
set aMessage to "Input Target size in KB ( " & (kbBase as string) & " based )"
set aRes to text returned of (display dialog aMessage default answer "300" buttons {"OK"} default button 1)
if aRes = false or aRes = "" then return
set targLimit to (aRes as number) * kbBase

–選択中のファイルのうちの1つから親フォルダを求め、出力先ファイルパスを組み立てる
set outPathTarg to (contents of first item of filRes1)
set pathString to NSString’s stringWithString:outPathTarg
set newPath to (pathString’s stringByDeletingLastPathComponent()) as string

–Main Loop
repeat with i in filRes1
  set aNSImage to (NSImage’s alloc()’s initWithContentsOfFile:(i))
  
  
–巨大すぎる画像のリサイズ時への保険で、最小サイズで投機的に圧縮して結果を確認する
  
set minSize to calcSavedJPEGSizeFromNSIMage(aNSImage, (last item of compressList) / 100) of me
  
  
if minSize < targLimit then
    –Simulate Suitable JPEG Compression Ratio to target file size
    
repeat with ii in compressList
      set jj to ii / 100
      
set fileSize to calcSavedJPEGSizeFromNSIMage(aNSImage, jj) of me
      
      
if fileSize < targLimit then
        exit repeat
      end if
    end repeat
  else
    set jj to 0.01 –エラー時にはやけくそで1%まで圧縮指定
  end if
  
  
set outPOSIXpath to (newPath & "/" & (NSUUID’s UUID()’s UUIDString()) as string) & "_" & (jj as string)
  
set savePath to outPOSIXpath & ".jpg"
  
  
saveNSImageAtPathAsJPG(aNSImage, savePath, jj) of me
end repeat

–Alias listから指定UTIに含まれるものをPOSIX pathのリストで返す
on filterAliasListByUTI(aList, targUTI)
  set newList to {}
  
repeat with i in aList
    set j to POSIX path of i
    
set tmpUTI to my retUTIfromPath(j)
    
set utiRes to my filterUTIList({tmpUTI}, targUTI)
    
if utiRes is not equal to {} then
      set the end of newList to j
    end if
  end repeat
  
return newList
end filterAliasListByUTI

–指定のPOSIX pathのファイルのUTIを求める
on retUTIfromPath(aPOSIXPath)
  set aURL to |NSURL|’s fileURLWithPath:aPOSIXPath
  
set {theResult, theValue} to aURL’s getResourceValue:(reference) forKey:NSURLTypeIdentifierKey |error|:(missing value)
  
  
if theResult = true then
    return theValue as string
  else
    return theResult
  end if
end retUTIfromPath

–UTIリストが指定UTIに含まれているかどうか演算を行う
on filterUTIList(aUTIList, aUTIstr)
  set anArray to NSArray’s arrayWithArray:aUTIList
  
set aPred to NSPredicate’s predicateWithFormat_("SELF UTI-CONFORMS-TO %@", aUTIstr)
  
set bRes to (anArray’s filteredArrayUsingPredicate:aPred) as list
  
return bRes
end filterUTIList

–NSImageを指定パスにJPEG形式で保存、qulityNumは0.0〜1.0。1.0は無圧縮
on saveNSImageAtPathAsJPG(anImage, outPath, qulityNum as real)
  set imageRep to anImage’s TIFFRepresentation()
  
set aRawimg to NSBitmapImageRep’s imageRepWithData:imageRep
  
set pathString to NSString’s stringWithString:outPath
  
set newPath to pathString’s stringByExpandingTildeInPath()
  
set myNewImageData to (aRawimg’s representationUsingType:(NSJPEGFileType) |properties|:{NSImageCompressionFactor:qulityNum})
  
  
set aLength to (myNewImageData’s |length|()) as number
  
  
set aRes to (myNewImageData’s writeToFile:newPath atomically:true) as boolean
  
return aRes –true/false
end saveNSImageAtPathAsJPG

–NSImageをJPEG形式で保存したときのファイルサイズを計算
on calcSavedJPEGSizeFromNSIMage(anImage, qulityNum as real)
  set imageRep to anImage’s TIFFRepresentation()
  
set aRawimg to NSBitmapImageRep’s imageRepWithData:imageRep
  
set myNewImageData to (aRawimg’s representationUsingType:(NSJPEGFileType) |properties|:{NSImageCompressionFactor:qulityNum})
  
set aLength to (myNewImageData’s |length|()) as number
  
return aLength
end calcSavedJPEGSizeFromNSIMage

★Click Here to Open This Script 

(Visited 384 times, 2 visits today)
Posted in file Image list UTI | Tagged 10.11savvy 10.12savvy 10.13savvy 10.14savvy Finder NSArray NSBitmapImageRep NSImage NSPredicate NSString NSURL NSURLTypeIdentifierKey NSUUID | Leave a comment

Finder上で選択中の画像のうち、最小のものに合わせて各画像の右上を基準にサイズ統一

Posted on 1月 26, 2019 by Takaaki Naganoya

Finderで選択中の画像のうち、最小のものに合わせて各画像の右上を原点にサイズを統一するAppleScriptです。

Finderで選択中のファイルから画像のみ抽出し、そのうちサイズが最小のものに合わせて他の画像をトリミングし、変更したものをデスクトップフォルダに出力します。

以前に画像の左上を基準に自動トリミングするバージョンのScriptを作成しましたが、あれはメニュー操作の説明用スクリーンショットの大きさを統一するためのもの。右上基準の本バージョンは、Driveのリネームやステータスバーの操作内容を説明するためのスクリーンショットの大きさ統一のために用意したものです。


▲大きさを揃える画像をFinder上で選択


▲処理後の画像。大きさが最小の画像に合わせてそろっている。切り抜き基準は右上

スクリーンショット画像を複数撮った場合に、厳密に同じサイズに固定することは(各種スクリーンショット作成ユーティリティを使わないと)行いづらいところです。

そこで、最小の画像を計算で求めて、それに合わせて自動トリミングするようにしてみました。Cocoaの機能を用いて画像処理しているため、Photoshopは必要ありません。

最小の画像を求めるのに、幅+高さの値でソートして最小のものを求めています(widthとheightによる2 key sortではなく1 Keyで済ませたかったので)。

AppleScript名:Finder上で選択中の画像のうち、最小のものに合わせて各画像の右上を基準にサイズ統一
— Created 2018-01-26 by Takaaki Naganoya
— 2019 Piyomaru Software
use AppleScript version "2.5"
use scripting additions
use framework "Foundation"
use framework "AppKit"
use framework "QuartzCore"

property |NSURL| : a reference to current application’s |NSURL|
property NSUUID : a reference to current application’s NSUUID
property NSArray : a reference to current application’s NSArray
property NSString : a reference to current application’s NSString
property NSImage : a reference to current application’s NSImage
property NSScreen : a reference to current application’s NSScreen
property NSZeroRect : a reference to current application’s NSZeroRect
property NSPredicate : a reference to current application’s NSPredicate
property NSPNGFileType : a reference to current application’s NSPNGFileType
property NSMutableArray : a reference to current application’s NSMutableArray
property NSCompositeCopy : a reference to current application’s NSCompositeCopy
property NSGraphicsContext : a reference to current application’s NSGraphicsContext
property NSBitmapImageRep : a reference to current application’s NSBitmapImageRep
property NSURLTypeIdentifierKey : a reference to current application’s NSURLTypeIdentifierKey
property NSCalibratedRGBColorSpace : a reference to current application’s NSCalibratedRGBColorSpace

tell application "Finder"
  set selList to selection as alias list
end tell

–指定のAlias listのうち画像のみ抽出
set filRes1 to filterAliasListByUTI(selList, "public.image") of me
if filRes1 = {} then
  tell current application
    –Error Message (No Selection)
    
display dialog "Finder上で選択されているファイルはありません。" buttons {"OK"} default button 1 with icon 1 with title "画像リサイズ処理できません"
  end tell
  
return
end if

–各種情報を入れたArrayを作成
set anArray to NSMutableArray’s new()
repeat with i in selList
  set imgPath to (POSIX path of i)
  
  
set aImage to makeNSImageFromFile(i) of me
  
set sizeInfo to |size|() of aImage
  
set sizeInfo to sizeInfo & {aImg:aImage, total:(width of sizeInfo) + (height of sizeInfo), myPath:imgPath}
  (
anArray’s addObject:sizeInfo)
end repeat

–最小のサイズの画像の算出
set aRes to anArray’s valueForKeyPath:("@min.total")
set bRes to first item of (filterRecListByLabel(anArray, "total == " & aRes as string) of me) –最小サイズの画像

–最小サイズ画像のwidthとheight
set minWidth to bRes’s width
set minHeight to bRes’s height

–環境情報の取得
set aPath to POSIX path of (path to desktop)
set retinaF to (NSScreen’s mainScreen()’s backingScaleFactor()) as real
–>  2.0 (Retina) / 1.0 (Non Retina)

set cRes to filterRecListByLabel(anArray, "total != " & aRes as string) of me –最小サイズ以外の画像

repeat with i in cRes
  set j to contents of i
  
set anImage to aImg of j
  
set fRes to myPath of j
  
  
set tmpSize to |size|() of anImage
  
set tmpWidth to (width of tmpSize)
  
set tmpHeight to (height of tmpSize)
  
  
set cropedImage to (my cropNSImageBy:{(tmpWidth – minWidth), 0, minWidth, minHeight} fromImage:anImage)
  
  
–Retina環境対策
  
if retinaF > 1.0 then
    set cropedImage to (my resizedImage:cropedImage toScale:(1.0))
  end if
  
  
–ファイル書き込み
  
set fRes to retUUIDfilePathFromDir(aPath, "png") of me
  
set sRes to saveNSImageAtPathAsPNG(cropedImage, fRes) of me
end repeat

–リストに入れたレコードを、指定の属性ラベルの値で抽出
on filterRecListByLabel(aRecList as list, aPredicate as string)
  –ListからNSArrayへの型変換
  
set aArray to NSArray’s arrayWithArray:aRecList
  
  
–抽出
  
set aPredicate to NSPredicate’s predicateWithFormat:aPredicate
  
set filteredArray to aArray’s filteredArrayUsingPredicate:aPredicate
  
  
–NSArrayからListに型変換して返す
  
set bList to filteredArray as list
  
return bList
end filterRecListByLabel

–Alias listから指定UTIに含まれるものをPOSIX pathのリストで返す
on filterAliasListByUTI(aList, targUTI)
  set newList to {}
  
repeat with i in aList
    set j to POSIX path of i
    
set tmpUTI to my retUTIfromPath(j)
    
set utiRes to my filterUTIList({tmpUTI}, targUTI)
    
if utiRes is not equal to {} then
      set the end of newList to j
    end if
  end repeat
  
return newList
end filterAliasListByUTI

–指定のPOSIX pathのファイルのUTIを求める
on retUTIfromPath(aPOSIXPath)
  set aURL to |NSURL|’s fileURLWithPath:aPOSIXPath
  
set {theResult, theValue} to aURL’s getResourceValue:(reference) forKey:NSURLTypeIdentifierKey |error|:(missing value)
  
  
if theResult = true then
    return theValue as string
  else
    return theResult
  end if
end retUTIfromPath

–UTIリストが指定UTIに含まれているかどうか演算を行う
on filterUTIList(aUTIList, aUTIstr)
  set anArray to NSArray’s arrayWithArray:aUTIList
  
set aPred to NSPredicate’s predicateWithFormat_("SELF UTI-CONFORMS-TO %@", aUTIstr)
  
set bRes to (anArray’s filteredArrayUsingPredicate:aPred) as list
  
return bRes
end filterUTIList

on cropNSImageTo:{x1, y1, x2, y2} fromImage:theImage
  set newWidth to x2 – x1
  
set newHeight to y2 – y1
  
set theSize to (theImage’s |size|()) as record
  
set oldHeight to height of theSize
  
  
— transpose y value for Cocoa coordintates
  
set y1 to oldHeight – newHeight – y1
  
set newRect to {{x:x1, y:y1}, {width:newWidth, height:newHeight}}
  
theImage’s lockFocus()
  
set theRep to NSBitmapImageRep’s alloc()’s initWithFocusedViewRect:newRect
  
theImage’s unlockFocus()
  
  
set outImage to NSImage’s alloc()’s initWithSize:(theRep’s |size|())
  
outImage’s addRepresentation:theRep
  
  
return outImage
end cropNSImageTo:fromImage:

on makeNSImageFromFile(anAlias)
  set imgPath to (POSIX path of anAlias)
  
set aURL to (|NSURL|’s fileURLWithPath:(imgPath))
  
return (NSImage’s alloc()’s initWithContentsOfURL:aURL)
end makeNSImageFromFile

–NSImageを指定の大きさでトリミング
on cropNSImageBy:{x1, y1, newWidth, newHeight} fromImage:theImage
  set theSize to (theImage’s |size|()) as record
  
set oldHeight to height of theSize
  
  
— transpose y value for Cocoa coordintates
  
set y1 to oldHeight – newHeight – y1
  
set newRect to {{x:x1, y:y1}, {width:newWidth, height:newHeight}}
  
theImage’s lockFocus()
  
set theRep to NSBitmapImageRep’s alloc()’s initWithFocusedViewRect:newRect
  
theImage’s unlockFocus()
  
  
set outImage to NSImage’s alloc()’s initWithSize:(theRep’s |size|())
  
outImage’s addRepresentation:theRep
  
  
return outImage
end cropNSImageBy:fromImage:

on retUUIDfilePathFromDir(aPath, aEXT)
  set aUUIDstr to (NSUUID’s UUID()’s UUIDString()) as string
  
set aPath to ((NSString’s stringWithString:aPath)’s stringByAppendingPathComponent:aUUIDstr)’s stringByAppendingPathExtension:aEXT
  
return aPath
end retUUIDfilePathFromDir

–NSImageを指定パスにPNG形式で保存
on saveNSImageAtPathAsPNG(anImage, outPath)
  set imageRep to anImage’s TIFFRepresentation()
  
set aRawimg to NSBitmapImageRep’s imageRepWithData:imageRep
  
set pathString to NSString’s stringWithString:outPath
  
set newPath to pathString’s stringByExpandingTildeInPath()
  
set myNewImageData to (aRawimg’s representationUsingType:(NSPNGFileType) |properties|:(missing value))
  
set aRes to (myNewImageData’s writeToFile:newPath atomically:true) as boolean
  
return aRes –true/false
end saveNSImageAtPathAsPNG

on resizedImage:aSourceImg toScale:imgScale
  if (aSourceImg’s isValid()) as boolean = false then error "Invalid NSImage"
  
  
set aSize to aSourceImg’s |size|()
  
–>  {​​​​​width:32.0, ​​​​​height:32.0​​​}
  
  
set aWidth to (aSize’s width) * imgScale
  
set aHeight to (aSize’s height) * imgScale
  
  
set aRep to NSBitmapImageRep’s alloc()’s initWithBitmapDataPlanes:(missing value) pixelsWide:aWidth pixelsHigh:aHeight bitsPerSample:8 samplesPerPixel:4 hasAlpha:true isPlanar:false colorSpaceName:(NSCalibratedRGBColorSpace) bytesPerRow:0 bitsPerPixel:0
  
  
set newSize to {width:aWidth, height:aHeight}
  
aRep’s setSize:newSize
  
  
NSGraphicsContext’s saveGraphicsState()
  
NSGraphicsContext’s setCurrentContext:(NSGraphicsContext’s graphicsContextWithBitmapImageRep:aRep)
  
  
aSourceImg’s drawInRect:(current application’s NSMakeRect(0, 0, aWidth, aHeight)) fromRect:(NSZeroRect) operation:(NSCompositeCopy) fraction:(1.0)
  
  
NSGraphicsContext’s restoreGraphicsState()
  
  
set newImg to NSImage’s alloc()’s initWithSize:newSize
  
newImg’s addRepresentation:aRep
  
  
return newImg
end resizedImage:toScale:

★Click Here to Open This Script 

(Visited 45 times, 1 visits today)
Posted in file Image | Tagged 10.11savvy 10.12savvy 10.13savvy NSArray NSBitmapImageRep NSImage NSPredicate NSScreen NSString NSURL NSUUID | Leave a comment

squeezeNetで画像のオブジェクト認識を行い、結果をCSV出力してNumbersでオープン

Posted on 11月 12, 2018 by Takaaki Naganoya

Core MLモデル「squeezeNet.mlmodel」を用いて画像のオブジェクト認識を行い、結果をデスクトップにCSV形式でデータ書き出しを行い、NumbersでオープンするAppleScriptです。

–> Download squeezeNetKit.framework (To ~/Library/Frameworks)

macOS 10.13上ではスクリプトエディタ、Script Debugger上で、macOS 10.14上ではScript Debugger上で動作します(AppleScript Appletでも動作)。

さまざまなCore MLモデルを用いて画像認識を行わせてはみたものの、最もスコアの高いもののラベルだけを返させても、結果がまったく内容にそぐわないケースが多く見られます。


▲機械学習の評価値が1.0に近いものは確度が高く、0.0に近いものは判断に迷った末に消極的に出した値。経験則でいえば、最高スコアの項目が0.7以上のスコアでないといまひとつのようです(0.7以上でもダメな時はダメなわけで、、、)

画像認識については、結果があまりに的外れで「なんじゃこら?」というケースが多いので、確認のためにCSVデータ出力させてNumbers上で確認させてみることにしてみました。そのためにありあわせのサブルーチンを組み合わせて作ったものです。

スコアが高い順に結果を並べて確認してみると、最も高いスコアの値であっても0.0に近い評価値であることがあり、「何も考えずに最高スコアのラベルだけ取ってくるのはものすごく危険」なことがよくわかります。


▲squeezeNet.mlmodelをNetronでビジュアライズしたところ(一部抜粋)

AppleScript名:SqueezeNetでオブジェクト判定して結果をCSV書き出ししてNumbersでオープン.scpt
–  Created by: Takaaki Naganoya
–  Created on: 2018/11/11
–  Copyright © 2018 Piyomaru Software, All Rights Reserved
use AppleScript version "2.7" — High Sierra (10.13) or later
use framework "Foundation"
use framework "AppKit"
use framework "squeezeNetKit"
use scripting additions

property NSUUID : a reference to current application’s NSUUID
property NSArray : a reference to current application’s NSArray
property NSImage : a reference to current application’s NSImage
property NSMutableArray : a reference to current application’s NSMutableArray
property NSSortDescriptor : a reference to current application’s NSSortDescriptor

set aFile to POSIX path of (choose file of type {"public.image"})
set aImage to NSImage’s alloc()’s initWithContentsOfFile:aFile
set resDict to (current application’s imageClassifier’s alloc()’s init()’s ImageClassifierWithImageAndRetDict:aImage)

set kArray to (resDict’s allKeys())
set vArray to (resDict’s allValues())
set aLen to kArray’s |count|()

set anArray to NSMutableArray’s new()

repeat with i from 0 to (aLen – 1)
  set tmpKey to (kArray’s objectAtIndex:i) as string
  
set tmpVal to (vArray’s objectAtIndex:i) as real
  (
anArray’s addObject:{aKey:tmpKey, aVal:tmpVal})
end repeat

–Sort by value
set bList to sortRecListByLabel(anArray, "aVal", false) of me

–record in list –> 2D list
set cList to convRecInListTo2DList(bList) of me

–デスクトップにCSVファイルを書き出してNumbersでオープン
set aPath to (((path to desktop) as string) & (NSUUID’s UUID()’s UUIDString()) as string) & ".csv"
set fRes to saveAsCSV(cList, aPath) of me
tell application "Numbers"
  open (aPath as alias)
end tell

–リストに入れたレコードを、指定の属性ラベルの値でソート
on sortRecListByLabel(aRecList as list, aLabelStr as string, ascendF as boolean)
  set aArray to NSArray’s arrayWithArray:aRecList
  
set sortDesc to NSSortDescriptor’s alloc()’s initWithKey:aLabelStr ascending:ascendF
  
set sortDescArray to NSArray’s arrayWithObjects:sortDesc
  
set sortedArray to aArray’s sortedArrayUsingDescriptors:sortDescArray
  
set bList to (sortedArray) as anything
  
return bList
end sortRecListByLabel

on convRecInListTo2DList(aList)
  set anArray to NSMutableArray’s arrayWithArray:aList
  
set fItem to anArray’s objectAtIndex:0
  
set keyList to fItem’s allKeys() as list
  
set aCount to anArray’s |count|()
  
  
set allArray to NSMutableArray’s new()
  
  
repeat with i from 1 to aCount
    set anItem to (anArray’s objectAtIndex:(i – 1))
    
set tmpItem to {}
    
    
repeat with ii in keyList
      set tmpDat to (anItem’s valueForKeyPath:(contents of ii))
      
if tmpDat is not equal to missing value then
        set the end of tmpItem to tmpDat
      else
        set the end of tmpItem to ""
      end if
    end repeat
    (
allArray’s addObject:tmpItem)
  end repeat
  
  
set allList to allArray as list
  
set the beginning of allList to keyList
  
return allList
end convRecInListTo2DList

–CSV Kit

–2D List to CSV file
on saveAsCSV(aList, aPath)
  –set crlfChar to (ASCII character 13) & (ASCII character 10)
  
set crlfChar to (string id 13) & (string id 10)
  
set LF to (string id 10)
  
set wholeText to ""
  
  
repeat with i in aList
    set newLine to {}
    
    
–Sanitize (Double Quote)
    
repeat with ii in i
      set jj to ii as text
      
set kk to repChar(jj, string id 34, (string id 34) & (string id 34)) of me –Escape Double Quote
      
set the end of newLine to kk
    end repeat
    
    
–Change Delimiter
    
set aLineText to ""
    
set curDelim to AppleScript’s text item delimiters
    
set AppleScript’s text item delimiters to "\",\""
    
set aLineList to newLine as text
    
set AppleScript’s text item delimiters to curDelim
    
    
set aLineText to repChar(aLineList, return, "") of me –delete return
    
set aLineText to repChar(aLineText, LF, "") of me –delete lf
    
    
set wholeText to wholeText & "\"" & aLineText & "\"" & crlfChar –line terminator: CR+LF
  end repeat
  
  
if (aPath as string) does not end with ".csv" then
    set bPath to aPath & ".csv" as Unicode text
  else
    set bPath to aPath as Unicode text
  end if
  
  
write_to_file(wholeText, bPath, false) of me
  
end saveAsCSV

on write_to_file(this_data, target_file, append_data)
  tell current application
    try
      set the target_file to the target_file as text
      
set the open_target_file to open for access file target_file with write permission
      
if append_data is false then set eof of the open_target_file to 0
      
write this_data to the open_target_file starting at eof
      
close access the open_target_file
      
return true
    on error error_message
      try
        close access file target_file
      end try
      
return error_message
    end try
  end tell
end write_to_file

on repChar(origText as text, targChar as text, repChar as text)
  set curDelim to AppleScript’s text item delimiters
  
set AppleScript’s text item delimiters to targChar
  
set tmpList to text items of origText
  
set AppleScript’s text item delimiters to repChar
  
set retText to tmpList as string
  
set AppleScript’s text item delimiters to curDelim
  
return retText
end repChar

★Click Here to Open This Script 

(Visited 118 times, 1 visits today)
Posted in file Image list Machine Learning Record Sort | Tagged 10.13savvy 10.14savvy NSArray NSImage NSMutableArray NSSortDescriptor NSUUID Numbers | Leave a comment

Code39のバーコードをpdfで生成 v2

Posted on 11月 3, 2018 by Takaaki Naganoya

オープンソースのBarcodeKitを用いて、Code 3 of 9のバーコードをPDFで作成するAppleScriptです。

–> Download BarCodeKit.framework (To ~/Library/Frameworks/)

AppleScript名:Code39のバーコードをpdfで生成 v2
— Created 2015-12-13 by Takaaki Naganoya
— 2015 Piyomaru Software
use AppleScript version "2.4"
use scripting additions
use framework "Foundation"
use framework "BarcodeKit" –https://github.com/Cocoanetics/BarCodeKit
use framework "AppKit"
use framework "Quartz"

set dtPath to POSIX path of (path to desktop folder)
set outPath to dtPath & (current application’s NSUUID’s UUID()’s UUIDString() as text) & ".pdf"

set aBK to current application’s BCKCode39Code’s alloc()’s initWithContent:"0123456789" |error|:(missing value)

set anImage to current application’s NSImage’s imageWithBarCode:aBK options:(missing value)

–Make Blank PDF
set aPDFdoc to current application’s PDFDocument’s alloc()’s init()

(aPDFdoc’s insertPage:(current application’s PDFPage’s alloc()’s initWithImage:anImage) atIndex:0)
aPDFdoc’s writeToFile:outPath

–NSImageを指定パスにPNG形式で保存
on saveNSImageAtPathAsPNG(anImage, outPath)
  set imageRep to anImage’s TIFFRepresentation()
  
set aRawimg to current application’s NSBitmapImageRep’s imageRepWithData:imageRep
  
set pathString to current application’s NSString’s stringWithString:outPath
  
set newPath to pathString’s stringByExpandingTildeInPath()
  
set myNewImageData to (aRawimg’s representationUsingType:(current application’s NSPNGFileType) |properties|:(missing value))
  
set aRes to (myNewImageData’s writeToFile:newPath atomically:true) as boolean
  
return aRes –true/false
end saveNSImageAtPathAsPNG

★Click Here to Open This Script 

(Visited 196 times, 1 visits today)
Posted in file Image PDF | Tagged 10.11savvy 10.12savvy 10.13savvy NSBitmapImageRep NSImage NSString NSUUID PDFDocument PDFPage | Leave a comment

心配性のリネームプログラム

Posted on 8月 15, 2018 by Takaaki Naganoya

安全策の上に安全策を講じた、心配性のファイル名称変更AppleScriptです。

基本的にはファイルのリネームプログラムであり、Finder上で選択中のファイルについてリネームを行います。

ただし、ファイルのリネーム時に同じファイル名のファイルがすでに存在していて、普段であれば衝突回避のために子番号を振るなどの対処を行うところが、そういう対応が許されていないようなケースに直面しました。

同じフォルダ内にある3つの画像ファイルを、名称が衝突するような他の名称に変更するようなケースです。

1.jpg --> 2.jpg(すでに2.jpgが存在)
2.jpg --> 3.jpg(すでに3.jpgが存在)
3.jpg --> 1.jpg

少々、頭を抱えてしまいました。

そこで、テンポラリフォルダをファイル1つごとに作成し、テンポラリフォルダにファイルを移動。

1.jpg --> /temp/uuid0001/1.jpg

そのタコツボ的なテンポラリフォルダの中でリネームを実施。

/temp/uuid0001/1.jpg --> /temp/uuid0001/2.jpg

リネームしたファイルを元のフォルダに戻すというリネームルーチンを作成した次第です。もちろん、作成したテンポラリフォルダは削除しておきます。

/temp/uuid0001/2.jpg --> 2.jpg

最近はこのAppleScriptのように、ファイル操作処理はNSFileManagerで実行し、Finderには「選択中のファイルの情報を取得」ぐらいしか行わせていません。そのため、ファイル処理が従来よりもはるかに高速に行えて、ちょっと楽しいぐらいです。

数千ファイルのコピー(込み入ったルールに従いJANコードなどのデータを参照して名前を決定したり、フォルダ名を製品名で作成したりとか)が1・2秒というオーダーで終わってしまうのは、SSD上で処理しているせいもありますが、NSFileManager経由でのファイル処理を行っているおかげです(64bit化したCocoa Finderはとにかく処理が遅いのでAppleScriptからのファイル操作用に使うとダメ)。

AppleScript名:tempフォルダに移動しつつリネームして、終了後に元フォルダに戻す v2.scptd
— Created 2018-08-14 by Takaaki Naganoya
— 2018 Piyomaru Software
use AppleScript version "2.4"
use scripting additions
use framework "Foundation"

property NSUUID : a reference to current application’s NSUUID
property NSString : a reference to current application’s NSString
property NSFileManager : a reference to current application’s NSFileManager

property tResList : {}
property tFol : ""
property newNameTemplate : "test_"

set tResList to {}
set tFol to POSIX path of (path to temporary items)

tell application "Finder"
  set aSel to selection as alias list
  
if aSel = {} then
    display notification "No Selection"
    
return
  end if
end tell

–コピー元ファイルの親フォルダを求める(リネーム後に戻す)
set origFol to POSIX path of (contents of first item of aSel)
set origFolStr to ((NSString’s stringWithString:origFol)’s stringByDeletingLastPathComponent()) as string

–一時フォルダに移動してリネーム
set aCount to 1
repeat with i1 in aSel
  set j1 to POSIX path of (contents of i1)
  
set newName to newNameTemplate & (aCount as string)
  
set j1Res to renameSafely(j1, newName) of me
  
set the end of tResList to (j1Res as string)
  
set aCount to aCount + 1
end repeat

–元のフォルダに戻して一時フォルダ削除
repeat with i2 in tResList
  set j2 to contents of i2
  
set j2Res to (my moveFileAt:j2 toFolder:origFolStr)
  
set j2Res to deleteParentFol(j2) of me
end repeat

–安全なリネーム(個別のテンポラリフォルダに移動してリネーム)
on renameSafely(aFile, newName)
  –set tFol to POSIX path of (path to temporary items)
  
set aUUIDstr to ((NSUUID’s UUID()’s UUIDString()) as string)
  
set aTmpFol to tFol & aUUIDstr
  
  
set dRes to makeDirAbsolutely(aTmpFol) of me
  
set mRes to my moveFileAt:aFile toFolder:aTmpFol
  
  
set aStr to (NSString’s stringWithString:aFile)
  
set newFullPath to aTmpFol & "/" & aStr’s lastPathComponent()
  
set aExt to aStr’s pathExtension()
  
  
set fRes to renameFileItem(newFullPath, newName) of me
  
  
set renamedPath to aTmpFol & "/" & newName & "." & aExt
  
  
return renamedPath
end renameSafely

–指定パスににフォルダを作成する
on makeDirAbsolutely(dirStr)
  set fileManager to NSFileManager’s defaultManager()
  
set aRes to fileManager’s createDirectoryAtPath:dirStr withIntermediateDirectories:true attributes:(missing value) |error|:(reference)
  
copy aRes to {aFlag, aError}
  
return aFlag as boolean
end makeDirAbsolutely

on moveFileAt:POSIXPath toFolder:folderPOSIXPath
  set POSIXPath to NSString’s stringWithString:POSIXPath
  
set theName to POSIXPath’s lastPathComponent()
  
set folderPOSIXPath to NSString’s stringWithString:folderPOSIXPath
  
set theNewPath to folderPOSIXPath’s stringByAppendingPathComponent:theName
  
set fileManager to NSFileManager’s defaultManager()
  
set theResult to fileManager’s moveItemAtPath:POSIXPath toPath:theNewPath |error|:(missing value)
  
return theNewPath
end moveFileAt:toFolder:

on renameFileItem(aPOSIXpath as string, newName as string)
  set theNSFileManager to NSFileManager’s defaultManager()
  
set POSIXPathNSString to NSString’s stringWithString:(aPOSIXpath)
  
  
–Make New File Path
  
set anExtension to POSIXPathNSString’s pathExtension()
  
set newPath to (POSIXPathNSString’s stringByDeletingLastPathComponent()’s stringByAppendingPathComponent:newName)’s stringByAppendingPathExtension:anExtension
  
  
–Rename
  
if theNSFileManager’s fileExistsAtPath:newPath then
    return false
  else
    set theResult to theNSFileManager’s moveItemAtPath:POSIXPathNSString toPath:newPath |error|:(missing value)
    
if (theResult as integer = 1) then
      return (newPath as string)
    else
      return false
    end if
  end if
end renameFileItem

on deleteParentFol(aPOSIX)
  set aStr to NSString’s stringWithString:aPOSIX
  
set parentFol to aStr’s stringByDeletingLastPathComponent()
  
set aRes to deleteItemAt(parentFol) of me
  
return aRes
end deleteParentFol

on deleteItemAt(aPOSIX)
  set theNSFileManager to NSFileManager’s defaultManager()
  
set theResult to theNSFileManager’s removeItemAtPath:(aPOSIX) |error|:(missing value)
  
return (theResult as integer = 1) as boolean
end deleteItemAt

★Click Here to Open This Script 

(Visited 392 times, 1 visits today)
Posted in file File path | Tagged 10.11savvy 10.12savvy NSFileManager NSString NSUUID | Leave a comment

Finder上で選択中の画像のうち、最小のものに合わせて各画像の左上を原点にサイズ統一

Posted on 7月 27, 2018 by Takaaki Naganoya

Finderで選択中の画像のうち、最小のものに合わせて各画像の左上を原点にサイズを統一するAppleScriptです。

Finderで選択中のファイルから画像のみ抽出し、そのうちサイズが最小のものに合わせて他の画像をトリミングし、変更したものをデスクトップフォルダに出力します。


▲大きさを揃える画像をFinder上で選択


▲処理前の画像。大きさがまちまち


▲処理後の画像。大きさが最小の画像に合わせてそろっている

スクリーンショット画像を複数撮った場合に、厳密に同じサイズに固定することは(各種スクリーンショット作成ユーティリティを使わないと)行いづらいところです。

そこで、最小の画像を計算で求めて、それに合わせて自動トリミングするようにしてみました。Cocoaの機能を用いて画像処理しているため、Photoshopは必要ありません。

最小の画像を求めるのに、幅+高さの値でソートして最小のものを求めています(widthとheightによる2 key sortではなく1 Keyで済ませたかったので)。

Blogや書籍用の掲載画面図の作成用、といったところでしょうか。Retina画面で撮ったスクリーンショットと非Retina画面のスクリーンショットが混在するとうまく動きません(スクリーンショット画像からはRetina環境で撮った画像であるかどうかを取得できません)。

スクリーンショットの画像からRetina/非Retina環境で撮ったかを判定するのは、(Retina対応機であるかをMachine IDから取得したあとで)Syslogにアクセスしてスクリーンが接続されたか、取り外されたかといった状態を追っていくしかないのかも。

本ScriptをmacOS 10.13.6上で動作確認して驚いたのですが、いままでRecordが返ってくるべき箇所でlistが返ってくる盛大なバグが直って、本ScriptがmacOS 10.13用に書き換えずに動きました(動かないことを確認しようとして動いたので驚いた)。

AppleScript名:Finder上で選択中の画像のうち、最小のものに合わせて各画像の左上を原点にサイズ統一 v2
— Created 2018-07-23 by Takaaki Naganoya
— 2018 Piyomaru Software
use AppleScript version "2.5"
use scripting additions
use framework "Foundation"
use framework "AppKit"
use framework "QuartzCore"

property |NSURL| : a reference to current application’s |NSURL|
property NSUUID : a reference to current application’s NSUUID
property NSArray : a reference to current application’s NSArray
property NSString : a reference to current application’s NSString
property NSImage : a reference to current application’s NSImage
property NSScreen : a reference to current application’s NSScreen
property NSZeroRect : a reference to current application’s NSZeroRect
property NSPredicate : a reference to current application’s NSPredicate
property NSPNGFileType : a reference to current application’s NSPNGFileType
property NSMutableArray : a reference to current application’s NSMutableArray
property NSCompositeCopy : a reference to current application’s NSCompositeCopy
property NSGraphicsContext : a reference to current application’s NSGraphicsContext
property NSBitmapImageRep : a reference to current application’s NSBitmapImageRep
property NSURLTypeIdentifierKey : a reference to current application’s NSURLTypeIdentifierKey
property NSCalibratedRGBColorSpace : a reference to current application’s NSCalibratedRGBColorSpace

tell application "Finder"
  set selList to selection as alias list
end tell

–指定のAlias listのうち画像のみ抽出
set filRes1 to filterAliasListByUTI(selList, "public.image") of me
if filRes1 = {} then
  tell current application
    –Error Message (No Selection)
    
display dialog "Finder上で選択されているファイルはありません。" buttons {"OK"} default button 1 with icon 1 with title "画像リサイズ処理できません"
  end tell
  
return
end if

–各種情報を入れたArrayを作成
set anArray to NSMutableArray’s new()
repeat with i in selList
  set imgPath to (POSIX path of i)
  
  
set aImage to makeNSImageFromFile(i) of me
  
set sizeInfo to |size|() of aImage
  
set sizeInfo to sizeInfo & {aImg:aImage, total:(width of sizeInfo) + (height of sizeInfo), myPath:imgPath}
  (
anArray’s addObject:sizeInfo)
end repeat

–最小のサイズの画像の算出
set aRes to anArray’s valueForKeyPath:("@min.total")
set bRes to first item of (filterRecListByLabel(anArray, "total == " & aRes as string) of me) –最小サイズの画像

–最小サイズ画像のwidthとheight
set minWidth to bRes’s width
set minHeight to bRes’s height

–環境情報の取得
set aPath to POSIX path of (path to desktop)
set retinaF to (NSScreen’s mainScreen()’s backingScaleFactor()) as real
–>  2.0 (Retina) / 1.0 (Non Retina)

set cRes to filterRecListByLabel(anArray, "total != " & aRes as string) of me –最小サイズ以外の画像

repeat with i in cRes
  set j to contents of i
  
set anImage to aImg of j
  
set fRes to myPath of j
  
  
set cropedImage to (my cropNSImageBy:{0, 0, minWidth, minHeight} fromImage:anImage) –v1で間違っていた
  
  
–Retina環境対策
  
if retinaF > 1.0 then
    set cropedImage to (my resizedImage:cropedImage toScale:(1.0))
  end if
  
  
–ファイル書き込み
  
set fRes to retUUIDfilePathFromDir(aPath, "png") of me
  
set sRes to saveNSImageAtPathAsPNG(cropedImage, fRes) of me
end repeat

–リストに入れたレコードを、指定の属性ラベルの値で抽出
on filterRecListByLabel(aRecList as list, aPredicate as string)
  –ListからNSArrayへの型変換
  
set aArray to NSArray’s arrayWithArray:aRecList
  
  
–抽出
  
set aPredicate to NSPredicate’s predicateWithFormat:aPredicate
  
set filteredArray to aArray’s filteredArrayUsingPredicate:aPredicate
  
  
–NSArrayからListに型変換して返す
  
set bList to filteredArray as list
  
return bList
end filterRecListByLabel

–Alias listから指定UTIに含まれるものをPOSIX pathのリストで返す
on filterAliasListByUTI(aList, targUTI)
  set newList to {}
  
repeat with i in aList
    set j to POSIX path of i
    
set tmpUTI to my retUTIfromPath(j)
    
set utiRes to my filterUTIList({tmpUTI}, targUTI)
    
if utiRes is not equal to {} then
      set the end of newList to j
    end if
  end repeat
  
return newList
end filterAliasListByUTI

–指定のPOSIX pathのファイルのUTIを求める
on retUTIfromPath(aPOSIXPath)
  set aURL to |NSURL|’s fileURLWithPath:aPOSIXPath
  
set {theResult, theValue} to aURL’s getResourceValue:(reference) forKey:NSURLTypeIdentifierKey |error|:(missing value)
  
  
if theResult = true then
    return theValue as string
  else
    return theResult
  end if
end retUTIfromPath

–UTIリストが指定UTIに含まれているかどうか演算を行う
on filterUTIList(aUTIList, aUTIstr)
  set anArray to NSArray’s arrayWithArray:aUTIList
  
set aPred to NSPredicate’s predicateWithFormat_("SELF UTI-CONFORMS-TO %@", aUTIstr)
  
set bRes to (anArray’s filteredArrayUsingPredicate:aPred) as list
  
return bRes
end filterUTIList

on cropNSImageTo:{x1, y1, x2, y2} fromImage:theImage
  set newWidth to x2 – x1
  
set newHeight to y2 – y1
  
set theSize to (theImage’s |size|()) as record
  
set oldHeight to height of theSize
  
  
— transpose y value for Cocoa coordintates
  
set y1 to oldHeight – newHeight – y1
  
set newRect to {{x:x1, y:y1}, {width:newWidth, height:newHeight}}
  
theImage’s lockFocus()
  
set theRep to NSBitmapImageRep’s alloc()’s initWithFocusedViewRect:newRect
  
theImage’s unlockFocus()
  
  
set outImage to NSImage’s alloc()’s initWithSize:(theRep’s |size|())
  
outImage’s addRepresentation:theRep
  
  
return outImage
end cropNSImageTo:fromImage:

on makeNSImageFromFile(anAlias)
  set imgPath to (POSIX path of anAlias)
  
set aURL to (|NSURL|’s fileURLWithPath:(imgPath))
  
return (NSImage’s alloc()’s initWithContentsOfURL:aURL)
end makeNSImageFromFile

–NSImageを指定の大きさでトリミング
on cropNSImageBy:{x1, y1, newWidth, newHeight} fromImage:theImage
  set theSize to (theImage’s |size|()) as record
  
set oldHeight to height of theSize
  
  
— transpose y value for Cocoa coordintates
  
set y1 to oldHeight – newHeight – y1
  
set newRect to {{x:x1, y:y1}, {width:newWidth, height:newHeight}}
  
theImage’s lockFocus()
  
set theRep to NSBitmapImageRep’s alloc()’s initWithFocusedViewRect:newRect
  
theImage’s unlockFocus()
  
  
set outImage to NSImage’s alloc()’s initWithSize:(theRep’s |size|())
  
outImage’s addRepresentation:theRep
  
  
return outImage
end cropNSImageBy:fromImage:

on retUUIDfilePathFromDir(aPath, aEXT)
  set aUUIDstr to (NSUUID’s UUID()’s UUIDString()) as string
  
set aPath to ((NSString’s stringWithString:aPath)’s stringByAppendingPathComponent:aUUIDstr)’s stringByAppendingPathExtension:aEXT
  
return aPath
end retUUIDfilePathFromDir

–NSImageを指定パスにPNG形式で保存
on saveNSImageAtPathAsPNG(anImage, outPath)
  set imageRep to anImage’s TIFFRepresentation()
  
set aRawimg to NSBitmapImageRep’s imageRepWithData:imageRep
  
set pathString to NSString’s stringWithString:outPath
  
set newPath to pathString’s stringByExpandingTildeInPath()
  
set myNewImageData to (aRawimg’s representationUsingType:(NSPNGFileType) |properties|:(missing value))
  
set aRes to (myNewImageData’s writeToFile:newPath atomically:true) as boolean
  
return aRes –true/false
end saveNSImageAtPathAsPNG

on resizedImage:aSourceImg toScale:imgScale
  if (aSourceImg’s isValid()) as boolean = false then error "Invalid NSImage"
  
  
set aSize to aSourceImg’s |size|()
  
–>  {​​​​​width:32.0, ​​​​​height:32.0​​​}
  
  
set aWidth to (aSize’s width) * imgScale
  
set aHeight to (aSize’s height) * imgScale
  
  
set aRep to NSBitmapImageRep’s alloc()’s initWithBitmapDataPlanes:(missing value) pixelsWide:aWidth pixelsHigh:aHeight bitsPerSample:8 samplesPerPixel:4 hasAlpha:true isPlanar:false colorSpaceName:(NSCalibratedRGBColorSpace) bytesPerRow:0 bitsPerPixel:0
  
  
set newSize to {width:aWidth, height:aHeight}
  
aRep’s setSize:newSize
  
  
NSGraphicsContext’s saveGraphicsState()
  
NSGraphicsContext’s setCurrentContext:(NSGraphicsContext’s graphicsContextWithBitmapImageRep:aRep)
  
  
aSourceImg’s drawInRect:(current application’s NSMakeRect(0, 0, aWidth, aHeight)) fromRect:(NSZeroRect) operation:(NSCompositeCopy) fraction:(1.0)
  
  
NSGraphicsContext’s restoreGraphicsState()
  
  
set newImg to NSImage’s alloc()’s initWithSize:newSize
  
newImg’s addRepresentation:aRep
  
  
return newImg
end resizedImage:toScale:

★Click Here to Open This Script 

(Visited 75 times, 1 visits today)
Posted in file Image | Tagged 10.11savvy 10.12savvy 10.13savvy Finder NSArray NSBitmapImageRep NSImage NSMutableArray NSPredicate NSScreen NSString NSURL NSUUID | 1 Comment

色付き単色画像を作成する(自由色指定&色名推定)

Posted on 7月 17, 2018 by Takaaki Naganoya

指定画像を任意の色で単色化し、指定色名をファイル名に反映させてファイル出力するAppleScriptです。

もとは、「色付き単色画像を作成する」AppleScriptに、

 ・choose colorによるユーザー選択色を反映
 ・choose colorで指定した色のざっくりとした色名検出

などの機能をつなぎ合わせたものです。

日本地図の白地図からカラーバリエーション画像を出力する際に作成しました。線が黒で書かれている白地図(白地図というのはそういうものですが)から、さまざまな色のバリエーションを作成。その際に、どのような色を指定したかをファイル名に反映させておいたほうが便利だったので、そのようにしてみました。

GPUImage.frameworkを利用しています。

–> GPUImage.framework (To ~/Library/Frameworks/)

色名推定のロジックもけっこうしっくりきていますが、明度も反映して、明るいものは「light-」、暗いものは「dark-」と出力させてもいいような気がします。ただし、「dark-orange」はBrownのことですし、ほかにも色名を別途振り直したほうがいいパターンもあるように思われます。

AppleScript名:色付き単色画像を作成する(自由色指定&色名推定)
— Created 2017-02-11 by Takaaki Naganoya
— Modified 2018-07-15 by Takaaki Naganoya
— 2017-2018 Piyomaru Software
use AppleScript version "2.4"
use scripting additions
use framework "Foundation"
use framework "AppKit"
use framework "GPUImage" –https://github.com/BradLarson/GPUImage

property NSUUID : a reference to current application’s NSUUID
property NSColor : a reference to current application’s NSColor
property NSString : a reference to current application’s NSString
property NSImage : a reference to current application’s NSImage
property NSBezierPath : a reference to current application’s NSBezierPath
property NSPNGFileType : a reference to current application’s NSPNGFileType
property GPUImagePicture : a reference to current application’s GPUImagePicture
property NSBitmapImageRep : a reference to current application’s NSBitmapImageRep

–Select Image File
set aFile to POSIX path of (choose file of type {"public.image"} with prompt "Select image")

–Select Color
set {rCol, gCol, bCol} to choose color

set fillColorR to makeNSColorFromRGBAval(rCol, gCol, bCol, 65535, 65535) of me
set fillColorRName to retColorDomainNameFromNSColor(fillColorR) of me –だいたいの色名称を計算

set imgRes to makeMonoColoredImage(aFile, fillColorR) of me
set fRes to retUUIDandKeyfilePath(aFile, fillColorRName, "png") of me
set bRes to saveNSImageAtPathAsPNG(imgRes, fRes) of me

— return "UUID_aKey.aEXT" full path
on retUUIDandKeyfilePath(aPath, aKey, aEXT)
  set aUUIDstr to ((NSUUID’s UUID()’s UUIDString()) as string) & "_" & aKey
  
set aPath to ((NSString’s stringWithString:aPath)’s stringByDeletingLastPathComponent()’s stringByAppendingPathComponent:aUUIDstr)’s stringByAppendingPathExtension:aEXT
  
return aPath
end retUUIDandKeyfilePath

on makeMonoColoredImage(aFile, NScolorObj)
  set aImage to NSImage’s alloc()’s initWithContentsOfFile:aFile
  
return makeColoredNSImageWithColor(aImage, NScolorObj) of me –色付き単色画像を作成する
end makeMonoColoredImage

on makeColoredNSImageWithColor(aImage, fillColor)
  set aSize to aImage’s |size|()
  
set aWidth to width of aSize
  
set aHeight to height of aSize
  
set newNSImage to makeNSImageWithFilledWithColor(aWidth, aHeight, fillColor)
  
set grayImage to filterWithNSImage(aImage, "GPUImageGrayscaleFilter") of me
  
set compImage to composeImageWithBlendFilter(grayImage, newNSImage, "GPUImageScreenBlendFilter") of me
  
return compImage
end makeColoredNSImageWithColor

on filterWithNSImage(aNSImage, filterName as string)
  set aClass to current application’s NSClassFromString(filterName)
  
set aImageFilter to aClass’s alloc()’s init()
  
set aProcImg to (aImageFilter’s imageByFilteringImage:aNSImage)
  
return aProcImg
end filterWithNSImage

on composeImageWithBlendFilter(aImage, bImage, filterName)
  set aClass to current application’s NSClassFromString(filterName)
  
set blendFilter to aClass’s alloc()’s init()
  
set pictureA to GPUImagePicture’s alloc()’s initWithImage:aImage
  
pictureA’s addTarget:blendFilter
  
pictureA’s processImage()
  
set imgRes to blendFilter’s imageByFilteringImage:bImage
  
return imgRes
end composeImageWithBlendFilter

–指定サイズの画像を作成し、指定色で塗ってNSImageで返す
on makeNSImageWithFilledWithColor(aWidth, aHeight, fillColor)
  –Imageの作成  
  
set curSize to current application’s NSMakeSize(aWidth, aHeight)
  
set anImage to NSImage’s alloc()’s initWithSize:curSize
  
  
anImage’s lockFocus() –描画開始
  
  
set theRect to {{x:0, y:0}, {height:aHeight, width:aWidth}}
  
set theNSBezierPath to NSBezierPath’s bezierPath
  
theNSBezierPath’s appendBezierPathWithRect:theRect
  
  
fillColor’s |set|() –色設定
  
theNSBezierPath’s fill() –ぬりつぶし
  
  
anImage’s unlockFocus() –描画ここまで
  
  
–生成した画像のRaw画像を作成
  
set imageRep to anImage’s TIFFRepresentation()
  
set aRawimg to NSBitmapImageRep’s imageRepWithData:imageRep
  
  
set newImg to NSImage’s alloc()’s initWithSize:curSize
  
newImg’s addRepresentation:aRawimg
  
return newImg
end makeNSImageWithFilledWithColor

–NSImageを指定パスにPNG形式で保存
on saveNSImageAtPathAsPNG(anImage, outPath)
  set imageRep to anImage’s TIFFRepresentation()
  
set aRawimg to NSBitmapImageRep’s imageRepWithData:imageRep
  
set pathString to NSString’s stringWithString:outPath
  
set newPath to pathString’s stringByExpandingTildeInPath()
  
set myNewImageData to (aRawimg’s representationUsingType:(NSPNGFileType) |properties|:(missing value))
  
set aRes to (myNewImageData’s writeToFile:newPath atomically:true) as boolean
  
return aRes –true/false
end saveNSImageAtPathAsPNG

–NSColor(内容はRGBAカラー)からだいたいの色名を推測
on retColorDomainNameFromNSColor(aCol)
  set hueVal to aCol’s hueComponent()
  
set satVal to aCol’s saturationComponent()
  
set brightVal to aCol’s brightnessComponent()
  
  
if satVal ≤ 0.01 then set satVal to 0.0
  
  
set colName to ""
  
  
if satVal = 0.0 then
    if brightVal ≤ 0.2 then
      set colName to "black"
    else if (brightVal > 0.95) then
      set colName to "white"
    else
      set colName to "gray"
    end if
  else
    if hueVal ≤ (15.0 / 360) or hueVal ≥ (330 / 360) then
      set colName to "red"
    else if hueVal ≤ (45.0 / 360) then
      set colName to "orange"
    else if hueVal < (70.0 / 360) then
      set colName to "yellow"
    else if hueVal < (150.0 / 360) then
      set colName to "green"
    else if hueVal < (190.0 / 360) then
      set colName to "green(cyan)"
    else if (hueVal < 250.0 / 360.0) then
      set colName to "blue"
    else if (hueVal < 290.0 / 360.0) then
      set colName to "purple"
    else
      set colName to "red(magenta)"
    end if
  end if
  
  
return colName
end retColorDomainNameFromNSColor

on makeNSColorFromRGBAval(redValue as integer, greenValue as integer, blueValue as integer, alphaValue as integer, aMaxVal as integer)
  set aRedCocoa to (redValue / aMaxVal) as real
  
set aGreenCocoa to (greenValue / aMaxVal) as real
  
set aBlueCocoa to (blueValue / aMaxVal) as real
  
set aAlphaCocoa to (alphaValue / aMaxVal) as real
  
set aColor to NSColor’s colorWithCalibratedRed:aRedCocoa green:aGreenCocoa blue:aBlueCocoa alpha:aAlphaCocoa
  
return aColor
end makeNSColorFromRGBAval

★Click Here to Open This Script 

(Visited 36 times, 1 visits today)
Posted in Color file Image | Tagged 10.11savvy 10.12savvy 10.13savvy NSBezierPath NSBitmapImageRep NSColor NSImage NSString NSUUID | Leave a comment

電子書籍(PDF)をオンラインストアで販売中!

Google Search

Popular posts

  • AppleScriptによるWebブラウザ自動操縦ガイド
  • macOS 13, Ventura(継続更新)
  • ドラッグ&ドロップ機能の未来?
  • macOS 12.x上のAppleScriptのトラブルまとめ
  • PFiddlesoft UI Browserが製品終了に
  • macOS 12.3 beta 5、ASの障害が解消される(?)
  • SF Symbolsを名称で指定してPNG画像化
  • 新刊発売:AppleScriptによるWebブラウザ自動操縦ガイド
  • macOS 12.3 beta4、まだ直らないASまわりの障害
  • macOS 12.3上でFinder上で選択中のファイルをそのままオープンできない件
  • Safariで表示中のYouTubeムービーのサムネイル画像を取得
  • macOS 12のスクリプトエディタで、Context Menu機能にバグ
  • Pixelmator Pro v2.4.1で新機能追加+AppleScriptコマンド追加
  • 人類史上初、魔導書の観点から書かれたAppleScript入門書「7つの宝珠」シリーズ開始?!
  • CotEditor v4.1.2でAppleScript系の機能を追加
  • macOS 12.5(21G72)がリリースされた!
  • UI Browserがgithub上でソース公開され、オープンソースに
  • Pages v12に謎のバグ。書類上に11枚しか画像を配置できない→解決
  • 新発売:AppleScriptからSiriを呼び出そう!
  • iWork 12.2がリリースされた

Tags

10.11savvy (1102) 10.12savvy (1243) 10.13savvy (1391) 10.14savvy (586) 10.15savvy (434) 11.0savvy (274) 12.0savvy (174) 13.0savvy (34) CotEditor (60) Finder (47) iTunes (19) Keynote (97) NSAlert (60) NSArray (51) NSBezierPath (18) NSBitmapImageRep (21) NSBundle (20) NSButton (34) NSColor (51) NSDictionary (27) NSFileManager (23) NSFont (18) NSImage (42) NSJSONSerialization (21) NSMutableArray (62) NSMutableDictionary (21) NSPredicate (36) NSRunningApplication (56) NSScreen (30) NSScrollView (22) NSString (118) NSURL (97) NSURLRequest (23) NSUTF8StringEncoding (30) NSUUID (18) NSView (33) NSWorkspace (20) Numbers (55) Pages (36) Safari (41) Script Editor (20) WKUserContentController (21) WKUserScript (20) WKWebView (23) WKWebViewConfiguration (22)

カテゴリー

  • 2D Bin Packing
  • 3D
  • AirDrop
  • AirPlay
  • Animation
  • AppleScript Application on Xcode
  • beta
  • Bluetooth
  • Books
  • boolean
  • bounds
  • Bug
  • Calendar
  • call by reference
  • Clipboard
  • Code Sign
  • Color
  • Custom Class
  • dialog
  • drive
  • exif
  • file
  • File path
  • filter
  • folder
  • Font
  • Font
  • GAME
  • geolocation
  • GUI
  • GUI Scripting
  • Hex
  • History
  • How To
  • iCloud
  • Icon
  • Image
  • Input Method
  • Internet
  • iOS App
  • JavaScript
  • JSON
  • JXA
  • Keychain
  • Keychain
  • Language
  • Library
  • list
  • Locale
  • Machine Learning
  • Map
  • Markdown
  • Menu
  • Metadata
  • MIDI
  • MIME
  • Natural Language Processing
  • Network
  • news
  • Noification
  • Notarization
  • Number
  • Object control
  • OCR
  • OSA
  • PDF
  • Peripheral
  • PRODUCTS
  • QR Code
  • Raw AppleEvent Code
  • Record
  • recursive call
  • regexp
  • Release
  • Remote Control
  • Require Control-Command-R to run
  • REST API
  • Review
  • RTF
  • Sandbox
  • Screen Saver
  • Script Libraries
  • sdef
  • search
  • Security
  • selection
  • shell script
  • Shortcuts Workflow
  • Sort
  • Sound
  • Spellchecker
  • Spotlight
  • SVG
  • System
  • Tag
  • Telephony
  • Text
  • Text to Speech
  • timezone
  • Tools
  • Update
  • URL
  • UTI
  • Web Contents Control
  • WiFi
  • XML
  • XML-RPC
  • イベント(Event)
  • 未分類

アーカイブ

  • 2023年3月
  • 2023年2月
  • 2023年1月
  • 2022年12月
  • 2022年11月
  • 2022年10月
  • 2022年9月
  • 2022年8月
  • 2022年7月
  • 2022年6月
  • 2022年5月
  • 2022年4月
  • 2022年3月
  • 2022年2月
  • 2022年1月
  • 2021年12月
  • 2021年11月
  • 2021年10月
  • 2021年9月
  • 2021年8月
  • 2021年7月
  • 2021年6月
  • 2021年5月
  • 2021年4月
  • 2021年3月
  • 2021年2月
  • 2021年1月
  • 2020年12月
  • 2020年11月
  • 2020年10月
  • 2020年9月
  • 2020年8月
  • 2020年7月
  • 2020年6月
  • 2020年5月
  • 2020年4月
  • 2020年3月
  • 2020年2月
  • 2020年1月
  • 2019年12月
  • 2019年11月
  • 2019年10月
  • 2019年9月
  • 2019年8月
  • 2019年7月
  • 2019年6月
  • 2019年5月
  • 2019年4月
  • 2019年3月
  • 2019年2月
  • 2019年1月
  • 2018年12月
  • 2018年11月
  • 2018年10月
  • 2018年9月
  • 2018年8月
  • 2018年7月
  • 2018年6月
  • 2018年5月
  • 2018年4月
  • 2018年3月
  • 2018年2月

https://piyomarusoft.booth.pm/items/301502

メタ情報

  • 登録
  • ログイン
  • 投稿フィード
  • コメントフィード
  • WordPress.org

Forum Posts

  • 人気のトピック
  • 返信がないトピック

メタ情報

  • 登録
  • ログイン
  • 投稿フィード
  • コメントフィード
  • WordPress.org
Proudly powered by WordPress
Theme: Flint by Star Verte LLC