Menu

Skip to content
AppleScriptの穴
  • Home
  • Products
  • Books
  • Docs
  • Events
  • Forum
  • About This Blog
  • License
  • 仕事依頼

AppleScriptの穴

Useful & Practical AppleScript archive. Click '★Click Here to Open This Script' Link to download each AppleScript

タグ: CIImage

CoreImageで指定画像をautoAdjustmentFilters

Posted on 1月 21 by Takaaki Naganoya

Core ImageのCIFilterから、autoAdjustmentFiltersを呼び出して、いい感じにKeynote上とかで自動画像調整を行うのと同様に、画像に対して自動調整を行うAppleScriptです。

KeynoteやPages上の画像の自動補正機能は、大当たりすることもなければ大はずしすることもない、なかなかお得な機能です。

ちょっと、Finder上で選択した画像にひととおり自動補正をかけてお茶をにごしたい。

そんな機能が存在しないかと調べていたのですが、autoAdjustmentFiltersの存在は知っていたものの、いろいろ試しては、

current application’s CIImage’s autoAdjustmentFilters()

とか、

current application’s CIFilter’s autoAdjustmentFilters()

などと間違った記述を行なってmissing valueが返ってきては、首をひねりまくっていました。

Googleの検索エンジンで探してもなかなかサンプルに行き当たらないあたり、みんな苦労しているんじゃないかと疑っていますが、これは、

CIImage画像に対してautoAdjustmentFilters()を実行すると、自動調整用のCIFilterにパラメータが設定された状態でarrayに入って返ってくるのでした(これは、わからないぞ)。

半信半疑で実行してみたら、なんとなくそれっぽく自動調整された画像がデスクトップに出力されます。

AppleScript名:CoreImageで指定画像をautoAdjustmentFilters.scptd
—
–  Created by: Takaaki Naganoya
–  Created on: 2025/01/21
—
–  Copyright © 2025 Piyomaru Software, All Rights Reserved
—

use AppleScript version "2.8"
use framework "Foundation"
use framework "AppKit"
use framework "CoreImage"
use scripting additions

property CIFilter : a reference to current application’s CIFilter
property NSUUID : a reference to current application’s NSUUID
property |NSURL| : a reference to current application’s |NSURL|
property CIImage : a reference to current application’s CIImage
property NSString : a reference to current application’s NSString
property NSImage : a reference to current application’s NSImage
property NSPNGFileType : a reference to current application’s NSPNGFileType
property NSBitmapImageRep : a reference to current application’s NSBitmapImageRep

set imgPath to POSIX path of (choose file)
set aNSImage to makeNSImageFromPOSIXpath(imgPath) of me

set bImgRes to autoFiltersForNSImage(aNSImage) of me
if bImgRes = false then return

set outPath to retUUIDfilePath(POSIX path of (path to desktop), "png") of me
set sRes to saveNSImageAtPathAsPNG(bImgRes, outPath) of me

on autoFiltersForNSImage(aNSImage)
  set aCIImage to convNSImageToCIimage(aNSImage) of me
  
set filterList to aCIImage’s autoAdjustmentFilters
  
if filterList = missing value then return false
  
  
repeat with i in filterList
    set aFilter to contents of i
    (
aFilter’s setValue:(aCIImage) forKey:"inputImage")
    
set aOutImage to (aFilter’s valueForKey:"outputImage")
    
    
copy aOutImage to aCIImage
  end repeat
  
  
set outNSImage to convCIimageToNSImage(aOutImage) of me
  
  
return outNSImage
end autoFiltersForNSImage

on retUUIDfilePath(aPath, aEXT)
  set aUUIDstr to (NSUUID’s UUID()’s UUIDString()) as string
  
set aPath to ((NSString’s stringWithString:aPath)’s stringByAppendingPathComponent:aUUIDstr)’s stringByAppendingPathExtension:aEXT
  
return aPath
end retUUIDfilePath

on convCIimageToNSImage(aCIImage)
  set aRep to NSBitmapImageRep’s alloc()’s initWithCIImage:aCIImage
  
set tmpSize to aRep’s |size|()
  
set newImg to NSImage’s alloc()’s initWithSize:tmpSize
  
newImg’s addRepresentation:aRep
  
return newImg
end convCIimageToNSImage

on convNSImageToCIimage(aNSImage)
  set tiffDat to aNSImage’s TIFFRepresentation()
  
set aRep to NSBitmapImageRep’s imageRepWithData:tiffDat
  
set newImg to CIImage’s alloc()’s initWithBitmapImageRep:aRep
  
return newImg
end convNSImageToCIimage

on makeNSImageFromAlias(anAlias)
  set imgPath to (POSIX path of anAlias)
  
set aURL to (|NSURL|’s fileURLWithPath:(imgPath))
  
return (NSImage’s alloc()’s initWithContentsOfURL:aURL)
end makeNSImageFromAlias

on makeNSImageFromPOSIXpath(aPOSIX)
  set aURL to (|NSURL|’s fileURLWithPath:(aPOSIX))
  
return (NSImage’s alloc()’s initWithContentsOfURL:aURL)
end makeNSImageFromPOSIXpath

–NSImageを指定パスにPNG形式で保存
on saveNSImageAtPathAsPNG(anImage, outPath)
  set imageRep to anImage’s TIFFRepresentation()
  
set aRawimg to NSBitmapImageRep’s imageRepWithData:imageRep
  
set pathString to NSString’s stringWithString:outPath
  
set newPath to pathString’s stringByExpandingTildeInPath()
  
set myNewImageData to (aRawimg’s representationUsingType:(NSPNGFileType) |properties|:(missing value))
  
set aRes to (myNewImageData’s writeToFile:newPath atomically:true) as boolean
  
return aRes –true/false
end saveNSImageAtPathAsPNG

★Click Here to Open This Script 

Posted in filter Image | Tagged 12.0savvy 13.0savvy 14.0savvy 15.0savvy CIFilter CIImage | Leave a comment

クリップボードの画像を指定色でモノクロ化してクリップボードへ v3

Posted on 3月 13, 2022 by Takaaki Naganoya

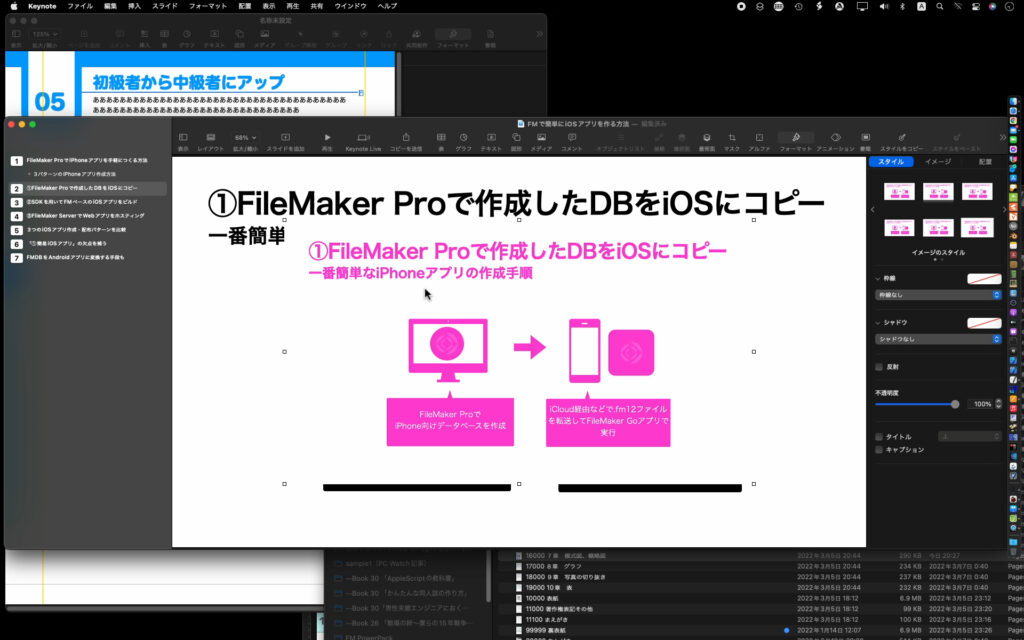
クリップボードに入れた画像を、グレースケール化したあとに指定の色のベタ塗り画像とフィルタで合成し、単色の色付き画像に変換するAppleScriptです。

資料に掲載する画像の情報量を減らすために、単色画像に変換したいと考えました。Photoshopだと2つのレイヤーの重ね合わせで指定して処理するような内容です。ただ、もうPhotoshopにできるぐらいのことの大部分は、AppleScriptだけで単独でできてしまうのが2022年的な状況です。

アプリケーションを使わずに処理するためには、CIFilterを用いて画像処理して、単色画像にすることになります。

CIFilterにもいろいろな画像フィルタ機能が用意されているわけで、ここから「どのフィルタを使うか」選ぶことになります。

# フィルタが200種類ぐらいあるんですけど!!

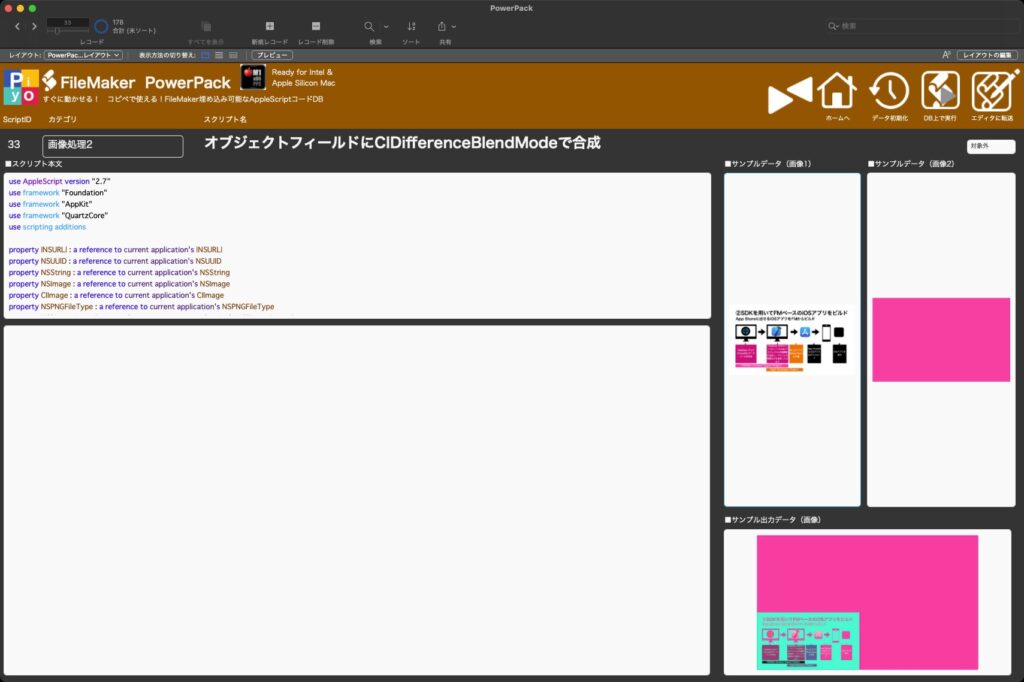
このような場合のために、FileMaker Proで作った「FileMaker Pro PowerPack」だとひととおりのCIFilterをサンプルデータで処理できるようにしておきました。

FileMaker Proのデータベース上にサンプルデータをコピー&ペーストしておけば、DB上でフィルタ処理してどのような処理をしてくれるかがわかります。

いやーー、作っておいてよかったー。「なんでこんなにフィルタ処理ばっかりあるんだよ!」的な話がありましたが、こうして実際に役立つわけで。フィルタの名称、編集できるテストデータ、処理結果が表示されるところまで……「動かせる資料」的なものに仕上がっています>FileMaker Pro PowerPack

ひととおりAppleScriptを作ってみて、いろいろ調整してみたところ……調整し切れなかったので、edama2さんに相談して(送りつけて)こんな感じに仕上がりました。

これでなんとか動くはずなのに、なぜこうなるのか。。。CIFilterを実際に日常的に使うツールで使ったのは実はこれが最初だったので、意外な挙動に割と困りました。


▲画面上の指定範囲のスクリーンショットを撮ってクリップボードへ


▲ScriptをmacOS標準搭載のスクリプトメニューから呼び出すことを前提に作った。


▲クリップボードの内容をペーストすると、単色化された画像が出力される

AppleScript名:クリップボードの画像を指定色でモノクロ化してクリップボードへ v3.scpt
—
–  Created by: Takaaki Naganoya
–  Created on: 2022/03/11
—
–  Copyright © 2022 Piyomaru Software, All Rights Reserved
–  v2 Takaaki Naganoya : マスクが1/4の大きさになったり2倍になったりしていた
–  v3 edama2:上記の問題に対処。クリーンナップ
—
use AppleScript version "2.7"
use framework "AppKit"
use framework "CoreImage"
use framework "Foundation"
use scripting additions

on run
  my main()
end run

on main()
  –クリップボード内のデータをNSImageとして取得
  
set sourceImg to my getClipboardASImage()
  
  
# 色指定
  
set aColor to my makeNSColorFromRGBA255val(252, 2, 128, 255)


# 同じ大きさの塗りつぶし画像を作成
  
tell current application’s NSImage’s alloc()
    tell initWithSize_(sourceImg’s |size|())
      lockFocus()
      
aColor’s |set|()
      
set aRect to current application’s NSMakeRect(0, 0, its |size|()’s width, its |size|()’s height)
      
current application’s NSBezierPath’s fillRect:aRect
      
unlockFocus()
      
set fillImg to it
    end tell
  end tell
  
  
# NSImage –> CIimage
  
set sourceImage to my convNSImageToCIimage(sourceImg)
  
set fillImage to my convNSImageToCIimage(fillImg)
  
  
set newImage to my filterImage2(fillImage, sourceImage)
  
  
my restoreClipboard({newImage})
end main

on filterImage2(fillImage, sourceImage)
  
  
set redValue to 0.295719844358
  
set greenValue to 0.295719844358
  
set blueValue to 0.295719844358
  
set alphaVlaue to 1.0
  
set aCIColor to current application’s CIColor’s alloc()’s initWithRed:redValue green:greenValue blue:blueValue alpha:alphaVlaue
  
  
tell current application’s CIFilter
    — CIFilter(モノクロ化)
    
tell filterWithName_("CIColorMonochrome")
      setDefaults()
      
setValue_forKey_(sourceImage, "inputImage")
      
setValue_forKey_(aCIColor, "inputColor")
      
set filteredImage to valueForKey_("outputImage")
    end tell
    
    
— CIFilter(モノクロ化)
    
tell filterWithName_("CIAdditionCompositing")
      setDefaults()
      
setValue_forKey_(fillImage, "inputImage")
      
setValue_forKey_(filteredImage, "inputBackgroundImage")
      
set theCIImage to valueForKey_(current application’s kCIOutputImageKey)
    end tell
  end tell
  
  
# CIImage –> NSImage
  
set imageRep to current application’s NSCIImageRep’s alloc()’s initWithCIImage:theCIImage
  
set rNSImage to current application’s NSImage’s alloc()’s initWithSize:(imageRep’s |size|())
  
rNSImage’s addRepresentation:imageRep
  
  
return rNSImage
end filterImage2

# NSImage –> CIimage
on convNSImageToCIimage(aNSImage)
  set tiffDat to aNSImage’s TIFFRepresentation()
  
set aRep to current application’s NSBitmapImageRep’s imageRepWithData:tiffDat
  
set newImg to current application’s CIImage’s alloc()’s initWithBitmapImageRep:aRep
  
return newImg
end convNSImageToCIimage

— クリップボードの内容をNSImageとして取り出して返す
on getClipboardASImage()
  set thePasteboard to current application’s NSPasteboard’s generalPasteboard()
  
set theAttributedStringNSArray to thePasteboard’s readObjectsForClasses:({current application’s NSImage}) options:(missing value)
  
set theNSImage to theAttributedStringNSArray’s objectAtIndex:0
  
return theNSImage
end getClipboardASImage

on restoreClipboard(theArray as list)
  set thePasteboard to current application’s NSPasteboard’s generalPasteboard()
  
thePasteboard’s clearContents()
  
thePasteboard’s writeObjects:theArray
end restoreClipboard

on makeNSColorFromRGBA255val(redValue as integer, greenValue as integer, blueValue as integer, alphaValue as integer)
  set aRedCocoa to (redValue / 255) as real
  
set aGreenCocoa to (greenValue / 255) as real
  
set aBlueCocoa to (blueValue / 255) as real
  
set aAlphaCocoa to (alphaValue / 255) as real
  
set aColor to current application’s NSColor’s colorWithCalibratedRed:aRedCocoa green:aGreenCocoa blue:aBlueCocoa alpha:aAlphaCocoa
  
return aColor
end makeNSColorFromRGBA255val

★Click Here to Open This Script 

Posted in filter Image | Tagged 12.0savvy CIColor CIImage NSBezierPath NSCIImageRep NSColor NSImage NSPasteboard | Leave a comment

CIFilterとGPUImageで画像差分検出演算を比較

Posted on 11月 22, 2019 by Takaaki Naganoya

オープンソースのGPUImage.framework(GPUImage1)はAppleScriptから呼び出すのも簡単ですし、機能セットも充実しており、非常に重宝して使っています。

ただし、GPUImage自体はSwiftで書き直されたGPUImage2、OSの変更を受けてOpenGLではなくMetalを用いるように書き直され、いまだ発展途上のGPUImage3と変化してきました。

・GPUImageのバージョンと搭載フィルタ数の推移

GPUImage1:■■■■■■■■■■■■ 125
GPUImage2:■■■■■■■■■■ 100
GPUImage3:■■■■ 45

GPUImage2/3とバージョンが進むにつれて搭載フィルタ数が減っており、かつGPUImage2以降はAppleScriptから呼べないため、GPUImage3は(自分の)移行先になりません。

Objective-CベースのGPUImage1系のプログラムを使い続けるという判断をしている開発者は多いようで、Github上で派生プログラムが大量にみつかります。ただ、GPUImage1系はmacOSがOpenGLを完全廃止にしたとたんに動かなくなるはずです。

このため、GPUImage1系に依存しているプログラムは別の部品を呼び出して処理する必要が出てきます。

一番有望なのは、macOS標準搭載のCIFilter。CIFilterについては、実際にプログラムを組んでみて「組みにくい」という印象を受けていました(機能はちゃんとしていそうなものの、機能数にドキュメントが見合っていません)。あと、AppleScriptからパラメータを指定しにくいという印象を受けていました(パラメータに指定するオブジェクトにAppleScriptから直接指定できないものがあるので、少しラッパーを書く必要がある)。

その後、各種フィルタを呼び出す汎用ルーチンを整備することで、利用難易度を下げる努力を自主的に行なっています。

・GPUImage3とCoreImageの搭載フィルタ数の比較

GPUImage3:■■■■ 45
CoreImage:■■■■■■■■■■■■■■■■■ 174

そこで、実際に処理速度の面でどうなのか、CIFilterとGPUImageを比較するとどうなのか、調べてみました。

まずは、ざっくりありもののルーチンを引っ張り出してきて実行。どちらも期待どおりの動作をしてくれます。ただし、周辺ルーチンの仕様が違っていたのでそこも合わせます。

乱数ファイル名を作成する定番のshell commandの「uuidgen」はお手軽な反面、呼び出すのに時間がかかるので(手元の時間で0.1秒程度強)、より高速なCocoaのUUIDStringを用いる部品に置き換えました。

それぞれのフレームワークごとの挙動の違いもあります。

経験上、GPUImage.frameworkは初回実行時だけは時間が長くかかる傾向があり(1秒以上かかる)、2回目以降はより短い時間で処理できるようになることを確認しています。一方、CIFilterは初回およびそれ以降の呼び出しでもさほど処理時間が変わりません。

これら2つを実際に同じデータで同一条件下で比較してみたところ、同一の処理(画像の差分計算)を行なったかぎりでは処理時間に差はほとんど有意な差はありませんでした。

Script Geek 2.0.1によるScriptの処理時間比較

First:GPUImage Version , Second:CoreImage Version

MacBookPro10,1,  macOS Version 10.14.6 (Build 18G2012),  10 iterations
         First Run   Total Time    Average  
First        0.969        1.194      0.119
Second       0.121        1.221      0.122
Ratio (excluding first run): 1:1.02

自分のメインマシン(MacBook Pro Retina 2012、Core i7 2.66GHz、RAM 8GB)ではどちらもテストデータ(1192x1684pixel 8bit color image x 2)を0.1〜0.2秒程度で処理できています。個人的には十分なスピードが出ていると感じていますが、不満がある方はデータをRAM Disk上に置いたり、並列処理するとよいのではないでしょうか(シングルスレッド処理が高速なマシンを用意するというのが一番効きそうではあります。iMac 5Kの上位モデルとか)。
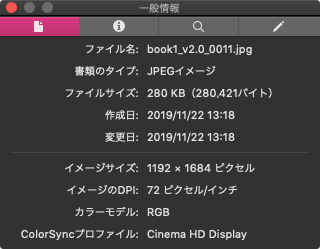
すべての類似フィルタで比較を行なったわけではありませんが(どれとどれが類似、という情報を整理するのに手間がかかる)、一番使っている「空白検出のためのヒストグラム計算フィルタ」はGPUImageにしか存在しませんでした(作成当時の話で現在はCoreImageにもCIAreaHistogramなどの機能があります)。

空白検出処理を高速に行えることで巨大なメリットが生じています。用途については枚挙にいとまがありませんが、Markdown書類をPDFにレンダリングした場合に、末尾に無用な空白のページが生じるケースがあり、これを検出しつつ末尾のページを自動削除することで、膨大な無駄手間を削減できています。空白検出処理を高速に行う手段を用意していないと、Photoshopで指定ページをレンダリングしてヒストグラムを計算する必要があるわけで、Photoshopのない環境に進出できなくなります。

空白画像の検出処理はGPUImage.framework抜きで(AppleScriptだけで)2〜3倍高速な処理を行える部品「画像の空白判定 v3」を作成済みなので、GPUImageなしでもさほど困りません。


▲同一環境にて、Photoshop CC 2018、GPUImage、AppleScriptだけで処理している「画像の空白判定 v3」で各種サイズの画像の空白検出を実行(単位:秒)

Objective-C/Swift系の開発者の方々に「GPUImageを経由してGPUのパワーを使って処理するよりも、AppleScript単体で空白の比較演算処理したほうが速かった」という事実をお話しすると、最初は「嘘つけ」というひきつった笑顔の反応なのですが、実際にコードを動かして動作原理を丁寧に説明すると分かっていただけるようです。

–> Download dffFilterDemoPrograms(Two Code-Signed AppleScript Applet Executables with Framework in its bundle)

AppleScript名:CoreImageでCIDifferenceBlendMode.scptd
—
–  Created by: Takaaki Naganoya
–  Created on: 2019/11/22
—
–  Copyright © 2019 Piyomaru Software, All Rights Reserved
—
use AppleScript version "2.4" — Yosemite (10.10) or later
use framework "Foundation"
use framework "AppKit"
use framework "QuartzCore"
use scripting additions

property CIFilter : a reference to current application’s CIFilter
property NSUUID : a reference to current application’s NSUUID
property |NSURL| : a reference to current application’s |NSURL|
property CIImage : a reference to current application’s CIImage
property NSString : a reference to current application’s NSString
property NSImage : a reference to current application’s NSImage
property NSPNGFileType : a reference to current application’s NSPNGFileType
property NSBitmapImageRep : a reference to current application’s NSBitmapImageRep

set mePath to POSIX path of (path to me)
set aImg to mePath & "Contents/Resources/book1_v2.0_0011.jpg"
set bImg to mePath & "Contents/Resources/book1_v2.1_0011.jpg"

–https://developer.apple.com/library/archive/documentation/
–GraphicsImaging/Reference/CoreImageFilterReference/index.html
–#//apple_ref/doc/filter/ci/CIDifferenceBlendMode
set cifilterName to "CIDifferenceBlendMode"

set imgRes to filterBlendImageFiles(aImg, bImg, cifilterName) of me

set outPath to retUUIDfilePath(POSIX path of (path to desktop), "png") of me
set sRes to saveNSImageAtPathAsPNG(imgRes, outPath) of me

–CIFilterをかけたJPEG画像を生成
on filterBlendImageFiles(aPath, bPath, aFilterName)
  –CIImage(A)を生成
  
set aURL to |NSURL|’s fileURLWithPath:aPath –Input
  
set aCIImage to CIImage’s alloc()’s initWithContentsOfURL:aURL
  
  
–CIImage(B)を生成
  
set bURL to |NSURL|’s fileURLWithPath:bPath –Input
  
set bCIImage to CIImage’s alloc()’s initWithContentsOfURL:bURL
  
  
— CIFilter をフィルタの名前で生成
  
set aFilter to CIFilter’s filterWithName:aFilterName
  
aFilter’s setDefaults() –各フィルタのパラメータはデフォルト
  
  
–Blend Filterを実行
  
aFilter’s setValue:(aCIImage) forKey:"inputImage"
  
aFilter’s setValue:(bCIImage) forKey:"inputBackgroundImage"
  
  
set aOutImage to aFilter’s valueForKey:"outputImage"
  
set outNSImage to convCIimageToNSImage(aOutImage) of me
  
return outNSImage
end filterBlendImageFiles

on retUUIDfilePath(aPath, aEXT)
  set aUUIDstr to (NSUUID’s UUID()’s UUIDString()) as string
  
set aPath to ((NSString’s stringWithString:aPath)’s stringByAppendingPathComponent:aUUIDstr)’s stringByAppendingPathExtension:aEXT
  
return aPath
end retUUIDfilePath

on convCIimageToNSImage(aCIImage)
  set aRep to NSBitmapImageRep’s alloc()’s initWithCIImage:aCIImage
  
set tmpSize to aRep’s |size|()
  
set newImg to NSImage’s alloc()’s initWithSize:tmpSize
  
newImg’s addRepresentation:aRep
  
return newImg
end convCIimageToNSImage

on convNSImageToCIimage(aNSImage)
  set tiffDat to aNSImage’s TIFFRepresentation()
  
set aRep to NSBitmapImageRep’s imageRepWithData:tiffDat
  
set newImg to CIImage’s alloc()’s initWithBitmapImageRep:aRep
  
return newImg
end convNSImageToCIimage

–NSImageを指定パスにPNG形式で保存
on saveNSImageAtPathAsPNG(anImage, outPath)
  set imageRep to anImage’s TIFFRepresentation()
  
set aRawimg to NSBitmapImageRep’s imageRepWithData:imageRep
  
set pathString to NSString’s stringWithString:outPath
  
set newPath to pathString’s stringByExpandingTildeInPath()
  
set myNewImageData to (aRawimg’s representationUsingType:(NSPNGFileType) |properties|:(missing value))
  
set aRes to (myNewImageData’s writeToFile:newPath atomically:true) as boolean
  
return aRes –true/false
end saveNSImageAtPathAsPNG

★Click Here to Open This Script 

AppleScript名:(比較用)GPUImageによる差分計算.scptd
—
–  Created by: Takaaki Naganoya
–  Created on: 2019/11/22
—
–  Copyright © 2019 Piyomaru Software, All Rights Reserved
—
use AppleScript version "2.4" — Yosemite (10.10) or later
use scripting additions
use framework "Foundation"
use framework "AppKit"
use framework "GPUImage" –https://github.com/BradLarson/GPUImage

property NSUUID : a reference to current application’s NSUUID
property |NSURL| : a reference to current application’s |NSURL|
property NSString : a reference to current application’s NSString
property NSImage : a reference to current application’s NSImage
property NSPNGFileType : a reference to current application’s NSPNGFileType
property NSBitmapImageRep : a reference to current application’s NSBitmapImageRep

set mePath to POSIX path of (path to me)
set aImagePath to mePath & "Contents/Resources/book1_v2.0_0011.jpg"
set bImagePath to mePath & "Contents/Resources/book1_v2.1_0011.jpg"

set imgRes to composeImageWithBlendFilter(aImagePath, bImagePath, "GPUImageDifferenceBlendFilter") of me

set outPath to retUUIDfilePath(POSIX path of (path to desktop), "png") of me
set sRes to saveNSImageAtPathAsPNG(imgRes, outPath) of me

on composeImageWithBlendFilter(aImagePath, bImagePath, filterName)
  set aImage to NSImage’s alloc()’s initWithContentsOfFile:aImagePath
  
set bImage to NSImage’s alloc()’s initWithContentsOfFile:bImagePath
  
  
set aClass to current application’s NSClassFromString(filterName)
  
set blendFilter to aClass’s alloc()’s init()
  
set pictureA to current application’s GPUImagePicture’s alloc()’s initWithImage:aImage
  
pictureA’s addTarget:blendFilter
  
pictureA’s processImage()
  
set imgRes to blendFilter’s imageByFilteringImage:bImage
  
return imgRes
end composeImageWithBlendFilter

on retUUIDfilePath(aPath, aEXT)
  set aUUIDstr to (NSUUID’s UUID()’s UUIDString()) as string
  
set aPath to ((NSString’s stringWithString:aPath)’s stringByAppendingPathComponent:aUUIDstr)’s stringByAppendingPathExtension:aEXT
  
return aPath
end retUUIDfilePath

–NSImageを指定パスにPNG形式で保存
on saveNSImageAtPathAsPNG(anImage, outPath)
  set imageRep to anImage’s TIFFRepresentation()
  
set aRawimg to NSBitmapImageRep’s imageRepWithData:imageRep
  
set pathString to NSString’s stringWithString:outPath
  
set newPath to pathString’s stringByExpandingTildeInPath()
  
set myNewImageData to (aRawimg’s representationUsingType:(NSPNGFileType) |properties|:(missing value))
  
set aRes to (myNewImageData’s writeToFile:newPath atomically:true) as boolean
  
return aRes –true/false
end saveNSImageAtPathAsPNG

★Click Here to Open This Script 

Posted in file filter Image | Tagged 10.14savvy 10.15savvy CIFilter CIImage NSBitmapImageRep NSImage NSPNGFileType NSString NSURL NSUUID | Leave a comment

クリップボードに入れたIllustratorのオブジェクトをQRコード認識 v2

Posted on 7月 28, 2019 by Takaaki Naganoya

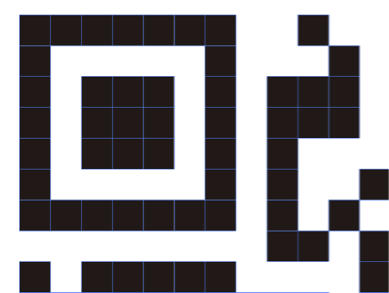
Adobe Illustrator書類上にある、QRコードのオブジェクトをクリップボード経由でNSImageに変換してQRコード認識するAppleScriptです。QRコード認識には、OS内蔵のCoreImageの機能を使っています。

# 実行前にAI書類上のQRコードオブジェクトを選択してコピー(Command-C)を実行してあることを前提条件としています。QRコードっぽいものであれば、別にAI書類上のオブジェクトでなくてもかまいません

昨日のScriptで、「そういえばなんでZXingObjCを使っているんだっけ?」と疑問を抱きました。理由ははっきりしています。CIDetectorではそのまま認識させてみたら認識しなかったためです。

QRコードやJANコード画像認識ソフトウェアは、割といろいろ条件がそろわないと認識してくれません。いわく、画像の大きさ、画像の解像度、画像の向き、コントラスト比、その他いろいろ。

スマホのカメラで認識する際にはユーザーが認識するまでいろいろ条件を変えて試行錯誤するので、ソフトウェアの力だけで認識させているわけではありません。いわば、人間をスマホの周辺機器として使用している状態です。

一方、静止画をソフトウェアで認識処理するさいには、人間が行っているフィードバック動作をソフトウェア側で行わなくてはなりません。

macOS内蔵のCIDetectorは、どうやら画像サイズに敏感なようで、いろいろリサイズして認識するかどうかチェックしなくてはなりません。逆に、最初からQRコードではないとわかっている画像を、しつこくQRコード認識し直しても時間の無駄です。

とりあえず、認識対象を2倍から4倍まで拡大して認識をリトライしています。実際にやってみたら、1倍では認識しなくても2倍で認識してくれました。実際に処理するデータ次第ですが、4倍まで試さなくても大丈夫なケースも多いことでしょう。

AppleScript名:rocogClipAsQR_v2.scptd
— Created 2019-07-28 by Takaaki Naganoya
— 2019 Piyomaru Software
use AppleScript version "2.4"
use scripting additions
use framework "Foundation"
use framework "AppKit"
use framework "CoreImage"

property CIImage : a reference to current application’s CIImage
property NSImage : a reference to current application’s NSImage
property CIDetector : a reference to current application’s CIDetector
property NSZeroRect : a reference to current application’s NSZeroRect
property NSDictionary : a reference to current application’s NSDictionary
property NSPasteboard : a reference to current application’s NSPasteboard
property NSCompositeCopy : a reference to current application’s NSCompositeCopy
property NSGraphicsContext : a reference to current application’s NSGraphicsContext
property NSBitmapImageRep : a reference to current application’s NSBitmapImageRep
property CIDetectorAccuracy : a reference to current application’s CIDetectorAccuracy
property CIDetectorTypeQRCode : a reference to current application’s CIDetectorTypeQRCode
property CIDetectorAccuracyHigh : a reference to current application’s CIDetectorAccuracyHigh
property NSImageInterpolationNone : a reference to current application’s NSImageInterpolationNone
property CIDetectorImageOrientation : a reference to current application’s CIDetectorImageOrientation
property NSCalibratedRGBColorSpace : a reference to current application’s NSCalibratedRGBColorSpace

set aRes to recogPasteboardASQR() of me

–クリップボードの内容をNSImageに
on recogPasteboardASQR()
  set aNSIMage to getClipboardASImage() of me
  
if aNSIMage = false then return false
  
  
set aRes to recogNSImageAsQRcodes(aNSIMage) of me –11: kBarcodeFormatQRCode
  
if aRes is not equal to {} then return aRes
  
  
–ループでQRコードとおぼしきイメージを拡大しつつQRコード認識
  
repeat with i from 2 to 4 –ここはチューニングの余地がある
    set bNSIMage to (my resizeNSImageWithoutAntlialias:aNSIMage toScale:(i as real))
    
set aRes to recogNSImageAsQRcodes(bNSIMage) of me
    
if aRes is not equal to {} then return aRes
  end repeat
  
  
return false
end recogPasteboardASQR

–NSImageをバーコードとして認識する
on recogNSImageAsQRcodes(aNSIMage)
  set imageRef to convNSImageToCIimage(aNSIMage) of me
  
  
— 検出器のオプションを NSDictonary で作成
  
set optDic1 to NSDictionary’s dictionaryWithObject:(CIDetectorAccuracyHigh) forKey:(CIDetectorAccuracy)
  
set faceDetector to CIDetector’s detectorOfType:(CIDetectorTypeQRCode) context:(missing value) options:optDic1
  
  
— QRコードの検出を行う際のオプションを NSDictonary で作成
  
set optDic2 to NSDictionary’s dictionaryWithObject:(CIDetectorImageOrientation) forKey:"Orientation"
  
  
— QRコード検出を実行
  
set faceArray to faceDetector’s featuresInImage:imageRef options:optDic2
  
set fList to {}
  
  
— 検出されたQRコードの位置とサイズをログに出力
  
repeat with i from 1 to (count of faceArray)
    set face to item i of faceArray
    
set bRec to (face’s messageString()) as string
    
–set cRec to retURLdecodedStrings(bRec) of me –URLエンコード対策
    
set the end of fList to bRec
  end repeat
  
  
return fList
end recogNSImageAsQRcodes

— クリップボードの内容をNSImageとして取り出して返す
on getClipboardASImage()
  set theNSPasteboard to NSPasteboard’s generalPasteboard()
  
set anArray to theNSPasteboard’s readObjectsForClasses:({NSImage}) options:(missing value)
  
if anArray = missing value or (anArray as list) = {} then return false
  
set aRes to anArray’s objectAtIndex:0
  
return aRes
end getClipboardASImage

—
on convNSImageToCIimage(aNSIMage)
  set tiffDat to aNSIMage’s TIFFRepresentation()
  
set aRep to NSBitmapImageRep’s imageRepWithData:tiffDat
  
set newImg to CIImage’s alloc()’s initWithBitmapImageRep:aRep
  
return newImg
end convNSImageToCIimage

–NSImageを指定倍率で拡大(アンチエイリアス解除状態で)
on resizeNSImageWithoutAntlialias:aSourceImg toScale:imgScale
  set aSize to aSourceImg’s |size|()
  
set aWidth to (aSize’s width) * imgScale
  
set aHeight to (aSize’s height) * imgScale
  
  
set aRep to NSBitmapImageRep’s alloc()’s initWithBitmapDataPlanes:(missing value) pixelsWide:aWidth pixelsHigh:aHeight bitsPerSample:8 samplesPerPixel:4 hasAlpha:true isPlanar:false colorSpaceName:(NSCalibratedRGBColorSpace) bytesPerRow:0 bitsPerPixel:0
  
  
set newSize to {width:aWidth, height:aHeight}
  
aRep’s setSize:newSize
  
  
NSGraphicsContext’s saveGraphicsState()
  
  
set theContext to NSGraphicsContext’s graphicsContextWithBitmapImageRep:aRep
  
NSGraphicsContext’s setCurrentContext:theContext
  
theContext’s setShouldAntialias:false
  
theContext’s setImageInterpolation:(NSImageInterpolationNone)
  
  
aSourceImg’s drawInRect:(current application’s NSMakeRect(0, 0, aWidth, aHeight)) fromRect:(NSZeroRect) operation:(NSCompositeCopy) fraction:(1.0)
  
  
NSGraphicsContext’s restoreGraphicsState()
  
  
set newImg to NSImage’s alloc()’s initWithSize:newSize
  
newImg’s addRepresentation:aRep
  
  
return newImg
end resizeNSImageWithoutAntlialias:toScale:

★Click Here to Open This Script 

Posted in Clipboard Image list QR Code | Tagged 10.12savvy 10.13savvy 10.14savvy CIDetector CIDetectorAccuracy CIDetectorAccuracyHigh CIDetectorImageOrientation CIDetectorTypeQRCode CIImage NSBitmapImageRep NSCalibratedRGBColorSpace NSCompositeCopy NSDictionary NSGraphicsContext NSImage NSImageInterpolationNone NSPasteboard NSZeroRect | 4 Comments

電子書籍(PDF)をオンラインストアで販売中!

Google Search

Popular posts

  • 開発機としてM2 Mac miniが来たのでガチレビュー
  • macOS 13.6.5 AS系のバグ、一切直らず
  • CotEditorで2つの書類の行単位での差分検出
  • Apple純正マウス、キーボードのバッテリー残量取得
  • macOS 15, Sequoia
  • 初心者がつまづきやすい「log」コマンド
  • 指定のWordファイルをPDFに書き出す
  • Adobe AcrobatをAppleScriptから操作してPDF圧縮
  • メキシカンハットの描画
  • Pages本執筆中に、2つの書類モード切り替えに気がついた
  • 与えられた文字列の1D Listのすべての順列組み合わせパターン文字列を返す v3(ベンチマーク用)
  • 2023年に書いた価値あるAppleScript
  • Pixelmator Pro v3.6.4でAppleScriptからの操作時の挙動に違和感が
  • AdobeがInDesign v19.4からPOSIX pathを採用
  • Safariで「プロファイル」機能を使うとAppleScriptの処理に影響
  • Cocoa Scripting Course 続刊計画
  • Numbersで選択範囲のセルの前後の空白を削除
  • macOS 14.xでScript Menuの実行速度が大幅に下がるバグ
  • NaturalLanguage.frameworkでNLEmbeddingの処理が可能な言語をチェック
  • AppleScriptによる並列処理

Tags

10.11savvy (1102) 10.12savvy (1243) 10.13savvy (1392) 10.14savvy (587) 10.15savvy (438) 11.0savvy (283) 12.0savvy (208) 13.0savvy (180) 14.0savvy (130) 15.0savvy (107) CotEditor (64) Finder (51) iTunes (19) Keynote (115) NSAlert (61) NSArray (51) NSBitmapImageRep (20) NSBundle (20) NSButton (34) NSColor (53) NSDictionary (28) NSFileManager (23) NSFont (21) NSImage (41) NSJSONSerialization (21) NSMutableArray (63) NSMutableDictionary (22) NSPredicate (36) NSRunningApplication (56) NSScreen (30) NSScrollView (22) NSString (119) NSURL (98) NSURLRequest (23) NSUTF8StringEncoding (30) NSView (33) NSWorkspace (20) Numbers (75) Pages (54) Safari (44) Script Editor (27) WKUserContentController (21) WKUserScript (20) WKWebView (23) WKWebViewConfiguration (22)

カテゴリー

  • 2D Bin Packing
  • 3D
  • AirDrop
  • AirPlay
  • Animation
  • AppleScript Application on Xcode
  • Beginner
  • Benchmark
  • beta
  • Bluetooth
  • Books
  • boolean
  • bounds
  • Bug
  • Calendar
  • call by reference
  • check sum
  • Clipboard
  • Cocoa-AppleScript Applet
  • Code Sign
  • Color
  • Custom Class
  • dialog
  • diff
  • drive
  • Droplet
  • exif
  • file
  • File path
  • filter
  • folder
  • Font
  • Font
  • GAME
  • geolocation
  • GUI
  • GUI Scripting
  • Hex
  • History
  • How To
  • iCloud
  • Icon
  • Image
  • Input Method
  • Internet
  • iOS App
  • JavaScript
  • JSON
  • JXA
  • Keychain
  • Keychain
  • Language
  • Library
  • list
  • Locale
  • Localize
  • Machine Learning
  • Map
  • Markdown
  • Menu
  • Metadata
  • MIDI
  • MIME
  • Natural Language Processing
  • Network
  • news
  • Noification
  • Notarization
  • Number
  • Object control
  • OCR
  • OSA
  • parallel processing
  • PDF
  • Peripheral
  • PRODUCTS
  • QR Code
  • Raw AppleEvent Code
  • Record
  • rectangle
  • recursive call
  • regexp
  • Release
  • Remote Control
  • Require Control-Command-R to run
  • REST API
  • Review
  • RTF
  • Sandbox
  • Screen Saver
  • Script Libraries
  • sdef
  • search
  • Security
  • selection
  • shell script
  • Shortcuts Workflow
  • Sort
  • Sound
  • Spellchecker
  • Spotlight
  • SVG
  • System
  • Tag
  • Telephony
  • Text
  • Text to Speech
  • timezone
  • Tools
  • Update
  • URL
  • UTI
  • Web Contents Control
  • WiFi
  • XML
  • XML-RPC
  • イベント(Event)
  • 未分類

アーカイブ

  • 2025年1月
  • 2024年12月
  • 2024年11月
  • 2024年10月
  • 2024年9月
  • 2024年8月
  • 2024年7月
  • 2024年6月
  • 2024年5月
  • 2024年4月
  • 2024年3月
  • 2024年2月
  • 2024年1月
  • 2023年12月
  • 2023年11月
  • 2023年10月
  • 2023年9月
  • 2023年8月
  • 2023年7月
  • 2023年6月
  • 2023年5月
  • 2023年4月
  • 2023年3月
  • 2023年2月
  • 2023年1月
  • 2022年12月
  • 2022年11月
  • 2022年10月
  • 2022年9月
  • 2022年8月
  • 2022年7月
  • 2022年6月
  • 2022年5月
  • 2022年4月
  • 2022年3月
  • 2022年2月
  • 2022年1月
  • 2021年12月
  • 2021年11月
  • 2021年10月
  • 2021年9月
  • 2021年8月
  • 2021年7月
  • 2021年6月
  • 2021年5月
  • 2021年4月
  • 2021年3月
  • 2021年2月
  • 2021年1月
  • 2020年12月
  • 2020年11月
  • 2020年10月
  • 2020年9月
  • 2020年8月
  • 2020年7月
  • 2020年6月
  • 2020年5月
  • 2020年4月
  • 2020年3月
  • 2020年2月
  • 2020年1月
  • 2019年12月
  • 2019年11月
  • 2019年10月
  • 2019年9月
  • 2019年8月
  • 2019年7月
  • 2019年6月
  • 2019年5月
  • 2019年4月
  • 2019年3月
  • 2019年2月
  • 2019年1月
  • 2018年12月
  • 2018年11月
  • 2018年10月
  • 2018年9月
  • 2018年8月
  • 2018年7月
  • 2018年6月
  • 2018年5月
  • 2018年4月
  • 2018年3月
  • 2018年2月

https://piyomarusoft.booth.pm/items/301502

メタ情報

  • ログイン
  • 投稿フィード
  • コメントフィード
  • WordPress.org

Forum Posts

  • 人気のトピック
  • 返信がないトピック

メタ情報

  • ログイン
  • 投稿フィード
  • コメントフィード
  • WordPress.org
Proudly powered by WordPress
Theme: Flint by Star Verte LLC