Menu

Skip to content
AppleScriptの穴
  • Home
  • Products
  • Books
  • Docs
  • Events
  • Forum
  • About This Blog
  • License
  • 仕事依頼

AppleScriptの穴

Useful & Practical AppleScript archive. Click '★Click Here to Open This Script' Link to download each AppleScript

タグ: NSPNGFileType

画像に円を塗る

Posted on 2月 11, 2020 by Takaaki Naganoya

作成した画像(NSImage)に円を塗るAppleScriptです。

最近、6角形の図形ばかり塗りつぶしていましたが、「円に変えるとどうなんだろう?」と考えて、本ルーチンを試作してみました。

ためしに、6角形ではなく円で塗りつぶしてみたものの、そんなにイケていない感じがします。

AppleScript名:画像に円を塗る.scptd
—
–  Created by: Takaaki Naganoya
–  Created on: 2020/02/11
—
–  Copyright © 2020 Piyomaru Software, All Rights Reserved
—
use AppleScript version "2.4" — Yosemite (10.10) or later
use framework "Foundation"
use framework "AppKit"
use scripting additions

property aRadius : 40

set aFile to POSIX path of (choose file name)
if aFile does not end with ".png" then
  set aFile to aFile & ".png"
end if

set aColor to current application’s NSColor’s redColor()

set aImage to current application’s NSImage’s alloc()’s initWithSize:{300, 300}

repeat with y from 0 to 300 by aRadius + 4
  repeat with x from 0 to 300 by aRadius + 4
    my drawCircleOnNSIMage(aImage, aRadius, x, y, aColor)
  end repeat
end repeat

set sRes to my saveNSImageAtPathAsPNG(aImage, aFile)

#  MARK: Call By Reference
on drawCircleOnNSIMage(aImage, aRadius, aXpos, aYpos, aColor)
  set aBezier to generateCircle(aRadius, aXpos, aYpos) of me
  (
aImage)’s lockFocus()
  
aColor’s |set|()
  
aBezier’s fill() –ぬりつぶし
  (
aImage)’s unlockFocus()
end drawCircleOnNSIMage

#  MARK: circleのBezier曲線を作成して返す
on generateCircle(theRadius, x, y)
  set aRect to current application’s NSMakeRect(x, y, theRadius, theRadius)
  
set aCirCle to current application’s NSBezierPath’s bezierPath()
  
aCirCle’s appendBezierPathWithOvalInRect:aRect
  
return aCirCle
end generateCircle

# NSImageを指定パスにPNG形式で保存
on saveNSImageAtPathAsPNG(anImage, outPath)
  set imageRep to anImage’s TIFFRepresentation()
  
set aRawimg to current application’s NSBitmapImageRep’s imageRepWithData:imageRep
  
set pathString to current application’s NSString’s stringWithString:outPath
  
set newPath to pathString’s stringByExpandingTildeInPath()
  
set myNewImageData to (aRawimg’s representationUsingType:(current application’s NSPNGFileType) |properties|:(missing value))
  
set aRes to (myNewImageData’s writeToFile:newPath atomically:true) as boolean
  
return aRes –成功ならtrue、失敗ならfalseが返る
end saveNSImageAtPathAsPNG

★Click Here to Open This Script 

(Visited 57 times, 1 visits today)
Posted in file File path Image | Tagged 10.14savvy 10.15savvy NSBezierPath NSBitmapImageRep NSColor NSImage NSPNGFileType NSString | Leave a comment

画像の指定エリアを透明色塗りつぶし(矩形切り抜き)

Posted on 2月 3, 2020 by Takaaki Naganoya

指定画像の指定エリア(矩形)を透明色で塗りつぶすAppleScriptです。透明色で塗りつぶす=矩形で切り抜いたようなかっこうになります。

画像(NSImage)を指定色で塗りつぶすという処理はよく見かけるものですが、clearColor()(透明色)で塗りつぶすという処理を行うとどうなるかといえば…………何も起こりません。

透明色でNSImageを塗りつぶすという処理は、たいへんに「ありそう」な処理ですが、なかなか見つからない。

さんざん探し回ったのですが、自分には見つけられませんでした。ちょうどEdama2さんに相談してみたところ、こういう処理を探し出してもらえました(ありがとうございますー)。ただ、見つけてきた処理そのままでは思い通りの結果にならなかったので、修正が必要であったとのこと。

透明塗りつぶし(切り抜き)の指定座標はCocoaの座標系をそのまま利用しているので、左下が原点です。

NSBezierPathで切り抜き(透明色で塗りつぶし)できるといいのになーという感じではあります。

AppleScript名:画像の指定エリアを透明色塗りつぶし(矩形切り抜き)
— Created 2017-11-19 by Takaaki Naganoya
— Modified 2018-02-14 by Takaaki Naganoya
— Modified 2020-02-03 by Edama2 & Takaaki Naganoya
use AppleScript version "2.5"
use scripting additions
use framework "Foundation"
use framework "AppKit"

property NSUUID : a reference to current application’s NSUUID
property NSColor : a reference to current application’s NSColor
property NSString : a reference to current application’s NSString
property NSImage : a reference to current application’s NSImage
property NSScreen : a reference to current application’s NSScreen
property NSBezierPath : a reference to current application’s NSBezierPath
property NSPNGFileType : a reference to current application’s NSPNGFileType
property NSCompositeClear : a reference to current application’s NSCompositeClear
property NSBitmapImageRep : a reference to current application’s NSBitmapImageRep

–切り抜きエリア(複数)
set drawList to {{origin:{x:0, y:0}, |size|:{width:200, height:100}}, {origin:{x:100, y:100}, |size|:{width:50, height:50}}}

set imgPath to POSIX path of (choose file of type {"public.image"})
set anImage to NSImage’s alloc()’s initWithContentsOfFile:imgPath

set fillColor to (NSColor’s colorWithCalibratedRed:1.0 green:0.0 blue:0.0 alpha:0.9)

–透明色塗りつぶし処理呼び出し
set resImage to drawImageWithClearColorFill(anImage, drawList) of me

set aUUIDstr to (NSUUID’s UUID()’s UUIDString()) as string
set aPath to ((NSString’s stringWithString:imgPath)’s stringByDeletingLastPathComponent()’s stringByAppendingPathComponent:aUUIDstr)’s stringByAppendingPathExtension:"png"

set fRes to saveImageRepAtPathAsPNG(resImage, aPath) of me

on drawImageWithClearColorFill(anImage, drawList)
  set retinaF to (NSScreen’s mainScreen()’s backingScaleFactor()) as real
  
–>  2.0 (Retina) / 1.0 (Non Retina)
  
  
set aClearCol to NSColor’s clearColor()
  
set op to current application’s NSCompositeClear
  
  
anImage’s lockFocus() –描画開始
  
  
repeat with i in drawList
    set origX to (x of origin of i) / retinaF
    
set origY to (y of origin of i) / retinaF
    
set sizeX to (width of |size| of i) / retinaF
    
set sizeY to (height of |size| of i) / retinaF
    
    
–Draw Clear Color
    
–http://www.drissman.com/blog/archives/2009/10/09/nsrectfill_and_nscolor_clearcolor.html
    
set theRect to {{x:origX, y:origY}, {width:sizeX, height:sizeY}}
    
aClearCol’s |set|()
    
current application’s NSRectFillUsingOperation(theRect, op)
  end repeat
  
  
anImage’s unlockFocus() –描画ここまで
  
  
return anImage –returns NSImage
end drawImageWithClearColorFill

–画像を指定パスにPNG形式で保存
on saveImageRepAtPathAsPNG(anImage, outPath)
  set imageRep to anImage’s TIFFRepresentation()
  
set aRawimg to NSBitmapImageRep’s imageRepWithData:imageRep
  
  
set pathString to NSString’s stringWithString:outPath
  
set newPath to pathString’s stringByExpandingTildeInPath()
  
  
set myNewImageData to (aRawimg’s representationUsingType:(NSPNGFileType) |properties|:(missing value))
  
return (myNewImageData’s writeToFile:newPath atomically:true) as boolean
end saveImageRepAtPathAsPNG

★Click Here to Open This Script 

(Visited 98 times, 1 visits today)
Posted in file File path Image | Tagged 10.14savvy 10.15savvy NSBitmapImageRep NSColor NSCompositeClear NSImage NSPNGFileType NSScreen NSString NSUUID | 1 Comment

GUI Scriptingでコンテクストメニューのキャプチャを取得

Posted on 1月 24, 2020 by Takaaki Naganoya

GUI Scriptingを用いてスクリプトエディタ上でコンテクストメニューを表示させて、コンテクストメニューのキャプチャを行うAppleScriptです。macOS 10.14.6上で試しただけなので、10.15上では試していません(たぶん動くと思うのですが)。

–> Watch Demo Movie

画面キャプチャをNSImageに取得する機能については、DSCapture.frameworkをビルドして、AppleScript(実行環境はScript Debugger)から呼び出しています。

–> Download DSCapture.framework (To ~/Library/Frameworks/)

AppleScriptの鬼っ子機能である「GUI Scripting」。ある顧客が「キーボードショートカットとキーボード操作をそのままScript化することでこれを作れ」という仕様を出してきて、とても実現できない内容がまだらに含まれていたので「ナイスジョーク!」と却下した記憶があります。

「できること」(キーボードショートカット操作)に「できないこと」(目視で当該データの位置確認)を混ぜて仕様を出されると悪夢でしかありません。

あと、GUI Scriptingで操作を行うと信頼性がないうえに、信頼性を確保するためには「待つ」という処理が必要だったり、本来のAppleScriptの処理速度よりも100倍以上遅くなるので、本当に必要な箇所にだけ使う&可能なかぎり使用しないというのが自分の基本的なスタンスです。

コンテクストメニューの画面キャプチャを自動で

そんな中、新型Piyomaru Script Assistant(macOS 10.14以降対応。10.13は無視)の資料を作るために、コンテクストメニューの内容を画面キャプチャする必要に迫られました。

AppleScriptが500個ぐらい、階層化されたメニューに入っているので、これの画面キャプチャを撮るだけで一仕事です。テストで1階層分の資料を作ってみたのですが、けっこうかかります。

そこで、スクリプトエディタ上で表示させたコンテクストメニューをプログラムで撮れないかを検討することになります。

真っ先に調べたのはCocoaにそういう機能がないかどうか。自前のプログラムのビューの内容をキャプチャすることはできますが、他のアプリケーションのビューをキャプチャする機能は見つかりませんでした。

仕方がないので、画面のキャプチャをまるごと取得して、撮影対象のビューの座標から画像の切り抜きを行うようにしてみました。

GUI Scriptingでコンテクストメニューを表示させるのは無理かと思っていたのですが、できるんですね。これも冗談半分で探してみたらあっけなく方法が見つかって、

tell theTarget to perform action "AXShowMenu" --コンテクストメニューの表示

これで実際にコンテクストメニューの表示を行えました。

実現はいろいろ大変

スクリプトエディタ上の画面撮影を行うので、Scriptの実行そのものはScript Debuggerで実行。

問題になったのは2点。

1つは、画面キャプチャの撮影を行うフレームワークでメインディスプレイから画面イメージをNSImageで取得し、その結果をメイン側(暗黙のrunハンドラといったほうがいいのか)のプロパティに返しているのですが、すぐに反映されないらしくて、クラッシュを頻発。

結局、プロパティに内容が反映されたことをループで時間待ちして受信。

もう1つ困った点は、コンテクストメニューの表示解除(キャンセル)。1つのコンテクストメニュー表示&キャプチャ撮影だけでは意味がありません。選択メニュー項目を変更して、複数のコンテクストメニューのキャプチャを順次行えなくてはなりません。

いろいろな方法を試してみたものの、最前面のアプリケーションを「スクリプトエディタ」でない状態を作ればコンテクストメニュー表示状態は解除されます(このあたり、AppleScriptが純粋なプログラマーに苦手とされる理由。実際に使っているユーザーでないとこういう発想自体が出てこない)。Script Debugger側で実行しているので、Script Debuggerをactivateすることでその状態(コンテクストメニュー表示解除)を作ってみました。

そんなわけでコンテクストメニューの(選択項目を変更して全項目を選択状態にした)画面キャプチャができました。

現在は1階層分のコンテクストメニューの撮影を行なっていますが、メニュー階層をすべてAppleScript側からスキャンして、それぞれのメニューに対して、各メニュー項目を表示した状態で巡回キャプチャできるとよさそうです。

cropNSImageTo:{x1, y1, x2, y2} fromImage:theImage ハンドラは、Y座標の変換をこの用途(全画面キャプチャしたNSImageの切り抜き)の帳尻合わせのために書き換えています。この用途以外では使えないはずです。

AppleScript名:GUI Scriptingで指定したGUI部品のキャプチャを取得.scptd
—
–  Created by: Takaaki Naganoya
–  Created on: 2020/01/24
—
–  Copyright © 2020 Piyomaru Software, All Rights Reserved
—

use AppleScript version "2.4" — Yosemite (10.10) or later
use framework "Foundation"
use framework "DSCapture" –https://github.com/kiding/DSCapture.framework
use framework "AppKit"
use scripting additions

property |NSURL| : a reference to current application’s |NSURL|
property NSUUID : a reference to current application’s NSUUID
property NSString : a reference to current application’s NSString
property NSImage : a reference to current application’s NSImage
property NSPNGFileType : a reference to current application’s NSPNGFileType
property NSBitmapImageRep : a reference to current application’s NSBitmapImageRep

property targPos : {0, 0}
property targSize : {0, 0}
property screenSize : {}
property outPath : ""
property captImg : missing value

set (my captImg) to missing value

tell application "System Events"
  tell process "スクリプトエディタ" –"Script Editor" (Japanese localized name)
    –Editor Area Reference
    
set theTarg to text area 1 of scroll area 1 of splitter group 1 of splitter group 1 of window 1
  end tell
end tell

repeat with i from 1 to 19
  
  
set captImg to missing value
  
set outPath to (POSIX path of (path to desktop)) & ((NSUUID’s UUID()’s UUIDString()) as string) & ".png"
  
  
set {mPos, mSize} to dispMenu(i, theTarg) of me
  
copy mPos to {cx1, cy1}
  
copy mSize to {cWidth, cHeight}
  
  
screenCapture() of me
  
  
repeat 100 times
    if (my captImg) is not equal to missing value then exit repeat
    
delay 0.1
  end repeat


set bImg to (my cropNSImageTo:{cx1, cy1, cWidth, cHeight} fromImage:(my captImg))
  
saveNSImageAtPathAsPNG(bImg, my outPath) of me
  
  
tell current application to activate –Cancel Context Menu
  
delay 0.1
end repeat

on screenCapture()
  current application’s DSCapture’s sharedCapture()’s |full|()’s captureWithTarget:me selector:"displayCaptureData:" useCG:false
end screenCapture

–Delegate Handler
on displayCaptureData:aSender
  set aCount to aSender’s |count|()
  
set anImage to (aSender’s imageAtIndex:0)
  
set my captImg to anImage
  
–saveNSImageAtPathAsPNG(anImage, my outPath) of me
end displayCaptureData:

on cropNSImageTo:{x1, y1, x2, y2} fromImage:theImage
  set newWidth to x2
  
set newHeight to y2
  
set theSize to (theImage’s |size|())
  
set oldHeight to height of theSize
  
  
— transpose y value for Cocoa coordintates
  
set y1 to oldHeight – newHeight – y1
  
set newRect to {{x:x1, y:y1}, {width:x2, height:y2}}
  
  
theImage’s lockFocus()
  
set theRep to NSBitmapImageRep’s alloc()’s initWithFocusedViewRect:newRect
  
theImage’s unlockFocus()
  
  
set outImage to NSImage’s alloc()’s initWithSize:(theRep’s |size|())
  
outImage’s addRepresentation:theRep
  
  
return outImage
end cropNSImageTo:fromImage:

–NSImageを指定パスにPNG形式で保存
on saveNSImageAtPathAsPNG(anImage, outPath)
  set imageRep to anImage’s TIFFRepresentation()
  
set aRawimg to current application’s NSBitmapImageRep’s imageRepWithData:imageRep
  
set pathString to current application’s NSString’s stringWithString:outPath
  
set newPath to pathString’s stringByExpandingTildeInPath()
  
set myNewImageData to (aRawimg’s representationUsingType:(current application’s NSPNGFileType) |properties|:(missing value))
  
set aRes to (myNewImageData’s writeToFile:newPath atomically:true) as boolean
  
return aRes –成功ならtrue、失敗ならfalseが返る
end saveNSImageAtPathAsPNG

on dispMenu(selInd, theTarget)
  activate application "Script Editor"
  
tell application "System Events"
    tell process "スクリプトエディタ" –"Script Editor" (Japanese localized name)
      
      
ignoring application responses
        tell theTarget to perform action "AXShowMenu" –コンテクストメニューの表示
      end ignoring
      
      
tell text area 1 of scroll area 1 of splitter group 1 of splitter group 1 of window 1
        tell menu 1
          set mPos to position
          
set mSize to size
          
          
set mList to every menu item
          
tell menu item (13 + selInd)
            set aRes to properties
            
set selected to true
          end tell
        end tell
      end tell
      
    end tell
  end tell
  
  
return {mPos, mSize}
end dispMenu

★Click Here to Open This Script 

(Visited 236 times, 3 visits today)
Posted in GUI Scripting | Tagged 10.14savvy NSBitmapImageRep NSImage NSPNGFileType NSString NSURL NSUUID | Leave a comment

CIFilterとGPUImageで画像差分検出演算を比較

Posted on 11月 22, 2019 by Takaaki Naganoya

オープンソースのGPUImage.framework(GPUImage1)はAppleScriptから呼び出すのも簡単ですし、機能セットも充実しており、非常に重宝して使っています。

ただし、GPUImage自体はSwiftで書き直されたGPUImage2、OSの変更を受けてOpenGLではなくMetalを用いるように書き直され、いまだ発展途上のGPUImage3と変化してきました。

・GPUImageのバージョンと搭載フィルタ数の推移

GPUImage1:■■■■■■■■■■■■ 125
GPUImage2:■■■■■■■■■■ 100
GPUImage3:■■■■ 45

GPUImage2/3とバージョンが進むにつれて搭載フィルタ数が減っており、かつGPUImage2以降はAppleScriptから呼べないため、GPUImage3は(自分の)移行先になりません。

Objective-CベースのGPUImage1系のプログラムを使い続けるという判断をしている開発者は多いようで、Github上で派生プログラムが大量にみつかります。ただ、GPUImage1系はmacOSがOpenGLを完全廃止にしたとたんに動かなくなるはずです。

このため、GPUImage1系に依存しているプログラムは別の部品を呼び出して処理する必要が出てきます。

一番有望なのは、macOS標準搭載のCIFilter。CIFilterについては、実際にプログラムを組んでみて「組みにくい」という印象を受けていました(機能はちゃんとしていそうなものの、機能数にドキュメントが見合っていません)。あと、AppleScriptからパラメータを指定しにくいという印象を受けていました(パラメータに指定するオブジェクトにAppleScriptから直接指定できないものがあるので、少しラッパーを書く必要がある)。

その後、各種フィルタを呼び出す汎用ルーチンを整備することで、利用難易度を下げる努力を自主的に行なっています。

・GPUImage3とCoreImageの搭載フィルタ数の比較

GPUImage3:■■■■ 45
CoreImage:■■■■■■■■■■■■■■■■■ 174

そこで、実際に処理速度の面でどうなのか、CIFilterとGPUImageを比較するとどうなのか、調べてみました。

まずは、ざっくりありもののルーチンを引っ張り出してきて実行。どちらも期待どおりの動作をしてくれます。ただし、周辺ルーチンの仕様が違っていたのでそこも合わせます。

乱数ファイル名を作成する定番のshell commandの「uuidgen」はお手軽な反面、呼び出すのに時間がかかるので(手元の時間で0.1秒程度強)、より高速なCocoaのUUIDStringを用いる部品に置き換えました。

それぞれのフレームワークごとの挙動の違いもあります。

経験上、GPUImage.frameworkは初回実行時だけは時間が長くかかる傾向があり(1秒以上かかる)、2回目以降はより短い時間で処理できるようになることを確認しています。一方、CIFilterは初回およびそれ以降の呼び出しでもさほど処理時間が変わりません。

これら2つを実際に同じデータで同一条件下で比較してみたところ、同一の処理(画像の差分計算)を行なったかぎりでは処理時間に差はほとんど有意な差はありませんでした。

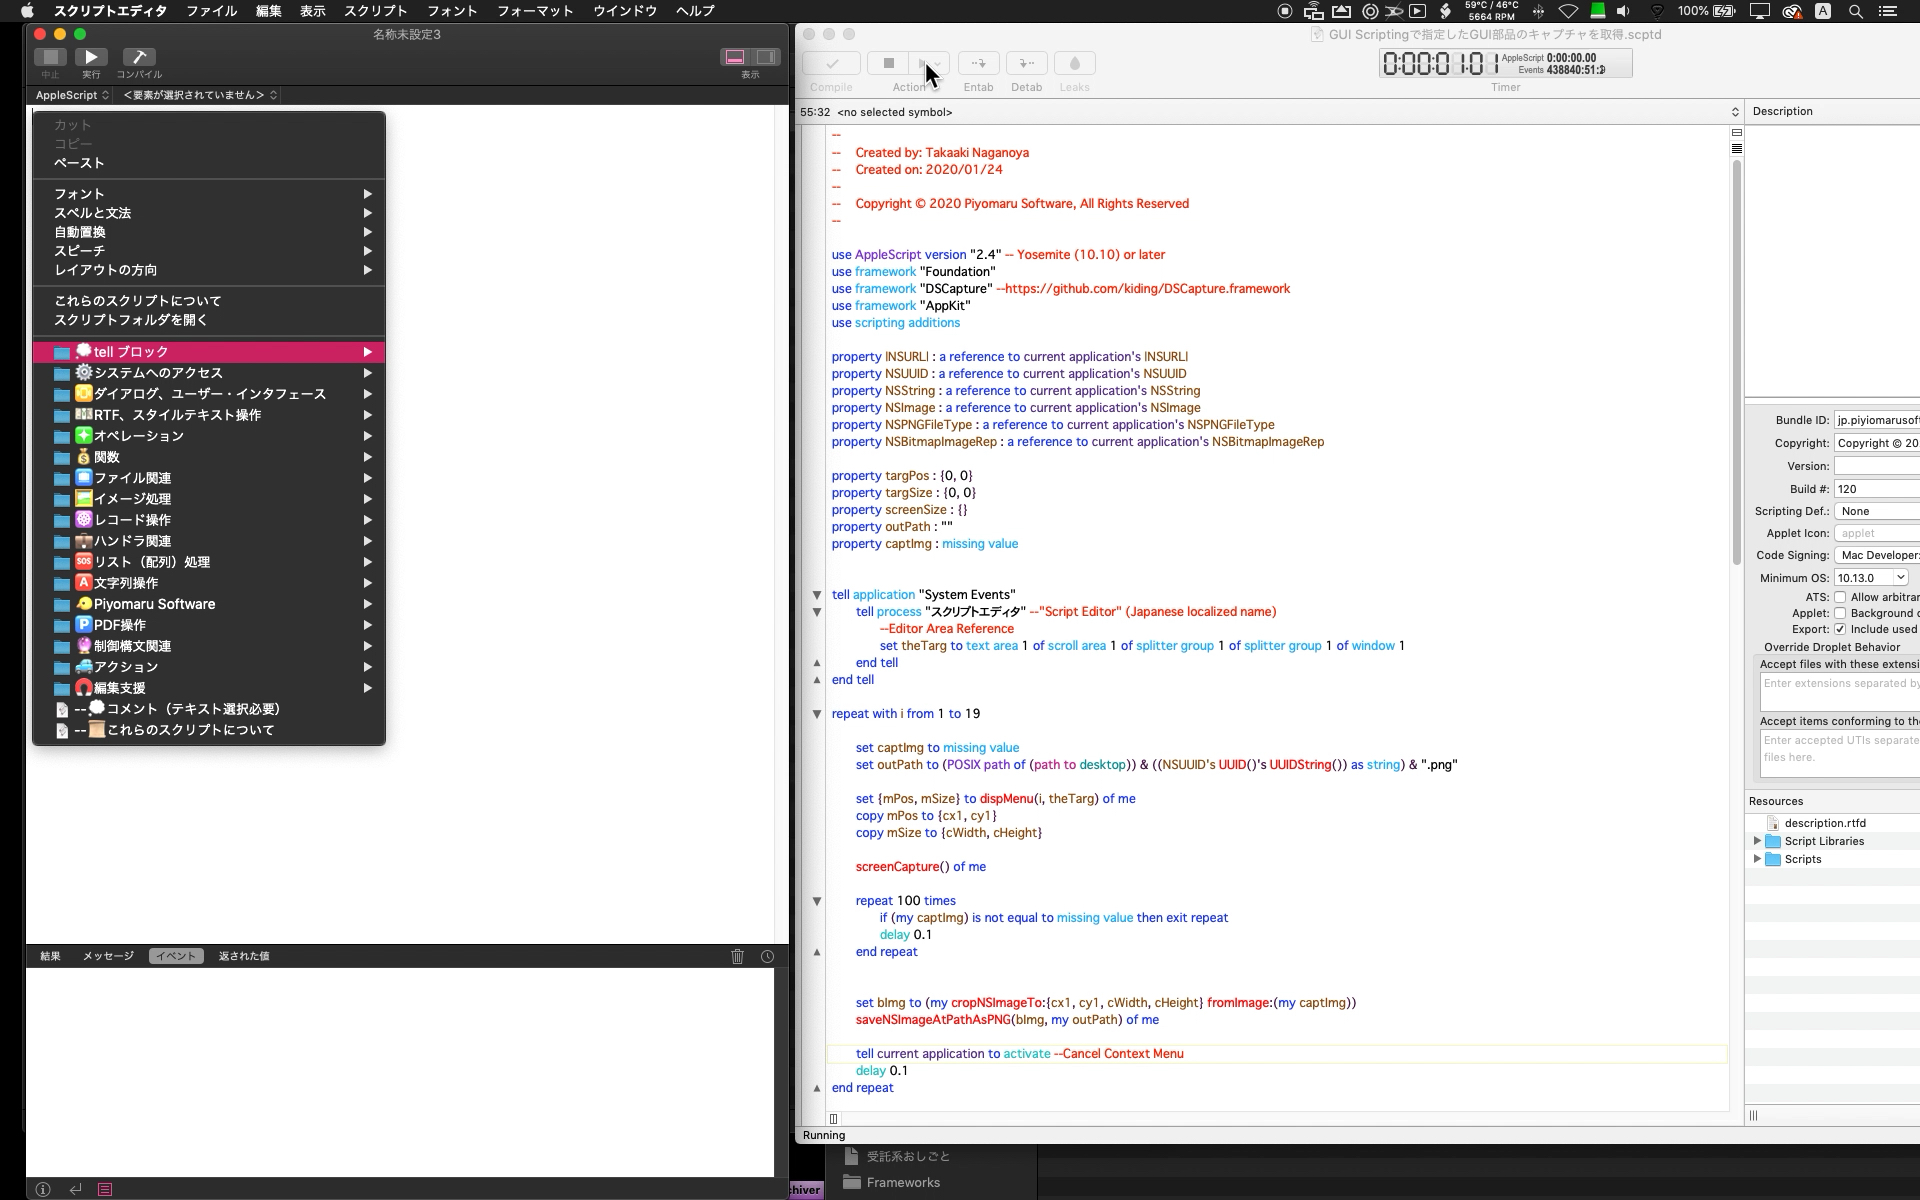
Script Geek 2.0.1によるScriptの処理時間比較

First:GPUImage Version , Second:CoreImage Version

MacBookPro10,1,  macOS Version 10.14.6 (Build 18G2012),  10 iterations
         First Run   Total Time    Average  
First        0.969        1.194      0.119
Second       0.121        1.221      0.122
Ratio (excluding first run): 1:1.02

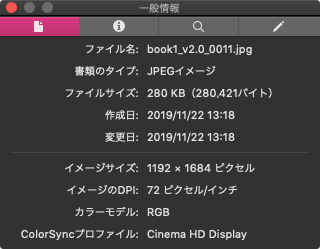
自分のメインマシン(MacBook Pro Retina 2012、Core i7 2.66GHz、RAM 8GB)ではどちらもテストデータ(1192x1684pixel 8bit color image x 2)を0.1〜0.2秒程度で処理できています。個人的には十分なスピードが出ていると感じていますが、不満がある方はデータをRAM Disk上に置いたり、並列処理するとよいのではないでしょうか(シングルスレッド処理が高速なマシンを用意するというのが一番効きそうではあります。iMac 5Kの上位モデルとか)。

すべての類似フィルタで比較を行なったわけではありませんが(どれとどれが類似、という情報を整理するのに手間がかかる)、一番使っている「空白検出のためのヒストグラム計算フィルタ」はGPUImageにしか存在しませんでした(作成当時の話で現在はCoreImageにもCIAreaHistogramなどの機能があります)。

空白検出処理を高速に行えることで巨大なメリットが生じています。用途については枚挙にいとまがありませんが、Markdown書類をPDFにレンダリングした場合に、末尾に無用な空白のページが生じるケースがあり、これを検出しつつ末尾のページを自動削除することで、膨大な無駄手間を削減できています。空白検出処理を高速に行う手段を用意していないと、Photoshopで指定ページをレンダリングしてヒストグラムを計算する必要があるわけで、Photoshopのない環境に進出できなくなります。

空白画像の検出処理はGPUImage.framework抜きで(AppleScriptだけで)2〜3倍高速な処理を行える部品「画像の空白判定 v3」を作成済みなので、GPUImageなしでもさほど困りません。


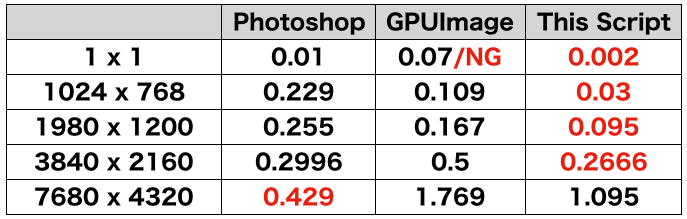
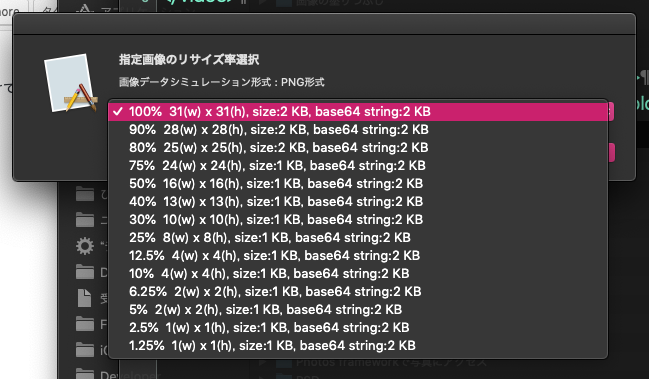
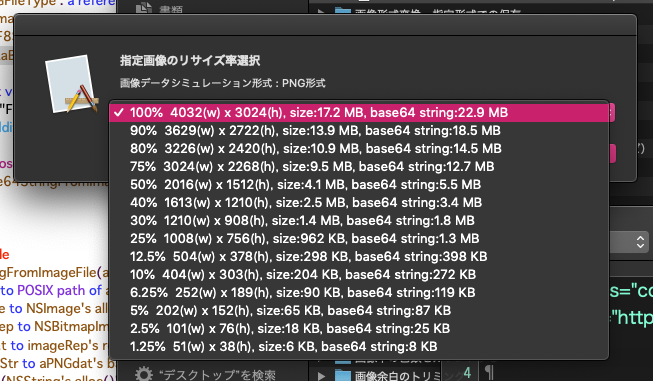
▲同一環境にて、Photoshop CC 2018、GPUImage、AppleScriptだけで処理している「画像の空白判定 v3」で各種サイズの画像の空白検出を実行(単位:秒)

Objective-C/Swift系の開発者の方々に「GPUImageを経由してGPUのパワーを使って処理するよりも、AppleScript単体で空白の比較演算処理したほうが速かった」という事実をお話しすると、最初は「嘘つけ」というひきつった笑顔の反応なのですが、実際にコードを動かして動作原理を丁寧に説明すると分かっていただけるようです。

–> Download dffFilterDemoPrograms(Two Code-Signed AppleScript Applet Executables with Framework in its bundle)

AppleScript名:CoreImageでCIDifferenceBlendMode.scptd
—
–  Created by: Takaaki Naganoya
–  Created on: 2019/11/22
—
–  Copyright © 2019 Piyomaru Software, All Rights Reserved
—
use AppleScript version "2.4" — Yosemite (10.10) or later
use framework "Foundation"
use framework "AppKit"
use framework "QuartzCore"
use scripting additions

property CIFilter : a reference to current application’s CIFilter
property NSUUID : a reference to current application’s NSUUID
property |NSURL| : a reference to current application’s |NSURL|
property CIImage : a reference to current application’s CIImage
property NSString : a reference to current application’s NSString
property NSImage : a reference to current application’s NSImage
property NSPNGFileType : a reference to current application’s NSPNGFileType
property NSBitmapImageRep : a reference to current application’s NSBitmapImageRep

set mePath to POSIX path of (path to me)
set aImg to mePath & "Contents/Resources/book1_v2.0_0011.jpg"
set bImg to mePath & "Contents/Resources/book1_v2.1_0011.jpg"

–https://developer.apple.com/library/archive/documentation/
–GraphicsImaging/Reference/CoreImageFilterReference/index.html
–#//apple_ref/doc/filter/ci/CIDifferenceBlendMode
set cifilterName to "CIDifferenceBlendMode"

set imgRes to filterBlendImageFiles(aImg, bImg, cifilterName) of me

set outPath to retUUIDfilePath(POSIX path of (path to desktop), "png") of me
set sRes to saveNSImageAtPathAsPNG(imgRes, outPath) of me

–CIFilterをかけたJPEG画像を生成
on filterBlendImageFiles(aPath, bPath, aFilterName)
  –CIImage(A)を生成
  
set aURL to |NSURL|’s fileURLWithPath:aPath –Input
  
set aCIImage to CIImage’s alloc()’s initWithContentsOfURL:aURL
  
  
–CIImage(B)を生成
  
set bURL to |NSURL|’s fileURLWithPath:bPath –Input
  
set bCIImage to CIImage’s alloc()’s initWithContentsOfURL:bURL
  
  
— CIFilter をフィルタの名前で生成
  
set aFilter to CIFilter’s filterWithName:aFilterName
  
aFilter’s setDefaults() –各フィルタのパラメータはデフォルト
  
  
–Blend Filterを実行
  
aFilter’s setValue:(aCIImage) forKey:"inputImage"
  
aFilter’s setValue:(bCIImage) forKey:"inputBackgroundImage"
  
  
set aOutImage to aFilter’s valueForKey:"outputImage"
  
set outNSImage to convCIimageToNSImage(aOutImage) of me
  
return outNSImage
end filterBlendImageFiles

on retUUIDfilePath(aPath, aEXT)
  set aUUIDstr to (NSUUID’s UUID()’s UUIDString()) as string
  
set aPath to ((NSString’s stringWithString:aPath)’s stringByAppendingPathComponent:aUUIDstr)’s stringByAppendingPathExtension:aEXT
  
return aPath
end retUUIDfilePath

on convCIimageToNSImage(aCIImage)
  set aRep to NSBitmapImageRep’s alloc()’s initWithCIImage:aCIImage
  
set tmpSize to aRep’s |size|()
  
set newImg to NSImage’s alloc()’s initWithSize:tmpSize
  
newImg’s addRepresentation:aRep
  
return newImg
end convCIimageToNSImage

on convNSImageToCIimage(aNSImage)
  set tiffDat to aNSImage’s TIFFRepresentation()
  
set aRep to NSBitmapImageRep’s imageRepWithData:tiffDat
  
set newImg to CIImage’s alloc()’s initWithBitmapImageRep:aRep
  
return newImg
end convNSImageToCIimage

–NSImageを指定パスにPNG形式で保存
on saveNSImageAtPathAsPNG(anImage, outPath)
  set imageRep to anImage’s TIFFRepresentation()
  
set aRawimg to NSBitmapImageRep’s imageRepWithData:imageRep
  
set pathString to NSString’s stringWithString:outPath
  
set newPath to pathString’s stringByExpandingTildeInPath()
  
set myNewImageData to (aRawimg’s representationUsingType:(NSPNGFileType) |properties|:(missing value))
  
set aRes to (myNewImageData’s writeToFile:newPath atomically:true) as boolean
  
return aRes –true/false
end saveNSImageAtPathAsPNG

★Click Here to Open This Script 

AppleScript名:(比較用)GPUImageによる差分計算.scptd
—
–  Created by: Takaaki Naganoya
–  Created on: 2019/11/22
—
–  Copyright © 2019 Piyomaru Software, All Rights Reserved
—
use AppleScript version "2.4" — Yosemite (10.10) or later
use scripting additions
use framework "Foundation"
use framework "AppKit"
use framework "GPUImage" –https://github.com/BradLarson/GPUImage

property NSUUID : a reference to current application’s NSUUID
property |NSURL| : a reference to current application’s |NSURL|
property NSString : a reference to current application’s NSString
property NSImage : a reference to current application’s NSImage
property NSPNGFileType : a reference to current application’s NSPNGFileType
property NSBitmapImageRep : a reference to current application’s NSBitmapImageRep

set mePath to POSIX path of (path to me)
set aImagePath to mePath & "Contents/Resources/book1_v2.0_0011.jpg"
set bImagePath to mePath & "Contents/Resources/book1_v2.1_0011.jpg"

set imgRes to composeImageWithBlendFilter(aImagePath, bImagePath, "GPUImageDifferenceBlendFilter") of me

set outPath to retUUIDfilePath(POSIX path of (path to desktop), "png") of me
set sRes to saveNSImageAtPathAsPNG(imgRes, outPath) of me

on composeImageWithBlendFilter(aImagePath, bImagePath, filterName)
  set aImage to NSImage’s alloc()’s initWithContentsOfFile:aImagePath
  
set bImage to NSImage’s alloc()’s initWithContentsOfFile:bImagePath
  
  
set aClass to current application’s NSClassFromString(filterName)
  
set blendFilter to aClass’s alloc()’s init()
  
set pictureA to current application’s GPUImagePicture’s alloc()’s initWithImage:aImage
  
pictureA’s addTarget:blendFilter
  
pictureA’s processImage()
  
set imgRes to blendFilter’s imageByFilteringImage:bImage
  
return imgRes
end composeImageWithBlendFilter

on retUUIDfilePath(aPath, aEXT)
  set aUUIDstr to (NSUUID’s UUID()’s UUIDString()) as string
  
set aPath to ((NSString’s stringWithString:aPath)’s stringByAppendingPathComponent:aUUIDstr)’s stringByAppendingPathExtension:aEXT
  
return aPath
end retUUIDfilePath

–NSImageを指定パスにPNG形式で保存
on saveNSImageAtPathAsPNG(anImage, outPath)
  set imageRep to anImage’s TIFFRepresentation()
  
set aRawimg to NSBitmapImageRep’s imageRepWithData:imageRep
  
set pathString to NSString’s stringWithString:outPath
  
set newPath to pathString’s stringByExpandingTildeInPath()
  
set myNewImageData to (aRawimg’s representationUsingType:(NSPNGFileType) |properties|:(missing value))
  
set aRes to (myNewImageData’s writeToFile:newPath atomically:true) as boolean
  
return aRes –true/false
end saveNSImageAtPathAsPNG

★Click Here to Open This Script 

(Visited 288 times, 3 visits today)
Posted in file filter Image | Tagged 10.14savvy 10.15savvy CIFilter CIImage NSBitmapImageRep NSImage NSPNGFileType NSString NSURL NSUUID | Leave a comment

指定画像をbase64エンコード文字列に変換

Posted on 10月 27, 2019 by Takaaki Naganoya

指定画像をbase64エンコーディング文字列に変換するAppleScriptです。

用途は、sdef(AppleScript用語辞書)に画像を突っ込む(ためのデータを作る)こと。それだけです。

ただ、あまりにでかい画像をbase64文字化して取得すると、スクリプトエディタが結果を表示したときに不安定になったり処理が返ってこなくなったりするので、文字列を取得する前にデータサイズを計算し、リサイズしてから文字列化するとか、他の形式(GIFなど)を用いてエンコードするなどのケアが必要になります。ねんのため。

元画像が何であっても、NSImageに読み込める画像なら(OSでサポートしている画像なら)読み込んで、PNG形式に変換したのちにBase64エンコード文字列に変換しています。


▲エンコードするにしても数10KBとかそのぐらいのファイルサイズの画像にしておかないと後がつらい


▲4K解像度の画像をbase64エンコードするとこんなに結果が巨大に

AppleScript名:指定画像をbase64エンコード文字列に変換.scptd
—
–  Created by: Takaaki Naganoya
–  Created on: 2019/10/25
—
–  Copyright © 2019 Piyomaru Software, All Rights Reserved
—
property NSString : a reference to current application’s NSString
property NSImage : a reference to current application’s NSImage
property NSPNGFileType : a reference to current application’s NSPNGFileType
property NSBitmapImageRep : a reference to current application’s NSBitmapImageRep
property NSUTF8StringEncoding : a reference to current application’s NSUTF8StringEncoding
property NSDataBase64EncodingEndLineWithLineFeed : a reference to current application’s NSDataBase64EncodingEndLineWithLineFeed

use AppleScript version "2.4" — Yosemite (10.10) or later
use framework "Foundation"
use scripting additions

set aFile to choose file of type {"public.image"}
set aStr to base64StringFromImageFile(aFile) of me

–Base64 Encode
on base64StringFromImageFile(aFile)
  set aPOSIX to POSIX path of aFile
  
set anImage to NSImage’s alloc()’s initWithContentsOfFile:aPOSIX
  
set imageRep to NSBitmapImageRep’s alloc()’s initWithData:(anImage’s TIFFRepresentation())
  
set aPNGdat to imageRep’s representationUsingType:(NSPNGFileType) |properties|:(missing value)
  
set base64Str to aPNGdat’s base64EncodedDataWithOptions:(NSDataBase64EncodingEndLineWithLineFeed)
  
set bStr to (NSString’s alloc()’s initWithData:base64Str encoding:(NSUTF8StringEncoding))
  
return bStr as string –or return NSString (delete as string) for speedy processing
end base64StringFromImageFile

★Click Here to Open This Script 

(Visited 790 times, 3 visits today)
Posted in Image Text | Tagged 10.12savvy 10.13savvy 10.14savvy 10.15savvy NSBitmapImageRep NSDataBase64EncodingEndLineWithLineFeed NSImage NSPNGFileType NSString NSUTF8StringEncoding | Leave a comment

指定画像をPNG形式(グレースケール)で保存

Posted on 7月 9, 2019 by Takaaki Naganoya

指定の画像ファイルをグレースケールのPNG画像ファイルに変換するAppleScriptです。

Appleが配布しているMNISTの手書き数字画像の認識CoreMLモデルをCocoa Framework化してみたところ、グレースケールの画像を要求されたため、画像をグレースケール化するルーチンを作ってみました。

結局、MNISTの手書き画像認識はうまく行かなかったのですが(全部「0」が返ってくる、、、)、グレースケール変換ルーチンは実用的だったので載せておくことにしました。

AppleScript名:指定画像をPNG形式(グレースケール)で保存
— Created 2019-07-09 by Takaaki Naganoya
— 2019 Piyomaru Software
use AppleScript version "2.4"
use scripting additions
use framework "Foundation"
use framework "AppKit"

property NSUUID : a reference to current application’s NSUUID
property NSString : a reference to current application’s NSString
property NSImage : a reference to current application’s NSImage
property NSColorSpace : a reference to current application’s NSColorSpace
property NSPNGFileType : a reference to current application’s NSPNGFileType
property NSBitmapImageRep : a reference to current application’s NSBitmapImageRep
property NSColorRenderingIntentPerceptual : a reference to current application’s NSColorRenderingIntentPerceptual

set aFile to POSIX path of (choose file of type {"public.image"} with prompt "Select Image A")
set aImage to NSImage’s alloc()’s initWithContentsOfFile:aFile

set fRes to retUUIDfilePath(aFile, "png") of me
set sRes to saveNSImageAtPathAsGreyPNG(aImage, fRes) of me

–指定ファイルパスを元にUUIDのファイル名、指定拡張子をつけたファイルパスを作成して返す
on retUUIDfilePath(aPath, aEXT)
  set aUUIDstr to (NSUUID’s UUID()’s UUIDString()) as string
  
set aPath to ((NSString’s stringWithString:aPath)’s stringByDeletingLastPathComponent()’s stringByAppendingPathComponent:aUUIDstr)’s stringByAppendingPathExtension:aEXT
  
return aPath
end retUUIDfilePath

–NSImageを指定パスにPNG形式で保存
on saveNSImageAtPathAsGreyPNG(anImage, outPath)
  set imageRep to anImage’s TIFFRepresentation()
  
set aRawimg to NSBitmapImageRep’s imageRepWithData:imageRep
  
  
–ビットマップをグレースケール変換
  
set bRawimg to convBitMapToDeviceGrey(aRawimg) of me
  
  
set pathString to NSString’s stringWithString:outPath
  
set newPath to pathString’s stringByExpandingTildeInPath()
  
  
set myNewImageData to (bRawimg’s representationUsingType:(NSPNGFileType) |properties|:(missing value))
  
set aRes to (myNewImageData’s writeToFile:newPath atomically:true) as boolean
  
return aRes –true/false
end saveNSImageAtPathAsGreyPNG

–NSBitmapImageRepをグレースケールに変換する
on convBitMapToDeviceGrey(aBitmap)
  set aSpace to NSColorSpace’s deviceGrayColorSpace()
  
set bRawimg to aBitmap’s bitmapImageRepByConvertingToColorSpace:aSpace renderingIntent:(NSColorRenderingIntentPerceptual)
  
return bRawimg
end convBitMapToDeviceGrey

★Click Here to Open This Script 

AppleScript名:指定画像をグレースケールのNSImageに変換
— Created 2019-07-09 by Takaaki Naganoya
— 2019 Piyomaru Software
use AppleScript version "2.4"
use scripting additions
use framework "Foundation"
use framework "AppKit"

property NSUUID : a reference to current application’s NSUUID
property NSString : a reference to current application’s NSString
property NSImage : a reference to current application’s NSImage
property NSColorSpace : a reference to current application’s NSColorSpace
property NSBitmapImageRep : a reference to current application’s NSBitmapImageRep
property NSColorRenderingIntentDefault : a reference to current application’s NSColorRenderingIntentDefault

set aFile to POSIX path of (choose file of type {"public.image"} with prompt "Select Image")
set aImage to NSImage’s alloc()’s initWithContentsOfFile:aFile

set nsImageRes to convNSImageAsGrey(aImage) of me

–NSImageをグレースケールに変換する(NSImageで入出力)
on convNSImageAsGrey(anImage)
  set imageRep to anImage’s TIFFRepresentation()
  
set aRawimg to NSBitmapImageRep’s imageRepWithData:imageRep
  
set aSpace to NSColorSpace’s deviceGrayColorSpace()
  
set bRawimg to aRawimg’s bitmapImageRepByConvertingToColorSpace:aSpace renderingIntent:(NSColorRenderingIntentDefault)
  
set outImage to NSImage’s alloc()’s initWithSize:(bRawimg’s |size|())
  
outImage’s addRepresentation:(bRawimg)
  
return outImage
end convNSImageAsGrey

★Click Here to Open This Script 

(Visited 122 times, 1 visits today)
Posted in Color file File path Image | Tagged 10.11savvy 10.12savvy 10.13savvy 10.14savvy NSBitmapImageRep NSColorRenderingIntentPerceptual NSColorSpace NSImage NSPNGFileType NSString NSUUID | Leave a comment

電子書籍(PDF)をオンラインストアで販売中!

Google Search

Popular posts

  • AppleScriptによるWebブラウザ自動操縦ガイド
  • macOS 13, Ventura(継続更新)
  • ドラッグ&ドロップ機能の未来?
  • macOS 12.x上のAppleScriptのトラブルまとめ
  • PFiddlesoft UI Browserが製品終了に
  • macOS 12.3 beta 5、ASの障害が解消される(?)
  • SF Symbolsを名称で指定してPNG画像化
  • 新刊発売:AppleScriptによるWebブラウザ自動操縦ガイド
  • macOS 12.3 beta4、まだ直らないASまわりの障害
  • macOS 12.3上でFinder上で選択中のファイルをそのままオープンできない件
  • Safariで表示中のYouTubeムービーのサムネイル画像を取得
  • macOS 12のスクリプトエディタで、Context Menu機能にバグ
  • Pixelmator Pro v2.4.1で新機能追加+AppleScriptコマンド追加
  • 人類史上初、魔導書の観点から書かれたAppleScript入門書「7つの宝珠」シリーズ開始?!
  • CotEditor v4.1.2でAppleScript系の機能を追加
  • macOS 12.5(21G72)がリリースされた!
  • UI Browserがgithub上でソース公開され、オープンソースに
  • Pages v12に謎のバグ。書類上に11枚しか画像を配置できない→解決
  • 新発売:AppleScriptからSiriを呼び出そう!
  • iWork 12.2がリリースされた

Tags

10.11savvy (1102) 10.12savvy (1243) 10.13savvy (1391) 10.14savvy (586) 10.15savvy (434) 11.0savvy (274) 12.0savvy (174) 13.0savvy (34) CotEditor (60) Finder (47) iTunes (19) Keynote (97) NSAlert (60) NSArray (51) NSBezierPath (18) NSBitmapImageRep (21) NSBundle (20) NSButton (34) NSColor (51) NSDictionary (27) NSFileManager (23) NSFont (18) NSImage (42) NSJSONSerialization (21) NSMutableArray (62) NSMutableDictionary (21) NSPredicate (36) NSRunningApplication (56) NSScreen (30) NSScrollView (22) NSString (118) NSURL (97) NSURLRequest (23) NSUTF8StringEncoding (30) NSUUID (18) NSView (33) NSWorkspace (20) Numbers (55) Pages (36) Safari (41) Script Editor (20) WKUserContentController (21) WKUserScript (20) WKWebView (23) WKWebViewConfiguration (22)

カテゴリー

  • 2D Bin Packing
  • 3D
  • AirDrop
  • AirPlay
  • Animation
  • AppleScript Application on Xcode
  • beta
  • Bluetooth
  • Books
  • boolean
  • bounds
  • Bug
  • Calendar
  • call by reference
  • Clipboard
  • Code Sign
  • Color
  • Custom Class
  • dialog
  • drive
  • exif
  • file
  • File path
  • filter
  • folder
  • Font
  • Font
  • GAME
  • geolocation
  • GUI
  • GUI Scripting
  • Hex
  • History
  • How To
  • iCloud
  • Icon
  • Image
  • Input Method
  • Internet
  • iOS App
  • JavaScript
  • JSON
  • JXA
  • Keychain
  • Keychain
  • Language
  • Library
  • list
  • Locale
  • Machine Learning
  • Map
  • Markdown
  • Menu
  • Metadata
  • MIDI
  • MIME
  • Natural Language Processing
  • Network
  • news
  • Noification
  • Notarization
  • Number
  • Object control
  • OCR
  • OSA
  • PDF
  • Peripheral
  • PRODUCTS
  • QR Code
  • Raw AppleEvent Code
  • Record
  • recursive call
  • regexp
  • Release
  • Remote Control
  • Require Control-Command-R to run
  • REST API
  • Review
  • RTF
  • Sandbox
  • Screen Saver
  • Script Libraries
  • sdef
  • search
  • Security
  • selection
  • shell script
  • Shortcuts Workflow
  • Sort
  • Sound
  • Spellchecker
  • Spotlight
  • SVG
  • System
  • Tag
  • Telephony
  • Text
  • Text to Speech
  • timezone
  • Tools
  • Update
  • URL
  • UTI
  • Web Contents Control
  • WiFi
  • XML
  • XML-RPC
  • イベント(Event)
  • 未分類

アーカイブ

  • 2023年3月
  • 2023年2月
  • 2023年1月
  • 2022年12月
  • 2022年11月
  • 2022年10月
  • 2022年9月
  • 2022年8月
  • 2022年7月
  • 2022年6月
  • 2022年5月
  • 2022年4月
  • 2022年3月
  • 2022年2月
  • 2022年1月
  • 2021年12月
  • 2021年11月
  • 2021年10月
  • 2021年9月
  • 2021年8月
  • 2021年7月
  • 2021年6月
  • 2021年5月
  • 2021年4月
  • 2021年3月
  • 2021年2月
  • 2021年1月
  • 2020年12月
  • 2020年11月
  • 2020年10月
  • 2020年9月
  • 2020年8月
  • 2020年7月
  • 2020年6月
  • 2020年5月
  • 2020年4月
  • 2020年3月
  • 2020年2月
  • 2020年1月
  • 2019年12月
  • 2019年11月
  • 2019年10月
  • 2019年9月
  • 2019年8月
  • 2019年7月
  • 2019年6月
  • 2019年5月
  • 2019年4月
  • 2019年3月
  • 2019年2月
  • 2019年1月
  • 2018年12月
  • 2018年11月
  • 2018年10月
  • 2018年9月
  • 2018年8月
  • 2018年7月
  • 2018年6月
  • 2018年5月
  • 2018年4月
  • 2018年3月
  • 2018年2月

https://piyomarusoft.booth.pm/items/301502

メタ情報

  • 登録
  • ログイン
  • 投稿フィード
  • コメントフィード
  • WordPress.org

Forum Posts

  • 人気のトピック
  • 返信がないトピック

メタ情報

  • 登録
  • ログイン
  • 投稿フィード
  • コメントフィード
  • WordPress.org
Proudly powered by WordPress
Theme: Flint by Star Verte LLC