画像のすべてのピクセルが白であることをチェックするAppleScriptです。
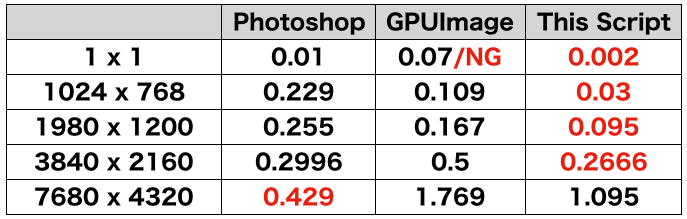
以前にmacOS 10.12上で作成した「空白画像検出v3」は一般的に処理時間のかかる空白画像の検出(ヒストグラム計算してチェックする?)が高速に処理できます(GPUImageでヒストグラム計算を行うより2倍ぐらい高速)。空白検出のためだけにAdobe Photoshopが必要になるといった事態は避けられます。
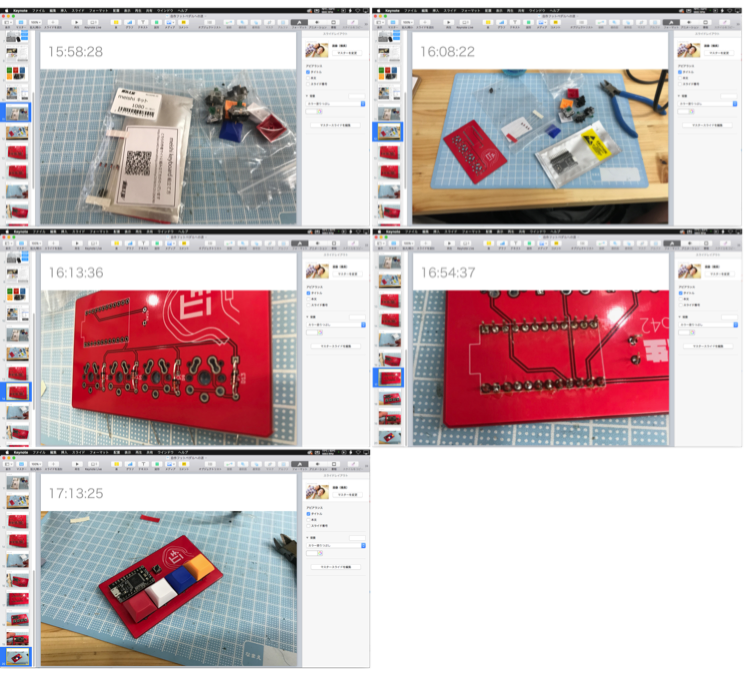
–> test Data(動作検証用各種テストデータ)
macOS 10.14.6上でこのルーチンを再度試してみたところ、思ったとおりに空白検出(数百万ピクセルの画像でも1つだけ黒であればfalseを返す)してくれません。ちょっと書き方を変えていますが、単体で通常のAppleScript(Cocoa不使用)にコンテクストメニューから突っ込むモジュールとして運用するためです。
copyコマンドがdeep copyしてくれない?
参照ではなくすべてのデータをコピーするコマンドとして、copyコマンドはとても重宝しています。単に「パラメータの代入の方向が違う偏屈なコマンド」ではなく、明示的にデータ内容をコピーするためのコマンドと認識しています。
AppleScriptのオブジェクト同様、Cocoaのオブジェクトについてもcopyコマンドでdeep copyしてくれるものと理解していましたが、macOS 10.14.6上で本ルーチンを試してみたところ、どうも参照をコピーしている気配がします。
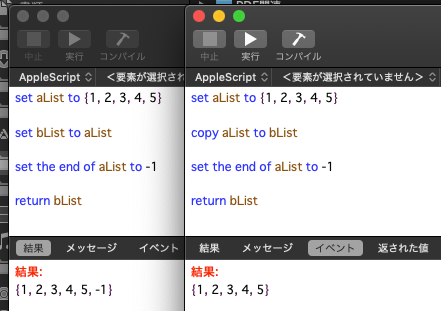
AppleScriptのオブジェクト(配列とか)をcopyコマンドでコピーすると、参照ではなくデータが複製されていることを確認しました。Cocoaオブジェクトのcopyも同様かどうかは、ちょっとそうじゃないんじゃないかというところです。
set bNSImage to aNSImage's |copy|()
Cocoaの世界のオブジェクトのコピーはこんな感じ(↑)でできたので、今後はこちらを採用することにします。
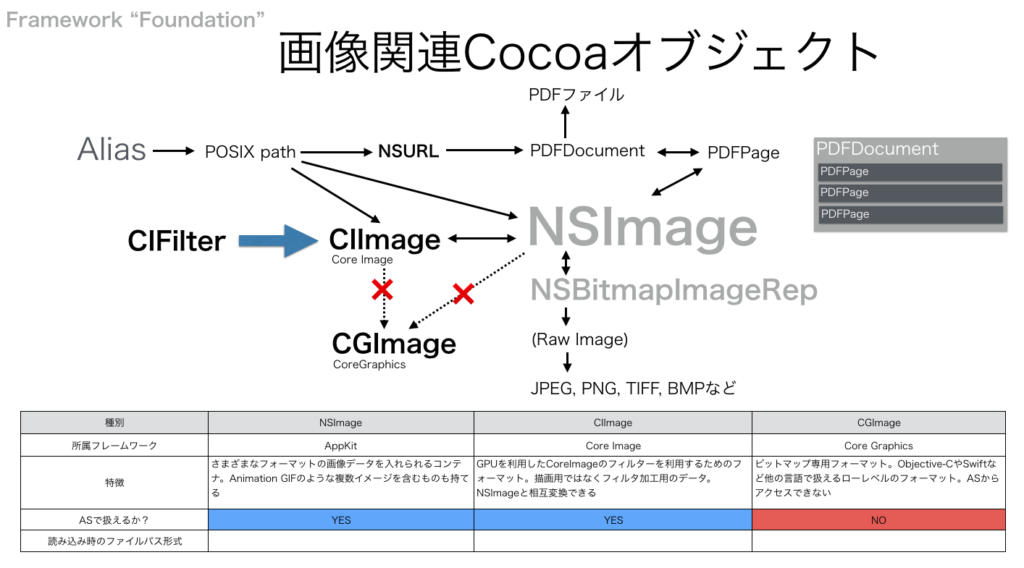
1×1のNSImageに色を塗るとデータサイズが増える
ビットマップ画像の状態であるNSBitmapImageRepになっていれば、1×1画像のサイズは同じことが期待されます。実際、macOS 10.12上ではそのように扱えていました。
ところが、macOS 10.14上で1×1ドットのNSImageに対して色を塗って、NSBitmapImageRepを取得すると、塗らない状態のNSImageよりもデータ(NSData)サイズが大きくなることがわかりました。
![]()
▲1×1のPNG画像をビットマップ化したデータ。赤が処理前、青が塗りつぶし処理後のデータ(macOS 10.14.6)。ピクセル数が増えてるのでは? と疑ってサイズを何回も計算して確認しましたが、間違っていません
しかも、データ量がmacOS 10.14と10.15では大幅に異なります(macOS 10.15では大幅にデータ量が減る)。
1×1 PNG画像 ビットマップ化したデータサイズ:3,354 Bytes(macOS 10.14.6)
1×1 PNG画像 塗りつぶし ビットマップ化したデータサイズ:3,574 Bytes(macOS 10.14.6)
1×1 PNG画像 塗りつぶし ビットマップ化したデータサイズ:750 Bytes(macOS 10.15.2)
さすがに匙を投げかけましたが、比較元のデータに透明の色(clearColor())を塗る=画像的に意味はないが、同じ処理を通すことでデータサイズを同程度にするという処理を行うことで、いい感じに空白検出できるようになりました。
なにをどういじくったら、1×1ビットマップ画像のサイズがOSアップデートごとに大幅に変わるのかさっぱり理解できないのですが、そこに何か意味があるのでしょうか?
Mac App Storeに出したアプリケーションで、PDFの空白ページ検出に本ルーチンを利用していますが、Appleのレビュー段階で「単にPDFから文字を抽出して空白検出しているのだろう」と思われてリジェクトされました。実際には、全ページを画像レンダリングして1ドットの画像でも存在していたら空白としては認識しない仕様になっているのですが、Appleのレビューワーには処理内容を説明して、各種ベンチマーク結果などを出さないと信じてもらえませんでした。
Appleのエンジニアが考えるところの空白検出が「文字チェックだけ」の使い物にならない処理だということはよくわかりました。また、頭からそのように思い込んで攻撃してきた間抜けにも遭遇してウンザリしました。
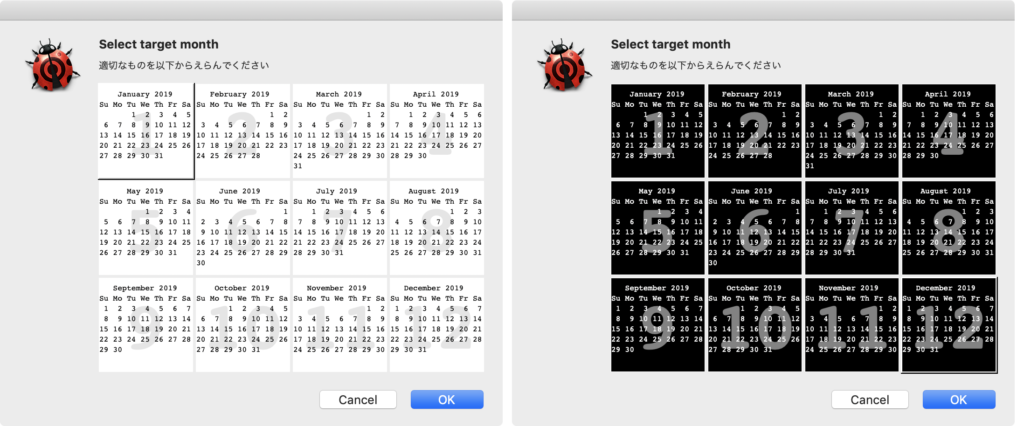
| AppleScript名:画像の空白判定 v4 |
| set aFile to (choose file of type {"public.image"}) set iRes to checkImageIsWhite(aFile) of whiteImageKit –> true –white (blank) image script whiteImageKit use AppleScript version "2.7" — High Sierra (10.13) or later use framework "Foundation" use framework "AppKit" use scripting additions property parent : AppleScript property NSData : a reference to current application’s NSData property NSDate : a reference to current application’s NSDate property |NSURL| : a reference to current application’s |NSURL| property NSColor : a reference to current application’s NSColor property NSImage : a reference to current application’s NSImage property NSBezierPath : a reference to current application’s NSBezierPath property NSBitmapImageRep : a reference to current application’s NSBitmapImageRep –Compare Original Data and on checkImageIsWhite(aFile) set aPOSIXpath to POSIX path of aFile set aURL to |NSURL|’s fileURLWithPath:(aPOSIXpath) set aNSImage to NSImage’s alloc()’s initWithContentsOfURL:(aURL) set bNSImage to NSImage’s alloc()’s initWithContentsOfURL:(aURL) –copy aNSImage to bNSImage–Not deep copy ???? set fillColor1 to NSColor’s clearColor() set blankNSImage1 to drawImageWithFilledColor(aNSImage, fillColor1) of me set fillColor2 to makeNSColorFromRGBAval(65535, 65535, 65535, 65535, 65535) of me set blankNSImage2 to drawImageWithFilledColor(bNSImage, fillColor2) of me set aTiff to blankNSImage1’s TIFFRepresentation() set bTiff to blankNSImage2’s TIFFRepresentation() set chkWhite to (aTiff’s isEqualToData:bTiff) as boolean return chkWhite end checkImageIsWhite on getSizeOfImage(anNSImage) set aSize to anNSImage’s |size|() set aClass to class of aSize if aClass = record then copy aSize to theSize –To macOS 10.12.x else –macOS 10.13 or later set sizeX to (item 1 of item 2 of aSize) set sizeY to (item 2 of item 2 of aSize) set theSize to {width:sizeX, height:sizeY} end if return theSize end getSizeOfImage –指定サイズの画像を作成し、背景を指定色で塗る on drawImageWithFilledColor(anImage, fillColor) set aSize to getSizeOfImage(anImage) of me anImage’s lockFocus() set theRect to {{x:0, y:0}, {width:(width of aSize), height:(height of aSize)}} set theNSBezierPath to NSBezierPath’s bezierPath theNSBezierPath’s appendBezierPathWithRect:theRect fillColor’s |set|() theNSBezierPath’s fill() anImage’s unlockFocus() return anImage end drawImageWithFilledColor –aMaxValを最大値とする数値でNSColorを作成して返す on makeNSColorFromRGBAval(redValue as integer, greenValue as integer, blueValue as integer, alphaValue as integer, aMaxVal as integer) set aRedCocoa to (redValue / aMaxVal) as real set aGreenCocoa to (greenValue / aMaxVal) as real set aBlueCocoa to (blueValue / aMaxVal) as real set aAlphaCocoa to (alphaValue / aMaxVal) as real set aColor to NSColor’s colorWithCalibratedRed:aRedCocoa green:aGreenCocoa blue:aBlueCocoa alpha:aAlphaCocoa return aColor end makeNSColorFromRGBAval end script |


 Adobe Illustrator書類上にある、QRコードのオブジェクトをクリップボード経由でNSImageに変換してQRコード認識するAppleScriptです。QRコード認識には、OS内蔵のCoreImageの機能を使っています。
 Photoshop CCで画像ファイル/PDFをオープンするAppleScriptです。
 1Dバーコード認識には定番の

