—
– Created by: Takaaki Naganoya
– Created on: 2020/02/28
—
– Copyright © 2020 Piyomaru Software, All Rights Reserved
— http://www.piyocast.com
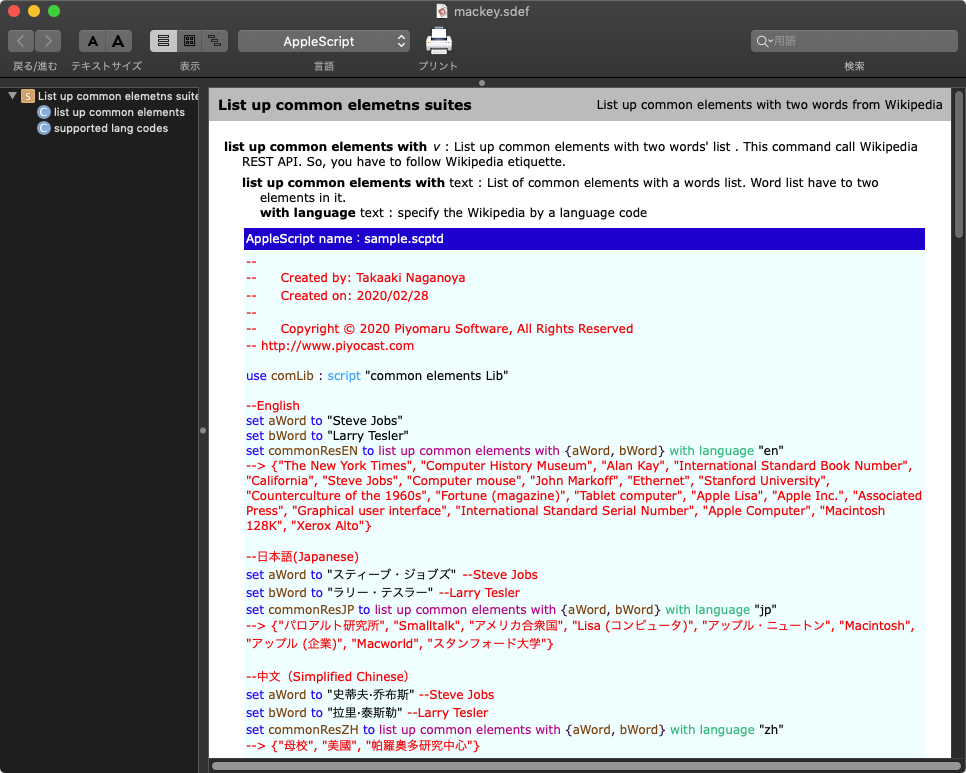
use comLib : script "common elements Lib"
–English
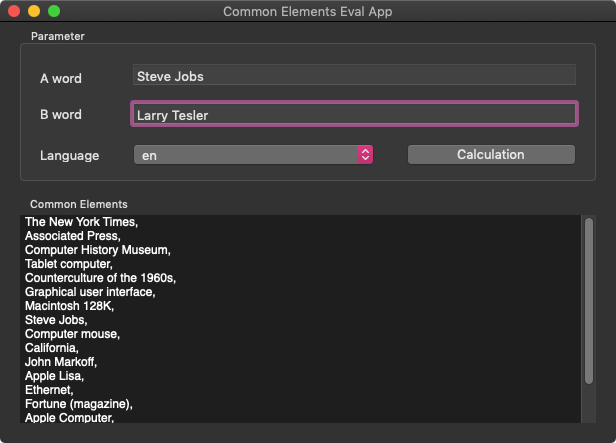
set aWord to "Steve Jobs"
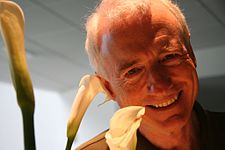
set bWord to "Larry Tesler"
set commonResEN to list up common elements with {aWord, bWord} with language "en"
–> {"The New York Times", "Computer History Museum", "Alan Kay", "International Standard Book Number", "California", "Steve Jobs", "Computer mouse", "John Markoff", "Ethernet", "Stanford University", "Counterculture of the 1960s", "Fortune (magazine)", "Tablet computer", "Apple Lisa", "Apple Inc.", "Associated Press", "Graphical user interface", "International Standard Serial Number", "Apple Computer", "Macintosh 128K", "Xerox Alto"}
–日本語(Japanese)
set aWord to "スティーブ・ジョブズ" –Steve Jobs
set bWord to "ラリー・テスラー" –Larry Tesler
set commonResJP to list up common elements with {aWord, bWord} with language "jp"
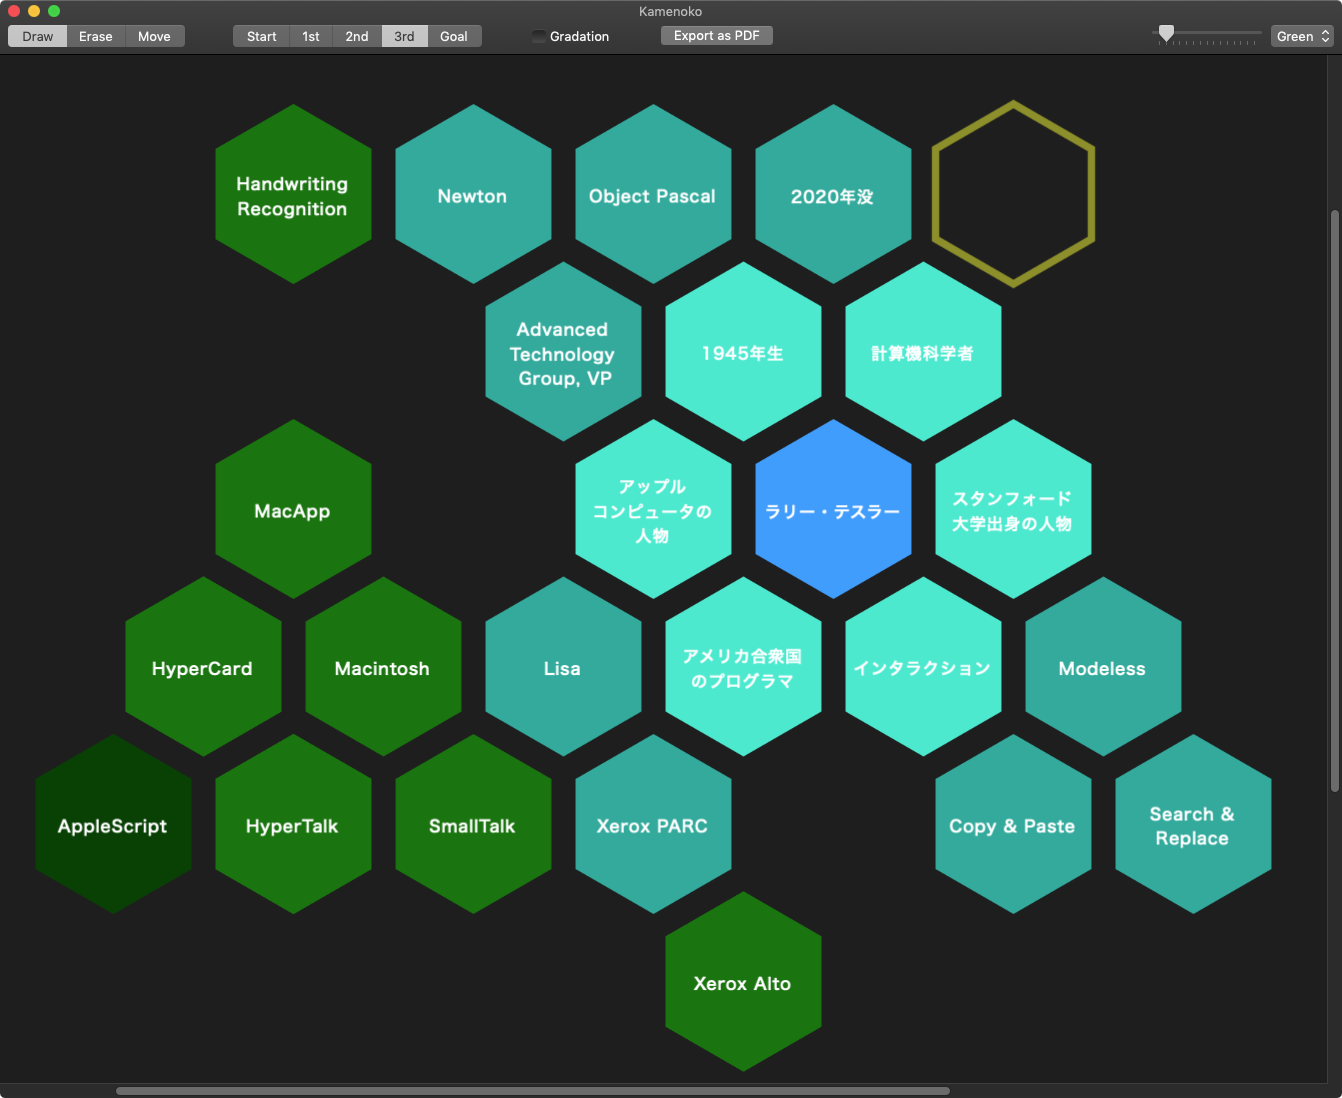
–> {"パロアルト研究所", "Smalltalk", "アメリカ合衆国", "Lisa (コンピュータ)", "アップル・ニュートン", "Macintosh", "アップル (企業)", "Macworld", "スタンフォード大学"}
–中文(Simplified Chinese)
set aWord to "史蒂夫·乔布斯" –Steve Jobs
set bWord to "拉里·泰斯勒" –Larry Tesler
set commonResZH to list up common elements with {aWord, bWord} with language "zh"
–> {"母校", "美國", "帕羅奧多研究中心"}
—한국어(Korean)
set aWord to "스티브 잡스" –Steve Jobs
set bWord to "빌 게이츠" –Bill Gates
set commonResKO to list up common elements with {aWord, bWord} with language "ko"
—> {"가상 국제 전거 파일", "위키인용집", "게마인자메 노름다타이", "네덜란드 왕립도서관", "국제 표준 도서 번호", "IBM", "SNAC", "CiNii", "개인용 컴퓨터", "BIBSYS", "영어", "국제 표준 명칭 식별자", "오스트레일리아 국립도서관", "LIBRIS", "체코 국립도서관", "미국", "스페인 국립도서관", "뮤직브레인즈", "프랑스 국립도서관", "이스라엘 국립도서관", "일본 국립국회도서관", "미국 의회도서관 제어 번호", "전거 통제", "국립중앙도서관", "WorldCat Identities", "실리콘 밸리의 신화", "프랑스 대학도서관 종합목록", "위키미디어 공용"}
–svenska
set aWord to "Steve Jobs"
set bWord to "Ross Perot"
set commonResSV to list up common elements with {aWord, bWord} with language "sv"
–> {"USA", "IBM", "Forbes", "Entreprenör", "Libris (bibliotekskatalog)"}
–Deutsch
set aWord to "Steve Jobs"
set bWord to "Larry Tesler"
set commonResDE to list up common elements with {aWord, bWord} with language "de"
–> {"Objektorientierte Programmierung", "Apple", "Apple Macintosh", "Xerox PARC", "Virtual International Authority File", "The New York Times", "Kalifornien", "Apple Lisa"}
–français
set aWord to "Steve Jobs"
set bWord to "Larry Tesler"
set commonResFR to list up common elements with {aWord, bWord} with language "fr"
–> {"The New York Times", "Palo Alto Research Center", "Informaticien", "Californie", "Apple", "États-Unis", "Autorité (sciences de l’information)"}
–Nederlands
set aWord to "Steve Jobs"
set bWord to "Larry Tesler"
set commonResNL to list up common elements with {aWord, bWord} with language "nl"
–> {"Verenigde Staten (hoofdbetekenis)", "Palo Alto Research Center", "Apple Macintosh", "Xerox", "Apple Inc.", "Apple Lisa", "Apple Newton"}
–italiano
set aWord to "Steve Jobs"
set bWord to "Larry Tesler"
set commonResIT to list up common elements with {aWord, bWord} with language "it"
–>{"Apple", "Stati Uniti d’America", "Xerox Palo Alto Research Center", "Informatico"}
–español
set aWord to "Steve Jobs"
set bWord to "Ross Perot"
set commonResES to list up common elements with {aWord, bWord} with language "es"
–> {"Emprendedor", "Library of Congress Control Number", "Wikidata", "IBM", "Enciclopedia Británica", "Wikimedia Commons", "Empresario", "CiNii", "National Diet Library", "Estados Unidos", "National Library of the Czech Republic", "Virtual International Authority File", "Bibliothèque nationale de France", "International Standard Name Identifier", "Integrated Authority File", "Système universitaire de documentation", "ISBN"}
–polski
set aWord to "Steve Jobs"
set bWord to "Larry Tesler"
set commonResPL to list up common elements with {aWord, bWord} with language "pl"
–> {"Apple Inc.", "Virtual International Authority File", "Xerox PARC"}
–Tiếng Việt
set aWord to "Steve Jobs"
set bWord to "Larry Tesler"
set commonResVI to list up common elements with {aWord, bWord} with language "vi"
–> {"Hoa Kỳ", "Apple Lisa", "California", "Apple Inc."}
–Arabic
set aWord to "ستيف جوبز"
set bWord to "روس بيرو"
set commonResAR to list up common elements with {aWord, bWord} with language "ar"
–> {"مكتبة البرلمان الوطني", "رقم الضبط في مكتبة الكونغرس", "رائد أعمال", "المكتبة الوطنية لجمهورية التشيك", "ملف استنادي متكامل", "ملف استنادي دولي افتراضي", "المكتبة الوطنية الفرنسية", "سايني", "ديل", "آي بي إم", "لغة إنجليزية", "ضبط استنادي", "حزب سياسي", "مهنة", "مدرسة أم", "واي باك مشين", "الولايات المتحدة", "المحدد المعياري الدولي للأسماء", "دولار أمريكي"}
–português
set aWord to "Steve Jobs"
set bWord to "Larry Tesler"
set commonResPT to list up common elements with {aWord, bWord} with language "pt"
–> {"Macintosh", "Alan Kay", "Apple Newton", "Povo dos Estados Unidos", "Língua inglesa", "Estados Unidos", "Ciência da computação", "Apple", "Califórnia", "Base Virtual Internacional de Autoridade"}
–Català
set aWord to "Steve Jobs"
set bWord to "Larry Tesler"
set commonResCA to list up common elements with {aWord, bWord} with language "ca"
–> {"Control d’autoritats", "Virtual International Authority File", "Apple Macintosh", "Apple Inc", "Interfície gràfica d’usuari"}
–Bahasa Indonesia
set aWord to "Steve Jobs"
set bWord to "Larry Tesler"
set commonResNO to list up common elements with {aWord, bWord} with language "id"
–> {"California", "Biografi", "Amerika Serikat"}
–magyar
set aWord to "Steve Jobs"
set bWord to "Larry Tesler"
set commonResHU to list up common elements with {aWord, bWord} with language "hu"
–> {"Amerikai Egyesült Államok", "Informatikus", "Wikimédia Commons", "Stanford Egyetem", "Nemzetközi Virtuális Katalógustár"}
–euskara
set aWord to "Steve Jobs"
set bWord to "Larry Tesler"
set commonResEU to list up common elements with {aWord, bWord} with language "eu"
–> {"Xerox", "Informatikari", "Ingeles", "Apple Inc.", "Ameriketako Estatu Batuak", "Wikidata", "Smalltalk", "Virtual International Authority File", "Stanford Unibertsitatea", "Wikimedia Commons"}
–Türkçe
set aWord to "Steve Jobs"
set bWord to "Larry Tesler"
set commonResTR to list up common elements with {aWord, bWord} with language "tr"
–> {"The New York Times", "Apple", "Amerika Birleşik Devletleri", "Kaliforniya"}
|


