—
– Created by: Takaaki Naganoya
– Created on: 2019/03/10
—
– Copyright © 2019 Piyomaru Software, All Rights Reserved
—
use AppleScript version "2.4" — Yosemite (10.10) or later
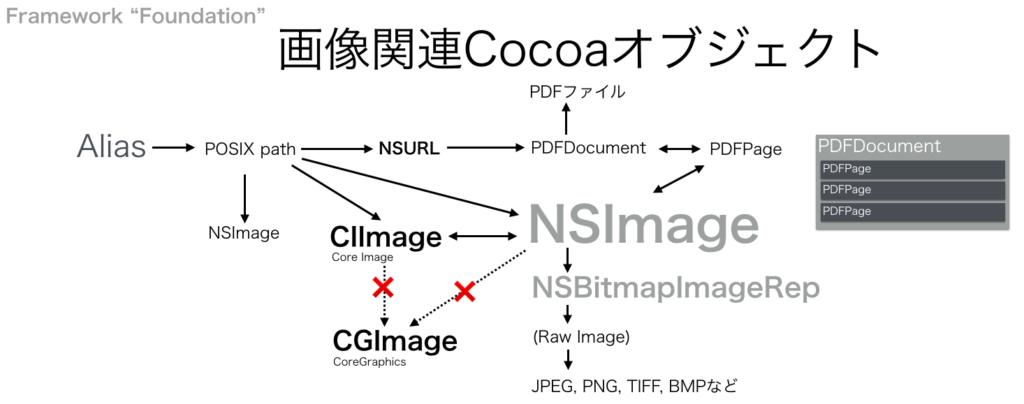
use framework "Foundation"
use framework "AppKit"
use framework "MapKit"
use scripting additions
use skLib : script "senjoNoKizunaLib"
property NSView : a reference to current application’s NSView
property NSAlert : a reference to current application’s NSAlert
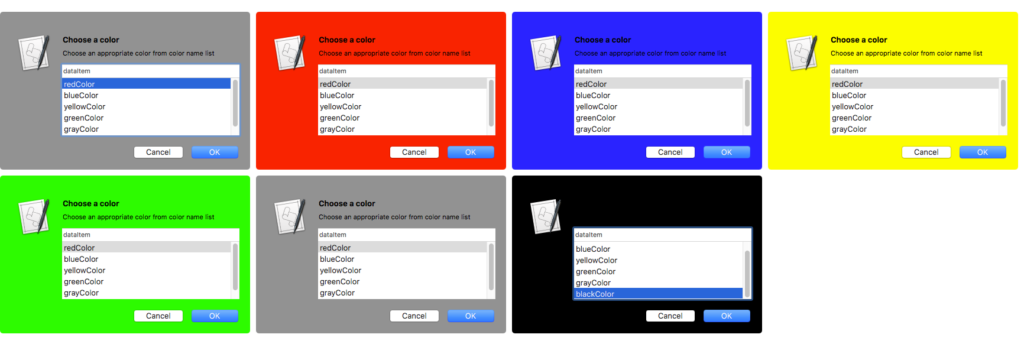
property NSColor : a reference to current application’s NSColor
property NSBrowser : a reference to current application’s NSBrowser
property MKMapView : a reference to current application’s MKMapView
property NSScrollView : a reference to current application’s NSScrollView
property NSMutableArray : a reference to current application’s NSMutableArray
property MKMapTypeHybrid : a reference to current application’s MKMapTypeHybrid
property MKMapTypeSatellite : a reference to current application’s MKMapTypeSatellite
property MKMapTypeStandard : a reference to current application’s MKMapTypeStandard
property NSSegmentedControl : a reference to current application’s NSSegmentedControl
property NSRunningApplication : a reference to current application’s NSRunningApplication
property NSAlertSecondButtonReturn : a reference to current application’s NSAlertSecondButtonReturn
property NSSegmentStyleTexturedRounded : a reference to current application’s NSSegmentStyleTexturedRounded
property zLevel : 17
property aMaxViewWidth : 1000
property aMaxViewHeight : 500
property theResult : 0
property returnCode : 0
property theDataSource : {}
property aSelection : {}
property aMapView : missing value
property aBrowser : missing value
property skDataList : {}
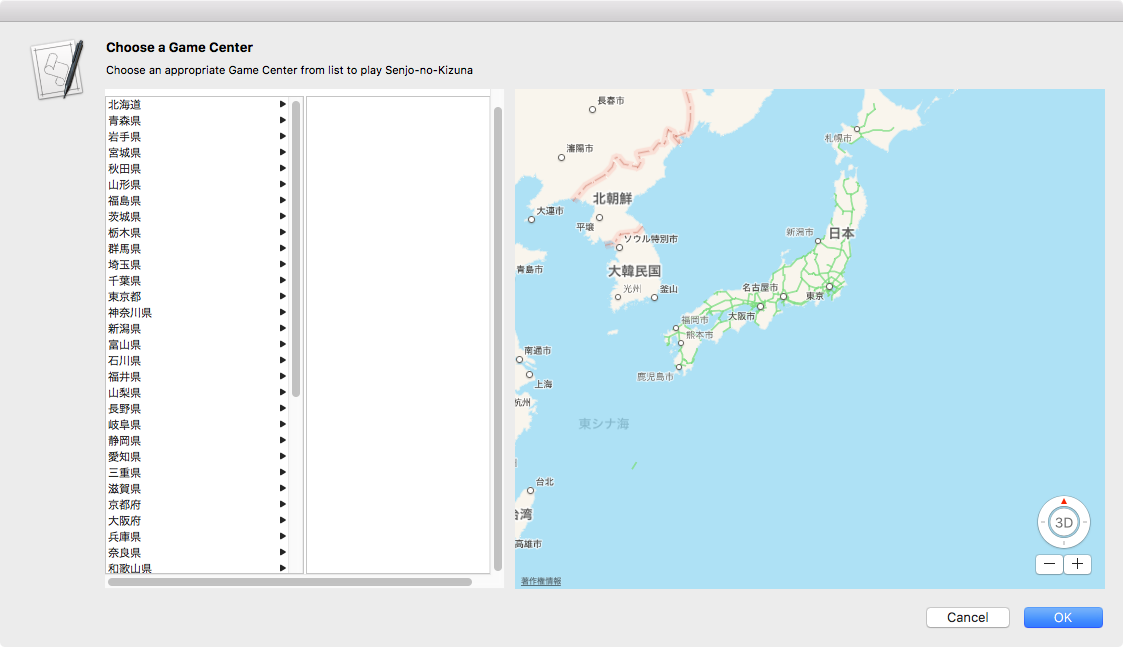
property prefList : {"北海道", "青森県", "岩手県", "宮城県", "秋田県", "山形県", "福島県", "茨城県", "栃木県", "群馬県", "埼玉県", "千葉県", "東京都", "神奈川県", "新潟県", "富山県", "石川県", "福井県", "山梨県", "長野県", "岐阜県", "静岡県", "愛知県", "三重県", "滋賀県", "京都府", "大阪府", "兵庫県", "奈良県", "和歌山県", "鳥取県", "島根県", "岡山県", "広島県", "山口県", "徳島県", "香川県", "愛媛県", "高知県", "福岡県", "佐賀県", "長崎県", "熊本県", "大分県", "宮崎県", "鹿児島県", "沖縄県"}
if my skDataList = {} then
set my skDataList to current application’s NSMutableArray’s arrayWithArray:(getSenjoNokizunaGameCenterDataList() of skLib)
end if
set tmpLen to length of (my skDataList as list)
set aSelection to {}
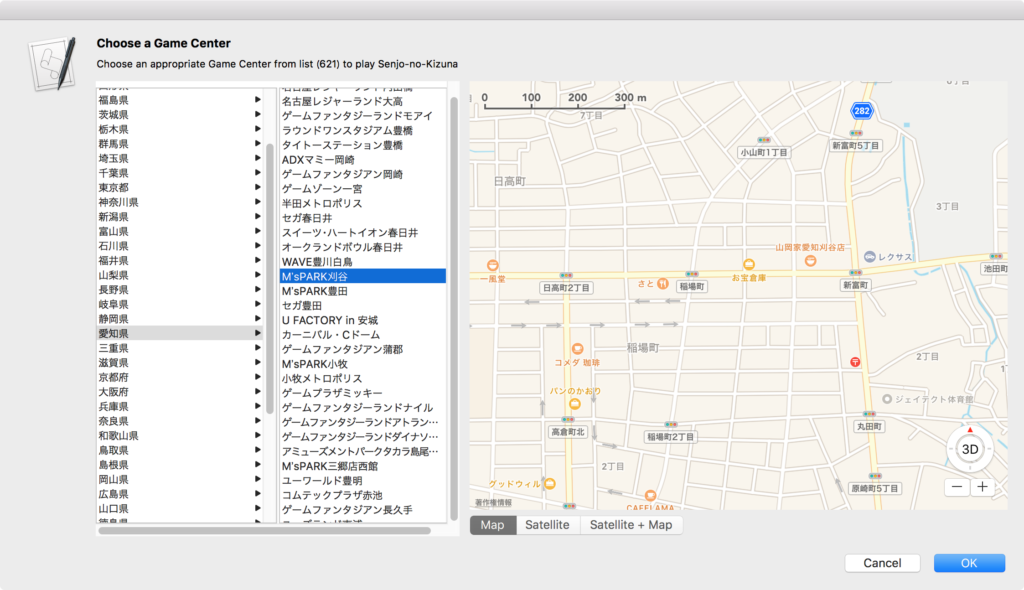
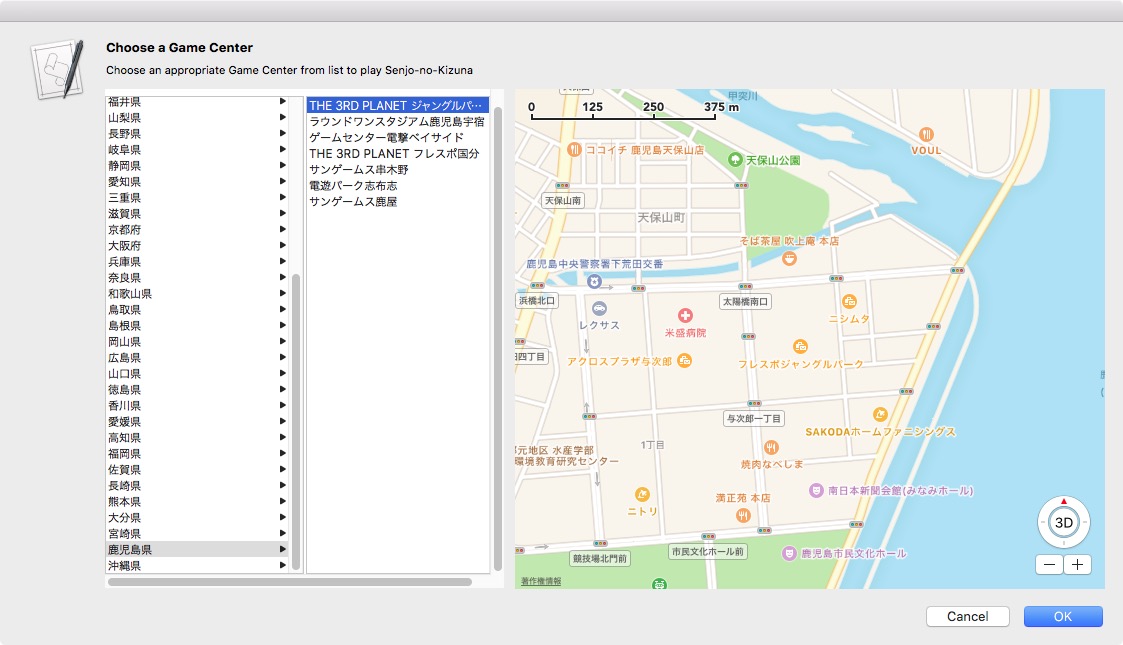
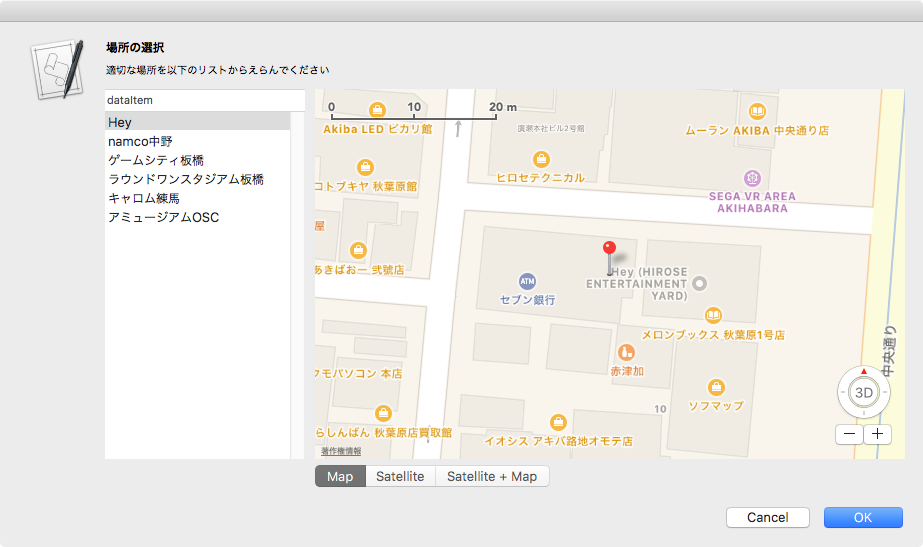
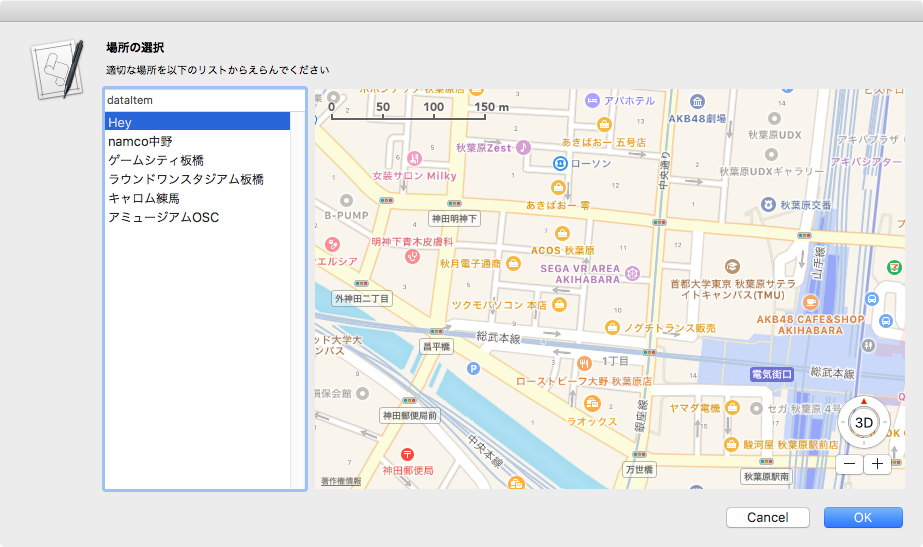
set paramObj to {myMessage:"Choose a Game Center", mySubMessage:("Choose an appropriate Game Center from list (" & tmpLen as string) & ") to play Senjo-no-Kizuna"}
my performSelectorOnMainThread:"chooseItemByBrowser:" withObject:(paramObj) waitUntilDone:true
if (my returnCode as number) = 1001 then error number -128
return my aSelection
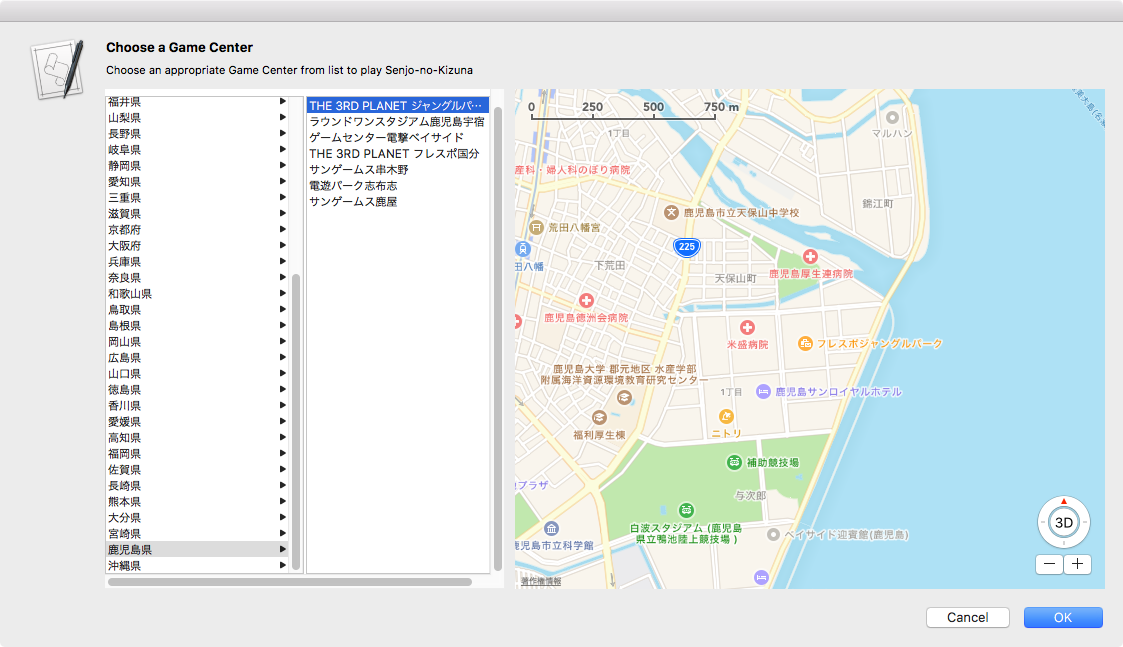
–> {loc_id:"QIEXj9er5QSA_Y42-OjPNg", gcName:"THE 3RD PLANET ジャングルパーク鹿児島", latitude:31.5703088, longitude:130.5653137, address:"鹿児島県 鹿児島市 与次郎 1-11-1 フレスポジャングルパーク2F"}
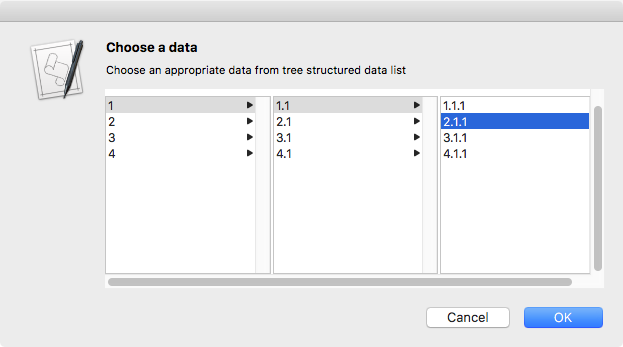
on chooseItemByBrowser:paramObj
set aMainMes to myMessage of paramObj
set aSubMes to mySubMessage of paramObj
— create a view
set theView to NSView’s alloc()’s initWithFrame:(current application’s NSMakeRect(0, 0, aMaxViewWidth, aMaxViewHeight))
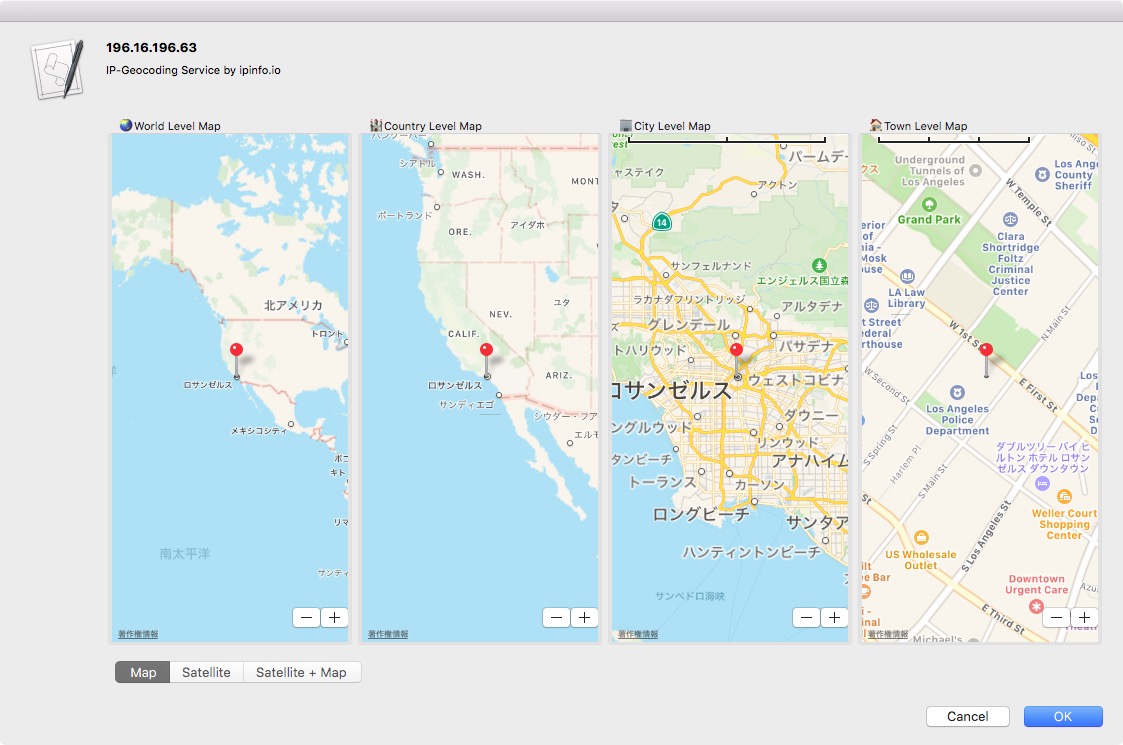
set aMapView to MKMapView’s alloc()’s initWithFrame:(current application’s NSMakeRect(410, 30, aMaxViewWidth – 410, aMaxViewHeight – 30))
tell aMapView
its setMapType:(MKMapTypeStandard)
its setZoomEnabled:true
its setScrollEnabled:true
its setPitchEnabled:true
its setRotateEnabled:true
its setShowsCompass:true
its setShowsZoomControls:true
its setShowsScale:true
its setShowsUserLocation:true
its setDelegate:me
end tell
— make browser view with scroll view
set aScrollWithTable to makeBrowserView(prefList, 400, aMaxViewHeight) of me
–Segmented Controlをつくる
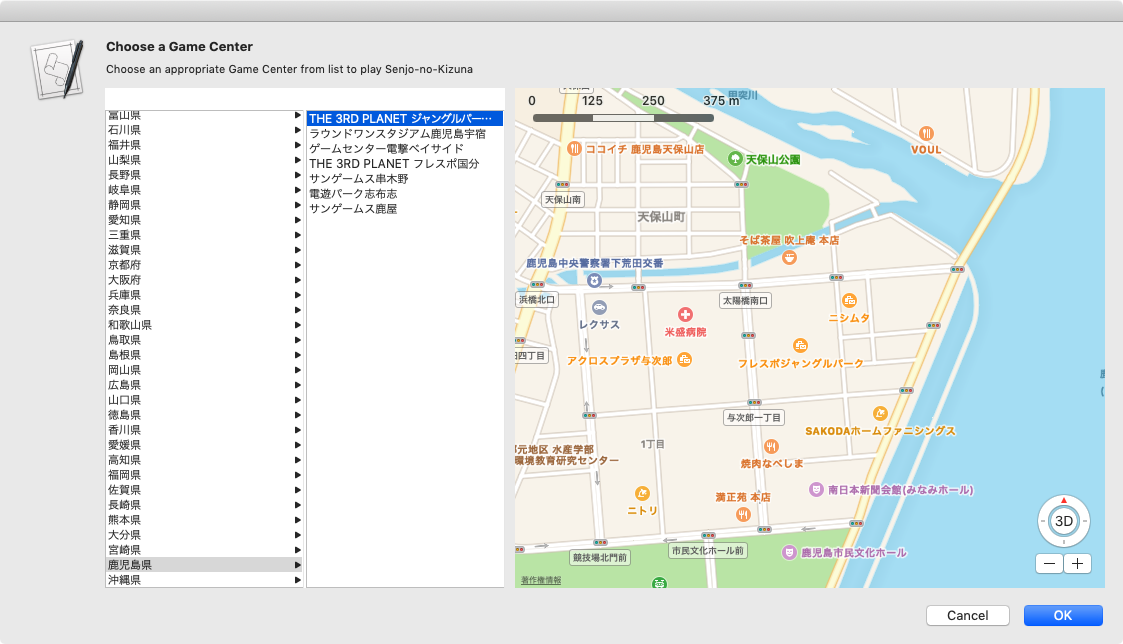
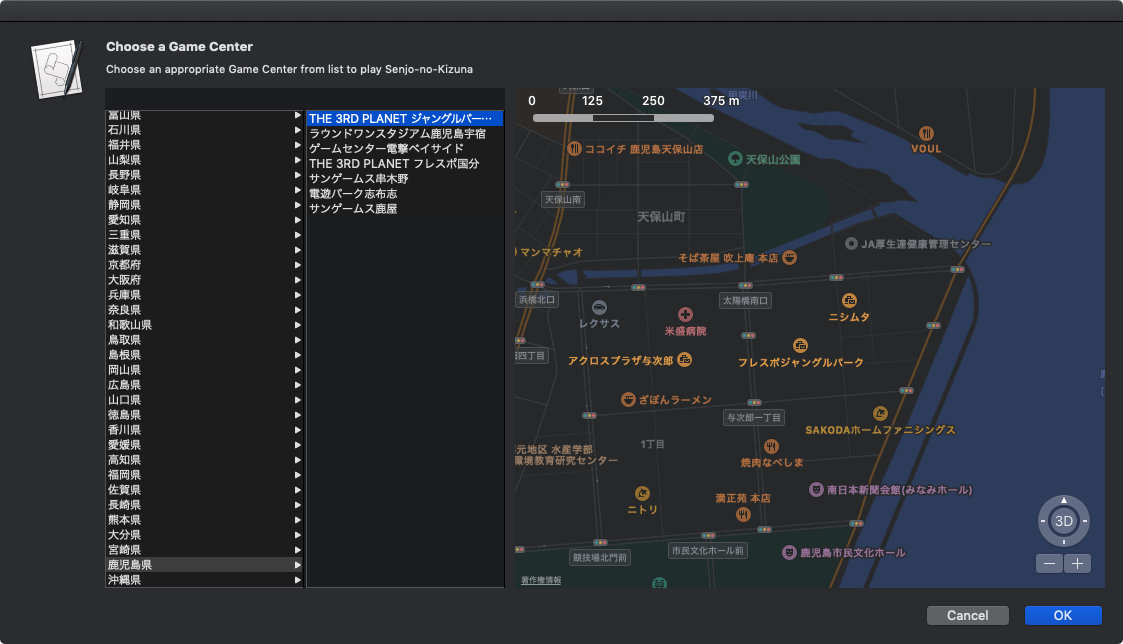
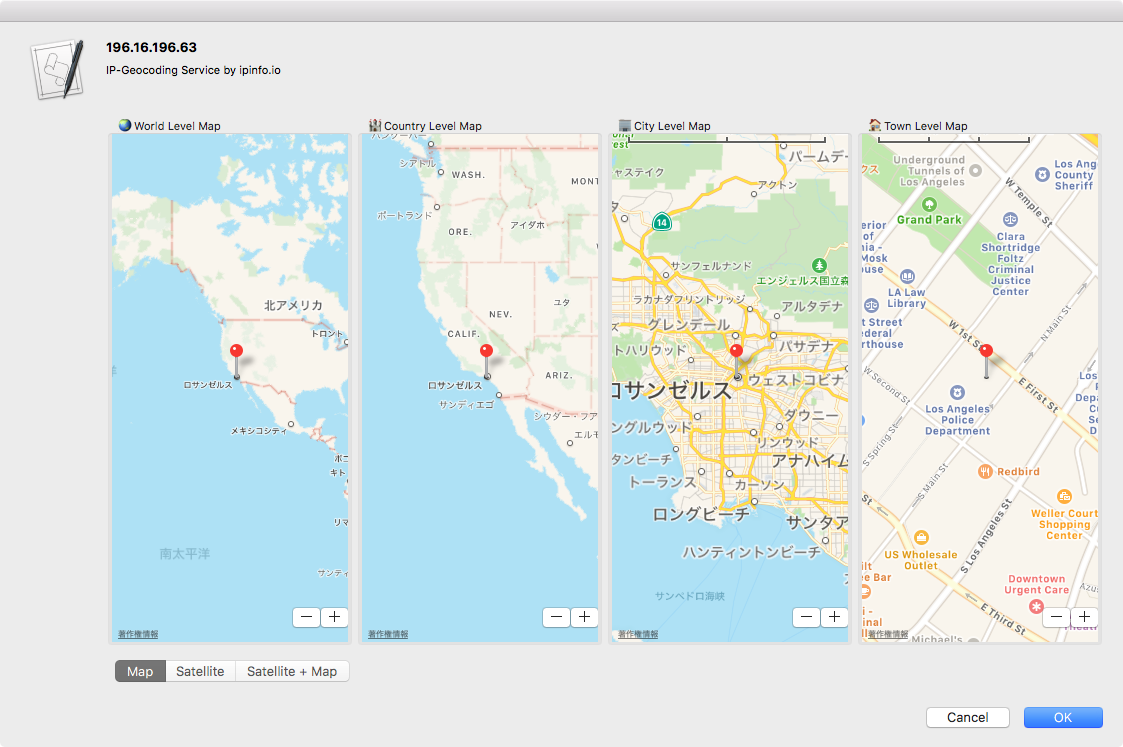
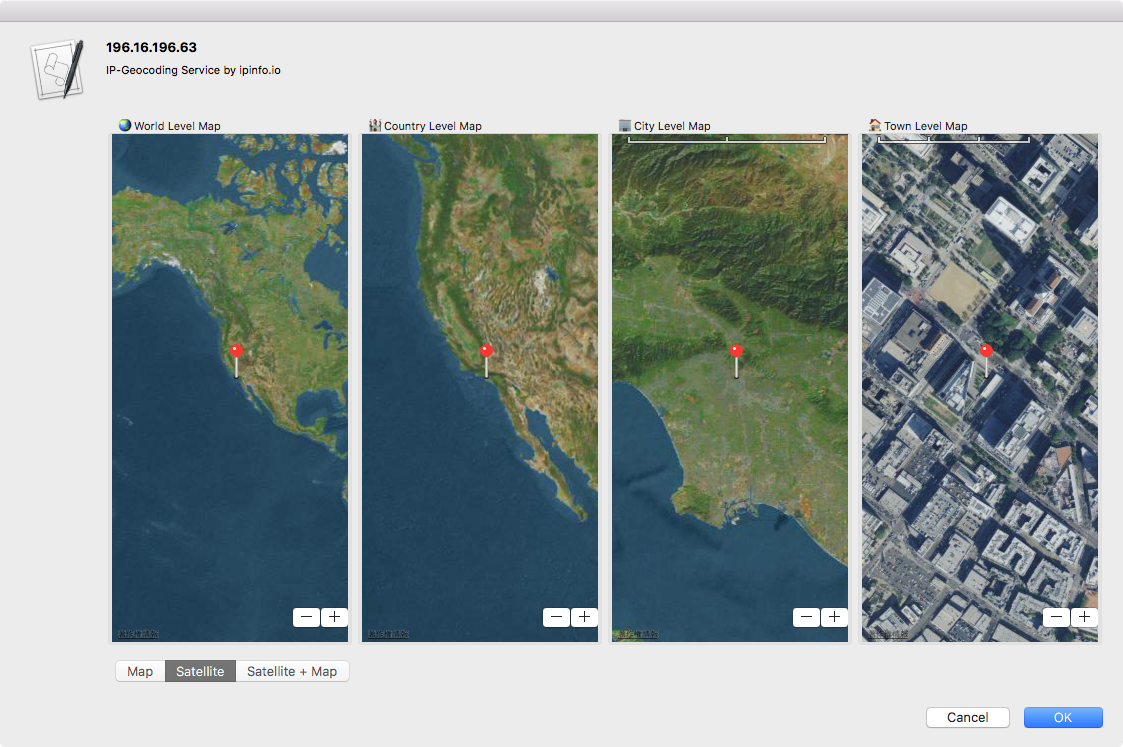
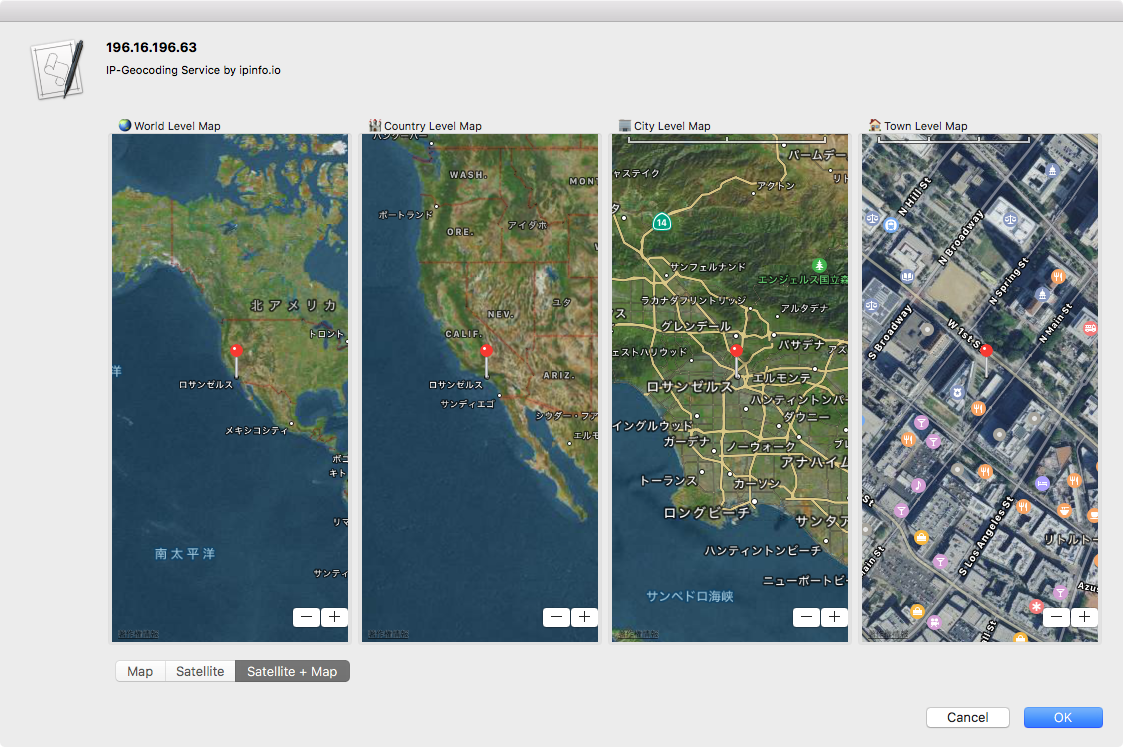
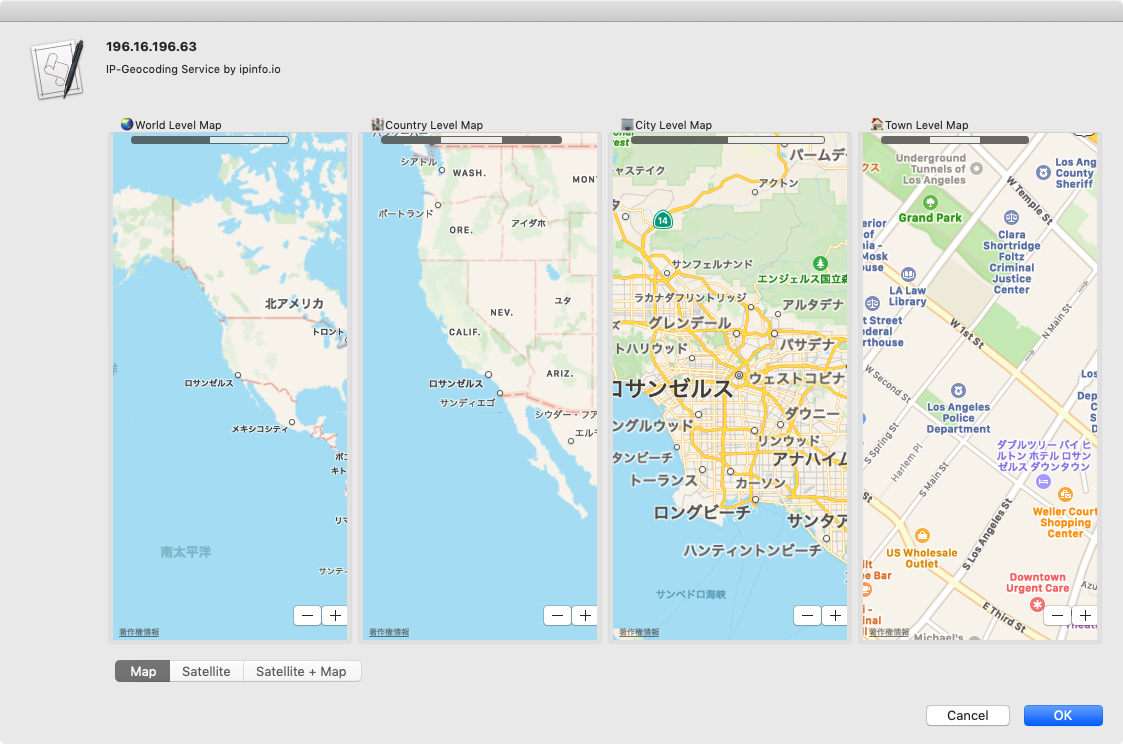
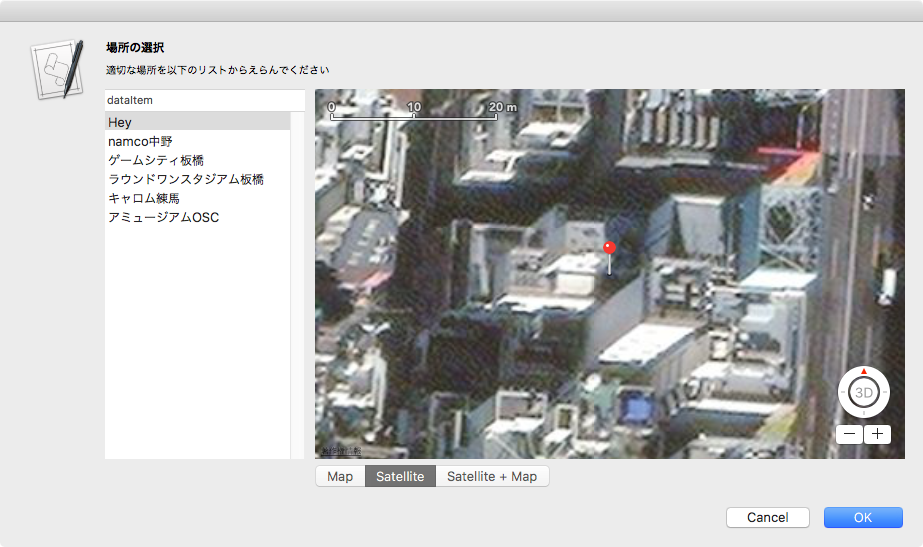
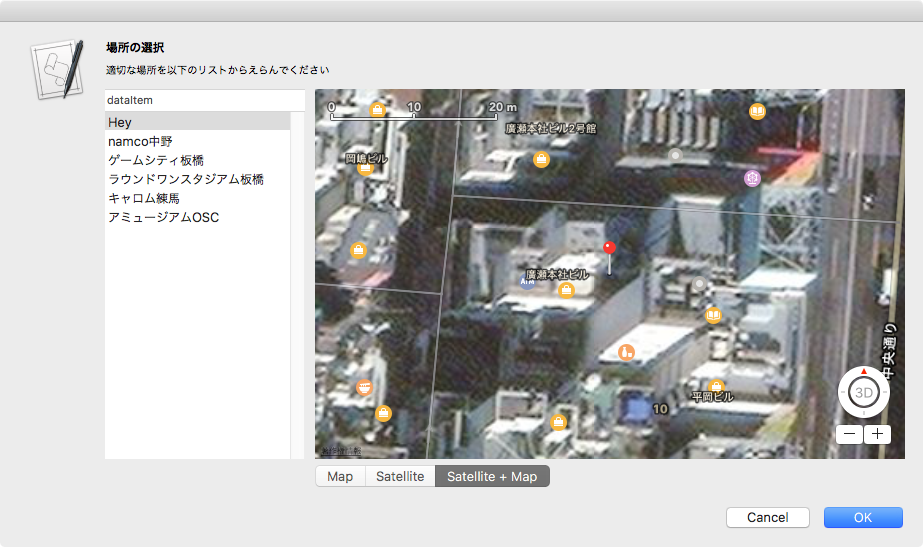
set segTitleList to {"Map", "Satellite", "Satellite + Map"}
set aSeg to makeSegmentedControl(segTitleList, 410, 0, 150, 20) of me
–Compose Views in NSView
theView’s setSubviews:{aScrollWithTable, aMapView, aSeg}
— set up alert
set theAlert to NSAlert’s alloc()’s init()
tell theAlert
its setMessageText:aMainMes
its setInformativeText:aSubMes
its addButtonWithTitle:"OK"
its addButtonWithTitle:"Cancel"
its setAccessoryView:theView
end tell
— show alert in modal loop
NSRunningApplication’s currentApplication()’s activateWithOptions:0
my performSelectorOnMainThread:"doModal:" withObject:(theAlert) waitUntilDone:true
end chooseItemByBrowser:
on doModal:aParam
set (my returnCode) to aParam’s runModal()
end doModal:
on makeBrowserView(aList as list, aWidth as number, aHeight as number)
set (my theDataSource) to NSMutableArray’s arrayWithArray:aList
set aScroll to NSScrollView’s alloc()’s initWithFrame:(current application’s NSMakeRect(0, 0, aWidth, aHeight))
set aBrowser to NSBrowser’s alloc()’s initWithFrame:(current application’s NSMakeRect(0, 0, aWidth, aHeight))
aBrowser’s setDelegate:(me)
aBrowser’s setTarget:(me)
aBrowser’s setAction:"browserCellSelected:"
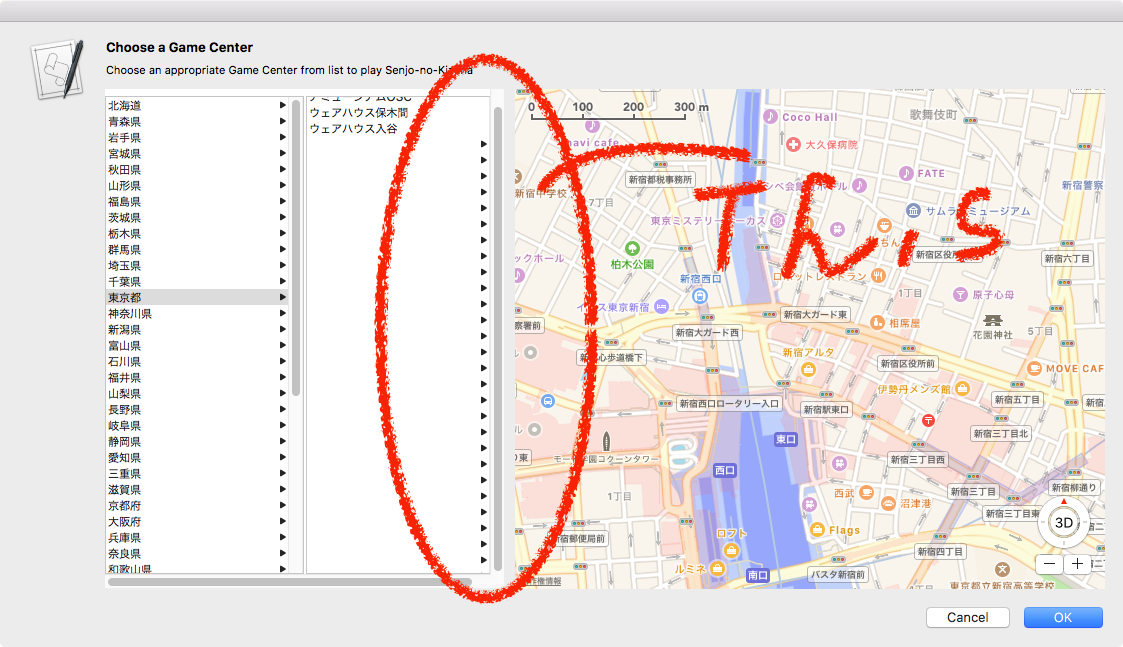
aBrowser’s setMinColumnWidth:120
aBrowser’s setSeparatesColumns:true
aBrowser’s setMaxVisibleColumns:2
aBrowser’s setAutohidesScroller:true
aBrowser’s setTakesTitleFromPreviousColumn:true
–aBrowser’s setBackgroundColor:(NSColor’s grayColor())
aScroll’s setDocumentView:aBrowser
aBrowser’s enclosingScrollView()’s setHasHorizontalScroller:true
aBrowser’s enclosingScrollView()’s setHasVerticalScroller:true
return aScroll
end makeBrowserView
–NSBrowser Event Handlers
on browser:aView numberOfRowsInColumn:aColumn
if aColumn = 0 then
return my theDataSource’s |count|()
else if aColumn = 1 then
set aPath to (text 2 thru -1 of ((aView’s |path|()) as string)) as string –ここが問題だったもよう
set tmpArray to (my filterRecListByLabel1(skDataList, "address BEGINSWITH ’" & aPath & "’")) as list
return (length of tmpArray)
else
return 0
end if
end browser:numberOfRowsInColumn:
on browser:aView willDisplayCell:(aCell) atRow:(rowIndex as integer) column:(colIndex as integer)
if colIndex = 0 then
–Prefectures
aCell’s setTitle:((item (rowIndex + 1) of prefList) as string)
aCell’s setLeaf:false
else if colIndex = 1 then
–Each Game Centers in the Prefecture
set aPath to text 2 thru -1 of ((aView’s |path|()) as string)
set tmpArray to my filterRecListByLabel1(skDataList, "address BEGINSWITH ’" & aPath & "’")
set tmpItem to (tmpArray’s objectAtIndex:rowIndex)
set aGameCenterName to (tmpItem’s gcName) as string
aCell’s setTitle:(aGameCenterName)
aCell’s setLeaf:true
else if colIndex ≥ 2 then
error "Wrong NSBrowser status"
end if
end browser:willDisplayCell:atRow:column:
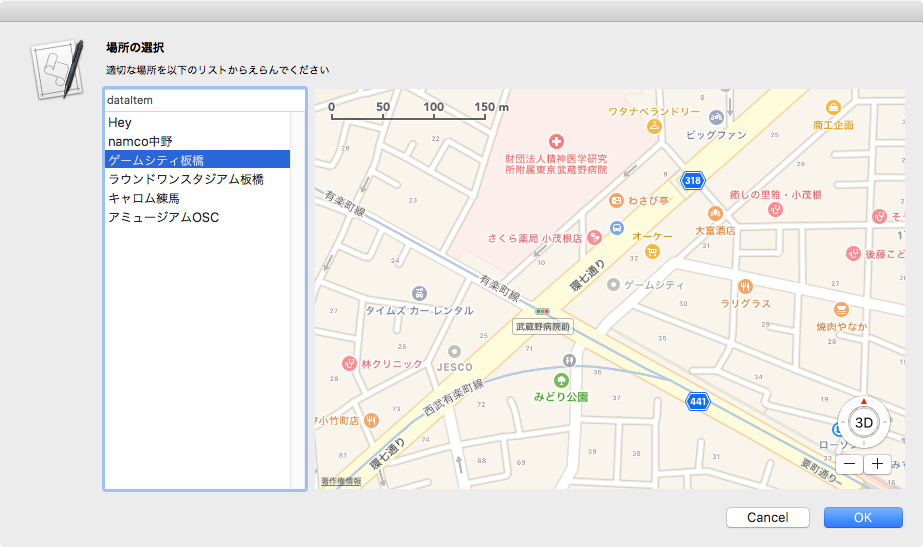
on browserCellSelected:aSender
set aPath to my aBrowser’s |path|()
set aList to (aPath’s pathComponents()) as list
set aLen to length of aList
if aLen = 3 then
–set aPref to contents of item 2 of aList
set aGc to contents of last item of aList
set tmpArray to my filterRecListByLabel1(skDataList, "gcName == ’" & aGc & "’")
–set tmpArray to my filterRecListByLabel1(skDataList, "gcName == " & aGc)
set tmpItem to contents of first item of (tmpArray as list)
copy tmpItem to my aSelection
set aLatitude to (latitude of tmpItem) as real
set aLongitude to (longitude of tmpItem) as real
tell aMapView
set aLocation to current application’s CLLocationCoordinate2DMake(aLatitude, aLongitude)
its setCenterCoordinate:aLocation zoomLevel:(zLevel) animated:false
end tell
end if
end browserCellSelected:
–NSArrayに入れたNSDictionaryを、指定の属性ラベルの値で抽出
on filterRecListByLabel1(aRecList, aPredicate as string)
set aPredicate to current application’s NSPredicate’s predicateWithFormat:aPredicate
set filteredArray to aRecList’s filteredArrayUsingPredicate:aPredicate
return filteredArray
end filterRecListByLabel1
–Segmented Controlをつくる
on makeSegmentedControl(titleList, startX, startY, aWidth, aHeight)
set aLen to length of titleList
set aSeg to NSSegmentedControl’s alloc()’s init()
aSeg’s setSegmentCount:aLen
set aCount to 0
repeat with i in titleList
set j to contents of i
(aSeg’s setLabel:j forSegment:aCount)
set aCount to aCount + 1
end repeat
aSeg’s setTranslatesAutoresizingMaskIntoConstraints:false
aSeg’s setSegmentStyle:(NSSegmentStyleTexturedRounded)
aSeg’s setFrame:(current application’s NSMakeRect(startX, startY, aWidth, aHeight))
aSeg’s setTrackingMode:0
aSeg’s setTarget:me
aSeg’s setAction:"clickedSeg:"
aSeg’s setSelectedSegment:0
return aSeg
end makeSegmentedControl
–Segmented Controlのクリック時のイベントハンドラ
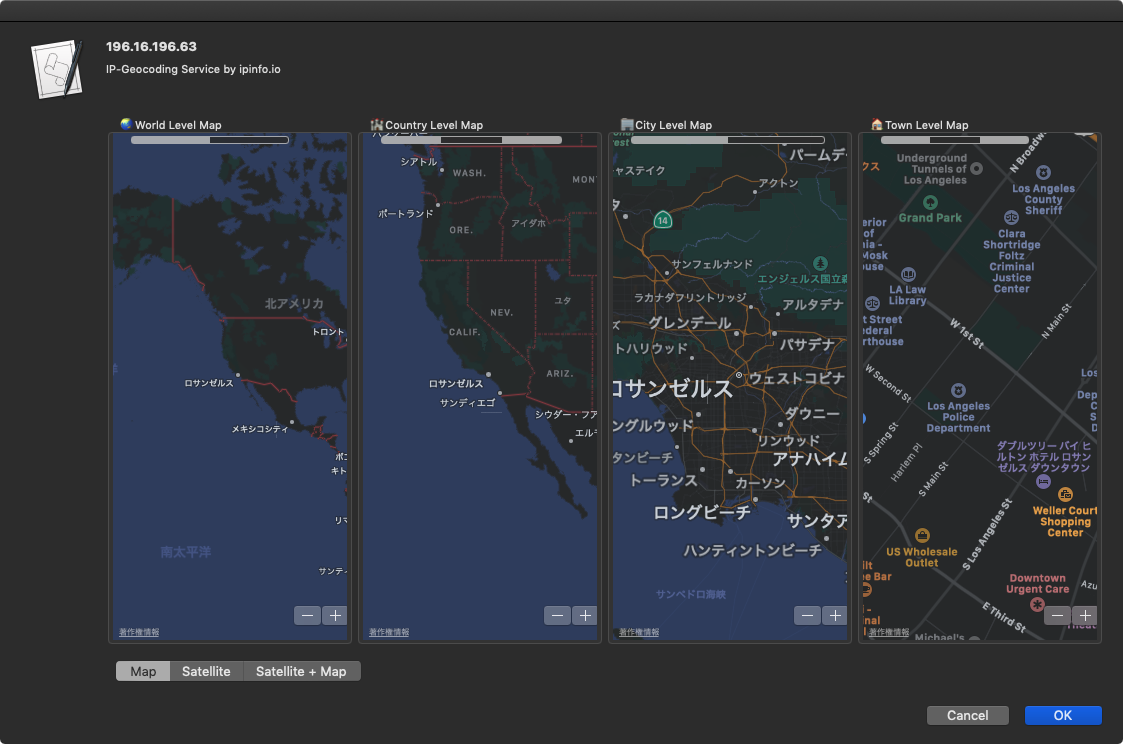
on clickedSeg:aSender
set aSel to aSender’s selectedSegment()
set tList to {MKMapTypeStandard, MKMapTypeSatellite, MKMapTypeHybrid}
set tmpType to contents of item (aSel + 1) of tList
aMapView’s setMapType:(tmpType)
set selSeg to aSel
end clickedSeg:
|


