Menu

Skip to content
AppleScriptの穴
  • Home
  • Products
  • Books
  • Docs
  • Events
  • Forum
  • About This Blog
  • License
  • 仕事依頼

AppleScriptの穴

Useful & Practical AppleScript archive. Click '★Click Here to Open This Script' Link to download each AppleScript

タグ: 10.11savvy

Keynote書類のテキスト色を置換

Posted on 6月 9, 2019 by Takaaki Naganoya

最前面のKeynote書類の文字色を置換するAppleScriptです。

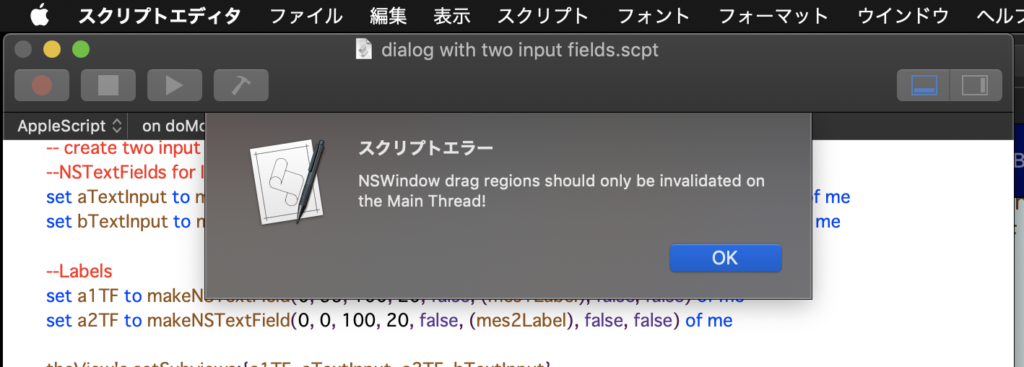
# 初出時にはmacOS 10.13であったため、スクリプトエディタ上からも野良Framework呼び出しができましたが、macOS 10.14以降ではSIPを解除するかScript Debugger上で実行する必要があります

Keynoteは文字色の置換をする機能が実装されていないので、個別に手で色を変更するか、あるいはスタイルを編集して一括で修正するやり方になります。

そこで、AppleScriptで色置換を行う処理を書いてみました。表の背景色を置換する処理を書いたときの部品を大幅に使いまわしています。

文字色の取得や判定は、テキストアイテムの1文字目の情報で判断しています。途中で色を変更しているような場合にはうまく検出できません(処理スピードを重視したことと、自分の利用方法の範囲ではそういう文字ごとに異なる色を指定するところまではサポートしなくてよいと考えたためです。仕事ならもうちょっと真面目に作り込むかもしれませんが、、、、)。

ポップアップメニュー中の色名の動的な推定に、オープンソースの「DBColorNames」をフレームワーク化した
「dbColNamesKit.framework」を利用しています。

–> dbColNamesKit.framework (To ~/Library/Frameworks)
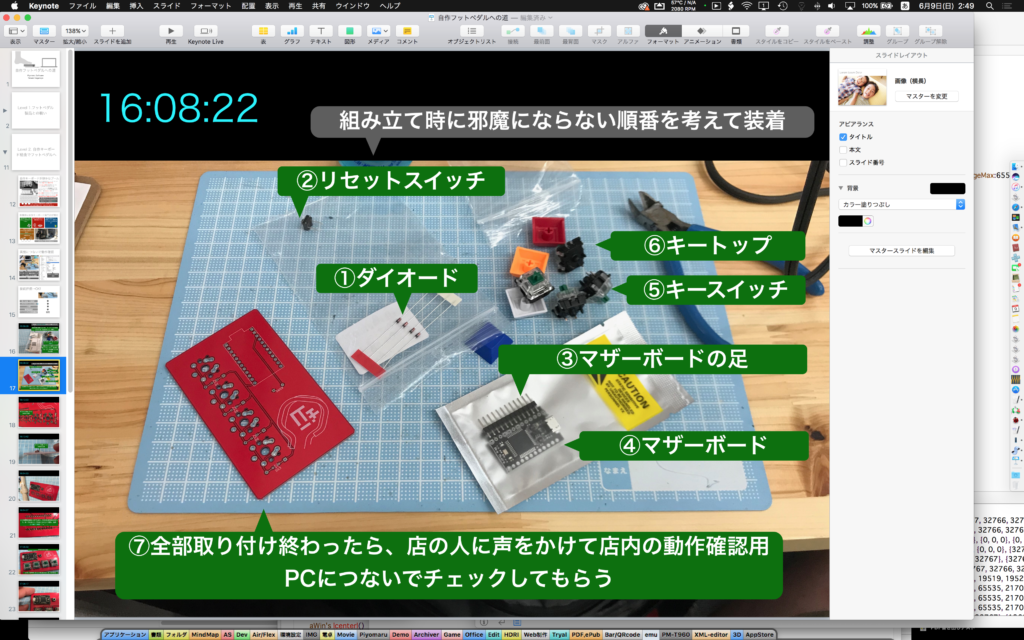
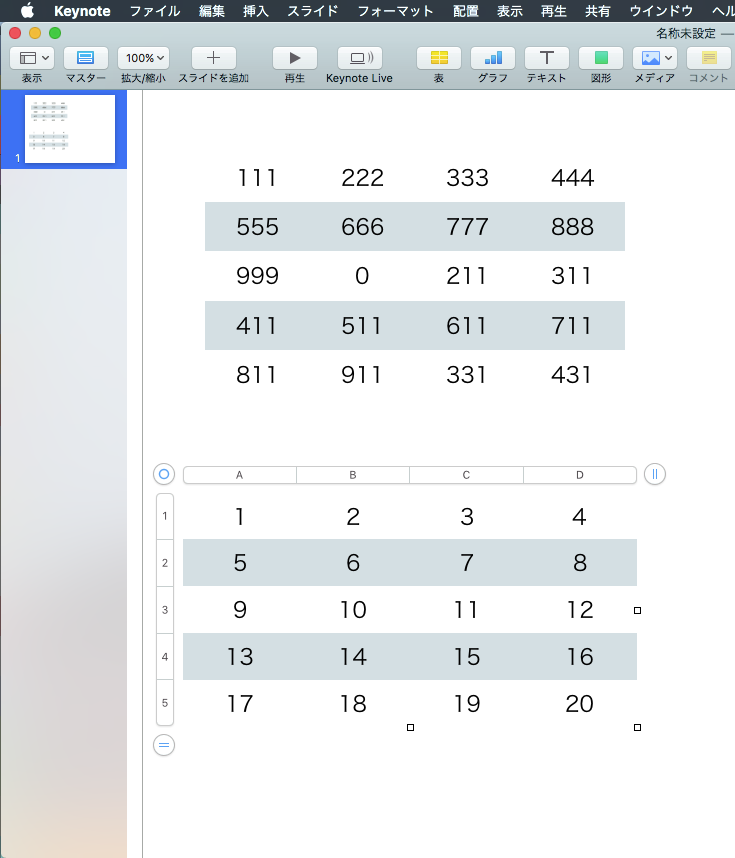
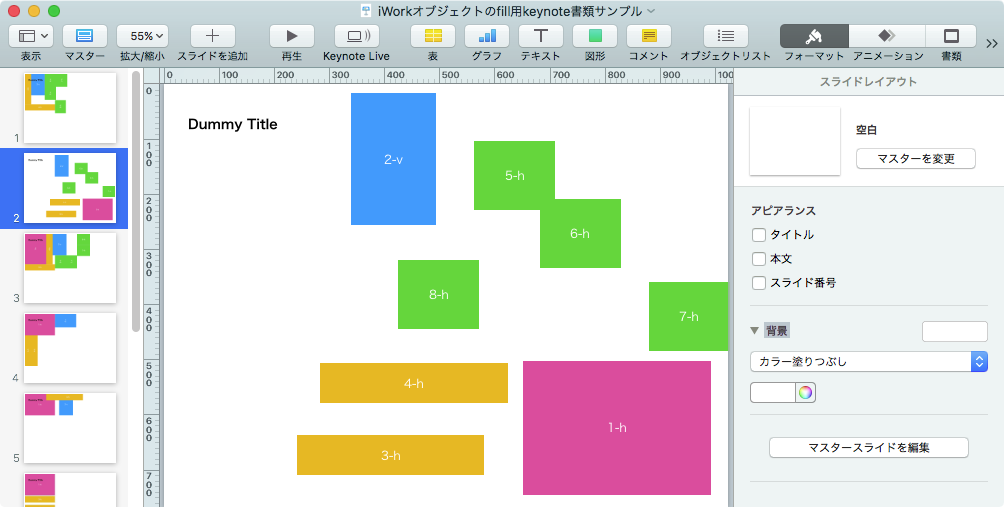
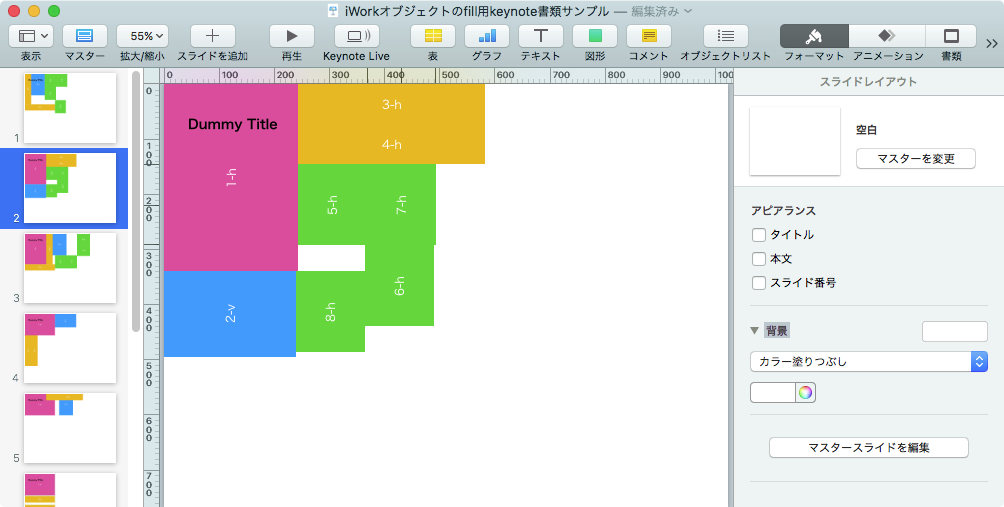
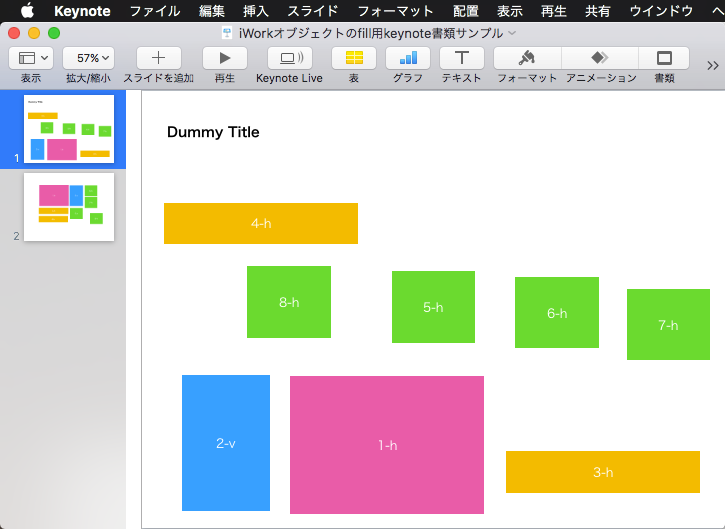
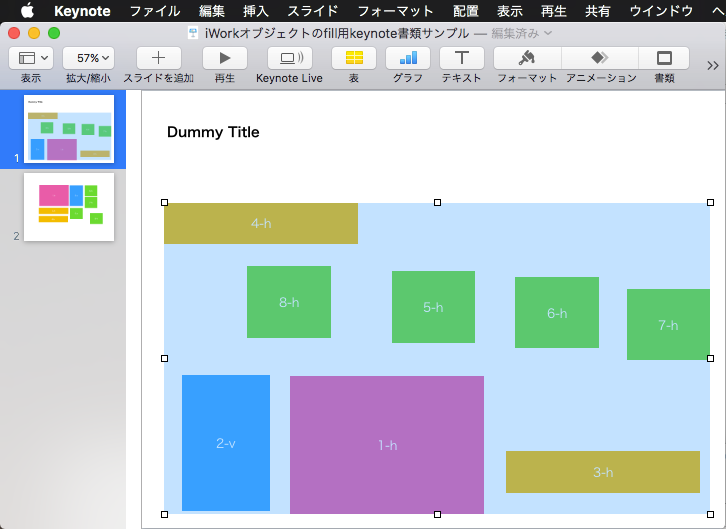

▲左上の時刻部分の色を置換したい


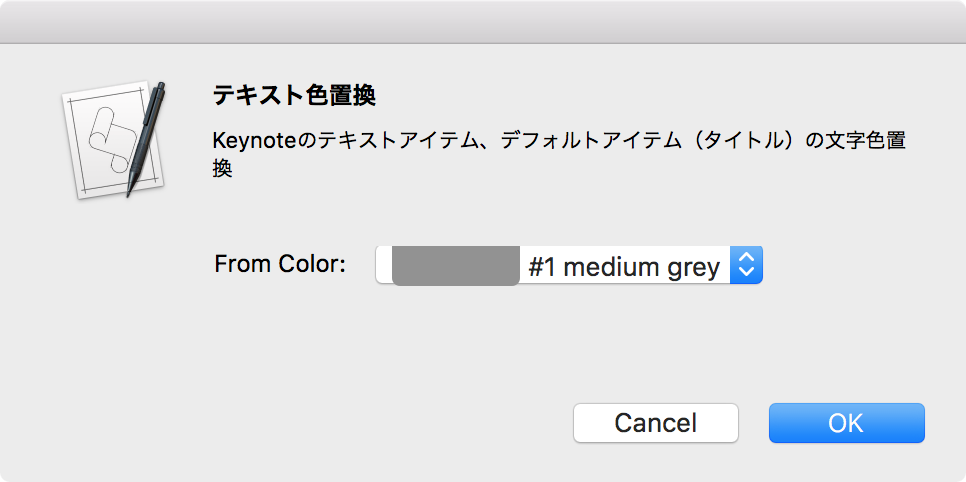
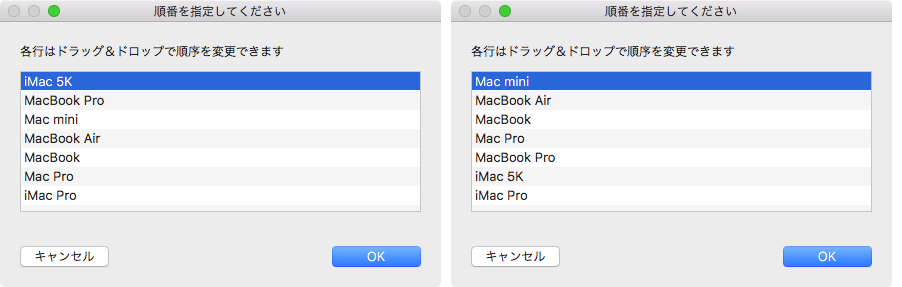
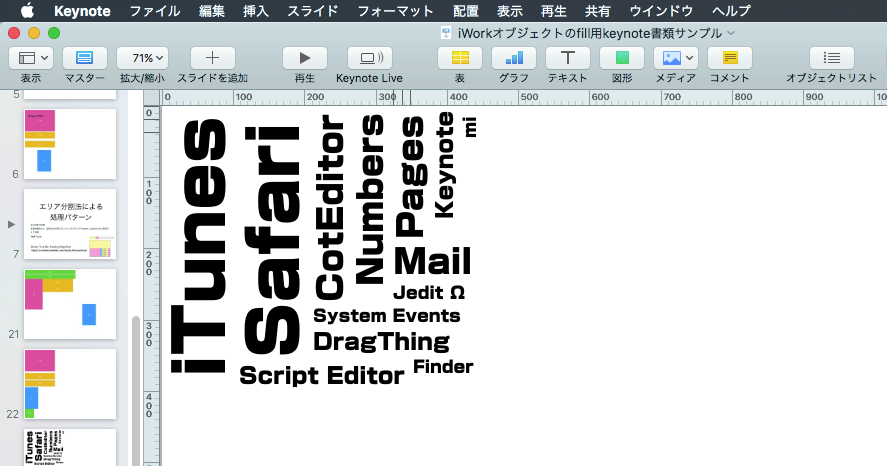
▲本Scriptを実行した直後。最前面のKeynote書類のすべてのテキストを走査して文字色を取得する


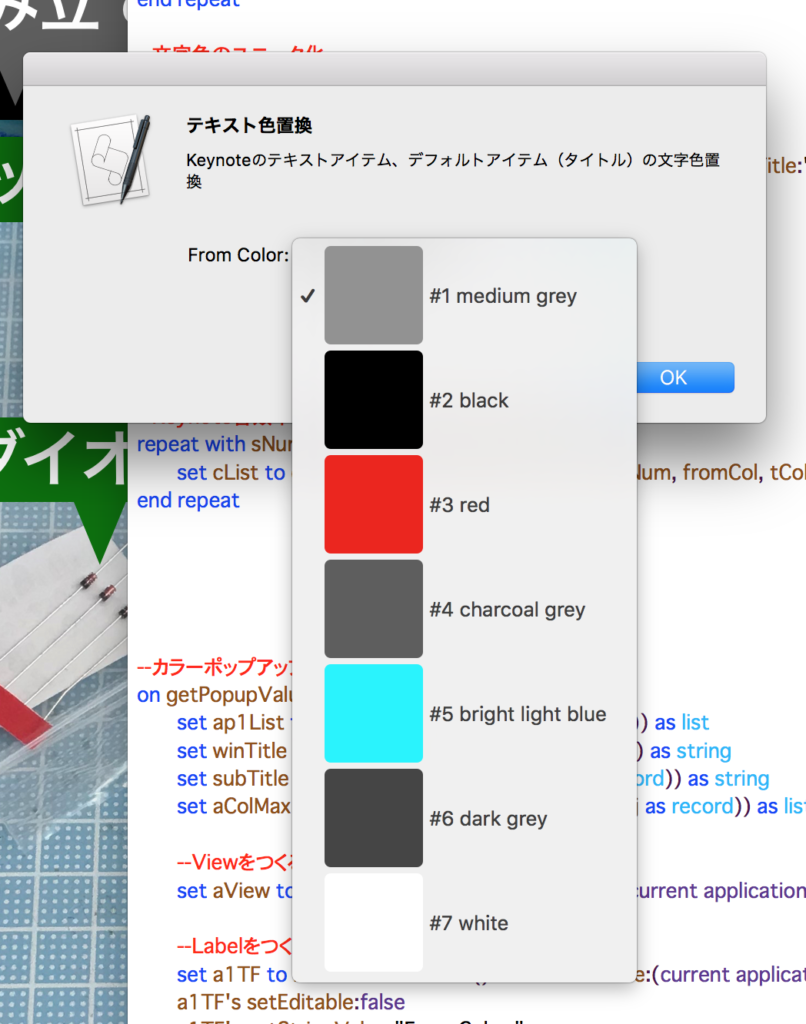
▲取得した文字色リスト。この中から置換対象を選択する。色データから色名を動的に生成し、色IDとともに名称で個別に指定したり識別したりできる
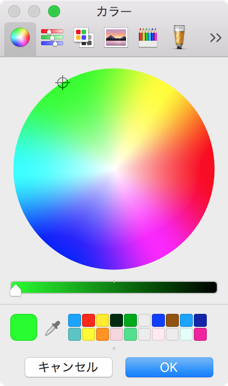

▲変更後の色をカラーピッカーで選択


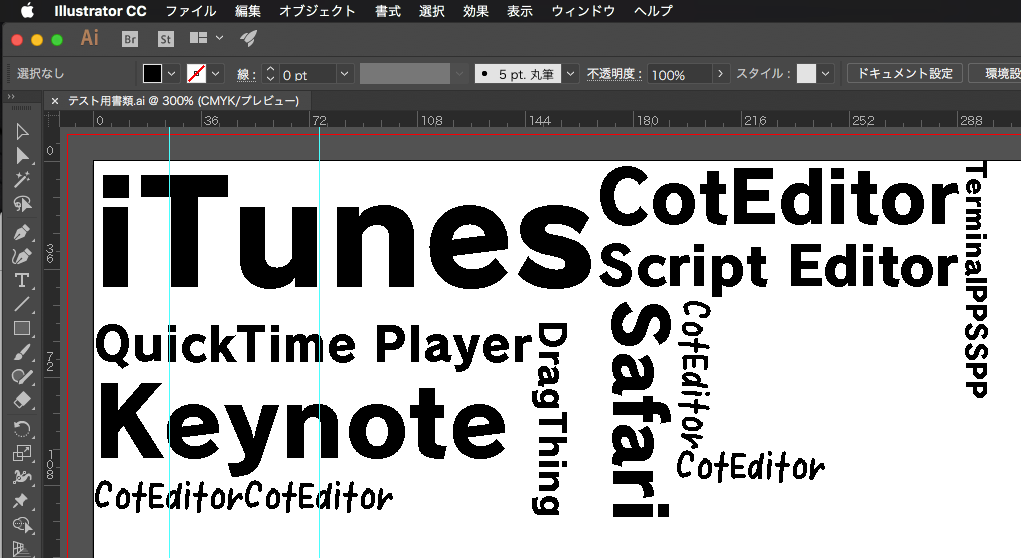
▲Keynote書類上の文字色を変更してみた

AppleScript名:Keynote書類の現在のテキスト色を置換.scptd
—
–  Created by: Takaaki Naganoya
–  Created on: 2019/06/08
—
–  Copyright © 2019 Piyomaru Software, All Rights Reserved
—
use AppleScript version "2.5" — Yosemite (10.11) or later
use framework "Foundation"
use framework "AppKit"
use framework "dbColNamesKit" –https://github.com/daniel-beard/DBColorNames/
use scripting additions

property NSView : a reference to current application’s NSView
property NSAlert : a reference to current application’s NSAlert
property NSColor : a reference to current application’s NSColor
property NSMenu : a reference to current application’s NSMenu
property NSImage : a reference to current application’s NSImage
property NSIndexSet : a reference to current application’s NSIndexSet
property NSTextField : a reference to current application’s NSTextField
property NSColorWell : a reference to current application’s NSColorWell
property NSMenuItem : a reference to current application’s NSMenuItem
property NSBezierPath : a reference to current application’s NSBezierPath
property NSPopUpButton : a reference to current application’s NSPopUpButton
property NSMutableArray : a reference to current application’s NSMutableArray
property NSRunningApplication : a reference to current application’s NSRunningApplication

property returnCode : 0
property pop1ind : 0

–スライド枚数をカウント
tell application "Keynote"
  tell front document
    set sCount to count every slide
  end tell
end tell

–すべてのテキストアイテム、タイトルから色情報を取得する
set cList to {}
repeat with sNum from 1 to sCount
  set cList to cList & getEveryTextColorOfSlide(sNum) of me
end repeat

–文字色のユニーク化
set dList to makeUniqueListOf(cList) of me

set paramObj to {mainDat:dList, myTitle:"テキスト色置換", mySubTitle:"Keynoteのテキストアイテム、デフォルトアイテム(タイトル)の文字色置換", myColorRangeMax:65535}
my getPopupValues:paramObj

if pop1ind = false then return –timed out
set fromCol to (contents of item pop1ind of dList)

–カラーピッカーで置換色選択
set tCol to choose color default color fromCol

–Keynote書類中のテキストの文字色を置換
repeat with sNum from 1 to sCount
  set cList to cList & repEveryTextColorOfSlide(sNum, fromCol, tCol) of me
end repeat

–カラーポップアップメニューをウィンドウ表示
on getPopupValues:paramObj
  set ap1List to (mainDat of (paramObj as record)) as list
  
set winTitle to (myTitle of (paramObj as record)) as string
  
set subTitle to (mySubTitle of (paramObj as record)) as string
  
set aColMax to (myColorRangeMax of (paramObj as record)) as list
  
  
–Viewをつくる
  
set aView to NSView’s alloc()’s initWithFrame:(current application’s NSMakeRect(0, 0, 360, 80))
  
  
–Labelをつくる
  
set a1TF to NSTextField’s alloc()’s initWithFrame:(current application’s NSMakeRect(0, 40, 80, 20))
  
a1TF’s setEditable:false
  
a1TF’s setStringValue:"From Color:"
  
a1TF’s setDrawsBackground:false
  
a1TF’s setBordered:false
  
  
–Ppopup Buttonをつくる
  
set a1Button to NSPopUpButton’s alloc()’s initWithFrame:(current application’s NSMakeRect(80, 40, 200, 20)) pullsDown:false
  
a1Button’s removeAllItems()
  
  
set a1Menu to NSMenu’s alloc()’s init()
  
set aCDB to current application’s DBColorNames’s alloc()’s init()
  
  
–Popup Menuをつくる
  
set iCount to 1
  
repeat with i in ap1List
    copy i to {r1, g1, b1}
    
    
set nsCol to makeNSColorFromRGBAval(r1, g1, b1, aColMax, aColMax) of me
    
set anImage to makeRoundedNSImageWithFilledWithColor(64, 64, nsCol, 4) of me
    
    
–色名をRGB値から動的に生成(あらかじめdbNamesが持っているカラーパレットの近似色の色名を返す)
    
set aTitle to "#" & (iCount as string) & " " & (aCDB’s nameForColor:nsCol) as string
    
    
–Menu Itemを作成する
    
set aMenuItem to (NSMenuItem’s alloc()’s initWithTitle:aTitle action:"actionHandler:" keyEquivalent:"")
    (
aMenuItem’s setImage:anImage)
    (
aMenuItem’s setEnabled:true)
    (
aMenuItem’s setTarget:me)
    (
a1Menu’s addItem:aMenuItem)
    
    
set iCount to iCount + 1
  end repeat
  
  
–Popup ButtonにPopup Menuを設定する
  
a1Button’s setMenu:a1Menu
  
  
–ViewにPopup Buttonとテキストラベルを入れる
  
aView’s addSubview:a1TF
  
aView’s addSubview:a1Button
  
aView’s setNeedsDisplay:true


— set up alert  
  
set theAlert to NSAlert’s alloc()’s init()
  
tell theAlert
    its setMessageText:winTitle
    
its setInformativeText:subTitle
    
its addButtonWithTitle:"OK"
    
its addButtonWithTitle:"Cancel"
    
its setAccessoryView:aView
  end tell
  
  
— show alert in modal loop
  
NSRunningApplication’s currentApplication()’s activateWithOptions:0
  
my performSelectorOnMainThread:"doModal:" withObject:(theAlert) waitUntilDone:true
  
if (my returnCode as number) = 1001 then error number -128
  
  
set s1Val to ((a1Button’s indexOfSelectedItem() as number) + 1)
  
copy s1Val to my pop1ind
end getPopupValues:

on doModal:aParam
  set (my returnCode) to aParam’s runModal()
end doModal:

–Popup Action Handler
on actionHandler:sender
  set aTag to tag of sender as integer
  
set aTitle to title of sender as string
end actionHandler:

–aMaxValを最大値とする数値でNSColorを作成して返す
on makeNSColorFromRGBAval(redValue as integer, greenValue as integer, blueValue as integer, alphaValue as integer, aMaxVal as integer)
  set aRedCocoa to (redValue / aMaxVal) as real
  
set aGreenCocoa to (greenValue / aMaxVal) as real
  
set aBlueCocoa to (blueValue / aMaxVal) as real
  
set aAlphaCocoa to (alphaValue / aMaxVal) as real
  
set aColor to NSColor’s colorWithCalibratedRed:aRedCocoa green:aGreenCocoa blue:aBlueCocoa alpha:aAlphaCocoa
  
return aColor
end makeNSColorFromRGBAval

–指定サイズのNSImageを作成し、指定色で塗ってNSImageで返す
on makeNSImageWithFilledWithColor(aWidth as integer, aHeight as integer, fillColor)
  set anImage to NSImage’s alloc()’s initWithSize:(current application’s NSMakeSize(aWidth, aHeight))
  
anImage’s lockFocus()
  
—
  
set theRect to {{x:0, y:0}, {height:aHeight, width:aWidth}}
  
set theNSBezierPath to NSBezierPath’s bezierPath
  
theNSBezierPath’s appendBezierPathWithRect:theRect
  
—
  
fillColor’s |set|() –色設定
  
theNSBezierPath’s fill() –ぬりつぶし
  
—
  
anImage’s unlockFocus()
  
—
  
return anImage
end makeNSImageWithFilledWithColor

–指定サイズのNSImageを作成し、指定色で塗ってNSImageで返す、anRadiusの半径の角丸で
on makeRoundedNSImageWithFilledWithColor(aWidth as integer, aHeight as integer, fillColor, anRadius as real)
  set anImage to NSImage’s alloc()’s initWithSize:(current application’s NSMakeSize(aWidth, aHeight))
  
anImage’s lockFocus()
  
—
  
set theRect to {{x:0, y:0}, {height:aHeight, width:aWidth}}
  
set theNSBezierPath to NSBezierPath’s bezierPathWithRoundedRect:theRect xRadius:anRadius yRadius:anRadius
  
—
  
fillColor’s |set|() –色設定
  
theNSBezierPath’s fill() –ぬりつぶし
  
—
  
anImage’s unlockFocus()
  
  
return anImage
end makeRoundedNSImageWithFilledWithColor

–最前面のKeynote書類のすべてのスライドから、テキストアイテムとタイトルアイテムの文字色を取得
on getEveryTextColorOfSlide(sNum)
  set cList to {}
  
  
tell application "Keynote"
    tell front document
      set sMax to count every slide
      
if sMax < sNum then return false
      
      
tell slide sNum
        –すべての文字アイテムの先頭の文字の色情報を取得
        
try
          set tCount to count every text item
          
repeat with i from 1 to tCount
            set s1List to color of character 1 of object text of text item i
            
set the end of cList to s1List
          end repeat
        on error
          –set s1List to {}
        end try
        
        
–タイトルの先頭の文字の色情報を取得
        
try
          set s2List to color of character 1 of object text of default title item
          
set the end of cList to s2List
        on error
          set s2List to {}
        end try
      end tell
      
    end tell
  end tell
  
  
return cList
end getEveryTextColorOfSlide

–最前面のKeynote書類の指定番号のスライドで、テキストアイテムとタイトルアイテムの文字色を置換
on repEveryTextColorOfSlide(sNum, fromCol, toCol)
  tell application "Keynote"
    tell front document
      set sMax to count every slide
      
if sMax < sNum then return false
      
      
tell slide sNum
        –すべての文字アイテムの先頭の文字の色情報を置換
        
try
          set tCount to count every text item
          
repeat with i from 1 to tCount
            set s1List to color of character 1 of object text of text item i
            
if s1List = fromCol then
              ignoring application responses
                set color of every character of object text of text item i to toCol
              end ignoring
            end if
          end repeat
        on error
          —
        end try
        
        
–タイトルの先頭の文字の色情報を置換
        
try
          set s2List to color of character 1 of object text of default title item
          
if s2List = fromCol then
            ignoring application responses
              set color of every character of object text of default title item to toCol
            end ignoring
          end if
        on error
          set s2List to {}
        end try
      end tell
      
    end tell
  end tell
end repEveryTextColorOfSlide

–Listのユニーク化
on makeUniqueListOf(theList)
  set theSet to current application’s NSOrderedSet’s orderedSetWithArray:theList
  
return (theSet’s array()) as list
end makeUniqueListOf

★Click Here to Open This Script 

Posted in Color dialog GUI list | Tagged 10.11savvy 10.12savvy 10.13savvy Keynote NSAlert NSBezierPath NSColor NSColorWell NSImage NSIndexSet NSMenu NSMenuItem NSMutableArray NSPopUpButton NSRunningApplication NSTextField NSView | Leave a comment

Keynoteの各slideのtitleから目次のテキストを作成してNumbersの表を作成

Posted on 5月 20, 2019 by Takaaki Naganoya

現在オープン中の最前面のKeynote書類の各スライド(ページ)のタイトルを取得して、Numbersの新規書類上にページとタイトルの一覧表を作成するAppleScriptです。

こういうのが、一番オーソドックスで誰でも「そういうのがあったら楽なのに」と思わせるような用途でしょう。

Keynoteの書類を作成してページ数が増え、タイトル一覧をながめつつ削除したりアップデートしたりする対象を探したいような場合に、このような一覧表を作成させるとわかりやすくて便利です。

本Scriptは本当にありもののルーチンをつなげて最低限の処理を行わせたものですが、さらに手の込んだ処理を行うことも可能です。たとえば、別途Keynote書類をスライド(ページ)ごとに画像書き出ししておいて、Numbersのセル上にプレビュー画像として入れておくとか。あるいは、Keynote書類の各スライドのマスターアイテム名を見て処理を変えるとか。実にいろいろあります。

作成と動作確認はmacOS 10.14.5+Keynote 9.0.2で行っていますが、macOS 10.13/10.12でも動作するはずですしました。

AppleScript名:Keynoteの各slideのtitleから目次のテキストを作成してNumbersの表を作成
—
–  Created by: Takaaki Naganoya
–  Created on: 2019/05/20
—
–  Copyright © 2019 Piyomaru Software, All Rights Reserved

use AppleScript version "2.4" — Yosemite (10.10) or later
use framework "Foundation"
use scripting additions

–Keynoteの各slideのタイトルを取得する
tell application "Keynote"
  tell document 1
    set aList to object text of default title item of every slide
  end tell
end tell

set aLen to (length of aList) + 1 –ヘッダー行の分を+1
set bLen to 2 –data width (columns)

–2D Listを作成する (Page, Title)
set newList to {}
set pCount to 1
repeat with i in aList
  set j to contents of i
  
set the end of newList to {pCount as string, j}
  
set pCount to pCount + 1
end repeat

–Numbersの書類を新規作成して、指定サイズの表を作成する
makeNewNumbersDocumentAndTable(aLen, bLen) of me

–作成した新規書類の表1に2D Listを入れる(ただし、100行分ぐらいを上限とする。それ以上は別途CSVを書き出してオープンさせたほうが圧倒的に高速)I
fillCurrentTable(newList) of me

on fillCurrentTable(aList)
  set aLen to length of aList
  
set aWidth to length of first item of aList
  
  
tell application "Numbers"
    tell front document
      tell active sheet
        tell table 1
          repeat with i from 1 to aLen
            tell row (i + 1)
              set aRowList to contents of item i of aList
              
repeat with ii from 1 to aWidth
                tell cell ii
                  set aTmpData to contents of item ii of aRowList
                  
ignoring application responses
                    set value to aTmpData
                  end ignoring
                end tell
              end repeat
            end tell
          end repeat
        end tell
      end tell
    end tell
  end tell
end fillCurrentTable

on makeNewNumbersDocumentAndTable(aHeight, aWidth)
  tell application "Numbers"
    make new document
    
    
tell front document
      tell active sheet
        delete every table
      end tell
    end tell
    
    
tell front document
      tell active sheet
        set tRes to make new table with properties {row count:aHeight, column count:aWidth}
        
return tRes
      end tell
    end tell
  end tell
end makeNewNumbersDocumentAndTable

★Click Here to Open This Script 

Posted in list | Tagged 10.11savvy 10.12savvy 10.13savvy 10.14savvy Keynote Numbers | Leave a comment

2D Listの行列入れ替え(transpose)

Posted on 5月 16, 2019 by Takaaki Naganoya

2D List(2次元配列)の行列入れ替えを行うAppleScriptです。

本プログラムは前の(2018.1.31に消える前の)Blogに掲載していたものを動作検証を行いつつ再掲載したもので、そもそもはShane StanleyのBridgePlus AppleScript Libraryのドキュメントに掲載されているもの、ほぼそのままです。

BridgePlusの前身であるASObjCExras.frameworkのときにこの機能を見つけて、どうしてこの機能がこの仕様になっているのか、その当時は理解できていませんでした。

2次元配列の回転だけなら、単純にデータを(画像のように)回転させるだけの処理のはずですが(→ 時計まわりに90度回すサンプル)、そういうわけでもない。なんでこんな処理をShaneが書いたのか理解できず、当時は「なーんか使えないメソッドがついてんなー」ぐらいにしか思っていませんでした。

そして、出会ってしまったわけです。この機能がバリバリに必要なデータに。そして、深く理解しました。これはShaneが説明不足すぎです。そして、「致命的に必要な機能」だったので最初からついていたわけです。

ExcelでもNumbersでもGoogle Spreadsheetでも、1レコードといったら行ごとに配置されているのが普通です。プログラマーを10人集めて、2次元配列でそういうデータを表現しろと言われたら、世界中のどこのプログラマーでもだいたい10人とも行ごとにレコードを表現すると思います。

そんな中、1レコード=1行ではなく1レコード=1列とかいうデータがやってきて、途方に暮れたすえにNumbers上で「行と列を転置」機能を利用して縦横の入れ替えを行なって、ハッと気づきました。

 「これや……このためについとったんや」

調べてみたら、ビンゴ! まさに2D Listのtransposeのための機能がBridgePlusの、

SMSForder's colsToRowsIn:① |error|:②

だったわけです。

「プログラミングの身体性」ともいうべきものがあります。実体験をもとにするとデータやオブジェクトをどのように操作すべきなのかを深く理解でき、逆に実体験がともなっていないとまったく理解できないという話であり、これがまさにそれだったのでしょう(AppleScriptってプログラミングの身体性の塊のような気も、、、、一般のプログラマーが仕様だけ読んで組もうとして挫折した話をウンザリするほど聞くもので。実際にアプリケーションを動かしてみないと理解できないことが多すぎです)。

なので、こういう「息を飲むような非常識なデータ」を前に途方に暮れないかぎり、このメソッドの有用性は理解できないと思います(自分がそうだったので)。

AppleScript名:2D Listの行列入れ替え.scptd
—
–  Created by: Takaaki Naganoya
–  Created on: 2019/05/16
—
–  Copyright © 2019 Piyomaru Software, All Rights Reserved
—
use AppleScript version "2.4" — Yosemite (10.10) or later
use framework "Foundation"
use scripting additions
use script "BridgePlus" –https://www.macosxautomation.com/applescript/apps/BridgePlus.html

set aList to {{"r0", "f1", "f2"}, {"r1", "f1r1", "f2r1"}, {"r2", "f1r2", "f2r2"}, {"r3", "f1r3", "f2r3"}}
set bList to transpose2DList(aList) of me
–> {{"r0", "r1", "r2", "r3"}, {"f1", "f1r1", "f1r2", "f1r3"}, {"f2", "f2r1", "f2r2", "f2r3"}}

on transpose2DList(aList as list)
  load framework
  
return (ASify from (current application’s SMSForder’s colsToRowsIn:aList |error|:(missing value)))
end transpose2DList

★Click Here to Open This Script 

Posted in list | Tagged 10.11savvy 10.12savvy 10.13savvy 10.14savvy Excel Numbers | Leave a comment

Keynoteのexport optionsにバグ

Posted on 5月 14, 2019 by Takaaki Naganoya

Keynoteのdocumentをmovieに書き出す(export)際に指定するオプションにバグがあることに気づきました。

AppleScript Users ML上でNigel Garvey氏に検証に付き合っていただきました。同氏にはこの場を借りて感謝の言葉を申し上げる次第です。

確認したのはv8.3および最新のv9.0.2ですが、実際にはv7.1で発生した変更によって起こったものと推測されています。

上記のように、手元のアプリケーションは(ほぼ)すべてのバージョンについてAppleScript用語辞書をHTMLに書き出してあり、diffにより差分チェックを行なっています。赤いタグ(ラベル)がついているのが変更があったバージョンで、この履歴をたどるとv7.0のexport optionsは、

movie format small / medium / large -- format for exported movie.

となっていましたが、Keynote v7.1において、

movie format 360p / 540p / 720p / 1080p / 2160p / native size -- format for exported movie.

と変更されました。実際にこれらのオプションを指定すると、構文確認時にエラーになります。AppleScriptで数値で始まる予約語(例:1080p)や演算記号を含む予約語(例:C++)は使えないので、そもそも言語仕様的に無理なものをsdefに定義しています。Appleの担当者の頭が沸いているとしか思えません。素人以下です。

それぞれ、small / medium / largeというsynonymが定義されているため、{movie format: large}などと入力して構文確認できますが、synonymでしかないため元のキーワードにフォワードされます。結果として、{movie format: 720p} と解釈され、エラーになります。

これは、AppleScriptの処理系の問題ではなくKeynote側の実装が間違っているためです(一切動作確認をしていないんでしょう)。

解決策はとくにありませんが、オリジナルサイズを指定する「native size」オプションだけはエラーにならないため、同オプションを指定するしかないと思います。

AppleScript名:KeynoteからのMovie書き出し
set targetFileHFSPath to (choose file name) as string –かならずファイル拡張子に「.m4v」を指定する必要がある

with timeout of 3600 seconds
  tell application "Keynote"
    export front document to file targetFileHFSPath as QuickTime movie with properties {movie format:native size}
  end tell
end timeout

★Click Here to Open This Script 

Posted in Bug | Tagged 10.11savvy 10.12savvy 10.13savvy 10.14savvy Keynote | 1 Comment

矩形座標同士の衝突判定(共通部分の検出) v3b

Posted on 5月 8, 2019 by Takaaki Naganoya

矩形座標(NSRect)同士の衝突判定を行うAppleScriptのmacOS 10.13以降対応改修版です。

macOS 10.13以降への対応を行う際に注意すべきなのは、NSRectやboundsを取得するScriptが異なる結果を返してこないか、確認を行うことです。

set bRect to current application's NSMakeRect(20, 90, 50, 120)
--> {origin:{x:20.0, y:90.0}, |size|:{width:50.0, height:120.0}}
--> {{20.0, 90.0}, {50.0, 120.0}}--10.13, 10.14, 10.15, 11.0

その中でも矩形同士の衝突(重なり)判定はとくに書き換えが必要な箇所です。

実際に、Adobe Illustratorのデータ上で複数製品のデータが並んで掲載されているケースで、製品ごとに別のマスキングレイヤー上に色違いの矩形を配置することで、その矩形エリア内のIllustratorオブジェクトを特定する処理を行ったときに、本ルーチンを使用していたため(macOS 10.13/14対応のために)書き換えが必要になりました。

macOS 10.13/14対応のための、

{{0.0, 0.0}, {0.0, 0.0}}

の部分が一番重要なポイントです。これが、

{{0, 0}, {0, 0}}

だとうまく動作しません。ここ、ちょっとだけハマりました。

2019/05/10 追記
初版では、NSRectがrecordで返ってくるか(macOS 10.10, 10.11, 10.12)、listで返ってくるか(macOS 10.13, 10.14)をOSのバージョンで判定していました。これは実際のところ間違いではないのですが、OSのバグなのか仕様の公式な変更なのか不明なため、たとえばNSNotFoundの定義値が間違っていたバグなどはmacOS 10.13.1で修正されるなど、マイナーバージョンアップで仕様が変わるケースも観測されています。そのため、OSバージョンを見て判定することは将来的に危険であると判断し、データの型を判定する方法に書き換えました(書き捨てレベルのルーチンなので、型判定を行う書き方もよくしています)。

AppleScript名:矩形座標同士の衝突判定(共通部分の検出) v3b
— Created 2017-03-06 by Takaaki Naganoya
— Modified 2019-05-10 by Takaaki Naganoya
— 2019 Piyomaru Software
use AppleScript version "2.4"
use scripting additions
use framework "Foundation"

set a1Rect to {origin:{x:10, y:10}, |size|:{width:100, height:100}}
set b1Rect to {origin:{x:30, y:30}, |size|:{width:100, height:100}}
set a1Res to detectRectanglesCollision(a1Rect, b1Rect) of me
–>  true
–>  true–macOS 10.13, 10.14

set a4Rect to {origin:{x:0, y:20}, |size|:{width:100, height:10}}
set b4Rect to {origin:{x:1000, y:10000}, |size|:{width:50, height:100}}
set a2Res to detectRectanglesCollision(a4Rect, b4Rect) of me
–>  false
–>  false–macOS 10.13, 10.14

set a3Rect to {origin:{x:30, y:30}, |size|:{width:50, height:50}}
set b3Rect to {origin:{x:10, y:10}, |size|:{width:100, height:100}}
set a3Res to detectRectanglesCollision(a3Rect, b3Rect) of me
–> true
–> true–macOS 10.13, 10.14

set a4Rect to {origin:{x:0, y:20}, |size|:{width:100, height:10}}
set b4Rect to {origin:{x:10, y:10}, |size|:{width:50, height:100}}
set a4Res to detectRectanglesCollision(a4Rect, b4Rect) of me
–> true
–> true–macOS 10.13, 10.14

return {a1Res, a2Res, a3Res, a4Res}

–NSRect同士の衝突判定
on detectRectanglesCollision(aRect, bRect)
  set a1Res to (current application’s NSIntersectionRect(aRect, bRect)) as {record, list}
  
set tmpClass to class of a1Res
  
  
if tmpClass = record then
    –macOS 10.10, 10.11, 10.12
    
return not (a1Res = {origin:{x:0.0, y:0.0}, |size|:{width:0.0, height:0.0}})
  else if tmpClass = list then
    –macOS 10.13 or later
    
return not (a1Res = {{0.0, 0.0}, {0.0, 0.0}})
  end if
end detectRectanglesCollision

★Click Here to Open This Script 

Posted in Record | Tagged 10.11savvy 10.12savvy 10.13savvy 10.14savvy NSRect | 1 Comment

Keynoteで選択中の表を取得する

Posted on 5月 3, 2019 by Takaaki Naganoya

最前面に表示しているKeynote書類中の現在表示中のスライド(ページ)上の選択状態にある表オブジェクトへの参照を求めるAppleScriptです。

Keynote v9.0で、これまで実装されていなかった「selection」が実装されたものの、予約語として存在しているだけで機能アップはしていませんでした(Pages v8.0のついでにアップデート?)。

一方で、同様にselectionが実装されてこなかったにもかかわらず、普通に選択中の表オブジェクトへの参照を取得できているNumbersがあります(ちょっとトリッキーな書き方ですけれども)。

では、そのトリッキーな記述でKeynote上の選択状態にある表オブジェクトへの参照が取得できるのか? という疑問を持って実際に試してみたらできました、というのが本Scriptです。Keynote v8.1+macOS 10.12.6、Keynote v9.0.1+macOS 10.13.6、Keynote v9.0.1+macOS 10.14.4の組み合わせで動作確認しています。

実際に、表オブジェクトを選択して本Scriptを実行すると、表オブジェクトへの参照が得られます。

AppleScript名:Keynoteで選択中の表を取得する
tell application "Keynote"
  tell front document
    tell current slide
      try
        set theTable to first table whose class of selection range is range
      on error
        set tCount to count every table
        
if tCount = 0 then
          error "現在のスライド中に選択状態になっている表オブジェクトが存在しません"
        else
          –選択セルがない場合はTable 1を全選択
          
set theTable to table 1
        end if
      end try
      
      
tell theTable
        set aList to value of every cell
        
–> {1.0, 2.0, 3.0, 4.0, 5.0, 6.0, 7.0, 8.0, 9.0, 10.0, 11.0, 12.0, 13.0, 14.0, 15.0, 16.0, 17.0, 18.0, 19.0, 20.0}
      end tell
    end tell
  end tell
end tell

★Click Here to Open This Script 

Posted in How To | Tagged 10.11savvy 10.12savvy 10.13savvy 10.14savvy Keynote | 1 Comment

アラートダイアログ上にTextField x 2を表示 v2

Posted on 5月 2, 2019 by Takaaki Naganoya

アラートダイアログに簡易UIを実装して便利なダイアログ部品を整備する計画の一環として作成した、アラートダイアログにNSTextFieldを2つ+ラベル用のfield2つを作成して、ユーザーからの数値入力を取得するAppleScriptです。

スクリプトエディタ、ScriptDebuggerの両方で実行できますが、Script Menuから実行するとダイアログが最前面に表示されません。Script Menuから実行する場合にはAppleScript書類の状態で呼び出すのではなく、AppleScriptアプレットに書き出して呼び出すのがよいでしょう。

macOS 10.14上では本Scriptの実行は明確にメインスレッド上で行うことを要求されます。Control-Comand-Rで実行してください。

AppleScript名:アラートダイアログ上にTextField x 2を表示 v2
— Created 2019-05-02 by Takaaki Naganoya
— 2019 Piyomaru Software
use AppleScript version "2.5"
use scripting additions
use framework "Foundation"
use framework "AppKit"

property NSView : a reference to current application’s NSView
property NSAlert : a reference to current application’s NSAlert
property NSTextField : a reference to current application’s NSTextField
property NSRunningApplication : a reference to current application’s NSRunningApplication

property theResult : 0
property returnCode : 0

set paramObj to {myMessage:"Keynoteオブジェクトの2次元詰め込み", mySubMessage:"詰め込み先の矩形サイズを数値で入力してください", mes1:"幅", mes1Default:"900", mes2:"高さ", mes2Default:"500"}

set segRes to my simulateAndRetRect:paramObj
–> {a1Res:900, a2Res:500}

on simulateAndRetRect:paramObj
  –Receive Parameters
  
set aMainMes to (myMessage of paramObj) as string –Main Message
  
set aSubMes to (mySubMessage of paramObj) as string –Sub Message
  
set mes1Label to (mes1 of paramObj) as string –Text Input field 1 Label
  
set mes2Label to (mes2 of paramObj) as string –Text Input field 2 Label
  
set aTextInputString to (mes1Default of paramObj) as string –Text Input field 1 Default value
  
set bTextInputString to (mes2Default of paramObj) as string –Text Input field 2 Default value
  
  
— Create a view
  
set theView to NSView’s alloc()’s initWithFrame:(current application’s NSMakeRect(0, 0, 300, 60))
  
  
— create two input field and their labels pairs
  
–NSTextFields for Input
  
set aTextInput to makeNSTextField(100, 35, 140, 20, true, (aTextInputString), true, true) of me
  
set bTextInput to makeNSTextField(100, 0, 140, 20, true, (bTextInputString), true, true) of me
  
  
–Labels
  
set a1TF to makeNSTextField(0, 35, 100, 20, false, (mes1Label), false, false) of me
  
set a2TF to makeNSTextField(0, 0, 100, 20, false, (mes2Label), false, false) of me
  
  
theView’s setSubviews:{a1TF, aTextInput, a2TF, bTextInput}
  
  
— set up alert
  
set theAlert to NSAlert’s alloc()’s init()
  
tell theAlert
    its setMessageText:aMainMes
    
its setInformativeText:aSubMes
    
its addButtonWithTitle:"OK"
    
its addButtonWithTitle:"Cancel"
    
its setAccessoryView:theView
  end tell
  
  
— show alert in modal loop
  
NSRunningApplication’s currentApplication()’s activateWithOptions:0
  
my performSelectorOnMainThread:"doModal:" withObject:(theAlert) waitUntilDone:true
  
if (my returnCode as number) = 1001 then error number -128
  
  
set s1Val to (aTextInput’s integerValue()) as integer
  
set s2Val to (bTextInput’s integerValue()) as integer
  
  
return {a1Res:s1Val, a2Res:s2Val}
end simulateAndRetRect:

on doModal:aParam
  set (my returnCode) to aParam’s runModal()
end doModal:

on makeNSTextField(xPos as integer, yPos as integer, myWidth as integer, myHeight as integer, editableF as boolean, setVal as string, backgroundF as boolean, borderedF as boolean)
  set aNSString to NSTextField’s alloc()’s initWithFrame:(current application’s NSMakeRect(xPos, yPos, myWidth, myHeight))
  
aNSString’s setEditable:(editableF)
  
aNSString’s setStringValue:(setVal)
  
aNSString’s setDrawsBackground:(backgroundF)
  
aNSString’s setBordered:(borderedF)
  
return aNSString
end makeNSTextField

★Click Here to Open This Script 

Posted in GUI Text | Tagged 10.11savvy 10.12savvy 10.13savvy NSAlert NSRunningApplication NSTextField NSView | Leave a comment

GET method REST API v4.3

Posted on 5月 1, 2019 by Takaaki Naganoya

クラウド系のサービスを呼び出すためのAPIとして一般的なREST APIを呼び出すAppleScriptの最新版(のスケルトン)です。

# v4.2からv4.3にバージョンアップしました(2019/05/02)

macOS 10.10でほぼすべてのAppleScriptランタイムでCocoaの機能が利用できるようになったため、Cocoaの機能を利用してクラウド系サービスを呼び出すことを、割と早い時期から調査していました。

「ほぼすべて」と書いているのは、アプリケーション内蔵のScript Menu(iTunesとか)や、Folder Actionなどの独特なランタイム、あるいはMessages(旧称iChat)のメッセージ受信イベントから呼び出されるAppleScriptランタイムなど、それぞれのアプリケーション独自で実装している処理系についてはCocoaの機能が使えるかどうかは保証のかぎりではないからです。

明確に、当初からクラウドと機械学習をAppleScriptから利用するために、苦労してCocoaの機能を追いかけてきたわけです。その途中でいろいろサードパーティのFrameworkを呼び出せたりして、期待よりも大きな成果を手にしている昨今です。OSの内部機能を直接利用できることのメリットは、処理速度や詳細な情報取得など枚挙にいとまがありません(日本語の慣用句表現なので翻訳しにくいかも?)。

話をクラウドにもどしましょう。REST APIを呼び出すには、同期で実行されるNSURLConnectionを使うのが最も簡単で確実でした。

しかし、同APIは非推奨(近い将来に廃止される)という位置付けになったため、その代わりを探す必要に迫られました。すでにNSURLConnectionを用いて記述したREST API呼び出しのScriptが大量に存在していたからです。

代替APIとしてNSURLSessionが提示されましたが、こちらは非同期実行のみで同期実行モードはありません。いろいろ実験してみたものの、数回に1回ぐらい、サーバーからの応答をつかまえ損ねることがあり、処理時間もNSURLConnection版より長くかかります。

このため、「do shell script経由でcurlコマンドを使って回避するか?」といった回避策を検討していたところです。

そんな中、冗談半分でNSURLSessionを利用したバージョンをほんの少し修正してみたところ、いままでの不安定さが嘘のように安定して結果を得られるようになってきました。これはいい兆候です。

ただし、同時に問題点も見つかってきました。macOS標準装備のScript Editor上で実行する分には問題ないのですが、Script Debugger上で実行すると、macOS 10.12/10.13/10.14共通でサーバーからの応答を取得できず、タイムアウトエラーになります。

初回掲載時(v4.2)にはScript Debugger上でデータ受信を検出できないという問題がありました。データの受信用のプロパティがmissing valueでなければデータを受信した、という判定ロジックがうまく動いていない(どういう仕組みかはわからないものの、missing valueと判断され続けた? ラベル値とproperty名でコンフリクト起こしたかも?)現象が見られました。そこで、データの受信プロパティとデータ受信完了検出のプロパティを明確に分けて判定してみたところ、Script DebuggerやmacOS 10.14上でも問題なく動作することを確認しました。

AppleScript名:GET method REST API v4.3
— Created 2019-05-01 by Takaaki Naganoya
— 2019 Piyomaru Software
use AppleScript version "2.5"
use scripting additions
use framework "Foundation"
use framework "AppKit"

property |NSURL| : a reference to current application’s |NSURL|
property NSString : a reference to current application’s NSString
property NSURLSession : a reference to current application’s NSURLSession
property NSJSONSerialization : a reference to current application’s NSJSONSerialization
property NSMutableURLRequest : a reference to current application’s NSMutableURLRequest
property NSUTF8StringEncoding : a reference to current application’s NSUTF8StringEncoding
property NSURLSessionConfiguration : a reference to current application’s NSURLSessionConfiguration

property retData : missing value
property retCode : 0
property retHeaders : 0
property drecF : false

set reqURLStr to "http://jsonplaceholder.typicode.com/posts"
set aRESTres to callRestGETAPIAndParseResults(reqURLStr, 10) of me
–return retData of aRESTres

set aRESTcode to retCode of aRESTres
–return aRESTcode
–> 200

return retHeaders as record
–> {|content-type|:"application/json; charset=utf-8", Pragma:"no-cache", |x-powered-by|:"Express", |set-cookie|:"__cfduid=dd8b4572e0a59951cc7cf7a1120c368541554964103; expires=Fri, 10-Apr-20 06:28:23 GMT; path=/; domain=.typicode.com; HttpOnly", Server:"cloudflare", Via:"1.1 vegur", |content-encoding|:"gzip", Expires:"Wed, 01 May 2019 15:27:42 GMT", |cf-cache-status|:"HIT", |transfer-encoding|:"Identity", |cache-control|:"public, max-age=14400", |date|:"Wed, 01 May 2019 11:27:42 GMT", |access-control-allow-credentials|:"true", Connection:"keep-alive", |cf-ray|:"4d016861ac759413-NRT", Etag:"W/\"6b80-Ybsq/K6GwwqrYkAsFxqDXGC7DoM\"", Vary:"Origin, Accept-Encoding", |x-content-type-options|:"nosniff"}

on callRestGETAPIAndParseResults(reqURLStr as string, timeoutSec as integer)
  set (my retData) to false
  
set (my retCode) to 0
  
set (my retHeaders) to {}
  
set (my drecF) to false
  
  
set aURL to |NSURL|’s URLWithString:reqURLStr
  
set aRequest to NSMutableURLRequest’s requestWithURL:aURL
  
aRequest’s setHTTPMethod:"GET"
  
aRequest’s setValue:"gzip" forHTTPHeaderField:"Content-Encoding"
  
aRequest’s setValue:"application/json; charset=UTF-8" forHTTPHeaderField:"Content-Type"
  
  
set aConfig to NSURLSessionConfiguration’s defaultSessionConfiguration()
  
set aSession to NSURLSession’s sessionWithConfiguration:aConfig delegate:(me) delegateQueue:(missing value)
  
set aTask to aSession’s dataTaskWithRequest:aRequest
  
  
set hitF to false
  
aTask’s resume() –Start URL Session
  
  
repeat (1000 * timeoutSec) times
    if (my drecF) = true then
      set hitF to true
      
exit repeat
    end if
    
delay ("0.001" as real)
  end repeat
  
  
if hitF = false then error "REST API Timeout Error"
  
  
return {retData:retData, retCode:retCode, retHeaders:retHeaders}
end callRestGETAPIAndParseResults

on URLSession:tmpSession dataTask:tmpTask didReceiveData:tmpData
  parseSessionResults(tmpSession, tmpTask, tmpData) of me
  
set (my drecF) to true
end URLSession:dataTask:didReceiveData:

–ないとエラーになるので足した。とくに何もしていない
on URLSession:tmpSession dataTask:tmpTask willCacheResponse:cacheRes completionHandler:aHandler
  —
end URLSession:dataTask:willCacheResponse:completionHandler:

on parseSessionResults(aSession, aTask, tmpData)
  set aRes to aTask’s response()
  
set (my retCode) to aRes’s statusCode()
  
set (my retHeaders) to aRes’s allHeaderFields()
  
  
set resStr to NSString’s alloc()’s initWithData:tmpData encoding:(NSUTF8StringEncoding)
  
set jsonString to NSString’s stringWithString:(resStr)
  
  
set jsonData to jsonString’s dataUsingEncoding:(NSUTF8StringEncoding)
  
set aJsonDict to NSJSONSerialization’s JSONObjectWithData:jsonData options:0 |error|:(missing value)
  
  
set (my retData) to aJsonDict as list of string or string –as anything
end parseSessionResults

★Click Here to Open This Script 

Posted in REST API URL | Tagged 10.11savvy 10.12savvy 10.13savvy 10.14savvy NSJSONSerialization NSMutableURLRequest NSString NSURL NSURLSession NSURLSessionConfiguration | 3 Comments

各種GUI要素なしでSafari上に新規ウィンドウ表示

Posted on 4月 29, 2019 by Takaaki Naganoya

Safari上で操作ボタンなどのGUI要素を表示しないで新規ウィンドウ表示するAppleScriptです。

1つのウィンドウを表示するのはすぐにできましたが、複数表示が大変でした(ーー; 結局、適宜delayコマンドで時間待ちをする必要があったのでした。やれやれー。

現時点で用途はまったく不明なのですが、いつか必要になることもあるでしょう(そういうの多いな!)。「resizable=no」という指定をしているのに、ウィンドウがリサイズできるあたりはご愛嬌。

ちなみに、Safariのdocumentが1つ以上存在することを前提条件としていますが、そこは省略して明示していません(初心者がひっかかりがちな「不明確な前提条件」なのですが本説明をもってかえさせていただきます)。

Twitter上でロシアのMacユーザーが「だれかAppleScriptについて教えてくれー」と言っていたので、「Google翻訳の範囲でなら(込み入った話でなければ)いいぞ」と返信したら、マンツーマンでやりとり。

初のロシア人とのチャットです。

本ScriptのおおもとになったAppleScriptをAlfred.appを使ってキーボードショートカットで呼び出していたそうで、1アクションから1つのサイトをオープンするだけなのが不満で、複数のサイト(URL)をオープンするように変更したかったとのこと。

Google翻訳を使ってコミュニケーションしてみて、いろいろ理解しました。

(1)ロシア人、とっても普通

(2)話した相手がプログラミングわからない人だったので、いろいろ追加で話をされたが、プログラマーが一番嫌がる内容(最初からゴール地点が設定されていない)になってきたので「ここから先は仕事としてならやるが、ギャラなしだったらやらない」と明言して打ち切り

(3)Google翻訳を通じて「ロシア語に翻訳できない表現」がいろいろあって焦る。おそらく、英語ほどには日本語との間の翻訳の用例が多く蓄積されておらず、翻訳できなかったものと想像。一応、日本語→ロシア語に翻訳してから、その文章を再度日本語に再翻訳してチェック。トンでもない表現に翻訳されて驚愕するも、何例か日本語の表現を変えてリトライ

あとから振り返って考えると、「日本語からロシア語に翻訳するより、英語からロシア語に翻訳した方がよかった」、「ダスビダーニャ(До свидания)って挨拶は知っていたのに使えなかったよ、ハラショー」といったところでしょうか。

あとは、固定でプログラム中にURLのデータを入れておかないで、外部ファイル……たとえばNumbers書類上のデータであるとか、DragThingのURLランチャーに登録してある現在選択中のタブからURLを取得してオープンするとかいった処理が考えられると「お、頑張ったね」というレベルでしょうか。

AppleScript名:各種GUI要素なしでSafari上に新規ウィンドウ表示
set aURLstr to "http://piyocast.com/as"

tell application "Safari"
  tell front document
    set jsStr to "open(’" & aURLstr & "’, ’test’,’scrollbars=no,resizable=no,status=no,location=no," & "toolbar=no,menubar=no,width=1024,height=720,left=0,top=0’);"
    
do JavaScript jsStr
  end tell
end tell

★Click Here to Open This Script 

AppleScript名:各種GUI要素なしでSafari上に新規ウィンドウを複数表示
set aURLarray to {"http://piyocast.com/as", "http://www.apple.com", "http://www.microsoft.com"}

repeat with i in aURLarray
  set j to contents of i
  
openNewWindowWithoutGUIElements(j) of me
  
delay 3
end repeat

on openNewWindowWithoutGUIElements(aURLstr)
  set aNum to random number from 1 to 999
  
tell application "Safari"
    tell front document
      set jsStr to ("open(’" & aURLstr & "’, ’test" & aNum as string) & "’,’scrollbars=no,resizable=no,status=no,location=no," & "toolbar=no,menubar=no,width=1024,height=720,left=0,top=0’);"
      
do JavaScript jsStr
    end tell
  end tell
end openNewWindowWithoutGUIElements

★Click Here to Open This Script 

Posted in JavaScript list URL | Tagged 10.11savvy 10.12savvy 10.13savvy 10.14savvy Safari | Leave a comment

順序変更可能な項目選択ダイアログ

Posted on 4月 28, 2019 by Takaaki Naganoya

順序の変更が可能な項目選択(指定)ダイアログ表示AppleScriptです。

項目を行単位でドラッグ&ドロップして順番を変更できるようになっています。この機能を自前で作ろうとすると、筆舌に尽くし難いほど大変なのでMyriad Tables Libを利用して作ってみました。

Myriad Tables Libはたいへんに多機能なライブラリですが、あえて限定された機能だけを利用してみるというのもアリでしょう。

なにげに、仕事で実際に納品するプログラムによく使っています、Myriad Tables Lib。

AppleScript名:順序変更可能な項目選択ダイアログ.scpt
—
–  Created by: Takaaki Naganoya
–  Created on: 2019/04/28
—
–  Copyright © 2019 Piyomaru Software, All Rights Reserved
—
use AppleScript version "2.4"
use framework "Foundation"
use framework "AppKit"
use scripting additions
use script "Myriad Tables Lib" version "1.0.9" –https://www.macosxautomation.com/applescript/apps/Script_Libs.html

set aTitle to "順番を指定してください"
set aPrompt to "各行はドラッグ&ドロップで順序を変更できます"
set origData to {"iMac 5K", "MacBook Pro", "Mac mini", "MacBook Air", "MacBook", "Mac Pro", "iMac Pro"}

set selRowList to dispDroppableTableViewDialog(aTitle, aPrompt, origData) of me
–>{"Mac mini", "MacBook Air", "MacBook", "Mac Pro", "MacBook Pro", "iMac 5K", "iMac Pro"}

–順序変更可能なダイアログを表示
on dispDroppableTableViewDialog(aTitle, aPrompt, origData)
  set someData to make1DListTo2D(origData) of me
  
  
set myTable to make new table with data someData with title aTitle with prompt aPrompt initially selected rows {1} with multiple selections allowed
  
set theAccessoryView to current application’s NSView’s alloc()’s initWithFrame:(current application’s NSMakeRect(0, 0, 400, 0))
  
modify table myTable accessory view theAccessoryView with row dragging
  
  
set theResult to (display table myTable)
  
  
set selList to values returned of theResult
  
set sel2List to FlattenList(selList) of me
  
  
return sel2List
end dispDroppableTableViewDialog

–1D Listを2D Listに変換
on make1DListTo2D(aList as list)
  set outList to {}
  
repeat with i in aList
    set j to contents of i
    
set the end of outList to {j}
  end repeat
  
return outList
end make1DListTo2D

on FlattenList(aList)
  set oldDelims to AppleScript’s text item delimiters
  
set AppleScript’s text item delimiters to {"????"}
  
set aString to aList as text
  
set aList to text items of aString
  
set AppleScript’s text item delimiters to oldDelims
  
return aList
end FlattenList

★Click Here to Open This Script 

Posted in dialog GUI | Tagged 10.11savvy 10.12savvy 10.13savvy NSView | Leave a comment

クリップボードに入れられた画像をNSImageに変換して1Dバーコード認識

Posted on 4月 28, 2019 by Takaaki Naganoya

クリップボードに入れたバーコード画像をNSImageに変換して1Dバーコード認識して内容をデコードするAppleScriptです。

–> Download ZXingObjC.framework(To ~/Library/Frameworks)

1Dバーコード認識には定番の「ZXingObjC」を利用しているのですが、同プログラムは派生プロジェクトが多く、いまひとつどれを使っているのか、自分自身も正確に把握していなかったりします。

カメラからの入力映像から1次元バーコード認識を行うプログラムは多いのですが、画像から認識するプログラムはそれほどみかけません。さらに、それに輪をかけて、入力画像形式がNSImageではなくCGImageである場合が多く、ZXingでも入力はCGImage。

AppleScriptから生成できないCGImage。NSImageから直接の変換メソッドをAppleScript上で利用できないCGImage。

そこで、SFPSDWriterのコメントに書いてあったコードを参考に、NSImageで入力した画像をCGImageに変換して処理するメソッドをObjective-Cで追加して、AppleScriptから呼び出しやすく書き換えて呼び出してみました(オリジナルに「initWithNSImage:」というメソッドは実装されていません)。

実際には、Adobe IllustratorやAdobe InDesignにリンクされたバーコード画像素材をチェックするような用途を想定しています(実際、やっているので)。QRコード画像をデコードするScriptは用意していたものの、1D Bar Code画像をデコードするものを用意していなかったので、再調査。JANはEANとほとんど同じなので大丈夫でしたが、その他の日本マイナーなバーコード規格(郵便コードとか)については未調査のためわかりません。

ちなみに、本FrameworkはQRコードをサポートしているため、JANコード(1Dバーコード)とQRコード(2Dバーコード)の両方を同一Scriptでデコードできました。Illustratorオブジェクトで作られたバーコードを適宜クリップボードを経由してPDF化したものをデコードしてみたのですが、1Dバーコードと2Dバーコードのチェックに別々のルーチンを用意しないとダメだろうと覚悟していたところに、両方とも同じメソッド呼び出しでデコードできてしまい拍子抜け。

macOS 10.14上ではScript Debuggerで実行するか、AppleScriptをバンドル形式で保存してバンドル内にFrameworkを入れアプレット書き出しするとか、SIPによるプロテクションを解除するなどの方法で呼び出せます(Script Debuggerを使うのが一番いいでしょう)。

AppleScript名:クリップボードに入れられた画像をNSImageに変換して1Dバーコード認識.scptd
— Created 2015-09-20 by Takaaki Naganoya
— Modified 2019-04-27 by Takaaki Naganoya
— 2019 Piyomaru Software
use AppleScript version "2.4"
use scripting additions
use framework "Foundation"
use framework "AppKit"
use framework "ZXingObjC" –https://github.com/TheLevelUp/ZXingObjC

–クリップボードの内容をNSImageに
set aNSIMage to my getClipboardASImage()

–NSImageをバーコードとして認識する
set aSource to current application’s ZXCGImageLuminanceSource’s alloc()’s initWithNSImage:aNSIMage
set aBitmap to current application’s ZXBinaryBitmap’s binaryBitmapWithBinarizer:(current application’s ZXHybridBinarizer’s binarizerWithSource:aSource)

set aHints to current application’s ZXDecodeHints’s hints()
set aReader to current application’s ZXMultiFormatReader’s reader()
set aResult to aReader’s decode:(aBitmap) hints:(aHints) |error|:(missing value)

if aResult is equal to missing value then return false
set aCon to (aResult’s |text|()) as string
set aFormat to aResult’s barcodeFormat()

return {aCon, aFormat}

— クリップボードの内容をNSImageとして取り出して返す
on getClipboardASImage()
  set theNSPasteboard to current application’s NSPasteboard’s generalPasteboard()
  
set theAttributedStringNSArray to theNSPasteboard’s readObjectsForClasses:({current application’s NSImage}) options:(missing value)
  
set theNSAttributedString to theAttributedStringNSArray’s objectAtIndex:0
  
return theNSAttributedString
end getClipboardASImage

★Click Here to Open This Script 

Posted in Clipboard Image | Tagged 10.11savvy 10.12savvy 10.13savvy 10.14savvy NSPasteboard | Leave a comment

RectangleBinPackを用いて2D Bin Packを解く

Posted on 4月 23, 2019 by Takaaki Naganoya

オープンソースの「RectangleBinPack」を用いて2D Bin Packagingを解き、Keynote上のshapeオブジェクトを指定矩形内に詰め込むAppleScriptです。

–> Download Script bundle with RectangleBinPack in its bundle

# This AppleScript requires RectangleBinPack executable in its bundle. So, download the whole AppleScript bundle archive from the link above (↑)

オープン中のKeynote書類の表示中のスライド(ページ)上にある矩形オブジェクト(Shape)を指定の矩形エリア内に2D Packingします。

github上で調査してみたところ、2D Bin Packのプログラムの多くはCないしC++で記述されており(JavaScriptも多いですね)、コンパイルしてAppleScriptのバンドル内に入れて呼び出せます。

ただし、それらの多くがゲーム開発用のものらしく、オブジェクトの回転をサポートしていたり(実用性を考えると回転してほしくない)、面積の大きな順に渡しても無視したり(優先順位をサポートしない)と、実際のGUIアプリケーション上のオブジェクトの整列には向いていないものがほとんどです。


▲Before Packing


▲AFter Packing

唯一、タグクラウドの画像を作りたい場合に本プログラムは向いていると思います。とくに、Keynoteのスライド上にタグクラウドっぽいページを作って、発表内容を示すとかいうのは実用性もありそうです。


▲本Scriptを文字アイテム処理用に書き換えて2D Bin Packした処理結果


▲本ScriptをAdobe Illustrator CC 2018用に書き換えて2D Bin Packした処理結果

AppleScript名:rectBinPack v2.scptd
—
–  Created by: Takaaki Naganoya
–  Created on: 2019/04/23
—
–  Copyright © 2019 Piyomaru Software, All Rights Reserved
—
use AppleScript version "2.4" — Yosemite (10.10) or later
use framework "Foundation"
use scripting additions
use bPlus : script "BridgePlus" –https://www.macosxautomation.com/applescript/apps/BridgePlus.html

–Packaging Target Area
set binSizeX to 600
set binSizeY to 500

set {tList, a0List} to retRectsFromKeynote() of me
set aList to sortList2DDecending(a0List, {2, 4, 3}) of me –Sorting key is Width(main) and Area(sub) and Height(sub)
–> {{2, 340, 243, 82620}, {3, 340, 73, 24820}, {8, 340, 73, 24820}, {1, 155, 240, 37200}, {4, 147, 125, 18375}, {5, 147, 125, 18375}, {6, 147, 125, 18375}, {7, 147, 125, 18375}}

set aRes to twoDBinPacking(binSizeX, binSizeY, aList) of me
if aRes = false then return
–> {{myPos:{0, 0}, myID:1}, {myPos:{0, 340}, myID:2}, {myPos:{243, 0}, myID:3}, {myPos:{316, 0}, myID:4}, {myPos:{340, 240}, myID:5}, {myPos:{465, 240}, myID:6}, {myPos:{590, 0}, myID:7}, {myPos:{590, 125}, myID:8}}

tell application "Keynote"
  tell front document
    tell current slide
      repeat with i in aRes
        set {posX, posY} to myPos of i
        
set itemIndex to myID of i
        
set aDeg to myDegree of i
        
        
set anObjID to item 1 of (item itemIndex of aList)
        
        
set rotation of shape anObjID to aDeg
        
set position of shape anObjID to {posX, posY}
        
      end repeat
    end tell
  end tell
end tell

on twoDBinPacking(binSizeX as integer, binSizeY as integer, boxList as list)
  set aParamList to {binSizeX, binSizeY}
  
repeat with i in boxList
    copy i to {tmpID, tmpX, tmpY, tmpArea}
    
set aParamList to aParamList & tmpX
    
set aParamList to aParamList & tmpY
  end repeat
  
  
set aParam to retDelimitedText(aParamList, " ") of me
  
–> "800 800 340 243 340 73 340 73 155 240 147 125 147 125 147 125 147 125"
  
  
–Parameters for result parsing
  
set s1Str to "Packed to (x,y)=("
  
set s2Str to ")"
  
set s3Str to ","
  
  
–https://github.com/juj/RectangleBinPack
  
set aPath to POSIX path of (path to resource "BinPackTest") –cause error if "BinPackTest" is not present in this script bundle
  
try
    set aRes to do shell script quoted form of aPath & " " & aParam
  on error
    return false
  end try
  
  
if aRes does not end with "Done. All rectangles packed." then return false
  
  
set aList to paragraphs of aRes
  
  
set bList to {}
  
set aCount to 1
  
repeat with i in aList
    set j to contents of i
    
if j begins with "Packing rectangle of size " and j does not contain "Failed!" then
      set xyRes to pickUpFromToStrAndParse(j, s1Str, s2Str, s3Str) of me
      
      
–RectangleBinPackがオブジェクトの回転をサポートしているため、その対処
      
if xyRes is not equal to false then
        set s11Str to "(w,h)=("
        
set s12Str to ")"
        
set s13Str to ","
        
        
set whRes to pickUpFromToStrAndParse(j, s11Str, s12Str, s13Str) of me
        
set tmpBox to item aCount of boxList
        
copy tmpBox to {tmpID, tmpX, tmpY, tmpArea}
        
        
if whRes = {tmpX, tmpY} then
          set aDeg to 0
        else if whRes = {tmpY, tmpX} then
          set aDeg to 90
        else
          error
        end if
        
        
set the end of bList to {myPos:xyRes, myID:aCount, myDegree:aDeg}
      end if
      
set aCount to aCount + 1
    end if
  end repeat
  
  
return bList
end twoDBinPacking

on pickUpFromToStrAndParse(aStr as string, s1Str as string, s2Str as string, s3Str as string)
  set a1Offset to offset of s1Str in aStr
  
if a1Offset = 0 then return false
  
set bStr to text (a1Offset + (length of s1Str)) thru -1 of aStr
  
  
set a2Offset to offset of s2Str in bStr
  
if a2Offset = 0 then return false
  
  
set cStr to text 1 thru (a2Offset – (length of s2Str)) of bStr
  
set {x, y} to parseByDelim(cStr, s3Str) of me
  
  
return {x as integer, y as integer}
end pickUpFromToStrAndParse

on parseByDelim(aData, aDelim)
  set curDelim to AppleScript’s text item delimiters
  
set AppleScript’s text item delimiters to aDelim
  
set dList to text items of aData
  
set AppleScript’s text item delimiters to curDelim
  
return dList
end parseByDelim

–リストを指定デリミタでテキスト化
on retDelimitedText(aList, aNewDelim)
  set aText to ""
  
set curDelim to AppleScript’s text item delimiters
  
set AppleScript’s text item delimiters to aNewDelim
  
set aText to aList as text
  
set AppleScript’s text item delimiters to curDelim
  
return aText
end retDelimitedText

on retRectsFromKeynote()
  tell application "Keynote"
    tell front document
      tell current slide
        set tList to every shape
        
set bList to {}
        
set iCount to 1
        
        
repeat with i in tList
          set aWidth to width of i
          
set aHeight to height of i
          
set {xPos, yPos} to position of i
          
set anArea to aWidth * aHeight
          
          
set the end of bList to {iCount, aWidth, aHeight, anArea}
          
set iCount to iCount + 1
        end repeat
        
        
return {tList, bList}
      end tell
    end tell
  end tell
end retRectsFromKeynote

–入れ子のリストを昇順ソート
on sortList2DAscending(a, keyItem)
  return sort2DList(a, keyItem, {true}) of me
end sortList2DAscending

–入れ子のリストを降順ソート
on sortList2DDecending(a, keyItem)
  return sort2DList(a, keyItem, {false}) of me
end sortList2DDecending

–2D Listをソート
on sort2DList(aList as list, sortIndexes as list, sortOrders as list)
  load framework
  
  
–index値をAS流(アイテムが1はじまり)からCocoa流(アイテムが0はじまり)に変換
  
set newIndex to {}
  
repeat with i in sortIndexes
    set j to contents of i
    
set j to j – 1
    
set the end of newIndex to j
  end repeat
  
  
–Sort TypeのListを作成(あえて外部から指定する内容でもない)
  
set sortTypes to {}
  
repeat (length of sortIndexes) times
    set the end of sortTypes to "compare:"
  end repeat
  
  
–Sort
  
set resList to (current application’s SMSForder’s subarraysIn:(aList) sortedByIndexes:newIndex ascending:sortOrders sortTypes:sortTypes |error|:(missing value)) as {missing value, list}
  
  
return resList
end sort2DList

★Click Here to Open This Script 

Posted in 2D Bin Packing list Record Sort | Tagged 10.11savvy 10.12savvy 10.13savvy 10.14savvy Keynote | 1 Comment

packit4meを利用して3D Bin Packingを解く

Posted on 4月 20, 2019 by Takaaki Naganoya

指定の広さの空間(Bin)に任意のサイズのブロックの組み合わせを最適化して詰め込むPackingの問題を解くAppleScriptです。

→ 別途、2D Bin PackingのAppleScriptを掲載しています「RectangleBinPackを用いて2D Bin Packを解く」

身の回りのさまざまな用途で利用されている2D/3D Bin Packing。ところが、実際に使ってみたいと思っても、使い勝手のよいプログラムが見当たりません。Cocoa Frameworkになっていて、NSRectをリストで渡すと結果を返してくれるようなものが個人的には理想的ですが、そういう仕様のものはほぼありません(完全にないわけではないものの、使い物にならない、、、)。

そこで、一応自分でも2D Bin Packing処理をAppleScriptで書いたものの、「ぴよまるソフトウェア」内で相談したところ外部公開はしにくい状況。

そうはいっても、2D Bin Packingを利用したあんな用途やこんな用途が山のようにあるので、外部のプログラムを呼び出してみるのがよいだろうかと(ふたたび)考え出したときに、まさかのREST APIで2D/3D Bin Packingの機能を提供しているpackit4meを発見(よく見つかったな)。

Web APIを呼び出して、3D Bin Packingを計算します。よくあるREST APIなので、プログラミングではなく「作業」のレベルで対処できます。

で、3D Bin Packingはいいものの、本命の2D Bin Packingを計算。

Keynote上のオブジェクトから情報を取得して….

packit4meで2D Bin Packを解かせてみると、Web上の3Dプレビュー(↑)はともかく、JSON(↓)で返してくる値が割とむちゃくちゃ。

[{"size": "40 x 30","id": "0","size_1": 40,"size_2": 30,"weight_limit": 3,"curr_weight": 3,"item_count": 3,"items": [{"id": "2","orig_size": "17 x 12","sp_size": "17 x 12","size_1": 17,"size_2": 12,"sp_size_1": 17,"sp_size_2": 12,"x_origin_in_bin": -11.5,"y_origin_in_bin": -9,"weight": 1,"constraints": 0},{"id": "1","orig_size": "7 x 12","sp_size": "7 x 12","size_1": 7,"size_2": 12,"sp_size_1": 7,"sp_size_2": 12,"x_origin_in_bin": 0.5,"y_origin_in_bin": -9,"weight": 1,"constraints": 0},{"id": "3","orig_size": "17 x 3","sp_size": "17 x 3","size_1": 17,"size_2": 3,"sp_size_1": 17,"sp_size_2": 3,"x_origin_in_bin": -11.5,"y_origin_in_bin": -1.5,"weight": 1,"constraints": 0}]}]

座標値にマイナスの値が含まれているなどうまく動いていない印象を受けます(制約条件が違うんだろか?)。

少なくとも、作者は2D Bin PackのJSON出力は検証していないのではないでしょうか、、、、残念!

AppleScript名:POST method REST API_packit4me
— Created 2019-04-20 by Takaaki Naganoya
— 2019 Piyomaru Software
use AppleScript version "2.5"
use scripting additions
use framework "Foundation"

property |NSURL| : a reference to current application’s |NSURL|
property NSString : a reference to current application’s NSString
property NSJSONSerialization : a reference to current application’s NSJSONSerialization
property NSUTF8StringEncoding : a reference to current application’s NSUTF8StringEncoding

set aBinPack to "bins=0:50:5x5x5&items=0:0:0:1x2x3,0:0:0:1x2x3,0:0:0:1x2x3&binId=0"

set aRes to binPackByPackIt4me(aBinPack) of me
–> {size_1:5, size_2:5, size_3:5, |id|:"0", weight_limit:50, curr_weight:0, |size|:"5 x 5 x 5", item_count:3, |items|:{{|id|:"0", sp_size_3:3, x_origin_in_bin:-2, orig_size:"1 x 2 x 3", weight:0, sp_size:"1 x 2 x 3", y_origin_in_bin:-1.5, constraints:0, size_3:3, sp_size_1:1, z_origin_in_bin:1, size_2:2, sp_size_2:2, size_1:1}, {|id|:"0", sp_size_3:3, x_origin_in_bin:-1, orig_size:"1 x 2 x 3", weight:0, sp_size:"1 x 2 x 3", y_origin_in_bin:-1.5, constraints:0, size_3:3, sp_size_1:1, z_origin_in_bin:1, size_2:2, sp_size_2:2, size_1:1}, {|id|:"0", sp_size_3:3, x_origin_in_bin:-2, orig_size:"1 x 2 x 3", weight:0, sp_size:"1 x 2 x 3", y_origin_in_bin:0.5, constraints:0, size_3:3, sp_size_1:1, z_origin_in_bin:1, size_2:2, sp_size_2:2, size_1:1}}}

on binPackByPackIt4me(aBinPack as string)
  set tmpData to (do shell script "curl -X POST -H \"Content-Type: application/x-www-form-urlencoded\" -d \"" & aBinPack & "\" http://www.packit4me.com/api/call/raw")
  
set jsonString to NSString’s stringWithString:tmpData
  
set jsonData to jsonString’s dataUsingEncoding:(NSUTF8StringEncoding)
  
set aJsonDict to NSJSONSerialization’s JSONObjectWithData:jsonData options:0 |error|:(missing value)
  
set aRec to aJsonDict as record
  
return aRec
end binPackByPackIt4me

★Click Here to Open This Script 

Posted in 2D Bin Packing list Record REST API | Tagged 10.11savvy 10.12savvy 10.13savvy 10.14savvy NSJSONSerialization NSString NSURL NSUTF8StringEncoding | Leave a comment

Numbersで指定の2つの書類のデータのdiffを取る

Posted on 4月 19, 2019 by Takaaki Naganoya

指定の2つのNumbers書類(の中の現在表示中のシートのTable 1)同士のdiffを取るAppleScriptです。

# 書類内のシート内のどの表を処理するか、という階層化された対象選択を行うのにNSOutlineViewを用いたアラートダイアログを作っておきたい気持ちでいっぱいです

バージョン違いの書類間の差分を検出してレポートします。差分の評価は行単位で行なっており、同じデータでもカラムの順番を変えてあったりすると「別物」として検出します。

ただし、Numbersから2次元配列としてデータを抽出する際にすべてAppleScriptで処理するように書き換えた(macOS 10.14対策)ルーチンを使用しているので、大規模データの処理を行わせると(データ取得処理部分は)遅くなる可能性があります。

diffの計算部分はCocoaの機能に依存した(甘えまくった)処理を行なっているため、データが大きくてもそれほど遅くなりません。

612行の旧データと610行の新データをそれぞれ取得して差分を計算するのに、開発環境でだいたい3.5秒ぐらいです。同じ環境でBridgePlusを用いて1D List–> 2D List変換を行うバージョンを試してみたら、0.83秒ぐらいでした。

AppleScript名:Numbersで指定の2つの書類のデータのdiffを取る.scptd
—
–  Created by: Takaaki Naganoya
–  Created on: 2019/04/19
—
–  Copyright © 2019 Piyomaru Software, All Rights Reserved
—

use AppleScript version "2.4" — Yosemite (10.10) or later
use framework "Foundation"
use scripting additions

tell application "Numbers"
  set dList to name of every document
  
set oldDoc to contents of first item of (choose from list dList with prompt "古いデータを選択してください")
  
set newDoc to contents of first item of (choose from list dList with prompt "新しいデータを選択してください")
end tell

set oldData to get2DListFromADoc(oldDoc) of me
set newData to get2DListFromADoc(newDoc) of me

–List同士のDiffを計算する
set dRes to getDiffBetweenLists(oldData, newData) of me
–> {addItems:{{"キャッツアイ恵庭", 42.87588548, 141.5834606, "北海道 恵庭市 住吉町 2-9-1"}}, minusItems:{{"セガワールド白河", 37.11931521, 140.1944139, "福島県 白河市 新高山 1-1 メガステージ白河内"}, {"プレイアイシー", 35.3721071, 139.272272, "神奈川県 秦野市 南矢名 1-15-1"}, {"駅前スタジアムIII", 33.8395736, 132.7521903, "愛媛県 松山市 大手町 2-4-1"}}}

on get2DListFromADoc(aDocName)
  tell application "Numbers"
    tell document aDocName
      tell active sheet
        set theTable to table 1
        
        
tell theTable
          set selection range to cell range
          
          
set hcCount to header column count
          
set hrCount to header row count
          
set frCount to footer row count
          
          
set cCount to column count
          
set rCount to row count
          
          
set outList to {}
          
          
repeat with i from (hrCount + 1) to rCount
            tell row i
              set tmpList to value of cells (hcCount + 1) thru cCount
              
set the end of outList to tmpList
            end tell
          end repeat
        end tell
        
        
return outList
        
      end tell
    end tell
  end tell
end get2DListFromADoc

on getDiffBetweenLists(aArray as list, bArray as list)
  set allSet to current application’s NSMutableSet’s setWithArray:aArray
  
allSet’s addObjectsFromArray:bArray
  
  
–重複する要素のみ抜き出す
  
set duplicateSet to current application’s NSMutableSet’s setWithArray:aArray
  
duplicateSet’s intersectSet:(current application’s NSSet’s setWithArray:bArray)
  
  
–重複部分を削除する
  
allSet’s minusSet:duplicateSet
  
set resArray to (allSet’s allObjects()) as list
  
  
set aSet to current application’s NSMutableSet’s setWithArray:aArray
  
set bSet to current application’s NSMutableSet’s setWithArray:resArray
  
aSet’s intersectSet:bSet –積集合
  
set addRes to aSet’s allObjects() as list
  
  
set cSet to current application’s NSMutableSet’s setWithArray:bArray
  
cSet’s intersectSet:bSet –積集合
  
set minusRes to cSet’s allObjects() as list
  
  
return {addItems:minusRes, minusItems:addRes}
end getDiffBetweenLists

★Click Here to Open This Script 

Posted in list | Tagged 10.11savvy 10.12savvy 10.13savvy 10.14savvy NSMutableSet NSSet Numbers | Leave a comment

レコードのリストを複数Keyでソート

Posted on 4月 19, 2019 by Takaaki Naganoya

リストに入れたレコードを複数キー、キーごとのソート方向(ascending/descending)指定でソートするAppleScriptです。

ソート対象のラベルはサンプルのように階層構造ごと指定できます。キーとして列挙するラベルは、最初のものが主キーで、2番目以降はサブキーです。

AppleScript名:レコードのリストを複数Keyでソート.scptd
—
–  Created by: Takaaki Naganoya
–  Created on: 2019/04/19
—
–  Copyright © 2019 Piyomaru Software, All Rights Reserved
—
use AppleScript version "2.5"
use scripting additions
use framework "Foundation"

set aRecList to {{aName:"piyoko", aVal:10, bVal:{x:3, y:1}}, {aName:"piyomaru", aVal:20, bVal:{x:5, y:2}}, {aName:"piyoo", aVal:20, bVal:{x:4, y:5}}, {aName:"piyozo", aVal:10, bVal:{x:10, y:9}}}

set bList to sortRecListByLabel(aRecList, {"aVal", "bVal.x"}, {true, false}) of me
–> {{aName:"piyozo", aVal:10, bVal:{x:10, y:9}}, {aName:"piyoko", aVal:10, bVal:{x:3, y:1}}, {aName:"piyomaru", aVal:20, bVal:{x:5, y:2}}, {aName:"piyoo", aVal:20, bVal:{x:4, y:5}}}

–リストに入れたレコードを、指定の属性ラベルの値でソート
on sortRecListByLabel(aRecList as list, aLabelStr as list, ascendF as list)
  set aArray to current application’s NSArray’s arrayWithArray:aRecList
  
  
set aCount to length of aLabelStr
  
set sortDescArray to current application’s NSMutableArray’s new()
  
repeat with i from 1 to aCount
    set aLabel to (item i of aLabelStr)
    
set aKey to (item i of ascendF)
    
set sortDesc to (current application’s NSSortDescriptor’s alloc()’s initWithKey:aLabel ascending:aKey)
    (
sortDescArray’s addObject:sortDesc)
  end repeat
  
  
return (aArray’s sortedArrayUsingDescriptors:sortDescArray) as list
end sortRecListByLabel

★Click Here to Open This Script 

Posted in list Record Sort | Tagged 10.11savvy 10.12savvy 10.13savvy 10.14savvy NSArray NSMutableArray NSSortDescriptor | Leave a comment

Numbersの表を回転

Posted on 4月 18, 2019 by Takaaki Naganoya

Numbers書類上の現在のシートの指定の表を回転させるAppleScriptです。

画像のようにぐるぐる回すわけではなく、90度回転状態と通常状態を切り替えるようです。


▲初期状態


▲transpose1回実行


▲transpose2回実行

AppleScript名:Numbersの表を回転
tell application "Numbers"
  tell front document
    tell active sheet
      tell table 1
        transpose
      end tell
    end tell
  end tell
end tell

★Click Here to Open This Script 

Posted in How To | Tagged 10.11savvy 10.12savvy 10.13savvy 10.14savvy Numbers | 1 Comment

Google Sheets URLから正規表現でIDを抽出 v2

Posted on 4月 18, 2019 by Takaaki Naganoya

文字列で与えられたGoogle SpreadSheetsのURLから正規表現の機能を用いてSheets IDを抽出するAppleScriptです。

初回掲載時の内容にShane Stanleyから「長さが0の文字列」(zero length string)に対応できていないので、変更したほうがいいよ、という助言をもらったので書き換えました(Thanks Shane!)。

AppleScript名:Google Sheets URLから正規表現でIDを抽出 v2
— Created 2019-04-18 by Takaaki Naganoya
— Modified 2019-04-19 by Shane Stanley
use AppleScript version "2.5" –macOS 10.11 or later
use scripting additions
use framework "Foundation"

property NSString : a reference to current application’s NSString
property NSRegularExpressionSearch : a reference to current application’s NSRegularExpressionSearch

–https://developers.google.com/sheets/guides/concepts?hl=ja
set aURLText to "https://docs.google.com/spreadsheets/d/1qpyC0XzvTcKT6EISywvqESX3A0MwQoFDE8p-Bll4hps/edit#gid=0
"

set sheetsID to (stripGoogleSheetsIDFromURL(aURLText) of me) as string
–> "1qpyC0XzvTcKT6EISywvqESX3A0MwQoFDE8p-Bll4hps"

set aURLText to "" –Zero Length String
set sheetsID to (stripGoogleSheetsIDFromURL(aURLText) of me) as string
–> ""

on stripGoogleSheetsIDFromURL(aText as string)
  set sStrHead to "/spreadsheets/d/"
  
set regStr to sStrHead & "([a-zA-Z0-9-_]+)"
  
  
set anNSString to NSString’s stringWithString:aText
  
set aRange to anNSString’s rangeOfString:regStr options:(NSRegularExpressionSearch)
  
  
–if aRange = {location:0, length:0} then return ""–v1
  
if |length| of aRange = 0 then return "" –Prepare for zero length strings(Thanks Shane!)
  
  
set bStr to anNSString’s substringWithRange:aRange
  
set theString to bStr’s stringByReplacingOccurrencesOfString:sStrHead withString:"" options:(NSRegularExpressionSearch) range:{location:0, |length|:length of sStrHead}
  
  
return theString as string
end stripGoogleSheetsIDFromURL

★Click Here to Open This Script 

Posted in regexp Text URL | Tagged 10.11savvy 10.12savvy 10.13savvy 10.14savvy NSRegularExpressionSearch NSString | Leave a comment

Keynote上で選択中のオブジェクトのRectangleを合成

Posted on 4月 17, 2019 by Takaaki Naganoya

Keynoteでオープン中の書類の現在表示中の(選択中の)スライド(ページ)上のshapeオブジェクトの矩形領域をすべて合成したRectangleのshapeオブジェクトを作成するAppleScriptです。

本来はほかの動作を行うプログラムの試作品なのですが、いまのところNSRectの合成を行うのが目的になっています。

PlaneなAppleScriptとCocoaの機能の両方を組み合わせないと実現できない機能でもあり、もうひと押しですごい処理ができそうな気がしないでもありません。

Keynote v9.xであらたにAppleScript用語辞書に記載された「selection」はまだfront documentやcurrent slideのレベルでしか動作しておらず、slide上で選択中のiWork itemや各Object中のobject textの選択部分を取得できたりはしないので注意が必要です。


▲実行前


▲実行後

AppleScript名:Keynote上で選択中のオブジェクトのRectangleを合成
—
–  Created by: Takaaki Naganoya
–  Created on: 2019/04/17
—
–  Copyright © 2019 Piyomaru Software, All Rights Reserved
—
use AppleScript version "2.4"
use scripting additions
use framework "Foundation"

property totalRect : missing value

tell application "Keynote"
  tell front document
    tell current slide
      –SelectionがまだKeynoteでうまく働いていないので、そのかわり
      
set aaList to every iWork item
      
set aList to {}
      
repeat with i in aaList
        if (class of i) is in {shape} then
          set the end of aList to contents of i
        end if
      end repeat
      
      
–最初のアイテムを取り出す
      
set aFirst to contents of first item of aList
      
set {x1Pos, y1Pos} to position of aFirst
      
set aHeight to height of aFirst
      
set aWidth to width of aFirst
      
set my totalRect to {origin:{x:x1Pos, y:y1Pos}, |size|:{|width|:aWidth, |height|:aHeight}}
      
      
–残りのアイテムをNSRectに変換しつつ加算      
      
set aList to rest of aList
      
      
repeat with i in aList
        set aProp to properties of i
        
set aHeight to height of aProp
        
set aWidth to width of aProp
        
set anArea to aHeight * aWidth
        
set {x2Pos, y2Pos} to position of i
        
        
set tmpRect to {origin:{x:x2Pos, y:y2Pos}, |size|:{|width|:aWidth, |height|:aHeight}}
        
calcUnionRect(tmpRect) of me –Rectangleの加算を行う        
      end repeat
      
      
–Rectangleを合成した大きさと位置でshapeを新規作成
      
set tRect to (totalRect as record)
      
set newProp to {position:{(x of origin of tRect), (y of origin of tRect)}, width:(|width| of |size| of tRect), height:(|height| of |size| of tRect)}
      
set newShape to make new shape with properties newProp
      
set opacity of newShape to 30
    end tell
    
  end tell
end tell

on calcUnionRect(addRect)
  set totalRect to current application’s NSUnionRect(totalRect, addRect)
end calcUnionRect

★Click Here to Open This Script 

Posted in list Record | Tagged 10.11savvy 10.12savvy 10.13savvy 10.14savvy Keynote NSRect | Leave a comment

TerminalですべてのテーマのWindowを新規作成する

Posted on 4月 15, 2019 by Takaaki Naganoya

Terminal.appで実行環境に登録されているすべてのTerminalのテーマのWindowを新規オープンするAppleScriptです。

実行環境のTerminal.appに登録されている「プロファイル」をリストアップし、各プロファイル(AppleScript用語辞書的には「settings set」)で新規Windowを作成します。

本プログラムは、Terminal.appの機能確認のためのものであって、これ自体に意味はありません。

AppleScript名:TerminalですべてのテーマのWindowを新規作成する
— Created 2019-04-14 by Takaaki Naganoya
— 2019 Piyomaru Software

tell application "Terminal"
  set nList to name of every settings set
  
  
repeat with i in nList
    set j to contents of i
    
changeSettingAndMakeNewWindow(j) of me
  end repeat
end tell

on changeSettingAndMakeNewWindow(aTheme as string)
  tell application "Terminal"
    set tmpID to settings set aTheme
    
set default settings to tmpID
    
set startup settings to tmpID
    
    
tell window 1
      do script ""
      
activate
    end tell
  end tell
end changeSettingAndMakeNewWindow

★Click Here to Open This Script 

Posted in How To | Tagged 10.11savvy 10.12savvy 10.13savvy 10.14savvy Terminal | Leave a comment

指定MIME TypeのUTI文字列などを取得する

Posted on 4月 14, 2019 by Takaaki Naganoya

指定MIME TypeからUTIの文字列などのさまざまな情報を取得するAppleScriptです。

漠然と身の回りにファイル拡張子、UTI、MIME-typeなどの情報が転がっていますが、それぞれの意味を考え直すと、向き不向きというか想定されている利用シーンなどが大幅に異なります。

種類 内容説明
ファイル拡張子 ファイルの形式を一意に特定するもの。ただし、「.jpg」「.jpeg」など若干の表記ゆらぎを許容。詐称できてしまう
UTI ファイルのmacOS上での形式を一意に特定するもの。OS側が判断するものだが、拡張子次第。ただし、ゆらぎがない。UTI同士は階層構造を形成しており、上位のUTI(public.image)を指定することで下位UTIもまとめて指定できたりする
MIME-type 当該のファイルがインターネット上のファイル交換時にどのように受け取られるかを示す識別子。AppleScriptバンドルは拡張子「.scptd」で、UTIは「com.apple.applescript.script-bundle」だが、MIME-typeを取得すると「inode/directory」となる

と、ずいぶん違います。指定のファイルからMIME-typeを取得するだけであれば、こんな感じでしょうか。ただ、拡張子からMIME-typeを取得したり、MIME-typeからUTIを求めたりと、相互に変換する場合には(変換に意味がある場合には)いろいろと道具が必要です。

AppleScript名:指定ファイルからMIME-typeを取得する.scptd
—
–  Created by: Takaaki Naganoya
–  Created on: 2019/04/14
—
–  Copyright © 2019 Piyomaru Software, All Rights Reserved
—

set aFile to POSIX path of (choose file)
set mRes to do shell script "/usr/bin/file -b –mime-type " & quoted form of aFile
–> "text/html"

★Click Here to Open This Script 

UTI.frameworkを用いる場合にはこちら。

UTI.frameworkをビルドして使用しています。macOS 10.11/10.12/10.13では~/Library/Frameworksにインストールしてスクリプトエディタ上で本Scriptを実行すると記述どおりの結果が得られます。

macOS 10.14ではScript Debuggerを使用するか、あるいはSIPを解除してスクリプトエディタ上で実行することが可能です。自分でビルドして自分でCode Signしたコードぐらい、ホームディレクトリ下で勝手に実行させてほしいものです。

–> UTI.framework (To ~/Library/Frameworks)

AppleScript名:指定MIME TypeのUTI文字列などを取得する.scptd
—
–  Created by: Takaaki Naganoya
–  Created on: 2019/04/12
—
–  Copyright © 2019 Piyomaru Software, All Rights Reserved
—

use AppleScript version "2.4" — Yosemite (10.10) or later
use framework "Foundation"
use framework "UTI" –https://github.com/macmade/objc-uti
use scripting additions

set aUTIObj to (current application’s UTI’s UTIWithMIMEType:"image/gif")

set aRes to aUTIObj’s identifier()
–> com.compuserve.gif

set aRes to aUTIObj’s |description|() as string
–> "Graphics Interchange Format(GIF)"

set aRes to aUTIObj’s preferredOSType() as string
–> "GIFf"

set aRes to aUTIObj’s isDynamic() as boolean
–> false

set aRes to aUTIObj’s preferredFilenameExtension() as string
–> "gif"

set aRes to aUTIObj’s preferredMIMEType() as string
–> "image/gif"

set aRes to aUTIObj’s preferredNSPboardType() as string
–> "missing value"

set aRes to aUTIObj’s declaration() as record
–> {UTTypeIdentifier:"com.compuserve.gif", UTTypeDescription:"Graphics Interchange Format (GIF)", UTTypeTagSpecification:{|com.apple.ostype|:{"GIFf"}, |public.mime-type|:{"image/gif"}, |public.filename-extension|:{"gif"}}, UTTypeConformsTo:{"public.image"}}

set aRes to aUTIObj’s declaringBundleURL()’s |path|() as string
–> "/System/Library/CoreServices/CoreTypes.bundle"

set aRes to aUTIObj’s tagSpecifications() as record
–> {|com.apple.ostype|:{"GIFf"}, |public.mime-type|:{"image/gif"}, |public.filename-extension|:{"gif"}}

set aRes to aUTIObj’s conformsTo() as list
–> {"public.image"}

set aRes to aUTIObj’s referenceURL()
–> missing value

set aRes to aUTIObj’s |version|()
–> missing value

★Click Here to Open This Script 

Posted in file MIME UTI | Tagged 10.11savvy 10.12savvy 10.13savvy 10.14savvy | Leave a comment

Post navigation

  • Older posts
  • Newer posts

電子書籍(PDF)をオンラインストアで販売中!

Google Search

Popular posts

  • 開発機としてM2 Mac miniが来たのでガチレビュー
  • CotEditorで2つの書類の行単位での差分検出
  • macOS 15, Sequoia
  • 指定のWordファイルをPDFに書き出す
  • Pages本執筆中に、2つの書類モード切り替えに気がついた
  • Numbersで選択範囲のセルの前後の空白を削除
  • メキシカンハットの描画
  • Pixelmator Pro v3.6.4でAppleScriptからの操作時の挙動に違和感が
  • AdobeがInDesign v19.4からPOSIX pathを採用
  • AppleScriptによる並列処理
  • Safariで「プロファイル」機能を使うとAppleScriptの処理に影響
  • Cocoa Scripting Course 続刊計画
  • macOS 14.xでScript Menuの実行速度が大幅に下がるバグ
  • AppleScript入門③AppleScriptを使った「自動化」とは?
  • NaturalLanguage.frameworkでNLEmbeddingの処理が可能な言語をチェック
  • Keynote/Pagesで選択中の表カラムの幅を均等割
  • Keynote、Pages、Numbers Ver.14.0が登場
  • macOS 15 リモートApple Eventsにバグ?
  • デフォルトインストールされたフォント名を取得するAppleScript
  • AppleScript入門① AppleScriptってなんだろう?

Tags

10.11savvy (1101) 10.12savvy (1242) 10.13savvy (1391) 10.14savvy (587) 10.15savvy (438) 11.0savvy (283) 12.0savvy (212) 13.0savvy (193) 14.0savvy (145) 15.0savvy (127) CotEditor (66) Finder (51) iTunes (19) Keynote (116) NSAlert (61) NSArray (51) NSBitmapImageRep (20) NSBundle (20) NSButton (34) NSColor (53) NSDictionary (28) NSFileManager (23) NSFont (21) NSImage (41) NSJSONSerialization (21) NSMutableArray (63) NSMutableDictionary (22) NSPredicate (36) NSRunningApplication (56) NSScreen (30) NSScrollView (22) NSString (119) NSURL (98) NSURLRequest (23) NSUTF8StringEncoding (30) NSView (33) NSWorkspace (20) Numbers (76) Pages (54) Safari (44) Script Editor (27) WKUserContentController (21) WKUserScript (20) WKWebView (23) WKWebViewConfiguration (22)

カテゴリー

  • 2D Bin Packing
  • 3D
  • AirDrop
  • AirPlay
  • Animation
  • AppleScript Application on Xcode
  • Beginner
  • Benchmark
  • beta
  • Bluetooth
  • Books
  • boolean
  • bounds
  • Bug
  • Calendar
  • call by reference
  • check sum
  • Clipboard
  • Cocoa-AppleScript Applet
  • Code Sign
  • Color
  • Custom Class
  • date
  • dialog
  • diff
  • drive
  • Droplet
  • exif
  • file
  • File path
  • filter
  • folder
  • Font
  • Font
  • GAME
  • geolocation
  • GUI
  • GUI Scripting
  • Hex
  • History
  • How To
  • iCloud
  • Icon
  • Image
  • Input Method
  • Internet
  • iOS App
  • JavaScript
  • JSON
  • JXA
  • Keychain
  • Keychain
  • Language
  • Library
  • list
  • Locale
  • Localize
  • Machine Learning
  • Map
  • Markdown
  • Menu
  • Metadata
  • MIDI
  • MIME
  • Natural Language Processing
  • Network
  • news
  • Noification
  • Notarization
  • Number
  • Object control
  • OCR
  • OSA
  • parallel processing
  • PDF
  • Peripheral
  • PRODUCTS
  • QR Code
  • Raw AppleEvent Code
  • Record
  • rectangle
  • recursive call
  • regexp
  • Release
  • Remote Control
  • Require Control-Command-R to run
  • REST API
  • Review
  • RTF
  • Sandbox
  • Screen Saver
  • Script Libraries
  • sdef
  • search
  • Security
  • selection
  • shell script
  • Shortcuts Workflow
  • Sort
  • Sound
  • Spellchecker
  • Spotlight
  • SVG
  • System
  • Tag
  • Telephony
  • Text
  • Text to Speech
  • timezone
  • Tools
  • Update
  • URL
  • UTI
  • Web Contents Control
  • WiFi
  • XML
  • XML-RPC
  • イベント(Event)
  • 未分類

アーカイブ

  • 2025年4月
  • 2025年3月
  • 2025年2月
  • 2025年1月
  • 2024年12月
  • 2024年11月
  • 2024年10月
  • 2024年9月
  • 2024年8月
  • 2024年7月
  • 2024年6月
  • 2024年5月
  • 2024年4月
  • 2024年3月
  • 2024年2月
  • 2024年1月
  • 2023年12月
  • 2023年11月
  • 2023年10月
  • 2023年9月
  • 2023年8月
  • 2023年7月
  • 2023年6月
  • 2023年5月
  • 2023年4月
  • 2023年3月
  • 2023年2月
  • 2023年1月
  • 2022年12月
  • 2022年11月
  • 2022年10月
  • 2022年9月
  • 2022年8月
  • 2022年7月
  • 2022年6月
  • 2022年5月
  • 2022年4月
  • 2022年3月
  • 2022年2月
  • 2022年1月
  • 2021年12月
  • 2021年11月
  • 2021年10月
  • 2021年9月
  • 2021年8月
  • 2021年7月
  • 2021年6月
  • 2021年5月
  • 2021年4月
  • 2021年3月
  • 2021年2月
  • 2021年1月
  • 2020年12月
  • 2020年11月
  • 2020年10月
  • 2020年9月
  • 2020年8月
  • 2020年7月
  • 2020年6月
  • 2020年5月
  • 2020年4月
  • 2020年3月
  • 2020年2月
  • 2020年1月
  • 2019年12月
  • 2019年11月
  • 2019年10月
  • 2019年9月
  • 2019年8月
  • 2019年7月
  • 2019年6月
  • 2019年5月
  • 2019年4月
  • 2019年3月
  • 2019年2月
  • 2019年1月
  • 2018年12月
  • 2018年11月
  • 2018年10月
  • 2018年9月
  • 2018年8月
  • 2018年7月
  • 2018年6月
  • 2018年5月
  • 2018年4月
  • 2018年3月
  • 2018年2月

https://piyomarusoft.booth.pm/items/301502

メタ情報

  • ログイン
  • 投稿フィード
  • コメントフィード
  • WordPress.org

Forum Posts

  • 人気のトピック
  • 返信がないトピック

メタ情報

  • ログイン
  • 投稿フィード
  • コメントフィード
  • WordPress.org
Proudly powered by WordPress
Theme: Flint by Star Verte LLC