Menu

Skip to content
AppleScriptの穴
  • Home
  • Products
  • Books
  • Docs
  • Events
  • Forum
  • About This Blog
  • License
  • 仕事依頼

AppleScriptの穴

Useful & Practical AppleScript archive. Click '★Click Here to Open This Script' Link to download each AppleScript

カテゴリー: file

クリップボードに入れたIllustratorのオブジェクトをQRコード認識

Posted on 7月 27, 2019 by Takaaki Naganoya

Adobe Illustrator書類上にある、QRコードのオブジェクトをクリップボード経由でNSImageに変換してQRコード認識するAppleScriptです。QRコード認識には、オープンソースのZXingObjCをCocoa Framework化したものを使っています。

–> Download recogClipAsQR.scptd (Including Framework)

ことのはじまりは、Adobe Illustrator書類上になにがしかのプラグインで作成されたとおぼしきQRコードのオブジェクトが配置されていたことです。これをデコードして内容が正しいか、デコードしたURLは実在するものかといったチェックをする必要がありました(もっと大きなプログラムの一部として)。

これはけっこうな難問でした。AI書類全体をPDFや他の形式の画像として書き出したものを認識させてみたものの、なかなかQRコードとして認識してくれません。

いろいろ試行錯誤していくうちに、AI書類を構成する各部品ごとに画像書き出しして認識させると、QRコードとして認識したりしました。

結局、AI書類上の各種オブジェクト(QRコードはグループ化されていたので、group item)にアクセスし、クリップボード経由で(いったんコピーして)画像に書き出すと認識してくれました。

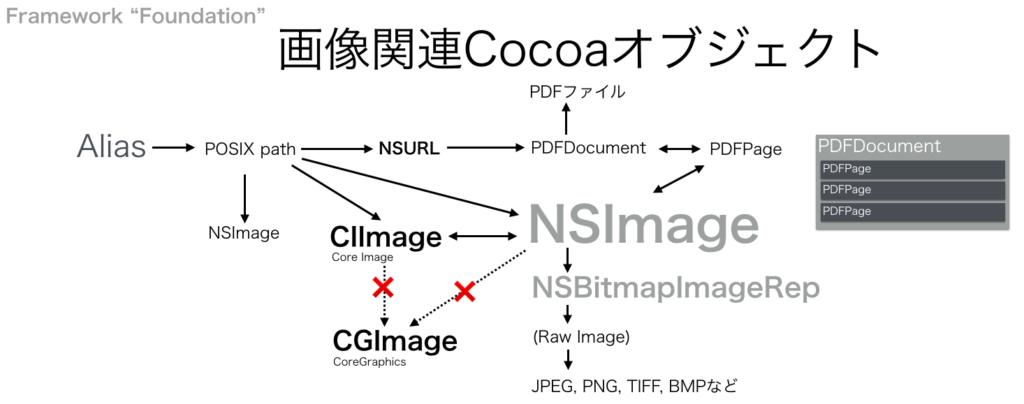
ファイルに書き出すオーバーヘッドを減らしたかったので、クリップボードの内容をそのままNSImageとして取得。ここで、AppleScriptの標準搭載命令(the clipboard)からCocoaのNSPasteBoardを使うように変更したことで、大幅なスピードアップを図れました。クリップボード経由でデータ変換するやりかたは、データが小さければ手軽かつ便利でいいのですが、データが大きくなると処理に時間がかかってたいへんです。主にClassic Mac OSの時代によく使われていた方法でもあります(macOS上でもごくたまに使いますが、こういうやり方をなくそうというのがClassic Mac OSからMac OS Xへの移行時のScripter間の共通認識だったので、なるべく避けていたんですね)。

かくして、Adobe Illustrator上でコピーしておいたQRコードのオブジェクトを、クリップボード(ペーストボード)経由でQRコードとしてデコードするものができ、便利に使っています。

本Scriptは、

macOS 10.12.x:スクリプトエディタ、Script Debugger
macOS 10.13.x:スクリプトエディタ、Script Debugger
macOS 10.14.x:Script Debugger、マシンのSIPを解除してあればスクリプトエディタ上でも動作

という環境で動作します。macOS 10.14.x上でSIPを解除していない状態でも、アプレット書き出しした状態であればバンドル内のFrameworkを読み込んで動作します。

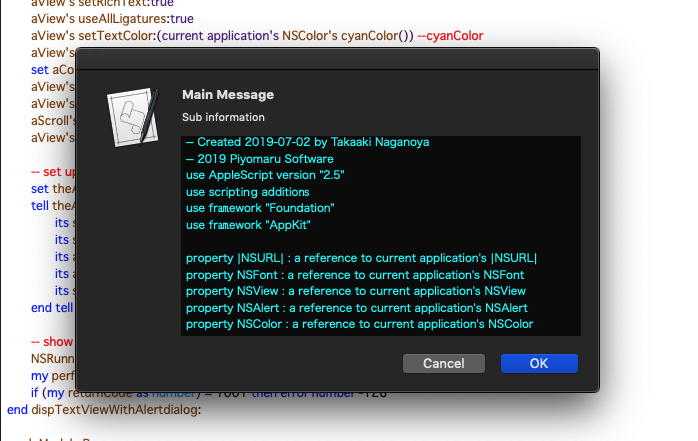
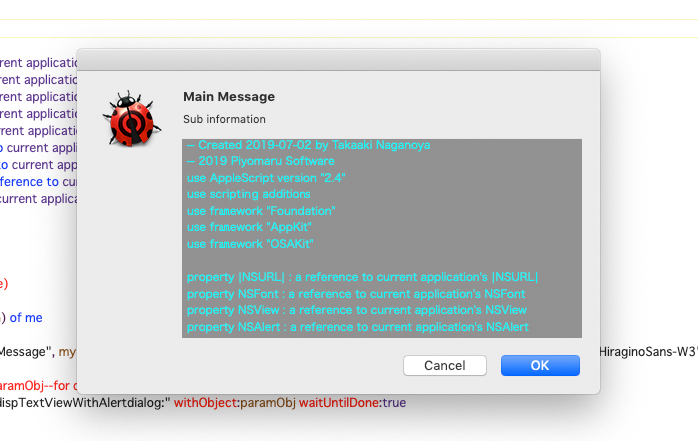
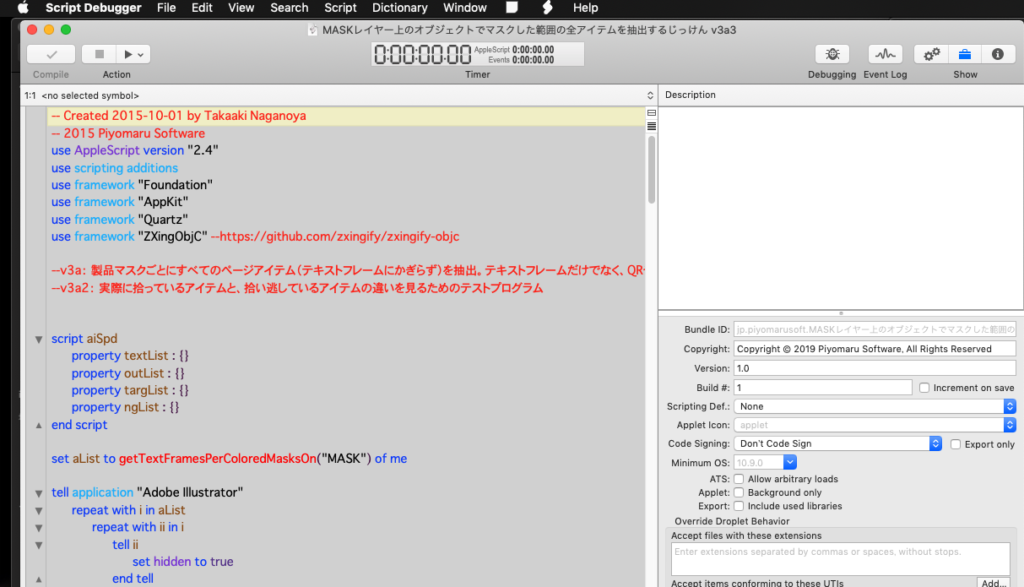
AppleScript名:recogClipAsQR.scptd
— Created 2019-07-20 by Takaaki Naganoya
— 2019 Piyomaru Software
use AppleScript version "2.4"
use scripting additions
use framework "Foundation"
use framework "AppKit"
use framework "ZXingObjC" –https://github.com/TheLevelUp/ZXingObjC

property NSImage : a reference to current application’s NSImage
property NSPasteboard : a reference to current application’s NSPasteboard
property ZXDecodeHints : a reference to current application’s ZXDecodeHints
property ZXBinaryBitmap : a reference to current application’s ZXBinaryBitmap
property ZXHybridBinarizer : a reference to current application’s ZXHybridBinarizer
property ZXMultiFormatReader : a reference to current application’s ZXMultiFormatReader
property ZXCGImageLuminanceSource : a reference to current application’s ZXCGImageLuminanceSource

set qrRes to recogClipboardASQR() of me
–> {"http://xxxxxxxxxxxxxxxxxxx", 11}

–クリップボードの内容をNSImageに
on recogClipboardASQR()
  set aNSIMage to my getClipboardASImage()
  
if aNSIMage = false then return false
  
set aRes to recogNSIMageAsBarcodes(aNSIMage, 11) of me –11: kBarcodeFormatQRCode
  
return aRes
end recogClipboardASQR

–NSImageをQRコードとして認識する
on recogNSIMageAsBarcodes(aNSIMage, aHintType)
  set aSource to ZXCGImageLuminanceSource’s alloc()’s initWithNSImage:(aNSIMage)
  
set aBitmap to ZXBinaryBitmap’s binaryBitmapWithBinarizer:(ZXHybridBinarizer’s binarizerWithSource:(aSource))
  
  
–https://github.com/zxingify/zxingify-objc/blob/master/ZXingObjC/core/ZXBarcodeFormat.h
  
set aHints to ZXDecodeHints’s hints()
  
aHints’s addPossibleFormat:(aHintType)
  
  
set aReader to ZXMultiFormatReader’s reader()
  
set aResult to aReader’s decode:(aBitmap) hints:(aHints) |error|:(missing value)
  
  
if aResult is equal to missing value then return false
  
set aCon to (aResult’s |text|()) as string
  
set aFormat to aResult’s barcodeFormat()
  
  
return {aCon, aFormat}
end recogNSIMageAsBarcodes

— クリップボードの内容をNSImageとして取り出して返す
on getClipboardASImage()
  set theNSPasteboard to NSPasteboard’s generalPasteboard()
  
set anArray to theNSPasteboard’s readObjectsForClasses:({NSImage}) options:(missing value)
  
if anArray = missing value or (anArray as list) = {} then return false
  
set aRes to anArray’s objectAtIndex:0
  
return aRes
end getClipboardASImage

★Click Here to Open This Script 

Posted in Clipboard file Image QR Code | Tagged 10.12savvy 10.13savvy 10.14savvy NSImage NSPasteboard | 1 Comment

指定画像をPNG形式(グレースケール)で保存

Posted on 7月 9, 2019 by Takaaki Naganoya

指定の画像ファイルをグレースケールのPNG画像ファイルに変換するAppleScriptです。

Appleが配布しているMNISTの手書き数字画像の認識CoreMLモデルをCocoa Framework化してみたところ、グレースケールの画像を要求されたため、画像をグレースケール化するルーチンを作ってみました。

結局、MNISTの手書き画像認識はうまく行かなかったのですが(全部「0」が返ってくる、、、)、グレースケール変換ルーチンは実用的だったので載せておくことにしました。

AppleScript名:指定画像をPNG形式(グレースケール)で保存
— Created 2019-07-09 by Takaaki Naganoya
— 2019 Piyomaru Software
use AppleScript version "2.4"
use scripting additions
use framework "Foundation"
use framework "AppKit"

property NSUUID : a reference to current application’s NSUUID
property NSString : a reference to current application’s NSString
property NSImage : a reference to current application’s NSImage
property NSColorSpace : a reference to current application’s NSColorSpace
property NSPNGFileType : a reference to current application’s NSPNGFileType
property NSBitmapImageRep : a reference to current application’s NSBitmapImageRep
property NSColorRenderingIntentPerceptual : a reference to current application’s NSColorRenderingIntentPerceptual

set aFile to POSIX path of (choose file of type {"public.image"} with prompt "Select Image A")
set aImage to NSImage’s alloc()’s initWithContentsOfFile:aFile

set fRes to retUUIDfilePath(aFile, "png") of me
set sRes to saveNSImageAtPathAsGreyPNG(aImage, fRes) of me

–指定ファイルパスを元にUUIDのファイル名、指定拡張子をつけたファイルパスを作成して返す
on retUUIDfilePath(aPath, aEXT)
  set aUUIDstr to (NSUUID’s UUID()’s UUIDString()) as string
  
set aPath to ((NSString’s stringWithString:aPath)’s stringByDeletingLastPathComponent()’s stringByAppendingPathComponent:aUUIDstr)’s stringByAppendingPathExtension:aEXT
  
return aPath
end retUUIDfilePath

–NSImageを指定パスにPNG形式で保存
on saveNSImageAtPathAsGreyPNG(anImage, outPath)
  set imageRep to anImage’s TIFFRepresentation()
  
set aRawimg to NSBitmapImageRep’s imageRepWithData:imageRep
  
  
–ビットマップをグレースケール変換
  
set bRawimg to convBitMapToDeviceGrey(aRawimg) of me
  
  
set pathString to NSString’s stringWithString:outPath
  
set newPath to pathString’s stringByExpandingTildeInPath()
  
  
set myNewImageData to (bRawimg’s representationUsingType:(NSPNGFileType) |properties|:(missing value))
  
set aRes to (myNewImageData’s writeToFile:newPath atomically:true) as boolean
  
return aRes –true/false
end saveNSImageAtPathAsGreyPNG

–NSBitmapImageRepをグレースケールに変換する
on convBitMapToDeviceGrey(aBitmap)
  set aSpace to NSColorSpace’s deviceGrayColorSpace()
  
set bRawimg to aBitmap’s bitmapImageRepByConvertingToColorSpace:aSpace renderingIntent:(NSColorRenderingIntentPerceptual)
  
return bRawimg
end convBitMapToDeviceGrey

★Click Here to Open This Script 

AppleScript名:指定画像をグレースケールのNSImageに変換
— Created 2019-07-09 by Takaaki Naganoya
— 2019 Piyomaru Software
use AppleScript version "2.4"
use scripting additions
use framework "Foundation"
use framework "AppKit"

property NSUUID : a reference to current application’s NSUUID
property NSString : a reference to current application’s NSString
property NSImage : a reference to current application’s NSImage
property NSColorSpace : a reference to current application’s NSColorSpace
property NSBitmapImageRep : a reference to current application’s NSBitmapImageRep
property NSColorRenderingIntentDefault : a reference to current application’s NSColorRenderingIntentDefault

set aFile to POSIX path of (choose file of type {"public.image"} with prompt "Select Image")
set aImage to NSImage’s alloc()’s initWithContentsOfFile:aFile

set nsImageRes to convNSImageAsGrey(aImage) of me

–NSImageをグレースケールに変換する(NSImageで入出力)
on convNSImageAsGrey(anImage)
  set imageRep to anImage’s TIFFRepresentation()
  
set aRawimg to NSBitmapImageRep’s imageRepWithData:imageRep
  
set aSpace to NSColorSpace’s deviceGrayColorSpace()
  
set bRawimg to aRawimg’s bitmapImageRepByConvertingToColorSpace:aSpace renderingIntent:(NSColorRenderingIntentDefault)
  
set outImage to NSImage’s alloc()’s initWithSize:(bRawimg’s |size|())
  
outImage’s addRepresentation:(bRawimg)
  
return outImage
end convNSImageAsGrey

★Click Here to Open This Script 

Posted in Color file File path Image | Tagged 10.11savvy 10.12savvy 10.13savvy 10.14savvy NSBitmapImageRep NSColorRenderingIntentPerceptual NSColorSpace NSImage NSPNGFileType NSString NSUUID | Leave a comment

アラートダイアログ上にTextViewを表示

Posted on 7月 8, 2019 by Takaaki Naganoya

アラートダイアログ上にTextViewを表示して、指定のテキストを閲覧するAppleScriptです。

とくにこれといって何か表示するものを思いつかなかったので、自分自身のソースコードを取得して表示しています。スクリプトエディタやScript Debugger上で実行した場合には自分自身のソースコードをテキストビュー上で表示します。

読み取り専用のスクリプトやアプレットで実行している場合にはソースコードを取得できません。何か適宜自分で表示させたいテキストを与えてみてください。

AppleScript名:アラートダイアログ上にTexViewを表示
— Created 2019-07-02 by Takaaki Naganoya
— 2019 Piyomaru Software
use AppleScript version "2.4"
use scripting additions
use framework "Foundation"
use framework "AppKit"
use framework "OSAKit"

property |NSURL| : a reference to current application’s |NSURL|
property NSFont : a reference to current application’s NSFont
property NSView : a reference to current application’s NSView
property NSAlert : a reference to current application’s NSAlert
property NSColor : a reference to current application’s NSColor
property NSTextView : a reference to current application’s NSTextView
property NSScrollView : a reference to current application’s NSScrollView
property NSRunningApplication : a reference to current application’s NSRunningApplication
property OSAScript : a reference to current application’s OSAScript

property returnCode : 0

–Get Self Source Code (a kind of joke)
set mePath to path to me
set asStr to getASsourceFor(mePath) of me

set paramObj to {myMessage:"Main Message", mySubMessage:"Sub information", mes1:(asStr), mesWidth:400, mesHeight:200, fontName:"HiraginoSans-W3", fontSize:11.0}

–my dispTextViewWithAlertdialog:paramObj–for debug
my performSelectorOnMainThread:"dispTextViewWithAlertdialog:" withObject:paramObj waitUntilDone:true

on dispTextViewWithAlertdialog:paramObj
  –Receive Parameters
  
set aMainMes to (myMessage of paramObj) as string –Main Message
  
set aSubMes to (mySubMessage of paramObj) as string –Sub Message
  
set mesStr to (mes1 of paramObj) as string –Text Input field 1 Label
  
set aWidth to (mesWidth of paramObj) as integer –TextView width
  
set aHeight to (mesHeight of paramObj) as integer –TextView height
  
set aFontName to (fontName of paramObj) as string –TextView font name
  
set aFontSize to (fontSize of paramObj) as real –TextView font size
  
  
— Create a TextView with Scroll View
  
set aScroll to NSScrollView’s alloc()’s initWithFrame:(current application’s NSMakeRect(0, 0, aWidth, aHeight))
  
set aView to NSTextView’s alloc()’s initWithFrame:(current application’s NSMakeRect(0, 0, aWidth, aHeight))
  
aView’s setRichText:true
  
aView’s useAllLigatures:true
  
aView’s setTextColor:(current application’s NSColor’s cyanColor()) –cyanColor
  
aView’s setFont:(current application’s NSFont’s fontWithName:aFontName |size|:aFontSize)
  
set aColor to current application’s NSColor’s colorWithDeviceRed:0.0 green:0.0 blue:0.0 alpha:0.5
  
aView’s setBackgroundColor:aColor
  
aView’s setString:mesStr
  
aScroll’s setDocumentView:aView
  
aView’s enclosingScrollView()’s setHasVerticalScroller:true
  
  
— set up alert
  
set theAlert to NSAlert’s alloc()’s init()
  
tell theAlert
    its setMessageText:aMainMes
    
its setInformativeText:aSubMes
    
its addButtonWithTitle:"OK"
    
its addButtonWithTitle:"Cancel"
    
its setAccessoryView:aScroll
  end tell
  
  
— show alert in modal loop
  
NSRunningApplication’s currentApplication()’s activateWithOptions:0
  
my performSelectorOnMainThread:"doModal:" withObject:(theAlert) waitUntilDone:true
  
if (my returnCode as number) = 1001 then error number -128
end dispTextViewWithAlertdialog:

on doModal:aParam
  set (my returnCode) to aParam’s runModal()
end doModal:

–指定AppleScriptファイルのソースコードを取得する(実行専用Scriptからは取得できない)
— Original Created 2014-02-23 Shane Stanley
on getASsourceFor(anAlias as {alias, string})
  set aURL to |NSURL|’s fileURLWithPath:(POSIX path of anAlias)
  
set theScript to OSAScript’s alloc()’s initWithContentsOfURL:aURL |error|:(missing value)
  
  
if theScript is equal to missing value then
    error "Compile Error" — handle error
  else
    set sourceText to theScript’s source()
  end if
  
  
return sourceText as string
end getASsourceFor

★Click Here to Open This Script 

Posted in Color file File path Font GUI Text URL | Tagged 10.11savvy 10.12savvy 10.13savvy 10.14savvy NSAlert NSColor NSFont NSRunningApplication NSScrollView NSTextView NSURL OSAScript | Leave a comment

指定フォルダ以下のWordのファイルをすべてPDFに書き出す

Posted on 6月 22, 2019 by Takaaki Naganoya

指定フォルダ以下のWordファイルをSpotlight機能でリストアップし、かたっぱしからPDF書き出しするAppleScriptです。

Wordの制御以外はありもののルーチンを組み合わせただけなので、とくにたいした手間がかかっているわけではありません。

逆に、Wordでファイルをオープンするという動作が割とたいへんだということがわかりました。Wordの書類によっては変換の必要があるようで、オープン時に形式を聞かれました。Word書類を作成したWordのバージョン次第のようですが、注意したいところです。Script中ではオートで変換してくれるように指定しておいたものの、それほど現場でさまざまな書類を処理したわけではありません。

処理する書類の古さや、作成したWordがどのOS上で作られたかによっては、さらに何かを追加指定する必要があるかもしれません(確認は作成時最新のWord v16.24+macOS 10.12.6にて行いました)。

Spotlightでサーチして、指定フォルダ以下のWord書類をすべてリストアップしたあと、オープンしてPDFに書き出してクローズ、という動作を繰り返します。実にAppleScript「らしい」処理です。

これを、GUI Scripting(メニューやボタンの強制的な操作)だけで行うサンプルもあるようですが、GUI Scriptingは各アプリケーションの持っているAppleScriptのコマンド(AppleScript用語辞書に書かれています)に記載のない命令を「仕方なく」「例外的に」実行するだけのものであって、こういう「命令が最初から用意されているコマンド」を実行させてもメリットが何もありません。

GUI Scriptingを使ったScriptを評して「遅い」とか「確実性がない」と言われることが多いようですが、それはGUI Scriptingを使っているからです。GUI Scriptingを使うと、AppleScript本来の処理速度よりも10〜100倍ぐらい遅くなる(Cocoaの機能を活用している現代のAppleScriptだとそこから50倍ぐらい高速)ものなので、GUI Scriptingが(System Eventsを用いてメニューやボタンのクリックが行われている)多用されているAppleScriptは、本来の性能を活かせない可能性が高い(もっと高速に処理できる余地がある)ことを知っていただきたいところです。

本Scriptはそのような意味をこめて作成・公開したものです。

–> Download WordFileToPDFExporter Run-Only (Applet)

AppleScript名:WordFileToPDFExporter.scptd
— Created 2019-06-20 by Takaaki Naganoya
— 2019 Piyomaru Software
use AppleScript version "2.4"
use scripting additions
use framework "Foundation"
use mdLib : script "Metadata Lib" version "2.0.0" –https://www.macosxautomation.com/applescript/apps/Script_Libs.html#Metadata_Lib

property NSString : a reference to current application’s NSString
property NSFileManager : a reference to current application’s NSFileManager
property NSOrderedSame : a reference to current application’s NSOrderedSame

set basePath to (path to desktop) as string –Target Folder to write PDFs
set origPath to POSIX path of (choose folder with prompt "Select Word File Orig Folder") –(path to documents folder)

–Find Word (.doc & .docx ) files by Spotlight
set resList to mdLib’s searchFolders:{origPath} searchString:("kMDItemContentTypeTree == %@ || kMDItemContentTypeTree == %@") searchArgs:{"org.openxmlformats.wordprocessingml.document", "com.microsoft.word.doc"}

if resList = {} then
  –No Word Files or Spotlight index is broken
  
display dialog "There is no Word File within your folder.." buttons {"OK"} default button 1 with icon 1
  
return
end if

set resNumLen to length of ((length of resList) as string)

–Close Word Documents without saving
closeEveryWordDocs() of me

set sCount to 1 –saving file counter
set erCount to 0

–Loop by Word files
repeat with i in resList
  set j to contents of i
  
set anAlias to (POSIX file j) as alias
  
set dRes to openWordFile(anAlias) of me
  
  
if dRes is not equal to false then
    set numStr to retZeroPaddingText(sCount, resNumLen + 1) of me
    
set newFile to basePath & numStr & "_" & (repFileNameExtension(dRes, ".pdf") of me)
    
saveWordDocAsPDF(newFile) of me
  else
    set erCount to erCount + 1
  end if
  
  
set sCount to sCount + 1 –Increment
end repeat

–Report Finish
if erCount = 0 then
  activate
  
display dialog (sCount as string) & " Word files are converted to PDF.." buttons {"OK"} default button 1 with icon 1
else
  if erCount = 1 then
    set pluralStr to ""
  else
    set pluralStr to "s"
  end if
  
  
activate
  
display dialog (sCount as string) & " Word files are converted to PDF.." & return & "But " & (erCount as string) & "file" & pluralStr & " caused error to open" buttons {"OK"} default button 1 with icon 1
end if

–最前面のWord Documentを指定パスにPDFとして書き出す
on saveWordDocAsPDF(saveHFSpathStr)
  tell application "Microsoft Word"
    save as active document file name saveHFSpathStr file format format PDF
    
close front document saving no
  end tell
end saveWordDocAsPDF

–指定パスのWord書類をオープンする
on openWordFile(aFileAlias)
  tell application "Microsoft Word"
    try
      –このあたり、予想外にいろいろオープン処理を止めるダイアログ表示などがあるようなので試行錯誤が必要
      
open aFileAlias file converter open format auto
      
tell front document
        set dName to name
      end tell
    on error
      return false
    end try
  end tell
  
return dName
end openWordFile

–Word書類をすべてクローズ。未保存のものも破棄してクローズ
on closeEveryWordDocs()
  try
    tell application "Microsoft Word"
      close every document without saving
    end tell
  end try
end closeEveryWordDocs

–ファイル名から拡張子を置換する
on repFileNameExtension(origName, newExt)
  set aName to current application’s NSString’s stringWithString:origName
  
set theExtension to aName’s pathExtension()
  
if (theExtension as string) is not equal to "" then
    set thePathNoExt to aName’s stringByDeletingPathExtension()
    
set newName to (thePathNoExt’s stringByAppendingString:newExt)
  else
    set newName to (aName’s stringByAppendingString:newExt)
  end if
  
  
return newName as string
end repFileNameExtension

–数値にゼロパディングしたテキストを返す
on retZeroPaddingText(aNum, aLen)
  set tText to ("0000000000" & aNum as text)
  
set tCount to length of tText
  
set resText to text (tCount – aLen + 1) thru tCount of tText
  
return resText
end retZeroPaddingText

★Click Here to Open This Script 

Posted in file PDF | Tagged 10.12savvy 10.13savvy 10.14savvy NSFileManager NSOrderedSame NSString Word | Leave a comment

Keynoteで選択中のスライドだけをデスクトップに画像で書き出す

Posted on 6月 20, 2019 by Takaaki Naganoya

Keynoteでオープン中の最前面の書類で、選択中のスライドだけをデスクトップにPNG画像で書き出すAppleScriptです。Keynote 9.xを必要とします(macOS 10.13以降)。

ちょっとした説明のためにKeynoteの資料の一部だけを画面上でキャプチャして、メールなどに添付して送ることはよくあります(全部送ると量がおおすぎたり、焦点がぼやけたり)。

そこで、複数枚のスライド(ページ)を選択しておくと、それらのみを画像書き出しするAppleScriptを作ってみました。Keynoteにそんな機能はないのですが、「選択中のページ番号」は取れるので、書類全体をPDF書き出ししておいて、書き出したPDFから指定ページを画像として再書き出しを行い、PDFを削除しています。

手品のように見える処理でも、実際に行える機能を組み合わせて地道に作っているだけです。問題は、「手品」が実は地道な調査と機能確認、こまごまとしたライブラリの整備の末に実現されていることが、一般の方にはわかりにくいということでしょうか(いきなり手品を求められて絶句すること多し)。

仕事の合間に作ったので、割と雑な作りです。書き出し画像のファイル名衝突チェックなどは入れていません。

それでも、スクリプトメニューに入れて利用するとなかなか便利です。

AppleScript名:Keynoteで選択中のスライドだけをデスクトップに画像で書き出す.scptd
—
–  Created by: Takaaki Naganoya
–  Created on: 2019/06/20
—
–  Copyright © 2019 Piyomaru Software, All Rights Reserved
—
use AppleScript version "2.7" — 10.13 or later
use framework "Foundation"
use framework "Quartz"
use framework "AppKit"
use scripting additions

set dtPath to (path to desktop) as string

tell application "Keynote"
  set aVer to version
  
  
considering numeric strings
    if aVer < "9.0" then
      display dialog "Too old version for this Script." buttons {"OK"} default button 1 with icon 1
      
return
    end if
  end considering
  
  
tell front document
    set aSel to selection –選択中のスライドオブジェクトへの参照がリストで入る
    
set pList to {}
    
repeat with i in aSel
      set tmpPage to slide number of i
      
set the end of pList to tmpPage
    end repeat
    
  end tell
end tell

–Keynote書類を指定フォルダにPDF書き出し(全ページ書き出し)
set savedPDFPath to exportKeynoteDocToPDF(dtPath) of me
if savedPDFPath = false then return –Error

set aPOSIXpath to POSIX path of savedPDFPath

–書き出したPDFから、部分的にPNG画像に書き出す
repeat with p in pList
  –PDFの指定ページをNSImageとして取り出す
  
set tmpNSImage to getNSImageFromPDFPage(aPOSIXpath, p) of me
  
  
–PDFの書き出しファイル名に子番号にスライド番号をつける
  
set bPath to addStringbeforeExtension(aPOSIXpath, "_" & (p as string)) of me
  
  
–PDF書き出しファイル名に
  
set newPath to repFilePathExtension(bPath, ".png") of me
  
  
–指定のNSImageを指定のパスにPNG形式で保存
  
set sRes to saveNSImageAtPathAsPNG(tmpNSImage, newPath) of me
end repeat

–書き出したPDFを削除
tell application "Finder"
  delete savedPDFPath
end tell

–Keynote書類からPDF書き出し
on exportKeynoteDocToPDF(targFolderPath as string)
  tell application "Keynote"
    set dCount to count every document
    
if dCount = 0 then
      return false
    end if
    
set aPath to file of document 1
  end tell
  
  
set curPath to (current application’s NSString’s stringWithString:(POSIX path of aPath))’s lastPathComponent()’s stringByDeletingPathExtension()’s stringByAppendingString:".pdf"
  
set outPath to (targFolderPath & curPath)
  
  
tell application "Keynote"
    set anOpt to {class:export options, export style:IndividualSlides, all stages:false, skipped slides:true, PDF image quality:Best}
    
export document 1 to file outPath as PDF with properties anOpt
  end tell
  
  
return (outPath as alias)
  
end exportKeynoteDocToPDF

–指定のPDFから、指定のページをNSImageで返す
on getNSImageFromPDFPage(aPOSIX, aPage as number)
  set aURL to (current application’s |NSURL|’s fileURLWithPath:aPOSIX)
  
  
set aPDFdoc to current application’s PDFDocument’s alloc()’s initWithURL:aURL
  
set pCount to aPDFdoc’s pageCount()
  
  
set compFactor to 1.0 –1.0 — 0.0 = max jpeg compression, 1.0 = none
  
  
–Detect Retina Environment
  
set retinaF to current application’s NSScreen’s mainScreen()’s backingScaleFactor()
  
if retinaF = 1.0 then
    set aScale to 2.0 –Non Retina Env
  else
    set aScale to 1.0 –Retina Env
  end if
  
  
set thisPage to (aPDFdoc’s pageAtIndex:(aPage – 1))
  
set anNSImage to (current application’s NSImage’s alloc()’s initWithData:(thisPage’s dataRepresentation()))
  
  
if anNSImage = missing value then error "Error in getting imagerep from PDF"
  
  
return anNSImage
end getNSImageFromPDFPage

–ファイル名の拡張子の直前に子番号的な文字列を入れる
on addStringbeforeExtension(aPath, extraString)
  set pathString to current application’s NSString’s stringWithString:aPath
  
set theExtension to pathString’s pathExtension()
  
set thePathNoExt to pathString’s stringByDeletingPathExtension()
  
set newPath to (thePathNoExt’s stringByAppendingString:extraString)’s stringByAppendingPathExtension:theExtension
  
return newPath as string
end addStringbeforeExtension

–与えられたパスの拡張子を付け替える
on repFilePathExtension(origPath, newExt)
  set aName to current application’s NSString’s stringWithString:origPath
  
set theExtension to aName’s pathExtension()
  
if (theExtension as string) is not equal to "" then
    set thePathNoExt to aName’s stringByDeletingPathExtension()
    
set newName to (thePathNoExt’s stringByAppendingString:newExt)
  else
    set newName to (aName’s stringByAppendingString:newExt)
  end if
  
return newName as string
end repFilePathExtension

–NSImageを指定パスにPNG形式で保存
on saveNSImageAtPathAsPNG(anImage, outPath)
  set imageRep to anImage’s TIFFRepresentation()
  
set aRawimg to current application’s NSBitmapImageRep’s imageRepWithData:imageRep
  
set pathString to current application’s NSString’s stringWithString:outPath
  
set newPath to pathString’s stringByExpandingTildeInPath()
  
set myNewImageData to (aRawimg’s representationUsingType:(current application’s NSPNGFileType) |properties|:(missing value))
  
set aRes to (myNewImageData’s writeToFile:newPath atomically:true) as boolean
  
return aRes –true/false
end saveNSImageAtPathAsPNG

★Click Here to Open This Script 

Posted in file File path Image PDF | Tagged 10.13savvy 10.14savvy Finder Keynote NSBitmapImageRep NSImage NSScreen NSString NSURL PDFDocument | Leave a comment

CotEditorで編集中のMarkdown書類をPDFプレビュー

Posted on 6月 15, 2019 by Takaaki Naganoya

CotEditorで編集中のMarkdown書類を、MacDownでPDF書き出しして、Skimでオープンして表示するAppleScriptです。

CotEditorにMarkdownのプレビュー機能がついたらいいと思っている人は多いようですが、MarkdownはMarkdownで、方言は多いし標準がないし、1枚もののMarkdown書類だけ編集できればいいのか、本などのプロジェクト単位で編集とか、目次が作成できないとダメとか、リンクした画像の扱いをどうするのかとか、対応しようとすると「ほぼ別のソフトを作るのと同じ」ぐらい手間がかかりそうです(メンテナー様ご本人談)。

そこで、AppleScript経由で他のソフトを連携させてPDFプレビューさせてみました。これなら、誰にも迷惑をかけずに、今日この時点からすぐにMarkdownのプレビューが行えます(当然、HTML書き出ししてSafariでプレビューするバージョンははるかかなた昔に作ってあります)。

ただし、OS側の機能制限の問題で、CotEditor上のスクリプトメニューから実行はできません(GUI Scriptingの実行が許可されない)。OS側のスクリプトメニューに登録して実行する必要があります。

GUI Scriptingを利用してメニュー操作を行なっているため、システム環境設定で許可しておく必要があります。

本来であれば、PDFの書き出し先フォルダ(この場合は書き出しダイアログで、GUI Scirptingを用いてCommand-Dで指定して一律に場所指定が行えるデスクトップフォルダ)に同名のPDFが存在しないかどうかチェックし、存在すれば削除するといった処理が必要ですが、面倒だったのであらかじめMarkdown書類をUUIDにリネームしておくことで、書き出されたPDFも同じくUUIDのファイル名になるため、論理上はファイル名の衝突を回避できるため、削除処理を省略しています。

AppleScript名:🌏レンダリングしてPDFプレビュー
— Created 2019-06-15 by Takaaki Naganoya
— 2019 Piyomaru Software
use AppleScript version "2.5"
use scripting additions
use framework "Foundation"
use framework "AppKit"

property NSUUID : a reference to current application’s NSUUID
property NSWorkspace : a reference to current application’s NSWorkspace

–オープン中のMarkdown書類を取得する
tell application "CotEditor"
  tell front document
    set cStyle to coloring style
    
if cStyle is not equal to "Markdown" then
      display dialog "編集中のファイルはMarkdown書類ではないようです。" buttons {"OK"} default button 1
      
return
    end if
    
    
set aPath to path
  end tell
end tell

–一時フォルダにMarkdown書類をコピー
set sPath to (path to temporary items)
tell application "Finder"
  set sRes to (duplicate ((POSIX file aPath) as alias) to folder sPath with replacing)
end tell

–コピーしたMarkdown書類をリネーム
set s1Res to sRes as alias
set aUUID to NSUUID’s UUID()’s UUIDString() as text –UUIDを作成する
tell application "Finder"
  set name of s1Res to (aUUID & ".md")
end tell

–Markdown書類をデスクトップにPDF書き出し
set pdfRes to exportFromMacDown(POSIX path of s1Res) of me

–PDF Viewerでオープン
tell application "Skim" –Preview.appでもOK
  activate
  
open pdfRes
end tell

–一時フォルダに書き出したMarkdown書類を削除
tell application "Finder"
  delete s1Res
end tell

–指定のMacDownファイル(alias)をデスクトップ上にPDFで書き出し
on exportFromMacDown(anAlias)
  set s1Text to paragraphs of (do shell script "ls ~/Desktop/*.pdf") –pdf書き出し前のファイル一覧
  
  
tell application "MacDown"
    open {anAlias}
  end tell
  
  
macDownForceSave() of me
  
  
tell application "MacDown"
    close every document without saving
  end tell
  
  
do shell script "sync" –ねんのため
  
  
set s2Text to paragraphs of (do shell script "ls ~/Desktop/*.pdf") –pdf書き出し後のファイル一覧
  
  
set dRes to getDiffBetweenLists(s1Text, s2Text) of me –デスクトップ上のPDFファイル名一覧の差分を取得
  
set d2Res to (addItems of dRes)
  
  
if length of d2Res ≥ 1 then
    return contents of first item of d2Res
  else
    error "Error in exporting PDF to desktop folder…."
  end if
end exportFromMacDown

on getDiffBetweenLists(aArray as list, bArray as list)
  set allSet to current application’s NSMutableSet’s setWithArray:aArray
  
allSet’s addObjectsFromArray:bArray
  
  
–重複する要素のみ抜き出す
  
set duplicateSet to current application’s NSMutableSet’s setWithArray:aArray
  
duplicateSet’s intersectSet:(current application’s NSSet’s setWithArray:bArray)
  
  
–重複部分を削除する
  
allSet’s minusSet:duplicateSet
  
set resArray to (allSet’s allObjects()) as list
  
  
set aSet to current application’s NSMutableSet’s setWithArray:aArray
  
set bSet to current application’s NSMutableSet’s setWithArray:resArray
  
aSet’s intersectSet:bSet –積集合
  
set addRes to aSet’s allObjects() as list
  
  
set cSet to current application’s NSMutableSet’s setWithArray:bArray
  
cSet’s intersectSet:bSet –積集合
  
set minusRes to cSet’s allObjects() as list
  
  
return {addItems:minusRes, minusItems:addRes}
end getDiffBetweenLists

–注意!! ここでGUI Scriptingを使用。バージョンが変わったときにメニュー階層などの変更があったら書き換え
on macDownForceSave()
  activate application "MacDown"
  
tell application "System Events"
    tell process "MacDown"
      — File > Export > PDF
      
click menu item 2 of menu 1 of menu item 14 of menu 1 of menu bar item 3 of menu bar 1
      
      
–Go to Desktop Folder
      
keystroke "d" using {command down}
      
      
–Save Button on Sheet
      
click button 1 of sheet 1 of window 1
    end tell
  end tell
end macDownForceSave

–Bundle IDからアプリケーションのPathを返す
on retAppAbusolutePathFromBundleID(aBundleID)
  set appPath to NSWorkspace’s sharedWorkspace()’s absolutePathForAppBundleWithIdentifier:aBundleID
  
if appPath = missing value then return false
  
return appPath as string
end retAppAbusolutePathFromBundleID

★Click Here to Open This Script 

Posted in file File path GUI Scripting Markdown PDF shell script | Tagged 10.11savvy 10.12savvy 10.13savvy CotEditor Finder MacDown NSUUID NSWorkspace Skim | Leave a comment

Markdown書類をメモ.appに新規エントリで登録する

Posted on 6月 11, 2019 by Takaaki Naganoya

指定のMarkdown書類をメモ.app(Notes.app)に新規エントリとして登録するAppleScriptです。


▲テストに使ったMarkdown書類

Markdown書類をUTF-8のテキストとして読み込み、それをHTMLに変換し、そのままメモ.app(Notes.app)に新規エントリとして登録します。Markdown書類のHTMLへの解釈はオープンソースのMMMarkdownを利用しています。

自分はMarkdownエディタにMacDownを用いているため、使用しているMarkdown書類もMacDownが解釈する、割と自由度の高い(HTMLコードをそのまま書いておいても許容するような)Markdownのコードを与えて処理してみましたが、これらはMMMarkdownでHTML変換する際にスルーされたせいか、装飾がかなり再現されているように感じます。

Markdownタグの互換性はエディタごとに大きく異なるため、確認はお手元のエディタ用のMarkdown書類で行なってください。

–> Download MMMarkdown.framework (To ~/Library/Frameworks/)


▲MMMarkdownを用いてMarkdown書類をHTMLに変換し、メモ.app(Notes.app)に登録した内容。表以外はけっこう反映できている

タイトルやメモ.app(Notes.app)上の登録先などは適宜変更してみてください。

何も考えずに、手元にあったMarkdown書類を処理してみたところ、http://のリンクや、applescript://のリンクなどもそのまま反映。色情報もそのまま反映されているようです。


▲macOS 10.14.5上で、Applet形式で実行。表も反映されている

macOS 10.14上では、①Script Debuggerを用いて実行 ②Frameworkを含めてApplet形式に書き出して実行 ③SIPを解除してスクリプトエディタ上で実行 のどちらか好きなものを選んでください。

Framework入りでAppletに書き出したものをダウンロードできるようにしておきました。macOS 10.14以降ではこちらもお試しください。

2019/6/15 フレームワークのリンク先が間違っていたようで、バイナリを書き出しし直しました。また、macOS 10.14環境で一部Scripterが言っているような「アプリケーション操作の認証を再度求められる」ような現象には遭遇していません。

–> MarkdownToNotes.zip

AppleScript名:Markdown書類をメモ.appに新規エントリで登録する.scptd
— Created 2019-06-11 by Takaaki Naganoya
— 2019 Piyomaru Software
use AppleScript version "2.4"
use scripting additions
use framework "Foundation"
use framework "MMMarkdown" –https://github.com/mdiep/MMMarkdown

property NSUUID : a reference to current application’s NSUUID

–Markdown書類の読み込み
set aFile to choose file of type {"net.daringfireball.markdown"}
tell current application
  set aStr to (read aFile as «class utf8»)
end tell

–Markdown to HTML
set htmlString to current application’s MMMarkdown’s HTMLStringWithMarkdown:aStr |error|:(missing value)

–メモ.app(Notes.app)に新規エントリを作成する
set aUUID to NSUUID’s UUID()’s UUIDString() as text –UUIDを作成する
tell application "Notes"
  make new note at folder "Notes" of account "iCloud" with properties {name:"TEST Notes_" & aUUID, body:(htmlString as string)}
end tell

★Click Here to Open This Script 

Posted in file Markdown | Tagged 10.11savvy 10.12savvy 10.13savvy 10.14savvy Notes | Leave a comment

Finder上で選択中のファイルをDMGに変換して圧縮 v2

Posted on 6月 6, 2019 by Takaaki Naganoya

Finder上で選択中のファイルをあらたに作ったDiskImageに入れてZip圧縮するAppleScriptです。

Script Menuに入れて実行することを前提にして作ってあります。

Google DriveなどのクラウドストレージにAppleScriptアプレットなどの実行ファイルをアップロードすると、バンドルが壊れたり、実行できなくなったりします。

そのため、仕方なくZip圧縮してアップロードしたりするわけですが、どうもZipの中身までGoogle Drive側が内容を展開して確認するらしく、ウィルスと疑われてZip圧縮した実行ファイルをダウンロードできないケースが見られます。

また、.dmgファイルに入れただけでもGoogle Driveが中身をスキャンして実行ファイルに警告を出すとのこと。一般的にはウィルスの拡散を防止する機能として好意的に受け止められるべきものですが、本当にプログラムを受け渡す必要がある場合には、こまった仕様です。

そこで、Diskimageに入れて、本来であればパスワードをつけてZip圧縮したいところですが、取り回しが悪くなるので、パスワードはつけないでアーカイブ化するようにしてみました。


▲Finder上で選択中のファイル(複数可)


▲本Scriptでdmg化してZip圧縮したもの


▲Zipアーカイブを展開してdiskimageファイルをマウントしたところ

本Scriptは、おおよそ自分で組んだ記憶がないのと、プログラムの構造が自分らしくないので、おそらくMacScripter.netあたりで拾ってきたScriptをそのまま使っていたものでしょう。それを一部修正してみました。オリジナルのScriptではFinder上で選択中のフォルダのみ処理するようになっていましたが、実際にはファイルをやりとりしたい(AppleScriptアプレットのケース多し)ので、ファイルをそのままdmg化できるように変更しました(単にフォルダを作成してコピーするだけですが)。

本ScriptはmacOS 10.15Beta1上では、macOS 10.15側にバグがあるため動作しません(POSIX pathへの変換程度でバグを作ってほしくないなー)。

AppleScript名:Finder上で選択中のファイルをDMGに変換して圧縮 v2
—
–  Created by: Takaaki Naganoya
–  Created on: 2019/06/06
—
–  Copyright © 2019 Piyomaru Software, All Rights Reserved
—
use AppleScript version "2.5"
use scripting additions
use framework "Foundation"

property NSUUID : a reference to current application’s NSUUID

property deleteV : true –DMG変換後に対象フォルダを削除しない(trueで削除)
property zipDmg : true –DMG作成後にZip圧縮する(trueで圧縮+DMG削除)

–Finder上の選択項目を取得、選択されていない場合には処理終了
tell application "Finder"
  set selList to selection as alias list
  
if selList = {} or selList = "" or selList = missing value then
    activate
    
display dialog "何も選択されていません。" buttons {"OK"} default button 1 with icon 1
    
return
  end if
end tell

–一時フォルダを作って選択中のアイテムをコピー
set aUUID to NSUUID’s UUID()’s UUIDString() as text

set aTmp to POSIX path of (path to desktop) –macOS 10.15 beta1ではおかしな結果が返ってくる
set tmpDir to aTmp & aUUID
do shell script "mkdir -p " & quoted form of tmpDir

set targFol to (POSIX file tmpDir) as alias

try
  tell application "Finder"
    duplicate selList to folder targFol
  end tell
on error
  display dialog "エラー:ファイルのコピー中にエラーが発生" buttons {"OK"} default button 1 with icon 1
  
return
end try

set aList to {targFol}

tell application "Finder"
  
  
set dmgList to {}
  
  
–選択中のアイテムを順次処理するループ
  
repeat with i in aList
    set the end of dmgList to makeDMGfromFolderAlias(i, "") of me –パスワードは付けない
    
    
–処理後のフォルダを削除する処理
    
if (deleteV as boolean) = true then
      deleteFolderItself(i) of me
    else
      –元フォルダを削除しない場合、元フォルダの名前を変更する
      
tell application "Finder"
        set aName to name of i
      end tell
      
      
set aName to aName & "_origFol"
      
      
tell application "Finder"
        set name of i to aName
      end tell
    end if
  end repeat
  
  
if zipDmg = true then
    repeat with i in dmgList
      set j to contents of i
      
      
set f1Path to quoted form of j –DMGファイルのPOSIX Path
      
set f2Path to quoted form of (j & ".zip") –ZipファイルのPOSIX Path
      
      
–タイムアウト時間は2時間
      
with timeout of 7200 seconds
        do shell script "/usr/bin/zip -r -j " & f2Path & " " & f1Path
        
do shell script "/bin/rm -f " & f1Path
      end timeout
      
    end repeat
  end if
end tell

–指定のフォルダ(alias)をDiskImageに変換する
on makeDMGfromFolderAlias(aaSel, aPassword)
  
  
set aPassword to aPassword as string
  
  
tell application "Finder"
    set fn to name of aaSel
  end tell
  
  
set aDir to (POSIX path of aaSel)
  
set aDir to quoted form of aDir
  
  
set fp2 to do shell script "dirname " & aDir
  
set fp2 to fp2 & "/"
  
  
set outPath to (fp2 & fn & ".dmg")
  
  
if aPassword is not equal to "" then
    –パスワードつきの場合
    
set aCMD to "printf ’" & aPassword & "’ | hdiutil create -encryption -srcfolder " & aDir & " " & (quoted form of outPath)
  else
    –パスワードなしの場合
    
set aCMD to "hdiutil create -srcfolder " & aDir & " " & (quoted form of outPath)
  end if
  
  
set fp3 to do shell script aCMD
  
  
return outPath
  
end makeDMGfromFolderAlias

–指定フォルダ内をすべて削除し、そのフォルダ自体も削除
on deleteFolderItself(aFol)
  set aU to (quoted form of POSIX path of aFol)
  
do shell script "rm -rf " & aU
end deleteFolderItself

★Click Here to Open This Script 

Posted in file list | Tagged 10.12savvy 10.13savvy 10.14savvy Finder NSUUID | Leave a comment

Photoshop CCでファイルをオープン

Posted on 5月 29, 2019 by Takaaki Naganoya

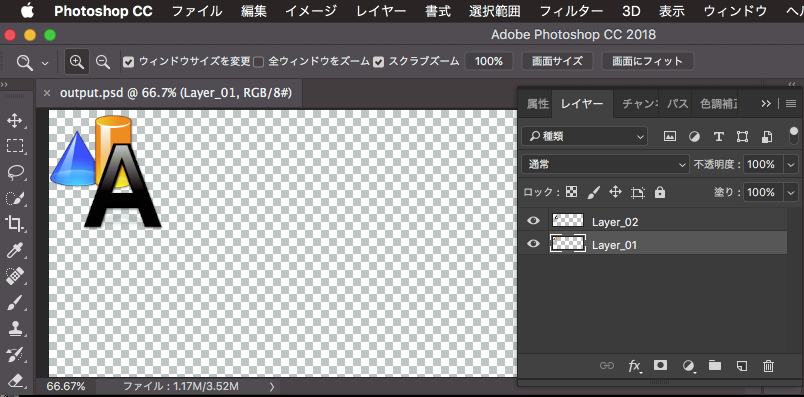
Photoshop CCで画像ファイル/PDFをオープンするAppleScriptです。

作成と動作確認はmacOS 10.14.5+Photoshop CC2019で行っています。一般的な画像ファイルのオープンはこちら。

Adobeのアプリケーションの操作を行っていると、5分に1回ぐらい首をひねる瞬間がやってきますが、疑問に思っても無駄なので、各種操作はサブルーチンに追い出して、直接Adobeアプリケーションの相手をしないほうが精神衛生上よいと思われます(contentsという超重要な予約語がコンフリクトしているのでオブジェクトを取り出してループするときに途方に暮れるとか、アプリケーションによってはオブジェクトの座標情報の順序がおかしいとかいろいろ)。

その中でもとびきりおかしいのが、この、Photoshopでのファイルオープン時のファイルパスの取り扱いです。

結局このおかしな書き方でしかオープンしてくれない(aliasを直接openできない謎仕様)という状況で、ここで疑問が生まれると、ふたたびAdobeのアプリケーションのおかしな仕様をひととおり体験することになるのです。

# 後から気づきましたが、Photoshopのopen命令は返り値がないですね、、、、

AppleScript名:Photoshop CCで画像ファイルをオープンする
set a to choose file

set aPosix to POSIX path of a

tell application id "com.adobe.photoshop"
  open file aPosix
end tell

★Click Here to Open This Script 

PDFのオープンはこちらです。PDFをbounding boxでトリミングしてオープンするのは、Cocoaの機能を利用してもなかなか骨が折れるので、かえってPhotoshopを呼び出してPDF→画像変換を行うほうが簡単なようです。

AppleScript名:Photoshop CCでPDFをオープンする
set aFile to (choose file)
set aPOSIX to POSIX path of aFile

set aPage to 1
set aResol to 300

tell application id "com.adobe.photoshop"
  open file aPOSIX as PDF with options {class:PDF open options, page:aPage, crop page:bounding box, resolution:aResol, mode:RGB}
end tell

★Click Here to Open This Script 

Posted in file Image PDF | Tagged 10.12savvy 10.13savvy 10.14savvy Photoshop | Leave a comment

Photosで選択中の写真をKeynoteの現在の書類の現在のスライド以降に配置 v2

Posted on 5月 27, 2019 by Takaaki Naganoya

Photosで選択中の写真をKeynoteで現在オープン中の書類の現在のスライド(ページ)以降に配置していくAppleScriptの改良版です。

作業の過程をiPhoneで写真撮影。撮影した写真を写真.app(Photos.app)経由でKeynote書類にまとめる作業を行なっていました。作業工程を時間こみで表示できないとわかりにくかったので、Keynoteの各スライドに時刻を入れるようにAppleScriptを書いておきました。

初版では写真.app(Photos)上の選択項目を一切ソートなどしなかったため、exifから取得した撮影日付で昇順ソートしています。


▲写真.app(Photos)上でKeynoteに配置したい写真を選択


▲あらかじめKeynote上でマスタースライド「画像(横長)」上のアイテムを編集しておくといいかも


▲AppleScriptによって写真.app上の写真をKeynote書類上に順次割り付け。タイトル部分にexifに記録されていた撮影時刻が入る


▲実行結果。写真.appから割り付けた写真は撮影日時でソートされている

AppleScript名:Photosで選択中の写真をKeynoteの現在の書類の現在のスライド以降に配置 v2
—
–  Created by: Takaaki Naganoya
–  Created on: 2019/05/26
—
–  Copyright © 2019 Piyomaru Software, All Rights Reserved
—
use AppleScript version "2.4"
use scripting additions
use framework "Foundation"
use framework "AppKit"
use BPlus : script "BridgePlus" –https://www.macosxautomation.com/applescript/apps/BridgePlus.html
use mdLib : script "Metadata Lib" version "2.0.0" –https://www.macosxautomation.com/applescript/apps/Script_Libs.html#Metadata_Lib

property NSUUID : a reference to current application’s NSUUID
property NSString : a reference to current application’s NSString
property SMSForder : a reference to current application’s SMSForder
property NSFileManager : a reference to current application’s NSFileManager

tell application "Keynote"
  if (count every document) = 0 then return
end tell

–Photosで選択中の写真をすべて書き出してalias listを取得する
set aList to exportSelectedPhotoOnPhotos() of me
if aList = {} or aList = false then return

set aLen to length of aList

–書き出した画像の親フォルダを求めておく(あとで削除するため)
tell application "Finder"
  set parentFol to parent of (item 1 of aList)
end tell

–exifから撮影日時を取得して2D List化
set aaList to {}
repeat with i in aList
  set j to contents of i
  
set exifDate to readExifDateTimeOriginal(j) of me
  
set the end of aaList to {j, exifDate, (time string of exifDate)}
end repeat

–撮影日時で昇順ソート
set aaaList to sortList2DAscending(aaList, {2}) of me

tell application "Keynote"
  tell front document
    tell current slide
      set curNum to slide number –現在表示中のスライドの番号(ページ数)を取得する
    end tell
    
    
–Photosから取得した写真のアイテム数でループ
    
repeat with i from 1 to aLen
      copy (item i of aaaList) to {aPhoto, aDateObj, creTime}
      
      
set newSlide to make new slide at slide (curNum + i) with properties {base slide:master slide "画像(横長)"} –This item is localized!! Maybe a "Photo"
      
      
tell newSlide
        set object text of default title item to creTime
        
set file name of image 1 to aPhoto –place an image to image placeholder
      end tell
      
      
–配置画像を削除
      
tell application "Finder"
        delete aPhoto –配置した写真を削除
      end tell
    end repeat
  end tell
end tell

–あとしまつ
tell application "Finder"
  delete parentFol –画像のダウンロードフォルダを削除
end tell

–Photosで選択中のファイルをtmporaryフォルダに書き出してalias listで返す
on exportSelectedPhotoOnPhotos()
  set dtPath to (path to temporary items) as text
  
set aUUID to NSUUID’s UUID()’s UUIDString() as text
  
  
set dirPath to ((POSIX path of dtPath) & aUUID)
  
set fileManager to NSFileManager’s defaultManager()
  
set aRes to (fileManager’s createDirectoryAtPath:dirPath withIntermediateDirectories:true attributes:(missing value) |error|:(reference))
  
set dtPath to dtPath & aUUID
  
  
tell application "Photos"
    set a to selection
    
if a = {} then return {}
    
set aRes to (export a to file dtPath)
  end tell
  
  
tell application "Finder"
    tell folder dtPath
      set fList to (every file) as alias list
    end tell
  end tell
  
  
if fList = {} then return false
  
return fList
end exportSelectedPhotoOnPhotos

–指定JPEG画像のExif情報からDateTimeOriginalを取得してAS dateオブジェクトに変換して返す
on readExifDateTimeOriginal(aTargFileAlias)
  set theMetadata to readMetadataFrom(aTargFileAlias) of me
  
if theMetadata = false then return false
  
  
set keysList to theMetadata’s allKeys()
  
  
if "{Exif}" is not in (keysList as list) then return false
  
  
set exifDate to theMetadata’s valueForKeyPath:"{Exif}.DateTimeOriginal"
  
if exifDate = missing value then return false
  
  
set a to NSString’s stringWithString:exifDate
  
set {aDateStr, aTimeStr} to (a’s componentsSeparatedByString:" ") as list
  
set bDateStr to repChar(aDateStr, ":", "/") of me
  
set fullDate to date (bDateStr & " " & aTimeStr)
  
  
return fullDate
end readExifDateTimeOriginal

–指定のファイルからメタデータを取得する
on readMetadataFrom(imageFile)
  load framework
  
set {theRecord, theError} to SMSForder’s metadataFromImage:imageFile |error|:(reference)
  
if theRecord = missing value then — there was a problem, so extract the error description
    error false
  else
    return theRecord
  end if
end readMetadataFrom

–文字置換
on repChar(origText as string, targChar as string, repChar as string)
  set curDelim to AppleScript’s text item delimiters
  
set AppleScript’s text item delimiters to targChar
  
set tmpList to text items of origText
  
set AppleScript’s text item delimiters to repChar
  
set retText to tmpList as string
  
set AppleScript’s text item delimiters to curDelim
  
return retText
end repChar

–入れ子のリストを昇順ソート
on sortList2DAscending(a, keyItem)
  return sort2DList(a, keyItem, {true}) of me
end sortList2DAscending

–入れ子のリストを降順ソート
on sortList2DDecending(a, keyItem)
  return sort2DList(a, keyItem, {false}) of me
end sortList2DDecending

–2D Listをソート
on sort2DList(aList as list, sortIndexes as list, sortOrders as list)
  load framework
  
  
–index値をAS流(アイテムが1はじまり)からCocoa流(アイテムが0はじまり)に変換
  
set newIndex to {}
  
repeat with i in sortIndexes
    set j to contents of i
    
set j to j – 1
    
set the end of newIndex to j
  end repeat
  
  
set sortTypes to {}
  
repeat (length of sortIndexes) times
    set the end of sortTypes to "compare:"
  end repeat
  
  
set resList to (SMSForder’s subarraysIn:(aList) sortedByIndexes:newIndex ascending:sortOrders sortTypes:sortTypes |error|:(missing value)) as {missing value, list}
  
  
return resList
end sort2DList

★Click Here to Open This Script 

Posted in Calendar exif file Image list | Tagged 10.12savvy 10.13savvy 10.14savvy Finder Keynote NSFileManager NSString NSUUID Photos | Leave a comment

Photosで選択中の写真をKeynoteの現在の書類の現在のスライド以降に配置

Posted on 5月 27, 2019 by Takaaki Naganoya

Photosで選択中の写真をKeynoteで現在オープン中の書類の現在のスライド(ページ)以降に配置していくAppleScriptです。

作業の過程をiPhoneで写真撮影。撮影した写真を写真.app(Photos.app)経由でKeynote書類にまとめる作業を行なっていました。作業工程を時間こみで表示できないとわかりにくかったので、Keynoteの各スライドに時刻を入れるようにAppleScriptを書いておきました(同じ作業が二度あるかは不明ですが、二度目からは明らかに時間の節約。つまり時間の貯金ができることになります)。

写真.app(Photos)上でKeynoteに配置したい写真を選択しておき、本Scriptを実行します。

Keynote書類上に新規スライドを追加し、撮影時刻と写真を配置していきます。

実行直後にPhotosで選択中の写真をファイルに書き出すため、若干待たされます。

# 複数のマシンでiCloudを介して写真を同期した場合に、写真.appのライブラリの写真の並び順は撮影日時どおりにならないようなので、明示的にソートしておく必要があるようです

ちなみに、写真の自作キーボードキットはこの後フットペダルにつなぎなおして、PPSSPP用の足踏みコントローラー化する予定です(「戦場の絆ポータブル」用)。

AppleScript名:Photosで選択中の写真をKeynoteの現在の書類の現在のスライド以降に配置
—
–  Created by: Takaaki Naganoya
–  Created on: 2019/05/26
—
–  Copyright © 2019 Piyomaru Software, All Rights Reserved
—
use AppleScript version "2.4"
use scripting additions
use framework "Foundation"
use framework "AppKit"
use BPlus : script "BridgePlus" –https://www.macosxautomation.com/applescript/apps/BridgePlus.html
use mdLib : script "Metadata Lib" version "2.0.0" –https://www.macosxautomation.com/applescript/apps/Script_Libs.html#Metadata_Lib

property NSUUID : a reference to current application’s NSUUID
property NSString : a reference to current application’s NSString
property NSFileManager : a reference to current application’s NSFileManager

tell application "Keynote"
  if (count every document) = 0 then return
end tell

–Photosで選択中の写真をすべて書き出してalias listを取得する
set aList to exportSelectedPhotoOnPhotos() of me
if aList = {} or aList = false then return

set aLen to length of aList

–書き出した画像の親フォルダを求めておく(あとで削除するため)
tell application "Finder"
  set parentFol to parent of (item 1 of aList)
end tell

tell application "Keynote"
  tell front document
    tell current slide
      set curNum to slide number –現在表示中のスライドの番号(ページ数)を取得する
    end tell
    
    
–Photosから取得した写真のアイテム数でループ
    
repeat with i from 1 to aLen
      set aPhoto to contents of item i of aList
      
set newSlide to make new slide at slide (curNum + i) with properties {base slide:master slide "画像(横長)"} –This item is localized!! Maybe a "Photo"
      
set creTime to getCreationTime(aPhoto) of me
      
tell newSlide
        set object text of default title item to creTime
        
set file name of image 1 to aPhoto –place an image to image placeholder
      end tell
      
      
–配置画像を削除
      
tell application "Finder"
        delete aPhoto –配置した写真を削除
      end tell
    end repeat
  end tell
end tell

–あとしまつ
tell application "Finder"
  delete parentFol –画像のダウンロードフォルダを削除
end tell

–指定のaliasからExif情報の作成日の時刻情報を返す
on getCreationTime(anAlias)
  set exifDate to readExifDateTimeOriginal(anAlias) of me
  
return time string of exifDate
end getCreationTime

–Photosで選択中のファイルをtmporaryフォルダに書き出してalias listで返す
on exportSelectedPhotoOnPhotos()
  set dtPath to (path to temporary items) as text
  
set aUUID to NSUUID’s UUID()’s UUIDString() as text
  
  
set dirPath to ((POSIX path of dtPath) & aUUID)
  
set fileManager to NSFileManager’s defaultManager()
  
set aRes to (fileManager’s createDirectoryAtPath:dirPath withIntermediateDirectories:true attributes:(missing value) |error|:(reference))
  
set dtPath to dtPath & aUUID
  
  
tell application "Photos"
    set a to selection
    
if a = {} then return {}
    
set aRes to (export a to file dtPath)
  end tell
  
  
tell application "Finder"
    tell folder dtPath
      set fList to (every file) as alias list
    end tell
  end tell
  
  
if fList = {} then return false
  
return fList
end exportSelectedPhotoOnPhotos

–指定JPEG画像のExif情報からDateTimeOriginalを取得してAS dateオブジェクトに変換して返す
on readExifDateTimeOriginal(aTargFileAlias)
  set theMetadata to readMetadataFrom(aTargFileAlias) of me
  
if theMetadata = false then return false
  
  
set keysList to theMetadata’s allKeys()
  
  
if "{Exif}" is not in (keysList as list) then return false
  
  
set exifDate to theMetadata’s valueForKeyPath:"{Exif}.DateTimeOriginal"
  
if exifDate = missing value then return false
  
  
set a to NSString’s stringWithString:exifDate
  
set {aDateStr, aTimeStr} to (a’s componentsSeparatedByString:" ") as list
  
set bDateStr to repChar(aDateStr, ":", "/") of me
  
set fullDate to date (bDateStr & " " & aTimeStr)
  
  
return fullDate
end readExifDateTimeOriginal

–指定のファイルからメタデータを取得する
on readMetadataFrom(imageFile)
  load framework
  
set {theRecord, theError} to current application’s SMSForder’s metadataFromImage:imageFile |error|:(reference)
  
if theRecord = missing value then — there was a problem, so extract the error description
    error false
  else
    return theRecord
  end if
end readMetadataFrom

–文字置換
on repChar(origText as string, targChar as string, repChar as string)
  set curDelim to AppleScript’s text item delimiters
  
set AppleScript’s text item delimiters to targChar
  
set tmpList to text items of origText
  
set AppleScript’s text item delimiters to repChar
  
set retText to tmpList as string
  
set AppleScript’s text item delimiters to curDelim
  
return retText
end repChar

★Click Here to Open This Script 

Posted in Calendar exif file Image list | Tagged 10.12savvy 10.13savvy 10.14savvy Finder Keynote NSFileManager NSString NSUUID Photos | 1 Comment

ScriptDebuggerでオープン中のScriptをScriptBundleに

Posted on 5月 23, 2019 by Takaaki Naganoya

ScriptDebuggerを使っていて、この作業がひんぱんに発生するのでScriptで自動化しました。

AppleScript書類を編集していて、バンドル内にFrameworkなどを突っ込みたいのにフラットなAppleScript書類(.scpt)だったので、そのままでは突っ込めず、コピペで新規バンドル書類(.scptd)を作成して、同じ名前で保存し直す作業です。

とてもとても標準機能で実装されていそうな内容ですが、子細に調査して存在していなかったので(ASObjC Explorerにはあったような気が)、ささっとAppleScriptで実装してScriptDebuggerのスクリプトメニューに入れて使っています。

ウィンドウの表示座標をきっちりそろえるとか、オリジナルのScriptを新規Scriptの作成後にクローズするとか、作りたくなってウズウズしてくる(自分的な)完成度の低さですが、そこでかっちり作り込むと「仕事中にちょっとだけ作るScript」の域を超えてしまうので、自制した次第です。

「すでに、バンドル形式のScriptが同一フォルダ内に存在する場合には警告を出して処理を中止する」か、あるいは「ファイル名に子番号をつけて重複を回避する」ぐらいの処理は足してもいいような気がします。


▲初期状態。フラットなAppleScript(.scpt)で書かれていたので、バンドル内にいろいろ追加できない状態


▲本Scriptの実行後の状態。ファイル名は拡張子を「.scptd」に変更しただけの状態

AppleScript名:ScriptをScript Bundleに
— Created 2019-05-23 by Takaaki Naganoya
— 2019 Piyomaru Software
use AppleScript version "2.4"
use scripting additions
use framework "Foundation"

tell application "Script Debugger"
  tell front document
    set myType to script type
    
if myType = bundled compiled script then
      display notification "There is no need to convert…."
      
return
    end if
    
    
set mySource to source text
    
set mySpec to file spec
    
    
try
      close with saving
    on error
      display notification "Can not save this Script. So I quited conversion process…."
      
return
    end try
  end tell
end tell

–ファイルパスの拡張子を付け替えてFileに変換
set pathString to current application’s NSString’s stringWithString:(POSIX path of mySpec)
set newPath to ((pathString’s stringByDeletingPathExtension())’s stringByAppendingPathExtension:"scptd") as string
set aFile to POSIX file newPath

–ファイル拡張子を付け替えた新規ファイル名で保存
tell application "Script Debugger"
  set aDoc to make new document with properties {source text:mySource, script type:bundled compiled script}
  
tell aDoc
    set aRes to compile –構文確認(ねんのため)
    
if aRes = false then return
    
    
–compileを通った場合のみファイル保存を行う
    
save in aFile
  end tell
end tell

★Click Here to Open This Script 

Posted in file File path | Tagged 10.12savvy 10.13savvy 10.14savvy ScriptDebugger | 1 Comment

指定MIME TypeのUTI文字列などを取得する

Posted on 4月 14, 2019 by Takaaki Naganoya

指定MIME TypeからUTIの文字列などのさまざまな情報を取得するAppleScriptです。

漠然と身の回りにファイル拡張子、UTI、MIME-typeなどの情報が転がっていますが、それぞれの意味を考え直すと、向き不向きというか想定されている利用シーンなどが大幅に異なります。

種類 内容説明
ファイル拡張子 ファイルの形式を一意に特定するもの。ただし、「.jpg」「.jpeg」など若干の表記ゆらぎを許容。詐称できてしまう
UTI ファイルのmacOS上での形式を一意に特定するもの。OS側が判断するものだが、拡張子次第。ただし、ゆらぎがない。UTI同士は階層構造を形成しており、上位のUTI(public.image)を指定することで下位UTIもまとめて指定できたりする
MIME-type 当該のファイルがインターネット上のファイル交換時にどのように受け取られるかを示す識別子。AppleScriptバンドルは拡張子「.scptd」で、UTIは「com.apple.applescript.script-bundle」だが、MIME-typeを取得すると「inode/directory」となる

と、ずいぶん違います。指定のファイルからMIME-typeを取得するだけであれば、こんな感じでしょうか。ただ、拡張子からMIME-typeを取得したり、MIME-typeからUTIを求めたりと、相互に変換する場合には(変換に意味がある場合には)いろいろと道具が必要です。

AppleScript名:指定ファイルからMIME-typeを取得する.scptd
—
–  Created by: Takaaki Naganoya
–  Created on: 2019/04/14
—
–  Copyright © 2019 Piyomaru Software, All Rights Reserved
—

set aFile to POSIX path of (choose file)
set mRes to do shell script "/usr/bin/file -b –mime-type " & quoted form of aFile
–> "text/html"

★Click Here to Open This Script 

UTI.frameworkを用いる場合にはこちら。

UTI.frameworkをビルドして使用しています。macOS 10.11/10.12/10.13では~/Library/Frameworksにインストールしてスクリプトエディタ上で本Scriptを実行すると記述どおりの結果が得られます。

macOS 10.14ではScript Debuggerを使用するか、あるいはSIPを解除してスクリプトエディタ上で実行することが可能です。自分でビルドして自分でCode Signしたコードぐらい、ホームディレクトリ下で勝手に実行させてほしいものです。

–> UTI.framework (To ~/Library/Frameworks)

AppleScript名:指定MIME TypeのUTI文字列などを取得する.scptd
—
–  Created by: Takaaki Naganoya
–  Created on: 2019/04/12
—
–  Copyright © 2019 Piyomaru Software, All Rights Reserved
—

use AppleScript version "2.4" — Yosemite (10.10) or later
use framework "Foundation"
use framework "UTI" –https://github.com/macmade/objc-uti
use scripting additions

set aUTIObj to (current application’s UTI’s UTIWithMIMEType:"image/gif")

set aRes to aUTIObj’s identifier()
–> com.compuserve.gif

set aRes to aUTIObj’s |description|() as string
–> "Graphics Interchange Format(GIF)"

set aRes to aUTIObj’s preferredOSType() as string
–> "GIFf"

set aRes to aUTIObj’s isDynamic() as boolean
–> false

set aRes to aUTIObj’s preferredFilenameExtension() as string
–> "gif"

set aRes to aUTIObj’s preferredMIMEType() as string
–> "image/gif"

set aRes to aUTIObj’s preferredNSPboardType() as string
–> "missing value"

set aRes to aUTIObj’s declaration() as record
–> {UTTypeIdentifier:"com.compuserve.gif", UTTypeDescription:"Graphics Interchange Format (GIF)", UTTypeTagSpecification:{|com.apple.ostype|:{"GIFf"}, |public.mime-type|:{"image/gif"}, |public.filename-extension|:{"gif"}}, UTTypeConformsTo:{"public.image"}}

set aRes to aUTIObj’s declaringBundleURL()’s |path|() as string
–> "/System/Library/CoreServices/CoreTypes.bundle"

set aRes to aUTIObj’s tagSpecifications() as record
–> {|com.apple.ostype|:{"GIFf"}, |public.mime-type|:{"image/gif"}, |public.filename-extension|:{"gif"}}

set aRes to aUTIObj’s conformsTo() as list
–> {"public.image"}

set aRes to aUTIObj’s referenceURL()
–> missing value

set aRes to aUTIObj’s |version|()
–> missing value

★Click Here to Open This Script 

Posted in file MIME UTI | Tagged 10.11savvy 10.12savvy 10.13savvy 10.14savvy | Leave a comment

指定フォルダ内のファイルのうち、指定UTIに該当するものをすべて取得してフルパスを返す

Posted on 4月 13, 2019 by Takaaki Naganoya

指定フォルダ内のファイルのうち、指定のUTIに該当するものをすべて取得してフルパス(file/POSIX)で返すAppleScriptです。

指定フォルダの直下のみを走査し、サブフォルダ内は走査しません。調べてみるとUTIでファイルを絞り込む機能は存在していないようなので(見落としているだけ?)、すべてファイルを取得してからループでUTIを調べつつ該当するかどうかチェックしています。

書けば書くほど「それってSpotlightでよくね?」という気がしますが、確実に取得したい(Spotlightインデックスが破損していたり、サーバー上のファイルではSpotlightが効かない場合もある)場合に使うとよいでしょうか。

AppleScript名:指定フォルダ内のファイルのうち、指定UTIに該当するものをすべて取得してフルパスを返す
—
–  Created by: Takaaki Naganoya
–  Created on: 2019/04/13
—
–  Copyright © 2019 Piyomaru Software, All Rights Reserved
—
use AppleScript version "2.5"
use scripting additions
use framework "Foundation"

property |NSURL| : a reference to current application’s |NSURL|
property NSArray : a reference to current application’s NSArray
property NSPredicate : a reference to current application’s NSPredicate
property NSFileManager : a reference to current application’s NSFileManager
property NSURLTypeIdentifierKey : a reference to current application’s NSURLTypeIdentifierKey
property NSDirectoryEnumerationSkipsHiddenFiles : a reference to current application’s NSDirectoryEnumerationSkipsHiddenFiles

set aUTI to "com.adobe.pdf"
set libPath to ((path to documents folder) as string)
set posixLibPath to POSIX path of libPath

set f1List to getFilepathListByUTI(posixLibPath, aUTI, "file") of me
–> {file "Cherry:Users:me:Documents:0718kenpo.pdf", file "Cherry:Users:me:Documents:2013-09Rekihaku.pdf", file "Cherry:Users:maro:Documents:airserver.pdf"}

set f2List to getFilepathListByUTI(posixLibPath, aUTI, "POSIX") of me
–> {"/Users/me/Documents/0718kenpo.pdf", "/Users/me/Documents/2013-09Rekihaku.pdf", "/Users/me/Documents/airserver.pdf"}

on getFilepathListByUTI(aFolPOSIX, aUTI as string, aFileType as string)
  script spdFile
    property urlList : {}
  end script
  
  
if aFileType is not in {"file", "POSIX"} then return {}
  
  
set aFM to NSFileManager’s defaultManager()
  
set aFolExt to (aFM’s fileExistsAtPath:aFolPOSIX isDirectory:true) as boolean
  
if aFolExt = false then return {} –フォルダ自体が存在しなければヌルリストを返す
  
  
set aURL to |NSURL|’s fileURLWithPath:aFolPOSIX
  
set theOptions to ((current application’s NSDirectoryEnumerationSkipsPackageDescendants) as integer) + ((current application’s NSDirectoryEnumerationSkipsHiddenFiles) as integer)
  
set urlArray to (aFM’s contentsOfDirectoryAtURL:aURL includingPropertiesForKeys:{} options:theOptions |error|:(missing value))
  
if urlArray = missing value then return {}
  
  
set (urlList of spdFile) to urlArray as list
  
set newList to {}
  
  
repeat with i in (urlList of spdFile)
    set j to POSIX path of i
    
set tmpUTI to my retUTIfromPath(j)
    
set utiRes to my filterUTIList({tmpUTI}, aUTI)
    
    
if utiRes is not equal to {} then
      if aFileType = "POSIX" then
        set the end of newList to j
      else if aFileType = "file" then
        set the end of newList to POSIX file j
      end if
    end if
    
  end repeat
  
  
return newList
end getFilepathListByUTI

–指定のPOSIX pathのファイルのUTIを求める
on retUTIfromPath(aPOSIXPath)
  set aURL to |NSURL|’s fileURLWithPath:aPOSIXPath
  
set {theResult, theValue} to aURL’s getResourceValue:(reference) forKey:NSURLTypeIdentifierKey |error|:(missing value)
  
  
if theResult = true then
    return theValue as string
  else
    return theResult
  end if
end retUTIfromPath

–UTIリストが指定UTIに含まれているかどうか演算を行う
on filterUTIList(aUTIList, aUTIstr)
  set anArray to NSArray’s arrayWithArray:aUTIList
  
set aPred to NSPredicate’s predicateWithFormat_("SELF UTI-CONFORMS-TO %@", aUTIstr)
  
set bRes to (anArray’s filteredArrayUsingPredicate:aPred) as list
  
return bRes
end filterUTIList

★Click Here to Open This Script 

Posted in file File path list UTI | Tagged 10.11savvy 10.12savvy 10.13savvy 10.14savvy NSArray NSDirectoryEnumerationSkipsHiddenFiles NSFileManager NSPredicate NSURL NSURLTypeIdentifierKey | 3 Comments

指定フォルダ内のファイルのうち、指定拡張子リストに入っているものをすべて取得してフルパスを返す

Posted on 4月 12, 2019 by Takaaki Naganoya

指定フォルダに入っているファイルのうち、指定拡張子リストに該当するものをフルパスで返すAppleScriptです。

macOS 10.6以降の64ビット化されたFinderは動作が遅いため、大量のファイル情報を取得するなどの用途には不向きです。このため、「(ファイル選択を取得する以外の)ファイル処理にはFinderを使わない」のが現在のAppleScriptのセオリーとなっています。

本Scriptでは、~/Library/Script Libraries/フォルダの存在確認と、その中に格納されている「scpt」「scptd」の拡張子を持つAppleScript書類ファイルのリストアップを高速に行います。

AppleScript名:指定フォルダ内のファイルのうち、指定拡張子リストに入っているものをすべて取得してフルパスを返す
use AppleScript version "2.5"
use scripting additions
use framework "Foundation"

property |NSURL| : a reference to current application’s |NSURL|
property NSPredicate : a reference to current application’s NSPredicate
property NSFileManager : a reference to current application’s NSFileManager
property NSDirectoryEnumerationSkipsHiddenFiles : a reference to current application’s NSDirectoryEnumerationSkipsHiddenFiles

set anExpList to {"scpt", "scptd"} — no dot
set libPath to (((path to library folder from user domain) as string) & "Script Libraries:")
set posixLibPath to POSIX path of libPath
set fList to getFilepathListByExt(posixLibPath, anExpList) of me

on getFilepathListByExt(aFol, aExtList as list)
  set aFM to NSFileManager’s defaultManager()
  
set aFolExt to (aFM’s fileExistsAtPath:aFol isDirectory:true) as boolean
  
if aFolExt = false then return {} –フォルダ自体が存在しなければヌルリストを返す
  
  
set aURL to |NSURL|’s fileURLWithPath:aFol
  
set theOptions to ((current application’s NSDirectoryEnumerationSkipsPackageDescendants) as integer) + ((current application’s NSDirectoryEnumerationSkipsHiddenFiles) as integer)
  
set urlArray to aFM’s contentsOfDirectoryAtURL:aURL includingPropertiesForKeys:{} options:theOptions |error|:(missing value)
  
set thePred to NSPredicate’s predicateWithFormat_("pathExtension.lowercaseString IN %@", aExtList)
  
set anArray to (urlArray’s filteredArrayUsingPredicate:thePred)
  
return anArray as {missing value, list}
end getFilepathListByExt

★Click Here to Open This Script 

Posted in file list | Tagged 10.12savvy 10.13savvy 10.14savvy NSFileManager NSPredicate NSURL | Leave a comment

MP3ファイルからMP3タグの情報を取得

Posted on 4月 1, 2019 by Takaaki Naganoya

MP3ファイルからMP3タグの情報を取得するAppleScriptです。

とりあえず「取り出せることを確認した」というレベルの実装で、取り出したデータをタグに応じた加工を行うといった処理はほとんど書いてありません。各自よろしくお取り扱いください(投げやり)。

正直、Musicフォルダ以外に転がっている野良MP3ファイルから直接MP3タグ情報を読まなくても、iTunes.appにインポートしておいて、iTunes.appやらiTunesLibrary.framework経由で楽曲ファイルにアクセスしたほうが(データ形式のゆらぎを吸収してもらえるため)安全で楽です。

AppleScript名:MP3ファイルからMP3タグの情報を取得.scptd
—
–  Created by: Takaaki Naganoya
–  Created on: 2019/04/01
—
–  Copyright © 2019 Piyomaru Software, All Rights Reserved
— 参照先:http://d.hatena.ne.jp/terazzo/20120107/1325967445
use AppleScript version "2.4" — Yosemite (10.10) or later
use framework "Foundation"
use framework "AppKit"
use framework "AVFoundation"
use scripting additions

property |NSURL| : a reference to current application’s |NSURL|
property NSImage : a reference to current application’s NSImage
property AVURLAsset : a reference to current application’s AVURLAsset
property AVMetadataFormatID3Metadata : a reference to current application’s AVMetadataFormatID3Metadata
property AVMetadataCommonKeyAlbumName : a reference to current application’s AVMetadataCommonKeyAlbumName

set aPath to POSIX path of (choose file of type {"public.mp3"})
set aMP3Info to getMP3TagsFromFile(aPath) of me

on getMP3TagsFromFile(aPath)
  set aURL to |NSURL|’s fileURLWithPath:aPath
  
set anAsset to AVURLAsset’s assetWithURL:aURL
  
  
set aRes to (anAsset’s availableMetadataFormats()’s containsObject:(AVMetadataFormatID3Metadata)) as boolean
  
if aRes = false then return false
  
  
set origMetadata to (anAsset’s metadataForFormat:(AVMetadataFormatID3Metadata)) as list
  
set outList to {}
  
  
repeat with i in origMetadata
    set aKey to (i’s |key|()) as list of string or string –as anything
    
set bKey to i’s commonKey() as list of string or string –as anything
    
    
if aKey = "PIC" or aKey = "APIC" then
      set aVal to (i’s value())
      
set aVal to (NSImage’s alloc()’s initWithData:aVal)
    else
      set aVal to (i’s value()) as list of string or string –as anything
    end if
    
set the end of outList to {aKey, bKey, aVal}
  end repeat
  
  
return outList
end getMP3TagsFromFile

★Click Here to Open This Script 

Posted in file | Tagged 10.12savvy 10.13savvy 10.14savvy AVURLAsset NSImage NSURL | Leave a comment

HTMLをplain textに変換(文字コード自動認識ライブラリ展開)

Posted on 3月 14, 2019 by Takaaki Naganoya

HTMLをプレーンテキストに変換するAppleScriptです。

本来は、文字コードの自動推測を行う部分はライブラリ化していますが、掲載用にライブラリをScript中に展開してみました。

コードの自動推測部分の処理は、昔のCotEditorのソースを読んで前半部分の「古くからある文字エンコーディングの勝ち抜け」処理を書き、後半部分のマイナー文字エンコーディングの多数決&文字化け検出方式がオリジナル処理部分です。

本コード自動推測は、意味のある日本語のテキストを処理するように設計してあるので、寿司屋の湯呑みのように魚の名前の漢字が1文字で羅列されているようなテキストの文字コード自動判別でミスを起こす可能性があります(実際に魚の名前のテキストを作って読み込んでみましたが、とくに問題はありませんでした)。

ただ、最近はUTF-8だけでなんとかなりそうなので、そこまでエグいテキストに遭遇することもないでしょう。

AppleScript名:HTMLをplain textに変換(文字コード自動認識ライブラリ展開)
— Created 2017-09-08 by Takaaki Naganoya
— 2017 Piyomaru Software
use AppleScript version "2.4"
use scripting additions
use framework "Foundation"
–use jLib : script "japaneseTextEncodingDetector"

property NSString : a reference to current application’s NSString
property NSMutableArray : a reference to current application’s NSMutableArray
property NSAttributedString : a reference to current application’s NSAttributedString
property NSUnicodeStringEncoding : a reference to current application’s NSUnicodeStringEncoding

set aFile to choose file
set aRes to readJapanesTextFileWithGuessingEncoding(POSIX path of aFile) of me
if aRes = false then return ""

set aPlainText to HTMLDecode(aRes) of me

on HTMLDecode(HTMLString)
  set theString to current application’s NSString’s stringWithString:HTMLString
  
set theData to theString’s dataUsingEncoding:(NSUnicodeStringEncoding)
  
set attStr to NSAttributedString’s alloc()’s initWithHTML:theData documentAttributes:(missing value)
  
return (attStr’s |string|()) as string
end HTMLDecode

–Read Japanese text with detecting its text encoding
on readJapanesTextFileWithGuessingEncoding(aPOSIXpath as string)
  
  
–ISO2022JP check
  
set aNSData to current application’s NSData’s dataWithContentsOfFile:aPOSIXpath
  
set aDataLength to aNSData’s |length|()
  
if aDataLength > 1024 then set aDataLength to 1024
  
  
–0x1B check
  
set anNSString to current application’s NSString’s stringWithString:(character id 27) — 0x1B
  
set theData to anNSString’s dataUsingEncoding:(current application’s NSUTF8StringEncoding)
  
set theRange to aNSData’s rangeOfData:theData options:0 range:(current application’s NSMakeRange(0, aDataLength))
  
  
–found 0x1B in aNSData
  
if |length| of theRange = 1 and location of theRange < aDataLength then
    set aStr to (current application’s NSString’s alloc()’s initWithData:aNSData encoding:(current application’s NSISO2022JPStringEncoding)) –21
    
if aStr is not equal to missing value then return (aStr as text) — ISO2022JP
  end if
  
  
–EUC
  
set resValue to (current application’s NSString’s alloc()’s initWithData:aNSData encoding:(current application’s NSJapaneseEUCStringEncoding))
  
if resValue is not equal to missing value then return (resValue as text)
  
  
–UTF-8
  
set resValue to (current application’s NSString’s alloc()’s initWithData:aNSData encoding:(current application’s NSUTF8StringEncoding))
  
if resValue is not equal to missing value then return (resValue as text)
  
  
–SHift JIS
  
set resValue to (current application’s NSString’s alloc()’s initWithData:aNSData encoding:(current application’s NSShiftJISStringEncoding))
  
if resValue is not equal to missing value then return (resValue as text)
  
  
–多数決を取る
  
–UTF-16BE/LE/無印Unicodeは多数決を取る
  
set resValue1 to (current application’s NSString’s alloc()’s initWithData:aNSData encoding:(current application’s NSUTF16BigEndianStringEncoding)) as text
  
set sample1 to getTextSample(resValue1) of me
  
set lang1 to specifyLanguageOfText(sample1) of me
  
set para1 to length of (paragraphs of sample1)
  
set words1 to length of (words of sample1)
  
  
–UTF-16LE  
  
set resValue2 to (current application’s NSString’s alloc()’s initWithData:aNSData encoding:(current application’s NSUTF16LittleEndianStringEncoding)) as text
  
set sample2 to getTextSample(resValue2) of me
  
set lang2 to specifyLanguageOfText(sample2) of me
  
set para2 to length of (paragraphs of sample2)
  
set words2 to length of (words of sample2)
  
  
–無印Unicode
  
set resValue3 to (current application’s NSString’s alloc()’s initWithData:aNSData encoding:(current application’s NSUnicodeStringEncoding)) as text
  
set sample3 to getTextSample(resValue3) of me
  
set lang3 to specifyLanguageOfText(sample3) of me
  
set para3 to length of (paragraphs of sample3)
  
set words3 to length of (words of sample3)
  
  
–文字および文法的に見て「日本語」ならそれを返す
  
if lang1 = "ja" then return resValue1
  
if lang2 = "ja" then return resValue2
  
if lang3 = "ja" then return resValue2


–文字化けしたときには、日本語の「Word」として認識されづらく、Paragraphも少ない(1とか)なので条件で除外する
  
if para1 is not equal to 1 then
    if (words1 ≤ words2) or (words1 ≤ words3) then
      return resValue1
    end if
  end if
  
  
if para2 is not equal to 1 then
    if (words2 ≤ words1) or (words2 ≤ words3) then
      return resValue2
    end if
  end if
  
  
if para3 is not equal to 1 then
    if (words3 ≤ words1) or (words3 ≤ words2) then
      return resValue3
    end if
  end if
  
  
return false –文字コード判定に失敗した
end readJapanesTextFileWithGuessingEncoding

on specifyLanguageOfText(aStr)
  set aNSstring to current application’s NSString’s stringWithString:aStr
  
set tagSchemes to current application’s NSArray’s arrayWithObjects:(current application’s NSLinguisticTagSchemeLanguage)
  
set tagger to current application’s NSLinguisticTagger’s alloc()’s initWithTagSchemes:tagSchemes options:0
  
tagger’s setString:aNSstring
  
set aLanguage to tagger’s tagAtIndex:0 |scheme|:(current application’s NSLinguisticTagSchemeLanguage) tokenRange:(missing value) sentenceRange:(missing value)
  
return aLanguage as text
end specifyLanguageOfText

on getTextSample(aText)
  set aLen to length of aText
  
if aLen < 1024 then
    set bLen to aLen
  else
    set bLen to 1024
  end if
  
return (text 1 thru bLen of aText)
end getTextSample

★Click Here to Open This Script 

Posted in file Text | Tagged 10.11savvy 10.12savvy 10.13savvy 10.14savvy NSAttributedString NSMutableArray NSString | Leave a comment

SFPSDWriterでレイヤー分けしたPhotoshopデータを作成

Posted on 2月 27, 2019 by Takaaki Naganoya

オープンソースのSFPSDWriterを呼び出して、レイヤー分けしたPhotoshopデータを作成するAppleScriptです。

SFPSDWriterは基本的にCGImageを与えてPSDを作成するプログラムですが、AppleScriptからはCGImageを作れません。

SFPSDWriterのソースコードを読んでみたら、コメントにNSImageからCGImageへの変換方法が書かれていたので、NSImageを受け付けるメソッドを新規追加してAppleScriptから呼べるようにしてみました。

–> Download SFPSDWriter.framework(To ~/Library/Frameworks)

PSDを読み書きするObjective-Cのプログラムは割とすぐに見つかるのですが、AppleScriptから呼べない(CGImageをパラメータにするため)ものが多く、どれか1つぐらいは使えてほしいと思っていました。

SFPSDWriterの機能はすべて試せていませんが、名前どおり本ソフトはPSDファイルを書き込む専用であって、読むためのものではありません。これ以外にPSDファイルを読み込んでオブジェクトを取り出せる(ように改造できる)ものを探しておきたいところです。Photoshopを用いないでPSDデータにアクセスできることには価値があります。Mac App Storeに出すソフトウェアだととくにそうです。

Photoshopを操作してほぼ同様の処理を行うものを書いてみましたが、SFPSDWriterを用いて処理したほうがシンプルなことに驚きます。

AppleScript名:SFPSDWriterのじっけん
— Created 2016-03-12 by Takaaki Naganoya
— Modified 2019-02-27 by Takaaki Naganoya
— 2019 Piyomaru Software
use AppleScript version "2.4"
use scripting additions
use framework "Foundation"
use framework "AppKit"
use framework "SFPSDWriter" –https://github.com/shinyfrog/SFPSDWriter

property |NSURL| : a reference to current application’s |NSURL|
property NSString : a reference to current application’s NSString
property NSImage : a reference to current application’s NSImage
property SFPSDWriter : a reference to current application’s SFPSDWriter
property NSWorkspace : a reference to current application’s NSWorkspace

property SFPSDResolutionUnitPPI : 1
property SFPSDResolutionUnitPPC : 2

set layer1 to NSImage’s alloc()’s initWithContentsOfURL:(|NSURL|’s fileURLWithPath:(POSIX path of (choose file of type {"public.png"})))
set layer2 to NSImage’s alloc()’s initWithContentsOfURL:(|NSURL|’s fileURLWithPath:(POSIX path of (choose file of type {"public.png"})))

set anWriter to SFPSDWriter’s alloc()’s initWithDocumentSize:(current application’s CGSizeMake(1024, 400)) andResolution:72.0 andResolutionUnit:(SFPSDResolutionUnitPPI)

anWriter’s addLayerWithNSImage:layer1 andName:"Layer_01" andOpacity:1.0 andOffset:{x:0.0, y:0.0}
anWriter’s addLayerWithNSImage:layer2 andName:"Layer_02" andOpacity:1.0 andOffset:{x:50.0, y:50.0}

set aPSD to anWriter’s createPSDData()

set pathString to NSString’s stringWithString:"~/Desktop/output.psd"
set newPath to pathString’s stringByExpandingTildeInPath()

aPSD’s writeToFile:newPath atomically:true

–Open with Adobe Photoshop
NSWorkspace’s sharedWorkspace()’s openFile:newPath

★Click Here to Open This Script 

AppleScript名:PhotoshopでSFPSDWriterと同じような処理を行う
— Created 2019-02-27 by Takaaki Naganoya
— 2019 Piyomaru Software
set layer1 to (choose file of type {"public.png"}) as string
set layer2 to (choose file of type {"public.png"}) as string

tell application id "com.adobe.photoshop"
  activate
  
close every document saving no
  
  
set aDoc to make new document with properties {height:900, width:900, resolution:72.0, mode:RGB, bits per channel:eight, initial fill:transparent, color profile kind:none, pixel aspect ratio:1.0}
  
tell aDoc
    set origLayer to (first item of (name of every art layer)) as string
  end tell
  
  
open file layer1
  
set bDoc to a reference to current document
  
tell bDoc
    select all
    
copy
    
close without saving
  end tell
  
  
tell aDoc
    set artLayerRef to make new art layer with properties {name:"Layer_01"}
    
set current layer to artLayerRef
    
tell artLayerRef
      paste
    end tell
  end tell
  
  
open file layer2
  
set cDoc to a reference to current document
  
tell cDoc
    select all
    
copy
    
close without saving
  end tell
  
  
tell aDoc
    set artLayerRef to make new art layer with properties {name:"Layer_02"}
    
set current layer to artLayerRef
    
tell artLayerRef
      paste
    end tell
    
    
delete art layer origLayer
  end tell
end tell

★Click Here to Open This Script 

Posted in file Image | Tagged 10.11savvy 10.12savvy 10.13savvy Photoshop | 1 Comment

指定ファイルサイズのJPEGに変換(圧縮率可変)_1K=1024で計算

Posted on 2月 11, 2019 by Takaaki Naganoya

Finder上で選択中の画像ファイルを指定ファイルサイズを下回るよう圧縮率を調整してJPEGに変換するAppleScriptです。

指定画像を指定のファイルサイズ(1K=1024で計算)以内になるよう、非圧縮の状態から段階的に圧縮率を高くして仕上がりファイルサイズを下回るかどうか演算を行います。ファイルに書き込まずに仕上がりサイズの計算を行うところが新機軸です。

macOS標準搭載のスクリプトメニューから呼び出して使うことを想定しています。実行すると、ダイアログ表示して指定ファイルサイズをKB単位で数値入力する必要があります。

巨大な画像ファイルを処理してしまった場合への対処として、最初に最高圧縮率で圧縮してみて、指定ファイルサイズ以内になるかどうかを計算します。

最初は圧縮率100%から25%まで1%きざみで仕上がり画像ファイルサイズを計算してみたのですが、数十Mバイトの巨大な画像を処理させたら、途中でマウスカーソルが反応しないほどOSが無反応になったので(暴走状態?)、それを避けるために、このような処理を行なってみました。

JPEGにファイル変換した画像はデスクトップに

UUID_JPEG画質.jpg

の形式で出力されます。JPEG画質は1.0から0.01までの数値です。

AppleScript名:指定ファイルサイズのJPEGに変換(圧縮率可変)_1K=1024で計算
— Created 2014-02-21 Shane Stanley
— Modified 2019-02-11 Takaaki Naganoya
use AppleScript version "2.5"
use scripting additions
use framework "Foundation"
use framework "AppKit"

property |NSURL| : a reference to current application’s |NSURL|
property NSUUID : a reference to current application’s NSUUID
property NSArray : a reference to current application’s NSArray
property NSString : a reference to current application’s NSString
property NSImage : a reference to current application’s NSImage
property NSPredicate : a reference to current application’s NSPredicate
property NSJPEGFileType : a reference to current application’s NSJPEGFileType
property NSBitmapImageRep : a reference to current application’s NSBitmapImageRep
property NSURLTypeIdentifierKey : a reference to current application’s NSURLTypeIdentifierKey

property compressList : {100, 99, 98, 97, 96, 95, 90, 85, 80, 75, 70, 65, 60, 55, 50, 40, 30, 20, 25} –大→小 へと並んでいる必要がある
property kbBase : 1024

tell application "Finder"
  set inFiles to selection as alias list
end tell

–指定のAlias listのうち画像ファイルのみ抽出
set filRes1 to filterAliasListByUTI(inFiles, "public.image") of me
if filRes1 = {} then return

–ターゲットサイズを指定
set aMessage to "Input Target size in KB ( " & (kbBase as string) & " based )"
set aRes to text returned of (display dialog aMessage default answer "300" buttons {"OK"} default button 1)
if aRes = false or aRes = "" then return
set targLimit to (aRes as number) * kbBase

–選択中のファイルのうちの1つから親フォルダを求め、出力先ファイルパスを組み立てる
set outPathTarg to (contents of first item of filRes1)
set pathString to NSString’s stringWithString:outPathTarg
set newPath to (pathString’s stringByDeletingLastPathComponent()) as string

–Main Loop
repeat with i in filRes1
  set aNSImage to (NSImage’s alloc()’s initWithContentsOfFile:(i))
  
  
–巨大すぎる画像のリサイズ時への保険で、最小サイズで投機的に圧縮して結果を確認する
  
set minSize to calcSavedJPEGSizeFromNSIMage(aNSImage, (last item of compressList) / 100) of me
  
  
if minSize < targLimit then
    –Simulate Suitable JPEG Compression Ratio to target file size
    
repeat with ii in compressList
      set jj to ii / 100
      
set fileSize to calcSavedJPEGSizeFromNSIMage(aNSImage, jj) of me
      
      
if fileSize < targLimit then
        exit repeat
      end if
    end repeat
  else
    set jj to 0.01 –エラー時にはやけくそで1%まで圧縮指定
  end if
  
  
set outPOSIXpath to (newPath & "/" & (NSUUID’s UUID()’s UUIDString()) as string) & "_" & (jj as string)
  
set savePath to outPOSIXpath & ".jpg"
  
  
saveNSImageAtPathAsJPG(aNSImage, savePath, jj) of me
end repeat

–Alias listから指定UTIに含まれるものをPOSIX pathのリストで返す
on filterAliasListByUTI(aList, targUTI)
  set newList to {}
  
repeat with i in aList
    set j to POSIX path of i
    
set tmpUTI to my retUTIfromPath(j)
    
set utiRes to my filterUTIList({tmpUTI}, targUTI)
    
if utiRes is not equal to {} then
      set the end of newList to j
    end if
  end repeat
  
return newList
end filterAliasListByUTI

–指定のPOSIX pathのファイルのUTIを求める
on retUTIfromPath(aPOSIXPath)
  set aURL to |NSURL|’s fileURLWithPath:aPOSIXPath
  
set {theResult, theValue} to aURL’s getResourceValue:(reference) forKey:NSURLTypeIdentifierKey |error|:(missing value)
  
  
if theResult = true then
    return theValue as string
  else
    return theResult
  end if
end retUTIfromPath

–UTIリストが指定UTIに含まれているかどうか演算を行う
on filterUTIList(aUTIList, aUTIstr)
  set anArray to NSArray’s arrayWithArray:aUTIList
  
set aPred to NSPredicate’s predicateWithFormat_("SELF UTI-CONFORMS-TO %@", aUTIstr)
  
set bRes to (anArray’s filteredArrayUsingPredicate:aPred) as list
  
return bRes
end filterUTIList

–NSImageを指定パスにJPEG形式で保存、qulityNumは0.0〜1.0。1.0は無圧縮
on saveNSImageAtPathAsJPG(anImage, outPath, qulityNum as real)
  set imageRep to anImage’s TIFFRepresentation()
  
set aRawimg to NSBitmapImageRep’s imageRepWithData:imageRep
  
set pathString to NSString’s stringWithString:outPath
  
set newPath to pathString’s stringByExpandingTildeInPath()
  
set myNewImageData to (aRawimg’s representationUsingType:(NSJPEGFileType) |properties|:{NSImageCompressionFactor:qulityNum})
  
  
set aLength to (myNewImageData’s |length|()) as number
  
  
set aRes to (myNewImageData’s writeToFile:newPath atomically:true) as boolean
  
return aRes –true/false
end saveNSImageAtPathAsJPG

–NSImageをJPEG形式で保存したときのファイルサイズを計算
on calcSavedJPEGSizeFromNSIMage(anImage, qulityNum as real)
  set imageRep to anImage’s TIFFRepresentation()
  
set aRawimg to NSBitmapImageRep’s imageRepWithData:imageRep
  
set myNewImageData to (aRawimg’s representationUsingType:(NSJPEGFileType) |properties|:{NSImageCompressionFactor:qulityNum})
  
set aLength to (myNewImageData’s |length|()) as number
  
return aLength
end calcSavedJPEGSizeFromNSIMage

★Click Here to Open This Script 

Posted in file Image list UTI | Tagged 10.11savvy 10.12savvy 10.13savvy 10.14savvy Finder NSArray NSBitmapImageRep NSImage NSPredicate NSString NSURL NSURLTypeIdentifierKey NSUUID | Leave a comment

Finder上で選択中のAppleScriptの行数をカウントする

Posted on 2月 8, 2019 by Takaaki Naganoya

Finder上で選択中のAppleScript書類の行数や種別を取得して表UIで表示するAppleScriptです。

Myriad Tables Libを用いて結果を表UIで表示しています。

当初はAppleScript書類からソースを取得するのに/usr/bin/osadecompileコマンドを使っていたのですが、OSAKit経由で処理したほうが高速な印象があります。

–> Download Executable archive for macOS 10.14 (include Myriad Tables Lib)

macOS 10.14上で動作させるためには、Script Debugger上で本Scriptをオープンするか、本Scriptをバンドル形式で保存し、バンドル内(/Contents/Resources/Script Libraries フォルダ)にMyriad Tables Libを入れ、AppleScriptアプレットとして書き出す必要があります。

また、初回実行時には「セキュリティ」の承認ダイアログが表示されるため、これをOKする必要があります。AppleScriptアプレットはFinder上でアイコンをダブルクリックすると「Finder上で選択中のアイテム」を拾えないため(その瞬間、Finder上での選択アイテムはアプレット自身になってしまうため)、DockやmacOS標準装備のスクリプトメニューに登録して起動する必要があります。

AppleScript名:Finder上で選択中のAppleScriptの行数をカウントする v2.scpt
— Created 2019-02-04 by Takaaki Naganoya
— 2019 Piyomaru Software
use AppleScript version "2.4"
use scripting additions
use framework "Foundation"
use framework "OSAKit"
use script "Myriad Tables Lib" version "1.0.8" –https://www.macosxautomation.com/applescript/apps/Script_Libs.html#MyriadTablesLib

property |NSURL| : a reference to current application’s |NSURL|
property NSArray : a reference to current application’s NSArray
property NSString : a reference to current application’s NSString
property OSAScript : a reference to current application’s OSAScript
property NSPredicate : a reference to current application’s NSPredicate
property NSURLIsPackageKey : a reference to current application’s NSURLIsPackageKey
property NSURLIsDirectoryKey : a reference to current application’s NSURLIsDirectoryKey
property NSURLTypeIdentifierKey : a reference to current application’s NSURLTypeIdentifierKey

–Finder上で選択中のファイルのうちAppleScript書類のみ抽出
tell application "Finder"
  set inFiles to selection as alias list
  
if inFiles = {} then return
end tell
set filRes1 to filterAliasListByUTIList(inFiles, {"com.apple.applescript.script", "com.apple.applescript.script-bundle"}) of me
if filRes1 = {} then return

–AppleScript書類の種別判定および行数カウント
set outList to {}
repeat with i in filRes1
  set aName to (NSString’s stringWithString:i)’s lastPathComponent() as string
  
set sInfo to detectScriptIsPureASorASOC(i) of me
  
set sText to scriptSource of getASsourceFor(i) of me
  
set sNum to count every paragraph of sText
  
set sUTI to retUTIfromPath(i) of me
  
if sUTI = "com.apple.applescript.script" then
    set sKind to "Script"
  else if sUTI = "com.apple.applescript.script-bundle" then
    set sKind to "Script Bundle"
  else
    set sKind to "Other"
  end if
  
  
set the end of outList to {aName, sInfo, sKind, sNum}
end repeat

–結果を表UIで表示する
tell script "Myriad Tables Lib"
  set aDispBounds to my makeInitialBounds:1200 withHeight:500
  
set theTable to make new table with data outList column headings {"script name", "ASOC", "Script Kind", "lines"} with title "AppleScript Line Count" with prompt "Your Selected Scripts" with row numbering and empty selection allowed –and can add and delete
  
modify table theTable initial position aDispBounds column widths pattern {1, 2, 3, 4} with hidden cancel button
  
modify columns in table theTable user date format {user format full, user format full} entry alignment align left
  (
display table theTable)
end tell

–Alias listから指定UTI Listに含まれるものをPOSIX pathのリストで返す
on filterAliasListByUTIList(aList as list, targUTIList as list)
  set outList to {}
  
repeat with i in targUTIList
    set j to contents of i
    
set aRes to filterAliasListByUTI(aList, j) of me
    
if aRes is not equal to {} then
      set outList to outList & aRes
    end if
  end repeat
  
return outList
end filterAliasListByUTIList

–Alias listから指定UTIに含まれるものをPOSIX pathのリストで返す
on filterAliasListByUTI(aList as list, targUTI)
  set newList to {}
  
repeat with i in aList
    set j to POSIX path of i
    
set tmpUTI to my retUTIfromPath(j)
    
set utiRes to my filterUTIList({tmpUTI}, targUTI)
    
if utiRes is not equal to {} then
      set the end of newList to j
    end if
  end repeat
  
return newList
end filterAliasListByUTI

–指定のPOSIX pathのファイルのUTIを求める
on retUTIfromPath(aPOSIXPath)
  set aURL to |NSURL|’s fileURLWithPath:aPOSIXPath
  
set {theResult, theValue} to aURL’s getResourceValue:(specifier) forKey:NSURLTypeIdentifierKey |error|:(missing value)
  
  
if theResult = true then
    return theValue as string
  else
    return theResult
  end if
end retUTIfromPath

–UTIリストが指定UTIに含まれているかどうか演算を行う
on filterUTIList(aUTIList, aUTIstr)
  set anArray to NSArray’s arrayWithArray:aUTIList
  
set aPred to NSPredicate’s predicateWithFormat_("SELF UTI-CONFORMS-TO %@", aUTIstr)
  
set bRes to (anArray’s filteredArrayUsingPredicate:aPred) as list
  
return bRes
end filterUTIList

on makeInitialBounds:(aTWidth as integer) withHeight:(aTHeight as integer)
  set aDispBounds to current application’s NSScreen’s mainScreen()’s frame()
  
if class of item 1 of aDispBounds = record then
    –macOS 10.10/10.11/10.12
    
set aWidth to (width of |size| of aDispBounds)
    
set aHeight to (height of |size| of aDispBounds)
  else
    –macOS 10.13 or later?
    
set aWidth to (item 1 of item 2 of aDispBounds)
    
set aHeight to (item 2 of item 2 of aDispBounds)
  end if
  
  
set xPos to (aWidth div 2) – (aTWidth div 2)
  
set yPos to (aHeight div 2) – (aTHeight div 2)
  
  
return {xPos, yPos, aTWidth, aTHeight}
end makeInitialBounds:withHeight:

–指定AppleScriptファイルがPure ASかASOCかを判定して返す
on detectScriptIsPureASorASOC(aFile)
  set sRes to getASsourceFor(aFile) of me
  
set sName to scriptKind of sRes –Name
  
set sText to scriptSource of sRes –Source
  
if sText = "" or sText = missing value then return missing value
  
  
if sName = "AppleScript" then
    if sText contains "use framework \"Foundation\"" then
      return true –ASOC
    else
      return false –Pure AppleScript
    end if
  else
    –JXAなど他のOSA言語の場合
    
return sName
  end if
end detectScriptIsPureASorASOC

–指定AppleScriptファイルのソースコードを取得する(実行専用Scriptからは取得できない)
on getASsourceFor(aPOSIXPath)
  set aURL to |NSURL|’s fileURLWithPath:(aPOSIXPath)
  
set theScript to current application’s OSAScript’s alloc()’s initWithContentsOfURL:aURL |error|:(missing value)
  
set scriptName to theScript’s |language|()’s |name|() as string
  
set theSource to theScript’s source() as text
  
return {scriptKind:scriptName, scriptSource:theSource}
end getASsourceFor

★Click Here to Open This Script 

Posted in file File path GUI OSA | Tagged 10.11savvy 10.12savvy 10.13savvy 10.14savvy NSArray NSPredicate NSString NSURL OSAScript | Leave a comment

Post navigation

  • Older posts
  • Newer posts

電子書籍(PDF)をオンラインストアで販売中!

Google Search

Popular posts

  • 開発機としてM2 Mac miniが来たのでガチレビュー
  • CotEditorで2つの書類の行単位での差分検出
  • macOS 13.6.5 AS系のバグ、一切直らず
  • macOS 15, Sequoia
  • 初心者がつまづきやすい「log」コマンド
  • 指定のWordファイルをPDFに書き出す
  • Pages本執筆中に、2つの書類モード切り替えに気がついた
  • Adobe AcrobatをAppleScriptから操作してPDF圧縮
  • メキシカンハットの描画
  • 与えられた文字列の1D Listのすべての順列組み合わせパターン文字列を返す v3(ベンチマーク用)
  • 2023年に書いた価値あるAppleScript
  • Pixelmator Pro v3.6.4でAppleScriptからの操作時の挙動に違和感が
  • Numbersで選択範囲のセルの前後の空白を削除
  • AdobeがInDesign v19.4からPOSIX pathを採用
  • Safariで「プロファイル」機能を使うとAppleScriptの処理に影響
  • Cocoa Scripting Course 続刊計画
  • AppleScriptによる並列処理
  • macOS 14.xでScript Menuの実行速度が大幅に下がるバグ
  • NaturalLanguage.frameworkでNLEmbeddingの処理が可能な言語をチェック
  • AppleScript入門③AppleScriptを使った「自動化」とは?

Tags

10.11savvy (1102) 10.12savvy (1243) 10.13savvy (1392) 10.14savvy (587) 10.15savvy (438) 11.0savvy (283) 12.0savvy (212) 13.0savvy (188) 14.0savvy (138) 15.0savvy (116) CotEditor (64) Finder (51) iTunes (19) Keynote (115) NSAlert (61) NSArray (51) NSBitmapImageRep (20) NSBundle (20) NSButton (34) NSColor (53) NSDictionary (28) NSFileManager (23) NSFont (21) NSImage (41) NSJSONSerialization (21) NSMutableArray (63) NSMutableDictionary (22) NSPredicate (36) NSRunningApplication (56) NSScreen (30) NSScrollView (22) NSString (119) NSURL (98) NSURLRequest (23) NSUTF8StringEncoding (30) NSView (33) NSWorkspace (20) Numbers (75) Pages (54) Safari (44) Script Editor (27) WKUserContentController (21) WKUserScript (20) WKWebView (23) WKWebViewConfiguration (22)

カテゴリー

  • 2D Bin Packing
  • 3D
  • AirDrop
  • AirPlay
  • Animation
  • AppleScript Application on Xcode
  • Beginner
  • Benchmark
  • beta
  • Bluetooth
  • Books
  • boolean
  • bounds
  • Bug
  • Calendar
  • call by reference
  • check sum
  • Clipboard
  • Cocoa-AppleScript Applet
  • Code Sign
  • Color
  • Custom Class
  • dialog
  • diff
  • drive
  • Droplet
  • exif
  • file
  • File path
  • filter
  • folder
  • Font
  • Font
  • GAME
  • geolocation
  • GUI
  • GUI Scripting
  • Hex
  • History
  • How To
  • iCloud
  • Icon
  • Image
  • Input Method
  • Internet
  • iOS App
  • JavaScript
  • JSON
  • JXA
  • Keychain
  • Keychain
  • Language
  • Library
  • list
  • Locale
  • Localize
  • Machine Learning
  • Map
  • Markdown
  • Menu
  • Metadata
  • MIDI
  • MIME
  • Natural Language Processing
  • Network
  • news
  • Noification
  • Notarization
  • Number
  • Object control
  • OCR
  • OSA
  • parallel processing
  • PDF
  • Peripheral
  • PRODUCTS
  • QR Code
  • Raw AppleEvent Code
  • Record
  • rectangle
  • recursive call
  • regexp
  • Release
  • Remote Control
  • Require Control-Command-R to run
  • REST API
  • Review
  • RTF
  • Sandbox
  • Screen Saver
  • Script Libraries
  • sdef
  • search
  • Security
  • selection
  • shell script
  • Shortcuts Workflow
  • Sort
  • Sound
  • Spellchecker
  • Spotlight
  • SVG
  • System
  • Tag
  • Telephony
  • Text
  • Text to Speech
  • timezone
  • Tools
  • Update
  • URL
  • UTI
  • Web Contents Control
  • WiFi
  • XML
  • XML-RPC
  • イベント(Event)
  • 未分類

アーカイブ

  • 2025年2月
  • 2025年1月
  • 2024年12月
  • 2024年11月
  • 2024年10月
  • 2024年9月
  • 2024年8月
  • 2024年7月
  • 2024年6月
  • 2024年5月
  • 2024年4月
  • 2024年3月
  • 2024年2月
  • 2024年1月
  • 2023年12月
  • 2023年11月
  • 2023年10月
  • 2023年9月
  • 2023年8月
  • 2023年7月
  • 2023年6月
  • 2023年5月
  • 2023年4月
  • 2023年3月
  • 2023年2月
  • 2023年1月
  • 2022年12月
  • 2022年11月
  • 2022年10月
  • 2022年9月
  • 2022年8月
  • 2022年7月
  • 2022年6月
  • 2022年5月
  • 2022年4月
  • 2022年3月
  • 2022年2月
  • 2022年1月
  • 2021年12月
  • 2021年11月
  • 2021年10月
  • 2021年9月
  • 2021年8月
  • 2021年7月
  • 2021年6月
  • 2021年5月
  • 2021年4月
  • 2021年3月
  • 2021年2月
  • 2021年1月
  • 2020年12月
  • 2020年11月
  • 2020年10月
  • 2020年9月
  • 2020年8月
  • 2020年7月
  • 2020年6月
  • 2020年5月
  • 2020年4月
  • 2020年3月
  • 2020年2月
  • 2020年1月
  • 2019年12月
  • 2019年11月
  • 2019年10月
  • 2019年9月
  • 2019年8月
  • 2019年7月
  • 2019年6月
  • 2019年5月
  • 2019年4月
  • 2019年3月
  • 2019年2月
  • 2019年1月
  • 2018年12月
  • 2018年11月
  • 2018年10月
  • 2018年9月
  • 2018年8月
  • 2018年7月
  • 2018年6月
  • 2018年5月
  • 2018年4月
  • 2018年3月
  • 2018年2月

https://piyomarusoft.booth.pm/items/301502

メタ情報

  • ログイン
  • 投稿フィード
  • コメントフィード
  • WordPress.org

Forum Posts

  • 人気のトピック
  • 返信がないトピック

メタ情報

  • ログイン
  • 投稿フィード
  • コメントフィード
  • WordPress.org
Proudly powered by WordPress
Theme: Flint by Star Verte LLC