Menu

Skip to content
AppleScriptの穴
  • Home
  • Products
  • Books
  • Docs
  • Events
  • Forum
  • About This Blog
  • License
  • 仕事依頼

AppleScriptの穴

Useful & Practical AppleScript archive. Click '★Click Here to Open This Script' Link to download each AppleScript

投稿者: Takaaki Naganoya

アラートダイアログ上に複数のNSBoxを作成してMKMapViewを表示

Posted on 3月 11, 2019 by Takaaki Naganoya

指定されたIPアドレスの位置情報(geo location)を検索して、アラートダイアログ上に拡大レベルの異なる4つの地図を表示するAppleScriptです。

IP Goecodingのサービスはipinfo.ioを利用しています。ただ、この手のサービスは入れ替わりが激しいので、長期的に使い続けられることを期待できないと感じています(有償サービスは別)。

このズームレベルが異なる地図の同時表示Viewは、作成したときには「これは画期的!」「ものすごく使いやすい!」と、狂喜乱舞したものですが、他のユーザーに見せてデモしたら、

「実際には限定されたエリア内の位置データを見ることが多いので、World LevelとかCountry Levelのビューは無駄なことが多い」
「地球を侵略しに来た異星人には向いているが、地球人向けには冗長」

といった意見が多く、オクラ入りしていました。アラートダイアログでさまざまなデータを可視化する部品の整備計画時に倉庫から引っ張り出されてきたものです。

唯一、IPアドレスという「見ただけではどこの国のものだかわからない」(Class AのIPは別。17.のAppleとか)データを可視化するときにはバッチリ合っています。

macOS 10.12〜10.14で確認していますが、唯一、macOS 10.14.4上では初期状態でピンが表示されません。ピン自体は存在しているので、地図表示タイプを変更すると表示されるのですが、一体これはどうしたものか。仕様なのかバグなのかわかりません。


▲なぜか本Blogにロス市警からのアクセスが(汗)


▲macOS 10.12.6 Map


▲macOS 10.12.6 Satellite


▲macOS 10.12.6 Map + Satellite


▲macOS 10.13.6 Map


▲macOS 10.14.4 Map (Light Mode)


▲macOS 10.14.4 Map (Dark Mode)

AppleScript名:アラートダイアログ上に複数のNSBoxを作成してMKMapViewを表示
— Created 2019-03-11 by Takaaki Naganoya
— 2019 Piyomaru Software
use AppleScript version "2.5"
use scripting additions
use framework "Foundation"
use framework "AppKit"
use framework "MapKit"
use framework "CoreLocation"

property NSAlert : a reference to current application’s NSAlert
property NSString : a reference to current application’s NSString
property NSScreen : a reference to current application’s NSScreen
property MKMapView : a reference to current application’s MKMapView
property MKMapTypeHybrid : a reference to current application’s MKMapTypeHybrid
property MKPointAnnotation : a reference to current application’s MKPointAnnotation
property NSJSONSerialization : a reference to current application’s NSJSONSerialization
property MKMapTypeSatellite : a reference to current application’s MKMapTypeSatellite
property MKMapTypeStandard : a reference to current application’s MKMapTypeStandard
property NSSegmentedControl : a reference to current application’s NSSegmentedControl
property NSRunningApplication : a reference to current application’s NSRunningApplication
property NSUTF8StringEncoding : a reference to current application’s NSUTF8StringEncoding
property NSSegmentStyleTexturedRounded : a reference to current application’s NSSegmentStyleTexturedRounded

property windisp : false
property selSeg : 0
property aMapViewList : {}

property segTitleList : {"Map", "Satellite", "Satellite + Map"}

property returnCode : 0

set aClip to the clipboard –このへんてきとう
set anIP to text returned of (display dialog "Input IP address to find its location" default answer aClip)

set windisp to false
set geoInfo to getGeoLocationByIPinfo(anIP) of me
if geoInfo = missing value then
  error "Network Error"
end if

set aInfo to loc of geoInfo

set aPos to offset of "," in aInfo
set aLatitude to text 1 thru (aPos – 1) of aInfo
set aLongitude to text (aPos + 1) thru -1 of aInfo

set aWidth to 1000
set aHeight to 600

set aButtonMSG to "OK"
set aMapViewList to {}

set paramObj to {viewWidth:aWidth, viewHeight:aHeight, viewTitle:anIP, viewSubTitle:"IP-Geocoding Service by ipinfo.io", viewLat:aLatitude, viewLong:aLongitude}

my performSelectorOnMainThread:"dispMapViewinDifferentScales:" withObject:(paramObj) waitUntilDone:true

on dispMapViewinDifferentScales:paramObj
  set aWidth to (viewWidth of paramObj) as real
  
set aHeight to (viewHeight of paramObj) as real
  
set aLat to (viewLat of paramObj) as real
  
set aLong to (viewLong of paramObj) as real
  
set aTitle to (viewTitle of paramObj) as string
  
set aSubTitle to (viewSubTitle of paramObj) as string
  
  
set selSeg to 0
  
  
–NSViewをつくる
  
set aView to current application’s NSView’s alloc()’s initWithFrame:(current application’s NSMakeRect(0, 0, aWidth, aHeight))
  
  
–各レベルのMapViewをBoxでつくる
  
set wList to {{3, "🌏World Level Map"}, {5, "🏰Country Level Map"}, {10, "🏢City Level Map"}, {17, "🏠Town Level Map"}}
  
set xPos to 0
  
repeat with i in wList
    copy i to {aLevelNum, aBoxTitle}
    
    
–Boxをつくる
    
set aBox to (current application’s NSBox’s alloc()’s initWithFrame:(current application’s NSMakeRect(xPos, 40, aWidth * 0.25, aHeight – 70)))
    (
aBox’s setTitle:aBoxTitle)
    
    
–MapView+Pinをつくる
    
set aMapView to makeMKMapView(aWidth * 0.25, aHeight – 70, aLevelNum, aLat, aLong, aTitle) of me
    
    (
aBox’s addSubview:aMapView)
    (
aView’s addSubview:aBox)
    
    
set the end of aMapViewList to aMapView
    
set xPos to xPos + (aWidth * 0.25)
  end repeat
  
  
–Segmented Controlをつくる
  
set aSeg to makeSegmentedControl(segTitleList, aWidth, aHeight) of me
  
aView’s addSubview:aSeg
  
  
— set up alert  
  
set theAlert to NSAlert’s alloc()’s init()
  
tell theAlert
    its setMessageText:aTitle
    
its setInformativeText:aSubTitle
    
its addButtonWithTitle:"OK"
    
its addButtonWithTitle:"Cancel"
    
its setAccessoryView:aView
  end tell
  
  
— show alert in modal loop
  
NSRunningApplication’s currentApplication()’s activateWithOptions:0
  
my performSelectorOnMainThread:"doModal:" withObject:(theAlert) waitUntilDone:true
  
if (my returnCode as number) = 1001 then error number -128
end dispMapViewinDifferentScales:

on doModal:aParam
  set (my returnCode) to aParam’s runModal()
end doModal:

–MKMapViewをつくる
on makeMKMapView(aWidth, aHeight, aZoomLevel, aLat, aLong, aTitle)
  set aMapView to MKMapView’s alloc()’s initWithFrame:(current application’s NSMakeRect(0, 0, aWidth, aHeight))
  
aMapView’s setMapType:(current application’s MKMapTypeStandard)
  
  
aMapView’s setZoomEnabled:true
  
aMapView’s setScrollEnabled:true
  
aMapView’s setPitchEnabled:false
  
aMapView’s setRotateEnabled:false
  
aMapView’s setShowsCompass:true
  
aMapView’s setShowsZoomControls:true
  
aMapView’s setShowsScale:true
  
aMapView’s setShowsUserLocation:true
  
  
set aLocation to current application’s CLLocationCoordinate2DMake(aLat, aLong)
  
aMapView’s setCenterCoordinate:aLocation zoomLevel:aZoomLevel animated:false
  
aMapView’s setDelegate:me
  
  
–MapにPinを追加
  
set anAnnotation to current application’s MKPointAnnotation’s alloc()’s init()
  
anAnnotation’s setCoordinate:aLocation
  
anAnnotation’s setTitle:aTitle
  
aMapView’s addAnnotation:anAnnotation
  
  
return aMapView
end makeMKMapView

–Make Segmented Control
on makeSegmentedControl(titleList, aWidth, aHeight)
  set aLen to length of titleList
  
  
set aSeg to NSSegmentedControl’s alloc()’s init()
  
aSeg’s setSegmentCount:aLen
  
  
set aCount to 0
  
repeat with i in titleList
    set j to contents of i
    (
aSeg’s setLabel:j forSegment:aCount)
    
set aCount to aCount + 1
  end repeat
  
  
aSeg’s setTranslatesAutoresizingMaskIntoConstraints:false
  
aSeg’s setSegmentStyle:(NSSegmentStyleTexturedRounded)
  
aSeg’s setFrame:(current application’s NSMakeRect(10, 5, 260, 30))
  
aSeg’s setTrackingMode:0
  
aSeg’s setTarget:me
  
aSeg’s setAction:"clickedSeg:"
  
aSeg’s setSelectedSegment:0
  
  
return aSeg
end makeSegmentedControl

–Segmented Control’s clicked event handler
on clickedSeg:aSender
  set aSel to aSender’s selectedSegment()
  
set selSeg to (aSel + 1)
  
set mapList to {MKMapTypeStandard, MKMapTypeSatellite, MKMapTypeHybrid}
  
set curMap to contents of item selSeg of mapList
  
  
repeat with i in aMapViewList
    set aView to contents of i
    (
aView’s setMapType:(curMap))
  end repeat
end clickedSeg:

–http://ipinfo.io/developers
on getGeoLocationByIPinfo(myIP)
  set aURL to "http://ipinfo.io/" & myIP
  
set aRes to callRestGETAPIAndParseResults(aURL, 10) of me
  
return aRes as record
end getGeoLocationByIPinfo

on callRestGETAPIAndParseResults(reqURLStr as string, timeoutSec as integer)
  set tmpData to (do shell script "curl -X GET \"" & reqURLStr & "\"")
  
set jsonString to NSString’s stringWithString:tmpData
  
set jsonData to jsonString’s dataUsingEncoding:(NSUTF8StringEncoding)
  
set aJsonDict to NSJSONSerialization’s JSONObjectWithData:jsonData options:0 |error|:(missing value)
  
if aJsonDict = missing value then return false
  
return (aJsonDict as record)
end callRestGETAPIAndParseResults

on retURLwithParams(aBaseURL, aRec)
  set aDic to NSMutableDictionary’s dictionaryWithDictionary:aRec
  
set aKeyList to (aDic’s allKeys()) as list
  
set aValList to (aDic’s allValues()) as list
  
set aLen to length of aKeyList
  
  
set qList to {}
  
repeat with i from 1 to aLen
    set aName to contents of item i of aKeyList
    
set aVal to contents of item i of aValList
    
set the end of qList to (NSURLQueryItem’s queryItemWithName:aName value:aVal)
  end repeat
  
  
set aComp to NSURLComponents’s alloc()’s initWithString:aBaseURL
  
aComp’s setQueryItems:qList
  
set aURL to (aComp’s |URL|()’s absoluteString()) as text
  
  
return aURL
end retURLwithParams

★Click Here to Open This Script 

Posted in geolocation Network REST API | Tagged 10.11savvy 10.12savvy MKMapTypeHybrid MKMapTypeSatellite MKMapTypeStandard MKMapView MKPointAnnotation NSAlert NSJSONSerialization NSRunningApplication NSScreen NSSegmentedControl NSSegmentStyleTexturedRounded NSString NSUTF8StringEncoding | Leave a comment

Keyboard Viewerを表示する

Posted on 3月 10, 2019 by Takaaki Naganoya

入力メニューから呼び出すことのできる「キーボードビューア」(ソフトウェアキーボード)を表示するAppleScriptです。

macOSには、成り立ちのことなる2系統のソフトウェアキーボードが搭載されています。

文字入力補助用の「キーボードビューア」

1つが、本Scriptで対象にしている「キーボードビューア」。入力メニューから呼び出すタイプのソフトウェアキーボードです。昔のClassic Macintoshの時代には、ノート型のPowerBookが登場するまで(Macintosh Portableもあったものの、キーボードが取り外し可能でした)本体とキーボード、マウスが分離するタイプのコンピュータであったため、ソフトウェアキーボードの存在は必要なものでした。

キーボード未接続時の緊急用に「キー配列」というキーボードビューアの前進であるソフトウェアを使うことがありました。利用頻度ははとても低いものでした。マウスしかつなげていない時にキー入力するといった程度のものです。

昔、Classic MacOSの時代に、日本語手書きフォントでカタカナにマッピングしていたもの(R研究所の日本語手書きフォントなど)があったので、そうした変則的なフォントを入力するための補助UIとして使ったとかいう記憶はあります。

障害者補助用の「キーボード」スイッチ

もう1つが、アクセシビリティ系の機能で提供されている「キーボード」。システム環境設定>アクセシビリティ>スイッチコントロールで、「ホーム」のスイッチから、「キーボード」ボタンを選択すると表示されるソフトウェアキーボードです。

単なる文字入力だけではなく、キーボード自体が使えないユーザー向けにカーソル移動やマウスの左右クリック、ドラッグ&ドロップ、スクロールや日本語かな漢字変換などの機能を提供しています。

「キーボード」スイッチは、表示位置を変更できるものの、サイズの変更は行えませんとサイズの変更が可能です。キーボードビューアもリサイズが可能です。

昨今ソフトウェアキーボードの存在に注目が集まる

これらソフトウェアキーボード類は、タブレット型のPCでmacOSを動かしたり、Macの外部ディスプレイとしてiPadを用いる利用方法が紹介されるようになって、近年その存在が再注目されつつあります。

本AppleScriptはキーボードビューアを呼び出して表示します。呼び出しにBridgePlusを必要としており、macOS 10.14.x上で実行するためには、AppleScriptをバンドル形式のアプレットとして書き出し、アップレットのバンドル中にBrdgePlusを同梱する必要があります。

AppleScript名:Keyboard Viewerを表示する
— Created 2015-09-16 by Takaaki Naganoya
— 2015 Piyomaru Software
use AppleScript version "2.4"
use scripting additions
use framework "Foundation"
use BridgePLus : script "BridgePlus" version "1.2" –https://www.macosxautomation.com/applescript/apps/BridgePlus.html

property targInputID : "com.apple.KeyboardViewer"

load framework
set aList to (current application’s SMSForder’s allAvailableInputSourceIDs()) as list
if targInputID is in aList then
  set x to current application’s SMSForder’s changeInputSourceTo:targInputID
  
if x = false then error "Can not change input source."
end if

★Click Here to Open This Script 

Posted in Input Method System | Tagged 10.11savvy 10.12savvy 10.13savvy 10.14savvy | Leave a comment

Myriad Tables Libが1.0.9にアップデート

Posted on 3月 9, 2019 by Takaaki Naganoya

Shane StanleyのAppleScript Libraries「Myriad Tables Lib」の新バージョンv1.0.9がリリースされました。

→ ライブラリのページ


▲ソリューションによっては、機能のほとんどにテーブルビューUIが必要とされるものも

さまざまなソリューション開発時に登場頻度が高いものの、作ると割と手間が必要で大変な「テーブルビュー」を利用するScriptの作成を大幅に省力化できるライブラリです。

今回のv1.0.9ではリクエストを出していたhiddenフィールドの機能が追加されました。ユーザー名とパスワードを表UIで編集・表示したい場合にパスワード部分をhidden表示できると便利です。

このほか、macOS 10.14のDark Modeへの対応やドイツ語ローカライズの追加が行われました。

AppleScript名:Sample using version 1.0.9 hidden field.scpt
use AppleScript version "2.4"
use scripting additions
use script "Myriad Tables Lib" version "1.0.9"

set theHeads to {"First Name", "Last Name", "Index", "Police", "Score", "Some Date"}
set theDate to current date
set someData to {{"Saga", "Norén", 1, true, 12.0, theDate}, ¬
  {"Rasmus", "Larsson", 2, true, 13.5, missing value}, ¬
  {
"Freddie", "Holst", 3, false, 9.0, theDate + 40000}, ¬
  {
"Claes", "Sandberg", 4, false, 1.23456789E+4, theDate + 50000}, ¬
  {
"John", "Lundqvist", 5, true, 13.4567, theDate + 30000}, ¬
  {
"Annika", "Melander", 6, false, 22.0, theDate + 60000}}

— typical process: make table with "table dialog with data", modify if required, then display
set myTable to make new table with data someData with title "Sample table" column headings theHeads with prompt "You can select multiple rows. Everything is editable. Uses a row template. The Last Name field’s values are hidden." editable columns {} row template {"", "hidden", 1, true, 1.0, current date, missing value} with multiple selections allowed, row numbering and empty selection allowed
modify table myTable highlighted rows {2, 4} grid style grid both dashed between rows OK button name "Cool"
set theResult to display table myTable

★Click Here to Open This Script 

Posted in GUI | Tagged 10.11savvy 10.12savvy 10.13savvy 10.14savvy | Leave a comment

レコード in リストのラベルを置換する

Posted on 3月 9, 2019 by Takaaki Naganoya

レコード in リスト(配列に入れたレコード)のラベルを置換するAppleScriptです。

普通にプログラムを書いているととても必要な処理なので、Cocoaに最初から用意されているような気がするのですが、自分が知らないだけなんでしょうか?

# レコードのラベル部分を書き換えるのではなく、アクセス時の「valueForKeyPath」で指定するパス指定文字列のほうを書き換えたほうがまっとうな処理な気がします

AppleScript名:レコード in リストのラベルを置換する
—
–  Created by: Takaaki Naganoya
–  Created on: 2019/03/09
—
–  Copyright © 2019 Piyomaru Software, All Rights Reserved
—
use AppleScript version "2.5"
use scripting additions
use framework "Foundation"
use framework "AppKit"

set aList to {{gcName:"ディノスパーク札幌中央", address:"北海道 札幌市中央区 南三条西 1-8 ゲオディノス札幌中央ビル", loc_id:"94fQ-vXfZIWbNCIhWjMEEQ", latitude:43.0568243, longitude:141.3567126}, {gcName:"アドアーズ狸小路", address:"北海道 札幌市中央区 南三条西 4-12-1 アルシュビル5・6F", loc_id:"BaAw8srtioGkso463Jlrpg", latitude:43.0569575, longitude:141.352524}}

set labelRepList to {{"gcName", "latitude", "longitude"}, {"placeName", "aLat", "aLong"}}
set origLabel to contents of first item of labelRepList
set toLabel to contents of second item of labelRepList

set rList to repRecListLabels(aList, origLabel, toLabel) of me
–> {{placeName:"ディノスパーク札幌中央", loc_id:"94fQ-vXfZIWbNCIhWjMEEQ", aLong:141.3567126, address:"北海道 札幌市中央区 南三条西 1-8 ゲオディノス札幌中央ビル", aLat:43.0568243}, {placeName:"アドアーズ狸小路", loc_id:"BaAw8srtioGkso463Jlrpg", aLong:141.352524, address:"北海道 札幌市中央区 南三条西 4-12-1 アルシュビル5・6F", aLat:43.0569575}}

on repRecListLabels(aList as list, origLabel as list, toLabel as list)
  script spdRecList
    property newList : {}
    
property aList : {}
  end script
  
  
set (newList of spdRecList) to {}
  
set (aList of spdRecList) to aList
  
  
repeat with i in (aList of spdRecList)
    set aDict to (current application’s NSMutableDictionary’s dictionaryWithDictionary:i)
    
set allKeys to (aDict’s allKeys()) as list
    
set bDict to (current application’s NSMutableDictionary’s new())
    
    
repeat with ii in allKeys
      set jj to contents of ii
      
set tmpVal to (aDict’s valueForKey:jj)
      
      
if jj is in origLabel then
        using terms from scripting additions
          set aRes to offset of jj in origLabel
        end using terms from
        
set aLabel to contents of item aRes of toLabel
        (
bDict’s setObject:tmpVal forKey:aLabel)
      else
        (bDict’s setObject:tmpVal forKey:jj)
      end if
      
    end repeat
    
    
set bDict to bDict as record
    
set the end of (newList of spdRecList) to bDict
  end repeat
  
  
return (newList of spdRecList)
end repRecListLabels

on offset of bArg in anArg
  set aClass to class of anArg
  
set bClass to class of bArg
  
  
if {aClass, bClass} = {text, text} then –case 1
    return getOffset(anArg, bArg) of me
  else if {aClass, bClass} = {list, list} then –case 2 (The target case)
    return execOffsetList(bArg, anArg) of me
  else if {aClass, bClass} = {text, list} then –case 3 (Illegular case)
    return execOffsetList(bArg, {anArg}) of me
  else if {aClass, bClass} = {list, text} then –case 4 (Illegular case)
    return execOffsetList({bArg}, anArg) of me
  end if
end offset

–1D List同士のoffset演算を行うルーチンの本体
on execOffsetList(aList as list, bList as list)
  set resList to {}
  
repeat with i in aList
    set j to contents of i
    
set aCount to 1
    
    
repeat with ii in bList
      set jj to contents of ii
      
if jj = j then
        set the end of resList to aCount
        
exit repeat
      end if
      
set aCount to aCount + 1
    end repeat
  end repeat
  
  
–見つかったItem No.が連続値かどうかチェック
  
set sRes to chkSequential(resList) of me
  
if sRes = true then
    return contents of first item of resList
  else
    return false
  end if
end execOffsetList

–与えられた1D Listが連続値かどうかをチェックする
on chkSequential(aList as list)
  if length of aList = 1 then return true
  
if aList = {} then return false
  
  
set aFirst to first item of aList
  
set aList to rest of aList
  
  
repeat with i in aList
    set j to contents of i
    
if j is not equal to (aFirst + 1) then
      return false
    end if
    
copy j to aFirst
  end repeat
  
  
return true
end chkSequential

–テキスト同士のoffset ofを(2.5x fasterで)実行する
on getOffset(str as string, searchStr as string)
  set d to divideBy(str, searchStr)
  
if (count d) is less than 2 then return 0
  
return (length of item 1 of d) + 1
end getOffset

on divideBy(str, separator)
  set delSave to AppleScript’s text item delimiters
  
set the AppleScript’s text item delimiters to separator
  
set strItems to every text item of str
  
set the AppleScript’s text item delimiters to delSave
  
return strItems
end divideBy

★Click Here to Open This Script 

Posted in list Record | Tagged 10.11savvy 10.12savvy 10.13savvy 10.14savvy | Leave a comment

画像の空白判定 v3

Posted on 3月 7, 2019 by Takaaki Naganoya

指定の画像のドットがすべて白色かをチェックする(=画像の空白判定)AppleScriptです。

画像の空白判定処理は自分的にはひじょうに重要な処理であり、画像をグレースケール化しておいて、

(方法1)Photoshopを用いて明度ヒストグラムを取得し、明度=255のデータだけが存在することを確認
(方法2)GPUImage.frameworkを用いて明度ヒストグラムを取得し、明度=255のデータだけが存在することを確認

といった方法で確認を行なっていました。

PDFの余白ページ判定処理や、画像同士の差分確認など、Photoshopを使わずに済めば利用範囲も広がるため(Mac App Storeに出せるため)、AppleScript+Frameworkぐらいで高速処理できることにはものすごく価値があります。

そんな中、GPUImageは急速に2度の方向転換を行い、AppleScriptからは付き合いにくいフレームワークに変化しました。

全面的にSwiftで書き換えたGPUImage2、さらにmacOS 10.14で行われた「OpenGL/OpenCLの非推奨化」という方針転換(わかっていたことですが)を受け、Metalを活用するように書き換えられたGPUImage3へと姿を変えました。オリジナルから見るとほぼ別物です。

GPUImage 3はまだまだ機能不足なうえにAppleScriptから呼べない状態。ヒストグラムの計算フィルタも搭載されていません。Objective-Cで書かれ、中国のスマホ開発者が写真加工するのに活用しまくった、人民に愛されまくったGPUImageの姿はもう見られないのでしょうか。

GPUImageを用いた他のフィルタ処理はCIFilterで代替できるのであまり問題にはなりませんが、この空白画像検出処理だけはなんとしても代替手段を見つける必要に迫られました。応用例が多すぎるからです。

そこで思いついたのが、「チェック対象の画像と同サイズの白い画像を作って、データ内容が同じかどうか調べる」というシンプルな方法(最初から思いついてほしい>自分)。

これならCPUパワーもそれほど必要とせず、GPUの力を絞り出す必要もありません(あたりまえ)。

さっそく書いてみたものの、今度はどうも「白い色」の値が合わず、頭をひねりまくりました。


▲1×1ドット画像を新規作成して白く塗りつぶして比較。Photoshopで作成してファイルから読み込んだ画像とDataが同じにならない

カラープロファイルが合わないために「白い色」を指定してもイコールにならないようだったので、オリジナル画像をコピーしてそれ自体を白く塗りつぶして空白検出の比較対象としてみました。これで空白検出が無事できるようになりました。しかも、GPUImage.frameworkを使っていたバージョンよりもあからさまに高速、、、、

処理速度をPhotoshop版、GPUImage版のAppleScriptと比較してみたところ、1980×1200ピクセルぐらいの画像だとGPUImage版の倍ぐらい高速、8K(7680×4320)ぐらいになるとPhotoshopに負けるといったところです。


▲同一環境にて、Photoshop CC 2018、GPUImage、本Scriptで各種サイズの画像の空白検出を実行(単位:秒)

処理内容がシンプルなだけに小さい画像の処理は得意で、大きな画像は不向きといえるかもしれません。テスト機は例によってCore i7 2.66GHzメモリ8GBのマシンであり、より搭載メモリ量の多いマシンで実行すると挙動が変わってくるかもしれません。

補足までに、GPUImageの明度ヒストグラム検出は、結果を数値の配列ではなく、1×256ドットの「画像」として返してくる変態仕様なので、結果を判定するために1×256ピクセルの画像をループでチェックする必要があります。この仕様が余計なオーバーヘッドを生んでいる(つまり、GPUで処理しているから爆速、という世間の期待値を大幅に下回る処理内容になっている)可能性は否定できません。

ただ、PhosothopなしでPhotoshopと同様のヒストグラム処理が行えるという「手軽さ」がいいと思ってGPUImageを使い出したので、速度をベンチマークしてみると「こんなもんだろ」という印象です。

AppleScript名:画像の空白判定 v3.scpt
—
–  Created by: Takaaki Naganoya
–  Created on: 2019/03/07
—
–  Copyright © 2019 Piyomaru Software, All Rights Reserved
—
use AppleScript version "2.4" — Yosemite (10.10) or later
use framework "Foundation"
use framework "AppKit"
use scripting additions

property NSData : a reference to current application’s NSData
property NSDate : a reference to current application’s NSDate
property |NSURL| : a reference to current application’s |NSURL|
property NSColor : a reference to current application’s NSColor
property NSImage : a reference to current application’s NSImage
property NSBezierPath : a reference to current application’s NSBezierPath
property NSBitmapImageRep : a reference to current application’s NSBitmapImageRep

set aPOSIXpath to POSIX path of (choose file of type {"public.image"})

set a1Dat to NSDate’s timeIntervalSinceReferenceDate()

set iRes to checkImageIsWhite(aPOSIXpath) of me

set b1Dat to NSDate’s timeIntervalSinceReferenceDate()
set c1Dat to b1Dat – a1Dat

return {iRes, c1Dat}

–Compare Original Data and
on checkImageIsWhite(aPOSIXpath)
  set aURL to |NSURL|’s fileURLWithPath:(aPOSIXpath)
  
set anNSImage to NSImage’s alloc()’s initWithContentsOfURL:(aURL)
  
  
copy anNSImage to bNSImage
  
  
set fillColor to makeNSColorFromRGBAval(65535, 65535, 65535, 65535, 65535) of me
  
–set fillColor to NSColor’s whiteColor()
  
set blankImage to drawImageWithFilledColor(bNSImage, fillColor) of me
  
  
set imgA to anNSImage’s TIFFRepresentation()
  
set imgB to blankImage’s TIFFRepresentation()
  
  
set chkWhite to (imgA’s isEqualToData:imgB) as boolean
  
return chkWhite
end checkImageIsWhite

on getSizeOfImage(anNSImage)
  set aSize to anNSImage’s |size|()
  
set aClass to class of aSize
  
if aClass = record then
    copy aSize to theSize –To macOS 10.12.x
  else –macOS 10.13 or later
    set sizeX to (item 1 of item 2 of aSize)
    
set sizeY to (item 2 of item 2 of aSize)
    
set theSize to {width:sizeX, height:sizeY}
  end if
  
return theSize
end getSizeOfImage

–指定サイズの画像を作成し、背景を指定色で塗る
on drawImageWithFilledColor(anImage, fillColor)
  set aSize to getSizeOfImage(anImage) of me
  
  
anImage’s lockFocus()
  
  
set theRect to {{x:0, y:0}, {width:(width of aSize), height:(height of aSize)}}
  
set theNSBezierPath to NSBezierPath’s bezierPath
  
theNSBezierPath’s appendBezierPathWithRect:theRect
  
fillColor’s |set|()
  
theNSBezierPath’s fill()
  
  
anImage’s unlockFocus()
  
  
return anImage
end drawImageWithFilledColor

–aMaxValを最大値とする数値でNSColorを作成して返す
on makeNSColorFromRGBAval(redValue as integer, greenValue as integer, blueValue as integer, alphaValue as integer, aMaxVal as integer)
  set aRedCocoa to (redValue / aMaxVal) as real
  
set aGreenCocoa to (greenValue / aMaxVal) as real
  
set aBlueCocoa to (blueValue / aMaxVal) as real
  
set aAlphaCocoa to (alphaValue / aMaxVal) as real
  
set aColor to NSColor’s colorWithCalibratedRed:aRedCocoa green:aGreenCocoa blue:aBlueCocoa alpha:aAlphaCocoa
  
return aColor
end makeNSColorFromRGBAval

★Click Here to Open This Script 

Posted in Image | Tagged 10.11savvy 10.12savvy 10.13savvy 10.14savvy NSBezierPath NSColor NSData NSDate NSImage NSURL | 3 Comments

WiFiデバイスのパワーを操作

Posted on 3月 6, 2019 by Takaaki Naganoya

Macに内蔵/接続されている無線LAN(WiFi)デバイスのパワー(電源)をオン/オフ操作するAppleScriptです。

AppleScript名:WiFiデバイスのパワーを操作
— Created 2015-08-18 by Shane Stanley
— Modified 2019-03-06 by Takaaki Naganoya
use AppleScript version "2.4" –macOS 10.10 or later
use scripting additions
use framework "Foundation"
use framework "CoreWLAN"

property CWInterface : a reference to current application’s CWInterface

–Power On WiFi
set w1Res to powerControlEveryWiFiDevices(true) of me

delay 5

–Power Off WiFi
set w2Res to powerControlEveryWiFiDevices(false) of me

on powerControlEveryWiFiDevices(aFlag as boolean)
  set allNames to CWInterface’s interfaceNames()’s allObjects() as list
  
if allNames = {} then return false
  
  
set powerList to {}
  
repeat with i in allNames
    set j to contents of i
    
set aInterface to (CWInterface’s interfaceWithName:j)
    
set wRes to (aInterface’s setPower:aFlag |error|:(missing value))
    
    
–Get Power state and check it
    
set aPower to (aInterface’s powerOn()) as boolean
    
if aPower = (not aFlag) then
      if aFlag = true then
        set aStat to " on "
      else
        set aStat to " off "
      end if
      
display notification "Error occured in power" & aStat & "an Wifi deviece ( " & j & " )…."
    end if
    
set the end of powerList to aPower
  end repeat
  
  
return ({aFlag} is in powerList) –return whether some WiFi interface is on/off
end powerControlEveryWiFiDevices

★Click Here to Open This Script 

Posted in System WiFi | Tagged 10.11savvy 10.12savvy 10.13savvy 10.14savvy CWInterface | Leave a comment

アラートダイアログ上にWebViewを表示

Posted on 3月 5, 2019 by Takaaki Naganoya

アラートダイアログ上にWKWebViewを表示するAppleScriptです。

テストのためにYouTubeのムービーの自動再生URL(戦場の絆のリプレイムービー)をオープンしています。


▲Table ViewとWeb Viewを組み合わせて、所定の場所にYouTubeムービーの頭出しを行う試作品を作ってみたものの、JavaScript経由でWKWebViewをコントロールするのが難しくて頓挫

本来であれば、WkWebViewに対してJavaScript経由でさまざまな操作を行いたいところですが、オープン中のWebコンテンツに対して新たなJavaScriptのインスタンスを生成してセキュリティチェックを行なって、実際に実行を行うのが(自分には)少々難しく感じました。WkWebViewだとあまり凝った制御はできない印象です。Safariをコントロールするほうが自由度が高いところ。

WkWebViewを「自由にこづきまわして操作できる部品」として使うためには、素のままのWkWebViewではない何かを使ったほうがいいのかも?

AppleScript名:アラートダイアログ上にWebViewを表示.scptd
—
–  Created by: Takaaki Naganoya
–  Created on: 2019/03/02
—
–  Copyright © 2019 Piyomaru Software, All Rights Reserved
—
use AppleScript version "2.4" — Yosemite (10.10) or later
use framework "Foundation"
use framework "AppKit"
use framework "WebKit"
use scripting additions

property |NSURL| : a reference to current application’s |NSURL|
property NSAlert : a reference to current application’s NSAlert
property NSColor : a reference to current application’s NSColor
property NSString : a reference to current application’s NSString
property NSScreen : a reference to current application’s NSScreen
property NSButton : a reference to current application’s NSButton
property WKWebView : a reference to current application’s WKWebView
property NSScrollView : a reference to current application’s NSScrollView
property WKUserScript : a reference to current application’s WKUserScript
property NSURLRequest : a reference to current application’s NSURLRequest
property NSRunningApplication : a reference to current application’s NSRunningApplication
property NSUTF8StringEncoding : a reference to current application’s NSUTF8StringEncoding
property NSBackingStoreBuffered : a reference to current application’s NSBackingStoreBuffered
property WKUserContentController : a reference to current application’s WKUserContentController
property NSMomentaryLightButton : a reference to current application’s NSMomentaryLightButton
property WKWebViewConfiguration : a reference to current application’s WKWebViewConfiguration
property NSAlertSecondButtonReturn : a reference to current application’s NSAlertSecondButtonReturn
property WKUserScriptInjectionTimeAtDocumentEnd : a reference to current application’s WKUserScriptInjectionTimeAtDocumentEnd

property theResult : 0
property returnCode : 0
property theDataSource : {}

set aURL to "https://www.youtube.com/embed/GP_tVXTYdmY?autoplay=1&hd=1"
set paramObj to {myMessage:"Browse a Replay", mySubMessage:"Browse Senjo-No-Kizuna Replay Movie", targURL:aURL}
my performSelectorOnMainThread:"browseWebContents:" withObject:(paramObj) waitUntilDone:true

on browseWebContents:paramObj
  set aMainMes to myMessage of paramObj
  
set aSubMes to mySubMessage of paramObj
  
set tmpURL to (targURL of paramObj)
  
  
set aWidth to 600
  
set aHeight to 450
  
  
–WebViewをつくる
  
set aConf to WKWebViewConfiguration’s alloc()’s init()
  
  
–指定URLのJavaScriptをFetch
  
set jsSource to my fetchJSSourceString(tmpURL)
  
set userScript to WKUserScript’s alloc()’s initWithSource:jsSource injectionTime:(WKUserScriptInjectionTimeAtDocumentEnd) forMainFrameOnly:true
  
set userContentController to WKUserContentController’s alloc()’s init()
  
userContentController’s addUserScript:(userScript)
  
aConf’s setUserContentController:userContentController
  
  
set aWebView to WKWebView’s alloc()’s initWithFrame:(current application’s NSMakeRect(0, 0, aWidth, aHeight – 100)) configuration:aConf
  
aWebView’s setNavigationDelegate:me
  
aWebView’s setUIDelegate:me
  
aWebView’s setTranslatesAutoresizingMaskIntoConstraints:true
  
  
set bURL to |NSURL|’s URLWithString:tmpURL
  
set aReq to NSURLRequest’s requestWithURL:bURL
  
aWebView’s loadRequest:aReq –Webコンテンツのローディング
  
  
— set up alert  
  
set theAlert to NSAlert’s alloc()’s init()
  
tell theAlert
    its setMessageText:aMainMes
    
its setInformativeText:aSubMes
    
its addButtonWithTitle:"OK"
    
its addButtonWithTitle:"Cancel"
    
its setAccessoryView:aWebView
  end tell
  
  
— show alert in modal loop
  
NSRunningApplication’s currentApplication()’s activateWithOptions:0
  
my performSelectorOnMainThread:"doModal:" withObject:(theAlert) waitUntilDone:true
  
  
–Stop Web View Action
  
set bURL to |NSURL|’s URLWithString:"about:blank"
  
set bReq to NSURLRequest’s requestWithURL:bURL
  
aWebView’s loadRequest:bReq
  
  
if (my returnCode as number) = 1001 then error number -128
end browseWebContents:

on doModal:aParam
  set (my returnCode) to aParam’s runModal()
end doModal:

on viewDidLoad:aNotification
  return true
end viewDidLoad:

on fetchJSSourceString(aURL)
  set jsURL to |NSURL|’s URLWithString:aURL
  
set jsSourceString to NSString’s stringWithContentsOfURL:jsURL encoding:(NSUTF8StringEncoding) |error|:(missing value)
  
return jsSourceString
end fetchJSSourceString

★Click Here to Open This Script 

Posted in Internet URL | Tagged 10.11savvy 10.12savvy 10.13savvy NSAlert NSAlertSecondButtonReturn NSBackingStoreBuffered NSButton NSColor NSMomentaryLightButton NSRunningApplication NSScreen NSString NSURL NSURLRequest NSUTF8StringEncoding WKUserContentController WKUserScript WKUserScriptInjectionTimeAtDocumentEnd WKWebView WKWebViewConfiguration | Leave a comment

アラートダイアログ上に縦棒グラフを表示

Posted on 3月 4, 2019 by Takaaki Naganoya

アラートダイアログ上に縦棒グラフを表示するAppleScriptです。

グラフを作成するのであれば、NumbersやKeynoteなどを使ったほうがいいですが、簡単にデータの傾向だけダイアログ上で見せたいような場合のために作成した部品です。

NSImageViewの表示実験がしたかっただけなので、別に他の言語処理系で作成したグラフ画像を読み込んでNSImageに読み込んでからNSIMageViewで表示するぐらいの使い方でもぜんぜんOKでしょう。

WebViewを表示してインタラクティブなグラフ(マウスカーソルに反応してアニメーション表示を行うとか)を表示するといった使い方もよさそうです(アプリケーション化しないとダメかも)。

macOS 10.14上のDark Modeについては、実行環境によって対応度が異なります。


▲macOS 10.14上のDark Modeで実行したところ。左側からスクリプトエディタ、AppleScriptアプレット、スクリプトメニュー


▲macOS 10.14上のDark Modeで実行したところ。左側からScript Debugger、Script DebuggerからSD拡張アプレットで書き出したもの

グラフの描画については、色指定をblackColor()とかgrayColor()などと指定せずに、Dark Mode時に制御されるUI色で指定しておく必要があることでしょう。

AppleScript名:アラートダイアログ上に縦棒グラフを表示.scptd
—
–  Created by: Takaaki Naganoya
–  Created on: 2019/03/04
—
–  Copyright © 2019 Piyomaru Software, All Rights Reserved
—
use AppleScript version "2.4" — Yosemite (10.10) or later
use framework "Foundation"
use framework "AppKit"
use scripting additions

property NSFont : a reference to current application’s NSFont
property NSAlert : a reference to current application’s NSAlert
property NSColor : a reference to current application’s NSColor
property NSArray : a reference to current application’s NSArray
property NSString : a reference to current application’s NSString
property NSImage : a reference to current application’s NSImage
property NSScreen : a reference to current application’s NSScreen
property NSDictionary : a reference to current application’s NSDictionary
property NSBezierPath : a reference to current application’s NSBezierPath
property NSImageView : a reference to current application’s NSImageView
property NSMutableArray : a reference to current application’s NSMutableArray
property NSBitmapImageRep : a reference to current application’s NSBitmapImageRep
property NSRunningApplication : a reference to current application’s NSRunningApplication
property NSFontAttributeName : a reference to current application’s NSFontAttributeName
property NSAlertSecondButtonReturn : a reference to current application’s NSAlertSecondButtonReturn
property NSForegroundColorAttributeName : a reference to current application’s NSForegroundColorAttributeName
property NSImageScaleProportionallyUpOrDown : a reference to current application’s NSImageScaleProportionallyUpOrDown

property returnCode : 0

set plotData to {20, 30, 100, 80, 150, 90}
set paramObj to {myMessage:"This is a graph", mySubMessage:"Browse bar graph", aPlotData:plotData}
my performSelectorOnMainThread:"displayBarGraph:" withObject:(paramObj) waitUntilDone:true

on displayBarGraph:paramObj
  set aMainMes to myMessage of paramObj
  
set aSubMes to mySubMessage of paramObj
  
set aTList to (aPlotData of paramObj) as list
  
  
— make NSIMageView with graph image
  
set anImage to makeGraphImage(aTList, 300, 200) of me
  
set anImageView to NSImageView’s alloc()’s initWithFrame:{origin:{x:0.0, y:0.0}, |size|:{width:300.0, height:200.0}}
  
anImageView’s setImageScaling:(NSImageScaleProportionallyUpOrDown)
  
anImageView’s setEditable:false
  
anImageView’s setImage:anImage
  
anImageView’s display()
  
  
— set up alert  
  
set theAlert to NSAlert’s alloc()’s init()
  
tell theAlert
    its setMessageText:aMainMes
    
its setInformativeText:aSubMes
    
its addButtonWithTitle:"OK"
    
its addButtonWithTitle:"Cancel"
    
its setAccessoryView:anImageView
  end tell
  
  
— show alert in modal loop
  
NSRunningApplication’s currentApplication()’s activateWithOptions:0
  
my performSelectorOnMainThread:"doModal:" withObject:(theAlert) waitUntilDone:true
  
if (my returnCode as number) = 1001 then error number -128
end displayBarGraph:

on doModal:aParam
  set (my returnCode) to aParam’s runModal()
end doModal:

on makeGraphImage(plotData, aWidth, aHeight)
  set innerGapL to 30
  
set innerGapU to 10
  
set innerGapR to 20
  
set innerGapD to 20
  
set barGap to 10
  
  
–パラメータから下地になる画像を作成する
  
set aSize to current application’s NSMakeSize(aWidth, aHeight)
  
set anImage to NSImage’s alloc()’s initWithSize:aSize
  
  
–各種パラメータの計算
  
–copy plotArea to {plotWidth, plotHeight}
  
set itemNum to count every item of plotData
  
set barThickness to (aWidth – (itemNum * barGap * 2)) div itemNum
  
  
–プロットデータの最大値
  
set anArray to NSArray’s arrayWithArray:plotData
  
set aYmax to (anArray’s valueForKeyPath:"@max.self")’s intValue()
  
set aMaxYVal to aHeight – innerGapU – innerGapD
  
set aYPlotArea to aHeight – innerGapU – innerGapD – 20
  
set aYUnit to aYPlotArea / aYmax
  
  
–数値データをもとに描画データを組み立てる
  
set drawList to {}
  
  
set startX to innerGapL
  
copy startX to origX
  
  
repeat with i in plotData
    set the end of drawList to current application’s NSMakeRect(startX, innerGapD, barThickness, innerGapD + (i * aYUnit))
    
set startX to startX + barThickness + barGap
  end repeat
  
  
–グラフ塗りつぶし処理呼び出し
  
set fillColor to (NSColor’s colorWithCalibratedRed:0.1 green:0.1 blue:0.1 alpha:0.3)
  
set resImage to drawImageWithColorFill(anImage, drawList, fillColor) of me
  
  
–数値データ(文字)をグラフィックに記入
  
set fillColor2 to NSColor’s blackColor()
  
set resImage to drawImageWithString(resImage, drawList, fillColor2, plotData, "Eurostile Bold", 20.0) of me
  
  
–補助線を引く
  
set fillColor3 to (NSColor’s colorWithCalibratedRed:0.0 green:0.0 blue:0.0 alpha:0.8)
  
set aVertical to current application’s NSMakeRect(origX, innerGapD, aWidth – innerGapL – innerGapR, 1)
  
set aHorizontal to current application’s NSMakeRect(origX, innerGapD, 1, aHeight – innerGapU – innerGapD)
  
set draw2List to {aVertical, aHorizontal}
  
set resImage to drawImageWithColorFill(resImage, draw2List, fillColor3) of me
  
  
return resImage
end makeGraphImage

–NSImageに対して文字を描画する
on drawImageWithString(anImage, drawList, fillColor, dataList, aPSFontName, aFontSize)
  set retinaF to (NSScreen’s mainScreen()’s backingScaleFactor()) as real
  
–>  2.0 (Retina) / 1.0 (Non Retina)
  
  
set aDict to (NSDictionary’s dictionaryWithObjects:{NSFont’s fontWithName:aPSFontName |size|:aFontSize, fillColor} forKeys:{NSFontAttributeName, NSForegroundColorAttributeName})
  
  
anImage’s lockFocus() –描画開始
  
  
set aLen to length of drawList
  
repeat with i from 1 to aLen
    set i1 to contents of item i of drawList
    
    
set v2 to system attribute "sys2"
    
if v2 ≤ 12 then
      –To macOS 10.12.x
      
set origX to (x of origin of i1) / retinaF
      
set origY to (y of origin of i1) / retinaF
      
set sizeX to (width of |size| of i1) / retinaF
      
set sizeY to (height of |size| of i1) / retinaF
      
set theRect to {{x:origX, y:origY}, {width:sizeX, height:sizeY}}
    else
      –macOS 10.13 or later
      
set origX to (item 1 of item 1 of i1) / retinaF
      
set origY to (item 2 of item 1 of i1) / retinaF
      
set sizeX to (item 1 of item 2 of i1) / retinaF
      
set sizeY to (item 2 of item 2 of i1) / retinaF
      
set theRect to {{origX, origY}, {sizeX, sizeY}}
    end if
    
    
set aString to (current application’s NSString’s stringWithString:((contents of item i of dataList) as string))
    (
aString’s drawAtPoint:(current application’s NSMakePoint(origX + (sizeX / 2), sizeY)) withAttributes:aDict)
  end repeat
  
  
anImage’s unlockFocus() –描画ここまで
  
  
return anImage –returns NSImage
end drawImageWithString

–NSImageに対して矩形を塗りつぶす
on drawImageWithColorFill(anImage, drawList, fillColor)
  set retinaF to (NSScreen’s mainScreen()’s backingScaleFactor()) as real
  
–>  2.0 (Retina) / 1.0 (Non Retina)
  
  
anImage’s lockFocus() –描画開始
  
  
repeat with i in drawList
    set v2 to system attribute "sys2"
    
if v2 ≤ 12 then
      –To macOS 10.12.x
      
set origX to (x of origin of i) / retinaF
      
set origY to (y of origin of i) / retinaF
      
set sizeX to (width of |size| of i) / retinaF
      
set sizeY to (height of |size| of i) / retinaF
      
set theRect to {{x:origX, y:origY}, {width:sizeX, height:sizeY}}
    else
      –macOS 10.13 or later
      
set origX to (item 1 of item 1 of i) / retinaF
      
set origY to (item 2 of item 1 of i) / retinaF
      
set sizeX to (item 1 of item 2 of i) / retinaF
      
set sizeY to (item 2 of item 2 of i) / retinaF
      
set theRect to {{origX, origY}, {sizeX, sizeY}}
    end if
    
    
set theNSBezierPath to NSBezierPath’s bezierPath
    (
theNSBezierPath’s appendBezierPathWithRect:theRect)
    
    
fillColor’s |set|() –色設定
    
theNSBezierPath’s fill() –ぬりつぶし
  end repeat
  
  
anImage’s unlockFocus() –描画ここまで
  
  
return anImage –returns NSImage
end drawImageWithColorFill

★Click Here to Open This Script 

Posted in GUI Image list | Tagged 10.11savvy 10.12savvy 10.13savvy 10.14savvy NSAlert NSAlertSecondButtonReturn NSArray NSBezierPath NSBitmapImageRep NSColor NSDictionary NSFont NSFontAttributeName NSForegroundColorAttributeName NSImage NSImageScaleProportionallyUpOrDown NSImageView NSMutableArray NSRunningApplication NSScreen NSString | Leave a comment
「戦場の絆」の日本国内の設置店舗数をカウント

Posted on 3月 3, 2019 by Takaaki Naganoya

アーケードゲーム「戦場の絆」が設置されている日本国内のゲームセンターの件数をカウントするAppleScriptです。

指定ページを取得し、本文内容をプレーンテキスト化して正規表現でデータ抽出して加算を行うという処理内容です。

部品がありきたりなので、新規作成部分はほとんどありません(メイン部分だけ)。

AppleScript名:戦場の絆の日本国内の設置店舗数をカウント.scptd
—
–  Created by: Takaaki Naganoya
–  Created on: 2019/03/03
—
–  Copyright © 2019 Piyomaru Software, All Rights Reserved
—
use AppleScript version "2.4" — Yosemite (10.10) or later
use framework "Foundation"
use framework "AppKit"
use scripting additions

property NSArray : a reference to current application’s NSArray
property NSString : a reference to current application’s NSString
property NSPredicate : a reference to current application’s NSPredicate
property NSURLQueryItem : a reference to current application’s NSURLQueryItem
property NSAttributedString : a reference to current application’s NSAttributedString
property NSURLComponents : a reference to current application’s NSURLComponents
property NSMutableDictionary : a reference to current application’s NSMutableDictionary
property NSUnicodeStringEncoding : a reference to current application’s NSUnicodeStringEncoding

set aTotal to 0

–「戦場の絆」公式ページに掲載されている店舗一覧の都道府県別コード
set areaList to {"JP-01", "JP-02", "JP-03", "JP-04", "JP-05", "JP-06", "JP-07", "JP-08", "JP-09", "JP-10", "JP-11", "JP-12", "JP-13", "JP-14", "JP-15", "JP-16", "JP-17", "JP-18", "JP-19", "JP-20", "JP-21", "JP-22", "JP-23", "JP-24", "JP-25", "JP-26", "JP-27", "JP-28", "JP-29", "JP-30", "JP-31", "JP-32", "JP-33", "JP-34", "JP-35", "JP-36", "JP-37", "JP-38", "JP-39", "JP-40", "JP-41", "JP-42", "JP-43", "JP-44", "JP-45", "JP-46", "JP-47"}

–「戦場の絆」公式ページに掲載されている店舗一覧のBase URL
set baseURL to "https://gundam-kizuna.jp/locations/list"

–都道府県コードでループ
repeat with i in areaList
  –店舗一覧の都道府県別ページをダウンロード
  
set j to contents of i
  
set aRec to {area:j}
  
set aRes to retURLwithParams(baseURL, aRec) of me
  
set shellText to "curl -s " & aRes
  
set htmlRes to (do shell script shellText)
  
set aPlainText to (HTMLDecode(htmlRes) of me)
  
  
–店舗件数が入っている箇所を抽出して加算
  
set aList to paragraphs of aPlainText
  
set anArray to (NSArray’s arrayWithArray:aList)
  
set aPred to (NSPredicate’s predicateWithFormat:"SELF MATCHES ’[0-9]{1,3}件の店舗が見つかりました。’")
  
set bRes to (anArray’s filteredArrayUsingPredicate:aPred) as list
  
  
if bRes is not equal to {} then
    set a to repChar(contents of first item of bRes, "件の店舗が見つかりました。", "") of me
    
try
      set aNum to a as integer
      
set aTotal to aTotal + aNum
    on error
      log {"Error in ", j}
    end try
  end if
end repeat

return aTotal
–> 622 (2019/3/3)

(*
set countryList to {"HKG", "TWN"}–香港と台湾の店舗のコード
set baseURL2 to "https://gundam-kizuna.jp/locations/list"
*)

–パラメータつきURLを作成
on retURLwithParams(aBaseURL as string, aRec as record)
  set aDic to NSMutableDictionary’s dictionaryWithDictionary:aRec
  
  
set aKeyList to (aDic’s allKeys()) as list
  
set aValList to (aDic’s allValues()) as list
  
set aLen to length of aKeyList
  
set bLen to length of aValList
  
if aLen is not equal to bLen then return false
  
  
set qList to {}
  
repeat with i from 1 to aLen
    set aName to (contents of item i of aKeyList) as string
    
set aVal to (contents of item i of aValList) as string
    
set the end of qList to (NSURLQueryItem’s queryItemWithName:aName value:aVal)
  end repeat
  
  
set aComp to NSURLComponents’s alloc()’s initWithString:aBaseURL
  
aComp’s setQueryItems:qList
  
set aURL to (aComp’s |URL|()’s absoluteString()) as text
  
  
return aURL
end retURLwithParams

–テキストをHTMLとして解釈しプレーンテキスト化
on HTMLDecode(HTMLString)
  set theString to NSString’s stringWithString:HTMLString
  
set theData to theString’s dataUsingEncoding:(current application’s NSUnicodeStringEncoding)
  
set attStr to NSAttributedString’s alloc()’s initWithHTML:theData documentAttributes:(missing value)
  
set aStr to attStr’s |string|()
  
return aStr as string
end HTMLDecode

–文字置換
on repChar(origText as string, targStr as string, repStr as string)
  set {txdl, AppleScript’s text item delimiters} to {AppleScript’s text item delimiters, targStr}
  
set temp to text items of origText
  
set AppleScript’s text item delimiters to repStr
  
set res to temp as text
  
set AppleScript’s text item delimiters to txdl
  
return res
end repChar

★Click Here to Open This Script 

Posted in list regexp Text URL | Tagged 10.11savvy 10.12savvy 10.13savvy NSArray NSAttributedString NSMutableDictionary NSPredicate NSString NSUnicodeStringEncoding NSURLComponents NSURLQueryItem | Leave a comment

アラートダイアログ上にBrowserを表示

Posted on 3月 2, 2019 by Takaaki Naganoya

アラートダイアログ上にNSBrowserを表示するAppleScriptの試作品です。

# 本Scriptは実験用であって実用性はありません(^ー^;;

Finderに使われていることで認知度は高いものの、使いどころが難しいうえにサンプル・コードも多くないので登場頻度が少ないNSBrowserです。(Mac OS Xの前身である)NEXTSTEPのFile Managerがこんな感じのUIでした。

(個人的に)敷居の高かったNSBrowserも、いろいろ試してみたらいい感じになってきました。現状では単に2次元配列っぽいものにアクセスしているだけですが、ツリー型の構造データを与えるようにするとか、配列から徐々にデータ抽出する(大分類→中分類→小分類)ようにすれば、だいたい期待どおりの動作になるはずです。

NSBrowserも、使いたいときに調べると情報が見つからずに困りますが、用のないときなら調べておくといろいろ大丈夫そうです。

macOS 10.14上のスクリプトエディタ/Script Debugger上で動くようにハンドラをメインスレッド上で明示的に動作させるように変更しましたが、10.14上でだけ独特な挙動があるため要注意です。ただ、テストプログラムなのでそんなものだろうかと。

AppleScript名:アラートダイアログ上にBrowserを表示 v1.1.scptd
—
–  Created by: Takaaki Naganoya
–  Created on: 2019/03/02
—
–  Copyright © 2019 Piyomaru Software, All Rights Reserved
—
use AppleScript version "2.4" — Yosemite (10.10) or later
use framework "Foundation"
use framework "AppKit"
use scripting additions

property NSAlert : a reference to current application’s NSAlert
property NSColor : a reference to current application’s NSColor
property NSBrowser : a reference to current application’s NSBrowser
property NSScrollView : a reference to current application’s NSScrollView
property NSMutableArray : a reference to current application’s NSMutableArray
property NSRunningApplication : a reference to current application’s NSRunningApplication
property NSAlertSecondButtonReturn : a reference to current application’s NSAlertSecondButtonReturn

property theResult : 0
property returnCode : 0
property theDataSource : {}

set paramObj to {myMessage:"Choose a data", mySubMessage:"Choose an appropriate data from tree structured data list", aTableList:{{"1", "1.1", "1.1.1"}, {"2", "2.1", "2.1.1"}, {"3", "3.1", "3.1.1"}, {"4", "4.1", "4.1.1"}}}
–set aRes to my chooseItemByBrowser:paramObj
my performSelectorOnMainThread:"chooseItemByBrowser:" withObject:(paramObj) waitUntilDone:true

on chooseItemByBrowser:paramObj
  set aMainMes to myMessage of paramObj
  
set aSubMes to mySubMessage of paramObj
  
set aTList to (aTableList of paramObj) as list
  
  
— make browser view with scroll view
  
set aScrollWithTable to makeBrowserView(aTList, 500, 200) of me
  
  
— set up alert  
  
set theAlert to NSAlert’s alloc()’s init()
  
tell theAlert
    its setMessageText:aMainMes
    
its setInformativeText:aSubMes
    
its addButtonWithTitle:"OK"
    
its addButtonWithTitle:"Cancel"
    
its setAccessoryView:aScrollWithTable
  end tell
  
  
— show alert in modal loop
  
NSRunningApplication’s currentApplication()’s activateWithOptions:0
  
my performSelectorOnMainThread:"doModal:" withObject:(theAlert) waitUntilDone:true
  
if (my returnCode as number) = 1001 then error number -128
end chooseItemByBrowser:

on doModal:aParam
  set (my returnCode) to aParam’s runModal()
end doModal:

on makeBrowserView(aList as list, aWidth as number, aHeight as number)
  set (my theDataSource) to NSMutableArray’s arrayWithArray:aList
  
  
set aScroll to NSScrollView’s alloc()’s initWithFrame:(current application’s NSMakeRect(0, 0, aWidth, aHeight))
  
set aView to NSBrowser’s alloc()’s initWithFrame:(current application’s NSMakeRect(0, 0, aWidth, aHeight))
  
  
aView’s setDelegate:(me)
  
aView’s setMinColumnWidth:120
  
aView’s setSeparatesColumns:true
  
–aView’s setMaxVisibleColumns:2
  
aView’s setAutohidesScroller:true
  
–aView’s setBackgroundColor:(NSColor’s grayColor())
  
aView’s setReusesColumns:true
  
  
aScroll’s setDocumentView:aView
  
aView’s enclosingScrollView()’s setHasHorizontalScroller:true
  
aView’s enclosingScrollView()’s setHasVerticalScroller:true
  
  
return aScroll
end makeBrowserView

–NSBrowser Event Handlers
on browser:aView numberOfRowsInColumn:aColumn
  set aCount to my theDataSource’s |count|()
  
return aCount
end browser:numberOfRowsInColumn:

on browser:aView willDisplayCell:(aCell) atRow:rowIndex column:colIndex
  set selRow to (my theDataSource)’s objectAtIndex:(rowIndex)
  
set selCol to selRow’s objectAtIndex:(colIndex)
  
aCell’s setTitle:(selCol as string)
  
  
set colMax to ((my theDataSource)’s objectAtIndex:0)’s |count|()
  
log {"colMax, colIndex", colMax, colIndex}
  
set exMax to (colIndex < colMax – 1) as boolean
  
aCell’s setLeaf:(not exMax)
end browser:willDisplayCell:atRow:column:

★Click Here to Open This Script 

Posted in GUI list | Tagged 10.11savvy 10.12savvy 10.13savvy 10.14savvy NSAlert NSAlertSecondButtonReturn NSBrowser NSColor NSMutableArray NSRunningApplication NSScrollView | Leave a comment
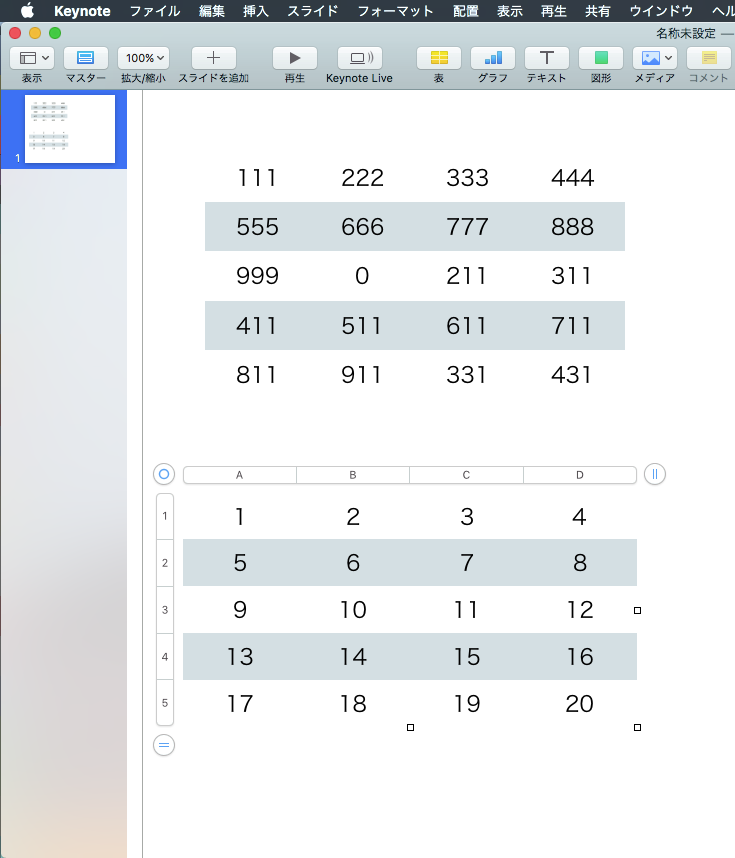
SFPSDWriterでレイヤー分けしたPhotoshopデータを作成

Posted on 2月 27, 2019 by Takaaki Naganoya

オープンソースのSFPSDWriterを呼び出して、レイヤー分けしたPhotoshopデータを作成するAppleScriptです。

SFPSDWriterは基本的にCGImageを与えてPSDを作成するプログラムですが、AppleScriptからはCGImageを作れません。

SFPSDWriterのソースコードを読んでみたら、コメントにNSImageからCGImageへの変換方法が書かれていたので、NSImageを受け付けるメソッドを新規追加してAppleScriptから呼べるようにしてみました。

–> Download SFPSDWriter.framework(To ~/Library/Frameworks)

PSDを読み書きするObjective-Cのプログラムは割とすぐに見つかるのですが、AppleScriptから呼べない(CGImageをパラメータにするため)ものが多く、どれか1つぐらいは使えてほしいと思っていました。

SFPSDWriterの機能はすべて試せていませんが、名前どおり本ソフトはPSDファイルを書き込む専用であって、読むためのものではありません。これ以外にPSDファイルを読み込んでオブジェクトを取り出せる(ように改造できる)ものを探しておきたいところです。Photoshopを用いないでPSDデータにアクセスできることには価値があります。Mac App Storeに出すソフトウェアだととくにそうです。

Photoshopを操作してほぼ同様の処理を行うものを書いてみましたが、SFPSDWriterを用いて処理したほうがシンプルなことに驚きます。

AppleScript名:SFPSDWriterのじっけん
— Created 2016-03-12 by Takaaki Naganoya
— Modified 2019-02-27 by Takaaki Naganoya
— 2019 Piyomaru Software
use AppleScript version "2.4"
use scripting additions
use framework "Foundation"
use framework "AppKit"
use framework "SFPSDWriter" –https://github.com/shinyfrog/SFPSDWriter

property |NSURL| : a reference to current application’s |NSURL|
property NSString : a reference to current application’s NSString
property NSImage : a reference to current application’s NSImage
property SFPSDWriter : a reference to current application’s SFPSDWriter
property NSWorkspace : a reference to current application’s NSWorkspace

property SFPSDResolutionUnitPPI : 1
property SFPSDResolutionUnitPPC : 2

set layer1 to NSImage’s alloc()’s initWithContentsOfURL:(|NSURL|’s fileURLWithPath:(POSIX path of (choose file of type {"public.png"})))
set layer2 to NSImage’s alloc()’s initWithContentsOfURL:(|NSURL|’s fileURLWithPath:(POSIX path of (choose file of type {"public.png"})))

set anWriter to SFPSDWriter’s alloc()’s initWithDocumentSize:(current application’s CGSizeMake(1024, 400)) andResolution:72.0 andResolutionUnit:(SFPSDResolutionUnitPPI)

anWriter’s addLayerWithNSImage:layer1 andName:"Layer_01" andOpacity:1.0 andOffset:{x:0.0, y:0.0}
anWriter’s addLayerWithNSImage:layer2 andName:"Layer_02" andOpacity:1.0 andOffset:{x:50.0, y:50.0}

set aPSD to anWriter’s createPSDData()

set pathString to NSString’s stringWithString:"~/Desktop/output.psd"
set newPath to pathString’s stringByExpandingTildeInPath()

aPSD’s writeToFile:newPath atomically:true

–Open with Adobe Photoshop
NSWorkspace’s sharedWorkspace()’s openFile:newPath

★Click Here to Open This Script 

AppleScript名:PhotoshopでSFPSDWriterと同じような処理を行う
— Created 2019-02-27 by Takaaki Naganoya
— 2019 Piyomaru Software
set layer1 to (choose file of type {"public.png"}) as string
set layer2 to (choose file of type {"public.png"}) as string

tell application id "com.adobe.photoshop"
  activate
  
close every document saving no
  
  
set aDoc to make new document with properties {height:900, width:900, resolution:72.0, mode:RGB, bits per channel:eight, initial fill:transparent, color profile kind:none, pixel aspect ratio:1.0}
  
tell aDoc
    set origLayer to (first item of (name of every art layer)) as string
  end tell
  
  
open file layer1
  
set bDoc to a reference to current document
  
tell bDoc
    select all
    
copy
    
close without saving
  end tell
  
  
tell aDoc
    set artLayerRef to make new art layer with properties {name:"Layer_01"}
    
set current layer to artLayerRef
    
tell artLayerRef
      paste
    end tell
  end tell
  
  
open file layer2
  
set cDoc to a reference to current document
  
tell cDoc
    select all
    
copy
    
close without saving
  end tell
  
  
tell aDoc
    set artLayerRef to make new art layer with properties {name:"Layer_02"}
    
set current layer to artLayerRef
    
tell artLayerRef
      paste
    end tell
    
    
delete art layer origLayer
  end tell
end tell

★Click Here to Open This Script 

Posted in file Image | Tagged 10.11savvy 10.12savvy 10.13savvy Photoshop | 1 Comment

クリップボード内のRTFをStyled Stringとして解釈して行ごとに分割して画面描画サイズ幅で昇順ソートして再結合

Posted on 2月 27, 2019 by Takaaki Naganoya

クリップボードにコピーしておいた書式つきテキストを、行ごとに画面上の描画サイズで昇順ソートし、再結合してクリップボードに転送するAppleScriptです。

ほぼ毎日使っているAppleScriptの改良版です。

Cocoaの機能を呼び出すと、AppleScript冒頭にproperty宣言文を書くことになりますが(書かなくてもいいんですが)、この宣言文を「プロポーショナルフォントを考慮しつつ実際の画面上の描画サイズを考慮」して短いものから長いものにソートして掲載しています。

ただし、従来のバージョンでは実際のフォントではなく一律に指定フォントで描画したさいの描画幅でソートしていたため、ごくまれに掲載時のリストが短い順になっていませんでした(世界中で誰も気にしてねえよ! ^ー^;)。

これを、実際の指定フォントやサイズを考慮した行単位のスタイル付きテキストに分解し、描画幅でソートしたあとにスタイル付きテキストを再合成するようにしました。

従来のOld Style AppleScriptではスタイル付きテキストの操作は一切できませんでしたが、Cocoaの機能を活用することでこのように自由度の高い処理ができるようになった、という好例です。

なお、本ルーチンによって厳密に描画幅でソートしても、Web掲載時にはWebブラウザのレンダリングのルール(&ユーザー側で指定しているWebブラウザのフォント)が適用されるため、macOS上のアプリケーション上での見た目と若干違いが出るという残念な結果も出ています。

macOS標準装備のスクリプトメニューに入れて呼び出しています。

AppleScript名:クリップボード内のRTFをStyled Stringとして解釈して行ごとに分割して画面描画サイズ幅で昇順ソートして再結合
— Created 2017-04-24 by Shane Stanley
— Modified 2019-02-27 by Takaaki Naganoya
use AppleScript version "2.5"
use scripting additions
use framework "Foundation"
use framework "AppKit"
use bPlus : script "BridgePlus" –https://www.macosxautomation.com/applescript/apps/BridgePlus.html

property NSFont : a reference to current application’s NSFont
property NSColor : a reference to current application’s NSColor
property NSPasteboard : a reference to current application’s NSPasteboard
property NSAttributedString : a reference to current application’s NSAttributedString
property NSFontAttributeName : a reference to current application’s NSFontAttributeName
property NSMutableAttributedString : a reference to current application’s NSMutableAttributedString
property NSForegroundColorAttributeName : a reference to current application’s NSForegroundColorAttributeName

–クリップボードの内容をNSAttributedStringに
set anAttr to my getClipboardASStyledText()
if anAttr = missing value then return

–Split Attributed Strings into lines
set attrList to splitAttributedStringByLines(anAttr) of me

–Sort by Width in ascending
set sortedList to shellSortListAscending(attrList, 1) of me

–Append Attributed Strings
set mutableReturn to NSMutableAttributedString’s alloc()’s initWithString:(return)
set outStr to NSMutableAttributedString’s alloc()’s initWithString:""

repeat with i in sortedList
  copy i to {tmpWidth, tmpAttr}
  (
outStr’s appendAttributedString:tmpAttr)
  
  
set tmpStr to tmpAttr’s |string|() as string
  
if (tmpStr does not end with string id 10) and (tmpStr does not end with string id 13) then
    (outStr’s appendAttributedString:mutableReturn)
  end if
end repeat

— Set Styled String to Clipboard
set theArray to {outStr}
restoreClipboard(theArray) of me

–Clipboardにデータを設定する
on restoreClipboard(theArray as list)
  set thePasteboard to NSPasteboard’s generalPasteboard()
  
thePasteboard’s clearContents()
  
thePasteboard’s writeObjects:theArray
end restoreClipboard

— クリップボードの内容をNSAttributedStringとして取り出して返す
on getClipboardASStyledText()
  try
    set theNSPasteboard to NSPasteboard’s generalPasteboard()
    
set theAttributedStringNSArray to theNSPasteboard’s readObjectsForClasses:({NSAttributedString}) options:(missing value)
    
set theNSAttributedString to theAttributedStringNSArray’s objectAtIndex:0
    
return theNSAttributedString
  on error
    return missing value
  end try
end getClipboardASStyledText

on splitAttributedStringByLines(theStyledText)
  set outList to {}
  
set outAttr to NSMutableAttributedString’s alloc()’s initWithString:""
  
  
set thePureString to theStyledText’s |string|() –pure string from theStyledText
  
set theLength to theStyledText’s |length|()
  
set startIndex to 0
  
  
repeat until (startIndex = theLength)
    set {theAtts, theRange} to theStyledText’s attributesAtIndex:startIndex longestEffectiveRange:(reference) inRange:{startIndex, theLength – startIndex}
    
set aText to (thePureString’s substringWithRange:theRange) as string –String
    
    
set aColor to (theAtts’s valueForKeyPath:"NSColor") –Color
    
set aFont to (theAtts’s valueForKeyPath:"NSFont") –Font
    
if aFont is equal to missing value then error "Not font name and size are specified" –Font Name error
    
set aDFontName to aFont’s displayName() –Font Name
    
set aDFontSize to aFont’s pointSize() –Font Size
    
    
set tmpAttrStr to generateAttributedString(aText, aDFontName, aDFontSize, aColor) of me
    
outAttr’s appendAttributedString:tmpAttrStr
    
    
if (aText contains return) or (aText contains string id 10) then –CR or LF
      set tmpSize to outAttr’s |size|()
      
set tmpWidth to retWidthFromSize(tmpSize) of me
      
      
set the end of outList to {tmpWidth, outAttr}
      
set outAttr to NSMutableAttributedString’s alloc()’s initWithString:""
    end if
    
    
set startIndex to current application’s NSMaxRange(theRange)
  end repeat
  
  
set tmpSize to outAttr’s |size|()
  
set tmpWidth to retWidthFromSize(tmpSize) of me
  
set the end of outList to {tmpWidth, outAttr}
  
  
return outList
end splitAttributedStringByLines

on retWidthFromSize(tmpSize)
  if class of tmpSize = record then
    –macOS 10.10, 10.11, 10.12
    
set tmpWidth to width of tmpSize
  else
    –macOS 10.13, 10.14
    
set tmpWidth to first item of tmpSize
  end if
  
return tmpWidth
end retWidthFromSize

on generateAttributedString(aStr, aFontPSName, aFontSize, aColor)
  set tmpAttr to NSMutableAttributedString’s alloc()’s initWithString:aStr
  
set aRange to current application’s NSMakeRange(0, tmpAttr’s |length|())
  
set aVal1 to NSFont’s fontWithName:aFontPSName |size|:aFontSize
  
tmpAttr’s beginEditing()
  
tmpAttr’s addAttribute:(NSFontAttributeName) value:aVal1 range:aRange
  
tmpAttr’s addAttribute:(NSForegroundColorAttributeName) value:aColor range:aRange
  
tmpAttr’s endEditing()
  
return tmpAttr
end generateAttributedString

–入れ子のリストを昇順ソート
on shellSortListAscending(a, keyItem)
  return sort2DList(a, keyItem, {true}) of me
end shellSortListAscending

–入れ子のリストを降順ソート
on shellSortListDecending(a, keyItem)
  return sort2DList(a, keyItem, {false}) of me
end shellSortListDecending

–2D Listをソート
on sort2DList(aList as list, sortIndexes as list, sortOrders as list)
  load framework
  
–index値をAS流(アイテムが1はじまり)からCocoa流(アイテムが0はじまり)に変換
  
set newIndex to {}
  
repeat with i in sortIndexes
    set j to contents of i
    
set j to j – 1
    
set the end of newIndex to j
  end repeat
  
  
–Sort TypeのListを作成(あえて外部から指定する内容でもない)
  
set sortTypes to {}
  
repeat (length of sortIndexes) times
    set the end of sortTypes to "compare:"
  end repeat
  
  
–Sort
  
set resList to (current application’s SMSForder’s subarraysIn:(aList) sortedByIndexes:newIndex ascending:sortOrders sortTypes:sortTypes |error|:(missing value)) as list
  
return resList
end sort2DList

★Click Here to Open This Script 

Posted in Clipboard Color list RTF Sort Text | Tagged 10.11savvy 10.12savvy 10.13savvy 10.14savvy NSAttributedString NSColor NSFont NSFontAttributeName NSForegroundColorAttributeName NSMutableAttributedString NSPasteboard | Leave a comment
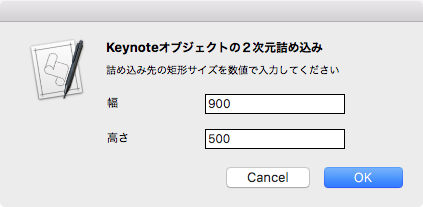
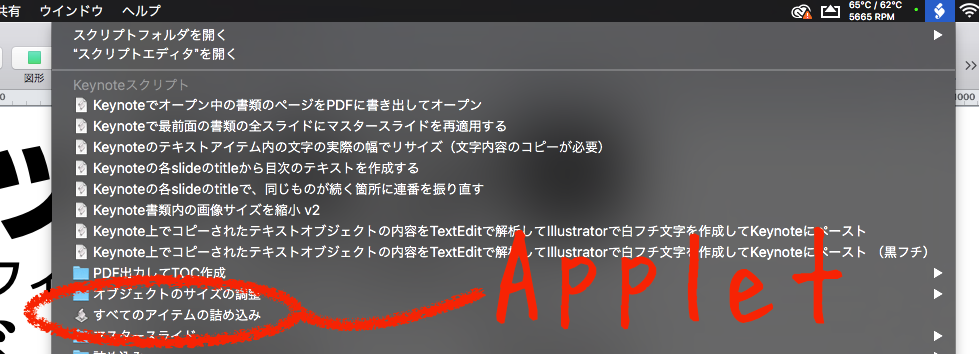
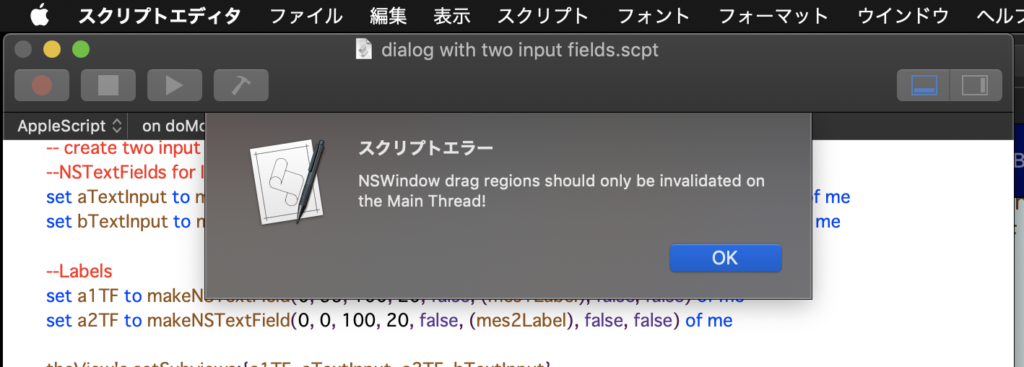
アラートダイアログの背景色を指定してTable Viewを表示

Posted on 2月 25, 2019 by Takaaki Naganoya

指定色のアラートダイアログを作成し、その上にScroll View+Table Viewを表示して選択肢の選択を行うAppleScriptです。

アラートダイアログの背景色変更のテストを行なったものです。また、メソッド名をテキストで(Table Viewから)取得し、そのメソッド名で色を作成するテスト(NSSelectorFromString)も行いました。

Table Viewで選択した色は、次回実行時に反映されます(スクリプトエディタ/Script Debugger上で)。

本当はTable View上で行を選択したときに、アラートダイアログの背景色を変更させたかったのですが、試してみたもののうまく動かなかったので、その機能は削りました。最初から指定色のダイアログウィンドウを表示するだけなら問題はないので、現状のようなコードに落ち着きました。

AppleScript名:アラートダイアログの背景色を指定してTable Viewを表示
— Created 2019-02-25 by Takaaki Naganoya
— 2019 Piyomaru Software
use AppleScript version "2.5"
use scripting additions
use framework "Foundation"
use framework "AppKit"

property NSAlert : a reference to current application’s NSAlert
property NSColor : a reference to current application’s NSColor
property NSIndexSet : a reference to current application’s NSIndexSet
property NSScrollView : a reference to current application’s NSScrollView
property NSTableView : a reference to current application’s NSTableView
property NSTableColumn : a reference to current application’s NSTableColumn
property NSMutableArray : a reference to current application’s NSMutableArray
property NSRunningApplication : a reference to current application’s NSRunningApplication
property NSAlertSecondButtonReturn : a reference to current application’s NSAlertSecondButtonReturn
property NSFullSizeContentViewWindowMask : a reference to current application’s NSFullSizeContentViewWindowMask

property theResult : 0
property returnCode : 0
property theDataSource : {}
property theColList : {}
property theWindow : missing value
property selectedColor : missing value

set paramObj to {myMessage:"Choose a color", mySubMessage:"Choose an appropriate color from color name list", aTableList:{"redColor", "blueColor", "yellowColor", "greenColor", "grayColor", "blackColor"}}
set aRes to my chooseItemByTableView:paramObj

on chooseItemByTableView:paramObj
  set aMainMes to myMessage of paramObj
  
set aSubMes to mySubMessage of paramObj
  
set aTList to (aTableList of paramObj) as list
  
  
— make table view with scroll view
  
set aScrollWithTable to makeTableView(aTList, 300, 120) of me
  
  
— set up alert  
  
set theAlert to NSAlert’s alloc()’s init()
  
tell theAlert
    its setMessageText:aMainMes
    
its setInformativeText:aSubMes
    
its addButtonWithTitle:"OK"
    
its addButtonWithTitle:"Cancel"
    
its setAccessoryView:aScrollWithTable
  end tell
  
  
— customize alert’s window style and color
  
if selectedColor = missing value then
    set tmpColor to NSColor’s grayColor()
  else
    set tmpSel to current application’s NSSelectorFromString(selectedColor)
    
set tmpColor to NSColor’s performSelector:tmpSel
  end if
  
  
set theWindow to theAlert’s |window|()
  
theWindow’s setTitleVisibility:false
  
–theWindow’s setStyleMask:( NSFullSizeContentViewWindowMask)
  
theWindow’s setTitlebarAppearsTransparent:true
  
theWindow’s setBackgroundColor:tmpColor
  
  
— show alert in modal loop
  
NSRunningApplication’s currentApplication()’s activateWithOptions:0
  
my performSelectorOnMainThread:"doModal:" withObject:(theAlert) waitUntilDone:true
  
if (my returnCode as number) = 1001 then error number -128
  
  
return (aScrollWithTable’s documentView’s selectedRow()) + 1
end chooseItemByTableView:

on doModal:aParam
  set (my returnCode) to aParam’s runModal()
end doModal:

on makeTableView(aList as list, aWidth as number, aHeight as number)
  set aOffset to 40
  
  
set sourceList to {}
  
repeat with i in aList
    set the end of sourceList to {dataItem:(contents of i)}
  end repeat
  
  
set theDataSource to NSMutableArray’s alloc()’s init()
  
theDataSource’s addObjectsFromArray:sourceList
  
  
set aScroll to NSScrollView’s alloc()’s initWithFrame:(current application’s NSMakeRect(0, aOffset, aWidth, aHeight))
  
set aView to NSTableView’s alloc()’s initWithFrame:(current application’s NSMakeRect(0, aOffset, aWidth, aHeight))


set aColumn to (NSTableColumn’s alloc()’s initWithIdentifier:"dataItem")
  (
aColumn’s setWidth:aWidth)
  (
aColumn’s headerCell()’s setStringValue:"dataItem")
  (
aView’s addTableColumn:aColumn)
  
  
aView’s setDelegate:me
  
aView’s setDataSource:me
  
aView’s reloadData()
  
  
aScroll’s setDocumentView:aView
  
aView’s enclosingScrollView()’s setHasVerticalScroller:true
  
  
–1行目を選択
  
set aIndexSet to NSIndexSet’s indexSetWithIndex:0
  
aView’s selectRowIndexes:aIndexSet byExtendingSelection:false
  
  
–強制的にトップにスクロール
  
set aDBounds to aScroll’s documentView()’s |bounds|()
  
if class of aDBounds = list then
    –macOS 10.13 or later
    
set maxHeight to item 2 of item 1 of aDBounds
  else
    –macOS 10.10….10.12
    
set maxHeight to height of |size| of aDBounds
  end if
  
  
set aPT to current application’s NSMakePoint(0.0, -40.0) —— (aScroll’s documentView()’s |bounds|()’s |size|()’s height))
  
aScroll’s documentView()’s scrollPoint:aPT
  
  
return aScroll
end makeTableView

–TableView Event Handlers
on numberOfRowsInTableView:aView
  return my theDataSource’s |count|()
end numberOfRowsInTableView:

on tableView:aView objectValueForTableColumn:aColumn row:aRow
  set selRow to (aRow as number)
  
set aRec to (my theDataSource)’s objectAtIndex:selRow
  
set aTitle to (aColumn’s headerCell()’s title()) as string
  
set aRes to (aRec’s valueForKey:aTitle) as string
  
set my selectedColor to aRes
  
  
return aRes
end tableView:objectValueForTableColumn:row:

on tableView:aView shouldEditTableColumn:aTableColumn row:rowIndex
  return false –Not Editable
end tableView:shouldEditTableColumn:row:

★Click Here to Open This Script 

Posted in Color GUI list | Tagged 10.11savvy 10.12savvy 10.13savvy 10.14savvy NSAlert NSAlertSecondButtonReturn NSColor NSFullSizeContentViewWindowMask NSIndexSet NSMutableArray NSRunningApplication NSScrollView NSTableColumn NSTableView | Leave a comment

アラートダイアログ上にTable View+Map View+Segmented Controlを表示

Posted on 2月 23, 2019 by Takaaki Naganoya

アラートダイアログを作成し、その上にScroll View+Table ViewおよびMap Viewを表示して選択肢の選択を行うAppleScriptです。Segmented Controlで地図の種別切り替えを行い、項目選択用のTable Viewを編集不可にしました。

Map Viewを使用するために、インターネット接続が必要です。地図表示パフォーマンスはインターネット接続速度次第です。


▲Map Type = Standard (Map)


▲Map Type = Satellite


▲Map Type = Hybrid (Satellite + Map)

本Scriptに与える緯度・経度情報についてはあらかじめ住所ジオコーダーによって「住所情報→緯度・経度情報」の変換を行なったものを書いておく必要がありますが、Yahoo!の住所ジオコーダーサービスなどを呼び出せば、住所情報をパラメーターとすることも可能です。

サンプルデータの緯度・経度情報は、例によって「戦場の絆」の入っている近所のゲーセンの情報を適当にみつくろって入れてみたものです。

本ダイアログは、それほど件数の多くない(20件ぐらい?)選択肢からの選択を意図して作ったものですが、数百件とか数千件のデータから選ぶような場合には、Outline Viewを利用して小エリアごとに分割するとか、Search Fieldを連動させてキーワードによる絞り込みを有効にするなど、それなりの対処が必要です。

AppleScript名:アラートダイアログ上にTable View+Map View+Segmented Controlを表示
— Created 2019-02-23 by Takaaki Naganoya
— 2019 Piyomaru Software
use AppleScript version "2.5"
use scripting additions
use framework "Foundation"
use framework "AppKit"
use framework "MapKit"

property NSAlert : a reference to current application’s NSAlert
property NSIndexSet : a reference to current application’s NSIndexSet
property MKMapView : a reference to current application’s MKMapView
property NSScrollView : a reference to current application’s NSScrollView
property NSTableView : a reference to current application’s NSTableView
property NSTableColumn : a reference to current application’s NSTableColumn
property NSMutableArray : a reference to current application’s NSMutableArray
property MKPointAnnotation : a reference to current application’s MKPointAnnotation
property NSSegmentedControl : a reference to current application’s NSSegmentedControl
property NSRunningApplication : a reference to current application’s NSRunningApplication
property NSAlertSecondButtonReturn : a reference to current application’s NSAlertSecondButtonReturn
property NSSegmentStyleTexturedRounded : a reference to current application’s NSSegmentStyleTexturedRounded

property MKMapTypeHybrid : a reference to current application’s MKMapTypeHybrid
property MKMapTypeSatellite : a reference to current application’s MKMapTypeSatellite
property MKMapTypeStandard : a reference to current application’s MKMapTypeStandard

property zLevel : 21 –Map Zoom Level (0:World View, 21:House/Building Zoom View)
property aMaxViewWidth : 800
property theResult : 0
property returnCode : 0
property theDataSource : {}
property curRow : 0
property aMapView : missing value
property nameL : {}
property placeL : {}

set aPlaceList to {{placeName:"Hey", aLat:"35.69906613", aLong:"139.77084064"}, {placeName:"namco中野", aLat:"35.70859274", aLong:"139.66584339"}, {placeName:"ゲームシティ板橋", aLat:"35.74572771", aLong:"139.67553260"}, {placeName:"ラウンドワンスタジアム板橋", aLat:"35.77661583", aLong:"139.67864491"}, {placeName:"キャロム練馬", aLat:"35.76386421", aLong:"139.66591600"}, {placeName:"アミュージアムOSC", aLat:"35.75308308", aLong:"139.59476696"}}

set paramObj to {myMessage:"場所の選択", mySubMessage:"適切な場所を以下のリストからえらんでください", placeList:aPlaceList}
my performSelectorOnMainThread:"chooseItemByTableViewWithMapAndSegment:" withObject:(paramObj) waitUntilDone:true
if (my theResult) = 0 then error number -128
return (my theResult)

on chooseItemByTableViewWithMapAndSegment:paramObj
  set aMainMes to myMessage of paramObj
  
set aSubMes to mySubMessage of paramObj
  
set aTList to (placeList of paramObj) as list
  
  
set nameL to {}
  
set placeL to {}
  
repeat with i in aTList
    set the end of nameL to (placeName of i)
    
set the end of placeL to {contents of (aLat of i), contents of (aLong of i)}
  end repeat
  
  
— create a view
  
set theView to current application’s NSView’s alloc()’s initWithFrame:(current application’s NSMakeRect(0, 0, aMaxViewWidth, 400))
  
  
— make table view with scroll view
  
set aScrollWithTable to makeTableView(nameL, 200, 400) of me
  
  
set aMapView to MKMapView’s alloc()’s initWithFrame:(current application’s NSMakeRect(210, 30, aMaxViewWidth – 210, 370))
  
tell aMapView
    its setMapType:MKMapTypeStandard
    
its setZoomEnabled:true
    
its setScrollEnabled:true
    
its setPitchEnabled:true
    
its setRotateEnabled:true
    
its setShowsCompass:true
    
its setShowsZoomControls:true
    
its setShowsScale:true
    
its setShowsUserLocation:true
    
    
set aLocation to current application’s CLLocationCoordinate2DMake((first item of first item of placeL) as real, (second item of first item of placeL) as real)
    
its setCenterCoordinate:aLocation zoomLevel:(zLevel) animated:false
    
its setDelegate:me
  end tell
  
  
–MapにPinを追加
  
repeat with i from 1 to (length of nameL)
    set tmpAdr to contents of item i of nameL
    
copy item i of placeL to {tmpLat, tmpLong}
    
    
set aLocation to current application’s CLLocationCoordinate2DMake(tmpLat as real, tmpLong as real)
    
set anAnnotation to MKPointAnnotation’s alloc()’s init()
    (
anAnnotation’s setCoordinate:aLocation)
    (
anAnnotation’s setTitle:tmpAdr)
    (
aMapView’s addAnnotation:anAnnotation)
  end repeat
  
  
–Segmented Controlをつくる
  
set segTitleList to {"Map", "Satellite", "Satellite + Map"}
  
set aSeg to makeSegmentedControl(segTitleList, 210, 0, 150, 20) of me
  
  
theView’s setSubviews:{aScrollWithTable, aMapView, aSeg}
  
  
— set up alert  
  
set theAlert to NSAlert’s alloc()’s init()
  
tell theAlert
    its setMessageText:aMainMes
    
its setInformativeText:aSubMes
    
its addButtonWithTitle:"OK"
    
its addButtonWithTitle:"Cancel"
    
its setAccessoryView:theView
  end tell
  
  
–To enable the first annotation visible
  
copy item 1 of placeL to {tmpLat, tmpLong}
  
set aLocation to current application’s CLLocationCoordinate2DMake(tmpLat as real, tmpLong as real)
  
aMapView’s setCenterCoordinate:aLocation zoomLevel:(zLevel) animated:false
  
  
— show alert in modal loop
  
NSRunningApplication’s currentApplication()’s activateWithOptions:0
  
my performSelectorOnMainThread:"doModal:" withObject:(theAlert) waitUntilDone:true
  
  
set (my theResult) to (aScrollWithTable’s documentView’s selectedRow()) + 1
end chooseItemByTableViewWithMapAndSegment:

on doModal:aParam
  set (my returnCode) to aParam’s runModal()
end doModal:

on makeTableView(aList as list, aWidth as number, aHeight as number)
  set aOffset to 0
  
  
set sourceList to {}
  
repeat with i in aList
    set the end of sourceList to {dataItem:(contents of i)}
  end repeat
  
  
set theDataSource to NSMutableArray’s alloc()’s init()
  
theDataSource’s addObjectsFromArray:sourceList
  
  
set aScroll to NSScrollView’s alloc()’s initWithFrame:(current application’s NSMakeRect(0, 30, aWidth, aHeight – 30))
  
set aView to NSTableView’s alloc()’s initWithFrame:(current application’s NSMakeRect(0, 30, aWidth, aHeight – 30))


set aColumn to (NSTableColumn’s alloc()’s initWithIdentifier:"dataItem")
  (
aColumn’s setWidth:aWidth)
  (
aColumn’s headerCell()’s setStringValue:"dataItem")
  (
aView’s addTableColumn:aColumn)
  
  
aView’s setDelegate:me
  
aView’s setDataSource:me
  
aView’s reloadData()
  
  
aScroll’s setDocumentView:aView
  
aView’s enclosingScrollView()’s setHasVerticalScroller:true
  
  
–1行目を選択
  
set aIndexSet to NSIndexSet’s indexSetWithIndex:0
  
aView’s selectRowIndexes:aIndexSet byExtendingSelection:false
  
  
–強制的にトップにスクロール
  
set aDBounds to aScroll’s documentView()’s |bounds|()
  
if class of aDBounds = list then
    –macOS 10.13 or later
    
set maxHeight to item 2 of item 1 of aDBounds
  else
    –macOS 10.10, 10.11, 10.12
    
set maxHeight to height of |size| of aDBounds
  end if
  
  
set aPT to current application’s NSMakePoint(0.0, -40.0) —— (aScroll’s documentView()’s |bounds|()’s |size|()’s height))
  
aScroll’s documentView()’s scrollPoint:aPT
  
  
return aScroll
end makeTableView

–TableView Event Handlers
on numberOfRowsInTableView:aView
  return my theDataSource’s |count|()
end numberOfRowsInTableView:

on tableView:aView objectValueForTableColumn:aColumn row:aRow
  set (tmpRow) to aView’s selectedRow() as number
  
  
–Table View上で現在選択行「以外の」行が選択されたら、Mapを選択項目で更新
  
if (my curRow) is not equal to tmpRow then
    set tmpLat to (first item of item (tmpRow + 1) of placeL) as real
    
set tmpLong to (second item of item (tmpRow + 1) of placeL) as real
    
    
tell aMapView
      set aLocation to current application’s CLLocationCoordinate2DMake(tmpLat, tmpLong)
      
its setCenterCoordinate:aLocation zoomLevel:(zLevel) animated:false
    end tell
    
    
set (my curRow) to tmpRow
  end if
  
  
set aRec to (my theDataSource)’s objectAtIndex:(aRow as number)
  
set aTitle to (aColumn’s headerCell()’s title()) as string
  
set aRes to (aRec’s valueForKey:aTitle)
  
return aRes
end tableView:objectValueForTableColumn:row:

on tableView:aView shouldEditTableColumn:aTableColumn row:rowIndex
  return false –Not Editable
end tableView:shouldEditTableColumn:row:

–Segmented Controlをつくる
on makeSegmentedControl(titleList, startX, startY, aWidth, aHeight)
  set aLen to length of titleList
  
  
set aSeg to NSSegmentedControl’s alloc()’s init()
  
aSeg’s setSegmentCount:aLen
  
  
set aCount to 0
  
repeat with i in titleList
    set j to contents of i
    (
aSeg’s setLabel:j forSegment:aCount)
    
set aCount to aCount + 1
  end repeat
  
  
aSeg’s setTranslatesAutoresizingMaskIntoConstraints:false
  
aSeg’s setSegmentStyle:(NSSegmentStyleTexturedRounded)
  
aSeg’s setFrame:(current application’s NSMakeRect(startX, startY, aWidth, aHeight))
  
aSeg’s setTrackingMode:0
  
aSeg’s setTarget:me
  
aSeg’s setAction:"clickedSeg:"
  
aSeg’s setSelectedSegment:0
  
  
return aSeg
end makeSegmentedControl

–Segmented Controlのクリック時のイベントハンドラ
on clickedSeg:aSender
  set aSel to aSender’s selectedSegment()
  
set tList to {MKMapTypeStandard, MKMapTypeSatellite, MKMapTypeHybrid}
  
set tmpType to contents of item (aSel + 1) of tList
  
  
aMapView’s setMapType:(tmpType)
  
  
set selSeg to aSel
end clickedSeg:

★Click Here to Open This Script 

Posted in geolocation GUI | Tagged 10.11savvy 10.12savvy 10.13savvy 10.14savvy MKMapView MKPointAnnotation NSAlert NSAlertSecondButtonReturn NSIndexSet NSMutableArray NSRunningApplication NSScrollView NSSegmentedControl NSSegmentStyleTexturedRounded NSTableColumn NSTableView | Leave a comment

アラートダイアログ上にTable View+Map Viewを表示

Posted on 2月 22, 2019 by Takaaki Naganoya

アラートダイアログを作成し、その上にScroll View+Table ViewおよびMap Viewを表示して選択肢の選択を行うAppleScriptです。

Map Viewを使用するために、インターネット接続が必要です。地図表示パフォーマンスはインターネット接続速度次第です。

{{placeName:"Hey", aLat:"35.69906613", aLong:"139.77084064"}....}

のように位置データを、

名称, 緯度, 経度

とまとめたリストで選択肢を指定します。実行すると選択肢のアイテム番号(1からはじまる)を返してきます。


▲左から、macOS 10.12.6、10.13.6、10.14.4betaで同じAppleScriptを動かしたところ。同じ場所、同じZoom LevelでもOSバージョンごとに微妙に表示内容が違う

現状の実装では、表UI(Table View)内のデータがダブルクリックで編集できてしまうので、編集できないようにするあたりが改良対象でしょうか。あと、地図・衛星写真の切り替えもつけておくとよいでしょう。

本Scriptに与える緯度・経度情報についてはあらかじめ住所ジオコーダーによって「住所情報→緯度・経度情報」の変換を行なったものを書いておく必要がありますが、Yahoo!の住所ジオコーダーサービスなどを呼び出せば、住所情報をパラメーターとすることも可能です。

サンプルデータの緯度・経度情報は、例によって「戦場の絆」の入っている近所のゲーセンの情報を適当にみつくろって入れてみたものです。

AppleScript名:アラートダイアログ上にTable View+Map Viewを表示 v2
— Created 2019-02-22 by Takaaki Naganoya
— 2019 Piyomaru Software
use AppleScript version "2.5"
use scripting additions
use framework "Foundation"
use framework "AppKit"
use framework "MapKit"

property NSAlert : a reference to current application’s NSAlert
property NSIndexSet : a reference to current application’s NSIndexSet
property MKMapView : a reference to current application’s MKMapView
property NSScrollView : a reference to current application’s NSScrollView
property NSTableView : a reference to current application’s NSTableView
property NSTableColumn : a reference to current application’s NSTableColumn
property NSMutableArray : a reference to current application’s NSMutableArray
property NSRunningApplication : a reference to current application’s NSRunningApplication
property NSAlertSecondButtonReturn : a reference to current application’s NSAlertSecondButtonReturn

property zLevel : 18
property aMaxViewWidth : 800
property theResult : 0
property returnCode : 0
property theDataSource : {}
property curRow : 0
property aMapView : missing value
property nameL : {}
property placeL : {}

set aPlaceList to {{placeName:"Hey", aLat:"35.69906613", aLong:"139.77084064"}, {placeName:"namco中野", aLat:"35.70859274", aLong:"139.66584339"}, {placeName:"ゲームシティ板橋", aLat:"35.74572771", aLong:"139.67553260"}, {placeName:"ラウンドワンスタジアム板橋", aLat:"35.77661583", aLong:"139.67864491"}, {placeName:"キャロム練馬", aLat:"35.76386421", aLong:"139.66591600"}, {placeName:"アミュージアムOSC", aLat:"35.75308308", aLong:"139.59476696"}}

set paramObj to {myMessage:"場所の選択", mySubMessage:"適切な場所を以下のリストからえらんでください", placeList:aPlaceList}
my performSelectorOnMainThread:"chooseItemByTableViewWithMap:" withObject:(paramObj) waitUntilDone:true
return (my theResult)

on chooseItemByTableViewWithMap:paramObj
  set aMainMes to myMessage of paramObj
  
set aSubMes to mySubMessage of paramObj
  
set aTList to (placeList of paramObj) as list
  
  
set nameL to {}
  
set placeL to {}
  
repeat with i in aTList
    set the end of nameL to (placeName of i)
    
set the end of placeL to {contents of (aLat of i), contents of (aLong of i)}
  end repeat
  
  
— create a view
  
set theView to current application’s NSView’s alloc()’s initWithFrame:(current application’s NSMakeRect(0, 0, aMaxViewWidth, 400))
  
  
— make table view with scroll view
  
set aScrollWithTable to makeTableView(nameL, 200, 400) of me
  
  
set aMapView to MKMapView’s alloc()’s initWithFrame:(current application’s NSMakeRect(210, 0, aMaxViewWidth – 210, 400))
  
tell aMapView
    its setMapType:(current application’s MKMapTypeStandard)
    
its setZoomEnabled:true
    
its setScrollEnabled:true
    
its setPitchEnabled:true
    
its setRotateEnabled:true
    
its setShowsCompass:true
    
its setShowsZoomControls:true
    
its setShowsScale:true
    
its setShowsUserLocation:true
    
    
set aLocation to current application’s CLLocationCoordinate2DMake((first item of first item of placeL) as real, (second item of first item of placeL) as real)
    
    
its setCenterCoordinate:aLocation zoomLevel:(zLevel) animated:false
    
its setDelegate:me
  end tell
  
  
theView’s setSubviews:{aScrollWithTable, aMapView}
  
  
— set up alert  
  
set theAlert to NSAlert’s alloc()’s init()
  
tell theAlert
    its setMessageText:aMainMes
    
its setInformativeText:aSubMes
    
its addButtonWithTitle:"OK"
    
its addButtonWithTitle:"Cancel"
    
its setAccessoryView:theView
  end tell
  
  
— show alert in modal loop
  
NSRunningApplication’s currentApplication()’s activateWithOptions:0
  
my performSelectorOnMainThread:"doModal:" withObject:(theAlert) waitUntilDone:true
  
if (my returnCode as number) = 1001 then error number -128
  
  
set (my theResult) to (aScrollWithTable’s documentView’s selectedRow()) + 1
end chooseItemByTableViewWithMap:

on doModal:aParam
  set (my returnCode) to aParam’s runModal()
end doModal:

on makeTableView(aList as list, aWidth as number, aHeight as number)
  set aOffset to 0
  
  
set sourceList to {}
  
repeat with i in aList
    set the end of sourceList to {dataItem:(contents of i)}
  end repeat
  
  
set theDataSource to NSMutableArray’s alloc()’s init()
  
theDataSource’s addObjectsFromArray:sourceList
  
  
set aScroll to NSScrollView’s alloc()’s initWithFrame:(current application’s NSMakeRect(0, aOffset, aWidth, aHeight))
  
set aView to NSTableView’s alloc()’s initWithFrame:(current application’s NSMakeRect(0, aOffset, aWidth, aHeight))


set aColumn to (NSTableColumn’s alloc()’s initWithIdentifier:"dataItem")
  (
aColumn’s setWidth:aWidth)
  (
aColumn’s headerCell()’s setStringValue:"dataItem")
  (
aView’s addTableColumn:aColumn)
  
  
aView’s setDelegate:me
  
aView’s setDataSource:me
  
aView’s reloadData()
  
  
aScroll’s setDocumentView:aView
  
aView’s enclosingScrollView()’s setHasVerticalScroller:true
  
  
–1行目を選択
  
set aIndexSet to NSIndexSet’s indexSetWithIndex:0
  
aView’s selectRowIndexes:aIndexSet byExtendingSelection:false
  
  
–強制的にトップにスクロール
  
–強制的にトップにスクロール
  
–set maxHeight to aScroll’s documentView()’s |bounds|()’s |size|()’s height
  
set aDBounds to aScroll’s documentView()’s |bounds|()
  
if class of aDBounds = list then
    –macOS 10.13 or later
    
set maxHeight to item 2 of item 1 of aDBounds
  else
    –macOS 10.10….10.12
    
set maxHeight to height of |size| of aDBounds
  end if
  
  
set aPT to current application’s NSMakePoint(0.0, -40.0) —— (aScroll’s documentView()’s |bounds|()’s |size|()’s height))
  
aScroll’s documentView()’s scrollPoint:aPT
  
  
return aScroll
end makeTableView

–TableView Event Handlers
on numberOfRowsInTableView:aView
  return my theDataSource’s |count|()
end numberOfRowsInTableView:

on tableView:aView objectValueForTableColumn:aColumn row:aRow
  set (tmpRow) to aView’s selectedRow() as number
  
  
–Table View上で現在選択行「以外の」行が選択されたら、Mapを選択項目で更新
  
if (my curRow) is not equal to tmpRow then
    set tmpLat to (first item of item (tmpRow + 1) of placeL) as real
    
set tmpLong to (second item of item (tmpRow + 1) of placeL) as real
    
    
tell aMapView
      set aLocation to current application’s CLLocationCoordinate2DMake(tmpLat, tmpLong)
      
its setCenterCoordinate:aLocation zoomLevel:(zLevel) animated:false
    end tell
    
    
set (my curRow) to tmpRow
  end if
  
  
set aRec to (my theDataSource)’s objectAtIndex:(aRow as number)
  
set aTitle to (aColumn’s headerCell()’s title()) as string
  
set aRes to (aRec’s valueForKey:aTitle)
  
return aRes
end tableView:objectValueForTableColumn:row:

★Click Here to Open This Script 

Posted in geolocation GUI list | Tagged 10.11savvy 10.12savvy 10.13savvy 10.14savvy MKMapView NSAlert NSAlertSecondButtonReturn NSIndexSet NSMutableArray NSRunningApplication NSScrollView NSTableColumn NSTableView | Leave a comment

アラートダイアログ上にTable Viewを表示

Posted on 2月 22, 2019 by Takaaki Naganoya

アラートダイアログを作成し、その上にScroll View+Table Viewを表示して選択肢の選択を行うAppleScriptです。

1D List(1次元配列)を与え、選択を行うUIです。実行すると選択肢のアイテム番号(1からはじまる)を返してきます。

とくにこれが作りたかったのではなく、位置情報(Geo Location)の選択をTable Viewで行い、該当する場所をMap Viewに表示させると擬似的に複数の固定位置情報から任意のものを選択させるダイアログが作れるだろうかと思って作成した試作品です。

東京への引っ越しの荷物が到着して、ようやく検証用のサブマシンが届いたものの、ネットワークを新規敷設しなくてはならないのでぼちぼちです。

AppleScript名:アラートダイアログ上にTable Viewを表示 v3
— Created 2019-02-21 by Takaaki Naganoya
— 2019 Piyomaru Software
use AppleScript version "2.5"
use scripting additions
use framework "Foundation"
use framework "AppKit"

property NSAlert : a reference to current application’s NSAlert
property NSIndexSet : a reference to current application’s NSIndexSet
property NSScrollView : a reference to current application’s NSScrollView
property NSTableView : a reference to current application’s NSTableView
property NSTableColumn : a reference to current application’s NSTableColumn
property NSMutableArray : a reference to current application’s NSMutableArray
property NSRunningApplication : a reference to current application’s NSRunningApplication
property NSAlertSecondButtonReturn : a reference to current application’s NSAlertSecondButtonReturn

property theResult : 0
property returnCode : 0
property theDataSource : {}

set paramObj to {myMessage:"項目の選択", mySubMessage:"適切なものを以下からえらんでください", aTableList:{"なし", "りんご", "ひよこ", "ぎょうざ", "すなぎも", "ぼんじり", "もも"}}
set aRes to my chooseItemByTableView:paramObj

on chooseItemByTableView:paramObj
  set aMainMes to myMessage of paramObj
  
set aSubMes to mySubMessage of paramObj
  
set aTList to (aTableList of paramObj) as list
  
  
–define the matrix size where you’ll put the radio buttons
  
set aScrollWithTable to makeTableView(aTList, 300, 150) of me
  
  
— set up alert  
  
set theAlert to NSAlert’s alloc()’s init()
  
tell theAlert
    its setMessageText:aMainMes
    
its setInformativeText:aSubMes
    
its addButtonWithTitle:"OK"
    
its addButtonWithTitle:"Cancel"
    
its setAccessoryView:aScrollWithTable
  end tell
  
  
— show alert in modal loop
  
NSRunningApplication’s currentApplication()’s activateWithOptions:0
  
my performSelectorOnMainThread:"doModal:" withObject:(theAlert) waitUntilDone:true
  
if (my returnCode as number) = 1001 then error number -128
  
  
return (aScrollWithTable’s documentView’s selectedRow()) + 1
end chooseItemByTableView:

on doModal:aParam
  set (my returnCode) to aParam’s runModal()
end doModal:

on makeTableView(aList as list, aWidth as number, aHeight as number)
  set aOffset to 40
  
  
set sourceList to {}
  
repeat with i in aList
    set the end of sourceList to {dataItem:(contents of i)}
  end repeat
  
  
set theDataSource to NSMutableArray’s alloc()’s init()
  
theDataSource’s addObjectsFromArray:sourceList
  
  
set aScroll to NSScrollView’s alloc()’s initWithFrame:(current application’s NSMakeRect(0, aOffset, aWidth, aHeight))
  
set aView to NSTableView’s alloc()’s initWithFrame:(current application’s NSMakeRect(0, aOffset, aWidth, aHeight))


set aColumn to (NSTableColumn’s alloc()’s initWithIdentifier:"dataItem")
  (
aColumn’s setWidth:aWidth)
  (
aColumn’s headerCell()’s setStringValue:"dataItem")
  (
aView’s addTableColumn:aColumn)
  
  
aView’s setDelegate:me
  
aView’s setDataSource:me
  
aView’s reloadData()
  
  
aScroll’s setDocumentView:aView
  
aView’s enclosingScrollView()’s setHasVerticalScroller:true
  
  
–1行目を選択
  
set aIndexSet to NSIndexSet’s indexSetWithIndex:0
  
aView’s selectRowIndexes:aIndexSet byExtendingSelection:false
  
  
–強制的にトップにスクロール
  
–set maxHeight to aScroll’s documentView()’s |bounds|()’s |size|()’s height
  
set aDBounds to aScroll’s documentView()’s |bounds|()
  
if class of aDBounds = list then
    –macOS 10.13 or later
    
set maxHeight to item 2 of item 1 of aDBounds
  else
    –macOS 10.10….10.12
    
set maxHeight to height of |size| of aDBounds
  end if
  
  
set aPT to current application’s NSMakePoint(0.0, -40.0) —— (aScroll’s documentView()’s |bounds|()’s |size|()’s height))
  
aScroll’s documentView()’s scrollPoint:aPT
  
  
return aScroll
end makeTableView

–TableView Event Handlers
on numberOfRowsInTableView:aView
  return my theDataSource’s |count|()
end numberOfRowsInTableView:

on tableView:aView objectValueForTableColumn:aColumn row:aRow
  set aRec to (my theDataSource)’s objectAtIndex:(aRow as number)
  
set aTitle to (aColumn’s headerCell()’s title()) as string
  
set aRes to (aRec’s valueForKey:aTitle)
  
return aRes
end tableView:objectValueForTableColumn:row:

★Click Here to Open This Script 

Posted in GUI list | Tagged 10.11savvy 10.12savvy 10.13savvy 10.14savvy NSAlert NSAlertSecondButtonReturn NSIndexSet NSMutableArray NSRunningApplication NSScrollView NSTableColumn NSTableView | 1 Comment

アラートダイアログ上にsegmented controlを表示

Posted on 2月 19, 2019 by Takaaki Naganoya

アラートダイアログを作成し、その上にsegmented control(タブみたいな複数項目1択UI部品)を表示して選択肢の選択を行うAppleScriptです。

選択肢のインデックス番号が(1からはじまる)返ってきます。

AppleScript名:アラートダイアログ上にsegmented controlを表示
— Created 2019-02-14 by Takaaki Naganoya
— 2019 Piyomaru Software
use AppleScript version "2.5"
use scripting additions
use framework "Foundation"
use framework "AppKit"

property NSAlert : a reference to current application’s NSAlert
property NSView : a reference to current application’s NSView
property NSSegmentedControl : a reference to current application’s NSSegmentedControl
property NSRunningApplication : a reference to current application’s NSRunningApplication
property NSSegmentStyleTexturedRounded : a reference to current application’s NSSegmentStyleTexturedRounded

property theSegSel : 0
property returnCode : 0

set paramObj to {myMessage:"項目選択", mySubMessage:"どれか選択してください。", segmentMes:{"Red", "Blue", "Yellow", "Brown", "White", "Cyan", "Grey"}}
set segRes to my chooseSegment:paramObj

on chooseSegment:paramObj
  set aMainMes to myMessage of paramObj
  
set aSubMes to mySubMessage of paramObj
  
set segMesList to segmentMes of paramObj
  
  
— create a view
  
set theView to NSView’s alloc()’s initWithFrame:(current application’s NSMakeRect(0, 0, 400, 200))
  
  
–Segmented Controlをつくる
  
set aSeg to makeSegmentedControl(segMesList, 400, 80) of me
  
  
theView’s setSubviews:{aSeg}
  
  
set theAlert to NSAlert’s alloc()’s init()
  
  
— set up alert
  
tell theAlert
    its setMessageText:aMainMes
    
its setInformativeText:aSubMes
    
its addButtonWithTitle:"OK"
    
its addButtonWithTitle:"Cancel"
    
its setAccessoryView:aSeg
  end tell
  
  
— show alert in modal loop
  
NSRunningApplication’s currentApplication()’s activateWithOptions:0
  
my performSelectorOnMainThread:"doModal:" withObject:(theAlert) waitUntilDone:true
  
if (my returnCode as number) = 1001 then error number -128
  
  
set (my theSegSel) to (aSeg’s selectedSegment()) as number
  
return (my theSegSel) + 1
end chooseSegment:

on doModal:aParam
  set (my returnCode) to aParam’s runModal()
end doModal:

on makeSegmentedControl(titleList, aWidth, aHeight)
  set aLen to length of titleList
  
  
set aSeg to NSSegmentedControl’s alloc()’s init()
  
aSeg’s setSegmentCount:aLen
  
  
set aCount to 0
  
repeat with i in titleList
    set j to contents of i
    (
aSeg’s setLabel:j forSegment:aCount)
    
set aCount to aCount + 1
  end repeat
  
  
aSeg’s setTranslatesAutoresizingMaskIntoConstraints:false
  
aSeg’s setSegmentStyle:(NSSegmentStyleTexturedRounded)
  
aSeg’s setFrame:(current application’s NSMakeRect(20, aHeight – 60, aWidth, aHeight – 40))
  
aSeg’s setTrackingMode:0
  
aSeg’s setTarget:me
  
aSeg’s setAction:"clickedSeg:"
  
aSeg’s setSelectedSegment:0
  
  
return aSeg
end makeSegmentedControl

on clickedSeg:aSender
  set aSel to aSender’s selectedSegment()
  
set selSeg to aSel
end clickedSeg:

★Click Here to Open This Script 

Posted in dialog GUI list | Tagged 10.11savvy 10.12savvy 10.13savvy NSAlert NSRunningApplication NSSegmentedControl NSSegmentStyleTexturedRounded NSView | Leave a comment

アラートダイアログ上にRadio Buttonを表示

Posted on 2月 19, 2019 by Takaaki Naganoya

アラートダイアログを作成し、その上にRadio Buttonを表示して位置座標の選択を行うAppleScriptです。

任意の選択肢をlist(配列)で指定すると、その通りのRadio Buttonを表示します。ユーザーが選択した項目のtitle文字列を返します。項目番号ではありません。

AppleScript名:アラートダイアログ上にRadio Buttonを表示 v2
— Created 2019-02-14 by Takaaki Naganoya
— 2019 Piyomaru Software
use AppleScript version "2.5"
use scripting additions
use framework "Foundation"
use framework "AppKit"

property NSAlert : a reference to current application’s NSAlert
property NSMatrix : a reference to current application’s NSMatrix
property NSButtonCell : a reference to current application’s NSButtonCell
property NSRadioButton : a reference to current application’s NSRadioButton
property NSRadioModeMatrix : a reference to current application’s NSRadioModeMatrix
property NSAlertSecondButtonReturn : a reference to current application’s NSAlertSecondButtonReturn

property theResult : 0
property returnCode : 0

set paramObj to {myMessage:"項目の選択", mySubMessage:"適切なものを以下からえらんでください", matrixTitleList:{"なし", "りんご", "ひよこ", "ぎょうざ", "すなぎも", "ぼんじり", "もも"}}
set aRes to my chooseItemByRadioButton:paramObj

on chooseItemByRadioButton:paramObj
  set aMainMes to myMessage of paramObj
  
set aSubMes to mySubMessage of paramObj
  
set aMatList to (matrixTitleList of paramObj) as list
  
set aLen to length of aMatList
  
  
–create the radio button prototype
  
set aProto to NSButtonCell’s alloc()’s init()
  
aProto’s setTitle:"Options"
  
aProto’s setButtonType:(NSRadioButton)
  
  
–define the matrix size where you’ll put the radio buttons
  
set matrixRect to current application’s NSMakeRect(20.0, 20.0, 200.0, (20.0 * aLen))
  
set aMatrix to NSMatrix’s alloc()’s initWithFrame:matrixRect mode:(NSRadioModeMatrix) prototype:aProto numberOfRows:(aLen) numberOfColumns:1
  
  
set cellList to aMatrix’s cells()
  
set aCount to 0
  
repeat with i in aMatList
    set j to contents of i
    ((
cellList’s objectAtIndex:aCount)’s setTitle:j)
    
set aCount to aCount + 1
  end repeat
  
  
— set up alert  
  
set theAlert to NSAlert’s alloc()’s init()
  
tell theAlert
    its setMessageText:aMainMes
    
its setInformativeText:aSubMes
    
its addButtonWithTitle:"OK"
    
its addButtonWithTitle:"Cancel"
    
its setAccessoryView:aMatrix
  end tell
  
  
— show alert in modal loop
  
current application’s NSRunningApplication’s currentApplication()’s activateWithOptions:0
  
my performSelectorOnMainThread:"doModal:" withObject:(theAlert) waitUntilDone:true
  
if (my returnCode as number) = 1001 then error number -128
  
  
return (aMatrix’s selectedCell()’s title()) as string
end chooseItemByRadioButton:

on doModal:aParam
  set (my returnCode) to aParam’s runModal()
end doModal:

★Click Here to Open This Script 

Posted in dialog GUI list | Tagged 10.11savvy 10.12savvy 10.13savvy NSAlert NSAlertSecondButtonReturn NSButtonCell NSMatrix NSRadioButton NSRadioModeMatrix | Leave a comment

アラートダイアログ上にMap Viewを表示

Posted on 2月 19, 2019 by Takaaki Naganoya

アラートダイアログを作成し、その上にMap Viewを表示して位置座標の選択を行うAppleScriptです。

Map Viewを使用するためには、インターネット接続が必要です。

もしこれをAppleScriptのコマンドのように表現するなら「choose geo location」とかいうコマンドになるでしょうか。本当は地図.appのように地図中でクリックした場所にピンを打って選択箇所を明示するようなものを考えていたのですが、実際にASだけで作ろうとすると難しいものがありそうで。

こうした「ざっくり場所を選ぶ」ダイアログのほか、複数の地点をピンで表示し、そのうちのどれかを地図上で選択するといったコマンドがあると使いでがありそうです。

AppleScript名:アラートダイアログ上のMap Viewを表示
— Created 2019-02-14 by Takaaki Naganoya
— 2019 Piyomaru Software
use AppleScript version "2.5"
use scripting additions
use framework "Foundation"
use framework "MapKit"
use framework "AppKit"

property |NSURL| : a reference to current application’s |NSURL|
property NSData : a reference to current application’s NSData
property MKMapView : a reference to current application’s MKMapView
property NSURLRequest : a reference to current application’s NSURLRequest
property NSURLConnection : a reference to current application’s NSURLConnection

property theResult : 0
property returnCode : 0

set nRes to hasInternetConnection("http://www.google.com") of me
if nRes = false then error "No Internet Connection…."

–地図表示初期座標。一般的にはWiFi経由でAssistive-GPSから現在位置を拾って指定
set aLong to 130.55723797
set aLat to 31.57868838

set paramObj to {myMessage:"場所の選択", mySubMessage:"目標の場所を地図中央に入れてください", aLongitude:aLong, aLatitude:aLat}
my performSelectorOnMainThread:"chooseCoordinate:" withObject:(paramObj) waitUntilDone:true
return theResult
–> {latitude:31.57868838, longitude:130.55723797}

on chooseCoordinate:paramObj
  set aMainMes to myMessage of paramObj
  
set aSubMes to mySubMessage of paramObj
  
set aLong to aLongitude of paramObj
  
set aLat to aLatitude of paramObj
  
  
–MKMapViewをつくる
  
set aMapView to MKMapView’s alloc()’s initWithFrame:(current application’s NSMakeRect(0, 0, 500, 300))
  
tell aMapView
    its setMapType:(current application’s MKMapTypeStandard)
    
its setZoomEnabled:true
    
its setScrollEnabled:true
    
its setPitchEnabled:true
    
its setRotateEnabled:true
    
its setShowsCompass:true
    
its setShowsZoomControls:true
    
its setShowsScale:true
    
its setShowsUserLocation:true
    
    
set aLocation to current application’s CLLocationCoordinate2DMake(aLat, aLong)
    
its setCenterCoordinate:aLocation zoomLevel:17 animated:false
    
its setDelegate:me
  end tell
  
  
— set up alert  
  
set theAlert to current application’s NSAlert’s alloc()’s init()
  
tell theAlert
    its setMessageText:aMainMes
    
its setInformativeText:aSubMes
    
its addButtonWithTitle:"OK"
    
its addButtonWithTitle:"Cancel"
    
its setAccessoryView:aMapView
  end tell
  
  
— show alert in modal loop
  
current application’s NSRunningApplication’s currentApplication()’s activateWithOptions:(current application’s NSApplicationActivateIgnoringOtherApps)
  
set returnCode to theAlert’s runModal()
  
if returnCode = (current application’s NSAlertSecondButtonReturn) then error number -128
  
  
set (my theResult) to (aMapView’s centerCoordinate()) as record
end chooseCoordinate:

–Internet Connection Check
on hasInternetConnection(aURLString)
  set aURL to |NSURL|’s alloc()’s initWithString:aURLString
  
set aReq to NSURLRequest’s alloc()’s initWithURL:aURL cachePolicy:(current application’s NSURLRequestReloadIgnoringLocalCacheData) timeoutInterval:5.0
  
set urlRes to (NSURLConnection’s sendSynchronousRequest:aReq returningResponse:(missing value) |error|:(missing value))
  
if urlRes = missing value then
    return false
  else
    return true
  end if
end hasInternetConnection

★Click Here to Open This Script 

Posted in geolocation GUI Internet | Tagged 10.11savvy 10.12savvy 10.13savvy NSData NSURL NSView | Leave a comment

アラートダイアログ上にpath control x2を表示

Posted on 2月 18, 2019 by Takaaki Naganoya

アラートダイアログを作成し、その上にpath controlを2つ表示してパスの選択を行うAppleScriptです。

path controlには、対象のフォルダ/ファイルをドラッグ&ドロップしてファイルのパスを指定できます。使いやすい一方で、choose folderコマンドのようにフォルダの新規作成までサポートしているわけではありません。

スクリプトエディタ、Script Debugger、Appletなどでは正常に動作しますが、スクリプトメニュー上から呼び出すとアラートダイアログが最前面に表示されず、前に出す操作が必要になります。

AppleScript名:アラートダイアログ上のpath control x2を表示
— Created 2019-02-14 by Takaaki Naganoya
— 2019 Piyomaru Software
use AppleScript version "2.5"
use scripting additions
use framework "Foundation"
use framework "AppKit"

property theResult : 0
property returnCode : 0

set paramObj to {myMessage:"項目選択", mySubMessage:"どれか選択してください。", fromPathMes:"移動元:", toPathMes:"移動先:"}
set segRes to my chooseTwoPath:paramObj
–> {fromPathRes:"/Users/me/Documents/AppleScript/パスコントロール", toPathRes:"/Users/me/Documents/AppleScript/タッチバー"}

on chooseTwoPath:paramObj
  set aMainMes to myMessage of paramObj
  
set aSubMes to mySubMessage of paramObj
  
set fromLabel to fromPathMes of paramObj
  
set toLabel to toPathMes of paramObj
  
  
— create a view
  
set theView to current application’s NSView’s alloc()’s initWithFrame:(current application’s NSMakeRect(0, 0, 800, 60))
  
  
— create two path control & text field
  
set aPathControl to current application’s NSPathControl’s alloc()’s initWithFrame:(current application’s NSMakeRect(100, 35, 700, 20))
  
set bPathControl to current application’s NSPathControl’s alloc()’s initWithFrame:(current application’s NSMakeRect(100, 0, 700, 20))
  
aPathControl’s setBackgroundColor:(current application’s NSColor’s cyanColor())
  
bPathControl’s setBackgroundColor:(current application’s NSColor’s yellowColor())
  
  
set aHome to current application’s |NSURL|’s fileURLWithPath:(current application’s NSHomeDirectory()) –initial dir
  
aPathControl’s setURL:aHome
  
bPathControl’s setURL:aHome
  
  
set a1TF to current application’s NSTextField’s alloc()’s initWithFrame:(current application’s NSMakeRect(0, 35, 100, 20))
  
set a2TF to current application’s NSTextField’s alloc()’s initWithFrame:(current application’s NSMakeRect(0, 0, 100, 20))
  
a1TF’s setEditable:false
  
a2TF’s setEditable:false
  
a1TF’s setStringValue:fromLabel
  
a2TF’s setStringValue:toLabel
  
a1TF’s setDrawsBackground:false
  
a2TF’s setDrawsBackground:false
  
a1TF’s setBordered:false
  
a2TF’s setBordered:false
  
  
theView’s setSubviews:{a1TF, aPathControl, a2TF, bPathControl}
  
  
— set up alert
  
set theAlert to current application’s NSAlert’s alloc()’s init()
  
tell theAlert
    its setMessageText:aMainMes
    
its setInformativeText:aSubMes
    
its addButtonWithTitle:"OK"
    
its addButtonWithTitle:"Cancel"
    
its setAccessoryView:theView
  end tell
  
  
— show alert in modal loop
  
current application’s NSRunningApplication’s currentApplication()’s activateWithOptions:0
  
my performSelectorOnMainThread:"doModal:" withObject:(theAlert) waitUntilDone:true
  
if (my returnCode as number) = 1001 then error number -128
  
  
set s1Val to (aPathControl’s |URL|’s |path|()) as string
  
set s2Val to (bPathControl’s |URL|’s |path|()) as string
  
  
return {fromPathRes:s1Val, toPathRes:s2Val}
end chooseTwoPath:

on doModal:aParam
  set (my returnCode) to aParam’s runModal()
end doModal:

★Click Here to Open This Script 

Posted in File path GUI | Tagged 10.11savvy 10.12savvy 10.13savvy | Leave a comment

Post navigation

  • Older posts
  • Newer posts

電子書籍(PDF)をオンラインストアで販売中!

Google Search

Popular posts

  • 開発機としてM2 Mac miniが来たのでガチレビュー
  • macOS 15, Sequoia
  • Pages本執筆中に、2つの書類モード切り替えに気がついた
  • Numbersで選択範囲のセルの前後の空白を削除
  • メキシカンハットの描画
  • Pixelmator Pro v3.6.4でAppleScriptからの操作時の挙動に違和感が
  • AppleScriptによる並列処理
  • macOS 15でも変化したText to Speech環境
  • Safariで「プロファイル」機能を使うとAppleScriptの処理に影響
  • AppleScript入門③AppleScriptを使った「自動化」とは?
  • デフォルトインストールされたフォント名を取得するAppleScript
  • 【続報】macOS 15.5で特定ファイル名パターンのfileをaliasにcastすると100%クラッシュするバグ
  • Script Debuggerの開発と販売が2025年に終了
  • macOS 15 リモートApple Eventsにバグ?
  • AppleScript入門① AppleScriptってなんだろう?
  • macOS 14で変更になったOSバージョン取得APIの返り値
  • NSObjectのクラス名を取得 v2.1
  • macOS 15:スクリプトエディタのAppleScript用語辞書を確認できない
  • 有害ではなくなっていたSpaces
  • AVSpeechSynthesizerで読み上げテスト

Tags

10.11savvy (1101) 10.12savvy (1242) 10.13savvy (1391) 10.14savvy (587) 10.15savvy (438) 11.0savvy (283) 12.0savvy (212) 13.0savvy (197) 14.0savvy (150) 15.0savvy (139) CotEditor (66) Finder (51) Keynote (119) NSAlert (61) NSArray (51) NSBitmapImageRep (20) NSBundle (20) NSButton (34) NSColor (53) NSDictionary (28) NSFileManager (23) NSFont (21) NSImage (41) NSJSONSerialization (21) NSMutableArray (63) NSMutableDictionary (22) NSPredicate (36) NSRunningApplication (56) NSScreen (30) NSScrollView (22) NSString (119) NSURL (98) NSURLRequest (23) NSUTF8StringEncoding (30) NSView (33) NSWorkspace (20) Numbers (76) Pages (55) Pixelmator Pro (20) Safari (44) Script Editor (27) WKUserContentController (21) WKUserScript (20) WKWebView (23) WKWebViewConfiguration (22)

カテゴリー

  • 2D Bin Packing
  • 3D
  • AirDrop
  • AirPlay
  • Animation
  • AppleScript Application on Xcode
  • Beginner
  • Benchmark
  • beta
  • Bluetooth
  • Books
  • boolean
  • bounds
  • Bug
  • Calendar
  • call by reference
  • check sum
  • Clipboard
  • Cocoa-AppleScript Applet
  • Code Sign
  • Color
  • Custom Class
  • date
  • dialog
  • diff
  • drive
  • Droplet
  • exif
  • file
  • File path
  • filter
  • folder
  • Font
  • Font
  • GAME
  • geolocation
  • GUI
  • GUI Scripting
  • Hex
  • History
  • How To
  • iCloud
  • Icon
  • Image
  • Input Method
  • Internet
  • iOS App
  • JavaScript
  • JSON
  • JXA
  • Keychain
  • Keychain
  • Language
  • Library
  • list
  • Locale
  • Localize
  • Machine Learning
  • Map
  • Markdown
  • Menu
  • Metadata
  • MIDI
  • MIME
  • Natural Language Processing
  • Network
  • news
  • Noification
  • Notarization
  • Number
  • Object control
  • OCR
  • OSA
  • parallel processing
  • PDF
  • Peripheral
  • process
  • PRODUCTS
  • QR Code
  • Raw AppleEvent Code
  • Record
  • rectangle
  • recursive call
  • regexp
  • Release
  • Remote Control
  • Require Control-Command-R to run
  • REST API
  • Review
  • RTF
  • Sandbox
  • Screen Saver
  • Script Libraries
  • sdef
  • search
  • Security
  • selection
  • shell script
  • Shortcuts Workflow
  • Sort
  • Sound
  • Spellchecker
  • Spotlight
  • SVG
  • System
  • Tag
  • Telephony
  • Text
  • Text to Speech
  • timezone
  • Tools
  • Update
  • URL
  • UTI
  • Web Contents Control
  • WiFi
  • XML
  • XML-RPC
  • イベント(Event)
  • 未分類

アーカイブ

  • 2025年7月
  • 2025年6月
  • 2025年5月
  • 2025年4月
  • 2025年3月
  • 2025年2月
  • 2025年1月
  • 2024年12月
  • 2024年11月
  • 2024年10月
  • 2024年9月
  • 2024年8月
  • 2024年7月
  • 2024年6月
  • 2024年5月
  • 2024年4月
  • 2024年3月
  • 2024年2月
  • 2024年1月
  • 2023年12月
  • 2023年11月
  • 2023年10月
  • 2023年9月
  • 2023年8月
  • 2023年7月
  • 2023年6月
  • 2023年5月
  • 2023年4月
  • 2023年3月
  • 2023年2月
  • 2023年1月
  • 2022年12月
  • 2022年11月
  • 2022年10月
  • 2022年9月
  • 2022年8月
  • 2022年7月
  • 2022年6月
  • 2022年5月
  • 2022年4月
  • 2022年3月
  • 2022年2月
  • 2022年1月
  • 2021年12月
  • 2021年11月
  • 2021年10月
  • 2021年9月
  • 2021年8月
  • 2021年7月
  • 2021年6月
  • 2021年5月
  • 2021年4月
  • 2021年3月
  • 2021年2月
  • 2021年1月
  • 2020年12月
  • 2020年11月
  • 2020年10月
  • 2020年9月
  • 2020年8月
  • 2020年7月
  • 2020年6月
  • 2020年5月
  • 2020年4月
  • 2020年3月
  • 2020年2月
  • 2020年1月
  • 2019年12月
  • 2019年11月
  • 2019年10月
  • 2019年9月
  • 2019年8月
  • 2019年7月
  • 2019年6月
  • 2019年5月
  • 2019年4月
  • 2019年3月
  • 2019年2月
  • 2019年1月
  • 2018年12月
  • 2018年11月
  • 2018年10月
  • 2018年9月
  • 2018年8月
  • 2018年7月
  • 2018年6月
  • 2018年5月
  • 2018年4月
  • 2018年3月
  • 2018年2月

https://piyomarusoft.booth.pm/items/301502

メタ情報

  • ログイン
  • 投稿フィード
  • コメントフィード
  • WordPress.org

Forum Posts

  • 人気のトピック
  • 返信がないトピック

メタ情報

  • ログイン
  • 投稿フィード
  • コメントフィード
  • WordPress.org
Proudly powered by WordPress
Theme: Flint by Star Verte LLC