Menu

Skip to content
AppleScriptの穴
  • Home
  • Products
  • Books
  • Docs
  • Events
  • Forum
  • About This Blog
  • License
  • 仕事依頼

AppleScriptの穴

Useful & Practical AppleScript archive. Click '★Click Here to Open This Script' Link to download each AppleScript

タグ: NSURL

アラートダイアログ上にTextViewを表示

Posted on 7月 8, 2019 by Takaaki Naganoya

アラートダイアログ上にTextViewを表示して、指定のテキストを閲覧するAppleScriptです。

とくにこれといって何か表示するものを思いつかなかったので、自分自身のソースコードを取得して表示しています。スクリプトエディタやScript Debugger上で実行した場合には自分自身のソースコードをテキストビュー上で表示します。
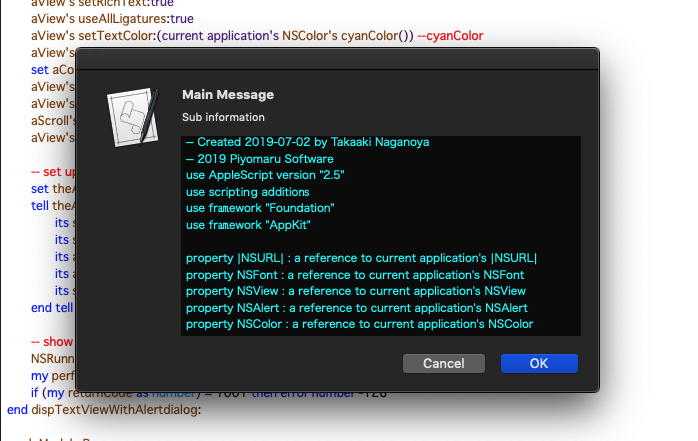
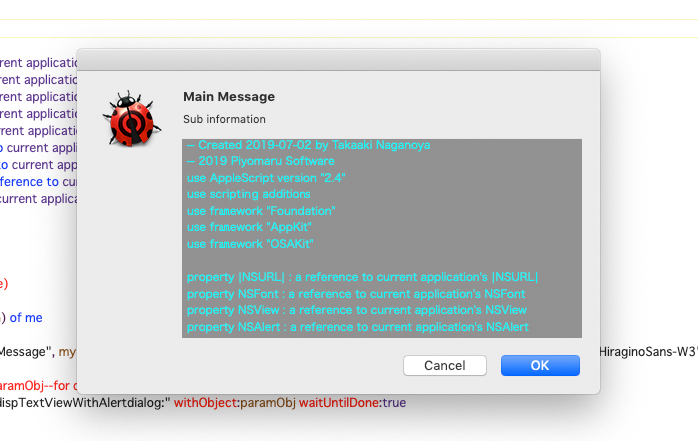
読み取り専用のスクリプトやアプレットで実行している場合にはソースコードを取得できません。何か適宜自分で表示させたいテキストを与えてみてください。

AppleScript名:アラートダイアログ上にTexViewを表示
— Created 2019-07-02 by Takaaki Naganoya
— 2019 Piyomaru Software
use AppleScript version "2.4"
use scripting additions
use framework "Foundation"
use framework "AppKit"
use framework "OSAKit"

property |NSURL| : a reference to current application’s |NSURL|
property NSFont : a reference to current application’s NSFont
property NSView : a reference to current application’s NSView
property NSAlert : a reference to current application’s NSAlert
property NSColor : a reference to current application’s NSColor
property NSTextView : a reference to current application’s NSTextView
property NSScrollView : a reference to current application’s NSScrollView
property NSRunningApplication : a reference to current application’s NSRunningApplication
property OSAScript : a reference to current application’s OSAScript

property returnCode : 0

–Get Self Source Code (a kind of joke)
set mePath to path to me
set asStr to getASsourceFor(mePath) of me

set paramObj to {myMessage:"Main Message", mySubMessage:"Sub information", mes1:(asStr), mesWidth:400, mesHeight:200, fontName:"HiraginoSans-W3", fontSize:11.0}

–my dispTextViewWithAlertdialog:paramObj–for debug
my performSelectorOnMainThread:"dispTextViewWithAlertdialog:" withObject:paramObj waitUntilDone:true

on dispTextViewWithAlertdialog:paramObj
  –Receive Parameters
  
set aMainMes to (myMessage of paramObj) as string –Main Message
  
set aSubMes to (mySubMessage of paramObj) as string –Sub Message
  
set mesStr to (mes1 of paramObj) as string –Text Input field 1 Label
  
set aWidth to (mesWidth of paramObj) as integer –TextView width
  
set aHeight to (mesHeight of paramObj) as integer –TextView height
  
set aFontName to (fontName of paramObj) as string –TextView font name
  
set aFontSize to (fontSize of paramObj) as real –TextView font size
  
  
— Create a TextView with Scroll View
  
set aScroll to NSScrollView’s alloc()’s initWithFrame:(current application’s NSMakeRect(0, 0, aWidth, aHeight))
  
set aView to NSTextView’s alloc()’s initWithFrame:(current application’s NSMakeRect(0, 0, aWidth, aHeight))
  
aView’s setRichText:true
  
aView’s useAllLigatures:true
  
aView’s setTextColor:(current application’s NSColor’s cyanColor()) –cyanColor
  
aView’s setFont:(current application’s NSFont’s fontWithName:aFontName |size|:aFontSize)
  
set aColor to current application’s NSColor’s colorWithDeviceRed:0.0 green:0.0 blue:0.0 alpha:0.5
  
aView’s setBackgroundColor:aColor
  
aView’s setString:mesStr
  
aScroll’s setDocumentView:aView
  
aView’s enclosingScrollView()’s setHasVerticalScroller:true
  
  
— set up alert
  
set theAlert to NSAlert’s alloc()’s init()
  
tell theAlert
    its setMessageText:aMainMes
    
its setInformativeText:aSubMes
    
its addButtonWithTitle:"OK"
    
its addButtonWithTitle:"Cancel"
    
its setAccessoryView:aScroll
  end tell
  
  
— show alert in modal loop
  
NSRunningApplication’s currentApplication()’s activateWithOptions:0
  
my performSelectorOnMainThread:"doModal:" withObject:(theAlert) waitUntilDone:true
  
if (my returnCode as number) = 1001 then error number -128
end dispTextViewWithAlertdialog:

on doModal:aParam
  set (my returnCode) to aParam’s runModal()
end doModal:

–指定AppleScriptファイルのソースコードを取得する(実行専用Scriptからは取得できない)
— Original Created 2014-02-23 Shane Stanley
on getASsourceFor(anAlias as {alias, string})
  set aURL to |NSURL|’s fileURLWithPath:(POSIX path of anAlias)
  
set theScript to OSAScript’s alloc()’s initWithContentsOfURL:aURL |error|:(missing value)
  
  
if theScript is equal to missing value then
    error "Compile Error" — handle error
  else
    set sourceText to theScript’s source()
  end if
  
  
return sourceText as string
end getASsourceFor

★Click Here to Open This Script 

Posted in Color file File path Font GUI Text URL | Tagged 10.11savvy 10.12savvy 10.13savvy 10.14savvy NSAlert NSColor NSFont NSRunningApplication NSScrollView NSTextView NSURL OSAScript | Leave a comment

Keynoteで選択中のスライドだけをデスクトップに画像で書き出す

Posted on 6月 20, 2019 by Takaaki Naganoya

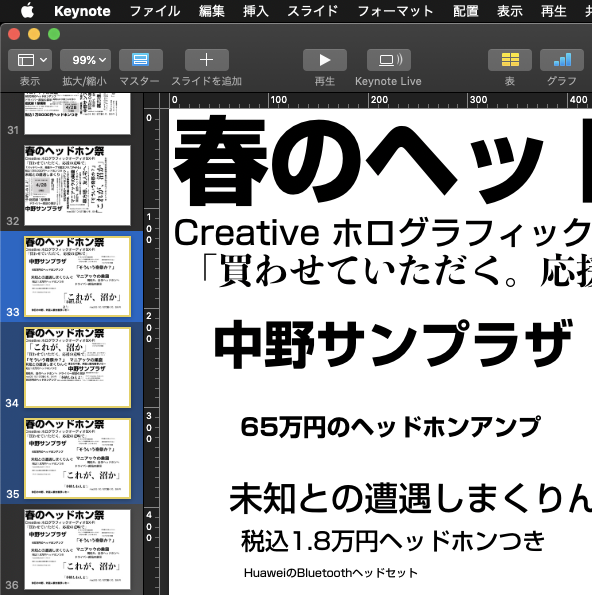
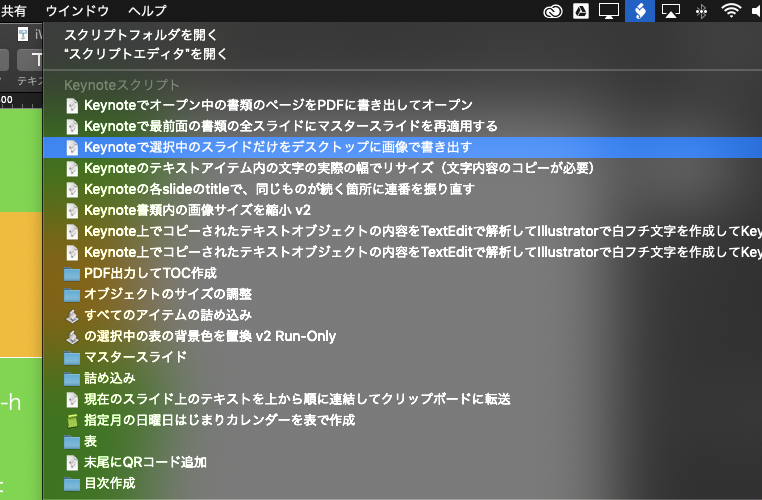
Keynoteでオープン中の最前面の書類で、選択中のスライドだけをデスクトップにPNG画像で書き出すAppleScriptです。Keynote 9.xを必要とします(macOS 10.13以降)。

ちょっとした説明のためにKeynoteの資料の一部だけを画面上でキャプチャして、メールなどに添付して送ることはよくあります(全部送ると量がおおすぎたり、焦点がぼやけたり)。

そこで、複数枚のスライド(ページ)を選択しておくと、それらのみを画像書き出しするAppleScriptを作ってみました。Keynoteにそんな機能はないのですが、「選択中のページ番号」は取れるので、書類全体をPDF書き出ししておいて、書き出したPDFから指定ページを画像として再書き出しを行い、PDFを削除しています。

手品のように見える処理でも、実際に行える機能を組み合わせて地道に作っているだけです。問題は、「手品」が実は地道な調査と機能確認、こまごまとしたライブラリの整備の末に実現されていることが、一般の方にはわかりにくいということでしょうか(いきなり手品を求められて絶句すること多し)。

仕事の合間に作ったので、割と雑な作りです。書き出し画像のファイル名衝突チェックなどは入れていません。

それでも、スクリプトメニューに入れて利用するとなかなか便利です。

AppleScript名:Keynoteで選択中のスライドだけをデスクトップに画像で書き出す.scptd
—
–  Created by: Takaaki Naganoya
–  Created on: 2019/06/20
—
–  Copyright © 2019 Piyomaru Software, All Rights Reserved
—
use AppleScript version "2.7" — 10.13 or later
use framework "Foundation"
use framework "Quartz"
use framework "AppKit"
use scripting additions

set dtPath to (path to desktop) as string

tell application "Keynote"
  set aVer to version
  
  
considering numeric strings
    if aVer < "9.0" then
      display dialog "Too old version for this Script." buttons {"OK"} default button 1 with icon 1
      
return
    end if
  end considering
  
  
tell front document
    set aSel to selection –選択中のスライドオブジェクトへの参照がリストで入る
    
set pList to {}
    
repeat with i in aSel
      set tmpPage to slide number of i
      
set the end of pList to tmpPage
    end repeat
    
  end tell
end tell

–Keynote書類を指定フォルダにPDF書き出し(全ページ書き出し)
set savedPDFPath to exportKeynoteDocToPDF(dtPath) of me
if savedPDFPath = false then return –Error

set aPOSIXpath to POSIX path of savedPDFPath

–書き出したPDFから、部分的にPNG画像に書き出す
repeat with p in pList
  –PDFの指定ページをNSImageとして取り出す
  
set tmpNSImage to getNSImageFromPDFPage(aPOSIXpath, p) of me
  
  
–PDFの書き出しファイル名に子番号にスライド番号をつける
  
set bPath to addStringbeforeExtension(aPOSIXpath, "_" & (p as string)) of me
  
  
–PDF書き出しファイル名に
  
set newPath to repFilePathExtension(bPath, ".png") of me
  
  
–指定のNSImageを指定のパスにPNG形式で保存
  
set sRes to saveNSImageAtPathAsPNG(tmpNSImage, newPath) of me
end repeat

–書き出したPDFを削除
tell application "Finder"
  delete savedPDFPath
end tell

–Keynote書類からPDF書き出し
on exportKeynoteDocToPDF(targFolderPath as string)
  tell application "Keynote"
    set dCount to count every document
    
if dCount = 0 then
      return false
    end if
    
set aPath to file of document 1
  end tell
  
  
set curPath to (current application’s NSString’s stringWithString:(POSIX path of aPath))’s lastPathComponent()’s stringByDeletingPathExtension()’s stringByAppendingString:".pdf"
  
set outPath to (targFolderPath & curPath)
  
  
tell application "Keynote"
    set anOpt to {class:export options, export style:IndividualSlides, all stages:false, skipped slides:true, PDF image quality:Best}
    
export document 1 to file outPath as PDF with properties anOpt
  end tell
  
  
return (outPath as alias)
  
end exportKeynoteDocToPDF

–指定のPDFから、指定のページをNSImageで返す
on getNSImageFromPDFPage(aPOSIX, aPage as number)
  set aURL to (current application’s |NSURL|’s fileURLWithPath:aPOSIX)
  
  
set aPDFdoc to current application’s PDFDocument’s alloc()’s initWithURL:aURL
  
set pCount to aPDFdoc’s pageCount()
  
  
set compFactor to 1.0 –1.0 — 0.0 = max jpeg compression, 1.0 = none
  
  
–Detect Retina Environment
  
set retinaF to current application’s NSScreen’s mainScreen()’s backingScaleFactor()
  
if retinaF = 1.0 then
    set aScale to 2.0 –Non Retina Env
  else
    set aScale to 1.0 –Retina Env
  end if
  
  
set thisPage to (aPDFdoc’s pageAtIndex:(aPage – 1))
  
set anNSImage to (current application’s NSImage’s alloc()’s initWithData:(thisPage’s dataRepresentation()))
  
  
if anNSImage = missing value then error "Error in getting imagerep from PDF"
  
  
return anNSImage
end getNSImageFromPDFPage

–ファイル名の拡張子の直前に子番号的な文字列を入れる
on addStringbeforeExtension(aPath, extraString)
  set pathString to current application’s NSString’s stringWithString:aPath
  
set theExtension to pathString’s pathExtension()
  
set thePathNoExt to pathString’s stringByDeletingPathExtension()
  
set newPath to (thePathNoExt’s stringByAppendingString:extraString)’s stringByAppendingPathExtension:theExtension
  
return newPath as string
end addStringbeforeExtension

–与えられたパスの拡張子を付け替える
on repFilePathExtension(origPath, newExt)
  set aName to current application’s NSString’s stringWithString:origPath
  
set theExtension to aName’s pathExtension()
  
if (theExtension as string) is not equal to "" then
    set thePathNoExt to aName’s stringByDeletingPathExtension()
    
set newName to (thePathNoExt’s stringByAppendingString:newExt)
  else
    set newName to (aName’s stringByAppendingString:newExt)
  end if
  
return newName as string
end repFilePathExtension

–NSImageを指定パスにPNG形式で保存
on saveNSImageAtPathAsPNG(anImage, outPath)
  set imageRep to anImage’s TIFFRepresentation()
  
set aRawimg to current application’s NSBitmapImageRep’s imageRepWithData:imageRep
  
set pathString to current application’s NSString’s stringWithString:outPath
  
set newPath to pathString’s stringByExpandingTildeInPath()
  
set myNewImageData to (aRawimg’s representationUsingType:(current application’s NSPNGFileType) |properties|:(missing value))
  
set aRes to (myNewImageData’s writeToFile:newPath atomically:true) as boolean
  
return aRes –true/false
end saveNSImageAtPathAsPNG

★Click Here to Open This Script 

Posted in file File path Image PDF | Tagged 10.13savvy 10.14savvy Finder Keynote NSBitmapImageRep NSImage NSScreen NSString NSURL PDFDocument | Leave a comment

URLにリソースが存在するかチェック v5(NSURLSession)

Posted on 5月 24, 2019 by Takaaki Naganoya

指定URLの存在確認を行うAppleScriptです。

以前はNSURLConnectionを使って確認するものを使っていましたが、NSURLSessionへと移行しようかというところ。

もちろん、shellのcurlコマンドを使えば数行で済んでしまいますが、そこをあえてCocoaの機能を利用して、というよりはちょっと前に書いたREST API呼び出しのサブルーチンが絶好調で動いているので、これをそのまま流用してみました。

ライブラリ化して自分のScriptのバンドル内に入れておくとか、~/Library/Script Librariesフォルダに入れておくとか、そういう使い方になると思います。自分でもわざわざこれだけの機能のために、これだけの量のコードをゼロから書くことは……めったにありません。

AppleScript名:URLにリソースが存在するかチェック(curl版)_v2
set aURL to "http://www.apple.com/jp/"
set aRes to chekURLExistence(aURL) of me

on chekURLExistence(aURL)
  try
    set aRes to do shell script ("/usr/bin/curl -LI " & aURL)
  on error
    return false
  end try
  
return ((aRes contains "HTTP/1.1 200") or (aRes contains "HTTP/2 200")) as boolean
end chekURLExistence

★Click Here to Open This Script 

AppleScript名:URLにリソースが存在するかチェック v5(NSURLSession)
— Created 2019-05-24 by Takaaki Naganoya
— 2019 Piyomaru Software
use AppleScript version "2.4"
use scripting additions
use framework "Foundation"

property |NSURL| : a reference to current application’s |NSURL|
property NSString : a reference to current application’s NSString
property NSURLSession : a reference to current application’s NSURLSession
property NSJSONSerialization : a reference to current application’s NSJSONSerialization
property NSMutableURLRequest : a reference to current application’s NSMutableURLRequest
property NSUTF8StringEncoding : a reference to current application’s NSUTF8StringEncoding
property NSURLSessionConfiguration : a reference to current application’s NSURLSessionConfiguration

property retData : missing value
property retCode : 0
property retHeaders : 0
property drecF : false

set aURL to "http://piyocast.com/as/"
set uRes to chekURLExistence(aURL) of me
–> true

on chekURLExistence(aURL as string)
  set webRes to callRestGETAPIAndParseResults(aURL, 5) of me
  
return ((retCode of webRes) as integer = 200)
end chekURLExistence

— 指定URLにファイル(画像など)が存在するかチェック
–> {存在確認結果(boolean), レスポンスヘッダー(NSDictionary), データ(NSData)}
on callRestGETAPIAndParseResults(reqURLStr as string, timeOutSec as real)
  set (my retData) to false
  
set (my retCode) to 0
  
set (my retHeaders) to {}
  
set (my drecF) to false
  
  
set aURL to |NSURL|’s URLWithString:reqURLStr
  
set aRequest to NSMutableURLRequest’s requestWithURL:aURL
  
aRequest’s setHTTPMethod:"GET"
  
aRequest’s setValue:"gzip" forHTTPHeaderField:"Content-Encoding"
  
aRequest’s setValue:"application/json; charset=UTF-8" forHTTPHeaderField:"Content-Type"
  
  
set aConfig to NSURLSessionConfiguration’s defaultSessionConfiguration()
  
set aSession to NSURLSession’s sessionWithConfiguration:aConfig delegate:(me) delegateQueue:(missing value)
  
set aTask to aSession’s dataTaskWithRequest:aRequest
  
  
set hitF to false
  
aTask’s resume() –Start URL Session
  
  
repeat (1000 * timeOutSec) times
    if (my drecF) = true then
      set hitF to true
      
exit repeat
    end if
    
delay ("0.001" as real)
  end repeat
  
  
if hitF = false then error "REST API Timeout Error"
  
  
return {retData:retData, retCode:retCode, retHeaders:retHeaders}
end callRestGETAPIAndParseResults

on URLSession:tmpSession dataTask:tmpTask didReceiveData:tmpData
  parseSessionResults(tmpSession, tmpTask, tmpData) of me
  
set (my drecF) to true
end URLSession:dataTask:didReceiveData:

–ないとエラーになるので足した。とくに何もしていない
on URLSession:tmpSession dataTask:tmpTask willCacheResponse:cacheRes completionHandler:aHandler
  —
end URLSession:dataTask:willCacheResponse:completionHandler:

on parseSessionResults(aSession, aTask, tmpData)
  set aRes to aTask’s response()
  
set (my retCode) to aRes’s statusCode()
  
set (my retHeaders) to aRes’s allHeaderFields()
  
  
set resStr to NSString’s alloc()’s initWithData:tmpData encoding:(NSUTF8StringEncoding)
  
set jsonString to NSString’s stringWithString:(resStr)
  
  
set jsonData to jsonString’s dataUsingEncoding:(NSUTF8StringEncoding)
  
set aJsonDict to NSJSONSerialization’s JSONObjectWithData:jsonData options:0 |error|:(missing value)
  
  
set (my retData) to aJsonDict as anything
end parseSessionResults

★Click Here to Open This Script 

Posted in Network Record URL | Tagged 10.12savvy 10.13savvy 10.14savvy NSJSONSerialization NSMutableURLRequest NSString NSURL NSURLSession NSURLSessionConfiguration NSUTF8StringEncoding | Leave a comment

GET method REST API v4.3

Posted on 5月 1, 2019 by Takaaki Naganoya

クラウド系のサービスを呼び出すためのAPIとして一般的なREST APIを呼び出すAppleScriptの最新版(のスケルトン)です。

# v4.2からv4.3にバージョンアップしました(2019/05/02)

macOS 10.10でほぼすべてのAppleScriptランタイムでCocoaの機能が利用できるようになったため、Cocoaの機能を利用してクラウド系サービスを呼び出すことを、割と早い時期から調査していました。

「ほぼすべて」と書いているのは、アプリケーション内蔵のScript Menu(iTunesとか)や、Folder Actionなどの独特なランタイム、あるいはMessages(旧称iChat)のメッセージ受信イベントから呼び出されるAppleScriptランタイムなど、それぞれのアプリケーション独自で実装している処理系についてはCocoaの機能が使えるかどうかは保証のかぎりではないからです。

明確に、当初からクラウドと機械学習をAppleScriptから利用するために、苦労してCocoaの機能を追いかけてきたわけです。その途中でいろいろサードパーティのFrameworkを呼び出せたりして、期待よりも大きな成果を手にしている昨今です。OSの内部機能を直接利用できることのメリットは、処理速度や詳細な情報取得など枚挙にいとまがありません(日本語の慣用句表現なので翻訳しにくいかも?)。

話をクラウドにもどしましょう。REST APIを呼び出すには、同期で実行されるNSURLConnectionを使うのが最も簡単で確実でした。

しかし、同APIは非推奨(近い将来に廃止される)という位置付けになったため、その代わりを探す必要に迫られました。すでにNSURLConnectionを用いて記述したREST API呼び出しのScriptが大量に存在していたからです。

代替APIとしてNSURLSessionが提示されましたが、こちらは非同期実行のみで同期実行モードはありません。いろいろ実験してみたものの、数回に1回ぐらい、サーバーからの応答をつかまえ損ねることがあり、処理時間もNSURLConnection版より長くかかります。

このため、「do shell script経由でcurlコマンドを使って回避するか?」といった回避策を検討していたところです。

そんな中、冗談半分でNSURLSessionを利用したバージョンをほんの少し修正してみたところ、いままでの不安定さが嘘のように安定して結果を得られるようになってきました。これはいい兆候です。

ただし、同時に問題点も見つかってきました。macOS標準装備のScript Editor上で実行する分には問題ないのですが、Script Debugger上で実行すると、macOS 10.12/10.13/10.14共通でサーバーからの応答を取得できず、タイムアウトエラーになります。

初回掲載時(v4.2)にはScript Debugger上でデータ受信を検出できないという問題がありました。データの受信用のプロパティがmissing valueでなければデータを受信した、という判定ロジックがうまく動いていない(どういう仕組みかはわからないものの、missing valueと判断され続けた? ラベル値とproperty名でコンフリクト起こしたかも?)現象が見られました。そこで、データの受信プロパティとデータ受信完了検出のプロパティを明確に分けて判定してみたところ、Script DebuggerやmacOS 10.14上でも問題なく動作することを確認しました。

AppleScript名:GET method REST API v4.3
— Created 2019-05-01 by Takaaki Naganoya
— 2019 Piyomaru Software
use AppleScript version "2.5"
use scripting additions
use framework "Foundation"
use framework "AppKit"

property |NSURL| : a reference to current application’s |NSURL|
property NSString : a reference to current application’s NSString
property NSURLSession : a reference to current application’s NSURLSession
property NSJSONSerialization : a reference to current application’s NSJSONSerialization
property NSMutableURLRequest : a reference to current application’s NSMutableURLRequest
property NSUTF8StringEncoding : a reference to current application’s NSUTF8StringEncoding
property NSURLSessionConfiguration : a reference to current application’s NSURLSessionConfiguration

property retData : missing value
property retCode : 0
property retHeaders : 0
property drecF : false

set reqURLStr to "http://jsonplaceholder.typicode.com/posts"
set aRESTres to callRestGETAPIAndParseResults(reqURLStr, 10) of me
–return retData of aRESTres

set aRESTcode to retCode of aRESTres
–return aRESTcode
–> 200

return retHeaders as record
–> {|content-type|:"application/json; charset=utf-8", Pragma:"no-cache", |x-powered-by|:"Express", |set-cookie|:"__cfduid=dd8b4572e0a59951cc7cf7a1120c368541554964103; expires=Fri, 10-Apr-20 06:28:23 GMT; path=/; domain=.typicode.com; HttpOnly", Server:"cloudflare", Via:"1.1 vegur", |content-encoding|:"gzip", Expires:"Wed, 01 May 2019 15:27:42 GMT", |cf-cache-status|:"HIT", |transfer-encoding|:"Identity", |cache-control|:"public, max-age=14400", |date|:"Wed, 01 May 2019 11:27:42 GMT", |access-control-allow-credentials|:"true", Connection:"keep-alive", |cf-ray|:"4d016861ac759413-NRT", Etag:"W/\"6b80-Ybsq/K6GwwqrYkAsFxqDXGC7DoM\"", Vary:"Origin, Accept-Encoding", |x-content-type-options|:"nosniff"}

on callRestGETAPIAndParseResults(reqURLStr as string, timeoutSec as integer)
  set (my retData) to false
  
set (my retCode) to 0
  
set (my retHeaders) to {}
  
set (my drecF) to false
  
  
set aURL to |NSURL|’s URLWithString:reqURLStr
  
set aRequest to NSMutableURLRequest’s requestWithURL:aURL
  
aRequest’s setHTTPMethod:"GET"
  
aRequest’s setValue:"gzip" forHTTPHeaderField:"Content-Encoding"
  
aRequest’s setValue:"application/json; charset=UTF-8" forHTTPHeaderField:"Content-Type"
  
  
set aConfig to NSURLSessionConfiguration’s defaultSessionConfiguration()
  
set aSession to NSURLSession’s sessionWithConfiguration:aConfig delegate:(me) delegateQueue:(missing value)
  
set aTask to aSession’s dataTaskWithRequest:aRequest
  
  
set hitF to false
  
aTask’s resume() –Start URL Session
  
  
repeat (1000 * timeoutSec) times
    if (my drecF) = true then
      set hitF to true
      
exit repeat
    end if
    
delay ("0.001" as real)
  end repeat
  
  
if hitF = false then error "REST API Timeout Error"
  
  
return {retData:retData, retCode:retCode, retHeaders:retHeaders}
end callRestGETAPIAndParseResults

on URLSession:tmpSession dataTask:tmpTask didReceiveData:tmpData
  parseSessionResults(tmpSession, tmpTask, tmpData) of me
  
set (my drecF) to true
end URLSession:dataTask:didReceiveData:

–ないとエラーになるので足した。とくに何もしていない
on URLSession:tmpSession dataTask:tmpTask willCacheResponse:cacheRes completionHandler:aHandler
  —
end URLSession:dataTask:willCacheResponse:completionHandler:

on parseSessionResults(aSession, aTask, tmpData)
  set aRes to aTask’s response()
  
set (my retCode) to aRes’s statusCode()
  
set (my retHeaders) to aRes’s allHeaderFields()
  
  
set resStr to NSString’s alloc()’s initWithData:tmpData encoding:(NSUTF8StringEncoding)
  
set jsonString to NSString’s stringWithString:(resStr)
  
  
set jsonData to jsonString’s dataUsingEncoding:(NSUTF8StringEncoding)
  
set aJsonDict to NSJSONSerialization’s JSONObjectWithData:jsonData options:0 |error|:(missing value)
  
  
set (my retData) to aJsonDict as list of string or string –as anything
end parseSessionResults

★Click Here to Open This Script 

Posted in REST API URL | Tagged 10.11savvy 10.12savvy 10.13savvy 10.14savvy NSJSONSerialization NSMutableURLRequest NSString NSURL NSURLSession NSURLSessionConfiguration | 3 Comments

packit4meを利用して3D Bin Packingを解く

Posted on 4月 20, 2019 by Takaaki Naganoya

指定の広さの空間(Bin)に任意のサイズのブロックの組み合わせを最適化して詰め込むPackingの問題を解くAppleScriptです。

→ 別途、2D Bin PackingのAppleScriptを掲載しています「RectangleBinPackを用いて2D Bin Packを解く」

身の回りのさまざまな用途で利用されている2D/3D Bin Packing。ところが、実際に使ってみたいと思っても、使い勝手のよいプログラムが見当たりません。Cocoa Frameworkになっていて、NSRectをリストで渡すと結果を返してくれるようなものが個人的には理想的ですが、そういう仕様のものはほぼありません(完全にないわけではないものの、使い物にならない、、、)。

そこで、一応自分でも2D Bin Packing処理をAppleScriptで書いたものの、「ぴよまるソフトウェア」内で相談したところ外部公開はしにくい状況。

そうはいっても、2D Bin Packingを利用したあんな用途やこんな用途が山のようにあるので、外部のプログラムを呼び出してみるのがよいだろうかと(ふたたび)考え出したときに、まさかのREST APIで2D/3D Bin Packingの機能を提供しているpackit4meを発見(よく見つかったな)。

Web APIを呼び出して、3D Bin Packingを計算します。よくあるREST APIなので、プログラミングではなく「作業」のレベルで対処できます。

で、3D Bin Packingはいいものの、本命の2D Bin Packingを計算。

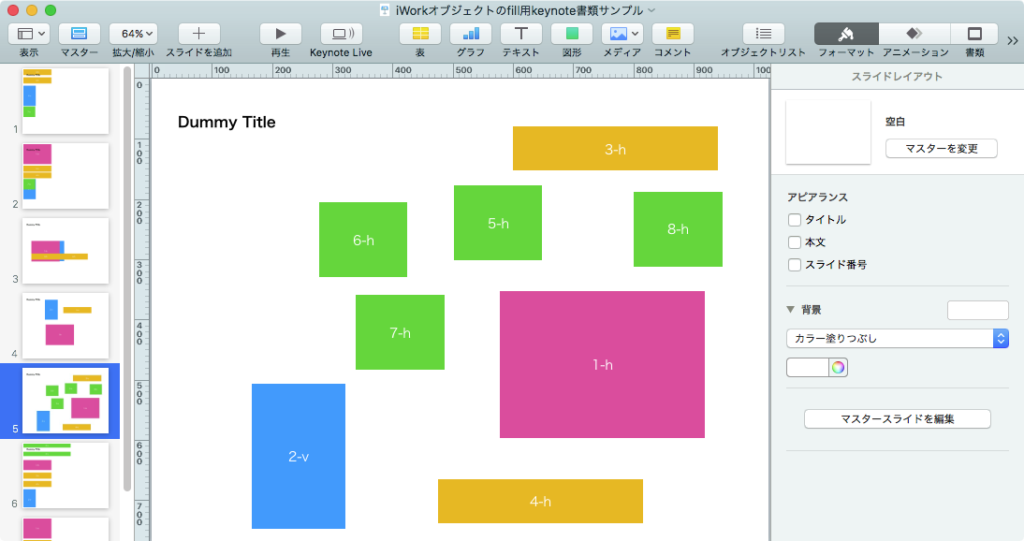
Keynote上のオブジェクトから情報を取得して….

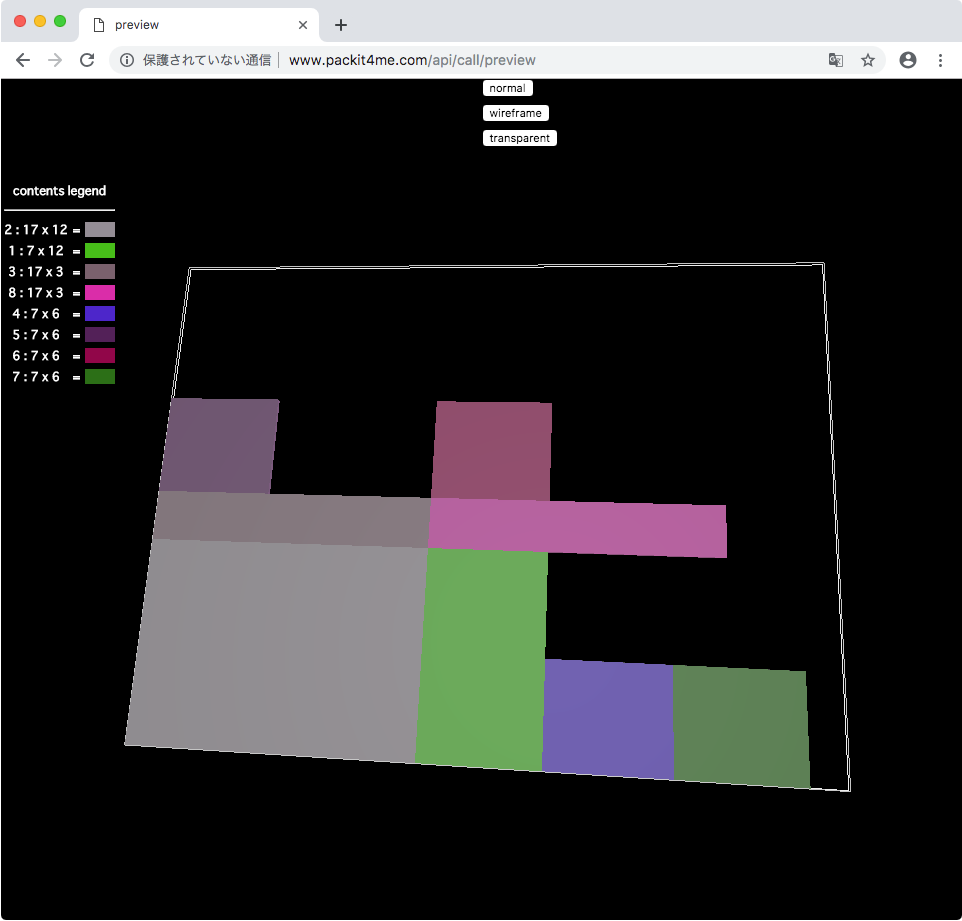
packit4meで2D Bin Packを解かせてみると、Web上の3Dプレビュー(↑)はともかく、JSON(↓)で返してくる値が割とむちゃくちゃ。

[{"size": "40 x 30","id": "0","size_1": 40,"size_2": 30,"weight_limit": 3,"curr_weight": 3,"item_count": 3,"items": [{"id": "2","orig_size": "17 x 12","sp_size": "17 x 12","size_1": 17,"size_2": 12,"sp_size_1": 17,"sp_size_2": 12,"x_origin_in_bin": -11.5,"y_origin_in_bin": -9,"weight": 1,"constraints": 0},{"id": "1","orig_size": "7 x 12","sp_size": "7 x 12","size_1": 7,"size_2": 12,"sp_size_1": 7,"sp_size_2": 12,"x_origin_in_bin": 0.5,"y_origin_in_bin": -9,"weight": 1,"constraints": 0},{"id": "3","orig_size": "17 x 3","sp_size": "17 x 3","size_1": 17,"size_2": 3,"sp_size_1": 17,"sp_size_2": 3,"x_origin_in_bin": -11.5,"y_origin_in_bin": -1.5,"weight": 1,"constraints": 0}]}]

座標値にマイナスの値が含まれているなどうまく動いていない印象を受けます(制約条件が違うんだろか?)。

少なくとも、作者は2D Bin PackのJSON出力は検証していないのではないでしょうか、、、、残念!

AppleScript名:POST method REST API_packit4me
— Created 2019-04-20 by Takaaki Naganoya
— 2019 Piyomaru Software
use AppleScript version "2.5"
use scripting additions
use framework "Foundation"

property |NSURL| : a reference to current application’s |NSURL|
property NSString : a reference to current application’s NSString
property NSJSONSerialization : a reference to current application’s NSJSONSerialization
property NSUTF8StringEncoding : a reference to current application’s NSUTF8StringEncoding

set aBinPack to "bins=0:50:5x5x5&items=0:0:0:1x2x3,0:0:0:1x2x3,0:0:0:1x2x3&binId=0"

set aRes to binPackByPackIt4me(aBinPack) of me
–> {size_1:5, size_2:5, size_3:5, |id|:"0", weight_limit:50, curr_weight:0, |size|:"5 x 5 x 5", item_count:3, |items|:{{|id|:"0", sp_size_3:3, x_origin_in_bin:-2, orig_size:"1 x 2 x 3", weight:0, sp_size:"1 x 2 x 3", y_origin_in_bin:-1.5, constraints:0, size_3:3, sp_size_1:1, z_origin_in_bin:1, size_2:2, sp_size_2:2, size_1:1}, {|id|:"0", sp_size_3:3, x_origin_in_bin:-1, orig_size:"1 x 2 x 3", weight:0, sp_size:"1 x 2 x 3", y_origin_in_bin:-1.5, constraints:0, size_3:3, sp_size_1:1, z_origin_in_bin:1, size_2:2, sp_size_2:2, size_1:1}, {|id|:"0", sp_size_3:3, x_origin_in_bin:-2, orig_size:"1 x 2 x 3", weight:0, sp_size:"1 x 2 x 3", y_origin_in_bin:0.5, constraints:0, size_3:3, sp_size_1:1, z_origin_in_bin:1, size_2:2, sp_size_2:2, size_1:1}}}

on binPackByPackIt4me(aBinPack as string)
  set tmpData to (do shell script "curl -X POST -H \"Content-Type: application/x-www-form-urlencoded\" -d \"" & aBinPack & "\" http://www.packit4me.com/api/call/raw")
  
set jsonString to NSString’s stringWithString:tmpData
  
set jsonData to jsonString’s dataUsingEncoding:(NSUTF8StringEncoding)
  
set aJsonDict to NSJSONSerialization’s JSONObjectWithData:jsonData options:0 |error|:(missing value)
  
set aRec to aJsonDict as record
  
return aRec
end binPackByPackIt4me

★Click Here to Open This Script 

Posted in 2D Bin Packing list Record REST API | Tagged 10.11savvy 10.12savvy 10.13savvy 10.14savvy NSJSONSerialization NSString NSURL NSUTF8StringEncoding | Leave a comment

指定フォルダ内のファイルのうち、指定UTIに該当するものをすべて取得してフルパスを返す

Posted on 4月 13, 2019 by Takaaki Naganoya

指定フォルダ内のファイルのうち、指定のUTIに該当するものをすべて取得してフルパス(file/POSIX)で返すAppleScriptです。

指定フォルダの直下のみを走査し、サブフォルダ内は走査しません。調べてみるとUTIでファイルを絞り込む機能は存在していないようなので(見落としているだけ?)、すべてファイルを取得してからループでUTIを調べつつ該当するかどうかチェックしています。

書けば書くほど「それってSpotlightでよくね?」という気がしますが、確実に取得したい(Spotlightインデックスが破損していたり、サーバー上のファイルではSpotlightが効かない場合もある)場合に使うとよいでしょうか。

AppleScript名:指定フォルダ内のファイルのうち、指定UTIに該当するものをすべて取得してフルパスを返す
—
–  Created by: Takaaki Naganoya
–  Created on: 2019/04/13
—
–  Copyright © 2019 Piyomaru Software, All Rights Reserved
—
use AppleScript version "2.5"
use scripting additions
use framework "Foundation"

property |NSURL| : a reference to current application’s |NSURL|
property NSArray : a reference to current application’s NSArray
property NSPredicate : a reference to current application’s NSPredicate
property NSFileManager : a reference to current application’s NSFileManager
property NSURLTypeIdentifierKey : a reference to current application’s NSURLTypeIdentifierKey
property NSDirectoryEnumerationSkipsHiddenFiles : a reference to current application’s NSDirectoryEnumerationSkipsHiddenFiles

set aUTI to "com.adobe.pdf"
set libPath to ((path to documents folder) as string)
set posixLibPath to POSIX path of libPath

set f1List to getFilepathListByUTI(posixLibPath, aUTI, "file") of me
–> {file "Cherry:Users:me:Documents:0718kenpo.pdf", file "Cherry:Users:me:Documents:2013-09Rekihaku.pdf", file "Cherry:Users:maro:Documents:airserver.pdf"}

set f2List to getFilepathListByUTI(posixLibPath, aUTI, "POSIX") of me
–> {"/Users/me/Documents/0718kenpo.pdf", "/Users/me/Documents/2013-09Rekihaku.pdf", "/Users/me/Documents/airserver.pdf"}

on getFilepathListByUTI(aFolPOSIX, aUTI as string, aFileType as string)
  script spdFile
    property urlList : {}
  end script
  
  
if aFileType is not in {"file", "POSIX"} then return {}
  
  
set aFM to NSFileManager’s defaultManager()
  
set aFolExt to (aFM’s fileExistsAtPath:aFolPOSIX isDirectory:true) as boolean
  
if aFolExt = false then return {} –フォルダ自体が存在しなければヌルリストを返す
  
  
set aURL to |NSURL|’s fileURLWithPath:aFolPOSIX
  
set theOptions to ((current application’s NSDirectoryEnumerationSkipsPackageDescendants) as integer) + ((current application’s NSDirectoryEnumerationSkipsHiddenFiles) as integer)
  
set urlArray to (aFM’s contentsOfDirectoryAtURL:aURL includingPropertiesForKeys:{} options:theOptions |error|:(missing value))
  
if urlArray = missing value then return {}
  
  
set (urlList of spdFile) to urlArray as list
  
set newList to {}
  
  
repeat with i in (urlList of spdFile)
    set j to POSIX path of i
    
set tmpUTI to my retUTIfromPath(j)
    
set utiRes to my filterUTIList({tmpUTI}, aUTI)
    
    
if utiRes is not equal to {} then
      if aFileType = "POSIX" then
        set the end of newList to j
      else if aFileType = "file" then
        set the end of newList to POSIX file j
      end if
    end if
    
  end repeat
  
  
return newList
end getFilepathListByUTI

–指定のPOSIX pathのファイルのUTIを求める
on retUTIfromPath(aPOSIXPath)
  set aURL to |NSURL|’s fileURLWithPath:aPOSIXPath
  
set {theResult, theValue} to aURL’s getResourceValue:(reference) forKey:NSURLTypeIdentifierKey |error|:(missing value)
  
  
if theResult = true then
    return theValue as string
  else
    return theResult
  end if
end retUTIfromPath

–UTIリストが指定UTIに含まれているかどうか演算を行う
on filterUTIList(aUTIList, aUTIstr)
  set anArray to NSArray’s arrayWithArray:aUTIList
  
set aPred to NSPredicate’s predicateWithFormat_("SELF UTI-CONFORMS-TO %@", aUTIstr)
  
set bRes to (anArray’s filteredArrayUsingPredicate:aPred) as list
  
return bRes
end filterUTIList

★Click Here to Open This Script 

Posted in file File path list UTI | Tagged 10.11savvy 10.12savvy 10.13savvy 10.14savvy NSArray NSDirectoryEnumerationSkipsHiddenFiles NSFileManager NSPredicate NSURL NSURLTypeIdentifierKey | 3 Comments

指定フォルダ内のファイルのうち、指定拡張子リストに入っているものをすべて取得してフルパスを返す

Posted on 4月 12, 2019 by Takaaki Naganoya

指定フォルダに入っているファイルのうち、指定拡張子リストに該当するものをフルパスで返すAppleScriptです。

macOS 10.6以降の64ビット化されたFinderは動作が遅いため、大量のファイル情報を取得するなどの用途には不向きです。このため、「(ファイル選択を取得する以外の)ファイル処理にはFinderを使わない」のが現在のAppleScriptのセオリーとなっています。

本Scriptでは、~/Library/Script Libraries/フォルダの存在確認と、その中に格納されている「scpt」「scptd」の拡張子を持つAppleScript書類ファイルのリストアップを高速に行います。

AppleScript名:指定フォルダ内のファイルのうち、指定拡張子リストに入っているものをすべて取得してフルパスを返す
use AppleScript version "2.5"
use scripting additions
use framework "Foundation"

property |NSURL| : a reference to current application’s |NSURL|
property NSPredicate : a reference to current application’s NSPredicate
property NSFileManager : a reference to current application’s NSFileManager
property NSDirectoryEnumerationSkipsHiddenFiles : a reference to current application’s NSDirectoryEnumerationSkipsHiddenFiles

set anExpList to {"scpt", "scptd"} — no dot
set libPath to (((path to library folder from user domain) as string) & "Script Libraries:")
set posixLibPath to POSIX path of libPath
set fList to getFilepathListByExt(posixLibPath, anExpList) of me

on getFilepathListByExt(aFol, aExtList as list)
  set aFM to NSFileManager’s defaultManager()
  
set aFolExt to (aFM’s fileExistsAtPath:aFol isDirectory:true) as boolean
  
if aFolExt = false then return {} –フォルダ自体が存在しなければヌルリストを返す
  
  
set aURL to |NSURL|’s fileURLWithPath:aFol
  
set theOptions to ((current application’s NSDirectoryEnumerationSkipsPackageDescendants) as integer) + ((current application’s NSDirectoryEnumerationSkipsHiddenFiles) as integer)
  
set urlArray to aFM’s contentsOfDirectoryAtURL:aURL includingPropertiesForKeys:{} options:theOptions |error|:(missing value)
  
set thePred to NSPredicate’s predicateWithFormat_("pathExtension.lowercaseString IN %@", aExtList)
  
set anArray to (urlArray’s filteredArrayUsingPredicate:thePred)
  
return anArray as {missing value, list}
end getFilepathListByExt

★Click Here to Open This Script 

Posted in file list | Tagged 10.12savvy 10.13savvy 10.14savvy NSFileManager NSPredicate NSURL | Leave a comment

PDFのしおり(TOC)の内容を取得する v3

Posted on 4月 11, 2019 by Takaaki Naganoya

指定のTOCつきPDFからTOCをrecord in listで取得するAppleScriptです。各TOC項目のページ数、アウトラインレベル、ラベル(ページ名称)を順次取得して配列に出力します。

先日発売したBlogアーカイブ本のTOCを本Scriptで取得すると、以下のようになります(抜粋)。

{{pageIndex:1, outlineLevel:1, outLabel:"表紙"}, {pageIndex:2, outlineLevel:1, outLabel:"商標について"}, {pageIndex:3, outlineLevel:1, outLabel:"本書をご覧になるために"}, ... {pageIndex:34, outlineLevel:1, outLabel:"2011/1"}, {pageIndex:35, outlineLevel:2, outLabel:"リスト同士のdiffをとる"}, {pageIndex:40, outlineLevel:2, outLabel:"日本の月呼称を返す"}, {pageIndex:42, outlineLevel:2, outLabel:"指定の月を1月分リスト化"},...... {pageIndex:450, outlineLevel:1, outLabel:"奥付"}}

あれ? 「本書について」(2P)という記事が掲載もれしているのを、TOC出力から見つけてしまった、、、、、、、、

AppleScript名:PDFのしおり(TOC)の内容を取得する v3
— Created 2017-01-09 by Takaaki Naganoya
— Modified 2019-04-10 by Takaaki Naganoya
— 2019 Piyomaru Software
use AppleScript version "2.4"
use scripting additions
use framework "Foundation"
use framework "Quartz"

property |NSURL| : a reference to current application’s |NSURL|
property PDFDocument : a reference to current application’s PDFDocument
property titleList : {}

set my titleList to {}

set aFile to POSIX path of (choose file of type {"com.adobe.pdf"})

set fileURL to |NSURL|’s fileURLWithPath:aFile
set aPDFdoc to PDFDocument’s alloc()’s initWithURL:fileURL

–TOCの読み込み
set parentOL to aPDFdoc’s outlineRoot() –あらかじめTOCが存在していないとmissing valueになる
if parentOL is equal to missing value then
  display dialog "本PDFにはTOCが添付されていないため、処理を終了します" with title "No TOC Error:"
  
return
end if

getChilds(parentOL) of me
return (my titleList)
–> {{pageIndex:1, outlineLevel:1, outLabel:"表紙"}, {pageIndex:2, outlineLevel:1, outLabel:"商標について"}, {pageIndex:3, outlineLevel:1, outLabel:"本書をご覧になるために"}, {pageIndex:5, outlineLevel:1, outLabel:"まえがき"},…… {pageIndex:33, outlineLevel:1, outLabel:"2011年"}, {pageIndex:34, outlineLevel:1, outLabel:"2011/1"}, {pageIndex:35, outlineLevel:2, outLabel:"リスト同士のdiffをとる"}, {pageIndex:40, outlineLevel:2, outLabel:"日本の月呼称を返す"},…….}

–PDFOutlineを再帰で取得する
on getChilds(parentOL)
  set outLineStr to parentOL’s label()
  
set outLineCount to (parentOL’s numberOfChildren()) as number
  
  
repeat with i from 0 to (outLineCount – 1)
    set anOut to (parentOL’s childAtIndex:i)
    
    
–Label (Page Title)
    
set tmpOut to (anOut’s label()) as string
    
    
–Page Indel Label
    
set tmpInd to (anOut’s destination()’s page()’s label()) as integer
    
    
–Outline Level
    
set outlevel to 0
    
copy anOut to aTmpOut
    
repeat
      set aTmpOut to aTmpOut’s |parent|()
      
if aTmpOut = missing value then exit repeat
      
set outlevel to outlevel + 1
    end repeat
    
    
set the end of my titleList to {pageIndex:tmpInd, outlineLevel:outlevel, outLabel:tmpOut}
    
    
set tmpChild to (anOut’s numberOfChildren()) as integer
    
    
if tmpChild is not equal to 0 then
      getChilds(anOut) of me
    end if
  end repeat
end getChilds

★Click Here to Open This Script 

Posted in list PDF Record recursive call | Tagged 10.12savvy 10.13savvy 10.14savvy NSURL PDFDocument | Leave a comment

PDFのしおり(TOC)の内容を取得する v2

Posted on 4月 10, 2019 by Takaaki Naganoya

指定のTOCつきPDFからTOCを1Dリスト(1次元配列)で取得するAppleScriptです。各TOC項目のlabelの文字列を順次取得して1次元配列に出力します。

AppleScript名:PDFのしおり(TOC)の内容を取得する v2
— Created 2017-01-09 by Takaaki Naganoya
— 2017 Piyomaru Software
use AppleScript version "2.4"
use scripting additions
use framework "Foundation"
use framework "Quartz"

property |NSURL| : a reference to current application’s |NSURL|
property PDFDocument : a reference to current application’s PDFDocument
property titleList : {}

set my titleList to {}

set aFile to POSIX path of (choose file of type {"com.adobe.pdf"})

set fileURL to |NSURL|’s fileURLWithPath:aFile
set aPDFdoc to PDFDocument’s alloc()’s initWithURL:fileURL

–TOCの読み込み
set parentOL to aPDFdoc’s outlineRoot() –あらかじめTOCが存在していないとmissing valueになる
if parentOL is equal to missing value then
  display dialog "本PDFにはTOCが添付されていないため、処理を終了します" with title "No TOC Error:"
  
return
end if

getChilds(parentOL) of me
return (my titleList)

–再帰処理してみた
on getChilds(parentOL)
  set outLineStr to parentOL’s label()
  
set outLineCount to (parentOL’s numberOfChildren()) as number
  
  
repeat with i from 0 to (outLineCount – 1)
    set anOut to (parentOL’s childAtIndex:i)
    
set tmpOut to (anOut’s label()) as string
    
set the end of my titleList to tmpOut
    
set tmpChild to (anOut’s numberOfChildren()) as integer
    
    
if tmpChild is not equal to 0 then
      getChilds(anOut) of me
    end if
  end repeat
end getChilds

★Click Here to Open This Script 

Posted in list PDF recursive call | Tagged 10.12savvy 10.13savvy 10.14savvy NSURL PDFDocument | Leave a comment

Appleがいまだに直さないPDFViewのバグを回避する

Posted on 4月 10, 2019 by Takaaki Naganoya

PDFViewからcurrentPage()が取れないという、最低最悪レベルのバグが放置されたOSがリリースされ続けて2年。Devlopper Supportに報告しても返事の1つもない今日このごろです。

Apple Developper Connectionのインシデントを消費して質問しても返答がないので、本当に頭にきています。

この、macOS 10.13のBetaでは存在しなかったのにRelease版で作られた画期的なバグを回避するために、いろいろ工夫をしてみました。

テストしてみたところ、Objective-CやSwiftでは発生していないため、Scripting Bridgeのみで発生しているらしきバグのようです。こんな基本的な箇所でバグを作って直さない連中の気が知れません。

AppleのDevelopper Supportが役立たずで仕事をしないのは今日にはじまった話ではないので(Mailing Listが落ちた状態で、報告しても1か月放置した事件など)、仕方なく回避策を検討してみました。

(1)PDFViewまわりのWrapping ClassをObjective-Cで書いて使う
(2)Objective-Cでユーティリティを書いて、パラメータとして与えたPDFViewからObjective-CでcurrentPageを取得する
(3)今後もAppleがバグを作り続けることが予想されるため、サードパーティのPSPDFKitを導入する

といった対策を検討していたのですが、最も手短なものとして、

(4)表示中のページを自前で管理して、PDFViewに指定ページの内容を随時切り出して表示する

という対処を行ってみました。

PDFをオープンしてPDFViewで表示させ、左右の矢印キーでページをめくることができます。なお、macOS 10.14.5beta+Xcode 10.2上でビルドと確認を行いましたが、内容的にはXcodeのバージョンは関係ありません。

–> Download Xcode Project Archive (pdfTestZ)

AppleScript名:AppDelegate.applescript
—
— AppDelegate.applescript
— pdfTestZ
—
— Created by Takaaki Naganoya on 2019/04/09.
— Copyright © 2019 Piyomaru Software. All rights reserved.
—

script AppDelegate
  property parent : class "NSObject"
  
  
— IBOutlets
  
property theWindow : missing value
  
property aView : missing value
  
property maxPageNum : 0
  
property curPageIndex : 0
  
property aPDFDoc : missing value
  
property pLabelField : missing value


on applicationWillFinishLaunching:aNotification
  
end applicationWillFinishLaunching:
  
  
on applicationShouldTerminate:sender
    return current application’s NSTerminateNow
  end applicationShouldTerminate:


on clicked:aSender
    set aTag to (tag of aSender) as integer
    
    
if aTag = 100 then
      set aPath to choose file of type {"com.adobe.pdf"}
      
      
set pPath to POSIX path of aPath
      
set aURL to current application’s |NSURL|’s fileURLWithPath:pPath
      
set my aPDFDoc to current application’s PDFDocument’s alloc()’s initWithURL:aURL
      
      
set myFileName to (current application’s NSString’s stringWithString:pPath)’s lastPathComponent()
      
theWindow’s setTitle:myFileName
      
      
set maxPageNum to ((aPDFDoc’s pageCount()) as integer) – 1
      
set curPageIndex to 0
      
      
log {"maxPageNum", maxPageNum}
      
      
aView’s setAutoScales:true
      
aView’s setDisplaysPageBreaks:true
      
      
my dispCurPageDoc()
      
set tmpStr to ((maxPageNum + 1) as string) & "/" & ((curPageIndex + 1) as string)
      
pLabelField’s setStringValue:tmpStr
      
    else if aTag = 200 then
      
      
set tmpPage to my (aPDFDoc’s pageAtIndex:(curPageIndex))
      
set curPageLabel to tmpPage’s label()
      
      
tell current application
        display dialog (curPageLabel as string)
      end tell
      
    else if aTag = 1000 then
      my decPage()
      
my dispCurPageDoc()
      
    else if aTag = 1010 then
      my incPage()
      
my dispCurPageDoc()
      
    end if
    
  end clicked:
  
  
on dispCurPageDoc()
    set tmpPage to my (aPDFDoc’s pageAtIndex:(curPageIndex))
    
set tmpDoc to (current application’s PDFDocument’s alloc()’s initWithData:(tmpPage’s dataRepresentation()))
    
aView’s setDocument:tmpDoc
    
    
set tmpStr to ((maxPageNum + 1) as string) & "/" & ((curPageIndex + 1) as string)
    
pLabelField’s setStringValue:tmpStr
  end dispCurPageDoc


on incPage()
    if curPageIndex = maxPageNum then
      –何もしない
    else if curPageIndex < maxPageNum then
      set curPageIndex to curPageIndex + 1
    end if
  end incPage
  
  
on decPage()
    if curPageIndex = 0 then
      –何もしない
    else if curPageIndex > 0 then
      set curPageIndex to curPageIndex – 1
    end if
  end decPage
end script

★Click Here to Open This Script 

Posted in AppleScript Application on Xcode PDF | Tagged 10.13savvy 10.14savvy NSString NSURL PDFDocument PDFPage | 1 Comment

MP3ファイルからMP3タグの情報を取得

Posted on 4月 1, 2019 by Takaaki Naganoya

MP3ファイルからMP3タグの情報を取得するAppleScriptです。

とりあえず「取り出せることを確認した」というレベルの実装で、取り出したデータをタグに応じた加工を行うといった処理はほとんど書いてありません。各自よろしくお取り扱いください(投げやり)。

正直、Musicフォルダ以外に転がっている野良MP3ファイルから直接MP3タグ情報を読まなくても、iTunes.appにインポートしておいて、iTunes.appやらiTunesLibrary.framework経由で楽曲ファイルにアクセスしたほうが(データ形式のゆらぎを吸収してもらえるため)安全で楽です。

AppleScript名:MP3ファイルからMP3タグの情報を取得.scptd
—
–  Created by: Takaaki Naganoya
–  Created on: 2019/04/01
—
–  Copyright © 2019 Piyomaru Software, All Rights Reserved
— 参照先:http://d.hatena.ne.jp/terazzo/20120107/1325967445
use AppleScript version "2.4" — Yosemite (10.10) or later
use framework "Foundation"
use framework "AppKit"
use framework "AVFoundation"
use scripting additions

property |NSURL| : a reference to current application’s |NSURL|
property NSImage : a reference to current application’s NSImage
property AVURLAsset : a reference to current application’s AVURLAsset
property AVMetadataFormatID3Metadata : a reference to current application’s AVMetadataFormatID3Metadata
property AVMetadataCommonKeyAlbumName : a reference to current application’s AVMetadataCommonKeyAlbumName

set aPath to POSIX path of (choose file of type {"public.mp3"})
set aMP3Info to getMP3TagsFromFile(aPath) of me

on getMP3TagsFromFile(aPath)
  set aURL to |NSURL|’s fileURLWithPath:aPath
  
set anAsset to AVURLAsset’s assetWithURL:aURL
  
  
set aRes to (anAsset’s availableMetadataFormats()’s containsObject:(AVMetadataFormatID3Metadata)) as boolean
  
if aRes = false then return false
  
  
set origMetadata to (anAsset’s metadataForFormat:(AVMetadataFormatID3Metadata)) as list
  
set outList to {}
  
  
repeat with i in origMetadata
    set aKey to (i’s |key|()) as list of string or string –as anything
    
set bKey to i’s commonKey() as list of string or string –as anything
    
    
if aKey = "PIC" or aKey = "APIC" then
      set aVal to (i’s value())
      
set aVal to (NSImage’s alloc()’s initWithData:aVal)
    else
      set aVal to (i’s value()) as list of string or string –as anything
    end if
    
set the end of outList to {aKey, bKey, aVal}
  end repeat
  
  
return outList
end getMP3TagsFromFile

★Click Here to Open This Script 

Posted in file | Tagged 10.12savvy 10.13savvy 10.14savvy AVURLAsset NSImage NSURL | Leave a comment

画像の空白判定 v3

Posted on 3月 7, 2019 by Takaaki Naganoya

指定の画像のドットがすべて白色かをチェックする(=画像の空白判定)AppleScriptです。

画像の空白判定処理は自分的にはひじょうに重要な処理であり、画像をグレースケール化しておいて、

(方法1)Photoshopを用いて明度ヒストグラムを取得し、明度=255のデータだけが存在することを確認
(方法2)GPUImage.frameworkを用いて明度ヒストグラムを取得し、明度=255のデータだけが存在することを確認

といった方法で確認を行なっていました。

PDFの余白ページ判定処理や、画像同士の差分確認など、Photoshopを使わずに済めば利用範囲も広がるため(Mac App Storeに出せるため)、AppleScript+Frameworkぐらいで高速処理できることにはものすごく価値があります。

そんな中、GPUImageは急速に2度の方向転換を行い、AppleScriptからは付き合いにくいフレームワークに変化しました。

全面的にSwiftで書き換えたGPUImage2、さらにmacOS 10.14で行われた「OpenGL/OpenCLの非推奨化」という方針転換(わかっていたことですが)を受け、Metalを活用するように書き換えられたGPUImage3へと姿を変えました。オリジナルから見るとほぼ別物です。

GPUImage 3はまだまだ機能不足なうえにAppleScriptから呼べない状態。ヒストグラムの計算フィルタも搭載されていません。Objective-Cで書かれ、中国のスマホ開発者が写真加工するのに活用しまくった、人民に愛されまくったGPUImageの姿はもう見られないのでしょうか。

GPUImageを用いた他のフィルタ処理はCIFilterで代替できるのであまり問題にはなりませんが、この空白画像検出処理だけはなんとしても代替手段を見つける必要に迫られました。応用例が多すぎるからです。

そこで思いついたのが、「チェック対象の画像と同サイズの白い画像を作って、データ内容が同じかどうか調べる」というシンプルな方法(最初から思いついてほしい>自分)。

これならCPUパワーもそれほど必要とせず、GPUの力を絞り出す必要もありません(あたりまえ)。

さっそく書いてみたものの、今度はどうも「白い色」の値が合わず、頭をひねりまくりました。


▲1×1ドット画像を新規作成して白く塗りつぶして比較。Photoshopで作成してファイルから読み込んだ画像とDataが同じにならない

カラープロファイルが合わないために「白い色」を指定してもイコールにならないようだったので、オリジナル画像をコピーしてそれ自体を白く塗りつぶして空白検出の比較対象としてみました。これで空白検出が無事できるようになりました。しかも、GPUImage.frameworkを使っていたバージョンよりもあからさまに高速、、、、

処理速度をPhotoshop版、GPUImage版のAppleScriptと比較してみたところ、1980×1200ピクセルぐらいの画像だとGPUImage版の倍ぐらい高速、8K(7680×4320)ぐらいになるとPhotoshopに負けるといったところです。


▲同一環境にて、Photoshop CC 2018、GPUImage、本Scriptで各種サイズの画像の空白検出を実行(単位:秒)

処理内容がシンプルなだけに小さい画像の処理は得意で、大きな画像は不向きといえるかもしれません。テスト機は例によってCore i7 2.66GHzメモリ8GBのマシンであり、より搭載メモリ量の多いマシンで実行すると挙動が変わってくるかもしれません。

補足までに、GPUImageの明度ヒストグラム検出は、結果を数値の配列ではなく、1×256ドットの「画像」として返してくる変態仕様なので、結果を判定するために1×256ピクセルの画像をループでチェックする必要があります。この仕様が余計なオーバーヘッドを生んでいる(つまり、GPUで処理しているから爆速、という世間の期待値を大幅に下回る処理内容になっている)可能性は否定できません。

ただ、PhosothopなしでPhotoshopと同様のヒストグラム処理が行えるという「手軽さ」がいいと思ってGPUImageを使い出したので、速度をベンチマークしてみると「こんなもんだろ」という印象です。

AppleScript名:画像の空白判定 v3.scpt
—
–  Created by: Takaaki Naganoya
–  Created on: 2019/03/07
—
–  Copyright © 2019 Piyomaru Software, All Rights Reserved
—
use AppleScript version "2.4" — Yosemite (10.10) or later
use framework "Foundation"
use framework "AppKit"
use scripting additions

property NSData : a reference to current application’s NSData
property NSDate : a reference to current application’s NSDate
property |NSURL| : a reference to current application’s |NSURL|
property NSColor : a reference to current application’s NSColor
property NSImage : a reference to current application’s NSImage
property NSBezierPath : a reference to current application’s NSBezierPath
property NSBitmapImageRep : a reference to current application’s NSBitmapImageRep

set aPOSIXpath to POSIX path of (choose file of type {"public.image"})

set a1Dat to NSDate’s timeIntervalSinceReferenceDate()

set iRes to checkImageIsWhite(aPOSIXpath) of me

set b1Dat to NSDate’s timeIntervalSinceReferenceDate()
set c1Dat to b1Dat – a1Dat

return {iRes, c1Dat}

–Compare Original Data and
on checkImageIsWhite(aPOSIXpath)
  set aURL to |NSURL|’s fileURLWithPath:(aPOSIXpath)
  
set anNSImage to NSImage’s alloc()’s initWithContentsOfURL:(aURL)
  
  
copy anNSImage to bNSImage
  
  
set fillColor to makeNSColorFromRGBAval(65535, 65535, 65535, 65535, 65535) of me
  
–set fillColor to NSColor’s whiteColor()
  
set blankImage to drawImageWithFilledColor(bNSImage, fillColor) of me
  
  
set imgA to anNSImage’s TIFFRepresentation()
  
set imgB to blankImage’s TIFFRepresentation()
  
  
set chkWhite to (imgA’s isEqualToData:imgB) as boolean
  
return chkWhite
end checkImageIsWhite

on getSizeOfImage(anNSImage)
  set aSize to anNSImage’s |size|()
  
set aClass to class of aSize
  
if aClass = record then
    copy aSize to theSize –To macOS 10.12.x
  else –macOS 10.13 or later
    set sizeX to (item 1 of item 2 of aSize)
    
set sizeY to (item 2 of item 2 of aSize)
    
set theSize to {width:sizeX, height:sizeY}
  end if
  
return theSize
end getSizeOfImage

–指定サイズの画像を作成し、背景を指定色で塗る
on drawImageWithFilledColor(anImage, fillColor)
  set aSize to getSizeOfImage(anImage) of me
  
  
anImage’s lockFocus()
  
  
set theRect to {{x:0, y:0}, {width:(width of aSize), height:(height of aSize)}}
  
set theNSBezierPath to NSBezierPath’s bezierPath
  
theNSBezierPath’s appendBezierPathWithRect:theRect
  
fillColor’s |set|()
  
theNSBezierPath’s fill()
  
  
anImage’s unlockFocus()
  
  
return anImage
end drawImageWithFilledColor

–aMaxValを最大値とする数値でNSColorを作成して返す
on makeNSColorFromRGBAval(redValue as integer, greenValue as integer, blueValue as integer, alphaValue as integer, aMaxVal as integer)
  set aRedCocoa to (redValue / aMaxVal) as real
  
set aGreenCocoa to (greenValue / aMaxVal) as real
  
set aBlueCocoa to (blueValue / aMaxVal) as real
  
set aAlphaCocoa to (alphaValue / aMaxVal) as real
  
set aColor to NSColor’s colorWithCalibratedRed:aRedCocoa green:aGreenCocoa blue:aBlueCocoa alpha:aAlphaCocoa
  
return aColor
end makeNSColorFromRGBAval

★Click Here to Open This Script 

Posted in Image | Tagged 10.11savvy 10.12savvy 10.13savvy 10.14savvy NSBezierPath NSColor NSData NSDate NSImage NSURL | 3 Comments

アラートダイアログ上にWebViewを表示

Posted on 3月 5, 2019 by Takaaki Naganoya

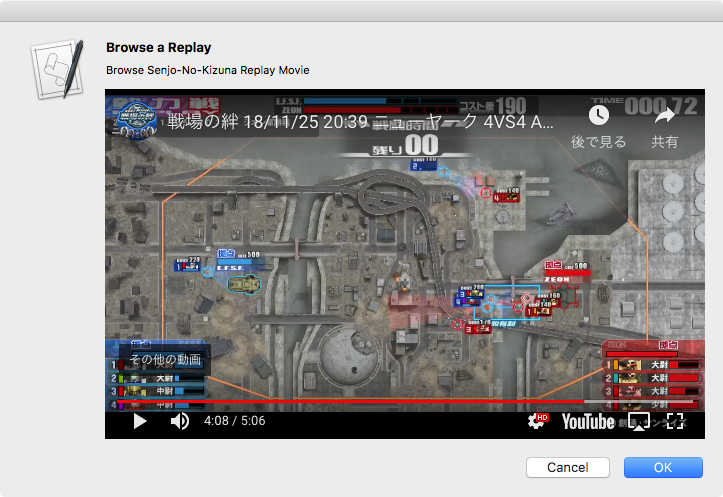
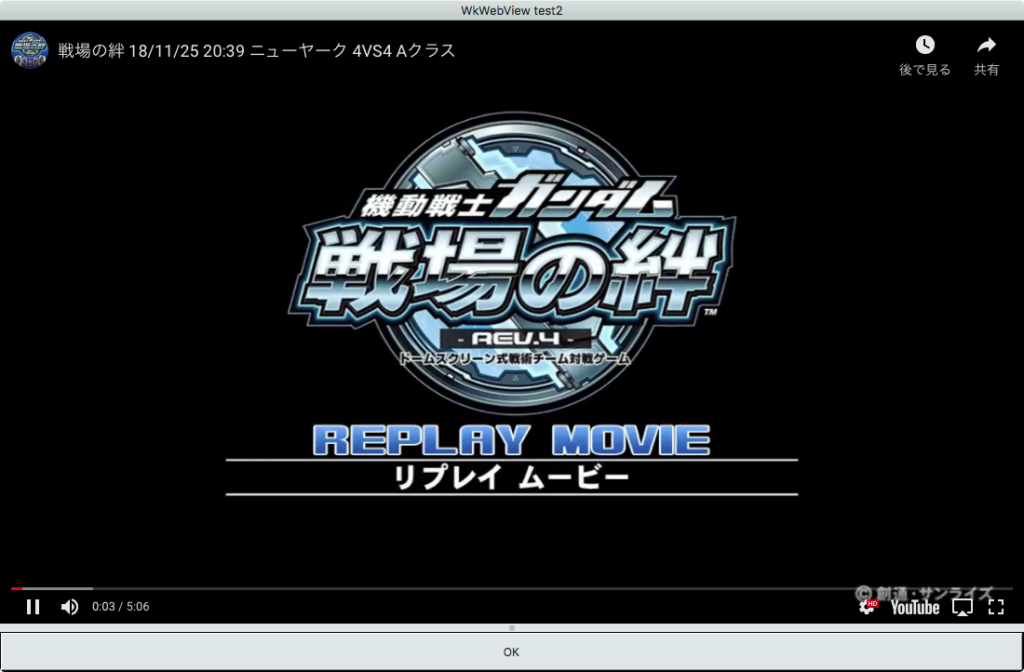
アラートダイアログ上にWKWebViewを表示するAppleScriptです。

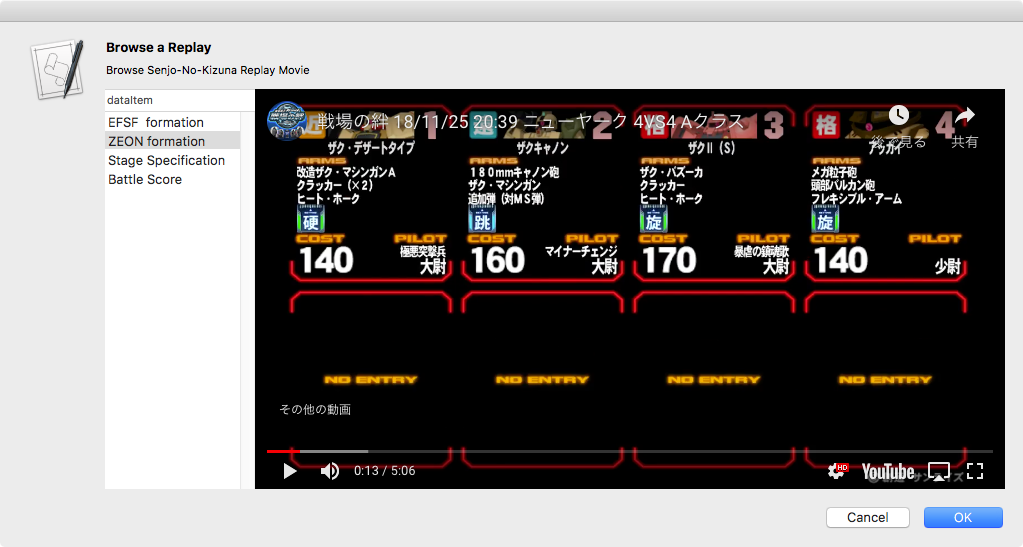
テストのためにYouTubeのムービーの自動再生URL(戦場の絆のリプレイムービー)をオープンしています。


▲Table ViewとWeb Viewを組み合わせて、所定の場所にYouTubeムービーの頭出しを行う試作品を作ってみたものの、JavaScript経由でWKWebViewをコントロールするのが難しくて頓挫

本来であれば、WkWebViewに対してJavaScript経由でさまざまな操作を行いたいところですが、オープン中のWebコンテンツに対して新たなJavaScriptのインスタンスを生成してセキュリティチェックを行なって、実際に実行を行うのが(自分には)少々難しく感じました。WkWebViewだとあまり凝った制御はできない印象です。Safariをコントロールするほうが自由度が高いところ。

WkWebViewを「自由にこづきまわして操作できる部品」として使うためには、素のままのWkWebViewではない何かを使ったほうがいいのかも?

AppleScript名:アラートダイアログ上にWebViewを表示.scptd
—
–  Created by: Takaaki Naganoya
–  Created on: 2019/03/02
—
–  Copyright © 2019 Piyomaru Software, All Rights Reserved
—
use AppleScript version "2.4" — Yosemite (10.10) or later
use framework "Foundation"
use framework "AppKit"
use framework "WebKit"
use scripting additions

property |NSURL| : a reference to current application’s |NSURL|
property NSAlert : a reference to current application’s NSAlert
property NSColor : a reference to current application’s NSColor
property NSString : a reference to current application’s NSString
property NSScreen : a reference to current application’s NSScreen
property NSButton : a reference to current application’s NSButton
property WKWebView : a reference to current application’s WKWebView
property NSScrollView : a reference to current application’s NSScrollView
property WKUserScript : a reference to current application’s WKUserScript
property NSURLRequest : a reference to current application’s NSURLRequest
property NSRunningApplication : a reference to current application’s NSRunningApplication
property NSUTF8StringEncoding : a reference to current application’s NSUTF8StringEncoding
property NSBackingStoreBuffered : a reference to current application’s NSBackingStoreBuffered
property WKUserContentController : a reference to current application’s WKUserContentController
property NSMomentaryLightButton : a reference to current application’s NSMomentaryLightButton
property WKWebViewConfiguration : a reference to current application’s WKWebViewConfiguration
property NSAlertSecondButtonReturn : a reference to current application’s NSAlertSecondButtonReturn
property WKUserScriptInjectionTimeAtDocumentEnd : a reference to current application’s WKUserScriptInjectionTimeAtDocumentEnd

property theResult : 0
property returnCode : 0
property theDataSource : {}

set aURL to "https://www.youtube.com/embed/GP_tVXTYdmY?autoplay=1&hd=1"
set paramObj to {myMessage:"Browse a Replay", mySubMessage:"Browse Senjo-No-Kizuna Replay Movie", targURL:aURL}
my performSelectorOnMainThread:"browseWebContents:" withObject:(paramObj) waitUntilDone:true

on browseWebContents:paramObj
  set aMainMes to myMessage of paramObj
  
set aSubMes to mySubMessage of paramObj
  
set tmpURL to (targURL of paramObj)
  
  
set aWidth to 600
  
set aHeight to 450
  
  
–WebViewをつくる
  
set aConf to WKWebViewConfiguration’s alloc()’s init()
  
  
–指定URLのJavaScriptをFetch
  
set jsSource to my fetchJSSourceString(tmpURL)
  
set userScript to WKUserScript’s alloc()’s initWithSource:jsSource injectionTime:(WKUserScriptInjectionTimeAtDocumentEnd) forMainFrameOnly:true
  
set userContentController to WKUserContentController’s alloc()’s init()
  
userContentController’s addUserScript:(userScript)
  
aConf’s setUserContentController:userContentController
  
  
set aWebView to WKWebView’s alloc()’s initWithFrame:(current application’s NSMakeRect(0, 0, aWidth, aHeight – 100)) configuration:aConf
  
aWebView’s setNavigationDelegate:me
  
aWebView’s setUIDelegate:me
  
aWebView’s setTranslatesAutoresizingMaskIntoConstraints:true
  
  
set bURL to |NSURL|’s URLWithString:tmpURL
  
set aReq to NSURLRequest’s requestWithURL:bURL
  
aWebView’s loadRequest:aReq –Webコンテンツのローディング
  
  
— set up alert  
  
set theAlert to NSAlert’s alloc()’s init()
  
tell theAlert
    its setMessageText:aMainMes
    
its setInformativeText:aSubMes
    
its addButtonWithTitle:"OK"
    
its addButtonWithTitle:"Cancel"
    
its setAccessoryView:aWebView
  end tell
  
  
— show alert in modal loop
  
NSRunningApplication’s currentApplication()’s activateWithOptions:0
  
my performSelectorOnMainThread:"doModal:" withObject:(theAlert) waitUntilDone:true
  
  
–Stop Web View Action
  
set bURL to |NSURL|’s URLWithString:"about:blank"
  
set bReq to NSURLRequest’s requestWithURL:bURL
  
aWebView’s loadRequest:bReq
  
  
if (my returnCode as number) = 1001 then error number -128
end browseWebContents:

on doModal:aParam
  set (my returnCode) to aParam’s runModal()
end doModal:

on viewDidLoad:aNotification
  return true
end viewDidLoad:

on fetchJSSourceString(aURL)
  set jsURL to |NSURL|’s URLWithString:aURL
  
set jsSourceString to NSString’s stringWithContentsOfURL:jsURL encoding:(NSUTF8StringEncoding) |error|:(missing value)
  
return jsSourceString
end fetchJSSourceString

★Click Here to Open This Script 

Posted in Internet URL | Tagged 10.11savvy 10.12savvy 10.13savvy NSAlert NSAlertSecondButtonReturn NSBackingStoreBuffered NSButton NSColor NSMomentaryLightButton NSRunningApplication NSScreen NSString NSURL NSURLRequest NSUTF8StringEncoding WKUserContentController WKUserScript WKUserScriptInjectionTimeAtDocumentEnd WKWebView WKWebViewConfiguration | Leave a comment

アラートダイアログ上にMap Viewを表示

Posted on 2月 19, 2019 by Takaaki Naganoya

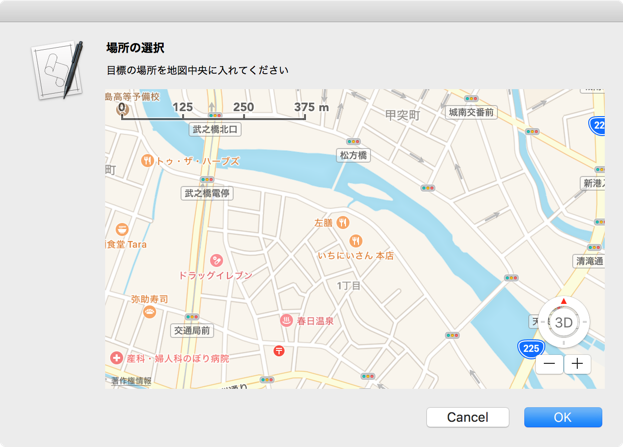
アラートダイアログを作成し、その上にMap Viewを表示して位置座標の選択を行うAppleScriptです。

Map Viewを使用するためには、インターネット接続が必要です。

もしこれをAppleScriptのコマンドのように表現するなら「choose geo location」とかいうコマンドになるでしょうか。本当は地図.appのように地図中でクリックした場所にピンを打って選択箇所を明示するようなものを考えていたのですが、実際にASだけで作ろうとすると難しいものがありそうで。

こうした「ざっくり場所を選ぶ」ダイアログのほか、複数の地点をピンで表示し、そのうちのどれかを地図上で選択するといったコマンドがあると使いでがありそうです。

AppleScript名:アラートダイアログ上のMap Viewを表示
— Created 2019-02-14 by Takaaki Naganoya
— 2019 Piyomaru Software
use AppleScript version "2.5"
use scripting additions
use framework "Foundation"
use framework "MapKit"
use framework "AppKit"

property |NSURL| : a reference to current application’s |NSURL|
property NSData : a reference to current application’s NSData
property MKMapView : a reference to current application’s MKMapView
property NSURLRequest : a reference to current application’s NSURLRequest
property NSURLConnection : a reference to current application’s NSURLConnection

property theResult : 0
property returnCode : 0

set nRes to hasInternetConnection("http://www.google.com") of me
if nRes = false then error "No Internet Connection…."

–地図表示初期座標。一般的にはWiFi経由でAssistive-GPSから現在位置を拾って指定
set aLong to 130.55723797
set aLat to 31.57868838

set paramObj to {myMessage:"場所の選択", mySubMessage:"目標の場所を地図中央に入れてください", aLongitude:aLong, aLatitude:aLat}
my performSelectorOnMainThread:"chooseCoordinate:" withObject:(paramObj) waitUntilDone:true
return theResult
–> {latitude:31.57868838, longitude:130.55723797}

on chooseCoordinate:paramObj
  set aMainMes to myMessage of paramObj
  
set aSubMes to mySubMessage of paramObj
  
set aLong to aLongitude of paramObj
  
set aLat to aLatitude of paramObj
  
  
–MKMapViewをつくる
  
set aMapView to MKMapView’s alloc()’s initWithFrame:(current application’s NSMakeRect(0, 0, 500, 300))
  
tell aMapView
    its setMapType:(current application’s MKMapTypeStandard)
    
its setZoomEnabled:true
    
its setScrollEnabled:true
    
its setPitchEnabled:true
    
its setRotateEnabled:true
    
its setShowsCompass:true
    
its setShowsZoomControls:true
    
its setShowsScale:true
    
its setShowsUserLocation:true
    
    
set aLocation to current application’s CLLocationCoordinate2DMake(aLat, aLong)
    
its setCenterCoordinate:aLocation zoomLevel:17 animated:false
    
its setDelegate:me
  end tell
  
  
— set up alert  
  
set theAlert to current application’s NSAlert’s alloc()’s init()
  
tell theAlert
    its setMessageText:aMainMes
    
its setInformativeText:aSubMes
    
its addButtonWithTitle:"OK"
    
its addButtonWithTitle:"Cancel"
    
its setAccessoryView:aMapView
  end tell
  
  
— show alert in modal loop
  
current application’s NSRunningApplication’s currentApplication()’s activateWithOptions:(current application’s NSApplicationActivateIgnoringOtherApps)
  
set returnCode to theAlert’s runModal()
  
if returnCode = (current application’s NSAlertSecondButtonReturn) then error number -128
  
  
set (my theResult) to (aMapView’s centerCoordinate()) as record
end chooseCoordinate:

–Internet Connection Check
on hasInternetConnection(aURLString)
  set aURL to |NSURL|’s alloc()’s initWithString:aURLString
  
set aReq to NSURLRequest’s alloc()’s initWithURL:aURL cachePolicy:(current application’s NSURLRequestReloadIgnoringLocalCacheData) timeoutInterval:5.0
  
set urlRes to (NSURLConnection’s sendSynchronousRequest:aReq returningResponse:(missing value) |error|:(missing value))
  
if urlRes = missing value then
    return false
  else
    return true
  end if
end hasInternetConnection

★Click Here to Open This Script 

Posted in geolocation GUI Internet | Tagged 10.11savvy 10.12savvy 10.13savvy NSData NSURL NSView | Leave a comment

指定ファイルサイズのJPEGに変換(圧縮率可変)_1K=1024で計算

Posted on 2月 11, 2019 by Takaaki Naganoya

Finder上で選択中の画像ファイルを指定ファイルサイズを下回るよう圧縮率を調整してJPEGに変換するAppleScriptです。

指定画像を指定のファイルサイズ(1K=1024で計算)以内になるよう、非圧縮の状態から段階的に圧縮率を高くして仕上がりファイルサイズを下回るかどうか演算を行います。ファイルに書き込まずに仕上がりサイズの計算を行うところが新機軸です。

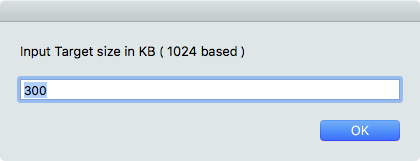
macOS標準搭載のスクリプトメニューから呼び出して使うことを想定しています。実行すると、ダイアログ表示して指定ファイルサイズをKB単位で数値入力する必要があります。

巨大な画像ファイルを処理してしまった場合への対処として、最初に最高圧縮率で圧縮してみて、指定ファイルサイズ以内になるかどうかを計算します。

最初は圧縮率100%から25%まで1%きざみで仕上がり画像ファイルサイズを計算してみたのですが、数十Mバイトの巨大な画像を処理させたら、途中でマウスカーソルが反応しないほどOSが無反応になったので(暴走状態?)、それを避けるために、このような処理を行なってみました。

JPEGにファイル変換した画像はデスクトップに

UUID_JPEG画質.jpg

の形式で出力されます。JPEG画質は1.0から0.01までの数値です。

AppleScript名:指定ファイルサイズのJPEGに変換(圧縮率可変)_1K=1024で計算
— Created 2014-02-21 Shane Stanley
— Modified 2019-02-11 Takaaki Naganoya
use AppleScript version "2.5"
use scripting additions
use framework "Foundation"
use framework "AppKit"

property |NSURL| : a reference to current application’s |NSURL|
property NSUUID : a reference to current application’s NSUUID
property NSArray : a reference to current application’s NSArray
property NSString : a reference to current application’s NSString
property NSImage : a reference to current application’s NSImage
property NSPredicate : a reference to current application’s NSPredicate
property NSJPEGFileType : a reference to current application’s NSJPEGFileType
property NSBitmapImageRep : a reference to current application’s NSBitmapImageRep
property NSURLTypeIdentifierKey : a reference to current application’s NSURLTypeIdentifierKey

property compressList : {100, 99, 98, 97, 96, 95, 90, 85, 80, 75, 70, 65, 60, 55, 50, 40, 30, 20, 25} –大→小 へと並んでいる必要がある
property kbBase : 1024

tell application "Finder"
  set inFiles to selection as alias list
end tell

–指定のAlias listのうち画像ファイルのみ抽出
set filRes1 to filterAliasListByUTI(inFiles, "public.image") of me
if filRes1 = {} then return

–ターゲットサイズを指定
set aMessage to "Input Target size in KB ( " & (kbBase as string) & " based )"
set aRes to text returned of (display dialog aMessage default answer "300" buttons {"OK"} default button 1)
if aRes = false or aRes = "" then return
set targLimit to (aRes as number) * kbBase

–選択中のファイルのうちの1つから親フォルダを求め、出力先ファイルパスを組み立てる
set outPathTarg to (contents of first item of filRes1)
set pathString to NSString’s stringWithString:outPathTarg
set newPath to (pathString’s stringByDeletingLastPathComponent()) as string

–Main Loop
repeat with i in filRes1
  set aNSImage to (NSImage’s alloc()’s initWithContentsOfFile:(i))
  
  
–巨大すぎる画像のリサイズ時への保険で、最小サイズで投機的に圧縮して結果を確認する
  
set minSize to calcSavedJPEGSizeFromNSIMage(aNSImage, (last item of compressList) / 100) of me
  
  
if minSize < targLimit then
    –Simulate Suitable JPEG Compression Ratio to target file size
    
repeat with ii in compressList
      set jj to ii / 100
      
set fileSize to calcSavedJPEGSizeFromNSIMage(aNSImage, jj) of me
      
      
if fileSize < targLimit then
        exit repeat
      end if
    end repeat
  else
    set jj to 0.01 –エラー時にはやけくそで1%まで圧縮指定
  end if
  
  
set outPOSIXpath to (newPath & "/" & (NSUUID’s UUID()’s UUIDString()) as string) & "_" & (jj as string)
  
set savePath to outPOSIXpath & ".jpg"
  
  
saveNSImageAtPathAsJPG(aNSImage, savePath, jj) of me
end repeat

–Alias listから指定UTIに含まれるものをPOSIX pathのリストで返す
on filterAliasListByUTI(aList, targUTI)
  set newList to {}
  
repeat with i in aList
    set j to POSIX path of i
    
set tmpUTI to my retUTIfromPath(j)
    
set utiRes to my filterUTIList({tmpUTI}, targUTI)
    
if utiRes is not equal to {} then
      set the end of newList to j
    end if
  end repeat
  
return newList
end filterAliasListByUTI

–指定のPOSIX pathのファイルのUTIを求める
on retUTIfromPath(aPOSIXPath)
  set aURL to |NSURL|’s fileURLWithPath:aPOSIXPath
  
set {theResult, theValue} to aURL’s getResourceValue:(reference) forKey:NSURLTypeIdentifierKey |error|:(missing value)
  
  
if theResult = true then
    return theValue as string
  else
    return theResult
  end if
end retUTIfromPath

–UTIリストが指定UTIに含まれているかどうか演算を行う
on filterUTIList(aUTIList, aUTIstr)
  set anArray to NSArray’s arrayWithArray:aUTIList
  
set aPred to NSPredicate’s predicateWithFormat_("SELF UTI-CONFORMS-TO %@", aUTIstr)
  
set bRes to (anArray’s filteredArrayUsingPredicate:aPred) as list
  
return bRes
end filterUTIList

–NSImageを指定パスにJPEG形式で保存、qulityNumは0.0〜1.0。1.0は無圧縮
on saveNSImageAtPathAsJPG(anImage, outPath, qulityNum as real)
  set imageRep to anImage’s TIFFRepresentation()
  
set aRawimg to NSBitmapImageRep’s imageRepWithData:imageRep
  
set pathString to NSString’s stringWithString:outPath
  
set newPath to pathString’s stringByExpandingTildeInPath()
  
set myNewImageData to (aRawimg’s representationUsingType:(NSJPEGFileType) |properties|:{NSImageCompressionFactor:qulityNum})
  
  
set aLength to (myNewImageData’s |length|()) as number
  
  
set aRes to (myNewImageData’s writeToFile:newPath atomically:true) as boolean
  
return aRes –true/false
end saveNSImageAtPathAsJPG

–NSImageをJPEG形式で保存したときのファイルサイズを計算
on calcSavedJPEGSizeFromNSIMage(anImage, qulityNum as real)
  set imageRep to anImage’s TIFFRepresentation()
  
set aRawimg to NSBitmapImageRep’s imageRepWithData:imageRep
  
set myNewImageData to (aRawimg’s representationUsingType:(NSJPEGFileType) |properties|:{NSImageCompressionFactor:qulityNum})
  
set aLength to (myNewImageData’s |length|()) as number
  
return aLength
end calcSavedJPEGSizeFromNSIMage

★Click Here to Open This Script 

Posted in file Image list UTI | Tagged 10.11savvy 10.12savvy 10.13savvy 10.14savvy Finder NSArray NSBitmapImageRep NSImage NSPredicate NSString NSURL NSURLTypeIdentifierKey NSUUID | Leave a comment

Finder上で選択中のAppleScriptの行数をカウントする

Posted on 2月 8, 2019 by Takaaki Naganoya

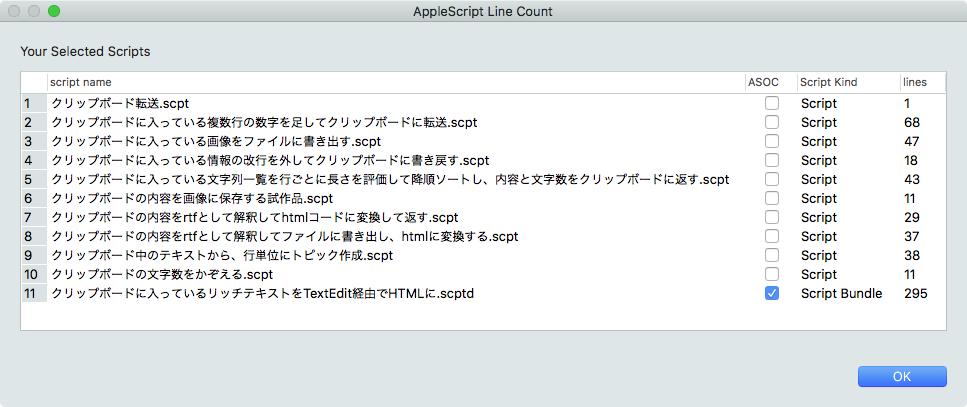
Finder上で選択中のAppleScript書類の行数や種別を取得して表UIで表示するAppleScriptです。

Myriad Tables Libを用いて結果を表UIで表示しています。

当初はAppleScript書類からソースを取得するのに/usr/bin/osadecompileコマンドを使っていたのですが、OSAKit経由で処理したほうが高速な印象があります。

–> Download Executable archive for macOS 10.14 (include Myriad Tables Lib)

macOS 10.14上で動作させるためには、Script Debugger上で本Scriptをオープンするか、本Scriptをバンドル形式で保存し、バンドル内(/Contents/Resources/Script Libraries フォルダ)にMyriad Tables Libを入れ、AppleScriptアプレットとして書き出す必要があります。

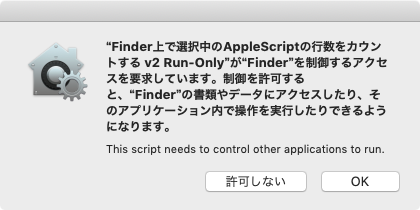
また、初回実行時には「セキュリティ」の承認ダイアログが表示されるため、これをOKする必要があります。AppleScriptアプレットはFinder上でアイコンをダブルクリックすると「Finder上で選択中のアイテム」を拾えないため(その瞬間、Finder上での選択アイテムはアプレット自身になってしまうため)、DockやmacOS標準装備のスクリプトメニューに登録して起動する必要があります。

AppleScript名:Finder上で選択中のAppleScriptの行数をカウントする v2.scpt
— Created 2019-02-04 by Takaaki Naganoya
— 2019 Piyomaru Software
use AppleScript version "2.4"
use scripting additions
use framework "Foundation"
use framework "OSAKit"
use script "Myriad Tables Lib" version "1.0.8" –https://www.macosxautomation.com/applescript/apps/Script_Libs.html#MyriadTablesLib

property |NSURL| : a reference to current application’s |NSURL|
property NSArray : a reference to current application’s NSArray
property NSString : a reference to current application’s NSString
property OSAScript : a reference to current application’s OSAScript
property NSPredicate : a reference to current application’s NSPredicate
property NSURLIsPackageKey : a reference to current application’s NSURLIsPackageKey
property NSURLIsDirectoryKey : a reference to current application’s NSURLIsDirectoryKey
property NSURLTypeIdentifierKey : a reference to current application’s NSURLTypeIdentifierKey

–Finder上で選択中のファイルのうちAppleScript書類のみ抽出
tell application "Finder"
  set inFiles to selection as alias list
  
if inFiles = {} then return
end tell
set filRes1 to filterAliasListByUTIList(inFiles, {"com.apple.applescript.script", "com.apple.applescript.script-bundle"}) of me
if filRes1 = {} then return

–AppleScript書類の種別判定および行数カウント
set outList to {}
repeat with i in filRes1
  set aName to (NSString’s stringWithString:i)’s lastPathComponent() as string
  
set sInfo to detectScriptIsPureASorASOC(i) of me
  
set sText to scriptSource of getASsourceFor(i) of me
  
set sNum to count every paragraph of sText
  
set sUTI to retUTIfromPath(i) of me
  
if sUTI = "com.apple.applescript.script" then
    set sKind to "Script"
  else if sUTI = "com.apple.applescript.script-bundle" then
    set sKind to "Script Bundle"
  else
    set sKind to "Other"
  end if
  
  
set the end of outList to {aName, sInfo, sKind, sNum}
end repeat

–結果を表UIで表示する
tell script "Myriad Tables Lib"
  set aDispBounds to my makeInitialBounds:1200 withHeight:500
  
set theTable to make new table with data outList column headings {"script name", "ASOC", "Script Kind", "lines"} with title "AppleScript Line Count" with prompt "Your Selected Scripts" with row numbering and empty selection allowed –and can add and delete
  
modify table theTable initial position aDispBounds column widths pattern {1, 2, 3, 4} with hidden cancel button
  
modify columns in table theTable user date format {user format full, user format full} entry alignment align left
  (
display table theTable)
end tell

–Alias listから指定UTI Listに含まれるものをPOSIX pathのリストで返す
on filterAliasListByUTIList(aList as list, targUTIList as list)
  set outList to {}
  
repeat with i in targUTIList
    set j to contents of i
    
set aRes to filterAliasListByUTI(aList, j) of me
    
if aRes is not equal to {} then
      set outList to outList & aRes
    end if
  end repeat
  
return outList
end filterAliasListByUTIList

–Alias listから指定UTIに含まれるものをPOSIX pathのリストで返す
on filterAliasListByUTI(aList as list, targUTI)
  set newList to {}
  
repeat with i in aList
    set j to POSIX path of i
    
set tmpUTI to my retUTIfromPath(j)
    
set utiRes to my filterUTIList({tmpUTI}, targUTI)
    
if utiRes is not equal to {} then
      set the end of newList to j
    end if
  end repeat
  
return newList
end filterAliasListByUTI

–指定のPOSIX pathのファイルのUTIを求める
on retUTIfromPath(aPOSIXPath)
  set aURL to |NSURL|’s fileURLWithPath:aPOSIXPath
  
set {theResult, theValue} to aURL’s getResourceValue:(specifier) forKey:NSURLTypeIdentifierKey |error|:(missing value)
  
  
if theResult = true then
    return theValue as string
  else
    return theResult
  end if
end retUTIfromPath

–UTIリストが指定UTIに含まれているかどうか演算を行う
on filterUTIList(aUTIList, aUTIstr)
  set anArray to NSArray’s arrayWithArray:aUTIList
  
set aPred to NSPredicate’s predicateWithFormat_("SELF UTI-CONFORMS-TO %@", aUTIstr)
  
set bRes to (anArray’s filteredArrayUsingPredicate:aPred) as list
  
return bRes
end filterUTIList

on makeInitialBounds:(aTWidth as integer) withHeight:(aTHeight as integer)
  set aDispBounds to current application’s NSScreen’s mainScreen()’s frame()
  
if class of item 1 of aDispBounds = record then
    –macOS 10.10/10.11/10.12
    
set aWidth to (width of |size| of aDispBounds)
    
set aHeight to (height of |size| of aDispBounds)
  else
    –macOS 10.13 or later?
    
set aWidth to (item 1 of item 2 of aDispBounds)
    
set aHeight to (item 2 of item 2 of aDispBounds)
  end if
  
  
set xPos to (aWidth div 2) – (aTWidth div 2)
  
set yPos to (aHeight div 2) – (aTHeight div 2)
  
  
return {xPos, yPos, aTWidth, aTHeight}
end makeInitialBounds:withHeight:

–指定AppleScriptファイルがPure ASかASOCかを判定して返す
on detectScriptIsPureASorASOC(aFile)
  set sRes to getASsourceFor(aFile) of me
  
set sName to scriptKind of sRes –Name
  
set sText to scriptSource of sRes –Source
  
if sText = "" or sText = missing value then return missing value
  
  
if sName = "AppleScript" then
    if sText contains "use framework \"Foundation\"" then
      return true –ASOC
    else
      return false –Pure AppleScript
    end if
  else
    –JXAなど他のOSA言語の場合
    
return sName
  end if
end detectScriptIsPureASorASOC

–指定AppleScriptファイルのソースコードを取得する(実行専用Scriptからは取得できない)
on getASsourceFor(aPOSIXPath)
  set aURL to |NSURL|’s fileURLWithPath:(aPOSIXPath)
  
set theScript to current application’s OSAScript’s alloc()’s initWithContentsOfURL:aURL |error|:(missing value)
  
set scriptName to theScript’s |language|()’s |name|() as string
  
set theSource to theScript’s source() as text
  
return {scriptKind:scriptName, scriptSource:theSource}
end getASsourceFor

★Click Here to Open This Script 

Posted in file File path GUI OSA | Tagged 10.11savvy 10.12savvy 10.13savvy 10.14savvy NSArray NSPredicate NSString NSURL OSAScript | Leave a comment

指定色で塗りつぶし角丸画像を作成

Posted on 2月 5, 2019 by Takaaki Naganoya

指定の矩形に対して、指定色で、指定半径の角丸で、指定ファイルパスに角丸ぬりつぶしPNG画像を作成するAppleScriptです。

色選択のポップアップメニュー中に入れるNSImage作成用に作ったものですが、ねんのために(動作確認のために)ファイル出力させてみました。

AppleScript名:指定色で塗りつぶし角丸画像を作成.scptd
—
–  Created by: Piyomaru Software
–  Created on: 2019/01/29
—
–  Copyright © 2019 Piyomaru Software, All Rights Reserved
—
use AppleScript version "2.4" — Yosemite (10.10) or later
use framework "Foundation"
use scripting additions
use framework "AppKit"

property |NSURL| : a reference to current application’s |NSURL|
property NSColor : a reference to current application’s NSColor
property NSString : a reference to current application’s NSString
property NSImage : a reference to current application’s NSImage
property NSScreen : a reference to current application’s NSScreen
property NSBezierPath : a reference to current application’s NSBezierPath
property NSPNGFileType : a reference to current application’s NSPNGFileType
property NSBitmapImageRep : a reference to current application’s NSBitmapImageRep

set tCol to choose color
copy tCol to {rVal, gVal, bVal}

set aRadius to 12
set aNSColor to makeNSColorFromRGBAval(rVal, gVal, bVal, 65535, 65535) of me
set aNSImage to makeRoundedNSImageWithFilledWithColor(100, 100, aNSColor, aRadius) of me

set aPath to NSString’s stringWithString:(POSIX path of (choose file name))
set bPath to aPath’s stringByAppendingPathExtension:"png"
set aRes to saveNSImageAtPathAsPNG(aNSImage, bPath) of me

–指定サイズのNSImageを作成し、指定色で塗ってNSImageで返す、anRadiusの半径の角丸で
on makeRoundedNSImageWithFilledWithColor(aWidth, aHeight, fillColor, anRadius as real)
  set anImage to NSImage’s alloc()’s initWithSize:(current application’s NSMakeSize(aWidth, aHeight))
  
anImage’s lockFocus()
  
—
  
set theRect to {{x:0, y:0}, {height:aHeight, width:aWidth}}
  
set theNSBezierPath to NSBezierPath’s bezierPathWithRoundedRect:theRect xRadius:anRadius yRadius:anRadius
  
—
  
fillColor’s |set|() –色設定
  
theNSBezierPath’s fill() –ぬりつぶし
  
—
  
anImage’s unlockFocus()
  
  
return anImage
end makeRoundedNSImageWithFilledWithColor

–aMaxValを最大値とする数値でNSColorを作成して返す
on makeNSColorFromRGBAval(redValue as integer, greenValue as integer, blueValue as integer, alphaValue as integer, aMaxVal as integer)
  set aRedCocoa to (redValue / aMaxVal) as real
  
set aGreenCocoa to (greenValue / aMaxVal) as real
  
set aBlueCocoa to (blueValue / aMaxVal) as real
  
set aAlphaCocoa to (alphaValue / aMaxVal) as real
  
set aColor to NSColor’s colorWithCalibratedRed:aRedCocoa green:aGreenCocoa blue:aBlueCocoa alpha:aAlphaCocoa
  
return aColor
end makeNSColorFromRGBAval

–NSImageを指定パスにPNG形式で保存
on saveNSImageAtPathAsPNG(anImage, outPath)
  set imageRep to anImage’s TIFFRepresentation()
  
set aRawimg to NSBitmapImageRep’s imageRepWithData:imageRep
  
  
set pathString to NSString’s stringWithString:outPath
  
set newPath to pathString’s stringByExpandingTildeInPath()
  
  
set myNewImageData to (aRawimg’s representationUsingType:(NSPNGFileType) |properties|:(missing value))
  
set aRes to (myNewImageData’s writeToFile:newPath atomically:true) as boolean
  
  
return aRes –成功ならtrue、失敗ならfalseが返る
end saveNSImageAtPathAsPNG

★Click Here to Open This Script 

Posted in file Image | Tagged 10.11savvy 10.12savvy 10.13savvy 10.14savvy NSBezierPath NSColor NSImage NSScreen NSString NSURL | Leave a comment

Finder上で選択中の画像のうち、最小のものに合わせて各画像の右上を基準にサイズ統一

Posted on 1月 26, 2019 by Takaaki Naganoya

Finderで選択中の画像のうち、最小のものに合わせて各画像の右上を原点にサイズを統一するAppleScriptです。

Finderで選択中のファイルから画像のみ抽出し、そのうちサイズが最小のものに合わせて他の画像をトリミングし、変更したものをデスクトップフォルダに出力します。

以前に画像の左上を基準に自動トリミングするバージョンのScriptを作成しましたが、あれはメニュー操作の説明用スクリーンショットの大きさを統一するためのもの。右上基準の本バージョンは、Driveのリネームやステータスバーの操作内容を説明するためのスクリーンショットの大きさ統一のために用意したものです。


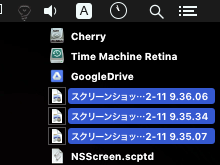
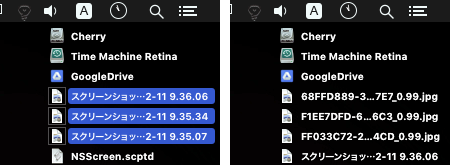
▲大きさを揃える画像をFinder上で選択


▲処理後の画像。大きさが最小の画像に合わせてそろっている。切り抜き基準は右上

スクリーンショット画像を複数撮った場合に、厳密に同じサイズに固定することは(各種スクリーンショット作成ユーティリティを使わないと)行いづらいところです。

そこで、最小の画像を計算で求めて、それに合わせて自動トリミングするようにしてみました。Cocoaの機能を用いて画像処理しているため、Photoshopは必要ありません。

最小の画像を求めるのに、幅+高さの値でソートして最小のものを求めています(widthとheightによる2 key sortではなく1 Keyで済ませたかったので)。

AppleScript名:Finder上で選択中の画像のうち、最小のものに合わせて各画像の右上を基準にサイズ統一
— Created 2018-01-26 by Takaaki Naganoya
— 2019 Piyomaru Software
use AppleScript version "2.5"
use scripting additions
use framework "Foundation"
use framework "AppKit"
use framework "QuartzCore"

property |NSURL| : a reference to current application’s |NSURL|
property NSUUID : a reference to current application’s NSUUID
property NSArray : a reference to current application’s NSArray
property NSString : a reference to current application’s NSString
property NSImage : a reference to current application’s NSImage
property NSScreen : a reference to current application’s NSScreen
property NSZeroRect : a reference to current application’s NSZeroRect
property NSPredicate : a reference to current application’s NSPredicate
property NSPNGFileType : a reference to current application’s NSPNGFileType
property NSMutableArray : a reference to current application’s NSMutableArray
property NSCompositeCopy : a reference to current application’s NSCompositeCopy
property NSGraphicsContext : a reference to current application’s NSGraphicsContext
property NSBitmapImageRep : a reference to current application’s NSBitmapImageRep
property NSURLTypeIdentifierKey : a reference to current application’s NSURLTypeIdentifierKey
property NSCalibratedRGBColorSpace : a reference to current application’s NSCalibratedRGBColorSpace

tell application "Finder"
  set selList to selection as alias list
end tell

–指定のAlias listのうち画像のみ抽出
set filRes1 to filterAliasListByUTI(selList, "public.image") of me
if filRes1 = {} then
  tell current application
    –Error Message (No Selection)
    
display dialog "Finder上で選択されているファイルはありません。" buttons {"OK"} default button 1 with icon 1 with title "画像リサイズ処理できません"
  end tell
  
return
end if

–各種情報を入れたArrayを作成
set anArray to NSMutableArray’s new()
repeat with i in selList
  set imgPath to (POSIX path of i)
  
  
set aImage to makeNSImageFromFile(i) of me
  
set sizeInfo to |size|() of aImage
  
set sizeInfo to sizeInfo & {aImg:aImage, total:(width of sizeInfo) + (height of sizeInfo), myPath:imgPath}
  (
anArray’s addObject:sizeInfo)
end repeat

–最小のサイズの画像の算出
set aRes to anArray’s valueForKeyPath:("@min.total")
set bRes to first item of (filterRecListByLabel(anArray, "total == " & aRes as string) of me) –最小サイズの画像

–最小サイズ画像のwidthとheight
set minWidth to bRes’s width
set minHeight to bRes’s height

–環境情報の取得
set aPath to POSIX path of (path to desktop)
set retinaF to (NSScreen’s mainScreen()’s backingScaleFactor()) as real
–>  2.0 (Retina) / 1.0 (Non Retina)

set cRes to filterRecListByLabel(anArray, "total != " & aRes as string) of me –最小サイズ以外の画像

repeat with i in cRes
  set j to contents of i
  
set anImage to aImg of j
  
set fRes to myPath of j
  
  
set tmpSize to |size|() of anImage
  
set tmpWidth to (width of tmpSize)
  
set tmpHeight to (height of tmpSize)
  
  
set cropedImage to (my cropNSImageBy:{(tmpWidth – minWidth), 0, minWidth, minHeight} fromImage:anImage)
  
  
–Retina環境対策
  
if retinaF > 1.0 then
    set cropedImage to (my resizedImage:cropedImage toScale:(1.0))
  end if
  
  
–ファイル書き込み
  
set fRes to retUUIDfilePathFromDir(aPath, "png") of me
  
set sRes to saveNSImageAtPathAsPNG(cropedImage, fRes) of me
end repeat

–リストに入れたレコードを、指定の属性ラベルの値で抽出
on filterRecListByLabel(aRecList as list, aPredicate as string)
  –ListからNSArrayへの型変換
  
set aArray to NSArray’s arrayWithArray:aRecList
  
  
–抽出
  
set aPredicate to NSPredicate’s predicateWithFormat:aPredicate
  
set filteredArray to aArray’s filteredArrayUsingPredicate:aPredicate
  
  
–NSArrayからListに型変換して返す
  
set bList to filteredArray as list
  
return bList
end filterRecListByLabel

–Alias listから指定UTIに含まれるものをPOSIX pathのリストで返す
on filterAliasListByUTI(aList, targUTI)
  set newList to {}
  
repeat with i in aList
    set j to POSIX path of i
    
set tmpUTI to my retUTIfromPath(j)
    
set utiRes to my filterUTIList({tmpUTI}, targUTI)
    
if utiRes is not equal to {} then
      set the end of newList to j
    end if
  end repeat
  
return newList
end filterAliasListByUTI

–指定のPOSIX pathのファイルのUTIを求める
on retUTIfromPath(aPOSIXPath)
  set aURL to |NSURL|’s fileURLWithPath:aPOSIXPath
  
set {theResult, theValue} to aURL’s getResourceValue:(reference) forKey:NSURLTypeIdentifierKey |error|:(missing value)
  
  
if theResult = true then
    return theValue as string
  else
    return theResult
  end if
end retUTIfromPath

–UTIリストが指定UTIに含まれているかどうか演算を行う
on filterUTIList(aUTIList, aUTIstr)
  set anArray to NSArray’s arrayWithArray:aUTIList
  
set aPred to NSPredicate’s predicateWithFormat_("SELF UTI-CONFORMS-TO %@", aUTIstr)
  
set bRes to (anArray’s filteredArrayUsingPredicate:aPred) as list
  
return bRes
end filterUTIList

on cropNSImageTo:{x1, y1, x2, y2} fromImage:theImage
  set newWidth to x2 – x1
  
set newHeight to y2 – y1
  
set theSize to (theImage’s |size|()) as record
  
set oldHeight to height of theSize
  
  
— transpose y value for Cocoa coordintates
  
set y1 to oldHeight – newHeight – y1
  
set newRect to {{x:x1, y:y1}, {width:newWidth, height:newHeight}}
  
theImage’s lockFocus()
  
set theRep to NSBitmapImageRep’s alloc()’s initWithFocusedViewRect:newRect
  
theImage’s unlockFocus()
  
  
set outImage to NSImage’s alloc()’s initWithSize:(theRep’s |size|())
  
outImage’s addRepresentation:theRep
  
  
return outImage
end cropNSImageTo:fromImage:

on makeNSImageFromFile(anAlias)
  set imgPath to (POSIX path of anAlias)
  
set aURL to (|NSURL|’s fileURLWithPath:(imgPath))
  
return (NSImage’s alloc()’s initWithContentsOfURL:aURL)
end makeNSImageFromFile

–NSImageを指定の大きさでトリミング
on cropNSImageBy:{x1, y1, newWidth, newHeight} fromImage:theImage
  set theSize to (theImage’s |size|()) as record
  
set oldHeight to height of theSize
  
  
— transpose y value for Cocoa coordintates
  
set y1 to oldHeight – newHeight – y1
  
set newRect to {{x:x1, y:y1}, {width:newWidth, height:newHeight}}
  
theImage’s lockFocus()
  
set theRep to NSBitmapImageRep’s alloc()’s initWithFocusedViewRect:newRect
  
theImage’s unlockFocus()
  
  
set outImage to NSImage’s alloc()’s initWithSize:(theRep’s |size|())
  
outImage’s addRepresentation:theRep
  
  
return outImage
end cropNSImageBy:fromImage:

on retUUIDfilePathFromDir(aPath, aEXT)
  set aUUIDstr to (NSUUID’s UUID()’s UUIDString()) as string
  
set aPath to ((NSString’s stringWithString:aPath)’s stringByAppendingPathComponent:aUUIDstr)’s stringByAppendingPathExtension:aEXT
  
return aPath
end retUUIDfilePathFromDir

–NSImageを指定パスにPNG形式で保存
on saveNSImageAtPathAsPNG(anImage, outPath)
  set imageRep to anImage’s TIFFRepresentation()
  
set aRawimg to NSBitmapImageRep’s imageRepWithData:imageRep
  
set pathString to NSString’s stringWithString:outPath
  
set newPath to pathString’s stringByExpandingTildeInPath()
  
set myNewImageData to (aRawimg’s representationUsingType:(NSPNGFileType) |properties|:(missing value))
  
set aRes to (myNewImageData’s writeToFile:newPath atomically:true) as boolean
  
return aRes –true/false
end saveNSImageAtPathAsPNG

on resizedImage:aSourceImg toScale:imgScale
  if (aSourceImg’s isValid()) as boolean = false then error "Invalid NSImage"
  
  
set aSize to aSourceImg’s |size|()
  
–>  {​​​​​width:32.0, ​​​​​height:32.0​​​}
  
  
set aWidth to (aSize’s width) * imgScale
  
set aHeight to (aSize’s height) * imgScale
  
  
set aRep to NSBitmapImageRep’s alloc()’s initWithBitmapDataPlanes:(missing value) pixelsWide:aWidth pixelsHigh:aHeight bitsPerSample:8 samplesPerPixel:4 hasAlpha:true isPlanar:false colorSpaceName:(NSCalibratedRGBColorSpace) bytesPerRow:0 bitsPerPixel:0
  
  
set newSize to {width:aWidth, height:aHeight}
  
aRep’s setSize:newSize
  
  
NSGraphicsContext’s saveGraphicsState()
  
NSGraphicsContext’s setCurrentContext:(NSGraphicsContext’s graphicsContextWithBitmapImageRep:aRep)
  
  
aSourceImg’s drawInRect:(current application’s NSMakeRect(0, 0, aWidth, aHeight)) fromRect:(NSZeroRect) operation:(NSCompositeCopy) fraction:(1.0)
  
  
NSGraphicsContext’s restoreGraphicsState()
  
  
set newImg to NSImage’s alloc()’s initWithSize:newSize
  
newImg’s addRepresentation:aRep
  
  
return newImg
end resizedImage:toScale:

★Click Here to Open This Script 

Posted in file Image | Tagged 10.11savvy 10.12savvy 10.13savvy NSArray NSBitmapImageRep NSImage NSPredicate NSScreen NSString NSURL NSUUID | Leave a comment

Automator Actionを実行

Posted on 1月 24, 2019 by Takaaki Naganoya

指定のAutomator Action(拡張子「.workflow」)を実行するAppleScriptです。

PDFKitをさんざんこづき回しても、指定のPDFに任意のすかし(Watermark)を入れるのが自分にはできなかったので、AutomatorのActionにそういうのが標準装備されているから、それを使えばいいんじゃないかと思い出し、Automator Workflowを直接実行するやりかたを調べて実行してみました。

# これは、Cocoaの機能を呼び出して実行しているものであって、Automatorアプリケーションを呼び出すとか、/usr/bin/automatorを呼び出すやり方などもあります

まだ、パラメータを指定してはいないので、パラメータを指定できるようにするとなおいいと思います。

AppleScript名:Automator Actionを実行.scptd
—
–  Created by: Takaaki Naganoya
–  Created on: 2019/01/22
—
–  Copyright © 2019 Piyomaru Software, All Rights Reserved
—
use AppleScript version "2.5" — El Capitan (10.11) or later
use framework "Foundation"
use framework "Automator"
use scripting additions

property |NSURL| : a reference to current application’s |NSURL|

set aURL to |NSURL|’s fileURLWithPath:(POSIX path of (choose file with prompt "Choose Automator Action" of type {"com.apple.automator-workflow"}))

set aWKres to current application’s AMWorkflow’s runWorkflowAtURL:aURL withInput:(missing value) |error|:(reference)

★Click Here to Open This Script 

Posted in file URL | Tagged 10.11savvy 10.12savvy 10.13savvy 10.14savvy AMWorkflow Automator NSURL | Leave a comment

WebView+ボタンを作成 v3.1(URLから読み込み)

Posted on 12月 3, 2018 by Takaaki Naganoya

WkWebViewを動的に生成して、YouTube上の指定ムービーを再生するAppleScriptの改良版です。とくにYouTube限定ではなく、Webコンテンツのブラウズを単体で行うための実験的なScriptです。

# AppleScriptでは、Webブラウザに命令を出せば数行のコマンドで簡単に任意のURLのWebコンテンツを表示させられますが、本ScriptはAppleScriptから他のアプリケーションを介さずに直接Cocoaの機能を呼び出して自前でWebコンテンツを表示させるものです。

NSWindow+NSSplitView+WKWebViewを作成して、Webサーバー上の内容を表示します。v3.0からの改良点は、再生中のWebコンテンツのクリアを明示的に行えるようになったことです。

スクリプトエディタ上で実行し、「OK」ボタンをクリックすると、ウィンドウがクローズし、Webコンテンツの再生も停止します(前バージョンではこれができなかった)。Script MenuおよびScript Debugger上では実行できるもののWebコンテンツ操作はできず、OKボタンも反応しません。

AppleScript Appletとして書き出して実行すると、そのままではインターネットへのアクセスが許可されていないため、表示できません。Info.plistのエントリを書き換える必要があるものと思われます。

再生中のWebコンテンツのクリアについては、US Appleが主催しているCocoa-Dev MLにFritz Andersonが2012年4月11日に投稿した、

On 11 Apr 2012, at 7:51 AM, Koen van der Drift wrote:

> Is there a way to empty or clear a webview when I close the popover,
> so that next time it is opened it doesn't show the previous page? I
> don't want to clear the cache, because when the webview is opened for
> an item that was already selected, it can be loaded from the cache.

What works for me on iOS is having the UIWebView load about:blank. Maybe it works the same in Mac OS.

	— F

が参考になりました。Google検索しても見つからなかったのに、MLの過去ログを漁ってみたら割と簡単に発見。あらかじめMLのログをAppleScriptのロボットでテーマごとに自動フォルダ分けして整理してあったのが効きました。

あとは、実行環境がかなり限定される(Script DebuggerやScript Menuから実行すると、Webコンテンツ操作やボタンのクリックができなくなる)点をなんとかしたいところです。AppleScriptアプレットだとそのまま書き出した状態ではネットワーク接続自体ができない(Info.plist書き換えでなんとか?)とか。

Script Menuからの実行時に無反応になる件をなんとかしたいところです。個人的には、Script Menuが主力実行(ランタイム)環境だと思っているので。

AppleScript名:WebView+ボタンを作成 v3.1(URLから読み込み)
— Created 2018-11-27 by Takaaki Naganoya
— Modified 2018-12-03 by Takaaki Naganoya
— 2018 Piyomaru Software
use AppleScript version "2.5"
use scripting additions
use framework "Foundation"
use framework "AppKit"
use framework "WebKit"

property |NSURL| : a reference to current application’s |NSURL|
property NSString : a reference to current application’s NSString
property NSScreen : a reference to current application’s NSScreen
property NSButton : a reference to current application’s NSButton
property NSWindow : a reference to current application’s NSWindow
property NSSplitView : a reference to current application’s NSSplitView
property NSTextView : a reference to current application’s NSTextView
property NSScrollView : a reference to current application’s NSScrollView
property WKWebView : a reference to current application’s WKWebView
property WKUserScript : a reference to current application’s WKUserScript
property NSURLRequest : a reference to current application’s NSURLRequest
property NSMutableString : a reference to current application’s NSMutableString
property NSWindowController : a reference to current application’s NSWindowController
property NSTitledWindowMask : a reference to current application’s NSTitledWindowMask
property NSRoundedBezelStyle : a reference to current application’s NSRoundedBezelStyle
property NSUTF8StringEncoding : a reference to current application’s NSUTF8StringEncoding
property NSBackingStoreBuffered : a reference to current application’s NSBackingStoreBuffered
property WKUserContentController : a reference to current application’s WKUserContentController
property NSMomentaryLightButton : a reference to current application’s NSMomentaryLightButton
property WKWebViewConfiguration : a reference to current application’s WKWebViewConfiguration
property NSScreenSaverWindowLevel : a reference to current application’s NSScreenSaverWindowLevel
property NSWindowStyleMaskResizable : a reference to current application’s NSWindowStyleMaskResizable
property NSWindowStyleMaskMiniaturizable : a reference to current application’s NSWindowStyleMaskMiniaturizable
property WKUserScriptInjectionTimeAtDocumentEnd : a reference to current application’s WKUserScriptInjectionTimeAtDocumentEnd

property windisp : false
property wController : false

set aWidth to 1100
set aHeight to 700

set aTitle to "WkWebView test2"
set aButtonMSG to "OK"

set aURL to "https://www.youtube.com/embed/GP_tVXTYdmY?autoplay=1&hd=1"

set paramObj to {aWidth, aHeight, aTitle, aURL, aButtonMSG, "600"}
my performSelectorOnMainThread:"dispWebView:" withObject:(paramObj) waitUntilDone:true

on dispWebView:paramObj
  set my windisp to false
  
copy (paramObj as list) to {aWidth, aHeight, aTitle, tmpURL, aButtonMSG, timeOutSecs}
  
  
set (my windisp) to true
  
  
set aWidth to aWidth as integer
  
set aHeight to aHeight as integer
  
set tmpURL to tmpURL as string
  
  
–WebViewをつくる
  
set aConf to WKWebViewConfiguration’s alloc()’s init()
  
  
–指定URLのJavaScriptをFetch
  
set jsSource to my fetchJSSourceString(tmpURL)
  
set userScript to WKUserScript’s alloc()’s initWithSource:jsSource injectionTime:(WKUserScriptInjectionTimeAtDocumentEnd) forMainFrameOnly:true
  
set userContentController to WKUserContentController’s alloc()’s init()
  
userContentController’s addUserScript:(userScript)
  
aConf’s setUserContentController:userContentController
  
  
set aWebView to WKWebView’s alloc()’s initWithFrame:(current application’s NSMakeRect(0, 0, aWidth, aHeight – 100)) configuration:aConf
  
aWebView’s setNavigationDelegate:me
  
aWebView’s setUIDelegate:me
  
aWebView’s setTranslatesAutoresizingMaskIntoConstraints:true
  
  
set bURL to |NSURL|’s URLWithString:tmpURL
  
set aReq to NSURLRequest’s requestWithURL:bURL
  
aWebView’s loadRequest:aReq –Webコンテンツのローディング


–Buttonをつくる
  
set bButton to (NSButton’s alloc()’s initWithFrame:(current application’s NSMakeRect(0, 0, aWidth, 40)))
  
bButton’s setTitle:aButtonMSG
  
bButton’s setTarget:me
  
bButton’s setAction:("clicked:")
  
bButton’s setKeyEquivalent:(return)
  
  
–SplitViewをつくる
  
set aSplitV to NSSplitView’s alloc()’s initWithFrame:(current application’s NSMakeRect(0, 0, aWidth, aHeight))
  
aSplitV’s setVertical:false
  
  
aSplitV’s addSubview:aWebView
  
aSplitV’s addSubview:bButton
  
aSplitV’s setNeedsDisplay:true
  
  
set aWin to makeWinWithView(aSplitV, aWidth, aHeight, aTitle, 1.0)
  
  
–NSWindowControllerを作ってみた
  
set my wController to NSWindowController’s alloc()
  
my (wController’s initWithWindow:aWin)
  
  
my (wController’s showWindow:me)
  
  
set aCount to (timeOutSecs as string as number) * 10 –timeout seconds * 10
  
repeat aCount times
    if (my windisp) = false then
      exit repeat
    end if
    
delay 0.1
  end repeat
  
  
–Stop Web View Action
  
set bURL to |NSURL|’s URLWithString:"about:blank"
  
set bReq to NSURLRequest’s requestWithURL:bURL
  
aWebView’s loadRequest:bReq
  
  
my closeWin:bButton
end dispWebView:

–Button Clicked Event Handler
on clicked:aSender
  set (my windisp) to false
  
my closeWin:aSender
end clicked:

–make Window for Input
on makeWinWithView(aView, aWinWidth, aWinHeight, aTitle, alphaV)
  set aScreen to NSScreen’s mainScreen()
  
set aFrame to {{0, 0}, {aWinWidth, aWinHeight}}
  
set aBacking to NSTitledWindowMask –NSBorderlessWindowMask
  
set aDefer to NSWindowStyleMaskMiniaturizable
  
  
— Window
  
set aWin to NSWindow’s alloc()
  (
aWin’s initWithContentRect:aFrame styleMask:aBacking backing:aDefer defer:false screen:aScreen)
  
  
aWin’s setTitle:aTitle
  
aWin’s setDelegate:me
  
aWin’s setDisplaysWhenScreenProfileChanges:true
  
aWin’s setHasShadow:true
  
aWin’s setIgnoresMouseEvents:false
  
aWin’s setLevel:(NSScreenSaverWindowLevel)
  
aWin’s setOpaque:false
  
aWin’s setAlphaValue:alphaV –append
  
aWin’s setReleasedWhenClosed:true
  
aWin’s |center|()
  
  
— Set Custom View
  
aWin’s setContentView:aView
  
  
return aWin
end makeWinWithView

–close win
on closeWin:aSender
  set tmpWindow to aSender’s |window|()
  
  
repeat with n from 10 to 1 by -1
    (tmpWindow’s setAlphaValue:n / 10)
    
delay 0.02
  end repeat
  
  
my wController’s |close|()
end closeWin:

on viewDidLoad:aNotification
  return true
end viewDidLoad:

on fetchJSSourceString(aURL)
  set jsURL to |NSURL|’s URLWithString:aURL
  
set jsSourceString to NSString’s stringWithContentsOfURL:jsURL encoding:(NSUTF8StringEncoding) |error|:(missing value)
  
return jsSourceString
end fetchJSSourceString

★Click Here to Open This Script 

Posted in URL | Tagged 10.11savvy 10.12savvy 10.13savvy 10.14savvy NSBackingStoreBuffered NSButton NSMomentaryLightButton NSMutableString NSRoundedBezelStyle NSScreen NSSplitView NSString NSTitledWindowMask NSURL NSURLRequest NSUTF8StringEncoding NSWindow NSWindowController WKUserContentController WKUserScript WKUserScriptInjectionTimeAtDocumentEnd WKWebView WKWebViewConfiguration | 1 Comment

Post navigation

  • Older posts
  • Newer posts

電子書籍(PDF)をオンラインストアで販売中!

Google Search

Popular posts

  • 開発機としてM2 Mac miniが来たのでガチレビュー
  • macOS 13.6.5 AS系のバグ、一切直らず
  • CotEditorで2つの書類の行単位での差分検出
  • Apple純正マウス、キーボードのバッテリー残量取得
  • macOS 15, Sequoia
  • 初心者がつまづきやすい「log」コマンド
  • 指定のWordファイルをPDFに書き出す
  • Adobe AcrobatをAppleScriptから操作してPDF圧縮
  • メキシカンハットの描画
  • Pages本執筆中に、2つの書類モード切り替えに気がついた
  • 与えられた文字列の1D Listのすべての順列組み合わせパターン文字列を返す v3(ベンチマーク用)
  • 2023年に書いた価値あるAppleScript
  • Pixelmator Pro v3.6.4でAppleScriptからの操作時の挙動に違和感が
  • AdobeがInDesign v19.4からPOSIX pathを採用
  • Safariで「プロファイル」機能を使うとAppleScriptの処理に影響
  • Cocoa Scripting Course 続刊計画
  • NaturalLanguage.frameworkでNLEmbeddingの処理が可能な言語をチェック
  • macOS 14.xでScript Menuの実行速度が大幅に下がるバグ
  • Numbersで選択範囲のセルの前後の空白を削除
  • AppleScriptによる並列処理

Tags

10.11savvy (1102) 10.12savvy (1243) 10.13savvy (1392) 10.14savvy (587) 10.15savvy (438) 11.0savvy (283) 12.0savvy (207) 13.0savvy (173) 14.0savvy (123) 15.0savvy (100) CotEditor (64) Finder (51) iTunes (19) Keynote (115) NSAlert (61) NSArray (51) NSBitmapImageRep (20) NSBundle (20) NSButton (34) NSColor (53) NSDictionary (28) NSFileManager (23) NSFont (21) NSImage (41) NSJSONSerialization (21) NSMutableArray (63) NSMutableDictionary (22) NSPredicate (36) NSRunningApplication (56) NSScreen (30) NSScrollView (22) NSString (119) NSURL (98) NSURLRequest (23) NSUTF8StringEncoding (30) NSView (33) NSWorkspace (20) Numbers (72) Pages (53) Safari (44) Script Editor (27) WKUserContentController (21) WKUserScript (20) WKWebView (23) WKWebViewConfiguration (22)

カテゴリー

  • 2D Bin Packing
  • 3D
  • AirDrop
  • AirPlay
  • Animation
  • AppleScript Application on Xcode
  • Beginner
  • Benchmark
  • beta
  • Bluetooth
  • Books
  • boolean
  • bounds
  • Bug
  • Calendar
  • call by reference
  • check sum
  • Clipboard
  • Cocoa-AppleScript Applet
  • Code Sign
  • Color
  • Custom Class
  • dialog
  • diff
  • drive
  • Droplet
  • exif
  • file
  • File path
  • filter
  • folder
  • Font
  • Font
  • GAME
  • geolocation
  • GUI
  • GUI Scripting
  • Hex
  • History
  • How To
  • iCloud
  • Icon
  • Image
  • Input Method
  • Internet
  • iOS App
  • JavaScript
  • JSON
  • JXA
  • Keychain
  • Keychain
  • Language
  • Library
  • list
  • Locale
  • Localize
  • Machine Learning
  • Map
  • Markdown
  • Menu
  • Metadata
  • MIDI
  • MIME
  • Natural Language Processing
  • Network
  • news
  • Noification
  • Notarization
  • Number
  • Object control
  • OCR
  • OSA
  • parallel processing
  • PDF
  • Peripheral
  • PRODUCTS
  • QR Code
  • Raw AppleEvent Code
  • Record
  • rectangle
  • recursive call
  • regexp
  • Release
  • Remote Control
  • Require Control-Command-R to run
  • REST API
  • Review
  • RTF
  • Sandbox
  • Screen Saver
  • Script Libraries
  • sdef
  • search
  • Security
  • selection
  • shell script
  • Shortcuts Workflow
  • Sort
  • Sound
  • Spellchecker
  • Spotlight
  • SVG
  • System
  • Tag
  • Telephony
  • Text
  • Text to Speech
  • timezone
  • Tools
  • Update
  • URL
  • UTI
  • Web Contents Control
  • WiFi
  • XML
  • XML-RPC
  • イベント(Event)
  • 未分類

アーカイブ

  • 2025年1月
  • 2024年12月
  • 2024年11月
  • 2024年10月
  • 2024年9月
  • 2024年8月
  • 2024年7月
  • 2024年6月
  • 2024年5月
  • 2024年4月
  • 2024年3月
  • 2024年2月
  • 2024年1月
  • 2023年12月
  • 2023年11月
  • 2023年10月
  • 2023年9月
  • 2023年8月
  • 2023年7月
  • 2023年6月
  • 2023年5月
  • 2023年4月
  • 2023年3月
  • 2023年2月
  • 2023年1月
  • 2022年12月
  • 2022年11月
  • 2022年10月
  • 2022年9月
  • 2022年8月
  • 2022年7月
  • 2022年6月
  • 2022年5月
  • 2022年4月
  • 2022年3月
  • 2022年2月
  • 2022年1月
  • 2021年12月
  • 2021年11月
  • 2021年10月
  • 2021年9月
  • 2021年8月
  • 2021年7月
  • 2021年6月
  • 2021年5月
  • 2021年4月
  • 2021年3月
  • 2021年2月
  • 2021年1月
  • 2020年12月
  • 2020年11月
  • 2020年10月
  • 2020年9月
  • 2020年8月
  • 2020年7月
  • 2020年6月
  • 2020年5月
  • 2020年4月
  • 2020年3月
  • 2020年2月
  • 2020年1月
  • 2019年12月
  • 2019年11月
  • 2019年10月
  • 2019年9月
  • 2019年8月
  • 2019年7月
  • 2019年6月
  • 2019年5月
  • 2019年4月
  • 2019年3月
  • 2019年2月
  • 2019年1月
  • 2018年12月
  • 2018年11月
  • 2018年10月
  • 2018年9月
  • 2018年8月
  • 2018年7月
  • 2018年6月
  • 2018年5月
  • 2018年4月
  • 2018年3月
  • 2018年2月

https://piyomarusoft.booth.pm/items/301502

メタ情報

  • ログイン
  • 投稿フィード
  • コメントフィード
  • WordPress.org

Forum Posts

  • 人気のトピック
  • 返信がないトピック

メタ情報

  • ログイン
  • 投稿フィード
  • コメントフィード
  • WordPress.org
Proudly powered by WordPress
Theme: Flint by Star Verte LLC