オープンソース開発されているフリーのテキストエディタ「CotEditor」v4.1.2において、AppleScript系の機能が追加されています。
・DocumentオブジェクトのhasBOM属性
has BOM (boolean, r/o) : Is the file encoding of the document has BOM (byte order mark)?
・convertコマンドのBOMオプション
convert v : Convert the document text to new encoding.
convert document : The document to convert encoding.
[lossy boolean] : Allows lossy conversion?
[BOM boolean] : Has the new encoding a BOM (byte order mark)?
to text : The new encoding, either in localized encoding name or an IANA charset name.
→ boolean : Did the convertion succeed?
・新設のjumpコマンド
jump v : Move the caret to the specified location. At least, either one of a parameter is required.
jump document : The document to move.
to line integer : The number of the line to go. If a negative value is provided, the line is counted from the end of the document.
[column integer] : The location in the line to jump. If a negative value is provided, the column is counted from the end of the line.
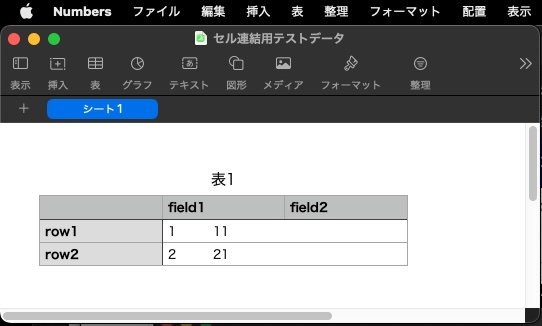
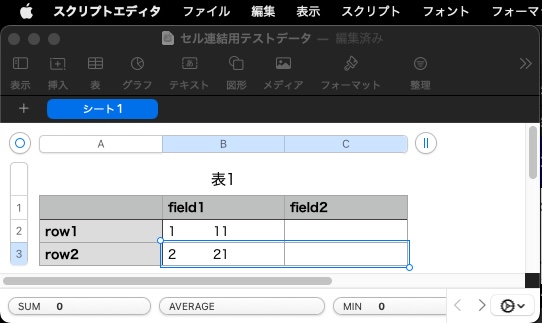
こんなサンプル書類があったとして、
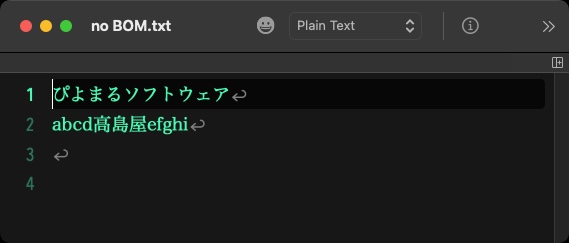
AppleScriptのdocumentオブジェクトの文字データを取得してダンプしてみても、
--No BOM
{"E3", "81", "B4", "E3", "82", "88", "E3", "81", "BE", "E3", "82", "8B", "E3", "82", "BD", "E3", "83", "95", "E3", "83", "88", "E3", "82", "A6", "E3", "82", "A7", "E3", "82", "A2", "0A", "61", "62", "63", "64", "E9", "AB", "98", "E5", "B3", "B6", "E5", "B1", "8B", "65", "66", "67", "68", "69", "0A", "0A"}

--with BOM
{"E3", "81", "B4", "E3", "82", "88", "E3", "81", "BE", "E3", "82", "8B", "E3", "82", "BD", "E3", "83", "95", "E3", "83", "88", "E3", "82", "A6", "E3", "82", "A7", "E3", "82", "A2", "0A", "61", "62", "63", "64", "E9", "AB", "98", "E5", "B3", "B6", "E5", "B1", "8B", "65", "66", "67", "68", "69", "0A", "0A"}
この状態ではhasBOM属性値で差があっても、内部データでは差が出ません。これをファイルに書き込んで、ファイル内容についてチェックを行うと、
--No BOM
0000000 81e3 e3b4 8882 81e3 e3be 8b82 82e3 e3bd
0000010 9583 83e3 e388 a682 82e3 e3a7 a282 610a
0000020 6362 e964 98ab b3e5 e5b6 8bb1 6665 6867
0000030 0a69 000a
0000033

--With BOM
0000000 bbef e3bf b481 82e3 e388 be81 82e3 e38b
0000010 bd82 83e3 e395 8883 82e3 e3a6 a782 82e3
0000020 0aa2 6261 6463 abe9 e598 b6b3 b1e5 658b
0000030 6766 6968 0a0a
0000036
のように、差を検出できます。


%20of%20me%0Dset%20aParam%20to%20urlDict's%20valueForKey:%22v%22%0Dif%20aParam%20=%20missing%20value%20then%20return%0D%0Dset%20imgURL%20to%20%22https://i1.ytimg.com/vi/%22%20&%20(aParam%20as%20string)%20&%20%22/mqdefault.jpg%22%0Dset%20newURL%20to%20%7CNSURL%7C's%20URLWithString:imgURL%0Dset%20aImg%20to%20NSImage's%20alloc()'s%20initWithContentsOfURL:newURL%0D%0Dset%20imgPath%20to%20(POSIX%20path%20of%20(path%20to%20pictures%20folder)%20&%20((aParam%20as%20string)%20&%20%22_%22)%20&%20(NSUUID's%20UUID()'s%20UUIDString())%20as%20string)%20&%20%22.png%22%0D%0D--Save%0DsaveNSImageAtPathAsPNG(aImg,%20imgPath)%20of%20me%0D%0D--Display%0DdispImage(aImg,%20%22YouTube%20thumbnail%22)%20of%20imgLib%0D%0D%0Don%20parseURLParamsAsDict(aURL)%0D%09set%20components%20to%20NSURLComponents's%20alloc()'s%20initWithString:aURL%0D%09set%20qList%20to%20(components's%20query())'s%20componentsSeparatedByString:%22&%22%0D%09%0D%09set%20paramRec%20to%20NSMutableDictionary's%20dictionary()%0D%09%0D%09repeat%20with%20i%20in%20qList%0D%09%09set%20keyAndValues%20to%20(i's%20componentsSeparatedByString:%22=%22)%0D%09%09(paramRec's%20setObject:(keyAndValues's%20objectAtIndex:1)%20forKey:(keyAndValues's%20objectAtIndex:0))%0D%09end%20repeat%0D%09%0D%09return%20paramRec%0Dend%20parseURLParamsAsDict%0D%0D%0D--NSImage%E3%82%92%E6%8C%87%E5%AE%9A%E3%83%91%E3%82%B9%E3%81%ABPNG%E5%BD%A2%E5%BC%8F%E3%81%A7%E4%BF%9D%E5%AD%98%0Don%20saveNSImageAtPathAsPNG(anImage,%20outPath)%0D%09set%20imageRep%20to%20anImage's%20TIFFRepresentation()%0D%09set%20aRawimg%20to%20NSBitmapImageRep's%20imageRepWithData:imageRep%0D%09%0D%09set%20pathString%20to%20NSString's%20stringWithString:outPath%0D%09set%20newPath%20to%20pathString's%20stringByExpandingTildeInPath()%0D%09%0D%09set%20myNewImageData%20to%20(aRawimg's%20representationUsingType:(NSPNGFileType)%20%7Cproperties%7C:(missing%20value))%0D%09set%20aRes%20to%20(myNewImageData's%20writeToFile:newPath%20atomically:true)%20as%20boolean%0D%09%0D%09return%20aRes%20--%E6%88%90%E5%8A%9F%E3%81%AA%E3%82%89true%E3%80%81%E5%A4%B1%E6%95%97%E3%81%AA%E3%82%89false%E3%81%8C%E8%BF%94%E3%82%8B%0Dend%20saveNSImageAtPathAsPNG)