Menu

Skip to content
AppleScriptの穴
  • Home
  • Products
  • Books
  • Docs
  • Events
  • Forum
  • About This Blog
  • License
  • 仕事依頼

AppleScriptの穴

Useful & Practical AppleScript archive. Click '★Click Here to Open This Script' Link to download each AppleScript

タグ: 10.11savvy

アラートダイアログの背景色を指定してTable Viewを表示

Posted on 2月 25, 2019 by Takaaki Naganoya

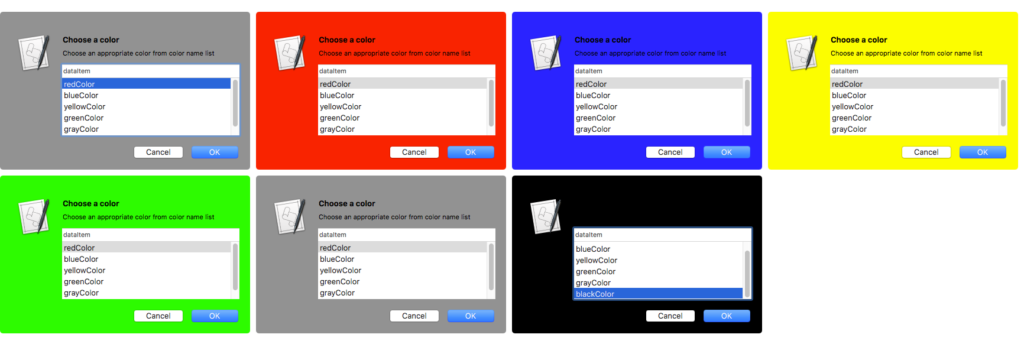
指定色のアラートダイアログを作成し、その上にScroll View+Table Viewを表示して選択肢の選択を行うAppleScriptです。

アラートダイアログの背景色変更のテストを行なったものです。また、メソッド名をテキストで(Table Viewから)取得し、そのメソッド名で色を作成するテスト(NSSelectorFromString)も行いました。

Table Viewで選択した色は、次回実行時に反映されます(スクリプトエディタ/Script Debugger上で)。

本当はTable View上で行を選択したときに、アラートダイアログの背景色を変更させたかったのですが、試してみたもののうまく動かなかったので、その機能は削りました。最初から指定色のダイアログウィンドウを表示するだけなら問題はないので、現状のようなコードに落ち着きました。

AppleScript名:アラートダイアログの背景色を指定してTable Viewを表示
— Created 2019-02-25 by Takaaki Naganoya
— 2019 Piyomaru Software
use AppleScript version "2.5"
use scripting additions
use framework "Foundation"
use framework "AppKit"

property NSAlert : a reference to current application’s NSAlert
property NSColor : a reference to current application’s NSColor
property NSIndexSet : a reference to current application’s NSIndexSet
property NSScrollView : a reference to current application’s NSScrollView
property NSTableView : a reference to current application’s NSTableView
property NSTableColumn : a reference to current application’s NSTableColumn
property NSMutableArray : a reference to current application’s NSMutableArray
property NSRunningApplication : a reference to current application’s NSRunningApplication
property NSAlertSecondButtonReturn : a reference to current application’s NSAlertSecondButtonReturn
property NSFullSizeContentViewWindowMask : a reference to current application’s NSFullSizeContentViewWindowMask

property theResult : 0
property returnCode : 0
property theDataSource : {}
property theColList : {}
property theWindow : missing value
property selectedColor : missing value

set paramObj to {myMessage:"Choose a color", mySubMessage:"Choose an appropriate color from color name list", aTableList:{"redColor", "blueColor", "yellowColor", "greenColor", "grayColor", "blackColor"}}
set aRes to my chooseItemByTableView:paramObj

on chooseItemByTableView:paramObj
  set aMainMes to myMessage of paramObj
  
set aSubMes to mySubMessage of paramObj
  
set aTList to (aTableList of paramObj) as list
  
  
— make table view with scroll view
  
set aScrollWithTable to makeTableView(aTList, 300, 120) of me
  
  
— set up alert  
  
set theAlert to NSAlert’s alloc()’s init()
  
tell theAlert
    its setMessageText:aMainMes
    
its setInformativeText:aSubMes
    
its addButtonWithTitle:"OK"
    
its addButtonWithTitle:"Cancel"
    
its setAccessoryView:aScrollWithTable
  end tell
  
  
— customize alert’s window style and color
  
if selectedColor = missing value then
    set tmpColor to NSColor’s grayColor()
  else
    set tmpSel to current application’s NSSelectorFromString(selectedColor)
    
set tmpColor to NSColor’s performSelector:tmpSel
  end if
  
  
set theWindow to theAlert’s |window|()
  
theWindow’s setTitleVisibility:false
  
–theWindow’s setStyleMask:( NSFullSizeContentViewWindowMask)
  
theWindow’s setTitlebarAppearsTransparent:true
  
theWindow’s setBackgroundColor:tmpColor
  
  
— show alert in modal loop
  
NSRunningApplication’s currentApplication()’s activateWithOptions:0
  
my performSelectorOnMainThread:"doModal:" withObject:(theAlert) waitUntilDone:true
  
if (my returnCode as number) = 1001 then error number -128
  
  
return (aScrollWithTable’s documentView’s selectedRow()) + 1
end chooseItemByTableView:

on doModal:aParam
  set (my returnCode) to aParam’s runModal()
end doModal:

on makeTableView(aList as list, aWidth as number, aHeight as number)
  set aOffset to 40
  
  
set sourceList to {}
  
repeat with i in aList
    set the end of sourceList to {dataItem:(contents of i)}
  end repeat
  
  
set theDataSource to NSMutableArray’s alloc()’s init()
  
theDataSource’s addObjectsFromArray:sourceList
  
  
set aScroll to NSScrollView’s alloc()’s initWithFrame:(current application’s NSMakeRect(0, aOffset, aWidth, aHeight))
  
set aView to NSTableView’s alloc()’s initWithFrame:(current application’s NSMakeRect(0, aOffset, aWidth, aHeight))


set aColumn to (NSTableColumn’s alloc()’s initWithIdentifier:"dataItem")
  (
aColumn’s setWidth:aWidth)
  (
aColumn’s headerCell()’s setStringValue:"dataItem")
  (
aView’s addTableColumn:aColumn)
  
  
aView’s setDelegate:me
  
aView’s setDataSource:me
  
aView’s reloadData()
  
  
aScroll’s setDocumentView:aView
  
aView’s enclosingScrollView()’s setHasVerticalScroller:true
  
  
–1行目を選択
  
set aIndexSet to NSIndexSet’s indexSetWithIndex:0
  
aView’s selectRowIndexes:aIndexSet byExtendingSelection:false
  
  
–強制的にトップにスクロール
  
set aDBounds to aScroll’s documentView()’s |bounds|()
  
if class of aDBounds = list then
    –macOS 10.13 or later
    
set maxHeight to item 2 of item 1 of aDBounds
  else
    –macOS 10.10….10.12
    
set maxHeight to height of |size| of aDBounds
  end if
  
  
set aPT to current application’s NSMakePoint(0.0, -40.0) —— (aScroll’s documentView()’s |bounds|()’s |size|()’s height))
  
aScroll’s documentView()’s scrollPoint:aPT
  
  
return aScroll
end makeTableView

–TableView Event Handlers
on numberOfRowsInTableView:aView
  return my theDataSource’s |count|()
end numberOfRowsInTableView:

on tableView:aView objectValueForTableColumn:aColumn row:aRow
  set selRow to (aRow as number)
  
set aRec to (my theDataSource)’s objectAtIndex:selRow
  
set aTitle to (aColumn’s headerCell()’s title()) as string
  
set aRes to (aRec’s valueForKey:aTitle) as string
  
set my selectedColor to aRes
  
  
return aRes
end tableView:objectValueForTableColumn:row:

on tableView:aView shouldEditTableColumn:aTableColumn row:rowIndex
  return false –Not Editable
end tableView:shouldEditTableColumn:row:

★Click Here to Open This Script 

Posted in Color GUI list | Tagged 10.11savvy 10.12savvy 10.13savvy 10.14savvy NSAlert NSAlertSecondButtonReturn NSColor NSFullSizeContentViewWindowMask NSIndexSet NSMutableArray NSRunningApplication NSScrollView NSTableColumn NSTableView | Leave a comment
アラートダイアログ上にTable View+Map View+Segmented Controlを表示

Posted on 2月 23, 2019 by Takaaki Naganoya

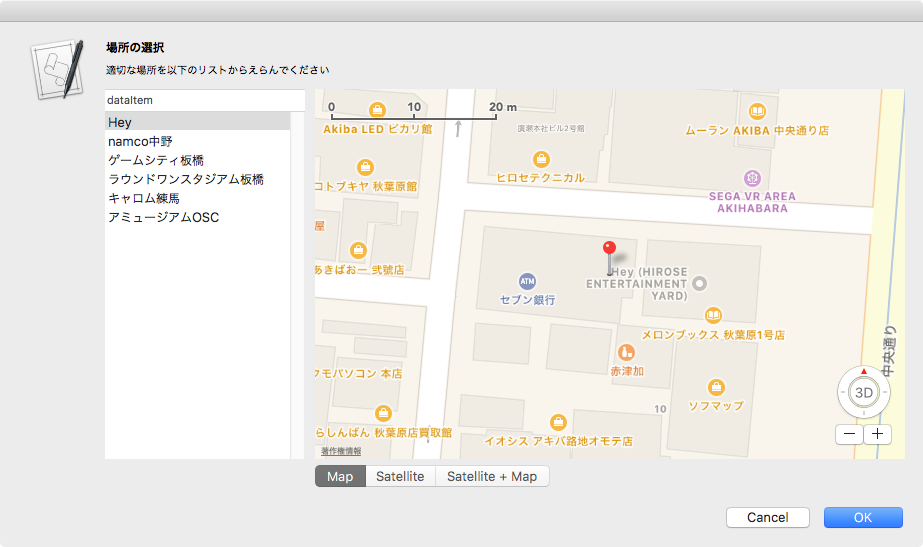
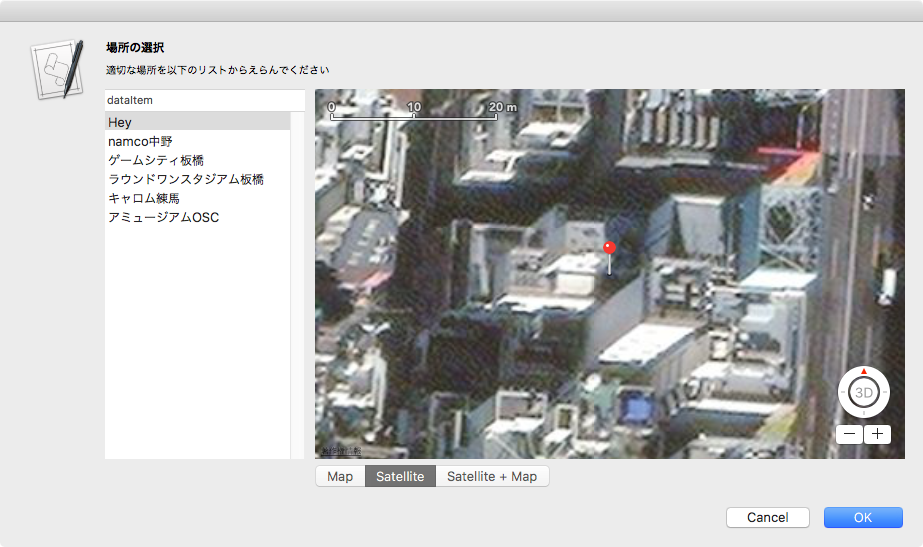
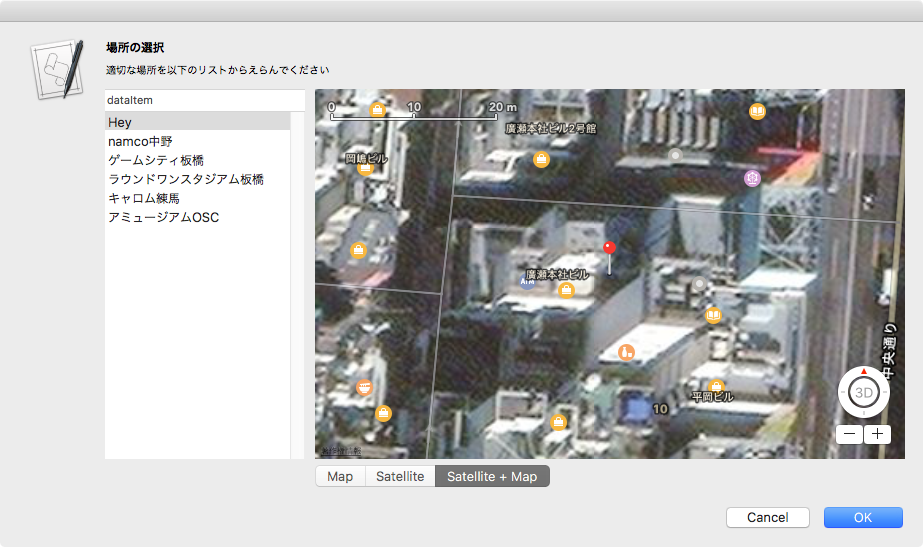
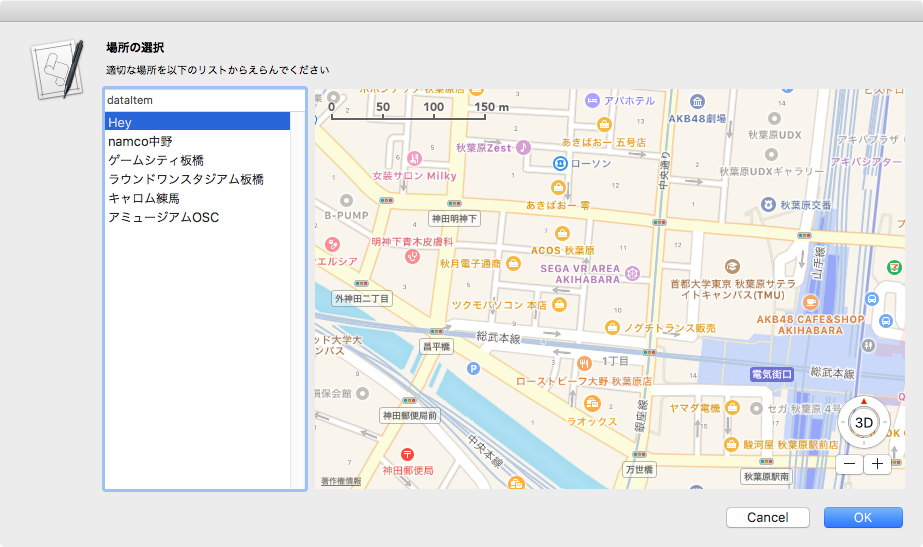
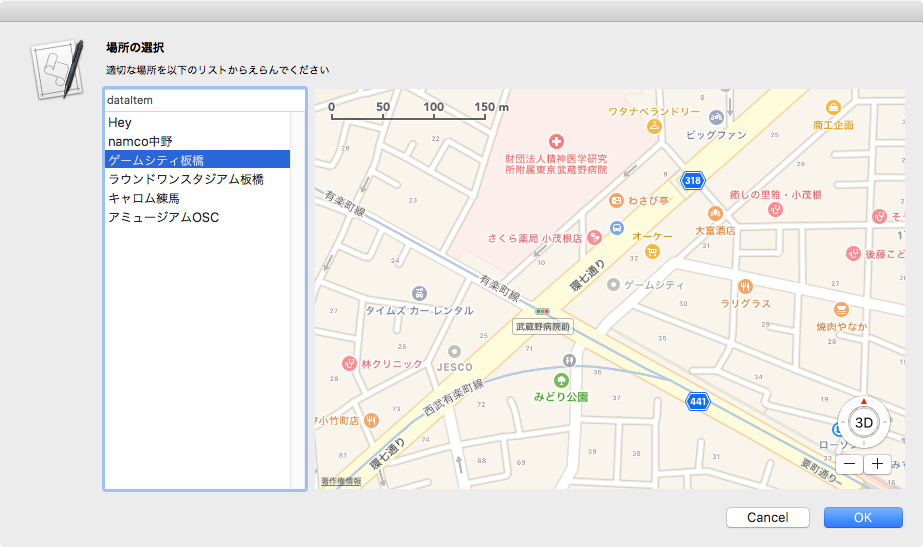
アラートダイアログを作成し、その上にScroll View+Table ViewおよびMap Viewを表示して選択肢の選択を行うAppleScriptです。Segmented Controlで地図の種別切り替えを行い、項目選択用のTable Viewを編集不可にしました。

Map Viewを使用するために、インターネット接続が必要です。地図表示パフォーマンスはインターネット接続速度次第です。


▲Map Type = Standard (Map)


▲Map Type = Satellite


▲Map Type = Hybrid (Satellite + Map)

本Scriptに与える緯度・経度情報についてはあらかじめ住所ジオコーダーによって「住所情報→緯度・経度情報」の変換を行なったものを書いておく必要がありますが、Yahoo!の住所ジオコーダーサービスなどを呼び出せば、住所情報をパラメーターとすることも可能です。

サンプルデータの緯度・経度情報は、例によって「戦場の絆」の入っている近所のゲーセンの情報を適当にみつくろって入れてみたものです。

本ダイアログは、それほど件数の多くない(20件ぐらい?)選択肢からの選択を意図して作ったものですが、数百件とか数千件のデータから選ぶような場合には、Outline Viewを利用して小エリアごとに分割するとか、Search Fieldを連動させてキーワードによる絞り込みを有効にするなど、それなりの対処が必要です。

AppleScript名:アラートダイアログ上にTable View+Map View+Segmented Controlを表示
— Created 2019-02-23 by Takaaki Naganoya
— 2019 Piyomaru Software
use AppleScript version "2.5"
use scripting additions
use framework "Foundation"
use framework "AppKit"
use framework "MapKit"

property NSAlert : a reference to current application’s NSAlert
property NSIndexSet : a reference to current application’s NSIndexSet
property MKMapView : a reference to current application’s MKMapView
property NSScrollView : a reference to current application’s NSScrollView
property NSTableView : a reference to current application’s NSTableView
property NSTableColumn : a reference to current application’s NSTableColumn
property NSMutableArray : a reference to current application’s NSMutableArray
property MKPointAnnotation : a reference to current application’s MKPointAnnotation
property NSSegmentedControl : a reference to current application’s NSSegmentedControl
property NSRunningApplication : a reference to current application’s NSRunningApplication
property NSAlertSecondButtonReturn : a reference to current application’s NSAlertSecondButtonReturn
property NSSegmentStyleTexturedRounded : a reference to current application’s NSSegmentStyleTexturedRounded

property MKMapTypeHybrid : a reference to current application’s MKMapTypeHybrid
property MKMapTypeSatellite : a reference to current application’s MKMapTypeSatellite
property MKMapTypeStandard : a reference to current application’s MKMapTypeStandard

property zLevel : 21 –Map Zoom Level (0:World View, 21:House/Building Zoom View)
property aMaxViewWidth : 800
property theResult : 0
property returnCode : 0
property theDataSource : {}
property curRow : 0
property aMapView : missing value
property nameL : {}
property placeL : {}

set aPlaceList to {{placeName:"Hey", aLat:"35.69906613", aLong:"139.77084064"}, {placeName:"namco中野", aLat:"35.70859274", aLong:"139.66584339"}, {placeName:"ゲームシティ板橋", aLat:"35.74572771", aLong:"139.67553260"}, {placeName:"ラウンドワンスタジアム板橋", aLat:"35.77661583", aLong:"139.67864491"}, {placeName:"キャロム練馬", aLat:"35.76386421", aLong:"139.66591600"}, {placeName:"アミュージアムOSC", aLat:"35.75308308", aLong:"139.59476696"}}

set paramObj to {myMessage:"場所の選択", mySubMessage:"適切な場所を以下のリストからえらんでください", placeList:aPlaceList}
my performSelectorOnMainThread:"chooseItemByTableViewWithMapAndSegment:" withObject:(paramObj) waitUntilDone:true
if (my theResult) = 0 then error number -128
return (my theResult)

on chooseItemByTableViewWithMapAndSegment:paramObj
  set aMainMes to myMessage of paramObj
  
set aSubMes to mySubMessage of paramObj
  
set aTList to (placeList of paramObj) as list
  
  
set nameL to {}
  
set placeL to {}
  
repeat with i in aTList
    set the end of nameL to (placeName of i)
    
set the end of placeL to {contents of (aLat of i), contents of (aLong of i)}
  end repeat
  
  
— create a view
  
set theView to current application’s NSView’s alloc()’s initWithFrame:(current application’s NSMakeRect(0, 0, aMaxViewWidth, 400))
  
  
— make table view with scroll view
  
set aScrollWithTable to makeTableView(nameL, 200, 400) of me
  
  
set aMapView to MKMapView’s alloc()’s initWithFrame:(current application’s NSMakeRect(210, 30, aMaxViewWidth – 210, 370))
  
tell aMapView
    its setMapType:MKMapTypeStandard
    
its setZoomEnabled:true
    
its setScrollEnabled:true
    
its setPitchEnabled:true
    
its setRotateEnabled:true
    
its setShowsCompass:true
    
its setShowsZoomControls:true
    
its setShowsScale:true
    
its setShowsUserLocation:true
    
    
set aLocation to current application’s CLLocationCoordinate2DMake((first item of first item of placeL) as real, (second item of first item of placeL) as real)
    
its setCenterCoordinate:aLocation zoomLevel:(zLevel) animated:false
    
its setDelegate:me
  end tell
  
  
–MapにPinを追加
  
repeat with i from 1 to (length of nameL)
    set tmpAdr to contents of item i of nameL
    
copy item i of placeL to {tmpLat, tmpLong}
    
    
set aLocation to current application’s CLLocationCoordinate2DMake(tmpLat as real, tmpLong as real)
    
set anAnnotation to MKPointAnnotation’s alloc()’s init()
    (
anAnnotation’s setCoordinate:aLocation)
    (
anAnnotation’s setTitle:tmpAdr)
    (
aMapView’s addAnnotation:anAnnotation)
  end repeat
  
  
–Segmented Controlをつくる
  
set segTitleList to {"Map", "Satellite", "Satellite + Map"}
  
set aSeg to makeSegmentedControl(segTitleList, 210, 0, 150, 20) of me
  
  
theView’s setSubviews:{aScrollWithTable, aMapView, aSeg}
  
  
— set up alert  
  
set theAlert to NSAlert’s alloc()’s init()
  
tell theAlert
    its setMessageText:aMainMes
    
its setInformativeText:aSubMes
    
its addButtonWithTitle:"OK"
    
its addButtonWithTitle:"Cancel"
    
its setAccessoryView:theView
  end tell
  
  
–To enable the first annotation visible
  
copy item 1 of placeL to {tmpLat, tmpLong}
  
set aLocation to current application’s CLLocationCoordinate2DMake(tmpLat as real, tmpLong as real)
  
aMapView’s setCenterCoordinate:aLocation zoomLevel:(zLevel) animated:false
  
  
— show alert in modal loop
  
NSRunningApplication’s currentApplication()’s activateWithOptions:0
  
my performSelectorOnMainThread:"doModal:" withObject:(theAlert) waitUntilDone:true
  
  
set (my theResult) to (aScrollWithTable’s documentView’s selectedRow()) + 1
end chooseItemByTableViewWithMapAndSegment:

on doModal:aParam
  set (my returnCode) to aParam’s runModal()
end doModal:

on makeTableView(aList as list, aWidth as number, aHeight as number)
  set aOffset to 0
  
  
set sourceList to {}
  
repeat with i in aList
    set the end of sourceList to {dataItem:(contents of i)}
  end repeat
  
  
set theDataSource to NSMutableArray’s alloc()’s init()
  
theDataSource’s addObjectsFromArray:sourceList
  
  
set aScroll to NSScrollView’s alloc()’s initWithFrame:(current application’s NSMakeRect(0, 30, aWidth, aHeight – 30))
  
set aView to NSTableView’s alloc()’s initWithFrame:(current application’s NSMakeRect(0, 30, aWidth, aHeight – 30))


set aColumn to (NSTableColumn’s alloc()’s initWithIdentifier:"dataItem")
  (
aColumn’s setWidth:aWidth)
  (
aColumn’s headerCell()’s setStringValue:"dataItem")
  (
aView’s addTableColumn:aColumn)
  
  
aView’s setDelegate:me
  
aView’s setDataSource:me
  
aView’s reloadData()
  
  
aScroll’s setDocumentView:aView
  
aView’s enclosingScrollView()’s setHasVerticalScroller:true
  
  
–1行目を選択
  
set aIndexSet to NSIndexSet’s indexSetWithIndex:0
  
aView’s selectRowIndexes:aIndexSet byExtendingSelection:false
  
  
–強制的にトップにスクロール
  
set aDBounds to aScroll’s documentView()’s |bounds|()
  
if class of aDBounds = list then
    –macOS 10.13 or later
    
set maxHeight to item 2 of item 1 of aDBounds
  else
    –macOS 10.10, 10.11, 10.12
    
set maxHeight to height of |size| of aDBounds
  end if
  
  
set aPT to current application’s NSMakePoint(0.0, -40.0) —— (aScroll’s documentView()’s |bounds|()’s |size|()’s height))
  
aScroll’s documentView()’s scrollPoint:aPT
  
  
return aScroll
end makeTableView

–TableView Event Handlers
on numberOfRowsInTableView:aView
  return my theDataSource’s |count|()
end numberOfRowsInTableView:

on tableView:aView objectValueForTableColumn:aColumn row:aRow
  set (tmpRow) to aView’s selectedRow() as number
  
  
–Table View上で現在選択行「以外の」行が選択されたら、Mapを選択項目で更新
  
if (my curRow) is not equal to tmpRow then
    set tmpLat to (first item of item (tmpRow + 1) of placeL) as real
    
set tmpLong to (second item of item (tmpRow + 1) of placeL) as real
    
    
tell aMapView
      set aLocation to current application’s CLLocationCoordinate2DMake(tmpLat, tmpLong)
      
its setCenterCoordinate:aLocation zoomLevel:(zLevel) animated:false
    end tell
    
    
set (my curRow) to tmpRow
  end if
  
  
set aRec to (my theDataSource)’s objectAtIndex:(aRow as number)
  
set aTitle to (aColumn’s headerCell()’s title()) as string
  
set aRes to (aRec’s valueForKey:aTitle)
  
return aRes
end tableView:objectValueForTableColumn:row:

on tableView:aView shouldEditTableColumn:aTableColumn row:rowIndex
  return false –Not Editable
end tableView:shouldEditTableColumn:row:

–Segmented Controlをつくる
on makeSegmentedControl(titleList, startX, startY, aWidth, aHeight)
  set aLen to length of titleList
  
  
set aSeg to NSSegmentedControl’s alloc()’s init()
  
aSeg’s setSegmentCount:aLen
  
  
set aCount to 0
  
repeat with i in titleList
    set j to contents of i
    (
aSeg’s setLabel:j forSegment:aCount)
    
set aCount to aCount + 1
  end repeat
  
  
aSeg’s setTranslatesAutoresizingMaskIntoConstraints:false
  
aSeg’s setSegmentStyle:(NSSegmentStyleTexturedRounded)
  
aSeg’s setFrame:(current application’s NSMakeRect(startX, startY, aWidth, aHeight))
  
aSeg’s setTrackingMode:0
  
aSeg’s setTarget:me
  
aSeg’s setAction:"clickedSeg:"
  
aSeg’s setSelectedSegment:0
  
  
return aSeg
end makeSegmentedControl

–Segmented Controlのクリック時のイベントハンドラ
on clickedSeg:aSender
  set aSel to aSender’s selectedSegment()
  
set tList to {MKMapTypeStandard, MKMapTypeSatellite, MKMapTypeHybrid}
  
set tmpType to contents of item (aSel + 1) of tList
  
  
aMapView’s setMapType:(tmpType)
  
  
set selSeg to aSel
end clickedSeg:

★Click Here to Open This Script 

Posted in geolocation GUI | Tagged 10.11savvy 10.12savvy 10.13savvy 10.14savvy MKMapView MKPointAnnotation NSAlert NSAlertSecondButtonReturn NSIndexSet NSMutableArray NSRunningApplication NSScrollView NSSegmentedControl NSSegmentStyleTexturedRounded NSTableColumn NSTableView | Leave a comment

アラートダイアログ上にTable View+Map Viewを表示

Posted on 2月 22, 2019 by Takaaki Naganoya

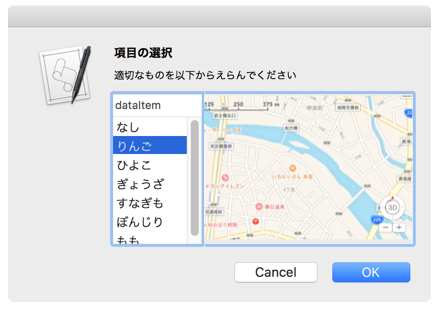
アラートダイアログを作成し、その上にScroll View+Table ViewおよびMap Viewを表示して選択肢の選択を行うAppleScriptです。

Map Viewを使用するために、インターネット接続が必要です。地図表示パフォーマンスはインターネット接続速度次第です。

{{placeName:"Hey", aLat:"35.69906613", aLong:"139.77084064"}....}

のように位置データを、

名称, 緯度, 経度

とまとめたリストで選択肢を指定します。実行すると選択肢のアイテム番号(1からはじまる)を返してきます。


▲左から、macOS 10.12.6、10.13.6、10.14.4betaで同じAppleScriptを動かしたところ。同じ場所、同じZoom LevelでもOSバージョンごとに微妙に表示内容が違う

現状の実装では、表UI(Table View)内のデータがダブルクリックで編集できてしまうので、編集できないようにするあたりが改良対象でしょうか。あと、地図・衛星写真の切り替えもつけておくとよいでしょう。

本Scriptに与える緯度・経度情報についてはあらかじめ住所ジオコーダーによって「住所情報→緯度・経度情報」の変換を行なったものを書いておく必要がありますが、Yahoo!の住所ジオコーダーサービスなどを呼び出せば、住所情報をパラメーターとすることも可能です。

サンプルデータの緯度・経度情報は、例によって「戦場の絆」の入っている近所のゲーセンの情報を適当にみつくろって入れてみたものです。

AppleScript名:アラートダイアログ上にTable View+Map Viewを表示 v2
— Created 2019-02-22 by Takaaki Naganoya
— 2019 Piyomaru Software
use AppleScript version "2.5"
use scripting additions
use framework "Foundation"
use framework "AppKit"
use framework "MapKit"

property NSAlert : a reference to current application’s NSAlert
property NSIndexSet : a reference to current application’s NSIndexSet
property MKMapView : a reference to current application’s MKMapView
property NSScrollView : a reference to current application’s NSScrollView
property NSTableView : a reference to current application’s NSTableView
property NSTableColumn : a reference to current application’s NSTableColumn
property NSMutableArray : a reference to current application’s NSMutableArray
property NSRunningApplication : a reference to current application’s NSRunningApplication
property NSAlertSecondButtonReturn : a reference to current application’s NSAlertSecondButtonReturn

property zLevel : 18
property aMaxViewWidth : 800
property theResult : 0
property returnCode : 0
property theDataSource : {}
property curRow : 0
property aMapView : missing value
property nameL : {}
property placeL : {}

set aPlaceList to {{placeName:"Hey", aLat:"35.69906613", aLong:"139.77084064"}, {placeName:"namco中野", aLat:"35.70859274", aLong:"139.66584339"}, {placeName:"ゲームシティ板橋", aLat:"35.74572771", aLong:"139.67553260"}, {placeName:"ラウンドワンスタジアム板橋", aLat:"35.77661583", aLong:"139.67864491"}, {placeName:"キャロム練馬", aLat:"35.76386421", aLong:"139.66591600"}, {placeName:"アミュージアムOSC", aLat:"35.75308308", aLong:"139.59476696"}}

set paramObj to {myMessage:"場所の選択", mySubMessage:"適切な場所を以下のリストからえらんでください", placeList:aPlaceList}
my performSelectorOnMainThread:"chooseItemByTableViewWithMap:" withObject:(paramObj) waitUntilDone:true
return (my theResult)

on chooseItemByTableViewWithMap:paramObj
  set aMainMes to myMessage of paramObj
  
set aSubMes to mySubMessage of paramObj
  
set aTList to (placeList of paramObj) as list
  
  
set nameL to {}
  
set placeL to {}
  
repeat with i in aTList
    set the end of nameL to (placeName of i)
    
set the end of placeL to {contents of (aLat of i), contents of (aLong of i)}
  end repeat
  
  
— create a view
  
set theView to current application’s NSView’s alloc()’s initWithFrame:(current application’s NSMakeRect(0, 0, aMaxViewWidth, 400))
  
  
— make table view with scroll view
  
set aScrollWithTable to makeTableView(nameL, 200, 400) of me
  
  
set aMapView to MKMapView’s alloc()’s initWithFrame:(current application’s NSMakeRect(210, 0, aMaxViewWidth – 210, 400))
  
tell aMapView
    its setMapType:(current application’s MKMapTypeStandard)
    
its setZoomEnabled:true
    
its setScrollEnabled:true
    
its setPitchEnabled:true
    
its setRotateEnabled:true
    
its setShowsCompass:true
    
its setShowsZoomControls:true
    
its setShowsScale:true
    
its setShowsUserLocation:true
    
    
set aLocation to current application’s CLLocationCoordinate2DMake((first item of first item of placeL) as real, (second item of first item of placeL) as real)
    
    
its setCenterCoordinate:aLocation zoomLevel:(zLevel) animated:false
    
its setDelegate:me
  end tell
  
  
theView’s setSubviews:{aScrollWithTable, aMapView}
  
  
— set up alert  
  
set theAlert to NSAlert’s alloc()’s init()
  
tell theAlert
    its setMessageText:aMainMes
    
its setInformativeText:aSubMes
    
its addButtonWithTitle:"OK"
    
its addButtonWithTitle:"Cancel"
    
its setAccessoryView:theView
  end tell
  
  
— show alert in modal loop
  
NSRunningApplication’s currentApplication()’s activateWithOptions:0
  
my performSelectorOnMainThread:"doModal:" withObject:(theAlert) waitUntilDone:true
  
if (my returnCode as number) = 1001 then error number -128
  
  
set (my theResult) to (aScrollWithTable’s documentView’s selectedRow()) + 1
end chooseItemByTableViewWithMap:

on doModal:aParam
  set (my returnCode) to aParam’s runModal()
end doModal:

on makeTableView(aList as list, aWidth as number, aHeight as number)
  set aOffset to 0
  
  
set sourceList to {}
  
repeat with i in aList
    set the end of sourceList to {dataItem:(contents of i)}
  end repeat
  
  
set theDataSource to NSMutableArray’s alloc()’s init()
  
theDataSource’s addObjectsFromArray:sourceList
  
  
set aScroll to NSScrollView’s alloc()’s initWithFrame:(current application’s NSMakeRect(0, aOffset, aWidth, aHeight))
  
set aView to NSTableView’s alloc()’s initWithFrame:(current application’s NSMakeRect(0, aOffset, aWidth, aHeight))


set aColumn to (NSTableColumn’s alloc()’s initWithIdentifier:"dataItem")
  (
aColumn’s setWidth:aWidth)
  (
aColumn’s headerCell()’s setStringValue:"dataItem")
  (
aView’s addTableColumn:aColumn)
  
  
aView’s setDelegate:me
  
aView’s setDataSource:me
  
aView’s reloadData()
  
  
aScroll’s setDocumentView:aView
  
aView’s enclosingScrollView()’s setHasVerticalScroller:true
  
  
–1行目を選択
  
set aIndexSet to NSIndexSet’s indexSetWithIndex:0
  
aView’s selectRowIndexes:aIndexSet byExtendingSelection:false
  
  
–強制的にトップにスクロール
  
–強制的にトップにスクロール
  
–set maxHeight to aScroll’s documentView()’s |bounds|()’s |size|()’s height
  
set aDBounds to aScroll’s documentView()’s |bounds|()
  
if class of aDBounds = list then
    –macOS 10.13 or later
    
set maxHeight to item 2 of item 1 of aDBounds
  else
    –macOS 10.10….10.12
    
set maxHeight to height of |size| of aDBounds
  end if
  
  
set aPT to current application’s NSMakePoint(0.0, -40.0) —— (aScroll’s documentView()’s |bounds|()’s |size|()’s height))
  
aScroll’s documentView()’s scrollPoint:aPT
  
  
return aScroll
end makeTableView

–TableView Event Handlers
on numberOfRowsInTableView:aView
  return my theDataSource’s |count|()
end numberOfRowsInTableView:

on tableView:aView objectValueForTableColumn:aColumn row:aRow
  set (tmpRow) to aView’s selectedRow() as number
  
  
–Table View上で現在選択行「以外の」行が選択されたら、Mapを選択項目で更新
  
if (my curRow) is not equal to tmpRow then
    set tmpLat to (first item of item (tmpRow + 1) of placeL) as real
    
set tmpLong to (second item of item (tmpRow + 1) of placeL) as real
    
    
tell aMapView
      set aLocation to current application’s CLLocationCoordinate2DMake(tmpLat, tmpLong)
      
its setCenterCoordinate:aLocation zoomLevel:(zLevel) animated:false
    end tell
    
    
set (my curRow) to tmpRow
  end if
  
  
set aRec to (my theDataSource)’s objectAtIndex:(aRow as number)
  
set aTitle to (aColumn’s headerCell()’s title()) as string
  
set aRes to (aRec’s valueForKey:aTitle)
  
return aRes
end tableView:objectValueForTableColumn:row:

★Click Here to Open This Script 

Posted in geolocation GUI list | Tagged 10.11savvy 10.12savvy 10.13savvy 10.14savvy MKMapView NSAlert NSAlertSecondButtonReturn NSIndexSet NSMutableArray NSRunningApplication NSScrollView NSTableColumn NSTableView | Leave a comment

アラートダイアログ上にTable Viewを表示

Posted on 2月 22, 2019 by Takaaki Naganoya

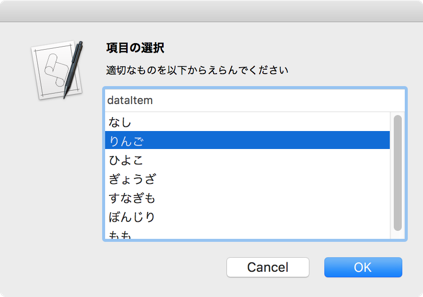
アラートダイアログを作成し、その上にScroll View+Table Viewを表示して選択肢の選択を行うAppleScriptです。

1D List(1次元配列)を与え、選択を行うUIです。実行すると選択肢のアイテム番号(1からはじまる)を返してきます。

とくにこれが作りたかったのではなく、位置情報(Geo Location)の選択をTable Viewで行い、該当する場所をMap Viewに表示させると擬似的に複数の固定位置情報から任意のものを選択させるダイアログが作れるだろうかと思って作成した試作品です。

東京への引っ越しの荷物が到着して、ようやく検証用のサブマシンが届いたものの、ネットワークを新規敷設しなくてはならないのでぼちぼちです。

AppleScript名:アラートダイアログ上にTable Viewを表示 v3
— Created 2019-02-21 by Takaaki Naganoya
— 2019 Piyomaru Software
use AppleScript version "2.5"
use scripting additions
use framework "Foundation"
use framework "AppKit"

property NSAlert : a reference to current application’s NSAlert
property NSIndexSet : a reference to current application’s NSIndexSet
property NSScrollView : a reference to current application’s NSScrollView
property NSTableView : a reference to current application’s NSTableView
property NSTableColumn : a reference to current application’s NSTableColumn
property NSMutableArray : a reference to current application’s NSMutableArray
property NSRunningApplication : a reference to current application’s NSRunningApplication
property NSAlertSecondButtonReturn : a reference to current application’s NSAlertSecondButtonReturn

property theResult : 0
property returnCode : 0
property theDataSource : {}

set paramObj to {myMessage:"項目の選択", mySubMessage:"適切なものを以下からえらんでください", aTableList:{"なし", "りんご", "ひよこ", "ぎょうざ", "すなぎも", "ぼんじり", "もも"}}
set aRes to my chooseItemByTableView:paramObj

on chooseItemByTableView:paramObj
  set aMainMes to myMessage of paramObj
  
set aSubMes to mySubMessage of paramObj
  
set aTList to (aTableList of paramObj) as list
  
  
–define the matrix size where you’ll put the radio buttons
  
set aScrollWithTable to makeTableView(aTList, 300, 150) of me
  
  
— set up alert  
  
set theAlert to NSAlert’s alloc()’s init()
  
tell theAlert
    its setMessageText:aMainMes
    
its setInformativeText:aSubMes
    
its addButtonWithTitle:"OK"
    
its addButtonWithTitle:"Cancel"
    
its setAccessoryView:aScrollWithTable
  end tell
  
  
— show alert in modal loop
  
NSRunningApplication’s currentApplication()’s activateWithOptions:0
  
my performSelectorOnMainThread:"doModal:" withObject:(theAlert) waitUntilDone:true
  
if (my returnCode as number) = 1001 then error number -128
  
  
return (aScrollWithTable’s documentView’s selectedRow()) + 1
end chooseItemByTableView:

on doModal:aParam
  set (my returnCode) to aParam’s runModal()
end doModal:

on makeTableView(aList as list, aWidth as number, aHeight as number)
  set aOffset to 40
  
  
set sourceList to {}
  
repeat with i in aList
    set the end of sourceList to {dataItem:(contents of i)}
  end repeat
  
  
set theDataSource to NSMutableArray’s alloc()’s init()
  
theDataSource’s addObjectsFromArray:sourceList
  
  
set aScroll to NSScrollView’s alloc()’s initWithFrame:(current application’s NSMakeRect(0, aOffset, aWidth, aHeight))
  
set aView to NSTableView’s alloc()’s initWithFrame:(current application’s NSMakeRect(0, aOffset, aWidth, aHeight))


set aColumn to (NSTableColumn’s alloc()’s initWithIdentifier:"dataItem")
  (
aColumn’s setWidth:aWidth)
  (
aColumn’s headerCell()’s setStringValue:"dataItem")
  (
aView’s addTableColumn:aColumn)
  
  
aView’s setDelegate:me
  
aView’s setDataSource:me
  
aView’s reloadData()
  
  
aScroll’s setDocumentView:aView
  
aView’s enclosingScrollView()’s setHasVerticalScroller:true
  
  
–1行目を選択
  
set aIndexSet to NSIndexSet’s indexSetWithIndex:0
  
aView’s selectRowIndexes:aIndexSet byExtendingSelection:false
  
  
–強制的にトップにスクロール
  
–set maxHeight to aScroll’s documentView()’s |bounds|()’s |size|()’s height
  
set aDBounds to aScroll’s documentView()’s |bounds|()
  
if class of aDBounds = list then
    –macOS 10.13 or later
    
set maxHeight to item 2 of item 1 of aDBounds
  else
    –macOS 10.10….10.12
    
set maxHeight to height of |size| of aDBounds
  end if
  
  
set aPT to current application’s NSMakePoint(0.0, -40.0) —— (aScroll’s documentView()’s |bounds|()’s |size|()’s height))
  
aScroll’s documentView()’s scrollPoint:aPT
  
  
return aScroll
end makeTableView

–TableView Event Handlers
on numberOfRowsInTableView:aView
  return my theDataSource’s |count|()
end numberOfRowsInTableView:

on tableView:aView objectValueForTableColumn:aColumn row:aRow
  set aRec to (my theDataSource)’s objectAtIndex:(aRow as number)
  
set aTitle to (aColumn’s headerCell()’s title()) as string
  
set aRes to (aRec’s valueForKey:aTitle)
  
return aRes
end tableView:objectValueForTableColumn:row:

★Click Here to Open This Script 

Posted in GUI list | Tagged 10.11savvy 10.12savvy 10.13savvy 10.14savvy NSAlert NSAlertSecondButtonReturn NSIndexSet NSMutableArray NSRunningApplication NSScrollView NSTableColumn NSTableView | 1 Comment
アラートダイアログ上にsegmented controlを表示

Posted on 2月 19, 2019 by Takaaki Naganoya

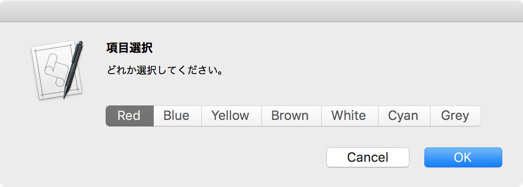
アラートダイアログを作成し、その上にsegmented control(タブみたいな複数項目1択UI部品)を表示して選択肢の選択を行うAppleScriptです。

選択肢のインデックス番号が(1からはじまる)返ってきます。

AppleScript名:アラートダイアログ上にsegmented controlを表示
— Created 2019-02-14 by Takaaki Naganoya
— 2019 Piyomaru Software
use AppleScript version "2.5"
use scripting additions
use framework "Foundation"
use framework "AppKit"

property NSAlert : a reference to current application’s NSAlert
property NSView : a reference to current application’s NSView
property NSSegmentedControl : a reference to current application’s NSSegmentedControl
property NSRunningApplication : a reference to current application’s NSRunningApplication
property NSSegmentStyleTexturedRounded : a reference to current application’s NSSegmentStyleTexturedRounded

property theSegSel : 0
property returnCode : 0

set paramObj to {myMessage:"項目選択", mySubMessage:"どれか選択してください。", segmentMes:{"Red", "Blue", "Yellow", "Brown", "White", "Cyan", "Grey"}}
set segRes to my chooseSegment:paramObj

on chooseSegment:paramObj
  set aMainMes to myMessage of paramObj
  
set aSubMes to mySubMessage of paramObj
  
set segMesList to segmentMes of paramObj
  
  
— create a view
  
set theView to NSView’s alloc()’s initWithFrame:(current application’s NSMakeRect(0, 0, 400, 200))
  
  
–Segmented Controlをつくる
  
set aSeg to makeSegmentedControl(segMesList, 400, 80) of me
  
  
theView’s setSubviews:{aSeg}
  
  
set theAlert to NSAlert’s alloc()’s init()
  
  
— set up alert
  
tell theAlert
    its setMessageText:aMainMes
    
its setInformativeText:aSubMes
    
its addButtonWithTitle:"OK"
    
its addButtonWithTitle:"Cancel"
    
its setAccessoryView:aSeg
  end tell
  
  
— show alert in modal loop
  
NSRunningApplication’s currentApplication()’s activateWithOptions:0
  
my performSelectorOnMainThread:"doModal:" withObject:(theAlert) waitUntilDone:true
  
if (my returnCode as number) = 1001 then error number -128
  
  
set (my theSegSel) to (aSeg’s selectedSegment()) as number
  
return (my theSegSel) + 1
end chooseSegment:

on doModal:aParam
  set (my returnCode) to aParam’s runModal()
end doModal:

on makeSegmentedControl(titleList, aWidth, aHeight)
  set aLen to length of titleList
  
  
set aSeg to NSSegmentedControl’s alloc()’s init()
  
aSeg’s setSegmentCount:aLen
  
  
set aCount to 0
  
repeat with i in titleList
    set j to contents of i
    (
aSeg’s setLabel:j forSegment:aCount)
    
set aCount to aCount + 1
  end repeat
  
  
aSeg’s setTranslatesAutoresizingMaskIntoConstraints:false
  
aSeg’s setSegmentStyle:(NSSegmentStyleTexturedRounded)
  
aSeg’s setFrame:(current application’s NSMakeRect(20, aHeight – 60, aWidth, aHeight – 40))
  
aSeg’s setTrackingMode:0
  
aSeg’s setTarget:me
  
aSeg’s setAction:"clickedSeg:"
  
aSeg’s setSelectedSegment:0
  
  
return aSeg
end makeSegmentedControl

on clickedSeg:aSender
  set aSel to aSender’s selectedSegment()
  
set selSeg to aSel
end clickedSeg:

★Click Here to Open This Script 

Posted in dialog GUI list | Tagged 10.11savvy 10.12savvy 10.13savvy NSAlert NSRunningApplication NSSegmentedControl NSSegmentStyleTexturedRounded NSView | Leave a comment
アラートダイアログ上にRadio Buttonを表示

Posted on 2月 19, 2019 by Takaaki Naganoya

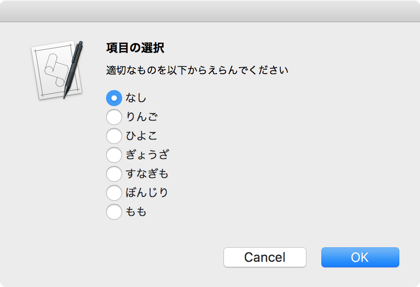
アラートダイアログを作成し、その上にRadio Buttonを表示して位置座標の選択を行うAppleScriptです。

任意の選択肢をlist(配列)で指定すると、その通りのRadio Buttonを表示します。ユーザーが選択した項目のtitle文字列を返します。項目番号ではありません。

AppleScript名:アラートダイアログ上にRadio Buttonを表示 v2
— Created 2019-02-14 by Takaaki Naganoya
— 2019 Piyomaru Software
use AppleScript version "2.5"
use scripting additions
use framework "Foundation"
use framework "AppKit"

property NSAlert : a reference to current application’s NSAlert
property NSMatrix : a reference to current application’s NSMatrix
property NSButtonCell : a reference to current application’s NSButtonCell
property NSRadioButton : a reference to current application’s NSRadioButton
property NSRadioModeMatrix : a reference to current application’s NSRadioModeMatrix
property NSAlertSecondButtonReturn : a reference to current application’s NSAlertSecondButtonReturn

property theResult : 0
property returnCode : 0

set paramObj to {myMessage:"項目の選択", mySubMessage:"適切なものを以下からえらんでください", matrixTitleList:{"なし", "りんご", "ひよこ", "ぎょうざ", "すなぎも", "ぼんじり", "もも"}}
set aRes to my chooseItemByRadioButton:paramObj

on chooseItemByRadioButton:paramObj
  set aMainMes to myMessage of paramObj
  
set aSubMes to mySubMessage of paramObj
  
set aMatList to (matrixTitleList of paramObj) as list
  
set aLen to length of aMatList
  
  
–create the radio button prototype
  
set aProto to NSButtonCell’s alloc()’s init()
  
aProto’s setTitle:"Options"
  
aProto’s setButtonType:(NSRadioButton)
  
  
–define the matrix size where you’ll put the radio buttons
  
set matrixRect to current application’s NSMakeRect(20.0, 20.0, 200.0, (20.0 * aLen))
  
set aMatrix to NSMatrix’s alloc()’s initWithFrame:matrixRect mode:(NSRadioModeMatrix) prototype:aProto numberOfRows:(aLen) numberOfColumns:1
  
  
set cellList to aMatrix’s cells()
  
set aCount to 0
  
repeat with i in aMatList
    set j to contents of i
    ((
cellList’s objectAtIndex:aCount)’s setTitle:j)
    
set aCount to aCount + 1
  end repeat
  
  
— set up alert  
  
set theAlert to NSAlert’s alloc()’s init()
  
tell theAlert
    its setMessageText:aMainMes
    
its setInformativeText:aSubMes
    
its addButtonWithTitle:"OK"
    
its addButtonWithTitle:"Cancel"
    
its setAccessoryView:aMatrix
  end tell
  
  
— show alert in modal loop
  
current application’s NSRunningApplication’s currentApplication()’s activateWithOptions:0
  
my performSelectorOnMainThread:"doModal:" withObject:(theAlert) waitUntilDone:true
  
if (my returnCode as number) = 1001 then error number -128
  
  
return (aMatrix’s selectedCell()’s title()) as string
end chooseItemByRadioButton:

on doModal:aParam
  set (my returnCode) to aParam’s runModal()
end doModal:

★Click Here to Open This Script 

Posted in dialog GUI list | Tagged 10.11savvy 10.12savvy 10.13savvy NSAlert NSAlertSecondButtonReturn NSButtonCell NSMatrix NSRadioButton NSRadioModeMatrix | Leave a comment

アラートダイアログ上にMap Viewを表示

Posted on 2月 19, 2019 by Takaaki Naganoya

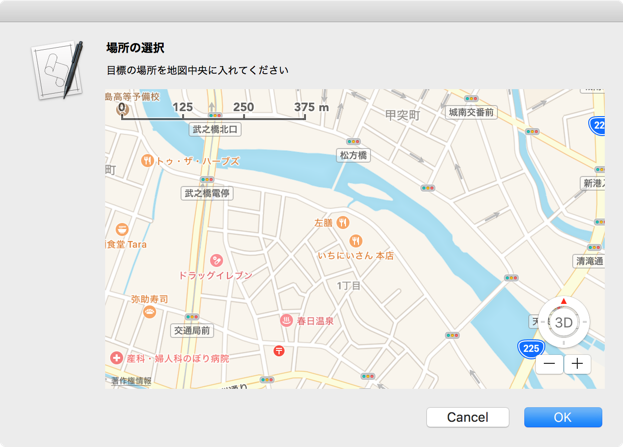
アラートダイアログを作成し、その上にMap Viewを表示して位置座標の選択を行うAppleScriptです。

Map Viewを使用するためには、インターネット接続が必要です。

もしこれをAppleScriptのコマンドのように表現するなら「choose geo location」とかいうコマンドになるでしょうか。本当は地図.appのように地図中でクリックした場所にピンを打って選択箇所を明示するようなものを考えていたのですが、実際にASだけで作ろうとすると難しいものがありそうで。

こうした「ざっくり場所を選ぶ」ダイアログのほか、複数の地点をピンで表示し、そのうちのどれかを地図上で選択するといったコマンドがあると使いでがありそうです。

AppleScript名:アラートダイアログ上のMap Viewを表示
— Created 2019-02-14 by Takaaki Naganoya
— 2019 Piyomaru Software
use AppleScript version "2.5"
use scripting additions
use framework "Foundation"
use framework "MapKit"
use framework "AppKit"

property |NSURL| : a reference to current application’s |NSURL|
property NSData : a reference to current application’s NSData
property MKMapView : a reference to current application’s MKMapView
property NSURLRequest : a reference to current application’s NSURLRequest
property NSURLConnection : a reference to current application’s NSURLConnection

property theResult : 0
property returnCode : 0

set nRes to hasInternetConnection("http://www.google.com") of me
if nRes = false then error "No Internet Connection…."

–地図表示初期座標。一般的にはWiFi経由でAssistive-GPSから現在位置を拾って指定
set aLong to 130.55723797
set aLat to 31.57868838

set paramObj to {myMessage:"場所の選択", mySubMessage:"目標の場所を地図中央に入れてください", aLongitude:aLong, aLatitude:aLat}
my performSelectorOnMainThread:"chooseCoordinate:" withObject:(paramObj) waitUntilDone:true
return theResult
–> {latitude:31.57868838, longitude:130.55723797}

on chooseCoordinate:paramObj
  set aMainMes to myMessage of paramObj
  
set aSubMes to mySubMessage of paramObj
  
set aLong to aLongitude of paramObj
  
set aLat to aLatitude of paramObj
  
  
–MKMapViewをつくる
  
set aMapView to MKMapView’s alloc()’s initWithFrame:(current application’s NSMakeRect(0, 0, 500, 300))
  
tell aMapView
    its setMapType:(current application’s MKMapTypeStandard)
    
its setZoomEnabled:true
    
its setScrollEnabled:true
    
its setPitchEnabled:true
    
its setRotateEnabled:true
    
its setShowsCompass:true
    
its setShowsZoomControls:true
    
its setShowsScale:true
    
its setShowsUserLocation:true
    
    
set aLocation to current application’s CLLocationCoordinate2DMake(aLat, aLong)
    
its setCenterCoordinate:aLocation zoomLevel:17 animated:false
    
its setDelegate:me
  end tell
  
  
— set up alert  
  
set theAlert to current application’s NSAlert’s alloc()’s init()
  
tell theAlert
    its setMessageText:aMainMes
    
its setInformativeText:aSubMes
    
its addButtonWithTitle:"OK"
    
its addButtonWithTitle:"Cancel"
    
its setAccessoryView:aMapView
  end tell
  
  
— show alert in modal loop
  
current application’s NSRunningApplication’s currentApplication()’s activateWithOptions:(current application’s NSApplicationActivateIgnoringOtherApps)
  
set returnCode to theAlert’s runModal()
  
if returnCode = (current application’s NSAlertSecondButtonReturn) then error number -128
  
  
set (my theResult) to (aMapView’s centerCoordinate()) as record
end chooseCoordinate:

–Internet Connection Check
on hasInternetConnection(aURLString)
  set aURL to |NSURL|’s alloc()’s initWithString:aURLString
  
set aReq to NSURLRequest’s alloc()’s initWithURL:aURL cachePolicy:(current application’s NSURLRequestReloadIgnoringLocalCacheData) timeoutInterval:5.0
  
set urlRes to (NSURLConnection’s sendSynchronousRequest:aReq returningResponse:(missing value) |error|:(missing value))
  
if urlRes = missing value then
    return false
  else
    return true
  end if
end hasInternetConnection

★Click Here to Open This Script 

Posted in geolocation GUI Internet | Tagged 10.11savvy 10.12savvy 10.13savvy NSData NSURL NSView | Leave a comment

アラートダイアログ上にpath control x2を表示

Posted on 2月 18, 2019 by Takaaki Naganoya

アラートダイアログを作成し、その上にpath controlを2つ表示してパスの選択を行うAppleScriptです。

path controlには、対象のフォルダ/ファイルをドラッグ&ドロップしてファイルのパスを指定できます。使いやすい一方で、choose folderコマンドのようにフォルダの新規作成までサポートしているわけではありません。

スクリプトエディタ、Script Debugger、Appletなどでは正常に動作しますが、スクリプトメニュー上から呼び出すとアラートダイアログが最前面に表示されず、前に出す操作が必要になります。

AppleScript名:アラートダイアログ上のpath control x2を表示
— Created 2019-02-14 by Takaaki Naganoya
— 2019 Piyomaru Software
use AppleScript version "2.5"
use scripting additions
use framework "Foundation"
use framework "AppKit"

property theResult : 0
property returnCode : 0

set paramObj to {myMessage:"項目選択", mySubMessage:"どれか選択してください。", fromPathMes:"移動元:", toPathMes:"移動先:"}
set segRes to my chooseTwoPath:paramObj
–> {fromPathRes:"/Users/me/Documents/AppleScript/パスコントロール", toPathRes:"/Users/me/Documents/AppleScript/タッチバー"}

on chooseTwoPath:paramObj
  set aMainMes to myMessage of paramObj
  
set aSubMes to mySubMessage of paramObj
  
set fromLabel to fromPathMes of paramObj
  
set toLabel to toPathMes of paramObj
  
  
— create a view
  
set theView to current application’s NSView’s alloc()’s initWithFrame:(current application’s NSMakeRect(0, 0, 800, 60))
  
  
— create two path control & text field
  
set aPathControl to current application’s NSPathControl’s alloc()’s initWithFrame:(current application’s NSMakeRect(100, 35, 700, 20))
  
set bPathControl to current application’s NSPathControl’s alloc()’s initWithFrame:(current application’s NSMakeRect(100, 0, 700, 20))
  
aPathControl’s setBackgroundColor:(current application’s NSColor’s cyanColor())
  
bPathControl’s setBackgroundColor:(current application’s NSColor’s yellowColor())
  
  
set aHome to current application’s |NSURL|’s fileURLWithPath:(current application’s NSHomeDirectory()) –initial dir
  
aPathControl’s setURL:aHome
  
bPathControl’s setURL:aHome
  
  
set a1TF to current application’s NSTextField’s alloc()’s initWithFrame:(current application’s NSMakeRect(0, 35, 100, 20))
  
set a2TF to current application’s NSTextField’s alloc()’s initWithFrame:(current application’s NSMakeRect(0, 0, 100, 20))
  
a1TF’s setEditable:false
  
a2TF’s setEditable:false
  
a1TF’s setStringValue:fromLabel
  
a2TF’s setStringValue:toLabel
  
a1TF’s setDrawsBackground:false
  
a2TF’s setDrawsBackground:false
  
a1TF’s setBordered:false
  
a2TF’s setBordered:false
  
  
theView’s setSubviews:{a1TF, aPathControl, a2TF, bPathControl}
  
  
— set up alert
  
set theAlert to current application’s NSAlert’s alloc()’s init()
  
tell theAlert
    its setMessageText:aMainMes
    
its setInformativeText:aSubMes
    
its addButtonWithTitle:"OK"
    
its addButtonWithTitle:"Cancel"
    
its setAccessoryView:theView
  end tell
  
  
— show alert in modal loop
  
current application’s NSRunningApplication’s currentApplication()’s activateWithOptions:0
  
my performSelectorOnMainThread:"doModal:" withObject:(theAlert) waitUntilDone:true
  
if (my returnCode as number) = 1001 then error number -128
  
  
set s1Val to (aPathControl’s |URL|’s |path|()) as string
  
set s2Val to (bPathControl’s |URL|’s |path|()) as string
  
  
return {fromPathRes:s1Val, toPathRes:s2Val}
end chooseTwoPath:

on doModal:aParam
  set (my returnCode) to aParam’s runModal()
end doModal:

★Click Here to Open This Script 

Posted in File path GUI | Tagged 10.11savvy 10.12savvy 10.13savvy | Leave a comment

アラートダイアログ上のDate Pickerで日付選択

Posted on 2月 18, 2019 by Takaaki Naganoya

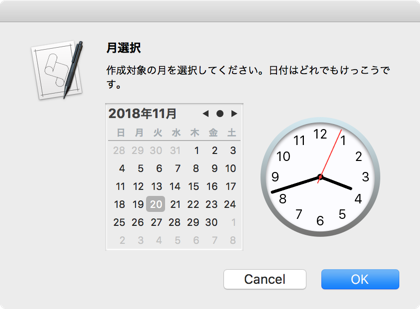
アラートダイアログを作成し、その上にDate Pickerを表示して日付の選択を行うAppleScriptです。

スクリプトエディタ、Script Debugger、Appletなどでは正常に動作しますが、スクリプトメニュー上から呼び出すとアラートダイアログが最前面に表示されず、前に出す操作が必要になります。

もともとはShane Stanleyが作成したカレンダー選択ダイアログでしたが、メインスレッドでの実行を強制しなくてはならなかったのと、汎用的に使える構造になっていなかったので、機能を整理しました。

このDate Pickerダイアログをもとに、さまざまなGUI部品を配置してちょっとしたユーザーの操作を受け付ける汎用ダイアログとして整備してみました。最終的には、SDEF(AppleScript用語辞書)をつけたAppleScript Librariesに仕上げるといい感じでしょうか。

アラートダイアログという、サイズ固定のダイアログウィンドウ上に各種GUI部品を表示するのは、使いにくいんじゃないかと疑問を持っていたのですが、表示後のリサイズはできないものの、中に入れるViewのサイズ次第でダイアログの大きさも可変なので、予想よりも使えそうです。

AppleScript名:アラートダイアログ上のDate Pickerで日付選択
— Created 2019-02-14 by Takaaki Naganoya
— 2019 Piyomaru Software
use AppleScript version "2.5"
use scripting additions
use framework "Foundation"
use framework "AppKit"

property NSAlert : a reference to current application’s NSAlert
property NSDate : a reference to current application’s NSDate
property NSView : a reference to current application’s NSView
property NSDatePicker : a reference to current application’s NSDatePicker
property NSRunningApplication : a reference to current application’s NSRunningApplication
property NSClockAndCalendarDatePickerStyle : a reference to current application’s NSClockAndCalendarDatePickerStyle
property NSYearMonthDayDatePickerElementFlag : a reference to current application’s NSYearMonthDayDatePickerElementFlag
property NSHourMinuteSecondDatePickerElementFlag : a reference to current application’s NSHourMinuteSecondDatePickerElementFlag

property theResult : missing value
property returnCode : 0

set paramObj to {myMessage:"月選択", mySubMessage:"作成対象の月を選択してください。日付はどれでもけっこうです。"}
set {targYear, targMonth, targDate} to my chooseDate:((paramObj) of me)
–> {2018, 10, 8}

on chooseDate:paramObj
  set aMainMes to myMessage of paramObj
  
set aSubMes to mySubMessage of paramObj
  
  
— create a view
  
set theView to NSView’s alloc()’s initWithFrame:(current application’s NSMakeRect(0, 0, 200, 300))
  
set datePicker to NSDatePicker’s alloc()’s initWithFrame:(current application’s NSMakeRect(0, 0, 300, 200))
  
datePicker’s setDatePickerStyle:(NSClockAndCalendarDatePickerStyle)
  
datePicker’s setDatePickerElements:((NSYearMonthDayDatePickerElementFlag) + (NSHourMinuteSecondDatePickerElementFlag as integer))
  
  
datePicker’s setDateValue:(NSDate’s |date|())
  
  
set theSize to datePicker’s fittingSize()
  
  
theView’s setFrameSize:theSize
  
datePicker’s setFrameSize:theSize
  
  
theView’s setSubviews:{datePicker}
  
  
set theAlert to NSAlert’s alloc()’s init()
  
  
— set up alert
  
tell theAlert
    its setMessageText:aMainMes
    
its setInformativeText:aSubMes
    
its addButtonWithTitle:"OK"
    
its addButtonWithTitle:"Cancel"
    
its setAccessoryView:theView
  end tell
  
  
— show alert in modal loop
  
NSRunningApplication’s currentApplication()’s activateWithOptions:0
  
my performSelectorOnMainThread:"doModal:" withObject:(theAlert) waitUntilDone:true
  
if (my returnCode as number) = 1001 then error number -128
  
  
set (my theResult) to (datePicker’s dateValue()) as date
  
  
set aYear to year of theResult
  
set aMonth to month of theResult as number
  
set aDate to day of theResult
  
return {aYear, aMonth, aDate}
end chooseDate:

on doModal:aParam
  set (my returnCode) to aParam’s runModal()
end doModal:

★Click Here to Open This Script 

Posted in GUI | Tagged 10.11savvy 10.12savvy NSAlert NSDate NSDatePicker NSRunningApplication NSView | 1 Comment

指定Localeおよび現在のユーザー環境のLocaleから短縮曜日名を取得

Posted on 2月 16, 2019 by Takaaki Naganoya

指定の任意のLocaleもしくはScript実行中のユーザー環境のLocaleを取得して、曜日の短縮名称を取得するAppleScriptです。

AppleScript名:指定Localeおよび現在のユーザー環境のLocaleから短縮曜日名を取得
— Created 2019-02-14 by Takaaki Naganoya
— 2019 Piyomaru Software
use AppleScript version "2.4"
use scripting additions
use framework "Foundation"

set aList to getLocalizedShortDaynames("en_US")
–>  {"Sun", "Mon", "Tue", "Wed", "Thu", "Fri", "Sat"}
set aList to getLocalizedShortDaynames("fr_FR")
–>  {"dim.", "lun.", "mar.", "mer.", "jeu.", "ven.", "sam."}
set aList to getLocalizedShortDaynames("ja_JP")
–>  {"日", "月", "火", "水", "木", "金", "土"}
set aList to getLocalizedShortDaynames("zh-Hans")
–>  {"周日", "周一", "周二", "周三", "周四", "周五", "周六"}

–現在のユーザーのLocale情報を取得して短縮曜日名を取得
set curLoc to (current application’s NSLocale’s currentLocale’s objectForKey:(current application’s NSLocaleIdentifier)) as string
–> "ja_JP"
set bList to getLocalizedShortDaynames(curLoc) of me
–> {"日", "月", "火", "水", "木", "金", "土"}

–ローカライズされた曜日名称を返す(短縮名称)
on getLocalizedShortDaynames(aLoc)
  set df to current application’s NSDateFormatter’s alloc()’s init()
  
df’s setLocale:(current application’s NSLocale’s localeWithLocaleIdentifier:aLoc)
  
set dayNames to df’s shortStandaloneWeekdaySymbols() as list
  
return dayNames
end getLocalizedShortDaynames

★Click Here to Open This Script 

Posted in Calendar Locale System | Tagged 10.11savvy 10.12savvy 10.13savvy 10.14savvy | Leave a comment

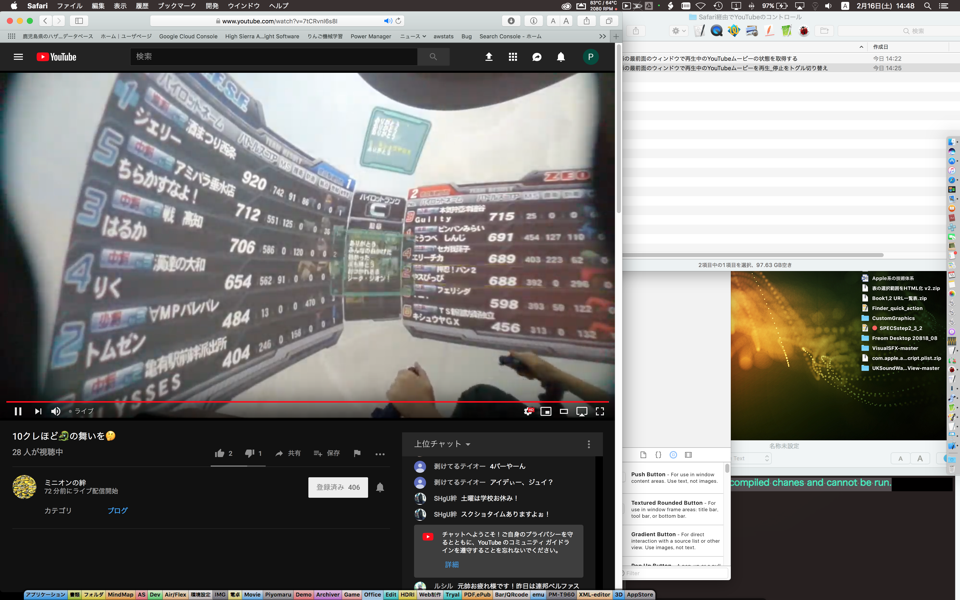
YouTubeムービーの状態を取得、操作

Posted on 2月 16, 2019 by Takaaki Naganoya

Safari上で表示中のYouTubeのムービーの再生状態を取得、再生/停止のトグル動作を行うなどのAppleScriptです。

追記(2021/7/31):pausedの属性を取得できていないですね。YouTube側に変更があったのか…?
追記(2022/1/21):YouTube側の仕様がかわって、ムービープレイヤーに対する操作が通りません。x倍速再生が便利だったのですが…

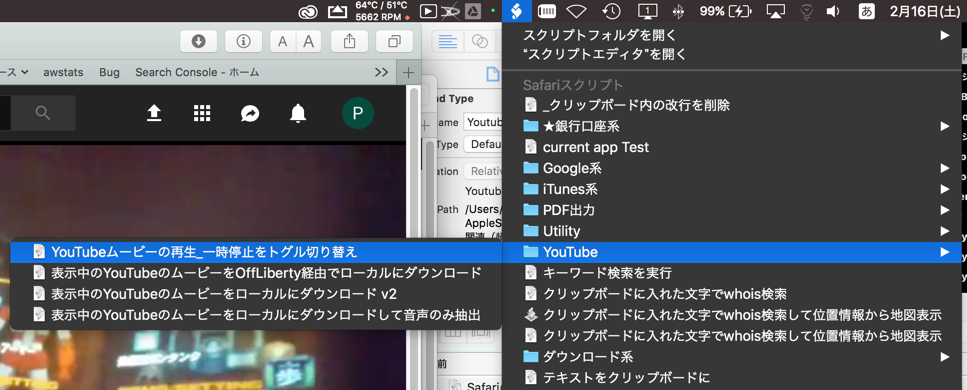
macOS標準搭載のスクリプトメニューに入れて呼び出しています。

AppleScript名:Safariの最前面のウィンドウで再生中のYouTubeムービーの状態を取得する
–Get YouTube Movie status
tell application "Safari"
  tell front document
    set aRes to (do JavaScript "document.querySelector(’#movie_player video’).paused;")
  end tell
end tell

★Click Here to Open This Script 

AppleScript名:Safariの最前面のウィンドウで再生中のYouTubeムービーを再生_停止をトグル切り替え
–Toggle Youtube play/pause
tell application "Safari"
  tell front document
    set aRes to (do JavaScript "document.querySelector(’#movie_player .ytp-play-button’).click();")
  end tell
end tell

★Click Here to Open This Script 

AppleScript名:Safariの最前面のウィンドウでオープン中のYouTubeムービーを再生
tell application "Safari"
  tell front document
    set aURL to URL
    
–最前面のウィンドウがYouTubeの場合のみ処理
    
if aURL begins with "https://www.youtube.com/" then
      set aRes to (do JavaScript "document.querySelector(’#movie_player video’).paused;")
      
if aRes = true then
        –停止中(一時停止中)の場合のみ再生操作
        (
do JavaScript "document.querySelector(’#movie_player .ytp-play-button’).click();")
      end if
    end if
  end tell
end tell

★Click Here to Open This Script 

AppleScript名:Safariの最前面のウィンドウでオープン中のYouTubeムービーの再生フレームの冒頭からの時間を取得
tell application "Safari"
  tell front document
    set aURL to URL
    
–最前面のウィンドウがYouTubeの場合のみ処理
    
if aURL begins with "https://www.youtube.com/" then
      set tRes to (do JavaScript "document.querySelector(’#movie_player video’).getCurrentTime();")
    end if
  end tell
end tell

★Click Here to Open This Script 

AppleScript名:Safariの最前面のウィンドウでオープン中のYouTubeムービーの再生ポジションを変更
tell application "Safari"
  tell front document
    set aURL to URL
    
–最前面のウィンドウがYouTubeの場合のみ処理
    
if aURL begins with "https://www.youtube.com/" then
      set tRes to (do JavaScript "document.querySelector(’#movie_player video’).currentTime =300;")
    end if
  end tell
end tell

★Click Here to Open This Script 

AppleScript名:Safariの最前面のウィンドウでオープン中のYouTubeムービーのdurationを取得
tell application "Safari"
  tell front document
    set aURL to URL
    
–最前面のウィンドウがYouTubeの場合のみ処理
    
if aURL begins with "https://www.youtube.com/" then
      set tRes to (do JavaScript "document.querySelector(’#movie_player video’).duration;")
    end if
  end tell
end tell

★Click Here to Open This Script 

Posted in JavaScript URL Web Contents Control | Tagged 10.11savvy 10.12savvy 10.13savvy 10.14savvy Safari | 3 Comments

Keynoteの最前面のドキュメントの現在のスライドに指定月の日曜日はじまりカレンダーを表で作成

Posted on 2月 14, 2019 by Takaaki Naganoya

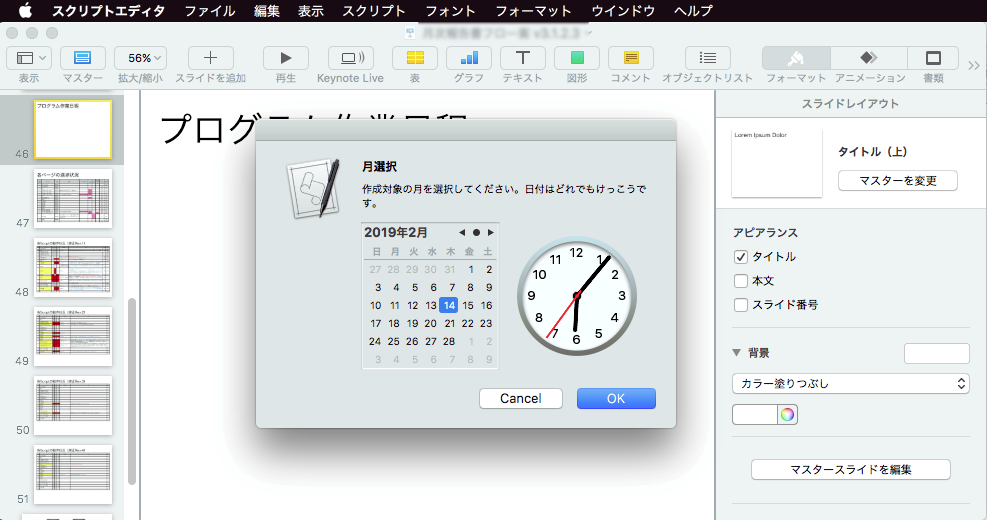
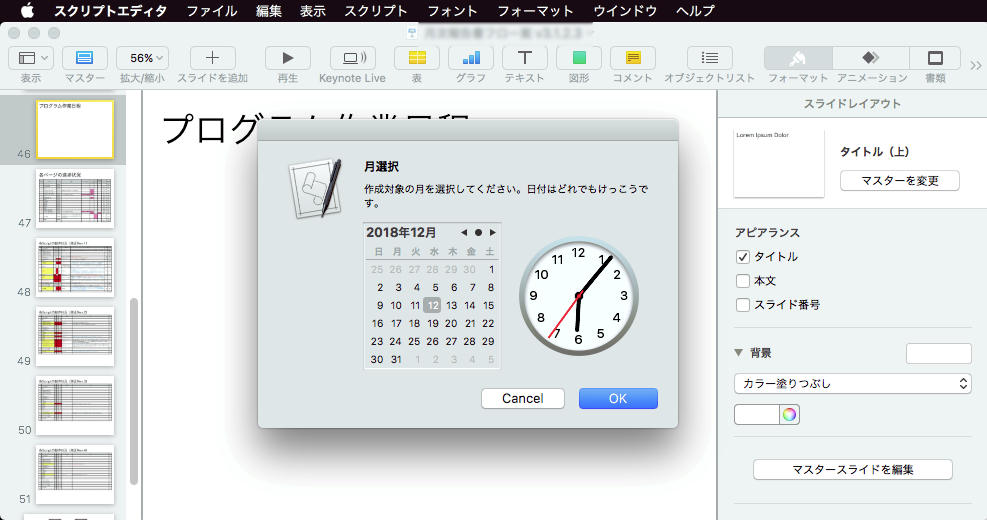
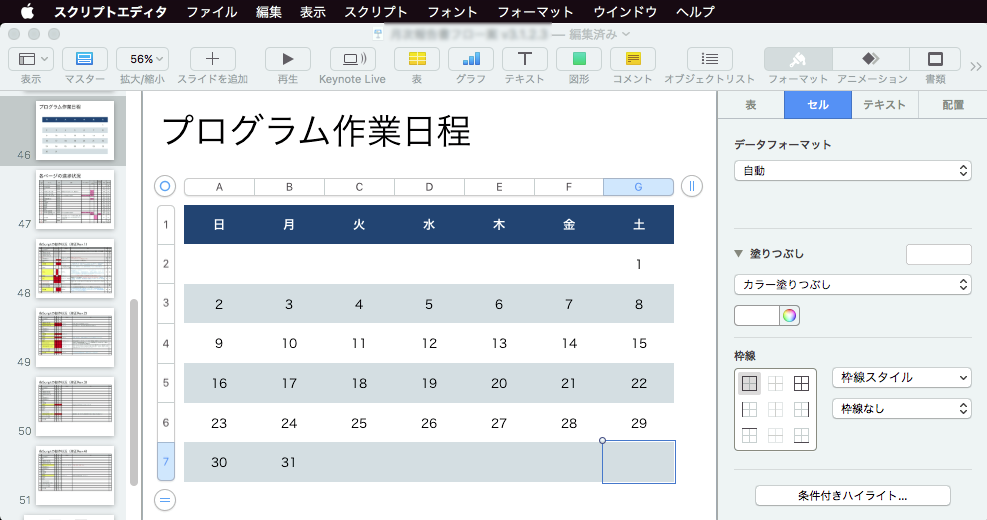
Keynoteの最前面の書類の現在選択中のスライド(ページ)に、指定月の日曜日はじまりカレンダーを、表オブジェクトで作成するAppleScriptです。

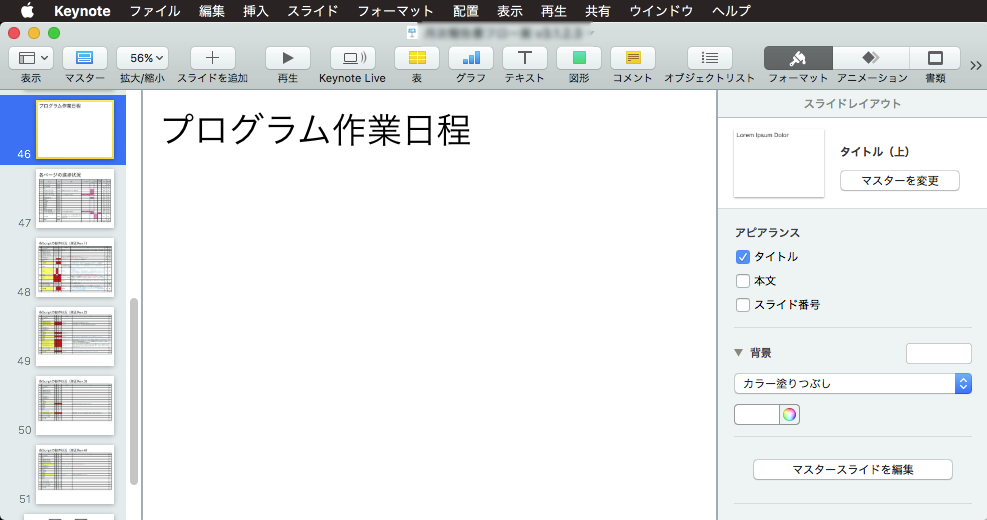
Keynoteで資料を作成していると、資料にカレンダーを入れたいケースが多々あります。Terminal.appを起動してcalコマンドでカレンダーを作ってみたり、Dashboardのカレンダーをコピーして入れることも多いですが、Dashboardはもうあるんだかないんだ分からない状態。かわりのものを用意してみました。

あとは、サイズやスタイル、土日のデータを削除するなど用途に応じて編集して表カレンダーを利用するとよいでしょう。

macOS標準装備のスクリプトメニューに入れて呼び出す場合には、アプリケーション形式で書き出したものを使う必要があります。

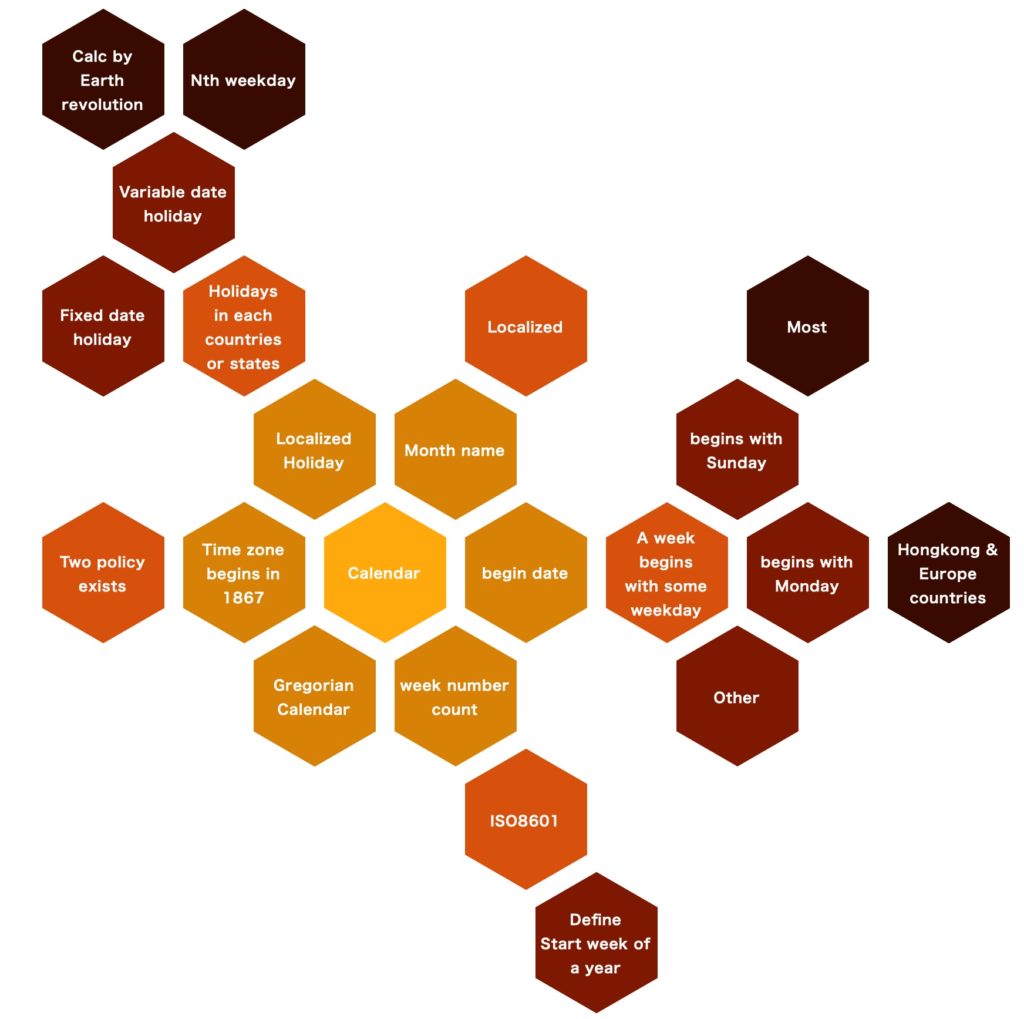
世の中のカレンダーは日曜日はじまりだけではないので、月曜日はじまりなど、その国、その現場ごとのルールに合わせて変更することが重要です。曜日名についても、実行中のユーザーの言語環境から取得して入れることも可能なので、そのようにしてもよいでしょう。

同じぐらいのスペックのマシンで本Scriptを動かすと、macOS 10.14, Mojave上では10.12.6上の(Keynote v8.1の)倍ぐらい速くて驚かされます。10.13.6上でも同様なのでOS側の対応というよりは、Keynote側のバージョンアップ(v8.1 –> v8.3)によるものかもしれません。

AppleScript名:指定月の日曜日はじまりカレンダーを表で作成 v2.scptd
— Created 2019-02-14 by Takaaki Naganoya
use AppleScript version "2.5"
use scripting additions
use framework "Foundation"
use framework "AppKit"

property theDate : missing value

property daysList : {"日", "月", "火", "水", "木", "金", "土"} –Japanese
–property daysList : {"Sun", "Mon", "Tue", "Wed", "Thu", "Fri", "Sat"}–English

set paramObj to {myMessage:"月選択", mySubMessage:"作成対象の月を選択してください。日付はどれでもけっこうです。"}
set {targYear, targMonth} to chooseMonth(paramObj) of me

–指定月のカレンダーを1D List(7 days x 6 weeks) で作成
set aCalList to retListCalendar(targYear, targMonth) of me

set fullCalList to daysList & aCalList

set aTitle to (targYear as string) & (targMonth as string)
set dCount to 1

tell application "Keynote"
  tell front document
    tell current slide
      set aTable to make new table with properties {header column count:0, header row count:1, row count:7, column count:7, name:aTitle}
      
tell aTable
        repeat with i from 1 to 49
          tell cell i
            ignoring application responses
              set value to contents of item dCount of fullCalList
            end ignoring
          end tell
          
set dCount to dCount + 1
        end repeat
      end tell
    end tell
  end tell
end tell

–カレンダー作成対象の年、月を選択(ただし、日付をクリックして選択しないと値を取得できないので注意)
on chooseMonth(paramObj)
  my performSelectorOnMainThread:"chooseDate:" withObject:(paramObj) waitUntilDone:true
  
set aYear to year of theDate
  
set aMonth to month of theDate as number
  
return {aYear, aMonth}
end chooseMonth

on chooseDate:paramObj
  set aMainMes to myMessage of paramObj
  
set aSubMes to mySubMessage of paramObj
  
  
— create a view
  
set theView to current application’s NSView’s alloc()’s initWithFrame:(current application’s NSMakeRect(0, 0, 100, 200))
  
set datePicker to current application’s NSDatePicker’s alloc()’s initWithFrame:(current application’s NSMakeRect(0, 0, 100, 100))
  
datePicker’s setDatePickerStyle:(current application’s NSClockAndCalendarDatePickerStyle)
  
datePicker’s setDatePickerElements:((current application’s NSYearMonthDayDatePickerElementFlag) + (current application’s NSHourMinuteSecondDatePickerElementFlag as integer))
  
  
datePicker’s setDateValue:(current application’s NSDate’s |date|())
  
  
set theSize to datePicker’s fittingSize()
  
  
theView’s setFrameSize:theSize
  
datePicker’s setFrameSize:theSize
  
  
theView’s setSubviews:{datePicker}
  
  
set theAlert to current application’s NSAlert’s alloc()’s init()
  
  
— set up alert
  
tell theAlert
    its setMessageText:aMainMes
    
its setInformativeText:aSubMes
    
its addButtonWithTitle:"OK"
    
its addButtonWithTitle:"Cancel"
    
its setAccessoryView:theView
  end tell
  
  
— show alert in modal loop
  
set returnCode to theAlert’s runModal()
  
if returnCode = (current application’s NSAlertSecondButtonReturn) then error number -128
  
  
— retrieve date
  
set (my theDate) to (datePicker’s dateValue()) as date
  
end chooseDate:

–指定月のカレンダーを1D List(7 days x 6 weeks) で返す
on retListCalendar(tYear, tMonth)
  set mLen to getMlen(tYear, tMonth) of me
  
set aList to {}
  
  
set fDat to getDateInternational(tYear, tMonth, 1) of me
  
tell current application
    set aOffset to (weekday of fDat) as number
  end tell
  
  
–header gap
  
repeat (aOffset – 1) times
    set the end of aList to ""
  end repeat
  
  
–calendar body
  
repeat with i from 1 to mLen
    set the end of aList to (i as string)
  end repeat
  
  
–footer gap
  
repeat (42 – aOffset – mLen + 1) times
    set the end of aList to ""
  end repeat
  
  
return aList
end retListCalendar

–現在のカレンダーで指定年月の日数を返す(国際化対応版)
on getMlen(aYear as integer, aMonth as integer)
  set theNSCalendar to current application’s NSCalendar’s currentCalendar()
  
set theDate to theNSCalendar’s dateWithEra:1 |year|:aYear |month|:aMonth |day|:1 hour:0 minute:0 |second|:0 nanosecond:0
  
set theResult to theNSCalendar’s rangeOfUnit:(current application’s NSDayCalendarUnit) inUnit:(current application’s NSMonthCalendarUnit) forDate:theDate
  
return |length| of theResult
end getMlen

–現在のカレンダーで指定年月のdate objectを返す
on getDateInternational(aYear, aMonth, aDay)
  set theNSCalendar to current application’s NSCalendar’s currentCalendar()
  
set theDate to theNSCalendar’s dateWithEra:1 |year|:aYear |month|:aMonth |day|:aDay hour:0 minute:0 |second|:0 nanosecond:0
  
return theDate as date
end getDateInternational

★Click Here to Open This Script 

Posted in Calendar GUI list | Tagged 10.11savvy 10.12savvy 10.13savvy 10.14savvy Keynote NSAlert NSAlertSecondButtonReturn NSCalendar NSClockAndCalendarDatePickerStyle NSDate NSDatePicker NSDayCalendarUnit NSHourMinuteSecondDatePickerElementFlag NSMonthCalendarUnit NSView NSYearMonthDayDatePickerElementFlag | Leave a comment

spacesKitで現在のSpacesのIDを取得する

Posted on 2月 12, 2019 by Takaaki Naganoya

オープンソースのTaskRail-MacをもとにしたspacesKitフレームワークを利用して、現在のSpacesのIDを取得する実験的なAppleScriptです。

–> Download spacesKit.framework (To ~/Library/Frameworks/)

Spaces変更通知を正確に受信したい

Spacesの変更操作についてはNotificationを受信できます。でも、Spacesの切り替え表示から「元と同じSpace」を選んで、Spacesの切り替えが発生しなかったとしても同様にNotificationが発生します。「現在選択中のSpaces」の情報を取得できないのでNotificationを利用しただけでは実用性がいまひとつでした。

Spacesごとに別々のDesktop Pictureを指定していればDesktop Pictureのパスをもとに特定できなくはありませんが、すべてのSpacesで同じDesktop Pictureが設定されていると区別できません。

そこで、TaskRail-Macの機能を利用して現在有効なSpacesのIDを取得し、本当に別のSpacesに切り替えたことを検出できました。

ただ、そこまでやってもいろいろ試してみると意外な伏兵に遭遇。

アプリケーションのフルスクリーン動作画面というのはOS的には動的に生成する別のテンポラリSpacesを利用しているようです。アプリケーションをフルスクリーン表示にしたり、YouTubeのムービーを全画面表示させるとSpaces切り替えNotificationを受信したりで、この「フルスクリーン表示」状態を検出・除外する方法を知りたいところです。

TaskRail-Macの返してくるSpacesのID

Spaces関連では、Terminal上から、

defaults read com.apple.spaces

と操作することで詳細な情報を取得できますが、spacesKitフレームワーク(TaskRail-Mac)で得られるIDはこのdefaltsコマンドの結果とは異なっています。

TaskRail-MacのObjective-Cのコードを読んでみると単にカウントを行なっているだけでIDに(OS内の設定値にもとづいた)根拠はないように見えます。

TaskRail-Macが返すIDは、defaults readで設定値を読み取った中に該当するものが見つかりませんでした。


▲spacesKitが返してくるID。左側のものが17207、右側デフォルトのものが311@macOS 10.14

また、複数ディスプレイを接続した環境でも、返ってくるIDは1つのみであり、メインディスプレイ以外でSpacesが変更されてもID値に変更はないため、メインディスプレイのSpacesのIDを返してくるものと考えてください。

ここで言う「メインディスプレイ」とは、MacBook系のノート型マシンの本体内蔵ディスプレイではなく、デスクトップが表示されるソフトウェア的なメインディスプレイを指します。

元になっているTaskRail-Mac自体がかなり実験的なプログラムであり、広範なハードウェアコンフィグレーション環境下でテストされたものでなく、「ディスプレイごとに個別のスペース」設定を行なっていない環境のみを考慮したものとうかがわれます。

これは、別にTaskRail-Macが悪いのではなく、AppleがSpaces関連のAPIを整備・公開していないためです。

macOS 10.14上で動かす場合には、アプレット書き出しを行なってアプレットのバンドル内にFrameworkを格納するか、~/Library/FrameworksにFrameworkをインストールしてScript Debugger上で実行、あるいはSIPを解除してスクリプトエディタ上で実行することが可能です。

AppleScript名:spacesKitで現在のSpacesのIDを取得する.scptd
—
–  Created by: Takaaki Naganoya
–  Created on: 2019/02/09
—
–  Copyright © 2019 Piyomaru Software, All Rights Reserved
—
use AppleScript version "2.4" — Yosemite (10.10) or later
use framework "Foundation"
use framework "spacesKit" –https://github.com/DamianSullivan/TaskRail-Mac
use scripting additions

set aSwitcher to current application’s TRDesktopSwitcher’s alloc()’s init()
set aRes to aSwitcher’s getCurrentSpaceId()

★Click Here to Open This Script 

AppleScript名:space notifier
—
–  Created by: Takaaki Naganoya
–  Created on: 2019/01/25
—
–  Copyright © 2019 Piyomaru Software, All Rights Reserved
—
use AppleScript version "2.4" — Yosemite (10.10) or later
use framework "Foundation"
use framework "AppKit"
use framework "spacesKit" –https://github.com/DamianSullivan/TaskRail-Mac
use scripting additions

property aSwitcher : missing value
property currentSpace : 0

set aCenter to current application’s NSWorkspace’s sharedWorkspace()’s notificationCenter()

aCenter’s addObserver:me selector:"spacesChanged:" |name|:"NSWorkspaceActiveSpaceDidChangeNotification" object:(missing value)

set aSwitcher to current application’s TRDesktopSwitcher’s alloc()’s init()
set currentSpace to aSwitcher’s getCurrentSpaceId() as integer

on spacesChanged:aNotif
  set aRes to aSwitcher’s getCurrentSpaceId() as integer
  
if aRes is not equal to currentSpace then
    log aRes
    
display notification "Active Spaces changed to " & (aRes as string)
    
say "Active Spaces changed to " & (aRes as string) using "Tom"
    
set currentSpace to aRes
  end if
end spacesChanged:

★Click Here to Open This Script 

Posted in System | Tagged 10.11savvy 10.12savvy 10.13savvy 10.14savvy | Leave a comment

指定ファイルサイズのJPEGに変換(圧縮率可変)_1K=1024で計算

Posted on 2月 11, 2019 by Takaaki Naganoya

Finder上で選択中の画像ファイルを指定ファイルサイズを下回るよう圧縮率を調整してJPEGに変換するAppleScriptです。

指定画像を指定のファイルサイズ(1K=1024で計算)以内になるよう、非圧縮の状態から段階的に圧縮率を高くして仕上がりファイルサイズを下回るかどうか演算を行います。ファイルに書き込まずに仕上がりサイズの計算を行うところが新機軸です。

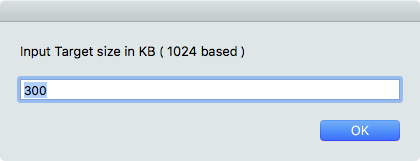
macOS標準搭載のスクリプトメニューから呼び出して使うことを想定しています。実行すると、ダイアログ表示して指定ファイルサイズをKB単位で数値入力する必要があります。

巨大な画像ファイルを処理してしまった場合への対処として、最初に最高圧縮率で圧縮してみて、指定ファイルサイズ以内になるかどうかを計算します。

最初は圧縮率100%から25%まで1%きざみで仕上がり画像ファイルサイズを計算してみたのですが、数十Mバイトの巨大な画像を処理させたら、途中でマウスカーソルが反応しないほどOSが無反応になったので(暴走状態?)、それを避けるために、このような処理を行なってみました。

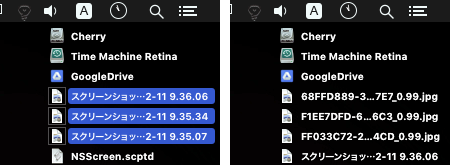
JPEGにファイル変換した画像はデスクトップに

UUID_JPEG画質.jpg

の形式で出力されます。JPEG画質は1.0から0.01までの数値です。

AppleScript名:指定ファイルサイズのJPEGに変換(圧縮率可変)_1K=1024で計算
— Created 2014-02-21 Shane Stanley
— Modified 2019-02-11 Takaaki Naganoya
use AppleScript version "2.5"
use scripting additions
use framework "Foundation"
use framework "AppKit"

property |NSURL| : a reference to current application’s |NSURL|
property NSUUID : a reference to current application’s NSUUID
property NSArray : a reference to current application’s NSArray
property NSString : a reference to current application’s NSString
property NSImage : a reference to current application’s NSImage
property NSPredicate : a reference to current application’s NSPredicate
property NSJPEGFileType : a reference to current application’s NSJPEGFileType
property NSBitmapImageRep : a reference to current application’s NSBitmapImageRep
property NSURLTypeIdentifierKey : a reference to current application’s NSURLTypeIdentifierKey

property compressList : {100, 99, 98, 97, 96, 95, 90, 85, 80, 75, 70, 65, 60, 55, 50, 40, 30, 20, 25} –大→小 へと並んでいる必要がある
property kbBase : 1024

tell application "Finder"
  set inFiles to selection as alias list
end tell

–指定のAlias listのうち画像ファイルのみ抽出
set filRes1 to filterAliasListByUTI(inFiles, "public.image") of me
if filRes1 = {} then return

–ターゲットサイズを指定
set aMessage to "Input Target size in KB ( " & (kbBase as string) & " based )"
set aRes to text returned of (display dialog aMessage default answer "300" buttons {"OK"} default button 1)
if aRes = false or aRes = "" then return
set targLimit to (aRes as number) * kbBase

–選択中のファイルのうちの1つから親フォルダを求め、出力先ファイルパスを組み立てる
set outPathTarg to (contents of first item of filRes1)
set pathString to NSString’s stringWithString:outPathTarg
set newPath to (pathString’s stringByDeletingLastPathComponent()) as string

–Main Loop
repeat with i in filRes1
  set aNSImage to (NSImage’s alloc()’s initWithContentsOfFile:(i))
  
  
–巨大すぎる画像のリサイズ時への保険で、最小サイズで投機的に圧縮して結果を確認する
  
set minSize to calcSavedJPEGSizeFromNSIMage(aNSImage, (last item of compressList) / 100) of me
  
  
if minSize < targLimit then
    –Simulate Suitable JPEG Compression Ratio to target file size
    
repeat with ii in compressList
      set jj to ii / 100
      
set fileSize to calcSavedJPEGSizeFromNSIMage(aNSImage, jj) of me
      
      
if fileSize < targLimit then
        exit repeat
      end if
    end repeat
  else
    set jj to 0.01 –エラー時にはやけくそで1%まで圧縮指定
  end if
  
  
set outPOSIXpath to (newPath & "/" & (NSUUID’s UUID()’s UUIDString()) as string) & "_" & (jj as string)
  
set savePath to outPOSIXpath & ".jpg"
  
  
saveNSImageAtPathAsJPG(aNSImage, savePath, jj) of me
end repeat

–Alias listから指定UTIに含まれるものをPOSIX pathのリストで返す
on filterAliasListByUTI(aList, targUTI)
  set newList to {}
  
repeat with i in aList
    set j to POSIX path of i
    
set tmpUTI to my retUTIfromPath(j)
    
set utiRes to my filterUTIList({tmpUTI}, targUTI)
    
if utiRes is not equal to {} then
      set the end of newList to j
    end if
  end repeat
  
return newList
end filterAliasListByUTI

–指定のPOSIX pathのファイルのUTIを求める
on retUTIfromPath(aPOSIXPath)
  set aURL to |NSURL|’s fileURLWithPath:aPOSIXPath
  
set {theResult, theValue} to aURL’s getResourceValue:(reference) forKey:NSURLTypeIdentifierKey |error|:(missing value)
  
  
if theResult = true then
    return theValue as string
  else
    return theResult
  end if
end retUTIfromPath

–UTIリストが指定UTIに含まれているかどうか演算を行う
on filterUTIList(aUTIList, aUTIstr)
  set anArray to NSArray’s arrayWithArray:aUTIList
  
set aPred to NSPredicate’s predicateWithFormat_("SELF UTI-CONFORMS-TO %@", aUTIstr)
  
set bRes to (anArray’s filteredArrayUsingPredicate:aPred) as list
  
return bRes
end filterUTIList

–NSImageを指定パスにJPEG形式で保存、qulityNumは0.0〜1.0。1.0は無圧縮
on saveNSImageAtPathAsJPG(anImage, outPath, qulityNum as real)
  set imageRep to anImage’s TIFFRepresentation()
  
set aRawimg to NSBitmapImageRep’s imageRepWithData:imageRep
  
set pathString to NSString’s stringWithString:outPath
  
set newPath to pathString’s stringByExpandingTildeInPath()
  
set myNewImageData to (aRawimg’s representationUsingType:(NSJPEGFileType) |properties|:{NSImageCompressionFactor:qulityNum})
  
  
set aLength to (myNewImageData’s |length|()) as number
  
  
set aRes to (myNewImageData’s writeToFile:newPath atomically:true) as boolean
  
return aRes –true/false
end saveNSImageAtPathAsJPG

–NSImageをJPEG形式で保存したときのファイルサイズを計算
on calcSavedJPEGSizeFromNSIMage(anImage, qulityNum as real)
  set imageRep to anImage’s TIFFRepresentation()
  
set aRawimg to NSBitmapImageRep’s imageRepWithData:imageRep
  
set myNewImageData to (aRawimg’s representationUsingType:(NSJPEGFileType) |properties|:{NSImageCompressionFactor:qulityNum})
  
set aLength to (myNewImageData’s |length|()) as number
  
return aLength
end calcSavedJPEGSizeFromNSIMage

★Click Here to Open This Script 

Posted in file Image list UTI | Tagged 10.11savvy 10.12savvy 10.13savvy 10.14savvy Finder NSArray NSBitmapImageRep NSImage NSPredicate NSString NSURL NSURLTypeIdentifierKey NSUUID | Leave a comment

クリップボード中の書式つきテキストのフォントサイズを取得する

Posted on 2月 8, 2019 by Takaaki Naganoya

クリップボードに入っているデータを書式付きテキストとして評価して取得し、そのうち最大のフォントサイズを取得するAppleScriptです。

クリップボードに入っているデータをプレーンテキストとして取得して処理することはよくやっていたのですが、書式付きテキストとして処理することはあまりやっていなかったので、試してみたものです。

AppleScript名:クリップボード中の書式つきテキストのフォントサイズを取得する.scptd
–Created 2015-08-03 by Shane Stanley
–Modified 2019-02-06 by Takaaki Naganoya
use AppleScript version "2.4"
use scripting additions
use framework "Foundation"
use framework "AppKit" — for NSPasteboard

property NSFont : a reference to current application’s NSFont
property NSColor : a reference to current application’s NSColor
property NSString : a reference to current application’s NSString
property NSFontAttributeName : a reference to current application’s NSFontAttributeName
property NSMutableAttributedString : a reference to current application’s NSMutableAttributedString
property NSForegroundColorAttributeName : a reference to current application’s NSForegroundColorAttributeName

–クリップボードの内容をNSAttributedStringに
set anAttr to my getClipboardASStyledText()
if anAttr = missing value then return 0

set maxSize to getAttributeStringFontSize(anAttr) of me
–> 13.0

— クリップボードの内容をNSAttributedStringとして取り出して返す
on getClipboardASStyledText()
  try
    set theNSPasteboard to current application’s NSPasteboard’s generalPasteboard()
    
set theAttributedStringNSArray to theNSPasteboard’s readObjectsForClasses:({current application’s NSAttributedString}) options:(missing value)
    
set theNSAttributedString to theAttributedStringNSArray’s objectAtIndex:0
    
return theNSAttributedString
  on error
    return missing value
  end try
end getClipboardASStyledText

on getAttributeStringFontSize(theStyledText)
  set maxSize to 0
  
set thePureString to theStyledText’s |string|() –pure string from theStyledText
  
set theLength to theStyledText’s |length|()
  
  
set startIndex to 0
  
  
repeat until (startIndex = theLength)
    set {theAtts, theRange} to theStyledText’s attributesAtIndex:startIndex longestEffectiveRange:(reference) inRange:{startIndex, theLength – startIndex}
    
    
–Font
    
set aFont to (theAtts’s valueForKeyPath:"NSFont")
    
if aFont is not equal to missing value then
      set aDFontName to aFont’s displayName()
      
set aDFontSize to (aFont’s pointSize()) as real
    end if
    
    
if maxSize < aDFontSize then
      set maxSize to aDFontSize
    end if
    
set startIndex to current application’s NSMaxRange(theRange)
  end repeat
  
  
return maxSize
end getAttributeStringFontSize

★Click Here to Open This Script 

Posted in RTF | Tagged 10.11savvy 10.12savvy 10.13savvy 10.14savvy NSColor NSFont NSFontAttributeName NSString | Leave a comment

Finder上で選択中のAppleScriptの行数をカウントする

Posted on 2月 8, 2019 by Takaaki Naganoya

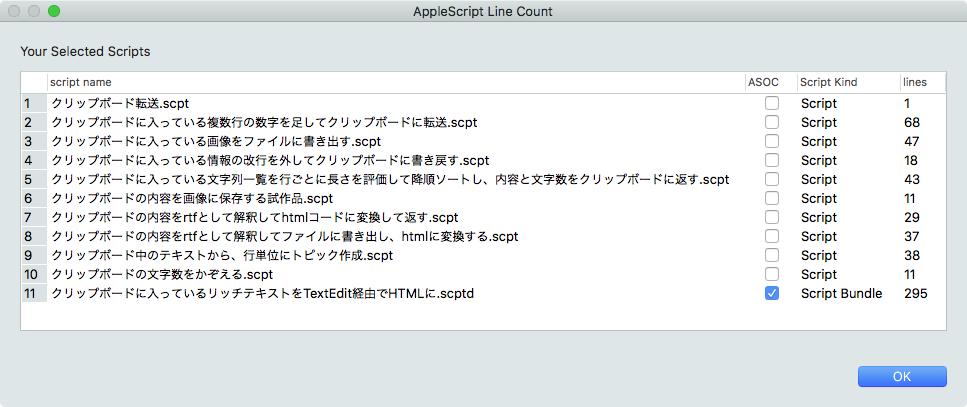
Finder上で選択中のAppleScript書類の行数や種別を取得して表UIで表示するAppleScriptです。

Myriad Tables Libを用いて結果を表UIで表示しています。

当初はAppleScript書類からソースを取得するのに/usr/bin/osadecompileコマンドを使っていたのですが、OSAKit経由で処理したほうが高速な印象があります。

–> Download Executable archive for macOS 10.14 (include Myriad Tables Lib)

macOS 10.14上で動作させるためには、Script Debugger上で本Scriptをオープンするか、本Scriptをバンドル形式で保存し、バンドル内(/Contents/Resources/Script Libraries フォルダ)にMyriad Tables Libを入れ、AppleScriptアプレットとして書き出す必要があります。

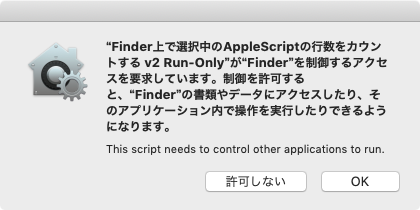
また、初回実行時には「セキュリティ」の承認ダイアログが表示されるため、これをOKする必要があります。AppleScriptアプレットはFinder上でアイコンをダブルクリックすると「Finder上で選択中のアイテム」を拾えないため(その瞬間、Finder上での選択アイテムはアプレット自身になってしまうため)、DockやmacOS標準装備のスクリプトメニューに登録して起動する必要があります。

AppleScript名:Finder上で選択中のAppleScriptの行数をカウントする v2.scpt
— Created 2019-02-04 by Takaaki Naganoya
— 2019 Piyomaru Software
use AppleScript version "2.4"
use scripting additions
use framework "Foundation"
use framework "OSAKit"
use script "Myriad Tables Lib" version "1.0.8" –https://www.macosxautomation.com/applescript/apps/Script_Libs.html#MyriadTablesLib

property |NSURL| : a reference to current application’s |NSURL|
property NSArray : a reference to current application’s NSArray
property NSString : a reference to current application’s NSString
property OSAScript : a reference to current application’s OSAScript
property NSPredicate : a reference to current application’s NSPredicate
property NSURLIsPackageKey : a reference to current application’s NSURLIsPackageKey
property NSURLIsDirectoryKey : a reference to current application’s NSURLIsDirectoryKey
property NSURLTypeIdentifierKey : a reference to current application’s NSURLTypeIdentifierKey

–Finder上で選択中のファイルのうちAppleScript書類のみ抽出
tell application "Finder"
  set inFiles to selection as alias list
  
if inFiles = {} then return
end tell
set filRes1 to filterAliasListByUTIList(inFiles, {"com.apple.applescript.script", "com.apple.applescript.script-bundle"}) of me
if filRes1 = {} then return

–AppleScript書類の種別判定および行数カウント
set outList to {}
repeat with i in filRes1
  set aName to (NSString’s stringWithString:i)’s lastPathComponent() as string
  
set sInfo to detectScriptIsPureASorASOC(i) of me
  
set sText to scriptSource of getASsourceFor(i) of me
  
set sNum to count every paragraph of sText
  
set sUTI to retUTIfromPath(i) of me
  
if sUTI = "com.apple.applescript.script" then
    set sKind to "Script"
  else if sUTI = "com.apple.applescript.script-bundle" then
    set sKind to "Script Bundle"
  else
    set sKind to "Other"
  end if
  
  
set the end of outList to {aName, sInfo, sKind, sNum}
end repeat

–結果を表UIで表示する
tell script "Myriad Tables Lib"
  set aDispBounds to my makeInitialBounds:1200 withHeight:500
  
set theTable to make new table with data outList column headings {"script name", "ASOC", "Script Kind", "lines"} with title "AppleScript Line Count" with prompt "Your Selected Scripts" with row numbering and empty selection allowed –and can add and delete
  
modify table theTable initial position aDispBounds column widths pattern {1, 2, 3, 4} with hidden cancel button
  
modify columns in table theTable user date format {user format full, user format full} entry alignment align left
  (
display table theTable)
end tell

–Alias listから指定UTI Listに含まれるものをPOSIX pathのリストで返す
on filterAliasListByUTIList(aList as list, targUTIList as list)
  set outList to {}
  
repeat with i in targUTIList
    set j to contents of i
    
set aRes to filterAliasListByUTI(aList, j) of me
    
if aRes is not equal to {} then
      set outList to outList & aRes
    end if
  end repeat
  
return outList
end filterAliasListByUTIList

–Alias listから指定UTIに含まれるものをPOSIX pathのリストで返す
on filterAliasListByUTI(aList as list, targUTI)
  set newList to {}
  
repeat with i in aList
    set j to POSIX path of i
    
set tmpUTI to my retUTIfromPath(j)
    
set utiRes to my filterUTIList({tmpUTI}, targUTI)
    
if utiRes is not equal to {} then
      set the end of newList to j
    end if
  end repeat
  
return newList
end filterAliasListByUTI

–指定のPOSIX pathのファイルのUTIを求める
on retUTIfromPath(aPOSIXPath)
  set aURL to |NSURL|’s fileURLWithPath:aPOSIXPath
  
set {theResult, theValue} to aURL’s getResourceValue:(specifier) forKey:NSURLTypeIdentifierKey |error|:(missing value)
  
  
if theResult = true then
    return theValue as string
  else
    return theResult
  end if
end retUTIfromPath

–UTIリストが指定UTIに含まれているかどうか演算を行う
on filterUTIList(aUTIList, aUTIstr)
  set anArray to NSArray’s arrayWithArray:aUTIList
  
set aPred to NSPredicate’s predicateWithFormat_("SELF UTI-CONFORMS-TO %@", aUTIstr)
  
set bRes to (anArray’s filteredArrayUsingPredicate:aPred) as list
  
return bRes
end filterUTIList

on makeInitialBounds:(aTWidth as integer) withHeight:(aTHeight as integer)
  set aDispBounds to current application’s NSScreen’s mainScreen()’s frame()
  
if class of item 1 of aDispBounds = record then
    –macOS 10.10/10.11/10.12
    
set aWidth to (width of |size| of aDispBounds)
    
set aHeight to (height of |size| of aDispBounds)
  else
    –macOS 10.13 or later?
    
set aWidth to (item 1 of item 2 of aDispBounds)
    
set aHeight to (item 2 of item 2 of aDispBounds)
  end if
  
  
set xPos to (aWidth div 2) – (aTWidth div 2)
  
set yPos to (aHeight div 2) – (aTHeight div 2)
  
  
return {xPos, yPos, aTWidth, aTHeight}
end makeInitialBounds:withHeight:

–指定AppleScriptファイルがPure ASかASOCかを判定して返す
on detectScriptIsPureASorASOC(aFile)
  set sRes to getASsourceFor(aFile) of me
  
set sName to scriptKind of sRes –Name
  
set sText to scriptSource of sRes –Source
  
if sText = "" or sText = missing value then return missing value
  
  
if sName = "AppleScript" then
    if sText contains "use framework \"Foundation\"" then
      return true –ASOC
    else
      return false –Pure AppleScript
    end if
  else
    –JXAなど他のOSA言語の場合
    
return sName
  end if
end detectScriptIsPureASorASOC

–指定AppleScriptファイルのソースコードを取得する(実行専用Scriptからは取得できない)
on getASsourceFor(aPOSIXPath)
  set aURL to |NSURL|’s fileURLWithPath:(aPOSIXPath)
  
set theScript to current application’s OSAScript’s alloc()’s initWithContentsOfURL:aURL |error|:(missing value)
  
set scriptName to theScript’s |language|()’s |name|() as string
  
set theSource to theScript’s source() as text
  
return {scriptKind:scriptName, scriptSource:theSource}
end getASsourceFor

★Click Here to Open This Script 

Posted in file File path GUI OSA | Tagged 10.11savvy 10.12savvy 10.13savvy 10.14savvy NSArray NSPredicate NSString NSURL OSAScript | Leave a comment

Script Debuggerに必要な機能を追加する

Posted on 2月 8, 2019 by Takaaki Naganoya

毎日仕事で使っているAppleScript統合開発環境(IDE)、Late Night SoftwareのScript Debugger。大変リッチな機能を持っているものの、仕事で使えば使ったで不満が出てくるもので、機能を追加したくなってきました。

Script Debugger自体もScriptableなアプリケーションなので、AppleScriptを記述して機能を追加できます。ScriptからはApple純正のスクリプトエディタとまったく同じことができるわけではありませんが、ある程度まではコントロールが可能です。

Script DebuggerのAppleScript用語辞書はスクリプトの分析機能がスクリプトエディタよりも大幅に高機能であり、比較にもなりません。ただし、スクリプト書類の書式(style runs)を取得できないため、構文色分けを利用した構文要素への分解ができませんでした。変数名のみ置換するとかハンドラ名のリストアップするといった、スクリプトエディタで10年以上前から利用している機能が使えないわけです(このあたりの処理をスクリプトエディタに依存せずに実行できるようになったのは、ほんのつい最近のことです)。マインドマップ上に各ハンドラの呼び出し関係を図示するような処理も10年ぐらい前からやっていますが、それもScript Debugger上では行えませんでした。一長一短です。

Script Debuggerは独自のScript Menuを持っており、~/Library/Application Support/Script Debugger 7/Scripts/フォルダ内に(Script Debuggerをコントロールする)各種AppleScriptを入れておくとScript Debugger内のScript Menuから呼び出して実行できるようになっています。

ここで紹介するのは「includeしているライブラリをすべてオープンする」Scriptと、「includeしているライブラリのScriptをすべてクローズする」Scriptです。

open all Script Library

スクリプトバンドルのAppleScriptで、バンドル内にAppleScriptライブラリを含んでいる場合に、それらをScript Debuggerでオープンします。機能を細分化して記述している場合に、全Scriptをチェックする必要が生じるとこのようにすべてオープンして確認する必要があります。本来、共通部分をライブラリ化しておく必要があるわけですが、突発的にこういう作業が発生したもので。

Close Script Libraries

「open all Script Library」スクリプトでオープンしたライブラリをクローズするAppleScriptです。Script Debugger上でメインのAppleScriptを選んでおくと、そのScript中でincludeしている(use)AppleScript Librariesをクローズします。

Script Debuggerで一番不満なのは動的に生成したWindowやMenuなどのイベントを拾ってくれないことですが、ほかにも、useコマンドで利用しているAppleScript Librariesでバンドル内に含めていないものをチェックしてバンドル内に入れる機能がないことでしょうか(動作確認して客先に送ったあとで焦ることがたびたび)。そのあたりもぼちぼち、、、、メーカーにリクエストを出して実装を待つよりも、自分でScriptを組んだほうが早いので、、、

AppleScript名:open all Script Library
tell application "Script Debugger"
  tell document 1
    set libList to (used script library files)
    
set aWin to script window of it
    
–> {script window id 13269 of application "Script Debugger"}
  end tell
  
  
set targWin to contents of first item of aWin
  
  
repeat with i in libList
    set j to contents of i
    
set jj to j as alias
    
    
try
      open jj in window targWin
    end try
  end repeat
end tell

★Click Here to Open This Script 

AppleScript名:Close Script Libraries
tell application "Script Debugger"
  tell front document
    set libList to (used script library files)
    
if libList = {} then return –No AppleScript Libraries
  end tell
  
  
set dList to every document
  
repeat with i in dList
    tell i
      set fSpec to file spec
      
if fSpec is in libList then
        ignoring application responses
          close with saving
        end ignoring
      end if
    end tell
  end repeat
end tell

★Click Here to Open This Script 

Posted in file OSA | Tagged 10.11savvy 10.12savvy 10.13savvy Script Debugger | Leave a comment

指定色で塗りつぶし角丸画像を作成

Posted on 2月 5, 2019 by Takaaki Naganoya

指定の矩形に対して、指定色で、指定半径の角丸で、指定ファイルパスに角丸ぬりつぶしPNG画像を作成するAppleScriptです。

色選択のポップアップメニュー中に入れるNSImage作成用に作ったものですが、ねんのために(動作確認のために)ファイル出力させてみました。

AppleScript名:指定色で塗りつぶし角丸画像を作成.scptd
—
–  Created by: Piyomaru Software
–  Created on: 2019/01/29
—
–  Copyright © 2019 Piyomaru Software, All Rights Reserved
—
use AppleScript version "2.4" — Yosemite (10.10) or later
use framework "Foundation"
use scripting additions
use framework "AppKit"

property |NSURL| : a reference to current application’s |NSURL|
property NSColor : a reference to current application’s NSColor
property NSString : a reference to current application’s NSString
property NSImage : a reference to current application’s NSImage
property NSScreen : a reference to current application’s NSScreen
property NSBezierPath : a reference to current application’s NSBezierPath
property NSPNGFileType : a reference to current application’s NSPNGFileType
property NSBitmapImageRep : a reference to current application’s NSBitmapImageRep

set tCol to choose color
copy tCol to {rVal, gVal, bVal}

set aRadius to 12
set aNSColor to makeNSColorFromRGBAval(rVal, gVal, bVal, 65535, 65535) of me
set aNSImage to makeRoundedNSImageWithFilledWithColor(100, 100, aNSColor, aRadius) of me

set aPath to NSString’s stringWithString:(POSIX path of (choose file name))
set bPath to aPath’s stringByAppendingPathExtension:"png"
set aRes to saveNSImageAtPathAsPNG(aNSImage, bPath) of me

–指定サイズのNSImageを作成し、指定色で塗ってNSImageで返す、anRadiusの半径の角丸で
on makeRoundedNSImageWithFilledWithColor(aWidth, aHeight, fillColor, anRadius as real)
  set anImage to NSImage’s alloc()’s initWithSize:(current application’s NSMakeSize(aWidth, aHeight))
  
anImage’s lockFocus()
  
—
  
set theRect to {{x:0, y:0}, {height:aHeight, width:aWidth}}
  
set theNSBezierPath to NSBezierPath’s bezierPathWithRoundedRect:theRect xRadius:anRadius yRadius:anRadius
  
—
  
fillColor’s |set|() –色設定
  
theNSBezierPath’s fill() –ぬりつぶし
  
—
  
anImage’s unlockFocus()
  
  
return anImage
end makeRoundedNSImageWithFilledWithColor

–aMaxValを最大値とする数値でNSColorを作成して返す
on makeNSColorFromRGBAval(redValue as integer, greenValue as integer, blueValue as integer, alphaValue as integer, aMaxVal as integer)
  set aRedCocoa to (redValue / aMaxVal) as real
  
set aGreenCocoa to (greenValue / aMaxVal) as real
  
set aBlueCocoa to (blueValue / aMaxVal) as real
  
set aAlphaCocoa to (alphaValue / aMaxVal) as real
  
set aColor to NSColor’s colorWithCalibratedRed:aRedCocoa green:aGreenCocoa blue:aBlueCocoa alpha:aAlphaCocoa
  
return aColor
end makeNSColorFromRGBAval

–NSImageを指定パスにPNG形式で保存
on saveNSImageAtPathAsPNG(anImage, outPath)
  set imageRep to anImage’s TIFFRepresentation()
  
set aRawimg to NSBitmapImageRep’s imageRepWithData:imageRep
  
  
set pathString to NSString’s stringWithString:outPath
  
set newPath to pathString’s stringByExpandingTildeInPath()
  
  
set myNewImageData to (aRawimg’s representationUsingType:(NSPNGFileType) |properties|:(missing value))
  
set aRes to (myNewImageData’s writeToFile:newPath atomically:true) as boolean
  
  
return aRes –成功ならtrue、失敗ならfalseが返る
end saveNSImageAtPathAsPNG

★Click Here to Open This Script 

Posted in file Image | Tagged 10.11savvy 10.12savvy 10.13savvy 10.14savvy NSBezierPath NSColor NSImage NSScreen NSString NSURL | Leave a comment

2D List中から、複数アイテムが存在するマーカーのx番目のXYマーカーの交点のデータを返す v1

Posted on 2月 3, 2019 by Takaaki Naganoya

2D List中から、ヘッダー行とヘッダー列の(はずの)場所からマーカーを特定し、Xマーカー、Yマーカーの交点座標の値をピックアップして返すAppleScriptです。

これまでにも、2D List(2次元配列9からXマーカー、Yマーカーを個別に指定して、交点座標の値をピックアップするScriptは使っていました。

ところが、実際に投入してみたところXマーカーに該当する文字列が複数ピックアップされる例が出てきたため、「何個目のマーカーを使用するか」「ヘッダー行の何行目までサーチするか」といった追加の機能が必要になってきました。そのための試作品です。

ヘッダー行がユニーク化されていないCSVとか、驚きでアゴが外れそうになるデータにお目にかかったので、その対策のために作ったものです。

AppleScript名:2D List中から、複数アイテムが存在するマーカーのx番目のXYマーカーの交点のデータを返す v1
—
–  Created by: Takaaki Naganoya
–  Created on: 2019/01/24
—
–  Copyright © 2019 Piyomaru Software, All Rights Reserved
—
use AppleScript version "2.4" — Yosemite (10.10) or later
use framework "Foundation"
use scripting additions
use Bplus : script "BridgePlus" –https://www.macosxautomation.com/applescript/apps/BridgePlus.html

set anXItem to "a"
set anXItemNum to 3
set anYItem to "z"
set anYItemNum to 1
set aList to {{"b", "a", "a", "a"}, {"x", "1x", "2x", "3x"}, {"y", "1y", "2y", "3y"}, {"z", "1z", "2z", "3z"}}

set aRes to getItemFromList(aList, anXItem, anXItemNum, anYItem, anYItemNum) of me
–> "3z"

on getItemFromList(aList as list, anXItem, anXItemNum as integer, anYItem, anYItemNum as integer)
  set xRes to findDataFrom2DList(anXItem, aList, 2) of me –> {{2, 1}, {4, 1}}
  
if length of xRes < anXItemNum then error "X-item Fewer Hits"
  
  
set yRes to findDataFrom2DList(anYItem, aList, -1) of me –> {{1, 4}}
  
if length of yRes < anYItemNum then error "Y-item Fewer Hits"
  
  
set xPosRes to item 1 of contents of item anXItemNum of xRes
  
set yPosRes to item 2 of contents of item anYItemNum of yRes
  
  
set aRes to item xPosRes of item yPosRes of aList
  
  
return aRes
end getItemFromList

on findDataFrom2DList(anItem, aList as list, yMax as integer)
  script spd
    property aList : {}
    
property resList : {}
  end script
  
  
set (aList of spd) to aList
  
set (resList of spd) to {}
  
  
set yCount to 1
  
  
repeat with i in (aList of spd)
    
    
set aResList to (Bplus’s indexesOfItem:anItem inList:i inverting:false) as list
    
    
set tmpList to {}
    
if aResList is not equal to {} then
      repeat with ii in aResList
        set jj to contents of ii
        
set the end of tmpList to {jj, yCount}
      end repeat
      
set (resList of spd) to (resList of spd) & tmpList
    end if
    
    
set yCount to yCount + 1
    
if (yMax is not equal to -1) and (yCount > yMax) then exit repeat
  end repeat
  
  
return (resList of spd) –return {{x, y}…..} item list (1-based)
end findDataFrom2DList

★Click Here to Open This Script 

Posted in list | Tagged 10.11savvy 10.12savvy 10.13savvy 10.14savvy | Leave a comment

Keynote書類の現在のスライド上の表1の背景色を置換 v1

Posted on 1月 31, 2019 by Takaaki Naganoya

Keynoteでオープン中の最前面の書類の現在表示中のスライドに存在する表1の背景色を置換するAppleScriptです。

Pages用のScriptをごく一部修正してkeynoteの表に対して処理できるようにしてみました。macOS 10.11, 10.12, 10.13ではスクリプトエディタ上で動作します。macOS 10.14ではSIPを解除してスクリプトエディタで動かすか、アプレット形式で書き出して、アプレットのバンドル中にdbColNamesKit.frameworkを入れると動きます。

Script DebuggerとScript Menu上では動作しません。

ポップアップメニュー中に色の名称の動的な推定に、オープンソースの「DBColorNames」をフレームワーク化した
「dbColNamesKit.framework」を利用しています。

–> dbColNamesKit.framework (To ~/Library/Frameworks)

AppleScript名:Keynote書類の現在のスライド上の表の背景色を置換 v1
— Created 2019-01-29 by Takaaki Naganoya
— 2019 Piyomaru Software
use AppleScript version "2.4"
use scripting additions
use framework "Foundation"
use framework "AppKit"
use framework "dbColNamesKit" –https://github.com/daniel-beard/DBColorNames/
use Bplus : script "BridgePlus" –https://www.macosxautomation.com/applescript/apps/BridgePlus.html

–v1:Convert Pages version to Keynote

property NSView : a reference to current application’s NSView
property NSColor : a reference to current application’s NSColor
property NSArray : a reference to current application’s NSArray
property NSMenu : a reference to current application’s NSMenu
property NSImage : a reference to current application’s NSImage
property NSScreen : a reference to current application’s NSScreen
property NSButton : a reference to current application’s NSButton
property NSWindow : a reference to current application’s NSWindow
property NSTextField : a reference to current application’s NSTextField
property NSMenuItem : a reference to current application’s NSMenuItem
property NSBezierPath : a reference to current application’s NSBezierPath
property NSPopUpButton : a reference to current application’s NSPopUpButton
property NSWindowController : a reference to current application’s NSWindowController
property NSTitledWindowMask : a reference to current application’s NSTitledWindowMask
property NSRoundedBezelStyle : a reference to current application’s NSRoundedBezelStyle
property NSFloatingWindowLevel : a reference to current application’s NSFloatingWindowLevel
property NSBackingStoreBuffered : a reference to current application’s NSBackingStoreBuffered
property NSMomentaryLightButton : a reference to current application’s NSMomentaryLightButton

property windisp : true
property wController : missing value
property pop1ind : 1

–初期化
set (my windisp) to true
set (my pop1ind) to 1
load framework

–Pagesの1ページ目にある表の塗り色を取得
tell application "Keynote"
  tell front document
    tell current slide
      tell table 1
        set c1List to background color of every cell
        
set aProp to properties
        
set xCount to column count of aProp
      end tell
    end tell
  end tell
end tell

–Convert 1D List to 2D List
set c3List to (current application’s SMSForder’s subarraysFrom:c1List groupedBy:xCount |error|:(missing value)) as list

–色データをユニーク化(重複削除)
set bList to uniquifyList(c1List) of me

–missing value(背景色なし)を除外する
set c2List to (current application’s SMSForder’s arrayByDeletingBlanksIn:(bList)) as list

–Popup Menuで置換色選択
set paramObj to {c2List, 65535, "OK", "Select Target Color", 180} –Timeout = 180 sec, Color val range = 16bit
my performSelectorOnMainThread:"getPopupValues:" withObject:(paramObj) waitUntilDone:true
if pop1ind = false then return –timed out
set fromCol to (contents of item pop1ind of c2List)

–カラーピッカーで置換色選択
set tCol to choose color default color fromCol

set d1 to current date

–実際に表の背景色を置換する
set hitList to findDataFrom2DList(fromCol, c3List) of me –データ上で当該色のセル情報を計算する

–Rangeを横スキャンと縦スキャンの2通りで試算(Two way Simulation)
set rList1 to retRangeFromPosListHorizontal(hitList) of me –横方向へのrange評価
set rList2 to retRangeFromPosListVertival(hitList) of me –縦方向へのrange評価

–Simulationの結果、要素数の少ない方(=処理時間の短い方=高速な方)を採用する
log {"Simulation", (length of rList1), (length of rList2)}
if (length of rList1) < (length of rList2) then
  copy rList1 to rangeList
else
  copy rList2 to rangeList
end if

tell application "Keynote"
  activate
  
tell front document
    tell current slide
      tell table 1
        repeat with i in rangeList
          set j to contents of i
          
          
ignoring application responses –非同期実行モードで高速実行
            set background color of range j to tCol
          end ignoring
          
        end repeat
      end tell
    end tell
  end tell
end tell

set d2 to current date
return d2 – d1

–カラーポップアップメニューをウィンドウ表示
on getPopupValues:paramObj
  copy (paramObj as list) to {ap1List, aColMax, aButtonMSG, aSliderValMSG, timeOutSecs}
  
  
set (my windisp) to true
  
  
set aView to NSView’s alloc()’s initWithFrame:(current application’s NSMakeRect(0, 0, 360, 100))
  
  
–Labelをつくる
  
set a1TF to NSTextField’s alloc()’s initWithFrame:(current application’s NSMakeRect(30, 60, 80, 20))
  
a1TF’s setEditable:false
  
a1TF’s setStringValue:"Color:"
  
a1TF’s setDrawsBackground:false
  
a1TF’s setBordered:false
  
  
–Ppopup Buttonをつくる
  
set a1Button to NSPopUpButton’s alloc()’s initWithFrame:(current application’s NSMakeRect(80, 60, 200, 20)) pullsDown:false
  
a1Button’s removeAllItems()
  
  
set a1Menu to NSMenu’s alloc()’s init()
  
set aCDB to current application’s DBColorNames’s alloc()’s init()
  
  
set iCount to 1
  
repeat with i in ap1List
    copy i to {r1, g1, b1}
    
    
set nsCol to makeNSColorFromRGBAval(r1, g1, b1, aColMax, aColMax) of me
    
set anImage to makeRoundedNSImageWithFilledWithColor(64, 64, nsCol, 4) of me
    
    
set aTitle to "#" & (iCount as string) & " " & (aCDB’s nameForColor:nsCol) as string
    
set aMenuItem to (NSMenuItem’s alloc()’s initWithTitle:aTitle action:"actionHandler:" keyEquivalent:"")
    (
aMenuItem’s setImage:anImage)
    (
aMenuItem’s setEnabled:true)
    (
a1Menu’s addItem:aMenuItem)
    
    
set iCount to iCount + 1
  end repeat
  
  
a1Button’s setMenu:a1Menu


–Buttonをつくる
  
set bButton to (NSButton’s alloc()’s initWithFrame:(current application’s NSMakeRect(80, 10, 140, 40)))
  
bButton’s setButtonType:(NSMomentaryLightButton)
  
bButton’s setBezelStyle:(NSRoundedBezelStyle)
  
bButton’s setTitle:aButtonMSG
  
bButton’s setTarget:me
  
bButton’s setAction:("clicked:")
  
bButton’s setKeyEquivalent:(return)
  
  
aView’s addSubview:a1TF
  
  
aView’s addSubview:a1Button
  
aView’s addSubview:bButton
  
aView’s setNeedsDisplay:true
  
  
–NSWindowControllerを作ってみた(いらない?)
  
set aWin to (my makeWinWithView(aView, 300, 100, aSliderValMSG))
  
  
set wController to NSWindowController’s alloc()
  
wController’s initWithWindow:aWin
  
  
wController’s showWindow:me
  
  
set aCount to timeOutSecs * 100
  
  
set hitF to false
  
repeat aCount times
    if (my windisp) = false then
      set hitF to true
      
exit repeat
    end if
    
delay 0.01
    
set aCount to aCount – 1
  end repeat
  
  
my closeWin:aWin
  
  
if hitF = true then
    set s1Val to ((a1Button’s indexOfSelectedItem() as number) + 1)
  else
    set s1Val to false
  end if
  
  
copy s1Val to my pop1ind
  
end getPopupValues:

on clicked:aSender
  set (my windisp) to false
end clicked:

–make Window for Display
on makeWinWithView(aView, aWinWidth as integer, aWinHeight as integer, aTitle as string)
  set aScreen to NSScreen’s mainScreen()
  
set aFrame to {{0, 0}, {aWinWidth, aWinHeight}}
  
  
set aBacking to NSTitledWindowMask
  
  
set aDefer to NSBackingStoreBuffered
  
  
— Window
  
set aWin to NSWindow’s alloc()
  (
aWin’s initWithContentRect:aFrame styleMask:aBacking backing:aDefer defer:false screen:aScreen)
  
  
aWin’s setTitle:aTitle
  
aWin’s setDelegate:me
  
aWin’s setDisplaysWhenScreenProfileChanges:true
  
aWin’s setHasShadow:true
  
aWin’s setIgnoresMouseEvents:false
  
aWin’s setLevel:(NSFloatingWindowLevel)
  
aWin’s setOpaque:false
  
aWin’s setReleasedWhenClosed:true
  
aWin’s |center|()
  
  
aWin’s setContentView:aView
  
  
return aWin
end makeWinWithView

–close win
on closeWin:aWindow
  repeat with n from 10 to 1 by -1
    (aWindow’s setAlphaValue:n / 10)
    
delay 0.02
  end repeat
  
aWindow’s |close|()
end closeWin:

–Popup Action Handler
on actionHandler:sender
  set aTag to tag of sender as integer
  
set aTitle to title of sender as string
end actionHandler:

–aMaxValを最大値とする数値でNSColorを作成して返す
on makeNSColorFromRGBAval(redValue as integer, greenValue as integer, blueValue as integer, alphaValue as integer, aMaxVal as integer)
  set aRedCocoa to (redValue / aMaxVal) as real
  
set aGreenCocoa to (greenValue / aMaxVal) as real
  
set aBlueCocoa to (blueValue / aMaxVal) as real
  
set aAlphaCocoa to (alphaValue / aMaxVal) as real
  
set aColor to NSColor’s colorWithCalibratedRed:aRedCocoa green:aGreenCocoa blue:aBlueCocoa alpha:aAlphaCocoa
  
return aColor
end makeNSColorFromRGBAval

–指定サイズのNSImageを作成し、指定色で塗ってNSImageで返す
on makeNSImageWithFilledWithColor(aWidth as integer, aHeight as integer, fillColor)
  set anImage to NSImage’s alloc()’s initWithSize:(current application’s NSMakeSize(aWidth, aHeight))
  
anImage’s lockFocus()
  
—
  
set theRect to {{x:0, y:0}, {height:aHeight, width:aWidth}}
  
set theNSBezierPath to NSBezierPath’s bezierPath
  
theNSBezierPath’s appendBezierPathWithRect:theRect
  
—
  
fillColor’s |set|() –色設定
  
theNSBezierPath’s fill() –ぬりつぶし
  
—
  
anImage’s unlockFocus()
  
—
  
return anImage
end makeNSImageWithFilledWithColor

–指定サイズのNSImageを作成し、指定色で塗ってNSImageで返す、anRadiusの半径の角丸で
on makeRoundedNSImageWithFilledWithColor(aWidth as integer, aHeight as integer, fillColor, anRadius as real)
  set anImage to NSImage’s alloc()’s initWithSize:(current application’s NSMakeSize(aWidth, aHeight))
  
anImage’s lockFocus()
  
—
  
set theRect to {{x:0, y:0}, {height:aHeight, width:aWidth}}
  
set theNSBezierPath to NSBezierPath’s bezierPathWithRoundedRect:theRect xRadius:anRadius yRadius:anRadius
  
—
  
fillColor’s |set|() –色設定
  
theNSBezierPath’s fill() –ぬりつぶし
  
—
  
anImage’s unlockFocus()
  
  
return anImage
end makeRoundedNSImageWithFilledWithColor

on uniquifyList(aList as list)
  set aArray to NSArray’s arrayWithArray:aList
  
set bArray to aArray’s valueForKeyPath:"@distinctUnionOfObjects.self"
  
return bArray as list
end uniquifyList

on findDataFrom2DList(anItem, aList as list)
  script spd
    property aList : {}
    
property resList : {}
  end script
  
  
set (aList of spd) to aList
  
set (resList of spd) to {}
  
  
set yCount to 1
  
  
repeat with i in (aList of spd)
    
    
set aResList to (Bplus’s indexesOfItem:anItem inList:i inverting:false) as list
    
    
set tmpList to {}
    
if aResList is not equal to {} then
      repeat with ii in aResList
        set jj to contents of ii
        
set the end of tmpList to {jj, yCount}
      end repeat
      
set (resList of spd) to (resList of spd) & tmpList
    end if
    
    
set yCount to yCount + 1
  end repeat
  
  
return (resList of spd) –return {{x, y}…..} item list (1-based)
end findDataFrom2DList

on retRangeFromPosListVertival(posList as list)
  script rangeSPD
    property posList2 : {}
  end script
  
  
–縦方向へのrange評価に都合がいいようにソート
  
set (posList2 of rangeSPD) to shellSortListAscending(posList, {1, 2}) of me
  
  
–先頭データをピックアップ
  
set firstData to first item of (posList2 of rangeSPD)
  
set (posList2 of rangeSPD) to rest of (posList2 of rangeSPD)
  
  
copy firstData to {curX1, curY1}
  
set tmpRangeStr to aNumToExcelColumn(curX1) of me & (curY1 as string) & ":"
  
  
set tmpRange to {}
  
set hitF to false
  
  
set outList to {}
  
  
repeat with i in (posList2 of rangeSPD)
    copy i to {tmpX, tmpY}
    
    
–log {"{curX1, curY1}", {curX1, curY1}}
    
–log {"{tmpX, tmpY}", {tmpX, tmpY}}


if (curX1 = tmpX) and (curY1 + 1 = tmpY) then
      –Y方向への連続値を拾っている最中
      
if hitF = false then
        –log "case 1a"
        
–log {"hitF", hitF}
        
set hitF to true
      else
        –log "case 1b"
        
–log {"hitF", hitF}
        
–横に連続しているブロックの途中
      end if
    else
      –直前の値と連続していない
      
if hitF = false then
        –log "case 2a"
        
–log {"hitF", hitF}
        
set tmpRangeStr to tmpRangeStr & aNumToExcelColumn(curX1) of me & (curY1 as string)
        
set the end of outList to tmpRangeStr
        
set tmpRangeStr to aNumToExcelColumn(tmpX) of me & (tmpY as string) & ":"
        
set hitF to false
      else
        –log "case 2b"
        
–log {"hitF", hitF}
        
–連続ブロックの末尾を拾った
        
set tmpRangeStr to tmpRangeStr & aNumToExcelColumn(curX1) of me & (curY1 as string)
        
set the end of outList to tmpRangeStr
        
set tmpRangeStr to aNumToExcelColumn(tmpX) of me & (tmpY as string) & ":"
        
set hitF to false
        
–log {"tmpRangeStr", tmpRangeStr}
      end if
    end if
    
    
copy {tmpX, tmpY} to {curX1, curY1}
  end repeat
  
  
–log {tmpRangeStr, hitF}
  
  
if (hitF = true) or (tmpRangeStr is not equal to "") then
    set tmpRangeStr to tmpRangeStr & aNumToExcelColumn(curX1) of me & (curY1 as string)
    
set the end of outList to tmpRangeStr
  end if
  
  
return outList
end retRangeFromPosListVertival

on retRangeFromPosListHorizontal(posList as list)
  script rangeSPD
    property posList2 : {}
  end script
  
  
copy posList to (posList2 of rangeSPD)
  
  
–先頭データをピックアップ
  
set firstData to first item of (posList2 of rangeSPD)
  
set (posList2 of rangeSPD) to rest of (posList2 of rangeSPD)
  
  
copy firstData to {curX1, curY1}
  
set tmpRangeStr to aNumToExcelColumn(curX1) of me & (curY1 as string) & ":"
  
  
set tmpRange to {}
  
set hitF to false
  
  
set outList to {}
  
  
repeat with i in (posList2 of rangeSPD)
    copy i to {tmpX, tmpY}
    
    
–log {"{curX1, curY1}", {curX1, curY1}}
    
–log {"{tmpX, tmpY}", {tmpX, tmpY}}


if (curX1 + 1 = tmpX) and (curY1 = tmpY) then
      –X方向への連続値を拾っている最中
      
if hitF = false then
        –log "case 1a"
        
–log {"hitF", hitF}
        
set hitF to true
      else
        –log "case 1b"
        
–log {"hitF", hitF}
        
–横に連続しているブロックの途中
      end if
    else
      –直前の値と連続していない
      
if hitF = false then
        –log "case 2a"
        
–log {"hitF", hitF}
        
set tmpRangeStr to tmpRangeStr & aNumToExcelColumn(curX1) of me & (curY1 as string)
        
set the end of outList to tmpRangeStr
        
set tmpRangeStr to aNumToExcelColumn(tmpX) of me & (tmpY as string) & ":"
        
set hitF to false
      else
        –log "case 2b"
        
–log {"hitF", hitF}
        
–連続ブロックの末尾を拾った
        
set tmpRangeStr to tmpRangeStr & aNumToExcelColumn(curX1) of me & (curY1 as string)
        
set the end of outList to tmpRangeStr
        
set tmpRangeStr to aNumToExcelColumn(tmpX) of me & (tmpY as string) & ":"
        
set hitF to false
        
–log {"tmpRangeStr", tmpRangeStr}
      end if
    end if
    
    
copy {tmpX, tmpY} to {curX1, curY1}
  end repeat
  
  
–log {tmpRangeStr, hitF}
  
  
if (hitF = true) or (tmpRangeStr is not equal to "") then
    set tmpRangeStr to tmpRangeStr & aNumToExcelColumn(curX1) of me & (curY1 as string)
    
set the end of outList to tmpRangeStr
  end if
  
  
return outList
end retRangeFromPosListHorizontal

–2008/05/01 By Takaaki Naganoya
–10進数数値をExcel 2004/2008的カラム表現にエンコードするサブルーチン を使いまわし
–1〜1351までの間であれば正しいエンコーディング結果を返す
on aNumToExcelColumn(origNum as integer)
  if origNum > 1351 then
    error "エラー:Excel 2004/2008的カラム表現(A1形式)への変換ルーチンにおいて、想定範囲外(1351以上)のパラメータが指定されました"
  end if
  
  
set upperDigitEncTable to {"A", "B", "C", "D", "E", "F", "G", "H", "I", "J", "K", "L", "M", "N", "O", "P", "Q", "R", "S", "T", "U", "V", "W", "X", "Y", "Z", "A"}
  
set lowerDigitEncTable to {"A", "B", "C", "D", "E", "F", "G", "H", "I", "J", "K", "L", "M", "N", "O", "P", "Q", "R", "S", "T", "U", "V", "W", "X", "Y", "Z", "A"}
  
  
set oNum to origNum
  
set nTh to 26
  
set stringLength to 4
  
  
–数字が1桁の場合の対応
  
if origNum < 27 then
    set aRes to (item origNum of upperDigitEncTable) as string
    
return aRes
  end if


if origNum > 702 then
    –3桁になる場合
    
set upupNum to oNum div 676 –整数除算–上の上の桁
    
set oNum to oNum – (upupNum * 676)
    
set upNum to oNum div 26 –整数除算–上の桁
    
set lowNum to oNum mod 26 – 1 –余剰計算–下の桁
    
    
–超つじつま合わせ処理
    
if lowNum = -1 then
      set upNum to upNum – 1
      
set lowNum to 25
    end if
    
    
set upupChar to (item upupNum of upperDigitEncTable) as string
    
set upChar to (item upNum of upperDigitEncTable) as string
    
set lowChar to (item (lowNum + 1) of lowerDigitEncTable) as string
    
set resText to upupChar & upChar & lowChar
    
  else
    –2桁の場合
    
set upNum to oNum div 26 –整数除算–上の桁
    
set lowNum to oNum mod 26 – 1 –余剰計算–下の桁
    
    
–超つじつま合わせ処理
    
if lowNum = -1 then
      set upNum to upNum – 1
      
set lowNum to 25
    end if
    
    
set upChar to (item upNum of upperDigitEncTable) as string
    
set lowChar to (item (lowNum + 1) of lowerDigitEncTable) as string
    
set resText to upChar & lowChar
    
  end if
  
  
return resText
end aNumToExcelColumn

–入れ子のリストを昇順ソート
on shellSortListAscending(a, keyItem)
  return sort2DList(a, keyItem, {true}) of me
end shellSortListAscending

–入れ子のリストを降順ソート
on shellSortListDecending(a, keyItem)
  return sort2DList(a, keyItem, {false}) of me
end shellSortListDecending

–2D Listをソート
on sort2DList(aList as list, sortIndexes as list, sortOrders as list)
  
  
–index値をAS流(アイテムが1はじまり)からCocoa流(アイテムが0はじまり)に変換
  
set newIndex to {}
  
repeat with i in sortIndexes
    set j to contents of i
    
set j to j – 1
    
set the end of newIndex to j
  end repeat
  
  
–Sort TypeのListを作成(あえて外部から指定する内容でもない)
  
set sortTypes to {}
  
repeat (length of sortIndexes) times
    set the end of sortTypes to "compare:"
  end repeat
  
  
–Sort
  
set resList to (current application’s SMSForder’s subarraysIn:(aList) sortedByIndexes:newIndex ascending:sortOrders sortTypes:sortTypes |error|:(missing value)) as list
  
  
return resList
end sort2DList

★Click Here to Open This Script 

Posted in Color GUI | Tagged 10.11savvy 10.12savvy 10.13savvy 10.14savvy Keynote NSArray NSBezierPath NSButton NSColor NSImage NSMenu NSMenuItem NSPopUpButton NSScreen NSTextField NSView NSWindow NSWindowController | 1 Comment

Post navigation

  • Older posts
  • Newer posts

電子書籍(PDF)をオンラインストアで販売中!

Google Search

Popular posts

  • 開発機としてM2 Mac miniが来たのでガチレビュー
  • macOS 15, Sequoia
  • 指定のWordファイルをPDFに書き出す
  • Pages本執筆中に、2つの書類モード切り替えに気がついた
  • Numbersで選択範囲のセルの前後の空白を削除
  • メキシカンハットの描画
  • Pixelmator Pro v3.6.4でAppleScriptからの操作時の挙動に違和感が
  • AdobeがInDesign v19.4からPOSIX pathを採用
  • Safariで「プロファイル」機能を使うとAppleScriptの処理に影響
  • AppleScriptによる並列処理
  • Cocoa Scripting Course 続刊計画
  • macOS 14.xでScript Menuの実行速度が大幅に下がるバグ
  • AppleScript入門③AppleScriptを使った「自動化」とは?
  • Keynote/Pagesで選択中の表カラムの幅を均等割
  • Keynote、Pages、Numbers Ver.14.0が登場
  • デフォルトインストールされたフォント名を取得するAppleScript
  • macOS 15 リモートApple Eventsにバグ?
  • AppleScript入門① AppleScriptってなんだろう?
  • Numbersで最前面の書類のすべてのシート上の表の行数を合計
  • macOS 14で変更になったOSバージョン取得APIの返り値

Tags

10.11savvy (1101) 10.12savvy (1242) 10.13savvy (1391) 10.14savvy (587) 10.15savvy (438) 11.0savvy (283) 12.0savvy (212) 13.0savvy (194) 14.0savvy (147) 15.0savvy (129) CotEditor (66) Finder (51) iTunes (19) Keynote (116) NSAlert (61) NSArray (51) NSBitmapImageRep (20) NSBundle (20) NSButton (34) NSColor (53) NSDictionary (28) NSFileManager (23) NSFont (21) NSImage (41) NSJSONSerialization (21) NSMutableArray (63) NSMutableDictionary (22) NSPredicate (36) NSRunningApplication (56) NSScreen (30) NSScrollView (22) NSString (119) NSURL (98) NSURLRequest (23) NSUTF8StringEncoding (30) NSView (33) NSWorkspace (20) Numbers (76) Pages (55) Safari (44) Script Editor (27) WKUserContentController (21) WKUserScript (20) WKWebView (23) WKWebViewConfiguration (22)

カテゴリー

  • 2D Bin Packing
  • 3D
  • AirDrop
  • AirPlay
  • Animation
  • AppleScript Application on Xcode
  • Beginner
  • Benchmark
  • beta
  • Bluetooth
  • Books
  • boolean
  • bounds
  • Bug
  • Calendar
  • call by reference
  • check sum
  • Clipboard
  • Cocoa-AppleScript Applet
  • Code Sign
  • Color
  • Custom Class
  • date
  • dialog
  • diff
  • drive
  • Droplet
  • exif
  • file
  • File path
  • filter
  • folder
  • Font
  • Font
  • GAME
  • geolocation
  • GUI
  • GUI Scripting
  • Hex
  • History
  • How To
  • iCloud
  • Icon
  • Image
  • Input Method
  • Internet
  • iOS App
  • JavaScript
  • JSON
  • JXA
  • Keychain
  • Keychain
  • Language
  • Library
  • list
  • Locale
  • Localize
  • Machine Learning
  • Map
  • Markdown
  • Menu
  • Metadata
  • MIDI
  • MIME
  • Natural Language Processing
  • Network
  • news
  • Noification
  • Notarization
  • Number
  • Object control
  • OCR
  • OSA
  • parallel processing
  • PDF
  • Peripheral
  • PRODUCTS
  • QR Code
  • Raw AppleEvent Code
  • Record
  • rectangle
  • recursive call
  • regexp
  • Release
  • Remote Control
  • Require Control-Command-R to run
  • REST API
  • Review
  • RTF
  • Sandbox
  • Screen Saver
  • Script Libraries
  • sdef
  • search
  • Security
  • selection
  • shell script
  • Shortcuts Workflow
  • Sort
  • Sound
  • Spellchecker
  • Spotlight
  • SVG
  • System
  • Tag
  • Telephony
  • Text
  • Text to Speech
  • timezone
  • Tools
  • Update
  • URL
  • UTI
  • Web Contents Control
  • WiFi
  • XML
  • XML-RPC
  • イベント(Event)
  • 未分類

アーカイブ

  • 2025年4月
  • 2025年3月
  • 2025年2月
  • 2025年1月
  • 2024年12月
  • 2024年11月
  • 2024年10月
  • 2024年9月
  • 2024年8月
  • 2024年7月
  • 2024年6月
  • 2024年5月
  • 2024年4月
  • 2024年3月
  • 2024年2月
  • 2024年1月
  • 2023年12月
  • 2023年11月
  • 2023年10月
  • 2023年9月
  • 2023年8月
  • 2023年7月
  • 2023年6月
  • 2023年5月
  • 2023年4月
  • 2023年3月
  • 2023年2月
  • 2023年1月
  • 2022年12月
  • 2022年11月
  • 2022年10月
  • 2022年9月
  • 2022年8月
  • 2022年7月
  • 2022年6月
  • 2022年5月
  • 2022年4月
  • 2022年3月
  • 2022年2月
  • 2022年1月
  • 2021年12月
  • 2021年11月
  • 2021年10月
  • 2021年9月
  • 2021年8月
  • 2021年7月
  • 2021年6月
  • 2021年5月
  • 2021年4月
  • 2021年3月
  • 2021年2月
  • 2021年1月
  • 2020年12月
  • 2020年11月
  • 2020年10月
  • 2020年9月
  • 2020年8月
  • 2020年7月
  • 2020年6月
  • 2020年5月
  • 2020年4月
  • 2020年3月
  • 2020年2月
  • 2020年1月
  • 2019年12月
  • 2019年11月
  • 2019年10月
  • 2019年9月
  • 2019年8月
  • 2019年7月
  • 2019年6月
  • 2019年5月
  • 2019年4月
  • 2019年3月
  • 2019年2月
  • 2019年1月
  • 2018年12月
  • 2018年11月
  • 2018年10月
  • 2018年9月
  • 2018年8月
  • 2018年7月
  • 2018年6月
  • 2018年5月
  • 2018年4月
  • 2018年3月
  • 2018年2月

https://piyomarusoft.booth.pm/items/301502

メタ情報

  • ログイン
  • 投稿フィード
  • コメントフィード
  • WordPress.org

Forum Posts

  • 人気のトピック
  • 返信がないトピック

メタ情報

  • ログイン
  • 投稿フィード
  • コメントフィード
  • WordPress.org
Proudly powered by WordPress
Theme: Flint by Star Verte LLC