Menu

Skip to content
AppleScriptの穴
  • Home
  • Products
  • Books
  • Docs
  • Events
  • Forum
  • About This Blog
  • License
  • 仕事依頼

AppleScriptの穴

Useful & Practical AppleScript archive. Click '★Click Here to Open This Script' Link to download each AppleScript

タグ: 10.14savvy

ページ範囲処理 v2

Posted on 2月 14, 2021 by Takaaki Naganoya

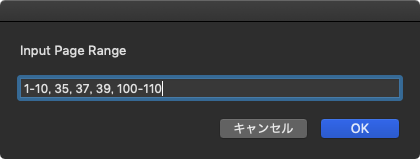
処理対象ページをユーザーに文字入力させた場合に、

X1,X2,X3,Y-Z

のようなフォーマットを解釈して、処理対象ページ番号をすべて展開するAppleScriptです。

もともと16年前に作成したScriptを書き換えたものです。オリジナルもとくに現行環境で問題なく動いているのですが、ソートルーチンを高速なものに差し替えています。ただし、処理データの量がたいして多くないことを前提としているため(数万ページ指定しないとCocoaのソートルーチンを利用するメリットがない)、Cocoaのソートルーチンは使っていません。

AppleScript名:ページ範囲処理 v2
—
–  Created by: Takaaki Naganoya
–  Created on: 2005/11/04
–  Modified on: 2021/02/14
—
–  Copyright © 2021 Piyomaru Software, All Rights Reserved
—
use AppleScript version "2.4" — Yosemite (10.10) or later
use framework "Foundation"
use scripting additions

set parsedList to parsePageRangeString("1-10, 35, 37, 39, 100-110") of me
–> {1, 2, 3, 4, 5, 6, 7, 8, 9, 10, 35, 37, 39, 100, 101, 102, 103, 104, 105, 106, 107, 108, 109, 110}

–ページ範囲指定のテキスト(多分)を展開して実際のページ数の一覧リストに
on parsePageRangeString(pageText as string)
  set curDelim to AppleScript’s text item delimiters
  
set AppleScript’s text item delimiters to ("," as string)
  
set aList to text items of pageText
  
set AppleScript’s text item delimiters to curDelim
  
  
set eList to {}
  
repeat with i in aList
    set j to contents of i
    
if ("-" as string) is in j then
      set eList to eList & parseByHyphen(j) of me
    else
      set the end of eList to j as number
    end if
  end repeat
  
  
set eList to removeDuplicates(eList) of me
  
set eList to shellSortAscending(eList) of me
  
  
return eList
end parsePageRangeString

–重複部分を削除
on removeDuplicates(aList)
  set newList to {}
  
repeat with i from 1 to (length of aList)
    set anItem to item 1 of aList
    
set aList to rest of aList
    
if {anItem} is not in aList then set end of newList to anItem
  end repeat
  
return newList
end removeDuplicates

–ハイフンを実際の数値に変換
on parseByHyphen(aText)
  set aText to aText as string
  
set curDelim to AppleScript’s text item delimiters
  
set AppleScript’s text item delimiters to ("-" as string)
  
set aList to text items of aText
  
set AppleScript’s text item delimiters to curDelim
  
  
set sList to {}
  
repeat with i from ((item 1 of aList) as number) to ((item 2 of aList) as number)
    set the end of sList to i
  end repeat
  
return sList
end parseByHyphen

–入れ子ではないリストの昇順ソート
on shellSortAscending(aSortList)
  script oBj
    property list : aSortList
  end script
  
  
set len to count oBj’s list’s items
  
set gap to 1
  
  
repeat while (gap ≤ len)
    set gap to ((gap * 3) + 1)
  end repeat
  
  
repeat while (gap > 0)
    set gap to (gap div 3)
    
if (gap < len) then
      repeat with i from gap to (len – 1)
        set temp to oBj’s list’s item (i + 1)
        
set j to i
        
repeat while ((j ≥ gap) and (oBj’s list’s item (j – gap + 1) > temp))
          set oBj’s list’s item (j + 1) to oBj’s list’s item (j – gap + 1)
          
set j to j – gap
        end repeat
        
set oBj’s list’s item (j + 1) to temp
      end repeat
    end if
  end repeat
  
  
return oBj’s list
end shellSortAscending

★Click Here to Open This Script 

Posted in list Text | Tagged 10.13savvy 10.14savvy 10.15savvy 11.0savvy | Leave a comment

CotEditorの各Windowで選択しておいた内容を座標でソートして結合

Posted on 2月 11, 2021 by Takaaki Naganoya

CotEditorでオープン中の複数のウィンドウから、各ウィンドウ(書類)の選択範囲を取得し、各ウィンドウの画面上の位置情報をもとに、その順番(Y座標、X座標)にテキストを組み合わせて新規書類を作成するAppleScriptです。


▲DEMO


▲Live Coding

当初、ウィンドウの重ね合わせ順(windowのindex)も考慮していたのですが、実際にためしてみたところ、重ね合わせ順を使うのは無駄だったので、機能を外しました。

AppleScript名:CotEditorの各Windowで選択しておいた内容を重ね合わせ順と座標でソートして結合.scpt
—
–  Created by: Takaaki Naganoya
–  Created on: 2021/02/10
—
–  Copyright © 2021 Piyomaru Software, All Rights Reserved
—
use AppleScript version "2.5"
use scripting additions
use framework "Foundation"

set wList to {}

tell application "CotEditor"
  set wCount to count (every window whose visible is true)
  
if wCount < 2 then return
  
  
repeat with i from 1 to wCount
    tell window i
      set tmpBounds to bounds
      
      
set tmpProp to properties
    end tell
    
    
set tmpDoc to document of tmpProp
    
tell tmpDoc
      set aCon to contents of selection
    end tell
    
    
set tmpX to item 1 of tmpBounds
    
set tmpY to item 2 of tmpBounds
    
set tmpRec to {winIndex:i, winX:tmpX, winY:tmpY, selText:aCon}
    
    
set the end of wList to tmpRec
    
  end repeat
  
end tell

–座標値をもとにソートして選択テキストを返す
set sWList to sortRecListByLabel(wList, {"winY", "winX"}, {true, true}) of me
set anArray to current application’s NSArray’s arrayWithArray:sWList
set vList to (anArray’s valueForKey:"selText") as list
set jointStr to retArrowText(vList, return) of me

–CotEditor上で指定テキストでドキュメントを新規作成
makeNewCotEditorDoc(jointStr) of me

–リストを指定デリミタを追加しつつテキスト化
on retArrowText(aList, aDelim)
  set aText to ""
  
set curDelim to AppleScript’s text item delimiters
  
set AppleScript’s text item delimiters to aDelim
  
set aText to aList as text
  
set AppleScript’s text item delimiters to curDelim
  
return aText
end retArrowText

–リストに入れたレコードを、指定の属性ラベルの値でソート
on sortRecListByLabel(aRecList as list, aLabelStr as list, ascendF as list)
  set aArray to current application’s NSArray’s arrayWithArray:aRecList
  
  
set aCount to length of aLabelStr
  
set sortDescArray to current application’s NSMutableArray’s new()
  
repeat with i from 1 to aCount
    set aLabel to (item i of aLabelStr)
    
set aKey to (item i of ascendF)
    
set sortDesc to (current application’s NSSortDescriptor’s alloc()’s initWithKey:aLabel ascending:aKey)
    (
sortDescArray’s addObject:sortDesc)
  end repeat
  
  
return (aArray’s sortedArrayUsingDescriptors:sortDescArray) as list
end sortRecListByLabel

–指定テキストでCotEditorの新規書類を作成
on makeNewCotEditorDoc(aCon)
  tell application "CotEditor"
    activate
    
set newDoc to make new document
    
tell newDoc
      set contents to aCon
    end tell
  end tell
end makeNewCotEditorDoc

★Click Here to Open This Script 

Posted in list Record | Tagged 10.14savvy 10.15savvy 11.0savvy CotEditor | Leave a comment

We released English edition of “FileMaker Pro Scripting Book with AppleScript”

Posted on 2月 9, 2021 by Takaaki Naganoya

Just we released English edition of ebook “FileMaker Pro Scripting Book with AppleScript”.

–> Download Sampler PDF

Title:FileMaker Pro Scripting Book with AppleScript English Edition
Author:Takaaki Naganoya@Piyomaru Software
Technical Supervisor:Masayuki Nii
Price: JPY 3,000 (About USD 30)@our ebook store, JPY 3,500+VAT 10%@PayPal
Delivery: Soon@our ebook store, 1 business day @ paypal (Check and return your URL on cloud storage via email)
Page:158
File format:PDF
Supplement : AppleScript files / RTF exported files / Piyomaru Script Assistant v2 (Japanese Version)

–> Online Store
–> Product Support page


Somebody asked me “Is there English version?” on twitter. I started translation project at that word.

At that point, I thought the translation project wouldn’t be too much hassle.But…it was wrong for me. It took more effort to translate it than write original Japanese version.

Japanese is a strange language. The subject can be omitted.Writing Japanese sentences makes a lot of effort to create a “good atmosphere” rather than facts.

It was very hard work. I added about 20 pages to explain the current status and history of AppleScript itself.

I hope this book will reach a large number of users.

Posted in PRODUCTS | Tagged 10.14savvy 10.15savvy 11.0savvy FileMaker Pro | Leave a comment

最前面のKeynote書類のテキストアイテムの英語化率を求める

Posted on 1月 28, 2021 by Takaaki Naganoya

Keynote書類内のテキストアイテムのうち、どの程度が英語で書かれているかを計算するAppleScriptです。macOS 10.14以降で動作します。

日本語で書いた本を英語に翻訳しているわけですが、進捗を確認するのに自分でページを見ながら確認する作業が地味に大変です。そこで、この大変な作業をAppleScriptで自動処理することにしました。最終的なチェックは目視で行う必要がありますが、翻訳済みのテキストがどの程度あるかをテキストアイテムの個数ベースで(文章の長さは考慮せず)自動計算します。

AppleScriptでKeynote書類中のテキストアイテム中のテキストをすべて取得し、言語を自動判定して英語化率(≒英訳作業の進捗率)を計算してみました。


▲Script Debugger v8で実行したところ。Dark Modeへの対応が嬉しいが、全体的に動作が重い

日本語と英語以外にいろいろ意図しない言語判定されているテキストアイテムが存在していますが、そんな言語は書いていないのでおおよそ英語ブロックでしょう。

いま英語化率は80%と出ていますが、誤判定もあるはずなので、最後の最後は目視判定が必要と思われます。あとは、日本語フォントが指定されている箇所をクリーニングして、英語フォントに指定し直す作業も必要です。

開発マシンでmacOS 10.14.6+Keynote 10.1の環境で、139ページある「FileMaker Pro Scripting Book」の全テキスト判定に3.9秒ほどかかります。速度面でとくに不満はありませんが、こういう処理をM1 Macで行うとどの程度の速度になるのかには興味があります。

FileMaker選手権に応募した作品が入賞すれば、開発マシンの更新も可能かもしれませんが……勝負は時の運ということで。


▲英語への翻訳が完了したページ(表紙)


▲まだ日本語の文章がまだらに残っているページ。ただ、オリジナルの日本語版をもとに日本語の本のルールでページ順を設定しているので、「本当にこれでいいのか?」(奥付が最終ページにある日本スタイルそのまま、とか)とは思っています

AppleScript名:最前面のKeynote書類のテキストアイテムの英語化率を求める.scptd
—
–  Created by: Takaaki Naganoya
–  Created on: 2021/01/27
—
–  Copyright © 2021 Piyomaru Software, All Rights Reserved
—

use AppleScript version "2.7" — High Sierra (10.13) or later
use framework "Foundation"
use framework "NaturalLanguage" –Mojave (10.14) or later
use scripting additions

tell application "Keynote"
  set dCount to count every document
  
if dCount = 0 then
    display notification "There is no Keynote document"
    
return {}
  end if
end tell

set tOut to {}
set erOut to {}

tell application "Keynote"
  tell front document
    set sCount to count every slide
    
repeat with i from 1 to sCount
      tell slide i
        set tList to every text item
        
        
repeat with i in tList
          set aTmpStr to object text of i
          
if aTmpStr is not equal to "" then
            set b1Res to guessLanguageCodeOf(aTmpStr) of me
            
set the end of tOut to b1Res
            
(*
            if b1Res is not equal to "en" then
              set the end of erOut to aTmpStr
            else
              set the end of tOut to b1Res
            end if
            *)

          end if
        end repeat
      end tell
    end repeat
  end tell
end tell

set tPercent to calcOneItemsPercent(tOut, "en") of me

on guessLanguageCodeOf(theString as string)
  set aNL to current application’s NLLanguageRecognizer’s alloc()’s init()
  
aNL’s processString:theString
  
set langRes to (aNL’s dominantLanguage()) as string
  
return langRes
end guessLanguageCodeOf

–true/falseで構成されるlistのうち、指定要素が占める割合を%で計算。小数点以下を四捨五入
on calcOneItemsPercent(aList, targItem)
  set aLen to length of aList
  
set theCountedSet to current application’s NSCountedSet’s alloc()’s initWithArray:aList
  
set tRes to (theCountedSet’s countForObject:targItem)
  
if tRes < 1 then return 0
  
set pRes to (tRes / aLen) * 100
  
return (round pRes rounding as taught in school)
end calcOneItemsPercent

★Click Here to Open This Script 

Posted in Language Text | Tagged 10.14savvy 10.15savvy 11.0savvy Keynote | 1 Comment

Keynoteで選択中のテキストアイテムからテキスト取り出し

Posted on 1月 27, 2021 by Takaaki Naganoya

Keynoteで選択中のテキストアイテムからテキスト情報を抽出するAppleScriptです。

# 本内容は当時のKeynote v11.xの状況を反映したもので、その後リリースされたv12ではselectionを取得できるように変更されました

FileMaker Pro Scripting Bookの英語版を来る日も来る日も作っており、気づけばぜんぜんScriptを書いていないので「Piyomaru Software」ではなく「Piyomaru Publishing」だ、などと言っている今日このごろです。Keynoteを毎日使っていますが、微妙に痒いところに手が届かないので、使えば使うほどAppleScriptで機能を補いたくなってきます。

Keynoteに「selected objects」といった「選択中のオブジェクト」を求めるAppleScript用語が用意されていないため、本来やりたい「選択中の部品のデータを処理して元の部品に書き戻す」「選択中の部品からデータを抜き出す」といった処理ができません。selectionで取得できるのが「選択中のスライド」だというのが非常に残念です。

Keynote書類でテキストアイテムを選択し、コピーすると……テキスト情報は取り出せません。Finder上でクリップボード内容を確認してみると、あろうことか「PNGイメージ」と表示されます。

コピーされたクリップボードの内容を解析して、そのオブジェクト情報からテキストを抽出できるとよいだろうか、などとも考えたのですが、

Keynote内部オブジェクトで、ちょっと手強そうです。

というわけで、Keynote側には一切機能がないわけですが、選択中のオブジェクトをコピーし、新規ドキュメントにペーストしたうえで新規ドキュメント上のオブジェクトからテキストを取り出し、新規ドキュメントを破棄することにしました。

GUI Scriptingを用いているので、システム環境設定の「セキュリティとプライバシー」でGUI Scriptingを許可してから実行してください。

AppleScript名:選択中のテキストアイテムからテキスト取り出し.scptd
—
–  Created by: Takaaki Naganoya
–  Created on: 2021/01/27
—
–  Copyright © 2021 Piyomaru Software, All Rights Reserved
—

use AppleScript version "2.4" — Yosemite (10.10) or later
use framework "Foundation"
use scripting additions

set kList to getEveryTextFromCurrentKeynoteSlide() of me
set tRes to retDelimedText(kList, return) of me

on getEveryTextFromCurrentKeynoteSlide()
  tell application "Keynote"
    activate
    
    
set dCount to count every document
    
if dCount = 0 then
      display notification "There is no Keynote document"
      
return {}
    end if
    
    
tell front document
      set sCount to count every slide
    end tell
    
if sCount = 0 then
      display notification "There is no Slide in Keynote document"
      
return {}
    end if
    
  end tell
  
  
–Copy
  
tell application "System Events"
    keystroke "c" using {command down}
  end tell


tell application "Keynote"
    activate
    
set nDoc to make new document
    
tell nDoc
      set aMaster to master slide "空白"
      
–set aMaster to master slide "Blank"
      
      
tell current slide
        set base slide to aMaster
      end tell
    end tell
    
  end tell
  
  
–Paste
  
tell application "System Events"
    keystroke "v" using {command down}
  end tell
  
  
delay 0.1 –Important!!
  
  
set tOut to {}
  
tell application "Keynote"
    tell front document
      tell current slide
        set tList to every iWork item
        
        
repeat with i in tList
          set aTmpStr to object text of i
          
set the end of tOut to aTmpStr
        end repeat
      end tell
    end tell
    
    
–Dispose document
    
tell front document
      close without saving
    end tell
  end tell
  
  
return tOut
end getEveryTextFromCurrentKeynoteSlide

on retDelimedText(aList, aDelim)
  set aText to ""
  
set curDelim to AppleScript’s text item delimiters
  
set AppleScript’s text item delimiters to aDelim
  
set aText to aList as text
  
set AppleScript’s text item delimiters to curDelim
  
return aText
end retDelimedText

★Click Here to Open This Script 

Posted in GUI Scripting Text | Tagged 10.14savvy 10.15savvy 11.0savvy Keynote | Leave a comment

AppleScript disassembler

Posted on 1月 23, 2021 by Takaaki Naganoya

Twitterで一時期さんざん騒がれていた(一部のアカウントが情報を拡散していた)、AppleScript Disasemblerについて調べてみました。

いわく、

「Macには5年前からウィルス(マイニングツール?)が出回っている。というのも、実行専用のAppleScript appletはAppleのウィルスチェックの対象から外れており、中身を確認できないからである。この脅威に対処するためのツールはXXに問い合わせるとよい。aevt disassemblerなどのツールを用意している」

という内容のものでした。分かりやすい恫喝です。「5年前からウィルスが」云々の是非は知りませんし、それにAppleScriptが使われているのかどうかなども知りません。見たことがないものについては、批評も判断も不可能です。

実行専用のAppleScript AppletだとAppleのチェックを免れる、という点については疑問が残ります。ただ、仮にそうしたものがあったとして、その実行内容をいちいちOS側がチェックしているとも考えにくいので、その可能性は否定できません。

そして、「aevt disassemblerなどのツール」という点、ここが問題です。本当にできるのか? 冗談ツールみたいなもの(特定条件では使えるが実用性がない)はあるのかもしれませんが、そんなに、現代の高度化しているAppleScriptのプログラムの内容を、実行専用バイナリから元ソース取り出しができるものなのか?????? これは、試してみないとなんとも言えません。

えーーー、AppleScriptはAppleEventのバイトコードに翻訳されて実行されます。

この、AppleEventのバイトコードから元のAppleScriptを戻せるかどうかについては、かなり初期から「イベントのコードと実際のAppleScriptの対処表を作れば、元のコードを取り出すことは原理上不可能ではないだろう」という推測が行われてきました。

ただ、その対処表を作るという手間がバカバカしく、苦労の割に得るものが少ないため誰も本気で取り組んでこなかったテーマでもあります。

とりあえず実行専用のAppleScriptでなければ「osadecompile」コマンドがOSに標準装備されているので、これでソースを取得することは可能です。

では、実行専用のAppleScriptやAppletからソースを取得できるのでしょうか?

Github上でそれらしきソフトウェアをみつけました。aevt_decompileとapplescript-disassemblerです。それぞれ実際に試してみました。

確認対象ファイルは、

①普通の(スクリプトエディタで)読める通常形式のAppleScript(.scpt)
②「実行専用」の通常形式のAppleScript(.scpt)
③「実行専用」のAppleScriptアプレット
④「実行専用」のAppleScriptアプレット(コード署名つき)

の4つです。主に、decompilerについて(確認もしないで)騒いでいる連中が槍玉に挙げているのは、③④のはずなので、①②はあくまで比較用です。

aevt_decompile

まず、aevt_decompileを実際にXcode上でビルドし、/usr/local/binにコピーしたうえでTerminal上から実行してみました。

Mac:bin me$ ./aevt_decompile /Users/me/Desktop/copy\ files\ to\ target\ folder.app 
2021-01-23 20:39:21.622 aevt_decompile[10457:2398389] The file “copy files to target folder” couldn’t be opened because you don’t have permission to view it.
Mac:bin me$ ./aevt_decompile /Users/me/Desktop/copy\ files\ to\ target\ folder.app/Contents/Resources/Scripts/main.scpt 
2021-01-23 20:39:55.375 aevt_decompile[10469:2400520] The file “main.scpt” couldn’t be opened using text encoding Unicode (UTF-8).
Mac:bin me$ ./aevt_decompile /Users/me/Desktop/copy\ files\ to\ target\ folder_no_sign.app/Contents/Resources/Scripts/main.scpt 
2021-01-23 20:41:02.693 aevt_decompile[10482:2405472] The file “main.scpt” couldn’t be opened using text encoding Unicode (UTF-8).
Mac:bin me$ ./aevt_decompile /Users/me/Desktop/copy\ files\ to\ target\ folder.scpt 
2021-01-23 20:41:47.007 aevt_decompile[10488:2407982] The file “copy files to target folder.scpt” couldn’t be opened using text encoding Unicode (UTF-8).

結果は、ことごとく「couldn’t be opened」でデスクトップフォルダ上に置いた①〜④のScriptをオープンできませんでした。

applescript-disassembler

Pythonで書かれたこのツールは実行権限を与えるだけで簡単に動きました。また、①〜④のファイルに対してアクセスすることができました。

こちらは結果が出てきました。かなり膨大な内容です。オリジナルのAppleScriptが、

set fileTexts to paragraphs of (the clipboard)

set chkFol to choose folder with prompt "[From] Select Check folder"
set moveTargFol to choose folder with prompt "[To] Select Copy Trget folder"

repeat with i in fileTexts
	set j to contents of i
	set fromPath to (chkFol as string) & j
	try
		tell application "Finder"
			duplicate file fromPath to moveTargFol
		end tell
	end try
end repeat

の程度のひじょうに簡単なものであったのですが、実際に出力されたのは、

# 注:HTMLタグと間違えられてしまう<>については全角記号に置き換えました

--Applet without Code Sign③

Mac:applescript-disassembler-master me$ ./disassembler.py /Users/me/Desktop/copy\ files\ to\ target\ folder_no_sign.app/Contents/Resources/Scripts/main.scpt 
=== data offset 2 ===
Function name : <Value type=object value=<Value type=event_identifier value=b'aevt'-b'oapp'-b'null'-b'\x00\x00\x80\x00'-b'****'-b'\x00\x00\x90\x00'>>
Function arguments:  <empty or unknown>
 00000 PushIt 
 00001 Push0 
 00002 MessageSend 0 # <Value type=object value=<Value type=event_identifier value=b'Jons'-b'gClp'-b'****'-b'\x00\x00\x00\x00'-b'null'-b'\xff\xff\x80\x00'>> 
 00005 PushLiteral 1 # <Value type=object value=<Value type=constant value=0x63706172>> 
 00006 MakeObjectAlias 22 # GetEvery

 00007 GetData 
 00008 PopGlobal b'fileTexts' 
 00009 StoreResult 
 0000a PushIt 
 0000b PushLiteral 3 # <Value type=object value=<Value type=constant value=0x70726d70>> 
 0000c PushLiteral 4 # [<Value type=special value=nil>, <Value type=string value=b'\x00[\x00F\x00r\x00o\x00m\x00]\x00 \x00S\x00e\x00l\x00e\x00c\x00t\x00 \x00C\x00h\x00e\x00c\x00k\x00 \x00f\x00o\x00l\x00d\x00e\x00r'>] 
 0000d Push2 
 0000e MessageSend 5 # <Value type=object value=<Value type=event_identifier value=b'syso'-b'stfl'-b'alis'-b'\x00\x00\x00\x00'-b'null'-b'\xff\xff\x80\x00'>> 
 00011 GetData 
 00012 PopGlobal b'chkFol' 
 00013 StoreResult 
 00014 PushIt 
 00015 PushLiteral 3 # <Value type=object value=<Value type=constant value=0x70726d70>> 
 00016 PushLiteral 7 # [<Value type=special value=nil>, <Value type=string value=b'\x00[\x00T\x00o\x00]\x00 \x00S\x00e\x00l\x00e\x00c\x00t\x00 \x00C\x00o\x00p\x00y\x00 \x00T\x00r\x00g\x00e\x00t\x00 \x00f\x00o\x00l\x00d\x00e\x00r'>] 
 00017 Push2 
 00018 MessageSend 5 # <Value type=object value=<Value type=event_identifier value=b'syso'-b'stfl'-b'alis'-b'\x00\x00\x00\x00'-b'null'-b'\xff\xff\x80\x00'>> 
 0001b GetData 
 0001c PopGlobal b'moveTargFol' 
 0001d StoreResult 
 0001e LinkRepeat 0x64

 00021 PushGlobal b'fileTexts' 
 00022 Dup 
 00023 PushLiteral 9 # <Value type=object value=<Value type=constant value=0x6b6f636c>> 
 00024 PushLiteral 10 # <Value type=object value=<Value type=constant value=0x636f626a>> 
 00025 Push2 
 00026 MessageSend 11 # <Value type=object value=<Value type=event_identifier value=b'core'-b'cnte'-b'****'-b'\x00\x00\x00\x00'-b'****'-b'\x00\x00\x10\x00'>> 
 00029 Push1 
 0002a PushUndefined 
 0002b RepeatInCollection <disassembler not implemented> 
 0002c Equal 
 0002d Equal 
 0002e PushVariable [var_0] 
 0002f PushLiteral 12 # <Value type=object value=<Value type=constant value=0x70636e74>> 
 00030 MakeObjectAlias 21 # GetProperty

 00031 GetData 
 00032 PopGlobal b'j' 
 00033 StoreResult 
 00034 PushGlobal b'chkFol' 
 00035 PushLiteral 14 # <Value type=object value=<Value type=constant value=0x54455854>> 
 00036 Coerce 
 00037 PushGlobal b'j' 
 00038 Concatenate 
 00039 GetData 
 0003a PopGlobal b'fromPath' 
 0003b StoreResult 
 0003c ErrorHandler 87 
     0003f PushLiteralExtended 16 # <Descriptor type=b'alis' content=b'\x00\x00\x00\x00\x014\x00\x02\x00\x01\x06Cherry\x00\x00\x00\x00\x00\x00\x00\x00\x00\x00\x00\x00\x00\x00\x00\x00\x00\x00\x00\x00\x00\x00\x00\x00\x00BD\x00\x01\xff\xff\xff\xff\nFinder.app\x00\x00\x00\x00\x00\x00\x00\x00\x00\x00\x00\x00\x00\x00\x00\x00\x00\x00\x00\x00\x00\x00\x00\x00\x00\x00\x00\x00\x00\x00\x00\x00\x00\x00\x00\x00\x00\x00\x00\x00\x00\x00\x00\x00\x00\x00\x00\x00\x00\x00\x00\x00\x00\xff\xff\xff\xff\x00\x00\x00\x00\x00\x00\x00\x00\x00\x00\x00\x00\xff\xff\xff\xff\x00\x00\n cu\x00\x00\x00\x00\x00\x00\x00\x00\x00\x00\x00\x00\x00\x0cCoreServices\x00\x02\x00)/:System:Library:CoreServices:Finder.app/\x00\x00\x0e\x00\x16\x00\n\x00F\x00i\x00n\x00d\x00e\x00r\x00.\x00a\x00p\x00p\x00\x0f\x00\x0e\x00\x06\x00C\x00h\x00e\x00r\x00r\x00y\x00\x12\x00&System/Library/CoreServices/Finder.app\x00\x13\x00\x01/\x00\xff\xff\x00\x00'> 
     00042 Tell 16 
         00045 PushIt 
         00046 PushLiteralExtended 17 # <Value type=object value=<Value type=constant value=0x66696c65>> 
         00049 PushGlobal b'fromPath' 
         0004a MakeObjectAlias 24 # GetIndexed (item A of B)

         0004b PushLiteralExtended 18 # <Value type=object value=<Value type=constant value=0x696e7368>> 
         0004e PushGlobal b'moveTargFol' 
         0004f Push2 
         00050 MessageSend 19 # <Value type=object value=<Value type=event_identifier value=b'core'-b'clon'-b'****'-b'\x00\x00\x00\x00'-b'****'-b'\x00\x00\x90\x00'>> 
         00053 EndTell 
     00054 EndErrorHandler 93 
 00057 HandleError 20 21 
 0005c PushUndefined 
 0005d Dup 
 0005e StoreResult 
 0005f Jump 0x2b 
 00062 Return 

のような、膨大な内容です。まるで、アセンブラのニーモニックを読んでいるかのような感覚です。

10行程度のScriptから14倍の内容が出力されています。一応、一部の処理内容については(エラートラップ部分など)推測することは可能ですが、前半部分はさっぱりです。断片的に変数名などがわかったり、後半のインデント構造的なものが見えたりするあたりはソースのように見えなくもありませんが、この出力から元のAppleScriptの内容を理解できたりするのでしょうか?

もしかすると、Classic Mac OSの開発経験があるとこの内容を「読む」ことが可能なのかもしれませんが、この内容では自分にはさっぱり分かりません。

現状では、AppleEventを人間が読んでも理解できそうな命令語に置き換え、パラメータともども一覧表示しているというものに見えます。そのレベルの機能については間違いなく実現しているでしょう。ただ、そのAppleEventニーモニックの展開ができたからといって、元のAppleScriptのプログラムを復元できるようには見えません。

# じっと眺めていると「スタック操作を頻繁に行っている」ように見えますが、それでもそれ以上の情報は読み取れません

applescript-disassemblerの機能は同梱のドキュメントのとおりで、実行専用のアプレットから元のAppleScriptのプログラムソースが得られるといったものではありませんでした。その動作内容についても確認できましたし、処理レベルも確認できました。

自分が行った検証のかぎりでは(検証前からおぼろげにわかっていましたが)、一部の人間が他の多くのユーザーの警戒心を煽っているような状況では「ない」と思います。おそらく、その解決ツールという名目でそれらしい動作を行うツールを(AppleScriptを読めない顧客に)売りつけ、お金を巻き上げようという魂胆なのでしょう。

Posted in news Security | Tagged 10.14savvy 10.15savvy 11.0savvy | Leave a comment

FileMaker Scripting Bookの英語版を作っています

Posted on 1月 22, 2021 by Takaaki Naganoya

英語版を作っています。とても真剣に。でも、英語版の本の「フォント感」がいまひとつ掴めなくて困ります。

本文にTimesはいまさら使ってない感じでサンセリフ系のフォントの幅の狭いものをタイトル部分に使っていたりするんでしょうし、各話の導入部分をイタリック体で装飾してメリハリ付けるんだろうな、などと手探りでやっています。

しょせんは英語ネイティブの人間が作っているわけではないので、違和感は残ると思っています。そこはこだわってもうまく違和感を消すことはできないでしょうから、しょーがないでしょう。

Posted in PRODUCTS | Tagged 10.14savvy 10.15savvy 11.0savvy FileMaker Pro | Leave a comment

Script Debugger v8 日本語対応中

Posted on 1月 14, 2021 by Takaaki Naganoya

Script Debuggerのv8のPublic Betaが出たので、早速試していますが……まだ日本語環境で作ったAppleScript書類の表示に問題を抱えています。

今回のv8ではApple Silliconへの対応のほか、待望のDark Mode対応なども行われ……普通にAppleScriptを表示するうえにScript Debugger側で設定したDark Themeで表示するなど表示情報が多層化されているようです。

そのために、Roman Language以外のCJK環境のフォント表示で問題を抱えているもよう。とはいっても、LateNight SoftwareはこのジャンルではMac界最強の開発チームであるため、対応は行われることでしょう。

それが今日明日のうちに実現されるかと言われれば、まだ時間が必要といった印象を受けています。

なお、さまざまな仕様の多くはSD7に準じているもようです。

「as anything」は「as any」と解釈されます。これは、macOS 10.13までは「as list or list of string」という謎の解釈を行なっていた(any型は内部的に存在していたが予約語がなかったもよう)ものが、macOS 10.14でスクリプトエディタ側は「as anything」と解釈し、Script Debugger側では「as any」と解釈するようになりました。

自分が「as anything」を発見した顛末は、

as anything

にまとめたとおりです。欠点もありますが、自分はこの「any型cast」は言語仕様上必要だと思います。スクリプトエディタとScript Debuggerでこの解釈が統一されていないのは問題であると考えます。

あるいは、スクリプトエディタやScript Debugger以外の「何か」があったほうがよいのかもしれません。Apple側は機能については追加する考えはないようですし(削るばっかり)、Script Debuggerも生産性の向上にはさほど寄与しません(ないと困る道具ではあるものの、あったからといってものすごく効率が上がるわけでもありません。クラッシュ回数多すぎです)。

生産性を維持するために自分がやっていることは、いままでに組んだScriptを部品化して再利用すること、部品を探しやすくすること、スニペット(断片的なプログラム記述入力)を充実させることです。Script Debuggerのスニペットで高度なことができるわけではない(Script Debugger側が想定している範囲を超えられない)ので、本当に必要な時以外はインテリジェントなスニペット(Piyomaru Script Assistant)で魔改造しまくってあるスクリプトエディタを使っています。

Script Debuggerが提供しているデバッグ機能は、ブレークポイントの設定やステップ実行、トレースなどのまっとうで高度な機能ですが、正直なところそれって「入門者レベルに有用」なものばかり(初心者にScript Debuggerは有用)。普通に書いているScripterがそれを必要としているかといえば、ちょっとニーズがズレてしまっていると感じます。数千行クラスの大規模なScriptのデバッグでステップ実行みたいな悠長なことはしませんよね? モジュール単位で再テストしやすくするための仕組みのほうが大事ですよね?

正直なところ、自分はスクリプトエディタにもScript Debuggerにも満足できていないので、第3の選択肢はあるべきだと考えます。

Posted in news | Tagged 10.14savvy 10.15savvy 11.0savvy Script Debugger | Leave a comment

FileMaker Pro Scripting Book with AppleScript発売開始

Posted on 1月 12, 2021 by Takaaki Naganoya

AppleScriptからFileMaker Proをコントロールするやり方を基礎から実戦レベルまで紹介する電子ブック「FileMaker Pro Scripting Book with AppleScript」を発売いたしました。定価は3,000円です。

→ お試し版のダウンロード

→ 販売ページ

→ English Version SAMPLER

→ English Version

これまでに、「AppleScriptえほんシリーズ」を3冊出しています。Scriptについて理解していなくても、本のとおりに操作して入力すればGUIアプリケーションを動かせることから、余力があればもっと充実させたいコンテンツではあります。


▲コンテスト応募作品「Word Color Palette」。いつものthree.js回転UIなど、AppleScriptでおなじみのInterfaceをFileMaker Pro上に移植。シソーラス辞書検索やSVGサンプルデータへの自動配色などにAppleScriptを利用(iOSやWindows上では機能ダウンした処理を実行)

FileMaker Proはさすがに機能が多く、この「えほんシリーズ」フォーマットの計画もあったのですが、内容に無理を感じていました。同様にSafari本についても検討したものの「途中から急に技術レベルが上がって、入門者向けにはならない」(do javascriptコマンドが出てくるあたり)ということで塩漬け状態。そのジレンマを打開するための新たなシリーズが「徹底解説シリーズ」です。

「画面図多め+文章少なめ」の「えほんシリーズ」のフォーマットを踏襲しつつ、「えほんシリーズ」の特徴である難易度設定の厳重な管理により、急激に難易度が上がったり、そもそも記事の難しさがどの程度なのかわからないといったことのないように配慮しています。「初級」「中級」「上級」の3レベル分けを行っています。

「えほんシリーズ」ではページ数を少なめ(64ページ以下)に抑えていましたが、「徹底解説シリーズ」では分量を抑えるよりも対象のテーマを説明し切ることに重点を置き、対象レベルを若干上げています。分冊構成にすることも検討したのですが「では、検索をしたかったら下巻も買ってね」というのはさすがにご無体なので、1冊にまとめて139ページとなっています。

とくに、対象がFileMaker Proということで、同アプリケーションのエキスパートである新居雅行氏から監修していただき、内容の充実も図っています。


▲掲載デモScript。FileMaker Proのスキーマ定義を自動で行うAppleScript。リストで与えたフィールド名を自動作成。ちょっと手直しすればNumbersの表計算データからフィールド名を外部供給することも容易

これまで、プログラムリストをPDF本文にURLリンクで埋め込むという手法を用いていましたが、macOS 10.15以降のPDFViewにおいてどうもこのURL埋め込み式のPDFをApple側がセキュリティホール源と捉えており、とくに説明なしに機能をダウンさせています。このあたりの話は「専用のビューワーアプリケーションを作る」「リストを掲載しているBlogのページにURLリンクで飛ばす」などの対処が検討されてきましたが、どれもすべてを解決できるわけではありません。

そこで、おおもとの方式に差し戻してAppleScript書類のアーカイブを添付することにしました。AppleScript書類と、他のOS環境でも内容をオープンできるようRTF形式のファイルも添付しています。

また、最近の電子書籍購入者の方にはご案内していますが、「Piyomaru Script Assistant」のバージョン2を添付。Cocoaの機能呼び出しを意識した内容に再編し、macOS 10.13以降のOS環境をターゲットとしています。スクリプトエディタのコンテクストメニューからAppleScriptの主要構文を選択入力できるこのツールは、作った本人でもインストールしていないと作業性が大幅に低下してしまうほどの必携ツールです。

完成度については、さすがに屈強の筆者であり開発者であり編集者である自分が朝から晩まで作り込んだうえに、新居さんに監修していただいた(ダメ出しされまくった)だけあって、「手元に1冊置いておきたい出来」にはなっていると自負しています。

Posted in PRODUCTS | Tagged 10.14savvy 10.15savvy 11.0savvy FileMaker Pro | Leave a comment

FileMaker Proのテキストフィールドにスタイル付きテキストを代入

Posted on 1月 5, 2021 by Takaaki Naganoya

FileMaker Proのテキストフィールドにスタイル付きテキストを代入するAppleScriptです。

FileMaker Proには、v4の頃からかわらないとてもユニークな特徴があります。それは、テキストフィールドに書式つきテキストを突っ込めることです。こんなことができるデータベースは他に類を見ません。

# 書式付きテキストのほかに書式を持たないシャドーフィールドでも持たせているんじゃないかと推測

スタイル付きテキストについては、ワープロなどのソフトウェアを併用して作成する方法もありますが、AppleScriptだけで作成できれば、FileMaker Proのスクリプトステップ内に突っ込むことができて便利です。

ただし、当のAppleScript自体のスタイル付きテキストの作成能力に関しては昔から残念なレベルでした(Classic MacOS時代にはOSAXで作れたような気も)。風向きが変わってきたのは、macOS 10.10でCocoa呼び出しがすべてのランタイム環境で使えるようになったあたりです。当然、FileMaker Proのスクリプトステップ内でも呼べるようになっていました。

残念なことにmacOS 10.10登場当時、FileMaker Proが32ビットアプリケーションだったため、FileMaker Proのスクリプトステップ「AppleScriptを実行」の中で呼び出せるFrameworkも32ビットに限られていました。Cocoa Frameworkの多くは32bitアプリケーションからも呼び出せるようになっていましたが、そうでないものも多々ありました。

FileMaker Pro v12で64ビット化され、中に記述したAppleScriptからも64bit Frameworkを呼べるようになりました。

本Scriptはあくまでも実験的なものですが、AppleScriptからCocoaの機能を呼び出して自由にスタイル付きテキストを作成し、それをクリップボード経由でFileMaker Pro側に受け渡します。FileMaker Pro側では指定のフィールドに対してクリップボードの内容を「貼り付け」コマンドで代入します。


▲指定フォント、指定サイズ、指定テキストでスタイル付きテキストを生成してフィールドに代入


▲FileMaker Pro側にクリップボードから内容を受け取ってフィールドに入れるFileMaker Script

代入先のフィールド名については、FileMaker Proのスクリプト呼び出しをAppleScriptの「do script」コマンド経由で行う場合には、パラメータの指定ができないため、一切指定できません。

……ただし、AppleScriptからURL Event経由でもFileMaker Pro側のスクリプト実行ができ、その場合にはパラメータの受け渡しができます。そのため、URL Event経由で呼び出せば「クリップボードに入っているスタイル付きテキストの受け渡し先フィールド名」を随時指定することも可能です。

# FileMaker Proのdo scriptコマンドに素直にパラメータを受け渡す機能を付けてほしい

そろそろFileMaker Proのお試し版の期限が切れるので、FileMaker Pro関連のScriptingのまとまった情報について本Blog上への投稿は行えません。まとまった情報については、電子ブック新刊「FileMaker Pro Scripting Book」(予定)をお買い求めください。

AppleScript名:テキストフィールドにスタイル付きテキスト.scpt
— Created 2020-12-29 by Takaaki Naganoya
— 2020 Piyomaru Software
use AppleScript version "2.4"
use scripting additions
use framework "Foundation"
use framework "AppKit"

set attrStr to makeRTFfromParameters("ぴよまるソフトウェアだよーーん", 3.0, 72) of me
(
my restoreClipboard:{attrStr})

tell application "FileMaker Pro"
  tell database 1
    do script "getAttrFromClipboard" –クリップボードの内容をtextFieldにペーストする
  end tell
end tell

–書式つきテキストを組み立てる
on makeRTFfromParameters(aStr as string, outlineNum as real, aFontSize as real)
  –フォント
  
set aVal1 to current application’s NSFont’s fontWithName:"HiraKakuStdN-W8" |size|:aFontSize
  
set aKey1 to (current application’s NSFontAttributeName)
  
  
–色
  
set aVal2 to current application’s NSColor’s blackColor()
  
set aKey2 to (current application’s NSForegroundColorAttributeName)
  
  
–カーニング
  
set aVal3 to -2.0
  
set akey3 to (current application’s NSKernAttributeName)
  
  
–アンダーライン
  
set aVal4 to 0
  
set akey4 to (current application’s NSUnderlineStyleAttributeName)
  
  
–リガチャ
  
set aVal5 to 2 –全てのリガチャを有効にする
  
set akey5 to (current application’s NSLigatureAttributeName)
  
  
–枠線(アウトライン)
  
set aVal6 to outlineNum
  
set akey6 to (current application’s NSStrokeWidthAttributeName)


set keyList to {aKey1, aKey2, akey3, akey4, akey5, akey6}
  
set valList to {aVal1, aVal2, aVal3, aVal4, aVal5, aVal6}
  
set attrsDictionary to current application’s NSMutableDictionary’s dictionaryWithObjects:valList forKeys:keyList
  
  
set attrStr to current application’s NSMutableAttributedString’s alloc()’s initWithString:aStr attributes:attrsDictionary
  
return attrStr
end makeRTFfromParameters

–クリップボードに内容を設定する
on restoreClipboard:theArray
  — get pasteboard
  
set thePasteboard to current application’s NSPasteboard’s generalPasteboard()
  
  
— clear it, then write new contents
  
thePasteboard’s clearContents()
  
thePasteboard’s writeObjects:theArray
end restoreClipboard:

★Click Here to Open This Script 

Posted in RTF | Tagged 10.14savvy 10.15savvy 11.0savvy FileMaker Pro | Leave a comment

クリップボードに入ったStyled Stringからフォントとサイズと文字内容の情報を取得

Posted on 1月 4, 2021 by Takaaki Naganoya

クリップボードに入ったStyled Stringから、フォント名とサイズと文字内容の情報を取得するAppleScriptです。

Keynoteのテキストオブジェクトのフォント名(フォントファミリー)を置換するAppleScriptを作ったときに、Keynoteが「選択中のオブジェクト」を取得する機能がないために、テキストオブジェクトの中(object text)をコピーして、AppleScript側にその情報を引き渡す必要がありました。


▲年末にコンテスト応募のために久しぶりにFileMaker Proにまとまった時間さわったので、そのノウハウを整理してまとめた本を作成中

こんなKeynote書類があったときに、タイトル部分の書式情報に該当するText Objectのみフォントを一括変更する、という処理です。

KeynoteのAppleScript用語辞書に、選択中のオブジェクトに対してアクセスできるオブジェクト(「selected items」のような)が定義されていれば、クリップボード経由で情報を受け取るような野蛮な処理はしないで済むのですが、、、、、

AppleScript名:クリップボードに入ったStyled Stringからフォントとサイズと文字内容の情報を取得.scptd
— Created 2021-01-03 by Takaaki Naganoya
— 2021 Piyomaru Software
use AppleScript version "2.5"
use scripting additions
use framework "Foundation"
use framework "AppKit"

property NSFont : a reference to current application’s NSFont
property NSColor : a reference to current application’s NSColor
property NSArray : a reference to current application’s NSArray
property NSString : a reference to current application’s NSString
property NSDictionary : a reference to current application’s NSDictionary
property NSPasteboard : a reference to current application’s NSPasteboard
property NSCountedSet : a reference to current application’s NSCountedSet
property NSMutableArray : a reference to current application’s NSMutableArray
property NSSortDescriptor : a reference to current application’s NSSortDescriptor
property NSAttributedString : a reference to current application’s NSAttributedString
property NSMutableDictionary : a reference to current application’s NSMutableDictionary
property NSFontAttributeName : a reference to current application’s NSFontAttributeName
property NSKernAttributeName : a reference to current application’s NSKernAttributeName
property NSMutableParagraphStyle : a reference to current application’s NSMutableParagraphStyle
property NSLigatureAttributeName : a reference to current application’s NSLigatureAttributeName
property NSMutableAttributedString : a reference to current application’s NSMutableAttributedString
property NSUnderlineStyleAttributeName : a reference to current application’s NSUnderlineStyleAttributeName
property NSParagraphStyleAttributeName : a reference to current application’s NSParagraphStyleAttributeName
property NSForegroundColorAttributeName : a reference to current application’s NSForegroundColorAttributeName

–クリップボード内にスタイル付きテキストが入っているかチェック
set cRes to clipboard info for «class RTF »
if cRes = {} then return

–クリップボードに入っているスタイル付きテキストから情報を取得
set {aFontName, aFontSZNum, aString} to getFontNameAndSizeFromClipboard() of me
–> {"DINCondensed-Bold", 170.0, "FileMaker Pro Scripting Book"}

–クリップボードの内容を書式つきテキストとして解釈
on getFontNameAndSizeFromClipboard()
  –クリップボードの内容を文字列として取得
  
using terms from scripting additions
    set aStr to (the clipboard) as string
  end using terms from
  
  
if aStr = "" then
    display dialog "No Data in Clipboard" buttons {"OK"} default button 1
    
return
  end if
  
  
–クリップボードの内容をStyled Stringで取得して最頻出フォントを取得
  
set clipboardAttrStr to getClipboardASStyledText() of me
  
if clipboardAttrStr = missing value then
    display dialog "Can not get clipboard as Styled String" buttons {"OK"} default button 1
    
return
  end if
  
set attrList to getAttributeRunsFromAttrString(clipboardAttrStr) of me
  
  
set anArray to ((NSArray’s arrayWithArray:attrList)’s valueForKeyPath:"fontName") as {list, string}
  
set aFontList to (countItemsByItsAppearance(anArray) of me)
  
set aFontName to theName of first item of aFontList
  
  
set fSizes to ((NSArray’s arrayWithArray:attrList)’s valueForKeyPath:"fontSize") as {list, real}
  
set aFontSZList to (countItemsByItsAppearance(fSizes) of me)
  
set aFontSZNum to theName of first item of aFontSZList
  
  
set aString to ((NSArray’s arrayWithArray:attrList)’s valueForKeyPath:"stringVal") as string
  
  
return {aFontName, aFontSZNum, aString}
end getFontNameAndSizeFromClipboard

–1D Listを文字列長でソート v2
on sort1DListByIndicatedStringLength(aList as list, aSortKey as string, sortOrder as boolean)
  set aArray to NSArray’s arrayWithArray:aList
  
set descLabel1 to NSString’s stringWithString:(aSortKey & ".length")
  
set descLabel2 to NSString’s stringWithString:aSortKey
  
set desc1 to NSSortDescriptor’s sortDescriptorWithKey:descLabel1 ascending:sortOrder
  
set desc2 to NSSortDescriptor’s sortDescriptorWithKey:descLabel2 ascending:true selector:"localizedCaseInsensitiveCompare:"
  
set bArray to aArray’s sortedArrayUsingDescriptors:{desc1, desc2}
  
return bArray as list
end sort1DListByIndicatedStringLength

–リストを指定デリミタをはさんでテキスト化
on retStrFromArrayWithDelimiter(aList as list, aDelim as string)
  set anArray to NSArray’s arrayWithArray:aList
  
set aRes to anArray’s componentsJoinedByString:aDelim
  
return aRes as text
end retStrFromArrayWithDelimiter

–書式つきテキストを組み立てる
on makeRTFfromParameters(aStr as string, fontName as string, aFontSize as real, aKerning as real, aLineSpacing as real)
  set aVal1 to NSFont’s fontWithName:fontName |size|:aFontSize
  
set aKey1 to (NSFontAttributeName)
  
  
set aVal2 to NSColor’s blackColor()
  
set aKey2 to (NSForegroundColorAttributeName)
  
  
set aVal3 to aKerning
  
set akey3 to (NSKernAttributeName)
  
  
set aVal4 to 0
  
set akey4 to (NSUnderlineStyleAttributeName)
  
  
set aVal5 to 2 –all ligature ON
  
set akey5 to (NSLigatureAttributeName)
  
  
set aParagraphStyle to NSMutableParagraphStyle’s alloc()’s init()
  
aParagraphStyle’s setMinimumLineHeight:(aLineSpacing)
  
aParagraphStyle’s setMaximumLineHeight:(aLineSpacing)
  
set akey7 to (NSParagraphStyleAttributeName)
  
  
set keyList to {aKey1, aKey2, akey3, akey4, akey5, akey7}
  
set valList to {aVal1, aVal2, aVal3, aVal4, aVal5, aParagraphStyle}
  
set attrsDictionary to NSMutableDictionary’s dictionaryWithObjects:valList forKeys:keyList
  
  
set attrStr to NSMutableAttributedString’s alloc()’s initWithString:aStr attributes:attrsDictionary
  
return attrStr
end makeRTFfromParameters

— クリップボードの内容をNSAttributedStringとして取り出して返す
on getClipboardASStyledText()
  set theNSPasteboard to NSPasteboard’s generalPasteboard()
  
set theAttributedStringNSArray to theNSPasteboard’s readObjectsForClasses:({NSAttributedString}) options:(missing value)
  
set theNSAttributedString to theAttributedStringNSArray’s objectAtIndex:0
  
return theNSAttributedString
end getClipboardASStyledText

–指定のNSAttributedStringから書式情報をlist of recordで取得
on getAttributeRunsFromAttrString(theStyledText)
  script aSpd
    property styleList : {}
  end script
  
  
set (styleList of aSpd) to {} —for output
  
  
set thePureString to theStyledText’s |string|() –pure string from theStyledText
  
  
set theLength to theStyledText’s |length|()
  
set startIndex to 0
  
  
repeat until (startIndex = theLength)
    set {theAtts, theRange} to theStyledText’s attributesAtIndex:startIndex longestEffectiveRange:(reference) inRange:{startIndex, theLength – startIndex}
    
    
set aText to (thePureString’s substringWithRange:theRange) as string
    
    
set aColor to (theAtts’s valueForKeyPath:"NSColor")
    
if aColor is not equal to missing value then
      set aSpace to aColor’s colorSpace()
      
      
set aRed to (aColor’s redComponent()) * 255
      
set aGreen to (aColor’s greenComponent()) * 255
      
set aBlue to (aColor’s blueComponent()) * 255
      
      
set colList to {aRed as integer, aGreen as integer, aBlue as integer}
      
set colStrForFind to (aRed as integer as string) & " " & (aGreen as integer as string) & " " & (aBlue as integer as string)
    else
      set colList to {0, 0, 0}
      
set colStrForFind to "0 0 0"
    end if
    
    
set aFont to (theAtts’s valueForKeyPath:"NSFont")
    
if aFont is not equal to missing value then
      set aDFontName to aFont’s fontName()
      
set aDFontSize to aFont’s pointSize()
    end if
    
    
set the end of (styleList of aSpd) to {stringVal:aText, colorStr:colStrForFind, colorVal:colList, fontName:aDFontName as string, fontSize:aDFontSize}
    
set startIndex to current application’s NSMaxRange(theRange)
  end repeat
  
  
return (styleList of aSpd)
end getAttributeRunsFromAttrString

–1D Listをアイテムの出現頻度順でソートして返す
on countItemsByItsAppearance(aList as list)
  set aSet to NSCountedSet’s alloc()’s initWithArray:aList
  
set bArray to NSMutableArray’s array()
  
set theEnumerator to aSet’s objectEnumerator()
  
  
repeat
    set aValue to theEnumerator’s nextObject()
    
if aValue is missing value then exit repeat
    
bArray’s addObject:(NSDictionary’s dictionaryWithObjects:{aValue, (aSet’s countForObject:aValue)} forKeys:{"theName", "numberOfTimes"})
  end repeat
  
  
set theDesc to NSSortDescriptor’s sortDescriptorWithKey:"numberOfTimes" ascending:false
  
bArray’s sortUsingDescriptors:{theDesc}
  
  
return bArray as list
end countItemsByItsAppearance

★Click Here to Open This Script 

Posted in Clipboard RTF | Tagged 10.14savvy 10.15savvy 11.0savvy | Leave a comment

日本語簡易パーサーeasyJParse v5

Posted on 12月 31, 2020 by Takaaki Naganoya

簡易日本語パーサー「easyJParse」のバージョンアップ版です。AppleScriptライブラリ「BridgePlus」を利用しないように改めました。

簡易日本語パーサーというのは、日本語の文を単語に分解するプログラムですが、品詞情報や係り受けの情報が得られるわけではなく、単に単語に分解するだけのもので、用途を日本語コマンド解釈などに限定した簡易版の形態素解析器もどきソフトウェアです。特定の人名など区切られて困る単語についてはカギ括弧などで括ることで(例:「ぴよまるソフトウェア」)まとまった単語として出力する機能を持たせています。

→ easyJParse v3
→ easyJParse v4

前バージョンまではBridgePlus Script Libraryを利用していましたが、同ライブラリがFrameworkを含んでいるために、確実に動かせるように設定するには技量(理解と慣れ)が必要です。自分の手元では動かせていますが、ユーザーによってはBridgePlusをmacOS 10.15以降のMacで利用できないケースも見られ(たぶん、操作間違い)、BridgePlusへの依存がマイナスポイントになりつつあるように感じられます。

本ScriptでBridgePlusから利用しているメソッドは2つ。どちらも既存のAppleScriptのルーチンの組み合わせで再現できる程度の簡単なもの。これらをすべて既存のルーチンの組み合わせで置き換えました。BridgePlus内蔵の機能を書き換える際に、扱うデータサイズはあまり大きくないものであることを前提に最適化しました。あまり巨大なデータを扱うのには向いていませんが、小さなデータを高速に処理できるようにしてあります。

MacBookPro10,1,  macOS Version 10.14.6 (Build 18G8005),  100 iterations
         First Run   Total Time    Average     Median    Maximum    Minimum   Std.Dev.
First       0.6685       0.6236     0.0062     0.0059     0.0083     0.0054     0.0008

正直なところ、この程度の極小データサイズだとCocoaの機能を利用するメリットがあまりないので、Cocoaを使わないように書き換えると高速化できます。高速化は必要に応じて行う程度でしょう。

外部ライブラリに依存しなくなったため、たとえばCotEditorのメニューから呼び出すScriptや、FileMaker Pro Scriptの中にまるごと日本語パーサーを突っ込むといった真似ができます。

AppleScript名:easyJParse v5.scptd
— Created 2018-09-26 by Takaaki Naganoya
— Modified 2020-12-31 by Takaaki Naganoya
— 2020 Piyomaru Software
use AppleScript version "2.5" — El Capitan (10.11) or later
use framework "Foundation"
use scripting additions

property NSArray : a reference to current application’s NSArray
property NSSortDescriptor : a reference to current application’s NSSortDescriptor

set aTargName to "Finderで選択中のAI書類上の「製品名」レイヤーから抜き出したコードをもとにスペック情報をGoogle Spreadsheet「製品コード表」から展開して保存。"
set aList to parseJ(aTargName, true) of me
–> {"Finder", "で", "選択", "中", "の", "AI", "書類", "上", "の", "「", "製品名", "」", "レイヤー", "から", "抜き出し", "た", "コード", "を", "もと", "に", "スペック", "情報", "を", "Google", " ", "Spreadsheet", "「", "製品コード表", "」", "から", "展開", "し", "て", "保存", "。"}–v4
–> {"Finder", "で", "選択", "中", "の", "AI", "書類", "上", "の", "「", "製品名", "」", "レイヤー", "から", "抜き出し", "た", "コード", "を", "もと", "に", "スペック", "情報", "を", "Google", " ", "Spreadsheet", "「", "製品コード表", "」", "から", "展開", "し", "て", "保存", "。"}–v5

return aList

set aTargName to "私の名前は「長野谷」です。"
set aList to parseJ(aTargName, true) of me
–> {"私", "の", "名前", "は", "「", "長野谷", "」", "です", "。"}–v4
–> {"私", "の", "名前", "は", "「", "長野谷", "」", "です", "。"}–v5

–カッコのネスティングとクロス(エラー)については、処理せずにそのまま出力
on parseJ(aTargStr as string, pickupPhraseByBracketPair as boolean)
  copy aTargStr to tStr
  
  
set cList to characters of tStr
  
set wList to words of tStr
  
  
set cLen to length of cList
  
  
set w2List to {}
  
set w3List to {}
  
set aCount to 0
  
  
set lastPos to 0
  
  
repeat with i in wList
    set j to contents of i
    
    
using terms from scripting additions
      set anOffset to offset of j in tStr
    end using terms from
    
    
if anOffset is not equal to 1 then
      set aChar to character (lastPos + 1) of aTargStr
      
      
set the end of w3List to {wordList:aChar, characterList:{aChar}, startPos:(lastPos + 1), endPos:(lastPos + 1)}
    end if
    
    
set aLen to length of j
    
    
set w2List to w2List & (characters of j)
    
set startPointer to (anOffset + aCount)
    
set endPointer to (anOffset + aCount + aLen – 1)
    
    
set the end of w3List to {wordList:j, characterList:(characters of j), startPos:startPointer, endPos:endPointer}
    
    
set trimStart to (anOffset + aLen)
    
    
if trimStart > (length of tStr) then
      set trimStart to 1
    end if
    
    
set tStr to text trimStart thru -1 of tStr
    
    
set aCount to aCount + anOffset + aLen – 1
    
copy endPointer to lastPos
  end repeat
  
  
–句読点など。文末の処理
  
if endPointer is not equal to cLen then
    set the end of w3List to {wordList:tStr, characterList:(characters of tStr), startPos:(lastPos + aCount), endPos:aLen}
  end if
  
  
set bArray to sortRecListByLabel((w3List), "startPos", true) of me
  
set cArray to (bArray’s valueForKeyPath:"wordList") as list
  
  
–カッコでくくった範囲を1つの塊として連結する
  
set bracketList to {"「", "」", "『", "』", "【", "】", "《", "》", "〈", "〉", "(", ")"}
  
set bList to jointItemsBetweenBrackets(cArray, bracketList) of me
  
  
return bList
end parseJ

–リストに入れたレコードを、指定の属性ラベルの値でソート
on sortRecListByLabel(aRecList as list, aLabelStr as string, ascendF as boolean)
  set aArray to NSArray’s arrayWithArray:aRecList
  
set sortDesc to NSSortDescriptor’s alloc()’s initWithKey:aLabelStr ascending:ascendF
  
set sortDescArray to NSArray’s arrayWithObject:sortDesc
  
set sortedArray to aArray’s sortedArrayUsingDescriptors:sortDescArray
  
return sortedArray
end sortRecListByLabel

on offset of bArg in anArg
  set aClass to class of anArg
  
set bClass to class of bArg
  
  
if {aClass, bClass} = {text, text} then –case 1
    return getOffset(anArg, bArg) of me
  else if {aClass, bClass} = {list, list} then –case 2 (The target case)
    return execOffsetList(bArg, anArg) of me
  else if {aClass, bClass} = {text, list} then –case 3 (Illegular case)
    return execOffsetList(bArg, {anArg}) of me
  else if {aClass, bClass} = {list, text} then –case 4 (Illegular case)
    return execOffsetList({bArg}, anArg) of me
  end if
end offset

–1D List同士のoffset演算を行うルーチンの本体
on execOffsetList(aList as list, bList as list)
  set resList to {}
  
repeat with i in aList
    set j to contents of i
    
set aCount to 1
    
    
repeat with ii in bList
      set jj to contents of ii
      
if jj = j then
        set the end of resList to aCount
        
exit repeat
      end if
      
set aCount to aCount + 1
    end repeat
  end repeat
  
  
–見つかったItem No.が連続値かどうかチェック
  
set sRes to chkSequential(resList) of me
  
if sRes = true then
    return contents of first item of resList
  else
    return false
  end if
end execOffsetList

–与えられた1D Listが連続値かどうかをチェックする
on chkSequential(aList)
  if length of aList = 1 then return true
  
if aList = {} then return false
  
  
set aFirst to first item of aList
  
set aList to rest of aList
  
  
repeat with i in aList
    set j to contents of i
    
if j is not equal to (aFirst + 1) then
      return false
    end if
    
copy j to aFirst
  end repeat
  
  
return true
end chkSequential

–テキスト同士のoffset ofを(2.5x fasterで)実行する
on getOffset(str, searchStr)
  set d to divideBy(str, searchStr)
  
if (count d) is less than 2 then return 0
  
return (length of item 1 of d) + 1
end getOffset

on divideBy(str, separator)
  set delSave to AppleScript’s text item delimiters
  
set the AppleScript’s text item delimiters to separator
  
set strItems to every text item of str
  
set the AppleScript’s text item delimiters to delSave
  
return strItems
end divideBy

–カッコでくくった範囲を1つの塊として連結する
on jointItemsBetweenBrackets(aList as list, bracketList as list)


–リスト内のブラケット位置の検出
  
set aRes to (my indexesOfItems:bracketList inArray:aList base:0) as list
  
–> {9, 12, 15, 18, 22, 25, 27, 29}–0 based
  
  
if aRes = {} then return aList
  
  
–位置情報リストを開始位置, 終了位置のペアの2D Listに変換する
  
set cList to my subarraysFrom:(aRes) groupedBy:2
  
–> {{9, 12}, {15, 18}, {22, 25}, {27, 29}}–0 based
  
  
–カッコの位置がクロスしていないかチェック(入れ子状態はエラーになる)
  
set dRes to checkCrossRange(cList) of me
  
if dRes = false then return aList
  
  
set ccList to reverse of cList –順次、ブラケットに囲まれた要素を連結していくので、アイテム数が随時変化する。アイテム番号が狂わないよう後方から処理する必要がある。そのために、リストの要素を逆順に組み替える
  
–> {{27, 29}, {22, 25}, {15, 18}, {9, 12}}–0 based
  
  
—
  
copy aList to aaList
  
  
repeat with i in ccList
    copy i to {s2Dat, e2Dat}
    
    
set s2Dat to s2Dat + 1 –Array index conversion from 0 to 1 based
    
set e2Dat to e2Dat + 1 –Array index conversion from 0 to 1 based
    
    
set tmp1 to items 1 thru s2Dat of aaList
    
set tmp2 to (items (s2Dat + 1) thru (e2Dat – 1) of aaList) as string
    
set tmp3 to items e2Dat thru -1 of aaList
    
    
set aaList to tmp1 & tmp2 & tmp3
  end repeat
  
  
return aaList
end jointItemsBetweenBrackets

–{始点, 終点}のペアの2D Listが違いにクロスしていないかチェック
on checkCrossRange(aList as list)
  set rList to {}
  
repeat with i in aList
    copy i to {sRange, eRange}
    
set tmpRange to current application’s NSMakeRange(sRange, eRange – sRange + 1)
    
set the end of rList to tmpRange
  end repeat
  
  
repeat with ii in rList
    set jj to contents of ii
    
repeat with i in rList
      set j to contents of i
      
      
if jj is not equal to j then
        set aRes to current application’s NSIntersectionRange(jj, j)
        
        
if aRes is not equal to {location:0, |length|:0} then
          return false
        end if
      end if
      
    end repeat
  end repeat
  
  
return true
end checkCrossRange

–BridgePlus内の命令を展開
on indexesOfItems:(iList as list) inArray:(aList as list) base:(baseNum as integer)
  return retIndexesOfNumInArray(iList, aList, baseNum) of me
end indexesOfItems:inArray:base:

–1Dリスト中のシーケンシャルサーチ(複数)
on retIndexesOfNumInArray(aTargetList, aList, baseNum)
  script obj
    property list : aList
    
property resList : {}
  end script
  
  
if baseNum is not in {0, 1} then return false
  
  
–set obj’s list to aList
  
set (resList of obj) to {}
  
set aCount to baseNum
  
set hitF to false
  
  
repeat with i in obj’s list
    set j to contents of i
    
if j is in aTargetList then
      set the end of (resList of obj) to aCount
    end if
    
    
set aCount to aCount + 1
  end repeat
  
  
return (resList of obj)
end retIndexesOfNumInArray

on subarraysFrom:(aList as list) groupedBy:(gNum as integer)
  script spdObj
    property list : aList
    
property bList : {}
  end script


–Group Num check
  
if gNum = 0 then return false
  
if length of aList < gNum then return false
  
  
if (length of aList) mod gNum is not equal to 0 then return
  
  
set (bList of spdObj) to {}
  
  
set tmpList to {}
  
set aCount to 1
  
  
repeat with i in aList
    set j to contents of i
    
set the end of tmpList to j
    
set aCount to aCount + 1
    
    
if aCount > gNum then
      set the end of (bList of spdObj) to tmpList
      
set tmpList to {}
      
set aCount to 1
    end if
  end repeat
  
  
return (bList of spdObj)
end subarraysFrom:groupedBy:

★Click Here to Open This Script 

Posted in Natural Language Processing Text | Tagged 10.13savvy 10.14savvy 10.15savvy 11.0savvy | Leave a comment

CoreML Modelからパラメータを取得する v2

Posted on 12月 30, 2020 by Takaaki Naganoya

CoreML Modelのファイル(.mlmodelc)から入力パラメータおよび出力データの情報を取得するAppleScriptです。

テストに使ったのはMS Classifier(299×299ピクセルの画像を入力)で、入力画像をGundamのモビルスーツとして扱い、連邦軍機体かジオン軍機体かを判定するCoreML Modelです。

機械学習モデルのパラメータ/モデル解析を行うツール「Netron」にはWebアプリ版もあるので、JavaScriptやPythonで解析できてしまうのかもしれません(Netronのソースを読んでみたら、そういう感じのファイルだけ入っていて驚かされました)。

AppleScript名:CoreML Modelからパラメータを取得する v2.scptd
—
–  Created by: Takaaki Naganoya
–  Created on: 2020/12/28
—
–  Copyright © 2020 Piyomaru Software, All Rights Reserved
—
use AppleScript version "2.7" — 10.13 or later
use framework "Foundation"
use framework "CoreML"
use scripting additions

set aVer to system version of (system info) –Get OS Version

considering numeric strings
  if aVer < "10.15" then
    –macOS 10.14。10.13は未検証
    
set mlFile to POSIX path of (choose folder) –mlmodelcを指定。macOS 10.14のFinder上ではフォルダに見えてしまう
  else
    –macOS 10.15 or later
    
set mlFile to POSIX path of (choose file of type {"com.apple.coreml.mlmodelc"}) –mlmodelcを指定。macOS 10.15以降のFinder上ではファイルに見える
  end if
end considering

set mlURL to current application’s |NSURL|’s fileURLWithPath:mlFile
set aModel to current application’s MLModel’s modelWithContentsOfURL:mlURL |error|:(missing value)
if aModel = missing value then return –mlmodelファイルだとエラーになる

set aMLDesc to aModel’s modelDescription
set inputDesc to aMLDesc’s inputDescriptionsByName()

–Input Information
set kList to inputDesc’s allKeys() as list
–> {"image"}

set vList to inputDesc’s allValues() as list
–> {(MLFeatureDescription) image : Image (Color, 299 x 299)}

–Output Information
set outputDeck to aMLDesc’s outputDescriptionsByName()
set k2List to outputDeck’s allKeys() as list
–> {"classLabel", "classLabelProbs"}

set v2List to outputDeck’s allValues() as list
–> {(MLFeatureDescription) classLabel : String, (MLFeatureDescription) classLabelProbs : Dictionary (String → Double)}

set vResList to {}
repeat with v in v2List
  set the end of vResList to v’s |name|() as string
end repeat
return vResList
–> {"classLabel", "classLabelProbs"}

★Click Here to Open This Script 

Posted in Machine Learning | Tagged 10.14savvy 10.15savvy 11.0savvy MLFeatureDescription MLModel NSURL | Leave a comment

Pixelmator ProのSVG to PNG変換

Posted on 12月 28, 2020 by Takaaki Naganoya

Pixelmator ProでSVGのファイルをPNG形式で書き出すAppleScriptです。

この、ダイアログでファイルを選択して書き出しファイル名を入力させるタイプのAppleScriptをたくさん掲載していますが、もともとAppleScriptの一括処理的なプログラムで、いちいちダイアログを出して1つ1つのファイルを保存させるようなことはやりません。あくまで、サンプルScriptの動作を完結させるための仕様です。

実際には、指定フォルダ以下にあるSVGファイルをSpotlightで抽出して、まとめて書き出し先のフォルダにPNG形式で書き出すといった処理になるでしょう。

SVG方面では1024jpさんのGapplinがあり、こちらもAppleScript対応しており各種操作が行えるようになっているのですが、Sandbox対応度に問題があるためかファイル書き出し操作がAppleScriptから行えていないので、現状では大量のSVG書類の変換にはPhotoshopかPixelmator Proということになりそうです。

SVGを読み込んで他の画像形式に書き出すためのCocoa Frameworkを利用できるとよさそうですが、いまひとつうまく動くものを知りません。


▲SVG対応のアプリケーション。SVGを読めるもの、書けるもの、書き出せるもの、と対応度はさまざま

AppleScript名:PixelmatorのSVG to PNG変換
—
–  Created by: Takaaki Naganoya
–  Created on: 2020/12/01
—
–  Copyright © 2020 Piyomaru Software, All Rights Reserved
—

use AppleScript version "2.7" — Yosemite (10.13) or later
use framework "Foundation"
use scripting additions

set aFile to choose file of type {"public.svg-image"}
set outPath to choose file name with prompt "select output file name"

tell application "Pixelmator Pro"
  open aFile
  
  
tell front document
    export to outPath as PNG
    
close without saving
  end tell
end tell

★Click Here to Open This Script 

AppleScript名:GaplinのSVG to PNG変換
set aFile to choose file of type {"public.svg-image"}
set outPath to choose file name with prompt "select output file name"

tell application "Gapplin"
  open aFile
  
  
tell front document
    export to outPath as PNG with options {class:export options, scale:1.0}
    
close without saving
  end tell
end tell

★Click Here to Open This Script 

Posted in file Image | Tagged 10.13savvy 10.14savvy 10.15savvy 11.0savvy Pixelmator Pro | Leave a comment

FileMaker ProのObject FieldにNSImageを設定する

Posted on 12月 26, 2020 by Takaaki Naganoya

FileMaker Proデータベースのオブジェクトフィールド上に生成したNSImageを入れるAppleScriptです。FileMaker Pro v19.2.1.14+macOS 11.2betaで動作確認しています。とくに環境依存は行わないはずです。

FileMaker Proのオブジェクトフィールドは一種のBlobで、画像やPDF、機械学習モデル(mlmodel)、他のデータベース(.fmp12)を突っ込んだりできます。

ところが、AppleScriptでNSImageを作成し、その結果をFileMaker Proのオブジェクトフィールドにそのまま入れることはできません。エラーになります。

方法1:AppleScript側でNSImageをクリップボードに入れ、FileMaker Pro側でクリップボードの内容をフィールドに入れる

この方法は、FileMaker Pro側が最前面にある場合には問題なかったのですが、FileMaker Proが最前面にない場合には問題が発生する可能性があります。実際に試して成功したのですが、クリップボード経由でAppleScript側とFileMaker Script側がデータをやりとりすることになり、膨大なデータを処理した場合の信頼性に疑問がつきました。

方法2:AppleScript側でNSImageをクリップボードに入れ、クリップボードの内容を標準命令で画像に変換したのち、普通にオブジェクトフィールドに入れる

各種アプリケーションが認識する「画像データ」に明示的に変換するためには、ファイルに書き出すのが確実ですが、クリップボード経由で「画像」に変換するのが安全策です。

NSImageをJPEGデータに変換して、その結果をそのままオブジェクトフィールドに突っ込んでもエラーになりました。これが最有力な案だと思っていたので、うまく動かなかったのは残念でした。

そこで、安全策をとって(仕方なく)クリップボード経由でNSImageを画像に変換することになりました。このままでは方法1と大差ないように見えますが、実際にはAppleScriptでクリップボードにNSImageを入れて、AppleScriptでクリップボード内容を画像として評価して取得するという処理を行っています。

スピードや確実さを考慮すると、なるべくクリップボード経由の処理は行いたくないので、対策は考えておきたいところです。クリップボードや一時ファイルを経由させるよりも、極力メモリ上で対処したいところです。


▲ユーザーにAppleScriptの実行権限を与えておくとAppleScriptによる制御が有効になるFileMaker Pro


▲テキストフィールド「originalString」から文字情報を取り出して、オブジェクトフィールド「imageStore」にAppleScriptで生成した画像を突っ込む


▲実行前


▲実行後(Mac mini 2014で処理に初回で0.1秒ほど。2回目以降は1桁速くなる) AppleScript側で画像を作成してフィルタ処理をかけたりして、好き放題に合成してFileMaker DB上のフィールドに設定できる。バーコードやQRコードをAppleScript側で生成して設定したり、PDFをレンダリングした画像を設定できるのは便利

AppleScript名:NSImage to FM Object Field v2.scptd
— Created 2020-12-20 by Takaaki Naganoya
— 2020 Piyomaru Software
use AppleScript version "2.4"
use scripting additions
use framework "Foundation"
use framework "AppKit"

property fmBundleID : ""

set fmBundleID to getBundleID() of me

–DB側から画像化するテキストを取得する
using terms from application "FileMaker Pro"
  tell application ID fmBundleID
    tell window 1
      tell current record
        set aText to field "originalString"
      end tell
    end tell
  end tell
end using terms from

set aWidth to 500.0 –幅
set aHeight to 200.0 –高さ

set fillColor to current application’s NSColor’s blackColor –塗り色
set drawColor to current application’s NSColor’s whiteColor –文字色

set {xPos, yPos} to {1, 5}

–新規画像を作成して背景を塗る
set aImage1 to makeImageWithFilledColor(aWidth, aHeight, fillColor) of me

–画像に文字を塗る
set aImage2 to drawStringsOnImage(aImage1, aText, "HiraKakuStd-W8", 36.0, drawColor, xPos, yPos) of me

(my restoreClipboard:{aImage2})
using terms from scripting additions
  set tmpImg to the clipboard as JPEG picture
end using terms from

–DBに画像を設定する
using terms from application "FileMaker Pro"
  tell application ID fmBundleID
    tell window 1
      tell current record
        set field "imageStore" to tmpImg
      end tell
    end tell
  end tell
end using terms from

–画像のうえに指定の文字を描画して画像を返す
on drawStringsOnImage(anImage, aText, aFontName, aPoint, drawColor, xPos, yPos)
  set aString to current application’s NSString’s stringWithString:aText
  
set aDict to current application’s NSDictionary’s dictionaryWithObjects:{current application’s NSFont’s fontWithName:aFontName |size|:aPoint, drawColor} forKeys:{current application’s NSFontAttributeName, current application’s NSForegroundColorAttributeName}
  
  
–文字描画開始
  
anImage’s lockFocus()
  
aString’s drawAtPoint:(current application’s NSMakePoint(xPos, yPos)) withAttributes:aDict
  
anImage’s unlockFocus()
  
–文字描画ここまで
  
  
return anImage
end drawStringsOnImage

–指定サイズの画像を作成し、背景を指定色で塗る
on makeImageWithFilledColor(aWidth, aHeight, fillColor)
  –Imageの作成  
  
set anImage to current application’s NSImage’s alloc()’s initWithSize:(current application’s NSMakeSize(aWidth, aHeight))
  
  
–描画開始
  
anImage’s lockFocus()
  
  
set theRect to {{x:0, y:0}, {width:aWidth, height:aHeight}}
  
set theNSBezierPath to current application’s NSBezierPath’s bezierPath
  
theNSBezierPath’s appendBezierPathWithRect:theRect
  
  
fillColor’s |set|() –色設定
  
theNSBezierPath’s fill() –ぬりつぶし
  
  
anImage’s unlockFocus()
  
–描画ここまで
  
  
return anImage –画像を返す
end makeImageWithFilledColor

on getBundleID()
  –FileMaker Pro 18
  
set fmProID to "com.filemaker.client.pro12"
  
  
–FileMaker Pro 18 Advanced
  
set fmProADVID to "com.filemaker.client.advanced12"
  
  
using terms from application "FileMaker Pro"
    tell current application
      set aName to name
    end tell
  end using terms from
  
  
if aName contains "Advanced" then
    return fmProADVID
  else
    return fmProID
  end if
end getBundleID

–クリップボードに内容を設定する
on restoreClipboard:theArray
  — get pasteboard
  
set thePasteboard to current application’s NSPasteboard’s generalPasteboard()
  
  
— clear it, then write new contents
  
thePasteboard’s clearContents()
  
thePasteboard’s writeObjects:theArray
end restoreClipboard:

★Click Here to Open This Script 

Posted in Image | Tagged 10.14savvy 10.15savvy 11.0savvy FileMaker | Leave a comment

Safariで表示中のタブを順次切り替え

Posted on 12月 26, 2020 by Takaaki Naganoya

StreamDeckから呼び出すことを前提に作ってみました。StreamDeckの実機は友人に返却したものの、ソフトウェア版のStreamDeck(iOSデバイスで動く)が稼働するので、iPhone上のStreamDeckアプリでMacをコントロール可能です。

AppleScript名:rotate tabs.scpt
tell application "Safari"
  tell front window
    set tCount to count every tab
    
set curTab to index of current tab
    
    
if curTab = tCount then
      set targTab to 1
    else
      set targTab to curTab + 1
    end if
    
    
set current tab to tab targTab
  end tell
end tell

★Click Here to Open This Script 

こんなAppleScriptを書いて、StreamDeckの設定ソフトウェアで「開く」アクションにAppleScriptを登録。

実行時、初回だけ「Safariのコントロールを許可するか?」というセキュリティダイアログが出てきますが、許可すれば2回目以降で聞かれることはありません。

Posted in Peripheral | Tagged 10.14savvy 10.15savvy 11.0savvy Safari Streamdeck | Leave a comment

Pixelmator Pro v2.0.2/2.0.3のAppleScript用語辞書変更点

Posted on 12月 25, 2020 by Takaaki Naganoya

Pixelmator Pro v2.0.1から2.0.2のバージョンアップ時にAppleScript用語辞書が変更されました。

・select color rangeコマンドにmodeを追加

new selection : Create a new selection.
add selection : Add to the existing selection.
subtract selection : Subtract from the existing selection.
intersect selection : Intersect with the existing selection.

Pixelmator Pro v2.0.2から2.0.3へのバージョンアップ時にはとくに変更はありません。

Posted in Update | Tagged 10.14savvy 10.15savvy 11.0savvy Pixelmator Pro | Leave a comment

同じバージョン番号のまま大幅に機能が変更されたSystem Events

Posted on 12月 15, 2020 by Takaaki Naganoya

macOS 10.15はBetaの頃から出来が悪くて、とても「これは常用できない」としてメインマシンにはインストールせず、専用のマシンに入れて様子を見ていました。10.15については「こんなもんリリースすんな」という印象。10.13については、担当者の首が飛ばない理由が分からない出来でした。

そんなmacOS 10.15で、ご無体な変更がSystem Eventsに見られました。

10.13、10.14、10.15、11.0とSystem Eventsのバージョン番号は同じ「1.3.6」ですが、AppleScript用語辞書の内容が大幅に変更されています。

これまでにもAppleのエンジニアの失敗やバグにいろいろ酷い目に遭わされてきましたが、「内容に大幅に変更があってもバージョン番号を変えない」という新たな失敗が記録されることになりました。これは、斬新な手口ですね! 

今後も、バージョン番号を変更せずに機能の変更を行なってくることが予想されます。できれば、ちゃんとバージョン番号を変更することも覚えてほしいですよね。

■macOS 10.13→10.14

(1)Disk-Folder-File Suiteから、指定のOSA言語のScriptを実行する「do script」コマンドが削除されました。同機能は標準命令の中にも重複して存在しており、とくに影響はありません。

■macOS 10.14→10.15

(1)desktop picture settingsに「dynamic style」という属性値が新設されました。指定できる値は「auto」「dynamic」「light」「dark」「unknown」。

(2)Audio File Suiteが削除された
どこまで行っても実装が微妙だったAudio File Suiteが削除されました。32bitコードだったのでしょうか。

(3)Movie File Suiteが削除された
同じく、微妙な出来だったMovie File Suitesが削除されました。理由はAudio File Suiteと同じなのでしょう。

(3)QuickTime File Suiteが削除された
同上。

(4)key up/key downコマンドが強化された
文字コードでしか指定できなかったkey up/key downコマンドが強化され、integerでキーコードを指定する従来どおりの指定方法のほか、textでキーボードの文字を指定できるようになりました。

■macOS 10.15→11.1

(1)dock preferences objectに属性値が新設された
autohide menu bar:システムメニューバーの自動非表示機能のオン/オフ
double click behavior:ウィンドウのタイトルバーをダブルクリックしたときの挙動の切り替え
minimize into application:ウィンドウのタイトルバーをダブルクリックしたときにDock上のアプリケーションアイコンに向けて最小化?
show indicators:Dock上のアプリケーションアイコンに起動中のインジケータ表示を行う/行わない設定
show recents:最近使ったアプリケーションのグループを表示する設定

こうした調査は、AppleScript用語辞書ファイル(sdef)そのものや、それをHTMLに書き出したデータを比較することで検討しているわけですが、一回それを電子書籍のオマケにすることを検討したものの、他のScripterに「そういうものに興味はないか?」と聞いてみたところ、まったく関心を持っていないようでした。

ある意味、最重要書類というか「秘伝のタレ」に近い情報ではあったものの、コピペだけでコードを書いているレベルのScripterは、そういう「一次情報」(死活問題になる)に関心がないんだなーということが分かっただけでした。

■表 System Eventsの用語辞書の変遷(「最新事情がわかるAppleScript 10大最新技術」より引用してアップデート)

macOS Version 10.x 2 3 4 5 6 7 8 9 10 11 12 13 14 15 11.0
Standard Suite ■ ■ ■ ■ ■ ■ ■ ■ ■ ■ ■ ■ ■ ■ ■
System Events Suite ■ ■ ■ ■ ■ ■ ■ ■ ■ ■ ■ ■ ■ ■ ■
Accounts Suite ■ ■ ■ ■ ■ ■ ■ ■ ■ ■ ■ ■ ■ ■ ■
Appearance Suite ■ ■ ■ ■ ■ ■ ■ ■ ■ ■ ■ ■
CD and DVD Preferences Suite ■ ■ ■ ■ ■ ■ ■ ■ ■ ■ ■ ■
Desktop Suite ■ ■ ■ ■ ■ ■ ■ ■ ■ ■ ■ ■
Dock Preferences Suite ■ ■ ■ ■ ■ ■ ■ ■ ■ ■ ■ ■
Login Items Suite ■ ■ ■ ■ ■ ■ ■ ■ ■ ■ ■ ■ ■ ■ ■
Network Preferences Suite ■ ■ ■ ■ ■ ■ ■ ■ ■ ■ ■
Screen Saver Suite ■ ■ ■ ■ ■ ■ ■ ■ ■ ■ ■
Audio File Suite ■ ■ ■ ■ ■ ■ ■ ■ ■ ■ ■ ■ ■
Security Suite ■ ■ ■ ■ ■ ■ ■ ■ ■ ■ ■ ■
Disk-Folder-File Suite ■ ■ ■ ■ ■ ■ ■ ■ ■ ■ ■ ■ ■ ■ ■
Folder Actions Suite ■ ■ ■ ■ ■ ■ ■ ■ ■ ■ ■ ■ ■ ■ ■
Movie File Suite ■ ■ ■ ■ ■ ■ ■ ■ ■ ■ ■ ■ ■
Power Suite ■ ■ ■ ■ ■ ■ ■ ■ ■ ■ ■ ■ ■ ■ ■
Processes Suite ■ ■ ■ ■ ■ ■ ■ ■ ■ ■ ■ ■ ■ ■ ■
Property List Suite ■ ■ ■ ■ ■ ■ ■ ■ ■ ■ ■ ■ ■ ■ ■
QuickTime File Suite ■ ■ ■ ■ ■ ■ ■ ■ ■ ■ ■ ■ ■
XML Suite ■ ■ ■ ■ ■ ■ ■ ■ ■ ■ ■ ■ ■ ■ ■
Type Definitions ■ ■ ■ ■ ■ ■ ■ ■ ■ ■ ■ ■ ■ ■ ■
Scripting Definition Suite ■ ■ ■ ■ ■ ■ ■
Text Suite ■ ■ ■ ■ ■ ■ ■
Expose Preferences Suite ■ ■ ■ ■
Posted in news | Tagged 10.14savvy 10.15savvy 11.0savvy System Events | 1 Comment

Numbersで選択範囲に背景色を塗られているセル数をカウント

Posted on 12月 14, 2020 by Takaaki Naganoya

Numbersでオープン中の最前面の書類の現在のシート上の選択状態にある表の選択範囲から、背景色(background color)が塗られているセルを数えるAppleScriptです。

用途は、WebGL + three.jsで作られた3Dの回転選択メニューのデータ確認のためです。Numbers上で表示範囲の表を作って、その上で背景色を塗ることで「どの位置にデータを表示するか」を指定します。そのさいに、並べるセル数が表示用のJavaScriptと合っていないと面倒なので、本Scriptで色つきセルをかぞえています。

Numbers上で背景色(background color)が塗られているセルは16ビットで色の値が返ってきますし、塗られていないセルはmissing valueが返ってきます。

AppleScript名:Numbersで選択範囲に背景色を塗られているセル数をカウント
—
–  Created by: Takaaki Naganoya
–  Created on: 2020/12/06
—
–  Copyright © 2020 Piyomaru Software, All Rights Reserved
—

use AppleScript version "2.4" — Yosemite (10.10) or later
use framework "Foundation"
use scripting additions

tell application "Numbers"
  tell front document
    –現在表示中のシートを対象にする
    
tell active sheet
      –Tableを特定する
      
try
        set theTable to first table whose class of selection range is range
      on error
        display notification "Numbers: There is no selection"
        
return {}
      end try
      
      
tell theTable
        –選択範囲のデータを1D Listで取得する
        
set aRes to background color of cells of selection range
      end tell


–Count Background
      
set aCount to 0
      
repeat with i in aRes
        set j to contents of i
        
        
if j is not equal to missing value then
          set aCount to aCount + 1
        end if
      end repeat
      
      
return aCount
    end tell
  end tell
end tell

★Click Here to Open This Script 

同様に、着色セルの座標値(x座標, y座標)を返すものも作って使用しています。

AppleScript名:Numbersで選択中のセルのうち背景色を塗られているもののx,y座標を2D Listで返す
—
–  Created by: Takaaki Naganoya
–  Created on: 2020/12/06
—
–  Copyright © 2020 Piyomaru Software, All Rights Reserved
—

use AppleScript version "2.4" — Yosemite (10.10) or later
use framework "Foundation"
use scripting additions

tell application "Numbers"
  tell front document
    –現在表示中のシートを対象にする
    
tell active sheet
      –Tableを特定する
      
try
        set theTable to first table whose class of selection range is range
      on error
        display notification "Numbers: There is no selection"
        
return {}
      end try
      
      
tell theTable
        tell selection range
          set cellRes to background color of cells
          
set aWidth to count every column
          
set aHeight to count every row
        end tell
      end tell
      
      
–Check selected cell’s background color
      
set cellL to {}
      
set adrCount to 1
      
repeat with y from 1 to aHeight
        repeat with x from 1 to aWidth
          set aTmp to contents of (item adrCount of cellRes)
          
          
if aTmp is not equal to missing value then
            set the end of cellL to {x, y}
          end if
          
          
set adrCount to adrCount + 1
        end repeat
      end repeat
      
      
return cellL
      
–> {{1, 1}, {2, 1}, {3, 1}, {6, 1}, {8, 1}, {12, 1}, {15, 1}, {16, 1}, {20, 1}, {21, 1}, {24, 1}, {27, 1}, {28, 1}, {29, 1}, {1, 2}, {4, 2}, {6, 2}, {9, 2}, {11, 2}, {14, 2}, {17, 2}, {19, 2}, {23, 2}, {25, 2}, {27, 2}, {1, 3}, {2, 3}, {3, 3}, {6, 3}, {10, 3}, {14, 3}, {17, 3}, {19, 3}, {20, 3}, {23, 3}, {25, 3}, {27, 3}, {28, 3}, {29, 3}, {1, 4}, {6, 4}, {10, 4}, {14, 4}, {17, 4}, {21, 4}, {23, 4}, {25, 4}, {27, 4}, {1, 5}, {6, 5}, {10, 5}, {15, 5}, {16, 5}, {19, 5}, {20, 5}, {21, 5}, {24, 5}, {27, 5}, {1, 7}, {5, 7}, {8, 7}, {11, 7}, {12, 7}, {15, 7}, {17, 7}, {19, 7}, {20, 7}, {21, 7}, {23, 7}, {27, 7}, {1, 8}, {2, 8}, {4, 8}, {5, 8}, {7, 8}, {9, 8}, {11, 8}, {13, 8}, {15, 8}, {17, 8}, {20, 8}, {23, 8}, {27, 8}, {1, 9}, {3, 9}, {5, 9}, {7, 9}, {8, 9}, {9, 9}, {11, 9}, {12, 9}, {15, 9}, {17, 9}, {20, 9}, {23, 9}, {25, 9}, {27, 9}, {1, 10}, {5, 10}, {7, 10}, {9, 10}, {11, 10}, {13, 10}, {15, 10}, {17, 10}, {20, 10}, {23, 10}, {24, 10}, {26, 10}, {27, 10}, {1, 11}, {5, 11}, {7, 11}, {9, 11}, {11, 11}, {13, 11}, {16, 11}, {20, 11}, {23, 11}, {27, 11}}
    end tell
  end tell
end tell

★Click Here to Open This Script 

Posted in Color list | Tagged 10.13savvy 10.14savvy 10.15savvy 11.0savvy Numbers | Leave a comment

HTMLカラー値から明度を取得

Posted on 12月 8, 2020 by Takaaki Naganoya

HTMLカラー値からNSColorを作成し、Gray Scaleに変換したのちに明度情報を取得するAppleScriptです。

RGB値をHSV(HSB)に変換して明度情報を取得するバージョンも試してみたのですが、個人的にはこちらの処理の方がしっくりくる感じでした。

# コメント部分のWhiteとBlackの記述が逆だったので修正しておきました

AppleScript名:HTMLカラー値から明度を取得 v1.1.scptd
—
–  Created by: Takaaki Naganoya
–  Created on: 2020/12/07
—
–  Copyright © 2020 Piyomaru Software, All Rights Reserved
—
use AppleScript version "2.4" — Yosemite (10.10) or later
use framework "Foundation"
use framework "AppKit"
use scripting additions

property NSColor : a reference to current application’s NSColor
property NSString : a reference to current application’s NSString
property NSAttributedString : a reference to current application’s NSAttributedString
property NSUTF16StringEncoding : a reference to current application’s NSUTF16StringEncoding
property NSDeviceWhiteColorSpace : a reference to current application’s NSDeviceWhiteColorSpace

set aCol to "#412a23"
set wCol to calcBrightnessFromHTMLColorCodeStr(aCol) of me
–> 0.245871186256

set aCol to "#000000" –Black
set wCol to calcBrightnessFromHTMLColorCodeStr(aCol) of me
–> 0.0

set aCol to "#FFFFFF" –White
set wCol to calcBrightnessFromHTMLColorCodeStr(aCol) of me
–> 1.0

set aCol to "#EEA096"
set wCol to calcBrightnessFromHTMLColorCodeStr(aCol) of me
–> 0.759391903877

on calcBrightnessFromHTMLColorCodeStr(aStr as string)
  set {rVal, gVal, bVal} to rgbHex2nunList(aStr) of me
  
–NSColorを作成
  
set aCol to makeNSColorFromRGBAval(rVal, gVal, bVal, 255, 255) of me
  
— グレースケール化
  
set gCol to aCol’s colorUsingColorSpaceName:(NSDeviceWhiteColorSpace)
  
set wComp to gCol’s whiteComponent() –whiteComponentを取得することで擬似的に明度情報を取得  
  
return wComp
end calcBrightnessFromHTMLColorCodeStr

on makeNSColorFromRGBAval(redValue as integer, greenValue as integer, blueValue as integer, alphaValue as integer, aMaxVal as integer)
  set aRedCocoa to (redValue / aMaxVal) as real
  
set aGreenCocoa to (greenValue / aMaxVal) as real
  
set aBlueCocoa to (blueValue / aMaxVal) as real
  
set aAlphaCocoa to (alphaValue / aMaxVal) as real
  
set aColor to NSColor’s colorWithCalibratedRed:aRedCocoa green:aGreenCocoa blue:aBlueCocoa alpha:aAlphaCocoa
  
return aColor
end makeNSColorFromRGBAval

on decodeCharacterReference(aStr)
  set anNSString to NSString’s stringWithString:aStr
  
set theData to anNSString’s dataUsingEncoding:(NSUTF16StringEncoding)
  
set styledString to NSAttributedString’s alloc()’s initWithHTML:theData documentAttributes:(missing value)
  
set plainText to (styledString’s |string|()) as string
  
return plainText
end decodeCharacterReference

–HTMLコードのRGB 16進数コードを数値リストに変換
on rgbHex2nunList(aHexStr)
  –エラーチェック
  
if aHexStr does not start with "#" then return false
  
if length of aHexStr is not equal to 7 then return false
  
set bHex to text 2 thru -1 of aHexStr
  
  
set {rStr, gStr, bStr} to {text 1 thru 2 of bHex, text 3 thru 4 of bHex, text 5 thru 6 of bHex}
  
  
set bList to {}
  
repeat with i in {rStr, gStr, bStr}
    set j to contents of i
    
set the end of bList to aHexStrToNum(j) of me
  end repeat
  
  
return bList
end rgbHex2nunList

–16進数文字列を10進数数値に変換する
on aHexStrToNum(hexStr)
  set hStr to "0123456789ABCDEF"
  
  
set aNum to 0
  
set aLen to length of hexStr
  
  
repeat with i from aLen to 1 by -1
    
    
set aCon to contents of character i of hexStr
    
using terms from scripting additions
      set aVal to (offset of aCon in hStr) – 1
    end using terms from
    
set aNum to aNum + aVal * (16 ^ (aLen – i))
    
  end repeat
  
  
return aNum as integer
end aHexStrToNum

★Click Here to Open This Script 

Posted in Color | Tagged 10.13savvy 10.14savvy 10.15savvy 11.0savvy NSAttributedString NSColor NSDeviceWhiteColorSpace NSString NSUTF16StringEncoding | Leave a comment

Post navigation

  • Older posts
  • Newer posts

電子書籍(PDF)をオンラインストアで販売中!

Google Search

Popular posts

  • 開発機としてM2 Mac miniが来たのでガチレビュー
  • macOS 15, Sequoia
  • 指定のWordファイルをPDFに書き出す
  • Pages本執筆中に、2つの書類モード切り替えに気がついた
  • Numbersで選択範囲のセルの前後の空白を削除
  • メキシカンハットの描画
  • Pixelmator Pro v3.6.4でAppleScriptからの操作時の挙動に違和感が
  • AdobeがInDesign v19.4からPOSIX pathを採用
  • AppleScriptによる並列処理
  • Safariで「プロファイル」機能を使うとAppleScriptの処理に影響
  • Cocoa Scripting Course 続刊計画
  • macOS 14.xでScript Menuの実行速度が大幅に下がるバグ
  • AppleScript入門③AppleScriptを使った「自動化」とは?
  • Keynote/Pagesで選択中の表カラムの幅を均等割
  • デフォルトインストールされたフォント名を取得するAppleScript
  • macOS 15 リモートApple Eventsにバグ?
  • Keynote、Pages、Numbers Ver.14.0が登場
  • macOS 15でも変化したText to Speech環境
  • AppleScript入門① AppleScriptってなんだろう?
  • macOS 14で変更になったOSバージョン取得APIの返り値

Tags

10.11savvy (1101) 10.12savvy (1242) 10.13savvy (1391) 10.14savvy (587) 10.15savvy (438) 11.0savvy (283) 12.0savvy (212) 13.0savvy (194) 14.0savvy (147) 15.0savvy (132) CotEditor (66) Finder (51) iTunes (19) Keynote (117) NSAlert (61) NSArray (51) NSBitmapImageRep (20) NSBundle (20) NSButton (34) NSColor (53) NSDictionary (28) NSFileManager (23) NSFont (21) NSImage (41) NSJSONSerialization (21) NSMutableArray (63) NSMutableDictionary (22) NSPredicate (36) NSRunningApplication (56) NSScreen (30) NSScrollView (22) NSString (119) NSURL (98) NSURLRequest (23) NSUTF8StringEncoding (30) NSView (33) NSWorkspace (20) Numbers (76) Pages (55) Safari (44) Script Editor (27) WKUserContentController (21) WKUserScript (20) WKWebView (23) WKWebViewConfiguration (22)

カテゴリー

  • 2D Bin Packing
  • 3D
  • AirDrop
  • AirPlay
  • Animation
  • AppleScript Application on Xcode
  • Beginner
  • Benchmark
  • beta
  • Bluetooth
  • Books
  • boolean
  • bounds
  • Bug
  • Calendar
  • call by reference
  • check sum
  • Clipboard
  • Cocoa-AppleScript Applet
  • Code Sign
  • Color
  • Custom Class
  • date
  • dialog
  • diff
  • drive
  • Droplet
  • exif
  • file
  • File path
  • filter
  • folder
  • Font
  • Font
  • GAME
  • geolocation
  • GUI
  • GUI Scripting
  • Hex
  • History
  • How To
  • iCloud
  • Icon
  • Image
  • Input Method
  • Internet
  • iOS App
  • JavaScript
  • JSON
  • JXA
  • Keychain
  • Keychain
  • Language
  • Library
  • list
  • Locale
  • Localize
  • Machine Learning
  • Map
  • Markdown
  • Menu
  • Metadata
  • MIDI
  • MIME
  • Natural Language Processing
  • Network
  • news
  • Noification
  • Notarization
  • Number
  • Object control
  • OCR
  • OSA
  • parallel processing
  • PDF
  • Peripheral
  • PRODUCTS
  • QR Code
  • Raw AppleEvent Code
  • Record
  • rectangle
  • recursive call
  • regexp
  • Release
  • Remote Control
  • Require Control-Command-R to run
  • REST API
  • Review
  • RTF
  • Sandbox
  • Screen Saver
  • Script Libraries
  • sdef
  • search
  • Security
  • selection
  • shell script
  • Shortcuts Workflow
  • Sort
  • Sound
  • Spellchecker
  • Spotlight
  • SVG
  • System
  • Tag
  • Telephony
  • Text
  • Text to Speech
  • timezone
  • Tools
  • Update
  • URL
  • UTI
  • Web Contents Control
  • WiFi
  • XML
  • XML-RPC
  • イベント(Event)
  • 未分類

アーカイブ

  • 2025年5月
  • 2025年4月
  • 2025年3月
  • 2025年2月
  • 2025年1月
  • 2024年12月
  • 2024年11月
  • 2024年10月
  • 2024年9月
  • 2024年8月
  • 2024年7月
  • 2024年6月
  • 2024年5月
  • 2024年4月
  • 2024年3月
  • 2024年2月
  • 2024年1月
  • 2023年12月
  • 2023年11月
  • 2023年10月
  • 2023年9月
  • 2023年8月
  • 2023年7月
  • 2023年6月
  • 2023年5月
  • 2023年4月
  • 2023年3月
  • 2023年2月
  • 2023年1月
  • 2022年12月
  • 2022年11月
  • 2022年10月
  • 2022年9月
  • 2022年8月
  • 2022年7月
  • 2022年6月
  • 2022年5月
  • 2022年4月
  • 2022年3月
  • 2022年2月
  • 2022年1月
  • 2021年12月
  • 2021年11月
  • 2021年10月
  • 2021年9月
  • 2021年8月
  • 2021年7月
  • 2021年6月
  • 2021年5月
  • 2021年4月
  • 2021年3月
  • 2021年2月
  • 2021年1月
  • 2020年12月
  • 2020年11月
  • 2020年10月
  • 2020年9月
  • 2020年8月
  • 2020年7月
  • 2020年6月
  • 2020年5月
  • 2020年4月
  • 2020年3月
  • 2020年2月
  • 2020年1月
  • 2019年12月
  • 2019年11月
  • 2019年10月
  • 2019年9月
  • 2019年8月
  • 2019年7月
  • 2019年6月
  • 2019年5月
  • 2019年4月
  • 2019年3月
  • 2019年2月
  • 2019年1月
  • 2018年12月
  • 2018年11月
  • 2018年10月
  • 2018年9月
  • 2018年8月
  • 2018年7月
  • 2018年6月
  • 2018年5月
  • 2018年4月
  • 2018年3月
  • 2018年2月

https://piyomarusoft.booth.pm/items/301502

メタ情報

  • ログイン
  • 投稿フィード
  • コメントフィード
  • WordPress.org

Forum Posts

  • 人気のトピック
  • 返信がないトピック

メタ情報

  • ログイン
  • 投稿フィード
  • コメントフィード
  • WordPress.org
Proudly powered by WordPress
Theme: Flint by Star Verte LLC