Pixelmator Pro v2.0.8で追加された3D LUT(Look Up Table)によるカラー調整機能。これを用いて、複数の3D LUTファイルによるカラー調整を行い、それぞれ3D LUTファイルのファイル名を反映させて書き出すAppleScriptです。
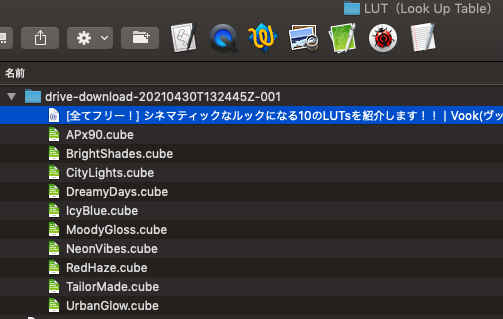
3D LUTファイルは、探してみるとあちこちで配布されており、割とありふれた存在のようです。実際にフリー配布されている3D LUTファイルをダウンロードしてきて、1つのフォルダに入れておき、指定画像に対してカラー調整を行わせてみました。
–> [全てフリー!] シネマティックなルックになる10のLUTsを紹介します!!
フォルダに入っている3D LUTファイルをすべてループで処理するので、3D LUTファイル100個でも1,000個でも処理できますし、ちょっと書き換えれば複数の画像に対してそれぞれすべての3D LUTファイルによる色調整を実行するようにもできます。
| AppleScript名:指定の画像を複数の3D LUTでカラー調整して画像書き出し.scpt |
| — – Created by: Takaaki Naganoya – Created on: 2020/05/02 — – Copyright © 2020 Piyomaru Software, All Rights Reserved — use AppleScript version "2.4" — Yosemite (10.10) or later use framework "Foundation" use scripting additions property |NSURL| : a reference to current application’s |NSURL| property NSArray : a reference to current application’s NSArray property NSPredicate : a reference to current application’s NSPredicate property NSURLTypeIdentifierKey : a reference to current application’s NSURLTypeIdentifierKey –処理対象の画像を選択 set anImage to choose file of type {"public.image"} default location (path to pictures folder) with prompt "Select Proc Image" set imgParent to getParentPathFromAlias(anImage) of me –3D LUTファイルを入れてあるフォルダを選択 set lutFolder to choose folder with prompt "Select 3D LUT folder" –Filter 3D LUT (.cube) files only tell application "Finder" set fList to (every file of folder lutFolder) as alias list end tell set lutList to getFilesWithUTI("com.blackmagicdesign.cube", fList) of me –指定の画像ファイルをオープン tell application "Pixelmator Pro" close every document saving no open anImage end tell –Main Loop repeat with i in lutList set aLut to contents of i –ファイルパスの加工処理 set newImgName to ((current application’s NSString’s stringWithString:(POSIX path of aLut))’s lastPathComponent()’s stringByDeletingPathExtension()’s stringByAppendingString:".jpg") as string set newImgFullPath to (imgParent as string) & "/" & newImgName set newImgFile to POSIX file newImgFullPath tell application "Pixelmator Pro" activate tell front document tell color adjustments of first layer –ここだけ、ネスティングを分割するとエラーになる set its custom lut to aLut end tell export to newImgFullPath as JPEG with properties {compression factor:0.5, bits per channel:8} undo end tell end tell end repeat –後片付け tell application "Pixelmator Pro" tell front document close without saving end tell end tell on getParentPathFromAlias(aliasPath) set aPath to POSIX path of aliasPath set pathString to current application’s NSString’s stringWithString:aPath set newPath to pathString’s stringByDeletingLastPathComponent() return newPath end getParentPathFromAlias on getFilesWithUTI(acceptUTI, aliasList) set aList to {} repeat with i in aliasList set anAlias to i as alias set aUTI to getUTIfromPath(anAlias) of me if aUTI is not equal to missing value then set uRes to filterUTIList({aUTI}, acceptUTI) of me if uRes is not equal to {} then set the end of aList to contents of i end if end if end repeat return aList end getFilesWithUTI –AliasからUTIを求める on getUTIfromPath(anAlias) set aPOSIXpath to POSIX path of anAlias set aURL to current application’s |NSURL|’s fileURLWithPath:aPOSIXpath if aURL = missing value then return missing value set aRes to aURL’s resourceValuesForKeys:{current application’s NSURLTypeIdentifierKey} |error|:(missing value) if aRes = missing value then return missing value return (aRes’s NSURLTypeIdentifierKey) as string end getUTIfromPath –UTIリストが指定UTIに含まれているかどうか演算を行う on filterUTIList(aUTIList, aUTIstr) set anArray to NSArray’s arrayWithArray:aUTIList set aPred to NSPredicate’s predicateWithFormat_("SELF UTI-CONFORMS-TO %@", aUTIstr) set bRes to (anArray’s filteredArrayUsingPredicate:aPred) as list return bRes end filterUTIList |

