Menu

Skip to content
AppleScriptの穴
  • Home
  • Products
  • Books
  • Docs
  • Events
  • Forum
  • About This Blog
  • License
  • 仕事依頼

AppleScriptの穴

Useful & Practical AppleScript archive. Click '★Click Here to Open This Script' Link to download each AppleScript

カテゴリー: System

集中モード(Don’t Disturb Mode)に設定する

Posted on 11月 16, 2021 by Takaaki Naganoya

macOS 12.x上で集中モード(Don’t Disturb Mode)に設定するAppleScriptです。

Shortcutsにその機能があるので、AppleScriptから呼ぶことになるでしょう。使っていると「日本語AppleScript」みたいな違和感の塊のようなショートカット.app。「おやすみモードをオフ時までオンにする」とか、無理に日本語にしないで英語にしてあったほうがまだ分かりやすいと思います。

この「集中モード」という機能についても、画面上で「おやすみモード」と表現されていたり「集中モード」と表現されていたり、いまひとつ機能を表す言葉のレベルに戸惑いを感じます。それとも、自分が何か根本的に勘違いしている箇所があるものでしょうか。

インストール+実行ルーチンを呼ぶことで、このショートカット・ワークフローがMac上に存在していなければインストールし、呼び出しを行います。


▲実行前


▲実行後

AppleScript名:Don’t Disturb Shortcuts v2.scpt
—
–  Created by: Takaaki Naganoya
–  Created on: 2021/11/01
—
–  Copyright © 2021 Piyomaru Software, All Rights Reserved
—

set aName to "PIYO_Don’t Disturb" –Shortcut名称
set aURL to "https://www.icloud.com/shortcuts/cf960093816e4c7fb8d23c10e8820790" –共有URL
set sRes to installAndRunShortcuts(aName, aURL) of me

–Install Shortcut and run it
on installAndRunShortcuts(aName, aURL)
  tell application "Shortcuts Events"
    set n1List to name of every shortcut
  end tell
  
  
if n1List does not contain aName then
    display notification "Plese Install my Shortcuts workflow"
    
open location aURL
  end if
  
  
repeat 100 times
    tell application "Shortcuts Events"
      set n2List to name of every shortcut
    end tell
    
    
if n2List contains aName then
      exit repeat
    end if
    
    
delay 0.5
  end repeat
  
  
if n2List does not contain aName then
    display dialog "I can’t run my Shortcuts because you canceled installing"
    
return false
  end if


tell application "Shortcuts Events"
    run shortcut aName
    
return true
  end tell
end installAndRunShortcuts

★Click Here to Open This Script 

Posted in System | Tagged 12.0savvy Shortcuts Shortcuts Events | Leave a comment

M1 Macの各種温度センサーから値を取得する

Posted on 8月 17, 2021 by Takaaki Naganoya

Mac内の各種温度センサーから値を取得するAppleScriptのM1 Mac(Apple Silicon Mac)の対応版です。

近年、macOSのCPU温度管理+放熱ファンの回転数制御がとってもいい加減で、AppleScriptからOSの機能を呼び出しまくるとCPU温度の加熱を心配する必要が出ていました(本当)。AppleScriptから高速にコントロールを行うとCPU温度が上昇し、サーマルスロットリングを引き起こしていました(本当)。

そのため、CPUの温度を計測する処理はけっこう重要なものになっていました。ちかごろは、バッチでまとまった処理を行うさいには、ループの一部でCPUの温度を計測して、異常過熱に備えるようになっています。

→ SMCkitで各種センサー値を取得する

M1 Macではそれほど温度の上昇は激しくはありませんが、製品ラインナップ中にはファンレス機(MacBook Air)もあるので、依然として温度センサーへのアクセスはAppleScriptによるバッチ処理でも必要となるはずです。

# 幸いにというか残念なことにというか、現在のM1 Mac+macOS 11.xではCocoaの機能呼び出し時にM1のIcestormで各種処理が行われてしまうために、心配するほどの異常過熱はなさそうです。速度がIntel Macよりも遥かに遅くなるので心配ありません(macOS 11時代の話。macOS 12でこれが改善されたために、Cocoaの機能を呼び出してもIntel Macを超えるスピードで処理できるようになった)

# 放熱ファンの回転数制御もできたらよかったのですが、そちらはなかなかAppleScriptからは呼べていません。TG Proの開発元にファン制御機能をAppleScriptから呼べるようにすることも提案しましたが、回転数を下げたままCPUをブン回すと異常加熱を起こすため、一律に強制ファン回転させることで対処することを逆に提案されました(つまり、提案が却下されたわけです)

その肝心のモジュールであるSMCWrapperがM1 Mac上では動かなくなっていました。理由の1つには、書かれた時代が古くてビルドできないこと。もう1つは、Intel MacとApple Silicon Macのハードウェア構成はそもそも別物なので、Intel Mac向けに書かれたプログラムでは必要なセンサーの値を取れなくなっていたことがあります。

「というわけで、M1 Mac上で温度センサーの値を取れません」

と、書こうとして「apple_sensors」のプロジェクトを見つけました。このプログラムを一部書き換え、センサー値の取得をループで行っていた部分を、1回で終了するようにしてバッチ処理の中で呼び出せるようにしてみました。

{{sName:"PMGR SOC Die Temp Sensor1", sVal:33.1}, {sName:"PMU tdev5", sVal:-21.6}, {sName:"PMU tdie6", sVal:40.8}, {sName:"PMU tdev3", sVal:37.3}, {sName:"PMU2 TR1l", sVal:42.8}, {sName:"ANE MTR Temp Sensor1", sVal:30.0}, {sName:"PMU tdev6", sVal:36.5}, {sName:"ISP MTR Temp Sensor5", sVal:30.0}, {sName:"GPU MTR Temp Sensor4", sVal:30.0}, {sName:"PMU tdev8", sVal:36.4}, {sName:"PMU tdie8", sVal:40.0}, {sName:"PMU2 TR3b", sVal:41.8}, {sName:"SOC MTR Temp Sensor0", sVal:32.4}, {sName:"eACC MTR Temp Sensor3", sVal:29.9}, {sName:"pACC MTR Temp Sensor5", sVal:28.5}, {sName:"PMU TP3w", sVal:41.6}, {sName:"PMU2 TR1d", sVal:36.8}, {sName:"PMU tdie1", sVal:41.8}, {sName:"PMU2 TR5b", sVal:42.4}, {sName:"PMU tdev7", sVal:38.1}, {sName:"PMU tdev1", sVal:35.4}, {sName:"PMU2 TR3d", sVal:35.3}, {sName:"pACC MTR Temp Sensor9", sVal:32.7}, {sName:"PMU2 TR7b", sVal:41.3}, {sName:"PMU tdev4", sVal:-21.5}, {sName:"pACC MTR Temp Sensor7", sVal:32.5}, {sName:"PMU tdie5", sVal:40.7}, {sName:"PMU2 TR5d", sVal:36.3}, {sName:"pACC MTR Temp Sensor3", sVal:32.0}, {sName:"PMU tdie7", sVal:41.3}, {sName:"PMGR SOC Die Temp Sensor2", sVal:32.9}, {sName:"PMU2 TR2l", sVal:42.9}, {sName:"PMU tdie2", sVal:39.8}, {sName:"pACC MTR Temp Sensor8", sVal:33.2}, {sName:"PMU tcal", sVal:51.9}, {sName:"PMU2 TR0Z", sVal:51.9}, {sName:"PMU2 TR4b", sVal:42.5}, {sName:"pACC MTR Temp Sensor4", sVal:32.1}, {sName:"PMGR SOC Die Temp Sensor0", sVal:33.1}, {sName:"GPU MTR Temp Sensor1", sVal:30.0}, {sName:"eACC MTR Temp Sensor0", sVal:29.4}, {sName:"PMU tdie4", sVal:40.7}, {sName:"PMU2 TR2d", sVal:35.0}, {sName:"PMU2 TR6b", sVal:40.3}, {sName:"SOC MTR Temp Sensor2", sVal:33.1}, {sName:"PMU tdev2", sVal:35.9}, {sName:"SOC MTR Temp Sensor1", sVal:35.5}, {sName:"NAND CH0 temp", sVal:34.0}, {sName:"PMU2 TR4d", sVal:35.2}, {sName:"pACC MTR Temp Sensor2", sVal:31.7}, {sName:"PMU2 TR8b", sVal:40.3}}

ただ、自分のマシン以外にM1 Macを持っていないので、M1 Macをお持ちの方は動作するか確認してみてください。CPU Typeを見て、Intel Macでは実行を中断するようになっています。

–> Download M1 Temp sensor(Applet)

下記リストはバンドル内にセンサー値にアクセスするコマンドライン・プログラムを含んでいないため、実行しても無意味です。

追記:M1 Pro、M1 Max、M1 UltraなどM1の派生プロセッサではセンサー名称が異なっているとの報告があります。また、後継プロセッサでセンサー名称がそのまま変更されない保証はありません

AppleScript名:sensor.scptd
—
–  Created by: Takaaki Naganoya
–  Created on: 2021/08/17
—
–  Copyright © 2021 Piyomaru Software, All Rights Reserved
—

use AppleScript version "2.4" — Yosemite (10.10) or later
use framework "Foundation"
use scripting additions

–https://github.com/fermion-star/apple_sensors
–Temperature Sensor Monitor for Apple Silicon M1
property comPathPX : missing value

set cpuRes to getCPUType() of me
if cpuRes is not equal to "ARM64E" then
  display dialog "This is not Apple Silicon Mac"
  
return
end if

set tMin to getMINAppleSiliconMacSensorValue() of me
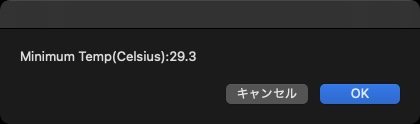
display dialog "Minimum Temp(Celsius):" & tMin as string

set tMax to getMAXAppleSiliconMacSensorValue() of me
display dialog "maximum Temp(Celsius):" & tMax as string

set tList to getAppleSiliconMacSensorValues() of me
–> {{sName:"PMGR SOC Die Temp Sensor1", sVal:33.3}, {sName:"PMU tdev5", sVal:-21.5}, {sName:"PMU tdie6", sVal:41.2}, {sName:"PMU tdev3", sVal:37.6}, {sName:"PMU2 TR1l", sVal:43.1}, {sName:"ANE MTR Temp Sensor1", sVal:30.0}, {sName:"PMU tdev6", sVal:37.3}, {sName:"ISP MTR Temp Sensor5", sVal:30.0}, {sName:"GPU MTR Temp Sensor4", sVal:30.0}, {sName:"PMU tdev8", sVal:36.9}, {sName:"PMU tdie8", sVal:38.7}, {sName:"PMU2 TR3b", sVal:40.5}, {sName:"SOC MTR Temp Sensor0", sVal:32.8}, {sName:"eACC MTR Temp Sensor3", sVal:29.1}, {sName:"pACC MTR Temp Sensor5", sVal:29.3}, {sName:"PMU TP3w", sVal:41.8}, {sName:"PMU2 TR1d", sVal:37.5}, {sName:"PMU tdie1", sVal:42.8}, {sName:"PMU2 TR5b", sVal:42.4}, {sName:"PMU tdev7", sVal:38.7}, {sName:"PMU tdev1", sVal:35.7}, {sName:"PMU2 TR3d", sVal:35.9}, {sName:"pACC MTR Temp Sensor9", sVal:32.5}, {sName:"PMU2 TR7b", sVal:42.0}, {sName:"PMU tdev4", sVal:-21.5}, {sName:"pACC MTR Temp Sensor7", sVal:35.2}, {sName:"PMU tdie5", sVal:41.6}, {sName:"PMU2 TR5d", sVal:36.7}, {sName:"pACC MTR Temp Sensor3", sVal:34.2}, {sName:"PMU tdie7", sVal:40.8}, {sName:"PMGR SOC Die Temp Sensor2", sVal:33.5}, {sName:"PMU2 TR2l", sVal:42.0}, {sName:"PMU tdie2", sVal:40.0}, {sName:"pACC MTR Temp Sensor8", sVal:34.5}, {sName:"PMU tcal", sVal:51.9}, {sName:"PMU2 TR0Z", sVal:51.9}, {sName:"PMU2 TR4b", sVal:42.9}, {sName:"pACC MTR Temp Sensor4", sVal:33.4}, {sName:"PMGR SOC Die Temp Sensor0", sVal:33.4}, {sName:"GPU MTR Temp Sensor1", sVal:30.0}, {sName:"eACC MTR Temp Sensor0", sVal:30.5}, {sName:"PMU tdie4", sVal:41.6}, {sName:"PMU2 TR2d", sVal:35.8}, {sName:"PMU2 TR6b", sVal:40.8}, {sName:"SOC MTR Temp Sensor2", sVal:35.0}, {sName:"PMU tdev2", sVal:36.2}, {sName:"SOC MTR Temp Sensor1", sVal:35.6}, {sName:"NAND CH0 temp", sVal:34.0}, {sName:"PMU2 TR4d", sVal:35.7}, {sName:"pACC MTR Temp Sensor2", sVal:32.0}, {sName:"PMU2 TR8b", sVal:42.9}}

return tList

–最も値が小さなセンサー値を返す
on getMINAppleSiliconMacSensorValue()
  checkComPath() of me
  
  
set smcRes to do shell script comPathPX
  
set {aList, bList} to paragraphs of smcRes
  
  
set b1List to parseByDelim(bList, ", ") of me
  
set b1List to items 1 thru -2 of b1List
  
  
–マイナス値のデータを無視する
  
set b2List to {}
  
repeat with i in b1List
    set j to contents of i
    
if j > 0 then
      set the end of b2List to j
    end if
  end repeat
  
  
set maxRes to minimumFromList(b2List) of me
  
return maxRes as real
end getMINAppleSiliconMacSensorValue

–最も値が大きなセンサー値を返す
on getMAXAppleSiliconMacSensorValue()
  checkComPath() of me
  
  
set smcRes to do shell script comPathPX
  
set {aList, bList} to paragraphs of smcRes
  
  
set b1List to parseByDelim(bList, ", ") of me
  
set b1List to items 1 thru -2 of b1List
  
  
set maxRes to maximumFromList(b1List) of me
  
return maxRes as real
end getMAXAppleSiliconMacSensorValue

–すべてのセンサー名と値を取得
on getAppleSiliconMacSensorValues()
  checkComPath() of me
  
  
set smcRes to do shell script comPathPX
  
set {aList, bList} to paragraphs of smcRes
  
  
set a1List to parseByDelim(aList, ", ") of me
  
set b1List to parseByDelim(bList, ", ") of me
  
  
set a1List to items 1 thru -2 of a1List
  
set b1List to items 1 thru -2 of b1List
  
  
set aLen to length of a1List
  
set outList to {}
  
  
repeat with i from 1 to aLen
    set aDat to contents of item i of a1List
    
set bDat to contents of item i of b1List
    
set the end of outList to {sName:aDat, sVal:bDat as real}
  end repeat
  
  
return outList
end getAppleSiliconMacSensorValues

on checkComPath()
  if my comPathPX = missing value then
    set mePath to (path to me) as string
    
set comPath to mePath & "Contents:Resources:temp_sensor2"
    
set my comPathPX to quoted form of (POSIX path of comPath)
  end if
end checkComPath

on parseByDelim(aData, aDelim)
  set curDelim to AppleScript’s text item delimiters
  
set AppleScript’s text item delimiters to aDelim
  
set dList to text items of aData
  
set AppleScript’s text item delimiters to curDelim
  
return dList
end parseByDelim

–最小値を取得する
on minimumFromList(nList)
  script o
    property nl : nList
  end script
  
  
set min to item 1 of o’s nl
  
repeat with i from 2 to (count nList)
    set n to item i of o’s nl
    
if n < min then set min to n
  end repeat
  
return min
end minimumFromList

–最大値を取得する
on maximumFromList(nList)
  script o
    property nl : nList
  end script
  
  
set max to item 1 of o’s nl
  
repeat with i from 2 to (count nList)
    set n to item i of o’s nl
    
if n > max then set max to n
  end repeat
  
return max
end maximumFromList

on getCPUType()
  set cpuStr to CPU type of (system info)
  
set aInd to (offset of " " in cpuStr)
  
if aInd = 0 then return cpuStr
  
set cpuStr to text 1 thru (aInd – 1) of cpuStr
  
return cpuStr
end getCPUType

★Click Here to Open This Script 

Posted in System | Tagged 11.0savvy Apple Silicon Mac | Leave a comment

M1への各種Framework移行

Posted on 7月 30, 2021 by Takaaki Naganoya

M1 Mac miniをメインマシンに変更してはや1か月ぐらい。普段のアプリケーションを利用する使い方では、ほとんどIntel Macと差がないというか、違いが分からない感じで使えています。

M1 Mac上でAppleScriptを動かすとIntel Macの10〜77倍遅いケースがままある(Cocoa Scripting時)ので、高性能マシンに乗り換えた感じはまったくしません。KeynoteとかMail.appとかSafariが速いだけの環境です。AppleScriptでバリバリにプログラムを書いているなら、iMac Proのほうが快適でしょう。Mac Proについては……三角関数の計算を間違える問題マシンとして認識しているので、まったく食指が動きません(価格的に無理ですが)。

ただ、M1 MacはCPUが熱くならないので放熱ファンで風を送らなくてよく、夏でも静かなのは助かります。

# macOS 12になって、Cocoa Scripting速度が大幅に改善されたので、(OSのバグや不具合はありますが)自分の使っている範囲では高速で快適です

Frameworkの移行

macOS 10.10以降、AppleScriptからオープンソース系のCocoa Frameworkが呼べるようになって、ほぼObjective-Cのコードを直接呼び出して実行できるようになって大変便利な状態になっています。Swiftで書かれたプログラムもBridging Headerを書けば呼べるらしいのですが、自分はいまひとつです。

Intel Mac環境でビルドして利用していたIntel BinaryのFrameworkを、そのまま呼び出すことはできていません。FrameworkについてはRosetta 2で翻訳されて実行できるという状況にはないので、Universal Binaryビルドを行う必要があるものと認識しています。

FrameworkのUniversalビルド

オープンソースのFrameworkのXcodeプロジェクトをそのまま手元に置いてあったので、Xcode 12でオープンしてビルドして、そのままAppleScriptから呼び出して実行できるものもありました。

「これなら問題なくいけるかも?」

……ある意味Yesともいえるし、Noともいえる状況です。

HTMLReader.frameworkあたりはほぼ何も考えずにUniversal Binaryビルドできました。これがないととても困るので助かります。

Intel MacとM1 Macではハードウェアの構成が違うので、そうしたIntel Macのハードウェアを前提としているものはもう、まるっきり動きません。オーディオ出力先のデバイスを変更するものは、まるっきりダメ。各種センサー類から情報を取得するもの(SMCkit)もダメでした。

macOS内蔵Frameworkでも互換性がないものも

Private Frameworkになりますが、ServerInformation.frameworkの中に入っている各種ハードウェアの名称テキストが、M1 Macについては入っていなかったりで。Intel Macとまるっきり同じ情報が入っているわけではないというのが意外でした。

macOSのバージョン間の違いによる「差」

これはFrameworkまわりの話ではありませんが、M1への移行は最新のmacOSへの移行でもあります。新しいという言葉から「改良されている」「よくなっている」と無条件に思ってしまいがちですが、「なくなっている機能がある」「削られた機能がある」という側面も無視できません。

macOSのバージョンが違えば、その構成ファイルも変わっています。とくに、Menu Extrasの構成が大きく変わっており、身近なところではScript MenuがmacOS 10.14でMenu Extrasから独立した小型アプリケーションに置き換わったりもしています。これがScript Menuだけでなく他のMenu Extrasでも同様の動きが起きており、どんどんその数が減少しています。

Menu Extrasの中の実行ファイルを呼び出しているようなScriptは、M1 MacつまりmacOS 11.x環境に持って行ったときに動かなくなります。ファイルそのものが存在していないので「当然」ではあります。

Posted in System | Tagged 11.0savvy 12.0savvy | Leave a comment

Macの製品名を求める(M1以降対応)v1a

Posted on 7月 29, 2021 by Takaaki Naganoya

実行中のMacの製品名を求めるAppleScriptです。もともと、AppleScriptで作成して使用しているアイデアプロセッサ「Kamenoko」で行っている処理なのですが、

M1上で実行すると、製品名は間違えるわ、仕様は合っていないわで散々でした。あ、マシンのアイコンは取ってきていますね。その他のデータはマシン移行をしたときにそのまま前のマシンのデータが残っていたためでしょう。

調べてみると、M1 Macでは従来どおりの製品名データを持っていないようで、Intel Macでは取得できていた製品の名前をわかりやすく記述するデータがありません。各国語にローカライズされていて便利だったのですが。

そこで、M1 MacかどうかのCPUタイプ検出を行い、そのうえで処理を分けることにしました。動作原理上、購入してセットアップしたてのマシンでこのファイルが存在しているかどうか、検証が必要だと思います。

AppleScript名:Macの製品名を求める(M1以降対応)v1a.scpt
—
–  Created by: Takaaki Naganoya
–  Created on: 2021/07/28
—
–  Copyright © 2021 Piyomaru Software, All Rights Reserved
—
use AppleScript version "2.7" — macOS 10.13 or later
use framework "Foundation"
use scripting additions

set hRes to retModelName() of me
–> "Mac mini (M1, 2020)"–macOS 11.5
–> "Mac mini Intelデュアルコアプロセッサおよび統合型グラフィックス搭載、2014年後期に投入。"–macOS 12beta
–> "15インチMacBook Pro, Retinaディスプレイ, Intel Core i7 (Mid 2012)"–macOS 10.14.6

on retModelName()
  set cRes to CPU type of (system info)
  
  
if cRes begins with "ARM" then
    –Apple Silicon Mac
    
set sText to "defaults read ~/Library/Preferences/com.apple.SystemProfiler.plist" & " ’CPU Names’ | cut -sd ’\"’ -f 4"
    
set hRes to do shell script sText
    
return hRes
  else if cRes begins with "Intel" then
    –Intel Mac
    
set hRes to retModelInfo() of me
    
return hRes
  end if
end retModelName

on retModelInfo()
  tell application "System Events"
    set osVersion to system version of (system info)
  end tell
  
— macOS 10.15.3 –> 15
  
  
considering numeric strings
    if osVersion ≥ "10.15" then
      –macOS 11.0以降
      
set pListPath to "/System/Library/PrivateFrameworks/ServerInformation.framework/" & "Versions/A/Resources/ja.lproj/SIMachineAttributes.plist"
    else if osVersion > "10.14" then
      –macOS 10.14まで
      
set pListPath to "/System/Library/PrivateFrameworks/ServerInformation.framework/" & "Versions/A/Resources/Japanese.lproj/SIMachineAttributes.plist"
    end if
  end considering
  
  
set aRec to retDictFromPlist(pListPath) of me
  
set hwName to (do shell script "sysctl -n hw.model")
  
set aMachineRec to retRecordByLabel(aRec, hwName) of me
  
set aMachineRec2 to first item of aMachineRec
  
return |description| of _LOCALIZABLE_ of aMachineRec2
end retModelInfo

on retDictFromPlist(aPath)
  set thePath to current application’s NSString’s stringWithString:aPath
  
set thePath to thePath’s stringByExpandingTildeInPath()
  
set theDict to current application’s NSDictionary’s dictionaryWithContentsOfFile:thePath
  
return theDict as record
end retDictFromPlist

on retRecordByLabel(aRec as record, aKey as string)
  set aDic to current application’s NSDictionary’s dictionaryWithDictionary:aRec
  
set aVal to aDic’s valueForKey:aKey
  
return aVal as list
end retRecordByLabel

on retRecordByKeyPath(aRec as record, aKey as string)
  set aDic to current application’s NSDictionary’s dictionaryWithDictionary:aRec
  
set aVal to aDic’s valueForKeyPath:aKey
  
return aVal
end retRecordByKeyPath

–1D Listを文字列長でソート v2
on sort1DListByStringLength(aList as list, sortOrder as boolean)
  set aArray to current application’s NSArray’s arrayWithArray:aList
  
set desc1 to current application’s NSSortDescriptor’s sortDescriptorWithKey:"length" ascending:sortOrder
  
set desc2 to current application’s NSSortDescriptor’s sortDescriptorWithKey:"self" ascending:true selector:"localizedCaseInsensitiveCompare:"
  
set bArray to aArray’s sortedArrayUsingDescriptors:{desc1, desc2}
  
return bArray as anything
end sort1DListByStringLength

★Click Here to Open This Script 

Posted in System | Tagged 10.13savvy 10.14savvy 10.15savvy 11.0savvy 12.0savvy | Leave a comment

指定のiOSアプリからジャンル情報を取得

Posted on 6月 20, 2021 by Takaaki Naganoya

M1 Macで、Mac App StoreからインストールしたiOSアプリから、ジャンル情報を取得するAppleScriptです。

iOSアプリケーションでは、Info.plist内にジャンル情報が記載されておらず、バンドル内の別ファイルに記載されています。これを読み取ることで、ジャンル情報を取得できます。

なかなか素敵な機能なのですが、Xcode上のCocoa-AppleScriptアプリケーション内で実行すると、Sandboxの制限によりデータアクセスができません。


▲macOSのFinder上でiOSアプリのバンドル内部を表示させたところ。メタデータが添付されているのがわかる

ただし、Macのアプリケーションのジャンル情報と項目が異なっていたり、相互に存在しないジャンルなどもあるため、そのままMac上でも同様のジャンルであると判定することは避けたほうがよいでしょう。

AppleScript名:指定のiOSアプリからジャンル情報を取得.scptd
—
–  Created by: Takaaki Naganoya
–  Created on: 2021/06/20
—
–  Copyright © 2021 Piyomaru Software, All Rights Reserved
—
use AppleScript version "2.7"
use scripting additions
use framework "Foundation"

set aFile to POSIX path of (choose file)
set gID to getGenreNumFromiOSApp(aFile) of me

on getGenreNumFromiOSApp(aPOSIX)
  set metaDataPOSIX to aPOSIX & "Wrapper/iTunesMetadata.plist"
  
set aRec to retDictFromPlist(metaDataPOSIX) of me
  
if aRec = missing value then return missing value
  
set aGenreID to genre of aRec
  
return aGenreID
end getGenreNumFromiOSApp

on retDictFromPlist(aPlistPath)
  set thePath to current application’s NSString’s stringWithString:aPlistPath
  
set thePath to thePath’s stringByExpandingTildeInPath()
  
set theDict to current application’s NSDictionary’s dictionaryWithContentsOfFile:thePath
  
if theDict = missing value then return missing value
  
return theDict as record
end retDictFromPlist

★Click Here to Open This Script 

Posted in file iOS App System | Tagged 10.11savvy | Leave a comment

Uni DetectorをはじめてM1 Mac実機で起動

Posted on 6月 18, 2021 by Takaaki Naganoya

DTKを使うこともなく、M1 Mac登場を横目にずっとIntel Macを使ってきました。ひとつには、買えなかったからという理由ですが、もう1つがWWDCまで待っていた(新ハードが出たら型落ちになってしまう恐怖)からです。

2020年の10月ごろにチーム内でUni Detectorを「作ろう!」という話になって、いろいろ人に見せたりしていましたが、

日本の開発者コミュニティ:バっカじゃねーの?
日本のユーザー:何のために作ってんのかわかんねー

という散々な反応でした。「なんでそこまで言うのか?」という散々な状況。

リリース後は海外を中心に評価していただき、日本国内で石を投げられることもなくなりました。

Uni Detectorはこの移行期に必要なアプリケーションであり、移行が終わった後でもアプリケーション自体を分析/情報収集できるツールとして便利に使えると思っています。

実機がない状況で作ったので(Intel Mac上にmacOS 11Beta環境は用意していましたが)、「仕様から推測するとこんな感じだろう」「もれ伝わっている情報をもとに作るとこんな感じだろう」と予測して作っていたわけです。

Uni DetectorをM1 Macで起動すると……

起動します。これは、Roesetta 2の機能によるものです。起動自体に時間はかかりません。

すべてのアプリケーションをチェックすべく「All」をクリックすると、「最初の違和感」がやってきます。Intel Mac上で動かすのと挙動がぜんぜん違います。最初のSpotlight経由でアプリケーション情報を集めるのにやたらと時間がかかります。「クラッシュしたか?」と思いながら様子を見ると、あっという間にバーが最後まで伸びて、処理が終わっていました。

Spotlight関連で性能が出ないのか、他の方法で情報収集したほうがいいのか……頭が痛いところです。

失敗した! という点がひとつ。マシンのCPUアーキテクチャの取得です。

これは、Rosetta上で動くIntelバイナリならおそらく「Intel」と判定されてしまうのでしょう。予想し切れるところではありませんが、違和感しかないので修正すべき点でしょう。

→ 予想どおり、Universal(Apple Silicon/Intel 64)ビルドを行ったら、マシンがApple Silicon Macだと認識されました。

事前に予測できなかった点がもうひとつ。OSバージョンの割り振り方です。macOS 10.15の次のmacOS 11シリーズのバージョン番号の振り方が事前にわかりませんでした。最初のバージョンが「11.0」と割り振られたので、その次が「11.1」のパターンと「11.0.1」のパターンの2通りが考えられたわけです。実際には前者でしたが、後者と予想していたので、当てが外れて「現在実行中のOSバージョン」をもとにマークを出す処理に失敗しています。

if aVerStr = "1013" then imgOS13's setHidden:false
if aVerStr = "1014" then imgOS14's setHidden:false
if aVerStr = "1015" then imgOS15's setHidden:false
if (aVerStr = "11") or (aVerStr = "1016") then imgOS16's setHidden:false
if (aVerStr = "12") or (aVerStr = "1017") then imgOS17's setHidden:false
if (aVerStr = "13") or (aVerStr = "1018") then imgOS18's setHidden:false

このあたり、macOS 11以上であればメジャーバージョンのみ返すようにライブラリを書き換え、かつ、Appleがバグを作ってOSバージョンを「10.16」などと返してきても大丈夫なように備えておきました(すごくありがち)。

これで、実行中のマシンのバージョンインジケータについては大丈夫です。

これは「よかった」点ですが、macOS上でiPhone用のアプリが動くことが告知されていたので、どのプラットフォーム向けに作られたアプリかを表示するようにしてあり、これは先見の明がありました(自画自賛)。

とってもやられた、という点もあります。

CPUアーキテクチャ別の円グラフを表示する機能があり、Intel MacでmacOS 10.14/10.15で動かす分には問題なく表示されるのですが、macOS 11のRelease版だとアプリケーションごとクラッシュします。macOS 11の問題(Apple側の問題)だと思いますが、Appleはそういうことをやる会社であり、Appleのせいでこういうトラブルが起こることは日常茶飯事です。たぶん、ソート周りでクラッシュを起こしているんだと思います(ていねいに、グラフ表示する前にソートルーチンで数字の大きい順にデータを並べ替えているので)。

→ クラッシュの原因がわかりました。NSStringのstringWithFormat:メソッドがIntel MacでもApple Silicon MacでもAppleScriptから呼ぶと100%クラッシュします。こんな基礎的なところでバグ作ってどーするんだか、、、(ーー;;

Posted in System | Tagged 11.0savvy | Leave a comment

macOS 11でメニューバークロックのアナログ/デジタル切り替え

Posted on 6月 17, 2021 by Takaaki Naganoya

macOS 11は、サブマシンで検証用に入れておいたぐらいでメインマシンはずーっとmacOS 10.14.6のままでした。M1 Macを導入したのでメイン環境をmacOS 11に移行。

いままで(macOS 10.14.6で)メニューから手軽に切り替えられていたメニューバークロックのアナログ/デジタル切り替え。ふだんは見やすいデジタル表示で、画面キャプチャする際にはアナログ表示に切り替えていました。

これが、macOS 11ではメニューから直接切り替えられないのがストレスで、すぐに切り替え方を調べてmacOS標準搭載のスクリプトメニューから切り替えられるようにしてみました。現在の設定値を読み取ってトグル動作(アナログ→デジタル、デジタル→アナログ)を行います。

–> Watch Demo movie

AppleScript名:macOS 11_メニューバークロックのアナログ_デジタルトグル切り替え.scpt
—
–  Created by: Takaaki Naganoya
–  Created on: 2021/06/17
—
–  Copyright © 2021 Piyomaru Software, All Rights Reserved
—

use AppleScript version "2.7"
use framework "Foundation"
use scripting additions

set cRes to (do shell script "defaults read com.apple.menuextra.clock.plist IsAnalog") as integer as boolean
set newBool to (not cRes) as string
do shell script "defaults write com.apple.menuextra.clock.plist IsAnalog -bool " & newBool
do shell script "killall ControlCenter"

★Click Here to Open This Script 

Posted in shell script System | Tagged 11.0savvy | Leave a comment

Hello M1

Posted on 6月 15, 2021 by Takaaki Naganoya

到着してとりあえずのセットアップを行ったM1 Mac mini。とりあえず、ごあいさつの「system info」コマンドの実行。

--> {AppleScript version:"2.7", AppleScript Studio version:"1.5.3", system version:"11.3.1", short user name:"testuser", long user name:"Takaaki Naganoya", user ID:501, user locale:"ja_JP", home directory:alias "Macintosh HD:Users:test1:", boot volume:"Macintosh HD:", computer name:"M1 mini", host name:"m1mini.local", IPv4 address:"192.168.x.xx", primary Ethernet address:"xx:xx:xx:xx:xx:xx", CPU type:"ARM64E", CPU speed:missing value, physical memory:16384}

「ARM64E」と返ってきました。へーー、CPU Typeはそんなかんじなんだ、へー。

CPU Speed、クロックのことですが……missing valueが返ってくるというのは、従来のAPIでは値を取れなくなったのでそのままです、ということなんでしょうか。

Posted in System | Tagged 11.0savvy | Leave a comment

AppleScriptでリアルタイムキースキャンを行いCotEditor書類上にカーソル描画

Posted on 10月 4, 2020 by Takaaki Naganoya

Modifier Keyのリアルタイムキースキャンを行なって、CotEditor書類上に文字でカーソル描画するAppleScriptです。30 x 30 の文字数のテキストを作成し、CotEditor書類に随時転送することで書き換えています。

AppleScriptでキースキャンといえば、Script/Applet起動時にoptionやcontrolなどのmodifier keys(装飾キー)が押されているかどうかを確認して、動作内容を変更するような用途でした。AppleScriptでGUIを作るのが大変だとか、AppleScriptで気軽にGUIを呼び出せない時代には、割と使われてきた手段です。

そんな中、macOS 10.10以降でCocoaの機能が気軽に利用できるようになってきたことで、Cocoaのキースキャン機能が利用できるようになりました。前述のModifier KeysのスキャンはmacOS側のセキュリティ機構でも問題視していないようで、気軽に使えそうです。ちなみに、SHIFTキーの左右は区別できません。

先日Pixelmator Proで「もぐら叩きゲーム」を作った際にも、このModifier Keysのスキャンは利用しましたが、実際にどの程度使い物になるのか確認しておきたいと考え、AppleScriptからの操作が高速なアプリケーションで試してみることにしてみました。

CotEditorにテキストで描画した画面を転送し、毎回テキスト内容をすべて書き換えることで本格的なゲームの用途に使えるのではないかと考えました。自分ではほとんどゲームを作ったこともないので、別にゲームを量産するつもりはありませんが……。テトリスぐらいならCotEditorのメニューから呼び出すAppleScript内で実行できそうな感じがします。

→ 冗談半分でAppleScriptで作られたTetrisを探してみたら、見つかりました

CotEditorでなくても、他のエディタでも同様の操作はできると思います。

AppleScript名:KeyScan TEST v3.scpt
—
–  Created by: Takaaki Naganoya
–  Created on: 2020/10/03
—
–  Copyright © 2020 Piyomaru Software, All Rights Reserved
—
use AppleScript version "2.4" — Yosemite (10.10) or later
use framework "Foundation"
use framework "AppKit" — for NSEvent
use scripting additions

–Initialize
set curPosX to 1
set curPosY to 1
set curMax to 30

set rText to ""
repeat curMax times
  set rText to rText & "🛑"
end repeat

tell application "CotEditor"
  write to console "Real-time Keyscan test with Modifier Keys
  [ Control ]    : Move Left
  [ Shift ]    : Move Right
  [ Option ]    : Move Up
  [ Command ]  : Move Down

  [ Caps Lock ]  : Quit this script"
  
  
make new document
  
activate
end tell

–Main Loop
repeat
  set leftF to my checkModifier:"control"
  
set rightF to my checkModifier:"shift"
  
set upF to my checkModifier:"option"
  
set downF to my checkModifier:"command"
  
  
set quitF to my checkModifier:"caps"
  
  
if quitF = true then return
  
  
if leftF = true then
    if curPosX > 1 then
      set curPosX to curPosX – 1
    end if
  else if rightF = true then
    if curPosX ≤ curMax then
      set curPosX to curPosX + 1
    end if
  end if
  
  
if upF = true then
    if curPosY > 1 then
      set curPosY to curPosY – 1
    end if
  else if downF = true then
    if curPosY < curMax then
      set curPosY to curPosY + 1
    end if
  end if


–make display text
  
set aText to ""
  
repeat with i from 1 to curMax + 1
    if i = curPosX then
      set aText to aText & "🛑"
    else
      set aText to aText & "㍳"
    end if
  end repeat


set bText to ""
  
repeat with y from 1 to curMax
    if y = curPosY then
      set bText to bText & rText & return
    else
      set bText to bText & aText & return
    end if
  end repeat
  
  
my displayText(bText)
  
end repeat

–テキスト画面描画
on displayText(aText)
  tell application "CotEditor"
    tell front document
      set contents to aText
    end tell
  end tell
end displayText

–複数同時検出に対応
on checkModifier:keyName
  if keyName = "option" then
    set theMask to current application’s NSAlternateKeyMask as integer
  else if keyName = "control" then
    set theMask to current application’s NSControlKeyMask as integer
  else if keyName = "command" then
    set theMask to current application’s NSCommandKeyMask as integer
  else if keyName = "shift" then
    set theMask to current application’s NSShiftKeyMask as integer
  else if keyName = "caps" then
    set theMask to current application’s NSEventModifierFlagCapsLock as integer
  else if keyName = "num" then
    set theMask to current application’s NSEventModifierFlagNumericPad as integer
  else if keyName = "help" then
    set theMask to current application’s NSEventModifierFlagHelp as integer
  else if keyName = "fn" then
    set theMask to current application’s NSEventModifierFlagFunction as integer
  else
    return false
  end if
  
  
set theFlag to current application’s NSEvent’s modifierFlags() as integer
  
if ((theFlag div theMask) mod 2) = 0 then
    return false
  else
    return true
  end if
end checkModifier:

★Click Here to Open This Script 

Posted in System | Tagged 10.13savvy 10.14savvy 10.15savvy 11.0savvy CotEditor NSEvent | Leave a comment

指定Finderウィンドウがどのディスプレイ上に表示されているかをIDで返す(0はじまり)

Posted on 9月 7, 2020 by Takaaki Naganoya

指定座標がどのディスプレイ上に表示されているかをIDで返すAppleScriptです。

試しに、Finderの最前面のウィンドウの始点座標を取得して、どのディスプレイ上に表示されているかを地道にループで計算しています。

0はメニューを配置しているメインディスプレイで、その後のIDについてはNSScreen’s screens()の出現順に割り振られています。

MacBook Pro 10,1にディスプレイ3枚接続して(通常状態)、さらにUSB経由でiPadをDuet Displayで外部ディスプレイ化。4枚のディスプレイで動作確認しています。

本来、どのディスプレイ上にあるかをきっちり判定できるはずなのですが、最後のIDのものだけうまく判定できていないので例外処理しています。

このあたりの動作内容が怪しかったので、ながらく放置状態になっていましたが、実際にディスプレイを4枚つないで動作確認してみたら大丈夫そうだったので掲載することに。

AppleScript名:指定Finderウィンドウがどのディスプレイ上に表示されているかをIDで返す(0はじまり).scptd
— Created 2015-11-01 by Takaaki Naganoya
— 2015 Piyomaru Software
use AppleScript version "2.4"
use scripting additions
use framework "Foundation"
use framework "AppKit"

tell application "Finder"
  if (count every window) = 0 then return
  
tell front window
    set {xPos, yPos} to position
    
log {xPos, yPos}
  end tell
end tell

set dispID to getPointInWhichScreen(xPos, yPos) of me

–指定座標がどのディスプレイ上に表示されているかをIDで返す(0はじまり。0はメインディスプレイ)
on getPointInWhichScreen(xPos, yPos)
  set dList to getScreensResol() of me
  
  
set aPoint to current application’s NSMakePoint(xPos, yPos)
  
set dCount to 0
  
repeat with i in dList
    set dRes to current application’s NSPointInRect(aPoint, i) as boolean
    
    
if dRes = true then
      return dCount
    end if
    
set dCount to dCount + 1
  end repeat
  
  
return dCount – 1 –ちょっと怪しいが、動作している様子
end getPointInWhichScreen

on getScreensResol()
  set dispList to (current application’s NSScreen’s screens()) as list
  
set dList to {}
  
repeat with i in dispList
    set framePref to i’s visibleFrame()
    
set {xPos, yPos} to first item of framePref
    
set theInfo to (i’s deviceDescription()’s NSDeviceSize) as record
    
set a1Rect to {origin:{x:xPos, y:yPos}, |size|:theInfo}
    
set the end of dList to a1Rect
  end repeat
  
return dList
end getScreensResol

★Click Here to Open This Script 

Posted in System | Tagged 10.13savvy 10.14savvy 10.15savvy 11.0savvy NSScreen | Leave a comment

macOS Big Surがバージョン番号に「11.0」を返してくるようになった

Posted on 8月 5, 2020 by Takaaki Naganoya

これまで、macOS 10.16.0というバージョン番号を返してきたmacOS Big Surが、Beta 4でAppleScript系、shell系、Cocoa系のさまざまなOSバージョン確認方法に対して「11.0」というバージョン番号を返してくるように変更になりました。

ここから先は、正式に11.0として扱うことにします。

ただし、いつものApple仕事なので、いつどのランタイム環境でOSバージョン取得を間違えるかわかったものではありません。OSバージョン取得まわりは今後も継続的に疑いの目で厳しく確認しておく必要のある箇所であると考えます。どうせAppleなので。

Posted in System | Tagged 11.0savvy | Leave a comment

カラーリストの処理

Posted on 7月 27, 2020 by Takaaki Naganoya

カラーリストまわりの情報を取得するAppleScriptです。

カラーピッカーで取得できる各種色セットの内容を取得できたりと、割と使いでがあります。

AppleScript名:使用可能なカラーリスト名称一覧を取得.scptd
—
–  Created by: Takaaki Naganoya
–  Created on: 2020/07/26
—
–  Copyright © 2020 Piyomaru Software, All Rights Reserved
—

use AppleScript version "2.4"
use scripting additions
use framework "Foundation"
use framework "AppKit"

set cList to ((current application’s NSColorList’s availableColorLists())’s valueForKeyPath:"name") as list
–> {"Apple", "System", "World", "Europe", "Japanese", "Scrivener", "AquaPro", "Crayons", "Web セーフカラー"}

★Click Here to Open This Script 

AppleScript名:指定名称のカラーリストに登録されているNSColorを配列で取得.scptd
—
–  Created by: Takaaki Naganoya
–  Created on: 2020/07/26
—
–  Copyright © 2020 Piyomaru Software, All Rights Reserved
—

use AppleScript version "2.4"
use scripting additions
use framework "Foundation"
use framework "AppKit"

set aColList to (current application’s NSColorList’s colorListNamed:"Crayons")

set kList to (aColList’s allKeys()) as list
set colList to {}
repeat with i in kList
  set j to contents of i
  
set cVal to (aColList’s colorWithKey:j)
  
set the end of colList to cVal
end repeat

return colList

★Click Here to Open This Script 

Posted in Color System | Tagged 10.13savvy 10.14savvy 10.15savvy 11.0savvy NSColor NSColorList | Leave a comment

CPUタイプを取得

Posted on 7月 23, 2020 by Takaaki Naganoya

実行中のMacのCPUタイプを取得するAppleScriptです。ARM Macではまた別の結果が返ってくることでしょう。

追記:
匿名希望のDTKユーザー1号さんから教えてもらいました。

set cpuStr to CPU type of (system info)

のDTKマシン上での実行結果は、Rosetta2環境では「Intel」、ARMネイティブ環境では「ARM」と返ってくるのだとか。1号さんに念を押されたのですが、まだβ段階なので将来的に同じ値が返ってくるかは保証できないということです。

正直、予想していたのは「ARM」か「Apple」かの2択だったので納得な内容です(詳細なモデル識別子をスペースを付けて出力してこないことも予想ずみ)。

おそらくですが、Mac用のApple Silicon(ARM)は複数タイプのもの(ノート用、外部GPUを用いるハイエンドデスクトップ用)が出てくるでしょうし、世代ごとにモデル名が変わっていくことでしょう(A14XBionicとか)。それでも、CPUタイプが識別できることの意義は、

「ARM Mac上なのにRosetta2環境で動作しているからパフォーマンスが落ちるかもしれないよ?」

といった警告メッセージを表示するぐらいでしょうか。AppleScriptのsystem infoコマンドで得られるCPU typeについては、Intel Macになってもながらく「Intel 80486」といったいい加減な名前を返してくるぐらいだったので、アーキテクチャ判定以上の情報を得られるという期待は持たないほうがよいでしょう。逆を言えば、Intel 80486の時代にすでにその定数が内部で定義されていた(Intel CPU上でMacOSを動作させるプロジェクトがあった)という証拠ともいえます(Star Trek projectの時代?)。

--macOS 10.14.6+Intel Mac (system info)
{AppleScript version:"2.7", AppleScript Studio version:"1.5.3", system version:"10.14.6", short user name:"me", long user name:"Takaaki Naganoya", user ID:504, user locale:"en_JP", home directory:alias "Machintosh HD:Users:me:", boot volume:"Machintosh HD", computer name:"MBPretina", host name:"MBPretina.local", IPv4 address:"xx.xx.xx.xx", primary Ethernet address:"xx:xx:xx:xx:xx:xx", CPU type:"Intel 80486", CPU speed:2600, physical memory:8192}

--macOS 10.15.6+Intel Mac (system info)
{AppleScript version:"2.7", AppleScript Studio version:"1.5.3", system version:"10.15.6", short user name:"me", long user name:"Takaaki Naganoya", user ID:502, user locale:"ja_JP", home directory:alias "Macintosh HD:Users:me:", boot volume:"Macintosh HD:", computer name:"YasMBP", host name:"YasMBP.local", IPv4 address:"xx.xx.xx.xx", primary Ethernet address:"xx:xx:xx:xx:xx:xx", CPU type:"Intel 80486", CPU speed:2700, physical memory:8192}

--macOS 11.0+Intel Mac (system info)
{AppleScript version:"2.7", AppleScript Studio version:"1.5.3", system version:"11.0", short user name:"me", long user name:"Takaaki Naganoya", user ID:501, user locale:"ja_JP", home directory:alias "Macintosh HD:Users:me:", boot volume:"Macintosh HD:", computer name:"Mac mini 2014", host name:"MacMini2014.local", IPv4 address:"xx.xx.xx.xx", primary Ethernet address:"xx:xx:xx:xx:xx:xx", CPU type:"Intel x86-64h Haswell", CPU speed:2600, physical memory:16384}
AppleScript名:CPUタイプを取得.scpt
set aRes to getCPUType() of me
–> "PowerPC"
–> "Intel"

on getCPUType()
  set cpuStr to CPU type of (system info)
  
set aInd to (offset of " " in cpuStr)
  
if aInd = 0 then return cpuStr
  
set cpuStr to text 1 thru (aInd – 1) of cpuStr
  
return cpuStr
end getCPUType

★Click Here to Open This Script 

Posted in System | Tagged 10.13savvy 10.14savvy 10.15savvy 11.0savvy | Leave a comment

CPUのバイトオーダーを取得

Posted on 7月 22, 2020 by Takaaki Naganoya

実行中のコンピュータ(多分Mac)のCPUのバイトオーダーを取得するAppleScriptです。

これまで、MacのCPUは68k(Big Endian)→PowerPC(Big Endian)→Intel(Little Endian)と来て、次はARM。

一応、IntelとArmは同じLittle Endianなので問題は少ないはずですが、ARM DTKをお持ちの方は試してコッソリ教えていただけるとありがたいです。

この情報がAppleScriptで取得できると何か「いいこと」があるかですが、別にメリットはありません。

ただ、CPUの名前が取得できると、処理速度を推測できてよいでしょう。Intel CPUに対してApple Silicon(ARM)がどの程度のパフォーマンスを発揮できるのか、実機が出てこないとわかりませんけれども。

PowerPCからIntelに変わったときには、先読みが深くなったためか(?)連番ファイルの処理で問題が出て、書き直しが必要になったことがありました。IntelからARMへの移行時には、iOS系のアプリケーションの操作を試みて問題が出たり、セキュリティ上の制限にひっかかったりすることでしょう。

AppleScript名:CPUのバイトオーダーを取得.scpt
—
–  Created by: Takaaki Naganoya
–  Created on: 2020/07/22
—
–  Copyright © 2020 Piyomaru Software, All Rights Reserved
—

use AppleScript version "2.4" — Yosemite (10.10) or later
use framework "Foundation"
use scripting additions

set bRes to getByteOrder() of me
–> true –Little Endian

on getByteOrder()
  set aRes to do shell script "sysctl -n hw.byteorder"
  
if aRes = "4321" then
    return false –Big Endian (PowerPC)
  else
    return true –Little Endian (Intel, Arm..maybe)
  end if
end getByteOrder

★Click Here to Open This Script 

Shane Stanleyからの投稿です。こっちの方がシンプルでいいですね。

AppleScript名:CPUのバイトオーダーを取得 v2.scptd
—
–  Created by: Shane Stanley
–  Created on: 2020/07/23
—

use AppleScript version "2.4" — Yosemite (10.10) or later
use framework "Foundation"
use scripting additions

set bRes to current application’s NSHostByteOrder() — 1 = little endian, 2 = big endian, 0 = unknown

★Click Here to Open This Script 

Posted in shell script System | Tagged 10.13savvy 10.14savvy 10.15savvy 11.0savvy NSHostByteOrder | Leave a comment

指定TTSボイスキャラクタの読み上げ例文テキストを取得

Posted on 7月 6, 2020 by Takaaki Naganoya

指定のテキスト読み上げ(Text To Speech)ボイスキャラクターの読み上げ例文テキストを取得して実際に読み上げるAppleScriptです。

TTS音声は言語や性別、年齢、高音質かどうかなどの情報を持っているので、これらを指定して絞り込むことが可能です。また、指定TTS音声キャラクターの例文テキストもこのように取得できます。

AppleScript名:指定TTSボイスキャラクタの読み上げ例文テキストを取得.scpt
— Created 2015-08-25 by Takaaki Naganoya
— Modified 2015-08-26 by Shane Stanley, Takaaki Naganoya
— Modified 2020-07-06 by Takaaki Naganoya
— 2020 Piyomaru Software
use AppleScript version "2.4"
use scripting additions
use framework "Foundation"
use framework "AppKit"
use scripting additions

set vList to getVoiceNames() of me
using terms from scripting additions
  set aTargTTSVoiceName to contents of (choose from list vList)
end using terms from

using terms from scripting additions
  set v1Res to getDemoText(aTargTTSVoiceName) of me
  
say v1Res using aTargTTSVoiceName
end using terms from

–Get TTS Voice sample text
on getDemoText(aName as string)
  set vList to getVoiceNames() of me
  
if aName is not in vList then return ""
  
set anID to getSpecifiedVoiceIDfromVoiceName(aName) of me
  
  
set aDemoText to ((current application’s NSSpeechSynthesizer’s attributesForVoice:anID)’s VoiceDemoText)
  
return aDemoText as string
end getDemoText

–Get all voice names
on getVoiceNames()
  –Make Blank Array
  
set outArray to current application’s NSMutableArray’s arrayWithObject:{}
  
set aList to {}
  
  
–Make Installed Voice List
  
set nameList to current application’s NSSpeechSynthesizer’s availableVoices()
  
repeat with i in nameList
    set j to contents of i
    
    
set aDic to ((current application’s NSSpeechSynthesizer’s attributesForVoice:j))
    
    
set aDemoText to (aDic’s VoiceDemoText) as string
    
set aName to (aDic’s VoiceName) as string
    
    
set the end of aList to aName
  end repeat
  
  
return aList as list
end getVoiceNames

–Voice Name –> Voice ID
on getSpecifiedVoiceIDfromVoiceName(VoiceName as string)
  set outArray to current application’s NSMutableArray’s arrayWithObject:{}
  
  
set aList to current application’s NSSpeechSynthesizer’s availableVoices()
  
set bList to aList as list
  
  
repeat with i in bList
    set j to contents of i
    
set aDic to (current application’s NSSpeechSynthesizer’s attributesForVoice:j)
    (
outArray’s addObject:aDic)
  end repeat
  
  
–Filter Voice
  
set aPredicate to current application’s NSPredicate’s predicateWithFormat_("VoiceName == %@", VoiceName)
  
  
set filteredArray to outArray’s filteredArrayUsingPredicate:aPredicate
  
set aReList to (filteredArray’s valueForKey:"VoiceIdentifier") as list
  
  
if length of aReList = 1 then
    return first item of aReList
  else
    return ""
  end if
end getSpecifiedVoiceIDfromVoiceName

★Click Here to Open This Script 

Posted in list Record System Text to Speech | Tagged 10.13savvy 10.14savvy 10.15savvy 11.0savvy NSMutableArray NSPredicate NSSpeechSynthesizer | Leave a comment

InstrumentsがAppleScriptに対応

Posted on 5月 19, 2020 by Takaaki Naganoya

InstrumentsはXcodeに同梱されているメモリ使用状況などの記録、ビジュアル化を行うツールで、アクティビティモニタの強化版といったものです。

監視対象のモジュール(Instruments)を選択してドキュメント上に配置し、監視対象プロセスを選択して記録すると、動作中のプロセスの各種リソース使用状況がわかります。

そのInstrumentsがAppleScriptに対応している(sdefを持っている)ことがわかりました(調べたことがなかった)。

Dock上でXcodeのサブメニューから起動が可能です。


▲macOS 10.14.6上で動作するInstruments version 11.3.1。バージョン番号はインストールされているXcodeと同じものを名乗っているもよう

Instrumentsを使って開発中のアプリケーションのメモリ使用状況を記録して可視化(グラフを眺めるぐらい?)してみると、ダラダラ長時間記録するよりも、目的の箇所で記録を行なったほうが使い勝手がよく、Instrumentで記録した書類が複数できてきます。

それらを選択してオープンするのに、Instruments書類(単なるログ?)はファイルサイズが巨大。これをオープンするとけっこうな処理時間がかかります。Scriptから操作できたほうがよさそうだと考えて、冗談半分でAS対応していないか調べたところ、対応していると出ました。

InstrumentsのAppleScript用語辞書の内容を見てみると、ファイルのオープン/クローズができる程度で、他に何ができるというわけでもありません。

Documentの新規作成ぐらいはできそうですが、試してみたところクラッシュします。新規作成時に、どのリソースを監視するかというモジュール(Instruments)を指定する必要があるので、ドキュメント作成時にこのInstrumentsを指定できないあたりでGUI側との機能の不一致が起こっているのでしょう。

また、ドキュメントを新規作成したあとで、個別にInstrumentsを追加できるコマンドも必要になっていくことでしょう。

AppleScript名:指定書類をオープン
—
–  Created by: Takaaki Naganoya
–  Created on: 2020/05/19
—
–  Copyright © 2020 Piyomaru Software, All Rights Reserved
—

set aFile to choose file

with timeout of 3600 seconds
  tell application "Instruments"
    open aFile
  end tell
end timeout

★Click Here to Open This Script 

AppleScript名:最前面のドキュメントから情報を取得
—
–  Created by: Takaaki Naganoya
–  Created on: 2020/05/19
—
–  Copyright © 2020 Piyomaru Software, All Rights Reserved
—

tell application "Instruments"
  tell front document
    properties
    
–> {file:file "Cherry:Users:me:Documents:Instruments_withoutRetina.trace:", modified:false, name:"Instruments_withoutRetina.trace", class:document}
    
  end tell
end tell

★Click Here to Open This Script 

AppleScript名:新規書類作成(クラッシュ)
—
–  Created by: Takaaki Naganoya
–  Created on: 2020/05/19
—
–  Copyright © 2020 Piyomaru Software, All Rights Reserved
—

tell application "Instruments"
  make new document –This command cause crash
end tell

★Click Here to Open This Script 

Posted in System | Tagged 10.14savvy 10.15savvy Instruments Xcode | Leave a comment

システムフォントをWeightつきで指定

Posted on 5月 15, 2020 by Takaaki Naganoya

システムフォントをWeightつきで指定するAppleScriptです。

NSFontまわりの、フォント名を具体的に文字列で指定「しない」フォントの指定方法を、(必要があったので)いろいろ調べてみました。

ここに紹介したサンプルでは、System FontをWeightおよびSize指定して取得していますが、本当にやりたいのは言語(英語、日本語など)とセリフつき(Timesなど)サンセリフ(Helveticaなど)、Handwritingフォントかなどの属性情報を指定すると、なんとなくフォントを特定してくれる処理で、とてもOS内にありそうな気もするのですが、まだ見つけられておりません。

AppleScript名:システムフォントをWeightつきで指定.scptd
—
–  Created by: Takaaki Naganoya
–  Created on: 2020/05/14
—
–  Copyright © 2020 Piyomaru Software, All Rights Reserved
—

use AppleScript version "2.4" — Yosemite (10.10) or later
use framework "Foundation"
use framework "AppKit"
use scripting additions

set aFont1 to current application’s NSFont’s systemFontOfSize:48 weight:(current application’s NSFontWeightRegular)
—> (NSFont) ".AppleSystemUIFont 48.00 pt. P [] (0x60000154c060) fobj=0x7f8bb176bfc0, spc=10.20"
set aFont1Name to aFont1’s fontName() as string
–> ".AppleSystemUIFont"

set aFont2 to current application’s NSFont’s systemFontOfSize:48 weight:(current application’s NSFontWeightUltraLight)
–> (NSFont) ".AppleSystemUIFontUltraLight 48.00 pt. P [] (0x6000012d42a0) fobj=0x7f8bb8925090, spc=10.10"
set aFont2Name to aFont2’s fontName() as string
–> ".AppleSystemUIFontUltraLight"

set aFont3 to current application’s NSFont’s systemFontOfSize:48 weight:(current application’s NSFontWeightThin)
–> (NSFont) ".AppleSystemUIFontThin 48.00 pt. P [] (0x6000013fd350) fobj=0x7f8bb3ba1140, spc=10.12"
set aFont3Name to aFont3’s fontName() as string
–> ".AppleSystemUIFontThin"

set aFont4 to current application’s NSFont’s systemFontOfSize:48 weight:(current application’s NSFontWeightLight)
–> (NSFont) ".AppleSystemUIFontLight 48.00 pt. P [] (0x6000013fd410) fobj=0x7f8bb3bbf890, spc=10.17"
set aFont4Name to aFont4’s fontName() as string
–> ".AppleSystemUIFontLight"

set aFont5 to current application’s NSFont’s systemFontOfSize:48 weight:(current application’s NSFontWeightMedium)
–> (NSFont) ".AppleSystemUIFontMedium 48.00 pt. P [] (0x60000151c8a0) fobj=0x7f8bb79289e0, spc=10.08"
set aFont5Name to aFont5’s fontName() as string
–> ".AppleSystemUIFontMedium"

set aFont6 to current application’s NSFont’s systemFontOfSize:48 weight:(current application’s NSFontWeightSemibold)
–> (NSFont) ".AppleSystemUIFontDemi 48.00 pt. P [] (0x6000013fd710) fobj=0x7f8bb69ef060, spc=9.96"
set aFont6Name to aFont6’s fontName() as string
–> ".AppleSystemUIFontDemi"

set aFont7 to current application’s NSFont’s systemFontOfSize:48 weight:(current application’s NSFontWeightBold)
–> (NSFont) ".AppleSystemUIFontBold 48.00 pt. P [] (0x600000bfa430) fobj=0x7f8bb3b55630, spc=9.84"
set aFont7Name to aFont7’s fontName() as string
–> ".AppleSystemUIFontBold"

set aFont8 to current application’s NSFont’s systemFontOfSize:48 weight:(current application’s NSFontWeightHeavy)
–> (NSFont) ".AppleSystemUIFontHeavy 48.00 pt. P [] (0x600000898a50) fobj=0x7f8bb3b79730, spc=9.66"
set aFont8Name to aFont8’s fontName() as string
–> ".AppleSystemUIFontHeavy"

set aFont9 to current application’s NSFont’s systemFontOfSize:48 weight:(current application’s NSFontWeightBlack)
–> (NSFont) ".AppleSystemUIFontBlack 48.00 pt. P [] (0x6000015a57a0) fobj=0x7f8bb14cb330, spc=9.49"
set aFont9Name to aFont9’s fontName() as string
–> ".AppleSystemUIFontBlack"

★Click Here to Open This Script 

AppleScript名:システムフォントをWeightつきで指定(monospacedDigitSystemFont).scptd
—
–  Created by: Takaaki Naganoya
–  Created on: 2020/05/14
—
–  Copyright © 2020 Piyomaru Software, All Rights Reserved
—

use AppleScript version "2.4" — Yosemite (10.10) or later
use framework "Foundation"
use framework "AppKit"
use scripting additions

set aFont1 to current application’s NSFont’s monospacedDigitSystemFontOfSize:16 weight:(current application’s NSFontWeightRegular)
—> (NSFont) ".SFNSText 16.00 pt. P [] (0x600001557d80) fobj=0x7f8bb7e011b0, spc=4.20"
set aFont1Name to aFont1’s fontName() as string
–> ".SFNSText"

set aFont2 to current application’s NSFont’s monospacedDigitSystemFontOfSize:16 weight:(current application’s NSFontWeightUltraLight)
–> (NSFont) ".SFNSText-Light 16.00 pt. P [] (0x6000015e08d0) fobj=0x7f8bb8914700, spc=4.02"
set aFont2Name to aFont2’s fontName() as string
–> ".SFNSText-Light"

set aFont3 to current application’s NSFont’s monospacedDigitSystemFontOfSize:16 weight:(current application’s NSFontWeightThin)
–> (NSFont) ".SFNSText-Light 16.00 pt. P [] (0x600000b789f0) fobj=0x7f8bb697f020, spc=4.02"
set aFont3Name to aFont3’s fontName() as string
–> ".SFNSText-Light"

set aFont4 to current application’s NSFont’s monospacedDigitSystemFontOfSize:16 weight:(current application’s NSFontWeightLight)
–> (NSFont) ".SFNSText-Light 16.00 pt. P [] (0x6000015a3c90) fobj=0x7f8bb88c2130, spc=4.02"
set aFont4Name to aFont4’s fontName() as string
–> ".SFNSText-Light"

set aFont5 to current application’s NSFont’s monospacedDigitSystemFontOfSize:16 weight:(current application’s NSFontWeightMedium)
–> (NSFont) ".SFNSText-Medium 16.00 pt. P [] (0x6000014667f0) fobj=0x7f8bb891bdd0, spc=4.06"
set aFont5Name to aFont5’s fontName() as string
–> ".SFNSText-Medium"

set aFont6 to current application’s NSFont’s monospacedDigitSystemFontOfSize:16 weight:(current application’s NSFontWeightSemibold)
–> (NSFont) ".SFNSText-Semibold 16.00 pt. P [] (0x6000014b7120) fobj=0x7f8bb8866210, spc=3.95"
set aFont6Name to aFont6’s fontName() as string
–> ".SFNSText-Semibold"

set aFont7 to current application’s NSFont’s monospacedDigitSystemFontOfSize:16 weight:(current application’s NSFontWeightBold)
–> (NSFont) ".SFNSText-Bold 16.00 pt. P [] (0x600001412dc0) fobj=0x7f8bb8920310, spc=3.81"
set aFont7Name to aFont7’s fontName() as string
–> ".SFNSText-Bold"

set aFont8 to current application’s NSFont’s monospacedDigitSystemFontOfSize:16 weight:(current application’s NSFontWeightHeavy)
–> (NSFont) ".SFNSText-Heavy 16.00 pt. P [] (0x600001443720) fobj=0x7f8bb6cea5f0, spc=3.61"
set aFont8Name to aFont8’s fontName() as string
–> ".SFNSText-Heavy"

set aFont9 to current application’s NSFont’s monospacedDigitSystemFontOfSize:16 weight:(current application’s NSFontWeightBlack)
–> (NSFont) ".SFNSText-Heavy 16.00 pt. P [] (0x60000145b5d0) fobj=0x7f8bb6996ff0, spc=3.61"
set aFont9Name to aFont9’s fontName() as string
–> ".SFNSText-Heavy"

★Click Here to Open This Script 

Posted in Font System | Tagged 10.13savvy 10.14savvy 10.15savvy NSFont | Leave a comment

Switch Controlがオンになっているか調べる

Posted on 5月 3, 2020 by Takaaki Naganoya

Switch Controlが起動中かどうかをNSWorkspace経由で調べるAppleScriptです。

いろいろなAppleScriptをSwitch Controlのパネルに盛り込んで利用していますが、けっこう使いでがあっていい感じです。Script MenuにAppleScriptを入れて呼び出すのも実用性が高くてよいのですが、Switch Controlのパネルに入れると常時フローティングパネルで表示される(消したり最小化も可)ため、アプリケーションの機能が不完全であると感じるところをユーザーが自分で勝手に補える感覚がとてもいい感じです。

ただ、1つ問題があるとすれば、Switch Controlをプログラム側から起動する方法が公開されていないようである点。本Scriptのように、起動中であることを判定する方法は提供されているのですが。

Switch Control(=AssistiveControl)がオンになっていると、InputManager側から見えるので

このあたりに解決の鍵がありそうな気もします。ただ、文字入力に介在できる機能でもあるため、セキュリティ上の懸念から「あえて」そうしたAPIを公開していないのかも。

現状では唯一、GUI Scriptingで野蛮にチェックボックスをクリックするか、あるいいはチェックボックスの値を変更するぐらいでしょう。実際に試してはいないので、これもできるか100%の保証があるものではありませんけれども。

AppleScript名:スイッチコントロールがオンになっているか調べる.scptd
—
–  Created by: Takaaki Naganoya
–  Created on: 2020/01/02
—
–  Copyright © 2020 Piyomaru Software, All Rights Reserved
—

use AppleScript version "2.4"
use scripting additions
use framework "Foundation"
use framework "AppKit"

current application’s NSWorkspace’s sharedWorkspace()’s isSwitchControlEnabled()
–> true / false

★Click Here to Open This Script 

Posted in System | Tagged 10.13savvy 10.14savvy 10.15savvy NSWorkspace Switch Control | Leave a comment

システム環境設定の「ディスプレイ」>「ディスプレイ」を表示

Posted on 4月 28, 2020 by Takaaki Naganoya

システム環境設定の「ディスプレイ」paneの「ディスプレイ」を表示するAppleScriptです。

やりかたは山のようにあるものの、Cocoa系の機能を使うとこんな感じ。

AppleScript名:システム環境設定の「ディスプレイ」>「ディスプレイ」を表示_asobjc.scptd
—
–  Created by: Takaaki Naganoya
–  Created on: 2020/04/28
—
–  Copyright © 2020 Piyomaru Software, All Rights Reserved
—
use AppleScript version "2.4" — Yosemite (10.10) or later
use framework "Foundation"
use framework "AppKit"
use scripting additions

current application’s NSWorkspace’s sharedWorkspace()’s openFile:"/System/Library/PreferencePanes/Displays.prefPane"

★Click Here to Open This Script 

まんま、同じ内容をshell呼び出しで書くとこんな感じ。

AppleScript名:システム環境設定の「ディスプレイ」>「ディスプレイ」を表示_shell.scptd
—
–  Created by: Takaaki Naganoya
–  Created on: 2020/04/28
—
–  Copyright © 2020 Piyomaru Software, All Rights Reserved
—

use AppleScript version "2.4" — Yosemite (10.10) or later
use framework "Foundation"
use scripting additions

do shell script "open /System/Library/PreferencePanes/Displays.prefPane"

★Click Here to Open This Script 

System Events経由でファイルオープンするとこんな感じ。POSIX pathをfileとして指定できて驚きました。aliasにcastしないとopenできないかと思っていました。

AppleScript名:システム環境設定の「ディスプレイ」>「ディスプレイ」を表示_System Events.scptd
—
–  Created by: Takaaki Naganoya
–  Created on: 2020/04/28
—
–  Copyright © 2020 Piyomaru Software, All Rights Reserved
—

use AppleScript version "2.4" — Yosemite (10.10) or later
use framework "Foundation"
use scripting additions

tell application "System Events"
  open file "/System/Library/PreferencePanes/Displays.prefPane"
end tell

★Click Here to Open This Script 

AppleScript的にいろいろルーチンを整備して汎用性を持たせつつ、十分な機能を用意するとこんな感じでしょうか。

AppleScript名:システム環境設定の「ディスプレイ」>「ディスプレイ」を表示
— Created 2017-10-10 by Takaaki Naganoya
— Created 2020-04-28 by Takaaki Naganoya
— 2020 Piyomaru Software
use AppleScript version "2.4"
use scripting additions
use framework "Foundation"

–Get every pane ID
set aList to getEveryPaneID() of me

–Get every anchor in a pane
set pList to getEveryAnchorName("com.apple.preference.displays") of me
–> {"displaysArrangementTab", "displaysNightShiftTab", "displaysColorTab", "displaysGeometryTab", "displaysDisplayTab"}

set aRes to dispSystemPreferences("com.apple.preference.displays", "displaysDisplayTab") of me
–> true

on dispSystemPreferences(paneID, anchorID)
  tell application "System Preferences"
    activate
    
set pList to id of every pane
    
if paneID is not in pList then return false
    
    
set current pane to pane paneID
    
tell current pane
      set nList to name of every anchor
      
if anchorID is not in nList then return false
      
reveal anchor anchorID
    end tell
  end tell
  
  
return true
end dispSystemPreferences

on getEveryPaneID()
  tell application "System Preferences"
    return id of every pane
  end tell
end getEveryPaneID

on getEveryAnchorName(paneID)
  tell application "System Preferences"
    set pList to id of every pane
    
if paneID is not in pList then return false
    
set current pane to pane paneID
    
tell current pane
      return name of every anchor
    end tell
  end tell
end getEveryAnchorName

★Click Here to Open This Script 

Posted in System | Tagged 10.13savvy 10.14savvy 10.15savvy NSWorkspace System Preferences | Leave a comment

ディスプレイのミラーリング表示(sandbox対応)

Posted on 4月 23, 2020 by Takaaki Naganoya

Mac用のオープンソースのディスプレイミラーリング・ツール「mirror-displays」を改変して、Xcode上でコードサインしやすく、かつAppleScriptアプリケーション(Xcode上で記述)から呼び出しやすくしたものです。

ディスプレイのミラーリング表示のOn/Offを行うmirror-displaysを、そのままMac App Storeに申請するアプリケーションの中にバイナリで入れようとしたら、Xcode上のValidate(Mac App Storeにアップロードする前段階の各種妥当性チェック)でひっかかってしまいました。

アプリケーションバンドル中のResourcesフォルダに入れてdo shell scriptで呼ぶという「お気楽」な呼び方が(Code Signの問題で)できなかったわけです。

# コマンドライン・ツールとしてビルドするときにCode Signすればよかったんじゃないか、という話もありますが、いずれ最終的にこの形式にする必要があったので、これでいいんじゃないかと

そこで、コマンドラインから呼び出す形式ではなく、Objective-Cのプログラム「らしい」形式に変更して(ヘッダファイルをゼロから書き起こしました)、AppleScriptから呼び出しやすく変更してみました。配布条件がGPLだったので、ここにmirror-displayまわりのソースと最低限の呼び出し側のAppleScriptアプリケーションのプロジェクトを掲載した次第です。

–> Download Xcode Project’s zip-archive

AppleScript名:AppDelegate.applescript
—
— AppDelegate.applescript
— mirrorTest
—
— Created by Takaaki Naganoya on 2020/04/15.
— Copyright © 2020 Takaaki Naganoya. All rights reserved.
—

script AppDelegate
  property parent : class "NSObject"
  
  
— IBOutlets
  
property theWindow : missing value
  
  
on applicationWillFinishLaunching:aNotification
    — Insert code here to initialize your application before any files are opened
  end applicationWillFinishLaunching:
  
  
on applicationShouldTerminate:sender
    — Insert code here to do any housekeeping before your application quits
    
return current application’s NSTerminateNow
  end applicationShouldTerminate:
  
  
on clicked:sender
    current application’s mirrorObjC’s alloc()’s init()’s mirror()
  end clicked:
end script

★Click Here to Open This Script 

Posted in Sandbox System | Tagged 10.13savvy 10.14savvy 10.15savvy | Leave a comment

Post navigation

  • Older posts
  • Newer posts

電子書籍(PDF)をオンラインストアで販売中!

Google Search

Popular posts

  • 開発機としてM2 Mac miniが来たのでガチレビュー
  • macOS 15, Sequoia
  • 指定のWordファイルをPDFに書き出す
  • Pages本執筆中に、2つの書類モード切り替えに気がついた
  • Numbersで選択範囲のセルの前後の空白を削除
  • メキシカンハットの描画
  • Pixelmator Pro v3.6.4でAppleScriptからの操作時の挙動に違和感が
  • AdobeがInDesign v19.4からPOSIX pathを採用
  • Safariで「プロファイル」機能を使うとAppleScriptの処理に影響
  • AppleScriptによる並列処理
  • Cocoa Scripting Course 続刊計画
  • macOS 14.xでScript Menuの実行速度が大幅に下がるバグ
  • AppleScript入門③AppleScriptを使った「自動化」とは?
  • Keynote/Pagesで選択中の表カラムの幅を均等割
  • Keynote、Pages、Numbers Ver.14.0が登場
  • デフォルトインストールされたフォント名を取得するAppleScript
  • macOS 15 リモートApple Eventsにバグ?
  • AppleScript入門① AppleScriptってなんだろう?
  • Numbersで最前面の書類のすべてのシート上の表の行数を合計
  • macOS 14で変更になったOSバージョン取得APIの返り値

Tags

10.11savvy (1101) 10.12savvy (1242) 10.13savvy (1391) 10.14savvy (587) 10.15savvy (438) 11.0savvy (283) 12.0savvy (212) 13.0savvy (194) 14.0savvy (147) 15.0savvy (129) CotEditor (66) Finder (51) iTunes (19) Keynote (116) NSAlert (61) NSArray (51) NSBitmapImageRep (20) NSBundle (20) NSButton (34) NSColor (53) NSDictionary (28) NSFileManager (23) NSFont (21) NSImage (41) NSJSONSerialization (21) NSMutableArray (63) NSMutableDictionary (22) NSPredicate (36) NSRunningApplication (56) NSScreen (30) NSScrollView (22) NSString (119) NSURL (98) NSURLRequest (23) NSUTF8StringEncoding (30) NSView (33) NSWorkspace (20) Numbers (76) Pages (55) Safari (44) Script Editor (27) WKUserContentController (21) WKUserScript (20) WKWebView (23) WKWebViewConfiguration (22)

カテゴリー

  • 2D Bin Packing
  • 3D
  • AirDrop
  • AirPlay
  • Animation
  • AppleScript Application on Xcode
  • Beginner
  • Benchmark
  • beta
  • Bluetooth
  • Books
  • boolean
  • bounds
  • Bug
  • Calendar
  • call by reference
  • check sum
  • Clipboard
  • Cocoa-AppleScript Applet
  • Code Sign
  • Color
  • Custom Class
  • date
  • dialog
  • diff
  • drive
  • Droplet
  • exif
  • file
  • File path
  • filter
  • folder
  • Font
  • Font
  • GAME
  • geolocation
  • GUI
  • GUI Scripting
  • Hex
  • History
  • How To
  • iCloud
  • Icon
  • Image
  • Input Method
  • Internet
  • iOS App
  • JavaScript
  • JSON
  • JXA
  • Keychain
  • Keychain
  • Language
  • Library
  • list
  • Locale
  • Localize
  • Machine Learning
  • Map
  • Markdown
  • Menu
  • Metadata
  • MIDI
  • MIME
  • Natural Language Processing
  • Network
  • news
  • Noification
  • Notarization
  • Number
  • Object control
  • OCR
  • OSA
  • parallel processing
  • PDF
  • Peripheral
  • PRODUCTS
  • QR Code
  • Raw AppleEvent Code
  • Record
  • rectangle
  • recursive call
  • regexp
  • Release
  • Remote Control
  • Require Control-Command-R to run
  • REST API
  • Review
  • RTF
  • Sandbox
  • Screen Saver
  • Script Libraries
  • sdef
  • search
  • Security
  • selection
  • shell script
  • Shortcuts Workflow
  • Sort
  • Sound
  • Spellchecker
  • Spotlight
  • SVG
  • System
  • Tag
  • Telephony
  • Text
  • Text to Speech
  • timezone
  • Tools
  • Update
  • URL
  • UTI
  • Web Contents Control
  • WiFi
  • XML
  • XML-RPC
  • イベント(Event)
  • 未分類

アーカイブ

  • 2025年4月
  • 2025年3月
  • 2025年2月
  • 2025年1月
  • 2024年12月
  • 2024年11月
  • 2024年10月
  • 2024年9月
  • 2024年8月
  • 2024年7月
  • 2024年6月
  • 2024年5月
  • 2024年4月
  • 2024年3月
  • 2024年2月
  • 2024年1月
  • 2023年12月
  • 2023年11月
  • 2023年10月
  • 2023年9月
  • 2023年8月
  • 2023年7月
  • 2023年6月
  • 2023年5月
  • 2023年4月
  • 2023年3月
  • 2023年2月
  • 2023年1月
  • 2022年12月
  • 2022年11月
  • 2022年10月
  • 2022年9月
  • 2022年8月
  • 2022年7月
  • 2022年6月
  • 2022年5月
  • 2022年4月
  • 2022年3月
  • 2022年2月
  • 2022年1月
  • 2021年12月
  • 2021年11月
  • 2021年10月
  • 2021年9月
  • 2021年8月
  • 2021年7月
  • 2021年6月
  • 2021年5月
  • 2021年4月
  • 2021年3月
  • 2021年2月
  • 2021年1月
  • 2020年12月
  • 2020年11月
  • 2020年10月
  • 2020年9月
  • 2020年8月
  • 2020年7月
  • 2020年6月
  • 2020年5月
  • 2020年4月
  • 2020年3月
  • 2020年2月
  • 2020年1月
  • 2019年12月
  • 2019年11月
  • 2019年10月
  • 2019年9月
  • 2019年8月
  • 2019年7月
  • 2019年6月
  • 2019年5月
  • 2019年4月
  • 2019年3月
  • 2019年2月
  • 2019年1月
  • 2018年12月
  • 2018年11月
  • 2018年10月
  • 2018年9月
  • 2018年8月
  • 2018年7月
  • 2018年6月
  • 2018年5月
  • 2018年4月
  • 2018年3月
  • 2018年2月

https://piyomarusoft.booth.pm/items/301502

メタ情報

  • ログイン
  • 投稿フィード
  • コメントフィード
  • WordPress.org

Forum Posts

  • 人気のトピック
  • 返信がないトピック

メタ情報

  • ログイン
  • 投稿フィード
  • コメントフィード
  • WordPress.org
Proudly powered by WordPress
Theme: Flint by Star Verte LLC