— Created 2019-01-29 by Takaaki Naganoya
— Modified 2019-05-04 by Takaaki Naganoya
— 2019 Piyomaru Software
use AppleScript version "2.4"
use scripting additions
use framework "Foundation"
use framework "AppKit"
use framework "dbColNamesKit" –https://github.com/daniel-beard/DBColorNames/
use Bplus : script "BridgePlus" –https://www.macosxautomation.com/applescript/apps/BridgePlus.html
–v1:Convert Pages version to Keynote
–v2:Prepare Selected Table
property NSView : a reference to current application’s NSView
property NSColor : a reference to current application’s NSColor
property NSArray : a reference to current application’s NSArray
property NSMenu : a reference to current application’s NSMenu
property NSImage : a reference to current application’s NSImage
property NSScreen : a reference to current application’s NSScreen
property NSButton : a reference to current application’s NSButton
property NSWindow : a reference to current application’s NSWindow
property NSTextField : a reference to current application’s NSTextField
property NSMenuItem : a reference to current application’s NSMenuItem
property NSBezierPath : a reference to current application’s NSBezierPath
property NSPopUpButton : a reference to current application’s NSPopUpButton
property NSWindowController : a reference to current application’s NSWindowController
property NSTitledWindowMask : a reference to current application’s NSTitledWindowMask
property NSRoundedBezelStyle : a reference to current application’s NSRoundedBezelStyle
property NSFloatingWindowLevel : a reference to current application’s NSFloatingWindowLevel
property NSBackingStoreBuffered : a reference to current application’s NSBackingStoreBuffered
property NSMomentaryLightButton : a reference to current application’s NSMomentaryLightButton
property windisp : true
property wController : missing value
property pop1ind : 1
–初期化
set (my windisp) to true
set (my pop1ind) to 1
load framework
–選択中のTableオブジェクトへの参照を取得する
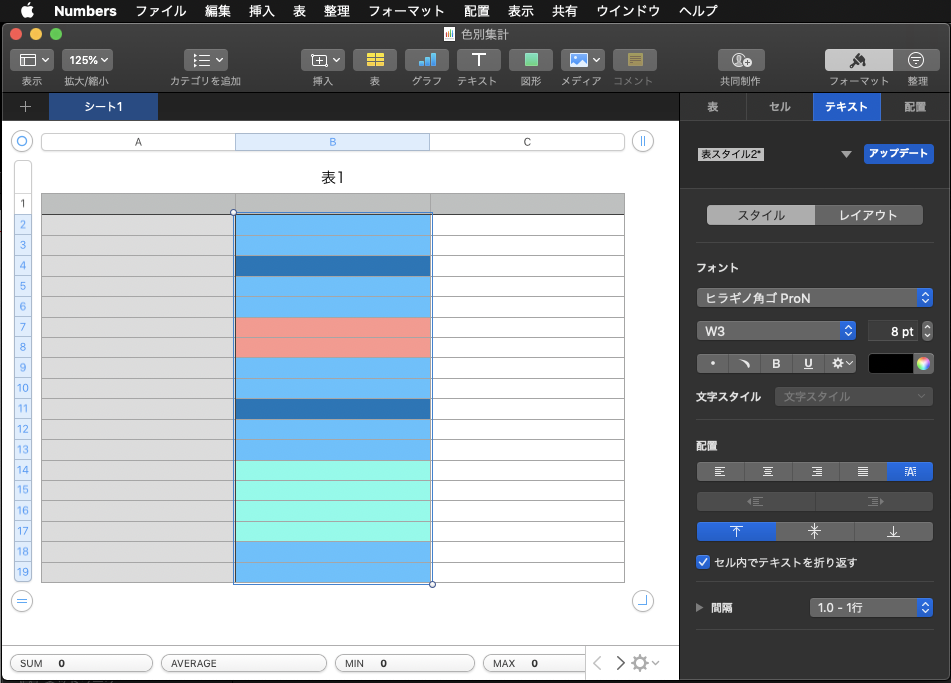
set theTable to getSelectedTable() of me
–選択中のTableオブジェクトの塗り色をすべて取得
tell application "Keynote"
tell theTable
set c1List to background color of every cell
set aProp to properties
set xCount to column count of aProp
end tell
end tell
–Convert 1D List to 2D List
set c3List to (current application’s SMSForder’s subarraysFrom:c1List groupedBy:xCount |error|:(missing value)) as list
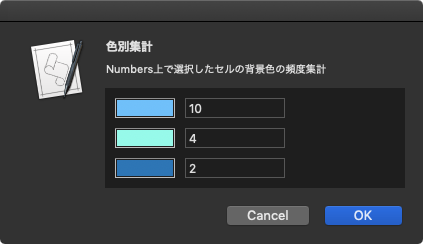
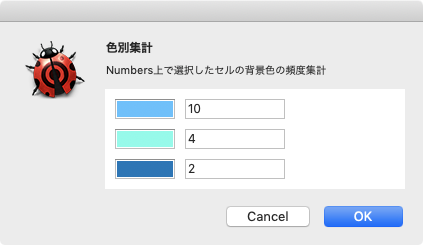
–色データをユニーク化(重複削除)
set bList to uniquifyList(c1List) of me
–missing value(背景色なし)を除外する
set c2List to (current application’s SMSForder’s arrayByDeletingBlanksIn:(bList)) as list
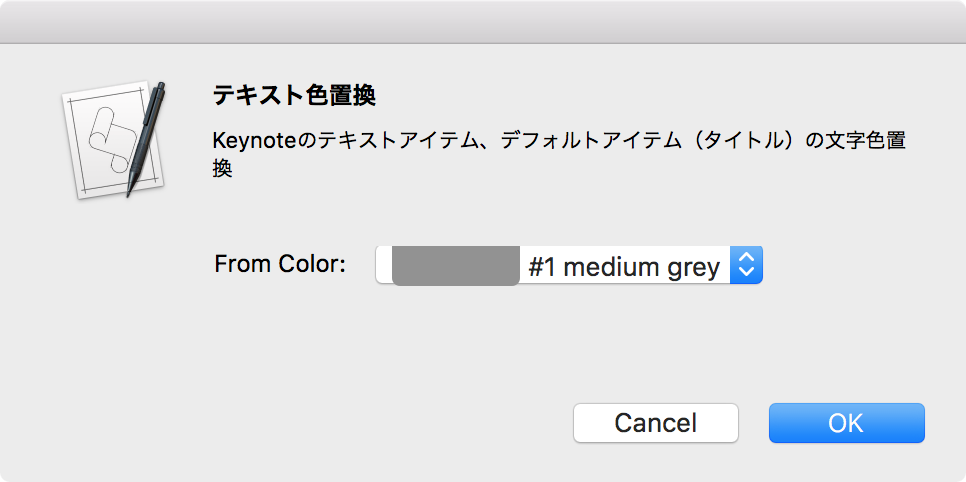
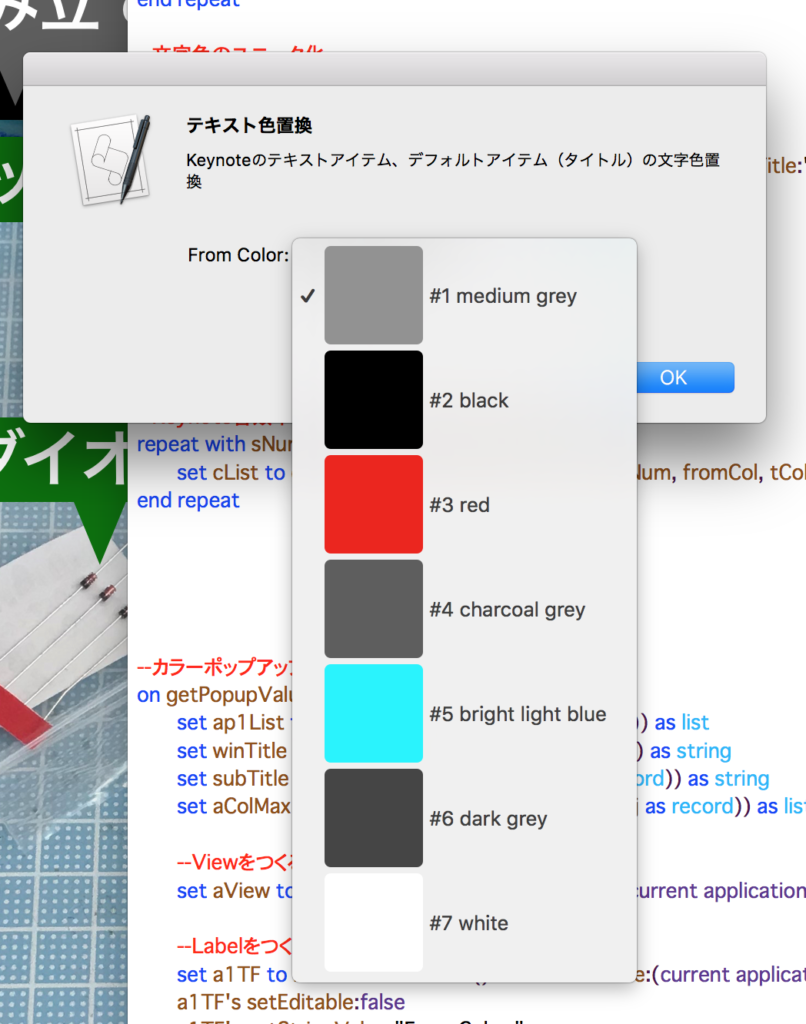
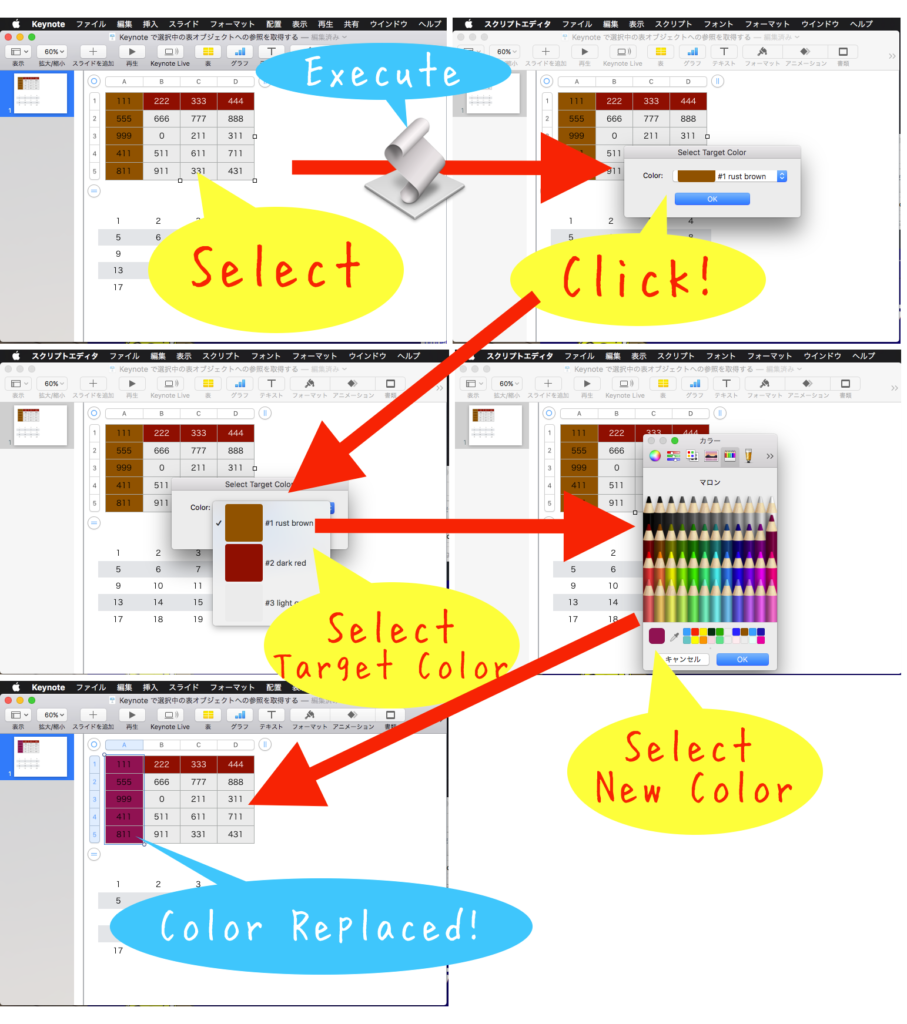
–Popup Menuで置換色選択
set paramObj to {c2List, 65535, "OK", "Select Target Color", 180} –Timeout = 180 sec, Color val range = 16bit
my performSelectorOnMainThread:"getPopupValues:" withObject:(paramObj) waitUntilDone:true
if pop1ind = false then return –timed out
set fromCol to (contents of item pop1ind of c2List)
–カラーピッカーで置換色選択
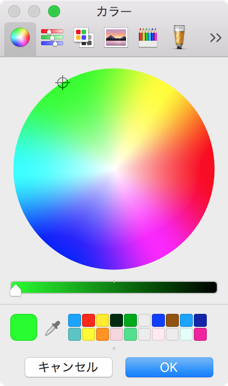
set tCol to choose color default color fromCol
set d1 to current date
–実際に表の背景色を置換する
set hitList to findDataFrom2DList(fromCol, c3List) of me –データ上で当該色のセル情報を計算する
–Rangeを横スキャンと縦スキャンの2通りで試算(Two way Simulation)
set rList1 to retRangeFromPosListHorizontal(hitList) of me –横方向へのrange評価
set rList2 to retRangeFromPosListVertival(hitList) of me –縦方向へのrange評価
–Simulationの結果、要素数の少ない方(=処理時間の短い方=高速な方)を採用する
log {"Simulation", (length of rList1), (length of rList2)}
if (length of rList1) < (length of rList2) then
copy rList1 to rangeList
else
copy rList2 to rangeList
end if
tell application "Keynote"
activate
tell theTable
repeat with i in rangeList
set j to contents of i
ignoring application responses –非同期実行モードで高速実行
set background color of range j to tCol
end ignoring
end repeat
end tell
end tell
set d2 to current date
return d2 – d1
on getSelectedTable()
tell application "Keynote"
tell front document
tell current slide
try
set theTable to first table whose class of selection range is range
on error
set tCount to count every table
if tCount = 0 then
error "No Selected Table Objects…"
else
–選択セルがない場合はTable 1を全選択
set theTable to table 1
end if
end try
return theTable
end tell
end tell
end tell
end getSelectedTable
–カラーポップアップメニューをウィンドウ表示
on getPopupValues:paramObj
copy (paramObj as list) to {ap1List, aColMax, aButtonMSG, aSliderValMSG, timeOutSecs}
set (my windisp) to true
set aView to NSView’s alloc()’s initWithFrame:(current application’s NSMakeRect(0, 0, 360, 100))
–Labelをつくる
set a1TF to NSTextField’s alloc()’s initWithFrame:(current application’s NSMakeRect(30, 60, 80, 20))
a1TF’s setEditable:false
a1TF’s setStringValue:"Color:"
a1TF’s setDrawsBackground:false
a1TF’s setBordered:false
–Ppopup Buttonをつくる
set a1Button to NSPopUpButton’s alloc()’s initWithFrame:(current application’s NSMakeRect(80, 60, 200, 20)) pullsDown:false
a1Button’s removeAllItems()
set a1Menu to NSMenu’s alloc()’s init()
set aCDB to current application’s DBColorNames’s alloc()’s init()
set iCount to 1
repeat with i in ap1List
copy i to {r1, g1, b1}
set nsCol to makeNSColorFromRGBAval(r1, g1, b1, aColMax, aColMax) of me
set anImage to makeRoundedNSImageWithFilledWithColor(64, 64, nsCol, 4) of me
set aTitle to "#" & (iCount as string) & " " & (aCDB’s nameForColor:nsCol) as string
set aMenuItem to (NSMenuItem’s alloc()’s initWithTitle:aTitle action:"actionHandler:" keyEquivalent:"")
(aMenuItem’s setImage:anImage)
(aMenuItem’s setEnabled:true)
(a1Menu’s addItem:aMenuItem)
set iCount to iCount + 1
end repeat
a1Button’s setMenu:a1Menu
–Buttonをつくる
set bButton to (NSButton’s alloc()’s initWithFrame:(current application’s NSMakeRect(80, 10, 140, 40)))
bButton’s setButtonType:(NSMomentaryLightButton)
bButton’s setBezelStyle:(NSRoundedBezelStyle)
bButton’s setTitle:aButtonMSG
bButton’s setTarget:me
bButton’s setAction:("clicked:")
bButton’s setKeyEquivalent:(return)
aView’s addSubview:a1TF
aView’s addSubview:a1Button
aView’s addSubview:bButton
aView’s setNeedsDisplay:true
–NSWindowControllerを作ってみた(いらない?)
set aWin to (my makeWinWithView(aView, 300, 100, aSliderValMSG))
set wController to NSWindowController’s alloc()
wController’s initWithWindow:aWin
wController’s showWindow:me
set aCount to timeOutSecs * 100
set hitF to false
repeat aCount times
if (my windisp) = false then
set hitF to true
exit repeat
end if
delay 0.01
set aCount to aCount – 1
end repeat
my closeWin:aWin
if hitF = true then
set s1Val to ((a1Button’s indexOfSelectedItem() as number) + 1)
else
set s1Val to false
end if
copy s1Val to my pop1ind
end getPopupValues:
on clicked:aSender
set (my windisp) to false
end clicked:
–make Window for Display
on makeWinWithView(aView, aWinWidth as integer, aWinHeight as integer, aTitle as string)
set aScreen to NSScreen’s mainScreen()
set aFrame to {{0, 0}, {aWinWidth, aWinHeight}}
set aBacking to NSTitledWindowMask
set aDefer to NSBackingStoreBuffered
— Window
set aWin to NSWindow’s alloc()
(aWin’s initWithContentRect:aFrame styleMask:aBacking backing:aDefer defer:false screen:aScreen)
aWin’s setTitle:aTitle
aWin’s setDelegate:me
aWin’s setDisplaysWhenScreenProfileChanges:true
aWin’s setHasShadow:true
aWin’s setIgnoresMouseEvents:false
aWin’s setLevel:(NSFloatingWindowLevel)
aWin’s setOpaque:false
aWin’s setReleasedWhenClosed:true
aWin’s |center|()
aWin’s setContentView:aView
return aWin
end makeWinWithView
–close win
on closeWin:aWindow
repeat with n from 10 to 1 by -1
(aWindow’s setAlphaValue:n / 10)
delay 0.02
end repeat
aWindow’s |close|()
end closeWin:
–Popup Action Handler
on actionHandler:sender
set aTag to tag of sender as integer
set aTitle to title of sender as string
end actionHandler:
–aMaxValを最大値とする数値でNSColorを作成して返す
on makeNSColorFromRGBAval(redValue as integer, greenValue as integer, blueValue as integer, alphaValue as integer, aMaxVal as integer)
set aRedCocoa to (redValue / aMaxVal) as real
set aGreenCocoa to (greenValue / aMaxVal) as real
set aBlueCocoa to (blueValue / aMaxVal) as real
set aAlphaCocoa to (alphaValue / aMaxVal) as real
set aColor to NSColor’s colorWithCalibratedRed:aRedCocoa green:aGreenCocoa blue:aBlueCocoa alpha:aAlphaCocoa
return aColor
end makeNSColorFromRGBAval
–指定サイズのNSImageを作成し、指定色で塗ってNSImageで返す
on makeNSImageWithFilledWithColor(aWidth as integer, aHeight as integer, fillColor)
set anImage to NSImage’s alloc()’s initWithSize:(current application’s NSMakeSize(aWidth, aHeight))
anImage’s lockFocus()
—
set theRect to {{x:0, y:0}, {height:aHeight, width:aWidth}}
set theNSBezierPath to NSBezierPath’s bezierPath
theNSBezierPath’s appendBezierPathWithRect:theRect
—
fillColor’s |set|() –色設定
theNSBezierPath’s fill() –ぬりつぶし
—
anImage’s unlockFocus()
—
return anImage
end makeNSImageWithFilledWithColor
–指定サイズのNSImageを作成し、指定色で塗ってNSImageで返す、anRadiusの半径の角丸で
on makeRoundedNSImageWithFilledWithColor(aWidth as integer, aHeight as integer, fillColor, anRadius as real)
set anImage to NSImage’s alloc()’s initWithSize:(current application’s NSMakeSize(aWidth, aHeight))
anImage’s lockFocus()
—
set theRect to {{x:0, y:0}, {height:aHeight, width:aWidth}}
set theNSBezierPath to NSBezierPath’s bezierPathWithRoundedRect:theRect xRadius:anRadius yRadius:anRadius
—
fillColor’s |set|() –色設定
theNSBezierPath’s fill() –ぬりつぶし
—
anImage’s unlockFocus()
return anImage
end makeRoundedNSImageWithFilledWithColor
on uniquifyList(aList as list)
set aArray to NSArray’s arrayWithArray:aList
set bArray to aArray’s valueForKeyPath:"@distinctUnionOfObjects.self"
return bArray as list
end uniquifyList
on findDataFrom2DList(anItem, aList as list)
script spd
property aList : {}
property resList : {}
end script
set (aList of spd) to aList
set (resList of spd) to {}
set yCount to 1
repeat with i in (aList of spd)
set aResList to (Bplus’s indexesOfItem:anItem inList:i inverting:false) as list
set tmpList to {}
if aResList is not equal to {} then
repeat with ii in aResList
set jj to contents of ii
set the end of tmpList to {jj, yCount}
end repeat
set (resList of spd) to (resList of spd) & tmpList
end if
set yCount to yCount + 1
end repeat
return (resList of spd) –return {{x, y}…..} item list (1-based)
end findDataFrom2DList
on retRangeFromPosListVertival(posList as list)
script rangeSPD
property posList2 : {}
end script
–縦方向へのrange評価に都合がいいようにソート
set (posList2 of rangeSPD) to shellSortListAscending(posList, {1, 2}) of me
–先頭データをピックアップ
set firstData to first item of (posList2 of rangeSPD)
set (posList2 of rangeSPD) to rest of (posList2 of rangeSPD)
copy firstData to {curX1, curY1}
set tmpRangeStr to aNumToExcelColumn(curX1) of me & (curY1 as string) & ":"
set tmpRange to {}
set hitF to false
set outList to {}
repeat with i in (posList2 of rangeSPD)
copy i to {tmpX, tmpY}
–log {"{curX1, curY1}", {curX1, curY1}}
–log {"{tmpX, tmpY}", {tmpX, tmpY}}
if (curX1 = tmpX) and (curY1 + 1 = tmpY) then
–Y方向への連続値を拾っている最中
if hitF = false then
–log "case 1a"
–log {"hitF", hitF}
set hitF to true
else
–log "case 1b"
–log {"hitF", hitF}
–横に連続しているブロックの途中
end if
else
–直前の値と連続していない
if hitF = false then
–log "case 2a"
–log {"hitF", hitF}
set tmpRangeStr to tmpRangeStr & aNumToExcelColumn(curX1) of me & (curY1 as string)
set the end of outList to tmpRangeStr
set tmpRangeStr to aNumToExcelColumn(tmpX) of me & (tmpY as string) & ":"
set hitF to false
else
–log "case 2b"
–log {"hitF", hitF}
–連続ブロックの末尾を拾った
set tmpRangeStr to tmpRangeStr & aNumToExcelColumn(curX1) of me & (curY1 as string)
set the end of outList to tmpRangeStr
set tmpRangeStr to aNumToExcelColumn(tmpX) of me & (tmpY as string) & ":"
set hitF to false
–log {"tmpRangeStr", tmpRangeStr}
end if
end if
copy {tmpX, tmpY} to {curX1, curY1}
end repeat
–log {tmpRangeStr, hitF}
if (hitF = true) or (tmpRangeStr is not equal to "") then
set tmpRangeStr to tmpRangeStr & aNumToExcelColumn(curX1) of me & (curY1 as string)
set the end of outList to tmpRangeStr
end if
return outList
end retRangeFromPosListVertival
on retRangeFromPosListHorizontal(posList as list)
script rangeSPD
property posList2 : {}
end script
copy posList to (posList2 of rangeSPD)
–先頭データをピックアップ
set firstData to first item of (posList2 of rangeSPD)
set (posList2 of rangeSPD) to rest of (posList2 of rangeSPD)
copy firstData to {curX1, curY1}
set tmpRangeStr to aNumToExcelColumn(curX1) of me & (curY1 as string) & ":"
set tmpRange to {}
set hitF to false
set outList to {}
repeat with i in (posList2 of rangeSPD)
copy i to {tmpX, tmpY}
–log {"{curX1, curY1}", {curX1, curY1}}
–log {"{tmpX, tmpY}", {tmpX, tmpY}}
if (curX1 + 1 = tmpX) and (curY1 = tmpY) then
–X方向への連続値を拾っている最中
if hitF = false then
–log "case 1a"
–log {"hitF", hitF}
set hitF to true
else
–log "case 1b"
–log {"hitF", hitF}
–横に連続しているブロックの途中
end if
else
–直前の値と連続していない
if hitF = false then
–log "case 2a"
–log {"hitF", hitF}
set tmpRangeStr to tmpRangeStr & aNumToExcelColumn(curX1) of me & (curY1 as string)
set the end of outList to tmpRangeStr
set tmpRangeStr to aNumToExcelColumn(tmpX) of me & (tmpY as string) & ":"
set hitF to false
else
–log "case 2b"
–log {"hitF", hitF}
–連続ブロックの末尾を拾った
set tmpRangeStr to tmpRangeStr & aNumToExcelColumn(curX1) of me & (curY1 as string)
set the end of outList to tmpRangeStr
set tmpRangeStr to aNumToExcelColumn(tmpX) of me & (tmpY as string) & ":"
set hitF to false
–log {"tmpRangeStr", tmpRangeStr}
end if
end if
copy {tmpX, tmpY} to {curX1, curY1}
end repeat
–log {tmpRangeStr, hitF}
if (hitF = true) or (tmpRangeStr is not equal to "") then
set tmpRangeStr to tmpRangeStr & aNumToExcelColumn(curX1) of me & (curY1 as string)
set the end of outList to tmpRangeStr
end if
return outList
end retRangeFromPosListHorizontal
–2008/05/01 By Takaaki Naganoya
–10進数数値をExcel 2004/2008的カラム表現にエンコードするサブルーチン を使いまわし
–1〜1351までの間であれば正しいエンコーディング結果を返す
on aNumToExcelColumn(origNum as integer)
if origNum > 1351 then
error "エラー:Excel 2004/2008的カラム表現(A1形式)への変換ルーチンにおいて、想定範囲外(1351以上)のパラメータが指定されました"
end if
set upperDigitEncTable to {"A", "B", "C", "D", "E", "F", "G", "H", "I", "J", "K", "L", "M", "N", "O", "P", "Q", "R", "S", "T", "U", "V", "W", "X", "Y", "Z", "A"}
set lowerDigitEncTable to {"A", "B", "C", "D", "E", "F", "G", "H", "I", "J", "K", "L", "M", "N", "O", "P", "Q", "R", "S", "T", "U", "V", "W", "X", "Y", "Z", "A"}
set oNum to origNum
set nTh to 26
set stringLength to 4
–数字が1桁の場合の対応
if origNum < 27 then
set aRes to (item origNum of upperDigitEncTable) as string
return aRes
end if
if origNum > 702 then
–3桁になる場合
set upupNum to oNum div 676 –整数除算–上の上の桁
set oNum to oNum – (upupNum * 676)
set upNum to oNum div 26 –整数除算–上の桁
set lowNum to oNum mod 26 – 1 –余剰計算–下の桁
–超つじつま合わせ処理
if lowNum = -1 then
set upNum to upNum – 1
set lowNum to 25
end if
set upupChar to (item upupNum of upperDigitEncTable) as string
set upChar to (item upNum of upperDigitEncTable) as string
set lowChar to (item (lowNum + 1) of lowerDigitEncTable) as string
set resText to upupChar & upChar & lowChar
else
–2桁の場合
set upNum to oNum div 26 –整数除算–上の桁
set lowNum to oNum mod 26 – 1 –余剰計算–下の桁
–超つじつま合わせ処理
if lowNum = -1 then
set upNum to upNum – 1
set lowNum to 25
end if
set upChar to (item upNum of upperDigitEncTable) as string
set lowChar to (item (lowNum + 1) of lowerDigitEncTable) as string
set resText to upChar & lowChar
end if
return resText
end aNumToExcelColumn
–入れ子のリストを昇順ソート
on shellSortListAscending(a, keyItem)
return sort2DList(a, keyItem, {true}) of me
end shellSortListAscending
–入れ子のリストを降順ソート
on shellSortListDecending(a, keyItem)
return sort2DList(a, keyItem, {false}) of me
end shellSortListDecending
–2D Listをソート
on sort2DList(aList as list, sortIndexes as list, sortOrders as list)
–index値をAS流(アイテムが1はじまり)からCocoa流(アイテムが0はじまり)に変換
set newIndex to {}
repeat with i in sortIndexes
set j to contents of i
set j to j – 1
set the end of newIndex to j
end repeat
–Sort TypeのListを作成(あえて外部から指定する内容でもない)
set sortTypes to {}
repeat (length of sortIndexes) times
set the end of sortTypes to "compare:"
end repeat
–Sort
set resList to (current application’s SMSForder’s subarraysIn:(aList) sortedByIndexes:newIndex ascending:sortOrders sortTypes:sortTypes |error|:(missing value)) as list
return resList
end sort2DList
|


