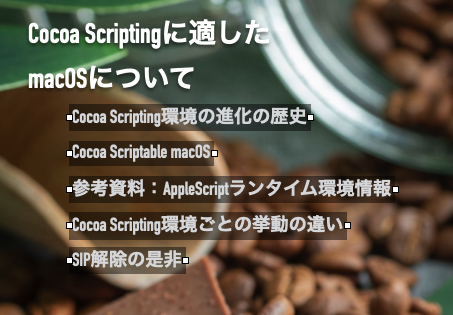
現在オープン中の最前面のPages書類の内容を伏せ字に置き換えるAppleScriptです。
新刊「Pages+AppleScriptで本をつくろう!」の作成のために書いたものです。Pages書類を付録として電子書籍に添付する場合に、あくまでデザインテンプレートとしての利用を見込んでいるため、本文がそのまま入っていると困るわけです、私が。
そんなわけで、せっかく作ったPages書類の内容を伏せ字にして、ダミー書類化するためのAppleScriptが必要になったわけです。
一応、テキストを伏せ字にするAppleScriptは作ってあったので、これをPages書類相手に処理するよう書き換えたものがこれです。
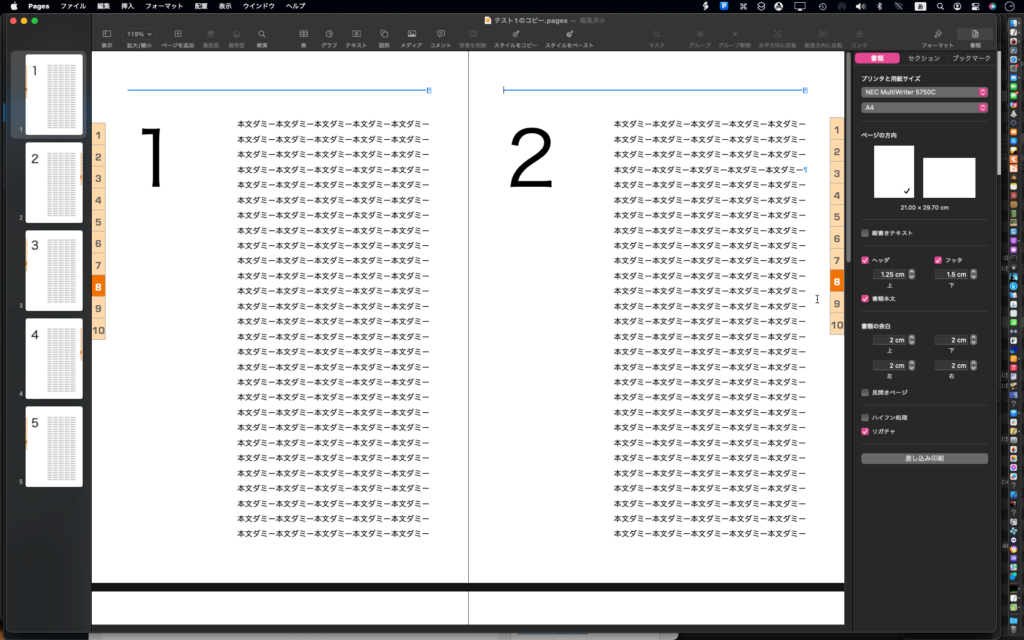
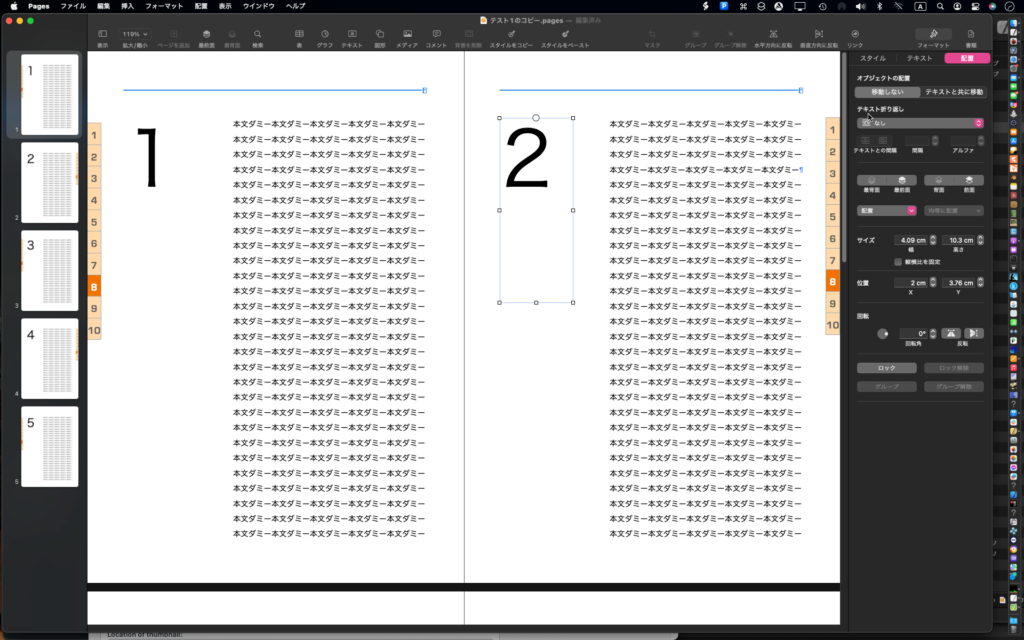
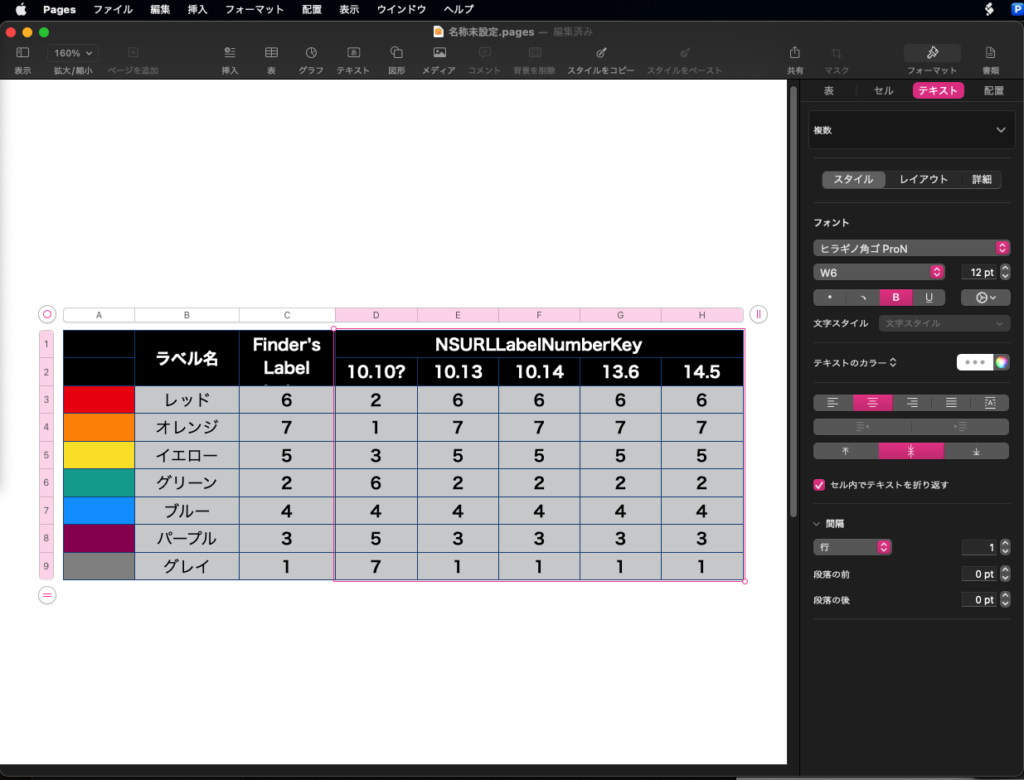
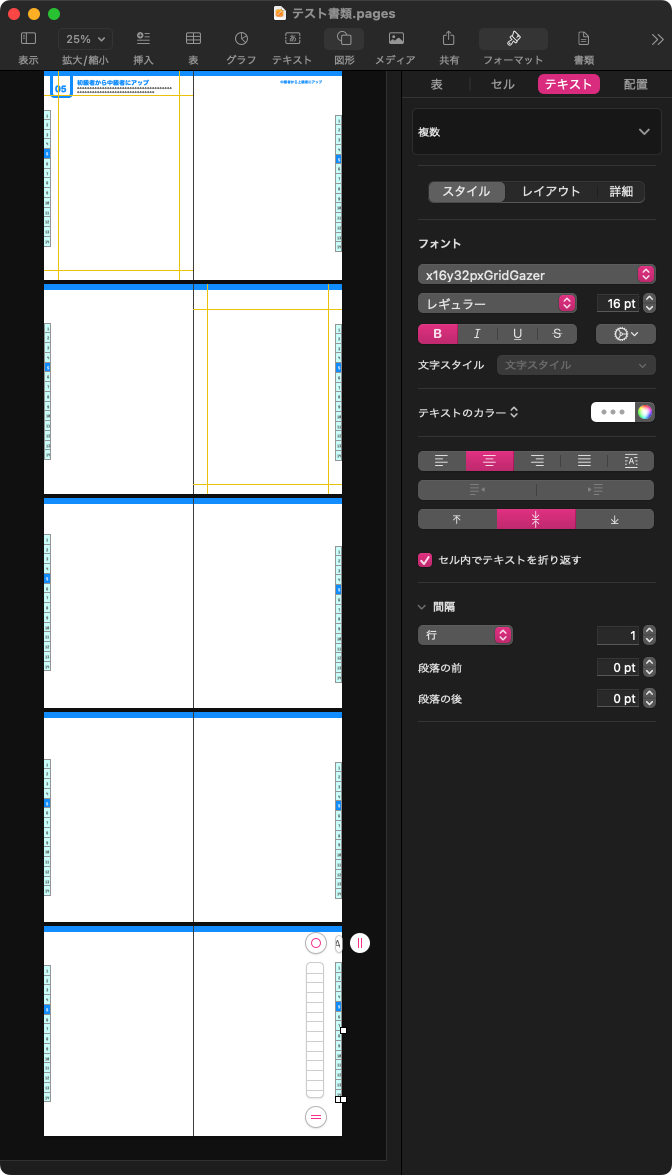
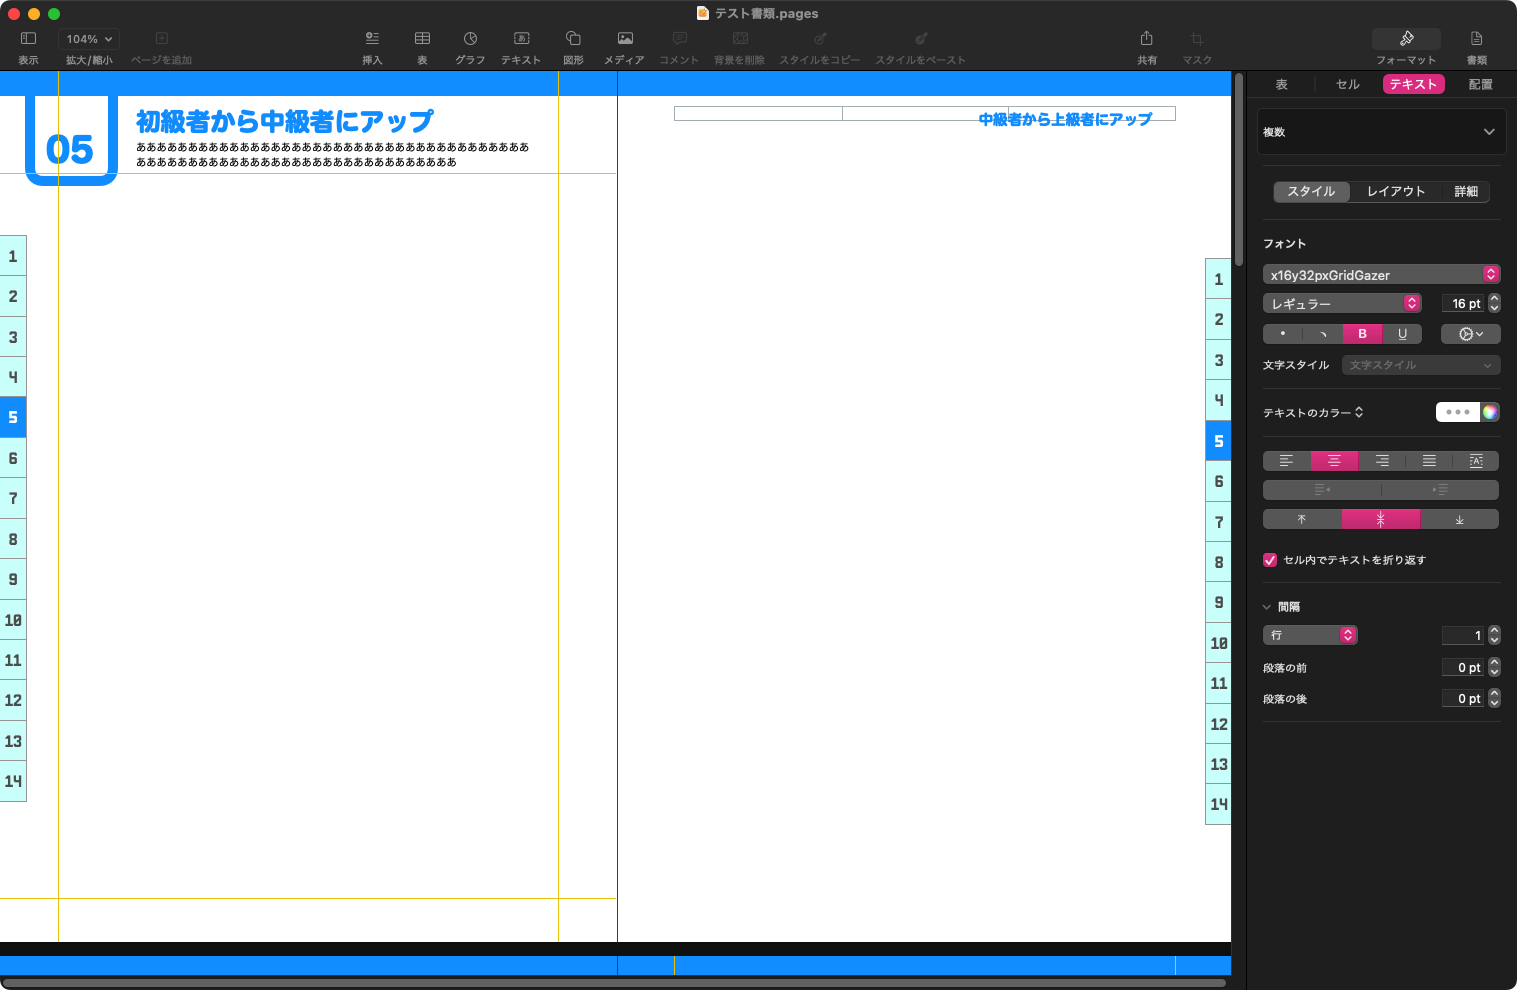
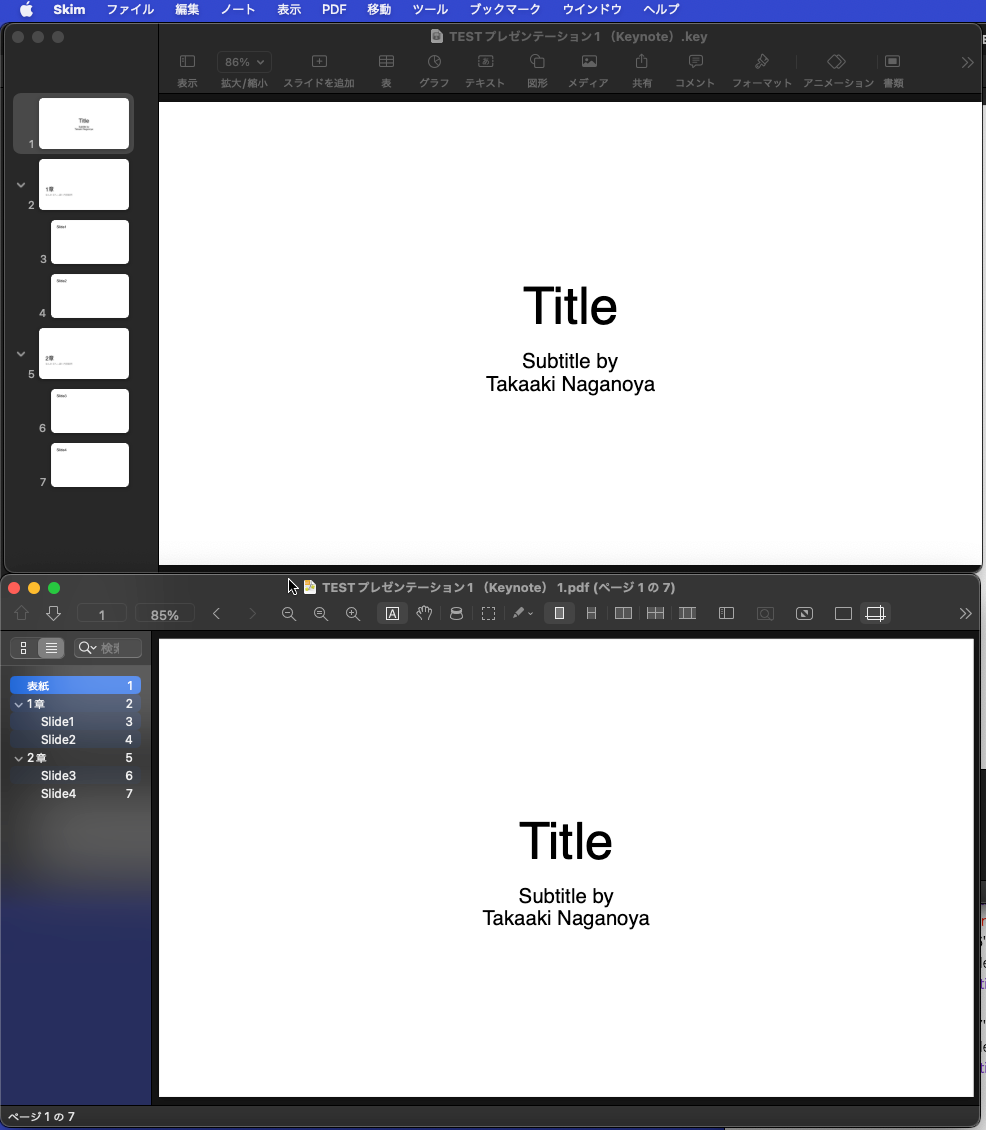
▲処理前
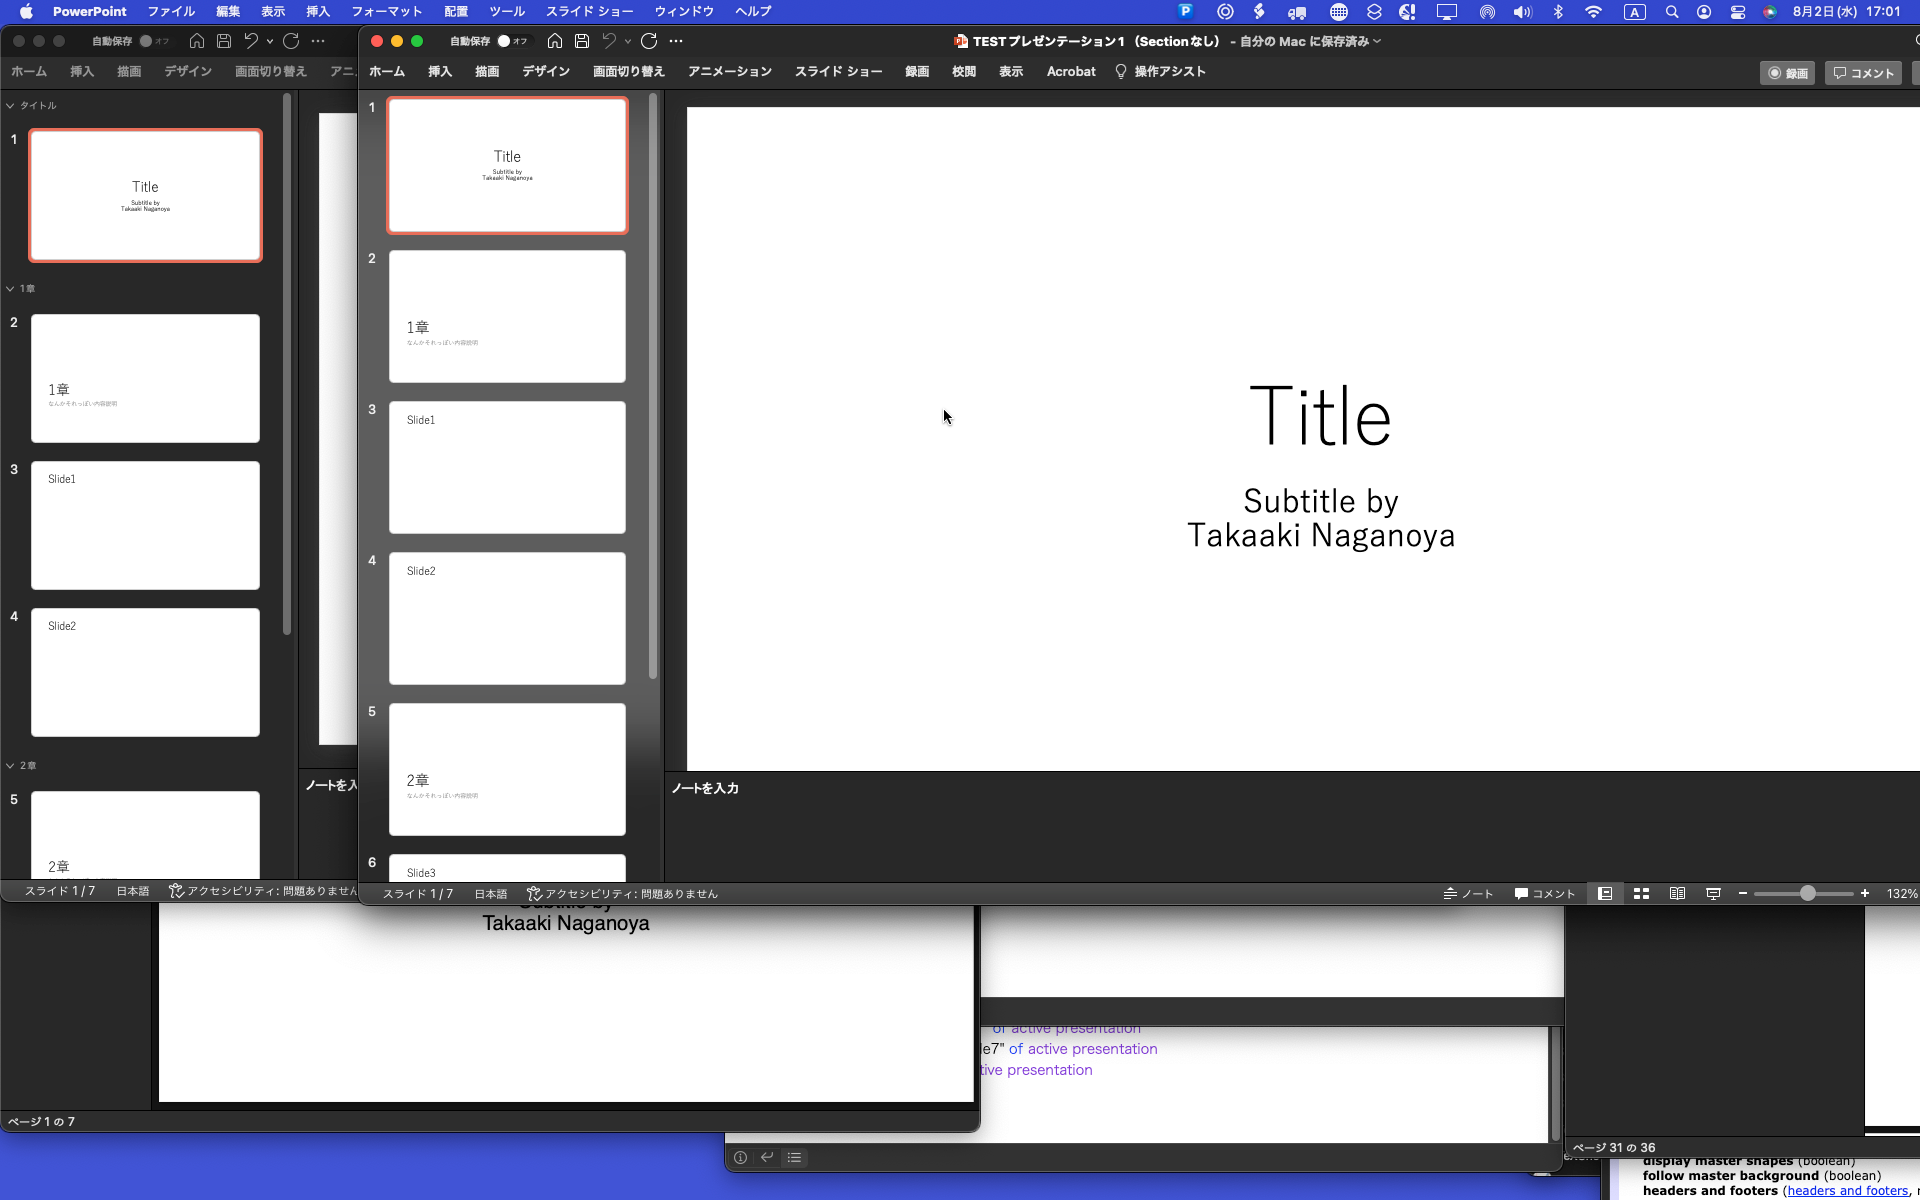
▲処理後
ただし、すべてのPages書類内のオブジェクトに対応していません。groupオブジェクトについては、メニュー操作を行えばグループ解除を行えなくもないですが、未着手です。
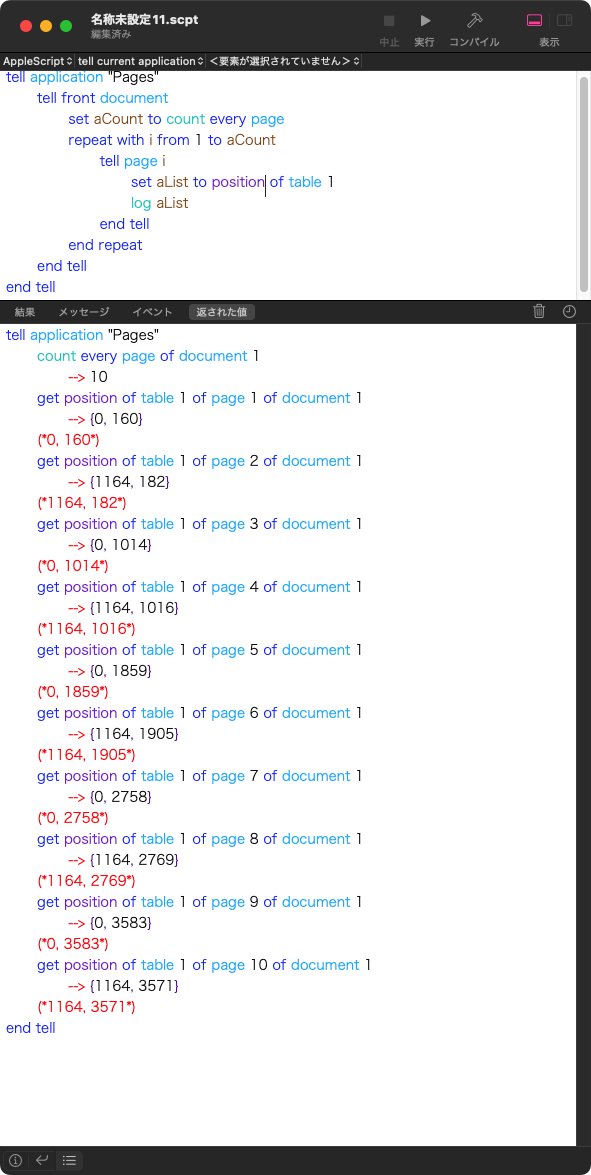
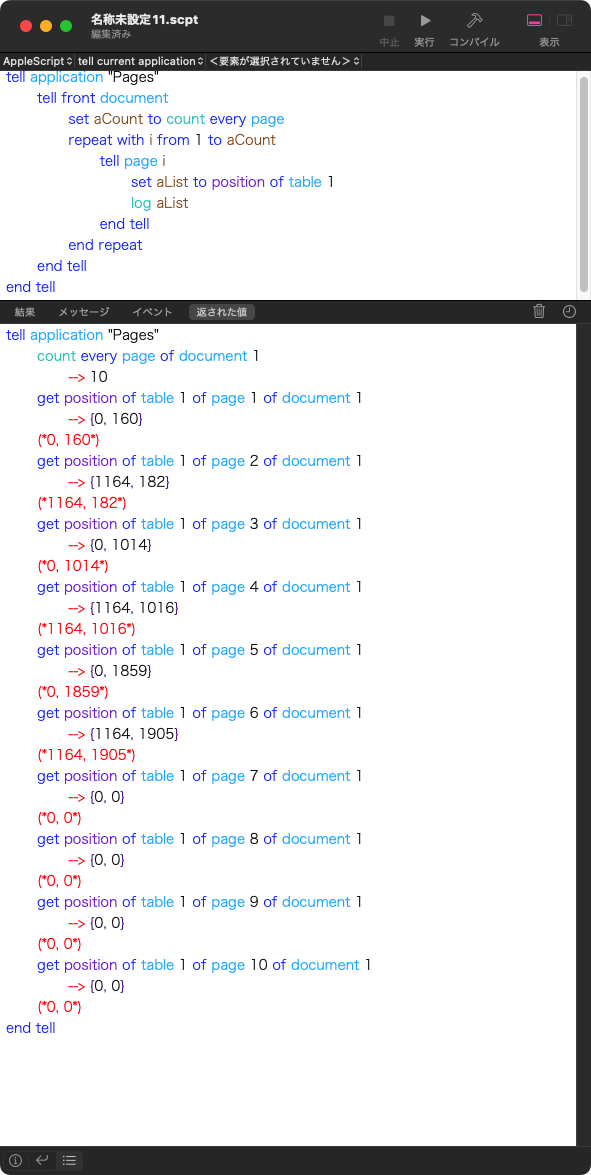
ちょっと気をつけて処理したのが「表」の内部セルに入っている値です。空欄だと値(value)がmissing valueになるので、そこは触らないほうがよかったかもしれません。
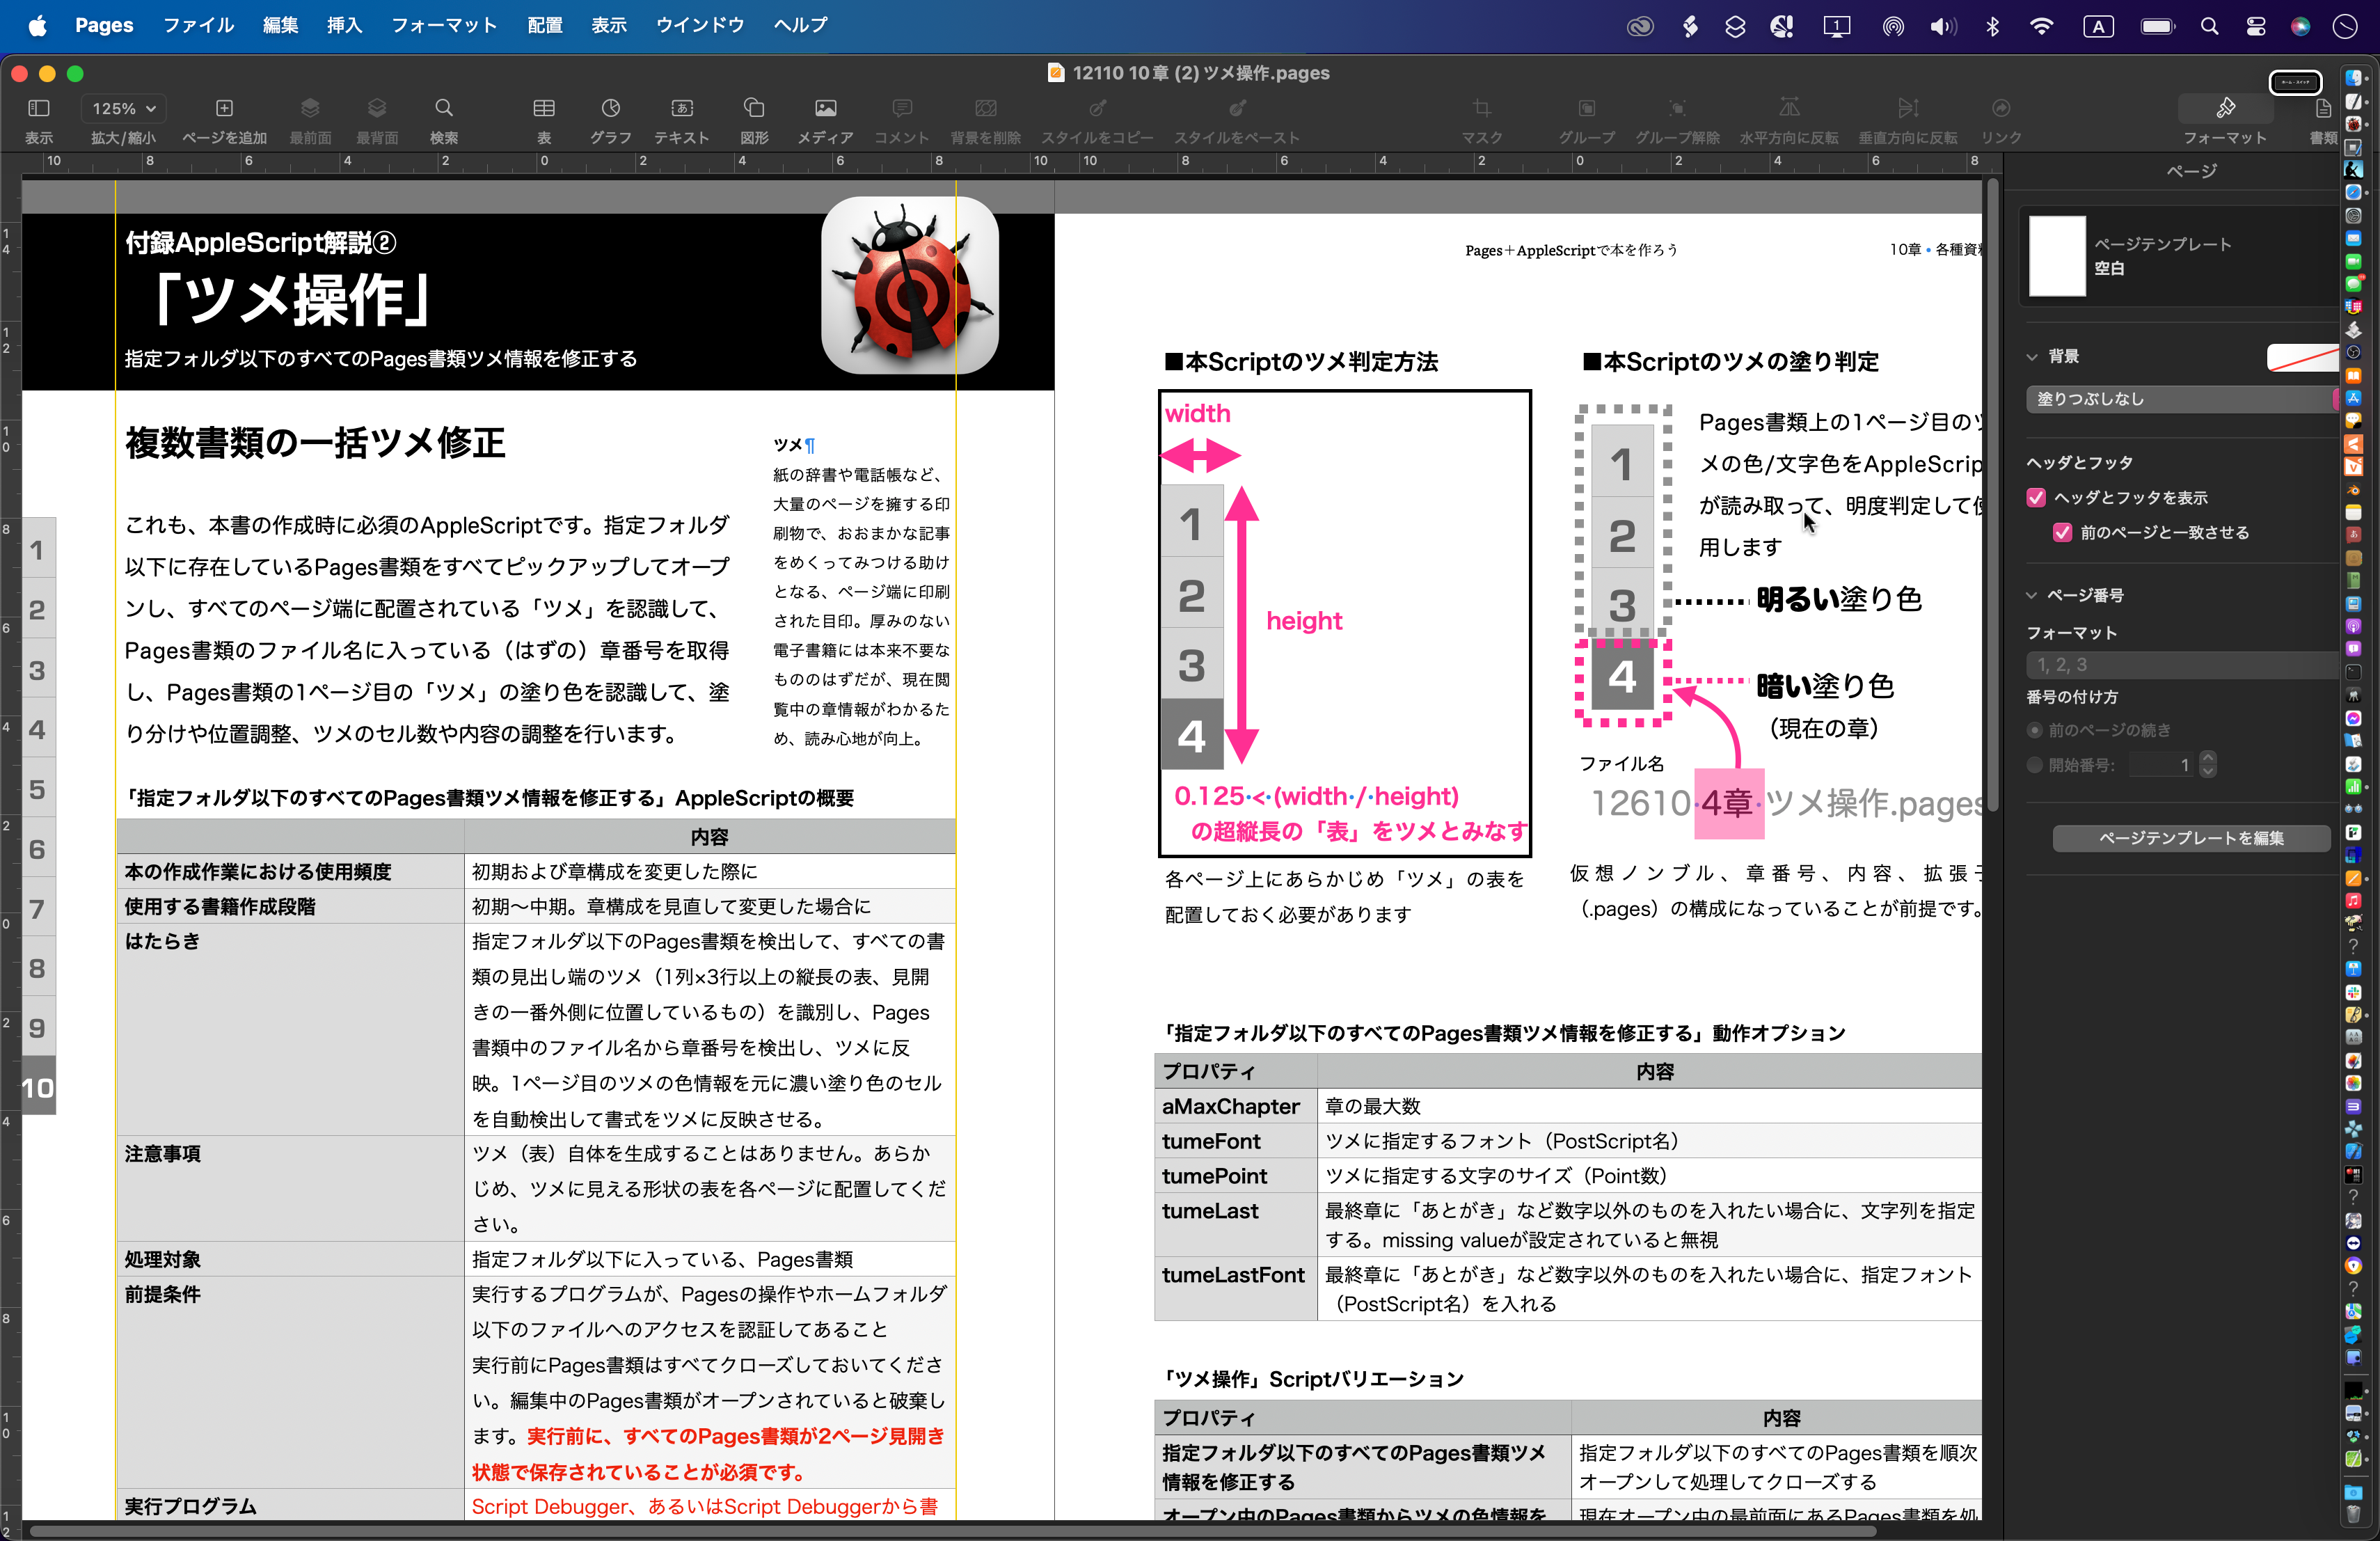
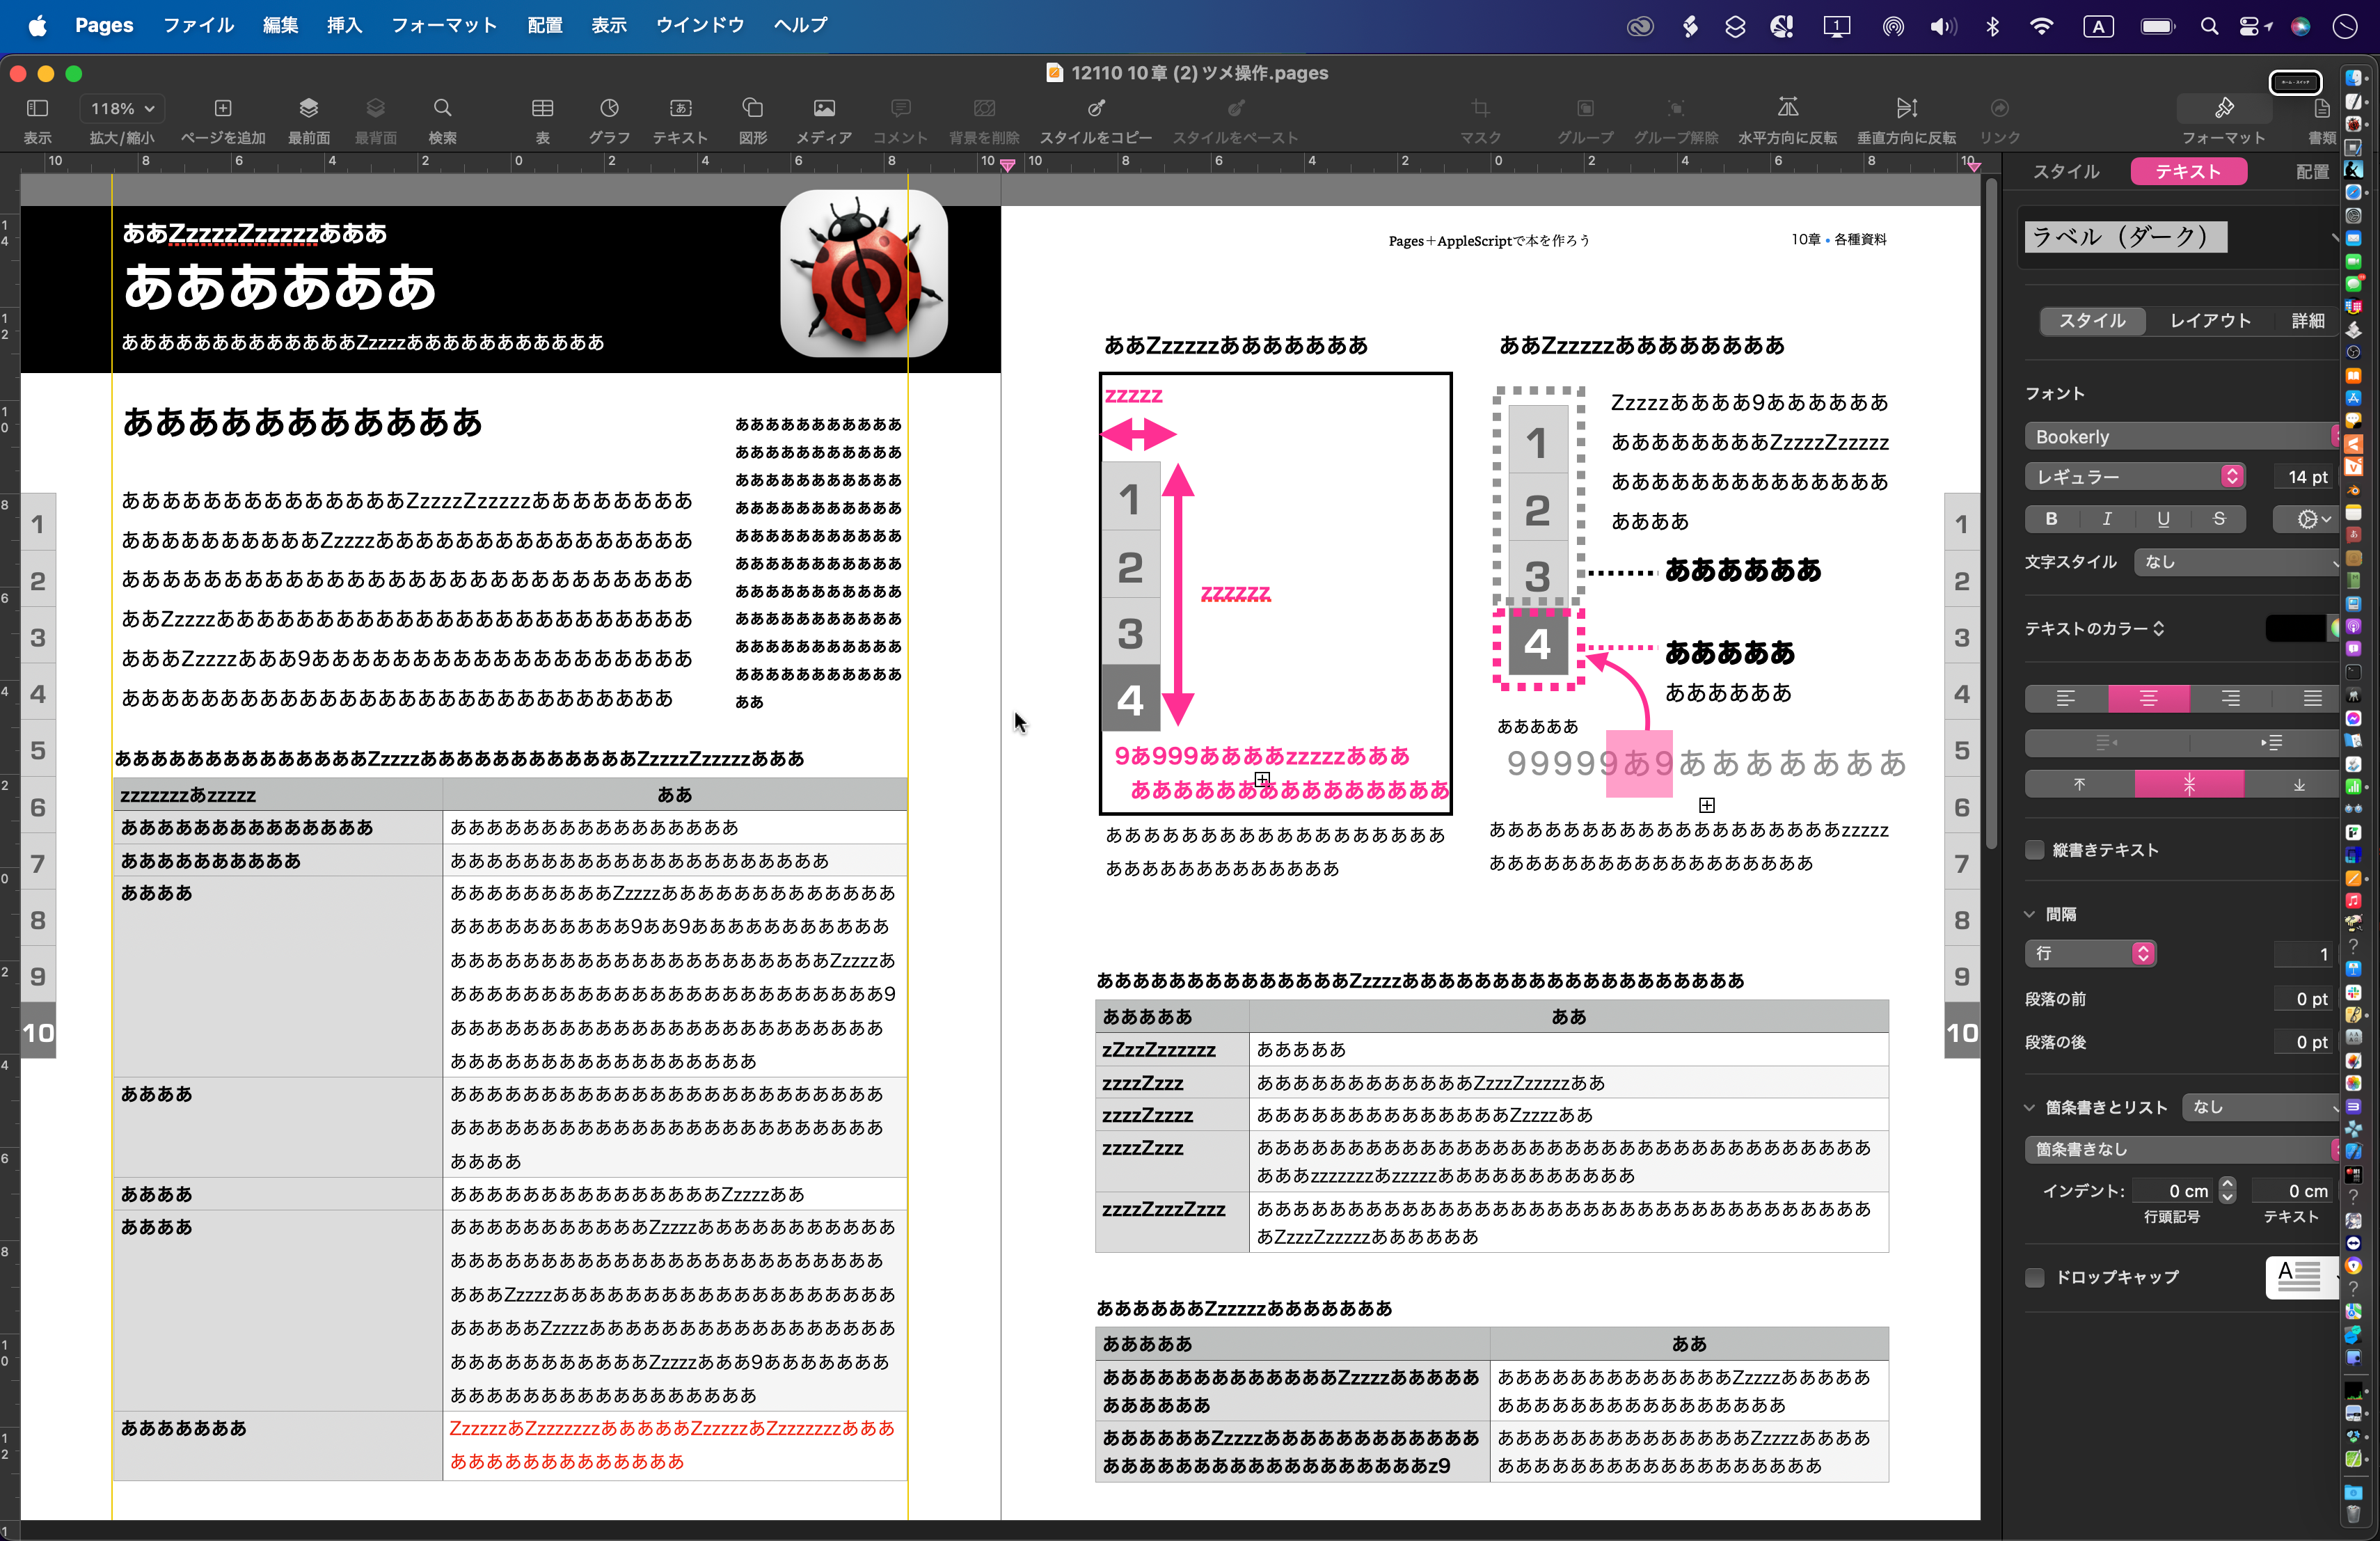
自分だけの事情になりますが、ページ左右端に「ツメ」と呼ばれるマークを「表」オブジェクトを用いて記入しているため、この「ツメ」に相当する「表」については無視するようにしています。
| AppleScript名:全ページを伏せ字に.scptd |
| — – Created by: Takaaki Naganoya – Created on: 2024/10/02 — – Copyright © 2024 Piyomaru Software, All Rights Reserved — use AppleScript version "2.4" — Yosemite (10.10) or later use framework "Foundation" use scripting additions tell application "Pages" tell front document set pCount to count every page repeat with p from 1 to pCount tell page p set aList to every iWork item repeat with i in aList set j to contents of i set tmpClass to class of j if tmpClass = shape then set aText to object text of j set mText to maskStrings(aText) of me set object text of j to mText else if tmpClass = group then else if tmpClass = table then tell j set tmpW to width set tmpH to height set tumeF to false set cColumn to count every column if tmpW = 0 or tmpH = 0 then — else set aRatio to tmpW / tmpH if aRatio < 0.125 then set tumeF to true if cColumn = 1 then set tumeF to true end if end tell –表がツメでない場合にのみ処理 if tumeF = false then tell j set aTitle to "" try set aTitle to name of it set mText to maskStrings(aTitle) of me set name of it to mText end try set cellList to every cell repeat with ii in cellList set jj to contents of ii set aValue to (value of jj) as string set mText to maskStrings(aValue) of me set value of jj to mText end repeat end tell end if end if end repeat end tell end repeat end tell end tell –指定したルールのとおりの文字種の並びになっているか? on maskStrings(aStr) set aList to characters of aStr set chkList to {} repeat with i from 1 to (length of aList) set j1 to contents of item i of aList set tmpStr to j1 set j2 to (my chkNumeric:j1) set j3 to (my chkAlphabetCapt:j1) set j4 to (my chkAlphabetSmall:j1) if j2 = true then set tmpStr to "9" else if j3 = true then set tmpStr to "Z" else if j4 = true then set tmpStr to "z" else set tmpStr to "あ" end if set the end of chkList to tmpStr end repeat return chkList as string end maskStrings — アルファベット大文字か on chkAlphabetCapt:checkString set aStr to current application’s NSString’s stringWithString:checkString set allCharSet to current application’s NSMutableCharacterSet’s alloc()’s init() allCharSet’s addCharactersInRange:(current application’s NSMakeRange(ASCII number of "A", 26)) set aBool to my chkCompareString:aStr baseString:allCharSet return aBool as boolean end chkAlphabetCapt: — アルファベット小文字か on chkAlphabetSmall:checkString set aStr to current application’s NSString’s stringWithString:checkString set allCharSet to current application’s NSMutableCharacterSet’s alloc()’s init() allCharSet’s addCharactersInRange:(current application’s NSMakeRange(ASCII number of "a", 26)) set aBool to my chkCompareString:aStr baseString:allCharSet return aBool as boolean end chkAlphabetSmall: –数字のみか on chkNumeric:checkString set digitCharSet to current application’s NSCharacterSet’s characterSetWithCharactersInString:"0123456789" set ret to my chkCompareString:checkString baseString:digitCharSet return ret as boolean end chkNumeric: –アルファベットと数字のみか on chkAlphaNumeric:checkString set alnumCharSet to current application’s NSCharacterSet’s alphanumericCharacterSet() set ret to my chkCompareString:checkString baseString:alnumCharSet return ret as boolean end chkAlphaNumeric: –アルファベットと数字と記号のみか on chkAlphaNumericSymbol:checkString set muCharSet to current application’s NSCharacterSet’s alphanumericCharacterSet()’s mutableCopy() muCharSet’s addCharactersInString:"$\"!~&=#[]._-+`|{}?%^*/’@-/:;()," set ret to my chkCompareString:checkString baseString:muCharSet return ret as boolean end chkAlphaNumericSymbol: –記号のみか on chkSymbol:checkString set muCharSet to current application’s NSCharacterSet’s alloc()’s init() muCharSet’s addCharactersInString:"$\"!~&=#[]._-+`|{}?%^*/’@-/:;()," set ret to my chkCompareString:checkString baseString:muCharSet return ret as boolean end chkSymbol: –全角文字が存在するか on chkMultiByteChar:checkString set aStr to current application’s NSString’s stringWithString:checkString set aRes to aStr’s canBeConvertedToEncoding:(current application’s NSASCIIStringEncoding) return (aRes as boolean) end chkMultiByteChar: on chkCompareString:checkString baseString:baseString set aScanner to current application’s NSScanner’s localizedScannerWithString:checkString aScanner’s setCharactersToBeSkipped:(missing value) aScanner’s scanCharactersFromSet:baseString intoString:(missing value) return (aScanner’s isAtEnd()) as boolean end chkCompareString:baseString: on chkCompareString:checkString characterSet:baseSet set anNSString to current application’s NSString’s stringWithString:checkString set theRange to anNSString’s rangeOfCharacterFromSet:baseSet return (|length| of theRange = 0) as boolean end chkCompareString:characterSet: |