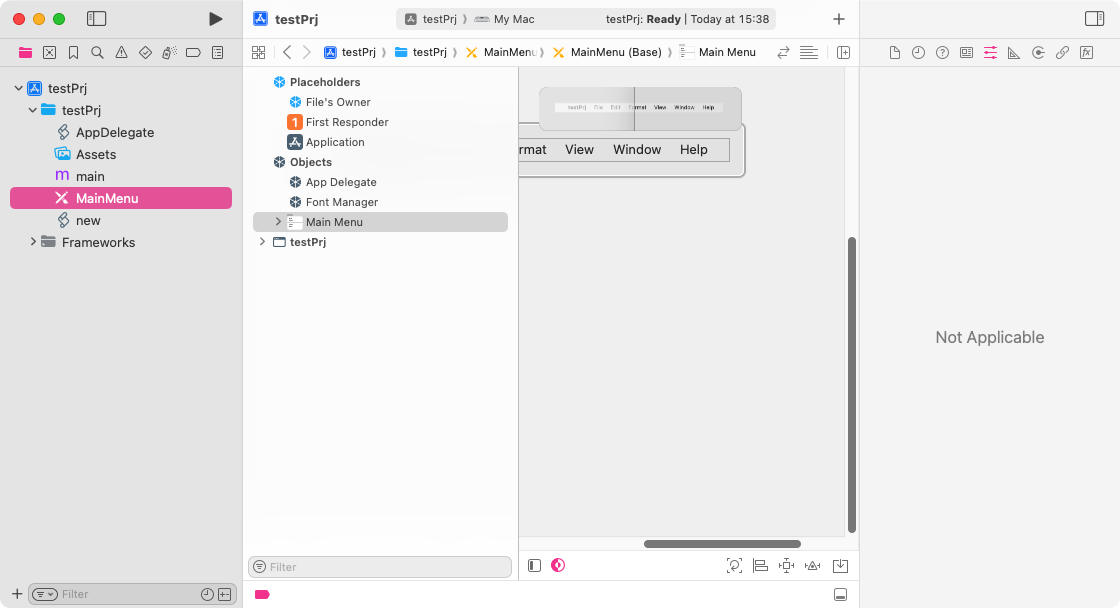
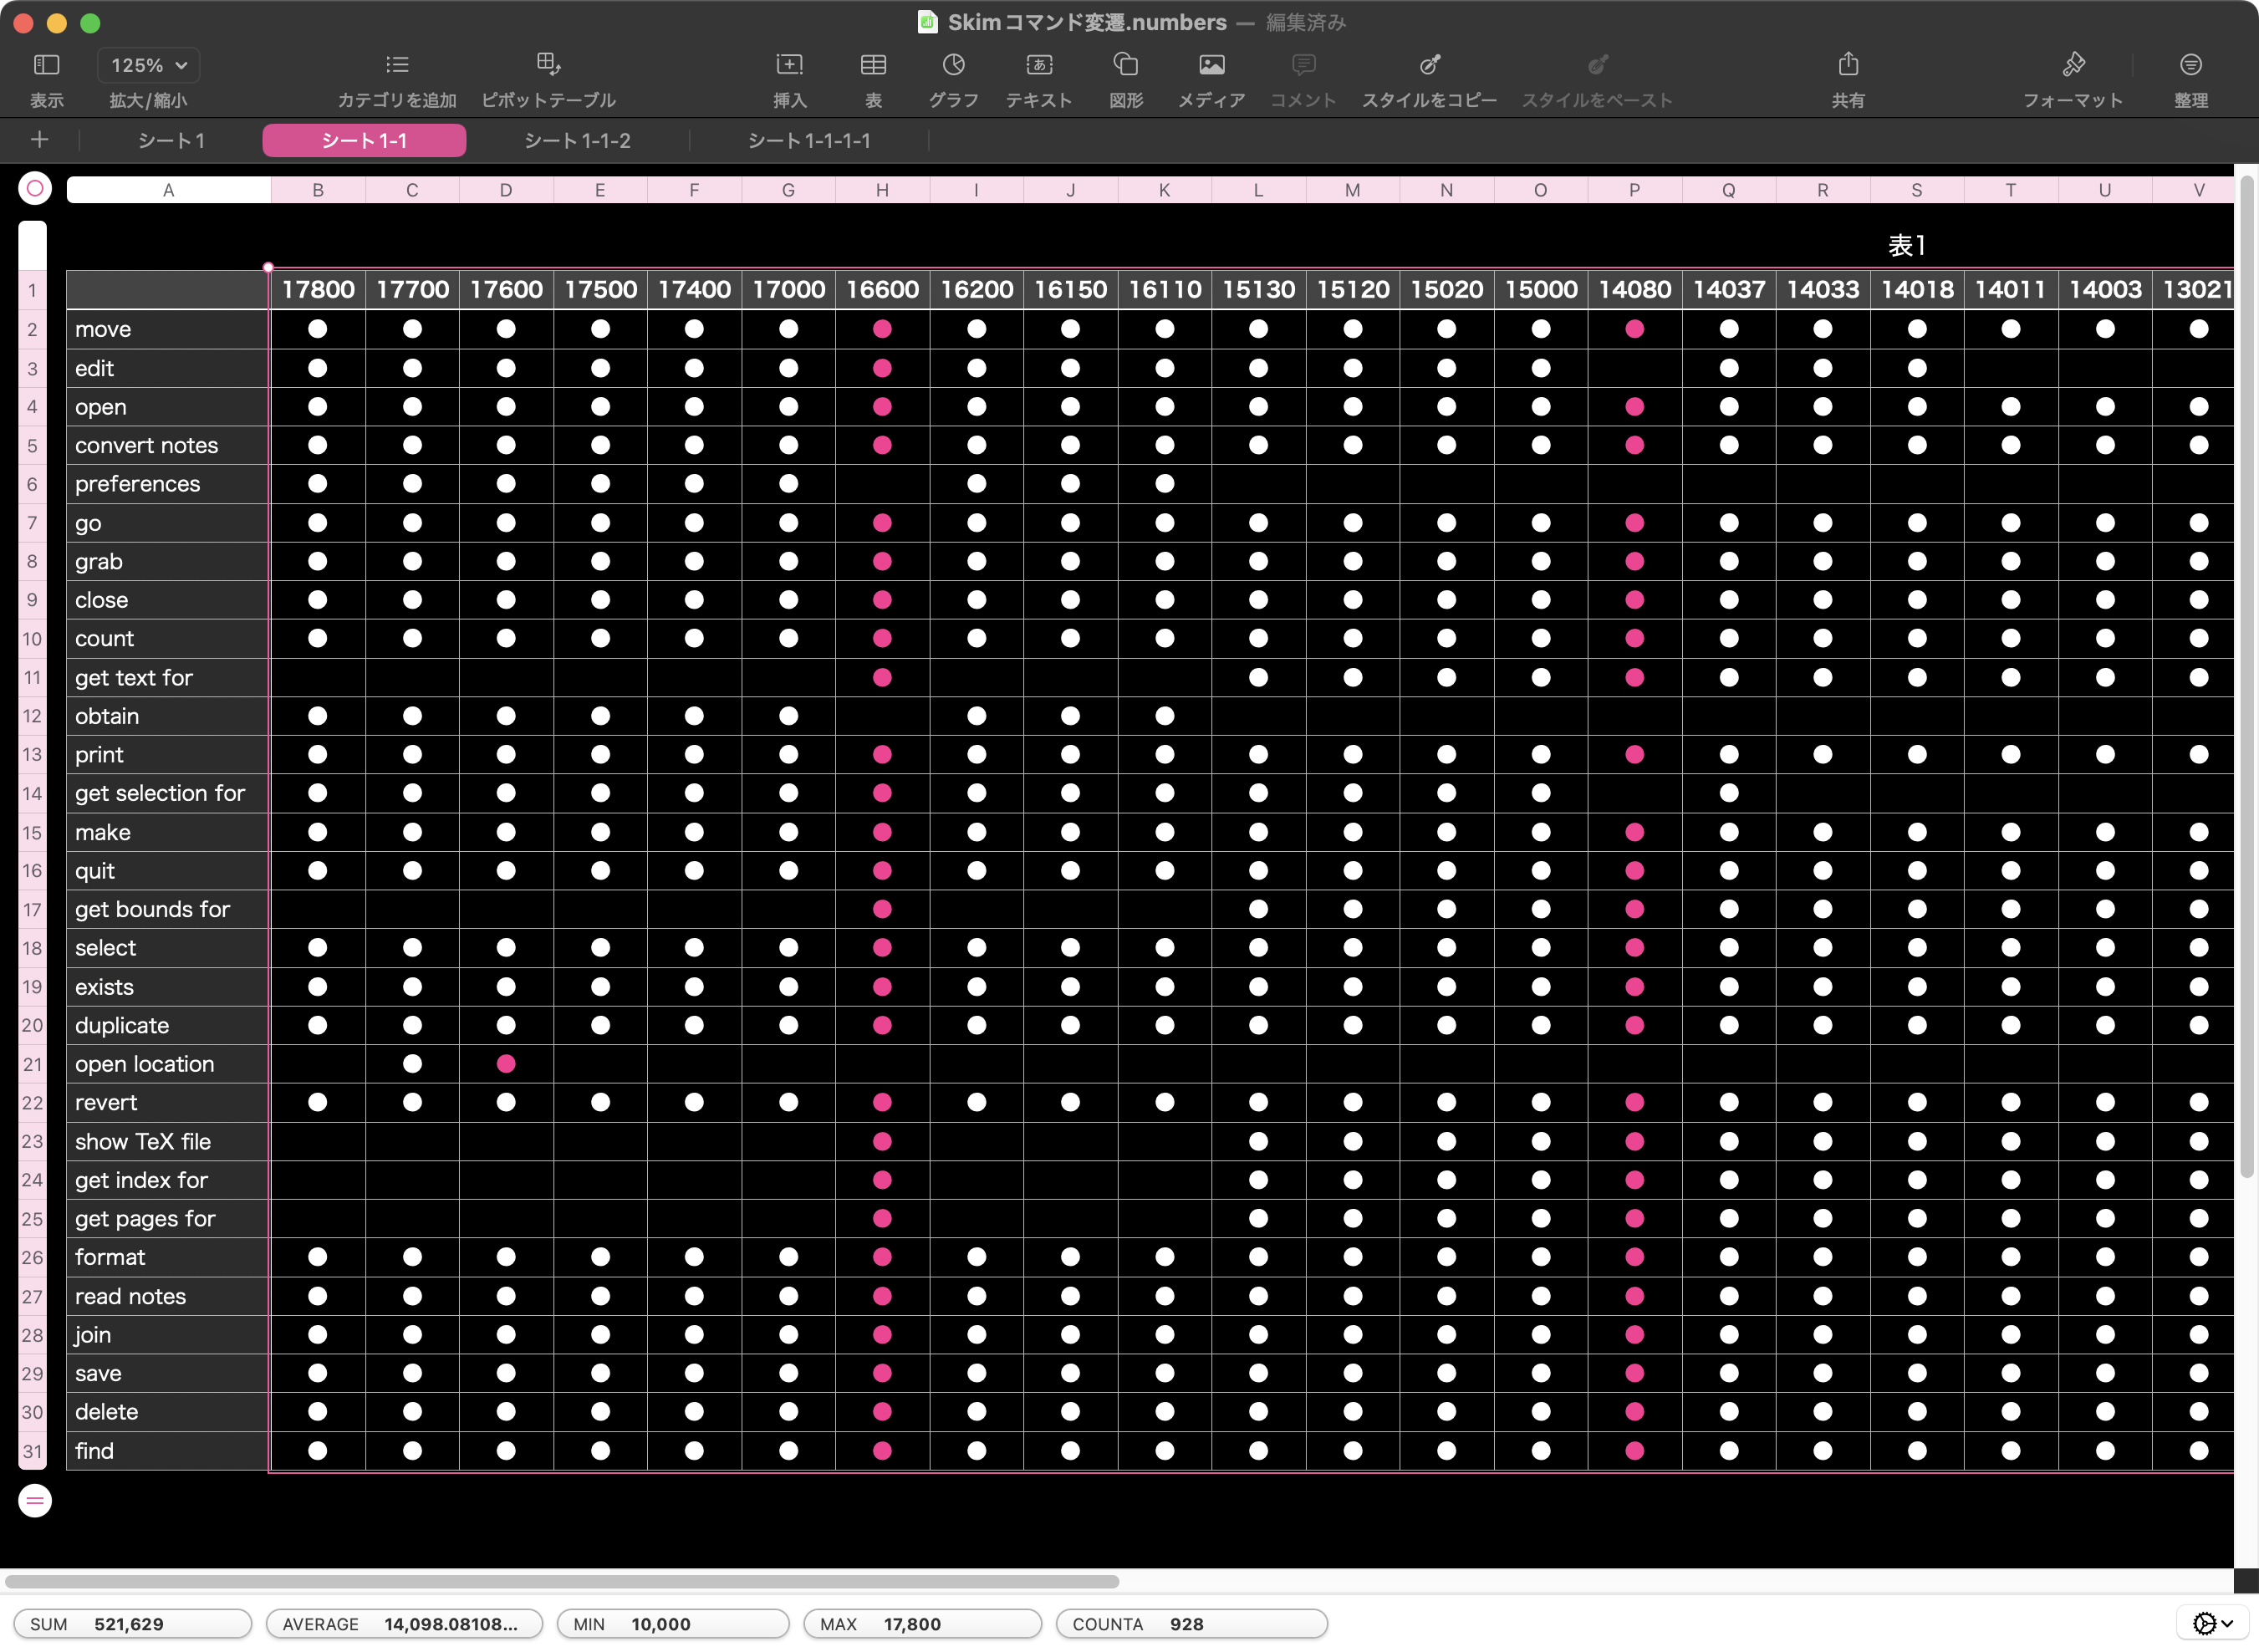
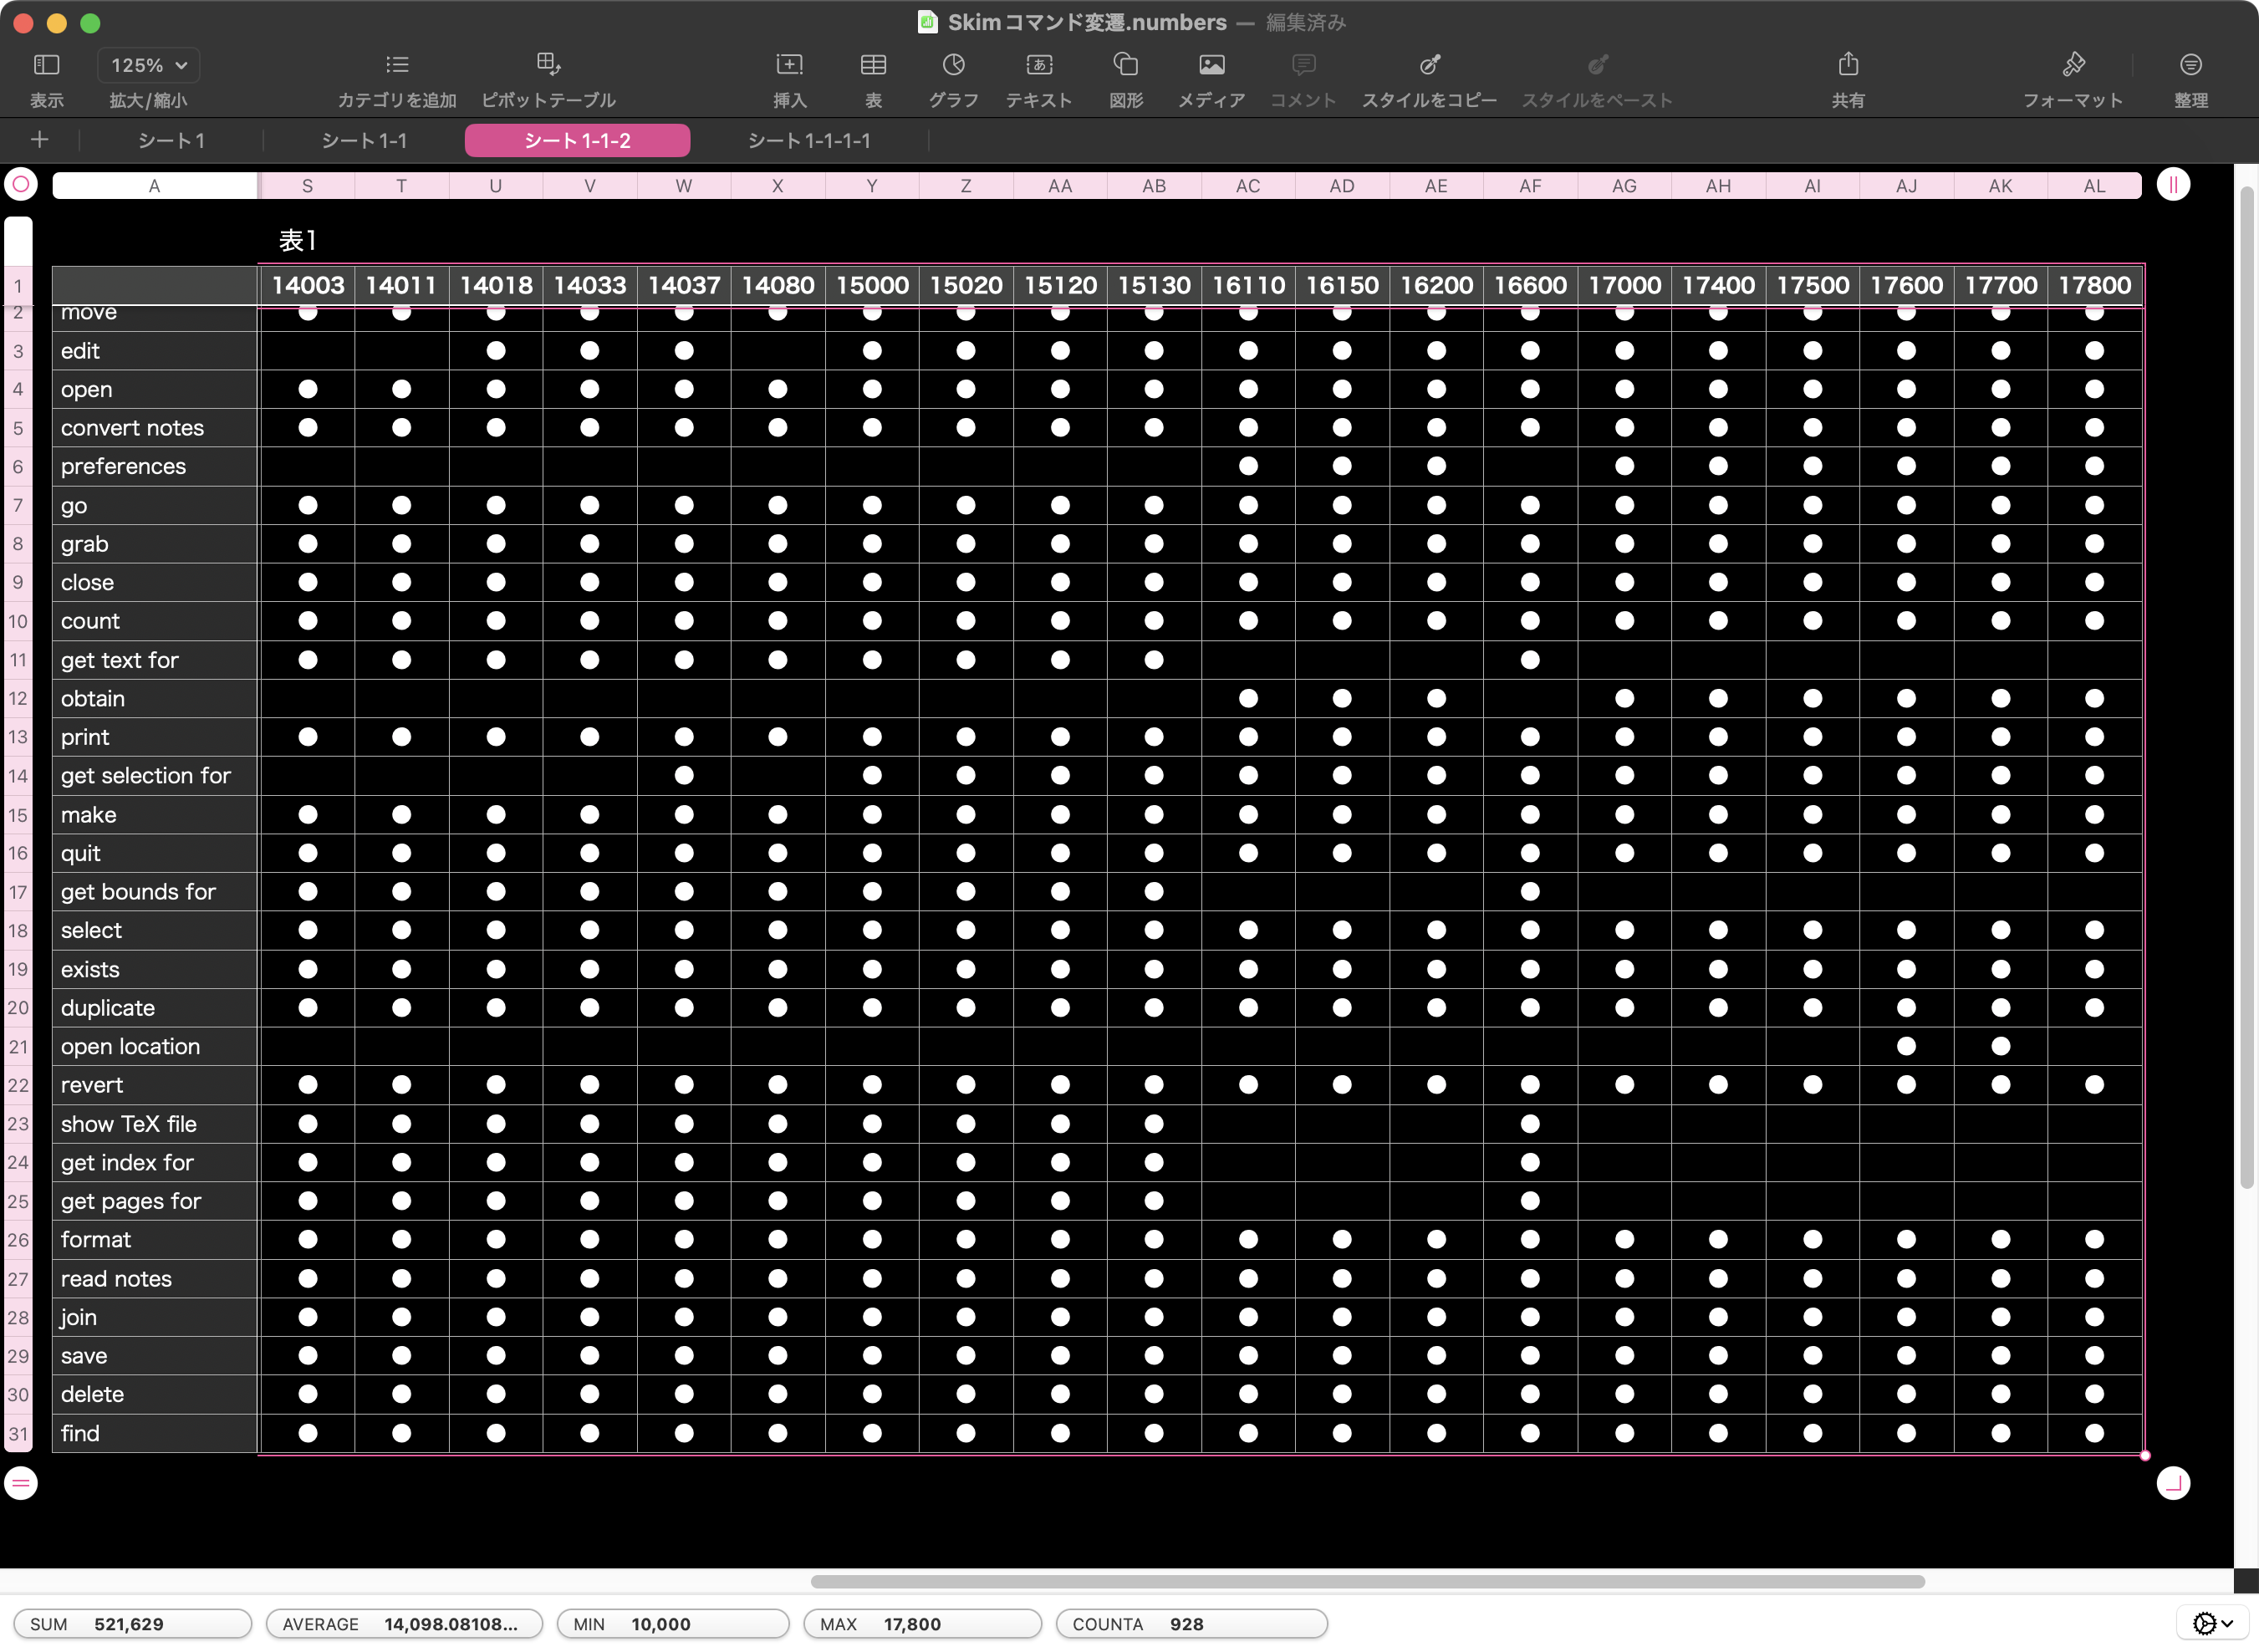
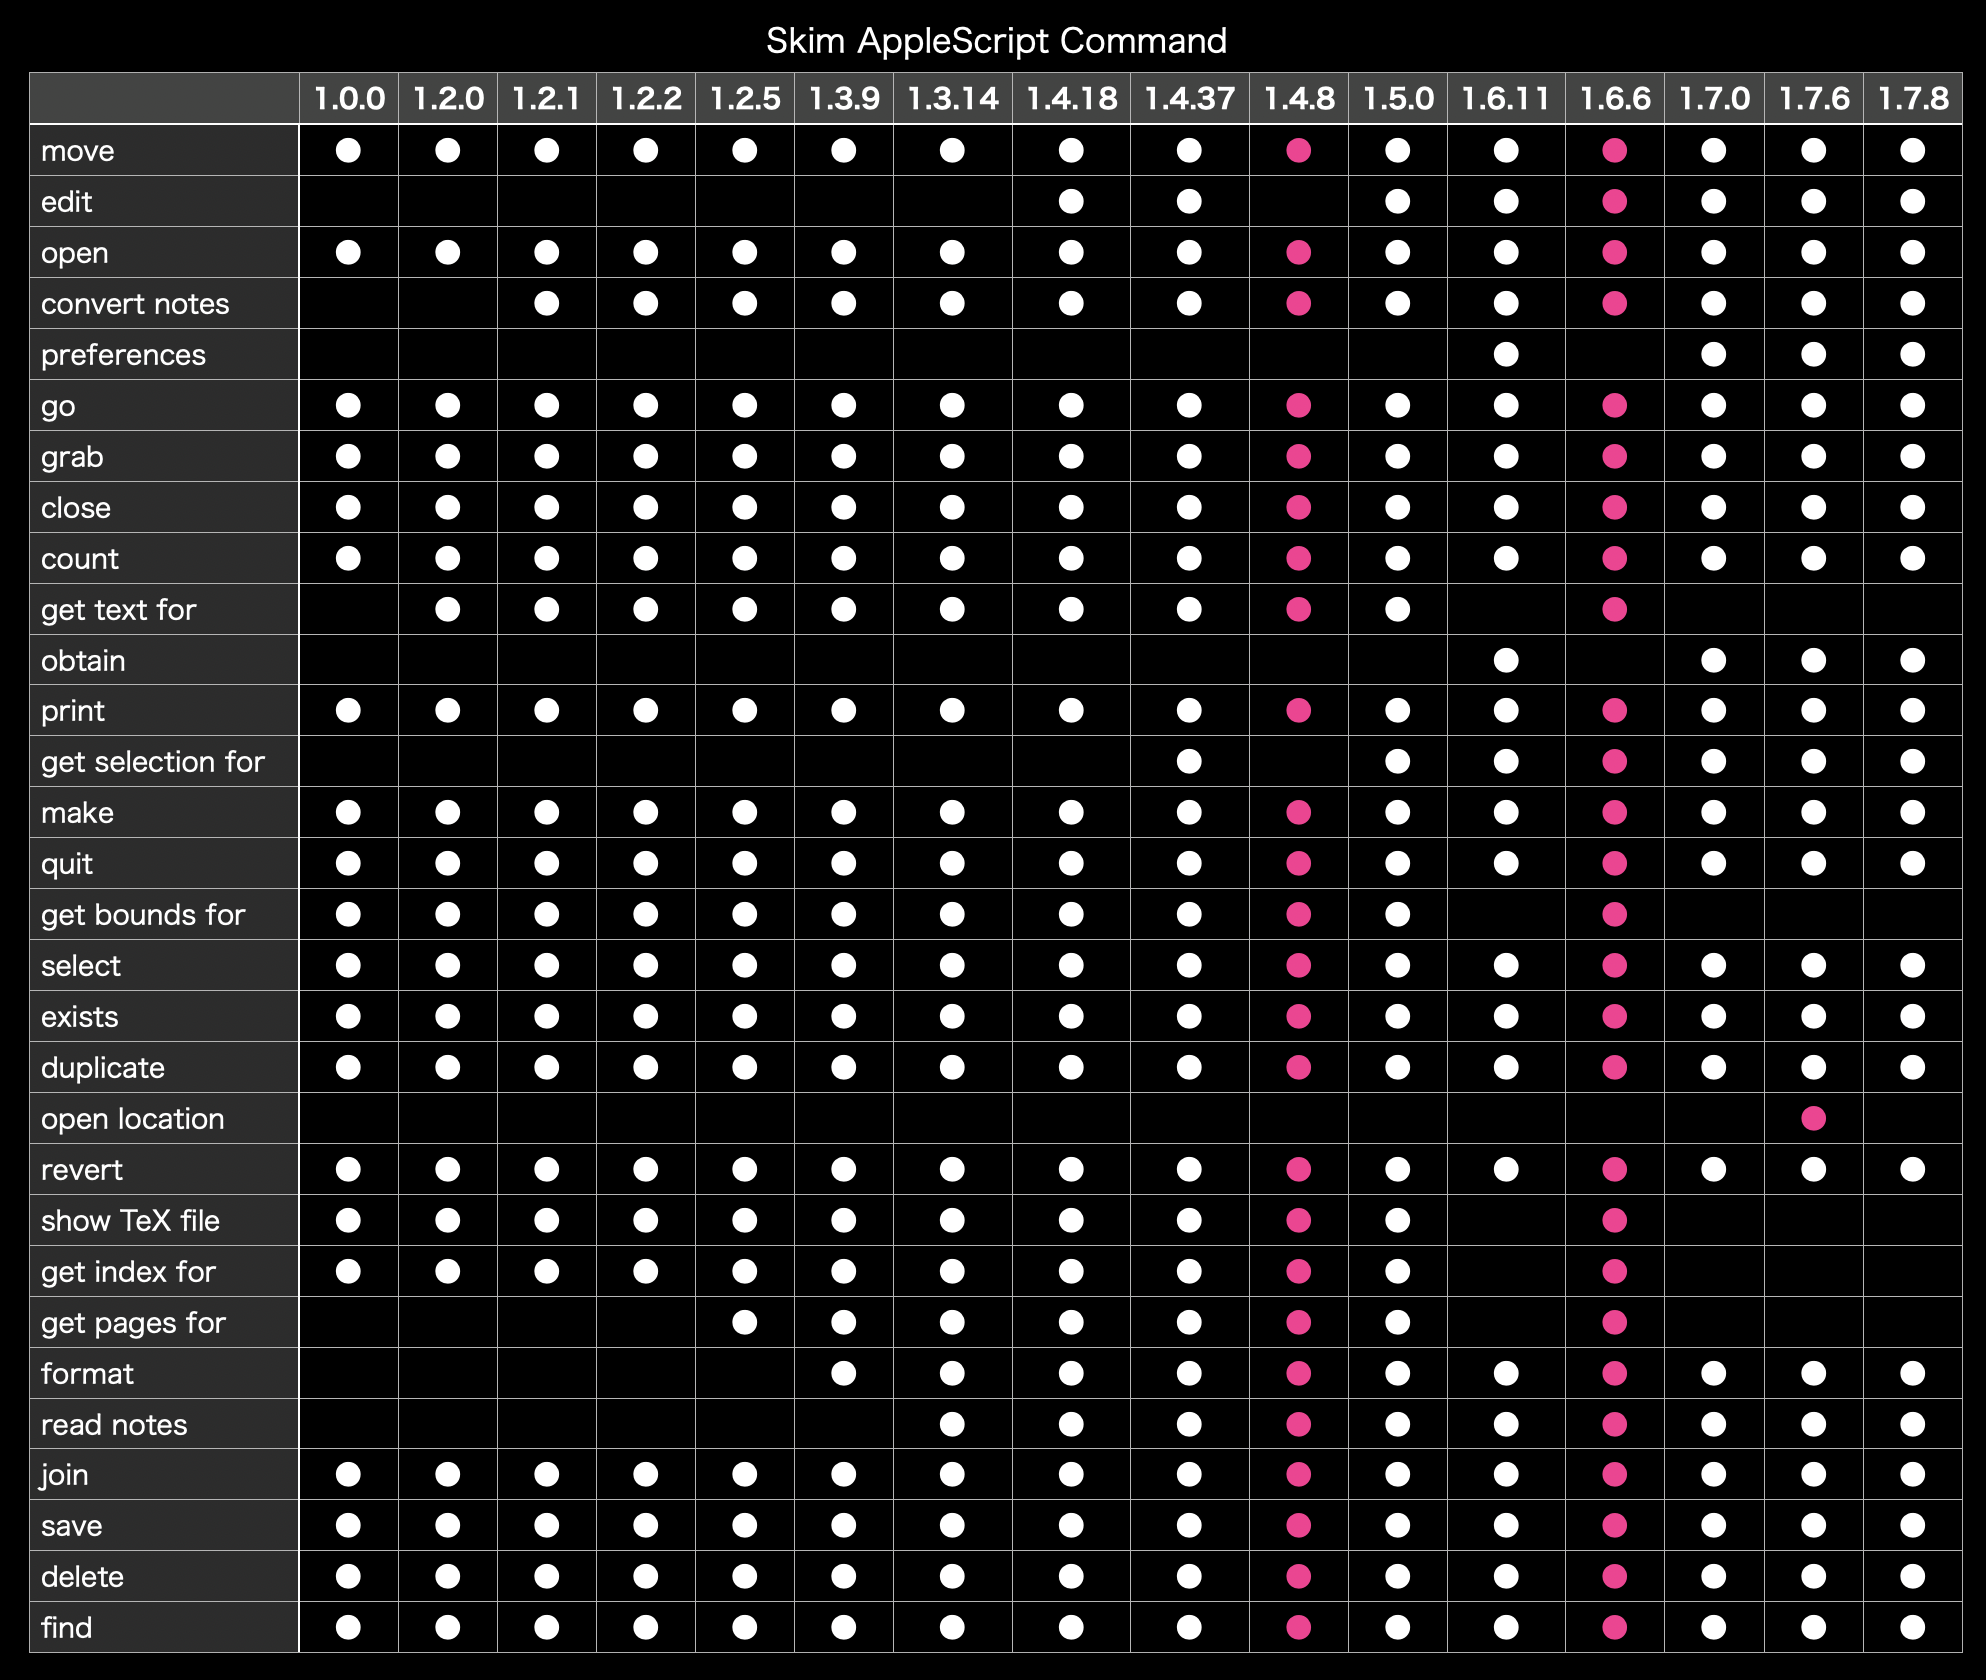
XcodeでオープンしているWorkspace Document(.xcodeproj)のパスを取得してクローズし、再度オープンするAppleScriptです。macOS 15.3上のXcode 16.2で動作をテストしました。
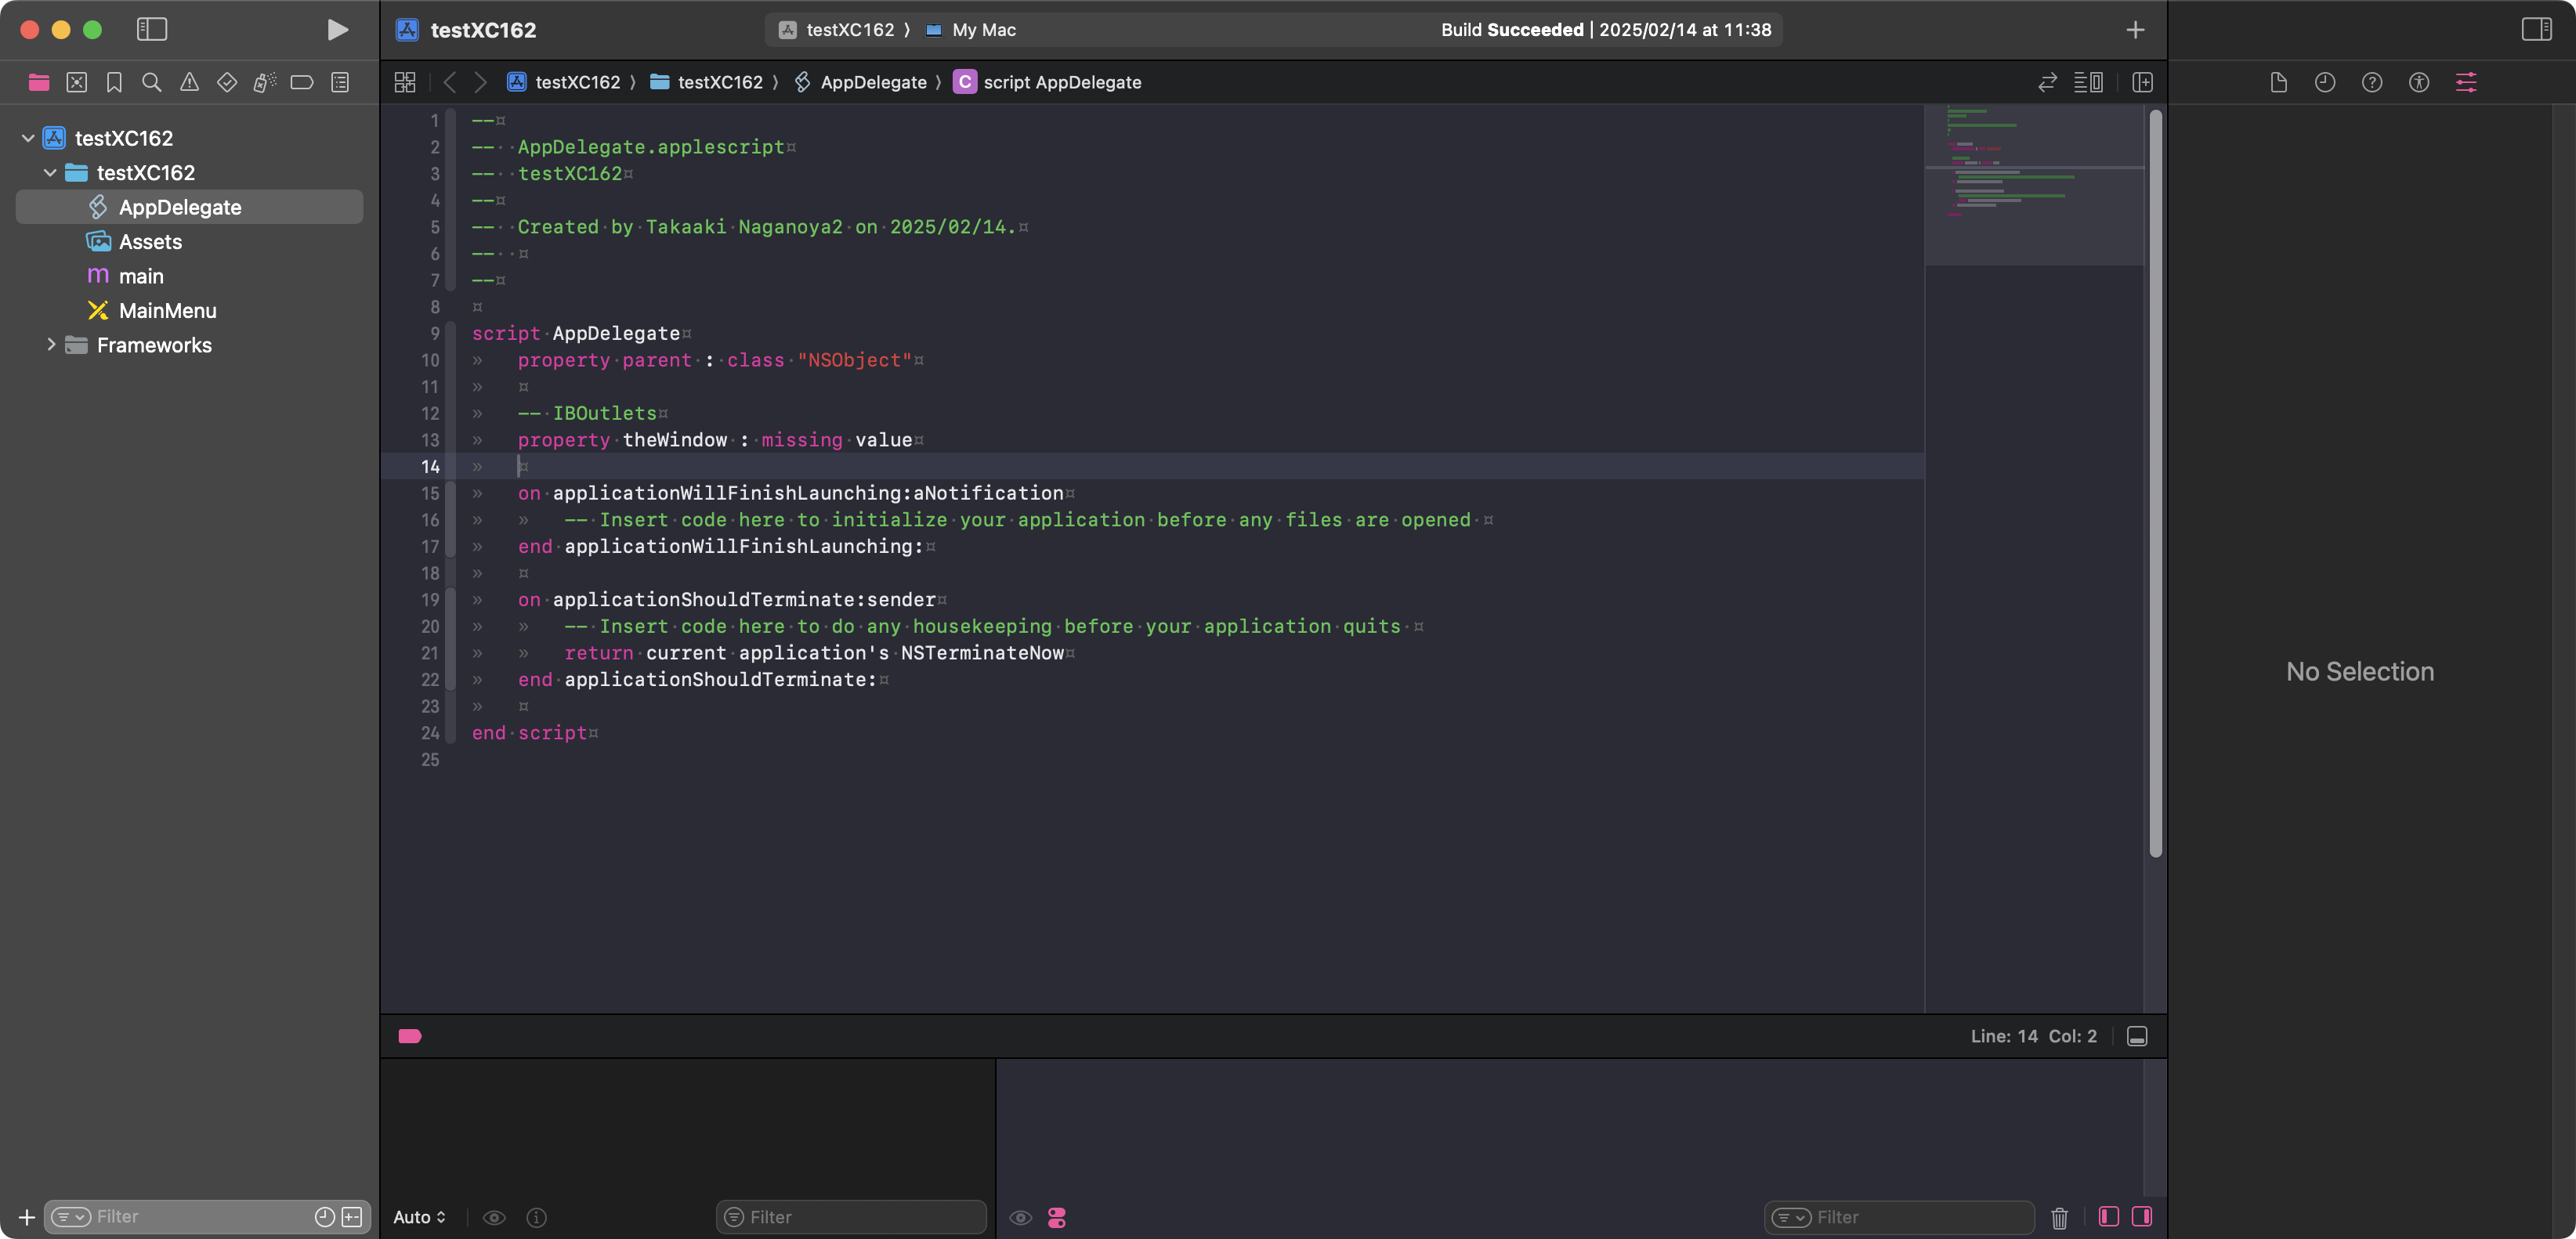
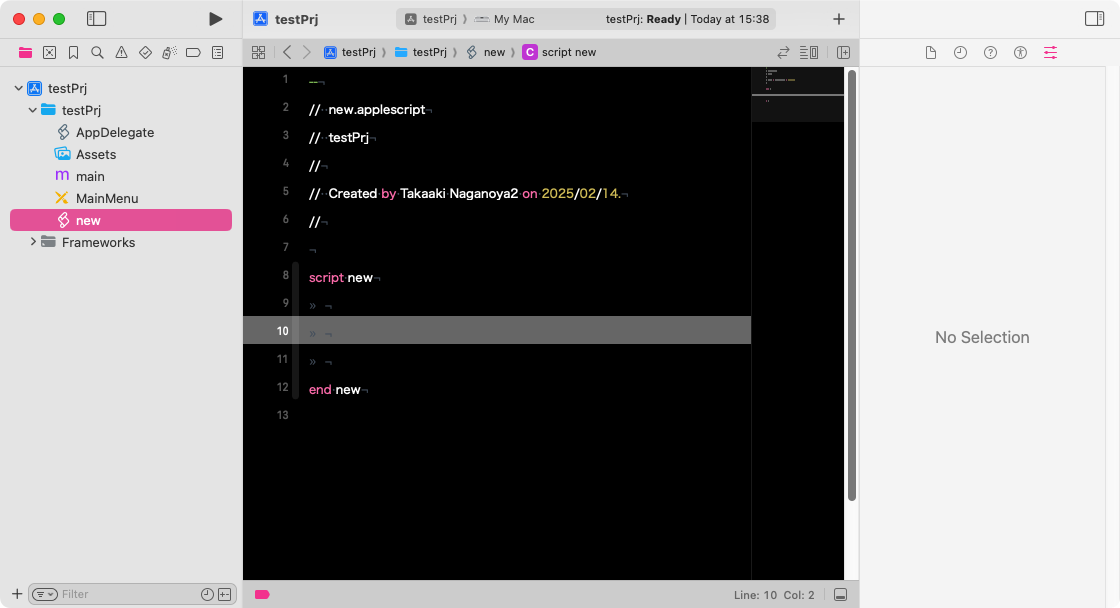
Xcodeでオープン中の.applescriptファイルの構文確認を行うために、いろいろ試行錯誤してみたものの、Xcodeでオープン中にはファイルへの書き込み権限を取得できない雰囲気が濃厚。Xcodeのエディタで表示中のコンテンツ(.applescript)の本文に文字列を突っ込んでみても、Xcodeに蹴られます。
# AppleScriptからの制御が封じられているので、まっとうな手口が使えません
これに対策するために、Xcode Projectをいったんクローズして、構文確認を行うとよさそうだったので、試作品を作ってみたものです。
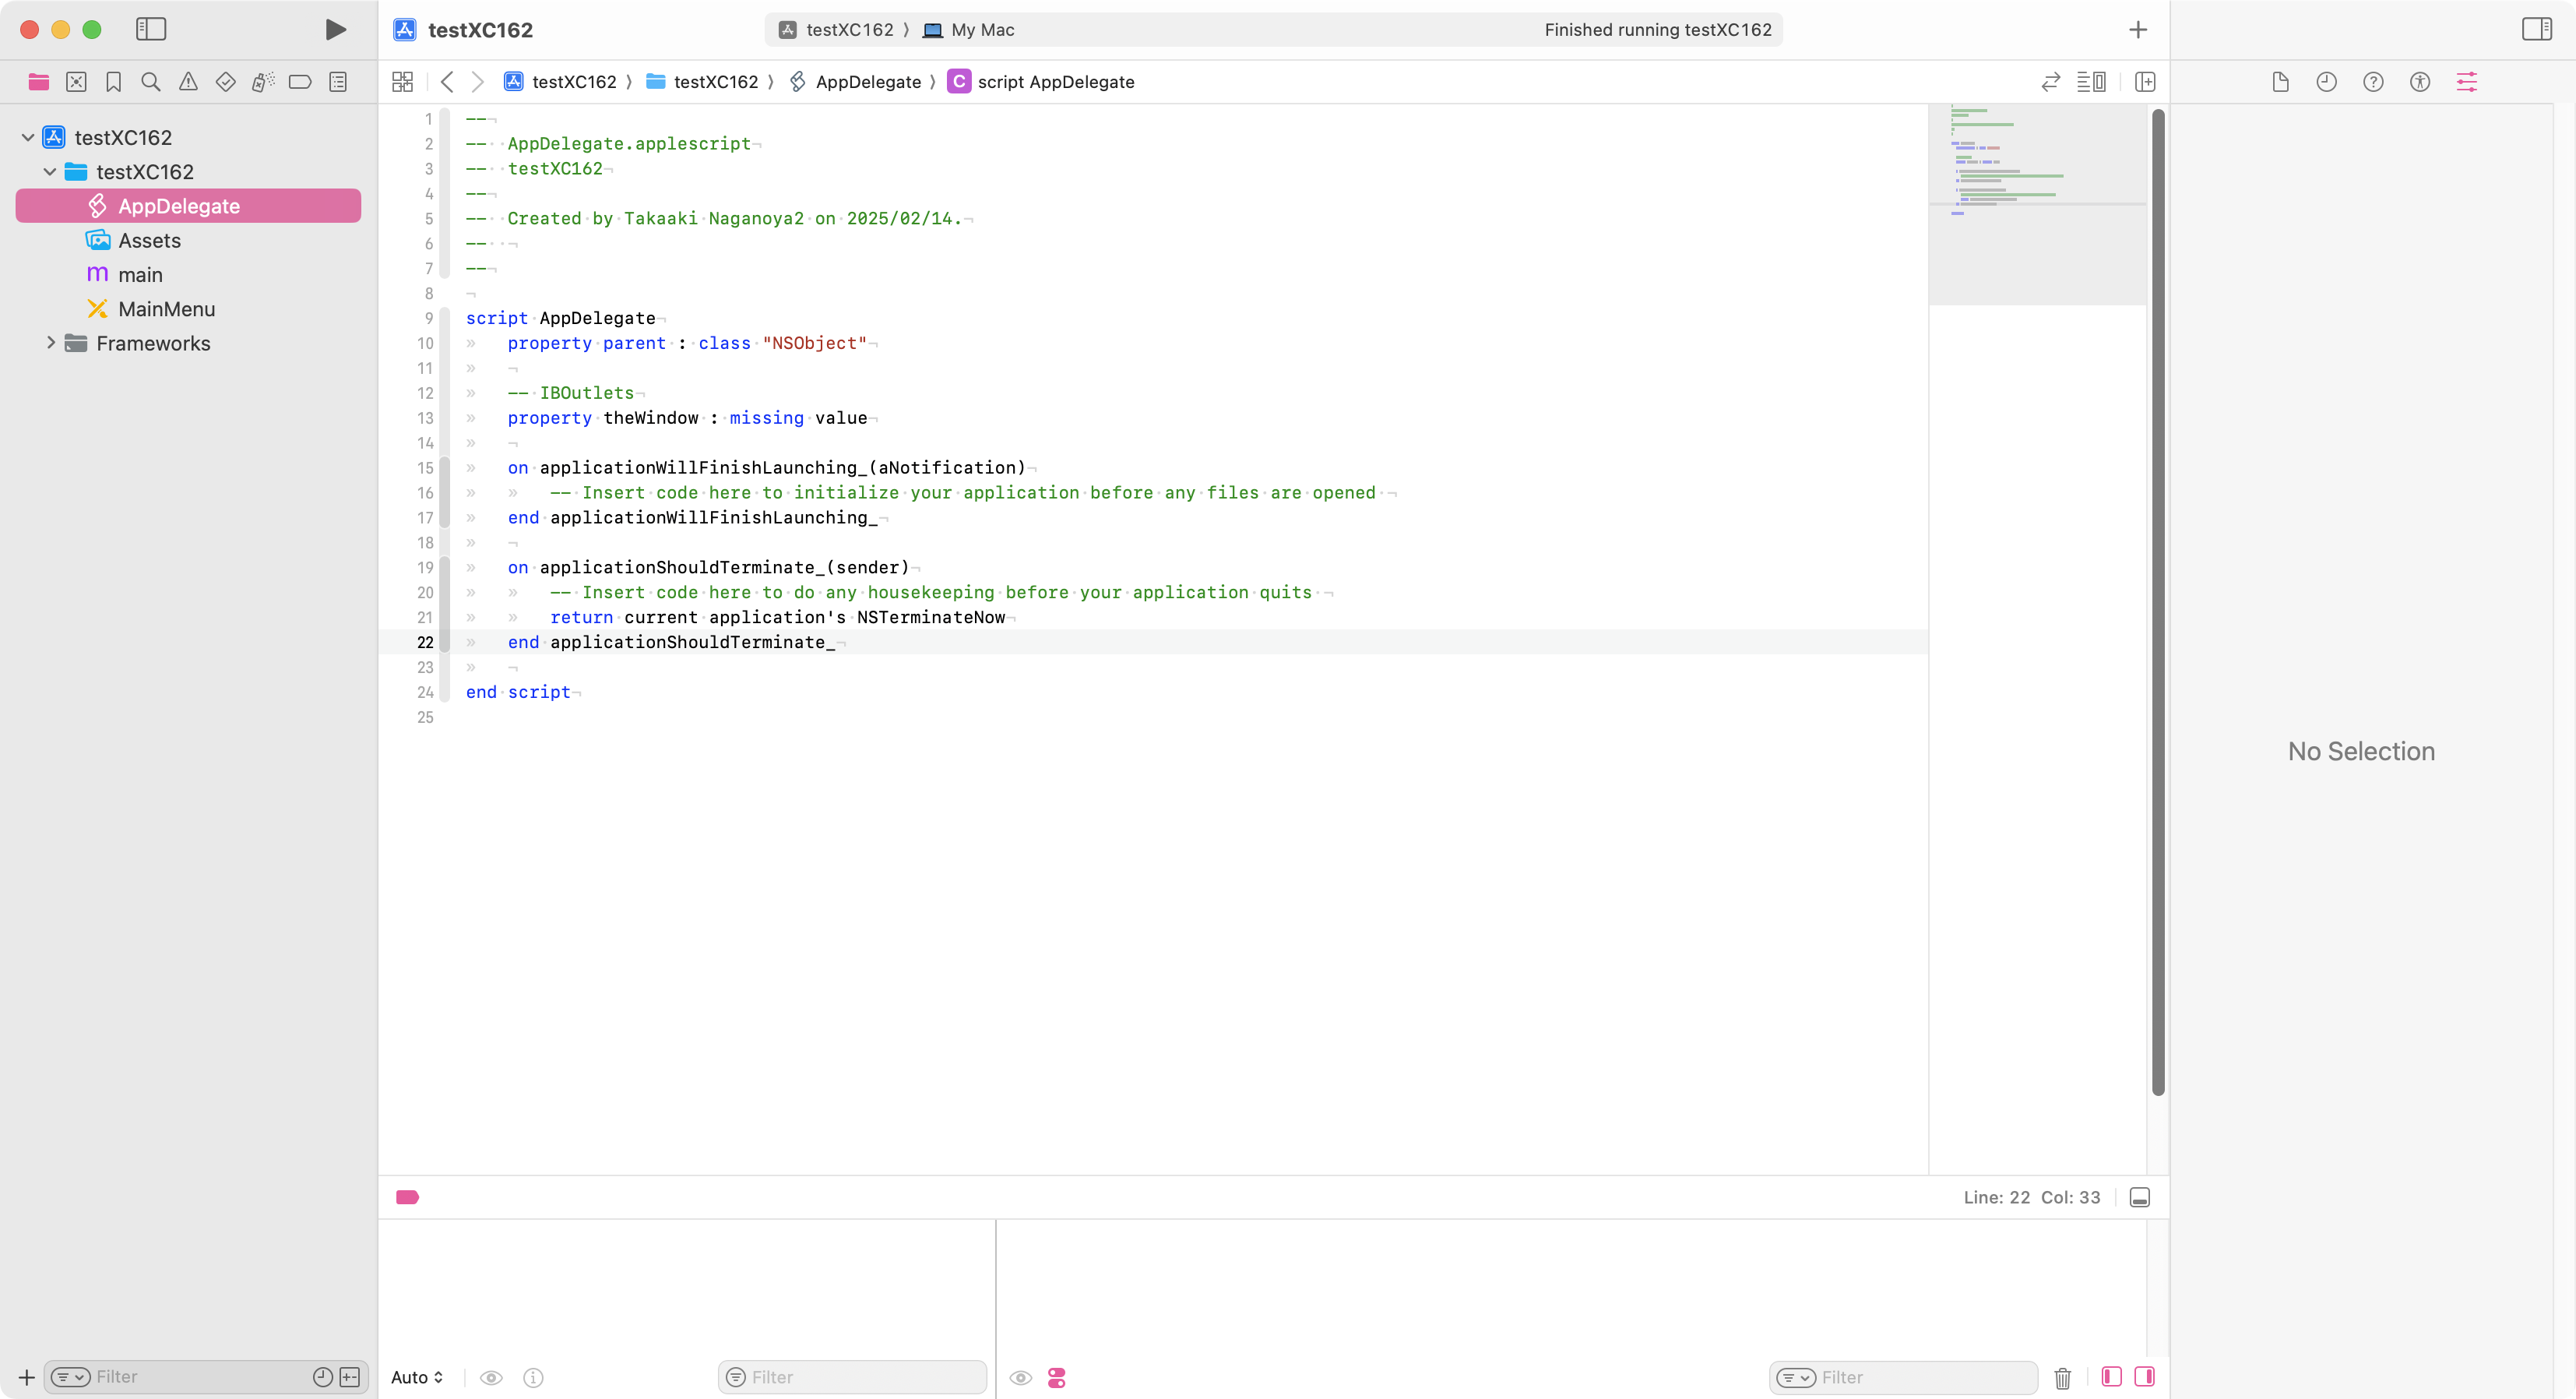
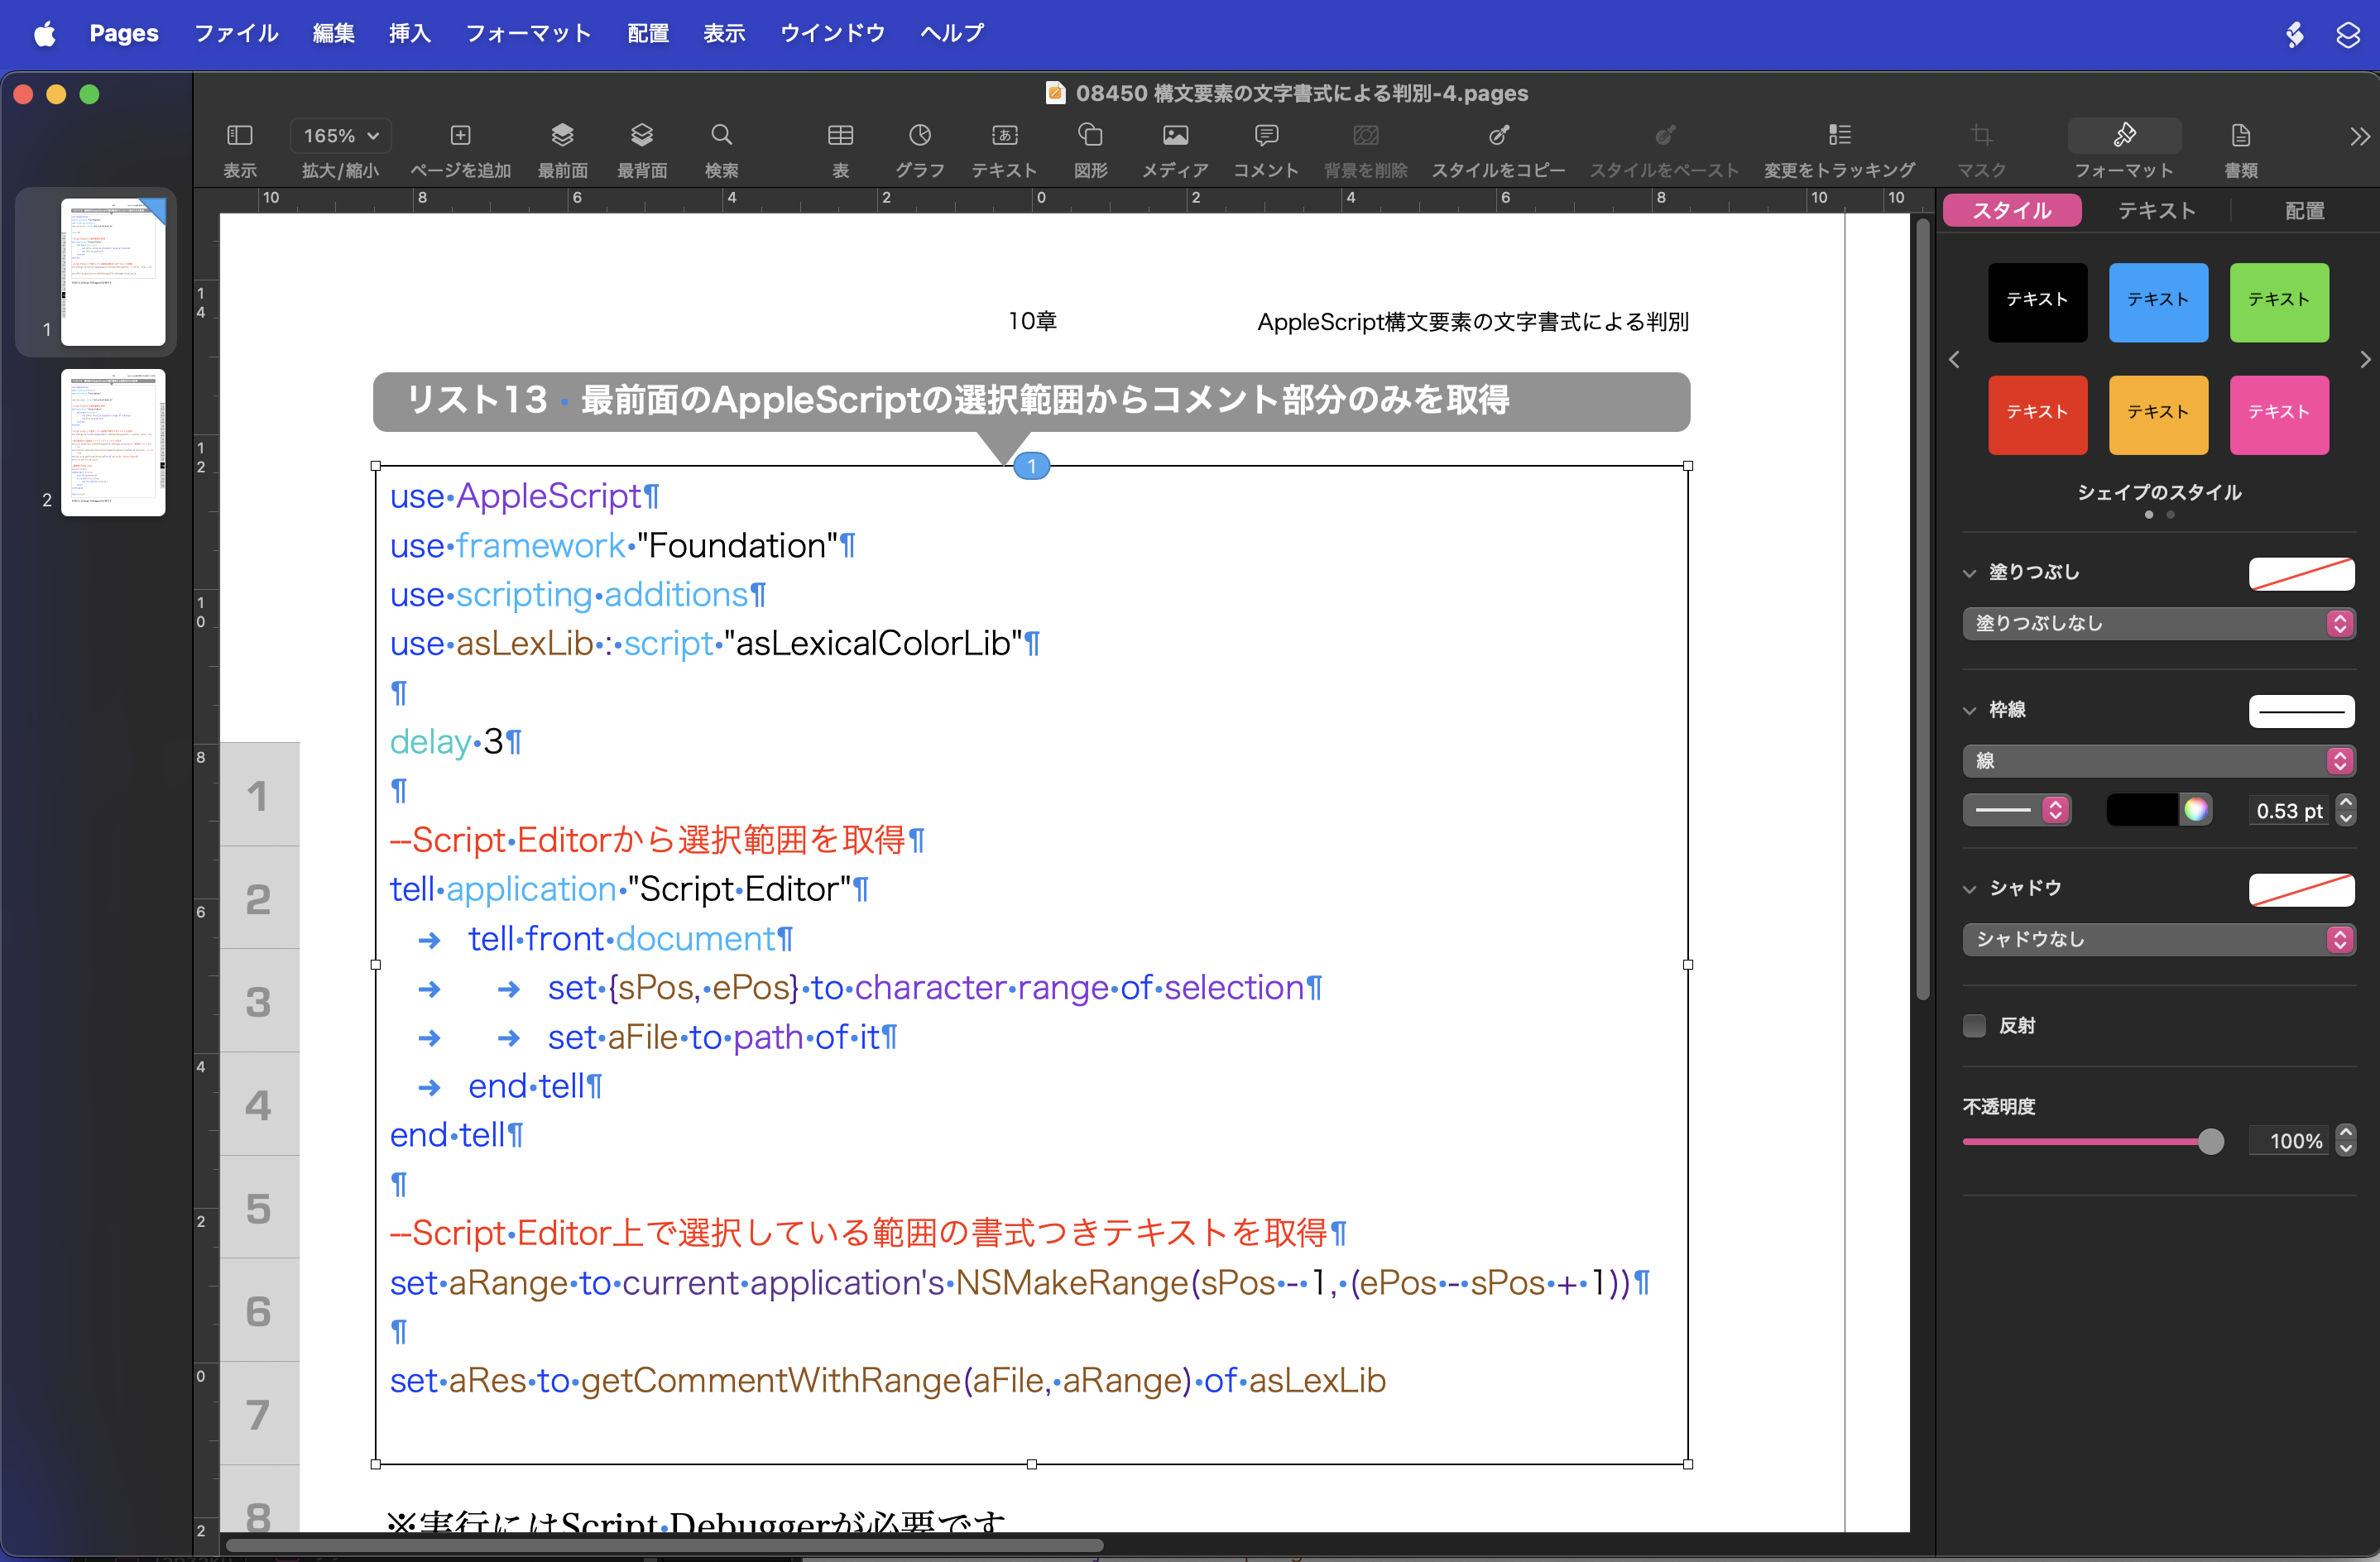
| AppleScript名:XcodeのWorkspace Documentをクローズ後、再オープン.scptd |
| — – Created by: Takaaki Naganoya – Created on: 2025/02/21 — – Copyright © 2025 Piyomaru Software, All Rights Reserved — use AppleScript version "2.4" — Yosemite (10.10) or later use framework "Foundation" use scripting additions tell application "Xcode" set xcVer to version tell workspace document 1 set xWSprojPath to path close end tell end tell –delay 1 tell application "Xcode" open ((POSIX file xWSprojPath) as alias) end tell |