| AppleScript名:指定のAppleScriptのソースを取得してOLD Style ASかASOCかを判定する v2 |
| — Created 2017-06-03 by Takaaki Naganoya — 2017 Piyomaru Software use AppleScript version "2.4" use scripting additions use framework "Foundation" use framework "OSAKit" set aFile to choose file of type {"com.apple.applescript.script", "com.apple.applescript.script-bundle"} set aRes to detectScriptIsPureASorASOC(aFile) of me –指定AppleScriptファイルがOLD Style ASかASOCかを判定して返す on detectScriptIsPureASorASOC(aFile) set sRes to getASsourceFor(aFile) of me set sName to scriptKind of sRes –Name set sText to scriptSource of sRes –Source if sText = "" or sText = missing value then return missing value if sName = "AppleScript" then if sText contains "use framework \"Foundation\"" then return true –ASOC else return false –Pure AppleScript end if else –JXAなど他のOSA言語の場合 return sName end if end detectScriptIsPureASorASOC –指定AppleScriptファイルのソースコードを取得する(実行専用Scriptからは取得できない) on getASsourceFor(anAlias as {alias, string}) set anHFSpath to anAlias as string set aURL to current application’s |NSURL|’s fileURLWithPath:(POSIX path of anHFSpath) set theScript to current application’s OSAScript’s alloc()’s initWithContentsOfURL:aURL |error|:(missing value) set scriptName to theScript’s |language|()’s |name|() as string set theSource to theScript’s source() as text return {scriptKind:scriptName, scriptSource:theSource} end getASsourceFor |
タグ: 10.13savvy
NSObjectの各種メソッドのじっけん
Cocoaの各種オブジェクトのルートクラスであるNSObjectが持っているメソッドのうち有用そうなものをAppleScriptから呼び出す実験です。
各種クラス(NSStringとかNSArrayとか)のReferenceに掲載されていないのに使えるメソッドが存在していることに、Cocoaを使い始めたころ不思議に思っていたのですが、上位クラスが持っているメソッドであることに(後になって)気づきました。
| AppleScript名:isEqualTo |
| — Created 2018-01-08 by Takaaki Naganoya — 2018 Piyomaru Software use AppleScript version "2.4" use scripting additions use framework "Foundation" set aStr to current application’s NSString’s stringWithString:"ABC" aStr’s isEqualTo:"ABC" –> true aStr’s isEqualTo:"abc" –> false |
| AppleScript名:isLike |
| — Created 2018-01-08 by Takaaki Naganoya — 2018 Piyomaru Software use AppleScript version "2.4" use scripting additions use framework "Foundation" –https://stackoverflow.com/questions/35902973/what-does-nsstrings-islike-actually-do set aStr to current application’s NSString’s stringWithString:"ABC" set aRes1 to aStr’s isLike:"AB*" –> true set aRes2 to aStr’s isLike:"AB?" –> true set aRes3 to aStr’s isLike:"[Aa]BC" –> true set aRes4 to aStr’s isLike:"[Aa][Bb]C" –> true set aRes5 to aStr’s isLike:"[^A]BC" –> true set aRes6 to aStr’s isLike:"[^a]BC" –> false set bStr to current application’s NSString’s stringWithString:"A1download" set aRes7 to bStr’s isLike:"[A-Z][0-9]" –こういう書き方は通らないらしい |
| AppleScript名:doesContain |
| — Created 2018-01-07 by Takaaki Naganoya — 2018 Piyomaru Software use AppleScript version "2.4" use scripting additions use framework "Foundation" set anArray to current application’s NSArray’s arrayWithArray:{1, 2, 3} anArray’s doesContain:1 –> true anArray’s doesContain:9 –> false –2D Arrayには通じないらしい set bArray to current application’s NSArray’s arrayWithArray:{{1, 1}, {2, 2}, {3, 3}} set cArray to current application’s NSArray’s arrayWithArray:{2, 2} bArray’s doesContain:cArray –> false bArray’s doesContain:2 –> false |
| AppleScript名:instancesRespondToSelector |
| — Created 2018-01-07 by Takaaki Naganoya — 2018 Piyomaru Software use AppleScript version "2.4" use scripting additions use framework "Foundation" ( current application’s NSObject’s |class|())’s instancesRespondToSelector:"init"–> true |
| AppleScript名:isSubclassOfClassのじっけん |
| — Created 2018-01-07 12:59:32 +0900 by Takaaki Naganoya — 2018 Piyomaru Software use AppleScript version "2.4" use scripting additions use framework "Foundation" set aStr to current application’s NSString’s stringWithString:"ABC" aStr’s superclass()’s isSubclassOfClass:(current application’s NSNumber) –> false aStr’s superclass()’s isSubclassOfClass:(current application’s NSString) –> true |
| AppleScript名:superclassを求める |
| — Created 2018-01-07 12:53:44 +0900 by Takaaki Naganoya — 2018 Piyomaru Software use AppleScript version "2.4" use scripting additions use framework "Foundation" set aStr to current application’s NSString’s stringWithString:"ABC" aStr’s superclass() –> (Class) NSMutableString aStr’s superclass()’s superclass() –> (Class) NSString aStr’s superclass()’s superclass()’s superclass() –> (Class) NSObject |
(Shane Stanleyからツッコミがあって追加↓)
| AppleScript名:scriptingIsEqualTo |
| use AppleScript version "2.4" use scripting additions use framework "Foundation" set aStr to current application’s NSString’s stringWithString:"ABC" aStr’s scriptingIsEqualTo:"ABC" –only for NSString/NSMutableString –> true aStr’s scriptingIsEqualTo:"abc" –> true set bStr to current application’s NSString’s stringWithString:"あいうえお" –Japanese Hiragana bStr’s scriptingIsEqualTo:"アイウエオ" –Japanese Katakana –> false bStr’s scriptingIsEqualTo:"ぁぃぅぇぉ" –Japanese Hiragana (Yo-On) –> false set bResAS to ("あいうえお" = "ぁぃぅぇぉ") –AppleScript system treat them as *Same* (NFKC Casefold) –> true |
デスクトップの表示、非表示切り替え
デスクトップの表示・非表示切り替えを行うAppleScriptです。
白い画像や黒い画像とデスクトップ表示状態を切り替えるAppleScriptを別々に実行するとデスクトップ非表示状態のまま戻ってこなくなることがあったので、単体で切り替えするScriptを用意してみた次第です。
| AppleScript名:デスクトップの表示、非表示切り替え |
| showHideDesktop(true)
on showHideDesktop(aBool) set aBoolStr to aBool as string do shell script "defaults write com.apple.finder CreateDesktop -bool " & aBoolStr do shell script "killall Finder" end showHideDesktop |
デスクトップピクチャを白いピクチャとトグルで差し替え v2
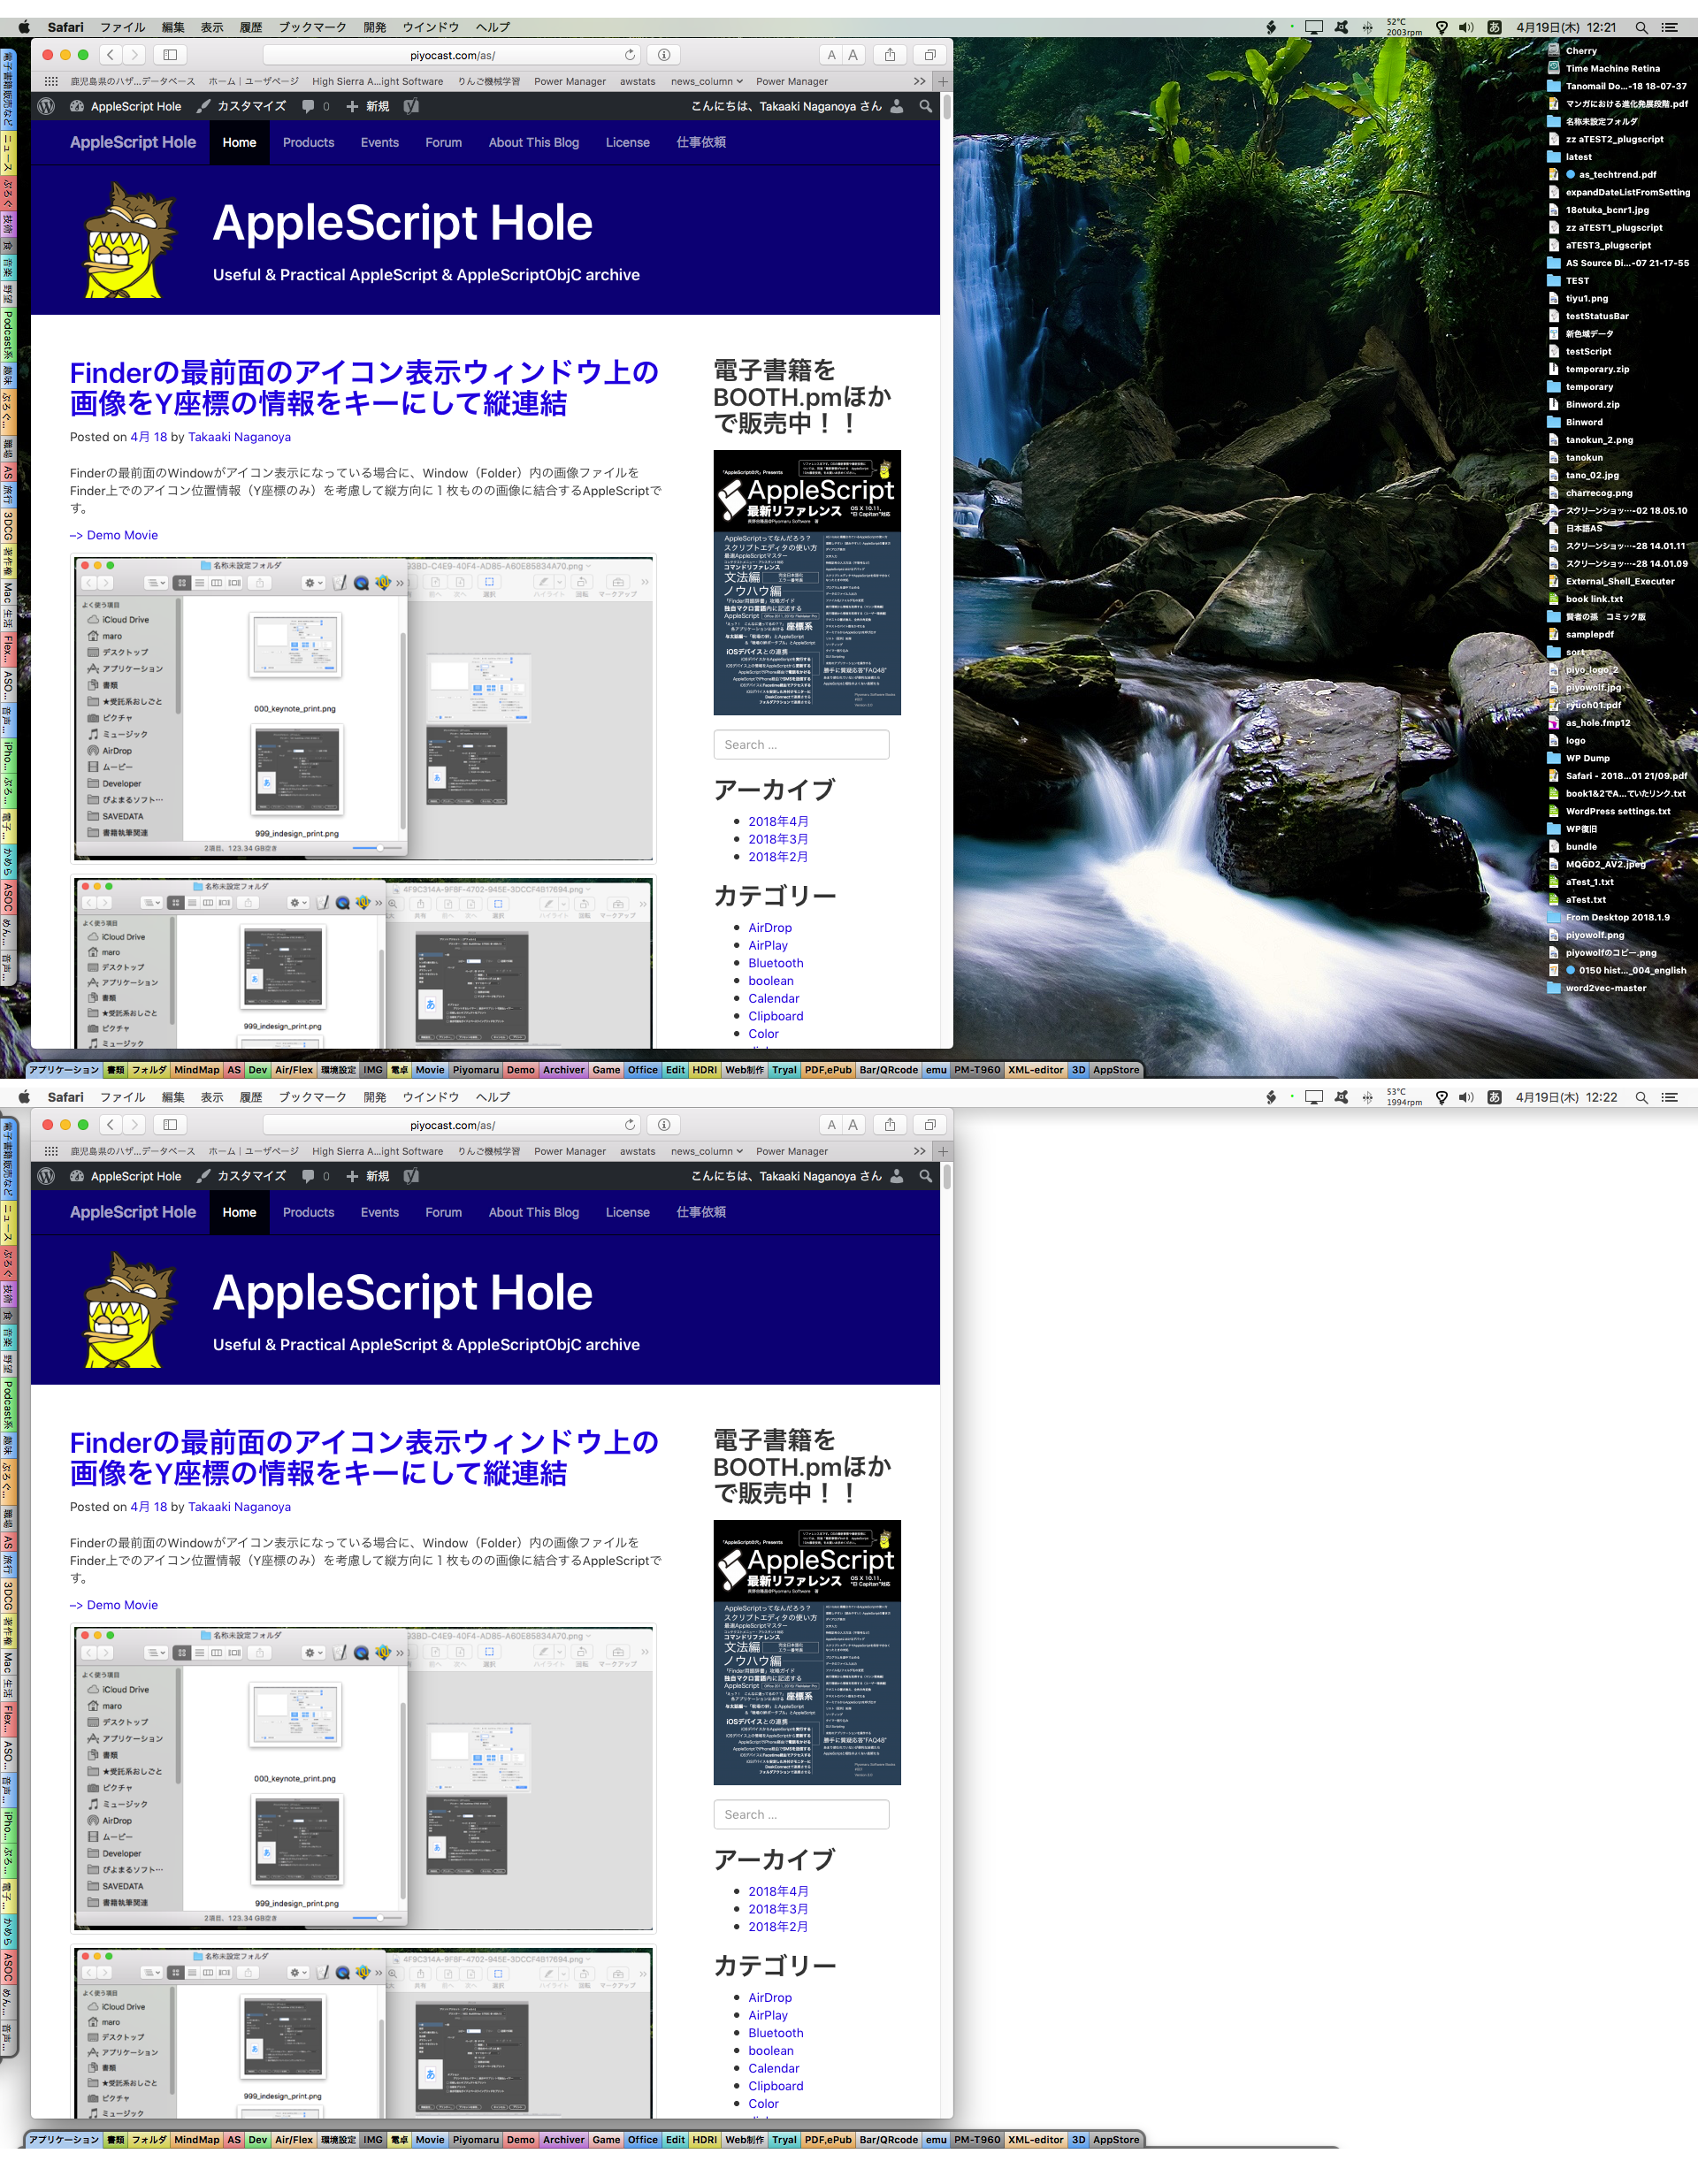
デスクトップピクチャの表示状態と、単色白色のデスクトップ+デスクトップ非表示状態のトグル切り替えを行うAppleScriptです。
資料や仕様書を作成する際に画面キャプチャを行うことが多いですが、その際にデスクトップに散らかっているファイルが映るとみっともないので、隠すために作成したものです。
1回実行するとデスクトップを隠し、もう1回実行すると元に戻ります。
| AppleScript名:デスクトップピクチャを白いピクチャとトグルで差し替え v2 |
| — Created 2016-05-31 by Takaaki Naganoya — Modified 2016-06-01 by Takaaki Naganoya–Desktop Iconの表示/非表示を追加 — 2016 Piyomaru Software use AppleScript version "2.4" use scripting additions use framework "Foundation" use framework "AppKit" property aSwitch : false property desktopPictures : {} property aColpath : "" if aSwitch = false then –デスクトップを白くする set desktopPictures to getDesktopPicturePathList() of me –白い画像を作成してデスクトップピクチャに設定 set aColpath to makeColordImageToTmp(255, 255, 255, 255) of me –R,G,B,A(それぞれ 0〜255) setDesktopPicture(aColpath) of me showHideDesktop(false) of me set aSwitch to true else –保存しておいたDesktop Pictureのリストを戻す setDesktopPicturePathList(desktopPictures) of me do shell script "rm -f " & quoted form of aColpath showHideDesktop(true) of me set aSwitch to false end if –デスクトップの表示/非表示切り替え on showHideDesktop(aBool as boolean) set aBoolStr to aBool as string do shell script "defaults write com.apple.finder CreateDesktop -bool " & aBoolStr do shell script "killall Finder" end showHideDesktop –デスクトップピクチャの状態を復帰する on setDesktopPicturePathList(aliasList) if aliasList = {} then display notification "保存しておいたデスクトップピクチャのリストが空になっています" return end if tell application "System Events" set dCount to count every desktop repeat with i from 1 to dCount set j to contents of item i of aliasList tell desktop i set picture to (POSIX path of j) end tell end repeat end tell end setDesktopPicturePathList –デスクトップピクチャの強制指定 on setDesktopPicture(aPathStr) tell application "System Events" set picture of every desktop to aPathStr end tell end setDesktopPicture –デスクトップピクチャのパスをaliasリストで取得 on getDesktopPicturePathList() set pList to {} tell application "System Events" set dCount to count every desktop repeat with i from 1 to dCount tell desktop i set aPic to (picture as POSIX file) as alias set end of pList to aPic end tell end repeat end tell return pList end getDesktopPicturePathList –テンポラリフォルダに指定色の画像を作成 on makeColordImageToTmp(rDat as integer, gDat as integer, bDat as integer, aDat as integer) set rCol to 255 / rDat set gCol to 255 / gDat set bCol to 255 / bDat set aCol to 255 / aDat — set aColor to current application’s NSColor’s colorWithDeviceRed:rCol green:gCol blue:bCol alpha:aCol set aDesktopPath to current application’s NSString’s stringWithString:(POSIX path of (path to temporary items)) set savePath to aDesktopPath’s stringByAppendingString:((current application’s NSUUID’s UUID()’s UUIDString())’s stringByAppendingString:".png") set aRes to makeImageWithFilledWithColor(1, 1, savePath, aColor) of me return (savePath as string) end makeColordImageToTmp –指定サイズの画像を作成し、指定色で塗ってファイル書き出し on makeImageWithFilledWithColor(aWidth, aHeight, outPath, fillColor) –Imageの作成 set anImage to current application’s NSImage’s alloc()’s initWithSize:(current application’s NSMakeSize(aWidth, aHeight)) anImage’s lockFocus() –描画実行 set theRect to {{x:0, y:0}, {height:aHeight, width:aWidth}} set theNSBezierPath to current application’s NSBezierPath’s bezierPath theNSBezierPath’s appendBezierPathWithRect:theRect fillColor’s |set|() theNSBezierPath’s fill() anImage’s unlockFocus() –描画ここまで –生成した画像のRaw画像を作成 set imageRep to anImage’s TIFFRepresentation() set aRawimg to current application’s NSBitmapImageRep’s imageRepWithData:imageRep set myNewImageData to (aRawimg’s representationUsingType:(current application’s NSPNGFileType) |properties|:(missing value)) –書き出しファイルパス情報を作成 set pathString to current application’s NSString’s stringWithString:outPath set newPath to pathString’s stringByExpandingTildeInPath() set aRes to (myNewImageData’s writeToFile:newPath atomically:true) as boolean return aRes –成功ならtrue、失敗ならfalseが返る end makeImageWithFilledWithColor |
デスクトップピクチャを黒いピクチャとトグルで差し替え v2
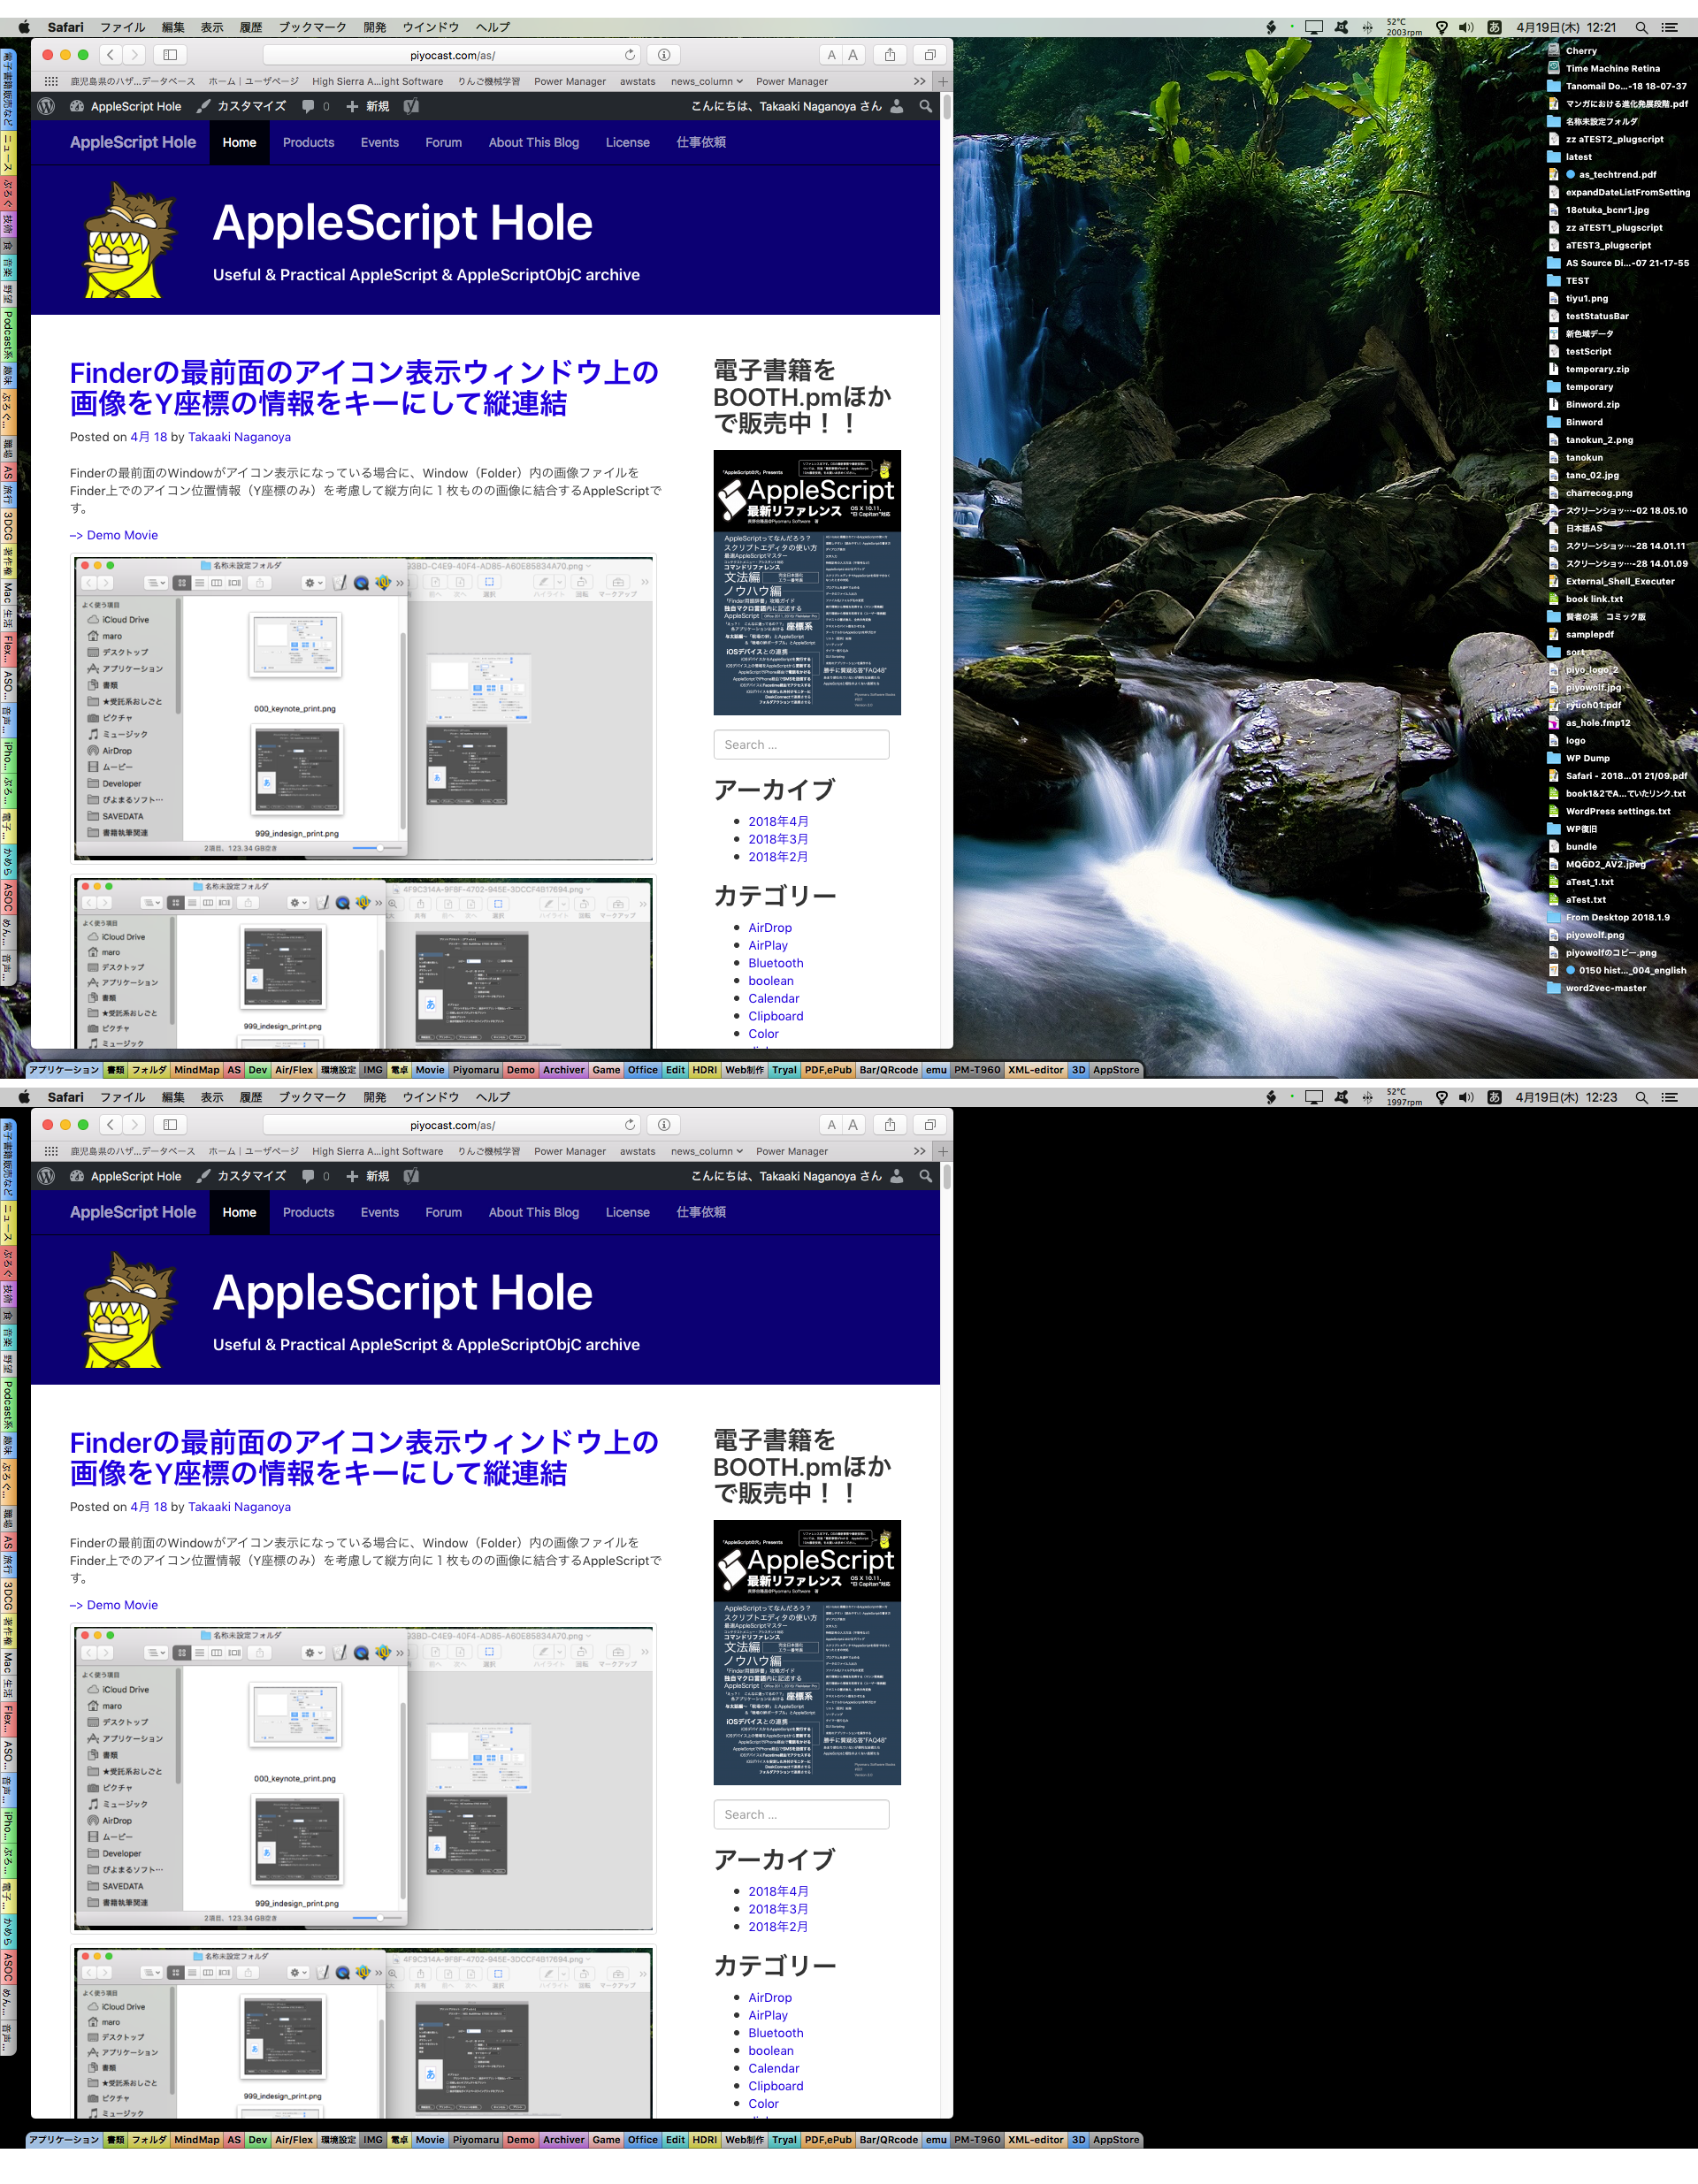
デスクトップピクチャの表示状態と、単色黒色のデスクトップ+デスクトップ非表示状態のトグル切り替えを行うAppleScriptです。
資料や仕様書を作成する際に画面キャプチャを行うことが多いですが、その際にデスクトップに散らかっているファイルが映るとみっともないので、隠すために作成したものです。–> Demo Movie
1回実行するとデスクトップを隠し、もう1回実行すると元に戻ります。
| AppleScript名:デスクトップピクチャを黒いピクチャとトグルで差し替え v2 |
| — Created 2016-05-31 by Takaaki Naganoya — Modified 2016-06-01 by Takaaki Naganoya–Desktop Iconの表示/非表示を追加 — 2016 Piyomaru Software use AppleScript version "2.4" use scripting additions use framework "Foundation" use framework "AppKit" property aSwitch : false property desktopPictures : {} property aColpath : "" if aSwitch = false then –デスクトップを黒くする set desktopPictures to getDesktopPicturePathList() of me –白い画像を作成してデスクトップピクチャに設定 set aColor to current application’s NSColor’s blackColor() set aColpath to makeColordImageToTmp(aColor) of me setDesktopPicture(aColpath) of me showHideDesktop(false) of me set aSwitch to true else –保存しておいたDesktop Pictureのリストを戻す setDesktopPicturePathList(desktopPictures) of me do shell script "rm -f " & quoted form of aColpath showHideDesktop(true) of me set aSwitch to false end if –デスクトップの表示/非表示切り替え on showHideDesktop(aBool as boolean) set aBoolStr to aBool as string do shell script "defaults write com.apple.finder CreateDesktop -bool " & aBoolStr do shell script "killall Finder" end showHideDesktop –デスクトップピクチャの状態を復帰する on setDesktopPicturePathList(aliasList) if aliasList = {} then display notification "保存しておいたデスクトップピクチャのリストが空になっています" return end if tell application "System Events" set dCount to count every desktop repeat with i from 1 to dCount set j to contents of item i of aliasList tell desktop i set picture to (POSIX path of j) end tell end repeat end tell end setDesktopPicturePathList –デスクトップピクチャの強制指定 on setDesktopPicture(aPathStr) tell application "System Events" set picture of every desktop to aPathStr end tell end setDesktopPicture –デスクトップピクチャのパスをaliasリストで取得 on getDesktopPicturePathList() set pList to {} tell application "System Events" set dCount to count every desktop repeat with i from 1 to dCount tell desktop i set aPic to (picture as POSIX file) as alias set end of pList to aPic end tell end repeat end tell return pList end getDesktopPicturePathList –テンポラリフォルダに指定色の画像を作成 on makeColordImageToTmp(aColor) –set aColor to current application’s NSColor’s colorWithDeviceRed:rCol green:gCol blue:bCol alpha:aCol set aDesktopPath to current application’s NSString’s stringWithString:(POSIX path of (path to temporary items)) set savePath to aDesktopPath’s stringByAppendingString:((current application’s NSUUID’s UUID()’s UUIDString())’s stringByAppendingString:".png") set aRes to makeImageWithFilledWithColor(1, 1, savePath, aColor) of me return (savePath as string) end makeColordImageToTmp –指定サイズの画像を作成し、指定色で塗ってファイル書き出し on makeImageWithFilledWithColor(aWidth, aHeight, outPath, fillColor) –Imageの作成 set anImage to current application’s NSImage’s alloc()’s initWithSize:(current application’s NSMakeSize(aWidth, aHeight)) anImage’s lockFocus() –描画実行 set theRect to {{x:0, y:0}, {height:aHeight, width:aWidth}} set theNSBezierPath to current application’s NSBezierPath’s bezierPath theNSBezierPath’s appendBezierPathWithRect:theRect fillColor’s |set|() theNSBezierPath’s fill() anImage’s unlockFocus() –描画ここまで –生成した画像のRaw画像を作成 set imageRep to anImage’s TIFFRepresentation() set aRawimg to current application’s NSBitmapImageRep’s imageRepWithData:imageRep set myNewImageData to (aRawimg’s representationUsingType:(current application’s NSPNGFileType) |properties|:(missing value)) –書き出しファイルパス情報を作成 set pathString to current application’s NSString’s stringWithString:outPath set newPath to pathString’s stringByExpandingTildeInPath() set aRes to (myNewImageData’s writeToFile:newPath atomically:true) as boolean return aRes –成功ならtrue、失敗ならfalseが返る end makeImageWithFilledWithColor |
Finderの最前面のアイコン表示ウィンドウ上の画像をY座標の情報をキーにして縦連結
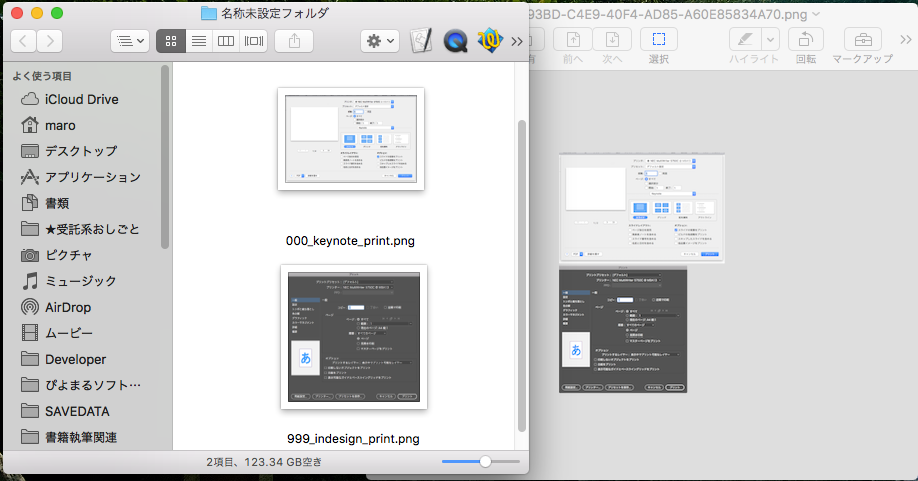
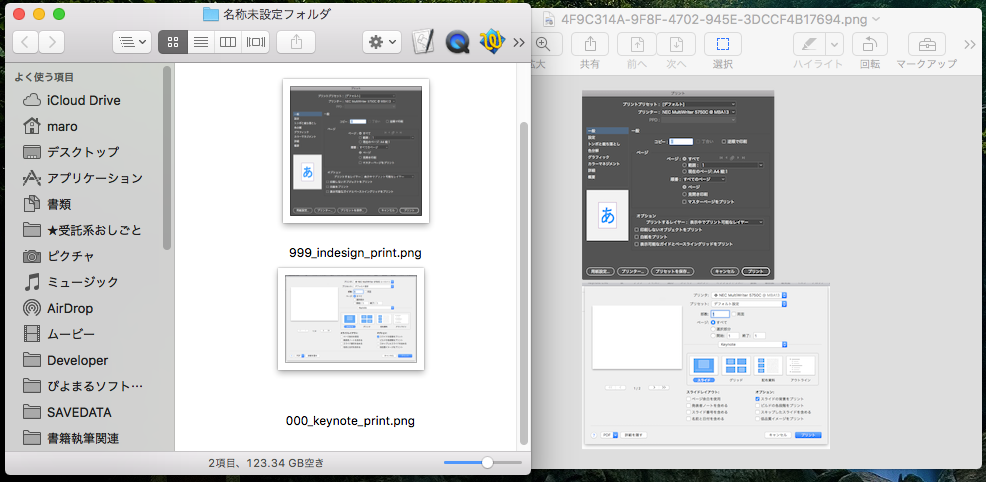
Finderの最前面のWindowがアイコン表示になっている場合に、Window(Folder)内の画像ファイルをFinder上でのアイコン位置情報(Y座標のみ)を考慮して縦方向に1枚ものの画像に結合するAppleScriptです。
| AppleScript名:Finderの最前面のアイコン表示ウィンドウ上の画像をY座標の情報をキーにして縦連結 |
| — Created 2018-04-10 by Takaaki Naganoya — 2018 Piyomaru Software use AppleScript version "2.5" use scripting additions use framework "Foundation" use framework "QuartzCore" use framework "AppKit" use bPlus : script "BridgePlus" –https://www.macosxautomation.com/applescript/apps/BridgePlus.html property |NSURL| : a reference to current application’s |NSURL| property NSUUID : a reference to current application’s NSUUID property NSArray : a reference to current application’s NSArray property NSString : a reference to current application’s NSString property NSImage : a reference to current application’s NSImage property NSWorkspace : a reference to current application’s NSWorkspace property NSPNGFileType : a reference to current application’s NSPNGFileType property NSMutableArray : a reference to current application’s NSMutableArray property NSBitmapImageRep : a reference to current application’s NSBitmapImageRep property NSURLTypeIdentifierKey : a reference to current application’s NSURLTypeIdentifierKey property yGap : 10 –連結時の画像間のアキ(縦方向) load framework tell application "Finder" tell front window set curView to current view if curView is not equal to icon view then display dialog "最前面のウィンドウがアイコン表示になっていないので、処理を終了します。" return end if try set posList to position of every file whose kind contains "イメージ" –"イメージ" is "image" or "picture" in Japanese set fileList to (every file whose kind contains "イメージ") as alias list –"イメージ" is "image" or "picture" in Japanese on error display dialog "最前面のウィンドウに画像ファイルが配置されていないため、処理を中止します。" return end try end tell set aList to {} set aLen to length of posList set bLen to length of fileList if aLen is not equal to bLen then return repeat with i from 1 to aLen set posItem to contents of item i of posList set aPath to POSIX path of item i of fileList set the end of aList to (posItem & aPath) end repeat end tell –> {{127, 42, "/Users/me/Desktop/名称未設定フォルダ/000_keynote_print.png"}, {302, 43, "/Users/me/Desktop/名称未設定フォルダ/999_indesign_print.png"}} set bList to sort2DListAscendingWithSecondItemKey(aList) of me –> {{127, 42, "/Users/me/Desktop/名称未設定フォルダ/000_keynote_print.png"}, {302, 43, "/Users/me/Desktop/名称未設定フォルダ/999_indesign_print.png"}} set cList to getEveryIndicatedItemsFrom2DList(bList, 3) of me –> {"/Users/me/Desktop/名称未設定フォルダ/000_keynote_print.png", "/Users/me/Desktop/名称未設定フォルダ/999_indesign_print.png"} –Finder最前面の画像ファイルをpathからImageを読み込んでArrayに入れる set imgList to NSMutableArray’s new() repeat with i in cList set aPath to contents of i set imgRes to (my isImageAtPath:aPath) if imgRes as boolean = true then set aNSImage to (NSImage’s alloc()’s initWithContentsOfFile:aPath) (imgList’s addObject:aNSImage) end if end repeat –KVCで画像の各種情報をまとめて取得 set sizeList to (imgList’s valueForKeyPath:"size") as list –NSSize to list of record conversion set maxWidth to ((NSArray’s arrayWithArray:sizeList)’s valueForKeyPath:"@max.width") as real set totalHeight to (((NSArray’s arrayWithArray:sizeList)’s valueForKeyPath:"@sum.height") as real) + 50 set totalCount to ((NSArray’s arrayWithArray:sizeList)’s valueForKeyPath:"@count") as integer –出力画像作成 set tSize to current application’s NSMakeSize(maxWidth, totalHeight + (yGap * totalCount)) set newImage to NSImage’s alloc()’s initWithSize:tSize –順次画像を新規画像に上書き set yOrig to 0 repeat with i in (imgList as list) set j to contents of i set curSize to j’s |size|() –set aRect to {0, (maxWidth – (curSize’s height())), (curSize’s width()), (curSize’s height())} set aRect to {0, (totalHeight – (curSize’s height())) – yOrig, (curSize’s width()), (curSize’s height())} set newImage to composeImage(newImage, j, aRect) of me set yOrig to yOrig + (curSize’s height()) + yGap end repeat –デスクトップにPNG形式でNSImageをファイル保存 set aDesktopPath to current application’s NSHomeDirectory()’s stringByAppendingString:"/Desktop/" set savePath to aDesktopPath’s stringByAppendingString:((NSUUID’s UUID()’s UUIDString())’s stringByAppendingString:".png") set fRes to saveNSImageAtPathAsPNG(newImage, savePath) of me –2つのNSImageを重ね合わせ合成してNSImageで返す on composeImage(backImage, composeImage, aTargerRect) set newImage to NSImage’s alloc()’s initWithSize:(backImage’s |size|()) copy aTargerRect to {x1, y1, x2, y2} newImage’s lockFocus() set v2 to system attribute "sys2" if v2 ≤ 12 then –To macOS 10.12.x set bRect to current application’s NSMakeRect(x1, y1, x2, y2) set newImageRect to current application’s CGRectZero set newImageRect’s |size| to (newImage’s |size|) else –macOS 10.13 or later set bRect to {{x1, y1}, {x2, y2}} set newImageRect to {{0, 0}, (newImage’s |size|)} end if backImage’s drawInRect:newImageRect composeImage’s drawInRect:bRect newImage’s unlockFocus() return newImage end composeImage –NSImageを指定パスにPNG形式で保存 on saveNSImageAtPathAsPNG(anImage, outPath) set imageRep to anImage’s TIFFRepresentation() set aRawimg to NSBitmapImageRep’s imageRepWithData:imageRep set pathString to NSString’s stringWithString:outPath set newPath to pathString’s stringByExpandingTildeInPath() set myNewImageData to (aRawimg’s representationUsingType:(NSPNGFileType) |properties|:(missing value)) set aRes to (myNewImageData’s writeToFile:newPath atomically:true) as boolean return aRes –成功ならtrue、失敗ならfalseが返る end saveNSImageAtPathAsPNG –指定のパスのファイルが画像かどうかをチェック on isImageAtPath:aPath set aURL to |NSURL|’s fileURLWithPath:aPath set {theResult, theValue} to aURL’s getResourceValue:(reference) forKey:NSURLTypeIdentifierKey |error|:(missing value) return (NSImage’s imageTypes()’s containsObject:theValue) as boolean end isImageAtPath: on sort2DListAscendingWithSecondItemKey(aList as list) set sortIndexList to {1} –Key Item id: begin from 0 set sortOrders to {true} –ascending = true set sortTypes to {"compare:"} set resList to (current application’s SMSForder’s subarraysIn:(aList) sortedByIndexes:sortIndexList ascending:sortOrders sortTypes:sortTypes |error|:(missing value)) as list return resList end sort2DListAscendingWithSecondItemKey –2D Listの各要素から、指定アイテムの要素だけを取り出してリストで返す on getEveryIndicatedItemsFrom2DList(aList as list, anItem as integer) –this item No. begins from 1 set outList to {} repeat with i in aList set j to contents of item anItem of i set the end of outList to j end repeat return outList end getEveryIndicatedItemsFrom2DList |
Finderの最前面のアイコン表示ウィンドウ上の画像をX座標の情報をキーにして横連結
Finderの最前面のWindowがアイコン表示になっている場合に、Window(Folder)内の画像ファイルをFinder上でのアイコン位置情報(X座標のみ)を考慮して横方向に1枚ものの画像に結合するAppleScriptです。
Blog掲載時に利用するために、Finder上で選択中の複数の画像ファイルを1枚ものの画像に(横方向/縦方向に)連結するAppleScriptを便利に使っています(ただし、「動けばいいや」程度で雑に作ったので、普段よりもやっつけ度がかなり高い、、、)。

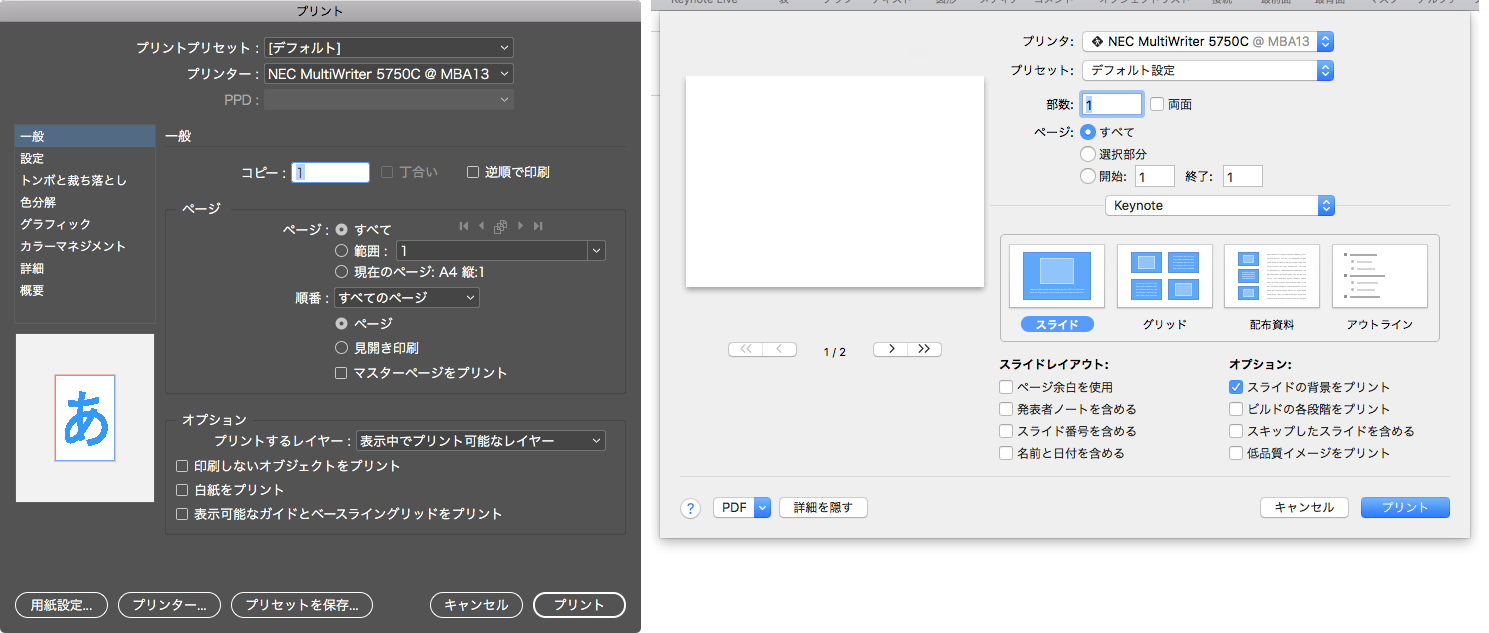
ただし、画像の並び順については「たぶん、作成日時の古い順」に連結されるといった具合に明示的に並び順を指定できるものではなかったので、本Scriptを作ってみました。 –> Demo Movie
![]()
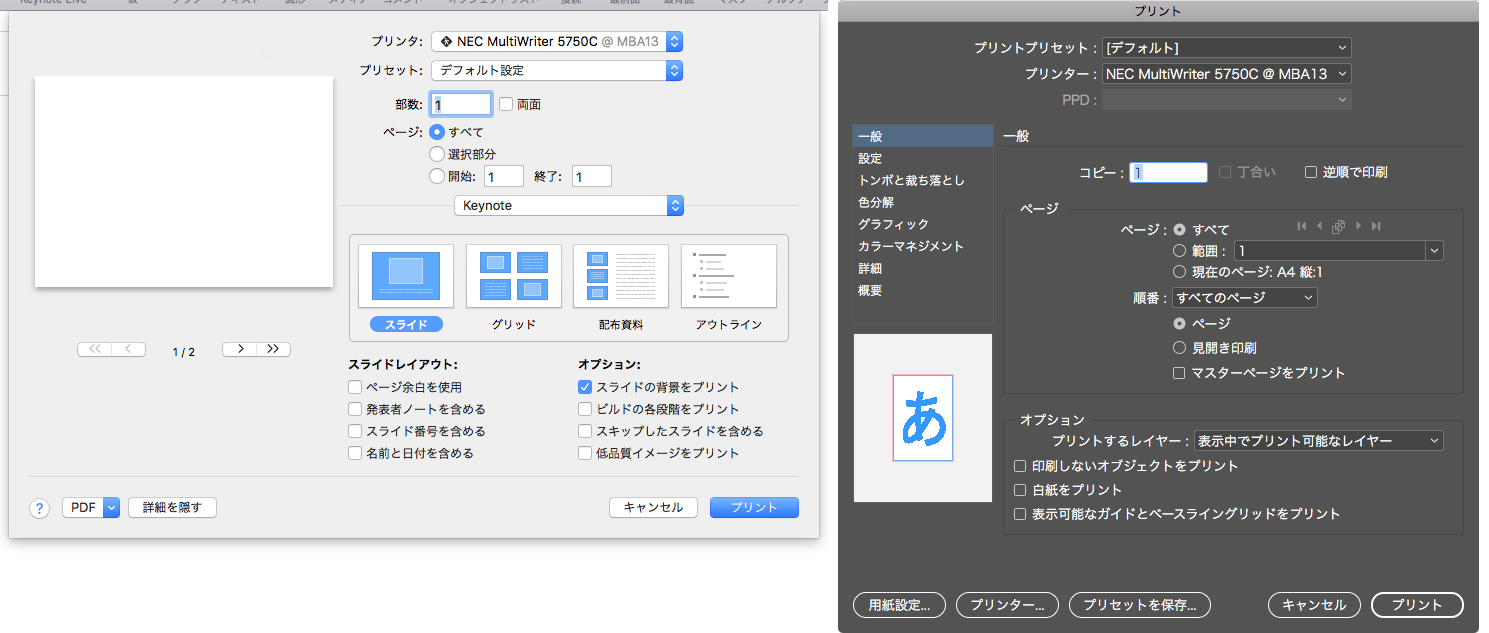
Finder上でicon viewに指定したWindow(Folder)内でLeft–>Rightの順に(X座標のみ評価)座標値をソートして連結します。
| AppleScript名:Finderの最前面のアイコン表示ウィンドウ上の画像をX座標の情報をキーにして横連結 |
| — Created 2018-04-10 by Takaaki Naganoya — 2018 Piyomaru Software use AppleScript version "2.5" use scripting additions use framework "Foundation" use framework "QuartzCore" use framework "AppKit" use bPlus : script "BridgePlus" –https://www.macosxautomation.com/applescript/apps/BridgePlus.html property |NSURL| : a reference to current application’s |NSURL| property NSUUID : a reference to current application’s NSUUID property NSArray : a reference to current application’s NSArray property NSString : a reference to current application’s NSString property NSImage : a reference to current application’s NSImage property NSWorkspace : a reference to current application’s NSWorkspace property NSPNGFileType : a reference to current application’s NSPNGFileType property NSMutableArray : a reference to current application’s NSMutableArray property NSBitmapImageRep : a reference to current application’s NSBitmapImageRep property NSURLTypeIdentifierKey : a reference to current application’s NSURLTypeIdentifierKey property xGap : 10 –連結時の画像間のアキ(横方向) load framework tell application "Finder" tell front window set curView to current view if curView is not equal to icon view then display dialog "最前面のウィンドウがアイコン表示になっていないので、処理を終了します。" return end if try set posList to position of every file whose kind contains "イメージ" –"イメージ" is "image" or "picture" in Japanese set fileList to (every file whose kind contains "イメージ") as alias list –"イメージ" is "image" or "picture" in Japanese on error display dialog "最前面のウィンドウに画像ファイルが配置されていないため、処理を中止します。" return end try end tell set aList to {} set aLen to length of posList set bLen to length of fileList if aLen is not equal to bLen then return repeat with i from 1 to aLen set posItem to contents of item i of posList set aPath to POSIX path of item i of fileList set the end of aList to (posItem & aPath) end repeat end tell –> {{127, 42, "/Users/me/Desktop/名称未設定フォルダ/000_keynote_print.png"}, {302, 43, "/Users/me/Desktop/名称未設定フォルダ/999_indesign_print.png"}} set bList to sort2DListAscendingWithFirstItemKey(aList) of me –> {{127, 42, "/Users/me/Desktop/名称未設定フォルダ/000_keynote_print.png"}, {302, 43, "/Users/me/Desktop/名称未設定フォルダ/999_indesign_print.png"}} set cList to getEveryIndicatedItemsFrom2DList(bList, 3) of me –> {"/Users/me/Desktop/名称未設定フォルダ/000_keynote_print.png", "/Users/me/Desktop/名称未設定フォルダ/999_indesign_print.png"} –Finder最前面の画像ファイルをpathからImageを読み込んでArrayに入れる set imgList to NSMutableArray’s new() repeat with i in cList set aPath to contents of i set imgRes to (my isImageAtPath:aPath) if imgRes as boolean = true then set aNSImage to (NSImage’s alloc()’s initWithContentsOfFile:aPath) (imgList’s addObject:aNSImage) end if end repeat –KVCで画像の各種情報をまとめて取得 set sizeList to (imgList’s valueForKeyPath:"size") as list –NSSize to list of record conversion set maxHeight to ((NSArray’s arrayWithArray:sizeList)’s valueForKeyPath:"@max.height") as real set totalWidth to ((NSArray’s arrayWithArray:sizeList)’s valueForKeyPath:"@sum.width") as real set totalCount to ((NSArray’s arrayWithArray:sizeList)’s valueForKeyPath:"@count") as integer –出力画像作成 set tSize to current application’s NSMakeSize((totalWidth + (xGap * totalCount)), maxHeight) set newImage to NSImage’s alloc()’s initWithSize:tSize –順次画像を新規画像に上書き set xOrig to 0 repeat with i in (imgList as list) set j to contents of i set curSize to j’s |size|() set aRect to {xOrig, (maxHeight – (curSize’s height())), (curSize’s width()), (curSize’s height())} set newImage to composeImage(newImage, j, aRect) of me set xOrig to xOrig + (curSize’s width()) + xGap end repeat –デスクトップにPNG形式でNSImageをファイル保存 set aDesktopPath to current application’s NSHomeDirectory()’s stringByAppendingString:"/Desktop/" set savePath to aDesktopPath’s stringByAppendingString:((NSUUID’s UUID()’s UUIDString())’s stringByAppendingString:".png") set fRes to saveNSImageAtPathAsPNG(newImage, savePath) of me –2つのNSImageを重ね合わせ合成してNSImageで返す on composeImage(backImage, composeImage, aTargerRect) set newImage to NSImage’s alloc()’s initWithSize:(backImage’s |size|()) copy aTargerRect to {x1, y1, x2, y2} newImage’s lockFocus() set v2 to system attribute "sys2" if v2 ≤ 12 then –To macOS 10.12.x set bRect to current application’s NSMakeRect(x1, y1, x2, y2) set newImageRect to current application’s CGRectZero set newImageRect’s |size| to (newImage’s |size|) else –macOS 10.13 or later set bRect to {{x1, y1}, {x2, y2}} set newImageRect to {{0, 0}, (newImage’s |size|)} end if backImage’s drawInRect:newImageRect composeImage’s drawInRect:bRect newImage’s unlockFocus() return newImage end composeImage –NSImageを指定パスにPNG形式で保存 on saveNSImageAtPathAsPNG(anImage, outPath) set imageRep to anImage’s TIFFRepresentation() set aRawimg to NSBitmapImageRep’s imageRepWithData:imageRep set pathString to NSString’s stringWithString:outPath set newPath to pathString’s stringByExpandingTildeInPath() set myNewImageData to (aRawimg’s representationUsingType:(NSPNGFileType) |properties|:(missing value)) set aRes to (myNewImageData’s writeToFile:newPath atomically:true) as boolean return aRes –成功ならtrue、失敗ならfalseが返る end saveNSImageAtPathAsPNG –指定のパスのファイルが画像かどうかをチェック on isImageAtPath:aPath set aURL to |NSURL|’s fileURLWithPath:aPath set {theResult, theValue} to aURL’s getResourceValue:(reference) forKey:NSURLTypeIdentifierKey |error|:(missing value) return (NSImage’s imageTypes()’s containsObject:theValue) as boolean end isImageAtPath: on sort2DListAscendingWithFirstItemKey(aList as list) set sortIndexList to {0} –Key Item id: begin from 0 set sortOrders to {true} –ascending = true set sortTypes to {"compare:"} set resList to (current application’s SMSForder’s subarraysIn:(aList) sortedByIndexes:sortIndexList ascending:sortOrders sortTypes:sortTypes |error|:(missing value)) as list return resList end sort2DListAscendingWithFirstItemKey –2D Listの各要素から、指定アイテムの要素だけを取り出してリストで返す on getEveryIndicatedItemsFrom2DList(aList as list, anItem as integer) –this item No. begins from 1 set outList to {} repeat with i in aList set j to contents of item anItem of i set the end of outList to j end repeat return outList end getEveryIndicatedItemsFrom2DList |
プリンタを指定してダイアログ非表示状態で印刷実行
出力先のプリンタを指定して、アプリケーション側の印刷ダイアログを表示させないで印刷を実行するAppleScriptです。
MacのGUIアプリケーションは、大別すると・・・
(1)標準的な印刷ダイアログ(Keynote, Pages, Numbersなど)
(2)アプリケーション側で自前で実装しているダイアログ(Adobe InDesign, Illustrator, Photoshop)
(3)その他(Javaアプリケーションやその他互換開発環境で作られたmacOSの標準機能を利用しないで作られたGUIアプリケーションなど)
のような印刷ダイアログがあり、ここで想定しているのは(1)です。(2)については専用の指定方法があり、(3)については「見なかったこと」にしています((3)だとAppleEventによる操作はほぼできません)。
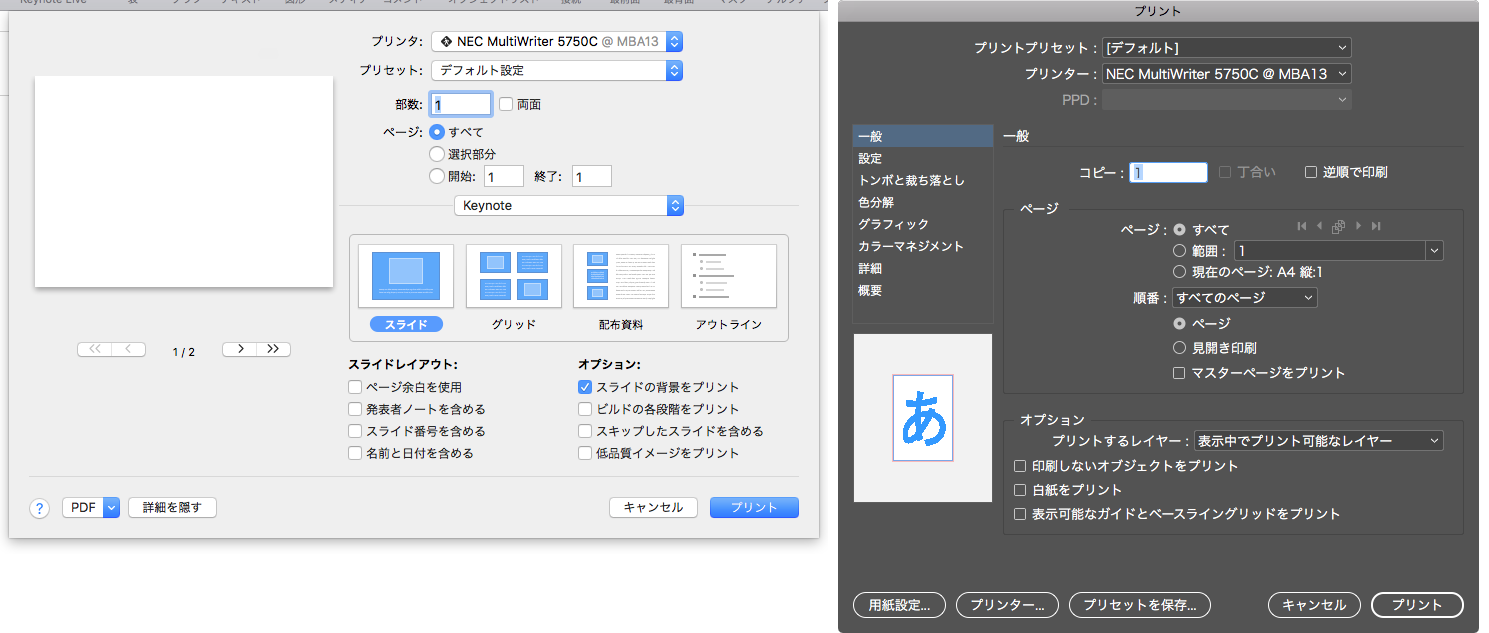
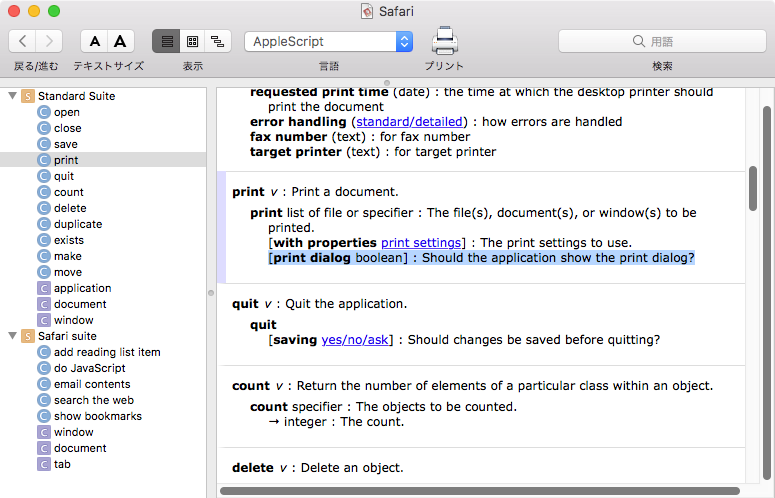
ただし、macOS 10.12.6+Safari 11.1で試してみたところ、Safariでダイアログ非表示の印刷はできませんでした。セキュリティ上の対策で抑止しているのか、それともバグなのかは不明です。
| AppleScript名:プリンタを指定してダイアログ非表示状態で印刷実行 |
| use AppleScript version "2.4" use scripting additions use framework "Foundation" use framework "AppKit" set pArray to current application’s NSPrinter’s printerNames set pList to pArray as list if length of pList > 1 then set targPrinter to choose from list pList with prompt "Choose a printer" if targPrinter = false then return end if set aPrinter to first item of targPrinter tell application "CotEditor" if (count every document) = 0 then return tell front document set aPrintSetting to {copies:1, starting page:1, ending page:1, target printer:aPrinter} print with properties aPrintSetting without print dialog end tell end tell |
プリント情報にアクセスする
| AppleScript名:プリント情報にアクセスする |
| — Created 2014-11-27 by Takaaki Naganoya — 2014 Piyomaru Software use AppleScript version "2.4" use scripting additions use framework "Foundation" use framework "AppKit" set aPrintInfo to current application’s NSPrintInfo’s sharedPrintInfo() set aPaperName to (aPrintInfo’s paperName()) as string –> "iso-a4" set aPaperSize to (aPrintInfo’s paperSize()) as record –> {width:595.0, height:842.0} set aLocPaperName to (aPrintInfo’s localizedPaperName()) as string –> "A4" set anOrientation to (aPrintInfo’s orientation()) as integer –> 0 aPrintInfo’s setPaperName:"iso-a5" set aPaperName to (aPrintInfo’s paperName()) as string –> "iso-a5" set aPaperSize to (aPrintInfo’s paperSize()) as record –> {width:420.0, height:595.0} set aLocPaperName to (aPrintInfo’s localizedPaperName()) as string –> "A5" aPrintInfo’s setOrientation:1 –(0:portrait, 1:landscape) set anOrientation to (aPrintInfo’s orientation()) as integer –> 1 |
プリンタ一覧を取得してデフォルトに設定
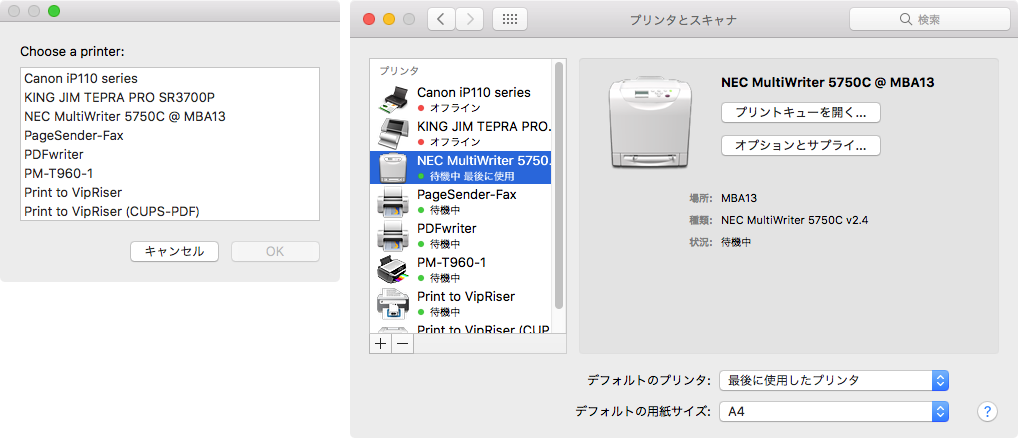
| AppleScript名:プリンタ一覧を取得してデフォルトに設定 |
| — Created 2015-08-11 by Shane Stanley use AppleScript version "2.4" use scripting additions use framework "Foundation" use framework "AppKit" set theNames to current application’s NSPrinter’s printerNames() as list –> {"KING JIM TEPRA PRO SR3700P", "NEC MultiWriter 5750C @ MBA13", "PDFwriter", "PM-T960-1", "USB Modem"} set printerName to (choose from list theNames with prompt "Choose a printer:") if printerName = false then error number -128 set thePrinter to current application’s NSPrinter’s printerWithName:(item 1 of printerName) (* –> (NSPrinter) { "Device Description" = { NSDeviceIsPrinter = YES; }; "Language Level" = 3; Name = "NEC MultiWriter 5750C @ MBA13"; Type = "NEC MultiWriter 5750C v2.4"; } *) set thePrintInfo to current application’s NSPrintInfo’s sharedPrintInfo() (* –> (NSPrintInfo) { NSBottomMargin = 90; NSCopies = 1; NSDestinationFormat = "com.apple.documentformat.default"; NSDetailedErrorReporting = 0; NSFaxNumber = ""; NSFirstPage = 1; NSHorizonalPagination = 2; NSHorizontallyCentered = 1; NSJobDisposition = NSPrintSpoolJob; NSJobSavingFileNameExtensionHidden = 0; NSLastPage = 2147483647; NSLeftMargin = 72; NSMustCollate = 1; NSOrientation = 0; NSPagesAcross = 1; NSPagesDown = 1; NSPaperName = "iso-a4"; NSPaperSize = "NSSize: {595, 842}"; NSPrintAllPages = 1; NSPrintProtected = 0; NSPrintSelectionOnly = 0; NSPrintTime = "0000-12-30 00:00:00 +0000"; NSPrinter = "{\n \"Device Description\" = {\n NSDeviceIsPrinter = YES;\n };\n \"Language Level\" = 3;\n Name = \"NEC MultiWriter 5750C @ MBA13\";\n Type = \"NEC MultiWriter 5750C v2.4\";\n}"; NSPrinterName = "NEC MultiWriter 5750C @ MBA13"; NSRightMargin = 72; NSSavePath = ""; NSScalingFactor = 1; NSTopMargin = 90; NSVerticalPagination = 0; NSVerticallyCentered = 1; } *) thePrintInfo’s setPrinter:thePrinter |
プリンタ一覧の情報を取得する v2
現在使用可能なプリンタの名称一覧を取得するAppleScriptです。
macOS上の各種アプリケーションでAppleScript用語辞書中にprintコマンドを含んでいる場合、文字列でプリンタ名称を指定できますが、そのプリンタ名称を取得するストレートな手段がありませんでした(lpstatコマンドで調べていました)。
# 初期のMac OS XにはPrint Centerというアプリケーションが存在しており、それがScriptableでした
本ScriptはCocoaの機能を呼び出して、プリンタ名を取得します。正直なところ、プリンタ名を直接指定して印刷出力する例はそれほど多くないのですが、印刷ダイアログを表示せずに印刷させたいケースがないわけではありません。また、プリンタ名を状況に応じて変更することも(OSが勝手にやってくれるとはいえ)、必要なケースもあります。ネットワーク上に複数のプリンタが存在している場合には必要になってくることでしょう。
| AppleScript名:プリンタ一覧の情報を取得する v2 |
| — Created 2014-11-27 by Takaaki Naganoya — Modified 2016-02-02 by Takaaki Naganoya — 2016 Piyomaru Software use AppleScript version "2.5" use scripting additions use framework "Foundation" use framework "AppKit" set pList to getPrinterNames() of me –> {"Canon iP110 series", "NEC MultiWriter 5750C @ MBA13", "PDFwriter", "PM-T960-1", "Print to VipRiser", "Print to VipRiser (CUPS-PDF)"} on getPrinterNames() –Get Printer Names set pArray to current application’s NSPrinter’s printerNames set pList to pArray as list –> {"Canon iP110 series", "KING JIM TEPRA PRO SR3700P", "NEC MultiWriter 5750C @ MBA13", "PageSender-Fax", "PDFwriter", "PM-T960-1", "Print to VipRiser", "Print to VipRiser (CUPS-PDF)"} –Get Printer Type (Driver Name?) set tArray to current application’s NSPrinter’s printerTypes set tList to tArray as list –> {"TEPRA PRO SR3700P", "NEC MultiWriter 5750C v2.4", "Lisanet PDFwriter", "EPSON PM-T960", "Fax Printer"} set colorPinterList to {} repeat with i in pList set j to contents of i –Is it a Printer? set aPrinter to (current application’s NSPrinter’s printerWithName:j) set aDesc to aPrinter’s deviceDescription set aRec to aDesc as record –> {NSDeviceIsPrinter:"YES"} –Is it a Color Printer? set aColor to (aPrinter’s isColor()) as boolean –isColor() deprecated? It works if aColor = true then set the end of colorPinterList to j end if end repeat return colorPinterList end getPrinterNames |
PDFを印刷するテスト v2
| AppleScript名:PDFを印刷するテスト v2 |
| — Created 2015-08-24 by Takaaki Naganoya — Modified 2018-03-24 by Takaaki Naganoya — 2018 Piyomaru Software use AppleScript version "2.4" use scripting additions use framework "Foundation" use framework "Quartz" use framework "AppKit" –Choose a PDF to print set aDoc to POSIX path of (choose file of type {"com.adobe.pdf"}) my performSelectorOnMainThread:"printPDF:" withObject:aDoc waitUntilDone:true on printPDF:anObject set aDocPath to current application’s NSString’s stringWithString:anObject set aPDF to current application’s PDFDocument’s alloc()’s initWithURL:(current application’s |NSURL|’s fileURLWithPath:aDocPath) –Make PDFView set aPDFView to current application’s PDFView’s alloc()’s init() aPDFView’s setDocument:aPDF aPDFView’s setAutoScales:true aPDFView’s setDisplaysPageBreaks:false –Make Window set aWin to current application’s NSWindow’s alloc()’s init() aWin’s setContentSize:(aPDFView’s frame()’s |size|()) aWin’s setContentView:aPDFView aWin’s |center|() –Print PDF set sharedPrintInfo to current application’s NSPrintInfo’s sharedPrintInfo() aPDFView’s printWithInfo:sharedPrintInfo autoRotate:true end printPDF: |
AppStore.appをコントロール
macOS用のAppStore.appはmacOS 10.13搭載バージョンまではある程度(ちょっとだけ)AppleScriptからコントロール可能でした。macOS 10.14〜11.0搭載のAppStore.app V3.0ではコントロールできなくなっています。
もちろん、強引にGUI Scriptingで操作することは可能ですし、アプリケーション自体のAppleScript用語辞書に依存しないURL Event(open location)で指定のアプリケーションを表示状態にすることは可能です。
| AppleScript名:AppStore.appをコントロール |
| tell application "App Store" properties –> {frontmost:false, class:application, name:"App Store", version:"1.0"} tell window 1 properties –> {document:missing value, closeable:true, zoomed:false, class:window, index:1, visible:true, name:"", modal:false, miniaturizable:true, titled:true, miniaturized:false, floating:false, id:55, resizable:true, bounds:{356, 22, 1843, 1161}, zoomable:true} end tell end tell delay 3 –指定のURLをオープンする open location "macappstore://itunes.apple.com/jp/app/double-pdf/id1243418387?mt=12" –> App Storeで指定のURLを表示 |
エイリアス書類からオリジナルファイルの情報を取得する
指定のエイリアス書類から、オリジナルファイルの情報を取得するAppleScriptです。
オリジナルファイルを求める処理、というよりはエイリアス書類のリンク切れ(実体ファイルの存在)チェックを行うというのが「隠れた目的」です。
「エイリアス書類」とaliasは別物なので注意が必要です。どちらかといえば説明に注意が必要といったところなのかも???
本Blogでは両者を「エイリアス書類」「alias」と区別して記述しています。
| AppleScript名:エイリアス書類からオリジナルファイルの情報を取得する |
| set aFile to choose file
tell application "Finder" try set origI to (original item of aFile) as alias on error –エイリアス書類のオリジナルファイルが削除されていた場合(リンク切れ。オリジナル書類が削除されていた場合)にはエラーになる set origI to false end try end tell |
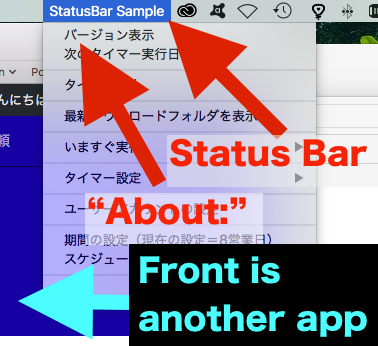
自分を最前面に移動させてAbout表示
実行プログラムを最前面に移動させて、Aboutウィンドウを表示するAppleScriptです。
Xcode上で作成するAppleScriptObjCアプリケーションで実行する場合には強制的にメインスレッドで実行させる(performSelectorOnMainThread:① withObject:② waitUntilDone:③)指定は必要ないのですが、スクリプトエディタ上で実行する分には必要です。

▲左側がメインスレッド実行指定時 右側は何も指定しないでスクリプトエディタ上で実行した場合(たまにこうなる)
ステータスバーに常駐するタイプのAppleScriptで、About表示を行う際に作成しました。つねに、他のアプリケーションが最前面にいるので、About表示を行うために一工夫必要だったので。
| AppleScript名:自分を最前面に移動させてAbout表示 |
| — Created 2018-04-10 by Takaaki Naganoya — 2018 Piyomaru Software use AppleScript version "2.4" use scripting additions use framework "Foundation" use framework "AppKit" — perform run this script in main thread my performSelectorOnMainThread:"aboutDisp:" withObject:(missing value) waitUntilDone:true on aboutDisp:aSender current application’s NSApp’s activateIgnoringOtherApps:true current application’s NSApp’s orderFrontStandardAboutPanel:(current application) end aboutDisp: |
指定フォルダのサブフォルダの中からYYYY_MM_DDで最新のものを抽出してFinderでオープン
指定フォルダ以下に存在するYYYY/MM/DDの3階層のフォルダで最新のものを抽出してFinder上で選択状態にするAppleScriptです。
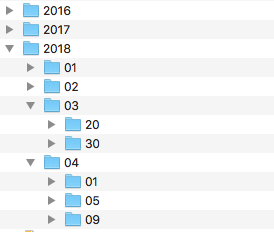
もともと、Safariのダウンロードフォルダに対してFolder Action Scriptを設定して、当日のYYYY/MM/DDの3階層のフォルダを作成してそこにダウンロードしたファイルを移動する処理を行っていました。
その最新フォルダをFinder上で表示する必要があったので、作成したものです。
AppleScriptのPOSIX pathとCocoaのPOSIX path(NSString)では末尾のスラッシュの有無が異なっており、専用ルーチンから切り分けて汎用ルーチンとして使いまわそうとして久しぶりにハマりました。
| AppleScript名:指定フォルダのサブフォルダの中からYYYY_MM_DDで最新のものを抽出してFinderでオープン |
| — Created 2018-04-09 by Takaaki Naganoya — 2018 Piyomaru Software use AppleScript version "2.4" use scripting additions use framework "Foundation" use bPlus : script "BridgePlus" –https://www.macosxautomation.com/applescript/apps/BridgePlus.html set sDL to POSIX path of (choose folder) –> "/Users/me/Downloads/"–AppleScript HFS to POSIX path (ends with slash) retLatestYYYYMMDDFolderUnder(sDL, 2017) of me on retLatestYYYYMMDDFolderUnder(aPOSIXFolderPath as string, minYYYY as integer) load framework –load BridgePlus framework if aPOSIXFolderPath ends with "/" then set aPOSIXFolderPath to text 1 thru -2 of aPOSIXFolderPath end if –> "/Users/maro/Downloads"–Cocoa POSIX path (does not end with) set sList to (current application’s NSString’s stringWithString:aPOSIXFolderPath)’s pathComponents() as list –> {"/", "Users", "me", "Downloads"} set sLen to length of sList –> 4 set fListRes to getFolderspathComponentsIn(aPOSIXFolderPath) of me –> {{"/", "Users", "me", "Downloads", "2016"}, {"/", "Users", "me", "Downloads", "2018", "03", "20"}…} set anArray to current application’s NSMutableArray’s arrayWithArray:fListRes set predStr to "SELF[SIZE] = " & (sLen + 3) as string set aPredicate to current application’s NSPredicate’s predicateWithFormat:predStr set t1Array to (anArray’s filteredArrayUsingPredicate:aPredicate) –> {{"/", "Users", "me", "Downloads", "2018", "03", "20"}…} set predStr1 to ("SELF[" & (sLen) as string) & "].floatValue >= " & (minYYYY as string) & " && SELF[" & ((sLen + 1) as string) & "].floatValue >= 1 && SELF[" & ((sLen + 2) as string) & "].floatValue >= 1" set aPredicate1 to current application’s NSPredicate’s predicateWithFormat:predStr1 set t2Array to (t1Array’s filteredArrayUsingPredicate:aPredicate1) as list –YYYY, MM, DDでそれぞれ降順ソート。最新のものを取得 set theResult to current application’s SMSForder’s subarraysIn:t2Array sortedByIndexes:{sLen, sLen + 1, sLen + 2} ascending:{false, false, false} sortTypes:{"compare:", "compare:", "compare:"} |error|:(missing value) if (theResult as list = {} or theResult = missing value) then return {} –最新のYYYY/MM/DDフォルダを取得してFinder上で選択表示 set theNewest to contents of first item of (theResult as list) set theNewestStr to (current application’s NSString’s pathWithComponents:theNewest) set parentPath to theNewestStr’s stringByDeletingLastPathComponent() set aRes to current application’s NSWorkspace’s sharedWorkspace()’s selectFile:theNewestStr inFileViewerRootedAtPath:parentPath end retLatestYYYYMMDDFolderUnder on getFolderspathComponentsIn(posixPath) script spd property allItems : {} end script set allItems of spd to {} set theNSURL to current application’s |NSURL|’s fileURLWithPath:posixPath set theNSFileManager to current application’s NSFileManager’s new() — get URL enumerator set theNSFileEnumerator to theNSFileManager’s enumeratorAtURL:theNSURL includingPropertiesForKeys:{current application’s NSURLIsDirectoryKey, current application’s NSURLIsPackageKey} options:((current application’s NSDirectoryEnumerationSkipsPackageDescendants) + (current application’s NSDirectoryEnumerationSkipsHiddenFiles as integer)) errorHandler:(missing value) — get all items from enumerator set (allItems of spd) to theNSFileEnumerator’s allObjects() set theFolders to {} — to store folders — loop through repeat with i from 1 to count of (allItems of spd) — is it a directory? set {theResult, isDirectory} to ((item i of (allItems of spd))’s getResourceValue:(reference) forKey:(current application’s NSURLIsDirectoryKey) |error|:(missing value)) if isDirectory as boolean = true then set {theResult, isPackage} to ((item i of (allItems of spd))’s getResourceValue:(reference) forKey:(current application’s NSURLIsPackageKey) |error|:(missing value)) — is it not a package? if not isPackage as boolean = true then set end of theFolders to (item i of (allItems of spd))’s pathComponents() as list –parse each directory into list end if end if end repeat return theFolders end getFolderspathComponentsIn |
Safariのダウンロードフォルダを求める v5
| AppleScript名:Safariのダウンロードフォルダを求める v5 |
| — Created 2015-03-06 by Takaaki Naganoya — Created 2018-04-09 by Takaaki Naganoya — 2018 Piyomaru Software use AppleScript version "2.4" use scripting additions use framework "Foundation" set dlRes to getSafariDownloadFolder() of me –> "/Users/maro/Downloads" on getSafariDownloadFolder() set theID to id of application "Safari" –> "com.apple.Safari" set dlRes2 to getAppDefaultsValue(theID, "DownloadsPath") return dlRes2 end getSafariDownloadFolder on getAppDefaultsValue(appBundleID, appKey) set storedDefaults to (current application’s NSUserDefaults’s standardUserDefaults()’s persistentDomainForName:appBundleID) set keyList to storedDefaults’s allKeys() as list if appKey is not in keyList then return missing value set dlRes to (storedDefaults’s valueForKeyPath:appKey) set dlRes2 to (dlRes’s stringByExpandingTildeInPath()) as list of string or string return dlRes2 end getAppDefaultsValue |
2D Listをアイテム数でフィルタリングする
| AppleScript名:2D Listをアイテム数でフィルタリングする |
| — Created 2018-04-09 by Takaaki Naganoya — 2018 Piyomaru Software use AppleScript version "2.4" use scripting additions use framework "Foundation" set aList to {{"1"}, {"2", "2"}, {"3", "3", "3"}, {"4", "4", "4", "4"}, {"5", "5", "5", "5", "5"}, {"6", "6", "6", "6", "6", "6"}, {"7", "7", "7", "7", "7", "7", "7"}, {"8", "8", "8", "8", "8", "8", "8", "8"}} set minItemNum to 7 set itemRes1 to retFilterItemMinNum(aList, minItemNum) of me –> {{"7", "7", "7", "7", "7", "7", "7"}, {"8", "8", "8", "8", "8", "8", "8", "8"}} set itemRes2 to retFilterItemEquNum(aList, minItemNum) of me –> {{"7", "7", "7", "7", "7", "7", "7"}} set itemRes3 to retFilterItemMaxNum(aList, minItemNum) of me –> {{"1"}, {"2", "2"}, {"3", "3", "3"}, {"4", "4", "4", "4"}, {"5", "5", "5", "5", "5"}, {"6", "6", "6", "6", "6", "6"}, {"7", "7", "7", "7", "7", "7", "7"}} on retFilterItemMinNum(aList, minItemNum) set anArray to current application’s NSMutableArray’s arrayWithArray:aList set predStr to "SELF[SIZE] >= " & (minItemNum as string) set aPredicate to current application’s NSPredicate’s predicateWithFormat:predStr set t2Array to (anArray’s filteredArrayUsingPredicate:aPredicate) as list return t2Array end retFilterItemMinNum on retFilterItemEquNum(aList, minItemNum) set anArray to current application’s NSMutableArray’s arrayWithArray:aList set predStr to "SELF[SIZE] = " & (minItemNum as string) set aPredicate to current application’s NSPredicate’s predicateWithFormat:predStr set t2Array to (anArray’s filteredArrayUsingPredicate:aPredicate) as list return t2Array end retFilterItemEquNum on retFilterItemMaxNum(aList, minItemNum) set anArray to current application’s NSMutableArray’s arrayWithArray:aList set predStr to "SELF[SIZE] <= " & (minItemNum as string) set aPredicate to current application’s NSPredicate’s predicateWithFormat:predStr set t2Array to (anArray’s filteredArrayUsingPredicate:aPredicate) as list return t2Array end retFilterItemMaxNum |
イメージビュー+ボタンを作成 v2
指定の画像を、画面の中央にウィンドウ表示するAppleScriptです。

NSWindowを作成して、そこにNSImageViewを表示し、さらにその上に透明状態のボタンを表示しています。画像をクリックすると、その上にかぶせているボタンがクリックを受信してウィンドウのクローズを行います。
| AppleScript名:イメージビュー+ボタンを作成 v2 |
| — Created 2015-12-11 by Takaaki Naganoya — Modified 2018-04-08 by Takaaki Naganoya — 2018 Piyomaru Software use AppleScript version "2.4" use scripting additions use framework "Foundation" use framework "AppKit" property windisp : false set aFilePath to POSIX path of (choose file) set aTitle to "イメージビューのじっけん/ImageView Test" set aButtonMSG to "OK" set wRes to dispImageView(aTitle, aFilePath, aButtonMSG, 10) of me on dispImageView(aTitle as text, dispImagePath, aButtonMSG as text, timeOutSecs as number) set (my windisp) to true –指定パスからNSImageに画像を読み込む set aImageURL to current application’s |NSURL|’s fileURLWithPath:dispImagePath set {theResult, theValue} to aImageURL’s getResourceValue:(reference) forKey:(current application’s NSURLTypeIdentifierKey) |error|:(missing value) if theResult is not equal to true then return false –the file is not a image set aImage to current application’s NSImage’s alloc()’s initWithContentsOfURL:aImageURL set aSize to aImage’s |size|() set imgWidth to width of aSize set imgHeight to height of aSize –NSImageViewを作って画像を読み込む set aView to current application’s NSImageView’s alloc()’s init() aView’s setBounds:(current application’s NSMakeRect(0, 0, imgWidth, imgHeight)) aView’s setImageScaling:(current application’s NSImageScaleProportionallyUpOrDown) aView’s setEditable:false aView’s setImage:aImage –Windowをつくる set aWin to makeWinWithView(aView, imgWidth, imgHeight, aTitle, 1.0) set wController to current application’s NSWindowController’s alloc() wController’s initWithWindow:aWin wController’s showWindow:me –Buttonをつくる set bButton to (current application’s NSButton’s alloc()’s initWithFrame:(current application’s NSMakeRect(0, 0, imgWidth, imgHeight))) bButton’s setTitle:"OK" bButton’s setTransparent:true bButton’s setTarget:me bButton’s setAction:("clicked:") aView’s addSubview:bButton aWin’s makeKeyAndOrderFront:me –Windowを表示状態に set aCount to timeOutSecs * 10 –timeout seconds * 10 repeat aCount times if (my windisp) = false then exit repeat end if delay 0.1 set aCount to aCount – 1 end repeat my closeWin:aWin return true –Safely closed end dispImageView –Button Clicked Event Handler on clicked:aSender log {"clicked:"} set (my windisp) to false end clicked: –make Window for Input on makeWinWithView(aView, aWinWidth, aWinHeight, aTitle, alphaV) set aScreen to current application’s NSScreen’s mainScreen() set aFrame to {{0, 0}, {aWinWidth, aWinHeight}} set aBacking to current application’s NSTitledWindowMask –NSBorderlessWindowMask set aDefer to current application’s NSBackingStoreBuffered — Window set aWin to current application’s NSWindow’s alloc() (aWin’s initWithContentRect:aFrame styleMask:aBacking backing:aDefer defer:false screen:aScreen) –aWin’s setBackgroundColor:(current application’s NSColor’s whiteColor()) aWin’s setTitle:aTitle aWin’s setDelegate:me aWin’s setDisplaysWhenScreenProfileChanges:true aWin’s setHasShadow:true aWin’s setIgnoresMouseEvents:false aWin’s setLevel:(current application’s NSPopUpMenuWindowLevel) –NSNormalWindowLevel aWin’s setOpaque:false aWin’s setAlphaValue:alphaV –append aWin’s setReleasedWhenClosed:true aWin’s |center|() aWin’s makeKeyAndOrderFront:(me) — Set Custom View aWin’s setContentView:aView return aWin end makeWinWithView –close win on closeWin:aWindow repeat with n from 10 to 1 by -1 (aWindow’s setAlphaValue:n / 10) delay 0.02 end repeat aWindow’s |close|() end closeWin: |
当日が1年の何週目かを求める
| AppleScript名:当日が1年の何週目かを求める.scptd |
| — – Created by: Takaaki Naganoya – Created on: 2018/04/08 — – Copyright © 2018 Piyomaru Software, All Rights Reserved — use AppleScript version "2.4" — Yosemite (10.10) or later use framework "Foundation" use scripting additions set a1Unit to (current application’s NSWeekOfYearCalendarUnit) set a2Unit to (current application’s NSDayCalendarUnit) set a3Unit to (current application’s NSMonthCalendarUnit) set a4Unit to (current application’s NSYearCalendarUnit) set aCalendar to current application’s NSCalendar’s currentCalendar() set aComponent to aCalendar’s components:(a1Unit + a2Unit + a3Unit + a4Unit) fromDate:(current application’s NSDate’s |date|()) set aWN to aComponent’s weekOfYear() –> 15 |

