| AppleScript名:RFC822エンコーダー v0 |
| — Created 2016-02-07 by Takaaki Naganoya — 2016 Piyomaru Software use AppleScript version "2.5" use scripting additions use framework "Foundation" set aStr to "2016-02-06 11:00:00" set rfc822str to retRFC822StrFromDateStr(aStr) of me –> "Sat, 06 Feb 2016 11:00:00GMT" on retRFC822StrFromDateObj(aObj) set aFormat to "yyyy-MM-dd HH:mm:ss" set aTZ to "GMT" set bDate to retNSDateFromStringWithTimeZone(aStr, aFormat, aTZ) of me set aGMform to current application’s NSDateFormatter’s alloc()’s init() aGMform’s setDateFormat:"EEE, dd MMM yyyy HH:mm:ss" aGMform’s setTimeZone:(current application’s NSTimeZone’s timeZoneForSecondsFromGMT:0) set usLocale to current application’s NSLocale’s alloc()’s initWithLocaleIdentifier:"GMT" aGMform’s setLocale:usLocale set theDate to aGMform’s stringFromDate:bDate set theDate to theDate’s stringByAppendingString:"GMT" return theDate as string end retRFC822StrFromDateObj on retRFC822StrFromDateStr(aStr) set aFormat to "yyyy-MM-dd HH:mm:ss" set aTZ to "GMT" set bDate to retNSDateFromStringWithTimeZone(aStr, aFormat, aTZ) of me set aGMform to current application’s NSDateFormatter’s alloc()’s init() aGMform’s setDateFormat:"EEE, dd MMM yyyy HH:mm:ss" aGMform’s setTimeZone:(current application’s NSTimeZone’s timeZoneForSecondsFromGMT:0) set usLocale to current application’s NSLocale’s alloc()’s initWithLocaleIdentifier:"GMT" aGMform’s setLocale:usLocale set theDate to aGMform’s stringFromDate:bDate set theDate to theDate’s stringByAppendingString:" GMT" return theDate as string end retRFC822StrFromDateStr on retNSDateFromStringWithTimeZone(aText, aFormat, aTZ) set aStr to current application’s NSString’s stringWithString:aText set theNSDateFormatter to current application’s NSDateFormatter’s alloc()’s init() theNSDateFormatter’s setDateFormat:(current application’s NSString’s stringWithString:aFormat) theNSDateFormatter’s setTimeZone:(current application’s NSTimeZone’s timeZoneWithAbbreviation:(current application’s NSString’s stringWithString:aTZ)) return (theNSDateFormatter’s dateFromString:aStr) –as date end retNSDateFromStringWithTimeZone |
タグ: 10.11savvy
RFC822デコーダー v0
| AppleScript名:RFC822デコーダー v0 |
| — Created 2016-02-07 by Takaaki Naganoya — 2016 Piyomaru Software –http://stackoverflow.com/questions/1850824/parsing-a-rfc-822-date-with-nsdateformatter use AppleScript version "2.4" use scripting additions use framework "Foundation" set dateString to "Sun, 19 May 2002 15:21:36 GMT" –set dateString to "Tue, 01 Dec 2009 08:48:25 +0000" set aRes to rfc822StrDecode(dateString) of me –> date "2002年5月20日月曜日 0:21:36" –http://stackoverflow.com/questions/1850824/parsing-a-rfc-822-date-with-nsdateformatter on rfc822StrDecode(dateString) set aTZ to "GMT" set en_US_POSIX to current application’s NSLocale’s alloc()’s initWithLocaleIdentifier:"en_US_POSIX" set dateFormatter to current application’s NSDateFormatter’s alloc()’s init() dateFormatter’s setLocale:en_US_POSIX dateFormatter’s setTimeZone:(current application’s NSTimeZone’s timeZoneWithAbbreviation:(current application’s NSString’s stringWithString:aTZ)) set aDate to missing value set RFC822String to (current application’s NSString’s stringWithString:dateString)’s uppercaseString() if (RFC822String’s rangeOfString:",")’s location() is not equal to (current application’s NSNotFound) then if aDate is equal to missing value then — Sun, 19 May 2002 15:21:36 GMT dateFormatter’s setDateFormat:"EEE, d MMM yyyy HH:mm:ss zzz" set aDate to dateFormatter’s dateFromString:RFC822String end if if aDate is equal to missing value then — Sun, 19 May 2002 15:21 GMT dateFormatter’s setDateFormat:"EEE, d MMM yyyy HH:mm zzz" set aDate to dateFormatter’s dateFromString:RFC822String end if if aDate is equal to missing value then — Sun, 19 May 2002 15:21:36 dateFormatter’s setDateFormat:"EEE, d MMM yyyy HH:mm:ss" set aDate to dateFormatter’s dateFromString:RFC822String end if if aDate is equal to missing value then — Sun, 19 May 2002 15:21:36 dateFormatter’s setDateFormat:"EEE, d MMM yyyy HH:mm" set aDate to dateFormatter’s dateFromString:RFC822String end if else if aDate is equal to missing value then — 19 May 2002 15:21:36 GMT dateFormatter’s setDateFormat:"d MMM yyyy HH:mm:ss zzz" set aDate to dateFormatter’s dateFromString:RFC822String end if if aDate is equal to missing value then — 19 May 2002 15:21 GMT dateFormatter’s setDateFormat:"d MMM yyyy HH:mm zzz" set aDate to dateFormatter’s dateFromString:RFC822String end if if aDate is equal to missing value then — 19 May 2002 15:21:36 dateFormatter’s setDateFormat:"d MMM yyyy HH:mm:ss" set aDate to dateFormatter’s dateFromString:RFC822String end if if aDate is equal to missing value then — 19 May 2002 15:21 dateFormatter’s setDateFormat:"d MMM yyyy HH:mm" set aDate to dateFormatter’s dateFromString:RFC822String end if end if if aDate is equal to missing value then return false return aDate as date end rfc822StrDecode |
今日のYYYY,MM,DDを取得する
| AppleScript名:今日のYYYY,MM,DDを取得する |
| — Created 2015-12-26 by Takaaki Naganoya — 2015 Piyomaru Software use AppleScript version "2.4" use scripting additions use framework "Foundation" use framework "AppKit" set aCalend to current application’s NSCalendar’s currentCalendar() set aDate to current application’s NSDate’s |date|() set aYear to aCalend’s component:(current application’s NSCalendarUnitYear) fromDate:aDate set aYearStr to numToZeroPaddingStr(aYear, 4, "0") of me set aMonth to aCalend’s component:(current application’s NSCalendarUnitMonth) fromDate:aDate set aMonthStr to numToZeroPaddingStr(aMonth, 2, "0") of me set aDay to aCalend’s component:(current application’s NSCalendarUnitDay) fromDate:aDate set aDayStr to numToZeroPaddingStr(aDay, 2, "0") of me set dStr to aYearStr & aMonthStr & aDayStr –> "20171219" –整数の値に指定桁数ゼロパディングして文字列で返す on numToZeroPaddingStr(aNum as integer, aDigit as integer, paddingChar as text) set aNumForm to current application’s NSNumberFormatter’s alloc()’s init() aNumForm’s setPaddingPosition:(current application’s NSNumberFormatterPadBeforePrefix) aNumForm’s setPaddingCharacter:paddingChar aNumForm’s setMinimumIntegerDigits:aDigit set bNum to current application’s NSNumber’s numberWithInt:aNum set aStr to aNumForm’s stringFromNumber:bNum return aStr as text end numToZeroPaddingStr |
epoch timeをdateに変換
| AppleScript名:epoch timeをdateに変換 |
| — Created 2017-12-19 by Takaaki Naganoya — 2017 Piyomaru Software use AppleScript version "2.4" use scripting additions use framework "Foundation" set epochTimeStr to current application’s NSString’s stringWithString:"1401325412" set aDate to (current application’s NSDate’s alloc()’s initWithTimeIntervalSince1970:(epochTimeStr’s doubleValue())) as date –> (NSDate) 2014-05-29 01:03:32 +0000 –> date "2014年5月29日木曜日 10:03:32" |
現在時刻のepoch timeを取得する
| AppleScript名:現在時刻のepoch timeを取得する |
| — Created 2017-12-19 by Takaaki Naganoya — 2017 Piyomaru Software use AppleScript version "2.4" use scripting additions use framework "Foundation" set curDate to current application’s NSDate’s |date|() set epochSeconds to (curDate’s timeIntervalSince1970()) |
iBooksライブラリ中のepubファイルから情報を取得 v3
| AppleScript名:iBooksライブラリ中のepubファイルから情報を取得 v3 |
| — Created 2017/02/26 by Christopher Stone — Modified 2017/11/01 by Takaaki Naganoya use framework "Foundation" use scripting additions use mdLib : script "Metadata Lib" version "1.0.0" –https://www.macosxautomation.com/applescript/apps/Script_Libs.html#Metadata_Lib property NSString : a reference to current application’s NSString property NSMutableArray : a reference to current application’s NSMutableArray property NSPropertyListFormat : a reference to current application’s NSPropertyListFormat property NSUTF8StringEncoding : a reference to current application’s NSUTF8StringEncoding property NSPropertyListImmutable : a reference to current application’s NSPropertyListImmutable property NSPropertyListSerialization : a reference to current application’s NSPropertyListSerialization set aPath to POSIX path of (path to library folder from user domain) set sourceFolder to aPath & "Containers/com.apple.BKAgentService/Data/Documents/iBooks/Books/" set textFiles to mdLib’s searchFolders:{sourceFolder} searchString:"kMDItemContentType contains %@ || kMDItemContentType contains %@ " searchArgs:{"com.apple.ibooks-folder", "org.idpf.epub-container"} set outDicList to NSMutableArray’s new() repeat with i in textFiles set aFile to (i as string) if aFile ends with "/" then set aFullPath to aFile & "iTunesMetadata.plist" else set aFullPath to aFile & "/iTunesMetadata.plist" end if try set xmlData to read ((POSIX file aFullPath) as alias) as «class utf8» set xRes to readPlistFromStr(xmlData) of me log xRes as list of string or string –as anything (maybe record or missing value) (*cover-writing-mode:vertical, genre:教育, scroll-axis:default, sort-artist:あっぷる, BKITunesMigratedMetadata:PersistentID:6.68315366592803E+18, seriesTitle:Everyone Can Code, sort-name:Swiftによるあぷりけーしょん開発:入門編, itemId:1209648719, apple-id:xxxxxxxxxxxx@xxx.xxx, fileExtension:ibooks, year:2017, releaseDate:2017-03-19T07:00:00Z, BKInsertionDate:512115887, asset-info:flavor:pluspub, file-size:60642970, book-info:publication-version:162901775, PageProgression:default, asset-info:flavor:pluspub, file-size:60642970, package-file-hash:XXXXXXXXXXXXXXXXXXXXXXXXXXXXXXXX, BKAllocatedSize:82993152, longDescription:このコースでは、Swiftという言語を使って基本的なプログラミングの土台をしっかりと作り上げていきます。基本的なiOSアプリケーションを一から開発するために必要なツール、手法、概念を活用して、実践的な練習に取り組みます。さらに、プログラミングと優れたアプリケーション開発の土台となる、ユーザーインターフェイス設計の基本原則についても学習します。このコースを受講するにあたってプログラミングの経験は必要ありません。プログラミングの経験がある場合、レッスンの最初の方は簡単に読み進めていただくとよいでしょう。このブックではプログラミングの基礎にとどまらず、ソフトウェア開発ツールや概念、ベストプラクティスについても学習できます。, artistId:9.39801385E+8, artistName:Apple Education, isPreview:false, BKDisplayName:mzbf.eqmpijqw..d2.dlv.d2.dlv.ibooks, human-friendly-publication-version:1.1, shouldDisableTouchEmulation:true, vendorId:379015, drmVersionNumber:0, kind:ebook, s:143462, genreId:10037, explicit:2, seriesAdamId:1.118575554E+9, publisher:Apple Inc. – Education, versionRestrictions:16843008, BKGenerationCount:2, desktopSupportLevel:supported, primaryLanguage:ja, itemName:Swiftによるアプリケーション開発:入門編, purchaseDate:2017-03-25T06:21:26Z, shouldDisableOptimizeSpeed:true, obeyPageBreaks:1, pageCount:244*) if xRes is not equal to missing value then (outDicList’s addObject:xRes) end if end try end repeat return outDicList as list of string or string –as anything –stringのplistを読み込んでNSDictionaryに on readPlistFromStr(theString) set aSource to NSString’s stringWithString:theString set pListData to aSource’s dataUsingEncoding:(NSUTF8StringEncoding) set aPlist to NSPropertyListSerialization’s propertyListFromData:pListData mutabilityOption:(NSPropertyListImmutable) |format|:(NSPropertyListFormat) errorDescription:(missing value) return aPlist end readPlistFromStr |
文字列で与えたシェルコマンドを実行する v2
do shell scriptコマンドとほぼ等価な、Cocoaの機能を用いたshell script実行のAppleScriptです。
よく「Terminal.app上のshell scriptをそのままdo shell scriptコマンドで実行して動かない」という声を聞きますが、そもそも環境変数が全然違うのでそのまま動くはずがありません。
AppleScriptのdo shell scriptコマンドは、いまのmacOSのセキュリティ向上の流れで行けば確実に近い将来に「デフォルトで実行禁止」「環境設定でオンにしてはじめて実行可能に」という扱いになることでしょう。
Cocoaのshell command呼び出し機能についても同様の制限が加わるかどうかは不明ですが、Cocoa経由でのshell command呼び出しAppleScriptについて調べておきました。
| AppleScript名:文字列で与えたシェルコマンドを実行する v2 |
| — Created 2016-02-13 by Takaaki Naganoya — 2016 Piyomaru Software –以下を参照: –http://stackoverflow.com/questions/412562/execute-a-terminal-command-from-a-cocoa-app use AppleScript version "2.4" use scripting additions use framework "Foundation" set aRes to (runCommandString("pwd") of me) as string –> "/" set bRes to (runCommandString("cd & ls -la") of me) as string –Lock Screen –runCommandAtPath("/System/Library/CoreServices/Menu Extras/User.menu/Contents/Resources/CGSession", "-suspend") of me –文字列で与えたシェルコマンドを実行する on runCommandString(commandStr as string) set aPipe to current application’s NSPipe’s pipe() set aTask to current application’s NSTask’s alloc()’s init() aTask’s setLaunchPath:"/bin/sh" aTask’s setArguments:{"-c", current application’s NSString’s stringWithFormat_("%@", commandStr)} –stringWithFormatはASOCに書き換え時の要注意点 aTask’s setStandardOutput:aPipe set aFile to aPipe’s fileHandleForReading() aTask’s |launch|() return current application’s NSString’s alloc()’s initWithData:(aFile’s readDataToEndOfFile()) encoding:(current application’s NSUTF8StringEncoding) end runCommandString –指定したパスのシェルコマンドを実行する(結果などは取得しない) on runCommandAtPath(commandPath as string, anArgument as string) set aTask to current application’s NSTask’s alloc()’s init() aTask’s setLaunchPath:commandPath aTask’s setArguments:(current application’s NSArray’s arrayWithObject:anArgument) aTask’s |launch|() end runCommandAtPath |
画像を文字認識して文字エリアを塗りつぶし v3
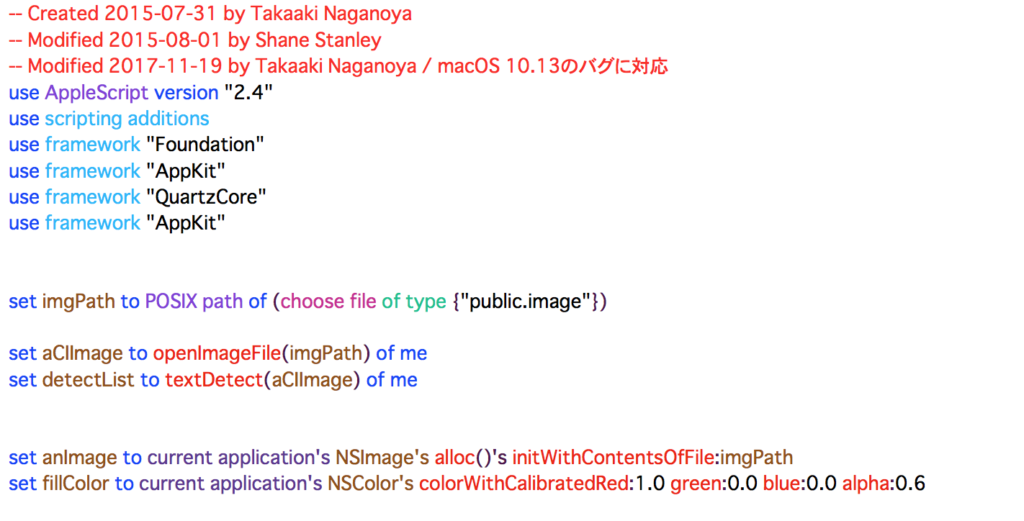
▲Original Image
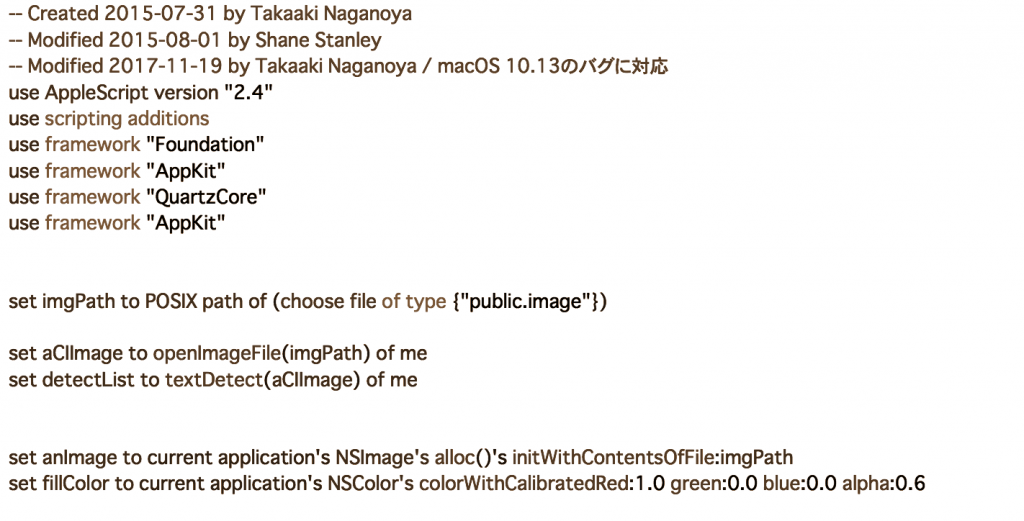
▲Filtered Image(CIColorMonochrome)
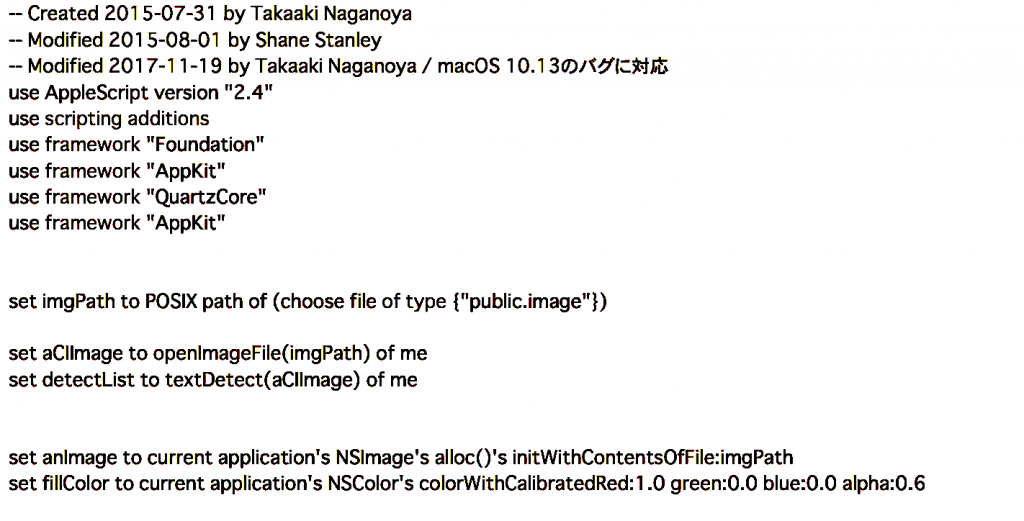
▲Filtered Image(CIColorPosterize)
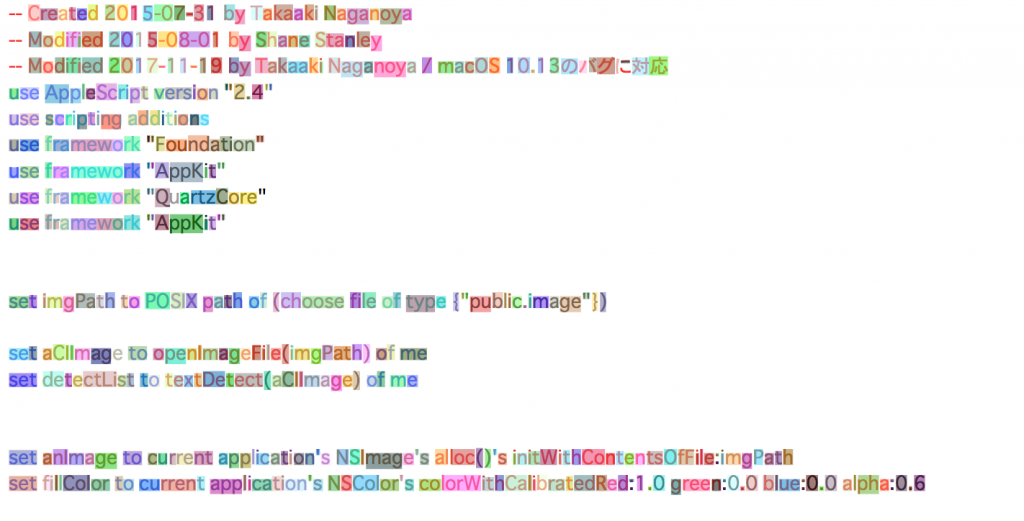
▲Result Image
| AppleScript名:画像を文字認識して文字エリアを塗りつぶし v3 |
| — Created 2017-11-19 by Takaaki Naganoya — Modified 2018-02-11 by Takaaki Naganoya –v3:画像の前処理を付加 use AppleScript version "2.5" use scripting additions use framework "Foundation" use framework "AppKit" use framework "QuartzCore" use framework "AppKit" set retinaF to (current application’s NSScreen’s mainScreen()’s backingScaleFactor()) as real –> 2.0 (Retina) / 1.0 (Non Retina) set imgPath to POSIX path of (choose file of type {"public.image"}) set anImage to current application’s NSImage’s alloc()’s initWithContentsOfFile:imgPath set aCIImage to convNSImageToCIimage(anImage) –モノクロ化フィルタ set bCIImage to monochromefilterACGImage(aCIImage) of me –2階調ポスタライズフィルタ set cCIImage to posterizefilterACGImage(bCIImage) of me –文字領域認識 set detectList to textDetect(cCIImage) of me –描画開始 anImage’s lockFocus() repeat with i in detectList set origX to (x of origin of i) / retinaF set origY to (y of origin of i) / retinaF set sizeX to (width of |size| of i) / retinaF set sizeY to (height of |size| of i) / retinaF set theRect to {{x:origX, y:origY}, {width:sizeX, height:sizeY}} set theNSBezierPath to current application’s NSBezierPath’s bezierPath (theNSBezierPath’s appendBezierPathWithRect:theRect) set rRnd to (random number from 1 to 10) / 10 set gRnd to (random number from 1 to 10) / 10 set bRnd to (random number from 1 to 10) / 10 set fillColor to (current application’s NSColor’s colorWithCalibratedRed:rRnd green:gRnd blue:bRnd alpha:0.6) fillColor’s |set|() –色設定 theNSBezierPath’s fill() –ぬりつぶし end repeat anImage’s unlockFocus() –描画ここまで set aUUIDstr to (current application’s NSUUID’s UUID()’s UUIDString()) as string set aPath to ((current application’s NSString’s stringWithString:imgPath)’s stringByDeletingLastPathComponent()’s stringByAppendingPathComponent:aUUIDstr)’s stringByAppendingPathExtension:"png" set fRes to saveImageRepAtPathAsPNG(anImage, aPath) of me on openImageFile(imageFile) — imageFile: POSIX path 形式のファイルパス set fileURL to current application’s |NSURL|’s fileURLWithPath:imageFile return current application’s CIImage’s alloc()’s initWithContentsOfURL:fileURL end openImageFile –画像を指定パスにPNG形式で保存 on saveImageRepAtPathAsPNG(anImage, outPath) set imageRep to anImage’s TIFFRepresentation() set aRawimg to current application’s NSBitmapImageRep’s imageRepWithData:imageRep –書き出しファイルパス情報を作成 set pathString to current application’s NSString’s stringWithString:outPath set newPath to pathString’s stringByExpandingTildeInPath() –書き出し set myNewImageData to (aRawimg’s representationUsingType:(current application’s NSPNGFileType) |properties|:(missing value)) return (myNewImageData’s writeToFile:newPath atomically:true) as boolean end saveImageRepAtPathAsPNG on textDetect(imageRef) — 検出器のオプションを NSDictonary で作成 set optDic1 to current application’s NSDictionary’s dictionaryWithObject:(current application’s CIDetectorAccuracyHigh) forKey:(current application’s CIDetectorAccuracy) set textDetector to current application’s CIDetector’s detectorOfType:(current application’s CIDetectorTypeText) context:(missing value) options:optDic1 — 文字エリア検出を実行 set optDic2 to current application’s NSDictionary’s dictionaryWithObject:true forKey:(current application’s CIDetectorReturnSubFeatures) set textArray to textDetector’s featuresInImage:imageRef options:optDic2 set fList to {} — 検出されたテキストの位置とサイズをログに出力 repeat with i from 1 to (count of textArray) set typeFace to item i of textArray set bList to (typeFace’s subFeatures()) repeat with ii in bList set aBounds to ii’s |bounds|() set aType to ii’s type() set the end of fList to aBounds end repeat end repeat return fList end textDetect on convCIimageToNSImage(aCIImage) set aRep to current application’s NSBitmapImageRep’s alloc()’s initWithCIImage:aCIImage set tmpSize to aRep’s |size|() set newImg to current application’s NSImage’s alloc()’s initWithSize:tmpSize newImg’s addRepresentation:aRep return newImg end convCIimageToNSImage on convNSImageToCIimage(aNSImage) set tiffDat to aNSImage’s TIFFRepresentation() set aRep to current application’s NSBitmapImageRep’s imageRepWithData:tiffDat set newImg to current application’s CIImage’s alloc()’s initWithBitmapImageRep:aRep return newImg end convNSImageToCIimage –Posterizeフィルタ on posterizefilterACGImage(aCIImage) set aFilter to current application’s CIFilter’s filterWithName:"CIColorPosterize" aFilter’s setDefaults() aFilter’s setValue:aCIImage forKey:"inputImage" aFilter’s setValue:2 forKey:"inputLevels" set aOutImage to aFilter’s valueForKey:"outputImage" return aOutImage end posterizefilterACGImage –Monochromeフィルタ on monochromefilterACGImage(aCIImage) set aFilter to current application’s CIFilter’s filterWithName:"CIColorMonochrome" aFilter’s setDefaults() aFilter’s setValue:aCIImage forKey:"inputImage" aFilter’s setValue:1.0 forKey:"inputIntensity" set aOutImage to aFilter’s valueForKey:"outputImage" return aOutImage end monochromefilterACGImage |
JPEG画像の破損チェック
かつて、破損JPEG画像はアプリケーションのクラッシュを引き起こすケースもあり、Mac OS Xでもなかなか細心の注意をはらって事前のチェックを行なっていました(Mac OS X 10.4のころ)。
AppleScriptによるバッチ処理では、大量のデータを相手にします。そのため、途中でエラーを発生させるようなイレギュラーなデータにはエラートラップを仕掛けてあらかじめ対処しておきますが、クラッシュを引き起こすような破損データについては事前に手の施しようがありません。
# 破損画像によるクラッシュが発生して処理が停止するトラブルに直面したときには、入稿データの添付画像の破損チェックを自動で行うようにして対処しました。そもそも破損していては話にならないので
この破損画像が引き起こすクラッシュは(iOSの方で)クラッカーからの格好の標的にされたため(初期の「脱獄」の手口がこの破損画像にともなうクラッシュ→実行権限乗っ取りでした)、対策がすすみ、iOSと共通基盤を持っているMac OS Xでも同様の対策が行われたためか、Mac OS X→OS X→macOSと呼称が変わるにつれて徐々にクラッシュしないように強化されてきた機能でもあります。
今日、破損画像にそれほど神経質にならなくても済むようになっていますが、古いOSを使い続けている環境がないわけではありません。そうした環境においては、画像処理前の破損画像のチェックは重要な処理であり続けることでしょう。
また、巨大な画像データを遅い回線/サーバー経由でダウンロードして処理する場合には、「念のため」チェックを行なっておくべきかもしれません。
本ScriptのようにJPEGマーカーの有無をチェックするのは、破損画像検出の手口としては入門レベルであり、画像処理を行うプログラムで実際に読み込み+表示+書き出しを行わせるぐらいの処理をしておく必要があります(読み込めて表示できても、書き出しができない破損画像にも遭遇しました)。
実際にさまざまな現場で集めた「破損画像」は、大切に自分の手元に集めてあります。
| AppleScript名:JPEG画像の破損チェック |
| — Created 2006-10-17 by Somebody — Modified 2015-10-06 by Takaaki Naganoya set aFile to choose file of type {"public.jpeg"} set dRes to VerifyCompleteJPEG(aFile) of me — to verify whether a JPEG is a111 full or partial (e.g. partially downloaded) JPEG — last two JPEG file bytes must be (ASCII character 255) & (ASCII character 217) on VerifyCompleteJPEG(f) try set s to read f from -2 for 2 on error return false –error "JPEG image is too short or currupted" end try if s = (ASCII character 255) & (ASCII character 217) then return true else return false end if end VerifyCompleteJPEG |
画像の破損チェック v2
| AppleScript名:画像の破損チェック v2 |
| set theFile to choose file set aRes to breakImageCheck(theFile) of me –> true / false –破損画像チェック –(通常時:true、破損時:false が返ってくる) –対象形式:PICT/Photoshop/BMP/QuickTime Image/GIF/JPEG/MacPaint/JPEG2/SGI/PSD/TGA/Text/PDF/PNG/TIFF on breakImageCheck(theFile) try tell application "Image Events" set {theWidth, theHeight} to dimensions of image theFile end tell return true –normal image on error return false –broken image end try end breakImageCheck |
macOS 10.14、10.15向けに修正。ただし、macOS 10.15ではデフォルト設定のままだとImage Eventsがユーザーディレクトリ以下のファイルにアクセスできない状態で出荷されているため、システム環境設定の「セキュリティとプライバシー」>「セキュリティ」>「フルディスクアクセス」に登録しておく必要があります。
| AppleScript名:画像の破損チェック v2b.scpt |
| set theFile to (choose file of type {"public.image"}) as «class furl» set aRes to breakImageCheck(theFile) of me –> true / false –破損画像チェック –(通常時:true、破損時:false が返ってくる) –対象形式:PICT/Photoshop/BMP/QuickTime Image/GIF/JPEG/MacPaint/JPEG2/SGI/PSD/TGA/Text/PDF/PNG/TIFF on breakImageCheck(theFile) try tell application "Image Events" set tmpImage to open theFile set aProp to properties of tmpImage close tmpImage end tell return true –normal image on error return false –broken image end try end breakImageCheck |
画像の破損チェック
画像の破損チェックを行うAppleScriptです。
昔、Mac OS X 10.3や10.4の時代には、破損画像をオープンするとアプリケーションごとクラッシュすることがありました。そのため、アプリケーションのクラッシュを伴うような「破損画像」のチェックを行うことには意味がありました。
その後、Mac OS XからOS Xへと名称が変更になったあたりで、共通の基盤を持っているiOSのクラッシュ対策がフィードバックされたためか、こうした破損画像に対する耐性が高まりました(OS X 10.7ぐらい?)。
画像の破損は、①オープン時にワーニングメッセージが出るレベル、②画像として読み込んでムービー書き出し時に問題の出るレベル、③そもそも全破損していてオープンすらできないレベル、に個人的に区分けしており、本ルーチンでは③に対してエラーを出しつつも、①と②についてはOSの進歩とともに問題になりにくくなっている(エラー検出できない)状態です。
AppleScriptの穴Blogアーカイブ本Vol.5において、「EPSファイルの破損チェック(高速版)」を収録しています。
| AppleScript名:画像の破損チェック |
| — Created 2016-08-24 by Takaaki Naganoya — 2016 Piyomaru Software use AppleScript version "2.4" use scripting additions use framework "Foundation" use framework "AppKit" set aPath to (choose file of type {"public.image"}) set aRes to confirmImage(aPath) of me –画像の破損チェック(can not open画像はチェックOK) 破損時にはfalseを返す on confirmImage(aPath) set aType to type identifier of (info for aPath) set aPOSIX to POSIX path of aPath set aImage to current application’s NSImage’s alloc()’s initWithContentsOfFile:aPOSIX if aImage = missing value then return {false, aType, 1} set aRes to aImage’s isValid() return {aRes, aType, 2} end confirmImage |
指定画像の明度ヒストグラム画像を出力する

▲Original Image
![]()
▲Filtered Image
| AppleScript名:指定画像の明度ヒストグラム画像を出力する |
| — Created 2017-02-12 by Takaaki Naganoya — 2017 Piyomaru Software use AppleScript version "2.4" use scripting additions use framework "Foundation" use framework "AppKit" use framework "GPUImage" –https://github.com/BradLarson/GPUImage set aFile to POSIX path of (choose file of type {"public.image"} with prompt "Select a Image to check it is white (or not) ") set anNSImage to current application’s NSImage’s alloc()’s initWithContentsOfFile:aFile set wRes to getHistogramFromImage(anNSImage, 4) of me set aPath to (POSIX path of (path to desktop) & (current application’s NSUUID’s UUID())’s UUIDString() as string) & ".png" set fRes to saveNSImageAtPathAsPNG(wRes, aPath) of me –指定のNSImageをGPUImage.frameworkで明度ヒストグラム化してNSImageで返す on getHistogramFromImage(aNSImage, histogramType) set aFilter to current application’s GPUImageHistogramFilter’s alloc()’s initWithHistogramType:histogramType set aProcImg to (aFilter’s imageByFilteringImage:aNSImage) return aProcImg end getHistogramFromImage –NSImageをGPUImage.frameworkの指定フィルタで処理してNSImageを返す on filterWithNSImage(aNSImage, filterName as string) set aClass to current application’s NSClassFromString(filterName) set aImageFilter to aClass’s alloc()’s init() set aProcImg to (aImageFilter’s imageByFilteringImage:aNSImage) return aProcImg end filterWithNSImage –NSImageを指定パスにPNG形式で保存 on saveNSImageAtPathAsPNG(anImage, outPath) set imageRep to anImage’s TIFFRepresentation() set aRawimg to current application’s NSBitmapImageRep’s imageRepWithData:imageRep set pathString to current application’s NSString’s stringWithString:outPath set newPath to pathString’s stringByExpandingTildeInPath() set myNewImageData to (aRawimg’s representationUsingType:(current application’s NSPNGFileType) |properties|:(missing value)) set aRes to (myNewImageData’s writeToFile:newPath atomically:true) as boolean return aRes –true/false end saveNSImageAtPathAsPNG |
画像にHistogramGeneratorを実行してデスクトップにPNG形式で保存

▲Original Image
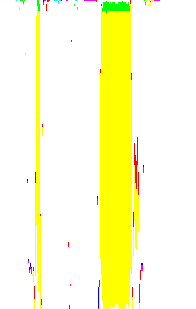
▲Filtered Image
| AppleScript名:画像にHistogramGeneratorを実行してデスクトップにPNG形式で保存.scptd |
| — Created 2017-02-05 by Takaaki Naganoya — 2017 Piyomaru Software use AppleScript version "2.4" use scripting additions use framework "Foundation" use framework "AppKit" use framework "GPUImage" –https://github.com/BradLarson/GPUImage –Read JPEG file set aFile to POSIX path of (choose file of type {"public.image"}) set anImage to current application’s NSImage’s alloc()’s initWithContentsOfFile:aFile –Filter Image set stillImageFilter to current application’s GPUImageHistogramGenerator’s alloc()’s init() set aProcImg to stillImageFilter’s imageByFilteringImage:anImage –Make New File Name set aUUIDstr to (current application’s NSUUID’s UUID()’s UUIDString()) as string set aPath to ((current application’s NSString’s stringWithString:aFile)’s stringByDeletingLastPathComponent()’s stringByAppendingPathComponent:aUUIDstr)’s stringByAppendingPathExtension:"png" set sRes to saveNSImageAtPathAsPNG(aProcImg, aPath as string) of me –NSImageを指定パスにPNG形式で保存 on saveNSImageAtPathAsPNG(anImage, outPath) set imageRep to anImage’s TIFFRepresentation() set aRawimg to current application’s NSBitmapImageRep’s imageRepWithData:imageRep set pathString to current application’s NSString’s stringWithString:outPath set newPath to pathString’s stringByExpandingTildeInPath() set myNewImageData to (aRawimg’s representationUsingType:(current application’s NSPNGFileType) |properties|:(missing value)) set aRes to (myNewImageData’s writeToFile:newPath atomically:true) as boolean return aRes –true/false end saveNSImageAtPathAsPNG |
画像にGaussianBlurFilterを実行してデスクトップにPNG形式で保存

▲Original Image

▲Filtered Image
| AppleScript名:画像にGaussianBlurFilterを実行してデスクトップにPNG形式で保存.scptd |
| — Created 2017-02-05 by Takaaki Naganoya — 2017 Piyomaru Software use AppleScript version "2.4" use scripting additions use framework "Foundation" use framework "AppKit" use framework "GPUImage" –https://github.com/BradLarson/GPUImage –Read JPEG file set aFile to POSIX path of (choose file of type {"public.image"}) set anImage to current application’s NSImage’s alloc()’s initWithContentsOfFile:aFile –Filter Image set stillImageFilter to current application’s GPUImageGaussianBlurFilter’s alloc()’s init() set aProcImg to stillImageFilter’s imageByFilteringImage:anImage –Make New File Name set aUUIDstr to (current application’s NSUUID’s UUID()’s UUIDString()) as string set aPath to ((current application’s NSString’s stringWithString:aFile)’s stringByDeletingLastPathComponent()’s stringByAppendingPathComponent:aUUIDstr)’s stringByAppendingPathExtension:"png" set sRes to saveNSImageAtPathAsPNG(aProcImg, aPath as string) of me –NSImageを指定パスにPNG形式で保存 on saveNSImageAtPathAsPNG(anImage, outPath) set imageRep to anImage’s TIFFRepresentation() set aRawimg to current application’s NSBitmapImageRep’s imageRepWithData:imageRep set pathString to current application’s NSString’s stringWithString:outPath set newPath to pathString’s stringByExpandingTildeInPath() set myNewImageData to (aRawimg’s representationUsingType:(current application’s NSPNGFileType) |properties|:(missing value)) set aRes to (myNewImageData’s writeToFile:newPath atomically:true) as boolean return aRes –true/false end saveNSImageAtPathAsPNG |
画像にUnsharpMaskFilterを実行してデスクトップにPNG形式で保存

▲Original Image

▲Filtered Image
| AppleScript名:画像にUnsharpMaskFilterを実行してデスクトップにPNG形式で保存.scptd |
| — Created 2017-02-05 by Takaaki Naganoya — 2017 Piyomaru Software use AppleScript version "2.4" use scripting additions use framework "Foundation" use framework "AppKit" use framework "GPUImage" –https://github.com/BradLarson/GPUImage –Read JPEG file set aFile to POSIX path of (choose file of type {"public.image"}) set anImage to current application’s NSImage’s alloc()’s initWithContentsOfFile:aFile –Filter Image set stillImageFilter to current application’s GPUImageUnsharpMaskFilter’s alloc()’s init() set aProcImg to stillImageFilter’s imageByFilteringImage:anImage –Make New File Name set aUUIDstr to (current application’s NSUUID’s UUID()’s UUIDString()) as string set aPath to ((current application’s NSString’s stringWithString:aFile)’s stringByDeletingLastPathComponent()’s stringByAppendingPathComponent:aUUIDstr)’s stringByAppendingPathExtension:"png" set sRes to saveNSImageAtPathAsPNG(aProcImg, aPath as string) of me –NSImageを指定パスにPNG形式で保存 on saveNSImageAtPathAsPNG(anImage, outPath) set imageRep to anImage’s TIFFRepresentation() set aRawimg to current application’s NSBitmapImageRep’s imageRepWithData:imageRep set pathString to current application’s NSString’s stringWithString:outPath set newPath to pathString’s stringByExpandingTildeInPath() set myNewImageData to (aRawimg’s representationUsingType:(current application’s NSPNGFileType) |properties|:(missing value)) set aRes to (myNewImageData’s writeToFile:newPath atomically:true) as boolean return aRes –true/false end saveNSImageAtPathAsPNG |
画像にSharpenFilterを実行してデスクトップにPNG形式で保存

▲Original Image

▲Filtered Image
| AppleScript名:画像にSharpenFilterを実行してデスクトップにPNG形式で保存.scptd |
| — Created 2017-02-05 by Takaaki Naganoya — 2017 Piyomaru Software use AppleScript version "2.4" use scripting additions use framework "Foundation" use framework "AppKit" use framework "GPUImage" –https://github.com/BradLarson/GPUImage –Read JPEG file set aFile to POSIX path of (choose file of type {"public.image"}) set anImage to current application’s NSImage’s alloc()’s initWithContentsOfFile:aFile –Filter Image set stillImageFilter to current application’s GPUImageSharpenFilter’s alloc()’s init() set aProcImg to stillImageFilter’s imageByFilteringImage:anImage –Make New File Name set aUUIDstr to (current application’s NSUUID’s UUID()’s UUIDString()) as string set aPath to ((current application’s NSString’s stringWithString:aFile)’s stringByDeletingLastPathComponent()’s stringByAppendingPathComponent:aUUIDstr)’s stringByAppendingPathExtension:"png" set sRes to saveNSImageAtPathAsPNG(aProcImg, aPath as string) of me –NSImageを指定パスにPNG形式で保存 on saveNSImageAtPathAsPNG(anImage, outPath) set imageRep to anImage’s TIFFRepresentation() set aRawimg to current application’s NSBitmapImageRep’s imageRepWithData:imageRep set pathString to current application’s NSString’s stringWithString:outPath set newPath to pathString’s stringByExpandingTildeInPath() set myNewImageData to (aRawimg’s representationUsingType:(current application’s NSPNGFileType) |properties|:(missing value)) set aRes to (myNewImageData’s writeToFile:newPath atomically:true) as boolean return aRes –true/false end saveNSImageAtPathAsPNG |
画像にFalseColorFilterを実行してデスクトップにPNG形式で保存

▲Original Image

▲Filtered Image
| AppleScript名:画像にFalseColorFilterを実行してデスクトップにPNG形式で保存.scptd |
| — Created 2017-02-05 by Takaaki Naganoya — 2017 Piyomaru Software use AppleScript version "2.4" use scripting additions use framework "Foundation" use framework "AppKit" use framework "GPUImage" –https://github.com/BradLarson/GPUImage –Read JPEG file set aFile to POSIX path of (choose file of type {"public.image"}) set anImage to current application’s NSImage’s alloc()’s initWithContentsOfFile:aFile –Filter Image set stillImageFilter to current application’s GPUImageFalseColorFilter’s alloc()’s init() set aProcImg to stillImageFilter’s imageByFilteringImage:anImage –Make New File Name set aUUIDstr to (current application’s NSUUID’s UUID()’s UUIDString()) as string set aPath to ((current application’s NSString’s stringWithString:aFile)’s stringByDeletingLastPathComponent()’s stringByAppendingPathComponent:aUUIDstr)’s stringByAppendingPathExtension:"png" set sRes to saveNSImageAtPathAsPNG(aProcImg, aPath as string) of me –NSImageを指定パスにPNG形式で保存 on saveNSImageAtPathAsPNG(anImage, outPath) set imageRep to anImage’s TIFFRepresentation() set aRawimg to current application’s NSBitmapImageRep’s imageRepWithData:imageRep set pathString to current application’s NSString’s stringWithString:outPath set newPath to pathString’s stringByExpandingTildeInPath() set myNewImageData to (aRawimg’s representationUsingType:(current application’s NSPNGFileType) |properties|:(missing value)) set aRes to (myNewImageData’s writeToFile:newPath atomically:true) as boolean return aRes –true/false end saveNSImageAtPathAsPNG |
画像にKuwaharaFilterを実行してデスクトップにPNG形式で保存

▲Original Image

▲Filtered Image
| AppleScript名:画像にKuwaharaFilterを実行してデスクトップにPNG形式で保存.scptd |
| — Created 2017-02-05 by Takaaki Naganoya — 2017 Piyomaru Software use AppleScript version "2.4" use scripting additions use framework "Foundation" use framework "AppKit" use framework "GPUImage" –https://github.com/BradLarson/GPUImage –Read JPEG file set aFile to POSIX path of (choose file of type {"public.image"}) set anImage to current application’s NSImage’s alloc()’s initWithContentsOfFile:aFile –Filter Image set stillImageFilter to current application’s GPUImageKuwaharaFilter’s alloc()’s init() set aProcImg to stillImageFilter’s imageByFilteringImage:anImage –Make New File Name set aUUIDstr to (current application’s NSUUID’s UUID()’s UUIDString()) as string set aPath to ((current application’s NSString’s stringWithString:aFile)’s stringByDeletingLastPathComponent()’s stringByAppendingPathComponent:aUUIDstr)’s stringByAppendingPathExtension:"png" set sRes to saveNSImageAtPathAsPNG(aProcImg, aPath as string) of me –NSImageを指定パスにPNG形式で保存 on saveNSImageAtPathAsPNG(anImage, outPath) set imageRep to anImage’s TIFFRepresentation() set aRawimg to current application’s NSBitmapImageRep’s imageRepWithData:imageRep set pathString to current application’s NSString’s stringWithString:outPath set newPath to pathString’s stringByExpandingTildeInPath() set myNewImageData to (aRawimg’s representationUsingType:(current application’s NSPNGFileType) |properties|:(missing value)) set aRes to (myNewImageData’s writeToFile:newPath atomically:true) as boolean return aRes –true/false end saveNSImageAtPathAsPNG |
画像にGrayscaleFilterを実行してデスクトップにPNG形式で保存

▲Original Image

▲Filtered Image
| AppleScript名:画像にGrayscaleFilterを実行してデスクトップにPNG形式で保存.scptd |
| — Created 2017-02-05 by Takaaki Naganoya — 2017 Piyomaru Software use AppleScript version "2.4" use scripting additions use framework "Foundation" use framework "AppKit" use framework "GPUImage" –https://github.com/BradLarson/GPUImage –Read JPEG file set aFile to POSIX path of (choose file of type {"public.image"}) set anImage to current application’s NSImage’s alloc()’s initWithContentsOfFile:aFile –Filter Image set stillImageFilter to current application’s GPUImageGrayscaleFilter’s alloc()’s init() set aProcImg to stillImageFilter’s imageByFilteringImage:anImage –Make New File Name set aUUIDstr to (current application’s NSUUID’s UUID()’s UUIDString()) as string set aPath to ((current application’s NSString’s stringWithString:aFile)’s stringByDeletingLastPathComponent()’s stringByAppendingPathComponent:aUUIDstr)’s stringByAppendingPathExtension:"png" set sRes to saveNSImageAtPathAsPNG(aProcImg, aPath as string) of me –NSImageを指定パスにPNG形式で保存 on saveNSImageAtPathAsPNG(anImage, outPath) set imageRep to anImage’s TIFFRepresentation() set aRawimg to current application’s NSBitmapImageRep’s imageRepWithData:imageRep set pathString to current application’s NSString’s stringWithString:outPath set newPath to pathString’s stringByExpandingTildeInPath() set myNewImageData to (aRawimg’s representationUsingType:(current application’s NSPNGFileType) |properties|:(missing value)) set aRes to (myNewImageData’s writeToFile:newPath atomically:true) as boolean return aRes –true/false end saveNSImageAtPathAsPNG |
画像にToonFilterを実行してデスクトップにPNG形式で保存

▲Original Image

▲Filtered Image
| AppleScript名:画像にToonFilterを実行してデスクトップにPNG形式で保存.scptd |
| — Created 2017-02-05 by Takaaki Naganoya — 2017 Piyomaru Software use AppleScript version "2.4" use scripting additions use framework "Foundation" use framework "AppKit" use framework "GPUImage" –https://github.com/BradLarson/GPUImage –Read JPEG file set aFile to POSIX path of (choose file of type {"public.image"}) set anImage to current application’s NSImage’s alloc()’s initWithContentsOfFile:aFile –Filter Image set stillImageFilter to current application’s GPUImageToonFilter’s alloc()’s init() set aProcImg to stillImageFilter’s imageByFilteringImage:anImage –Make New File Name set aUUIDstr to (current application’s NSUUID’s UUID()’s UUIDString()) as string set aPath to ((current application’s NSString’s stringWithString:aFile)’s stringByDeletingLastPathComponent()’s stringByAppendingPathComponent:aUUIDstr)’s stringByAppendingPathExtension:"png" set sRes to saveNSImageAtPathAsPNG(aProcImg, aPath as string) of me –NSImageを指定パスにPNG形式で保存 on saveNSImageAtPathAsPNG(anImage, outPath) set imageRep to anImage’s TIFFRepresentation() set aRawimg to current application’s NSBitmapImageRep’s imageRepWithData:imageRep set pathString to current application’s NSString’s stringWithString:outPath set newPath to pathString’s stringByExpandingTildeInPath() set myNewImageData to (aRawimg’s representationUsingType:(current application’s NSPNGFileType) |properties|:(missing value)) set aRes to (myNewImageData’s writeToFile:newPath atomically:true) as boolean return aRes –true/false end saveNSImageAtPathAsPNG |


