Menu

Skip to content
AppleScriptの穴
  • Home
  • Products
  • Books
  • Docs
  • Events
  • Forum
  • About This Blog
  • License
  • 仕事依頼

AppleScriptの穴

Useful & Practical AppleScript archive. Click '★Click Here to Open This Script' Link to download each AppleScript

カテゴリー: Image

デスクトップの表示、非表示切り替え

Posted on 4月 19, 2018 by Takaaki Naganoya

デスクトップの表示・非表示切り替えを行うAppleScriptです。

白い画像や黒い画像とデスクトップ表示状態を切り替えるAppleScriptを別々に実行するとデスクトップ非表示状態のまま戻ってこなくなることがあったので、単体で切り替えするScriptを用意してみた次第です。

AppleScript名:デスクトップの表示、非表示切り替え
showHideDesktop(true)

on showHideDesktop(aBool)
  set aBoolStr to aBool as string
  
do shell script "defaults write com.apple.finder CreateDesktop -bool " & aBoolStr
  
do shell script "killall Finder"
end showHideDesktop

★Click Here to Open This Script 

Posted in Image System | Tagged 10.11savvy 10.12savvy 10.13savvy | Leave a comment

デスクトップピクチャを白いピクチャとトグルで差し替え v2

Posted on 4月 19, 2018 by Takaaki Naganoya

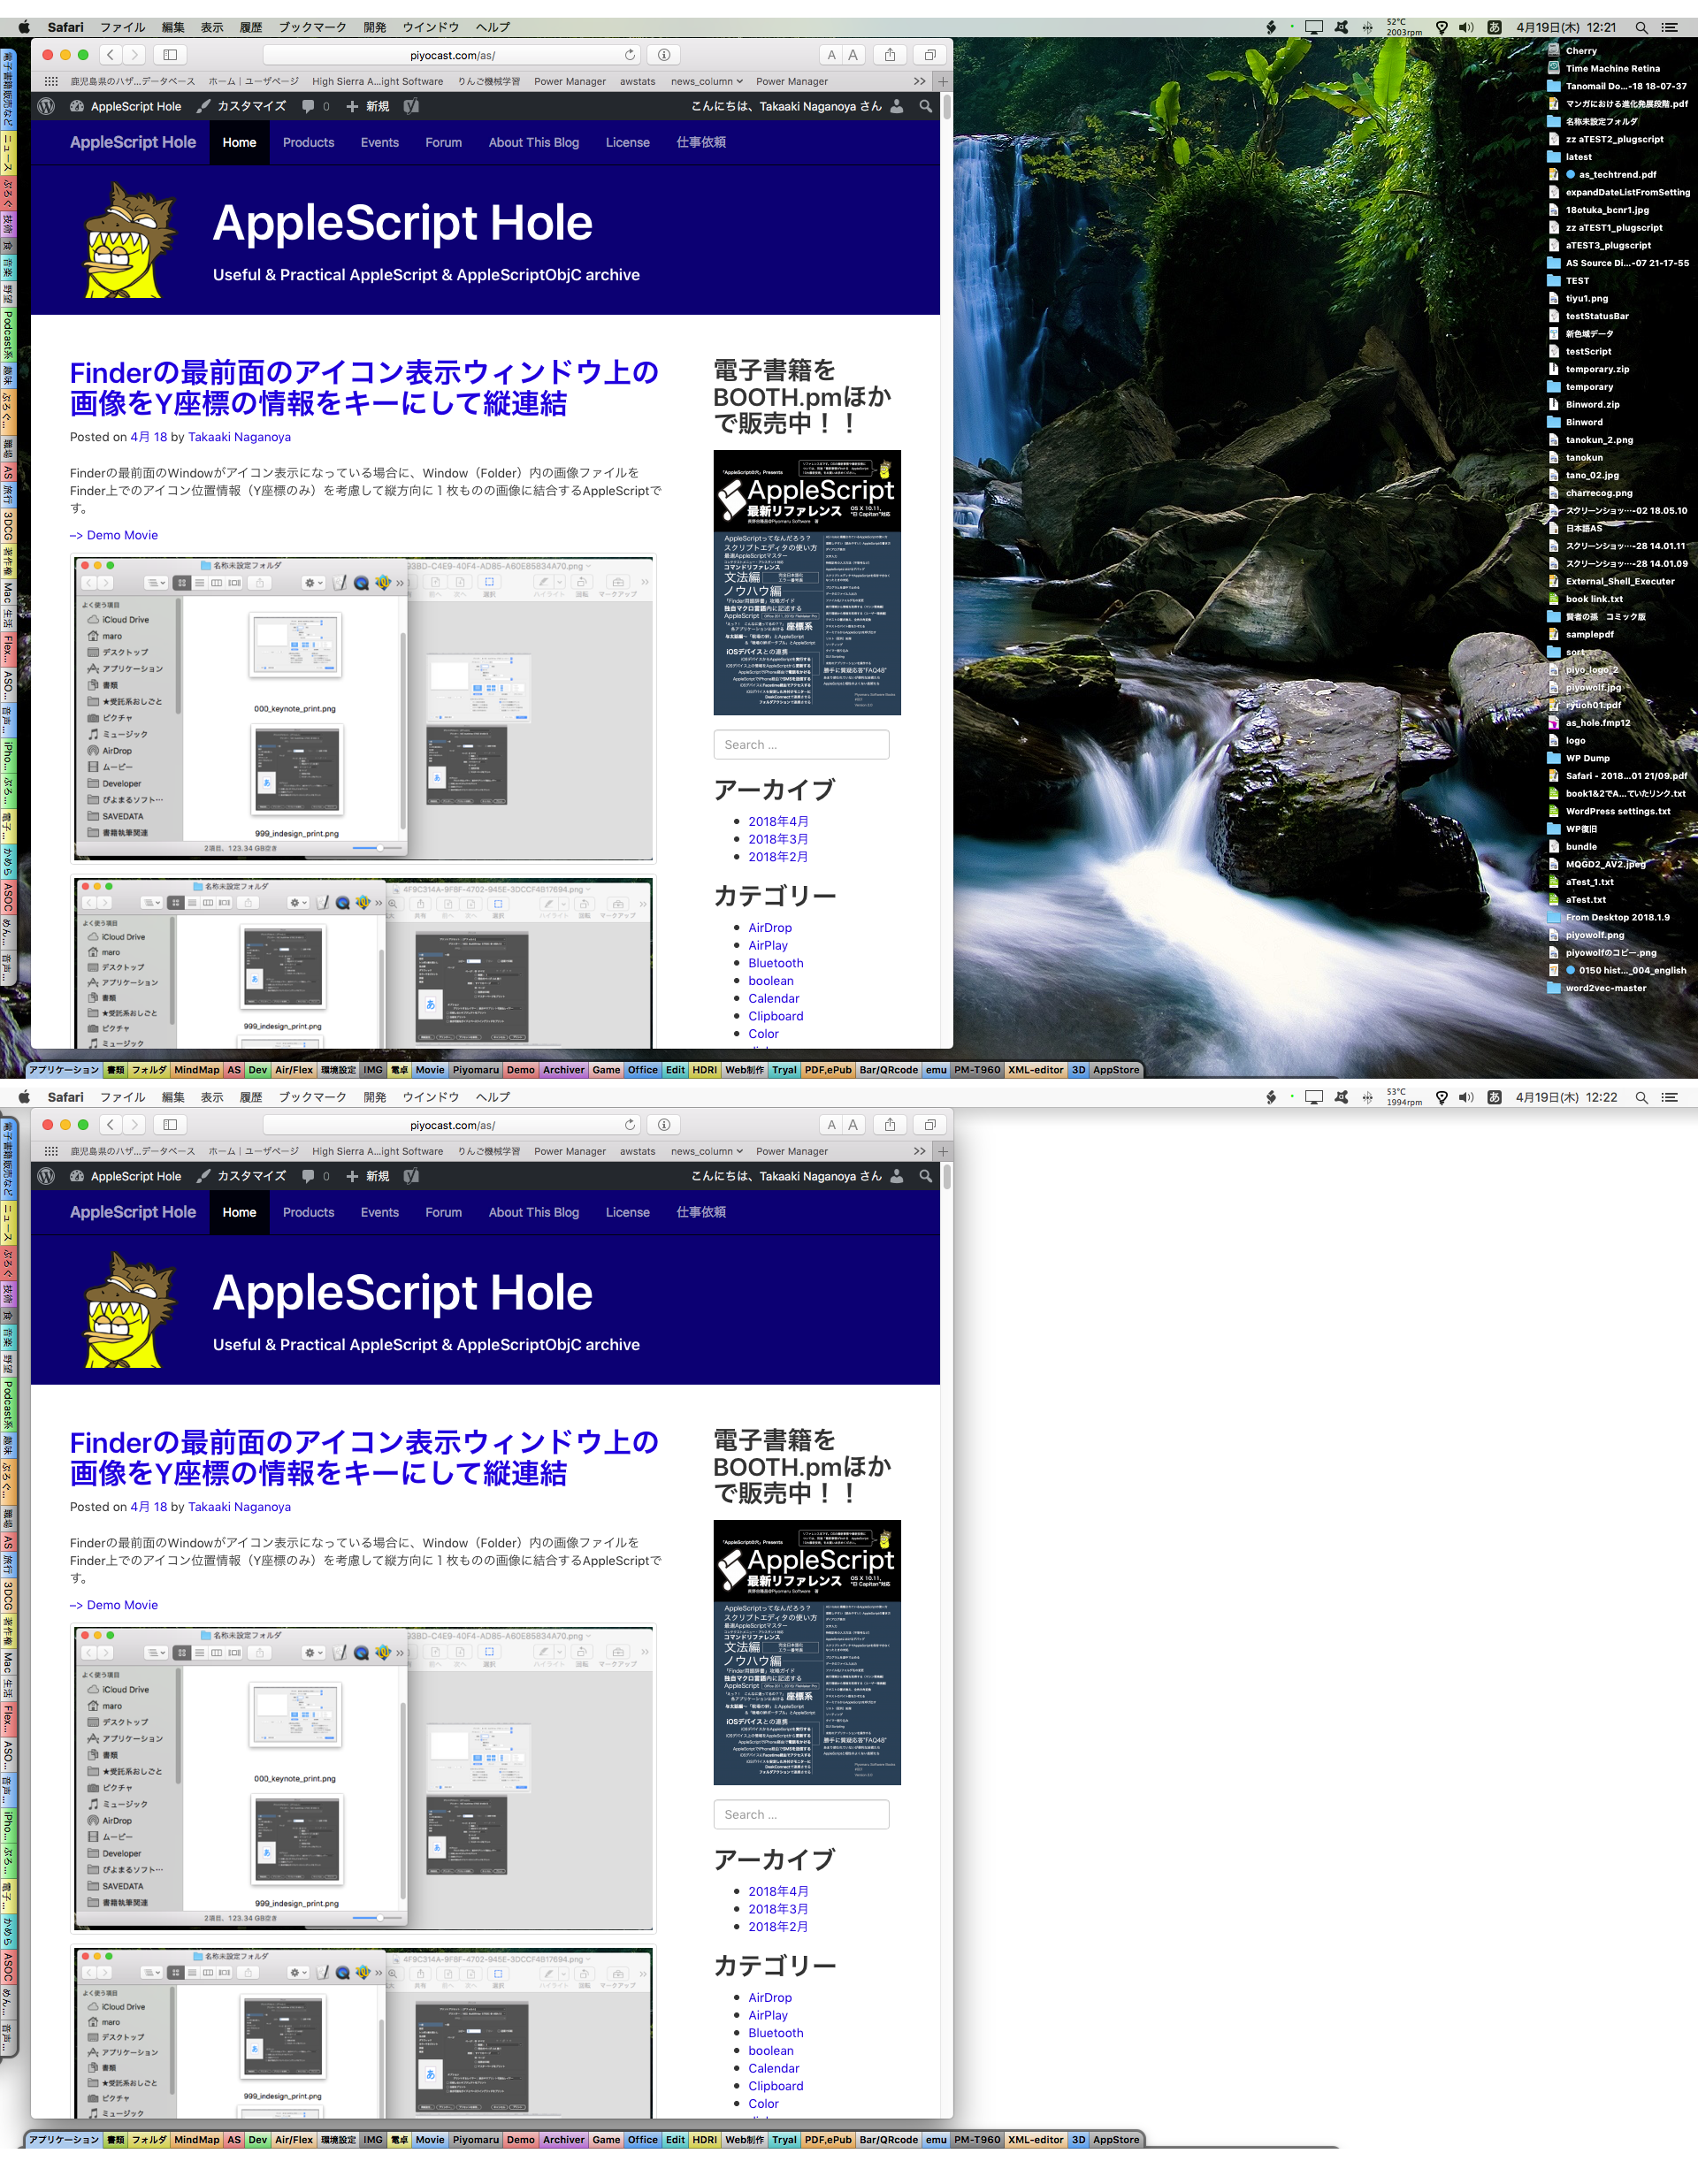
デスクトップピクチャの表示状態と、単色白色のデスクトップ+デスクトップ非表示状態のトグル切り替えを行うAppleScriptです。

資料や仕様書を作成する際に画面キャプチャを行うことが多いですが、その際にデスクトップに散らかっているファイルが映るとみっともないので、隠すために作成したものです。

1回実行するとデスクトップを隠し、もう1回実行すると元に戻ります。

AppleScript名:デスクトップピクチャを白いピクチャとトグルで差し替え v2
— Created 2016-05-31 by Takaaki Naganoya
— Modified 2016-06-01 by Takaaki Naganoya–Desktop Iconの表示/非表示を追加
— 2016 Piyomaru Software
use AppleScript version "2.4"
use scripting additions
use framework "Foundation"
use framework "AppKit"

property aSwitch : false
property desktopPictures : {}
property aColpath : ""

if aSwitch = false then
  –デスクトップを白くする
  
set desktopPictures to getDesktopPicturePathList() of me
  
–白い画像を作成してデスクトップピクチャに設定
  
set aColpath to makeColordImageToTmp(255, 255, 255, 255) of me –R,G,B,A(それぞれ 0〜255)
  
setDesktopPicture(aColpath) of me
  
showHideDesktop(false) of me
  
set aSwitch to true
else
  –保存しておいたDesktop Pictureのリストを戻す
  
setDesktopPicturePathList(desktopPictures) of me
  
do shell script "rm -f " & quoted form of aColpath
  
showHideDesktop(true) of me
  
set aSwitch to false
end if

–デスクトップの表示/非表示切り替え
on showHideDesktop(aBool as boolean)
  set aBoolStr to aBool as string
  
do shell script "defaults write com.apple.finder CreateDesktop -bool " & aBoolStr
  
do shell script "killall Finder"
end showHideDesktop

–デスクトップピクチャの状態を復帰する
on setDesktopPicturePathList(aliasList)
  if aliasList = {} then
    display notification "保存しておいたデスクトップピクチャのリストが空になっています"
    
return
  end if
  
  
tell application "System Events"
    set dCount to count every desktop
    
repeat with i from 1 to dCount
      set j to contents of item i of aliasList
      
tell desktop i
        set picture to (POSIX path of j)
      end tell
    end repeat
  end tell
end setDesktopPicturePathList

–デスクトップピクチャの強制指定
on setDesktopPicture(aPathStr)
  tell application "System Events"
    set picture of every desktop to aPathStr
  end tell
end setDesktopPicture

–デスクトップピクチャのパスをaliasリストで取得
on getDesktopPicturePathList()
  set pList to {}
  
tell application "System Events"
    set dCount to count every desktop
    
repeat with i from 1 to dCount
      tell desktop i
        set aPic to (picture as POSIX file) as alias
        
set end of pList to aPic
      end tell
    end repeat
  end tell
  
return pList
end getDesktopPicturePathList

–テンポラリフォルダに指定色の画像を作成
on makeColordImageToTmp(rDat as integer, gDat as integer, bDat as integer, aDat as integer)
  set rCol to 255 / rDat
  
set gCol to 255 / gDat
  
set bCol to 255 / bDat
  
set aCol to 255 / aDat
  
—
  
set aColor to current application’s NSColor’s colorWithDeviceRed:rCol green:gCol blue:bCol alpha:aCol
  
set aDesktopPath to current application’s NSString’s stringWithString:(POSIX path of (path to temporary items))
  
set savePath to aDesktopPath’s stringByAppendingString:((current application’s NSUUID’s UUID()’s UUIDString())’s stringByAppendingString:".png")
  
set aRes to makeImageWithFilledWithColor(1, 1, savePath, aColor) of me
  
return (savePath as string)
end makeColordImageToTmp

–指定サイズの画像を作成し、指定色で塗ってファイル書き出し
on makeImageWithFilledWithColor(aWidth, aHeight, outPath, fillColor)
  –Imageの作成  
  
set anImage to current application’s NSImage’s alloc()’s initWithSize:(current application’s NSMakeSize(aWidth, aHeight))
  
  
anImage’s lockFocus() –描画実行
  
set theRect to {{x:0, y:0}, {height:aHeight, width:aWidth}}
  
set theNSBezierPath to current application’s NSBezierPath’s bezierPath
  
theNSBezierPath’s appendBezierPathWithRect:theRect
  
fillColor’s |set|()
  
theNSBezierPath’s fill()
  
anImage’s unlockFocus() –描画ここまで
  
  
–生成した画像のRaw画像を作成
  
set imageRep to anImage’s TIFFRepresentation()
  
set aRawimg to current application’s NSBitmapImageRep’s imageRepWithData:imageRep
  
set myNewImageData to (aRawimg’s representationUsingType:(current application’s NSPNGFileType) |properties|:(missing value))
  
  
–書き出しファイルパス情報を作成
  
set pathString to current application’s NSString’s stringWithString:outPath
  
set newPath to pathString’s stringByExpandingTildeInPath()
  
set aRes to (myNewImageData’s writeToFile:newPath atomically:true) as boolean
  
return aRes –成功ならtrue、失敗ならfalseが返る
  
end makeImageWithFilledWithColor

★Click Here to Open This Script 

Posted in Image System | Tagged 10.11savvy 10.12savvy 10.13savvy | Leave a comment

デスクトップピクチャを黒いピクチャとトグルで差し替え v2

Posted on 4月 19, 2018 by Takaaki Naganoya

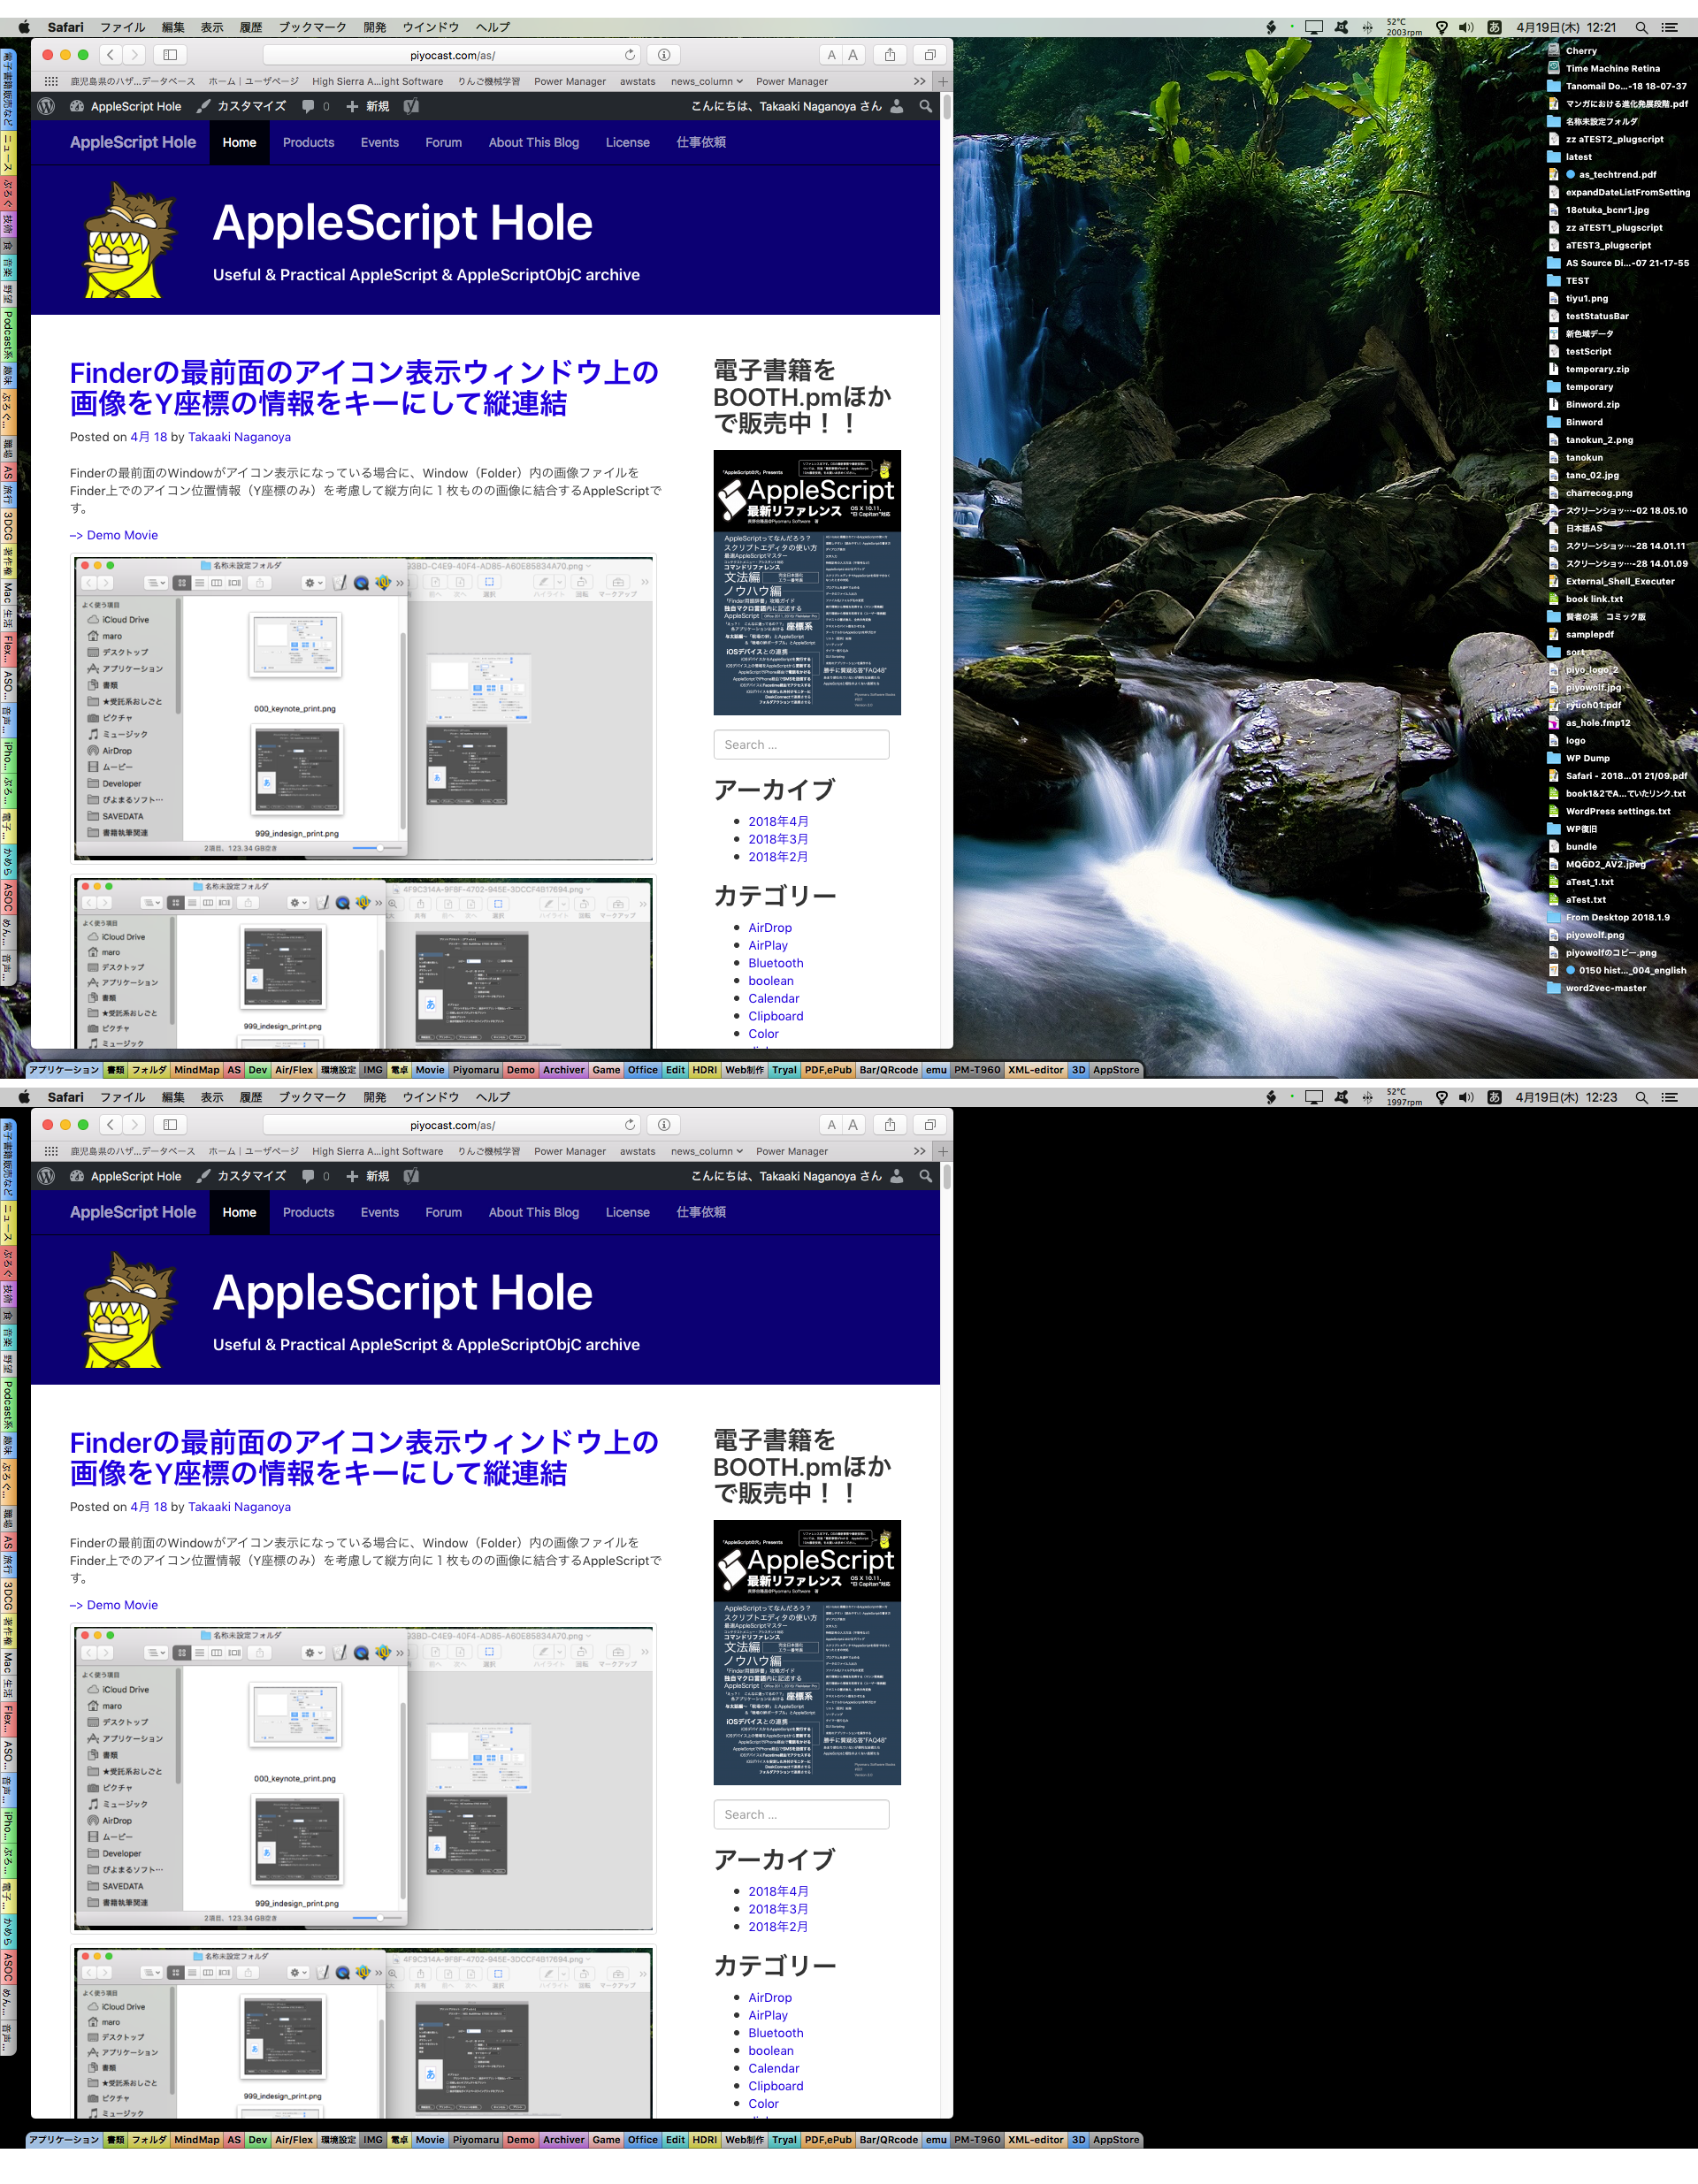
デスクトップピクチャの表示状態と、単色黒色のデスクトップ+デスクトップ非表示状態のトグル切り替えを行うAppleScriptです。

資料や仕様書を作成する際に画面キャプチャを行うことが多いですが、その際にデスクトップに散らかっているファイルが映るとみっともないので、隠すために作成したものです。–> Demo Movie

1回実行するとデスクトップを隠し、もう1回実行すると元に戻ります。

AppleScript名:デスクトップピクチャを黒いピクチャとトグルで差し替え v2
— Created 2016-05-31 by Takaaki Naganoya
— Modified 2016-06-01 by Takaaki Naganoya–Desktop Iconの表示/非表示を追加
— 2016 Piyomaru Software
use AppleScript version "2.4"
use scripting additions
use framework "Foundation"
use framework "AppKit"

property aSwitch : false
property desktopPictures : {}
property aColpath : ""

if aSwitch = false then
  –デスクトップを黒くする
  
set desktopPictures to getDesktopPicturePathList() of me
  
–白い画像を作成してデスクトップピクチャに設定
  
set aColor to current application’s NSColor’s blackColor()
  
set aColpath to makeColordImageToTmp(aColor) of me
  
setDesktopPicture(aColpath) of me
  
showHideDesktop(false) of me
  
set aSwitch to true
else
  –保存しておいたDesktop Pictureのリストを戻す
  
setDesktopPicturePathList(desktopPictures) of me
  
do shell script "rm -f " & quoted form of aColpath
  
showHideDesktop(true) of me
  
set aSwitch to false
end if

–デスクトップの表示/非表示切り替え
on showHideDesktop(aBool as boolean)
  set aBoolStr to aBool as string
  
do shell script "defaults write com.apple.finder CreateDesktop -bool " & aBoolStr
  
do shell script "killall Finder"
end showHideDesktop

–デスクトップピクチャの状態を復帰する
on setDesktopPicturePathList(aliasList)
  if aliasList = {} then
    display notification "保存しておいたデスクトップピクチャのリストが空になっています"
    
return
  end if
  
  
tell application "System Events"
    set dCount to count every desktop
    
repeat with i from 1 to dCount
      set j to contents of item i of aliasList
      
tell desktop i
        set picture to (POSIX path of j)
      end tell
    end repeat
  end tell
end setDesktopPicturePathList

–デスクトップピクチャの強制指定
on setDesktopPicture(aPathStr)
  tell application "System Events"
    set picture of every desktop to aPathStr
  end tell
end setDesktopPicture

–デスクトップピクチャのパスをaliasリストで取得
on getDesktopPicturePathList()
  set pList to {}
  
tell application "System Events"
    set dCount to count every desktop
    
repeat with i from 1 to dCount
      tell desktop i
        set aPic to (picture as POSIX file) as alias
        
set end of pList to aPic
      end tell
    end repeat
  end tell
  
return pList
end getDesktopPicturePathList

–テンポラリフォルダに指定色の画像を作成
on makeColordImageToTmp(aColor)
  –set aColor to current application’s NSColor’s colorWithDeviceRed:rCol green:gCol blue:bCol alpha:aCol
  
set aDesktopPath to current application’s NSString’s stringWithString:(POSIX path of (path to temporary items))
  
set savePath to aDesktopPath’s stringByAppendingString:((current application’s NSUUID’s UUID()’s UUIDString())’s stringByAppendingString:".png")
  
set aRes to makeImageWithFilledWithColor(1, 1, savePath, aColor) of me
  
return (savePath as string)
end makeColordImageToTmp

–指定サイズの画像を作成し、指定色で塗ってファイル書き出し
on makeImageWithFilledWithColor(aWidth, aHeight, outPath, fillColor)
  –Imageの作成  
  
set anImage to current application’s NSImage’s alloc()’s initWithSize:(current application’s NSMakeSize(aWidth, aHeight))
  
  
anImage’s lockFocus() –描画実行
  
set theRect to {{x:0, y:0}, {height:aHeight, width:aWidth}}
  
set theNSBezierPath to current application’s NSBezierPath’s bezierPath
  
theNSBezierPath’s appendBezierPathWithRect:theRect
  
fillColor’s |set|()
  
theNSBezierPath’s fill()
  
anImage’s unlockFocus() –描画ここまで
  
  
–生成した画像のRaw画像を作成
  
set imageRep to anImage’s TIFFRepresentation()
  
set aRawimg to current application’s NSBitmapImageRep’s imageRepWithData:imageRep
  
set myNewImageData to (aRawimg’s representationUsingType:(current application’s NSPNGFileType) |properties|:(missing value))
  
  
–書き出しファイルパス情報を作成
  
set pathString to current application’s NSString’s stringWithString:outPath
  
set newPath to pathString’s stringByExpandingTildeInPath()
  
set aRes to (myNewImageData’s writeToFile:newPath atomically:true) as boolean
  
return aRes –成功ならtrue、失敗ならfalseが返る
  
end makeImageWithFilledWithColor

★Click Here to Open This Script 

Posted in Image System | Tagged 10.11savvy 10.12savvy 10.13savvy | Leave a comment

Finderの最前面のアイコン表示ウィンドウ上の画像をY座標の情報をキーにして縦連結

Posted on 4月 18, 2018 by Takaaki Naganoya

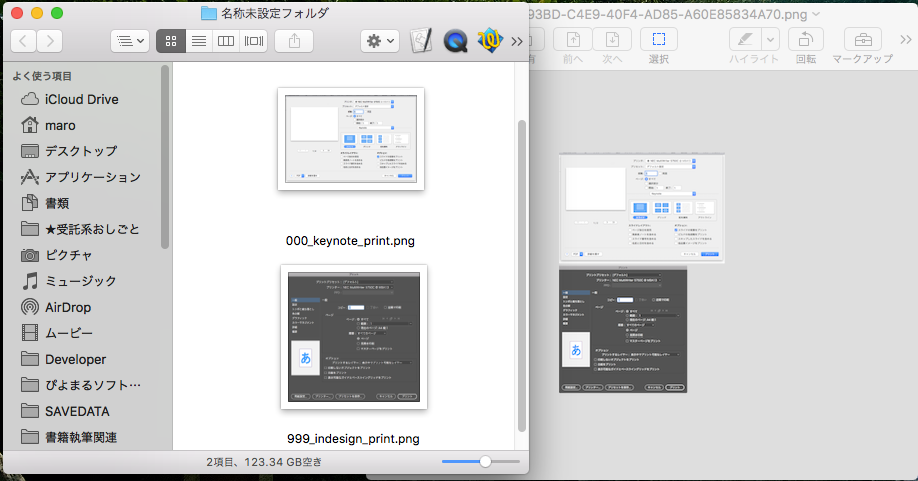
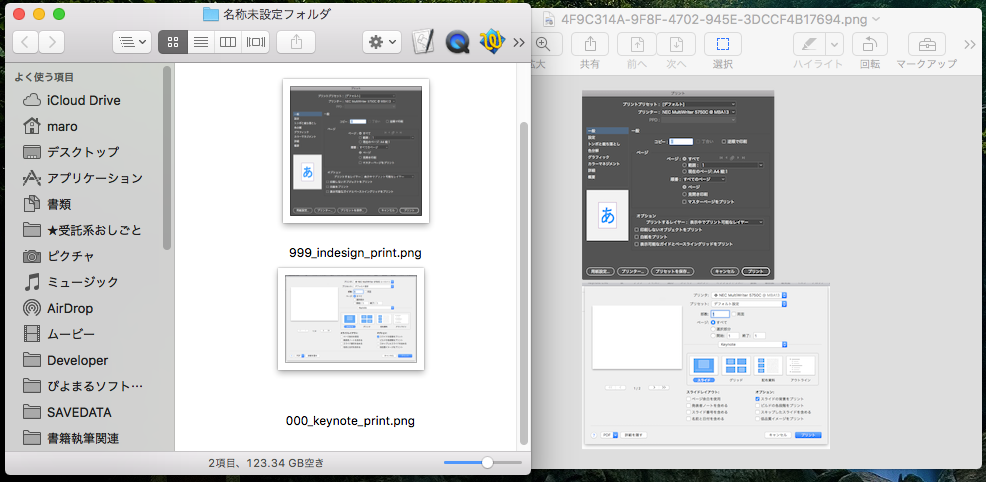
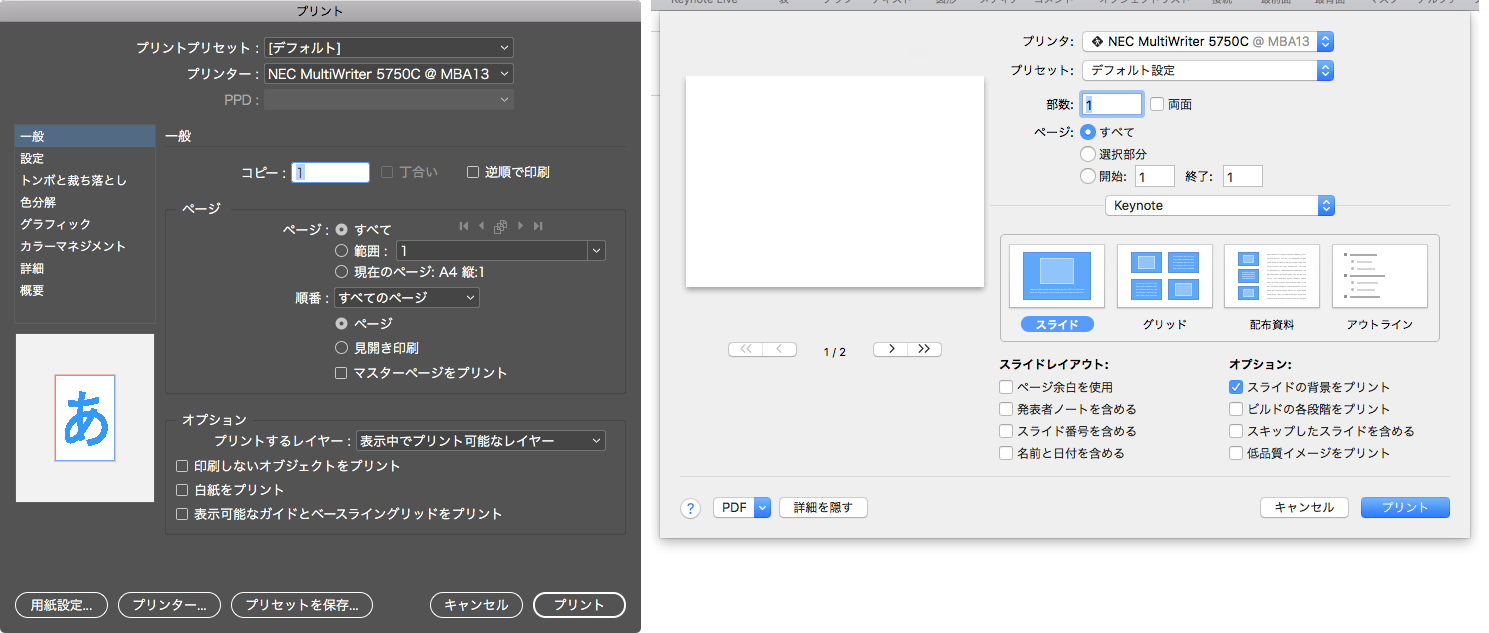
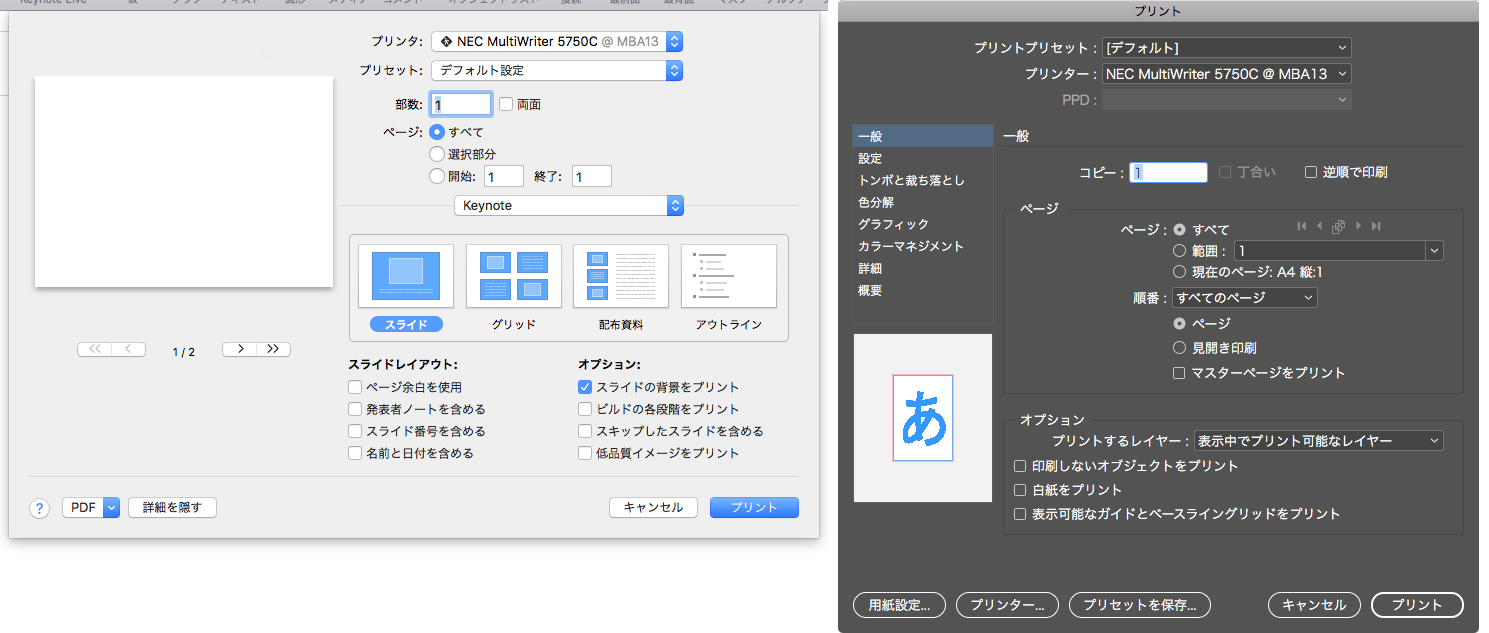
Finderの最前面のWindowがアイコン表示になっている場合に、Window(Folder)内の画像ファイルをFinder上でのアイコン位置情報(Y座標のみ)を考慮して縦方向に1枚ものの画像に結合するAppleScriptです。

–> Demo Movie

AppleScript名:Finderの最前面のアイコン表示ウィンドウ上の画像をY座標の情報をキーにして縦連結
— Created 2018-04-10 by Takaaki Naganoya
— 2018 Piyomaru Software
use AppleScript version "2.5"
use scripting additions
use framework "Foundation"
use framework "QuartzCore"
use framework "AppKit"
use bPlus : script "BridgePlus" –https://www.macosxautomation.com/applescript/apps/BridgePlus.html

property |NSURL| : a reference to current application’s |NSURL|
property NSUUID : a reference to current application’s NSUUID
property NSArray : a reference to current application’s NSArray
property NSString : a reference to current application’s NSString
property NSImage : a reference to current application’s NSImage
property NSWorkspace : a reference to current application’s NSWorkspace
property NSPNGFileType : a reference to current application’s NSPNGFileType
property NSMutableArray : a reference to current application’s NSMutableArray
property NSBitmapImageRep : a reference to current application’s NSBitmapImageRep
property NSURLTypeIdentifierKey : a reference to current application’s NSURLTypeIdentifierKey

property yGap : 10 –連結時の画像間のアキ(縦方向)

load framework

tell application "Finder"
  tell front window
    set curView to current view
    
if curView is not equal to icon view then
      display dialog "最前面のウィンドウがアイコン表示になっていないので、処理を終了します。"
      
return
    end if
    
    
try
      set posList to position of every file whose kind contains "イメージ" –"イメージ" is "image" or "picture" in Japanese
      
set fileList to (every file whose kind contains "イメージ") as alias list –"イメージ" is "image" or "picture" in Japanese
    on error
      display dialog "最前面のウィンドウに画像ファイルが配置されていないため、処理を中止します。"
      
return
    end try
  end tell
  
  
set aList to {}
  
set aLen to length of posList
  
set bLen to length of fileList
  
if aLen is not equal to bLen then return
  
  
repeat with i from 1 to aLen
    set posItem to contents of item i of posList
    
set aPath to POSIX path of item i of fileList
    
set the end of aList to (posItem & aPath)
  end repeat
end tell

–> {{127, 42, "/Users/me/Desktop/名称未設定フォルダ/000_keynote_print.png"}, {302, 43, "/Users/me/Desktop/名称未設定フォルダ/999_indesign_print.png"}}

set bList to sort2DListAscendingWithSecondItemKey(aList) of me
–> {{127, 42, "/Users/me/Desktop/名称未設定フォルダ/000_keynote_print.png"}, {302, 43, "/Users/me/Desktop/名称未設定フォルダ/999_indesign_print.png"}}

set cList to getEveryIndicatedItemsFrom2DList(bList, 3) of me
–>  {​​​​​"/Users/me/Desktop/名称未設定フォルダ/000_keynote_print.png", ​​​​​"/Users/me/Desktop/名称未設定フォルダ/999_indesign_print.png"​​​}

–Finder最前面の画像ファイルをpathからImageを読み込んでArrayに入れる
set imgList to NSMutableArray’s new()
repeat with i in cList
  set aPath to contents of i
  
  
set imgRes to (my isImageAtPath:aPath)
  
if imgRes as boolean = true then
    set aNSImage to (NSImage’s alloc()’s initWithContentsOfFile:aPath)
    (
imgList’s addObject:aNSImage)
  end if
end repeat

–KVCで画像の各種情報をまとめて取得
set sizeList to (imgList’s valueForKeyPath:"size") as list –NSSize to list of record conversion
set maxWidth to ((NSArray’s arrayWithArray:sizeList)’s valueForKeyPath:"@max.width") as real
set totalHeight to (((NSArray’s arrayWithArray:sizeList)’s valueForKeyPath:"@sum.height") as real) + 50
set totalCount to ((NSArray’s arrayWithArray:sizeList)’s valueForKeyPath:"@count") as integer

–出力画像作成
set tSize to current application’s NSMakeSize(maxWidth, totalHeight + (yGap * totalCount))
set newImage to NSImage’s alloc()’s initWithSize:tSize

–順次画像を新規画像に上書き
set yOrig to 0
repeat with i in (imgList as list)
  set j to contents of i
  
set curSize to j’s |size|()
  
–set aRect to {0, (maxWidth – (curSize’s height())), (curSize’s width()), (curSize’s height())}
  
set aRect to {0, (totalHeight – (curSize’s height())) – yOrig, (curSize’s width()), (curSize’s height())}
  
set newImage to composeImage(newImage, j, aRect) of me
  
set yOrig to yOrig + (curSize’s height()) + yGap
end repeat

–デスクトップにPNG形式でNSImageをファイル保存
set aDesktopPath to current application’s NSHomeDirectory()’s stringByAppendingString:"/Desktop/"
set savePath to aDesktopPath’s stringByAppendingString:((NSUUID’s UUID()’s UUIDString())’s stringByAppendingString:".png")
set fRes to saveNSImageAtPathAsPNG(newImage, savePath) of me

–2つのNSImageを重ね合わせ合成してNSImageで返す
on composeImage(backImage, composeImage, aTargerRect)
  set newImage to NSImage’s alloc()’s initWithSize:(backImage’s |size|())
  
  
copy aTargerRect to {x1, y1, x2, y2}
  
  
newImage’s lockFocus()
  
  
set v2 to system attribute "sys2"
  
if v2 ≤ 12 then
    –To macOS 10.12.x
    
set bRect to current application’s NSMakeRect(x1, y1, x2, y2)
    
set newImageRect to current application’s CGRectZero
    
set newImageRect’s |size| to (newImage’s |size|)
  else
    –macOS 10.13 or later
    
set bRect to {{x1, y1}, {x2, y2}}
    
set newImageRect to {{0, 0}, (newImage’s |size|)}
  end if
  
  
backImage’s drawInRect:newImageRect
  
composeImage’s drawInRect:bRect
  
  
newImage’s unlockFocus()
  
return newImage
end composeImage

–NSImageを指定パスにPNG形式で保存
on saveNSImageAtPathAsPNG(anImage, outPath)
  set imageRep to anImage’s TIFFRepresentation()
  
set aRawimg to NSBitmapImageRep’s imageRepWithData:imageRep
  
set pathString to NSString’s stringWithString:outPath
  
set newPath to pathString’s stringByExpandingTildeInPath()
  
set myNewImageData to (aRawimg’s representationUsingType:(NSPNGFileType) |properties|:(missing value))
  
set aRes to (myNewImageData’s writeToFile:newPath atomically:true) as boolean
  
return aRes –成功ならtrue、失敗ならfalseが返る
end saveNSImageAtPathAsPNG

–指定のパスのファイルが画像かどうかをチェック
on isImageAtPath:aPath
  set aURL to |NSURL|’s fileURLWithPath:aPath
  
set {theResult, theValue} to aURL’s getResourceValue:(reference) forKey:NSURLTypeIdentifierKey |error|:(missing value)
  
return (NSImage’s imageTypes()’s containsObject:theValue) as boolean
end isImageAtPath:

on sort2DListAscendingWithSecondItemKey(aList as list)
  set sortIndexList to {1} –Key Item id: begin from 0
  
set sortOrders to {true} –ascending = true
  
set sortTypes to {"compare:"}
  
set resList to (current application’s SMSForder’s subarraysIn:(aList) sortedByIndexes:sortIndexList ascending:sortOrders sortTypes:sortTypes |error|:(missing value)) as list
  
return resList
end sort2DListAscendingWithSecondItemKey

–2D Listの各要素から、指定アイテムの要素だけを取り出してリストで返す
on getEveryIndicatedItemsFrom2DList(aList as list, anItem as integer) –this item No. begins from 1
  set outList to {}
  
repeat with i in aList
    set j to contents of item anItem of i
    
set the end of outList to j
  end repeat
  
return outList
end getEveryIndicatedItemsFrom2DList

★Click Here to Open This Script 

Posted in file Image | Tagged 10.11savvy 10.12savvy 10.13savvy | Leave a comment

Finderの最前面のアイコン表示ウィンドウ上の画像をX座標の情報をキーにして横連結

Posted on 4月 17, 2018 by Takaaki Naganoya

Finderの最前面のWindowがアイコン表示になっている場合に、Window(Folder)内の画像ファイルをFinder上でのアイコン位置情報(X座標のみ)を考慮して横方向に1枚ものの画像に結合するAppleScriptです。

Blog掲載時に利用するために、Finder上で選択中の複数の画像ファイルを1枚ものの画像に(横方向/縦方向に)連結するAppleScriptを便利に使っています(ただし、「動けばいいや」程度で雑に作ったので、普段よりもやっつけ度がかなり高い、、、)。

ただし、画像の並び順については「たぶん、作成日時の古い順」に連結されるといった具合に明示的に並び順を指定できるものではなかったので、本Scriptを作ってみました。 –> Demo Movie

Finder上でicon viewに指定したWindow(Folder)内でLeft–>Rightの順に(X座標のみ評価)座標値をソートして連結します。

AppleScript名:Finderの最前面のアイコン表示ウィンドウ上の画像をX座標の情報をキーにして横連結
— Created 2018-04-10 by Takaaki Naganoya
— 2018 Piyomaru Software
use AppleScript version "2.5"
use scripting additions
use framework "Foundation"
use framework "QuartzCore"
use framework "AppKit"
use bPlus : script "BridgePlus" –https://www.macosxautomation.com/applescript/apps/BridgePlus.html

property |NSURL| : a reference to current application’s |NSURL|
property NSUUID : a reference to current application’s NSUUID
property NSArray : a reference to current application’s NSArray
property NSString : a reference to current application’s NSString
property NSImage : a reference to current application’s NSImage
property NSWorkspace : a reference to current application’s NSWorkspace
property NSPNGFileType : a reference to current application’s NSPNGFileType
property NSMutableArray : a reference to current application’s NSMutableArray
property NSBitmapImageRep : a reference to current application’s NSBitmapImageRep
property NSURLTypeIdentifierKey : a reference to current application’s NSURLTypeIdentifierKey

property xGap : 10 –連結時の画像間のアキ(横方向)

load framework

tell application "Finder"
  tell front window
    set curView to current view
    
if curView is not equal to icon view then
      display dialog "最前面のウィンドウがアイコン表示になっていないので、処理を終了します。"
      
return
    end if
    
    
try
      set posList to position of every file whose kind contains "イメージ" –"イメージ" is "image" or "picture" in Japanese
      
set fileList to (every file whose kind contains "イメージ") as alias list –"イメージ" is "image" or "picture" in Japanese
    on error
      display dialog "最前面のウィンドウに画像ファイルが配置されていないため、処理を中止します。"
      
return
    end try
  end tell
  
  
set aList to {}
  
set aLen to length of posList
  
set bLen to length of fileList
  
if aLen is not equal to bLen then return
  
  
repeat with i from 1 to aLen
    set posItem to contents of item i of posList
    
set aPath to POSIX path of item i of fileList
    
set the end of aList to (posItem & aPath)
  end repeat
end tell

–> {{127, 42, "/Users/me/Desktop/名称未設定フォルダ/000_keynote_print.png"}, {302, 43, "/Users/me/Desktop/名称未設定フォルダ/999_indesign_print.png"}}

set bList to sort2DListAscendingWithFirstItemKey(aList) of me
–> {{127, 42, "/Users/me/Desktop/名称未設定フォルダ/000_keynote_print.png"}, {302, 43, "/Users/me/Desktop/名称未設定フォルダ/999_indesign_print.png"}}

set cList to getEveryIndicatedItemsFrom2DList(bList, 3) of me
–>  {​​​​​"/Users/me/Desktop/名称未設定フォルダ/000_keynote_print.png", ​​​​​"/Users/me/Desktop/名称未設定フォルダ/999_indesign_print.png"​​​}

–Finder最前面の画像ファイルをpathからImageを読み込んでArrayに入れる
set imgList to NSMutableArray’s new()
repeat with i in cList
  set aPath to contents of i
  
  
set imgRes to (my isImageAtPath:aPath)
  
if imgRes as boolean = true then
    set aNSImage to (NSImage’s alloc()’s initWithContentsOfFile:aPath)
    (
imgList’s addObject:aNSImage)
  end if
end repeat

–KVCで画像の各種情報をまとめて取得
set sizeList to (imgList’s valueForKeyPath:"size") as list –NSSize to list of record conversion
set maxHeight to ((NSArray’s arrayWithArray:sizeList)’s valueForKeyPath:"@max.height") as real
set totalWidth to ((NSArray’s arrayWithArray:sizeList)’s valueForKeyPath:"@sum.width") as real
set totalCount to ((NSArray’s arrayWithArray:sizeList)’s valueForKeyPath:"@count") as integer

–出力画像作成
set tSize to current application’s NSMakeSize((totalWidth + (xGap * totalCount)), maxHeight)
set newImage to NSImage’s alloc()’s initWithSize:tSize

–順次画像を新規画像に上書き
set xOrig to 0
repeat with i in (imgList as list)
  set j to contents of i
  
set curSize to j’s |size|()
  
set aRect to {xOrig, (maxHeight – (curSize’s height())), (curSize’s width()), (curSize’s height())}
  
set newImage to composeImage(newImage, j, aRect) of me
  
set xOrig to xOrig + (curSize’s width()) + xGap
end repeat

–デスクトップにPNG形式でNSImageをファイル保存
set aDesktopPath to current application’s NSHomeDirectory()’s stringByAppendingString:"/Desktop/"
set savePath to aDesktopPath’s stringByAppendingString:((NSUUID’s UUID()’s UUIDString())’s stringByAppendingString:".png")
set fRes to saveNSImageAtPathAsPNG(newImage, savePath) of me

–2つのNSImageを重ね合わせ合成してNSImageで返す
on composeImage(backImage, composeImage, aTargerRect)
  set newImage to NSImage’s alloc()’s initWithSize:(backImage’s |size|())
  
  
copy aTargerRect to {x1, y1, x2, y2}
  
  
newImage’s lockFocus()
  
  
set v2 to system attribute "sys2"
  
if v2 ≤ 12 then
    –To macOS 10.12.x
    
set bRect to current application’s NSMakeRect(x1, y1, x2, y2)
    
set newImageRect to current application’s CGRectZero
    
set newImageRect’s |size| to (newImage’s |size|)
  else
    –macOS 10.13 or later
    
set bRect to {{x1, y1}, {x2, y2}}
    
set newImageRect to {{0, 0}, (newImage’s |size|)}
  end if
  
  
backImage’s drawInRect:newImageRect
  
composeImage’s drawInRect:bRect
  
  
newImage’s unlockFocus()
  
return newImage
end composeImage

–NSImageを指定パスにPNG形式で保存
on saveNSImageAtPathAsPNG(anImage, outPath)
  set imageRep to anImage’s TIFFRepresentation()
  
set aRawimg to NSBitmapImageRep’s imageRepWithData:imageRep
  
set pathString to NSString’s stringWithString:outPath
  
set newPath to pathString’s stringByExpandingTildeInPath()
  
set myNewImageData to (aRawimg’s representationUsingType:(NSPNGFileType) |properties|:(missing value))
  
set aRes to (myNewImageData’s writeToFile:newPath atomically:true) as boolean
  
return aRes –成功ならtrue、失敗ならfalseが返る
end saveNSImageAtPathAsPNG

–指定のパスのファイルが画像かどうかをチェック
on isImageAtPath:aPath
  set aURL to |NSURL|’s fileURLWithPath:aPath
  
set {theResult, theValue} to aURL’s getResourceValue:(reference) forKey:NSURLTypeIdentifierKey |error|:(missing value)
  
return (NSImage’s imageTypes()’s containsObject:theValue) as boolean
end isImageAtPath:

on sort2DListAscendingWithFirstItemKey(aList as list)
  set sortIndexList to {0} –Key Item id: begin from 0
  
set sortOrders to {true} –ascending = true
  
set sortTypes to {"compare:"}
  
set resList to (current application’s SMSForder’s subarraysIn:(aList) sortedByIndexes:sortIndexList ascending:sortOrders sortTypes:sortTypes |error|:(missing value)) as list
  
return resList
end sort2DListAscendingWithFirstItemKey

–2D Listの各要素から、指定アイテムの要素だけを取り出してリストで返す
on getEveryIndicatedItemsFrom2DList(aList as list, anItem as integer) –this item No. begins from 1
  set outList to {}
  
repeat with i in aList
    set j to contents of item anItem of i
    
set the end of outList to j
  end repeat
  
return outList
end getEveryIndicatedItemsFrom2DList

★Click Here to Open This Script 

Posted in file Image | Tagged 10.11savvy 10.12savvy 10.13savvy Finder | Leave a comment

イメージビュー+ボタンを作成 v2

Posted on 4月 9, 2018 by Takaaki Naganoya

指定の画像を、画面の中央にウィンドウ表示するAppleScriptです。

NSWindowを作成して、そこにNSImageViewを表示し、さらにその上に透明状態のボタンを表示しています。画像をクリックすると、その上にかぶせているボタンがクリックを受信してウィンドウのクローズを行います。

AppleScript名:イメージビュー+ボタンを作成 v2
— Created 2015-12-11 by Takaaki Naganoya
— Modified 2018-04-08 by Takaaki Naganoya
— 2018 Piyomaru Software
use AppleScript version "2.4"
use scripting additions
use framework "Foundation"
use framework "AppKit"

property windisp : false

set aFilePath to POSIX path of (choose file)
set aTitle to "イメージビューのじっけん/ImageView Test"
set aButtonMSG to "OK"

set wRes to dispImageView(aTitle, aFilePath, aButtonMSG, 10) of me

on dispImageView(aTitle as text, dispImagePath, aButtonMSG as text, timeOutSecs as number)
  set (my windisp) to true
  
  
–指定パスからNSImageに画像を読み込む
  
set aImageURL to current application’s |NSURL|’s fileURLWithPath:dispImagePath
  
set {theResult, theValue} to aImageURL’s getResourceValue:(reference) forKey:(current application’s NSURLTypeIdentifierKey) |error|:(missing value)
  
if theResult is not equal to true then return false –the file is not a image
  
set aImage to current application’s NSImage’s alloc()’s initWithContentsOfURL:aImageURL
  
set aSize to aImage’s |size|()
  
set imgWidth to width of aSize
  
set imgHeight to height of aSize


–NSImageViewを作って画像を読み込む
  
set aView to current application’s NSImageView’s alloc()’s init()
  
aView’s setBounds:(current application’s NSMakeRect(0, 0, imgWidth, imgHeight))
  
aView’s setImageScaling:(current application’s NSImageScaleProportionallyUpOrDown)
  
aView’s setEditable:false
  
aView’s setImage:aImage


–Windowをつくる
  
set aWin to makeWinWithView(aView, imgWidth, imgHeight, aTitle, 1.0)
  
set wController to current application’s NSWindowController’s alloc()
  
wController’s initWithWindow:aWin
  
wController’s showWindow:me


–Buttonをつくる
  
set bButton to (current application’s NSButton’s alloc()’s initWithFrame:(current application’s NSMakeRect(0, 0, imgWidth, imgHeight)))
  
bButton’s setTitle:"OK"
  
bButton’s setTransparent:true
  
bButton’s setTarget:me
  
bButton’s setAction:("clicked:")
  
  
aView’s addSubview:bButton
  
  
aWin’s makeKeyAndOrderFront:me –Windowを表示状態に
  
  
set aCount to timeOutSecs * 10 –timeout seconds * 10
  
repeat aCount times
    if (my windisp) = false then
      exit repeat
    end if
    
delay 0.1
    
set aCount to aCount – 1
  end repeat
  
  
my closeWin:aWin
  
  
return true –Safely closed
end dispImageView

–Button Clicked Event Handler
on clicked:aSender
  log {"clicked:"}
  
set (my windisp) to false
end clicked:

–make Window for Input
on makeWinWithView(aView, aWinWidth, aWinHeight, aTitle, alphaV)
  set aScreen to current application’s NSScreen’s mainScreen()
  
set aFrame to {{0, 0}, {aWinWidth, aWinHeight}}
  
set aBacking to current application’s NSTitledWindowMask –NSBorderlessWindowMask
  
set aDefer to current application’s NSBackingStoreBuffered
  
  
— Window
  
set aWin to current application’s NSWindow’s alloc()
  (
aWin’s initWithContentRect:aFrame styleMask:aBacking backing:aDefer defer:false screen:aScreen)
  
–aWin’s setBackgroundColor:(current application’s NSColor’s whiteColor())
  
  
aWin’s setTitle:aTitle
  
aWin’s setDelegate:me
  
aWin’s setDisplaysWhenScreenProfileChanges:true
  
aWin’s setHasShadow:true
  
aWin’s setIgnoresMouseEvents:false
  
aWin’s setLevel:(current application’s NSPopUpMenuWindowLevel) –NSNormalWindowLevel
  
aWin’s setOpaque:false
  
aWin’s setAlphaValue:alphaV –append
  
aWin’s setReleasedWhenClosed:true
  
aWin’s |center|()
  
aWin’s makeKeyAndOrderFront:(me)
  
  
— Set Custom View
  
aWin’s setContentView:aView
  
  
return aWin
  
end makeWinWithView

–close win
on closeWin:aWindow
  repeat with n from 10 to 1 by -1
    (aWindow’s setAlphaValue:n / 10)
    
delay 0.02
  end repeat
  
aWindow’s |close|()
end closeWin:

★Click Here to Open This Script 

Posted in GUI Image | Tagged 10.11savvy 10.12savvy 10.13savvy | Leave a comment

Finder上で選択中の画像を縦方向に連結 v1

Posted on 4月 8, 2018 by Takaaki Naganoya

Finder上で選択中の画像ファイルを縦方向に連結して結果をデスクトップ上に出力するAppleScriptです。

AppleScript名:Finder上で選択中の画像を縦方向に連結 v1
— Created 2017-11-21 by Takaaki Naganoya
— Modified 2018-04-06 by Takaaki Naganoya
— 2018 Piyomaru Software
use AppleScript version "2.5" — El Capitan (10.11) or later
use framework "Foundation"
use framework "QuartzCore"
use framework "AppKit"
use scripting additions

property |NSURL| : a reference to current application’s |NSURL|
property NSUUID : a reference to current application’s NSUUID
property NSArray : a reference to current application’s NSArray
property NSString : a reference to current application’s NSString
property NSImage : a reference to current application’s NSImage
property NSWorkspace : a reference to current application’s NSWorkspace
property NSPNGFileType : a reference to current application’s NSPNGFileType
property NSMutableArray : a reference to current application’s NSMutableArray
property NSBitmapImageRep : a reference to current application’s NSBitmapImageRep
property NSURLTypeIdentifierKey : a reference to current application’s NSURLTypeIdentifierKey

property yGap : 10 –連結時の画像間のアキ(横方向)

tell application "Finder"
  set aSel to selection as alias list
  
if aSel = {} or aSel = "" then return
end tell

–選択した画像をArrayに入れる
set imgList to NSMutableArray’s new()
repeat with i in aSel
  set aPath to POSIX path of i
  
  
set imgRes to (my isImageAtPath:aPath)
  
if imgRes as boolean = true then
    set aNSImage to (NSImage’s alloc()’s initWithContentsOfFile:aPath)
    (
imgList’s addObject:aNSImage)
  end if
end repeat

–KVCで画像の各種情報をまとめて取得
set sizeList to (imgList’s valueForKeyPath:"size") as list –NSSize to list of record conversion
set maxWidth to ((NSArray’s arrayWithArray:sizeList)’s valueForKeyPath:"@max.width") as real
set totalHeight to (((NSArray’s arrayWithArray:sizeList)’s valueForKeyPath:"@sum.height") as real) + 50
set totalCount to ((NSArray’s arrayWithArray:sizeList)’s valueForKeyPath:"@count") as integer

–出力画像作成
set tSize to current application’s NSMakeSize(maxWidth, totalHeight + (yGap * totalCount))
set newImage to NSImage’s alloc()’s initWithSize:tSize

–順次画像を新規画像に上書き
set yOrig to 0
repeat with i in (imgList as list)
  set j to contents of i
  
set curSize to j’s |size|()
  
–set aRect to {0, (maxWidth – (curSize’s height())), (curSize’s width()), (curSize’s height())}
  
set aRect to {0, (totalHeight – (curSize’s height())) – yOrig, (curSize’s width()), (curSize’s height())}
  
set newImage to composeImage(newImage, j, aRect) of me
  
set yOrig to yOrig + (curSize’s height()) + yGap
end repeat

–デスクトップにPNG形式でNSImageをファイル保存
set aDesktopPath to current application’s NSHomeDirectory()’s stringByAppendingString:"/Desktop/"
set savePath to aDesktopPath’s stringByAppendingString:((NSUUID’s UUID()’s UUIDString())’s stringByAppendingString:".png")
set fRes to saveNSImageAtPathAsPNG(newImage, savePath) of me

–2つのNSImageを重ね合わせ合成してNSImageで返す
on composeImage(backImage, composeImage, aTargerRect)
  set newImage to NSImage’s alloc()’s initWithSize:(backImage’s |size|())
  
  
copy aTargerRect to {x1, y1, x2, y2}
  
  
newImage’s lockFocus()
  
  
set v2 to system attribute "sys2"
  
if v2 ≤ 12 then
    –To macOS 10.12.x
    
set bRect to current application’s NSMakeRect(x1, y1, x2, y2)
    
set newImageRect to current application’s CGRectZero
    
set newImageRect’s |size| to (newImage’s |size|)
  else
    –macOS 10.13 or later
    
set bRect to {{x1, y1}, {x2, y2}}
    
set newImageRect to {{0, 0}, (newImage’s |size|)}
  end if
  
  
backImage’s drawInRect:newImageRect
  
composeImage’s drawInRect:bRect
  
  
newImage’s unlockFocus()
  
return newImage
end composeImage

–NSImageを指定パスにPNG形式で保存
on saveNSImageAtPathAsPNG(anImage, outPath)
  set imageRep to anImage’s TIFFRepresentation()
  
set aRawimg to NSBitmapImageRep’s imageRepWithData:imageRep
  
set pathString to NSString’s stringWithString:outPath
  
set newPath to pathString’s stringByExpandingTildeInPath()
  
set myNewImageData to (aRawimg’s representationUsingType:(NSPNGFileType) |properties|:(missing value))
  
set aRes to (myNewImageData’s writeToFile:newPath atomically:true) as boolean
  
return aRes –成功ならtrue、失敗ならfalseが返る
end saveNSImageAtPathAsPNG

–指定のパスのファイルが画像かどうかをチェック
on isImageAtPath:aPath
  set aURL to |NSURL|’s fileURLWithPath:aPath
  
set {theResult, theValue} to aURL’s getResourceValue:(reference) forKey:NSURLTypeIdentifierKey |error|:(missing value)
  
return (NSImage’s imageTypes()’s containsObject:theValue) as boolean
end isImageAtPath:

★Click Here to Open This Script 

Posted in file Image | Tagged 10.11savvy 10.12savvy 10.13savvy Finder | Leave a comment

配列に入れた画像を類似度でソートする

Posted on 4月 7, 2018 by Takaaki Naganoya

ターゲット画像に対して配列に入れた複数の画像を類似度をキーにしてソートするAppleScriptです。

最も類似度が高いと思われる画像をデスクトップにPNG形式で書き出します。

CocoaImageHashing.framework (To ~/Library/Frameworks/)

AppleScript名:配列に入れた画像を類似度でソートする
— Created 2016-10-30 by Takaaki Naganoya
— 2016 Piyomaru Software
use AppleScript version "2.4"
use scripting additions
use framework "Foundation"
use framework "CocoaImageHashing" –https://github.com/ameingast/cocoaimagehashing
–From Example: "Sorting an NSArray containing image data"

–比較元の画像を選択
set baseData to retDataFromPath(POSIX path of (choose file {"public.image"})) of me

–比較対象のデータを選択
set aData to retDataFromPath(POSIX path of (choose file {"public.image"})) of me
set bData to retDataFromPath(POSIX path of (choose file {"public.image"})) of me
set cData to retDataFromPath(POSIX path of (choose file {"public.image"})) of me

set aList to {aData, bData, cData}
set anArray to current application’s NSMutableArray’s arrayWithArray:aList

–配列に入れられた画像を類似度でソートする
set aRes to (current application’s OSImageHashing’s sharedInstance()’s sortedArrayUsingImageSimilartyComparator:baseData forArray:anArray)

–最も類似度の高い画像データを取り出す
set firstObj to aRes’s objectAtIndex:0
set anImage to current application’s NSImage’s alloc()’s initWithData:firstObj

–確認のため、デスクトップにPNG形式で最も類似度の高い画像を書き出す
set aFolder to POSIX path of (path to desktop folder)
set fRes to retUUIDfilePathFromFolder(aFolder, "png") of me
set sRes to saveNSImageAtPathAsPNG(anImage, fRes) of me

on retUUIDfilePathFromFolder(aFolder, aEXT)
  set aUUIDstr to (current application’s NSUUID’s UUID()’s UUIDString()) as string
  
set aPath to ((current application’s NSString’s stringWithString:aFolder)’s stringByAppendingPathComponent:aUUIDstr)’s stringByAppendingPathExtension:aEXT
  
return aPath
end retUUIDfilePathFromFolder

–NSImageを指定パスにPNG形式で保存
on saveNSImageAtPathAsPNG(anImage, outPath)
  set imageRep to anImage’s TIFFRepresentation()
  
set aRawimg to current application’s NSBitmapImageRep’s imageRepWithData:imageRep
  
set pathString to current application’s NSString’s stringWithString:outPath
  
set newPath to pathString’s stringByExpandingTildeInPath()
  
set myNewImageData to (aRawimg’s representationUsingType:(current application’s NSPNGFileType) |properties|:(missing value))
  
set aRes to (myNewImageData’s writeToFile:newPath atomically:true) as boolean
  
return aRes –true/false
end saveNSImageAtPathAsPNG

on retDataFromPath(aFile)
  set aURL to current application’s |NSURL|’s fileURLWithPath:aFile
  
set aData to current application’s NSData’s dataWithContentsOfURL:aURL
  
return aData
end retDataFromPath

★Click Here to Open This Script 

Posted in file Image Sort | Tagged 10.11savvy 10.12savvy 10.13savvy | 1 Comment

2つの画像が類似しているかを判定

Posted on 4月 7, 2018 by Takaaki Naganoya

2つの画像が類似しているかどうかを判定するAppleScriptです。

CocoaImageHashing.framework (To ~/Library/Frameworks/)

AppleScript名:2つの画像が類似しているかを判定
— Created 2016-10-30 by Takaaki Naganoya
— 2016 Piyomaru Software
use AppleScript version "2.4"
use scripting additions
use framework "Foundation"
use framework "CocoaImageHashing" –https://github.com/ameingast/cocoaimagehashing
–From Example: "Comparing two images for similarity"

set aFile to POSIX path of (choose file {"public.image"})
set bFile to POSIX path of (choose file {"public.image"})

set aRes to checkSimiliality(aFile, bFile) of me
–> true / false

on checkSimiliality(aFile, bFile)
  set aURL to current application’s |NSURL|’s fileURLWithPath:aFile
  
set bURL to current application’s |NSURL|’s fileURLWithPath:bFile
  
  
set aData to current application’s NSData’s dataWithContentsOfURL:aURL
  
set bData to current application’s NSData’s dataWithContentsOfURL:bURL
  
  
set aRes to (current application’s OSImageHashing’s sharedInstance()’s compareImageData:aData |to|:bData) as boolean
  
return aRes
end checkSimiliality

★Click Here to Open This Script 

Posted in file Image | Tagged 10.11savvy 10.12savvy 10.13savvy | 2 Comments

NSImageをリサイズ(アンチエイリアス解除)pattern 4

Posted on 4月 7, 2018 by Takaaki Naganoya

指定ファイルをNSImageに読み込んで、アンチエイリアスを使用せずに指定倍率に拡大するAppleScriptです。


▲Original & Resized Image (x10)

AppleScript名:NSImageをリサイズ(アンチエイリアス解除)pattern 4
— Created 2017-02-03 by Takaaki Naganoya
— Modified 2017-03-22 by Shane Stanley
use AppleScript version "2.4"
use scripting additions
use framework "Foundation"
use framework "AppKit"

set aPath to POSIX path of (choose file of type {"public.image"} with prompt "Select Image file to scale up (x10)")
set aNSImage to current application’s NSImage’s alloc()’s initWithContentsOfFile:aPath

set resizedImg to my resizeNSImageWithoutAntlialias:aNSImage toScale:10

set aDesktopPath to (current application’s NSProcessInfo’s processInfo()’s environment()’s objectForKey:("HOME"))’s stringByAppendingString:"/Desktop/"
set savePath to aDesktopPath’s stringByAppendingString:((current application’s NSUUID’s UUID()’s UUIDString())’s stringByAppendingString:".png")

set fRes to saveNSImageAtPathAsPNG(resizedImg, savePath) of me

–NSImageを指定倍率で拡大(アンチエイリアス解除状態で)
on resizeNSImageWithoutAntlialias:aSourceImg toScale:imgScale
  set aSize to aSourceImg’s |size|()
  
set aWidth to (aSize’s width) * imgScale
  
set aHeight to (aSize’s height) * imgScale
  
  
set aRep to current application’s NSBitmapImageRep’s alloc()’s initWithBitmapDataPlanes:(missing value) pixelsWide:aWidth pixelsHigh:aHeight bitsPerSample:8 samplesPerPixel:4 hasAlpha:true isPlanar:false colorSpaceName:(current application’s NSCalibratedRGBColorSpace) bytesPerRow:0 bitsPerPixel:0
  
  
set newSize to {width:aWidth, height:aHeight}
  
aRep’s setSize:newSize
  
  
current application’s NSGraphicsContext’s saveGraphicsState()
  
  
set theContext to current application’s NSGraphicsContext’s graphicsContextWithBitmapImageRep:aRep
  
current application’s NSGraphicsContext’s setCurrentContext:theContext
  
theContext’s setShouldAntialias:false
  
theContext’s setImageInterpolation:(current application’s NSImageInterpolationNone)
  
  
aSourceImg’s drawInRect:(current application’s NSMakeRect(0, 0, aWidth, aHeight)) fromRect:(current application’s NSZeroRect) operation:(current application’s NSCompositeCopy) fraction:(1.0)
  
  
current application’s NSGraphicsContext’s restoreGraphicsState()
  
  
set newImg to current application’s NSImage’s alloc()’s initWithSize:newSize
  
newImg’s addRepresentation:aRep
  
  
return newImg
end resizeNSImageWithoutAntlialias:toScale:

–NSImageを指定パスにPNG形式で保存
on saveNSImageAtPathAsPNG(anImage, outPath)
  set imageRep to anImage’s TIFFRepresentation()
  
set aRawimg to current application’s NSBitmapImageRep’s imageRepWithData:imageRep
  
  
set pathString to current application’s NSString’s stringWithString:outPath
  
set newPath to pathString’s stringByExpandingTildeInPath()
  
  
set myNewImageData to (aRawimg’s representationUsingType:(current application’s NSPNGFileType) |properties|:(missing value))
  
set aRes to (myNewImageData’s writeToFile:newPath atomically:true) as boolean
  
  
return aRes
end saveNSImageAtPathAsPNG

★Click Here to Open This Script 

Posted in file Image | Tagged 10.11savvy 10.12savvy 10.13savvy | Leave a comment

画像中の色の置き換え

Posted on 4月 7, 2018 by Takaaki Naganoya

指定画像中の指定色を置き換えるAppleScriptです。

replaceColorKit.framework (To ~/Library/Frameworks/)


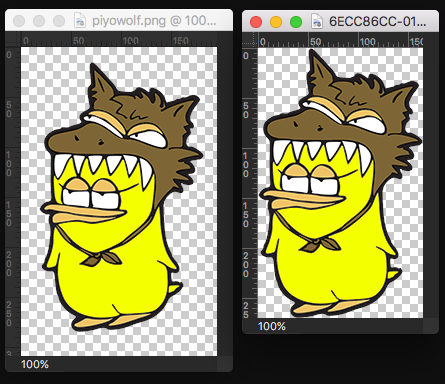
▲Color Replaced Image & Original (Yellow)

AppleScript名:画像中の色の置き換え
— Created 2017-04-23 by Takaaki Naganoya
— 2017 Piyomaru Software
use AppleScript version "2.4"
use scripting additions
use framework "Foundation"
use framework "replaceColorKit" –https://github.com/braginets/NSImage-replace-color
use framework "AppKit"

set aThreshold to 0.2

set aFile to POSIX path of (choose file of type {"public.image"})
set anImage to (current application’s NSImage’s alloc()’s initWithContentsOfFile:aFile)

set aColor to makeNSColorFromRGBA255val(246, 253, 0, 255) of me
set bColor to makeNSColorFromRGBA255val(154, 154, 154, 255) of me

set bImage to (anImage’s replaceColor:aColor withColor:bColor withThreshold:aThreshold)

set aDesktopPath to ((current application’s NSProcessInfo’s processInfo()’s environment()’s objectForKey:("HOME"))’s stringByAppendingString:"/Desktop/")
set savePath to (aDesktopPath’s stringByAppendingString:((current application’s NSString’s stringWithString:(aThreshold as string))’s stringByAppendingString:".png"))
set fRes to saveNSImageAtPathAsPNG(bImage, savePath) of me

–0〜255の数値でNSColorを作成する
on makeNSColorFromRGBA255val(redValue as integer, greenValue as integer, blueValue as integer, alphaValue as integer)
  set aRedCocoa to (redValue / 255) as real
  
set aGreenCocoa to (greenValue / 255) as real
  
set aBlueCocoa to (blueValue / 255) as real
  
set aAlphaCocoa to (alphaValue / 255) as real
  
set aColor to current application’s NSColor’s colorWithCalibratedRed:aRedCocoa green:aGreenCocoa blue:aBlueCocoa alpha:aAlphaCocoa
  
return aColor
end makeNSColorFromRGBA255val

–NSImageを指定パスにPNG形式で保存
on saveNSImageAtPathAsPNG(anImage, outPath)
  set imageRep to anImage’s TIFFRepresentation()
  
set aRawimg to current application’s NSBitmapImageRep’s imageRepWithData:imageRep
  
  
set pathString to current application’s NSString’s stringWithString:outPath
  
set newPath to pathString’s stringByExpandingTildeInPath()
  
  
set myNewImageData to (aRawimg’s representationUsingType:(current application’s NSPNGFileType) |properties|:(missing value))
  
set aRes to (myNewImageData’s writeToFile:newPath atomically:true) as boolean
  
  
return aRes
end saveNSImageAtPathAsPNG

★Click Here to Open This Script 

Posted in Color file Image | Tagged 10.11savvy 10.12savvy 10.13savvy | Leave a comment

指定画像の余白の自動トリミング

Posted on 4月 7, 2018 by Takaaki Naganoya

指定画像の余白トリミングを自動で行うAppleScriptです。

KGPixelBoundsClipKit.framework (To ~/Library/Frameworks/)

AppleScript名:指定画像の余白の自動トリミング
— Created 2017-04-26 by Takaaki Naganoya
— 2017 Piyomaru Software
use AppleScript version "2.4"
use scripting additions
use framework "Foundation"
use framework "AppKit"
use framework "KGPixelBoundsClipKit" –https://github.com/kgn/KGPixelBoundsClip

set aFile to POSIX path of (choose file of type {"public.image"})
set anImage to (current application’s NSImage’s alloc()’s initWithContentsOfFile:aFile)

set bImage to anImage’s imageClippedToPixelBounds()

set aDesktopPath to (current application’s NSProcessInfo’s processInfo()’s environment()’s objectForKey:("HOME"))’s stringByAppendingString:"/Desktop/"
set savePath to aDesktopPath’s stringByAppendingString:((current application’s NSUUID’s UUID()’s UUIDString())’s stringByAppendingString:".png")
set fRes to saveNSImageAtPathAsPNG(bImage, savePath) of me

–NSImageを指定パスにPNG形式で保存
on saveNSImageAtPathAsPNG(anImage, outPath)
  set imageRep to anImage’s TIFFRepresentation()
  
set aRawimg to current application’s NSBitmapImageRep’s imageRepWithData:imageRep
  
set pathString to current application’s NSString’s stringWithString:outPath
  
set newPath to pathString’s stringByExpandingTildeInPath()
  
set myNewImageData to (aRawimg’s representationUsingType:(current application’s NSPNGFileType) |properties|:(missing value))
  
set aRes to (myNewImageData’s writeToFile:newPath atomically:true) as boolean
  
return aRes
end saveNSImageAtPathAsPNG

★Click Here to Open This Script 

Posted in file Image | Tagged 10.11savvy 10.12savvy 10.13savvy | 2 Comments

NSImageの垂直、水平反転

Posted on 4月 7, 2018 by Takaaki Naganoya

NSImageの垂直方向、水平方向の反転を行うAppleScriptです。


▲Original Image


▲Horizontal Flipped Image


▲Vertical Flipped Image

AppleScript名:NSImageの垂直、水平反転
— Created 2017-07-25 by Takaaki Naganoya
— 2017 Piyomaru Software
use AppleScript version "2.4"
use scripting additions
use framework "Foundation"
use framework "AppKit"
–https://stackoverflow.com/questions/10936590/flip-nsimage-on-both-axes

set aFile to POSIX path of (choose file of type {"public.image"} with prompt "Select an Image")

set currentImage to current application’s NSImage’s alloc()’s initWithContentsOfFile:aFile
set imgRes to flipImageVertically(currentImage) of me
set fRes to retUUIDfilePath(aFile, "png") of me
set sRes to saveNSImageAtPathAsPNG(imgRes, fRes) of me

–水平方向の画像反転
on flipImageHorizontally(anNSImage)
  set transform to current application’s NSAffineTransform’s transform()
  
set dimList to anNSImage’s |size|()
  
set flipList to {-1.0, 0.0, 0.0, 1.0, dimList’s width, 0.0}
  
set tmpImage to current application’s NSImage’s alloc()’s initWithSize:(dimList)
  
tmpImage’s lockFocus()
  
transform’s setTransformStruct:flipList
  
transform’s concat()
  
anNSImage’s drawAtPoint:(current application’s NSMakePoint(0, 0)) fromRect:(current application’s NSMakeRect(0, 0, dimList’s width, dimList’s height)) operation:(current application’s NSCompositeCopy) fraction:1.0
  
tmpImage’s unlockFocus()
  
return tmpImage
end flipImageHorizontally

–垂直方向の画像反転
on flipImageVertically(anNSImage)
  set transform to current application’s NSAffineTransform’s transform()
  
set dimList to anNSImage’s |size|()
  
set flipList to {1.0, 0.0, 0.0, -1.0, 0.0, dimList’s height}
  
set tmpImage to current application’s NSImage’s alloc()’s initWithSize:(dimList)
  
tmpImage’s lockFocus()
  
transform’s setTransformStruct:flipList
  
transform’s concat()
  
anNSImage’s drawAtPoint:(current application’s NSMakePoint(0, 0)) fromRect:(current application’s NSMakeRect(0, 0, dimList’s width, dimList’s height)) operation:(current application’s NSCompositeCopy) fraction:1.0
  
tmpImage’s unlockFocus()
  
return tmpImage
end flipImageVertically

on retUUIDfilePath(aPath, aEXT)
  set aUUIDstr to (current application’s NSUUID’s UUID()’s UUIDString()) as string
  
set aPath to ((current application’s NSString’s stringWithString:aPath)’s stringByDeletingLastPathComponent()’s stringByAppendingPathComponent:aUUIDstr)’s stringByAppendingPathExtension:aEXT
  
return aPath
end retUUIDfilePath

–NSImageを指定パスにPNG形式で保存
on saveNSImageAtPathAsPNG(anImage, outPath)
  set imageRep to anImage’s TIFFRepresentation()
  
set aRawimg to current application’s NSBitmapImageRep’s imageRepWithData:imageRep
  
set pathString to current application’s NSString’s stringWithString:outPath
  
set newPath to pathString’s stringByExpandingTildeInPath()
  
set myNewImageData to (aRawimg’s representationUsingType:(current application’s NSPNGFileType) |properties|:(missing value))
  
set aRes to (myNewImageData’s writeToFile:newPath atomically:true) as boolean
  
return aRes –true/false
end saveNSImageAtPathAsPNG

★Click Here to Open This Script 

Posted in file Image | Tagged 10.11savvy 10.12savvy 10.13savvy | Leave a comment

単色画像(アルファ値必要)に色を指定して塗りつぶし

Posted on 4月 7, 2018 by Takaaki Naganoya

単色画像に色を指定して塗りつぶしを行うAppleScriptです。


▲Original Image


▲Result Image

AppleScript名:単色画像(アルファ値必要)に色を指定して塗りつぶし
— Created 2017-04-24 by Takaaki Naganoya
— 2017 Piyomaru Software
use AppleScript version "2.4"
use scripting additions
use framework "Foundation"
use framework "AppKit"
use framework "QuartzCore"
–http://piyocast.com/as/archives/4615

set aFile to POSIX path of (choose file of type "public.image")
set aColor to makeNSColorFromRGBA255val(0, 0, 255, 255) of me
set aColoredImage to fillColorWithImage(aFile, aColor) of me

set aDesktopPath to ((current application’s NSProcessInfo’s processInfo()’s environment()’s objectForKey:("HOME"))’s stringByAppendingString:"/Desktop/")
set savePath to (aDesktopPath’s stringByAppendingString:((current application’s NSString’s stringWithString:"testOverlay")’s stringByAppendingString:".png"))
set fRes to saveNSImageAtPathAsPNG(aColoredImage, savePath) of me

on fillColorWithImage(aFile, aColor)
  set anImage to (current application’s NSImage’s alloc()’s initWithContentsOfFile:aFile)
  
set aSize to anImage’s |size|()
  
set aWidth to (aSize’s width)
  
set aHeight to (aSize’s height)
  
set colordImage to makeNSImageWithFilledWithColor(aWidth, aHeight, aColor) of me
  
colordImage’s lockFocus()
  
anImage’s drawAtPoint:{0, 0} fromRect:(current application’s NSZeroRect) operation:(current application’s NSCompositeDestinationIn) fraction:1.0
  
colordImage’s unlockFocus()
  
return colordImage
end fillColorWithImage

–指定サイズの画像を作成し、指定色で塗ってファイル書き出し
on makeNSImageWithFilledWithColor(aWidth, aHeight, fillColor)
  set anImage to current application’s NSImage’s alloc()’s initWithSize:(current application’s NSMakeSize(aWidth, aHeight))
  
anImage’s lockFocus()
  
—
  
set theRect to {{x:0, y:0}, {height:aHeight, width:aWidth}}
  
set theNSBezierPath to current application’s NSBezierPath’s bezierPath
  
theNSBezierPath’s appendBezierPathWithRect:theRect
  
—
  
fillColor’s |set|() –色設定
  
theNSBezierPath’s fill() –ぬりつぶし
  
—
  
anImage’s unlockFocus()
  
—
  
return anImage
end makeNSImageWithFilledWithColor

on makeNSColorFromRGBA255val(redValue as integer, greenValue as integer, blueValue as integer, alphaValue as integer)
  set aRedCocoa to (redValue / 255) as real
  
set aGreenCocoa to (greenValue / 255) as real
  
set aBlueCocoa to (blueValue / 255) as real
  
set aAlphaCocoa to (alphaValue / 255) as real
  
set aColor to current application’s NSColor’s colorWithCalibratedRed:aRedCocoa green:aGreenCocoa blue:aBlueCocoa alpha:aAlphaCocoa
  
return aColor
end makeNSColorFromRGBA255val

–NSImageを指定パスにPNG形式で保存
on saveNSImageAtPathAsPNG(anImage, outPath)
  set imageRep to anImage’s TIFFRepresentation()
  
set aRawimg to current application’s NSBitmapImageRep’s imageRepWithData:imageRep
  
set pathString to current application’s NSString’s stringWithString:outPath
  
set newPath to pathString’s stringByExpandingTildeInPath()
  
set myNewImageData to (aRawimg’s representationUsingType:(current application’s NSPNGFileType) |properties|:(missing value))
  
set aRes to (myNewImageData’s writeToFile:newPath atomically:true) as boolean
  
return aRes –成功ならtrue、失敗ならfalseが返る
end saveNSImageAtPathAsPNG

★Click Here to Open This Script 

Posted in Color file Image | Tagged 10.11savvy 10.12savvy 10.13savvy | Leave a comment

AVCapture Deviceの情報を取得する

Posted on 4月 7, 2018 by Takaaki Naganoya
AppleScript名:AVCapture Deviceの情報を取得する
— Created 2017-10-24 by Takaaki Naganoya
— 2017 Piyomaru Software
use AppleScript version "2.4"
use scripting additions
use framework "Foundation"
use framework "AVFoundation"
–https://github.com/pombredanne/osx_headers/blob/master/Frameworks/AVFoundation/AVCaptureHALDevice.h

set inputDevs to current application’s AVCaptureDevice’s devices()

set a1Res to (inputDevs’s valueForKeyPath:"manufacturer") as list
–>  {​​​​​"ma++ ingalls for Cycling ’74", ​​​​​"Shape Services", ​​​​​"Apple Inc.", ​​​​​"Shape Services", ​​​​​"ma++ ingalls for Cycling ’74", ​​​​​"Allocinit.com", ​​​​​"Allocinit.com", ​​​​​"Apple Inc."​​​}

set a2Res to (inputDevs’s valueForKeyPath:"localizedName") as list
–>  {​​​​​"Soundflower (64ch)", ​​​​​"Mobiola Headphone", ​​​​​"内蔵マイク", ​​​​​"Mobiola Microphone", ​​​​​"Soundflower (2ch)", ​​​​​"CamTwist", ​​​​​"CamTwist (2VUY)", ​​​​​"FaceTime HDカメラ(内蔵)"​​​}

set a3Res to (inputDevs’s valueForKeyPath:"isConnected") as list
–>  {​​​​​1, ​​​​​1, ​​​​​1, ​​​​​1, ​​​​​1, ​​​​​1, ​​​​​1, ​​​​​1​​​}

set a4Res to (inputDevs’s valueForKeyPath:"activeFormat") as list
–>  {​​​​​(AVCaptureDeviceFormat) <AVCaptureDeviceFormat: 0x610000605a30> ’soun’/’lpcm’ SR=44100,FF=30,BPP=256,FPP=1,BPF=256,CH=64,BPC=32, ​​​​​(AVCaptureDeviceFormat) <AVCaptureDeviceFormat: 0x618000407a90> ’soun’/’lpcm’ SR=48000,FF=30,BPP=4,FPP=1,BPF=4,CH=1,BPC=32, ​​​​​(AVCaptureDeviceFormat) <AVCaptureDeviceFormat: 0x608000c171f0> ’soun’/’lpcm’ SR=44100,FF=4,BPP=8,FPP=1,BPF=8,CH=2,BPC=24, ​​​​​(AVCaptureDeviceFormat) <AVCaptureDeviceFormat: 0x600000c0ba40> ’soun’/’lpcm’ SR=48000,FF=30,BPP=4,FPP=1,BPF=4,CH=1,BPC=32, ​​​​​(AVCaptureDeviceFormat) <AVCaptureDeviceFormat: 0x610000606310> ’soun’/’lpcm’ SR=44100,FF=30,BPP=8,FPP=1,BPF=8,CH=2,BPC=32, ​​​​​(AVCaptureDeviceFormat) <AVCaptureDeviceFormat: 0x618000a07010> ’vide’/’BGRA’ enc dims = 720×480, pres dims = 720×480 { 30.00 fps }, ​​​​​(AVCaptureDeviceFormat) <AVCaptureDeviceFormat: 0x608000a15070> ’vide’/’2vuy’ enc dims = 720×480, pres dims = 720×480 { 30.00 fps }, ​​​​​(AVCaptureDeviceFormat) <AVCaptureDeviceFormat: 0x610000605bb0> ’vide’/’2vuy’ enc dims = 160×120, pres dims = 160×120 { 29.97 25.00 24.00 15.00 fps }​​​}

set a5Res to (inputDevs’s valueForKeyPath:"transportType") as list
–>  {​​​​​0, ​​​​​0, ​​​​​1.651274862E+9, ​​​​​0, ​​​​​0, ​​​​​1.651274862E+9, ​​​​​1.651274862E+9, ​​​​​1.651274862E+9​​​}

set a6Res to (inputDevs’s valueForKeyPath:"modelID") as list
–>  {​​​​​"com_cycling74_driver_SoundflowerDevice:Soundflower", ​​​​​"com_ShapeServices_driver_HSAudioDevice:Headset Audio Device", ​​​​​"AppleHDA:40", ​​​​​"com_ShapeServices_driver_HSAudioDevice:Headset Audio Device", ​​​​​"com_cycling74_driver_SoundflowerDevice:Soundflower", ​​​​​"Stiltskin", ​​​​​"Stiltskin", ​​​​​"UVC Camera VendorID_1452 ProductID_34064"​​​}

set a7Res to (inputDevs’s valueForKeyPath:"formats") as list
–>  {​​​​​{​​​​​​​(AVCaptureDeviceFormat) <AVCaptureDeviceFormat: 0x610000606240> ’soun’/’lpcm’ SR=192000,FF=30,BPP=256,FPP=1,BPF=256,CH=64,BPC=32, ​​​​​​​(AVCaptureDeviceFormat) <AVCaptureDeviceFormat: 0x610000605d30> ’soun’/’lpcm’ SR=176400,FF=30,BPP=256,FPP=1,BPF=256,CH=64,BPC=32, ​​​​​​​(AVCaptureDeviceFormat) <AVCaptureDeviceFormat: 0x610000605020> ’soun’/’lpcm’ SR=96000,FF=30,BPP=256,FPP=1,BPF=256,CH=64,BPC=32, ​​​​​​​(AVCaptureDeviceFormat) <AVCaptureDeviceFormat: 0x610000605a90> ’soun’/’lpcm’ SR=88200,FF=30,BPP=256,FPP=1,BPF=256,CH=64,BPC=32, ​​​​​​​(AVCaptureDeviceFormat) <AVCaptureDeviceFormat: 0x610000601b70> ’soun’/’lpcm’ SR=48000,FF=30,BPP=256,FPP=1,BPF=256,CH=64,BPC=32, ​​​​​​​(AVCaptureDeviceFormat) <AVCaptureDeviceFormat: 0x610000605a30> ’soun’/’lpcm’ SR=44100,FF=30,BPP=256,FPP=1,BPF=256,CH=64,BPC=32​​​​​},

set a8Res to (inputDevs’s valueForKeyPath:"connectionID") as list
–>  {​​​​​65, ​​​​​40, ​​​​​200, ​​​​​47, ​​​​​54, ​​​​​33, ​​​​​36, ​​​​​39​​​}

set a9Res to (inputDevs’s valueForKeyPath:"connectionUnitComponentSubType")
–>  (NSArray) {​​​​​1751215136, ​​​​​1751215136, ​​​​​1751215136, ​​​​​1751215136, ​​​​​1751215136, ​​​​​1684106272, ​​​​​1684106272, ​​​​​1684106272​​​}

set a10Res to (inputDevs’s valueForKeyPath:"deviceID") as list
–>  {​​​​​65, ​​​​​40, ​​​​​200, ​​​​​47, ​​​​​54, ​​​​​33, ​​​​​36, ​​​​​39​​​}

set a11Res to (inputDevs’s valueForKeyPath:"deviceSystem") as list
–>  {​​​​​2, ​​​​​2, ​​​​​2, ​​​​​2, ​​​​​2, ​​​​​1, ​​​​​1, ​​​​​1​​​}

set a12Res to (inputDevs’s valueForKeyPath:"isInUseByAnotherApplication") as list
–>  {​​​​​0, ​​​​​0, ​​​​​0, ​​​​​0, ​​​​​0, ​​​​​0, ​​​​​0, ​​​​​0​​​}

set a13Res to (inputDevs’s valueForKeyPath:"activeInputSource") as list
–>  {​​​​​missing value, ​​​​​missing value, ​​​​​(AVCaptureDeviceInputSource) <AVCaptureDeviceInputSource: 0x610000606290 ’imic’ "内蔵マイク">, ​​​​​missing value, ​​​​​missing value, ​​​​​missing value, ​​​​​missing value, ​​​​​missing value​​​}

set a14Res to (inputDevs’s valueForKeyPath:"uniqueID") as list
–>  {​​​​​"SoundflowerEngine:1", ​​​​​"HSAudioPipeEngine:0", ​​​​​"AppleHDAEngineInput:1B,0,1,0:1", ​​​​​"HSAudioPipeEngine:1", ​​​​​"SoundflowerEngine:0", ​​​​​"CDC85FD0-E73A-4FC2-B3A8-EA237D6990E0", ​​​​​"CDC85FD0-E73A-4FC2-B3A8-EA237D6990E1", ​​​​​"0x1a11000005ac8510"​​​}

set a15Res to (inputDevs’s valueForKeyPath:"inputSources") as list
–>  {​​​​​{}, ​​​​​{}, ​​​​​{​​​​​​​(AVCaptureDeviceInputSource) <AVCaptureDeviceInputSource: 0x610000606290 ’imic’ "内蔵マイク">​​​​​}, ​​​​​{}, ​​​​​{}, ​​​​​{}, ​​​​​{}, ​​​​​{}​​​}

set a16Res to (inputDevs’s valueForKeyPath:"description") as list
–>  {​​​​​"<AVCaptureHALDevice: 0x6180002f6d80 [Soundflower (64ch)][SoundflowerEngine:1]>", ​​​​​"<AVCaptureHALDevice: 0x6000002fba00 [Mobiola Headphone][HSAudioPipeEngine:0]>", ​​​​​"<AVCaptureHALDevice: 0x6180002fbe80 [内蔵マイク][AppleHDAEngineInput:1B,0,1,0:1]>", ​​​​​"<AVCaptureHALDevice: 0x6180002e8900 [Mobiola Microphone][HSAudioPipeEngine:1]>", ​​​​​"<AVCaptureHALDevice: 0x6100004f2c00 [Soundflower (2ch)][SoundflowerEngine:0]>", ​​​​​"<AVCaptureDALDevice: 0x7f804e6bae00 [CamTwist][CDC85FD0-E73A-4FC2-B3A8-EA237D6990E0]>", ​​​​​"<AVCaptureDALDevice: 0x7f804e5a3fa0 [CamTwist (2VUY)][CDC85FD0-E73A-4FC2-B3A8-EA237D6990E1]>", ​​​​​"<AVCaptureDALDevice: 0x7f804e5a24c0 [FaceTime HDカメラ(内蔵)][0x1a11000005ac8510]>"​​​}

★Click Here to Open This Script 

Posted in Image Sound System | Tagged 10.11savvy 10.12savvy 10.13savvy | Leave a comment

画像+文字作成テスト_v4

Posted on 4月 7, 2018 by Takaaki Naganoya

指定サイズの画像に対して指定の文字を描画して指定ファイル名のPNG画像を書き出すAppleScriptです。

AppleScript名:画像+文字作成テスト_v4
— Created 2015-07-31 by Takaaki Naganoya
— Modified 2015-08-01 by Shane Stanley
— Modified 2017-11-19 by Takaaki Naganoya / macOS 10.13のバグに対応
use AppleScript version "2.4"
use scripting additions
use framework "Foundation"
use framework "AppKit"

set aWidth to 400.0 –幅
set aHeight to 200.0 –高さ
set outPath to "~/Desktop/test.png" –書き出し先のファイルパス
set fillColor to current application’s NSColor’s blackColor –塗り色
set drawColor to current application’s NSColor’s whiteColor –文字色
set aText to "ぴよまるソフトウェア"
set {xPos, yPos} to {1, 5}

–新規画像を作成して背景を塗る
set anImage to makeImageWithFilledColor(aWidth, aHeight, outPath, fillColor) of me

–画像に文字を塗る(参照渡し(call by reference)で、結果はaImage1に入る)
drawStringsOnImage(anImage, aText, "HiraKakuStd-W8", 36.0, drawColor, xPos, yPos) of me

–ファイル保存
set aRes to saveImageRepAtPathAsPNG(anImage, outPath) of me

–画像のうえに指定の文字を描画して画像を返す
on drawStringsOnImage(anImage, aText, aFontName, aPoint, drawColor)
  set retinaF to (current application’s NSScreen’s mainScreen()’s backingScaleFactor()) as real
  
–>  2.0 (Retina) / 1.0 (Non Retina)
  
  set aString to current application’s NSString’s stringWithString:aText
  
set aDict to current application’s NSDictionary’s dictionaryWithObjects:{current application’s NSFont’s fontWithName:aFontName |size|:aPoint, drawColor} forKeys:{current application’s NSFontAttributeName, current application’s NSForegroundColorAttributeName}
  
set imageSize to anImage’s |size|()
  
set textSize to aString’s sizeWithAttributes:aDict
  
  set xPos to ((width of imageSize) – (width of textSize)) / 2 / retinaF
  
set yPos to ((height of imageSize) – (height of textSize)) / 2 / retinaF
  
  –文字描画開始
  
anImage’s lockFocus()
  
aString’s drawAtPoint:(current application’s NSMakePoint(xPos, yPos)) withAttributes:aDict
  
anImage’s unlockFocus()
end drawStringsOnImage

–指定サイズの画像を作成し、背景を指定色で塗る
on makeImageWithFilledColor(aWidth, aHeight, outPath, fillColor)
  set anImage to current application’s NSImage’s alloc()’s initWithSize:(current application’s NSMakeSize(aWidth, aHeight))
  
  –描画開始
  
anImage’s lockFocus()
  
  set theRect to {{x:0, y:0}, {width:aWidth, height:aHeight}}
  
set theNSBezierPath to current application’s NSBezierPath’s bezierPath
  
theNSBezierPath’s appendBezierPathWithRect:theRect
  
  fillColor’s |set|() –色設定
  
theNSBezierPath’s fill() –ぬりつぶし
  
  anImage’s unlockFocus()
  
–描画ここまで
  
  return anImage –画像を返す  
end makeImageWithFilledColor

–画像を指定パスにPNG形式で保存
on saveImageRepAtPathAsPNG(anImage, outPath)
  set imageRep to anImage’s TIFFRepresentation()
  
set aRawimg to current application’s NSBitmapImageRep’s imageRepWithData:imageRep
  
  –書き出しファイルパス情報を作成
  
set pathString to current application’s NSString’s stringWithString:outPath
  
set newPath to pathString’s stringByExpandingTildeInPath()
  
  –書き出し
  
set myNewImageData to (aRawimg’s representationUsingType:(current application’s NSPNGFileType) |properties|:(missing value))
  
set aRes to (myNewImageData’s writeToFile:newPath atomically:true) as boolean
  
  return aRes –成功ならtrue、失敗ならfalseが返る
end saveImageRepAtPathAsPNG

★Click Here to Open This Script 

Posted in call by reference file Image Text | Tagged 10.11savvy 10.12savvy 10.13savvy | 1 Comment

DSCaptureで画面キャプチャ

Posted on 4月 7, 2018 by Takaaki Naganoya

shellのscreencaptureコマンドを使わずにフレームワーク経由で画面キャプチャを行うAppleScriptです。

オープンソースのDSCaptureを利用しており、キャプチャ内容をファイルではなくNSImageに格納できる(メモリ上に、ファイルI/Oを経由せずに取得できる)ので、割と使い手があります。とくに、ファイルI/Oに対してはセキュリティ機能による制約が多いために、メモリ上で処理できることのメリットははかりしれません。

本サンプルScriptでは、動作確認のためにキャプチャ内容をファイルに保存していますが、本来このFrameworkの性格からいえばファイル保存するのは「特徴」を台無しにしています。キャプチャしたイメージ(NSImage)をメモリ上で加工するのに向いています。
–> Download DSCapture.framework (To ~/Library/Frameworks/)

AppleScript名:DSCaptureで画面キャプチャ
— Created 2017-01-16 by Takaaki Naganoya
— 2017 Piyomaru Software
use AppleScript version "2.4"
use scripting additions
use framework "Foundation"
use framework "DSCapture" –https://github.com/kiding/DSCapture.framework
use framework "AppKit"

–Full Screen (Every Display)
set aCapt to current application’s DSCapture’s sharedCapture()’s |full|()’s captureWithTarget:me selector:"displayCaptureData:" useCG:false

–Selected Area (Selected Area Only by user operation)
–set bCapt to current application’s DSCapture’s sharedCapture()’s |selection|()’s captureWithTarget:me selector:"displayCaptureData:" useCG:false

–Delegate Handler
on displayCaptureData:aSender
  set aCount to aSender’s |count|()
  
repeat with i from 0 to (aCount – 1)
    set anImage to (aSender’s imageAtIndex:i)
    
    
–Make Save Image Path
    
set aDesktopPath to ((current application’s NSProcessInfo’s processInfo()’s environment()’s objectForKey:("HOME"))’s stringByAppendingString:"/Desktop/")
    
set savePath to (aDesktopPath’s stringByAppendingString:((current application’s NSUUID’s UUID()’s UUIDString())’s stringByAppendingString:".png"))
    
saveNSImageAtPathAsPNG(anImage, savePath) of me
    
  end repeat
end displayCaptureData:

–NSImageを指定パスにPNG形式で保存
on saveNSImageAtPathAsPNG(anImage, outPath)
  set imageRep to anImage’s TIFFRepresentation()
  
set aRawimg to current application’s NSBitmapImageRep’s imageRepWithData:imageRep
  
set pathString to current application’s NSString’s stringWithString:outPath
  
set newPath to pathString’s stringByExpandingTildeInPath()
  
set myNewImageData to (aRawimg’s representationUsingType:(current application’s NSPNGFileType) |properties|:(missing value))
  
set aRes to (myNewImageData’s writeToFile:newPath atomically:true) as boolean
  
return aRes –成功ならtrue、失敗ならfalseが返る
end saveNSImageAtPathAsPNG

★Click Here to Open This Script 

Posted in file Image System | Tagged 10.11savvy 10.12savvy 10.13savvy | Leave a comment

Finder上で選択中の画像を横方向に連結 v4

Posted on 4月 6, 2018 by Takaaki Naganoya

Finder上で選択中の画像ファイルを横方向に連結して結果をデスクトップ上に出力するAppleScriptです。

Shane Stanleyから「macOS 10.13で動かないよ」とツッコミが入ってmacOS 10.13に対応するよう書き換えたものです。

AppleScript名:Finder上で選択中の画像を横方向に連結 v4
— Created 2017-11-21 by Takaaki Naganoya
— Modified 2018-04-06 by Takaaki Naganoya
— 2018 Piyomaru Software
use AppleScript version "2.5" — El Capitan (10.11) or later
use framework "Foundation"
use framework "QuartzCore"
use framework "AppKit"
use scripting additions

property |NSURL| : a reference to current application’s |NSURL|
property NSUUID : a reference to current application’s NSUUID
property NSArray : a reference to current application’s NSArray
property NSString : a reference to current application’s NSString
property NSImage : a reference to current application’s NSImage
property NSWorkspace : a reference to current application’s NSWorkspace
property NSPNGFileType : a reference to current application’s NSPNGFileType
property NSMutableArray : a reference to current application’s NSMutableArray
property NSBitmapImageRep : a reference to current application’s NSBitmapImageRep
property NSURLTypeIdentifierKey : a reference to current application’s NSURLTypeIdentifierKey

property xGap : 10 –連結時の画像間のアキ(横方向)

tell application "Finder"
  set aSel to selection as alias list
  
if aSel = {} or aSel = "" then return
end tell

–選択した画像をArrayに入れる
set imgList to NSMutableArray’s new()
repeat with i in aSel
  set aPath to POSIX path of i
  
  
set imgRes to (my isImageAtPath:aPath)
  
if imgRes as boolean = true then
    set aNSImage to (NSImage’s alloc()’s initWithContentsOfFile:aPath)
    (
imgList’s addObject:aNSImage)
  end if
end repeat

–KVCで画像の各種情報をまとめて取得
set sizeList to (imgList’s valueForKeyPath:"size") as list –NSSize to list of record conversion
set maxHeight to ((NSArray’s arrayWithArray:sizeList)’s valueForKeyPath:"@max.height") as real
set totalWidth to ((NSArray’s arrayWithArray:sizeList)’s valueForKeyPath:"@sum.width") as real
set totalCount to ((NSArray’s arrayWithArray:sizeList)’s valueForKeyPath:"@count") as integer

–出力画像作成
set tSize to current application’s NSMakeSize((totalWidth + (xGap * totalCount)), maxHeight)
set newImage to NSImage’s alloc()’s initWithSize:tSize

–順次画像を新規画像に上書き
set xOrig to 0
repeat with i in (imgList as list)
  set j to contents of i
  
set curSize to j’s |size|()
  
set aRect to {xOrig, (maxHeight – (curSize’s height())), (curSize’s width()), (curSize’s height())}
  
set newImage to composeImage(newImage, j, aRect) of me
  
set xOrig to xOrig + (curSize’s width()) + xGap
end repeat

–デスクトップにPNG形式でNSImageをファイル保存
set aDesktopPath to current application’s NSHomeDirectory()’s stringByAppendingString:"/Desktop/"
set savePath to aDesktopPath’s stringByAppendingString:((NSUUID’s UUID()’s UUIDString())’s stringByAppendingString:".png")
set fRes to saveNSImageAtPathAsPNG(newImage, savePath) of me

–2つのNSImageを重ね合わせ合成してNSImageで返す
on composeImage(backImage, composeImage, aTargerRect)
  set newImage to NSImage’s alloc()’s initWithSize:(backImage’s |size|())
  
  
copy aTargerRect to {x1, y1, x2, y2}
  
  
newImage’s lockFocus()
  
  
set v2 to system attribute "sys2"
  
if v2 ≤ 12 then
    –To macOS 10.12.x
    
set bRect to current application’s NSMakeRect(x1, y1, x2, y2)
    
set newImageRect to current application’s CGRectZero
    
set newImageRect’s |size| to (newImage’s |size|)
  else
    –macOS 10.13 or later
    
set bRect to {{x1, y1}, {x2, y2}}
    
set newImageRect to {{0, 0}, (newImage’s |size|)}
  end if
  
  
backImage’s drawInRect:newImageRect
  
composeImage’s drawInRect:bRect
  
  
newImage’s unlockFocus()
  
return newImage
end composeImage

–NSImageを指定パスにPNG形式で保存
on saveNSImageAtPathAsPNG(anImage, outPath)
  set imageRep to anImage’s TIFFRepresentation()
  
set aRawimg to NSBitmapImageRep’s imageRepWithData:imageRep
  
set pathString to NSString’s stringWithString:outPath
  
set newPath to pathString’s stringByExpandingTildeInPath()
  
set myNewImageData to (aRawimg’s representationUsingType:(NSPNGFileType) |properties|:(missing value))
  
set aRes to (myNewImageData’s writeToFile:newPath atomically:true) as boolean
  
return aRes –成功ならtrue、失敗ならfalseが返る
end saveNSImageAtPathAsPNG

–指定のパスのファイルが画像かどうかをチェック
on isImageAtPath:aPath
  set aURL to |NSURL|’s fileURLWithPath:aPath
  
set {theResult, theValue} to aURL’s getResourceValue:(reference) forKey:NSURLTypeIdentifierKey |error|:(missing value)
  
return (NSImage’s imageTypes()’s containsObject:theValue) as boolean
end isImageAtPath:

★Click Here to Open This Script 

Posted in file Image | Tagged 10.11savvy 10.12savvy 10.13savvy Finder | Leave a comment

画像の指定エリアを塗りつぶしで縦棒グラフを作成 v4

Posted on 4月 6, 2018 by Takaaki Naganoya

指定データをもとに縦棒グラフの画像をデスクトップフォルダ上に作成するAppleScriptです。

グラフの画像を作ろうとしたら、Keynote上で作成して画像書き出しするとかExcel上でグラフを作成して画像書き出しすることを考えますが、アプリケーションを利用しないでグラフ画像を作ってみました。

前バージョンがmacOS 10.13上で動作しなかったので、対処してみました。


▲macOS 10.13.5beta & macOS 10.12.6 (same result)

AppleScript名:画像の指定エリアを塗りつぶしで縦棒グラフを作成 v4
— Created 2017-11-19 by Takaaki Naganoya
— Modified 2018-04-01 by Takaaki Naganoya
use AppleScript version "2.5"
use scripting additions
use framework "Foundation"
use framework "AppKit"

property NSUUID : a reference to current application’s NSUUID
property NSColor : a reference to current application’s NSColor
property NSString : a reference to current application’s NSString
property NSImage : a reference to current application’s NSImage
property NSScreen : a reference to current application’s NSScreen
property NSBezierPath : a reference to current application’s NSBezierPath
property NSPNGFileType : a reference to current application’s NSPNGFileType
property NSBitmapImageRep : a reference to current application’s NSBitmapImageRep

set plotData to {20, 30, 100, 80, 150, 90}
set plotArea to {300, 200}

set innerGapL to 30
set innerGapU to 10
set innerGapR to 20
set innerGapD to 20
set barGap to 10

–パラメータから下地になる画像を作成する
set aSize to current application’s NSMakeSize(first item of plotArea, second item of plotArea)
set anImage to NSImage’s alloc()’s initWithSize:aSize

–各種パラメータの計算
copy plotArea to {plotWidth, plotHeight}
set itemNum to count every item of plotData
set barThickness to (plotWidth – (itemNum * barGap * 2)) div itemNum

–プロットデータの最大値
set anArray to current application’s NSArray’s arrayWithArray:plotData
set aYmax to (anArray’s valueForKeyPath:"@max.self")’s intValue()
set aMaxYVal to plotHeight – innerGapU – innerGapD
set aYPlotArea to plotHeight – innerGapU – innerGapD – 20
set aYUnit to aYPlotArea / aYmax

–数値データをもとに描画データを組み立てる
set drawList to {}

set startX to innerGapL
copy startX to origX

repeat with i in plotData
  set the end of drawList to current application’s NSMakeRect(startX, innerGapD, barThickness, innerGapD + (i * aYUnit))
  
set startX to startX + barThickness + barGap
end repeat

–グラフ塗りつぶし処理呼び出し
set fillColor to (NSColor’s colorWithCalibratedRed:0.1 green:0.1 blue:0.1 alpha:0.3)
set resImage to drawImageWithColorFill(anImage, drawList, fillColor) of me

–数値データ(文字)をグラフィックに記入
set fillColor2 to NSColor’s blackColor()
set resImage to drawImageWithString(resImage, drawList, fillColor2, plotData, "HiraginoSans-W1", 16.0) of me

–補助線を引く
set fillColor3 to (NSColor’s colorWithCalibratedRed:0.0 green:0.0 blue:0.0 alpha:0.8)
set aVertical to current application’s NSMakeRect(origX, innerGapD, plotWidth – innerGapL – innerGapR, 1)
set aHorizontal to current application’s NSMakeRect(origX, innerGapD, 1, plotHeight – innerGapU – innerGapD)
set draw2List to {aVertical, aHorizontal}
set resImage to drawImageWithColorFill(resImage, draw2List, fillColor3) of me

–画像のファイル出力
set imgPath to POSIX path of (path to desktop folder)
set aUUIDstr to (NSUUID’s UUID()’s UUIDString()) as string
set aPath to ((NSString’s stringWithString:imgPath)’s stringByAppendingPathComponent:aUUIDstr)’s stringByAppendingPathExtension:"png"
set fRes to saveImageRepAtPathAsPNG(resImage, aPath) of me

–NSImageに対して文字を描画する
on drawImageWithString(anImage, drawList, fillColor, dataList, aPSFontName, aFontSize)
  set retinaF to (NSScreen’s mainScreen()’s backingScaleFactor()) as real
  
–>  2.0 (Retina) / 1.0 (Non Retina)
  
  
set aDict to (current application’s NSDictionary’s dictionaryWithObjects:{current application’s NSFont’s fontWithName:aPSFontName |size|:aFontSize, fillColor} forKeys:{current application’s NSFontAttributeName, current application’s NSForegroundColorAttributeName})
  
  
anImage’s lockFocus() –描画開始
  
  
set aLen to length of drawList
  
repeat with i from 1 to aLen
    set i1 to contents of item i of drawList
    
    
set v2 to system attribute "sys2"
    
if v2 ≤ 12 then
      –To macOS 10.12.x
      
set origX to (x of origin of i1) / retinaF
      
set origY to (y of origin of i1) / retinaF
      
set sizeX to (width of |size| of i1) / retinaF
      
set sizeY to (height of |size| of i1) / retinaF
      
set theRect to {{x:origX, y:origY}, {width:sizeX, height:sizeY}}
    else
      –macOS 10.13 or later
      
set origX to (item 1 of item 1 of i1) / retinaF
      
set origY to (item 2 of item 1 of i1) / retinaF
      
set sizeX to (item 1 of item 2 of i1) / retinaF
      
set sizeY to (item 2 of item 2 of i1) / retinaF
      
set theRect to {{origX, origY}, {sizeX, sizeY}}
    end if
    
    
set aString to (current application’s NSString’s stringWithString:((contents of item i of dataList) as string))
    (
aString’s drawAtPoint:(current application’s NSMakePoint(origX + (sizeX / 2), sizeY)) withAttributes:aDict)
  end repeat
  
  
anImage’s unlockFocus() –描画ここまで
  
  
return anImage –returns NSImage
end drawImageWithString

–NSImageに対して矩形を塗りつぶす
on drawImageWithColorFill(anImage, drawList, fillColor)
  set retinaF to (NSScreen’s mainScreen()’s backingScaleFactor()) as real
  
–>  2.0 (Retina) / 1.0 (Non Retina)
  
  
anImage’s lockFocus() –描画開始
  
  
repeat with i in drawList
    
    
set v2 to system attribute "sys2"
    
if v2 ≤ 12 then
      –To macOS 10.12.x
      
set origX to (x of origin of i) / retinaF
      
set origY to (y of origin of i) / retinaF
      
set sizeX to (width of |size| of i) / retinaF
      
set sizeY to (height of |size| of i) / retinaF
      
set theRect to {{x:origX, y:origY}, {width:sizeX, height:sizeY}}
    else
      –macOS 10.13 or later
      
set origX to (item 1 of item 1 of i) / retinaF
      
set origY to (item 2 of item 1 of i) / retinaF
      
set sizeX to (item 1 of item 2 of i) / retinaF
      
set sizeY to (item 2 of item 2 of i) / retinaF
      
set theRect to {{origX, origY}, {sizeX, sizeY}}
    end if
    
    
set theNSBezierPath to NSBezierPath’s bezierPath
    (
theNSBezierPath’s appendBezierPathWithRect:theRect)
    
    
fillColor’s |set|() –色設定
    
theNSBezierPath’s fill() –ぬりつぶし
    
  end repeat
  
  
anImage’s unlockFocus() –描画ここまで
  
  
return anImage –returns NSImage
end drawImageWithColorFill

–画像を指定パスにPNG形式で保存
on saveImageRepAtPathAsPNG(anImage, outPath)
  set imageRep to anImage’s TIFFRepresentation()
  
set aRawimg to NSBitmapImageRep’s imageRepWithData:imageRep
  
  
–パスのチルダ展開処理
  
set pathString to NSString’s stringWithString:outPath
  
set newPath to pathString’s stringByExpandingTildeInPath()
  
  
set myNewImageData to (aRawimg’s representationUsingType:(NSPNGFileType) |properties|:(missing value))
  
return (myNewImageData’s writeToFile:newPath atomically:true) as boolean
end saveImageRepAtPathAsPNG

★Click Here to Open This Script 

Posted in file Image | Tagged 10.11savvy 10.12savvy 10.13savvy | Leave a comment

Finder上で選択中の画像を横方向に連結 v3

Posted on 4月 6, 2018 by Takaaki Naganoya

Finder上で選択中の画像ファイルを横方向に連結して結果をデスクトップ上に出力するAppleScriptです。

指定ファイルからUTIを取得するのに外部フレームワークを使っていたのを、Shane Stanleyから「標準機能でできるよ」とツッコミが入って書き換えたものです。

AppleScript名:Finder上で選択中の画像を横方向に連結 v3.scptd
— Created 2017-11-21 by Takaaki Naganoya
— Modified 2018-04-06 by Takaaki Naganoya
— 2018 Piyomaru Software
use AppleScript version "2.5" — El Capitan (10.11) or later
use framework "Foundation"
use framework "QuartzCore"
use framework "AppKit"
use scripting additions

property |NSURL| : a reference to current application’s |NSURL|
property NSUUID : a reference to current application’s NSUUID
property NSArray : a reference to current application’s NSArray
property NSString : a reference to current application’s NSString
property NSImage : a reference to current application’s NSImage
property NSWorkspace : a reference to current application’s NSWorkspace
property NSPNGFileType : a reference to current application’s NSPNGFileType
property NSMutableArray : a reference to current application’s NSMutableArray
property NSBitmapImageRep : a reference to current application’s NSBitmapImageRep
property NSURLTypeIdentifierKey : a reference to current application’s NSURLTypeIdentifierKey

property xGap : 10 –連結時の画像間のアキ(横方向)

tell application "Finder"
  set aSel to selection as alias list
  
if aSel = {} or aSel = "" then return
end tell

–選択した画像をArrayに入れる
set imgList to NSMutableArray’s new()
repeat with i in aSel
  set aPath to POSIX path of i
  
  
set imgRes to (my isImageAtPath:aPath)
  
if imgRes as boolean = true then
    set aNSImage to (NSImage’s alloc()’s initWithContentsOfFile:aPath)
    (
imgList’s addObject:aNSImage)
  end if
end repeat

–KVCで画像の各種情報をまとめて取得
set sizeList to (imgList’s valueForKeyPath:"size") as list –NSSize to list of record conversion
set maxHeight to ((NSArray’s arrayWithArray:sizeList)’s valueForKeyPath:"@max.height") as real
set totalWidth to ((NSArray’s arrayWithArray:sizeList)’s valueForKeyPath:"@sum.width") as real
set totalCount to ((NSArray’s arrayWithArray:sizeList)’s valueForKeyPath:"@count") as integer

–出力画像作成
set tSize to current application’s NSMakeSize((totalWidth + (xGap * totalCount)), maxHeight)
set newImage to NSImage’s alloc()’s initWithSize:tSize

–順次画像を新規画像に上書き
set xOrig to 0
repeat with i in (imgList as list)
  set j to contents of i
  
set curSize to j’s |size|()
  
set aRect to {xOrig, (maxHeight – (curSize’s height())), (curSize’s width()), (curSize’s height())}
  
set newImage to composeImage(newImage, j, aRect) of me
  
set xOrig to xOrig + (curSize’s width()) + xGap
end repeat

–デスクトップにPNG形式でNSImageをファイル保存
set aDesktopPath to current application’s NSHomeDirectory()’s stringByAppendingString:"/Desktop/"
set savePath to aDesktopPath’s stringByAppendingString:((NSUUID’s UUID()’s UUIDString())’s stringByAppendingString:".png")
set fRes to saveNSImageAtPathAsPNG(newImage, savePath) of me

–2つのNSImageを重ね合わせ合成してNSImageで返す
on composeImage(backImage, composeImage, aTargerRect)
  set newImage to NSImage’s alloc()’s initWithSize:(backImage’s |size|())
  
  
copy aTargerRect to {x1, y1, x2, y2}
  
set bRect to current application’s NSMakeRect(x1, y1, x2, y2)
  
  
newImage’s lockFocus()
  
  
set newImageRect to current application’s CGRectZero
  
set newImageRect’s |size| to (newImage’s |size|)
  
  
backImage’s drawInRect:newImageRect
  
composeImage’s drawInRect:bRect
  
  
newImage’s unlockFocus()
  
return newImage
end composeImage

–NSImageを指定パスにPNG形式で保存
on saveNSImageAtPathAsPNG(anImage, outPath)
  set imageRep to anImage’s TIFFRepresentation()
  
set aRawimg to NSBitmapImageRep’s imageRepWithData:imageRep
  
set pathString to NSString’s stringWithString:outPath
  
set newPath to pathString’s stringByExpandingTildeInPath()
  
set myNewImageData to (aRawimg’s representationUsingType:(NSPNGFileType) |properties|:(missing value))
  
set aRes to (myNewImageData’s writeToFile:newPath atomically:true) as boolean
  
return aRes –成功ならtrue、失敗ならfalseが返る
end saveNSImageAtPathAsPNG

–指定のパスのファイルが画像かどうかをチェック
on isImageAtPath:aPath
  set aURL to |NSURL|’s fileURLWithPath:aPath
  
set {theResult, theValue} to aURL’s getResourceValue:(reference) forKey:NSURLTypeIdentifierKey |error|:(missing value)
  
return (NSImage’s imageTypes()’s containsObject:theValue) as boolean
end isImageAtPath:

★Click Here to Open This Script 

Posted in file Image | Tagged 10.11savvy 10.12savvy Finder | Leave a comment

Post navigation

  • Older posts
  • Newer posts

電子書籍(PDF)をオンラインストアで販売中!

Google Search

Popular posts

  • 開発機としてM2 Mac miniが来たのでガチレビュー
  • CotEditorで2つの書類の行単位での差分検出
  • macOS 13.6.5 AS系のバグ、一切直らず
  • macOS 15, Sequoia
  • 初心者がつまづきやすい「log」コマンド
  • 指定のWordファイルをPDFに書き出す
  • Pages本執筆中に、2つの書類モード切り替えに気がついた
  • Adobe AcrobatをAppleScriptから操作してPDF圧縮
  • メキシカンハットの描画
  • 与えられた文字列の1D Listのすべての順列組み合わせパターン文字列を返す v3(ベンチマーク用)
  • 2023年に書いた価値あるAppleScript
  • Pixelmator Pro v3.6.4でAppleScriptからの操作時の挙動に違和感が
  • Numbersで選択範囲のセルの前後の空白を削除
  • AdobeがInDesign v19.4からPOSIX pathを採用
  • Safariで「プロファイル」機能を使うとAppleScriptの処理に影響
  • Cocoa Scripting Course 続刊計画
  • AppleScriptによる並列処理
  • macOS 14.xでScript Menuの実行速度が大幅に下がるバグ
  • NaturalLanguage.frameworkでNLEmbeddingの処理が可能な言語をチェック
  • AppleScript入門③AppleScriptを使った「自動化」とは?

Tags

10.11savvy (1102) 10.12savvy (1243) 10.13savvy (1392) 10.14savvy (587) 10.15savvy (438) 11.0savvy (283) 12.0savvy (212) 13.0savvy (188) 14.0savvy (138) 15.0savvy (116) CotEditor (64) Finder (51) iTunes (19) Keynote (115) NSAlert (61) NSArray (51) NSBitmapImageRep (20) NSBundle (20) NSButton (34) NSColor (53) NSDictionary (28) NSFileManager (23) NSFont (21) NSImage (41) NSJSONSerialization (21) NSMutableArray (63) NSMutableDictionary (22) NSPredicate (36) NSRunningApplication (56) NSScreen (30) NSScrollView (22) NSString (119) NSURL (98) NSURLRequest (23) NSUTF8StringEncoding (30) NSView (33) NSWorkspace (20) Numbers (75) Pages (54) Safari (44) Script Editor (27) WKUserContentController (21) WKUserScript (20) WKWebView (23) WKWebViewConfiguration (22)

カテゴリー

  • 2D Bin Packing
  • 3D
  • AirDrop
  • AirPlay
  • Animation
  • AppleScript Application on Xcode
  • Beginner
  • Benchmark
  • beta
  • Bluetooth
  • Books
  • boolean
  • bounds
  • Bug
  • Calendar
  • call by reference
  • check sum
  • Clipboard
  • Cocoa-AppleScript Applet
  • Code Sign
  • Color
  • Custom Class
  • dialog
  • diff
  • drive
  • Droplet
  • exif
  • file
  • File path
  • filter
  • folder
  • Font
  • Font
  • GAME
  • geolocation
  • GUI
  • GUI Scripting
  • Hex
  • History
  • How To
  • iCloud
  • Icon
  • Image
  • Input Method
  • Internet
  • iOS App
  • JavaScript
  • JSON
  • JXA
  • Keychain
  • Keychain
  • Language
  • Library
  • list
  • Locale
  • Localize
  • Machine Learning
  • Map
  • Markdown
  • Menu
  • Metadata
  • MIDI
  • MIME
  • Natural Language Processing
  • Network
  • news
  • Noification
  • Notarization
  • Number
  • Object control
  • OCR
  • OSA
  • parallel processing
  • PDF
  • Peripheral
  • PRODUCTS
  • QR Code
  • Raw AppleEvent Code
  • Record
  • rectangle
  • recursive call
  • regexp
  • Release
  • Remote Control
  • Require Control-Command-R to run
  • REST API
  • Review
  • RTF
  • Sandbox
  • Screen Saver
  • Script Libraries
  • sdef
  • search
  • Security
  • selection
  • shell script
  • Shortcuts Workflow
  • Sort
  • Sound
  • Spellchecker
  • Spotlight
  • SVG
  • System
  • Tag
  • Telephony
  • Text
  • Text to Speech
  • timezone
  • Tools
  • Update
  • URL
  • UTI
  • Web Contents Control
  • WiFi
  • XML
  • XML-RPC
  • イベント(Event)
  • 未分類

アーカイブ

  • 2025年2月
  • 2025年1月
  • 2024年12月
  • 2024年11月
  • 2024年10月
  • 2024年9月
  • 2024年8月
  • 2024年7月
  • 2024年6月
  • 2024年5月
  • 2024年4月
  • 2024年3月
  • 2024年2月
  • 2024年1月
  • 2023年12月
  • 2023年11月
  • 2023年10月
  • 2023年9月
  • 2023年8月
  • 2023年7月
  • 2023年6月
  • 2023年5月
  • 2023年4月
  • 2023年3月
  • 2023年2月
  • 2023年1月
  • 2022年12月
  • 2022年11月
  • 2022年10月
  • 2022年9月
  • 2022年8月
  • 2022年7月
  • 2022年6月
  • 2022年5月
  • 2022年4月
  • 2022年3月
  • 2022年2月
  • 2022年1月
  • 2021年12月
  • 2021年11月
  • 2021年10月
  • 2021年9月
  • 2021年8月
  • 2021年7月
  • 2021年6月
  • 2021年5月
  • 2021年4月
  • 2021年3月
  • 2021年2月
  • 2021年1月
  • 2020年12月
  • 2020年11月
  • 2020年10月
  • 2020年9月
  • 2020年8月
  • 2020年7月
  • 2020年6月
  • 2020年5月
  • 2020年4月
  • 2020年3月
  • 2020年2月
  • 2020年1月
  • 2019年12月
  • 2019年11月
  • 2019年10月
  • 2019年9月
  • 2019年8月
  • 2019年7月
  • 2019年6月
  • 2019年5月
  • 2019年4月
  • 2019年3月
  • 2019年2月
  • 2019年1月
  • 2018年12月
  • 2018年11月
  • 2018年10月
  • 2018年9月
  • 2018年8月
  • 2018年7月
  • 2018年6月
  • 2018年5月
  • 2018年4月
  • 2018年3月
  • 2018年2月

https://piyomarusoft.booth.pm/items/301502

メタ情報

  • ログイン
  • 投稿フィード
  • コメントフィード
  • WordPress.org

Forum Posts

  • 人気のトピック
  • 返信がないトピック

メタ情報

  • ログイン
  • 投稿フィード
  • コメントフィード
  • WordPress.org
Proudly powered by WordPress
Theme: Flint by Star Verte LLC