Menu

Skip to content
AppleScriptの穴
  • Home
  • Products
  • Books
  • Docs
  • Events
  • Forum
  • About This Blog
  • License
  • 仕事依頼

AppleScriptの穴

Useful & Practical AppleScript archive. Click '★Click Here to Open This Script' Link to download each AppleScript

タグ: Keynote

Keynoteでオープン中の最前面の現在のページのテキストアイテムを取得してテキスト化

Posted on 12月 6, 2018 by Takaaki Naganoya

Keynoteでオープン中の最前面の書類の、現在表示中のスライド(ページ)上に存在する文字情報を取得して、macOS標準装備のテキストエディタ「テキストエディット」の新規書類上に取得した文字情報をすべて転送するAppleScriptです。

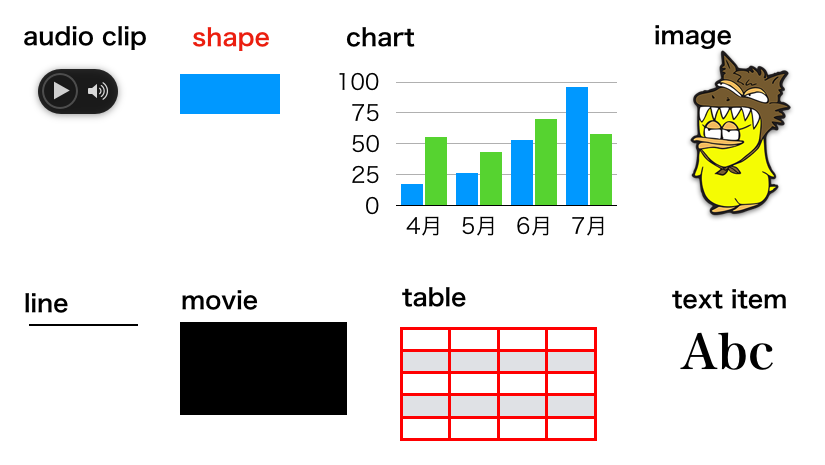
Keynote書類上に配置できるオブジェクトには、

このようなものがあります。

これらのうち文字情報が直接入力可能なtext itemおよびshapeを包括したiWork itemというオブジェクト、およびtableオブジェクトから文字情報を取得し、いろいろごみ取り(改行文字削除)を行なったりしたものをmacOS標準装備のテキストエディタに出力するものです。

Keynoteで作業中に編集中の書類内から文字情報を再利用したい場合のために作成したものです。


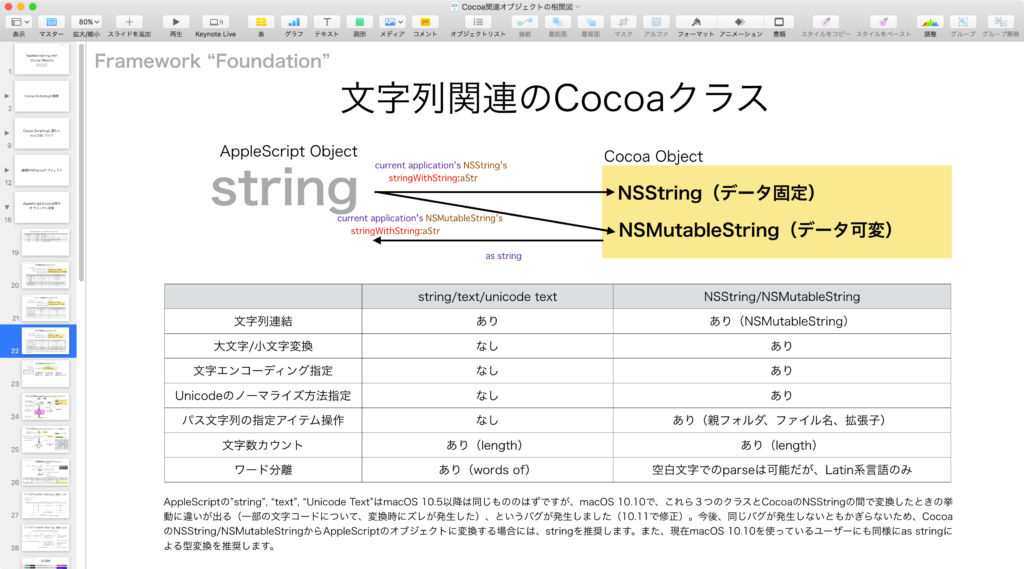
▲このようなKeynoteのスライド(ページ)上の文字情報を


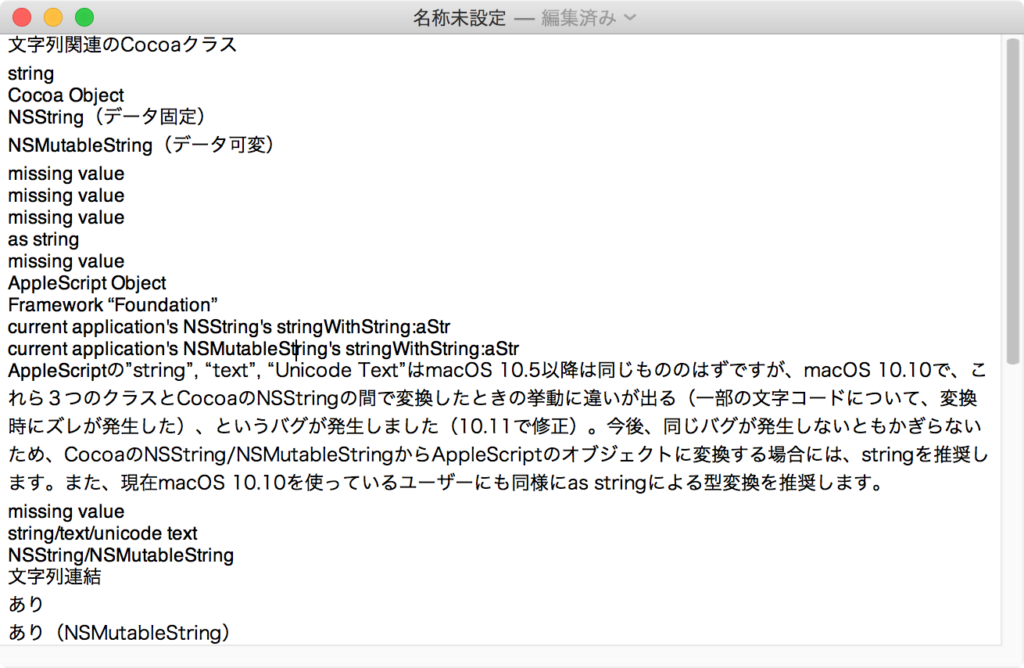
▲一括で取得してテキストエディタの新規書類上に転送

macOS標準装備のスクリプトメニューに入れて呼び出しています。

AppleScript名:Keynoteでオープン中の最前面の現在のページのテキストアイテムを取得してテキスト化
— Created 2018-11-28 by Takaaki Naganoya
— 2018 Piyomaru Software
use AppleScript version "2.4"
use scripting additions
use framework "Foundation"

set repTargList to {string id 10, string id 11, string id 13} –LF,CR,VTab一括置換

set t1List to {}
set t2List to {}

tell application "Keynote"
  if (count every document) = 0 then return
  
  
tell front document
    tell current slide
      if (count every iWork item) > 0 then
        set t1List to object text of every iWork item –text item, shapeなどを包括したオブジェクト
      end if
      
      
if (count every table) > 0 then
        set t2List to value of every cell of every table
      end if
      
    end tell
  end tell
end tell

set tList to t1List & t2List
set tList to FlattenList(tList) of me –force lists to 1D list

–タイトルごとにゴミ取り(改行文字の削除)
set outList to {}
repeat with i in tList
  set j1 to contents of i
  
  
if (j1 is not equal to missing value) and (j1 is not equal to "") then
    set jTmp to (paragraphs of j1) as string –しつこい改行文字(?)を除去するための処理
    
    
set j2 to replaceTextMultiple(jTmp, repTargList, "") of me as string
    
if j2 is not equal to "" then
      set the end of outList to j2
    end if
  end if
end repeat

–リストを改行で区切ったテキストに変換
set aStr to listToStringUsingTextItemDelimiter(outList, return) of me

–得られたテキストをTextEditの新規書類上に出力
tell application "TextEdit"
  activate
  
make new document
  
set text of front document to aStr
end tell

–リストを指定デリミタで区切ったテキストに変換
on listToStringUsingTextItemDelimiter(sourceList as list, textItemDelimiter as string)
  set anArray to current application’s NSArray’s arrayWithArray:sourceList
  
set aString to anArray’s componentsJoinedByString:textItemDelimiter
  
return (aString as string)
end listToStringUsingTextItemDelimiter

–任意のデータから特定の文字列を複数パターン一括置換
on replaceTextMultiple(origData as string, origTexts as list, repText as string)
  set curDelim to AppleScript’s text item delimiters
  
set AppleScript’s text item delimiters to origTexts
  
set origData to text items of origData
  
set AppleScript’s text item delimiters to {repText}
  
set origData to origData as text
  
set AppleScript’s text item delimiters to curDelim
  
return origData
end replaceTextMultiple

–多次元配列の強制1次元配列化 By Paul Berkowitz
on FlattenList(aList as list)
  set oldDelims to AppleScript’s text item delimiters
  
set AppleScript’s text item delimiters to {"????"}
  
set aString to aList as text
  
set aList to text items of aString
  
set AppleScript’s text item delimiters to oldDelims
  
return aList
end FlattenList

★Click Here to Open This Script 

Posted in list Text | Tagged 10.11savvy 10.12savvy 10.13savvy 10.14savvy Keynote | Leave a comment
Keynoteでオープン中の最前面の書類のすべてのページのタイトルを取得してテキスト化 v2

Posted on 12月 6, 2018 by Takaaki Naganoya

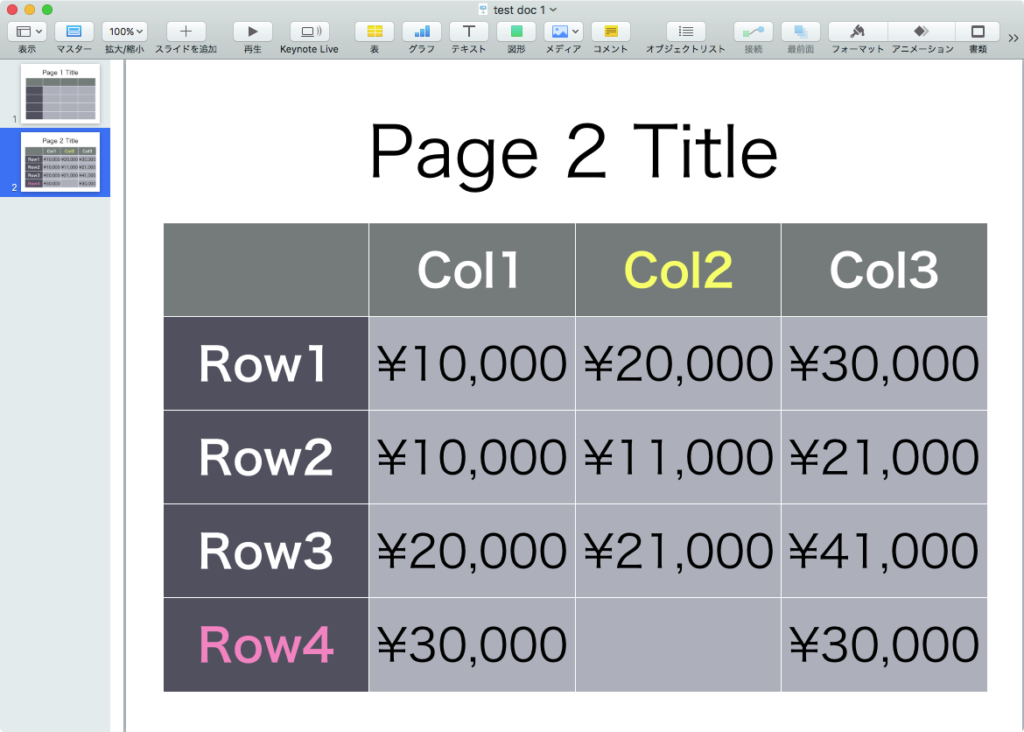
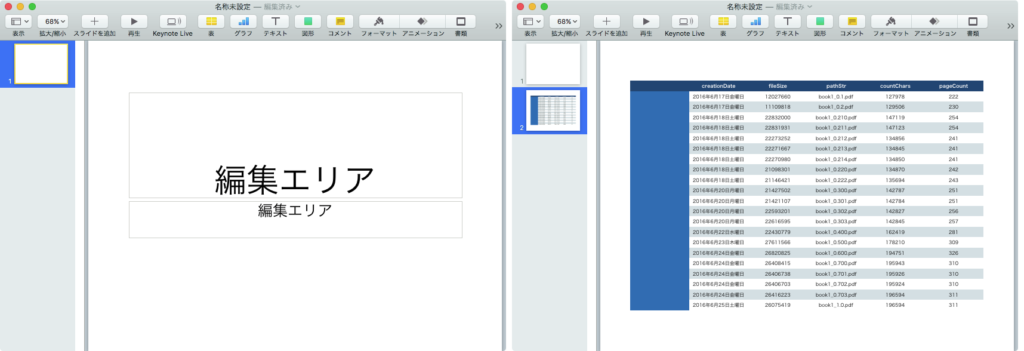
オープン中の最前面のKeynoteの書類の各スライド(ページ)のタイトルを取得して、改行文字を削除し、テキストエディット上の新規書類にタイトル一覧文字を入れるAppleScriptです。

Keynote書類は、きちんと各スライドのマスタースライドでタイトル入りのものを使用し、各スライドでタイトル用のテキストアイテムにタイトルを入れてあれば、AppleScriptからタイトルを取得できます。

もしも、スライド(ページ)上にタイトルが存在しない場合には、座標がどこどこ以上で文字サイズがXXXポイント以上のテキストアイテムのうち、もっとも上の方に存在しているものをタイトルとみなして取得する、といった処理も可能なので、そういう対策を行なってもよいでしょう。

ここでは、単にタイトル内容の再利用や内容確認などのためOS標準装備のテキストエディタに出力していますが、Keynote書類上に目次を作成するといった処理も普通に行なっています(仕様書の目次をつける場合など)。

Keynote書類に対する処理は、割と自分的に業務の効率化に寄与しています。毎月作成する説明用資料を、さまざまな書類のデータから数値を集めてKeynote書類を自動作成するといったAppleScriptも実際に存在しています。


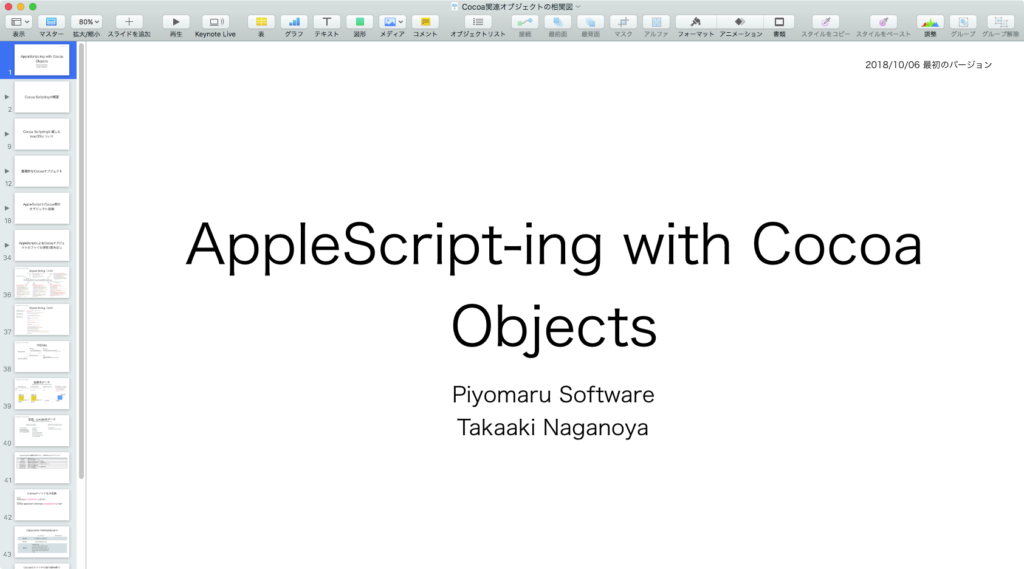
▲このようなKeynote書類を……


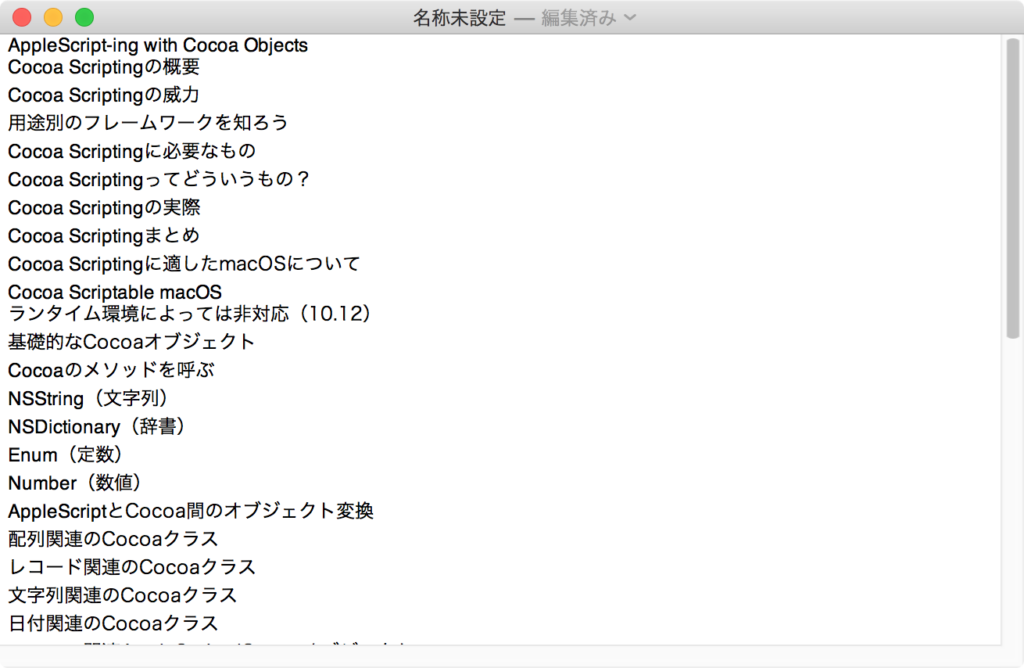
▲本Scriptで処理するとテキストエディット上にタイトル一覧が展開される

AppleScript名:Keynoteでオープン中の最前面の書類のすべてのページのタイトルを取得してテキスト化 v2
— Created 2018-11-28 by Takaaki Naganoya
— 2018 Piyomaru Software
use AppleScript version "2.4"
use scripting additions
use framework "Foundation"

set repTargList to {string id 10, string id 11, string id 13} –LF,CR,VTab一括置換

tell application "Keynote"
  if (count every document) = 0 then return
  
  
tell front document
    set tList to object text of default title item of every slide
  end tell
end tell

–タイトルごとにゴミ取り(改行文字の削除)
set outList to {}
repeat with i in tList
  set j1 to contents of i
  
set jTmp to (paragraphs of j1) as string –しつこい改行文字(?)を除去するための処理
  
  
set j2 to replaceTextMultiple(jTmp, repTargList, "") of me as string
  
if j2 is not equal to "" then
    set the end of outList to j2
  end if
end repeat

–リストを改行で区切ったテキストに変換
set aStr to listToStringUsingTextItemDelimiter(outList, return) of me

–得られたテキストをTextEditの新規書類上に出力
tell application "TextEdit"
  activate
  
make new document
  
set text of front document to aStr
end tell

–リストを指定デリミタで区切ったテキストに変換
on listToStringUsingTextItemDelimiter(sourceList as list, textItemDelimiter as string)
  set anArray to current application’s NSArray’s arrayWithArray:sourceList
  
set aString to anArray’s componentsJoinedByString:textItemDelimiter
  
return (aString as string)
end listToStringUsingTextItemDelimiter

–任意のデータから特定の文字列を複数パターン一括置換
on replaceTextMultiple(origData as string, origTexts as list, repText as string)
  set curDelim to AppleScript’s text item delimiters
  
set AppleScript’s text item delimiters to origTexts
  
set origData to text items of origData
  
set AppleScript’s text item delimiters to {repText}
  
set origData to origData as text
  
set AppleScript’s text item delimiters to curDelim
  
return origData
end replaceTextMultiple

★Click Here to Open This Script 

Posted in list Text | Tagged 10.11savvy 10.12savvy 10.13savvy 10.14savvy Keynote | Leave a comment

Keynoteの表セルに計算式を入れる

Posted on 12月 5, 2018 by Takaaki Naganoya

Keynoteの最前面の書類の現在表示中のスライド(ページ)上の表の指定セルに計算式を入れ、表示フォーマットを指定するAppleScriptです。

計算式については、Keynote上で実際に入力して、AppleScriptから指定セルのpropertyを取得して、記入方法を確認しました。

tell application "Keynote"
  tell front document
    tell current slide
      tell table 1
        tell column 2
          tell cell 3
            properties
            
–> {vertical alignment:center, row:row "3" of table 1 of slide 1 of document id "11E9C7CA-50E5-4360-A26D-C8B14BAE004D" of application "Keynote", class:cell, font name:"HiraKakuProN-W3", formatted value:"50%", background color:{65527, 65533, 65524}, formula:"=B2÷B1", name:"B3", text wrap:true, text color:{0, 0, 0}, alignment:center, column:column "B" of table 1 of slide 1 of document id "11E9C7CA-50E5-4360-A26D-C8B14BAE004D" of application "Keynote", format:percent, font size:22.0, value:0.5}            
          end tell
        end tell
      end tell
    end tell
  end tell
end tell

★Click Here to Open This Script 

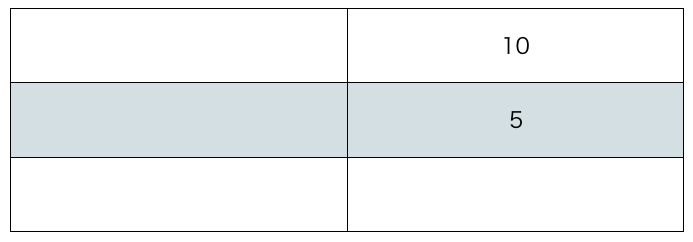
このような状態で、

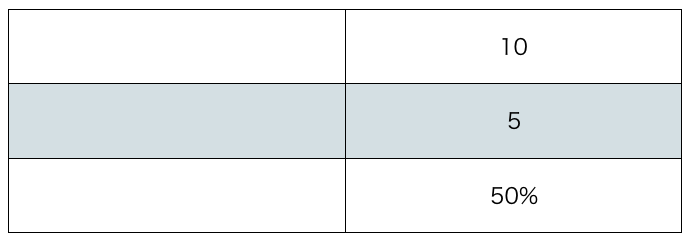
実際に実行すると、

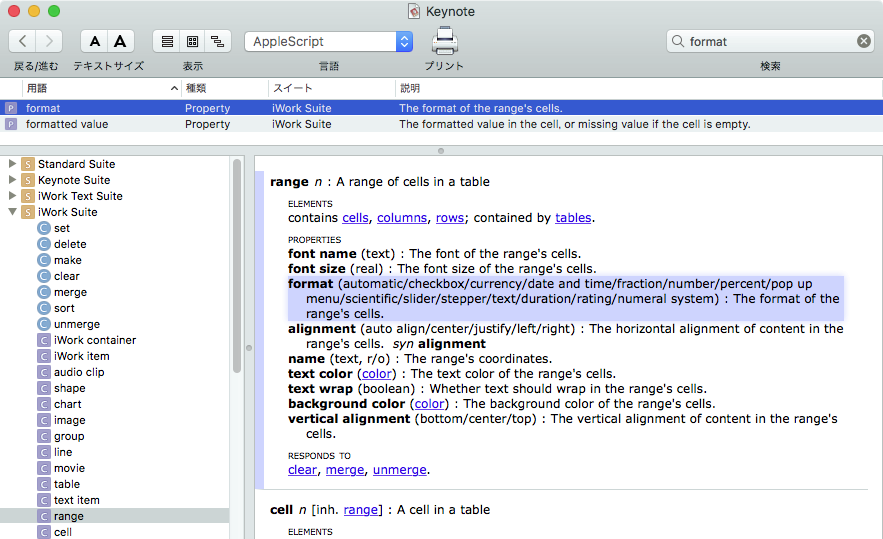
のようになります。セルに指定できるformatの種類は、KeynoteのAppleScript用語辞書にあるように、

automatic/‌checkbox/‌currency/‌date and time/‌fraction/‌number/‌percent/‌pop up menu/‌scientific/‌slider/‌stepper/‌text/‌duration/‌rating/‌numeral system

のとおりです。実際に指定してみるとわかるのですが、Keynoteのアプリケーション仕様にない予約語があり(checkbox、pop up menu、slider、stepper)これらを指定してもKeynoteがサポートしている範囲内のformatでしか表示されません。

なお、掲載Scriptではわかりやすいように確認処理を省略していますが、実行の前提条件としてKeynote書類がオープンされていて、表示中のスライド(ページ)上に表オブジェクトが存在する状態になっていることが必要です。これらの前提条件を満たしていない場合には、エラーになります。

AppleScript名:Keynoteの表セルに計算式を入れる
tell application "Keynote"
  tell front document
    tell current slide
      tell table 1
        tell column 2
          tell cell 3
            set its value to "=B2÷B1"
            
set its format to percent
          end tell
        end tell
      end tell
    end tell
  end tell
end tell

★Click Here to Open This Script 

Posted in How To | Tagged 10.11savvy 10.12savvy 10.13savvy 10.14savvy Keynote | Leave a comment

recordのlistでKeynoteに表を作成する v1.5

Posted on 10月 29, 2018 by Takaaki Naganoya

リスト(配列)に入ったレコード(dictionary)のデータをもとに、現在オープン中のKeynoteの書類にスライドを追加し、その上に表を作成するAppleScriptです。

Keynoteで書類をオープンしていない場合には、書類を新規作成します。

表のデータを順次埋めているのは、Keynoteの表作成機能がそのように実装されているからです。普通は、データ内容を指定して表の作成と内容を一気に指定するように実装するのが普通ですが、Keynoteのこの仕様はあまりいただけません。

そのため、各セルを順次データで埋めているわけですが(アプリケーションとの通信頻度が高くなるので本来は避けたい処理)、「ignoring application responses」〜「end ignoring」による非同期実行モードによりデータでセルを埋める箇所のみ倍速実行しています。

「ignoring application responses」を使うと、AppleScriptがアプリケーションに命令を出して、正常に実行されたかどうかの「実行結果」を待たないため、おおよそ2倍の速度で実行できます。ただし、命令が正常に実行できたかどうかを取得できないので、安全性が確認されているようなケースで返り値が不要な場合にのみ利用できます。

macOS 10.14, Mojaveで実行したところ、macOS 10.12, Sierraの倍ぐらいの速度で実行しました。なんだろうこれは(10.12:Keynote v8.1, 10.14:Keynote v8.2)、、、、ハードウェアの構成などはほぼ同じで、まったく同じScriptを実行したのですが、、、、

AppleScript名:recordのlistでKeynoteに表を作成する v1.5
— Created 2016-06-29 by Takaaki Naganoya
— 2016 Piyomaru Software
use AppleScript version "2.4"
use scripting additions
use framework "Foundation"

property aFontSize : 12

–This Date format is localized in Japanese. But this date string works only string. Don’t care about it.
set aList to {{pathStr:"book1_0.1.pdf", creationDate:"2016年6月17日金曜日", pageCount:222, countChars:127978, fileSize:"12027660"}, {pathStr:"book1_0.2.pdf", creationDate:"2016年6月17日金曜日", pageCount:230, countChars:129506, fileSize:"11109818"}, {pathStr:"book1_0.210.pdf", creationDate:"2016年6月18日土曜日", pageCount:254, countChars:147119, fileSize:"22832000"}, {pathStr:"book1_0.211.pdf", creationDate:"2016年6月18日土曜日", pageCount:254, countChars:147123, fileSize:"22831931"}, {pathStr:"book1_0.212.pdf", creationDate:"2016年6月18日土曜日", pageCount:241, countChars:134856, fileSize:"22273252"}, {pathStr:"book1_0.213.pdf", creationDate:"2016年6月18日土曜日", pageCount:241, countChars:134845, fileSize:"22271667"}, {pathStr:"book1_0.214.pdf", creationDate:"2016年6月18日土曜日", pageCount:241, countChars:134850, fileSize:"22270980"}, {pathStr:"book1_0.220.pdf", creationDate:"2016年6月18日土曜日", pageCount:242, countChars:134870, fileSize:"21098301"}, {pathStr:"book1_0.222.pdf", creationDate:"2016年6月18日土曜日", pageCount:243, countChars:135694, fileSize:"21146421"}, {pathStr:"book1_0.300.pdf", creationDate:"2016年6月20日月曜日", pageCount:251, countChars:142787, fileSize:"21427502"}, {pathStr:"book1_0.301.pdf", creationDate:"2016年6月20日月曜日", pageCount:251, countChars:142784, fileSize:"21421107"}, {pathStr:"book1_0.302.pdf", creationDate:"2016年6月20日月曜日", pageCount:256, countChars:142827, fileSize:"22593201"}, {pathStr:"book1_0.303.pdf", creationDate:"2016年6月20日月曜日", pageCount:257, countChars:142845, fileSize:"22616595"}, {pathStr:"book1_0.400.pdf", creationDate:"2016年6月22日水曜日", pageCount:281, countChars:162419, fileSize:"22430779"}, {pathStr:"book1_0.500.pdf", creationDate:"2016年6月23日木曜日", pageCount:309, countChars:178210, fileSize:"27611566"}, {pathStr:"book1_0.600.pdf", creationDate:"2016年6月24日金曜日", pageCount:326, countChars:194751, fileSize:"26820825"}, {pathStr:"book1_0.700.pdf", creationDate:"2016年6月24日金曜日", pageCount:310, countChars:195943, fileSize:"26408415"}, {pathStr:"book1_0.701.pdf", creationDate:"2016年6月24日金曜日", pageCount:310, countChars:195926, fileSize:"26406738"}, {pathStr:"book1_0.702.pdf", creationDate:"2016年6月24日金曜日", pageCount:310, countChars:195924, fileSize:"26406703"}, {pathStr:"book1_0.703.pdf", creationDate:"2016年6月24日金曜日", pageCount:311, countChars:196594, fileSize:"26416223"}, {pathStr:"book1_1.0.pdf", creationDate:"2016年6月25日土曜日", pageCount:311, countChars:196594, fileSize:"26075419"}}

set anItem to contents of first item of aList
set aDict to (current application’s NSMutableArray’s arrayWithObject:anItem)’s firstObject()
set aKeyList to aDict’s allKeys() as list
set aKeyCount to length of aKeyList
set aRowCount to length of aList

tell application "Keynote"
  set dCount to count every document
  
if dCount = 0 then
    set newDoc to make new document with properties {document theme:theme "ホワイト", width:1024, height:768} –This theme name is *localized* by stupid software maker in Cupertino. This means "White" in Japanese
  end if


tell document 1
    set aNewSlide to make new slide
    
set base slide of aNewSlide to master slide "空白" –This theme name is *localized* by stupid software maker in Cupertino. This means "Blank" in Japanese
    
    
tell aNewSlide
      set aTable to make new table with properties {column count:aKeyCount + 1, row count:aRowCount + 1}
      
      
tell aTable
        –ヘッダー行を作成(ラベルで埋める)
        
tell row 1
          repeat with i from 2 to aKeyCount + 1
            set aKey to item (i – 1) of aKeyList
            
            
–非同期実行ここから
            
ignoring application responses
              set value of cell i to aKey
              
set font size to aFontSize
            end ignoring
            
–非同期実行ここまで
            
          end repeat
        end tell
        
        
–各行のデータを埋める
        
repeat with ii from 2 to aRowCount + 1
          set aRecRow to item (ii – 1) of aList
          
tell row ii
            
            
repeat with iii from 2 to (aKeyCount + 1)
              
              
tell cell iii
                set aKey to item (iii – 1) of aKeyList
                
                
–非同期実行ここから
                
ignoring application responses
                  set value to retValueForKey(aRecRow, aKey) of me
                  
set font size to aFontSize
                end ignoring
                
–非同期実行ここまで
                
              end tell
            end repeat
          end tell
        end repeat
        
      end tell
    end tell
    
  end tell
end tell

on retValueForKey(aRec, aLabel)
  set tmpDic to current application’s NSMutableDictionary’s dictionaryWithDictionary:aRec
  
return (tmpDic’s valueForKey:aLabel) as string
end retValueForKey

★Click Here to Open This Script 

Posted in list Record | Tagged 10.11savvy 10.12savvy 10.13savvy 10.14savvy Keynote | Leave a comment

Keynoteで一番左上のshapeオブジェクトに他のshapeのサイズを合わせる

Posted on 8月 17, 2018 by Takaaki Naganoya

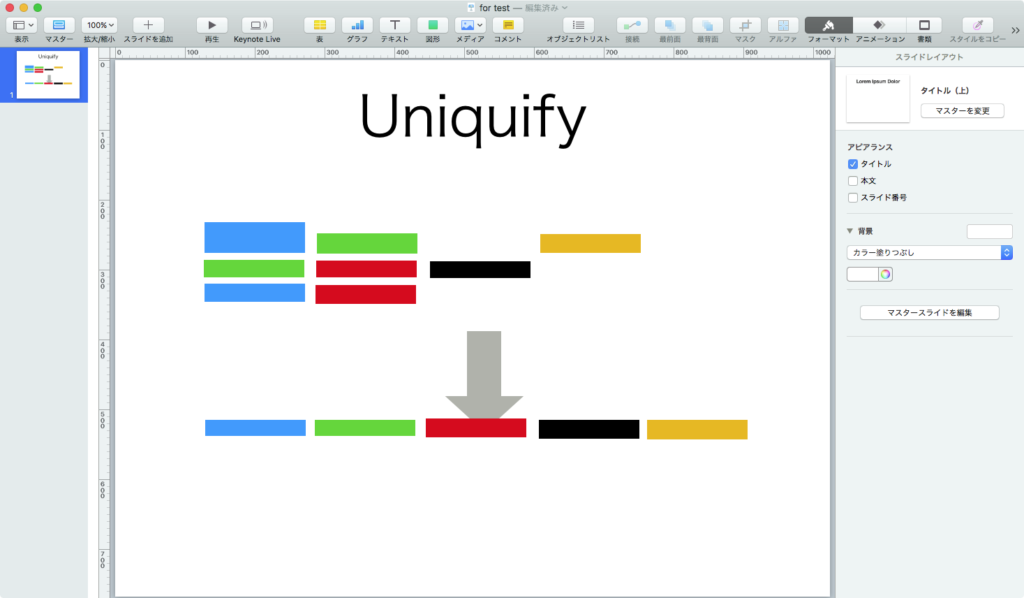
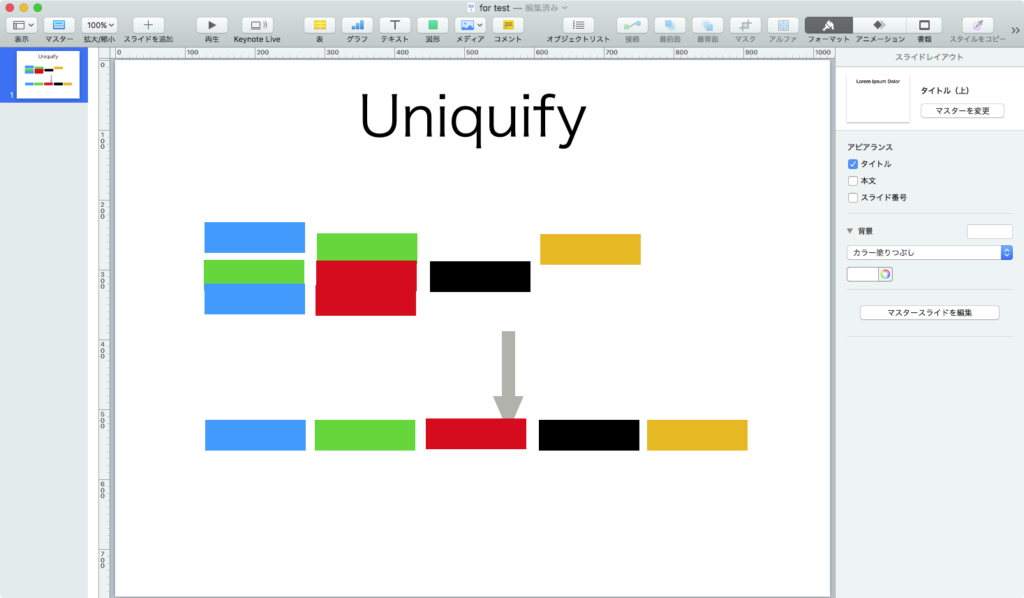
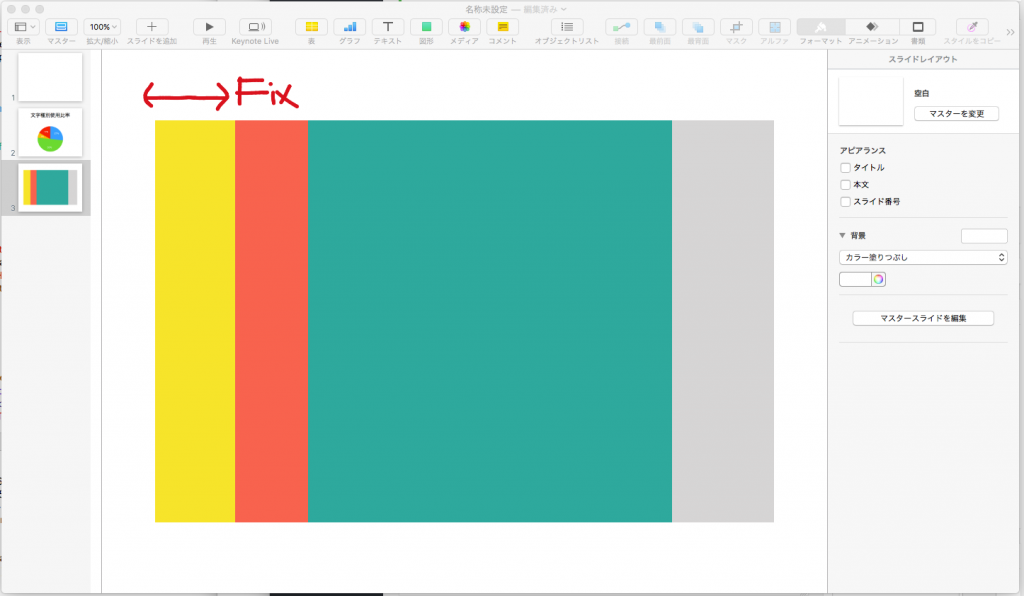
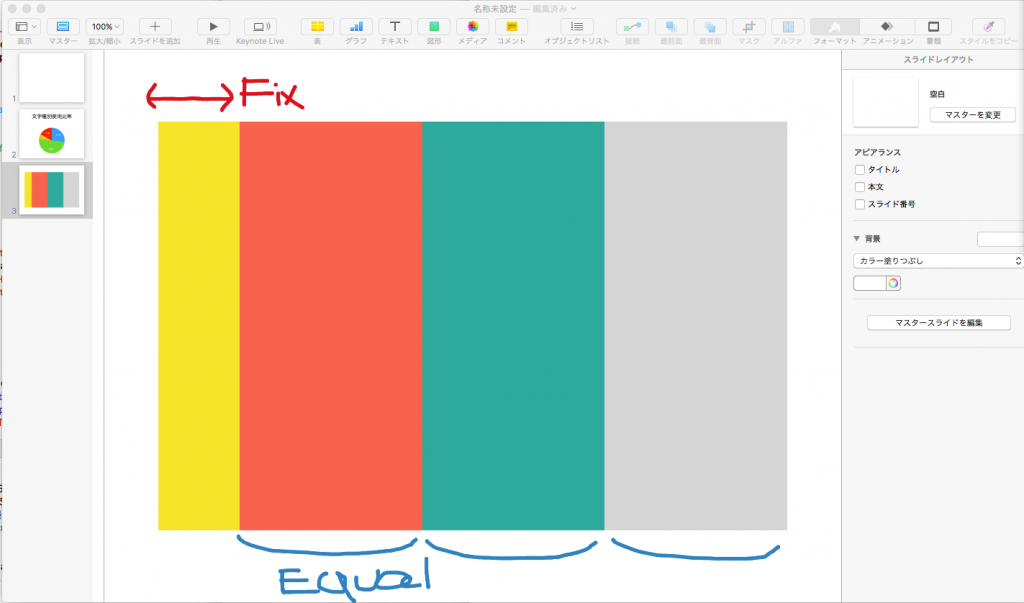
Keynoteでオープン中の最前面の書類で表示中のスライド(ページ)上の一番左上のshapeオブジェクトの縦横のサイズに他のshapeオブジェクトのサイズを合わせるAppleScriptです。

座標(position)の配列(2D Array)のソートにはBridgePlus Script Libraryを用いています。


▲初期状態


▲本AppleScriptで一番左上のshapeオブジェクトに他のshapeオブジェクトのサイズを合わせた


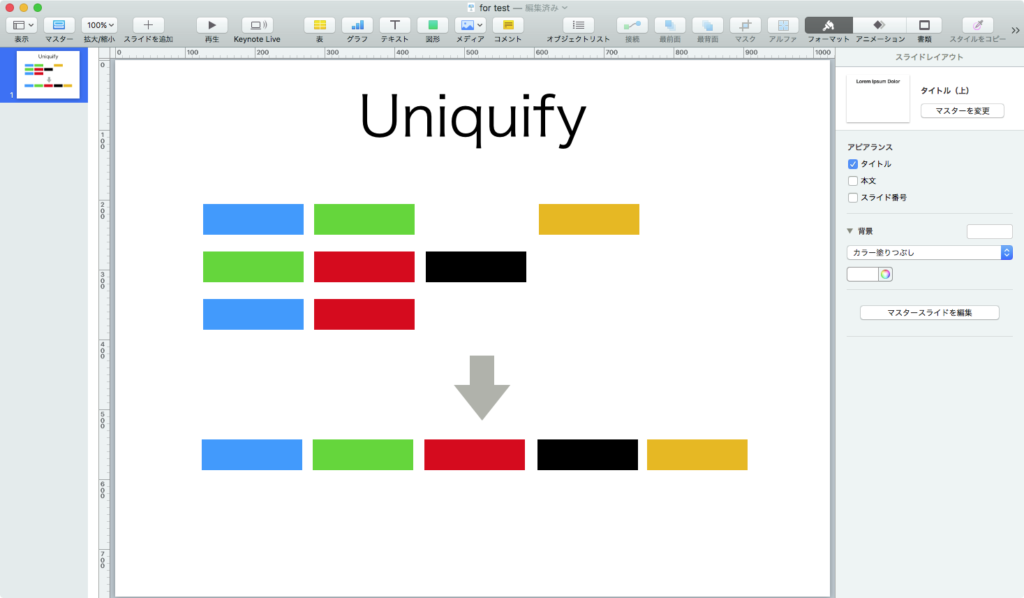
▲コマンドで適当に上ぞろえや左ぞろえを実行して整列(ここは手作業)

昔、Finder上のアイコンの整列AppleScriptを作ったことがあったので、その処理を使い回せば「いい感じの整列」はできそうです。

AppleScript名:Keynoteで一番左上のshapeオブジェクトに他のshapeのサイズを合わせる
— Created 2018-08-17 by Takaaki Naganoya
— 2018 Piyomaru Software
use AppleScript version "2.4"
use scripting additions
use framework "Foundation"
use bPlus : script "BridgePlus" –https://www.macosxautomation.com/applescript/apps/BridgePlus.html

tell application "Keynote"
  tell front document
    tell (current slide)
      — すべてのshapeオブジェクトの座標{x,y}を返す
      
set pList to position of every shape
      
      
— shapeオブジェクトの全座標を昇順ソートして最もX座標値が小さいものを返す
      
set mostLeftPos to first item of sort2DList(pList) of me
      
      
— 一番X,Y座標値が小さい(=左上にある)オブジェクトを特定
      
set mostLeftObj to first item of (every shape whose position is equal to mostLeftPos)
      
set mostLeftProp to properties of mostLeftObj
      
–> {opacity:100, parent:slide 13 of document id "95E47D6C-C444-41BD-9E7E-61229486F370" of application "Keynote", class:shape, reflection showing:false, background fill type:color fill, position:{45, 229}, object text:"", width:144, rotation:0, reflection value:0, height:25, locked:false}
      
      
set mostLeftHeight to height of mostLeftProp
      
set mostLeftWidth to width of mostLeftProp
      
      
— 「一番左」以外のshapeオブジェクトへの参照を取得して一気にオブジェクトのwidthをそろえる
      
set otherShape to a reference to (every shape whose position is not equal to mostLeftPos)
      
set width of otherShape to mostLeftWidth
      
set height of otherShape to mostLeftHeight
      
    end tell
  end tell
end tell

on sort2DList(aList)
  load framework
  
set sortIndexes to {1, 0} –Key Item id: begin from 0
  
set sortOrders to {true, true} –ascending = true
  
set sortTypes to {"compare:", "compare:"}
  
set resList to (current application’s SMSForder’s subarraysIn:(aList) sortedByIndexes:sortIndexes ascending:sortOrders sortTypes:sortTypes |error|:(missing value)) as list
  
return resList
end sort2DList

★Click Here to Open This Script 

Posted in list Sort | Tagged 10.11savvy 10.12savvy 10.13savvy Keynote | Leave a comment

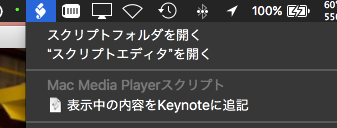
Mac Blue-ray Playerで表示中の内容をKeynoteに追記

Posted on 7月 3, 2018 by Takaaki Naganoya

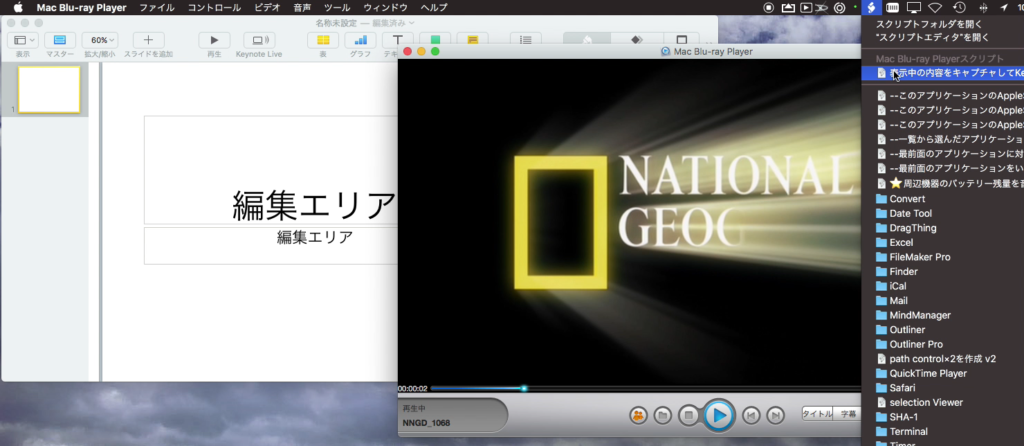
Mac Blue-ray Playerで表示中のディスクの映像を1コマキャプチャして、その画像をオープン中のKeynote書類の末尾に追記するAppleScriptです。

–> Watch Demo Movie

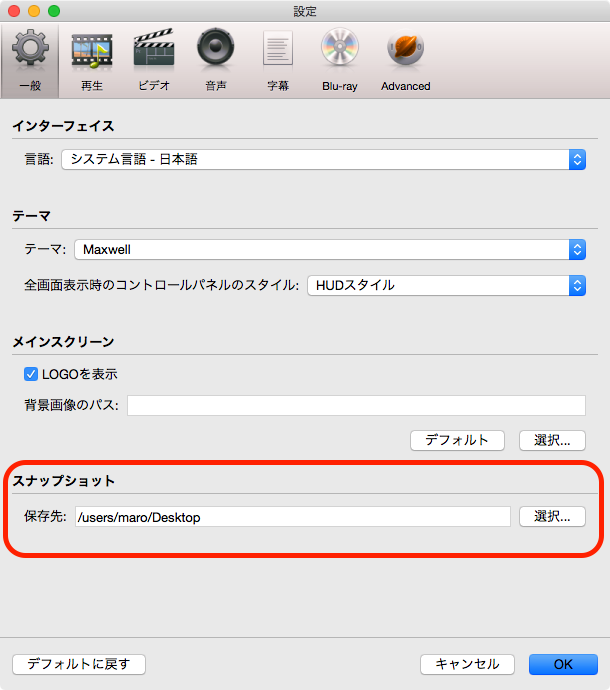
Mac Blue-ray Playerには表示中の映像を静止画像のスナップショットを作成する機能があり、保存先のフォルダは「環境設定」で指定できるようになっています。

本ScriptはmacOS標準搭載のScript Menuに入れて実行することを想定しています。また、自分はMac Blue-ray PlayerでBru-rayディスクではなくDVDを再生することが多く、本検証もDVDディスクで行なっています(たぶんBlu-rayでも大丈夫です)。

キャプチャ先のKeynote書類をあらかじめ作成してオープンしておきます。次に、Mac Blue-ray Playerでディスクを再生して、キャプチャしたい場所で一時停止し、本Scriptをメニューから呼び出して実行すると、Playerの表示内容をキャプチャして、Keynote書類の末尾に新規スライドを追加し、そこにキャプチャした画像をインポートします。

Mac Blue-ray Playerは発売直後(2011年)に購入し、そのままアップデートして利用していたのですが、発売後7年以上経過した現在ではサポートが終了。

アプリケーションを作る側の人間から言わせれば、ひんぱんにオンラインアップデートを行い、6年以上も同一製品ラインナップを維持してきたというのは(品質について批判もないことはないですが)、素直に尊敬に値します。

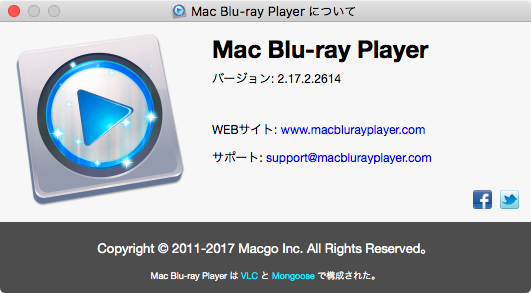
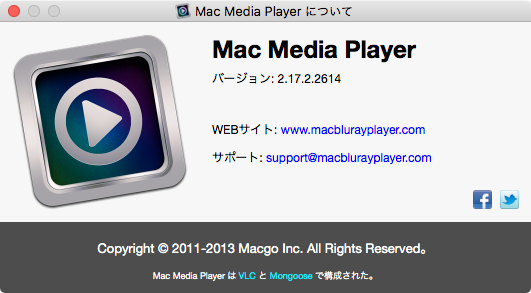
話が横道に入ってしまいましたが、Mac Blue-ray Playerは現在では「Mac Blu-ray Player Pro」「Mac Blu-ray Player Standard」そして無料版の「Free Mac Media Player」へと別れたようです。

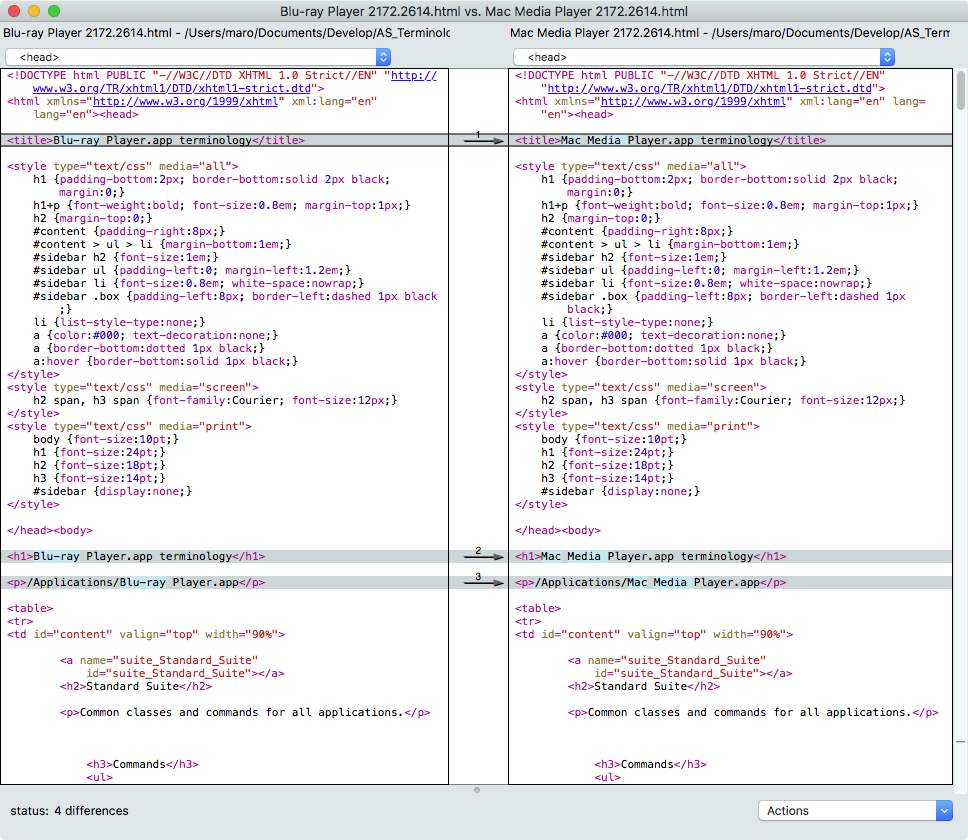
「Free Mac Media Player」は機能面からMac Blue-ray Playerとほぼ同じものに見えます。AppleScript用語辞書もMac Blue-ray Playerと同じものであり、Mac Blue-ray Player用のAppleScriptはFree Mac Media Playerでも使えます(tell application名を直すだけです)。

実際に、本Scriptを「Free Mac Media Player」向けに書き換えて実行できることを確認しています。

AppleScript名:Mac Blue-ray Playerで表示中の内容をKeynoteに追記
— Created 2018-07-02 by Takaaki Naganoya
— 2018 Piyomaru Software
use AppleScript version "2.4"
use scripting additions
use framework "Foundation"

property |NSURL| : a reference to current application’s |NSURL|
property NSPredicate : a reference to current application’s NSPredicate
property NSFileManager : a reference to current application’s NSFileManager
property NSUserDefaults : a reference to current application’s NSUserDefaults
property NSDirectoryEnumerationSkipsHiddenFiles : a reference to current application’s NSDirectoryEnumerationSkipsHiddenFiles

set aExtension to "png" — Mac Blue-ray Player’s Snapshot file name extension
set aKeyword to "スナップショット" –Mac Blue-ray Player’s Snapshot file name’s pre-fix (@Japanese User environment), maybe this is localized string

–Mac Blueray Playerの設定からスナップショットの設定値を取得する
set theID to "com.macblurayplayer.Mac Blu-ray Player"
set theTargKey to "Preferences.snapshotSavePath"
set vRes to defaultsReadFromPlistEntry(theID, theTargKey) of me

–Mac Blueray Playerの環境設定に「~」(チルダ)が入っていた場合に備えて展開
set pathString to current application’s NSString’s stringWithString:vRes
set sourceFolder to pathString’s stringByExpandingTildeInPath()

–処理前にスナップショットのファイルを削除
set file1Res to getFilePathListByExtAndKeyword(sourceFolder, aExtension, aKeyword) of me –ファイル一覧取得
trashItemsByList(file1Res) of me –削除

–Mac Blueray Playerで表示している内容を設定中のフォルダに「スナップショット -YYYY-MM-DD at hh_mm_ss AM-9999999999.png」のファイル名で保存
tell application "Blu-ray Player"
  snapshot –こんだけ
end tell

–処理前にスナップショットのファイルを削除
set file2Res to getFilePathListByExtAndKeyword(sourceFolder, aExtension, aKeyword) of me –ファイル一覧取得
if file2Res = file1Res or file2Res = {} then return –No Snap

–Add Snapshot images to Keynote
repeat with i in file2Res
  set tmpFile to POSIX file i
  
set tmpAlias to tmpFile as alias
  
  
tell application "Keynote"
    tell front document
      set endSlide to make new slide at end
      
      
set blankMaster to master slide "空白" –"Blank" in Japanese. This string is *localized*
      
      
tell endSlide
        set base slide to blankMaster
        
set thisImage to make new image with properties {file:tmpAlias}
      end tell
    end tell
  end tell
  
  
–ファイル削除(ゴミ箱に移動)
  
trashItemAt(tmpAlias) of me
end repeat

–指定フォルダ内のファイルを、拡張子と先頭キーワードで抽出
on getFilePathListByExtAndKeyword(aFol, aExt, aKeyword)
  set aFM to NSFileManager’s defaultManager()
  
set aURL to |NSURL|’s fileURLWithPath:aFol
  
set urlArray to aFM’s contentsOfDirectoryAtURL:aURL includingPropertiesForKeys:{} options:(NSDirectoryEnumerationSkipsHiddenFiles) |error|:(missing value)
  
set thePred to NSPredicate’s predicateWithFormat:"pathExtension == [c]%@ && lastPathComponent BEGINSWITH %@" argumentArray:{aExt, aKeyword}
  
set anArray to (urlArray’s filteredArrayUsingPredicate:thePred)
  
if anArray = missing value then return {}
  
return (anArray’s valueForKeyPath:"path") as list
end getFilePathListByExtAndKeyword

–ファイル削除(ゴミ箱に移動) POSIX path listで指定
on trashItemsByList(posixPathList)
  repeat with i in posixPathList
    set fRes to trashItemAt(i) of me
    
if fRes = false then error "Error deleting a path:" & (i as string)
  end repeat
end trashItemsByList

–ファイル削除(ゴミ箱に移動)
on trashItemAt(anAlias)
  set theNSFileManager to NSFileManager’s defaultManager()
  
set anNSURL to |NSURL|’s fileURLWithPath:(POSIX path of anAlias)
  
set theResult to theNSFileManager’s trashItemAtURL:anNSURL resultingItemURL:(missing value) |error|:(missing value)
  
return (theResult as integer = 1) as boolean
end trashItemAt

–指定IDのplistから指定キーの内容を取り出す
on defaultsReadFromPlistEntry(theID, theTargKey)
  set storedDefaults to (NSUserDefaults’s standardUserDefaults()’s persistentDomainForName:theID)
  
set keyList to storedDefaults’s allKeys() as list
  
if theTargKey is not in keyList then return false
  
set aRes to (storedDefaults’s valueForKeyPath:theTargKey) as list of string or string — as anything
  
return aRes
end defaultsReadFromPlistEntry

★Click Here to Open This Script 

Posted in Image | Tagged 10.11savvy 10.12savvy 10.13savvy Free Mac Media Player Keynote Mac Blu-ray Player NSDirectoryEnumerationSkipsHiddenFiles NSFileManager NSPredicate NSURL NSUserDefaults | Leave a comment

現在のスライド上のshapeオブジェクトのうち一番上のものに他のものの幅をそろえる

Posted on 5月 27, 2018 by Takaaki Naganoya

Keynoteの現在のスライド上のshapeオブジェクトのうち、一番上のものに他のものの幅をそろえるAppleScriptです。

いっそ、Shapeオブジェクトのboundsをすべて取得して、横長か縦長かを計算し、自動で基準オブジェクトを上にするか左のものにするかを判定してもよいのですが、少しやりすぎな感じもするので、現状のままにしてあります。

AppleScript名:現在のスライド上のshapeオブジェクトのうち一番上のものに他のものの幅をそろえる
— Created 2018-05-25 by Takaaki Naganoya
— 2018 Piyomaru Software
use AppleScript version "2.4"
use scripting additions
use framework "Foundation"
use bPlus : script "BridgePlus" –https://www.macosxautomation.com/applescript/apps/BridgePlus.html

tell application "Keynote"
  tell front document
    tell (current slide)
      — すべてのshapeオブジェクトの座標{x,y}を返す
      
set pList to position of every shape
      
      
— shapeオブジェクトの全座標を昇順ソートして最もX座標値が小さいものを返す
      
set mostLeftPos to first item of sort2DList(pList) of me
      
      
— 一番X座標値が小さい(=左にある)オブジェクトを特定
      
set mostLeftObj to first item of (every shape whose position is equal to mostLeftPos)
      
set mostLeftProp to properties of mostLeftObj
      
–> (*class:shape, opacity:100, parent:slide 5 of document id 253165F1-0596-4E72-B9E3-2AB6D6084125, reflection showing:false, background fill type:color fill, position:32, 160, object text:, width:56, rotation:0, reflection value:0, height:467, locked:false*)
      
      
set mostLeftHeight to height of mostLeftProp
      
set mostLeftWidth to width of mostLeftProp
      
      
— 「一番左」以外のshapeオブジェクトへの参照を取得して一気にオブジェクトのwidthをそろえる
      
set otherShape to a reference to (every shape whose position is not equal to mostLeftPos)
      
set width of otherShape to mostLeftWidth
    end tell
  end tell
end tell

on sort2DList(aList)
  load framework
  
set sortIndexes to {1} –Key Item id: begin from 0
  
set sortOrders to {true} –ascending = true
  
set sortTypes to {"compare:"}
  
set resList to (current application’s SMSForder’s subarraysIn:(aList) sortedByIndexes:sortIndexes ascending:sortOrders sortTypes:sortTypes |error|:(missing value)) as list
  
return resList
end sort2DList

★Click Here to Open This Script 

Posted in Sort | Tagged 10.11savvy 10.12savvy 10.13savvy Keynote | Leave a comment

現在のスライド上のshapeオブジェクトのうち一番左のものに他のものの高さをそろえる

Posted on 5月 25, 2018 by Takaaki Naganoya

Keynoteの現在のスライド上のshapeオブジェクトのうち、一番左のものに他のものの高さをそろえるAppleScriptです。

AppleScript名:現在のスライド上のshapeオブジェクトのうち一番左のものに他のものの高さをそろえる
— Created 2018-05-25 by Takaaki Naganoya
— 2018 Piyomaru Software
use AppleScript version "2.4"
use scripting additions
use framework "Foundation"
use bPlus : script "BridgePlus" –https://www.macosxautomation.com/applescript/apps/BridgePlus.html

tell application "Keynote"
  tell front document
    tell (current slide)
      — すべてのshapeオブジェクトの座標{x,y}を返す
      
set pList to position of every shape
      
      
— shapeオブジェクトの全座標を昇順ソートして最もX座標値が小さいものを返す
      
set mostLeftPos to first item of sort2DList(pList) of me
      
      
— 一番X座標値が小さい(=左にある)オブジェクトを特定
      
set mostLeftObj to first item of (every shape whose position is equal to mostLeftPos)
      
set mostLeftProp to properties of mostLeftObj
      
–> (*class:shape, opacity:100, parent:slide 5 of document id 253165F1-0596-4E72-B9E3-2AB6D6084125, reflection showing:false, background fill type:color fill, position:32, 160, object text:, width:56, rotation:0, reflection value:0, height:467, locked:false*)
      
      
set mostLeftHeight to height of mostLeftProp
      
set mostLeftWidth to width of mostLeftProp
      
      
— 「一番左」以外のshapeオブジェクトへの参照を取得して一気にオブジェクトのHeightをそろえる
      
set otherShape to a reference to (every shape whose position is not equal to mostLeftPos)
      
set height of otherShape to mostLeftHeight
    end tell
  end tell
end tell

on sort2DList(aList)
  load framework
  
set sortIndexes to {0} –Key Item id: begin from 0
  
set sortOrders to {true} –ascending = true
  
set sortTypes to {"compare:"}
  
set resList to (current application’s SMSForder’s subarraysIn:(aList) sortedByIndexes:sortIndexes ascending:sortOrders sortTypes:sortTypes |error|:(missing value)) as list
  
return resList
end sort2DList

★Click Here to Open This Script 

Posted in Sort | Tagged 10.11savvy 10.12savvy 10.13savvy Keynote | Leave a comment

Keynoteスライドの末尾にQRコードのスライドを追加

Posted on 5月 17, 2018 by Takaaki Naganoya

指定の連絡先情報のQRコード画像を作成して、現在オープン中のKeynoteのスライドの末尾に追加するAppleScriptです。

–> Watch Demo Movie

このAppleScriptでは、ただ固定の文字列をQRコード画像化していますが、Contacts(連絡先)から自分の連絡先の情報を取得して、そこからQRコード画像を作成すると、より「AppleScriptらしい」自動処理になると思います。

さらに、このKeynoteのスライドからPDFを書き出して、Slide Shareに自動アップロードし、そのURLもQRコード画像の中に入れると文句のつけようがありません。

AppleScriptによる自動化で「単なる1つのコマンドをScriptから呼び出すだけ」のものを大量に見かけますが、それだとほとんど意味がありません。複数のアプリケーションや複数のサービスを呼び出してそれらを連携させてはじめて「自動化する意味がある」内容になります。

AppleScript名:Keynoteスライドの末尾にQRコードのスライドを追加
— Created 2018-05-16 by Takaaki Naganoya
— 2018 Piyomaru Software
use AppleScript version "2.4"
use scripting additions
use framework "Foundation"
use framework "AppKit"
use framework "QuartzCore"

–QRCodeを作成
set a to "MEMORY:Piyomaru Software
NAME1:長野谷 隆昌
NAME2:ながのや たかあき
TEL1:080-xxxx-xxxxx
MAIL1:maro@piyocast.com
TEL2:080-xxxx-xxxxx
MAIL2:maro@xxxxxxxxx
MECARD:N:長野谷,隆昌;SOUND:ながのや,たかあき;TEL:080-9999-9999;TEL:03-9999-9999;EMAIL:maro@piyocast.com;EMAIL:maro@xxxxx.xxxxx;NOTE:ぴよまる;;"

set savedPath to makeQRCodeImageOnDesktop(a) of me
set savedFile to (POSIX file savedPath)
set savedAlias to savedFile as alias

tell application "Keynote"
  tell front document
    set endSlide to make new slide at end
    
    
set blankMaster to master slide "空白" –"Blank" in Japanese. This string is *localized*
    
    
tell endSlide
      set base slide to blankMaster
      
set thisImage to make new image with properties {file:savedAlias}
    end tell
  end tell
end tell

do shell script "rm -f " & quoted form of savedPath

on makeQRCodeImageOnDesktop(aData)
  set aStr to current application’s NSString’s stringWithString:aData
  
set strData to aStr’s dataUsingEncoding:(current application’s NSShiftJISStringEncoding) –シフトJISにエンコード
  
set qrFilter to current application’s CIFilter’s filterWithName:"CIQRCodeGenerator"
  
qrFilter’s setValue:strData forKey:"inputMessage"
  
qrFilter’s setValue:"H" forKey:"inputCorrectionLevel"
  
set anImage to qrFilter’s outputImage()
  
  
set convImg to convCIimageToNSImage(anImage) of me
  
  
–NSImageを拡大(アンチエイリアス解除で)
  
set resizedImg to my resizeNSImageWithoutAntlialias:convImg toScale:6.0
  
  
–デスクトップに保存
  
set aDesktopPath to (current application’s NSProcessInfo’s processInfo()’s environment()’s objectForKey:("HOME"))’s stringByAppendingString:"/Desktop/"
  
set savePath to aDesktopPath’s stringByAppendingString:((current application’s NSUUID’s UUID()’s UUIDString())’s stringByAppendingString:".png")
  
saveNSImageAtPathAsPNG(resizedImg, savePath) of me
  
  
return savePath as string
end makeQRCodeImageOnDesktop

on convCIimageToNSImage(aCIImage)
  set aRep to current application’s NSBitmapImageRep’s alloc()’s initWithCIImage:aCIImage
  
set tmpSize to aRep’s |size|()
  
set newImg to current application’s NSImage’s alloc()’s initWithSize:tmpSize
  
newImg’s addRepresentation:aRep
  
return newImg
end convCIimageToNSImage

on convNSImageToCIimage(aNSImage)
  set tiffDat to aNSImage’s TIFFRepresentation()
  
set aRep to current application’s NSBitmapImageRep’s imageRepWithData:tiffDat
  
set newImg to current application’s CIImage’s alloc()’s initWithBitmapImageRep:aRep
  
return newImg as string
end convNSImageToCIimage

–NSImageを指定パスにPNG形式で保存
on saveNSImageAtPathAsPNG(anImage, outPath)
  set imageRep to anImage’s TIFFRepresentation()
  
set aRawimg to current application’s NSBitmapImageRep’s imageRepWithData:imageRep
  
set pathString to current application’s NSString’s stringWithString:outPath
  
set newPath to pathString’s stringByExpandingTildeInPath()
  
set myNewImageData to (aRawimg’s representationUsingType:(current application’s NSPNGFileType) |properties|:(missing value))
  
set aRes to (myNewImageData’s writeToFile:newPath atomically:true) as boolean
  
return aRes –成功ならtrue、失敗ならfalseが返る
end saveNSImageAtPathAsPNG

–NSImageを指定倍率で拡大(アンチエイリアス解除状態で)–By Shane Stanley
on resizeNSImageWithoutAntlialias:aSourceImg toScale:imgScale
  set aSize to aSourceImg’s |size|()
  
set aWidth to (aSize’s width) * imgScale
  
set aHeight to (aSize’s height) * imgScale
  
  
set aRep to current application’s NSBitmapImageRep’s alloc()’s initWithBitmapDataPlanes:(missing value) pixelsWide:aWidth pixelsHigh:aHeight bitsPerSample:8 samplesPerPixel:4 hasAlpha:true isPlanar:false colorSpaceName:(current application’s NSCalibratedRGBColorSpace) bytesPerRow:0 bitsPerPixel:0
  
  
set newSize to {width:aWidth, height:aHeight}
  
aRep’s setSize:newSize
  
  
current application’s NSGraphicsContext’s saveGraphicsState()
  
  
set theContext to current application’s NSGraphicsContext’s graphicsContextWithBitmapImageRep:aRep
  
current application’s NSGraphicsContext’s setCurrentContext:theContext
  
theContext’s setShouldAntialias:false
  
theContext’s setImageInterpolation:(current application’s NSImageInterpolationNone)
  
  
aSourceImg’s drawInRect:(current application’s NSMakeRect(0, 0, aWidth, aHeight)) fromRect:(current application’s NSZeroRect) operation:(current application’s NSCompositeCopy) fraction:(1.0)
  
  
current application’s NSGraphicsContext’s restoreGraphicsState()
  
  
set newImg to current application’s NSImage’s alloc()’s initWithSize:newSize
  
newImg’s addRepresentation:aRep
  
  
return newImg
end resizeNSImageWithoutAntlialias:toScale:

★Click Here to Open This Script 

Posted in file QR Code | Tagged 10.12savvy 10.13savvy Keynote | 1 Comment

表示中のKeynoteの現在のスライド上のテキストを上から順に連結してクリップボードに転送

Posted on 4月 23, 2018 by Takaaki Naganoya

現在オープン中の最前面のKeynote書類の表示中のスライド(ページ)上にあるテキストオブジェクト内のテキストを、Y座標値をもとに(上から下に)並べ替えてクリップボードに転送するAppleScriptです。

–> Demo Movie

Keynote上で選択した複数のテキストオブジェクトの内容をそのままテキストエディタにコピー&ペーストで持っていけないので即席で書いたものです。

AppleScript名:表示中のKeynoteの現在のスライド上のテキストを上から順に連結してクリップボードに転送
— Created 2018-04-22 by Takaaki Naganoya
— 2018 Piyomaru Software
use AppleScript version "2.4"
use scripting additions
use framework "Foundation"
use bPlus : script "BridgePlus" –https://www.macosxautomation.com/applescript/apps/BridgePlus.html

tell application "Keynote"
  tell front document
    tell (current slide)
      set tList to properties of text items
    end tell
    
    
set posList to {}
    
repeat with i in tList
      set tmpPos to position of i
      
set tmpText to object text of i
      
set the end of posList to (tmpPos & tmpText)
    end repeat
    
  end tell
end tell

–Sort 2D List
load framework
set sortIndexes to {1} –Key Item id: begin from 0
set sortOrders to {true} –ascending = true
set sortTypes to {"compare:"}
set resList to (current application’s SMSForder’s subarraysIn:(posList) sortedByIndexes:sortIndexes ascending:sortOrders sortTypes:sortTypes |error|:(missing value)) as list

set allDat to ""

repeat with i in resList
  set a to contents of last item of i
  
set allDat to allDat & return & a
end repeat

set the clipboard to allDat

★Click Here to Open This Script 

Posted in Text | Tagged 10.11savvy 10.12savvy 10.13savvy Keynote | Leave a comment

Keynote, Pages, Numbersがアップデート

Posted on 3月 28, 2018 by Takaaki Naganoya

Keynote、Pages、Numbersがアップデートしました。

 Keynote:v7.3.1 –> v8.0.0
 Pages:v6.3.1 –> v 7.0.0
 Numbers:v4.3.1 –> v5.0.0

NumbersのCSV書き出し機能が強化・変更されたとのことなので、これまでNumbersで複数のシートを含む書類をCSV書き出ししたときの挙動とやや変わる可能性があります。

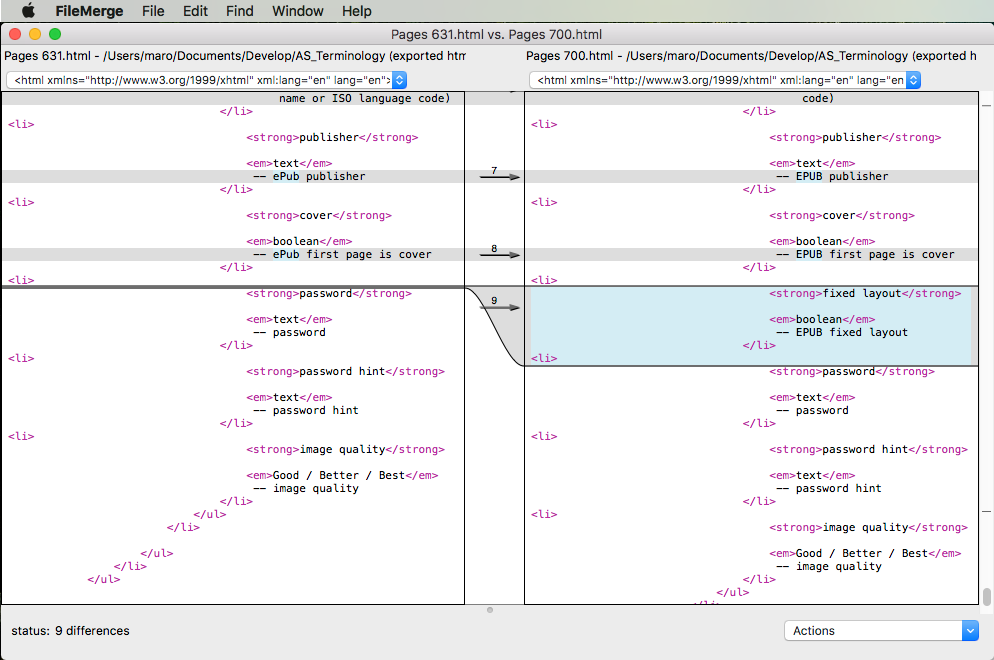
AppleScript用語辞書については、Pagesにのみ変更があります。これまで用語辞書には「ePub」と書かれていましたが、「EPUB」に変更されました。

また、PagesのEPUB書き出し設定(export options)で「fixed layout」という項目(boolean)が増えました。

Posted in 未分類 | Tagged 10.12savvy 10.13savvy Keynote Numbers Pages | Leave a comment

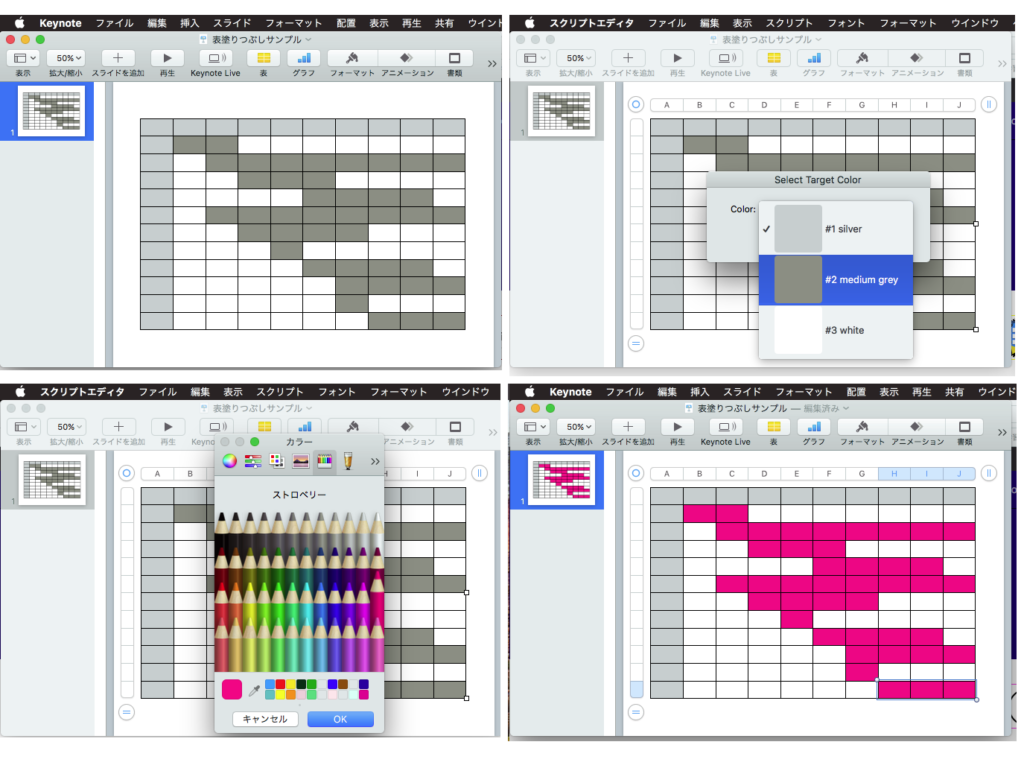
Crayon Pickerの色をKeynote上に赤、青、その他で判定して表にする

Posted on 2月 27, 2018 by Takaaki Naganoya

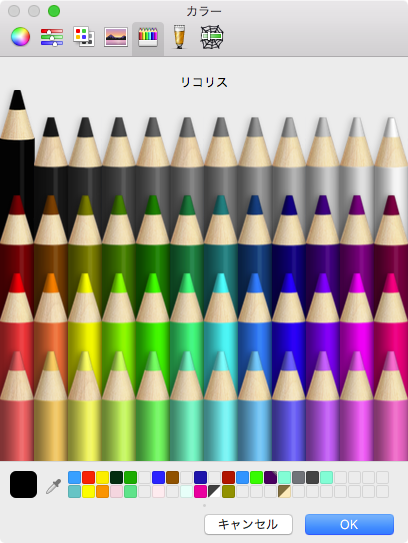
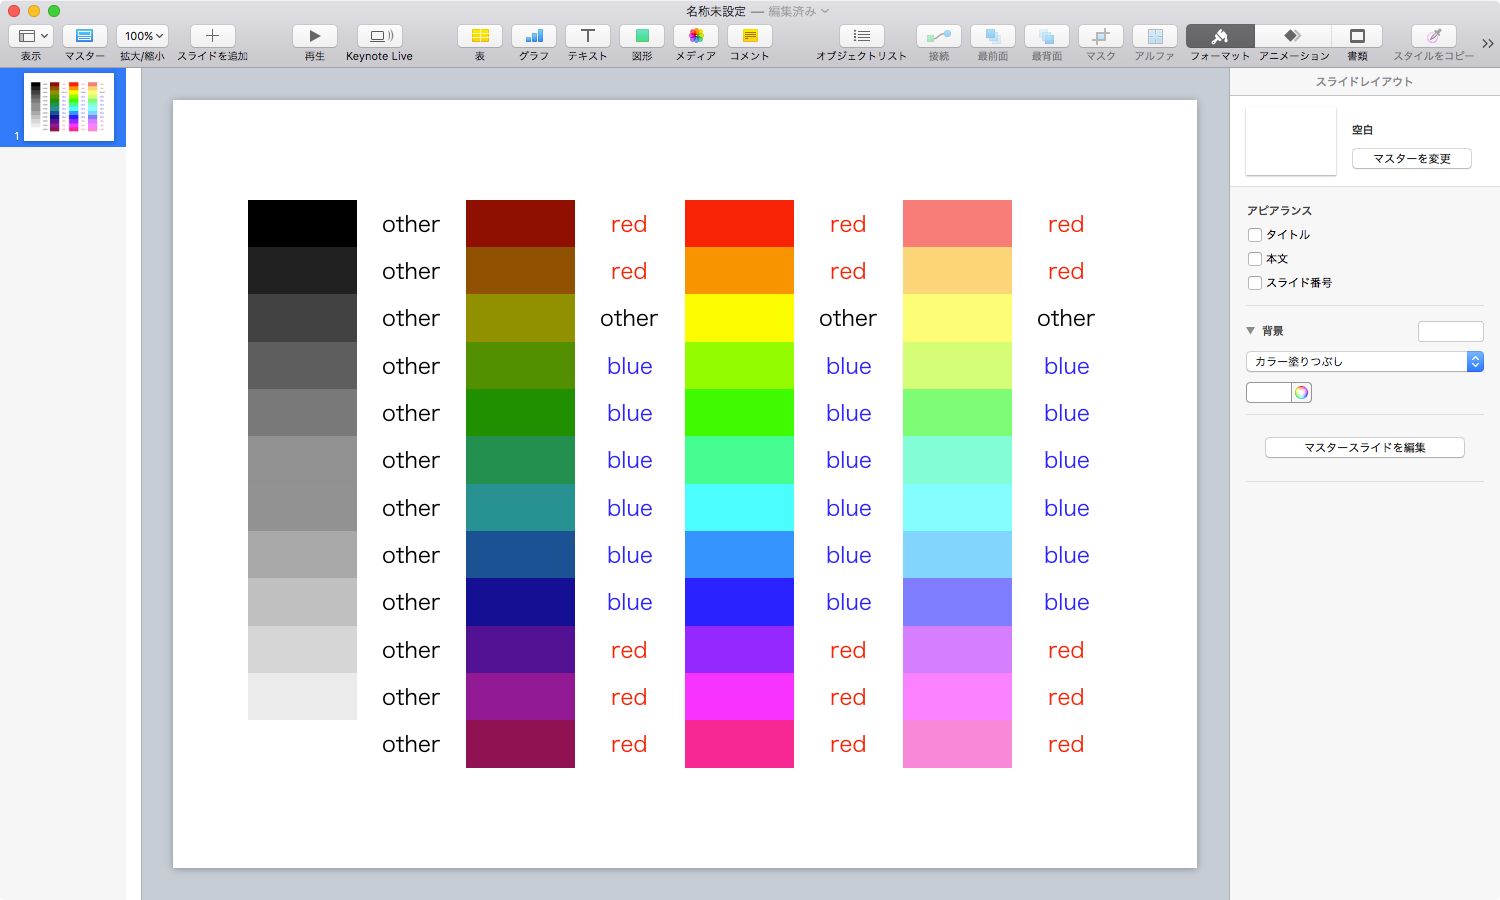
「クレヨンピッカー」の色を赤、青、その他で判定してKeynoteの表にプロットするAppleScriptです。

–> Demo Movie

AppleScript名:Crayon Pickerの色をKeynote上に赤、青、その他で判定して表にする
— Created 2018-02-27 by Takaaki Naganoya
— 2018 Piyomaru Software
use AppleScript version "2.4"
use scripting additions
use framework "Foundation"
use framework "AppKit"

property NSColor : a reference to current application’s NSColor

–Crayon Picker Color Data
set crayonPickerList to {{0, 0, 0}, {6425, 6425, 6425}, {13107, 13107, 13107}, {19532, 19532, 19532}, {26214, 26214, 26214}, {32639, 32639, 32639}, {32896, 32896, 32896}, {39321, 39321, 39321}, {46003, 46003, 46003}, {52428, 52428, 52428}, {59110, 59110, 59110}, {65535, 65535, 65535}, ¬
  {32896, 0, 0}, {32896, 16448, 0}, {32896, 32896, 0}, {16448, 32896, 0}, {0, 32896, 0}, {0, 32896, 16448}, {0, 32896, 32896}, {0, 16448, 32896}, {0, 0, 32896}, {16448, 0, 32896}, {32896, 0, 32896}, {32896, 0, 16448}, ¬
  {
65535, 0, 0}, {65535, 32896, 0}, {65535, 65535, 0}, {32896, 65535, 0}, {0, 65535, 0}, {0, 65535, 32896}, {0, 65535, 65535}, {0, 32896, 65535}, {0, 0, 65535}, {32896, 0, 65535}, {65535, 0, 65535}, {65535, 0, 32896}, ¬
  {
65535, 26214, 26214}, {65535, 52428, 26214}, {65535, 65535, 26214}, {52428, 65535, 26214}, {26214, 65535, 26214}, {26214, 65535, 52428}, {26214, 65535, 65535}, {26214, 52428, 65535}, {26214, 26214, 65535}, {52428, 26214, 65535}, {65535, 26214, 65535}, {65535, 28527, 53199} ¬
  }

tell application "Keynote"
  activate
  
set newDoc to make new document with properties {document theme:theme "ホワイト"} — theme name is *Localized*. This is "White" in Japanese
  
  
tell window 1
    –set {x1, y1, x2, y2} to bounds
    
    
set bounds to {0, 0, 1500, 900}
  end tell
  
  
tell newDoc
    set blankSlide to master slide "空白" –master slide name is *Localized*. This is "Blank" in Japanese
    
    
tell slide 1
      set base slide to blankSlide
      
      
delete every table
      
set tRes to make new table
      
      
tell tRes
        set row count to 12
        
set column count to 8
        
set background color of every cell to {65535, 65535, 65535}
        
set header column count to 0
        
set header row count to 0
        
set footer row count to 0
        
        
repeat with i from 0 to (length of crayonPickerList) – 1
          set a1Num to (i mod 12) + 1
          
set b1Num to ((i div 12) + 1) * 2 – 1
          
set b2Num to b1Num + 1
          
set aCol to contents of item (i + 1) of crayonPickerList
          
          
tell column b1Num
            tell cell a1Num
              ignoring application responses
                set background color to aCol
              end ignoring
            end tell
          end tell
          
          
—————————————————————————————————–
          
copy aCol to {rCol, gCol, bCol}
          
set aColor to makeNSColorFromRGBAval(rCol, gCol, bCol, 65535, 65535) of me
          
set cdnStr to retColorIsRedOrBlueFromNSColor(aColor) of me –red, blue, other
          
—————————————————————————————————–
          
          
if cdnStr = "red" then
            set textCol to {65535, 0, 0}
          else if cdnStr = "blue" then
            set textCol to {0, 0, 65535}
          else
            set textCol to {0, 0, 0}
          end if
          
          
tell column b2Num
            tell cell a1Num
              ignoring application responses
                set value to cdnStr
                
set text color to textCol
              end ignoring
            end tell
          end tell
          
        end repeat
        
      end tell
      
    end tell
  end tell
  
end tell

on retColorIsRedOrBlueFromNSColor(aColor)
  set aColDomain to retColorDomainNameFromNSColor(aColor) of me
  
if aColDomain is in {"magenta", "purple", "orange", "red"} then
    return "red"
  else if aColDomain is in {"green", "cyan", "blue"} then
    return "blue"
  else
    return "other"
  end if
end retColorIsRedOrBlueFromNSColor

on retColorDomainNameFromNSColor(aCol)
  set hueVal to aCol’s hueComponent()
  
set satVal to aCol’s saturationComponent()
  
set brightVal to aCol’s brightnessComponent()
  
  
if satVal ≤ 0.01 then set satVal to 0.0
  
  
set colName to ""
  
  
if satVal = 0.0 then
    if brightVal ≤ 0.2 then
      set colName to "black"
    else if (brightVal > 0.95) then
      set colName to "white"
    else
      set colName to "gray"
    end if
  else
    if hueVal ≤ (15.0 / 360) or hueVal ≥ (330 / 360) then
      set colName to "red"
    else if hueVal ≤ (45.0 / 360) then
      set colName to "orange"
    else if hueVal < (70.0 / 360) then
      set colName to "yellow"
    else if hueVal < (150.0 / 360) then
      set colName to "green"
    else if hueVal < (190.0 / 360) then
      set colName to "cyan"
    else if (hueVal < 250.0 / 360.0) then
      set colName to "blue"
    else if (hueVal < 290.0 / 360.0) then
      set colName to "purple"
    else
      set colName to "magenta"
    end if
  end if
  
  
return colName
end retColorDomainNameFromNSColor

on makeNSColorFromRGBAval(redValue as integer, greenValue as integer, blueValue as integer, alphaValue as integer, aMaxVal as integer)
  set aRedCocoa to (redValue / aMaxVal) as real
  
set aGreenCocoa to (greenValue / aMaxVal) as real
  
set aBlueCocoa to (blueValue / aMaxVal) as real
  
set aAlphaCocoa to (alphaValue / aMaxVal) as real
  
set aColor to NSColor’s colorWithCalibratedRed:aRedCocoa green:aGreenCocoa blue:aBlueCocoa alpha:aAlphaCocoa
  
return aColor
end makeNSColorFromRGBAval

★Click Here to Open This Script 

Keynote Control 1

Keynote Control 2

Posted in Color | Tagged 10.11savvy 10.12savvy 10.13savvy Keynote | Leave a comment

Keynote書類からPDF書き出し v2

Posted on 2月 25, 2018 by Takaaki Naganoya
AppleScript名:Keynote書類からPDF書き出し v2
— Created 2017-01-21 by Takaaki Naganoya
— 2017 Piyomaru Software
use AppleScript version "2.4"
use scripting additions
use framework "Foundation"

set tmpPath to (path to desktop) as string
set aRes to exportKeynoteDocToPDF(tmpPath)

–Keynote書類からPDF書き出し
on exportKeynoteDocToPDF(targFolderPath as string)
  
  
tell application "Keynote"
    set dCount to count every document
    
if dCount = 0 then
      return false
    end if
    
set aPath to file of document 1
  end tell
  
  
set curPath to (current application’s NSString’s stringWithString:(POSIX path of aPath))’s lastPathComponent()’s stringByDeletingPathExtension()’s stringByAppendingString:".pdf"
  
set outPath to (targFolderPath & curPath)
  
  
tell application "Keynote"
    set anOpt to {class:export options, export style:IndividualSlides, all stages:false, skipped slides:true, PDF image quality:Best}
    
export document 1 to file outPath as PDF with properties anOpt
  end tell
  
  
return (outPath as alias)
  
end exportKeynoteDocToPDF

★Click Here to Open This Script 

Keynote Control 1

Keynote Control 2

Posted in file PDF | Tagged 10.11savvy 10.12savvy 10.13savvy Keynote | Leave a comment

Keynoteでタイトルがマスターに入っていなかった場合に修正 v2

Posted on 2月 23, 2018 by Takaaki Naganoya

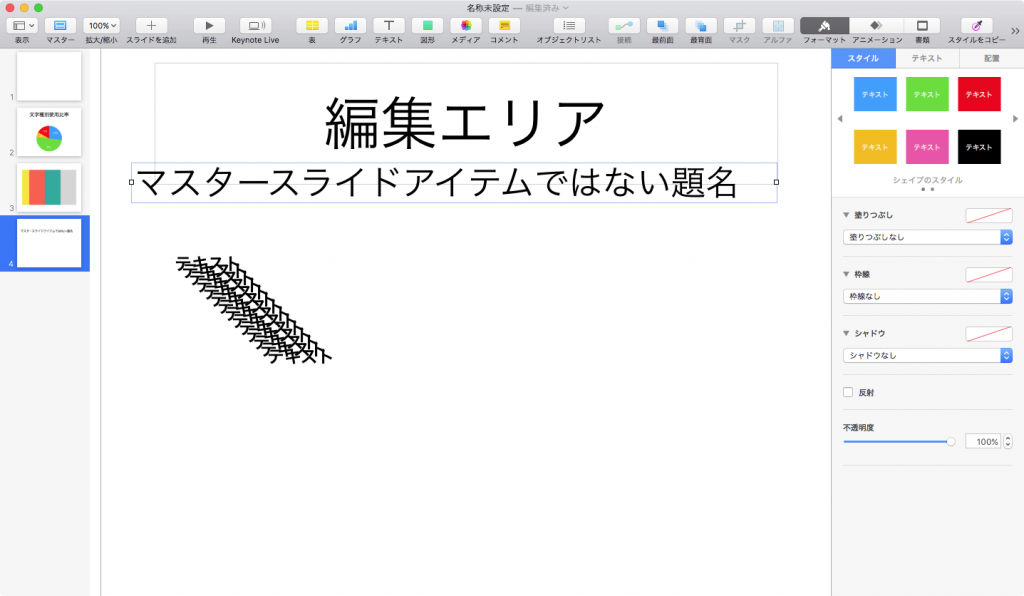
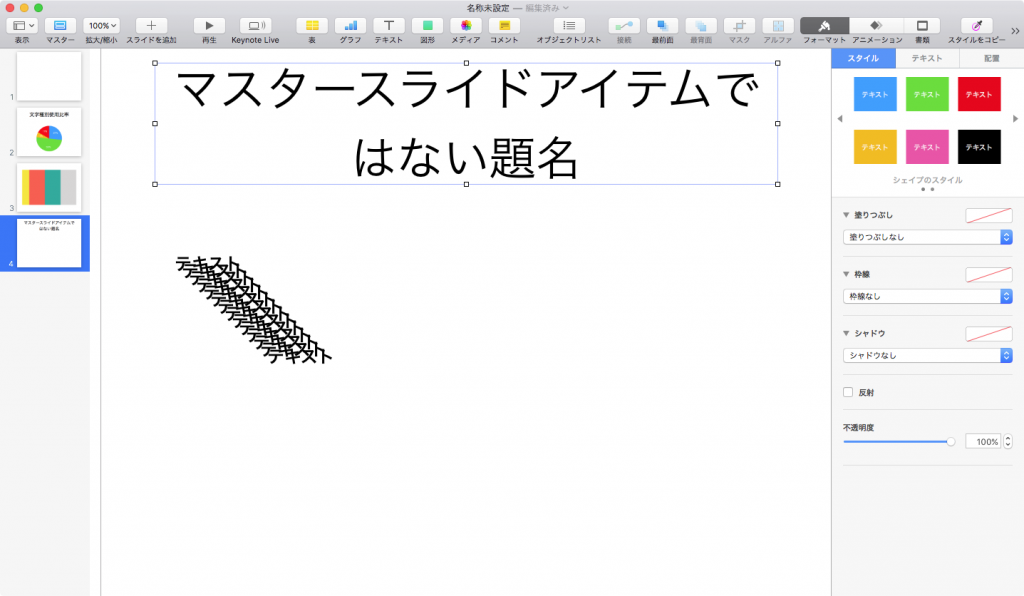
Keynoteのタイトルがマスターに入っていなかった場合に、スライドの一番左上に存在するテキストアイテムをタイトルに入れ直すAppleScriptです。

Keynoteで急いでスライドを作ってはみたものの、あわててタイトルをマスタースライドのタイトルオブジェクトに入れていなかった場合に、(見た目は変わらないものの)あとで修正しておく必要があるケースがあります(Keynoteのデータを再利用するような場合とか)。

そこで、現在表示中のスライド中で一番左上に存在するテキストアイテムで、フォントサイズ20ポイント以上、文字色が黒 {0, 0, 0} のものをタイトルとみなして、文字を取得。あらためてマスタースライドのタイトルオブジェクトに文字を入れ直します。

このままだと、色データが{0,0,1}になったぐらいで検出できなくなってしまいますが、Color Domain処理を組み合わせることで「だいたい黒」「黒っぽい色」といった判定が行えるため、組み合わせて使うと効果的でしょう。


▲Before


▲After

AppleScript名:Keynoteでタイトルがマスターに入っていなかった場合に矯正 v2
use AppleScript version "2.4"
use framework "Foundation"
use scripting additions
use bPlus : script "BridgePlus"

property minTitleFontSize : 20
property targBaseSlide : "タイトル(上)"

tell application "Keynote"
  tell front document
    set newMaster to master slide targBaseSlide
    
    
tell current slide
      set curBaseName to name of base slide
      
      
–現在のスライド上のすべてのテキストアイテムの座標{x ,y}を取得して最小(一番上)のものを推測
      
set pList to position of every text item
      
set p2List to sort2DListAscending(pList) of me
      
set mostUpPos to contents of first item of p2List
      
      
–一番上に存在するテキストアイテムから情報を抽出
      
set tTextItem to first item of (every text item whose position is mostUpPos)
      
tell tTextItem
        set tObjText to (object text)
        
set aTitle to tObjText as string
        
set aProp to size of (object text)
        
set aColor to color of (object text)
      end tell
      
      
–スライドの一番上に存在するテキストアイテムのフォントサイズが想定以上で、色が黒の場合には
      
–マスタースライドのデフォルトタイトルに、一番上に存在していたテキストアイテムの本文を突っ込む
      
if (aProp ≥ minTitleFontSize) and (aColor = {0, 0, 0}) then
        –色判定でColor Domain処理を行えば、「黒っぽい色」や「赤っぽい色」を対象にできる
        
        
if curBaseName is not equal to targBaseSlide then
          set base slide to newMaster
        end if
        
        
delete tTextItem
        
set object text of default title item to aTitle
      end if
    end tell
  end tell
end tell

–2D Listのソート
on sort2DListAscending(aList)
  load framework
  
set sortIndexes to {0, 1} –Key Item id: begin from 0
  
set sortOrders to {true, true} –Ascending, Ascending
  
set sortTypes to {"compare:", "compare:"}
  
set bList to (current application’s SMSForder’s subarraysIn:(aList) sortedByIndexes:sortIndexes ascending:sortOrders sortTypes:sortTypes |error|:(missing value))
  
return bList as list of string or string
end sort2DListAscending

★Click Here to Open This Script 

Keynote Control 1

Keynote Control 2

Posted in 未分類 | Tagged 10.11savvy 10.12savvy 10.13savvy Keynote | Leave a comment

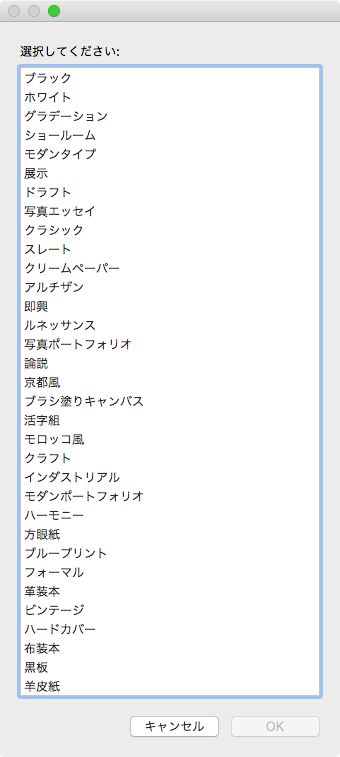
テーマを選択してKeynoteの新規ドキュメントを作成

Posted on 2月 23, 2018 by Takaaki Naganoya

AppleScript名:テーマを選択してKeynoteの新規ドキュメントを作成
tell application "Keynote"
  set tList to name of every theme
  
set themeName to first item of (choose from list tList)
  
set newDoc to make new document with properties {document theme:theme themeName}
  
end tell

★Click Here to Open This Script 

Keynote Control 1

Keynote Control 2

Posted in 未分類 | Tagged 10.11savvy 10.12savvy 10.13savvy Keynote | Leave a comment

Keynote 6.6でドキュメントを新規作成して指定可能なマスタースライド一覧を取得

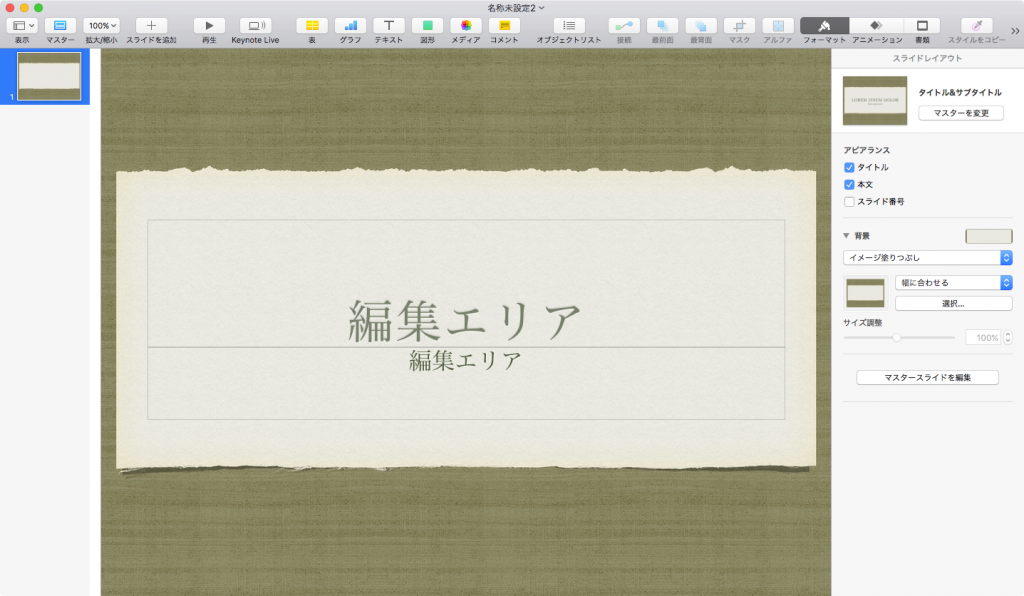
Posted on 2月 23, 2018 by Takaaki Naganoya
AppleScript名:Keynote 6.6でドキュメントを新規作成して指定可能なマスタースライド一覧を取得
— Created 2015-10-27 by Takaaki Naganoya
— 2015 Piyomaru Software
use AppleScript version "2.4"
use scripting additions
use framework "Foundation"

tell application "Keynote"
  –Keynoteの用語辞書のサンプルどおりに書いても動かない!!(オブジェクト名がローカライズされているので、テーマ名が言語環境依存)
  
set aDoc to (make new document with properties {document theme:theme "ホワイト", width:1920, height:1080})
  
  
tell aDoc
    set masList to name of every master slide
    
–> {"タイトル & サブタイトル", "画像(横長)", "タイトル(中央)", "画像(縦長)", "タイトル(上)", "タイトル & 箇条書き", "タイトル、箇条書き、画像", "箇条書き", "画像(3 点)", "引用", "写真", "空白"}
  end tell
end tell

★Click Here to Open This Script 

Keynote Control 1

Keynote Control 2

Posted in 未分類 | Tagged 10.11savvy 10.12savvy 10.13savvy Keynote | Leave a comment

Keynoteで現在表示中のスライド上にある表のカラム幅を自動調整

Posted on 2月 23, 2018 by Takaaki Naganoya


▲Before


▲After

AppleScript名:Keynoteで現在表示中のスライド上にある表のカラム幅を自動調整 v2
— Created 2017-10-06 by Takaaki Naganoya
— 2017 Piyomaru Software
use AppleScript version "2.4"
use scripting additions
use framework "Foundation"

tell application "Keynote"
  tell front document
    tell current slide
      
      
set tCount to count every table
      
if tCount = 0 then return
      
      
tell table 1
        
        
set cCount to count every column
        
set cWidth to width of every column
        
set aWidth to width –table width
        
        
set aveWidth to (aWidth – (first item of cWidth)) / (cCount – 1)
        
        
tell columns 2 thru cCount
          set width to aveWidth
        end tell
        
      end tell
    end tell
  end tell
end tell

★Click Here to Open This Script 

Keynote Control 1

Keynote Control 2

Posted in 未分類 | Tagged 10.11savvy 10.12savvy 10.13savvy Keynote | Leave a comment

Keynoteで2D円グラフを作成

Posted on 2月 23, 2018 by Takaaki Naganoya

Keynoteの現在の書類上に2D円グラフを作成するAppleScriptです。

その他、さまざまなKeynote上で作成可能なグラフを作成するAppleScriptについては、電子書籍「Keynote Control with AppleScript」❶❷で解説しています。

AppleScript名:Keynoteで2D円グラフを作成
–set aRec to {kanjiNum:24960, kanjiRating:28.0, hiraganaNum:56080, hiraganaRating:62.9, katakanaNum:1063, katakanaRating:1.2, otherNum:7136, otherRating:8.0} –文学(坊ちゃん)
–set aRec to {kanjiNum:563289, kanjiRating:22.0, hiraganaNum:1311933, hiraganaRating:51.2, katakanaNum:210161, katakanaRating:8.2, otherNum:478690, otherRating:18.7, totalCount:2564073}–異世界はスマートフォンとともに
set aRec to {kanjiNum:364870, kanjiRating:26.7, hiraganaNum:682261, hiraganaRating:50.0, katakanaNum:89109, katakanaRating:6.6, otherNum:230374, otherRating:16.9, totalCount:1366614} –Knight’s and Magic

set cCount to (kanjiNum of aRec)
set hCount to (hiraganaNum of aRec)
set kCount to (katakanaNum of aRec)
set oCount to (otherNum of aRec)

tell application "Keynote"
  set aDoc to (make new document with properties {document theme:theme "ホワイト", width:1024, height:768}) –Normal Slide
  
–set aDoc to (make new document with properties {document theme:theme "ホワイト", width:1920, height:1080})–Wide Slide
  
  
tell front document
    
    
set aSlide to make new slide at after (first slide) with properties {base slide:master slide "タイトル(上)"}
    
tell aSlide
      set object text of default title item to "文字種別使用比率"
      
–add chart row names {"文字種別"} column names {"漢字", "ひらがな", "カタカナ", "その他"} data {{cCount, hCount, kCount, oCount}} type pie_2d –group by chart row
      
add chart row names {"文字種別"} column names {"Kanji", "Hiragana", "Katakana", "Other"} data {{cCount, hCount, kCount, oCount}} type pie_2d –group by chart row
      
    end tell
    
  end tell
  
end tell

★Click Here to Open This Script 

Keynote Control 1

Keynote Control 2

Posted in 未分類 | Tagged 10.11savvy 10.12savvy 10.13savvy Keynote | Leave a comment

serializeされたlistのrecordからKeynoteで新規ドキュメントを作成してグラフを作成

Posted on 2月 7, 2018 by Takaaki Naganoya

AppleScript名:serializeされたlistのrecordからKeynoteで新規ドキュメントを作成してグラフを作成
— Created 2016-10-31 by Takaaki Naganoya
— 2016 Piyomaru Software
use AppleScript version "2.4"
use scripting additions
use framework "Foundation"

set selData to retSerializedData() of me
set aList to (deserializeToPlistString(selData) of me) as list
set aLen to length of aList
if aLen > 10 then
  set bList to items 1 thru 10 of aList
else
  copy aList to bList
end if

makeKeynoteGraph(bList, "自分のiTunesライブラリ中のジャンル内訳") of me

on makeKeynoteGraph(bList, aTitle)
  set labelList to {}
  
set dataList to {}
  
  
repeat with i from 1 to (length of bList)
    set the end of labelList to contents of theName of (item i of bList)
    
set the end of dataList to contents of numberOfTimes of (item i of bList)
  end repeat
  
  
set targWidth to 500
  
set targHeight to 500
  
  
tell application "Keynote"
    activate
    
set thisDocument to make new document with properties {height:764, width:1024, document theme:theme "ホワイト"}
    
    
tell thisDocument
      
      
set aHeight to height
      
set aWidth to width
      
      
tell slide 1
        set base slide to master slide "タイトル(上)" of thisDocument
        
set object text of default title item to aTitle
        
        
tell default title item
          set height to 80
        end tell
        
        (
add chart row names {"ROW A"} column names labelList data {dataList} type pie_2d group by chart column)
        
        
tell chart 1
          
          
set width to targWidth
          
set height to targHeight
          
          
set position to {(aWidth / 2) – (targWidth / 2), (aHeight / 2) – (targHeight / 2) + 20}
          
        end tell
        
      end tell
    end tell
  end tell
end makeKeynoteGraph

on retSerializedData()
  return "<?xml version=\"1.0\" encoding=\"UTF-8\"?>
<!DOCTYPE plist PUBLIC \"-//Apple//DTD PLIST 1.0//EN\" \"http://www.apple.com/DTDs/PropertyList-1.0.dtd\">
<plist version=\"1.0\">
<array>
  <dict>
    <key>numberOfTimes</key>
    <integer>1721</integer>
    <key>theName</key>
    <string>サウンドトラック</string>
  </dict>
  <dict>
    <key>numberOfTimes</key>
    <integer>942</integer>
    <key>theName</key>
    <string>ロック</string>
  </dict>
  <dict>
    <key>numberOfTimes</key>
    <integer>539</integer>
    <key>theName</key>
    <string>クラシック</string>
  </dict>
  <dict>
    <key>numberOfTimes</key>
    <integer>492</integer>
    <key>theName</key>
    <string>ポップ</string>
  </dict>
  <dict>
    <key>numberOfTimes</key>
    <integer>352</integer>
    <key>theName</key>
    <string>J-Pop</string>
  </dict>
  <dict>
    <key>numberOfTimes</key>
    <integer>330</integer>
    <key>theName</key>
    <string>アニメ</string>
  </dict>
  <dict>
    <key>numberOfTimes</key>
    <integer>279</integer>
    <key>theName</key>
    <string>Pop</string>
  </dict>
  <dict>
    <key>numberOfTimes</key>
    <integer>218</integer>
    <key>theName</key>
    <string>World</string>
  </dict>
  <dict>
    <key>numberOfTimes</key>
    <integer>188</integer>
    <key>theName</key>
    <string>Soundtrack</string>
  </dict>
  <dict>
    <key>numberOfTimes</key>
    <integer>187</integer>
    <key>theName</key>
    <string>ジャズ</string>
  </dict>
  <dict>
    <key>numberOfTimes</key>
    <integer>166</integer>
    <key>theName</key>
    <string>エレクトロニック</string>
  </dict>
  <dict>
    <key>numberOfTimes</key>
    <integer>165</integer>
    <key>theName</key>
    <string>Classical</string>
  </dict>
  <dict>
    <key>numberOfTimes</key>
    <integer>148</integer>
    <key>theName</key>
    <string>Rock</string>
  </dict>
  <dict>
    <key>numberOfTimes</key>
    <integer>125</integer>
    <key>theName</key>
    <string>R&amp;B</string>
  </dict>
  <dict>
    <key>numberOfTimes</key>
    <integer>104</integer>
    <key>theName</key>
    <string>ニューエイジ</string>
  </dict>
  <dict>
    <key>numberOfTimes</key>
    <integer>81</integer>
    <key>theName</key>
    <string>Unclassifiable</string>
  </dict>
  <dict>
    <key>numberOfTimes</key>
    <integer>57</integer>
    <key>theName</key>
    <string>Children’s</string>
  </dict>
  <dict>
    <key>numberOfTimes</key>
    <integer>47</integer>
    <key>theName</key>
    <string>歌謡曲</string>
  </dict>
  <dict>
    <key>numberOfTimes</key>
    <integer>38</integer>
    <key>theName</key>
    <string>Holiday</string>
  </dict>
  <dict>
    <key>numberOfTimes</key>
    <integer>34</integer>
    <key>theName</key>
    <string>オルタナティブ</string>
  </dict>
  <dict>
    <key>numberOfTimes</key>
    <integer>32</integer>
    <key>theName</key>
    <string>Data</string>
  </dict>
  <dict>
    <key>numberOfTimes</key>
    <integer>31</integer>
    <key>theName</key>
    <string>イージーリスニング</string>
  </dict>
  <dict>
    <key>numberOfTimes</key>
    <integer>28</integer>
    <key>theName</key>
    <string>ヴォーカル</string>
  </dict>
  <dict>
    <key>numberOfTimes</key>
    <integer>28</integer>
    <key>theName</key>
    <string>ワールド</string>
  </dict>
  <dict>
    <key>numberOfTimes</key>
    <integer>19</integer>
    <key>theName</key>
    <string>soundtrack</string>
  </dict>
  <dict>
    <key>numberOfTimes</key>
    <integer>15</integer>
    <key>theName</key>
    <string>ディズニー</string>
  </dict>
  <dict>
    <key>numberOfTimes</key>
    <integer>15</integer>
    <key>theName</key>
    <string>シンガーソングライター</string>
  </dict>
  <dict>
    <key>numberOfTimes</key>
    <integer>15</integer>
    <key>theName</key>
    <string>ブルース</string>
  </dict>
  <dict>
    <key>numberOfTimes</key>
    <integer>14</integer>
    <key>theName</key>
    <string>Easy Listening</string>
  </dict>
  <dict>
    <key>numberOfTimes</key>
    <integer>14</integer>
    <key>theName</key>
    <string>ラテン</string>
  </dict>
  <dict>
    <key>numberOfTimes</key>
    <integer>14</integer>
    <key>theName</key>
    <string>Electronica/Dance</string>
  </dict>
  <dict>
    <key>numberOfTimes</key>
    <integer>13</integer>
    <key>theName</key>
    <string>Anime</string>
  </dict>
  <dict>
    <key>numberOfTimes</key>
    <integer>10</integer>
    <key>theName</key>
    <string>フォーク</string>
  </dict>
  <dict>
    <key>numberOfTimes</key>
    <integer>9</integer>
    <key>theName</key>
    <string>J-POP</string>
  </dict>
  <dict>
    <key>numberOfTimes</key>
    <integer>9</integer>
    <key>theName</key>
    <string>New Age</string>
  </dict>
  <dict>
    <key>numberOfTimes</key>
    <integer>5</integer>
    <key>theName</key>
    <string>ダンス</string>
  </dict>
  <dict>
    <key>numberOfTimes</key>
    <integer>5</integer>
    <key>theName</key>
    <string>ホリデー</string>
  </dict>
  <dict>
    <key>numberOfTimes</key>
    <integer>4</integer>
    <key>theName</key>
    <string>カントリー</string>
  </dict>
  <dict>
    <key>numberOfTimes</key>
    <integer>4</integer>
    <key>theName</key>
    <string>演歌</string>
  </dict>
  <dict>
    <key>numberOfTimes</key>
    <integer>3</integer>
    <key>theName</key>
    <string>Latin</string>
  </dict>
  <dict>
    <key>numberOfTimes</key>
    <integer>3</integer>
    <key>theName</key>
    <string>ヒップホップ/ラップ</string>
  </dict>
  <dict>
    <key>numberOfTimes</key>
    <integer>2</integer>
    <key>theName</key>
    <string>Vocal</string>
  </dict>
  <dict>
    <key>numberOfTimes</key>
    <integer>2</integer>
    <key>theName</key>
    <string>R&amp;B/ソウル</string>
  </dict>
  <dict>
    <key>numberOfTimes</key>
    <integer>2</integer>
    <key>theName</key>
    <string>R&amp;B/ソウル</string>
  </dict>
  <dict>
    <key>numberOfTimes</key>
    <integer>2</integer>
    <key>theName</key>
    <string>#NIPPONSEI @ IRC.MIRCX.COM</string>
  </dict>
  <dict>
    <key>numberOfTimes</key>
    <integer>1</integer>
    <key>theName</key>
    <string>148</string>
  </dict>
  <dict>
    <key>numberOfTimes</key>
    <integer>1</integer>
    <key>theName</key>
    <string>Electronic</string>
  </dict>
  <dict>
    <key>numberOfTimes</key>
    <integer>1</integer>
    <key>theName</key>
    <string>Folk</string>
  </dict>
  <dict>
    <key>numberOfTimes</key>
    <integer>1</integer>
    <key>theName</key>
    <string>NHK FM(東京)</string>
  </dict>
  <dict>
    <key>numberOfTimes</key>
    <integer>1</integer>
    <key>theName</key>
    <string>その他</string>
  </dict>
  <dict>
    <key>numberOfTimes</key>
    <integer>1</integer>
    <key>theName</key>
    <string>チルドレン・ミュージック</string>
  </dict>
  <dict>
    <key>numberOfTimes</key>
    <integer>1</integer>
    <key>theName</key>
    <string>Seattle Pacific University – Latin</string>
  </dict>
  <dict>
    <key>numberOfTimes</key>
    <integer>1</integer>
    <key>theName</key>
    <string>Kayokyoku</string>
  </dict>
  <dict>
    <key>numberOfTimes</key>
    <integer>1</integer>
    <key>theName</key>
    <string>ヒップホップ/ ラップ</string>
  </dict>
  <dict>
    <key>numberOfTimes</key>
    <integer>1</integer>
    <key>theName</key>
    <string>Dance</string>
  </dict>
  <dict>
    <key>numberOfTimes</key>
    <integer>1</integer>
    <key>theName</key>
    <string>インストゥルメンタル</string>
  </dict>
  <dict>
    <key>numberOfTimes</key>
    <integer>1</integer>
    <key>theName</key>
    <string>146</string>
  </dict>
</array>
</plist>
"

  
end retSerializedData

–list or record –> XML-format plist string
on serializeToPlistString(aList as {list, record})
  set pListData to current application’s NSPropertyListSerialization’s dataWithPropertyList:aList |format|:(current application’s NSPropertyListXMLFormat_v1_0) options:0 |error|:(missing value)
  
set bStr to (current application’s NSString’s alloc()’s initWithData:pListData encoding:(current application’s NSUTF8StringEncoding)) as string
  
return bStr
end serializeToPlistString

–XML-format plist string–> list or record
on deserializeToPlistString(aStr as string)
  set deStr to current application’s NSString’s stringWithString:aStr
  
set theData to deStr’s dataUsingEncoding:(current application’s NSUTF8StringEncoding)
  
set aList to current application’s NSPropertyListSerialization’s propertyListWithData:theData options:(current application’s NSPropertyListMutableContainersAndLeaves) |format|:(missing value) |error|:(missing value)
  
return aList
end deserializeToPlistString

★Click Here to Open This Script 

Keynote Control 1

Keynote Control 2

Posted in Record | Tagged 10.11savvy 10.12savvy 10.13savvy Keynote | Leave a comment

Post navigation

  • Newer posts

電子書籍(PDF)をオンラインストアで販売中!

Google Search

Popular posts

  • 開発機としてM2 Mac miniが来たのでガチレビュー
  • macOS 15, Sequoia
  • Pages本執筆中に、2つの書類モード切り替えに気がついた
  • Numbersで選択範囲のセルの前後の空白を削除
  • メキシカンハットの描画
  • Pixelmator Pro v3.6.4でAppleScriptからの操作時の挙動に違和感が
  • AppleScriptによる並列処理
  • Safariで「プロファイル」機能を使うとAppleScriptの処理に影響
  • macOS 15でも変化したText to Speech環境
  • AppleScript入門③AppleScriptを使った「自動化」とは?
  • デフォルトインストールされたフォント名を取得するAppleScript
  • macOS 15 リモートApple Eventsにバグ?
  • 【続報】macOS 15.5で特定ファイル名パターンのfileをaliasにcastすると100%クラッシュするバグ
  • AppleScript入門① AppleScriptってなんだろう?
  • macOS 14で変更になったOSバージョン取得APIの返り値
  • Script Debuggerの開発と販売が2025年に終了
  • Keynoteで2階層のスライドのタイトルをまとめてテキスト化
  • NSObjectのクラス名を取得 v2.1
  • 有害ではなくなっていたSpaces
  • macOS 15:スクリプトエディタのAppleScript用語辞書を確認できない

Tags

10.11savvy (1101) 10.12savvy (1242) 10.13savvy (1391) 10.14savvy (587) 10.15savvy (438) 11.0savvy (283) 12.0savvy (212) 13.0savvy (194) 14.0savvy (147) 15.0savvy (135) CotEditor (66) Finder (51) iTunes (19) Keynote (119) NSAlert (61) NSArray (51) NSBitmapImageRep (20) NSBundle (20) NSButton (34) NSColor (53) NSDictionary (28) NSFileManager (23) NSFont (21) NSImage (41) NSJSONSerialization (21) NSMutableArray (63) NSMutableDictionary (22) NSPredicate (36) NSRunningApplication (56) NSScreen (30) NSScrollView (22) NSString (119) NSURL (98) NSURLRequest (23) NSUTF8StringEncoding (30) NSView (33) NSWorkspace (20) Numbers (76) Pages (55) Safari (44) Script Editor (27) WKUserContentController (21) WKUserScript (20) WKWebView (23) WKWebViewConfiguration (22)

カテゴリー

  • 2D Bin Packing
  • 3D
  • AirDrop
  • AirPlay
  • Animation
  • AppleScript Application on Xcode
  • Beginner
  • Benchmark
  • beta
  • Bluetooth
  • Books
  • boolean
  • bounds
  • Bug
  • Calendar
  • call by reference
  • check sum
  • Clipboard
  • Cocoa-AppleScript Applet
  • Code Sign
  • Color
  • Custom Class
  • date
  • dialog
  • diff
  • drive
  • Droplet
  • exif
  • file
  • File path
  • filter
  • folder
  • Font
  • Font
  • GAME
  • geolocation
  • GUI
  • GUI Scripting
  • Hex
  • History
  • How To
  • iCloud
  • Icon
  • Image
  • Input Method
  • Internet
  • iOS App
  • JavaScript
  • JSON
  • JXA
  • Keychain
  • Keychain
  • Language
  • Library
  • list
  • Locale
  • Localize
  • Machine Learning
  • Map
  • Markdown
  • Menu
  • Metadata
  • MIDI
  • MIME
  • Natural Language Processing
  • Network
  • news
  • Noification
  • Notarization
  • Number
  • Object control
  • OCR
  • OSA
  • parallel processing
  • PDF
  • Peripheral
  • process
  • PRODUCTS
  • QR Code
  • Raw AppleEvent Code
  • Record
  • rectangle
  • recursive call
  • regexp
  • Release
  • Remote Control
  • Require Control-Command-R to run
  • REST API
  • Review
  • RTF
  • Sandbox
  • Screen Saver
  • Script Libraries
  • sdef
  • search
  • Security
  • selection
  • shell script
  • Shortcuts Workflow
  • Sort
  • Sound
  • Spellchecker
  • Spotlight
  • SVG
  • System
  • Tag
  • Telephony
  • Text
  • Text to Speech
  • timezone
  • Tools
  • Update
  • URL
  • UTI
  • Web Contents Control
  • WiFi
  • XML
  • XML-RPC
  • イベント(Event)
  • 未分類

アーカイブ

  • 2025年6月
  • 2025年5月
  • 2025年4月
  • 2025年3月
  • 2025年2月
  • 2025年1月
  • 2024年12月
  • 2024年11月
  • 2024年10月
  • 2024年9月
  • 2024年8月
  • 2024年7月
  • 2024年6月
  • 2024年5月
  • 2024年4月
  • 2024年3月
  • 2024年2月
  • 2024年1月
  • 2023年12月
  • 2023年11月
  • 2023年10月
  • 2023年9月
  • 2023年8月
  • 2023年7月
  • 2023年6月
  • 2023年5月
  • 2023年4月
  • 2023年3月
  • 2023年2月
  • 2023年1月
  • 2022年12月
  • 2022年11月
  • 2022年10月
  • 2022年9月
  • 2022年8月
  • 2022年7月
  • 2022年6月
  • 2022年5月
  • 2022年4月
  • 2022年3月
  • 2022年2月
  • 2022年1月
  • 2021年12月
  • 2021年11月
  • 2021年10月
  • 2021年9月
  • 2021年8月
  • 2021年7月
  • 2021年6月
  • 2021年5月
  • 2021年4月
  • 2021年3月
  • 2021年2月
  • 2021年1月
  • 2020年12月
  • 2020年11月
  • 2020年10月
  • 2020年9月
  • 2020年8月
  • 2020年7月
  • 2020年6月
  • 2020年5月
  • 2020年4月
  • 2020年3月
  • 2020年2月
  • 2020年1月
  • 2019年12月
  • 2019年11月
  • 2019年10月
  • 2019年9月
  • 2019年8月
  • 2019年7月
  • 2019年6月
  • 2019年5月
  • 2019年4月
  • 2019年3月
  • 2019年2月
  • 2019年1月
  • 2018年12月
  • 2018年11月
  • 2018年10月
  • 2018年9月
  • 2018年8月
  • 2018年7月
  • 2018年6月
  • 2018年5月
  • 2018年4月
  • 2018年3月
  • 2018年2月

https://piyomarusoft.booth.pm/items/301502

メタ情報

  • ログイン
  • 投稿フィード
  • コメントフィード
  • WordPress.org

Forum Posts

  • 人気のトピック
  • 返信がないトピック

メタ情報

  • ログイン
  • 投稿フィード
  • コメントフィード
  • WordPress.org
Proudly powered by WordPress
Theme: Flint by Star Verte LLC