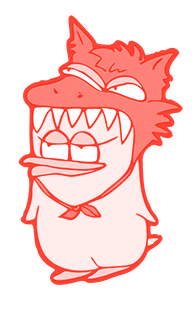
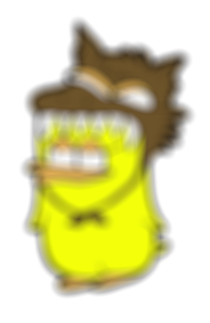
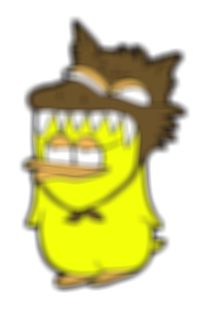
Menu

Skip to content
AppleScriptの穴
  • Home
  • Products
  • Books
  • Docs
  • Events
  • Forum
  • About This Blog
  • License
  • 仕事依頼

AppleScriptの穴

Useful & Practical AppleScript archive. Click '★Click Here to Open This Script' Link to download each AppleScript

タグ: 10.13savvy

色付き単色画像を作成する

Posted on 2月 9, 2018 by Takaaki Naganoya


▲Original


▲Filtered Image

–> GPUImage.framework (To ~/Library/Frameworks/)

AppleScript名:色付き単色画像を作成する
— Created 2017-02-11 by Takaaki Naganoya
— 2017 Piyomaru Software
use AppleScript version "2.4"
use scripting additions
use framework "Foundation"
use framework "AppKit"
use framework "GPUImage" –https://github.com/BradLarson/GPUImage

set aFile to POSIX path of (choose file of type {"public.image"} with prompt "Select image 1")
set fillColorR to current application’s NSColor’s redColor()
set imgRes to makeMonoColoredImage(aFile, fillColorR) of me
set fRes to retUUIDfilePath(aFile, "png") of me
set bRes to saveNSImageAtPathAsPNG(imgRes, fRes) of me

on retUUIDfilePath(aPath, aEXT)
  set aUUIDstr to (current application’s NSUUID’s UUID()’s UUIDString()) as string
  
set aPath to ((current application’s NSString’s stringWithString:aPath)’s stringByDeletingLastPathComponent()’s stringByAppendingPathComponent:aUUIDstr)’s stringByAppendingPathExtension:aEXT
  
return aPath
end retUUIDfilePath

on makeMonoColoredImage(aFile, NScolorObj)
  set aImage to current application’s NSImage’s alloc()’s initWithContentsOfFile:aFile
  
return makeColoredNSImageWithColor(aImage, NScolorObj) of me –色付き単色画像を作成する
end makeMonoColoredImage

on makeColoredNSImageWithColor(aImage, fillColor)
  set aSize to aImage’s |size|()
  
set aWidth to width of aSize
  
set aHeight to height of aSize
  
set newNSImage to makeNSImageWithFilledWithColor(aWidth, aHeight, fillColor)
  
set grayImage to filterWithNSImage(aImage, "GPUImageGrayscaleFilter") of me
  
set compImage to composeImageWithBlendFilter(grayImage, newNSImage, "GPUImageScreenBlendFilter") of me
  
return compImage
end makeColoredNSImageWithColor

on filterWithNSImage(aNSImage, filterName as string)
  set aClass to current application’s NSClassFromString(filterName)
  
set aImageFilter to aClass’s alloc()’s init()
  
set aProcImg to (aImageFilter’s imageByFilteringImage:aNSImage)
  
return aProcImg
end filterWithNSImage

on composeImageWithBlendFilter(aImage, bImage, filterName)
  set aClass to current application’s NSClassFromString(filterName)
  
set blendFilter to aClass’s alloc()’s init()
  
set pictureA to current application’s GPUImagePicture’s alloc()’s initWithImage:aImage
  
pictureA’s addTarget:blendFilter
  
pictureA’s processImage()
  
set imgRes to blendFilter’s imageByFilteringImage:bImage
  
return imgRes
end composeImageWithBlendFilter

–指定サイズの画像を作成し、指定色で塗ってNSImageで返す
on makeNSImageWithFilledWithColor(aWidth, aHeight, fillColor)
  –Imageの作成  
  
set curSize to current application’s NSMakeSize(aWidth, aHeight)
  
set anImage to current application’s NSImage’s alloc()’s initWithSize:curSize
  
  
anImage’s lockFocus() –描画開始
  
  
set theRect to {{x:0, y:0}, {height:aHeight, width:aWidth}}
  
set theNSBezierPath to current application’s NSBezierPath’s bezierPath
  
theNSBezierPath’s appendBezierPathWithRect:theRect
  
  
fillColor’s |set|() –色設定
  
theNSBezierPath’s fill() –ぬりつぶし
  
  
anImage’s unlockFocus() –描画ここまで
  
  
–生成した画像のRaw画像を作成
  
set imageRep to anImage’s TIFFRepresentation()
  
set aRawimg to current application’s NSBitmapImageRep’s imageRepWithData:imageRep
  
  
set newImg to current application’s NSImage’s alloc()’s initWithSize:curSize
  
newImg’s addRepresentation:aRawimg
  
return newImg
end makeNSImageWithFilledWithColor

–NSImageを指定パスにPNG形式で保存
on saveNSImageAtPathAsPNG(anImage, outPath)
  set imageRep to anImage’s TIFFRepresentation()
  
set aRawimg to current application’s NSBitmapImageRep’s imageRepWithData:imageRep
  
set pathString to current application’s NSString’s stringWithString:outPath
  
set newPath to pathString’s stringByExpandingTildeInPath()
  
set myNewImageData to (aRawimg’s representationUsingType:(current application’s NSPNGFileType) |properties|:(missing value))
  
set aRes to (myNewImageData’s writeToFile:newPath atomically:true) as boolean
  
return aRes –true/false
end saveNSImageAtPathAsPNG

★Click Here to Open This Script 

Posted in file filter Image | Tagged 10.11savvy 10.12savvy 10.13savvy | Leave a comment

CoreImageでフィルタしまくり

Posted on 2月 9, 2018 by Takaaki Naganoya

フィルタ名称をテキストで与えて動的に画像のフィルタ処理を変更させるAppleScriptです。

ただし、各CIFilterのパラメータまでは指定していないため、パラメータ値はデフォルトのままです。別途、パラメータ値を与えるようにすると有用性が増すことでしょう。

多数のCIFilterの名称をリスト(配列)で間接指定して、順次フィルター処理を行なってファイル出力する、というのが本プログラムの実験内容です。


▲Original


▲Filtered Image

AppleScript名:CoreImageでフィルタしまくり
— Created 2014-12-09 by Takaaki Naganoya
— 2014 Piyomaru Software
use AppleScript version "2.4"
use scripting additions
use framework "Foundation"
use framework "QuartzCore"

property CIFilter : a reference to current application’s CIFilter
property |NSURL| : a reference to current application’s |NSURL|
property CIImage : a reference to current application’s CIImage
property NSJPEGFileType : a reference to current application’s NSJPEGFileType
property NSBitmapImageRep : a reference to current application’s NSBitmapImageRep

–CIFilters (Not everything!!) From Apple’s Core Image Filter Reference
set ciList to {"CIColorPosterize"} –{"CIColorInvert", "CIBoxBlur", "CIDiscBlur", "CIGaussianBlur", "CIMedianFilter", "CIMotionBlur", "CINoiseReduction", "CIZoomBlur", "CIColorMonochrome", "CIColorPosterize", "CIPhotoEffectChrome", "CISepiaTone", "CISharpenLuminance", "CIUnsharpMask", "CIKaleidoscope"}

–画像を選択
set aPath to POSIX path of (choose file of type {"public.image"})

–すべてのフィルタを実行
repeat with i in ciList
  set j to contents of i
  
set aRes to convAsFilteredJPEG(aPath, j) of me
end repeat

–CIFilterをかけたJPEG画像を生成
–参照:http://ashplanning.blogspot.jp/ のうちのどこか
on convAsFilteredJPEG(aPath, aFilterName)
  set aURL to (|NSURL|’s fileURLWithPath:aPath) –Input
  
set aPOSIX to (POSIX path of aPath) & "_" & aFilterName & ".jpg" –Output
  
  
–CIImageを生成
  
set aCIImage to CIImage’s alloc()’s initWithContentsOfURL:aURL
  
  
— CIFilter をフィルタの名前で生成
  
set aFilter to CIFilter’s filterWithName:aFilterName
  
aFilter’s setDefaults() –各フィルタのパラメータはデフォルト(そこが問題)
  
  
–Filterを実行
  
aFilter’s setValue:aCIImage forKey:"inputImage"
  
set aOutImage to aFilter’s valueForKey:"outputImage"
  
  
— NSBitmapImageRep を CIImage から生成
  
set aRep to NSBitmapImageRep’s alloc()’s initWithCIImage:aOutImage
  
  
— NSBitmapImageRep から JPEG データを取得
  
set jpegData to aRep’s representationUsingType:(NSJPEGFileType) |properties|:(missing value)
  
  
— ファイルに保存
  
return (jpegData’s writeToFile:aPOSIX atomically:true) as boolean
end convAsFilteredJPEG

★Click Here to Open This Script 

Posted in file filter Image | Tagged 10.11savvy 10.12savvy 10.13savvy | Leave a comment

CoreImageで指定画像をCIGaussianBlur

Posted on 2月 9, 2018 by Takaaki Naganoya


▲Original


▲Filtered Image

AppleScript名:CoreImageで指定画像をCIGaussianBlur
— Created 2017-03-21 by Takaaki Naganoya
— 2017 Piyomaru Software
use AppleScript version "2.4"
use scripting additions
use framework "Foundation"
use framework "QuartzCore"

–画像を選択
set aPath to POSIX path of (choose file of type {"public.image"})
set aNSImage to current application’s NSImage’s alloc()’s initWithContentsOfFile:aPath

set paramRec to {inputRadius:10.0}
set imgRes to execCIFilterWithNSImageAndParams(aNSImage, "CIGaussianBlur", paramRec) of me

set aDesktopPath to (current application’s NSProcessInfo’s processInfo()’s environment()’s objectForKey:("HOME"))’s stringByAppendingString:"/Desktop/"
set savePath to aDesktopPath’s stringByAppendingString:((current application’s NSUUID’s UUID()’s UUIDString())’s stringByAppendingString:".png")

set fRes to saveNSImageAtPathAsPNG(imgRes, savePath) of me

–NSImageをCIImageに変換してCIfilterを実行
on execCIFilterWithNSImageAndParams(aNSImage, aFilterName as string, paramRec as record)
  set aDict to current application’s NSDictionary’s dictionaryWithDictionary:paramRec
  
  
set aCIImage to convNSImageToCIimage(aNSImage) of me
  
set aFilter to current application’s CIFilter’s filterWithName:aFilterName
  
  
aFilter’s setDefaults()
  
aFilter’s setValue:aCIImage forKey:"inputImage"
  
set aOutImage to aFilter’s valueForKey:"outputImage"
  
  
set keyList to aDict’s allKeys() as list
  
repeat with i in keyList
    set aVal to (aDict’s valueForKey:i) as list of string or string –as anything
    (
aFilter’s setValue:aVal forKey:(i as string))
  end repeat
  
  
set newNSImage to convCIimageToNSImage(aOutImage) of me
  
return newNSImage
end execCIFilterWithNSImageAndParams

on convCIimageToNSImage(aCIImage)
  set aRep to current application’s NSBitmapImageRep’s alloc()’s initWithCIImage:aCIImage
  
set tmpSize to aRep’s |size|()
  
set newImg to current application’s NSImage’s alloc()’s initWithSize:tmpSize
  
newImg’s addRepresentation:aRep
  
return newImg
end convCIimageToNSImage

on convNSImageToCIimage(aNSImage)
  set tiffDat to aNSImage’s TIFFRepresentation()
  
set aRep to current application’s NSBitmapImageRep’s imageRepWithData:tiffDat
  
set newImg to current application’s CIImage’s alloc()’s initWithBitmapImageRep:aRep
  
return newImg
end convNSImageToCIimage

–NSImageを指定パスにPNG形式で保存
on saveNSImageAtPathAsPNG(anImage, outPath)
  set imageRep to anImage’s TIFFRepresentation()
  
set aRawimg to current application’s NSBitmapImageRep’s imageRepWithData:imageRep
  
set pathString to current application’s NSString’s stringWithString:outPath
  
set newPath to pathString’s stringByExpandingTildeInPath()
  
set myNewImageData to (aRawimg’s representationUsingType:(current application’s NSPNGFileType) |properties|:(missing value))
  
set aRes to (myNewImageData’s writeToFile:newPath atomically:true) as boolean
  
return aRes –成功ならtrue、失敗ならfalseが返る
end saveNSImageAtPathAsPNG

★Click Here to Open This Script 

Posted in file filter Image | Tagged 10.11savvy 10.12savvy 10.13savvy | Leave a comment

CoreImageで指定画像をCIDiscBlur

Posted on 2月 9, 2018 by Takaaki Naganoya


▲Original


▲Filtered Image

AppleScript名:CoreImageで指定画像をCIDiscBlur
— Created 2017-03-21 by Takaaki Naganoya
— 2017 Piyomaru Software
use AppleScript version "2.4"
use scripting additions
use framework "Foundation"
use framework "QuartzCore"

–画像を選択
set aPath to POSIX path of (choose file of type {"public.image"})
set aNSImage to current application’s NSImage’s alloc()’s initWithContentsOfFile:aPath

set paramRec to {inputRadius:10.0}
set imgRes to execCIFilterWithNSImageAndParams(aNSImage, "CIDiscBlur", paramRec) of me

set aDesktopPath to (current application’s NSProcessInfo’s processInfo()’s environment()’s objectForKey:("HOME"))’s stringByAppendingString:"/Desktop/"
set savePath to aDesktopPath’s stringByAppendingString:((current application’s NSUUID’s UUID()’s UUIDString())’s stringByAppendingString:".png")

set fRes to saveNSImageAtPathAsPNG(imgRes, savePath) of me

–NSImageをCIImageに変換してCIfilterを実行
on execCIFilterWithNSImageAndParams(aNSImage, aFilterName as string, paramRec as record)
  set aDict to current application’s NSDictionary’s dictionaryWithDictionary:paramRec
  
  
set aCIImage to convNSImageToCIimage(aNSImage) of me
  
set aFilter to current application’s CIFilter’s filterWithName:aFilterName
  
  
aFilter’s setDefaults()
  
aFilter’s setValue:aCIImage forKey:"inputImage"
  
set aOutImage to aFilter’s valueForKey:"outputImage"
  
  
set keyList to aDict’s allKeys() as list
  
repeat with i in keyList
    set aVal to (aDict’s valueForKey:i) as list of string or string –as anything
    (
aFilter’s setValue:aVal forKey:(i as string))
  end repeat
  
  
set newNSImage to convCIimageToNSImage(aOutImage) of me
  
return newNSImage
end execCIFilterWithNSImageAndParams

on convCIimageToNSImage(aCIImage)
  set aRep to current application’s NSBitmapImageRep’s alloc()’s initWithCIImage:aCIImage
  
set tmpSize to aRep’s |size|()
  
set newImg to current application’s NSImage’s alloc()’s initWithSize:tmpSize
  
newImg’s addRepresentation:aRep
  
return newImg
end convCIimageToNSImage

on convNSImageToCIimage(aNSImage)
  set tiffDat to aNSImage’s TIFFRepresentation()
  
set aRep to current application’s NSBitmapImageRep’s imageRepWithData:tiffDat
  
set newImg to current application’s CIImage’s alloc()’s initWithBitmapImageRep:aRep
  
return newImg
end convNSImageToCIimage

–NSImageを指定パスにPNG形式で保存
on saveNSImageAtPathAsPNG(anImage, outPath)
  set imageRep to anImage’s TIFFRepresentation()
  
set aRawimg to current application’s NSBitmapImageRep’s imageRepWithData:imageRep
  
set pathString to current application’s NSString’s stringWithString:outPath
  
set newPath to pathString’s stringByExpandingTildeInPath()
  
set myNewImageData to (aRawimg’s representationUsingType:(current application’s NSPNGFileType) |properties|:(missing value))
  
set aRes to (myNewImageData’s writeToFile:newPath atomically:true) as boolean
  
return aRes –成功ならtrue、失敗ならfalseが返る
end saveNSImageAtPathAsPNG

★Click Here to Open This Script 

Posted in file filter Image | Tagged 10.11savvy 10.12savvy 10.13savvy | Leave a comment

CoreImageで指定画像をCIColorMonochrome

Posted on 2月 9, 2018 by Takaaki Naganoya


▲Original


▲Filtered Image

AppleScript名:CoreImageで指定画像をCIColorMonochrome
— Created 2017-03-21 by Takaaki Naganoya
— 2017 Piyomaru Software
use AppleScript version "2.4"
use scripting additions
use framework "Foundation"
use framework "QuartzCore"
use framework "AppKit"

property CIFilter : a reference to current application’s CIFilter
property CIColor : a reference to current application’s CIColor
property NSUUID : a reference to current application’s NSUUID
property CIImage : a reference to current application’s CIImage
property NSColor : a reference to current application’s NSColor
property NSString : a reference to current application’s NSString
property NSImage : a reference to current application’s NSImage
property NSDictionary : a reference to current application’s NSDictionary
property NSProcessInfo : a reference to current application’s NSProcessInfo
property NSPNGFileType : a reference to current application’s NSPNGFileType
property NSBitmapImageRep : a reference to current application’s NSBitmapImageRep

–画像を選択
set aPath to POSIX path of (choose file of type {"public.image"})
set aNSImage to NSImage’s alloc()’s initWithContentsOfFile:aPath

set aCIColor to makeCIColorFromParams(0.0, 1.0, 0.0, 1.0) of me

set paramRec to {inputColor:aCIColor, inputIntensity:1.0}
set imgRes to execCIFilterWithNSImageAndParams(aNSImage, "CIColorMonochrome", paramRec) of me

set aDesktopPath to (NSProcessInfo’s processInfo()’s environment()’s objectForKey:("HOME"))’s stringByAppendingString:"/Desktop/"
set savePath to aDesktopPath’s stringByAppendingString:((NSUUID’s UUID()’s UUIDString())’s stringByAppendingString:".png")

set fRes to saveNSImageAtPathAsPNG(imgRes, savePath) of me

–NSImageをCIImageに変換してCIfilterを実行
on execCIFilterWithNSImageAndParams(aNSImage, aFilterName as string, paramRec as record)
  set aDict to NSDictionary’s dictionaryWithDictionary:paramRec
  
  
set aCIImage to convNSImageToCIimage(aNSImage) of me
  
set aFilter to CIFilter’s filterWithName:aFilterName
  
  
aFilter’s setDefaults()
  
aFilter’s setValue:aCIImage forKey:"inputImage"
  
set aOutImage to aFilter’s valueForKey:"outputImage"
  
  
set keyList to aDict’s allKeys() as list
  
repeat with i in keyList
    set aVal to (aDict’s valueForKey:i) as list of string or string –as anything
    (
aFilter’s setValue:aVal forKey:(i as string))
  end repeat
  
  
set newNSImage to convCIimageToNSImage(aOutImage) of me
  
return newNSImage
end execCIFilterWithNSImageAndParams

on makeCIColorFromParams(redValue, greenValue, blueValue, alphaValue)
  set aNSColor to NSColor’s colorWithCalibratedRed:redValue green:greenValue blue:blueValue alpha:alphaValue
  
set aCIColor to CIColor’s alloc()’s initWithColor:aNSColor
  
return aCIColor
end makeCIColorFromParams

on convCIimageToNSImage(aCIImage)
  set aRep to NSBitmapImageRep’s alloc()’s initWithCIImage:aCIImage
  
set tmpSize to aRep’s |size|()
  
set newImg to NSImage’s alloc()’s initWithSize:tmpSize
  
newImg’s addRepresentation:aRep
  
return newImg
end convCIimageToNSImage

on convNSImageToCIimage(aNSImage)
  set tiffDat to aNSImage’s TIFFRepresentation()
  
set aRep to NSBitmapImageRep’s imageRepWithData:tiffDat
  
set newImg to CIImage’s alloc()’s initWithBitmapImageRep:aRep
  
return newImg
end convNSImageToCIimage

–NSImageを指定パスにPNG形式で保存
on saveNSImageAtPathAsPNG(anImage, outPath)
  set imageRep to anImage’s TIFFRepresentation()
  
set aRawimg to NSBitmapImageRep’s imageRepWithData:imageRep
  
set pathString to NSString’s stringWithString:outPath
  
set newPath to pathString’s stringByExpandingTildeInPath()
  
set myNewImageData to (aRawimg’s representationUsingType:(NSPNGFileType) |properties|:(missing value))
  
set aRes to (myNewImageData’s writeToFile:newPath atomically:true) as boolean
  
return aRes –成功ならtrue、失敗ならfalseが返る
end saveNSImageAtPathAsPNG

★Click Here to Open This Script 

Posted in file filter Image | Tagged 10.11savvy 10.12savvy 10.13savvy | Leave a comment

CoreImageで指定画像をBoxBlur v2

Posted on 2月 9, 2018 by Takaaki Naganoya


▲Original


▲Filtered Image

AppleScript名:CoreImageで指定画像をBoxBlur v2
— Created 2017-03-21 by Takaaki Naganoya
— 2017 Piyomaru Software
use AppleScript version "2.4"
use scripting additions
use framework "Foundation"
use framework "QuartzCore"

property CIFilter : a reference to current application’s CIFilter
property |NSURL| : a reference to current application’s |NSURL|
property NSUUID : a reference to current application’s NSUUID
property CIImage : a reference to current application’s CIImage
property NSString : a reference to current application’s NSString
property NSImage : a reference to current application’s NSImage
property NSProcessInfo : a reference to current application’s NSProcessInfo
property NSPNGFileType : a reference to current application’s NSPNGFileType
property NSBitmapImageRep : a reference to current application’s NSBitmapImageRep

–画像を選択
set aPath to POSIX path of (choose file of type {"public.image"})
set aNSImage to NSImage’s alloc()’s initWithContentsOfFile:aPath

set paramRec to {inputRadius:10} –5から10
set imgRes to execCIFilterWithNSImageAndParams(aNSImage, "CIBoxBlur", paramRec) of me

set savePath to retUUIDfilePath(aPath, "png") of me
set fRes to saveNSImageAtPathAsPNG(imgRes, savePath) of me

–NSImageをCIImageに変換してCIfilterを実行
on execCIFilterWithNSImageAndParams(aNSImage, aFilterName as string, paramRec as record)
  set aDict to current application’s NSDictionary’s dictionaryWithDictionary:paramRec
  
  
set aCIImage to convNSImageToCIimage(aNSImage) of me
  
set aFilter to current application’s CIFilter’s filterWithName:aFilterName
  
  
aFilter’s setDefaults()
  
aFilter’s setValue:aCIImage forKey:"inputImage"
  
set aOutImage to aFilter’s valueForKey:"outputImage"
  
  
set keyList to aDict’s allKeys() as list
  
repeat with i in keyList
    set aVal to (aDict’s valueForKey:i) as list of string or string –as anything
    (
aFilter’s setValue:aVal forKey:(i as string))
  end repeat
  
  
set newNSImage to convCIimageToNSImage(aOutImage) of me
  
return newNSImage
end execCIFilterWithNSImageAndParams

on convCIimageToNSImage(aCIImage)
  set aRep to NSBitmapImageRep’s alloc()’s initWithCIImage:aCIImage
  
set tmpSize to aRep’s |size|()
  
set newImg to NSImage’s alloc()’s initWithSize:tmpSize
  
newImg’s addRepresentation:aRep
  
return newImg
end convCIimageToNSImage

on convNSImageToCIimage(aNSImage)
  set tiffDat to aNSImage’s TIFFRepresentation()
  
set aRep to NSBitmapImageRep’s imageRepWithData:tiffDat
  
set newImg to CIImage’s alloc()’s initWithBitmapImageRep:aRep
  
return newImg
end convNSImageToCIimage

on retUUIDfilePath(aPath, aEXT)
  set aUUIDstr to (NSUUID’s UUID()’s UUIDString()) as string
  
set aPath to ((NSString’s stringWithString:aPath)’s stringByDeletingLastPathComponent()’s stringByAppendingPathComponent:aUUIDstr)’s stringByAppendingPathExtension:aEXT
  
return aPath
end retUUIDfilePath

–NSImageを指定パスにPNG形式で保存
on saveNSImageAtPathAsPNG(anImage, outPath)
  set imageRep to anImage’s TIFFRepresentation()
  
set aRawimg to NSBitmapImageRep’s imageRepWithData:imageRep
  
set pathString to NSString’s stringWithString:outPath
  
set newPath to pathString’s stringByExpandingTildeInPath()
  
set myNewImageData to (aRawimg’s representationUsingType:(NSPNGFileType) |properties|:(missing value))
  
set aRes to (myNewImageData’s writeToFile:newPath atomically:true) as boolean
  
return aRes –true/false
end saveNSImageAtPathAsPNG

★Click Here to Open This Script 

Posted in file filter Image | Tagged 10.11savvy 10.12savvy 10.13savvy | Leave a comment

CoreImageで指定画像を2階調ポスタライズ v2

Posted on 2月 9, 2018 by Takaaki Naganoya


▲Original


▲2-level postalized image

AppleScript名:CoreImageで指定画像を2階調ポスタライズ v2
— Created 2014-12-09 by Takaaki Naganoya
— 2014 Piyomaru Software
use AppleScript version "2.4"
use scripting additions
use framework "Foundation"
use framework "QuartzCore"

property |NSURL| : a reference to current application’s |NSURL|
property NSUUID : a reference to current application’s NSUUID
property NSString : a reference to current application’s NSString
property NSImage : a reference to current application’s NSImage
property NSPNGFileType : a reference to current application’s NSPNGFileType
property NSBitmapImageRep : a reference to current application’s NSBitmapImageRep

–CIFilters (Not everything!!) From Apple’s Core Image Filter Reference
set cifilterName to "CIColorPosterize"

–画像を選択
set aPath to POSIX path of (choose file of type {"public.image"})

–指定フィルタ名でフィルタしたNSImageを取得
set nsimageRes to filterAnImageFile(aPath, cifilterName) of me

–Save as PNG
set fRes to retUUIDfilePath(aPath, "png") of me
set sRes to saveNSImageAtPathAsPNG(nsimageRes, fRes) of me

–CIFilterをかけたJPEG画像を生成
–参照:http://ashplanning.blogspot.jp/ のうちのどこか
on filterAnImageFile(aPath, aFilterName)
  –CIImageを生成
  
set aURL to current application’s |NSURL|’s fileURLWithPath:aPath –Input
  
set aCIImage to current application’s CIImage’s alloc()’s initWithContentsOfURL:aURL
  
  
— CIFilter をフィルタの名前で生成
  
set aFilter to current application’s CIFilter’s filterWithName:aFilterName
  
aFilter’s setDefaults() –各フィルタのパラメータはデフォルト
  
  
–Filterを実行
  
aFilter’s setValue:aCIImage forKey:"inputImage"
  
aFilter’s setValue:2 forKey:"inputLevels"
  
  
set aOutImage to aFilter’s valueForKey:"outputImage"
  
set outNSImage to convCIimageToNSImage(aOutImage) of me
  
return outNSImage
end filterAnImageFile

on convCIimageToNSImage(aCIImage)
  set aRep to current application’s NSBitmapImageRep’s alloc()’s initWithCIImage:aCIImage
  
set tmpSize to aRep’s |size|()
  
set newImg to current application’s NSImage’s alloc()’s initWithSize:tmpSize
  
newImg’s addRepresentation:aRep
  
return newImg
end convCIimageToNSImage

on convNSImageToCIimage(aNSImage)
  set tiffDat to aNSImage’s TIFFRepresentation()
  
set aRep to current application’s NSBitmapImageRep’s imageRepWithData:tiffDat
  
set newImg to current application’s CIImage’s alloc()’s initWithBitmapImageRep:aRep
  
return newImg
end convNSImageToCIimage

on retUUIDfilePath(aPath, aEXT)
  set aUUIDstr to (NSUUID’s UUID()’s UUIDString()) as string
  
set aPath to ((NSString’s stringWithString:aPath)’s stringByDeletingLastPathComponent()’s stringByAppendingPathComponent:aUUIDstr)’s stringByAppendingPathExtension:aEXT
  
return aPath
end retUUIDfilePath

–NSImageを指定パスにPNG形式で保存
on saveNSImageAtPathAsPNG(anImage, outPath)
  set imageRep to anImage’s TIFFRepresentation()
  
set aRawimg to NSBitmapImageRep’s imageRepWithData:imageRep
  
set pathString to NSString’s stringWithString:outPath
  
set newPath to pathString’s stringByExpandingTildeInPath()
  
set myNewImageData to (aRawimg’s representationUsingType:(NSPNGFileType) |properties|:(missing value))
  
set aRes to (myNewImageData’s writeToFile:newPath atomically:true) as boolean
  
return aRes –true/false
end saveNSImageAtPathAsPNG

★Click Here to Open This Script 

Posted in file filter Image | Tagged 10.11savvy 10.12savvy 10.13savvy | Leave a comment

指定画像をBMP形式で保存

Posted on 2月 9, 2018 by Takaaki Naganoya
AppleScript名:指定画像をBMP形式で保存
— Created 2017-02-05 by Takaaki Naganoya
— 2017 Piyomaru Software
use AppleScript version "2.4"
use scripting additions
use framework "Foundation"
use framework "AppKit"

set aFile to POSIX path of (choose file of type {"public.image"} with prompt "Select Image A")
set aImage to current application’s NSImage’s alloc()’s initWithContentsOfFile:aFile

set fRes to retUUIDfilePath(aFile, "bmp") of me
set sRes to saveNSImageAtPathAsBMP(imgRes, fRes) of me

on retUUIDfilePath(aPath, aEXT)
  set aUUIDstr to (current application’s NSUUID’s UUID()’s UUIDString()) as string
  
set aPath to ((current application’s NSString’s stringWithString:aPath)’s stringByDeletingLastPathComponent()’s stringByAppendingPathComponent:aUUIDstr)’s stringByAppendingPathExtension:aEXT
  
return aPath
end retUUIDfilePath

–NSImageを指定パスにBMP形式で保存
on saveNSImageAtPathAsBMP(anImage, outPath)
  set imageRep to anImage’s TIFFRepresentation()
  
set aRawimg to current application’s NSBitmapImageRep’s imageRepWithData:imageRep
  
set pathString to current application’s NSString’s stringWithString:outPath
  
set newPath to pathString’s stringByExpandingTildeInPath()
  
set myNewImageData to (aRawimg’s representationUsingType:(current application’s NSBMPFileType) |properties|:(missing value))
  
set aRes to (myNewImageData’s writeToFile:newPath atomically:true) as boolean
  
return aRes –true/false
end saveNSImageAtPathAsBMP

★Click Here to Open This Script 

Posted in file Image | Tagged 10.11savvy 10.12savvy 10.13savvy | Leave a comment

指定画像をPNG形式で保存

Posted on 2月 9, 2018 by Takaaki Naganoya
AppleScript名:指定画像をPNG形式で保存
— Created 2017-02-05 by Takaaki Naganoya
— 2017 Piyomaru Software
use AppleScript version "2.4"
use scripting additions
use framework "Foundation"
use framework "AppKit"

set aFile to POSIX path of (choose file of type {"public.image"} with prompt "Select Image A")
set aImage to current application’s NSImage’s alloc()’s initWithContentsOfFile:aFile

set fRes to retUUIDfilePath(aFile, "png") of me
set sRes to saveNSImageAtPathAsPNG(imgRes, fRes) of me

on retUUIDfilePath(aPath, aEXT)
  set aUUIDstr to (current application’s NSUUID’s UUID()’s UUIDString()) as string
  
set aPath to ((current application’s NSString’s stringWithString:aPath)’s stringByDeletingLastPathComponent()’s stringByAppendingPathComponent:aUUIDstr)’s stringByAppendingPathExtension:aEXT
  
return aPath
end retUUIDfilePath

–NSImageを指定パスにPNG形式で保存
on saveNSImageAtPathAsPNG(anImage, outPath)
  set imageRep to anImage’s TIFFRepresentation()
  
set aRawimg to current application’s NSBitmapImageRep’s imageRepWithData:imageRep
  
set pathString to current application’s NSString’s stringWithString:outPath
  
set newPath to pathString’s stringByExpandingTildeInPath()
  
set myNewImageData to (aRawimg’s representationUsingType:(current application’s NSPNGFileType) |properties|:(missing value))
  
set aRes to (myNewImageData’s writeToFile:newPath atomically:true) as boolean
  
return aRes –true/false
end saveNSImageAtPathAsPNG

★Click Here to Open This Script 

Posted in file Image | Tagged 10.11savvy 10.12savvy 10.13savvy | Leave a comment

指定画像をJPG形式で保存

Posted on 2月 9, 2018 by Takaaki Naganoya

指定の画像をJPEG形式+指定圧縮率で保存するAppleScriptです。

現在は、これをさらに発展させて指定ファイルサイズになるまで圧縮率を順次変更して動的に圧縮率を変更して保存する、という処理に発展し、これは日常的に(SNSなどでアップロード可能なファイルサイズに制限があるサイトに画像掲載を行うさいに)利用しています。

AppleScript名:指定画像をJPG形式で保存
— Created 2017-02-05 by Takaaki Naganoya
— 2017 Piyomaru Software
use AppleScript version "2.4"
use scripting additions
use framework "Foundation"
use framework "AppKit"

set aFile to POSIX path of (choose file of type {"public.image"} with prompt "Select Image A")
set aImage to current application’s NSImage’s alloc()’s initWithContentsOfFile:aFile

set fRes to retUUIDfilePath(aFile, "jpg") of me
set sRes to saveNSImageAtPathAsJPG(aImage, fRes, 1.0) of me

on retUUIDfilePath(aPath, aEXT)
  set aUUIDstr to (current application’s NSUUID’s UUID()’s UUIDString()) as string
  
set aPath to ((current application’s NSString’s stringWithString:aPath)’s stringByDeletingLastPathComponent()’s stringByAppendingPathComponent:aUUIDstr)’s stringByAppendingPathExtension:aEXT
  
return aPath
end retUUIDfilePath

–NSImageを指定パスにJPEG形式で保存、qulityNumは0.0〜1.0。1.0は無圧縮
on saveNSImageAtPathAsJPG(anImage, outPath, qulityNum as real)
  set imageRep to anImage’s TIFFRepresentation()
  
set aRawimg to current application’s NSBitmapImageRep’s imageRepWithData:imageRep
  
set pathString to current application’s NSString’s stringWithString:outPath
  
set newPath to pathString’s stringByExpandingTildeInPath()
  
set myNewImageData to (aRawimg’s representationUsingType:(current application’s NSJPEGFileType) |properties|:{NSImageCompressionFactor:qulityNum})
  
set aRes to (myNewImageData’s writeToFile:newPath atomically:true) as boolean
  
return aRes –true/false
end saveNSImageAtPathAsJPG

★Click Here to Open This Script 

Posted in file Image | Tagged 10.11savvy 10.12savvy 10.13savvy | Leave a comment

指定画像をTIFF形式で保存

Posted on 2月 9, 2018 by Takaaki Naganoya
AppleScript名:指定画像をTIFF形式で保存
— Created 2017-02-05 by Takaaki Naganoya
— 2017 Piyomaru Software
use AppleScript version "2.4"
use scripting additions
use framework "Foundation"
use framework "AppKit"

set aFile to POSIX path of (choose file of type {"public.image"} with prompt "Select Image A")
set aImage to current application’s NSImage’s alloc()’s initWithContentsOfFile:aFile

set fRes to retUUIDfilePath(aFile, "tif") of me
set sRes to saveNSImageAtPathAsTIFF(imgRes, fRes) of me

on retUUIDfilePath(aPath, aEXT)
  set aUUIDstr to (current application’s NSUUID’s UUID()’s UUIDString()) as string
  
set aPath to ((current application’s NSString’s stringWithString:aPath)’s stringByDeletingLastPathComponent()’s stringByAppendingPathComponent:aUUIDstr)’s stringByAppendingPathExtension:aEXT
  
return aPath
end retUUIDfilePath

–NSImageを指定パスにTIFF形式で保存
on saveNSImageAtPathAsTIFF(anImage, outPath)
  set imageRep to anImage’s TIFFRepresentation()
  
set aRawimg to current application’s NSBitmapImageRep’s imageRepWithData:imageRep
  
set pathString to current application’s NSString’s stringWithString:outPath
  
set newPath to pathString’s stringByExpandingTildeInPath()
  
set myNewImageData to (aRawimg’s representationUsingType:(current application’s NSTIFFFileType) |properties|:(missing value))
  
set aRes to (myNewImageData’s writeToFile:newPath atomically:true) as boolean
  
return aRes –true/false
end saveNSImageAtPathAsTIFF

★Click Here to Open This Script 

Posted in file Image | Tagged 10.11savvy 10.12savvy 10.13savvy | Leave a comment

画像にステガノグラフィーで埋め込まれた文字列を取り出す

Posted on 2月 9, 2018 by Takaaki Naganoya

オープンソースのステガノグラフィーのプログラム「ISStego」(By Isaac Stevao Sena氏)を用いて、JPEG画像に埋め込んだ文字情報を取り出すAppleScriptです。

ISStegoは普通にObjective-Cで書かれたGUIベースのアプリケーションだったので、そのままではAppleScriptから呼び出せませんでした。

そこで、中身をそのままそっくり移し替えた新規フレームワーク「stegLib.framework」をでっちあげてビルドし、AppleScriptから呼び出してみました。

JPEG画像にUTF-8の文字情報(日本語文字列)を埋め込んで別のPNG画像に書き出し、書き出した画像からUTF-8の文字情報を取り出す実験を行ってみました。エンコードもデコードもうまく行っているようなので、うまく処理できていると思います。

ステガノグラフィーについて初めて聞いたのは20年ぐらい前のことと記憶していますが、こんなに手軽に使えるようになっていたとは驚きです。


▲Original Image


▲Information Embedded Image

–> stegLib.framework

AppleScript名:画像にステガノグラフィーで埋め込まれた文字列を取り出す
— Created 2015-10-21 by Takaaki Naganoya
— 2015 Piyomaru Software
use AppleScript version "2.4"
use scripting additions
use framework "Foundation"
use framework "AppKit"
use framework "stegLib" –https://github.com/isena/ISStego

set aFile to POSIX path of (choose file of type {"public.png"})
set aFilePath to current application’s NSString’s stringWithString:aFile
set aURL to current application’s |NSURL|’s fileURLWithPath:aFilePath
set aImage to current application’s NSImage’s alloc()’s initWithContentsOfURL:aURL

set aDecodedData to current application’s ISStegoDecoder’s alloc()’s init()’s decodeStegoImage:aImage |error|:(missing value)
set resStr to (current application’s NSString’s alloc()’s initWithData:aDecodedData encoding:(current application’s NSUTF8StringEncoding)) as string
–> "長野谷隆昌/ぴよまるソフトウェア/Piyomaru Software"

★Click Here to Open This Script 

Posted in file Image Text | Tagged 10.11savvy 10.12savvy 10.13savvy | Leave a comment

画像にステガノグラフィーで情報を埋め込む

Posted on 2月 9, 2018 by Takaaki Naganoya

オープンソースのステガノグラフィー(steganography)のプログラム「ISStego」(By Isaac Stevao Sena氏)を用いて、JPEG画像に文字情報を埋め込むAppleScriptです。

ISStegoは普通にObjective-Cで書かれたGUIベースのアプリケーションだったので、そのままではAppleScriptから呼び出せませんでした。

そこで、中身をそのままそっくり移し替えた新規フレームワーク「stegLib.framework」をでっちあげてビルドし、AppleScriptから呼び出してみました。

JPEG画像にUTF-8の文字情報(日本語文字列)を埋め込んで別のPNG画像に書き出し、書き出した画像からUTF-8の文字情報を取り出す実験を行ってみました。エンコードもデコードもうまく行っているようなので、うまく処理できていると思います。

ステガノグラフィー(steganography)について初めて聞いたのは20年ぐらい前のことと記憶していますが、こんなに手軽に使えるようになっていたとは驚きです。

Twitterにプログラムを投稿するのに、(140文字制限を回避するため)文字を画像化して投稿しているのを見て、「そこまでやるなら、画像にプログラムの文字データを埋め込めばいいのに」と思い、「ステガノグラフィーで埋め込めばいいんじゃないか?」ということで、埋め込めるようになったのですが、肝心のTwitterクライアントから画像をダウンロードする手段がなかったのがダメダメでした(Webブラウザ経由ならOKです)。


▲Original Image


▲Information Embedded Image

–> stegLib.framework

AppleScript名:画像にステガノグラフィーで情報を埋め込む
— Created 2015-10-21 by Takaaki Naganoya
— 2015 Piyomaru Software
use AppleScript version "2.4"
use scripting additions
use framework "Foundation"
use framework "AppKit"
use framework "stegLib" –https://github.com/isena/ISStego

set aFile to POSIX path of (choose file of type {"public.jpeg"})
set encString to "長野谷隆昌/ぴよまるソフトウェア/Piyomaru Software"

set aFilePath to current application’s NSString’s stringWithString:aFile
set aExt to "png"

set newPath to aFilePath’s stringByDeletingPathExtension()
set newPath2 to newPath’s stringByAppendingString:"_stego"
set newPath3 to newPath2’s stringByAppendingPathExtension:aExt

set aURL to current application’s |NSURL|’s fileURLWithPath:aFilePath
set aImage to current application’s NSImage’s alloc()’s initWithContentsOfURL:aURL
set strData to current application’s NSString’s stringWithString:encString

set aEncimage to current application’s ISStegoEncoder’s alloc()’s init()’s stegoImageForImage:aImage |data|:strData |error|:(missing value)
my saveImageRepAtPathAsPNG(aEncimage, newPath3)

–画像を指定パスにPNG形式で保存
on saveImageRepAtPathAsPNG(anImage, outPath)
  set imageRep to anImage’s TIFFRepresentation()
  
set aRawimg to current application’s NSBitmapImageRep’s imageRepWithData:imageRep
  
  
set pathString to current application’s NSString’s stringWithString:outPath
  
set newPath to pathString’s stringByExpandingTildeInPath()
  
  
set myNewImageData to (aRawimg’s representationUsingType:(current application’s NSPNGFileType) |properties|:(missing value))
  
return (myNewImageData’s writeToFile:newPath atomically:true) as boolean
end saveImageRepAtPathAsPNG

★Click Here to Open This Script 

Posted in file Image Text | Tagged 10.11savvy 10.12savvy 10.13savvy | Leave a comment

拡張子でUTIを指定しつつchoose file of type

Posted on 2月 8, 2018 by Takaaki Naganoya

choose fileコマンドを拡張して、選択対象をUTIではなくファイル拡張子で指定できるようにしたAppleScriptです。

もともと、Classic Mac OSの時代からファイルのタイプを指し示す識別子としてFile Type(”PICT”とか”MooV”とか)が存在していましたが、OS X 10.6あたりで廃止になり、ウヤムヤのまま部分的に延命してきたものの、macOS 10.13でファイルシステムにAPFSを採用(File Typeなどの情報がFile System上に存在しない)したことにより、完全に使用不能になりました。

ファイルの区別に利用してきた情報としては、File type以外にも、

 拡張子(複数の書き方をすることがある。.jpgとか.jpegとか)
 ファイルkind(ローカライズされている)
 type identifier(UTIのこと)

が存在しています。

「すべての画像」「プレーンテキスト全般」といったざっくりとした指定が可能なUTIは、AppleScript側にあまり機能が解放されておらず、あまり利用できていなかったのですが、macOS 10.10でCocoaの機能が利用できるようになってからはUTIの利用もすすんできました。

ただ、それなりに調べる作業も必要だったり、ツールを併用する必要もあったりするので、ファイル拡張子からUTIをScriptで調べて指定できたほうが便利な場合もあるのでは? と考え、このようなルーチン(+命令拡張)を書いてみたものです。

AppleScript名:拡張子でUTIを指定しつつchoose file of type
— Created 2018-1-20 by Takaaki Naganoya
— 2018 Piyomaru Software
use AppleScript version "2.4"
use framework "Foundation"
use scripting additions
use BridgePlus : script "BridgePlus" –https://www.macosxautomation.com/applescript/apps/BridgePlus.html

set aFile to choose file of type {"jpg", "png"} with prompt "This is a message"
set bFile to choose file of type {"scpt", "scptd"} with prompt "With default locaion" default location (path to desktop)

on choose file of type extList with prompt aMes as string : "" default location aLoc : missing value
  set utiList to {}
  
repeat with i in extList
    set the end of utiList to retFileFormatUTI(i) of me
  end repeat
  
if aLoc = missing value then
    continue choose file of type utiList with prompt aMes
  else
    continue choose file of type utiList with prompt aMes default location aLoc
  end if
end choose file

on retFileFormatUTI(aExt as string)
  load framework
  
return (current application’s SMSForder’s UTIForExtension:aExt) as string
end retFileFormatUTI

★Click Here to Open This Script 

Posted in dialog file UTI | Tagged 10.11savvy 10.12savvy 10.13savvy | Leave a comment

指定UTIでUTIを入れたリストをフィルタリング

Posted on 2月 8, 2018 by Takaaki Naganoya
AppleScript名:指定UTIでUTIを入れたリストをフィルタリング
— Created 2017-11-03 by Takaaki Naganoya
— 2017 Piyomaru Software
use AppleScript version "2.4"
use scripting additions
use framework "Foundation"

property NSPredicate : a reference to current application’s NSPredicate
property NSArray : a reference to current application’s NSArray

set aList to {"public.jpeg", "com.compuserve.gif", "public.svg-image", "public.plain-text", "com.apple.iwork.keynote.key", "com.apple.iwork.pages.pages", "com.apple.iwork.numbers.numbers", "com.microsoft.word.doc", "com.microsoft.excel.xls", "com.microsoft.powerpoint.ppt", "com.apple.mail.email", "com.apple.applescript.script", "com.apple.applescript.text", "public.html", "com.apple.property-list", "public.zip-archive", "public.au-audio", "com.apple.m4a-audio", "com.apple.m4v-video"}

set aRes to filterUTIList(aList, "public.text")
–>  {​​​​​"public.plain-text", ​​​​​"com.apple.applescript.script", ​​​​​"com.apple.applescript.text", ​​​​​"public.html"​​​}

set bRes to filterUTIList(aList, "public.image")
–>  {​​​​​"public.jpeg", ​​​​​"com.compuserve.gif", ​​​​​"public.svg-image"​​​}

set cRes to filterUTIList(aList, "public.audiovisual-content")
–>  {​​​​​"public.au-audio", ​​​​​"com.apple.m4a-audio", ​​​​​"com.apple.m4v-video"​​​}

on filterUTIList(aUTIList, aUTIstr)
  set anArray to NSArray’s arrayWithArray:aUTIList
  
set aPred to NSPredicate’s predicateWithFormat_("SELF UTI-CONFORMS-TO %@", aUTIstr)
  
set bRes to (anArray’s filteredArrayUsingPredicate:aPred) as list
  
return bRes
end filterUTIList

★Click Here to Open This Script 

Posted in file UTI | Tagged 10.11savvy 10.12savvy 10.13savvy | Leave a comment

指定拡張子のUTI文字列を取得する

Posted on 2月 8, 2018 by Takaaki Naganoya
AppleScript名:指定拡張子のUTI文字列を取得する
— Created 2016-10-24 by Takaaki Naganoya
— Modified 2016-10-25 by Shane Stanley
— 2016 Piyomaru Software
use AppleScript version "2.4"
use scripting additions
use framework "Foundation"
use framework "AVFoundation"
use BridgePlus : script "BridgePlus" –https://www.macosxautomation.com/applescript/apps/BridgePlus.html

set aRes to retFileFormatUTI("mov") of me
–>  "com.apple.quicktime-movie"

set aRes to retFileFormatUTI("mp4") of me
–>  "public.mpeg-4"

set aRes to retFileFormatUTI("m4v") of me
–>  "com.apple.m4v-video"

set aRes to retFileFormatUTI("m4a") of me
–>  "com.apple.m4a-audio"

set aRes to retFileFormatUTI("3gp") of me
–>  "public.3gpp"

set aRes to retFileFormatUTI("3gp2") of me
–>  "public.3gpp2"

set aRes to retFileFormatUTI("caf") of me
–>  "com.apple.coreaudio-format"

set aRes to retFileFormatUTI("wav") of me
–>  "com.microsoft.waveform-audio"

set aRes to retFileFormatUTI("aif") of me
–>  "public.aifc-audio"

set aRes to retFileFormatUTI("aifc") of me
–>  "public.aifc-audio"

set aRes to retFileFormatUTI("amr") of me
–>  "org.3gpp.adaptive-multi-rate-audio"

set aRes to retFileFormatUTI("mp3") of me
–>  "public.mp3"

set aRes to retFileFormatUTI("au") of me
–>  "public.au-audio"

set aRes to retFileFormatUTI("ac3") of me
–>  "public.ac3-audio"

on retFileFormatUTI(aExt as string)
  load framework
  
return (current application’s SMSForder’s UTIForExtension:aExt) as list of string or string
end retFileFormatUTI

★Click Here to Open This Script 

Posted in file UTI | Tagged 10.11savvy 10.12savvy 10.13savvy | Leave a comment

指定ファイルのUTI情報を取得

Posted on 2月 8, 2018 by Takaaki Naganoya

–> MagicKit.framework

AppleScript名:指定ファイルのUTI情報を取得
— Created 2017-10-25 by Takaaki Naganoya
— 2017 Piyomaru Software
use AppleScript version "2.4"
use scripting additions
use framework "Foundation"
use framework "MagicKit" –https://github.com/aidansteele/magickit

set aFile to POSIX path of (choose file)
set aRes to (current application’s GEMagicKit’s magicForFileAtPath:aFile)

set aaRes to aRes’s |description|() as string
–>  "ISO Media, MPEG v4 system, version 2"

set aMime to (aRes’s mimeType()) as string
–>  "video/mp4; charset=binary"

set utiList to (aRes’s uniformTypeHierarchy()) as list
–>  {​​​​​"com.apple.quicktime-movie", ​​​​​"public.movie", ​​​​​"public.audiovisual-content", ​​​​​"public.data", ​​​​​"public.content", ​​​​​"public.item"​​​}

set aDesc to (aRes’s |description|()) as string
–>  "ISO Media, Apple QuickTime movie"

★Click Here to Open This Script 

Posted in file UTI | Tagged 10.11savvy 10.12savvy 10.13savvy | Leave a comment

calcColorDomainLib

Posted on 2月 8, 2018 by Takaaki Naganoya

AppleScript名:calcColorDomainLib
— Created 2018-01-08 by Takaaki Naganoya
— 2018 Piyomaru Software
use AppleScript version "2.4"
use scripting additions
use framework "Foundation"
use framework "AppKit"

property NSColor : a reference to current application’s NSColor

set {rCol, gCol, bCol} to choose color
set cName to retColorDomainName(rCol, gCol, bCol, 65535) of me
set cValue to retColorDomainValue(rCol, gCol, bCol, 65535) of me
return {cName, cValue}

on retColorDomainName(rCol as integer, gCol as integer, bCol as integer, aColorMax)
  set aCol to makeNSColorFromRGBAval(rCol, gCol, bCol, aColorMax, aColorMax) of me
  
return retColorDomainNameFronNSColor(aCol) of me
end retColorDomainName

on retColorDomainNameFronNSColor(aCol)
  set hueVal to aCol’s hueComponent()
  
set satVal to aCol’s saturationComponent()
  
set brightVal to aCol’s brightnessComponent()
  
  
if satVal ≤ 0.01 then set satVal to 0.0
  
  
set colName to ""
  
  
if satVal = 0.0 then
    if brightVal ≤ 0.2 then
      set colName to "black"
    else if (brightVal > 0.95) then
      set colName to "white"
    else
      set colName to "gray"
    end if
  else
    if hueVal ≤ (15.0 / 360) or hueVal ≥ (330 / 360) then
      set colName to "red"
    else if hueVal ≤ (45.0 / 360) then
      set colName to "orange"
    else if hueVal < (70.0 / 360) then
      set colName to "yellow"
    else if hueVal < (150.0 / 360) then
      set colName to "green"
    else if hueVal < (190.0 / 360) then
      set colName to "light blue" –cyan
    else if (hueVal < 250.0 / 360.0) then
      set colName to "blue"
    else if (hueVal < 290.0 / 360.0) then
      set colName to "purple"
    else
      set colName to "pink" –magenta
    end if
  end if
  
  
return colName
end retColorDomainNameFronNSColor

on retColorDomainValue(rCol as integer, gCol as integer, bCol as integer, aColorMax)
  set aCol to makeNSColorFromRGBAval(rCol, gCol, bCol, aColorMax, aColorMax) of me
  
return retColorDomainValueFromNSColor(aCol) of me
end retColorDomainValue

on retColorDomainValueFromNSColor(aCol)
  set hueVal to aCol’s hueComponent()
  
set satVal to aCol’s saturationComponent()
  
set brightVal to aCol’s brightnessComponent()
  
  
if satVal ≤ 0.01 then set satVal to 0.0
  
  
if satVal = 0.0 then
    if brightVal ≤ 0.2 then
      set colVal to {0, 0, 0} –Black
    else if (brightVal > 0.95) then
      set colVal to {65535, 65535, 65535} –White
    else
      set colVal to {32768, 32768, 32768} –Gray
    end if
  else
    if hueVal ≤ (15.0 / 360) or hueVal ≥ (330 / 360) then
      set colVal to {65535, 0, 0} –red
    else if hueVal ≤ (45.0 / 360) then
      set colVal to {65535, 32768, 0} –orange
    else if hueVal < (70.0 / 360) then
      set colVal to {65533, 63639, 2654} –yellow
    else if hueVal < (150.0 / 360) then
      set colVal to {4626, 35488, 17789} –green
    else if hueVal < (190.0 / 360) then
      set colVal to {0, 60802, 65535} –cyan, light blue
    else if (hueVal < 250.0 / 360.0) then
      set colVal to {0, 0, 65535} –blue
    else if (hueVal < 290.0 / 360.0) then
      set colVal to {32768, 0, 32768} –purple
    else
      set colVal to {65535, 0, 65535} –magenta, pink
    end if
  end if
  
  
return colVal
end retColorDomainValueFromNSColor

on makeNSColorFromRGBAval(redValue as integer, greenValue as integer, blueValue as integer, alphaValue as integer, aMaxVal as integer)
  set aRedCocoa to (redValue / aMaxVal) as real
  
set aGreenCocoa to (greenValue / aMaxVal) as real
  
set aBlueCocoa to (blueValue / aMaxVal) as real
  
set aAlphaCocoa to (alphaValue / aMaxVal) as real
  
set aColor to NSColor’s colorWithCalibratedRed:aRedCocoa green:aGreenCocoa blue:aBlueCocoa alpha:aAlphaCocoa
  
return aColor
end makeNSColorFromRGBAval

★Click Here to Open This Script 

Posted in Color | Tagged 10.11savvy 10.12savvy 10.13savvy | 1 Comment

Camel Case化

Posted on 2月 8, 2018 by Takaaki Naganoya
AppleScript名:Camel Case化
— Created 2015-12-24 by Shane Stanley
use AppleScript version "2.4"
use scripting additions
use framework "Foundation"

camelCase("this is a pen") of me
–>  "thisIsAPen."

on camelCase(aPhrase)
  set firstWord to current application’s NSString’s stringWithString:(word 1 of aPhrase)
  
set firstWord to firstWord’s |lowercaseString|()
  
set restOfPhrase to current application’s NSString’s stringWithString:(text from word 2 to -1 of aPhrase)
  
set restOfPhrase to restOfPhrase’s capitalizedString()’s stringByReplacingOccurrencesOfString:space withString:""
  
set newPhrase to firstWord’s stringByAppendingString:restOfPhrase
  
return (newPhrase’s stringByFoldingWithOptions:(current application’s NSDiacriticInsensitiveSearch) locale:(missing value)) as text
end camelCase

★Click Here to Open This Script 

Posted in Text | Tagged 10.11savvy 10.12savvy 10.13savvy | Leave a comment

文字エンコーディングを自動判別してファイル読み込み v1.2.1

Posted on 2月 8, 2018 by Takaaki Naganoya

指定のテキストファイル(日本語テキストを想定)を、文字エンコーディングを自動判定して読み込むAppleScriptです。

これまで、日本語テキストファイルの文字エンコーディングを自動判定するのにテキストエディタをAppleScriptからコントロールして使っていましたが、それだと並列処理するAppleScriptの中で使用できないし、テキストエディタがない環境では実行することができません(ダウンロードすればいいだけの話ですが)。

さまざまな日本語テキストエディタのソースコードをながめて、文字コードの自動判定ロジックがわかってきたので、AppleScriptで実装してみました。さらに、独自の「文字化け判定ロジック」を考えたので、それを併用しています。

Step 1 伝統的な判定(勝ち抜け方式)

伝統的な文字コードの判定を順次行います。この、判定を行う順序が重要です。最初にISO2022JPのチェック、ついでEUC、UTF-8、シフトJISと、順次コード判定を行います。勝ち抜け方式で、妥当な文字エンコーディングとみなしたらそこで評価を打ち切ります。

Step 2 総当たり判定(全部評価してから考える)

UTF-16BE/LE/無印Unicodeについては、それぞれの文字エンコーディングで実際に評価してみて、文字化けしないものを採用します。独自ロジックにより文字化け状態をプログラム的に判断するのと、そのエンコーディングで読み込んだ結果をNSLinguisticTaggerで評価し、「ja」(日本語)と判定するかどうかの確認をすべてのエンコーディングで行なっています。

以上の2ステップでだいたい日本語テキストのエンコーディング自動判定ができています。

もし、寿司屋の湯のみ茶碗のように漢字で魚の名前を羅列した日本語テキストがUTF-16BEとかで書かれていたりすると自動判定できない可能性もありますが、青空文庫の日本語テキストやWebに掲載されているテクニカルな記事(アルファベットやカタカナの使用比率が高い)でテストしてみたところ、問題なく判定できています(実際に魚の名前のテキストを作って読み込んでみましたが、とくに問題はありませんでした)。

だいたい、日本語として意味をなしているようなテキストであれば、文字コードの自動判定はできているように思います。ただ、世間は広いので、本Scriptのロジックで判定できないようなケースもあるかもしれません。そのような時にはコメント欄やフォーラムへの報告をお願いいたします(対応するかどうかは別として。知り合いのテキストエディタ作者の方は、無償で公開しているソフトに文句を言われて「すぐに対応しろ!」だのと散々言われたそうで、、、、、、、)。

AppleScript名:文字エンコーディングを自動判別してファイル読み込み v1.2.1
— Created 2014-12-28 by Takaaki Naganoya
— Modified 2014-12-29 by Shane Stanley
— Modified 2015-10-03 by Takaaki Naganoya
use AppleScript version "2.5"
use scripting additions
use framework "Foundation"

set aPath to POSIX path of (choose file)
set aRes to readJapanesTextFileWithGuessingEncoding(aPath) of me
set bRes to aRes as string

–Read Japanese text with detecting its text encoding
on readJapanesTextFileWithGuessingEncoding(aPOSIXpath as string)
  
  
–ISO2022JP check
  
set aNSData to current application’s NSData’s dataWithContentsOfFile:aPOSIXpath
  
set aDataLength to aNSData’s |length|()
  
if aDataLength > 1024 then set aDataLength to 1024
  
  
–0x1B check
  
set anNSString to current application’s NSString’s stringWithString:(character id 27) — 0x1B
  
set theData to anNSString’s dataUsingEncoding:(current application’s NSUTF8StringEncoding)
  
set theRange to aNSData’s rangeOfData:theData options:0 range:(current application’s NSMakeRange(0, aDataLength))
  
  
–found 0x1B in aNSData
  
if |length| of theRange = 1 and location of theRange < aDataLength then
    set aStr to (current application’s NSString’s alloc()’s initWithData:aNSData encoding:(current application’s NSISO2022JPStringEncoding)) –21
    
if aStr is not equal to missing value then return (aStr as text) — ISO2022JP
  end if
  
  
–EUC
  
set resValue to (current application’s NSString’s alloc()’s initWithData:aNSData encoding:(current application’s NSJapaneseEUCStringEncoding))
  
–log resValue
  
if resValue is not equal to missing value then return (resValue as text)
  
–UTF-8
  
set resValue to (current application’s NSString’s alloc()’s initWithData:aNSData encoding:(current application’s NSUTF8StringEncoding))
  
–log resValue
  
if resValue is not equal to missing value then return (resValue as text)
  
–SHift JIS
  
set resValue to (current application’s NSString’s alloc()’s initWithData:aNSData encoding:(current application’s NSShiftJISStringEncoding))
  
–log resValue
  
if resValue is not equal to missing value then return (resValue as text)


–UTF-16BE/LE/無印Unicodeは多数決を取る
  
set resValue1 to (current application’s NSString’s alloc()’s initWithData:aNSData encoding:(current application’s NSUTF16BigEndianStringEncoding)) as text
  
–log resValue1
  
set sample1 to getTextSample(resValue1) of me
  
set lang1 to specifyLanguageOfText(sample1) of me
  
set para1 to length of (paragraphs of sample1)
  
set words1 to length of (words of sample1)
  
  
set resValue2 to (current application’s NSString’s alloc()’s initWithData:aNSData encoding:(current application’s NSUTF16LittleEndianStringEncoding)) as text
  
–log resValue2
  
set sample2 to getTextSample(resValue2) of me
  
set lang2 to specifyLanguageOfText(sample2) of me
  
set para2 to length of (paragraphs of sample2)
  
set words2 to length of (words of sample2)
  
  
set resValue3 to (current application’s NSString’s alloc()’s initWithData:aNSData encoding:(current application’s NSUnicodeStringEncoding)) as text
  
–log resValue3
  
set sample3 to getTextSample(resValue3) of me
  
set lang3 to specifyLanguageOfText(sample3) of me
  
set para3 to length of (paragraphs of sample3)
  
set words3 to length of (words of sample3)
  
  
–文字および文法的に見て「日本語」ならそれを返す
  
if lang1 = "ja" then return resValue1
  
if lang2 = "ja" then return resValue2
  
if lang3 = "ja" then return resValue2


–文字化けしたときには、日本語の「Word」として認識されづらく、Paragraphも少ない(1とか)なので条件で除外する
  
if para1 is not equal to 1 then
    if (words1 ≤ words2) or (words1 ≤ words3) then
      return resValue1
    end if
  end if
  
  
if para2 is not equal to 1 then
    if (words2 ≤ words1) or (words2 ≤ words3) then
      return resValue2
    end if
  end if
  
  
if para3 is not equal to 1 then
    if (words3 ≤ words1) or (words3 ≤ words2) then
      return resValue3
    end if
  end if
  
  
return false
  
  
(*
  –おまけ(未確認)
  set resValue to (current application’s NSString’s alloc()’s initWithData:aNSData encoding:(current application’s NSWindowsCP1251StringEncoding))
  if resValue is not equal to missing value then return resValue
  
  set resValue to (current application’s NSString’s alloc()’s initWithData:aNSData encoding:(current application’s NSWindowsCP1252StringEncoding))
  if resValue is not equal to missing value then return resValue
  
  set resValue to (current application’s NSString’s alloc()’s initWithData:aNSData encoding:(current application’s NSWindowsCP1253StringEncoding))
  if resValue is not equal to missing value then return resValue
  
  set resValue to (current application’s NSString’s alloc()’s initWithData:aNSData encoding:(current application’s NSWindowsCP1254StringEncoding))
  if resValue is not equal to missing value then return resValue
  
  set resValue to (current application’s NSString’s alloc()’s initWithData:aNSData encoding:(current application’s NSWindowsCP1250StringEncoding))
  if resValue is not equal to missing value then return resValue
  
  return false
  *)

end readJapanesTextFileWithGuessingEncoding

on specifyLanguageOfText(aStr)
  set aNSstring to current application’s NSString’s stringWithString:aStr
  
set tagSchemes to current application’s NSArray’s arrayWithObjects:(current application’s NSLinguisticTagSchemeLanguage)
  
set tagger to current application’s NSLinguisticTagger’s alloc()’s initWithTagSchemes:tagSchemes options:0
  
tagger’s setString:aNSstring
  
set aLanguage to tagger’s tagAtIndex:0 |scheme|:(current application’s NSLinguisticTagSchemeLanguage) tokenRange:(missing value) sentenceRange:(missing value)
  
return aLanguage as text
end specifyLanguageOfText

on getTextSample(aText)
  set aLen to length of aText
  
if aLen < 1024 then
    set bLen to aLen
  else
    set bLen to 1024
  end if
  
return (text 1 thru bLen of aText)
end getTextSample

★Click Here to Open This Script 

Posted in Text | Tagged 10.11savvy 10.12savvy 10.13savvy | 1 Comment

Post navigation

  • Older posts
  • Newer posts

電子書籍(PDF)をオンラインストアで販売中!

Google Search

Popular posts

  • 開発機としてM2 Mac miniが来たのでガチレビュー
  • macOS 15, Sequoia
  • 指定のWordファイルをPDFに書き出す
  • Pages本執筆中に、2つの書類モード切り替えに気がついた
  • Numbersで選択範囲のセルの前後の空白を削除
  • メキシカンハットの描画
  • Pixelmator Pro v3.6.4でAppleScriptからの操作時の挙動に違和感が
  • AdobeがInDesign v19.4からPOSIX pathを採用
  • AppleScriptによる並列処理
  • Safariで「プロファイル」機能を使うとAppleScriptの処理に影響
  • Cocoa Scripting Course 続刊計画
  • macOS 14.xでScript Menuの実行速度が大幅に下がるバグ
  • AppleScript入門③AppleScriptを使った「自動化」とは?
  • Keynote/Pagesで選択中の表カラムの幅を均等割
  • デフォルトインストールされたフォント名を取得するAppleScript
  • macOS 15 リモートApple Eventsにバグ?
  • macOS 15でも変化したText to Speech環境
  • AppleScript入門① AppleScriptってなんだろう?
  • macOS 14で変更になったOSバージョン取得APIの返り値
  • Numbersで最前面の書類のすべてのシート上の表の行数を合計

Tags

10.11savvy (1101) 10.12savvy (1242) 10.13savvy (1391) 10.14savvy (587) 10.15savvy (438) 11.0savvy (283) 12.0savvy (212) 13.0savvy (194) 14.0savvy (147) 15.0savvy (132) CotEditor (66) Finder (51) iTunes (19) Keynote (117) NSAlert (61) NSArray (51) NSBitmapImageRep (20) NSBundle (20) NSButton (34) NSColor (53) NSDictionary (28) NSFileManager (23) NSFont (21) NSImage (41) NSJSONSerialization (21) NSMutableArray (63) NSMutableDictionary (22) NSPredicate (36) NSRunningApplication (56) NSScreen (30) NSScrollView (22) NSString (119) NSURL (98) NSURLRequest (23) NSUTF8StringEncoding (30) NSView (33) NSWorkspace (20) Numbers (76) Pages (55) Safari (44) Script Editor (27) WKUserContentController (21) WKUserScript (20) WKWebView (23) WKWebViewConfiguration (22)

カテゴリー

  • 2D Bin Packing
  • 3D
  • AirDrop
  • AirPlay
  • Animation
  • AppleScript Application on Xcode
  • Beginner
  • Benchmark
  • beta
  • Bluetooth
  • Books
  • boolean
  • bounds
  • Bug
  • Calendar
  • call by reference
  • check sum
  • Clipboard
  • Cocoa-AppleScript Applet
  • Code Sign
  • Color
  • Custom Class
  • date
  • dialog
  • diff
  • drive
  • Droplet
  • exif
  • file
  • File path
  • filter
  • folder
  • Font
  • Font
  • GAME
  • geolocation
  • GUI
  • GUI Scripting
  • Hex
  • History
  • How To
  • iCloud
  • Icon
  • Image
  • Input Method
  • Internet
  • iOS App
  • JavaScript
  • JSON
  • JXA
  • Keychain
  • Keychain
  • Language
  • Library
  • list
  • Locale
  • Localize
  • Machine Learning
  • Map
  • Markdown
  • Menu
  • Metadata
  • MIDI
  • MIME
  • Natural Language Processing
  • Network
  • news
  • Noification
  • Notarization
  • Number
  • Object control
  • OCR
  • OSA
  • parallel processing
  • PDF
  • Peripheral
  • PRODUCTS
  • QR Code
  • Raw AppleEvent Code
  • Record
  • rectangle
  • recursive call
  • regexp
  • Release
  • Remote Control
  • Require Control-Command-R to run
  • REST API
  • Review
  • RTF
  • Sandbox
  • Screen Saver
  • Script Libraries
  • sdef
  • search
  • Security
  • selection
  • shell script
  • Shortcuts Workflow
  • Sort
  • Sound
  • Spellchecker
  • Spotlight
  • SVG
  • System
  • Tag
  • Telephony
  • Text
  • Text to Speech
  • timezone
  • Tools
  • Update
  • URL
  • UTI
  • Web Contents Control
  • WiFi
  • XML
  • XML-RPC
  • イベント(Event)
  • 未分類

アーカイブ

  • 2025年5月
  • 2025年4月
  • 2025年3月
  • 2025年2月
  • 2025年1月
  • 2024年12月
  • 2024年11月
  • 2024年10月
  • 2024年9月
  • 2024年8月
  • 2024年7月
  • 2024年6月
  • 2024年5月
  • 2024年4月
  • 2024年3月
  • 2024年2月
  • 2024年1月
  • 2023年12月
  • 2023年11月
  • 2023年10月
  • 2023年9月
  • 2023年8月
  • 2023年7月
  • 2023年6月
  • 2023年5月
  • 2023年4月
  • 2023年3月
  • 2023年2月
  • 2023年1月
  • 2022年12月
  • 2022年11月
  • 2022年10月
  • 2022年9月
  • 2022年8月
  • 2022年7月
  • 2022年6月
  • 2022年5月
  • 2022年4月
  • 2022年3月
  • 2022年2月
  • 2022年1月
  • 2021年12月
  • 2021年11月
  • 2021年10月
  • 2021年9月
  • 2021年8月
  • 2021年7月
  • 2021年6月
  • 2021年5月
  • 2021年4月
  • 2021年3月
  • 2021年2月
  • 2021年1月
  • 2020年12月
  • 2020年11月
  • 2020年10月
  • 2020年9月
  • 2020年8月
  • 2020年7月
  • 2020年6月
  • 2020年5月
  • 2020年4月
  • 2020年3月
  • 2020年2月
  • 2020年1月
  • 2019年12月
  • 2019年11月
  • 2019年10月
  • 2019年9月
  • 2019年8月
  • 2019年7月
  • 2019年6月
  • 2019年5月
  • 2019年4月
  • 2019年3月
  • 2019年2月
  • 2019年1月
  • 2018年12月
  • 2018年11月
  • 2018年10月
  • 2018年9月
  • 2018年8月
  • 2018年7月
  • 2018年6月
  • 2018年5月
  • 2018年4月
  • 2018年3月
  • 2018年2月

https://piyomarusoft.booth.pm/items/301502

メタ情報

  • ログイン
  • 投稿フィード
  • コメントフィード
  • WordPress.org

Forum Posts

  • 人気のトピック
  • 返信がないトピック

メタ情報

  • ログイン
  • 投稿フィード
  • コメントフィード
  • WordPress.org
Proudly powered by WordPress
Theme: Flint by Star Verte LLC